Category: Healthy

  • Crazy Good Kale and Wild Rice Salad

    Crazy Good Kale and Wild Rice Salad

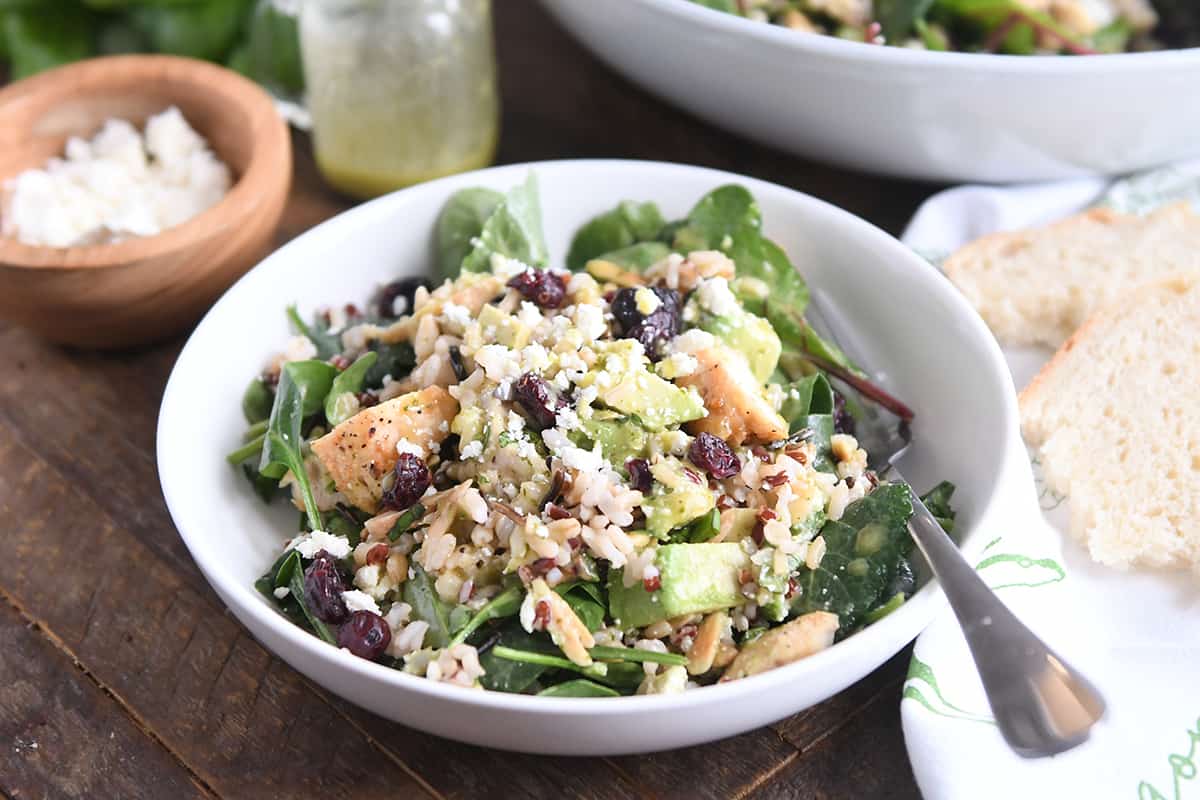
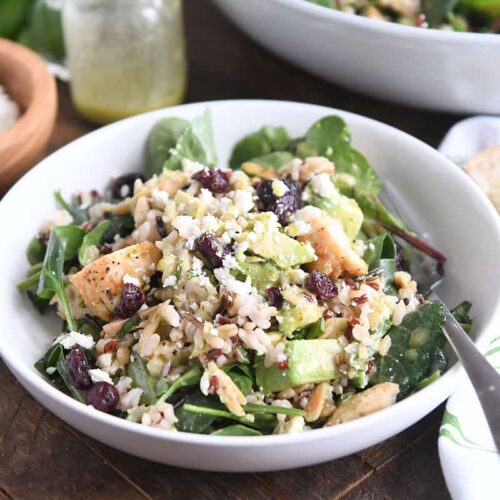
    This gorgeous kale and wild rice salad is loaded with so many delicious ingredients: chicken, avocados, feta, almonds, apples, and more! It’s so good!

    Sometimes a really loaded, really pretty, really delicious salad is exactly what my January doldrum heart needs.

    And this salad is like a big burst of happiness in a bowl. The flavors! The textures! That delectable dressing. I could eat this every day for the rest of my life and die a happy woman.
    Loaded with All the Good Things

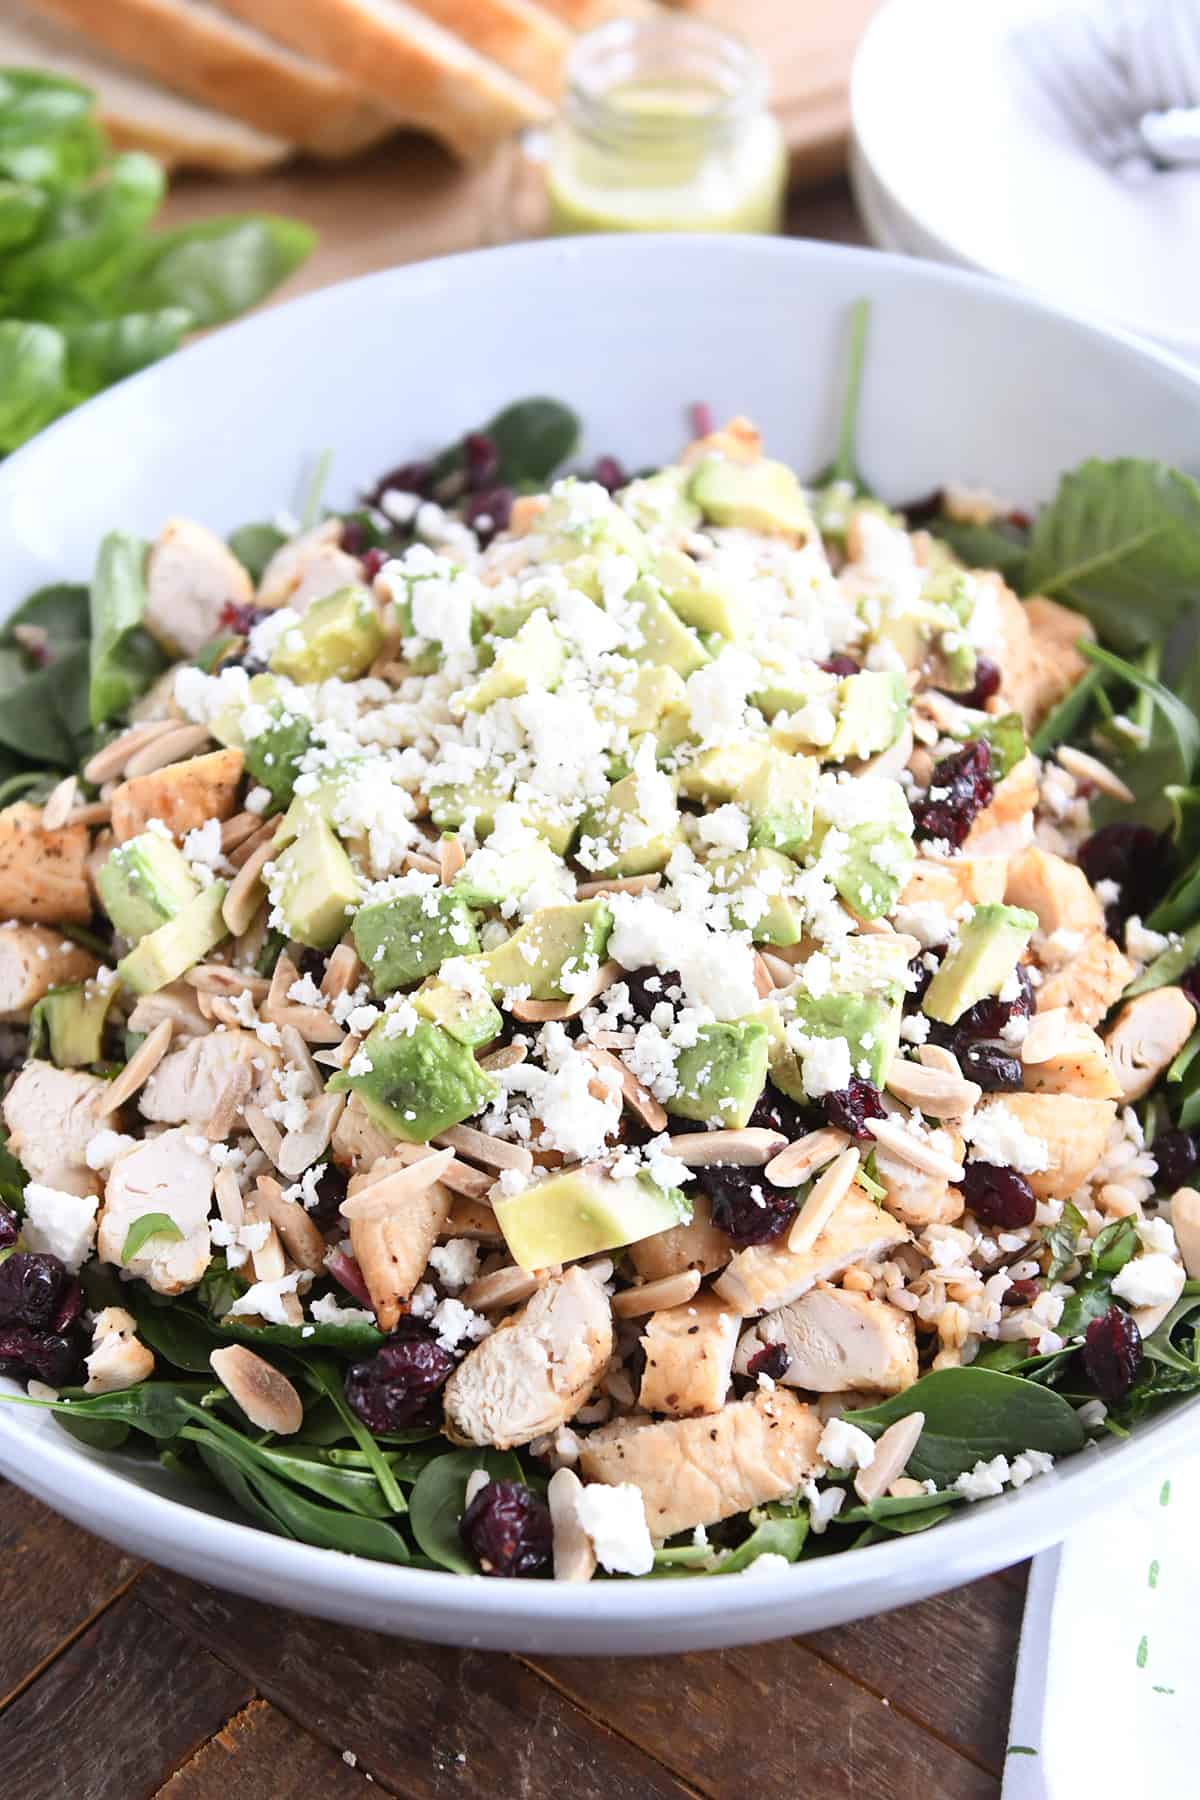
    Let’s take a quick look at all the yummy ingredients in this salad that starts with a base of kale or power greens.

    • brown/wild rice
    • grilled or cooked chicken
    • craisins
    • toasted almonds
    • honeycrisp apple
    • fresh basil (but if you can’t find it, just add a pinch of dried basil to the dressing)
    • avocado
    • feta cheese

    And as with any good salad, the ingredients could be swapped in and out depending on your taste preferences and/or creativity level.

    For instance, I think roasted sweet potatoes or roasted butternut squash would be amazing added to this salad. And the grilled chicken could easily be swapped for another protein or left out for a meatless salad.
    Balsamic Dressing

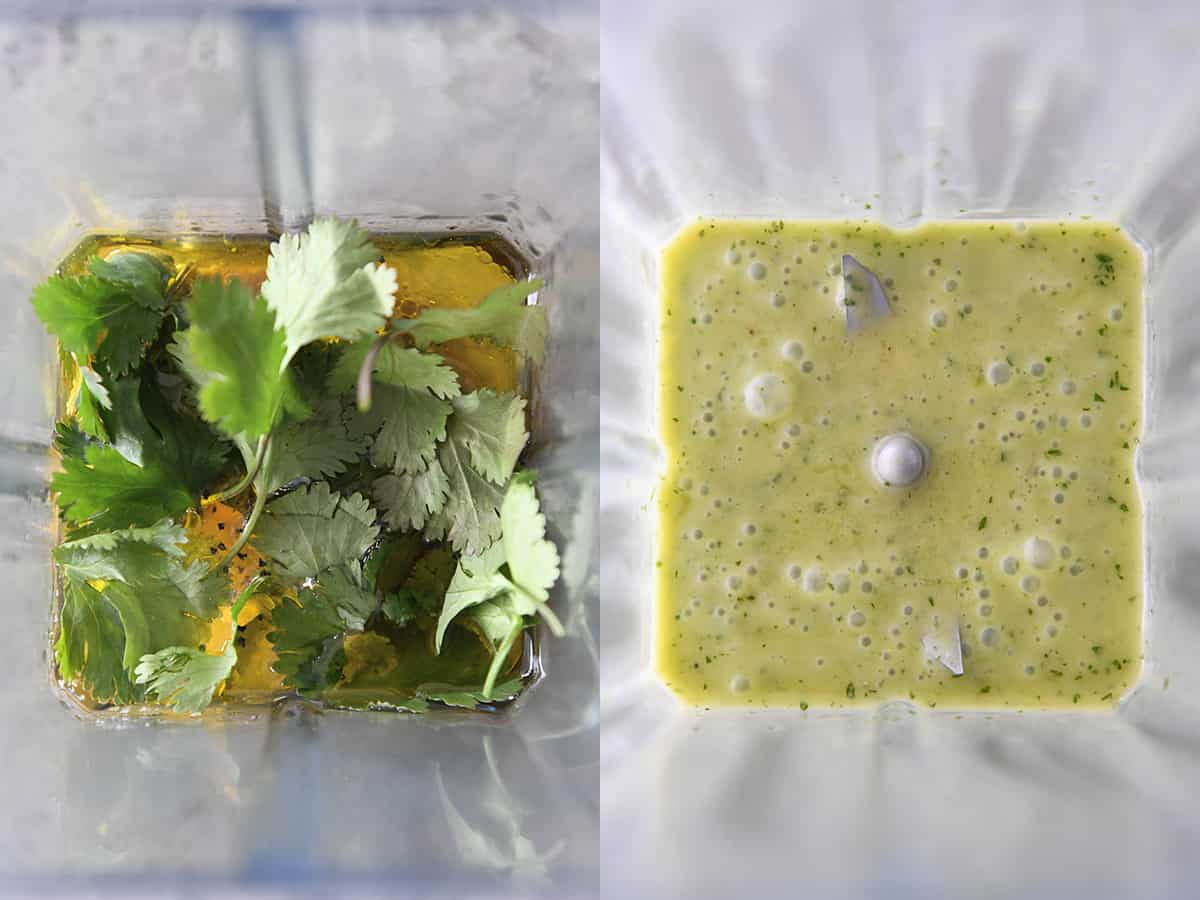
    The dressing for this salad is fresh, light, and tangy. It includes balsamic vinegar as well as fresh lemon juice.

    For the balsamic, you can use regular (dark) balsamic vinegar or white balsamic. I have a delicious mango white balsamic in my pantry, and it is incredible in this dressing.

    Red or white wine vinegar will also work. Blend everything together. It’s that easy!

    This is a lightly dressed salad, so if you prefer a higher dressing to salad ratio, you might want to double the dressing.
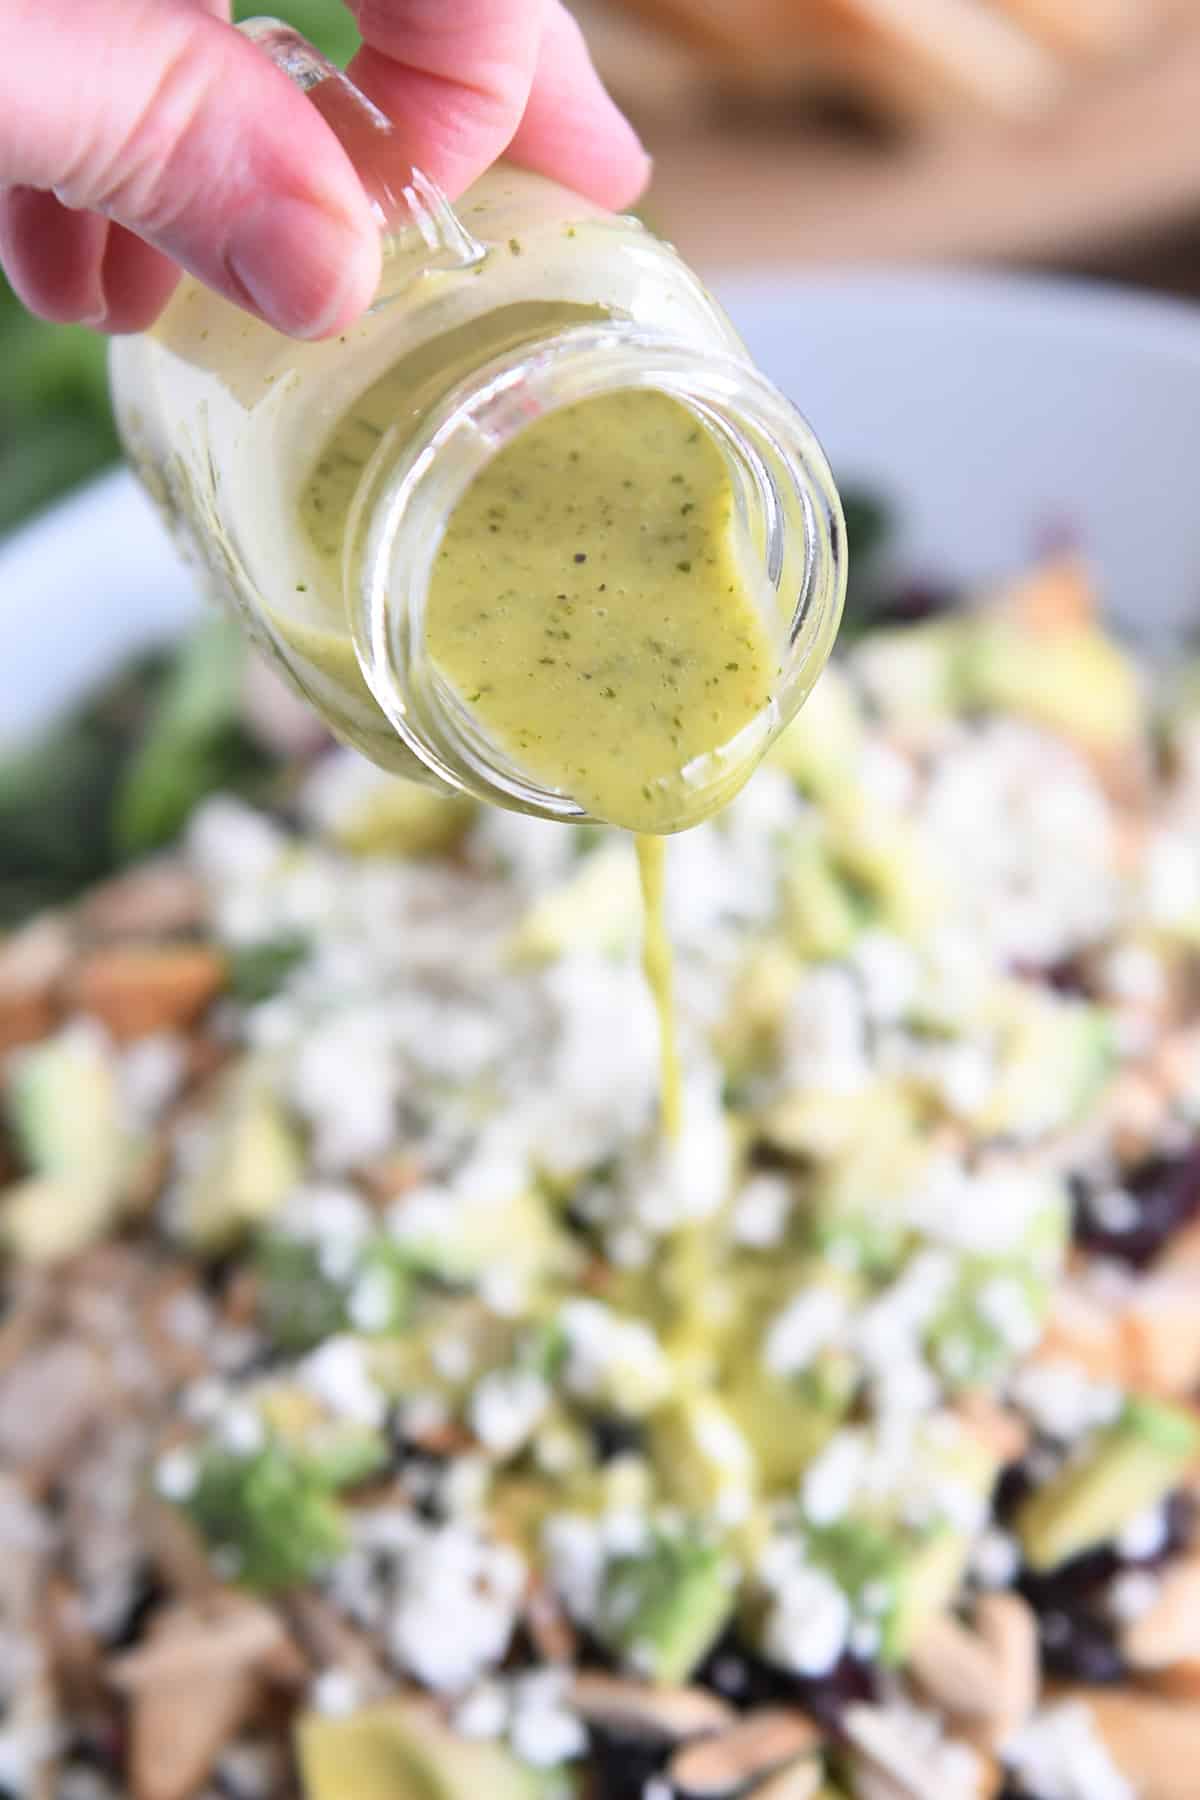
    Dress It Up

    Sometimes with big main dish salads like this, I prefer serving the dressing on the side in case there are leftovers.

    Too many times I’ve faced leftover salad in the fridge that has become decidedly less appealing overnight thanks to the soggy, limp lettuce and other questionable ingredients. Gives me the shivers just thinking about it.

    But all of the ingredients in this salad (minus the avocado) hold up very well to the dressing and as leftovers! (If you anticipate leftovers, consider serving the avocado on the side.)

    Drizzle the dressing over the top, give a light toss, and dig in!
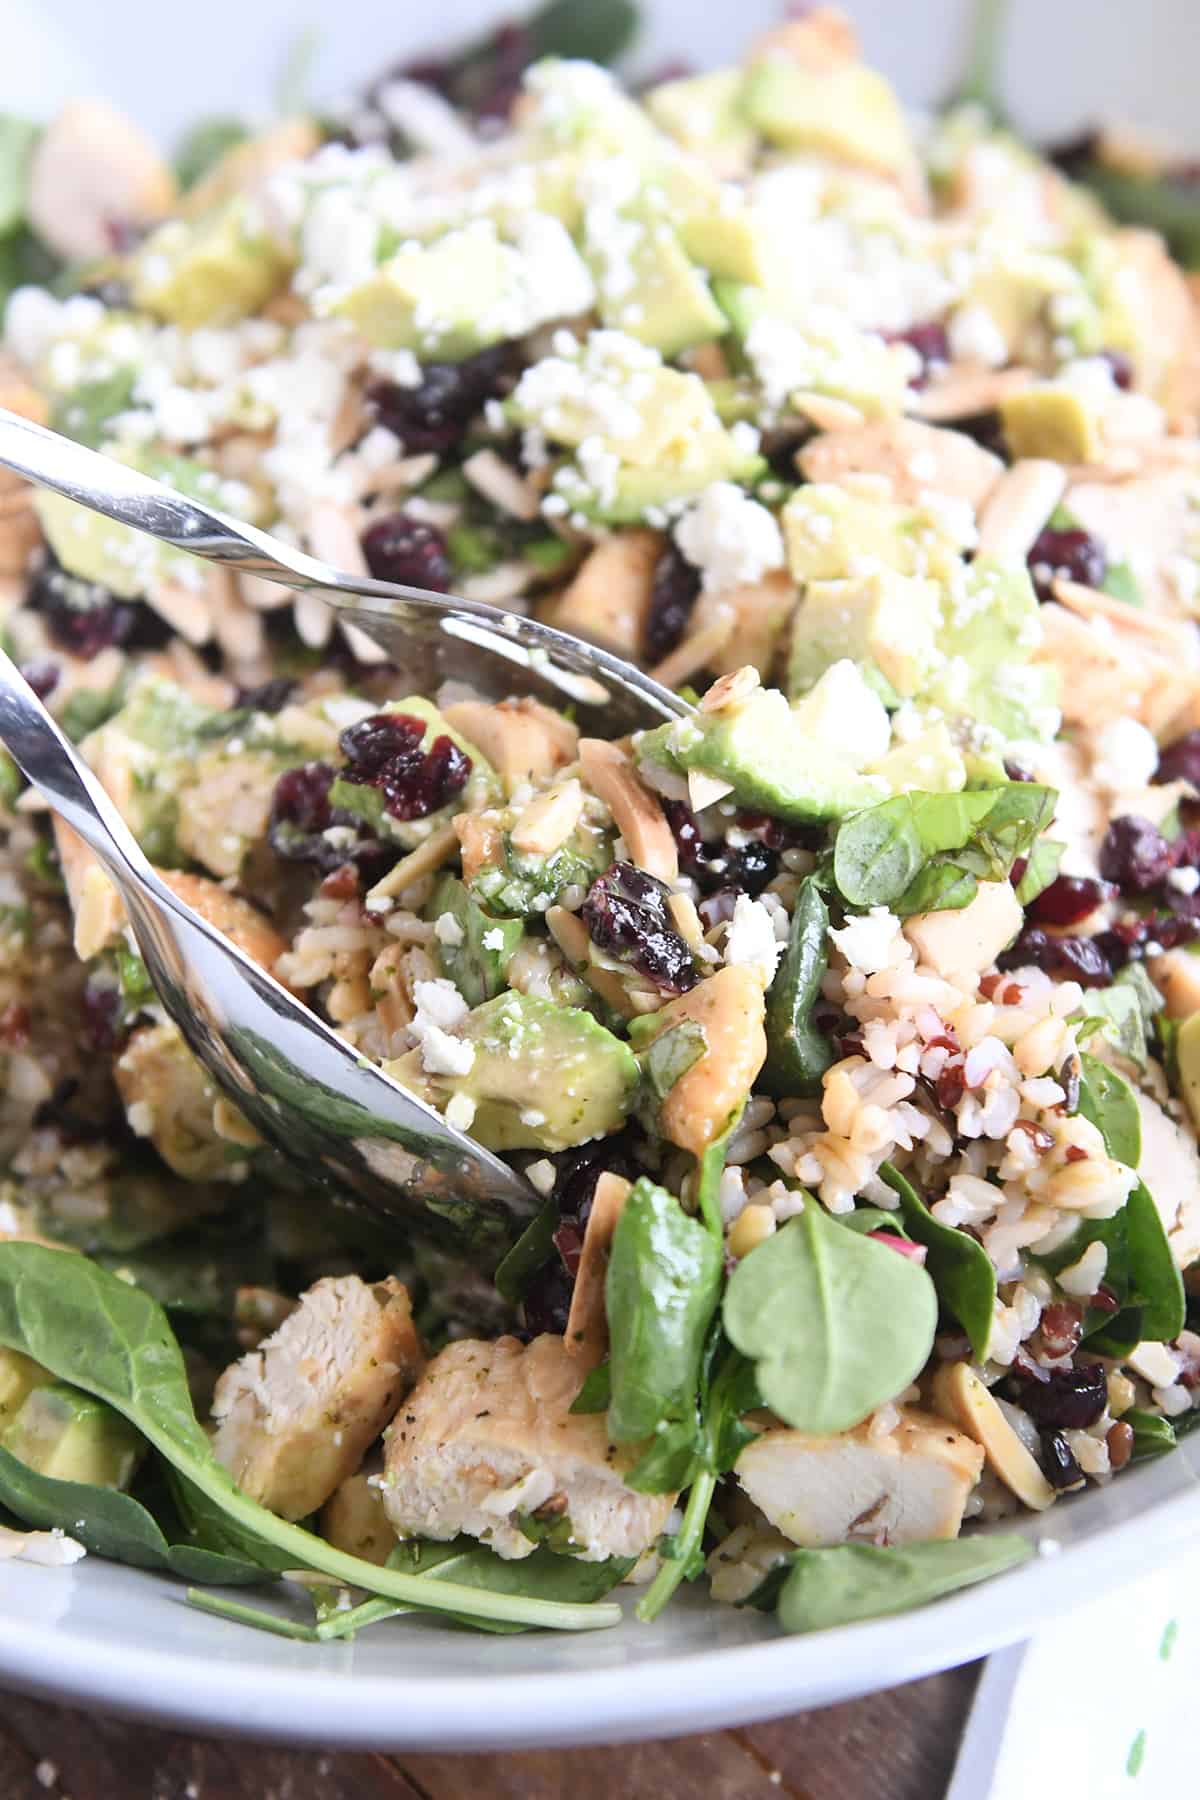
    Recipes From Friends

    This recipe comes highly recommended from my cousin-in-law, Tami, who I trust impeccably when it comes to recipes and food.

    She sent the recipe to me saying it was one of the best salads of her life and that I needed to make it ASAP. I did. And I can’t disagree. It’s a keeper…and a recipe I will be making over and over.

    I kept my greens in larger pieces, but Tami said her friend who made it chopped the kale/greens really finely. And I can see myself opting to do the same in the future when I am a bit more ambitious and not quite as lazy.

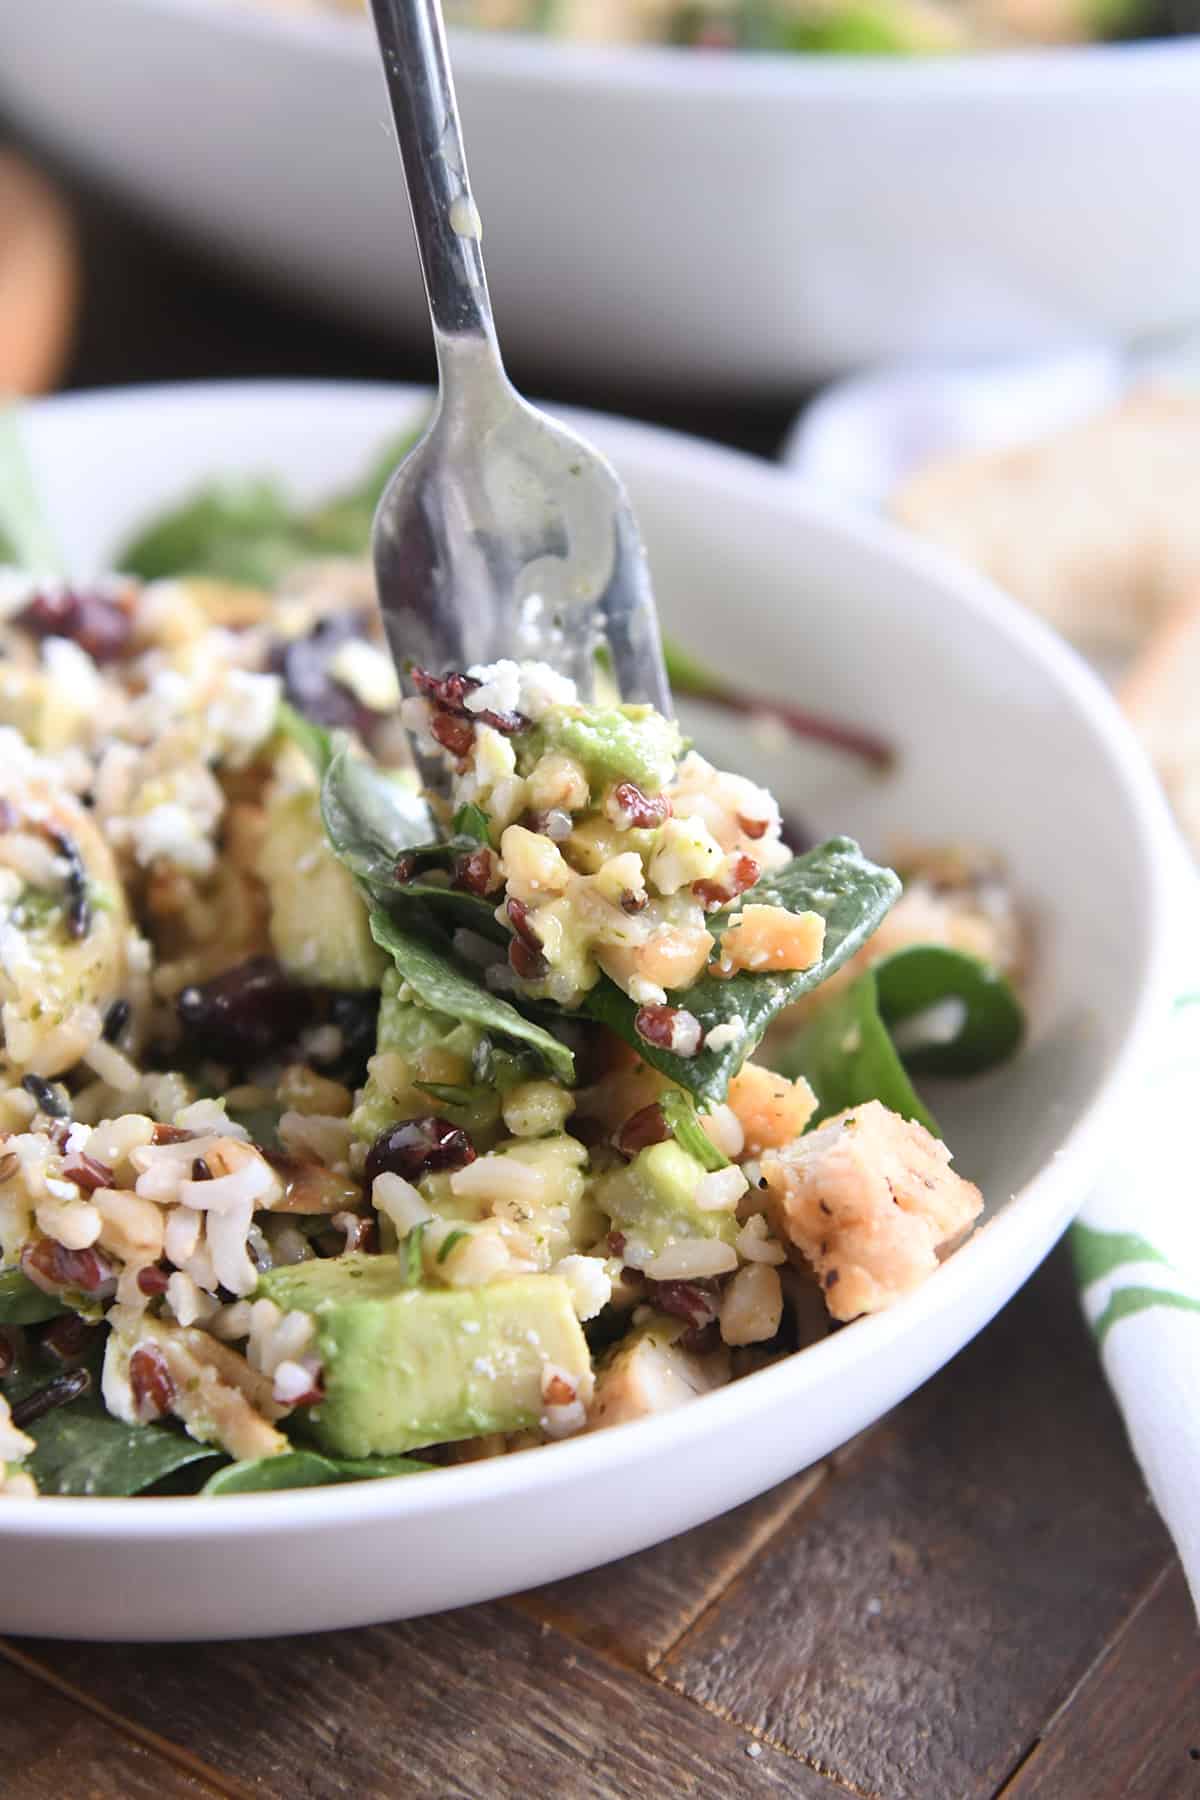
    There’s no wrong way to enjoy this salad. The wide variety of delicious ingredients and that crazy good dressing make it an absolutely stellar salad!
    One Year Ago: Amazing Instant Pot Lemon Curd 
    Two Years Ago: Loaded Cheesy Cauliflower Soup
    Three Years Ago: Asian-Style Meatballs with Sweet Chili Sauce
    Four Years Ago: Tender Greek Pork {Instant Pot or Slow Cooker} 
    Five Years Ago: Blueberry Cream Cheese Muffins
    Six Years Ago: Whole Grain Cinnamon Applesauce Bread 
    Seven Years Ago: 60-Second Chocolate Chip Mug Cookie
    Eight Years Ago: White Chocolate Macadamia Nut Cookies
    Nine Years Ago: Baked Tilapia with Ginger and Cilantro 
    Ten Years Ago: Brownie Mosaic Cheesecake 
    Kale and Wild Rice Salad

    Salad:

    • ¾ cup uncooked wild rice blend (see note)
    • 6 ounces (about 5 lightly packed cups) coarsely or finely chopped kale/baby spinach or a power greens mix (see note)
    • 2 to 3 cups cooked, chopped chicken (see note)
    • 1 medium honeycrisp apple, cored and diced
    • ½ to 1 cup slivered almonds, lightly toasted (see note)
    • ½ to 1 cup craisins or golden raisins
    • ½ to 1 cup crumbled feta cheese
    • ½ to 1 cup chopped fresh basil (optional – if not in season, add a pinch of dried basil to the dressing)
    • 1 to 2 medium avocados, diced

    Dressing:

    • ¼ cup olive oil
    • 2 tablespoons balsamic (see note) or red wine vinegar
    • 2 tablespoons fresh lemon juice
    • 2 teaspoons honey
    • 1 teaspoon Dijon mustard
    • ¼ teaspoon salt (I use coarse, kosher salt)
    • Pinch of black pepper
    • ¼ to ½ cup fresh cilantro

    Prevent your screen from going dark

    • Cook the rice according to package directions. Drain (if needed) and set aside to cool to room temperature.

    • For the dressing, combine all the ingredients in a blender and process until smooth and well-combined. Season to taste with additional salt and pepper, if needed. Set aside.

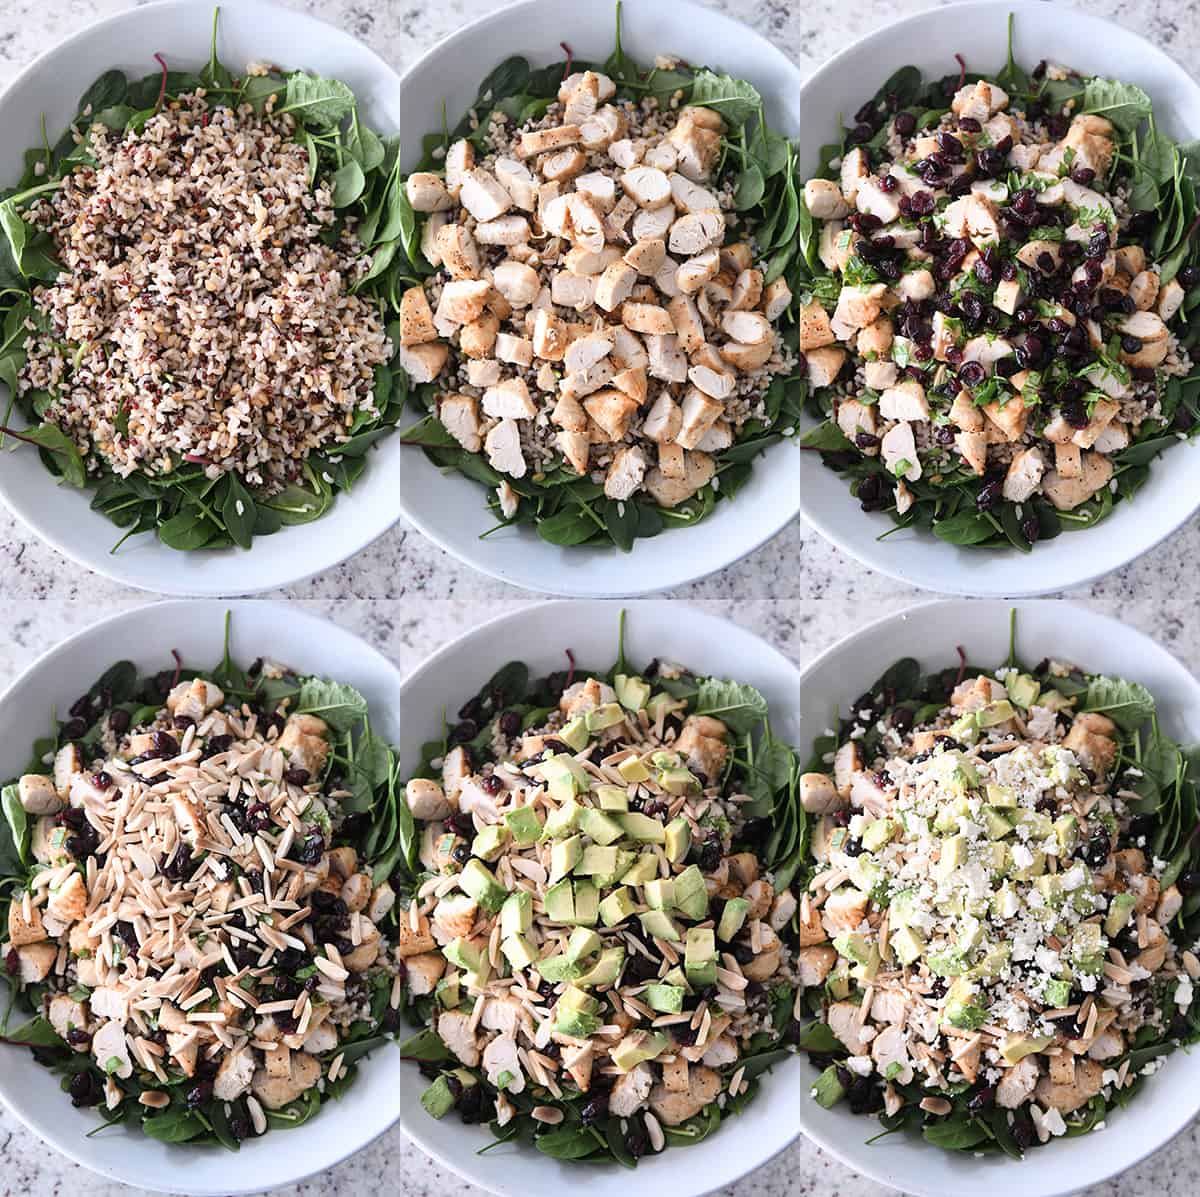
    • Assemble the salad by placing the greens in the bottom of a large serving bowl or on a platter. Top with rice, chicken, apples, almonds, craisins, feta, basil (if using), and avocados.

    • Drizzle dressing over salad and toss lightly to combine. Serve immediately.

    Dressing: this is a lightly dressed salad, so if you like a lot of dressing to salad ratio, consider doubling the recipe. 
    Rice: this is the wild rice blend I like to use (if you have a Winco close, you can find it in the bulk bins). You can also use tri-color quinoa for a rice alternative.
    Kale/Greens: for the greens, you can use all chopped kale or all chopped spinach, although I prefer using a power greens mix that has spinach, kale and other baby greens. The greens can be coarsely or finely chopped.
    Chicken: a rotisserie chicken or other cooked chicken will work well for this salad. I’ve also made it by seasoning chicken tenders with salt, pepper and garlic and cooking them on the grill (you could also use an air fryer, skillet on the stovetop over medium heat, or an oven set to broil). 
    Almonds: toasting the almonds adds delicious flavor and crunch – I use this easy microwave method to toast the nuts.
    Balsamic Vinegar: this salad dressing is delicious with regular (dark) balsamic vinegar; it’s also delicious with white balsamic vinegar or red wine vinegar. 

    Serving: 1 serving, Calories: 296kcal, Carbohydrates: 22g, Protein: 16g, Fat: 17g, Saturated Fat: 4g, Cholesterol: 38mg, Sodium: 225mg, Fiber: 4g, Sugar: 5g

    Recipe Source: by way of my cousin-in-law, Tami (and her friend who served it to her!)

    Disclaimer: I am a participant in the Amazon Services LLC Associates Program, an affiliate advertising program designed to provide a means for me to earn fees by linking to Amazon.com and affiliated sites. As an Amazon Associate I earn from qualifying purchases.
    Source link

  • Creamy Potato Salad with Dill Pickles (Lightened Up Recipe)

    Creamy Potato Salad with Dill Pickles (Lightened Up Recipe)

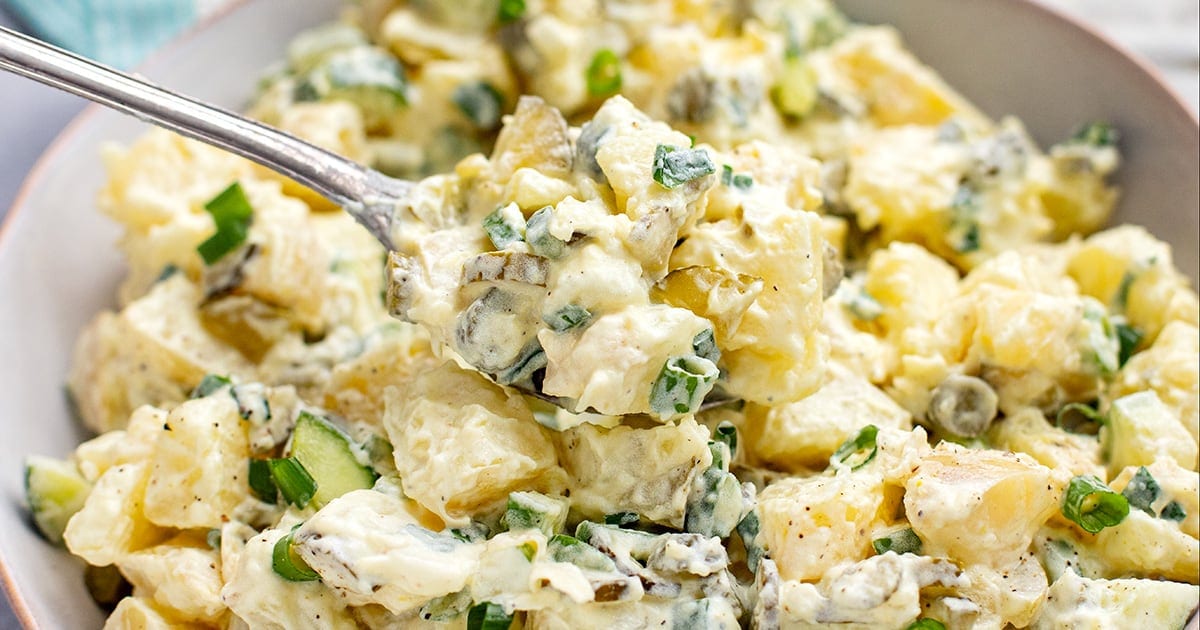
    This creamy potato salad with dill pickles is my go-to easy potato salad for BBQs and weekend dinners—tangy, crunchy and tossed in a lighter creamy dressing.


    Jump to: ℹ️ Overview | 🛒 Ingredients | 📷 How To Make | 📹 Watch The Video | 👩‍🍳 Recipe Tips | 🥗 Serving Suggestions | 📝Full Recipe Card | 🍽 More Salad Recipes


    • ⏱ Ready In: 35 minutes
    • 🍽 Serves: 8
    • 🌱 Diet: Vegetarian, gluten-free
    • 💪 Nutrition Highlights: Lighter dressing using light mayo and sour cream or Greek yogurt
    • 🥕 Main Ingredients: Potatoes, dill pickles, sweet pickles, cucumber, green onions
    • 🔥 Flavor Profile: Creamy, tangy, slightly sweet, crunchy, and fresh
    • 🧊 Meal-Prep Friendly: Keeps well for up to 4 days in the fridge
    • Best Served With: BBQ meats, grilled chicken, burgers, sausages, or roasted vegetables

    This creamy potato salad with dill pickles is the one I end up making the most. It’s simple, quick, and made with just a handful of ingredients, but the flavor is spot on.

    You get little pops of tangy dill pickles, a touch of sweetness from the sweet pickles, and fresh crunch from cucumber and green onions. Everything is coated in a lighter creamy dressing made with light mayo and light sour cream (or Greek yogurt if that’s what you have in the fridge).

    The potatoes stay nice and tender but not mushy, which is key for a good potato salad. The dressing is creamy without feeling heavy, and the pickle juice adds a little tang that really wakes the whole dish up.

    It’s one of those potato salads that people always ask about when I bring it to BBQs or family dinners. It’s also surprisingly great for meal prep — I’ll often serve it with grilled chicken or a couple of boiled eggs for a quick lunch.

    And yes… my 5-year-old happily eats this one too, which is always a good sign.

    🥔🥗 You might also like my other potato salads, such as this crispy smashed potato salad, this Spanish-inspired no-mayo potato salad with Romesco dressing, or this unique potato salad with capers, apple, and crispy bacon. These are all great summer salads, but I make them throughout the year, too.

    What You’ll Need

    Here is what you’ll need for this creamy potato salad. Find the full measurements in the recipe card below.

    Potatoes & Crunchy Bits

    • White potatoes – creamy and hold their shape well for potato salad; I have made this with larger potatoes and baby potatoes; red potatoes will also work and give you a fun color. PS. Leave the skin on if they’re clean for extra texture and fibre.
    • Fresh cucumber – adds freshness and crunch.
    • Dill pickles / gherkins – bring tangy acidity and savory flavor.
    • Sweet pickles – add a little sweetness that balances the tang.
    • Green onions – mild onion flavor and freshness.

    Note: Pickles are a classic flavor booster in creamy salads because they add tang, sweetness, and crunch that balance rich dressings. I love a combination of more savory dill and also sweet (like butter pickles), but you can use one type, just make sure it’s the total amount of both.

    Creamy Dressing

    • Light mayonnaise – the creamy base.
    • Light sour cream or Greek yogurt – adds tang and lightens the dressing.
    • Yellow mustard – a little zing.
    • Pickle juice – subtle acidity and extra pickle flavor.
    • Salt and pepper – to bring everything together.

    How To Make Creamy Potato Salad With Dill Pickles

    Find the full recipe and nutritional information below. Here are some handy step-by-step photos for how to make potato salad with dill pickles and creamy but light dressing.

    • Add potatoes to a pot with cold water and salt. Bring to a boil and simmer until just fork-tender, about 12–15 minutes.
    • Drain and let the potatoes cool slightly, then cut into bite-sized cubes.
    • Dice cucumber, dill pickles, sweet pickles, and green onions.
    • Whisk together mayonnaise, sour cream (or yogurt), mustard, pickle juice, salt, and pepper in a large bowl.
    • Add pickles, cucumber, and green onions to the bowl and follow with potatoes, and gently toss until coated.
    • Taste; add more salt or pepper if needed. Top with extra green onions or chives and a little black pepper.

    Watch The Video

    Recipe Tips

    • Start potatoes in cold water. This helps them cook evenly instead of being mushy outside and undercooked inside.
    • Don’t overcook the potatoes. They should be tender but still hold their shape. Overcooked potatoes will make the salad mushy.
    • Let the potatoes cool slightly before mixing. If they’re too hot, the dressing can separate.
    • Chop everything evenly. Small, uniform pieces make every bite balanced.
    • For extra flavor. Add a little chopped fresh dill or chives.
    • Storage: Store in an airtight container in the fridge for up to 4 days. Stir before serving, as the dressing may settle.
    • Make-ahead tip: This salad actually tastes better after a few hours in the fridge, which makes it perfect for BBQs or meal prep.

    Variations

    • Add hard-boiled eggs for a classic deli-style potato salad.
    • Add crispy bacon for a smoky twist.
    • Swap cucumber for celery if you prefer.

    Serving Suggestions

    This potato salad is basically made for summer meals and BBQs.

    Serve it alongside BBQs kabobs or skewers, grilled chicken tenders, burgers, sausages, or steak. It’s also great with grilled vegetables or baked salmon.

    For a quick lunch, I often pair it with air fryer chicken wings, shrimp skewers, or steak bites. For a quick lunch, you can pair it with canned tuna, boiled eggs, chickpeas, or grilled halloumi. It turns a simple side dish into a pretty satisfying meal.

    💬 If you’ve tried this creamy potato salad with dill pickles or any other recipe on the blog then don’t forget to rate the recipe and let me know how you got on in the comments below, I love hearing from you! You can also FOLLOW ME on Instagram, Facebook, Pinterest, YouTube, and or sign up to my Newsletter to see more of my delicious food.

    Want to Save This Recipe?

    Enter your email & I’ll send it to your inbox. Plus, get great new recipes from me every week!

    By submitting this form, you consent to receive emails from Cooked & Loved

    This creamy potato salad with dill pickles is my go-to easy potato salad for BBQs and weekend dinners—tangy, crunchy and tossed in a lighter creamy dressing. Find step-by-step photos and more recipe tips above.

    • If the potatoes are clean, leave the skin on and trim any blemishes or green spots. Cut into large wedges.

    • Add potatoes to a medium pot and cover with cold water. Stir in 1 teaspoon salt.

    • Bring to a boil, then reduce to a simmer and cook until potatoes are just tender when pierced with a knife, about 12–15 minutes.

    • Drain and allow potatoes to cool slightly, then cut into cubes.

    • While the potatoes cool, dice the cucumber, pickles and green onions.

    • In a large bowl, whisk together mustard, salt, pepper, pickle juice, mayonnaise and sour cream until smooth.

    • Add the diced pickles, cucumber, green onions and potatoes to the bowl.

    • Gently mix until everything is evenly coated in the dressing.

    • Taste and adjust seasoning if needed.

    • Serve topped with extra green onions or chives and a little cracked pepper.

    • Can I make potato salad ahead of time? Yes. It actually tastes better after chilling for a few hours as the flavours meld together, which makes it perfect for BBQs or meal prep.
    • What potatoes work best? Waxy potatoes like white or Yukon Gold hold their shape well.
    • Can I make this healthier? Yes — swap the sour cream for Greek yogurt and use light mayonnaise.
    • Can I skip the sweet pickles? You can, but they balance the tangy dill pickles nicely.
    • Can I add herbs? Fresh dill or chives are fantastic here.
    • Start potatoes in cold water. This helps them cook evenly instead of being mushy outside and undercooked inside.
    • Don’t overcook the potatoes. They should be tender but still hold their shape. Overcooked potatoes will make the salad mushy.
    • Let the potatoes cool slightly before mixing. If they’re too hot, the dressing can separate.
    • Chop everything evenly. Small, uniform pieces make every bite balanced.
    • For extra flavor. Add a little chopped fresh dill or chives.
    • Storage: Store in an airtight container in the fridge for up to 4 days. Stir before serving as the dressing may settle.
    • Add hard-boiled eggs for a classic deli-style potato salad.
    • Add crispy bacon for a smoky twist.
    • Swap cucumber for celery if you prefer.

    Calories: 175kcal | Carbohydrates: 28g | Protein: 3g | Fat: 6g | Saturated Fat: 2g | Polyunsaturated Fat: 3g | Monounsaturated Fat: 1g | Trans Fat: 0.01g | Cholesterol: 8mg | Sodium: 762mg | Potassium: 623mg | Fiber: 3g | Sugar: 4g | Vitamin A: 227IU | Vitamin C: 27mg | Calcium: 55mg | Iron: 1mg

    Keywords: potato salad, Creamy Potato Salad with Dill Pickles, Dill Pickle Potato Salad

    Check Out These Salad Recipes


    Source link

  • Liz’s Bistro Salad Recipe – Pinch of Yum

    Liz’s Bistro Salad Recipe – Pinch of Yum

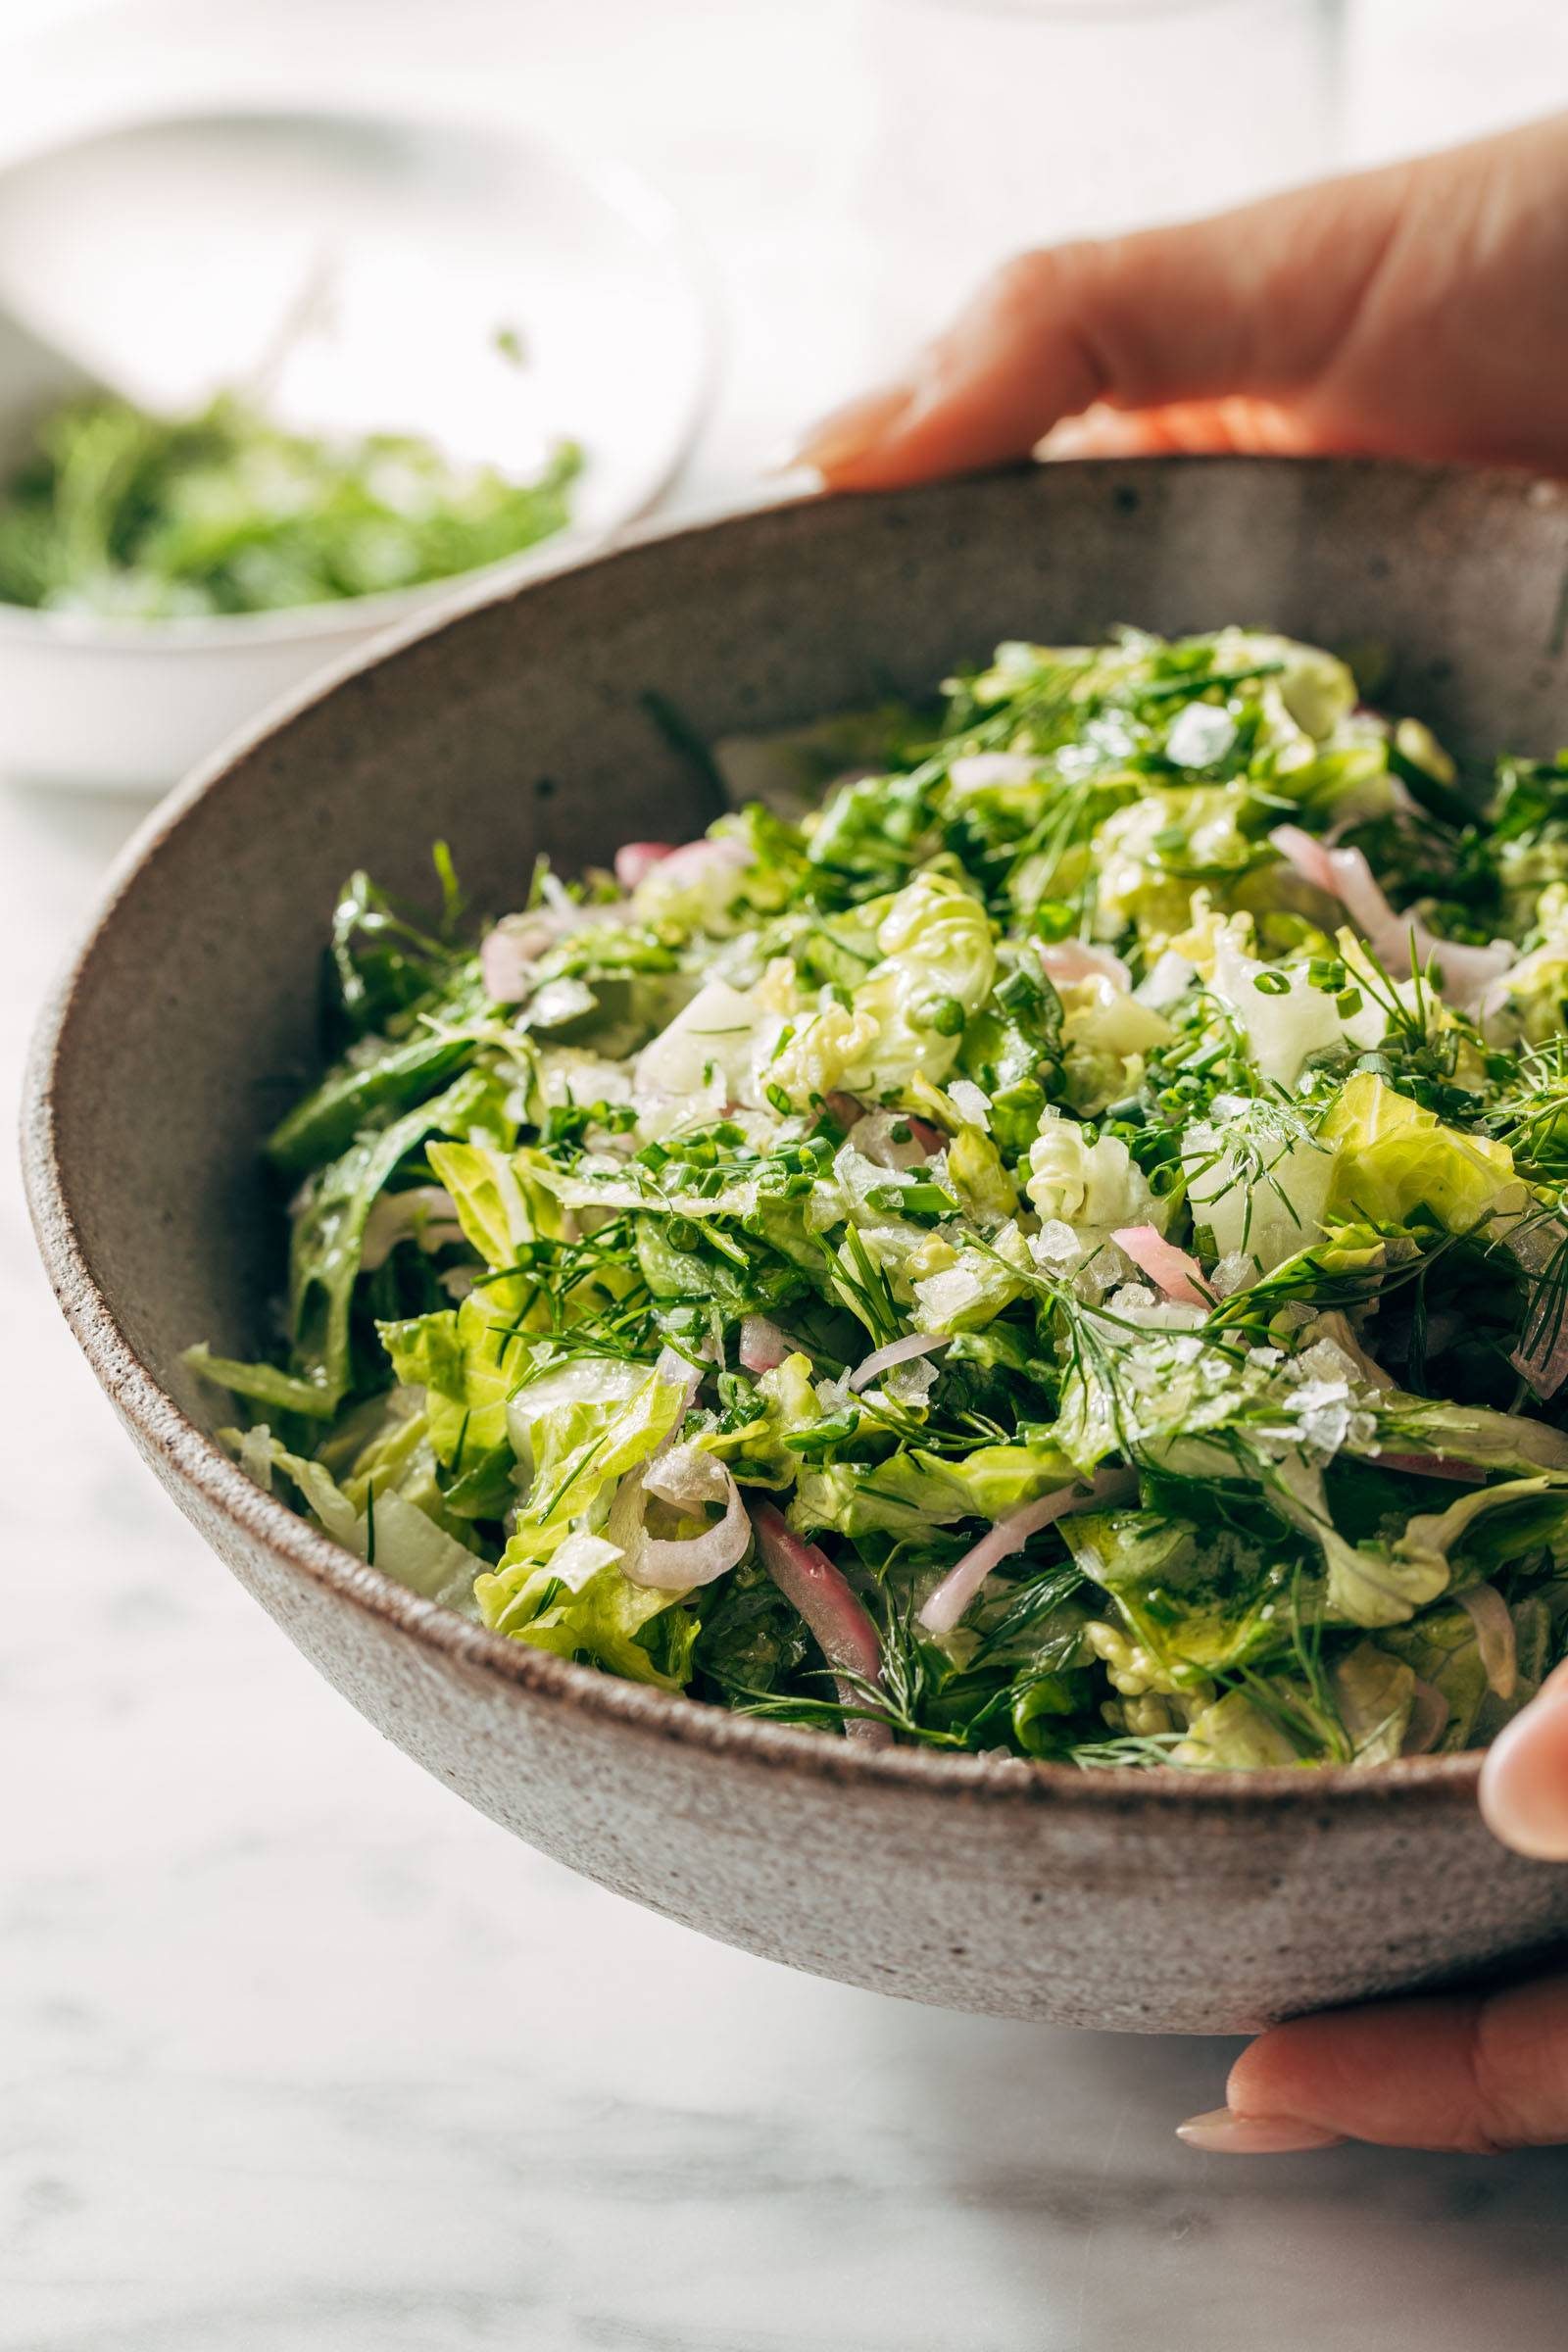
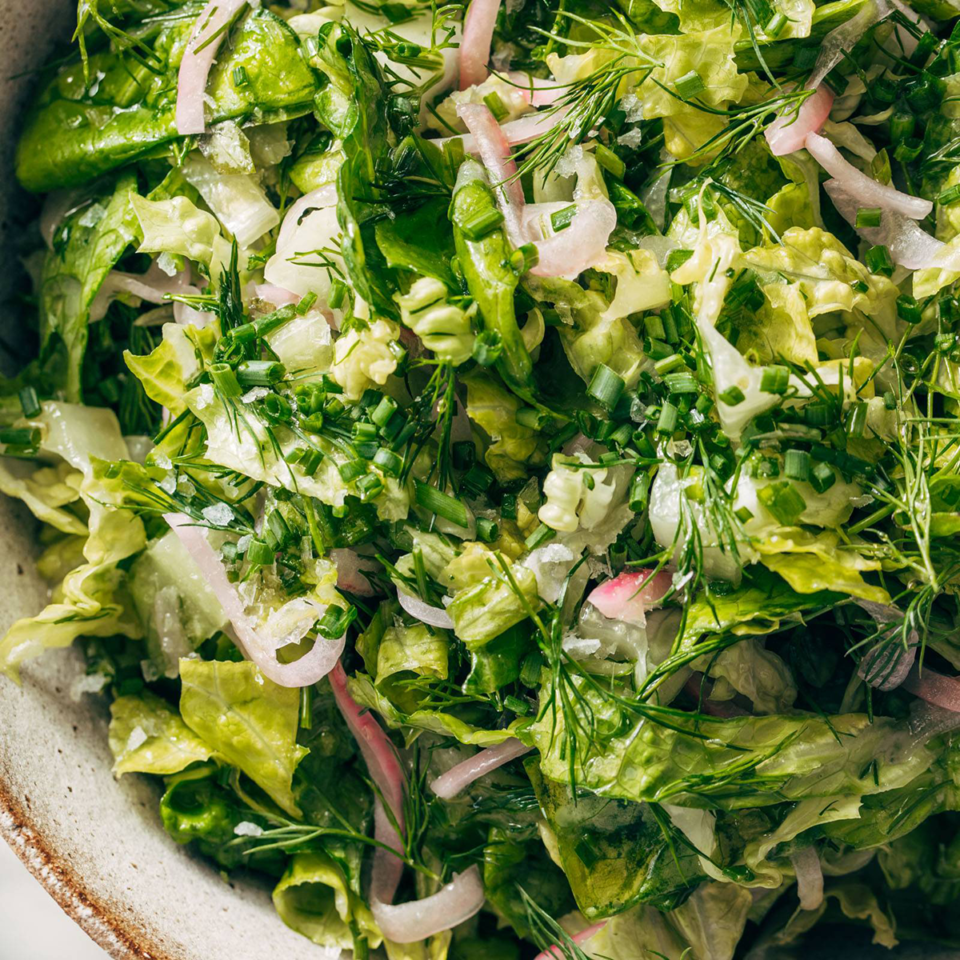
    Crunchy, light, bright, and ultra-fresh. This French-inspired bistro salad is an absolute star as a side for nearly any dinner. Tender greens, fresh herbs, pickled onions, and a delicate vinaigrette on top.

    This salad!

    WOW. I am fully in love with this salad.

    My friend Liz (of Liz’s Roasted Broccoli Salad fame) brought this salad to our dinner club a few weeks ago. We had a French-ish theme – charcuterie, French onion soup, beef bourguignon, creamy potatoes, homemade bread, and creme brûlée. LOL. And then there was Liz’s salad. It was like a little beacon of brightness in a sea of cream, butter, and cheese. I would (and have) eat this as a salad on its own, but the contrast of this with, say, a beef stew, or a really cheesy panini, or a big bowl of luscious mushroom soup – that’s where this salad shines.

    In This Post: Everything You Need For This Bistro Salad

    It’s a study in simplicity. The entire salad is greens, herbs, pickled onions, and vinaigrette. That’s it. It’s like a love song to everything green.

    But here’s why I really love it:

    It is an A+ balance of crunchy and light and delicate – the herbs are ultra-fresh but not bossy, the pickled onions are there but not in your face, and the combination of finely chopped romaine (cronchy) with gently torn butter lettuce (tender) with the lightest, brightest vinaigrette slicked into to every nook and cranny is absolute salad perfection.


    Print

    clock clock iconcutlery cutlery iconflag flag iconfolder folder iconinstagram instagram iconpinterest pinterest iconfacebook facebook iconprint print iconsquares squares iconheart heart iconheart solid heart solid icon

    Description

    Crunchy, light, bright, and ultra-fresh. This French-inspired bistro salad is an absolute star as a side for nearly any dinner. Tender greens, fresh herbs, pickled onions, and a delicate vinaigrette on top. 


    Pickled Onions

    Bistro Salad

    Vinaigrette


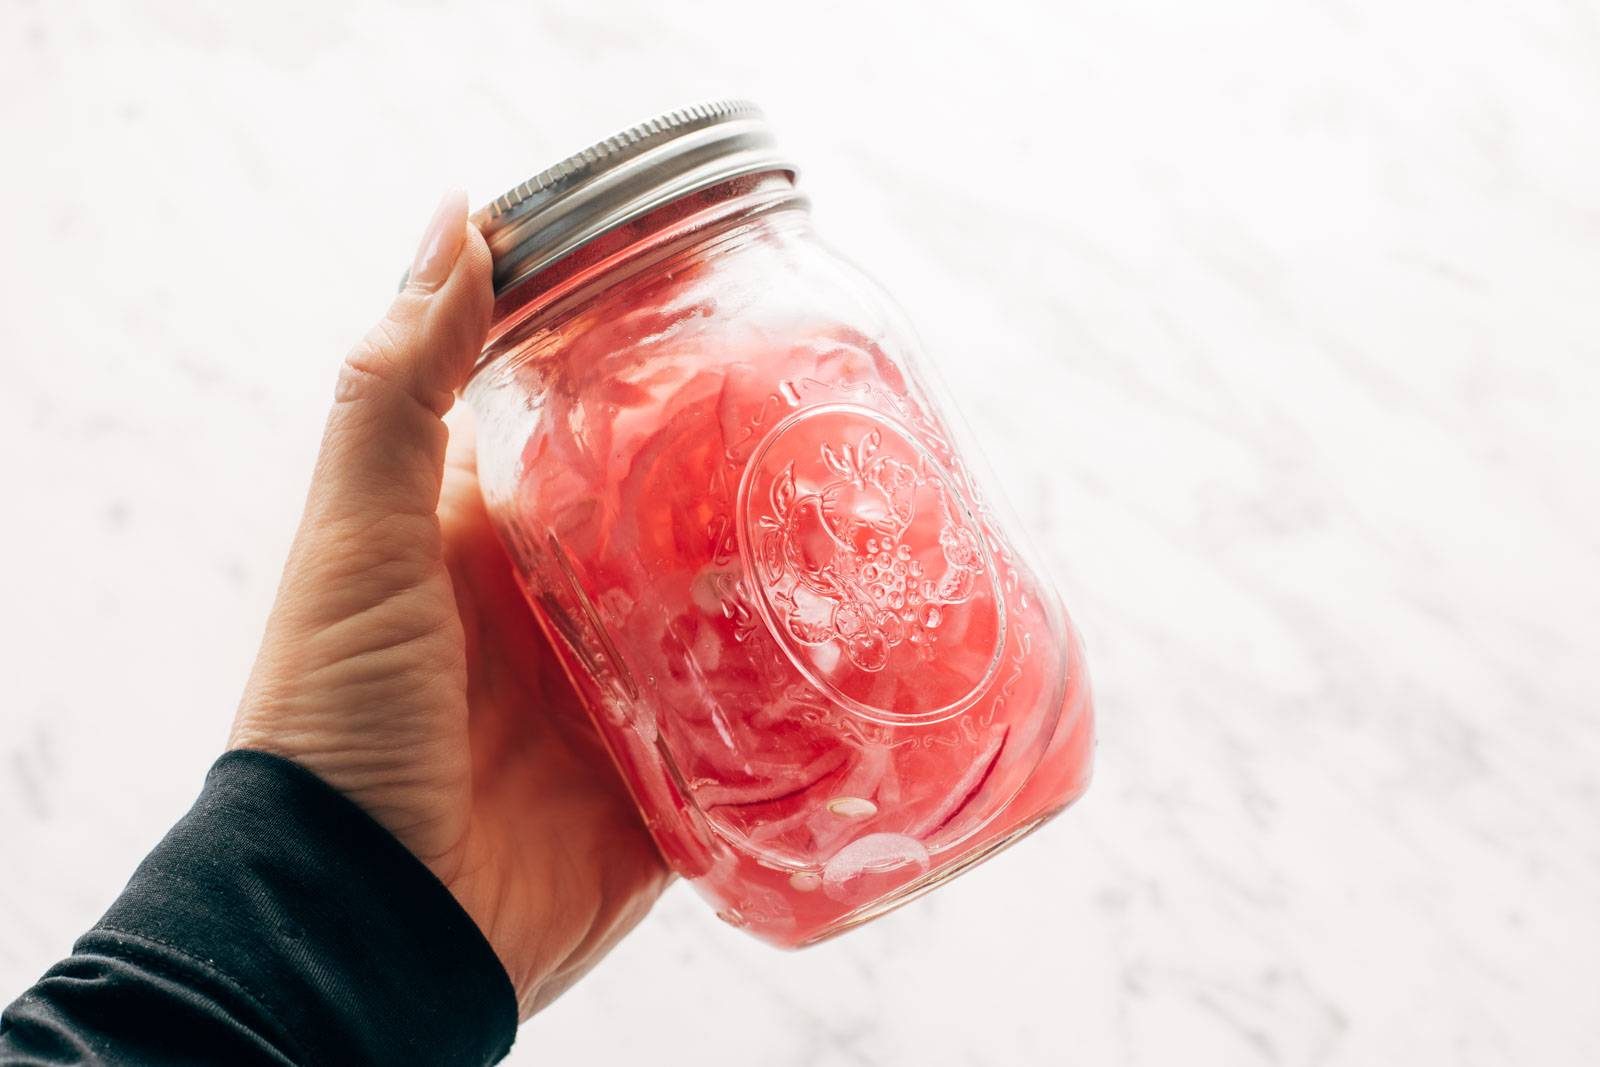
    1. Pickled Onions: Place the onions in a jar; fill the jar about a third of the way with vinegar, then fill to the top of the onions with water. Add salt and sugar, shake, and keep in the fridge for a few hours or a few days. (I’d suggest 30 minutes minimum if you’re short on time.) Pickled onions in a jar.
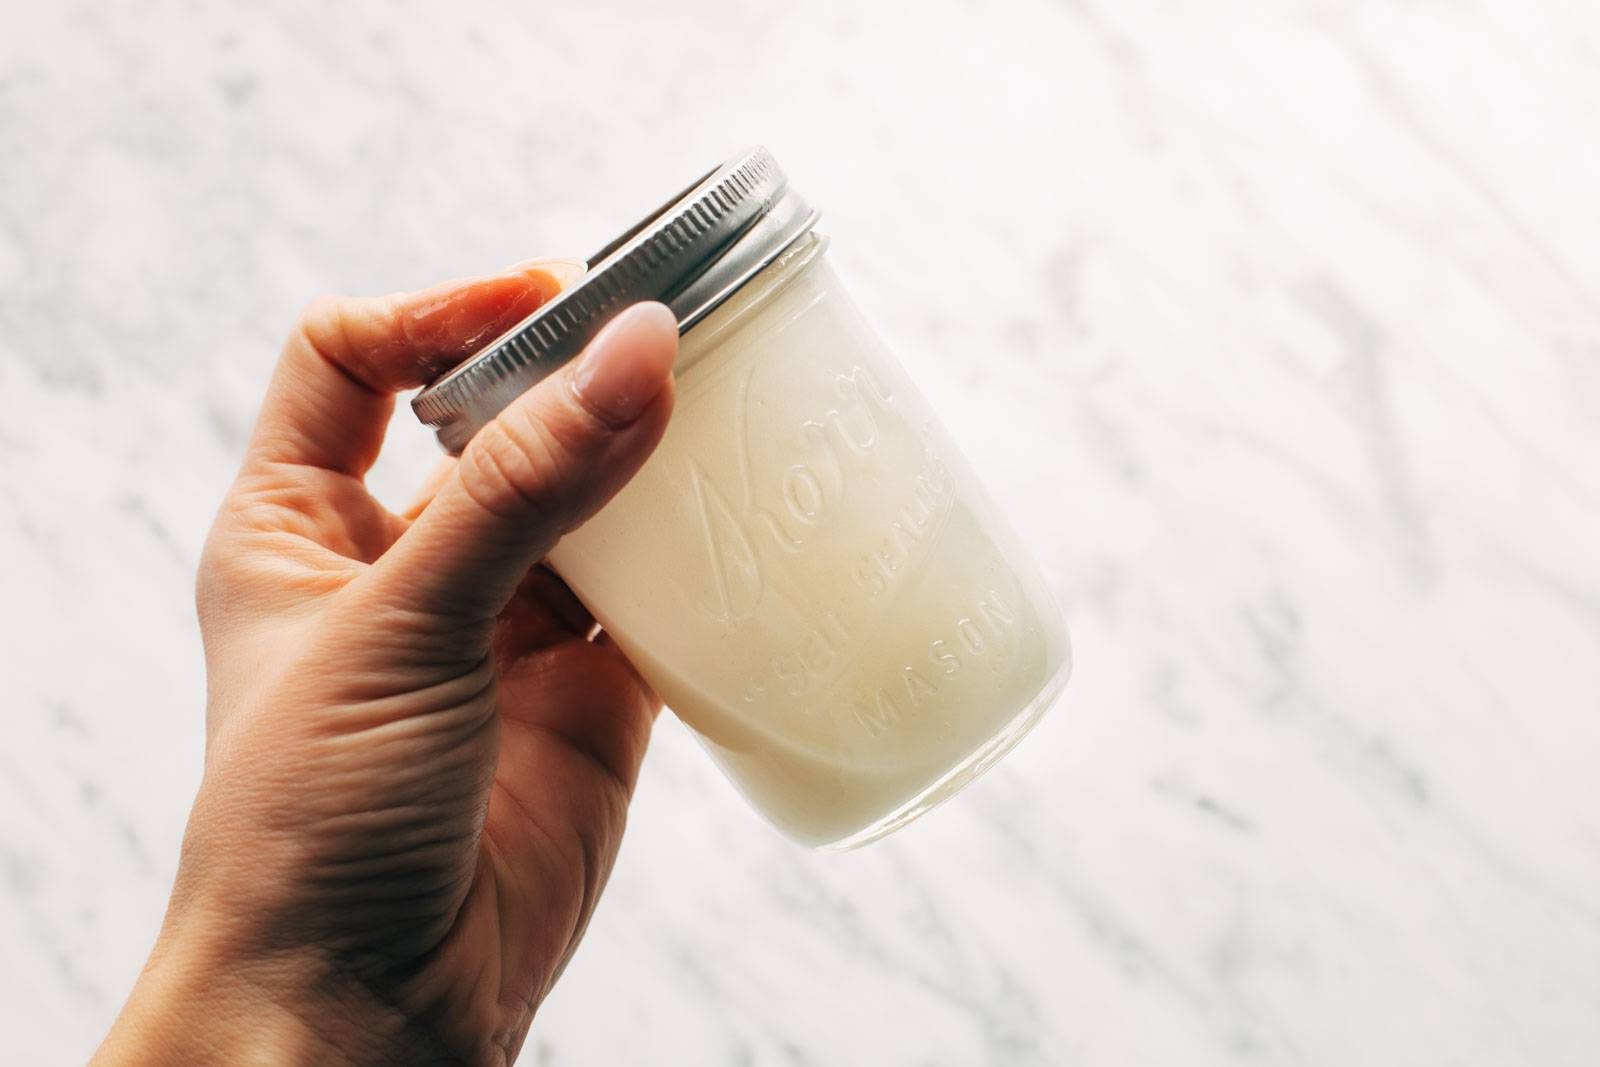
    2. Vinaigrette: Shake all dressing ingredients in a jar. It should be pleasantly bright and mellow – remember we’ll be adding a bunch of onions and herbs to the salad, so it’s okay for this dressing to be pretty chill. Keep this in the fridge if making ahead. Dressing in a jar.
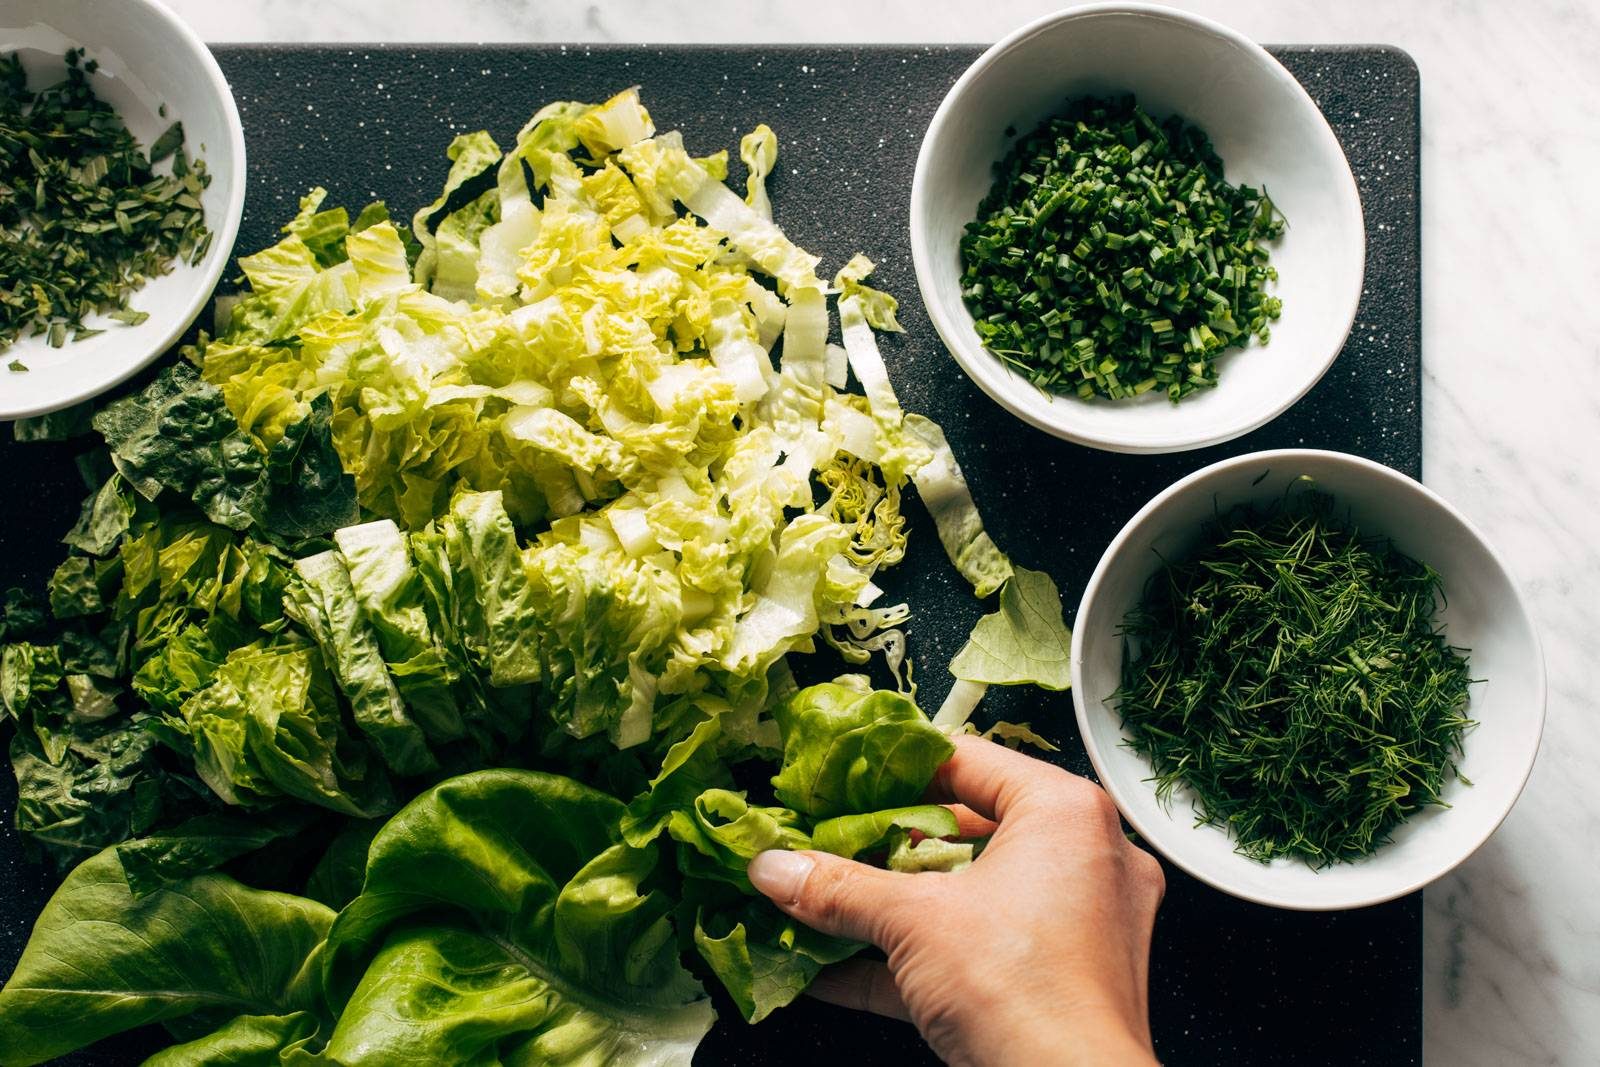
    3. Salad: Prep all your salad greens – chop the romaine and the herbs, and gently tear the lettuce leaves into bite sized pieces. Chopped veggies and herbs on a cutting board.
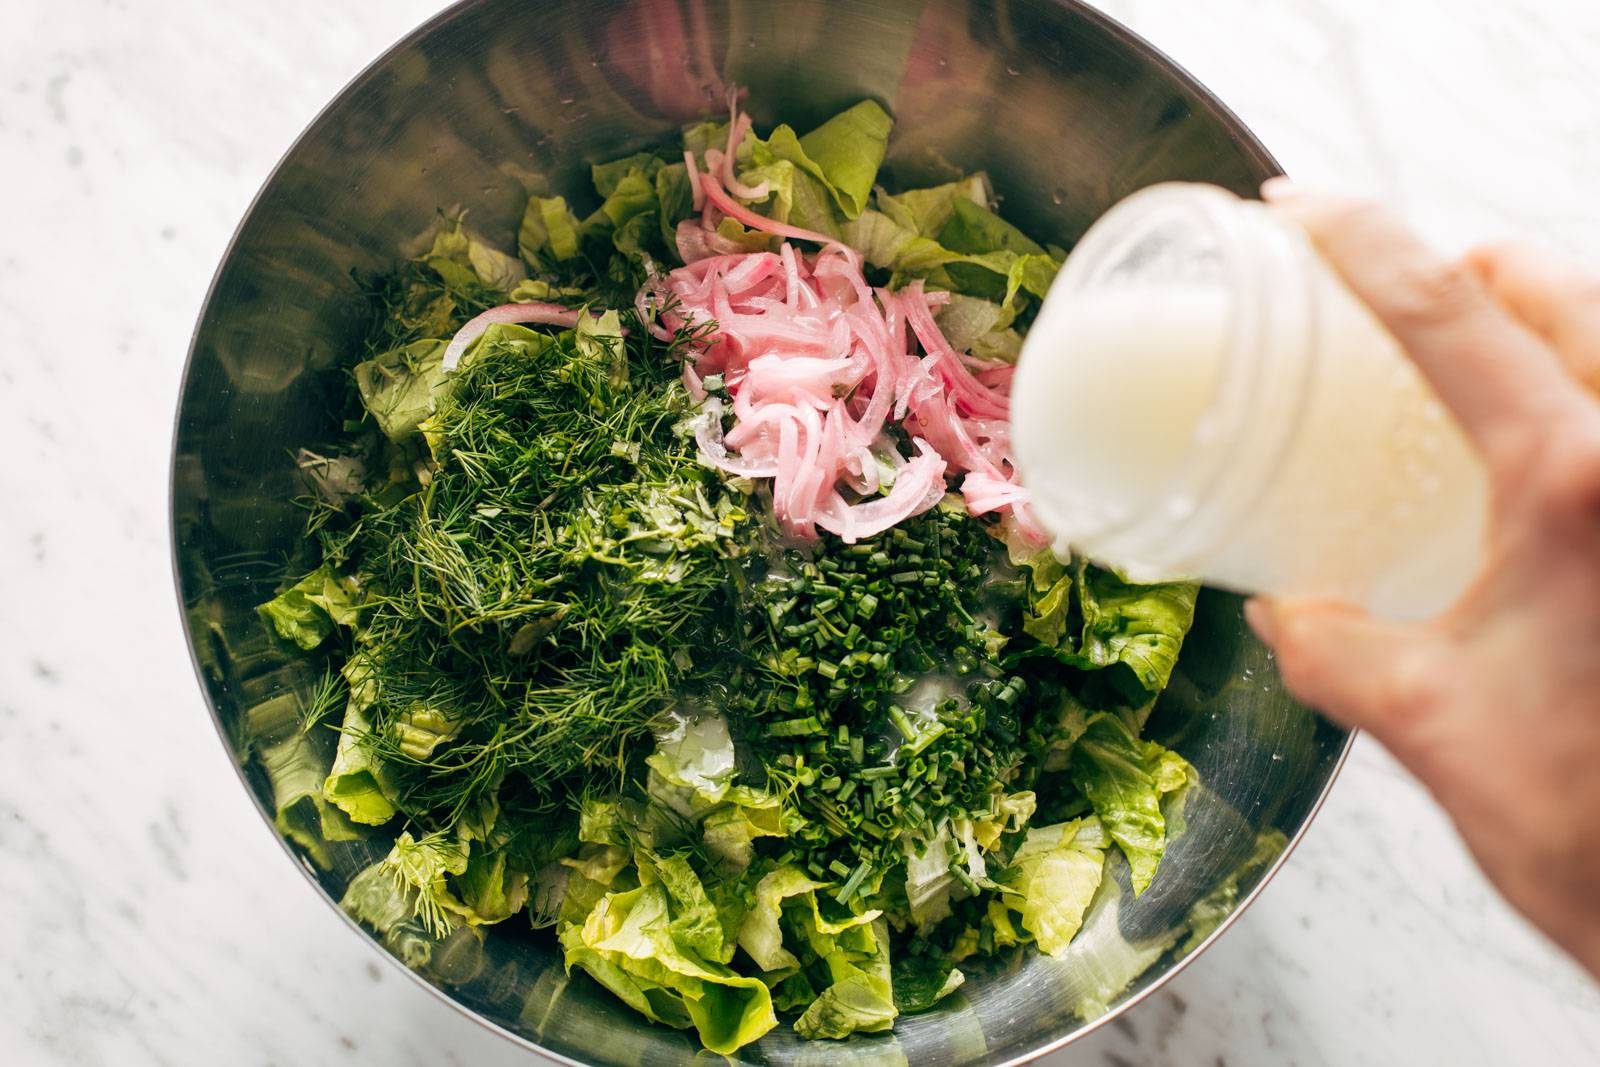
    4. Toss: Just before serving, toss greens, herbs, pickled onions, and dressing together – starting with about half of the dressing that’s in the jar, and adding more as necessary. Pouring salad dressing on a bowl of greens and herbs.
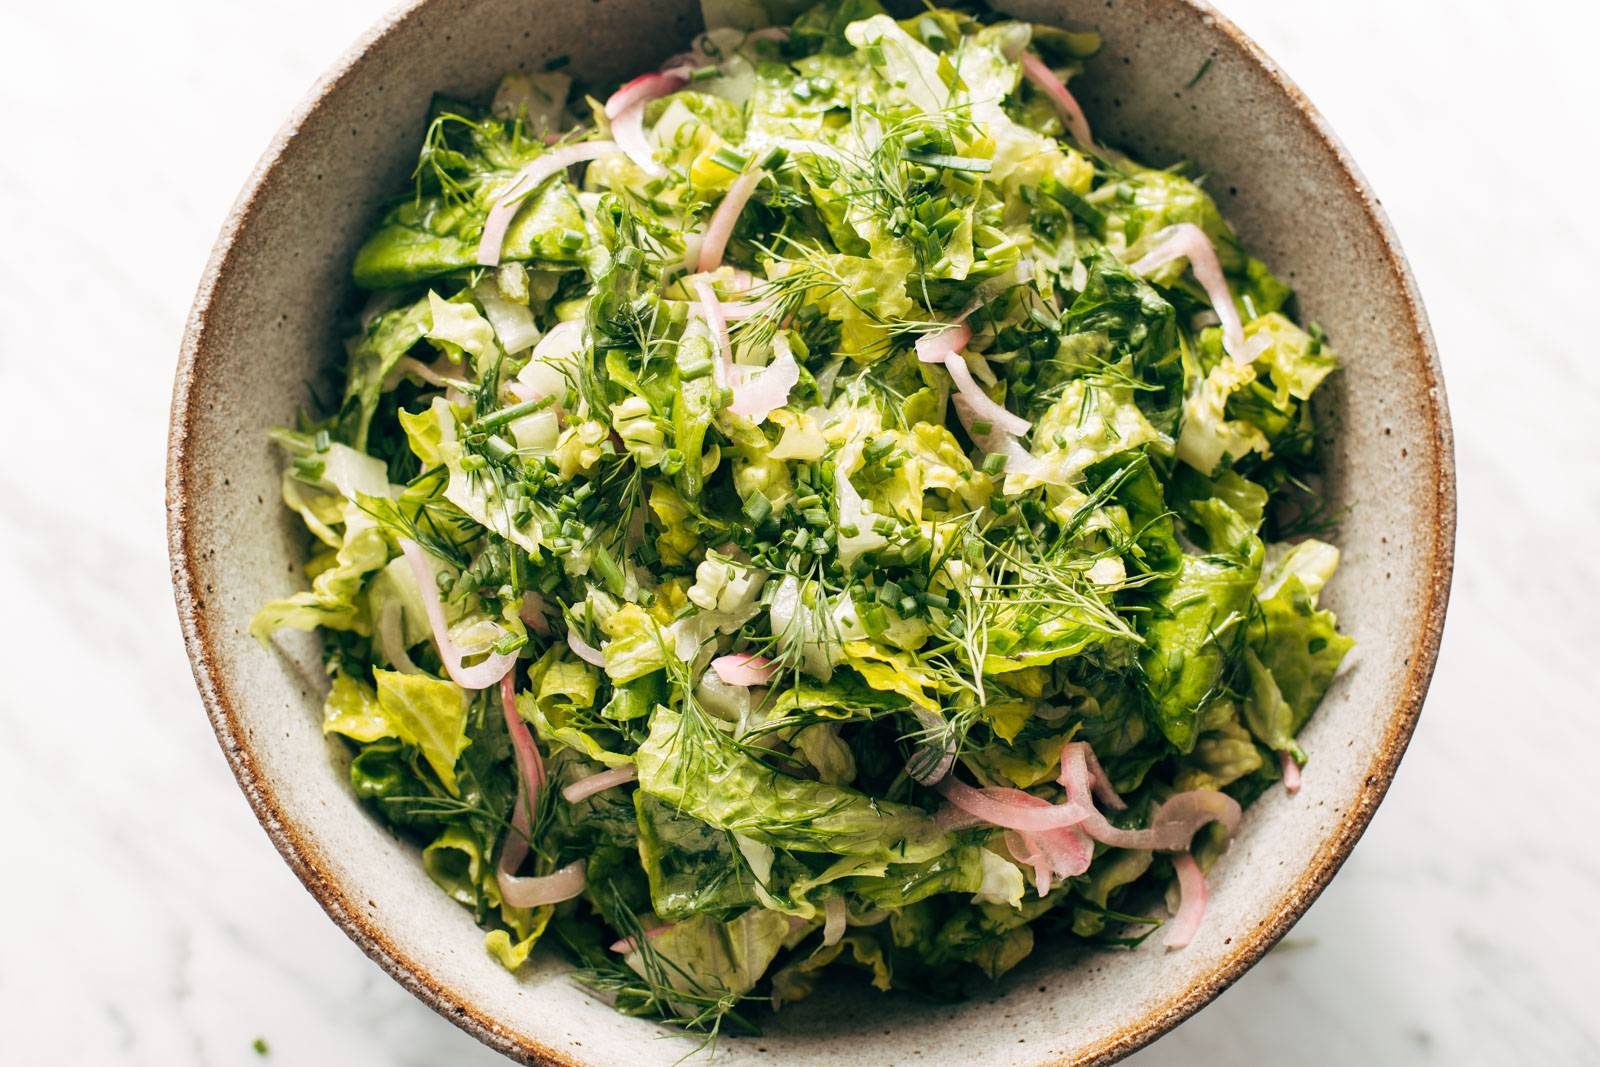
    5. Serve: Taste and adjust; add salt and pepper to taste. It’s tender, bright, a little puckery, and so fresh. I love it. Finished bistro salad in a bowl.

    Notes

    To make ahead: prep the onions and the dressing. Chop the greens. Store everything separately in the fridge, and assemble the amount you need just before serving! This works really well as a make-ahead side salad for dinners throughout the whole week. I would double the dressing and then just buy a bunch of greens and throw my 2-4 person salads together every night throughout the week.

    If you want to scale this up, you should have enough dressing for a 6-8 serving salad; just add another romaine heart and use a full head of butter lettuce instead of half.

    You can use another oil if you want, but I like canola for the neutral flavor – it keeps the dressing very mild.

    • Prep Time: 45 minutes
    • Category: Salad
    • Method: Chop
    • Cuisine: French-Inspired

    Keywords: bistro salad, french salad, side salad

    Other Things To Know About This Bistro Salad

    Salad with lettuce, fresh herbs, and pickled onions in a bowl.

    What Makes This a Bistro Salad?

    To my knowledge, this is generally what I understand to be a French Bistro Salad – or a simple green salad that is served in cafes and bistros around France. Liz brought this as the salad for our French dinner club night! And none of us are French, so we’re just doing our best out here to learn and borrow some French sophistication which is why I’m not necessarily going to call this a “French Bistro Salad” in case we are way off the mark.

    In general, I just like to think of this as a lightly dressed pile of greens that mentally takes you to a much fancier place (BISTRO LIFE!) and complements almost any dish on any plate. If you have more context on French Bistro Salads in general, feel free to pop your thoughts into the comments. 🙂

    What Else Could You Add To This Salad?

    If you’re feeling extra, a couple ideas that seem really solid:

    • toasted nuts like walnuts
    • goat cheese crumbles
    • shaved Parmesan cheese
    • golden crispies (really, just an excuse to make a big batch of these)
    • thinly shaved vegetables or fruits – squash, cucumber, apples

    Do You Have To Use Canola Oil?

    No, you don’t. The reason it’s used here is because it’s a neutral-flavored oil. But I will say, I have made this with olive oil and it’s delicious. My understanding is that part of the key to a French bistro salad is a very light dressing that doesn’t overpower the greens, and of the two versions I made, I definitely preferred the canola oil dressing – the olive oil comes on a bit strong. But personally, I’m not too precious of a cook so I say any kind of oil (where you like the flavor of the oil) could work! Just remember that everything here is pretty delicate (the chives, the lettuce, the dill, etc.) so you don’t want any one thing to really take over the salad.

    How Long Does This Keep?

    Not long, especially after you mix it. Those leaves start to get soggy pretty quickly, so I would recommend tossing the salad up within 5-15 minutes of serving. The elements will all keep individually for several days in the fridge, so keep them separate in the fridge and you’ll be good to go!

    How Great Is Liz?

    VERY GREAT! She is my salad-famous friend, the one we always go to for ideas on making vegetables great. Thanks, Liz! ♡

    Liz’s Bistro Salad: Frequently Asked Questions

    Can I use any salad greens here?

    Tender greens, like butter lettuce and romaine, really work best here so that the salad doesn’t get overpowered in flavor from something like spinach or arugula.

    How long will the pickled onions last?

    Store them for 3-5 days in a sealed jar in the fridge!

    Can this salad be meal prepped?

    Sure! The elements will all keep individually for several days in the fridge, so keep them separate in the fridge, mix things together right before enjoying, and you’ll be good to go!

    Source link

  • Quick and Easy Homemade Salsa

    Quick and Easy Homemade Salsa

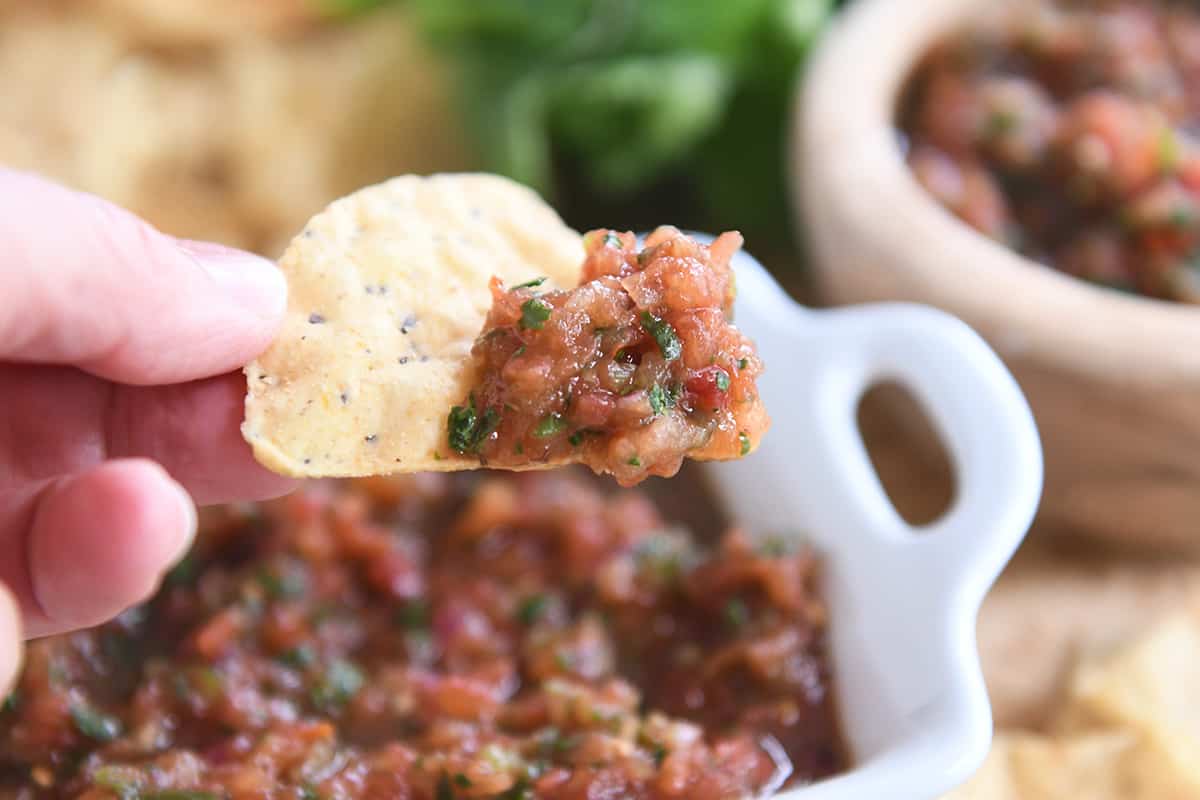
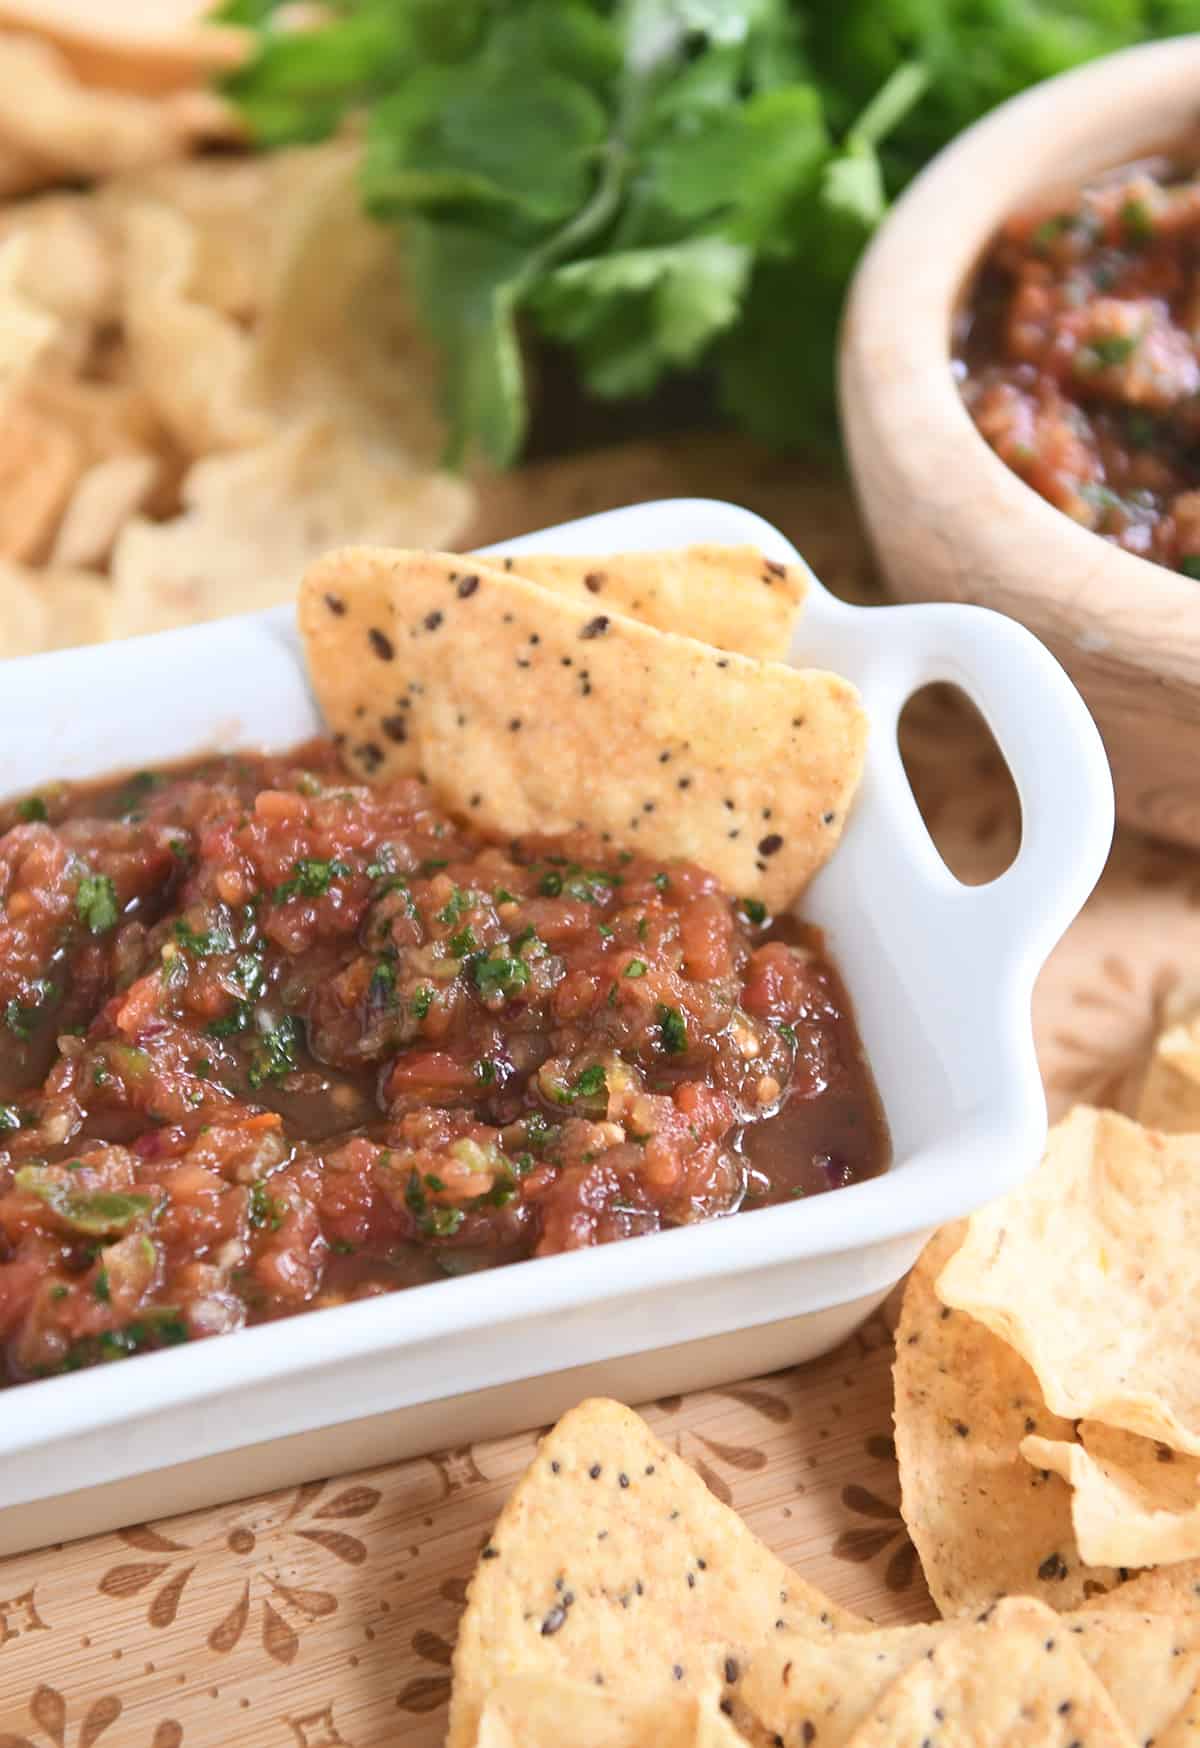
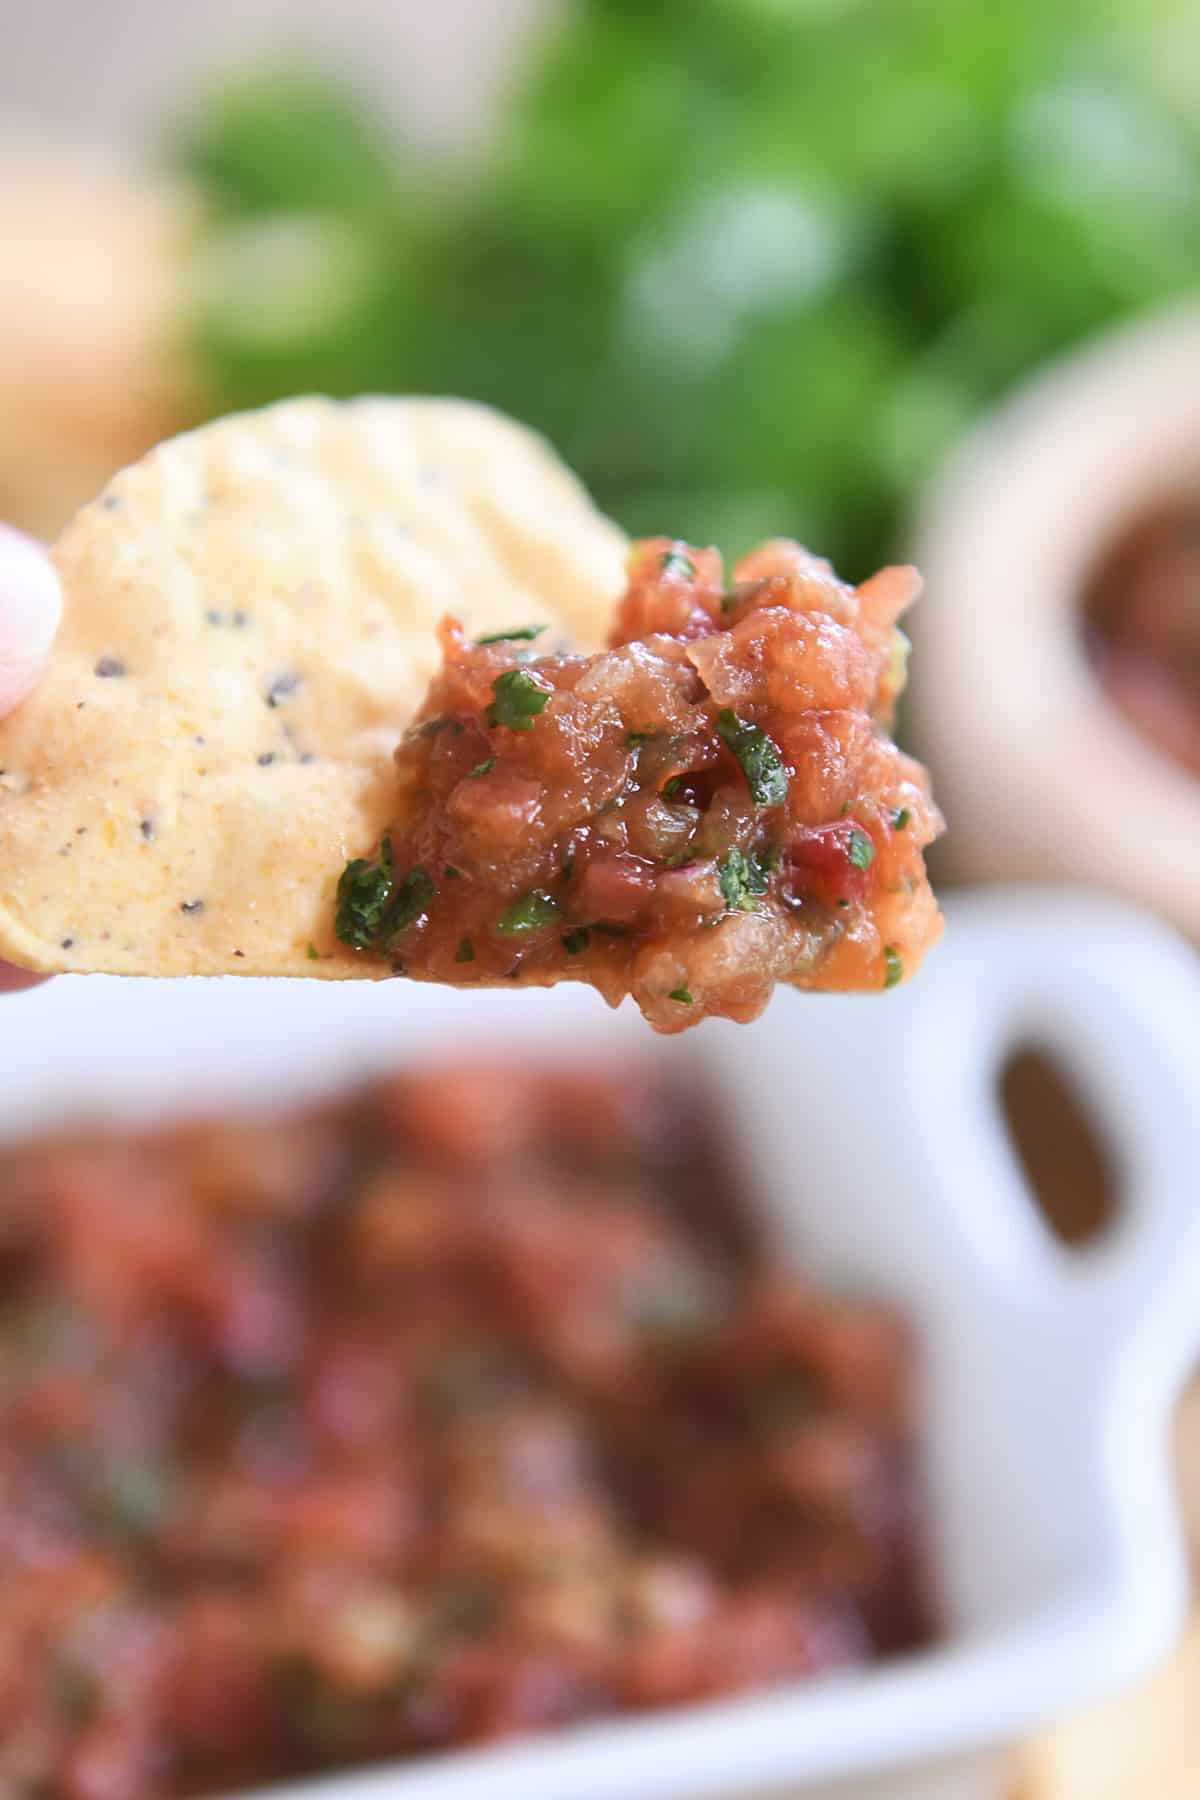
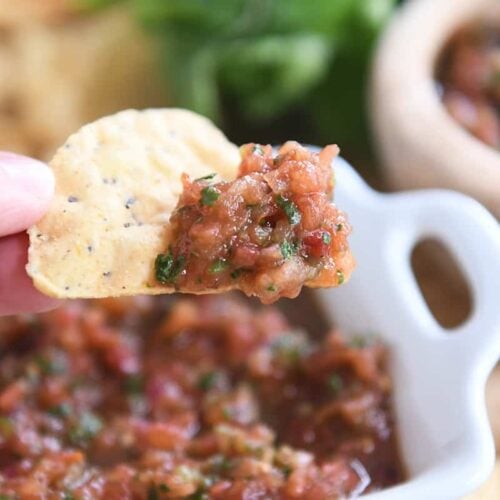
    This quick and easy homemade salsa is almost too good to be true. So fast and so simple, this fresh-tasting salsa will be yours in a matter of minutes!

    There is definitely a time and a place for real deal homemade salsa that can sit nice and pretty on your pantry shelves all year long.

    But when that level of effort is not in the cards (hi. me. most every day lately), this delicious, quick and easy version is for you.

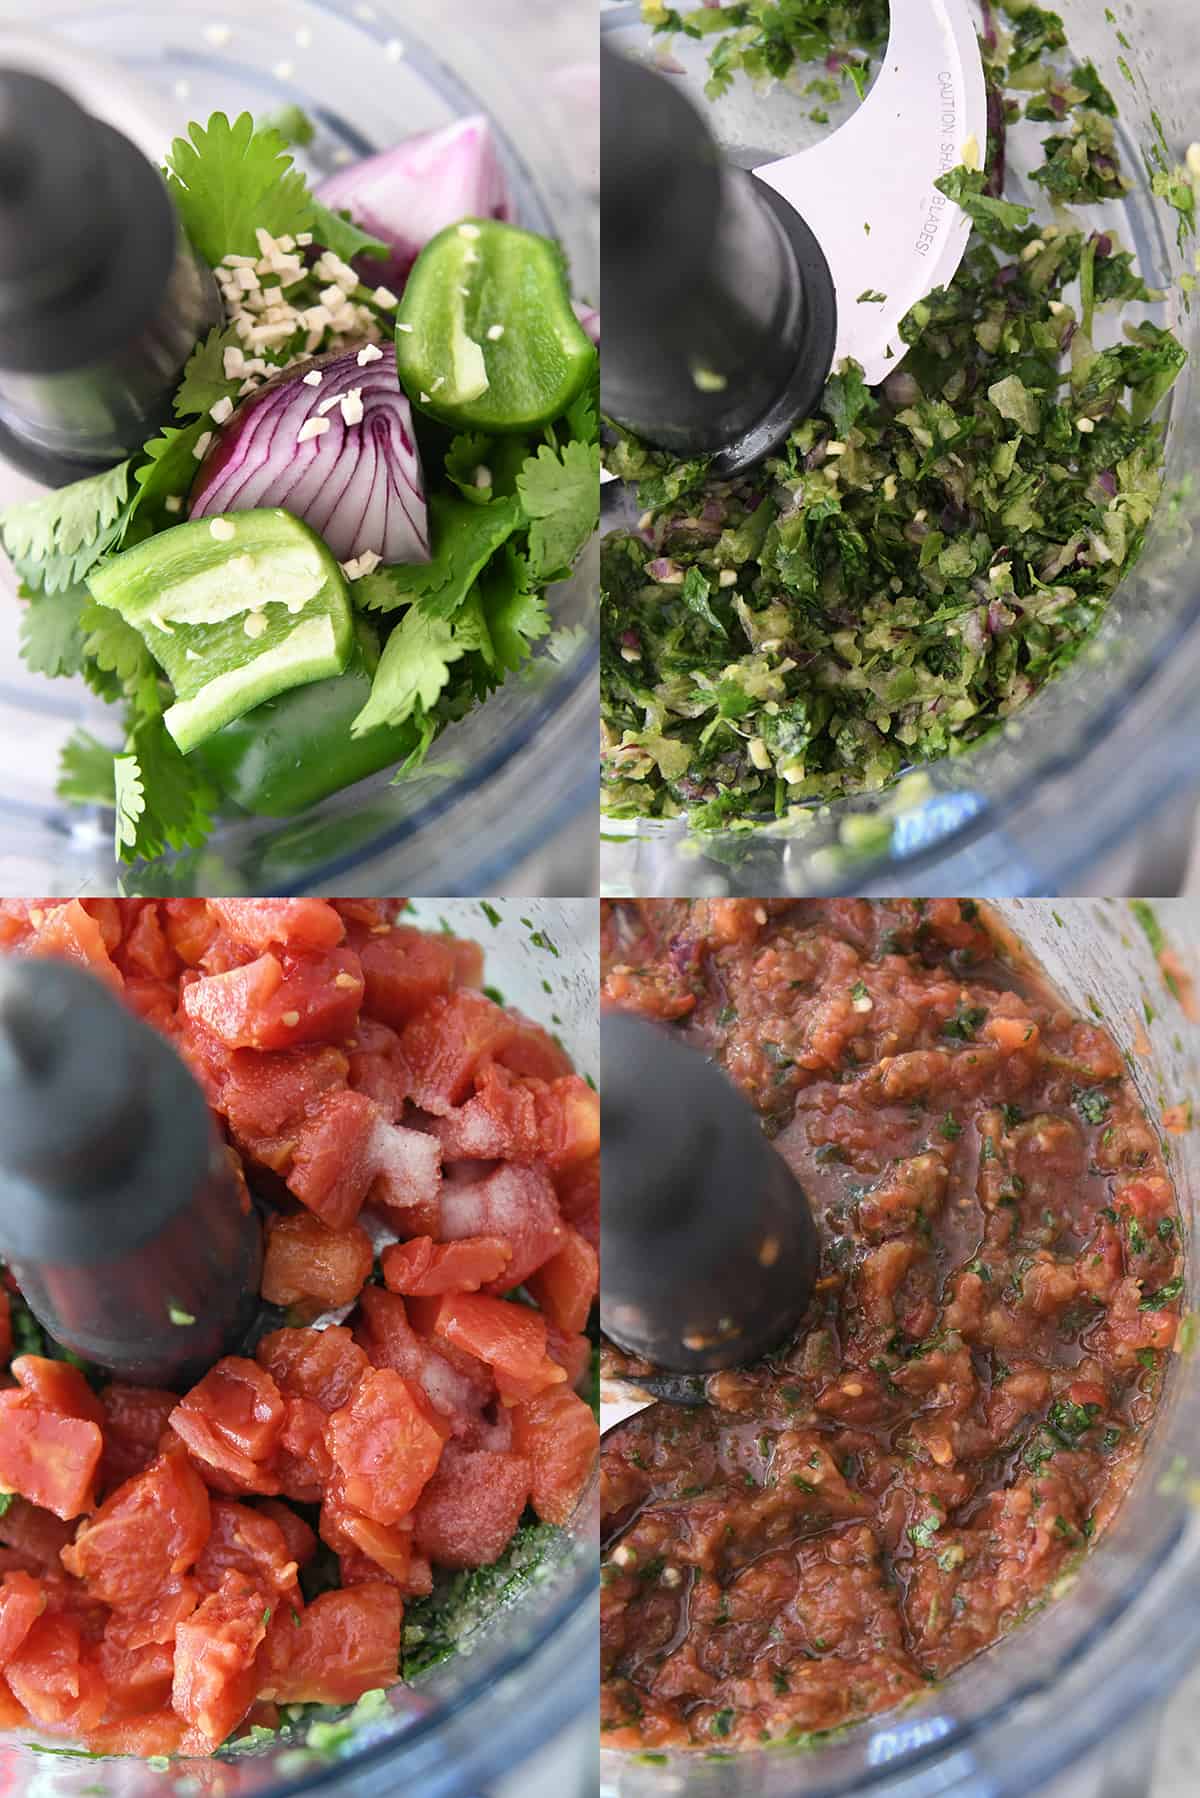
    How to Make Salsa in 5 Minutes or Less

    Step 1: chop up the cilantro, jalapeño, onion and garlic in a food processor*

    Step 2: add the tomatoes, salt and lime juice

    Step 3: pulse until your heart tells you it’s time to stop

    Step 4: grab the chips and dig in

    *Equipment Tip: I use a food processor for this recipe. But check out the notes below in the recipe for using a blender.

    Fresh and Flavorful

    Before you turn your nose up at canned tomatoes, give this salsa a chance. Otherwise, you’ll be missing out.

    The fresh flavors of the cilantro, lime juice, onion and garlic transform the canned tomatoes into a salsa worthy of any occasion.

    I’ve been making a version of this quick and easy homemade salsa for over ten years. In fact, if you’ve been around long enough you’ll recognize this old recipe.

    I took that recipe, plus a few notes from readers over the years, and created a slightly easier (if that’s even possible) and fresher version.

    Best Salsa Ever

    This salsa is so good that people have a really hard time believing it’s made from canned tomatoes.

    All the while, I’m sitting over here smug as a bug in a rug that I didn’t have to put my big pioneer girl pants on and peel fresh tomatoes. And we all still got crazy delicious salsa out of the deal. How ’bout that.

    I’ll never, ever turn my back on this epic 5-star homemade salsa recipe, but when I need fabulous, fresh-tasting salsa in a pinch AND want to delegate the making of it to my kids, this quick and easy version is where it’s at.

    One Year Ago: Loaded Fresh Basil and Sweet Corn Couscous Green Salad 
    Two Years Ago: Amazing Grilled Pork and Veggie Salad 
    Three Years Ago: Lemon Swig Sugar Cookies with Divine Lemon Frosting {No Rolling or Cutting Out!}
    Four Years Ago: Instant Pot Spaghetti 
    Five Years Ago: My Go-To Brownie Recipe {One-Bowl Deep, Dark Chocolate Brownies}
    Six Years Ago: Chicken Taco Salad {InstantPot, Slow Cooker, or Stovetop} 
    Seven Years Ago: Baked Orange-Glazed Meatballs
    Eight Years Ago: Glazed Lemon Yogurt Sheet Cake
    Nine Years Ago: Sour Cream Lime Tart {Or Pie!} 
    Ten Years Ago: Broiled Parmesan and Lemon Chicken 

    Quick and Easy Homemade Salsa

    • ½ bunch cilantro (about 1/2 cup packed – see note)
    • 1 jalapeño pepper, stem and seeds removed (leave seeds if you want more heat)
    • ¼ of a medium red onion
    • ½ to 1 teaspoon minced garlic (about 2-3 cloves)
    • 2 cans (15-ounces each) regular or fire-roasted diced tomatoes, well-drained
    • 1 teaspoon salt
    • 1 teaspoon sugar (optional, but I like how it balances the flavors)
    • 2 tablespoons fresh lime juice

    Prevent your screen from going dark

    • Add the cilantro, jalapeño, red onion and garlic to a food processor (see note for blender). Pulse until the ingredients are finely chopped.

    • Add the tomatoes, salt and lime juice. Pulse until the salsa reaches desired consistency. I tend to like the tomatoes finely chopped, but you can leave it chunkier.

    • Add additional salt and lime juice to taste, if needed (important!). Serve immediately or refrigerate for up to a week. Extra liquid can be drained off before serving, if desired.

    Cilantro: I don’t usually measure this exactly, I just grab half of the cilantro bunch by the leafy ends and twist off the top part, leaving most of the stems. I throw the leafy bunch into the food processor.
    Red Onion: 1/4 of a medium onion equates to about a 2- or 3-inch piece of onion. Use more or less to taste.
    Blender: I haven’t tried this with a blender, but I *think* it should work. The trickiest part will be chopping up the cilantro, onion, and garlic in the first step. If your blender may struggle with that step, finely chop those ingredients before adding them to the blender with the tomatoes, salt and lime juice. Then use the blender to pulse all the ingredients until desired consistency is reached. 

    Serving: 1 serving, Calories: 19kcal, Carbohydrates: 5g, Protein: 1g, Fat: 1g, Saturated Fat: 1g, Sodium: 438mg, Fiber: 1g, Sugar: 3g

    Recipe Source: from Mel’s Kitchen Cafe (updated from this old recipe as well as from reader feedback over the years – thanks Heather J. for the inspiration to update this recipe after sending me your famous quick salsa recipe!)

    Disclaimer: I am a participant in the Amazon Services LLC Associates Program, an affiliate advertising program designed to provide a means for me to earn fees by linking to Amazon.com and affiliated sites. As an Amazon Associate I earn from qualifying purchases.
    Source link

  • Cheesy Tex-Mex Zucchini Skillet

    Cheesy Tex-Mex Zucchini Skillet

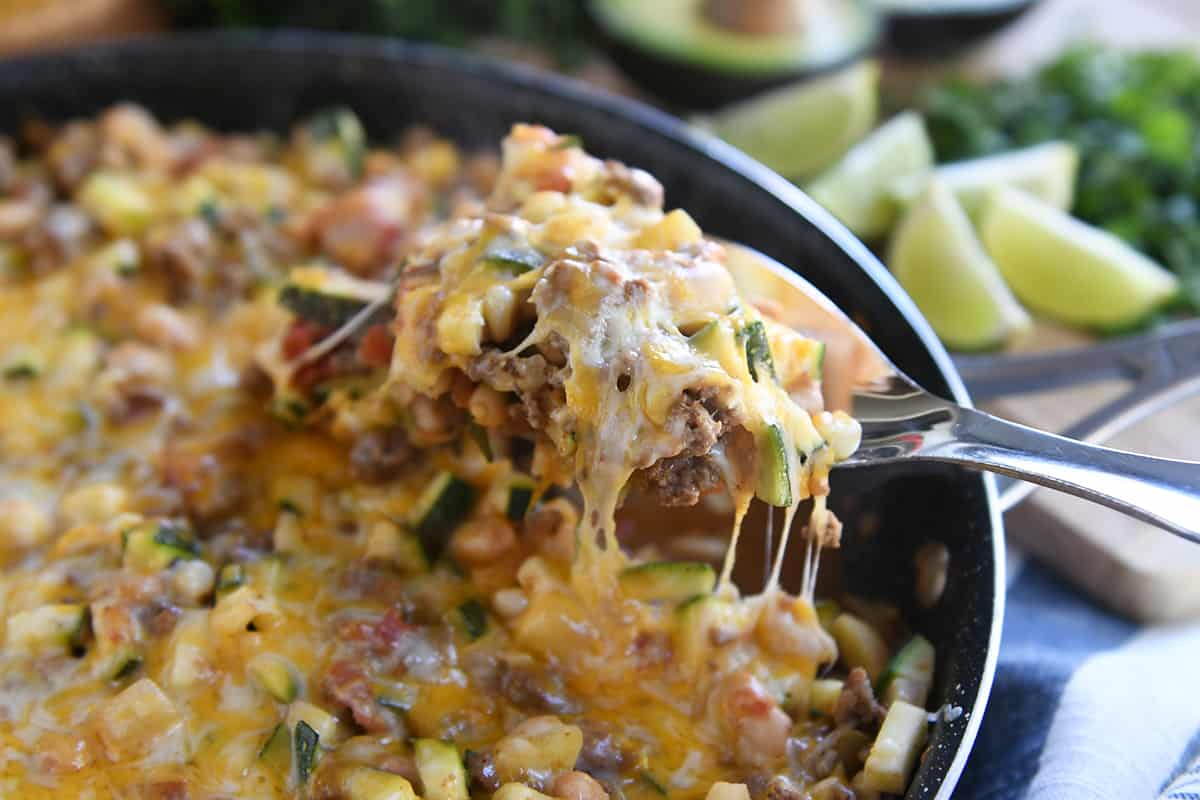
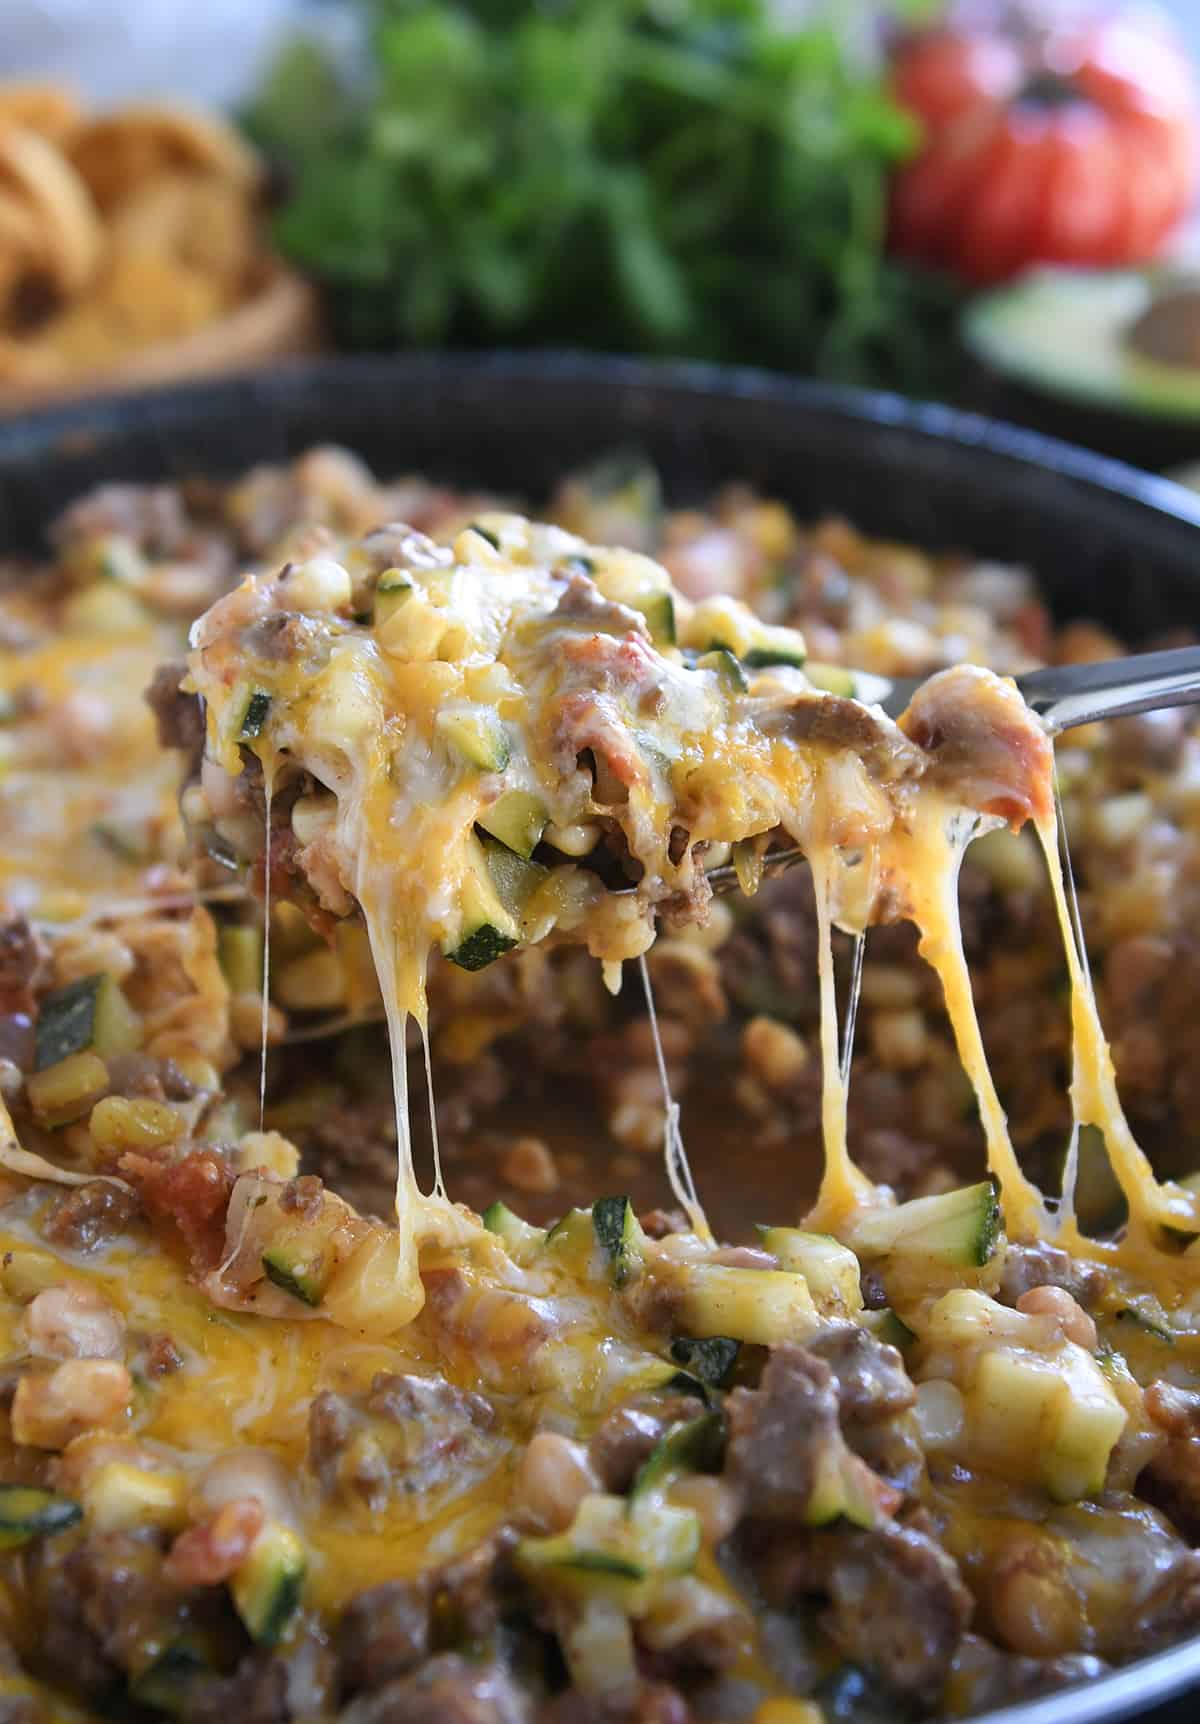
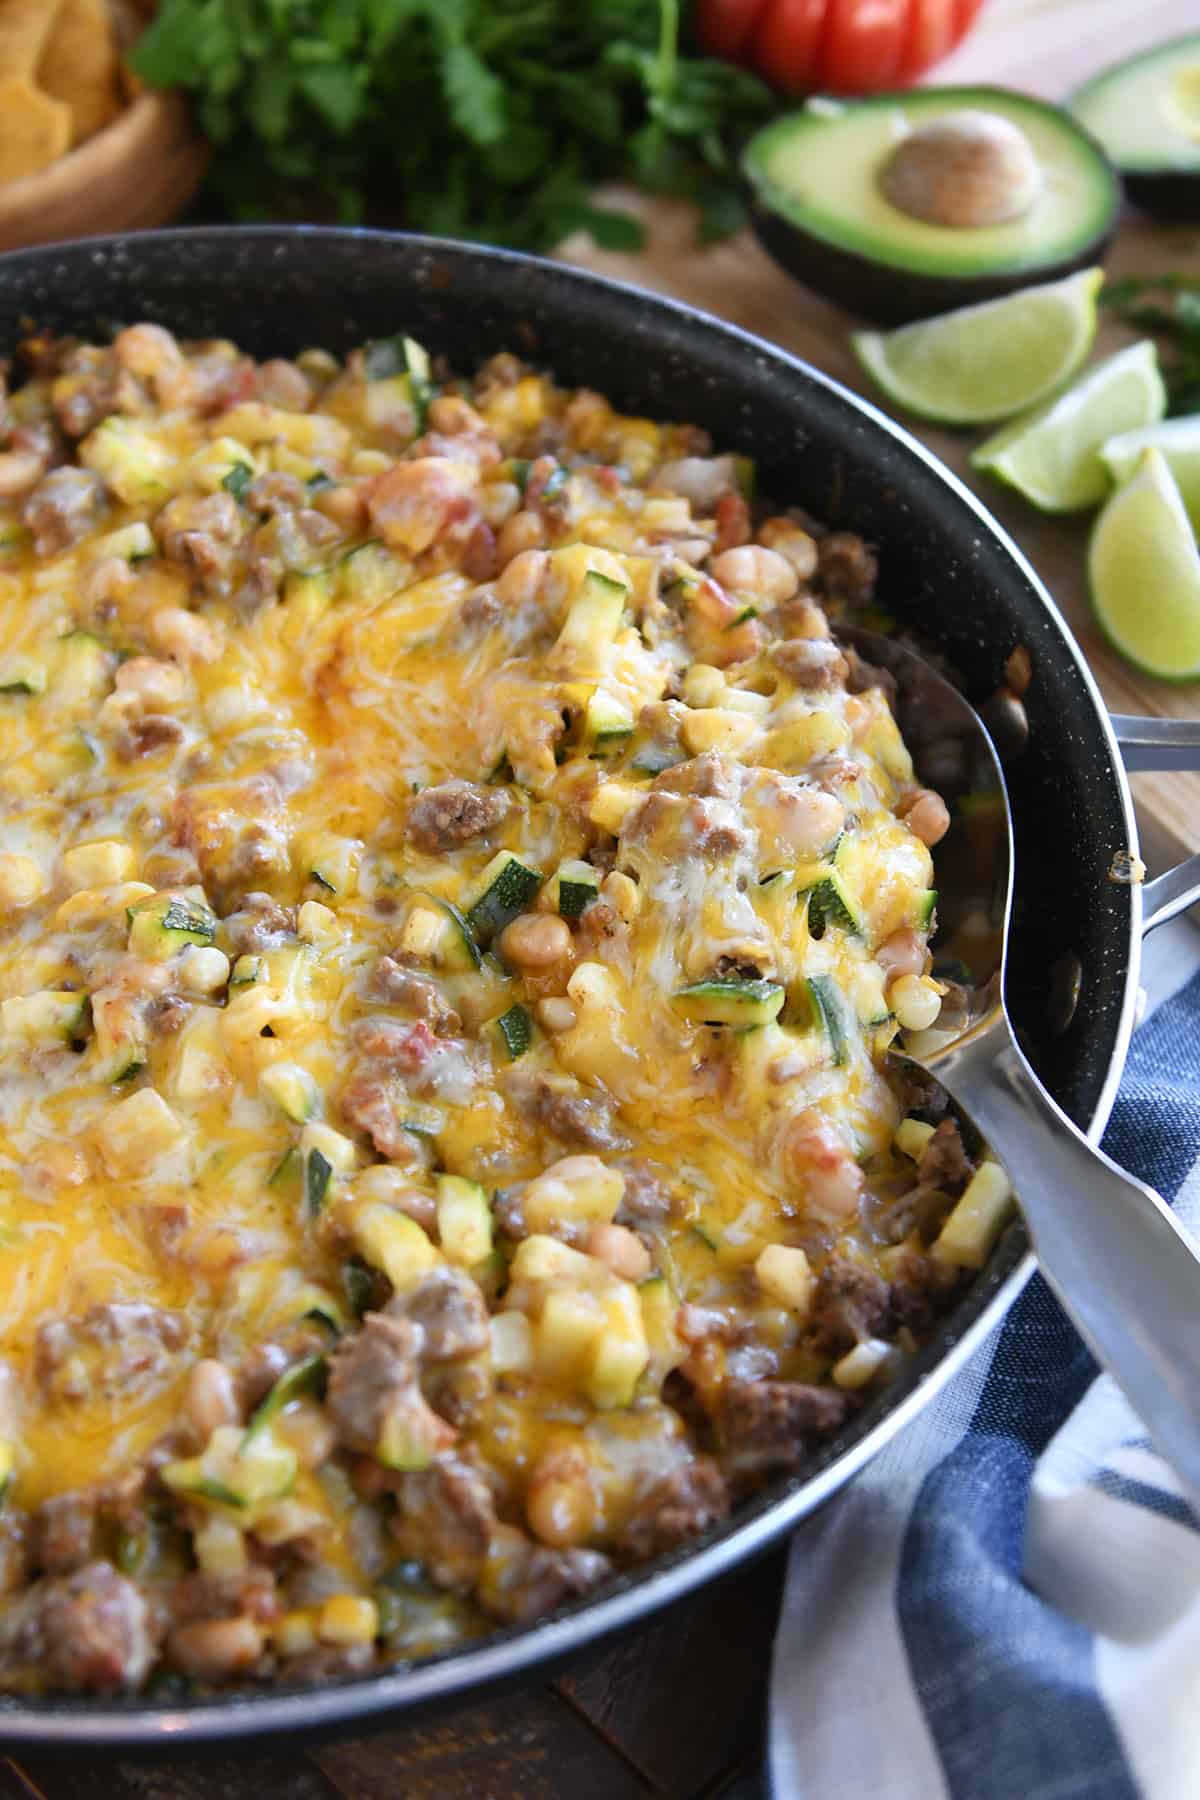
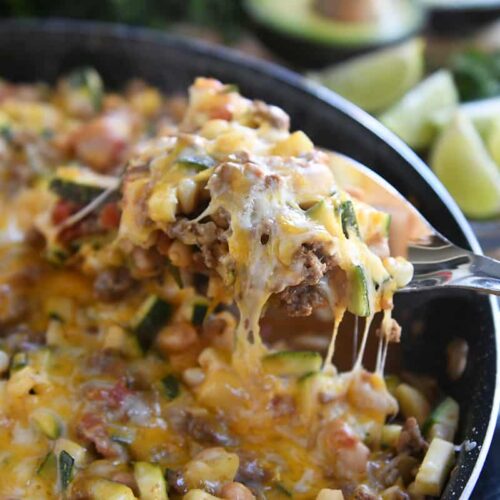
    This cheesy tex-mex zucchini skillet is a fantastic way to use zucchini! Quick and easy, it’s packed with flavor and hearty ingredients. So yummy!

    Looking for ways to use up that garden zucchini?

    This one-skillet zucchini meal is the perfect solution! It’s hearty and healthful, and it comes together fast! Bonus: all.the.cheese.

    Tex-Mex Zucchini Skillet Meal

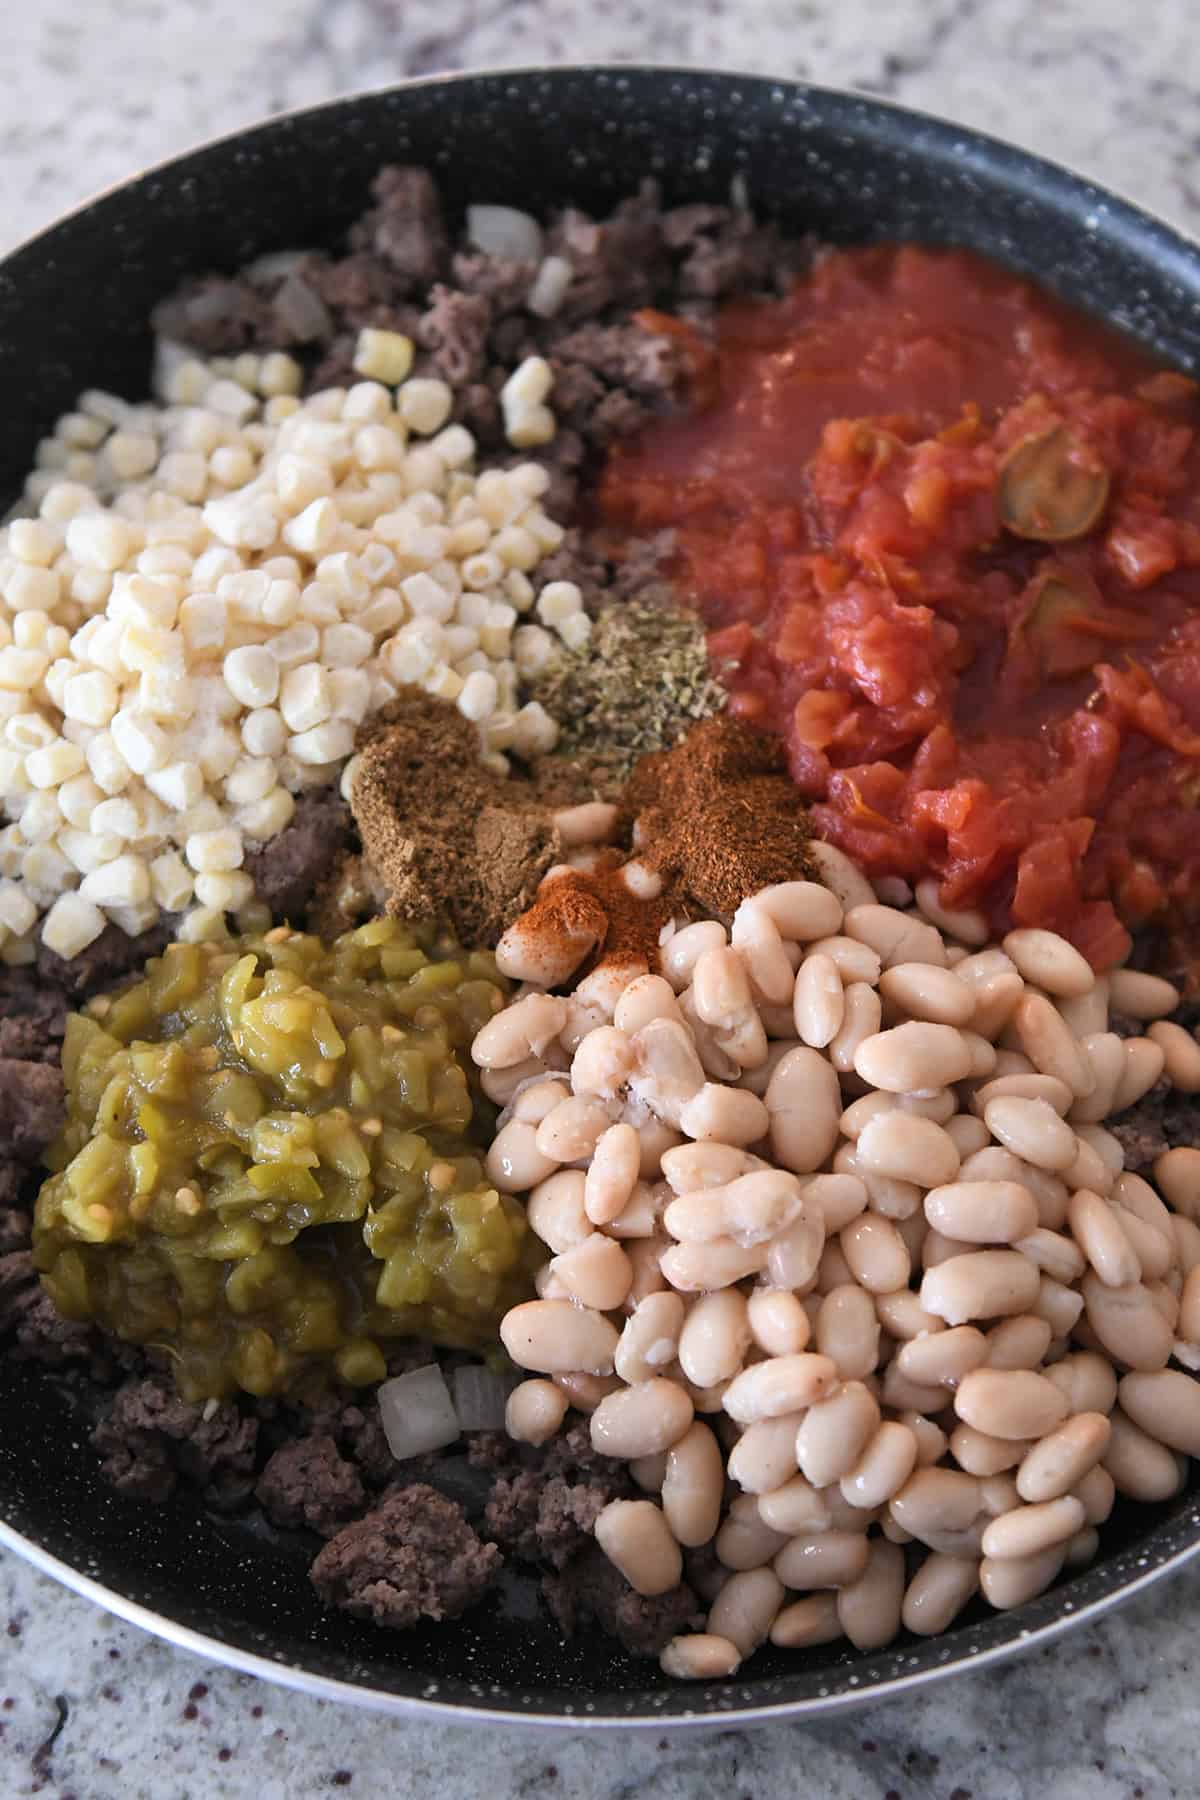
    This simple recipe starts with browning lean ground beef (or ground turkey) with onions and garlic, and then adding:

    • corn
    • beans
    • green chiles
    • diced tomatoes
    • cumin, chili powder, oregano and paprika

    All those ingredients get a good, efficient little stir to mix everything together.

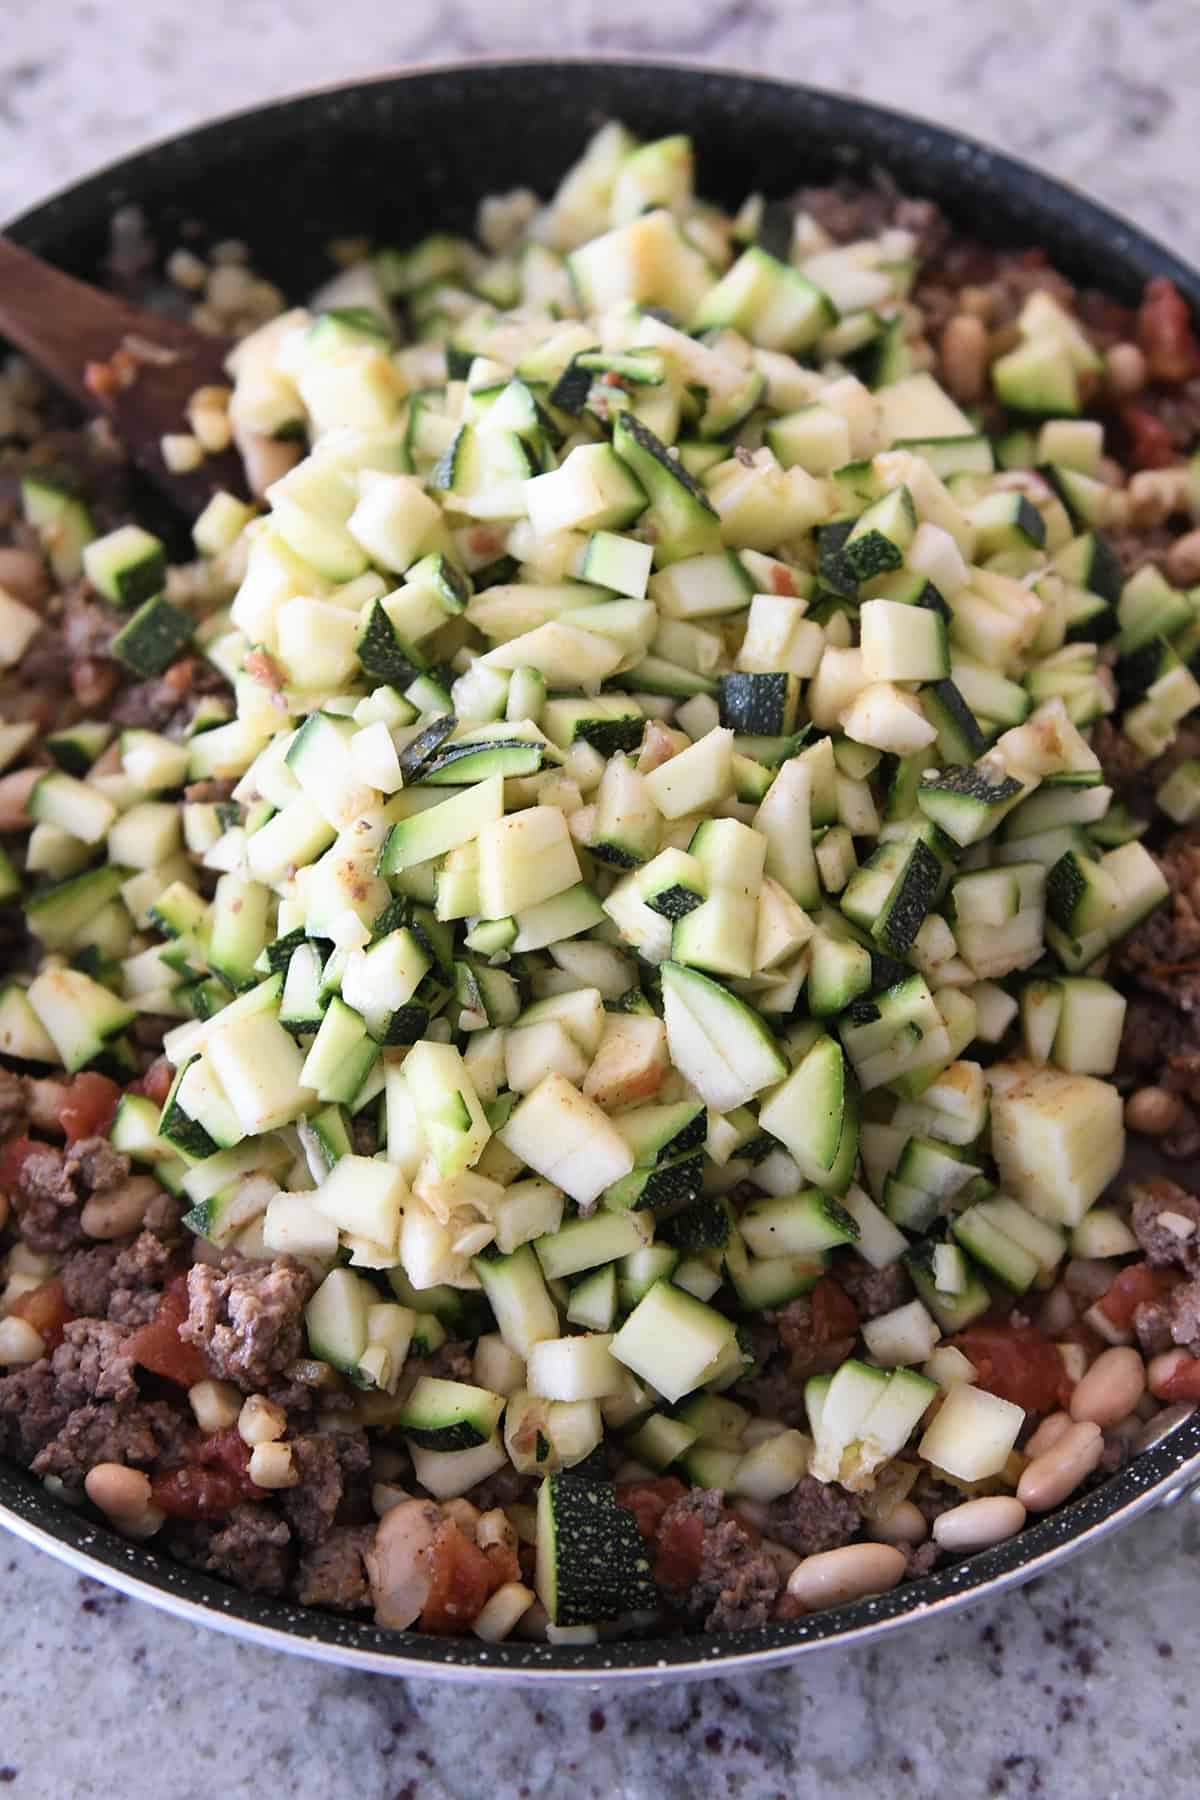
    And then the star of the show is added! ZUCCHINI.

    And lots of it. Four cups to be exact.

    The important part here is to dice the zucchini into small pieces (I use this handy food chopper – aff. link). It allows the zucchini to blend in delightfully well with the other ingredients rather than large chunks of zucchini totally stealing the show.

    Not only does this make the overall dish just *work* better, but it’s also easier on the potential squash haters in the bunch. I would know. I have 2 1/2 of them.

    Al Dente Zucchini

    Can I share a potentially shocking opinion?

    I don’t think zucchini needs to be cooked very long (or at all). Mushy zucchini is the literal absolute worst. And I’ve found that in savory dishes, I like zucchini pieces (or zucchini noodles) cooked for just a few minutes so they stay a bit al dente.

    Sometimes I even leave zucchini noodles uncooked, and they are delicious.

    However, you do you when it comes to the zucchini in this recipe. If you like softer zucchini, that’s totally fine. I’ll never know if you decide to cook the guts out of it.

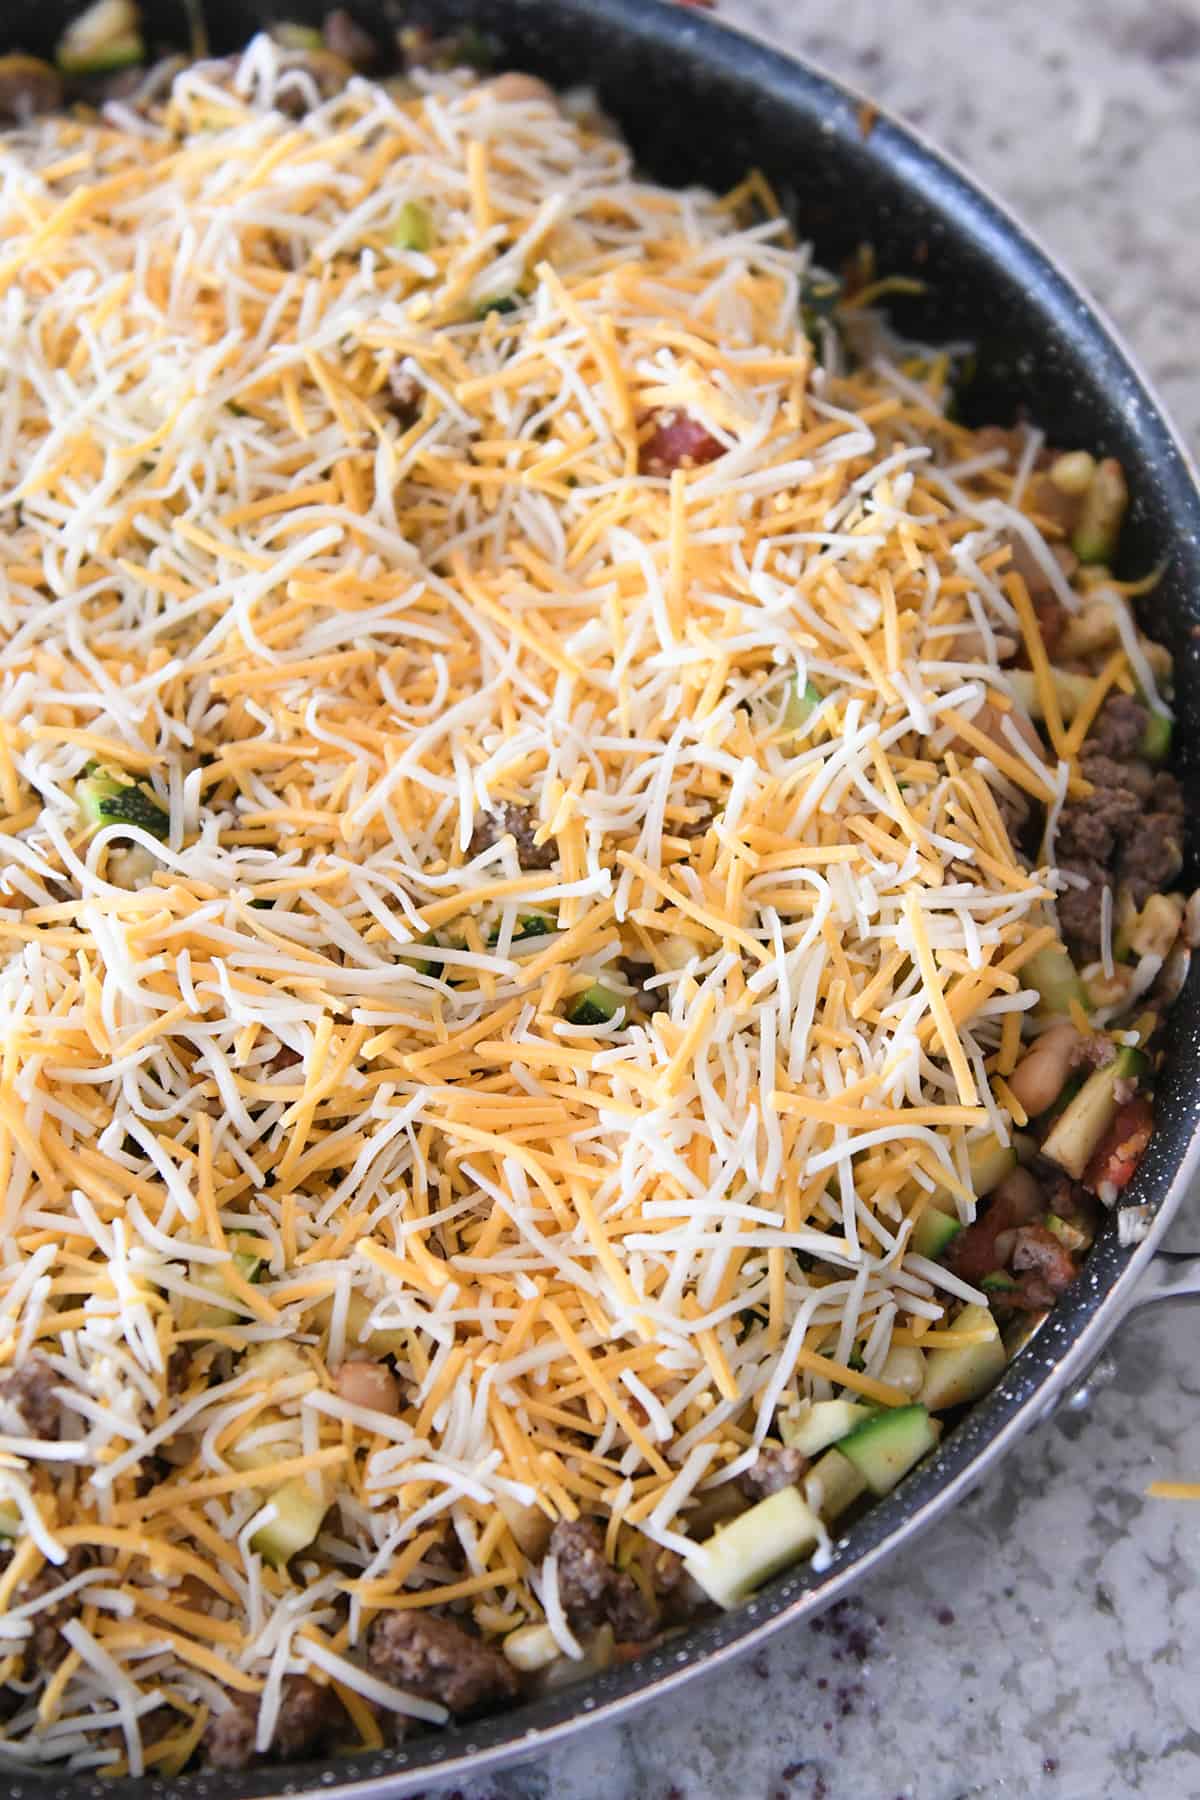
    Just promise me you’ll cover it all in a lot of cheese. A.Lot.Of.Cheese.

    You can get all fancy and broil the cheese-covered skillet in the oven.

    Or you can be lazy like me and cover the skillet with a lid, keep it over low heat, and let it sit there for a couple minutes until the cheese is melty and perfect.

    A Versatile Meal

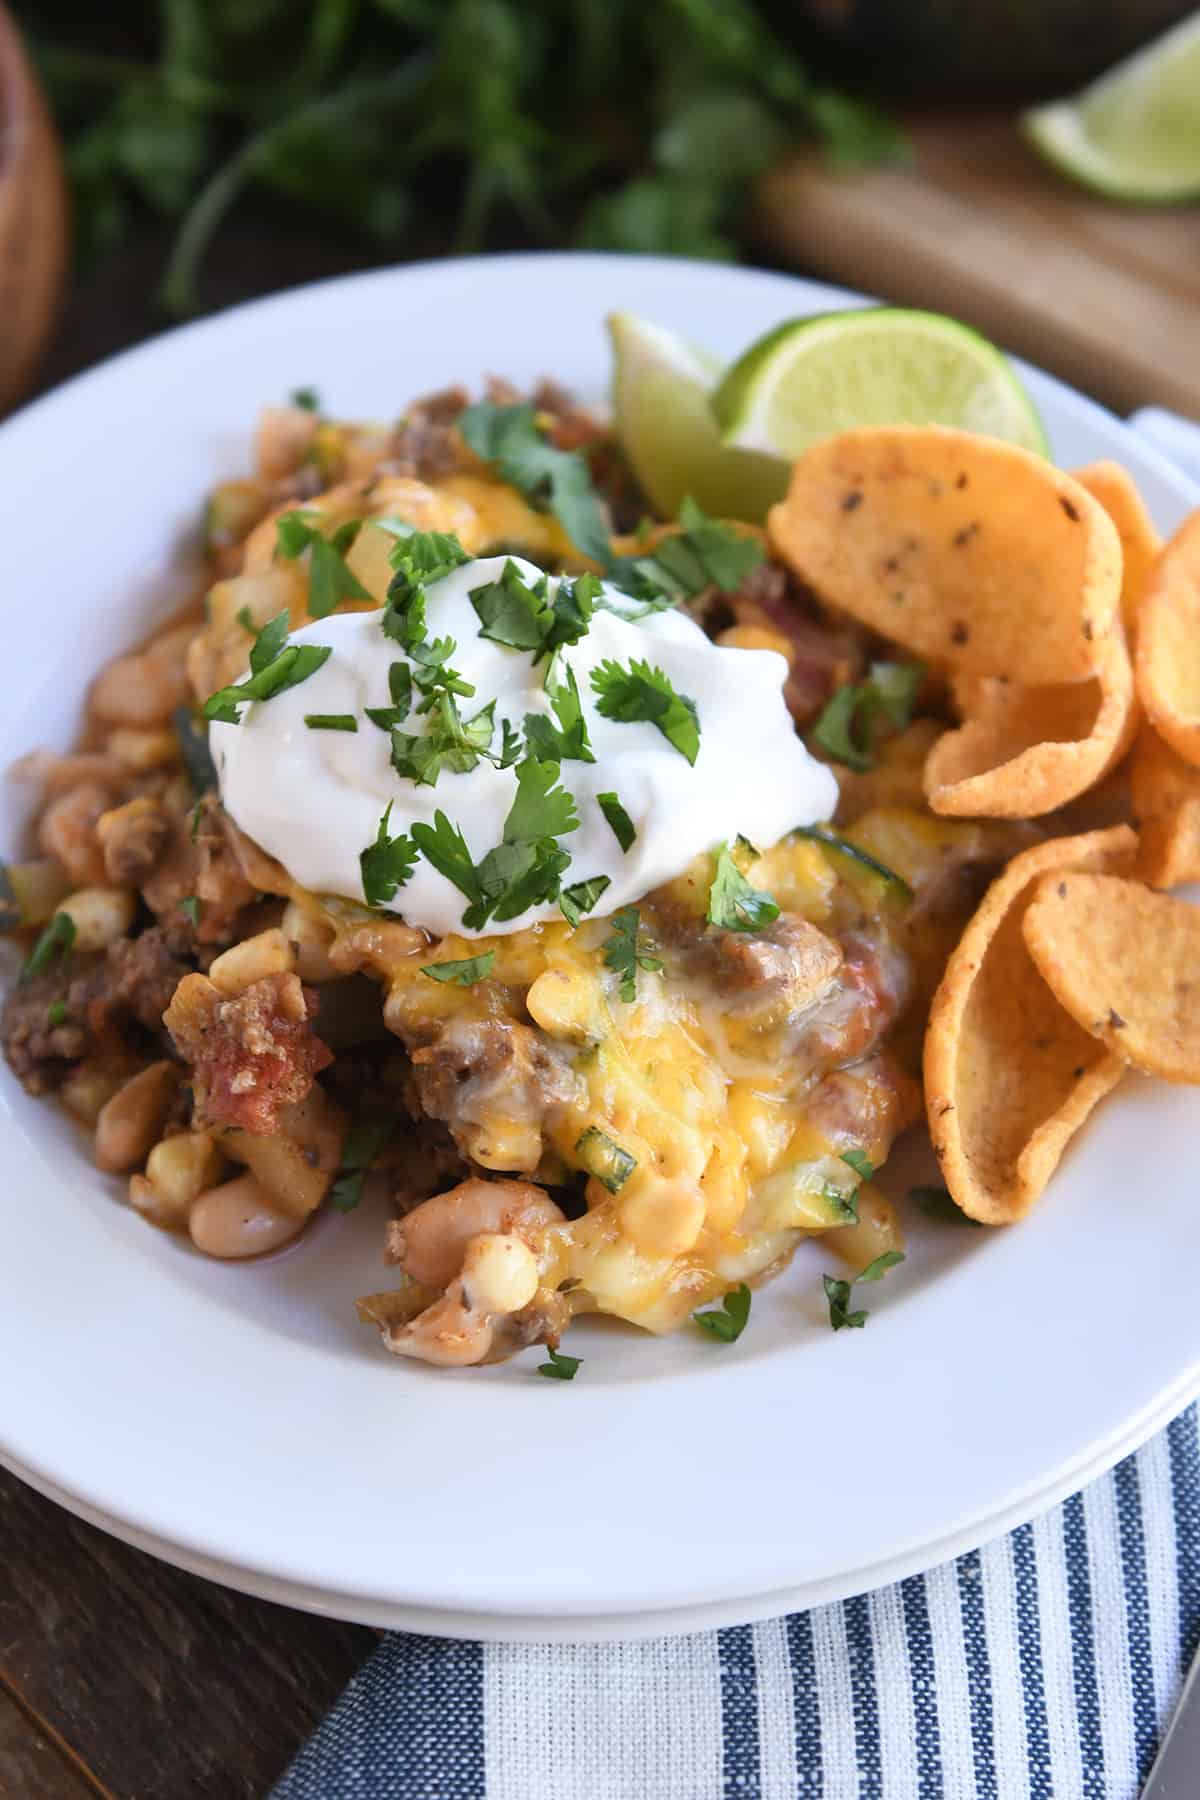
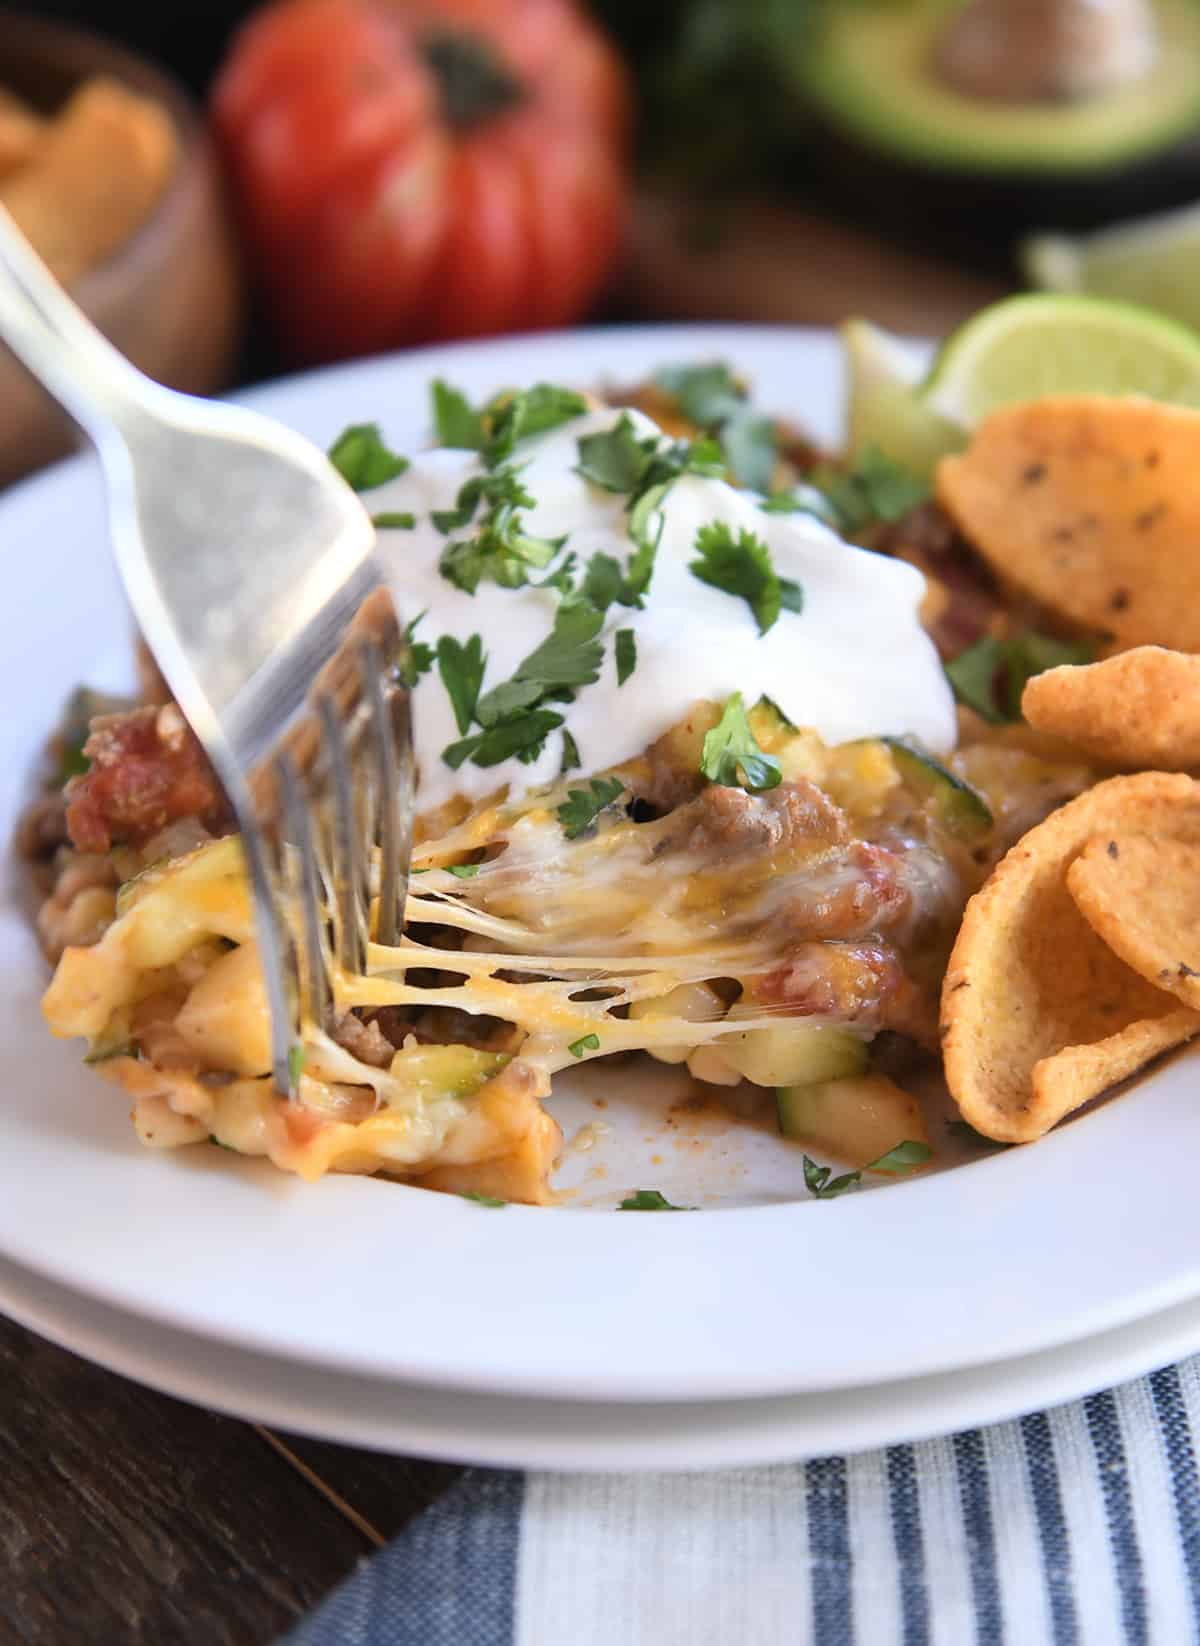
    This cheesy Tex-Mex zucchini skillet meal is so tasty! The flavors are amazing, and you can serve it a million different ways.

    Over rice.

    Loaded with toppings.

    With chips.

    I have several kids who give me serious side-eyes when it comes to squash in any form. I about fell over when my oldest child, who is One of Them, devoured this and declared it “crazy amazing” even knowing it was loaded with zucchini.

    Of course the hefty helping of cheese and sour cream on his portion didn’t hurt matters, but he even went back for seconds, and that has never happened with any dish that involves the Z-word.

    This zucchini skillet recipe is really adaptable. Play around with the ingredients and see what you come up with!

    It’s such a great way to use up the humble, beloved, green, garden veggie. I hope you love it!

    One Year Ago: Blueberry Muffin Bread 
    Two Years Ago: Soft Peanut Butter Sugar Cookies with Chocolate Frosting {No Rolling or Cutting Out}
    Three Years Ago: Frozen Strawberry Lemonade Pie 
    Four Years Ago: One Pot Creamy Tomato Basil Pasta 
    Five Years Ago: The Best Zucchini Bread 
    Six Years Ago: The Best Chocolate Zucchini Cake 
    Seven Years Ago: Triple Chocolate Zucchini Cookies
    Eight Years Ago: Frozen Mint Lemonade Slush
    Nine Years Ago: Tappan Hill Brownies
    Ten Years Ago: Summer Couscous Salad

    Cheesy Tex-Mex Zucchini Skillet

    • 1 pound lean ground beef or ground turkey
    • ½ cup finely chopped onion
    • 2 cloves garlic, finely minced (or 1/2 teaspoon garlic powder)
    • 1 teaspoon salt
    • ¼ teaspoon black pepper
    • 1 cup frozen corn kernels
    • 1 can (14.5-ounces) diced tomatoes (don’t drain)
    • 1 can (15-ounces) black, pinto, or white beans, drained and rinsed
    • 1 can (4-ounces) green chiles (mild or spicy), drained
    • 1 teaspoon cumin
    • 1 teaspoon chili powder
    • ½ teaspoons oregano
    • ¼ teaspoon paprika, smoked or sweet
    • 4 cups finely chopped zucchini (about 2 medium zucchinis)
    • 1 to 2 cups shredded Mexican-blend cheese

    Toppings:

    • Tortilla or corn chips
    • Sour cream
    • Fresh, chopped cilantro
    • Avocados
    • Salsa
    • Olives

    Prevent your screen from going dark

    • In a large, 12-inch nonstick skillet (it will be very full by the end, so don’t use a smaller size) over medium heat, brown the ground beef, onion, garlic, salt and pepper. Break the meat into small pieces and cook until no longer pink. Drain grease.

    • Add corn, tomatoes, beans, chiles, cumin, chili powder, oregano and paprika. Stir to combine.

    • Add the zucchini and stir until evenly combined. Bring the mixture to a gentle simmer over medium heat and cook, stirring often, until the ingredients are heated through and the zucchini is tender (I only cook for a few minutes so the zucchini stays al dente; cook longer if you want the zucchini softer).

    • Season to taste with additional salt and pepper, if needed.

    • Turn the heat to low. Pat the zucchini mixture into a mostly even layer, sprinkle with cheese, cover with a lid or loosely with foil, and let rest on the heat until the cheese is melted, 3-4 minutes.

    • Serve warm with toppings of choice: chips, sour cream, cilantro, olives, avocados, salsa, etc.

    Serving: 1 serving, Calories: 206kcal, Carbohydrates: 18g, Protein: 21g, Fat: 6g, Saturated Fat: 3g, Cholesterol: 44mg, Sodium: 407mg, Fiber: 6g, Sugar: 4g

    Disclaimer: I am a participant in the Amazon Services LLC Associates Program, an affiliate advertising program designed to provide a means for me to earn fees by linking to Amazon.com and affiliated sites. As an Amazon Associate I earn from qualifying purchases.
    Source link

  • Harissa Meatballs with Whipped Feta Recipe

    Harissa Meatballs with Whipped Feta Recipe

    These Harissa Meatballs with Whipped Feta are perfect for an easy SOS dinner! Store-bought meatballs, bell peppers, zucchini, harissa, and whipped feta all in one bowl. YUMMY!

    This is a fan favorite recipe that’s part of our Fall 2022 SOS Series! View the full series.


    Here’s a stunner for you.

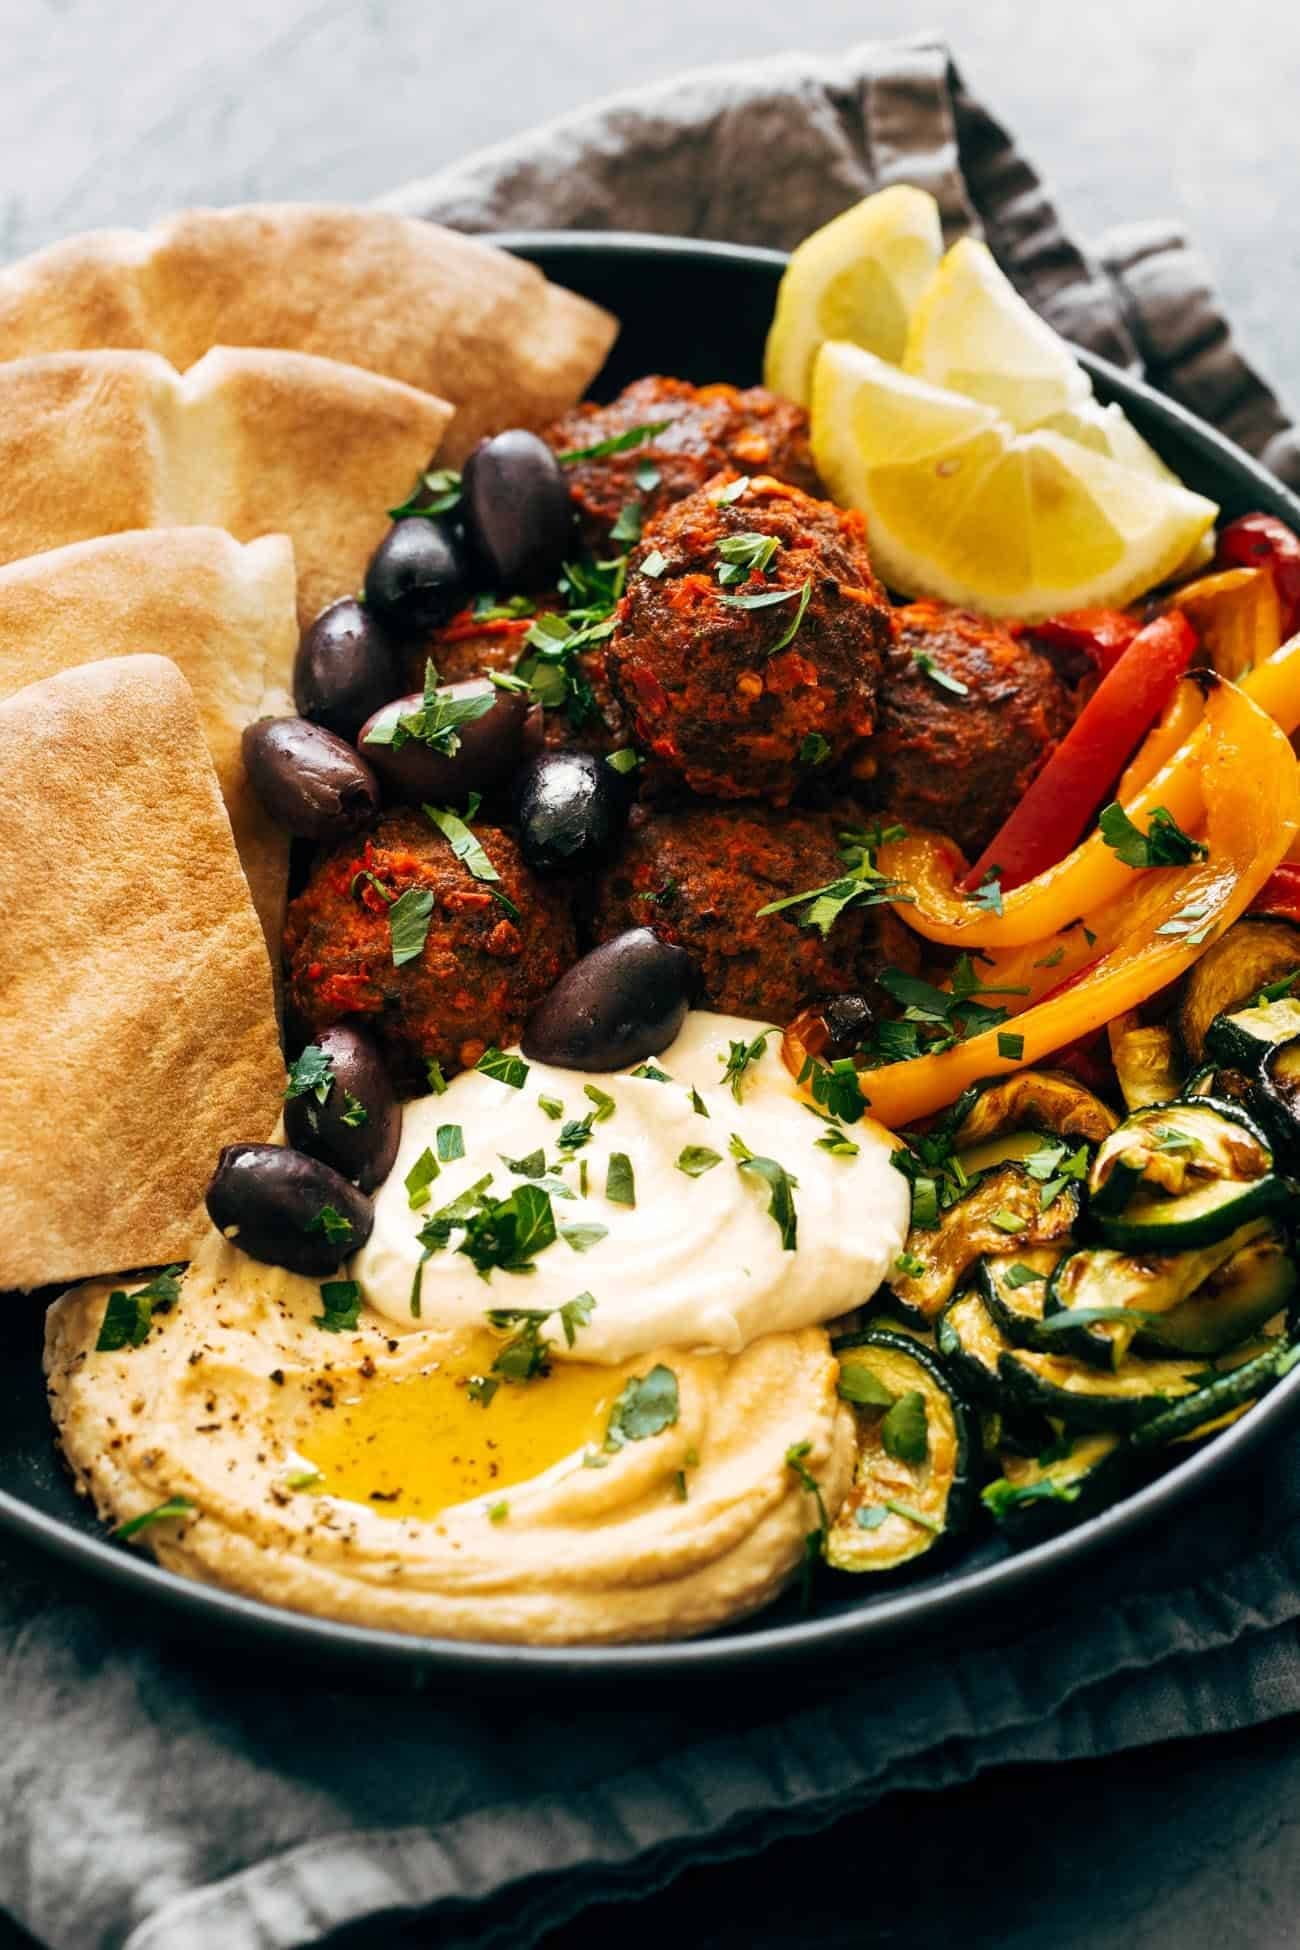
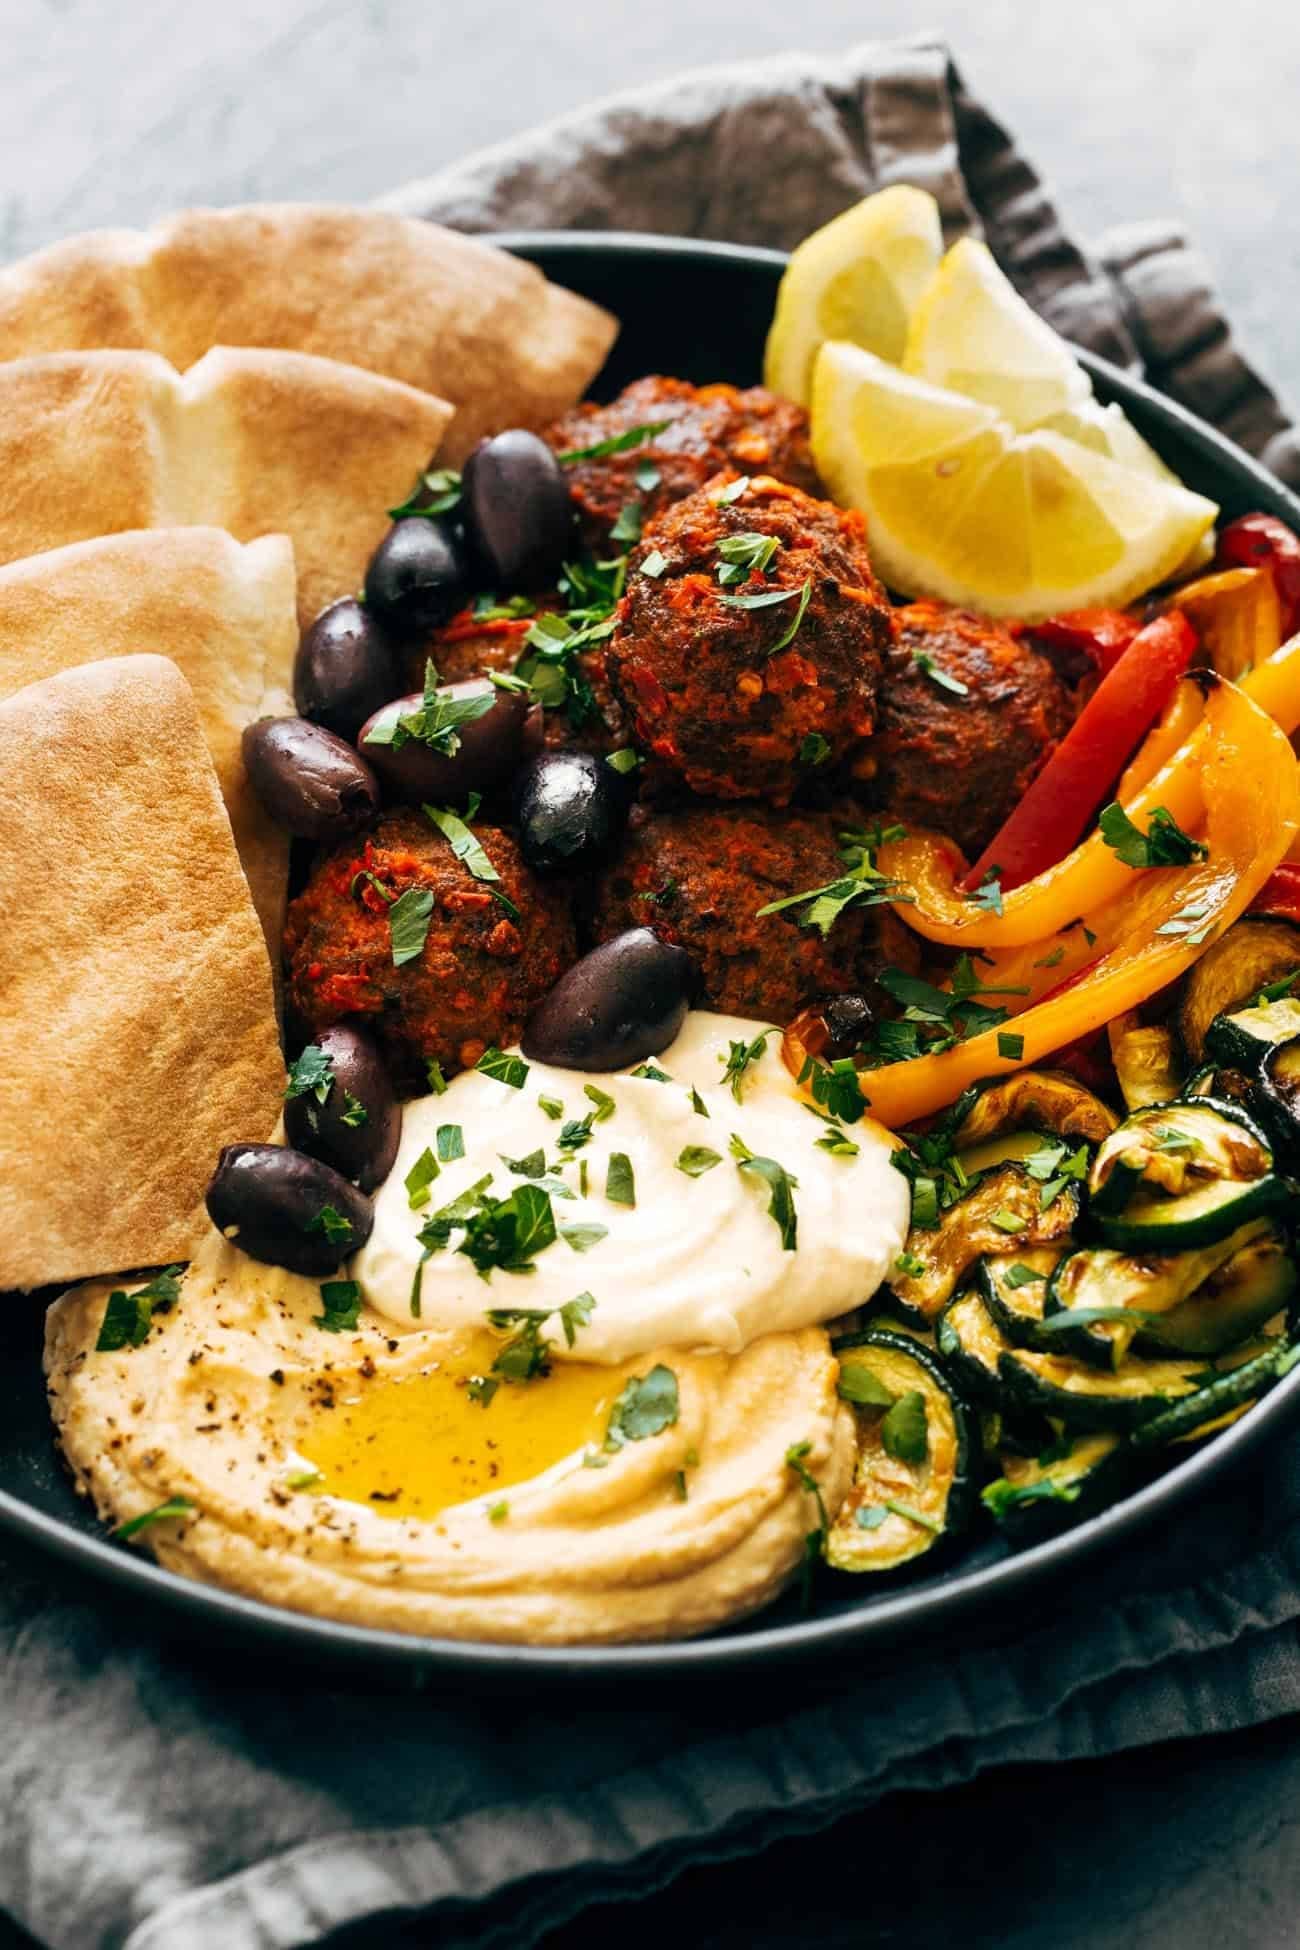
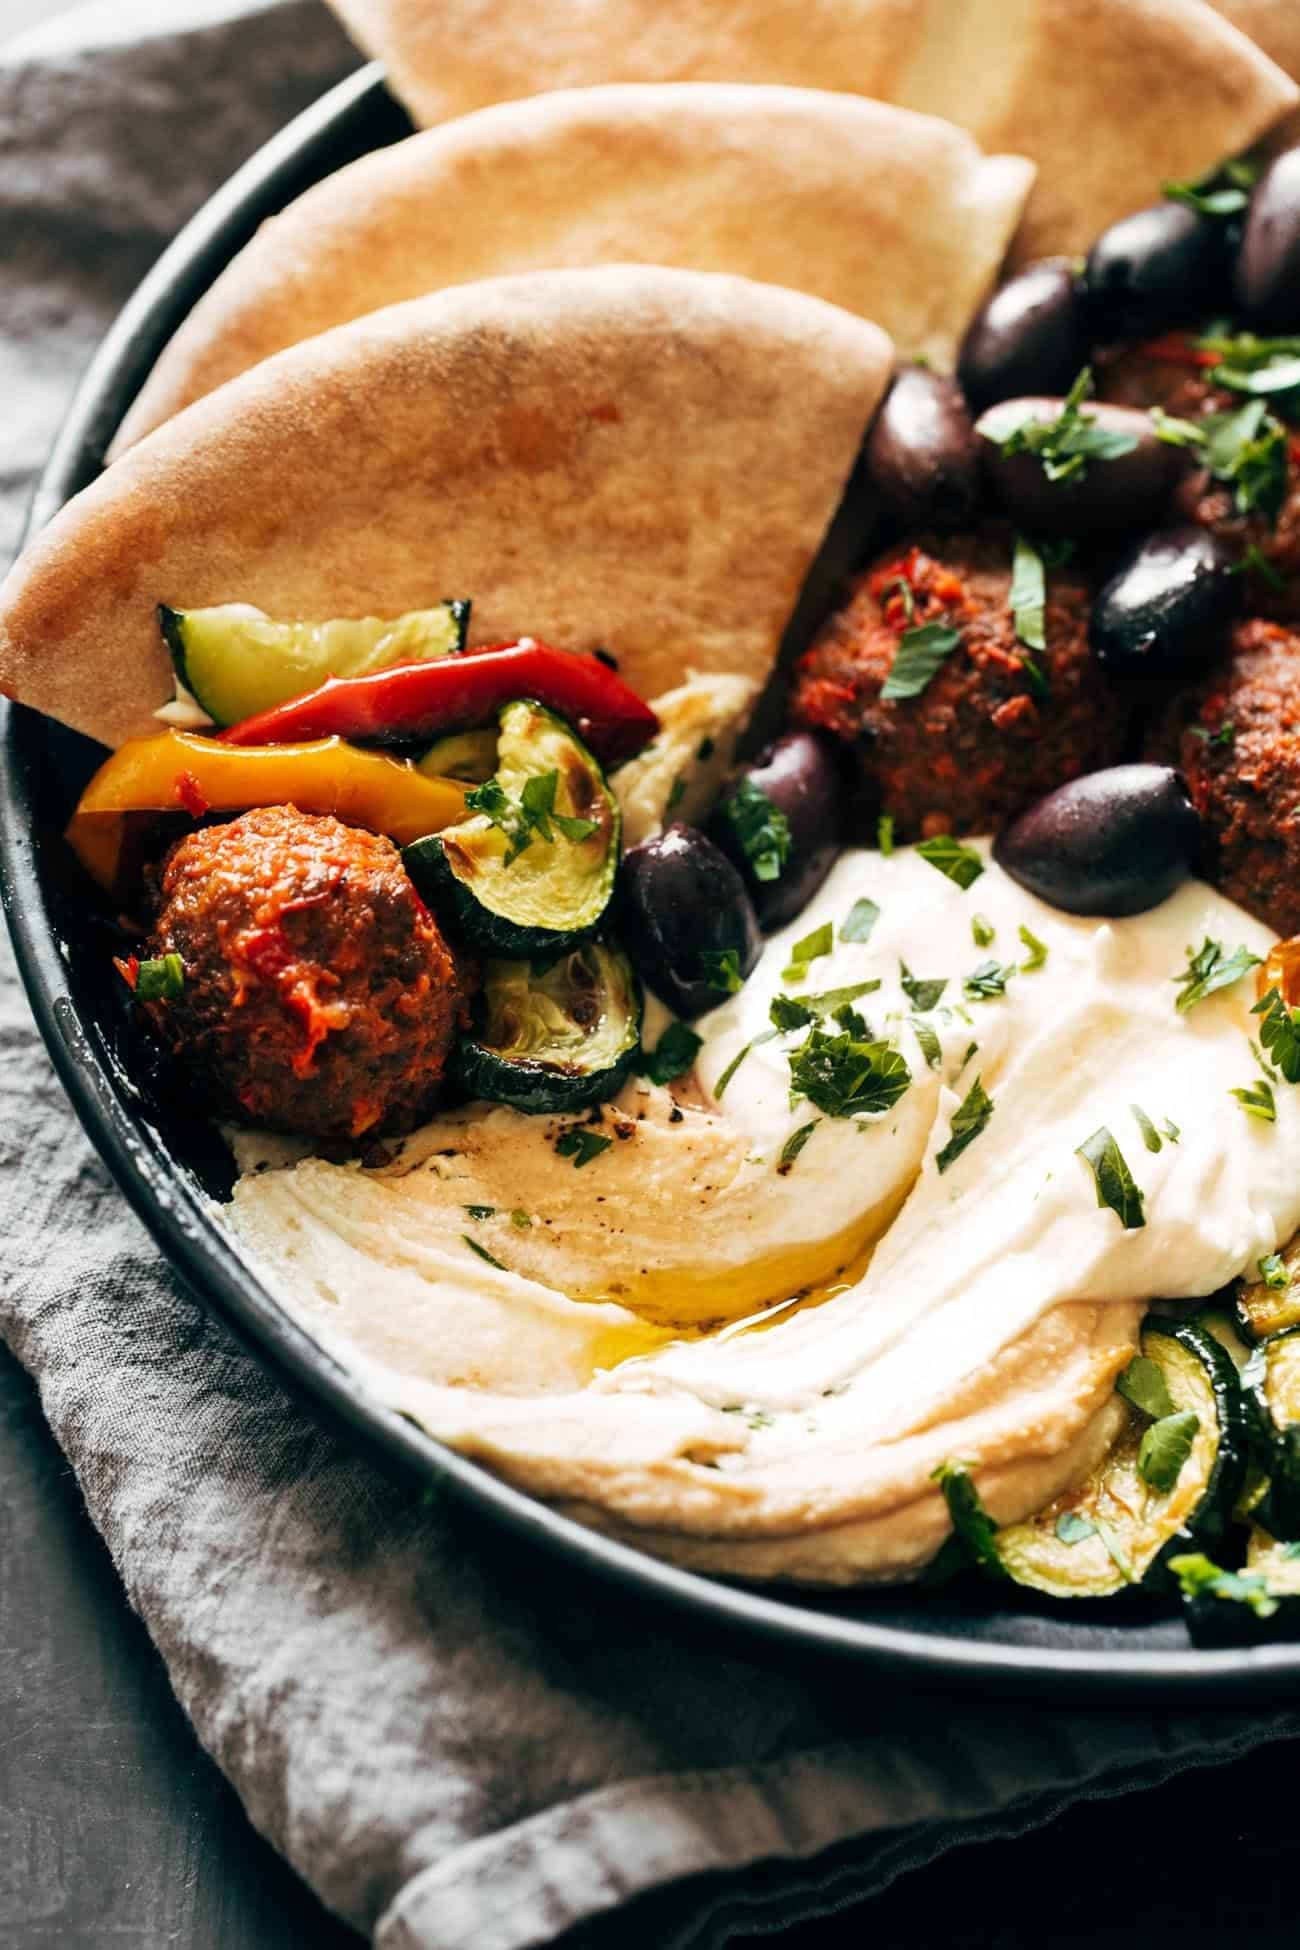
    You are looking at a big ol’ bowl of store-bought wonders such as hummus, olives, and pita bread, topped with a pile of meatballs (also store-bought! SOS life) that have been coated in a quick harissa / lemon / olive oil paste and baked to juicy-crisp perfection, roasted peppers and zucchini, and a super tangy, salty, whipped garlicky feta to add a little creamy punch to every bite.

    It sounds fancy when I write it all out, and actually, every bite really does feel very complex and so delicious. But in reality, almost everything can be store-bought, and then you just have two tasks: roasting a meatball and veggie sheet pan, and whipping up a block of feta.


    In This Post: Everything You Need For This Bowl


    Ingredients You Need To Make This Happen

    Here’s our shortcut-friendly ingredient list:

    • meatballs
    • harissa paste (it usually comes in a jar and is often sold in the “global foods” section at many grocery stores)
    • bell peppers
    • zucchini
    • hummus
    • pita
    • feta

    And assuming you’ve got olive oil, S&P, and garlic…this big bowl of goodness is yours for the taking.

    Close-up of Harissa Meatballs in a bowl

    How To Make This Bowl Come Together

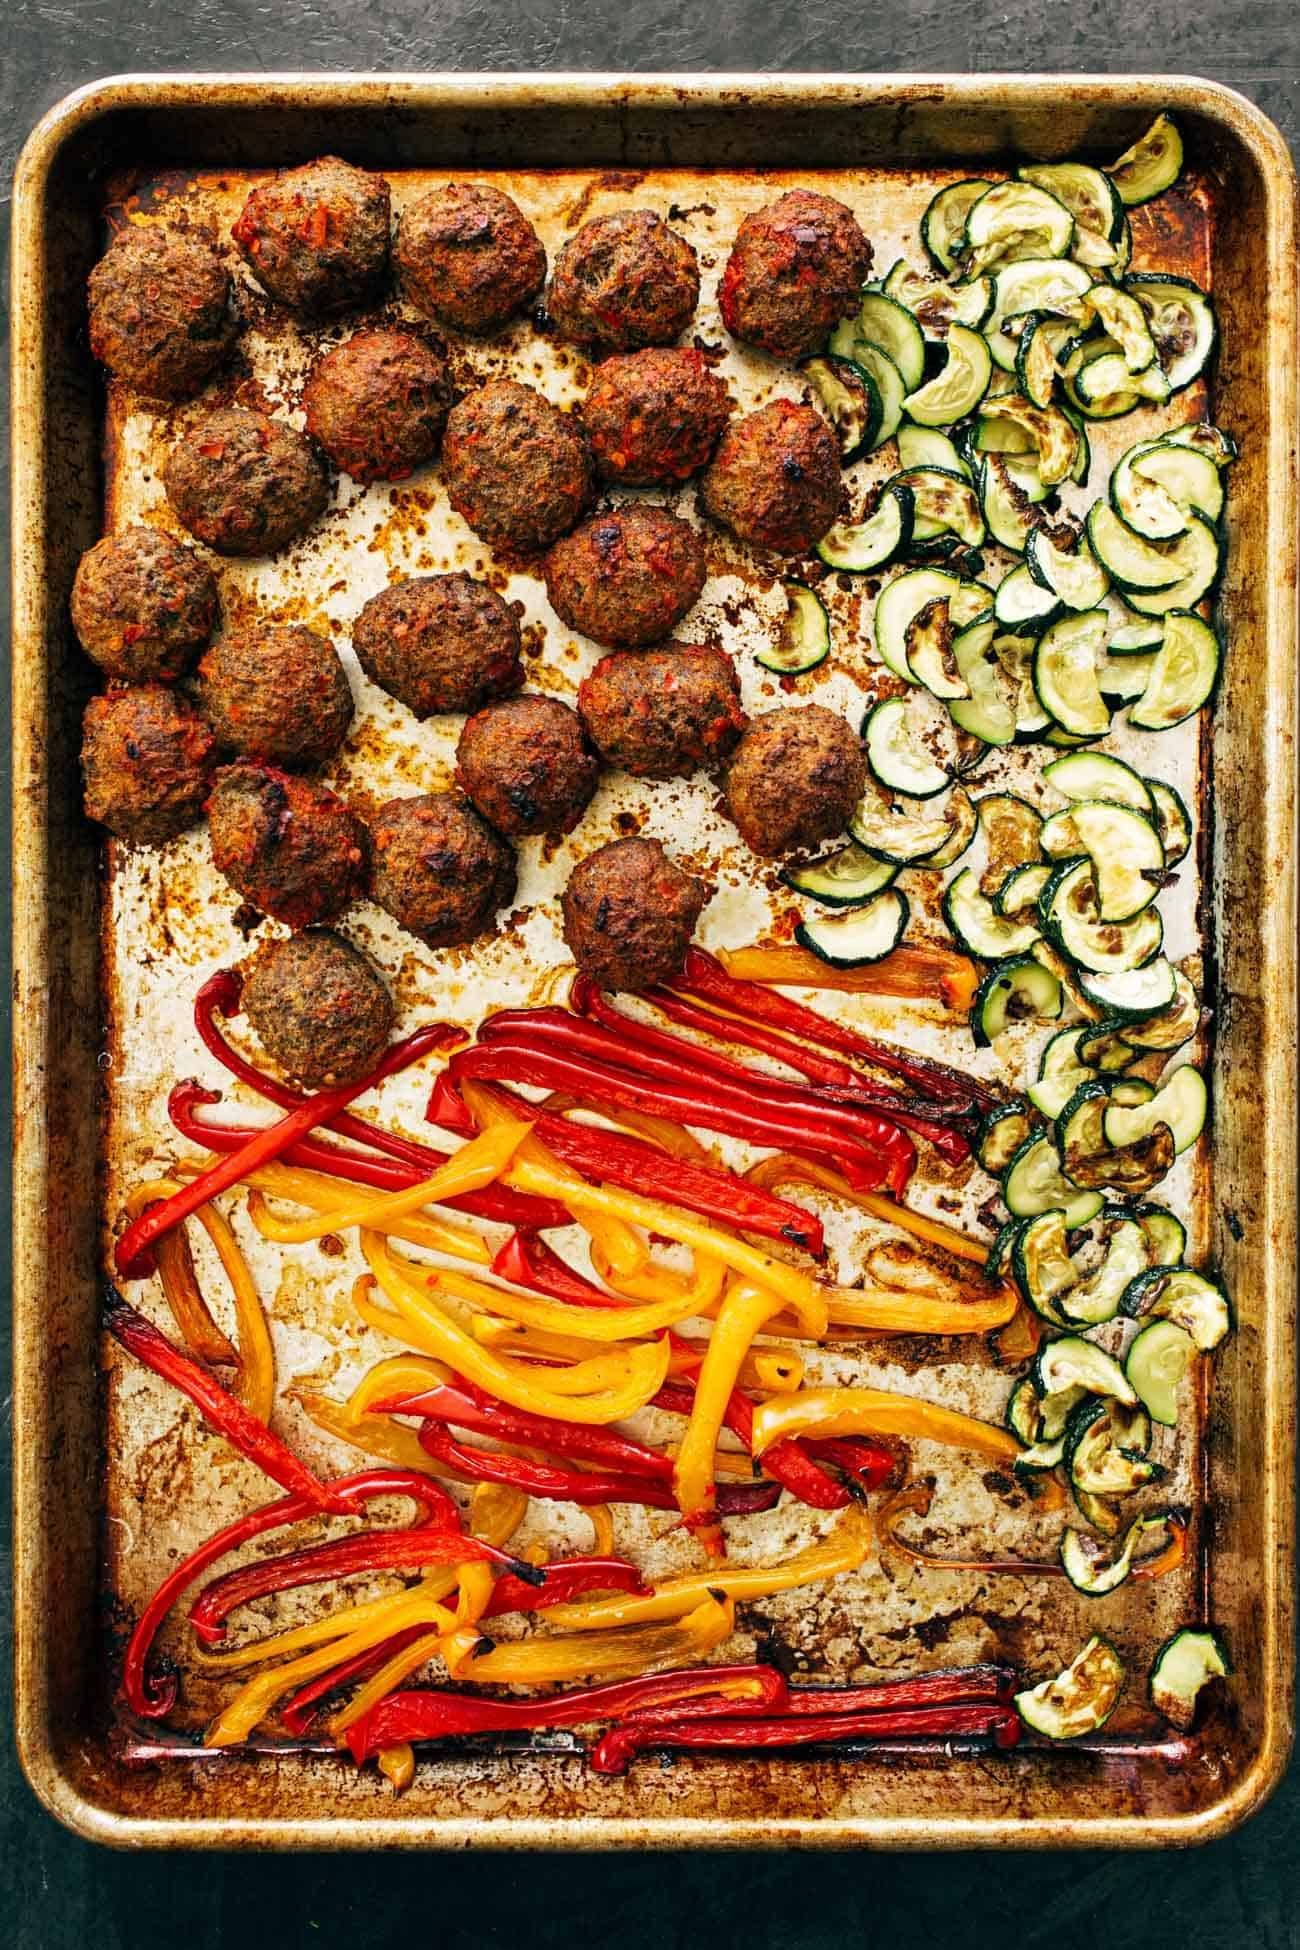
    Essentially what is happening here is the meatballs, peppers, and zucchini get roasted on one single pan.

    I know technically this isn’t the correct way to do it because you want each veggie to be cooked to its own perfection. And if you are particular about your zucchini, feel free to give it its own pan for optimal zucchini-specific roasting. But I found it most efficient (and 100% delicious) to just add the zucchini on the same pan – not for the whole time, but just for the last few minutes of roasting. If there’s an easy way to do something that still gets the same super-yum end results, you know I’m all over that. And in this case, everybody-on-one-pan is the way.

    Cooked ingredients on a sheet pan for Harissa Meatballs with Whipped Feta

    The Whipped Feta Is a Must-Make

    The only other really “active” cooking step here is blitzing up a block of feta cheese in a food processor or mini chopper (I love this one (affiliate link)) until it becomes a creamy, spreadable, dollop-able wonder that you might be tempted to put on, like, everything from here on out.

    This recipe, this combo of flavors, this textural heaven? This one is for those of us who like to go big. Lots of color, lots of puckery zip, lots of salt, and a good amount of heat from that harissa paste… more of all, please.

    In terms of eating this, you can just fork-and-knife it, OR you can get right up in there with your pillowy pita and swoop it directly into the hummus, top with a meatball and some veggies, and do a final dunk into that whipped feta to just take this day right over the top. (10/10 would recommend.)

    Close-up of Harissa Meatballs with Whipped Feta in a bowl

    Harissa Meatballs with Whipped Feta: Frequently Asked Questions

    What type of store-bought meatballs do you recommend?

    Any kind! I’ve tried pork, beef, chicken, and turkey meatballs – and I think veggie meatballs would also work really well as a vegetarian option! This recipe is very forgiving – it can work with meatballs that are pre-cooked, and I’ve also enjoyed this recipe with the pre-made, UNCOOKED meatballs that you can often buy in the meat department. For a specific brand, I really enjoyed these with the ALDI pre-made uncooked Italian style meatballs (I know, wrong flavor profile, but it worked just fine and the meatballs were amazing). I just brushed them with the harissa sauce before baking.

    I have some extra time. Can I make my own meatballs for this recipe?

    Sure can! These baked chicken meatballs are perfect in this recipe, and major bonus – they’re freezer-friendly if you wanted to prep these ahead of time. Doubling the recipe is not a bad idea!

    Is harissa paste spicy?

    It’s not terribly spicy, but harissa paste does pack some heat. I would rate it as mild+ or medium- level heat. I left a few meatballs un-sauced for my toddler just to make sure it wasn’t too spicy for her.

    I can’t find harissa paste. What else can I use?

    Chili oil or even sriracha could work here instead! Just adjust the amounts as necessary so that you don’t make it too spicy.

    Prefer To Watch Instead Of Read?

    Click here to watch step-by-step stories for how to make this recipe!

    Source Notes: Harissa paste is “a Tunisian hot chili pepper paste, the main ingredients of which are roasted red peppers, Baklouti peppers, spices and herbs such as garlic paste, caraway seeds, coriander seeds, cumin and olive oil to carry the oil-soluble flavors.” (definition from Wiki!) It reminds me a little bit of curry paste – it’s packed with flavor and vibrantly red in color. In the US, you can find it at many grocery stores that have a solidly stocked “global foods” section. It’s usually is sold in small jars. If you want to dabble with making your own (and I am actually tempted to after reading Suzy’s description), here is a recipe for homemade harissa paste.


    Print

    clock clock iconcutlery cutlery iconflag flag iconfolder folder iconinstagram instagram iconpinterest pinterest iconfacebook facebook iconprint print iconsquares squares iconheart heart iconheart solid heart solid icon

    Description

    These Harissa Meatballs with Whipped Feta are perfect for an easy SOS dinner! Store-bought meatballs, bell peppers, zucchini, harissa, and whipped feta all in one bowl. YUMMY!


    Meatballs and Such:

    Whipped Feta:

    Extras:


    1. Sheet Pan, Part One: Preheat the oven to 425 degrees. Place the peppers on one side of a large sheet pan. Drizzle with oil and sprinkle with salt. Mix the harissa with a little bit of olive oil, lemon juice, and garlic powder until you have a nice spreadable red paste. Coat your meatballs with the sauce (you can do this by tossing the meatballs in a bowl with the sauce if they’re pre-cooked, or just brushing the meatballs directly on the sheet pan if your meatballs are raw). Add meatballs to the center of the sheet pan. Bake for 15-20 minutes.

    2. Sheet Pan, Part Two: Add the zucchini to the pan with some olive oil and salt. Roast for another 10 minutes. For extra browning on everything, broil for about 5 minutes.

    3. Whip That Feta: In a food processor, chopper, or blender, whip up the feta, cream cheese, and garlic until a thick and creamy sauce forms. 

    4. Serve: Serve meatballs and veggies with a dollop of hummus, your whipped feta, pita wedges, and anything else you like (olives, lemon, etc.). And now DEVOUR. And repeat. And repeat. And repeat.

    • Prep Time: 15 minutes
    • Cook Time: 30 minutes
    • Category: Dinner
    • Method: Sheet Pan
    • Cuisine: American

    Keywords: harissa paste, meatballs, whipped feta

    We Love Sheet Pan Recipes. Here Are More Faves!


    One More Thing!

    This recipe is part of our collection of savory meatball recipes. Check it out!

    Source link

  • Skillet Lemon Parmesan Chicken and Zucchini

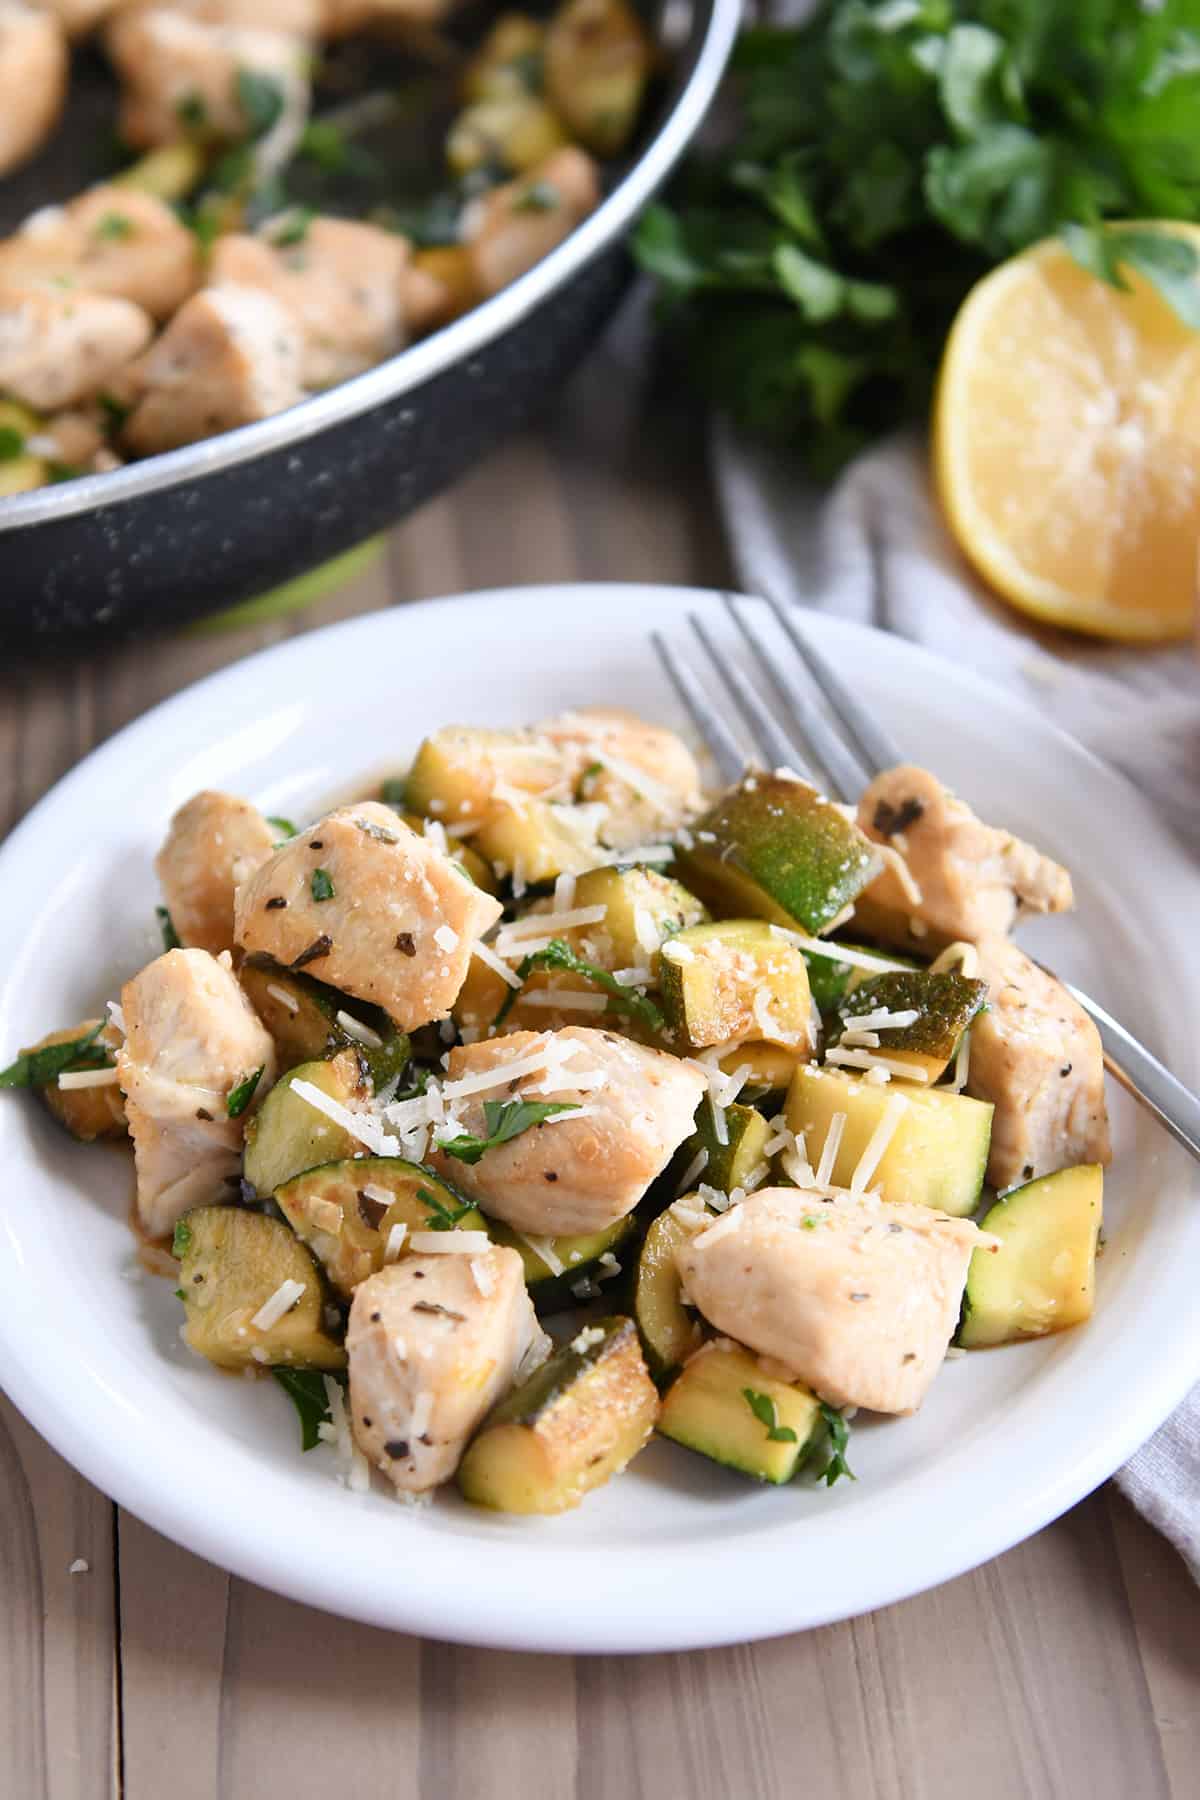
    Skillet Lemon Parmesan Chicken and Zucchini

    This quick and light skillet lemon parmesan chicken and zucchini is fantastic! So delicious, the bright lemon and deeper savory flavors are perfect!

    Let me kindly introduce you to the meal I could every day for the rest of forever and still be left wishing I had it on the menu plan again.

    It.is.so.yummy. (And ridiculously easy!)

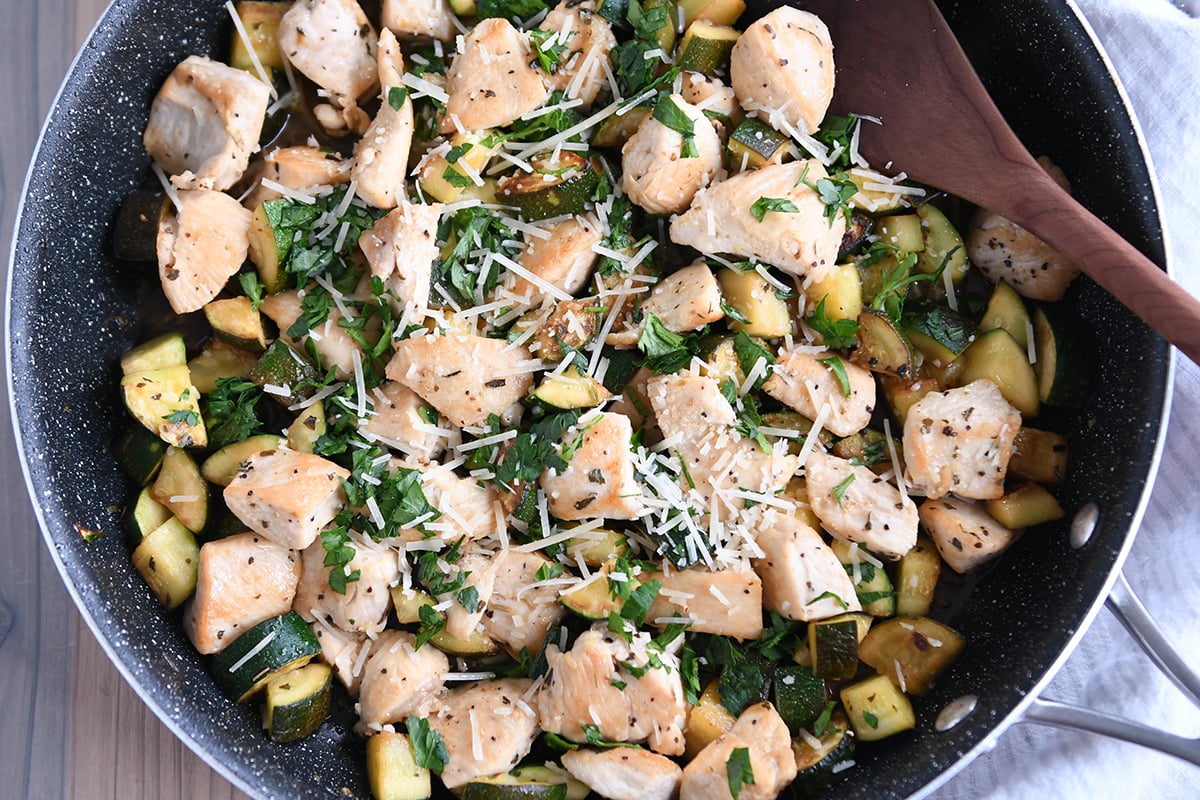
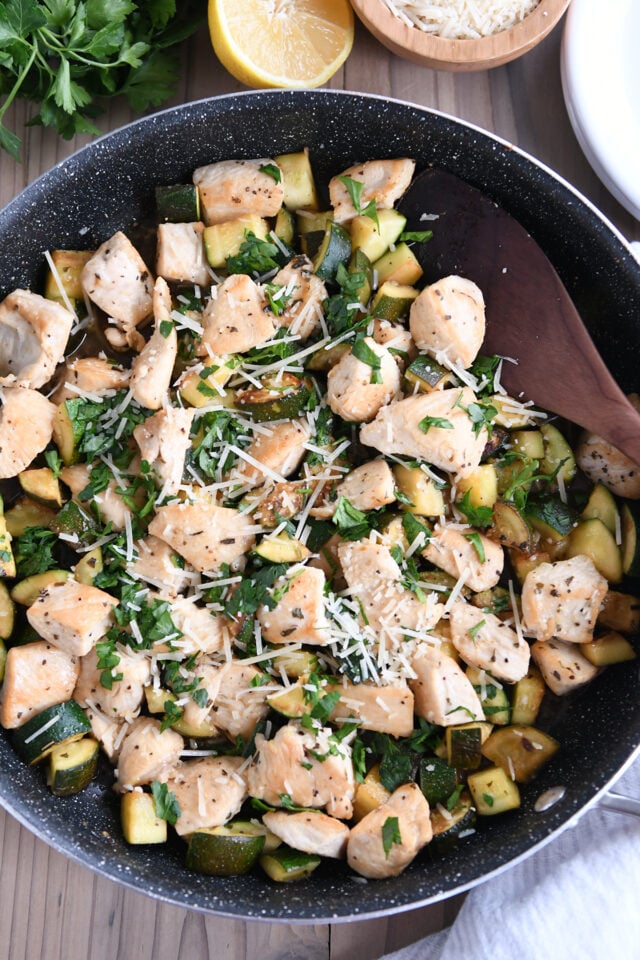
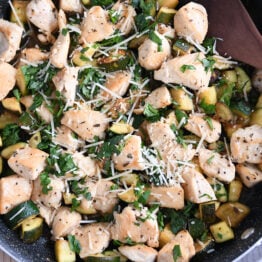
    Top down view of nonstick skillet with chicken, zucchini, parsley and parmesan.

    Tips for Skillet Success

    This recipe relies on a few things for optimum flavor.

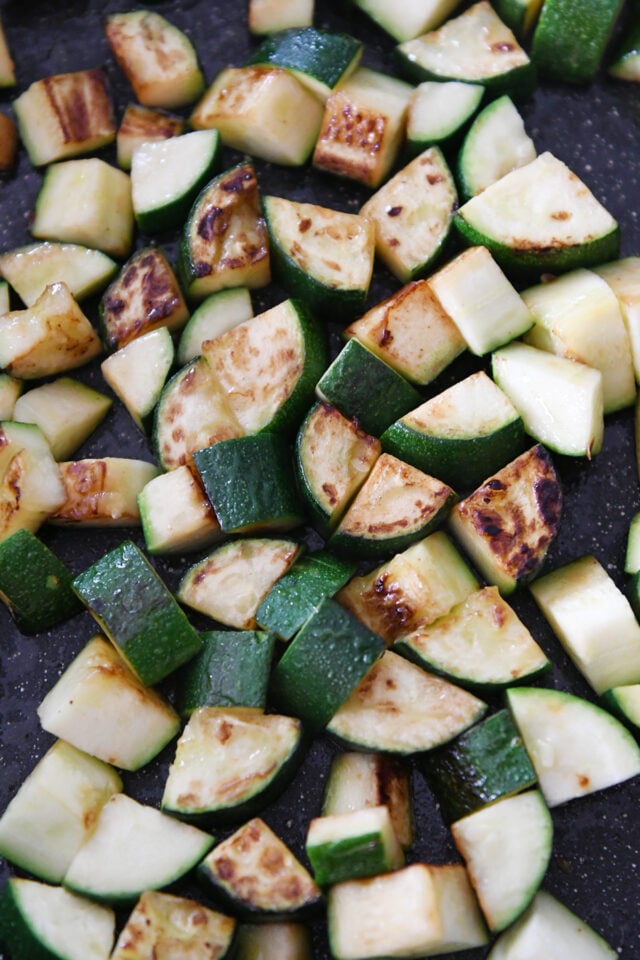
    The first is browning the chicken and zucchini in a hot skillet so they develop that beautiful golden color (and flavor!).

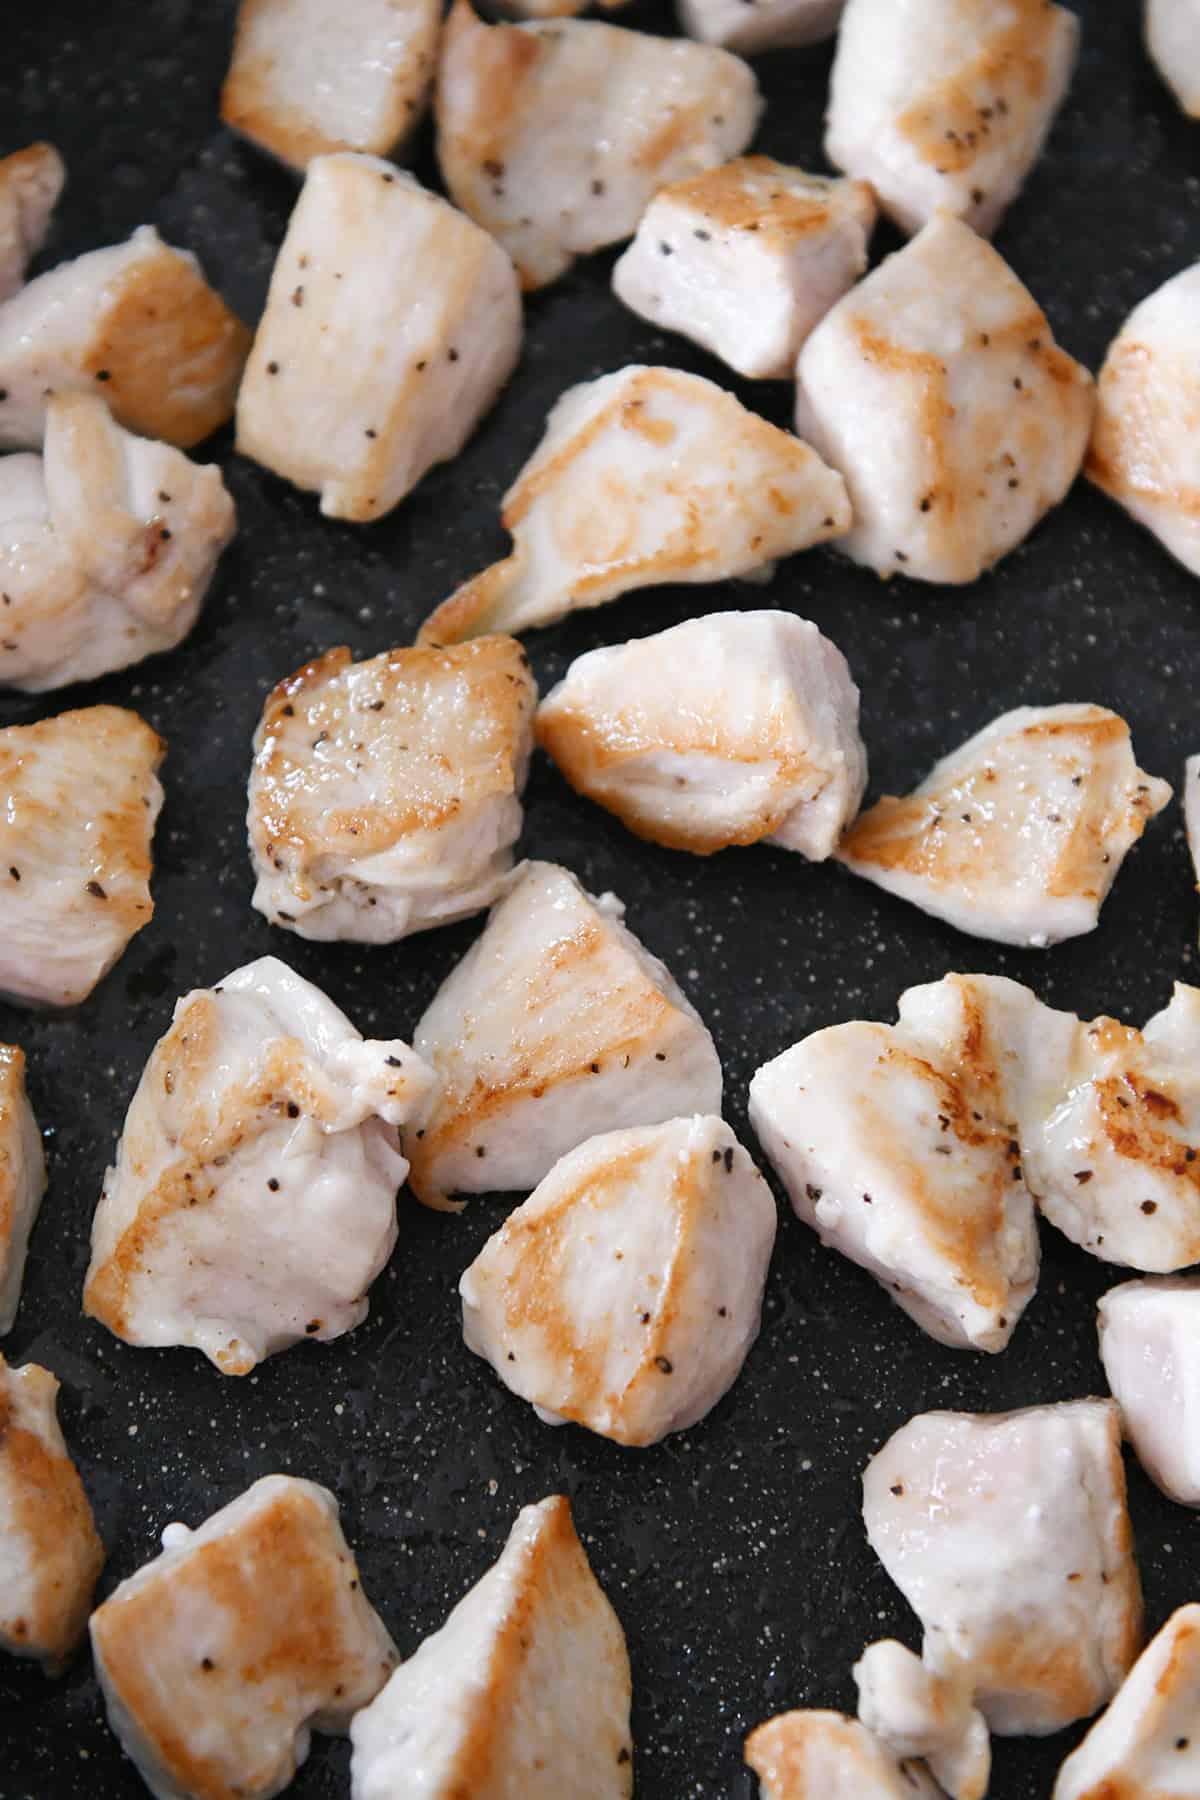
    To do this, heat the oil until rippling and hot and then add the chicken in a single layer. Make sure to pat the chicken dry! It helps the chicken to sizzle and sear instead of steam in liquid.

    Let the chicken cook WITHOUT STIRRING until golden. Flip and cook on the other side.

    You’ll do the same thing with the zucchini! The only difference is you can cook the zucchini for less time than the chicken.

    The zucchini is quite delicious cooked until just al dente. Say no to mushy zucchini!

    Golden cooked zucchini pieces in skillet.

    Layers of Flavor

    Once the chicken and zucchini have goldened up to perfection, stir in:

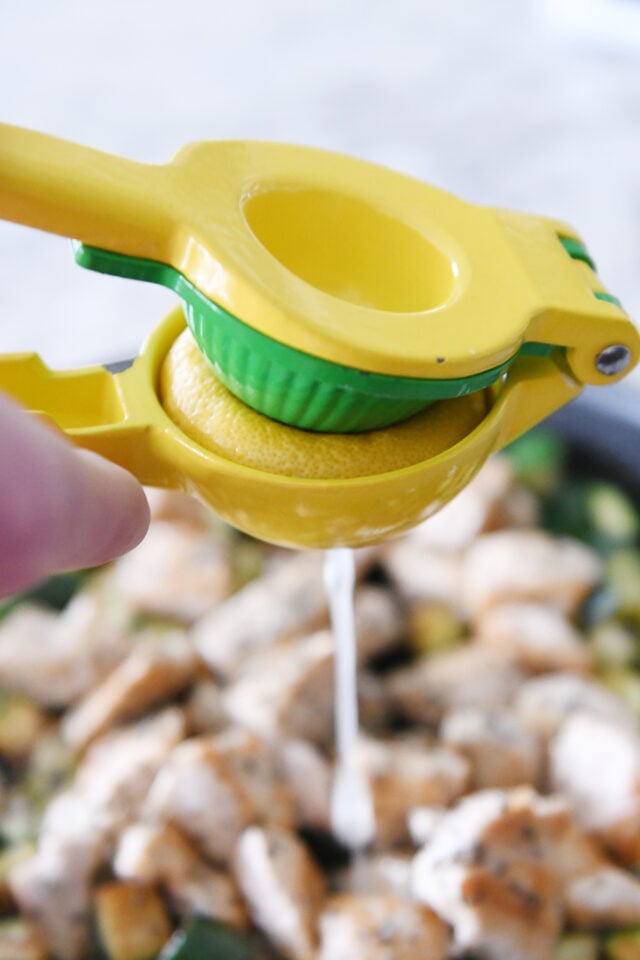
    • fresh lemon juice
    • a little dash of soy sauce (or a gluten-free alternative)
    • dried basil and a tiny bit of dried oregano

    Crank the heat up and let the ingredients sizzle until the liquid thickens slightly.

    Squeezing lemon through citrus press.

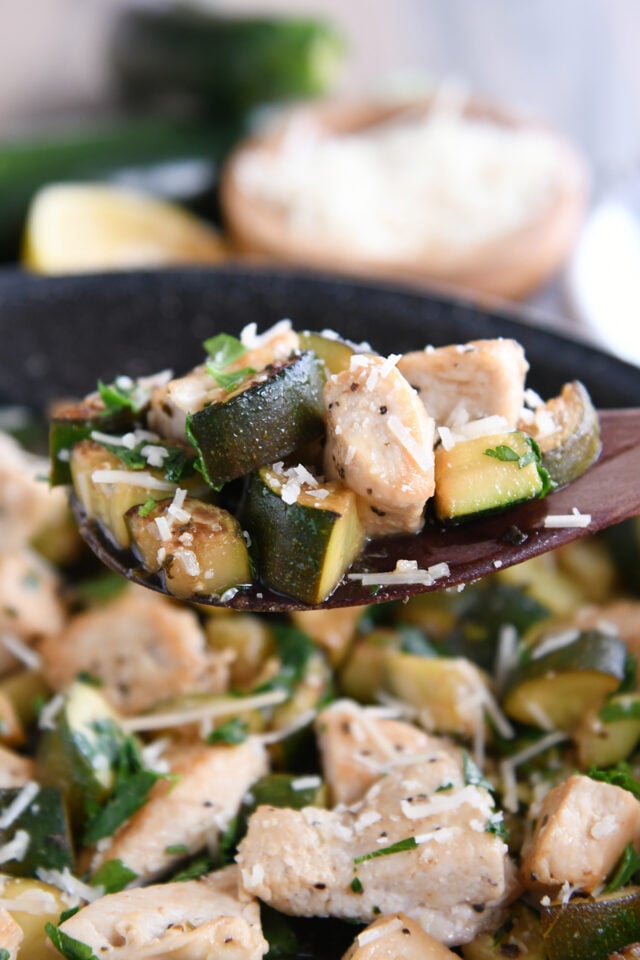
    At the very end, sprinkle with Parmesan cheese and fresh basil or parsley (optional but ultra-delish).

    And don’t forget to sample a little taste and add additional salt and pepper, if needed!

    This skillet lemon parmesan chicken and zucchini meal is so, so simple, but as tasty as a meal that takes hours!

    I could literally eat it every day.

    Wooden spoon with zucchini, chicken and parmesan cheese.

    Low Carb Skillet Meal

    While this recipe is naturally low carb, when I make it for dinner for the family, I usually alter the carb eco-system and serve it alongside jasmine or brown rice or sometimes flatbread.

    For the last few weeks, I’ve been making large batches of this and eating the leftovers for lunch all week with cottage cheese and cherry tomatoes on the side. (And yes, I eat the leftovers cold straight from the fridge because I’m a monster like that. 😂)

    You could easily vary the protein (use ground meat or shrimp, etc) as well as the veggies (yellow squash, broccoli, etc). It’s simple, fast, and amazing!

    One Year Ago: Quick and Easy Chinese Chicken and Broccoli 
    Two Years Ago: Amazing Instant Pot Lemon Curd
    Three Years Ago: Loaded Cheesy Cauliflower Soup
    Four Years Ago: Healthy Egg and Veggie Muffins
    Five Years Ago: Tender Greek Pork Instant Pot or Slow Cooker
    Six Years Ago: Chicken Tortilla Soup Instant Pot, Stovetop, Slow Cooker
    Seven Years Ago: Cashew Chicken Lettuce Wraps 30-Minute Meal
    Eight Years Ago: Korean Beef and Rice Or Quinoa: Simple 20-Minute Meal 
    Nine Years Ago: Tuscan Sausage and White Bean Soup
    Ten Years Ago: Asian Chicken Lettuce Wraps Quick and Delish

    Skillet with chicken, zucchini, parmesan and wooden spoon.

    Skillet Lemon Parmesan Chicken and Zucchini

    • 1 tablespoon olive oil
    • 1 ½ pounds boneless chicken breast or thighs
    • Salt, pepper, and garlic powder
    • 3 small zucchini (about 1 pound total)
    • 2 tablespoons fresh lemon juice
    • 1 tablespoon soy sauce
    • 1 teaspoon dried basil
    • ¼ teaspoon dried oregano
    • ½ cup shredded Parmesan cheese
    • Fresh parsley or basil, chopped (optional)

    Prevent your screen from going dark

    • Pat the chicken dry and cut into bite-size pieces. Toss with a couple pinches of salt, pepper and garlic powder. Chop the zucchini (discarding end with the stem) into 1/2-inch pieces. Set aside.

    • Heat the oil in a 12-inch nonstick skillet over medium heat until hot and rippling. Add the chicken pieces in a single layer. Let them cook WITHOUT STIRRING for 2-3 minutes until golden on one side. Flip and cook for another 2-3 minutes until cooked through. Remove to a plate reserving as much oil/liquid in the pan as possible.

    • Return the skillet to medium heat and add the zucchini in a single layer. Again, let the zucchini cook WITHOUT STIRRING (to maximize that golden color) for 1-2 minutes. Flip or stir and continue cooking for another minute or two until the zucchini is tender (but not mushy – don’t over cook).

    • Add the chicken back to the skillet and add the lemon juice, soy sauce, basil, and oregano. Stir to combine.

    • Increase the heat to medium high and cook until sizzling and the liquid thickens just a bit, 1-2 minutes.

    • Sprinkle with parmesan cheese and fresh herbs, if using. Season to taste with additional salt and pepper, if needed.

    Serving: 1 serving, Calories: 196kcal, Carbohydrates: 3g, Protein: 28g, Fat: 8g, Saturated Fat: 2g, Cholesterol: 78mg, Sodium: 438mg, Fiber: 1g, Sugar: 2g

    Recipe Source: from Mel’s Kitchen Cafe

    Disclaimer: I am a participant in the Amazon Services LLC Associates Program, an affiliate advertising program designed to provide a means for me to earn fees by linking to Amazon.com and affiliated sites. As an Amazon Associate I earn from qualifying purchases.
    Source link

  • House Favorite Roasted Brussels Sprouts Recipe

    House Favorite Roasted Brussels Sprouts Recipe

    These House Favorite Brussels Sprouts are the best side veg and are speckled with bright bursts of cranberries and nutty walnuts. The perfect addition to any meal!

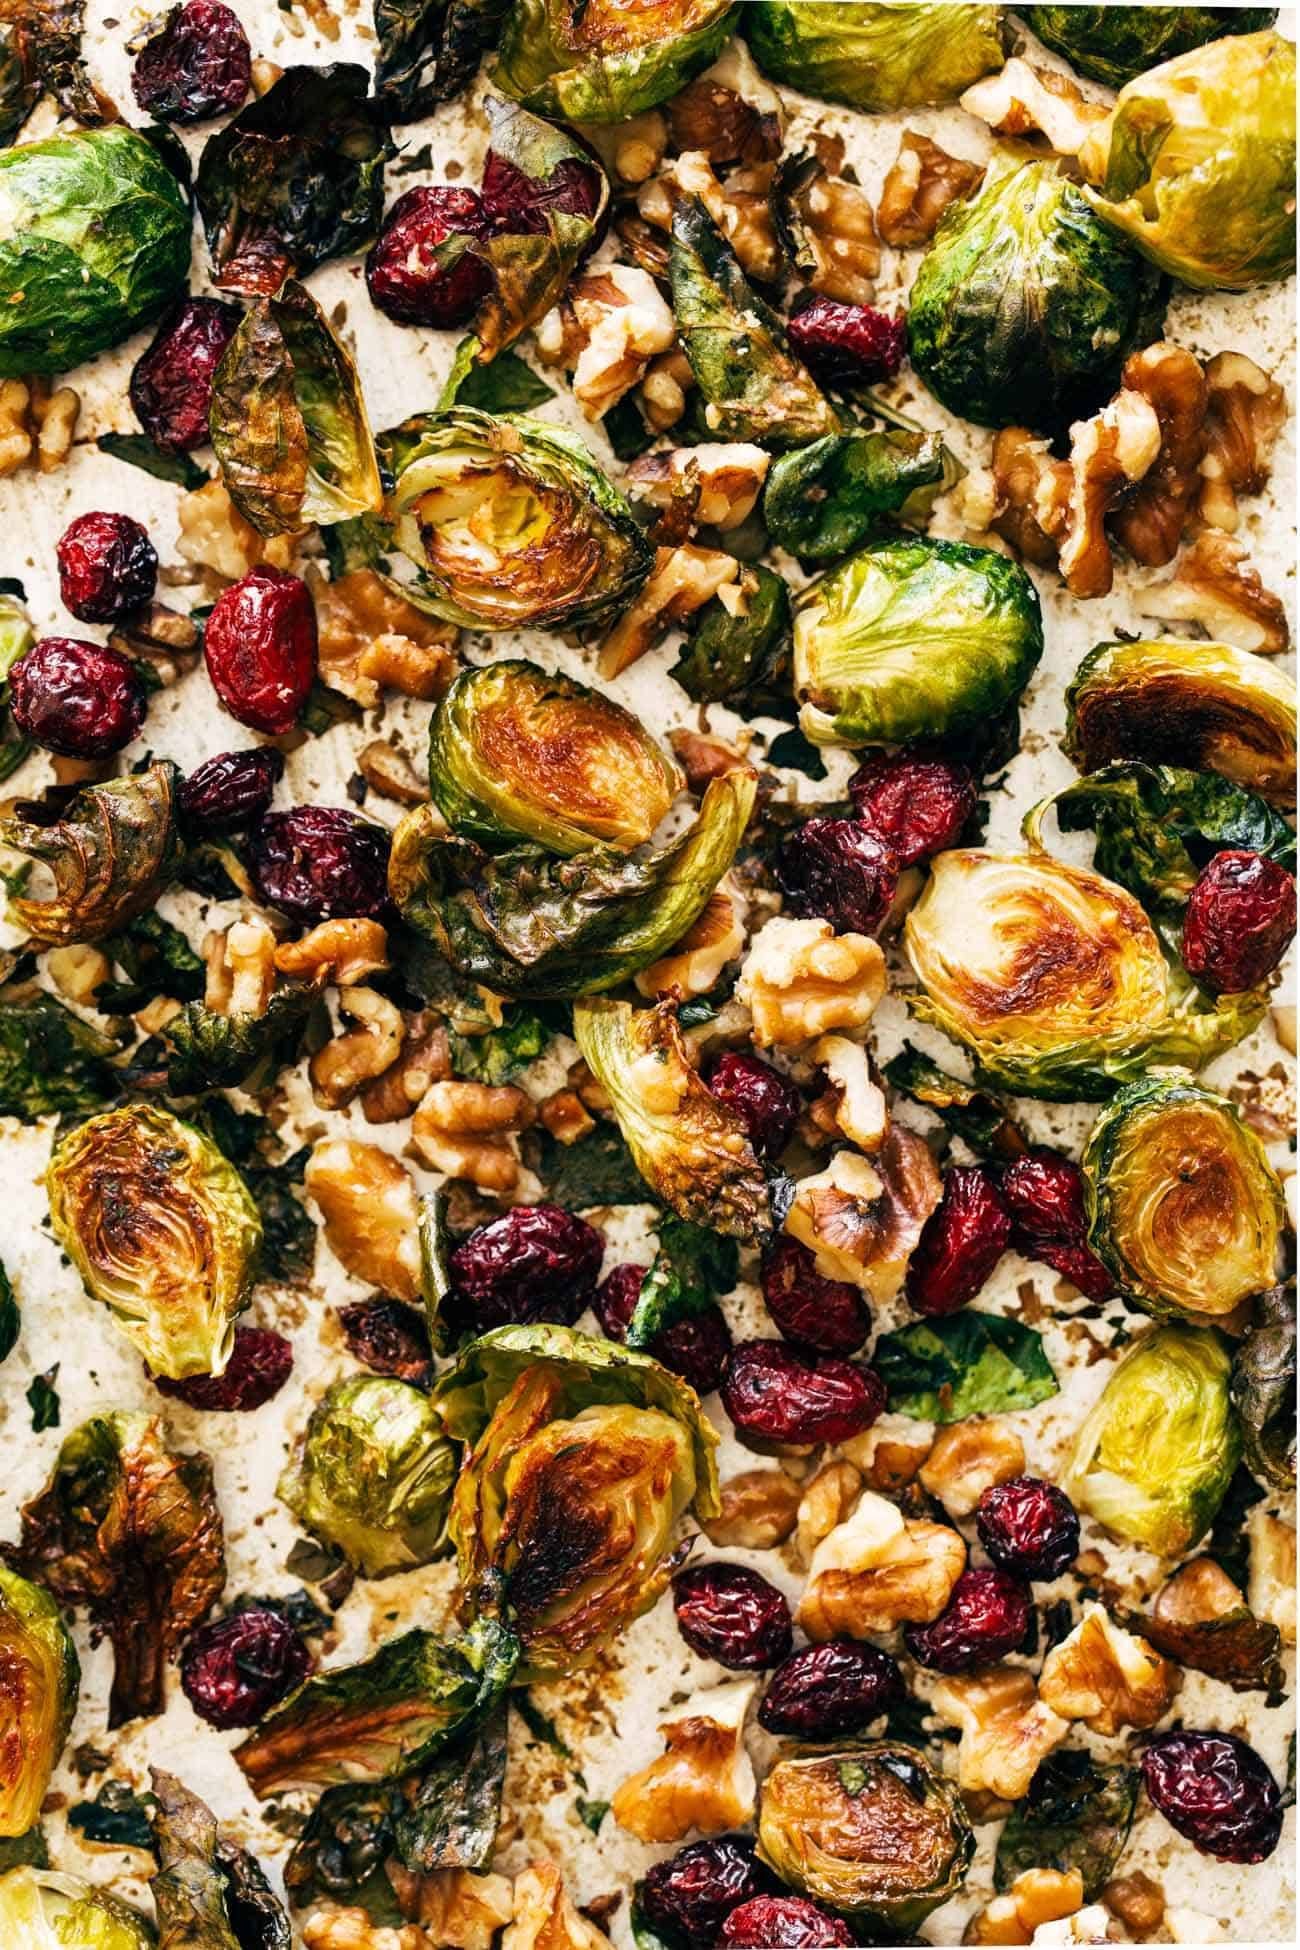
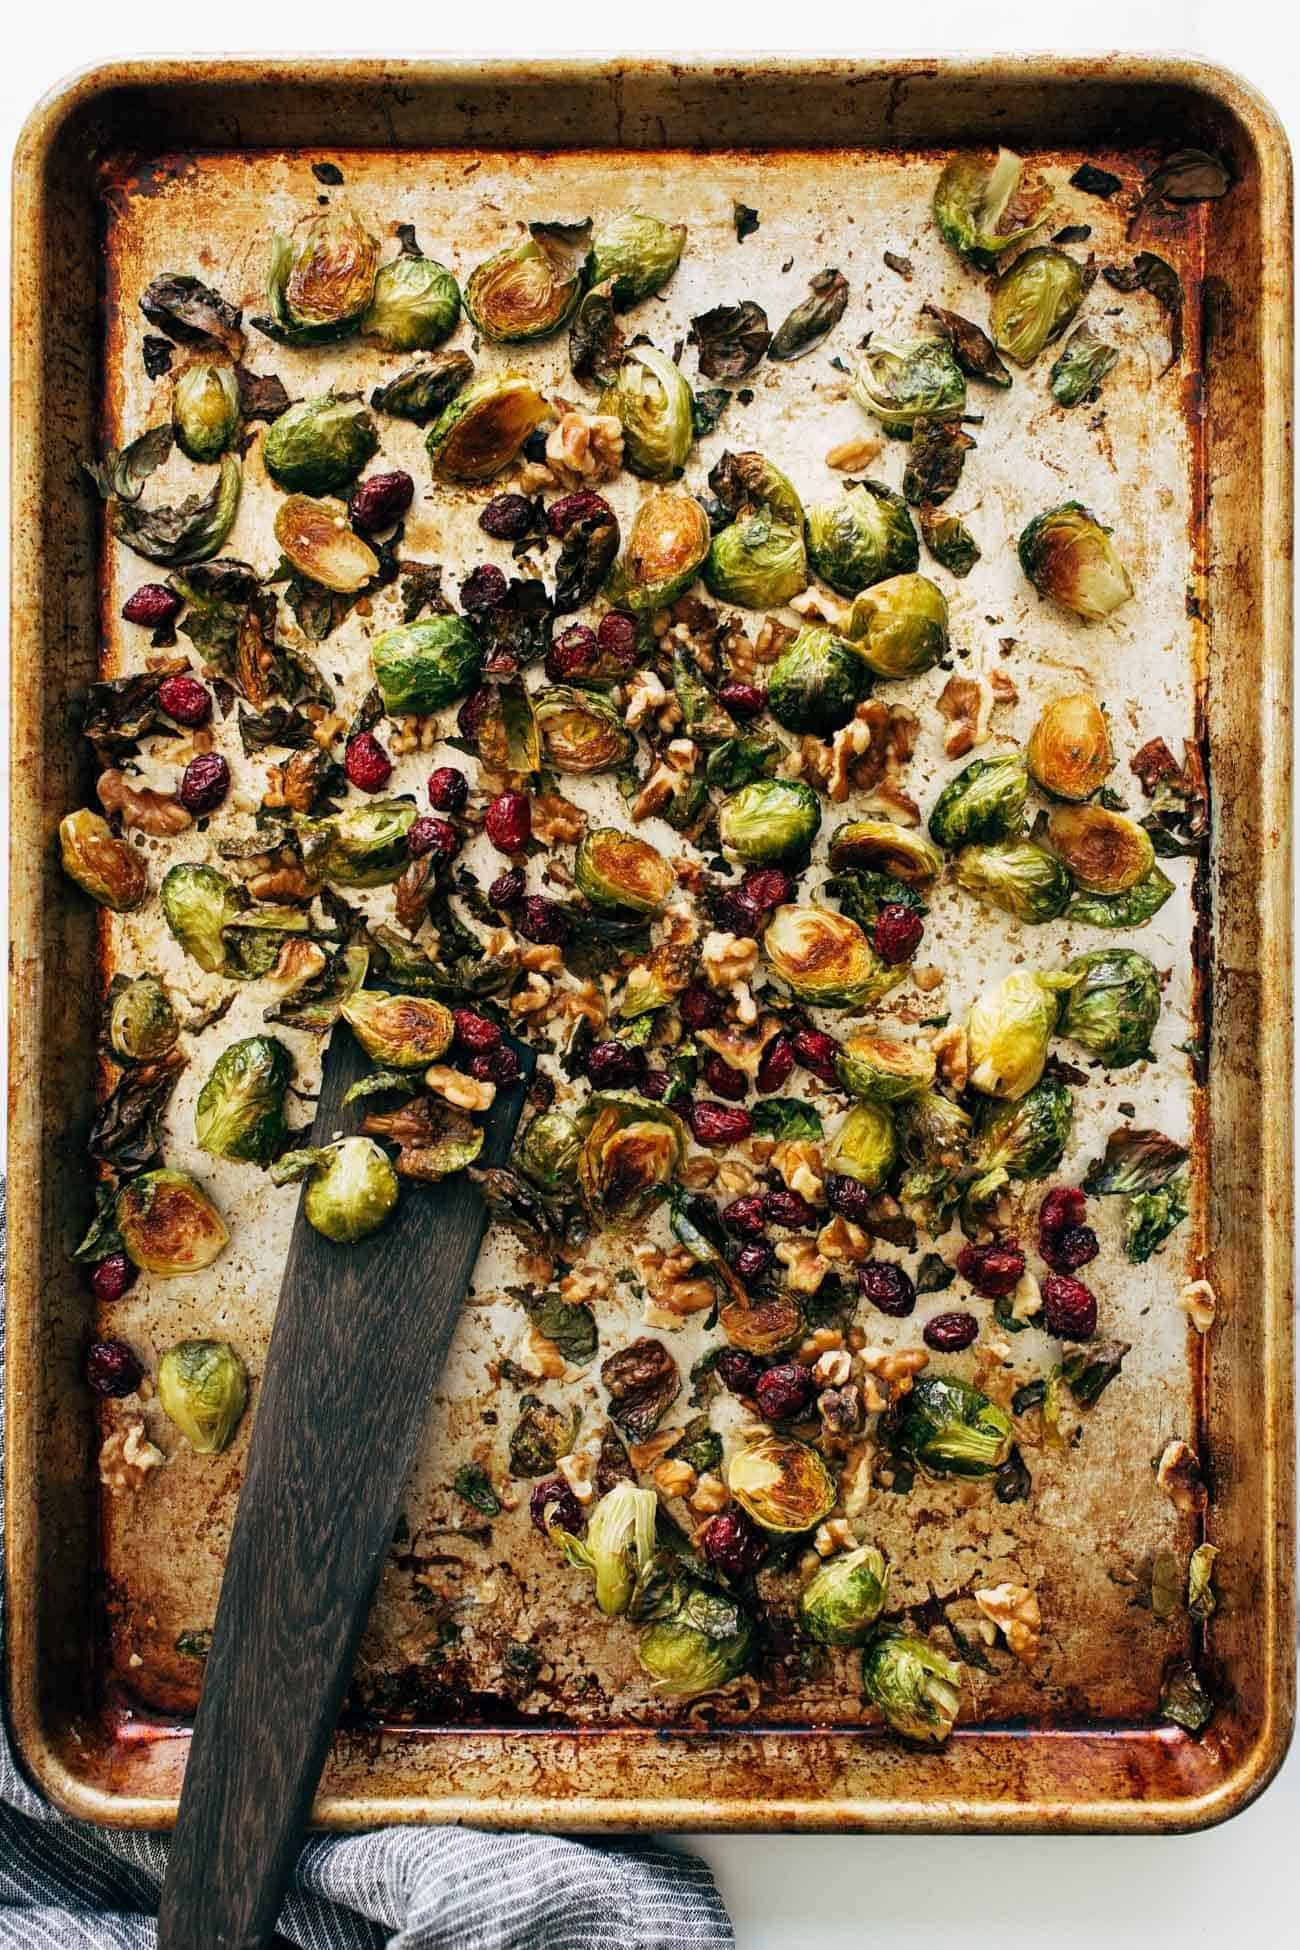
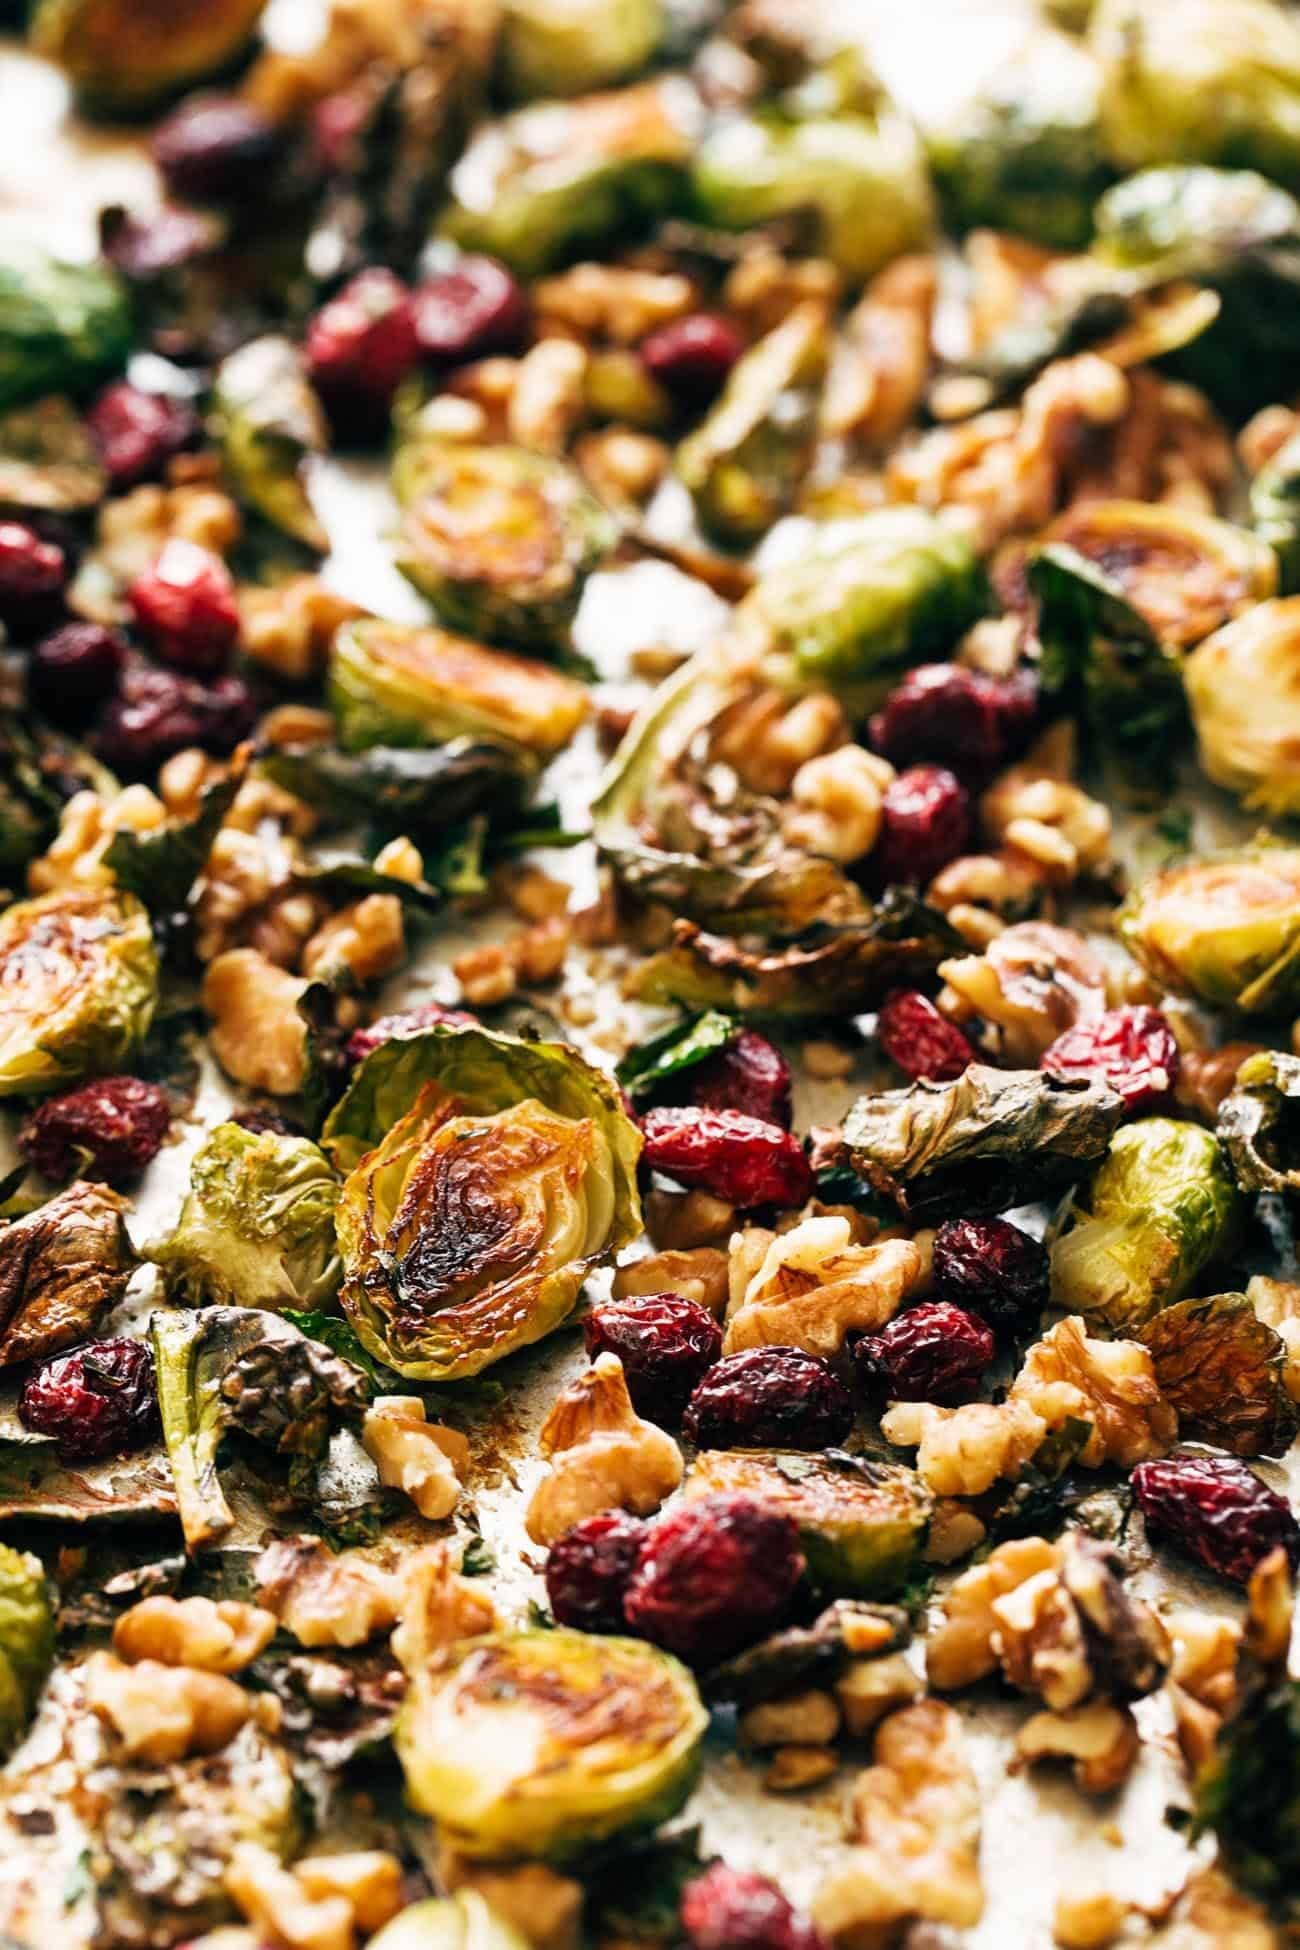
    Let’s talk about these roasty, sweet, nutty brussels sprouts that combine those tender-crisp, whole-brussel bites with the ultra thin and crispy leaves, all coated with a lil’ mustard-maple drench and speckled with juicy bites of dried cranberry. Oh my gosh. WHY ARE THEY SO GOOD.

    To be honest, I have very few “house favorites” in our house because I always change it up. Always trying new recipes, always moving on to the next thing. We hardly stay on any one recipe for more than just a few repeats because new! exciting! rah rah rah. But this recipe has been made WEEKLY for… um, the last five months? It has solidly earned its House Favorite status. We make these brussels sprouts all. the. time. We’ve even added a spicy variation to our repertoire and I cannot be stopped.

    Dad loves them, toddler loves them, Mom loves them AND loves that everyone loves them. Also: guests love them, although usually if it’s more than just us, we’re going to need to double the recipe because, yes, in our house, we will for sure finish one pan between the three of us.


    In This Post: Everything You Need For These Brussels Sprouts


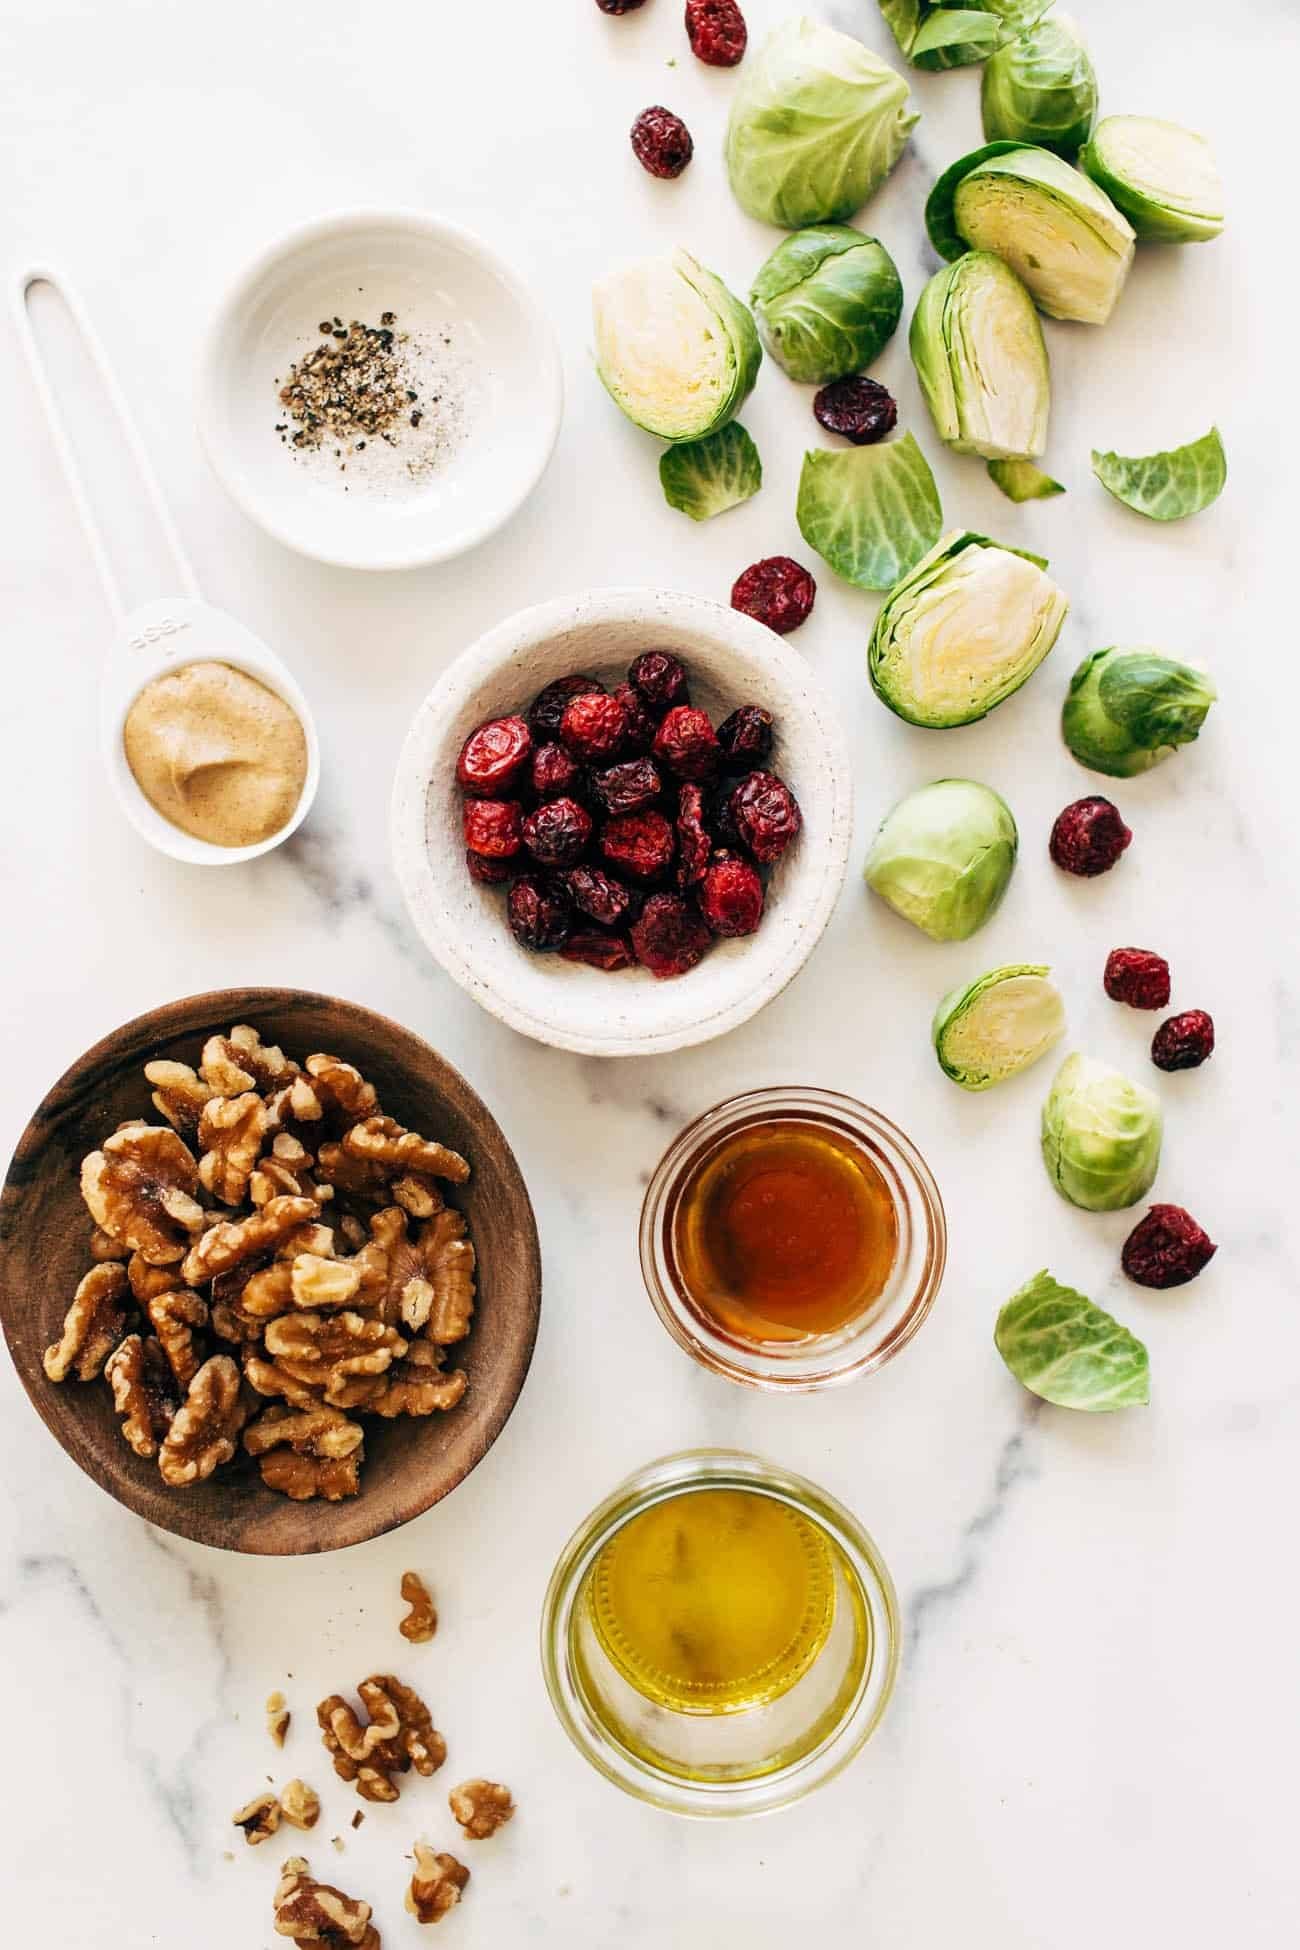
    Ingredients For These Roasted Brussels Sprouts

    This is an SOS series recipe – as in, an excellent back pocket choice for when you just need to get something on the table quickly – so here’s our super short and sweet ingredient list:

    • brussels sprouts
    • walnuts
    • dried cranberries
    • maple syrup
    • Dijon mustard

    And, of course, your standards: olive oil, salt, and pepper.

    Prefer To Watch Instead Of Read?

    Ingredients for House Favorite Brussels Sprouts

    How To Make Brussels Sprouts That Actually Taste Good

    Here we go!

    1. Prep your brussels sprouts. Cut off the base of the brussel sprout, remove the outer leaves, and cut it in half vertically. Turn on some music or a good show and go to town.
    2. Then, the brussels get tossed in olive oil and roast in the oven, cut side down, until they are nice and crispy.
    3. The walnuts get added for the last minute for a little toasting.
    4. The cranberries join the cool-down party.
    5. And finally, the sauce gets added directly to the pan. And by sauce, I mean an eyeballed little squirt of Dijon mustard and a solid drizzle of maple syrup (if you like things tangy, maybe a little balsamic vinegar too?). Get a little more olive oil, salt, and pepper up in there, maybe some red pepper flakes if you like things spicy, and ohhhkay yes.

    That was easy. We are in business.

    Roasted Brussels sprouts on a pan with a spatula

    What To Serve with Brussels Sprouts

    The brussels in and of themselves aren’t a meal (although, with the cranberries and walnuts in there…maybe they are?), but here are some ideas for what to serve them with – SOS STYLE.

    The flavors of this recipe can go so many directions with whatever it is you’re eating. And I’m sure you can think of 100 or more fancier ideas to round out the table if you’re going for a more impressive-dinner-party situation, so don’t let me hold you back.

    But for basic nights at home, when you want to really, truly, actually look forward to eating your vegetables, these basic, versatile, saucy, crispy sprouts are where it’s at.

    I’m telling you – HOUSE FAVORITE.

    Close-up of roasted Brussels sprouts on a pan with walnuts and cranberries.

    House Favorite Brussels Sprouts: Frequently Asked Questions

    I’m allergic to nuts. What can I substitute?

    You could leave the nuts out completely or, if you can have seeds, you could add pumpkin seeds here. Once you add the pumpkin seeds, just keep a close eye on things so they don’t burn.

    How could I prep brussels sprouts in advance?

    Brussels sprouts are really best fresh and crispy out of the oven, so for prepping ahead of time, I would recommend just cutting the brussels sprouts so they’re ready to get roasted, and whisk the mustard and maple syrup together so that’s ready to go too!

    Can I add meat to these brussels sprouts?

    Sure! Some diced pancetta or bacon would be great! You could also cook up some salmon to go with this very nicely.

    Are there any herbs I could add to this?

    Absolutely! Thyme and/or rosemary would be lovely additions to this.

    Can I add cheese to this?

    That sounds delicious! Yes. Crumbled goat cheese or feta cheese would be delicious.


    Print

    clock clock iconcutlery cutlery iconflag flag iconfolder folder iconinstagram instagram iconpinterest pinterest iconfacebook facebook iconprint print iconsquares squares iconheart heart iconheart solid heart solid icon

    Description

    These House Favorite Brussels Sprouts are the best side veg and are speckled with bright bursts of cranberries and nutty walnuts. The perfect addition to any meal! 


    1. Preheat the oven to 425 degrees. Place brussels sprouts cut-side down directly on a baking sheet. Drizzle with oil and sprinkle with salt and pepper.

    2. Roast brussels sprouts for 15-20 minutes, until cut sides are very brown and some of the leaves are crispy. Add walnuts, mustard, and maple; return to oven for 5-10 minutes to get the walnuts toasted. (You can choose to either add the sauce now, or when the pan comes out of the oven in step 3. If you add it now, it gets kind of baked into the brussels, but if you add it when they’re done baking, it’ll be a little more saucy. I like it both ways. Your choice!)

    3. Remove from oven. Toss with cranberries directly on the baking sheet. Season and serve immediately. Yumo!

    • Prep Time: 5 minutes
    • Cook Time: 20 minutes
    • Category: Side Dish
    • Method: Roast
    • Cuisine: American

    Keywords: brussels sprouts, walnuts, cranberries

    More Delicious Brussels Sprouts Recipes

    Source link

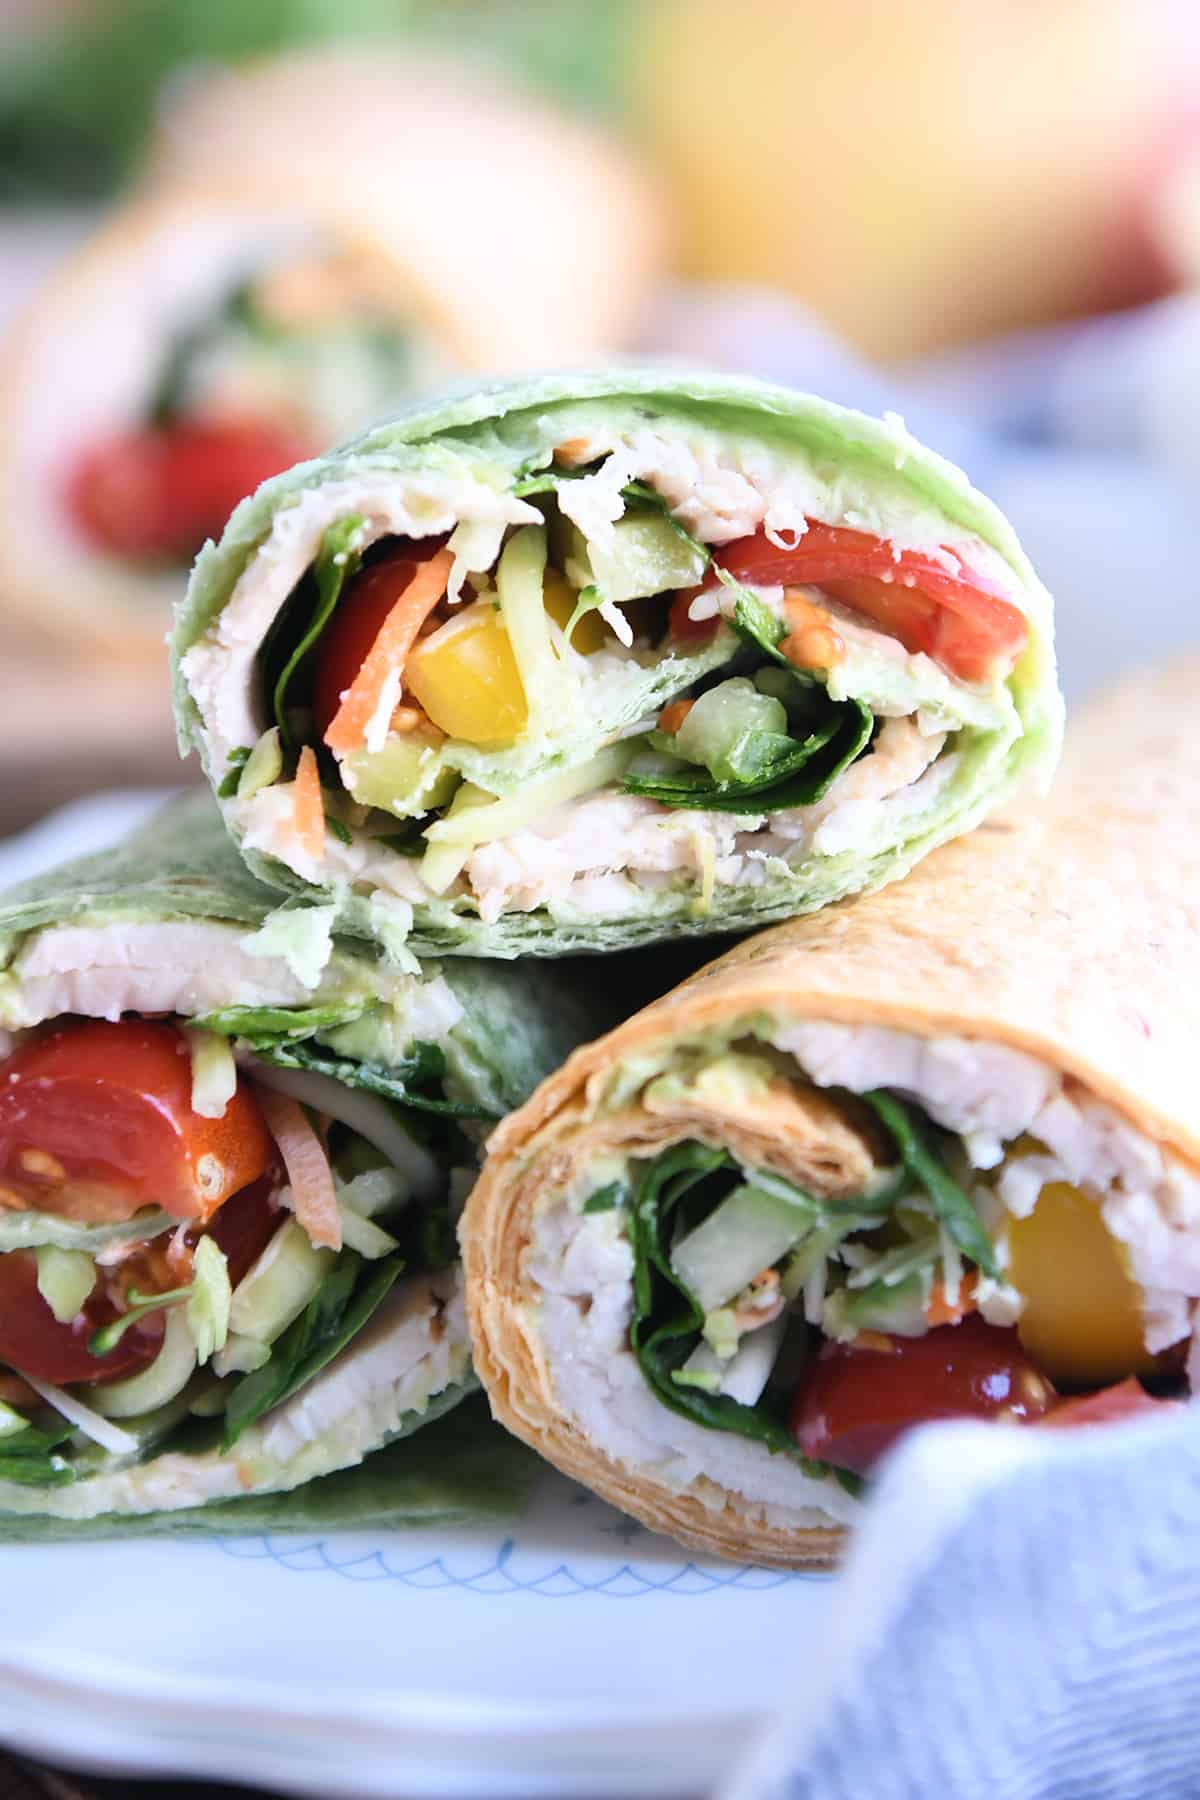
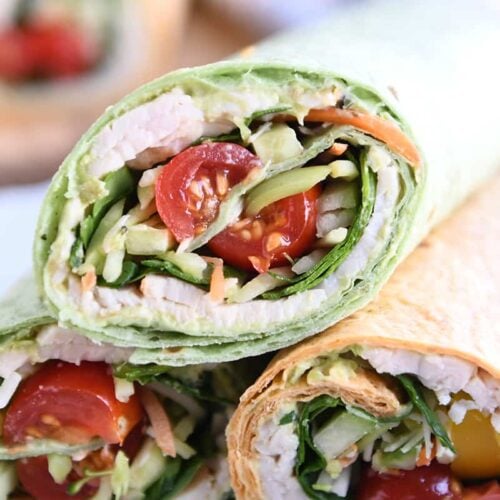
  • Turkey Avocado Veggie Wraps

    Turkey Avocado Veggie Wraps

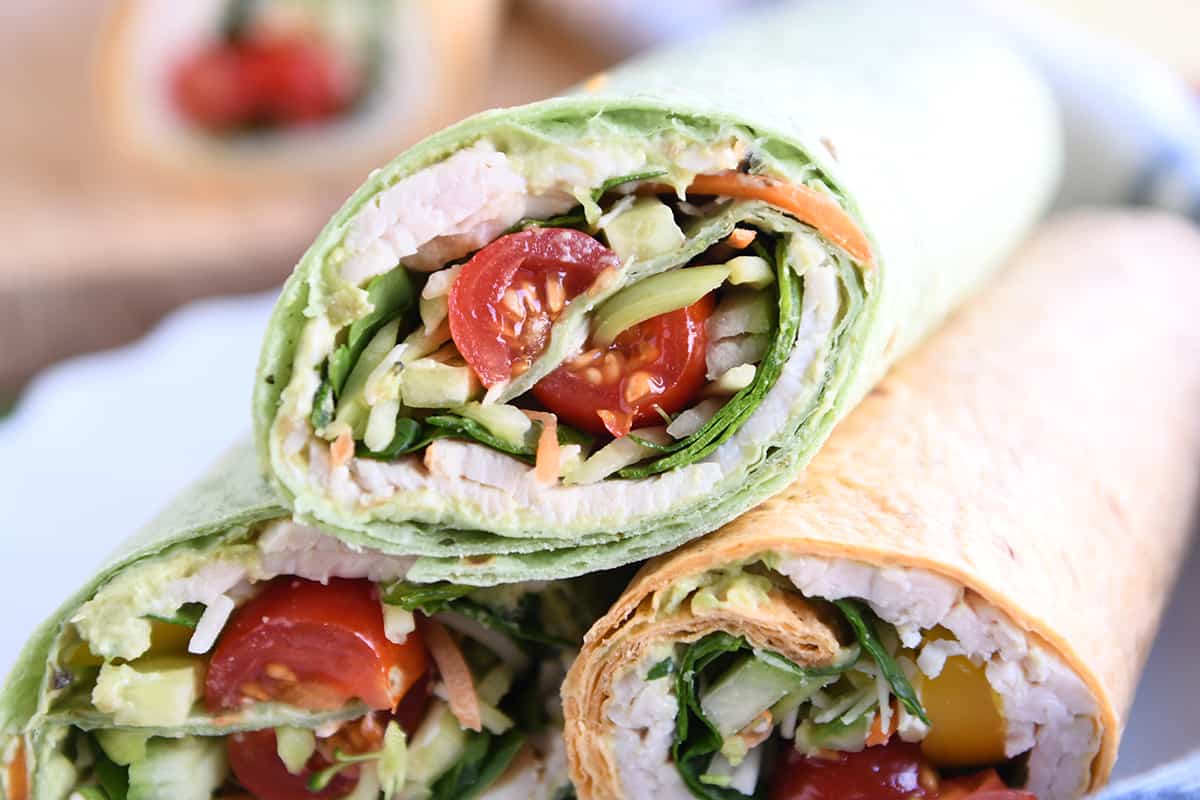
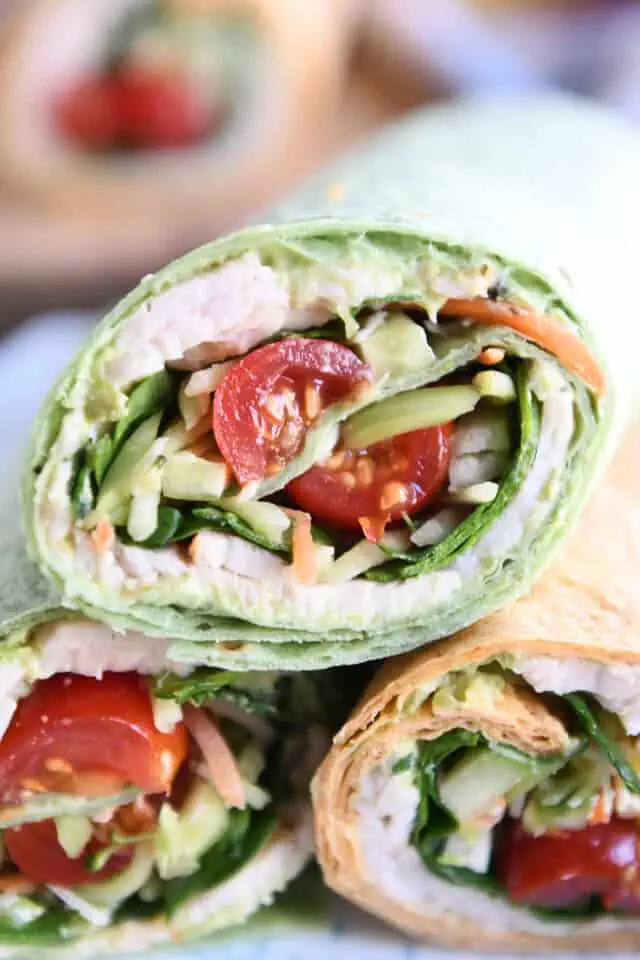
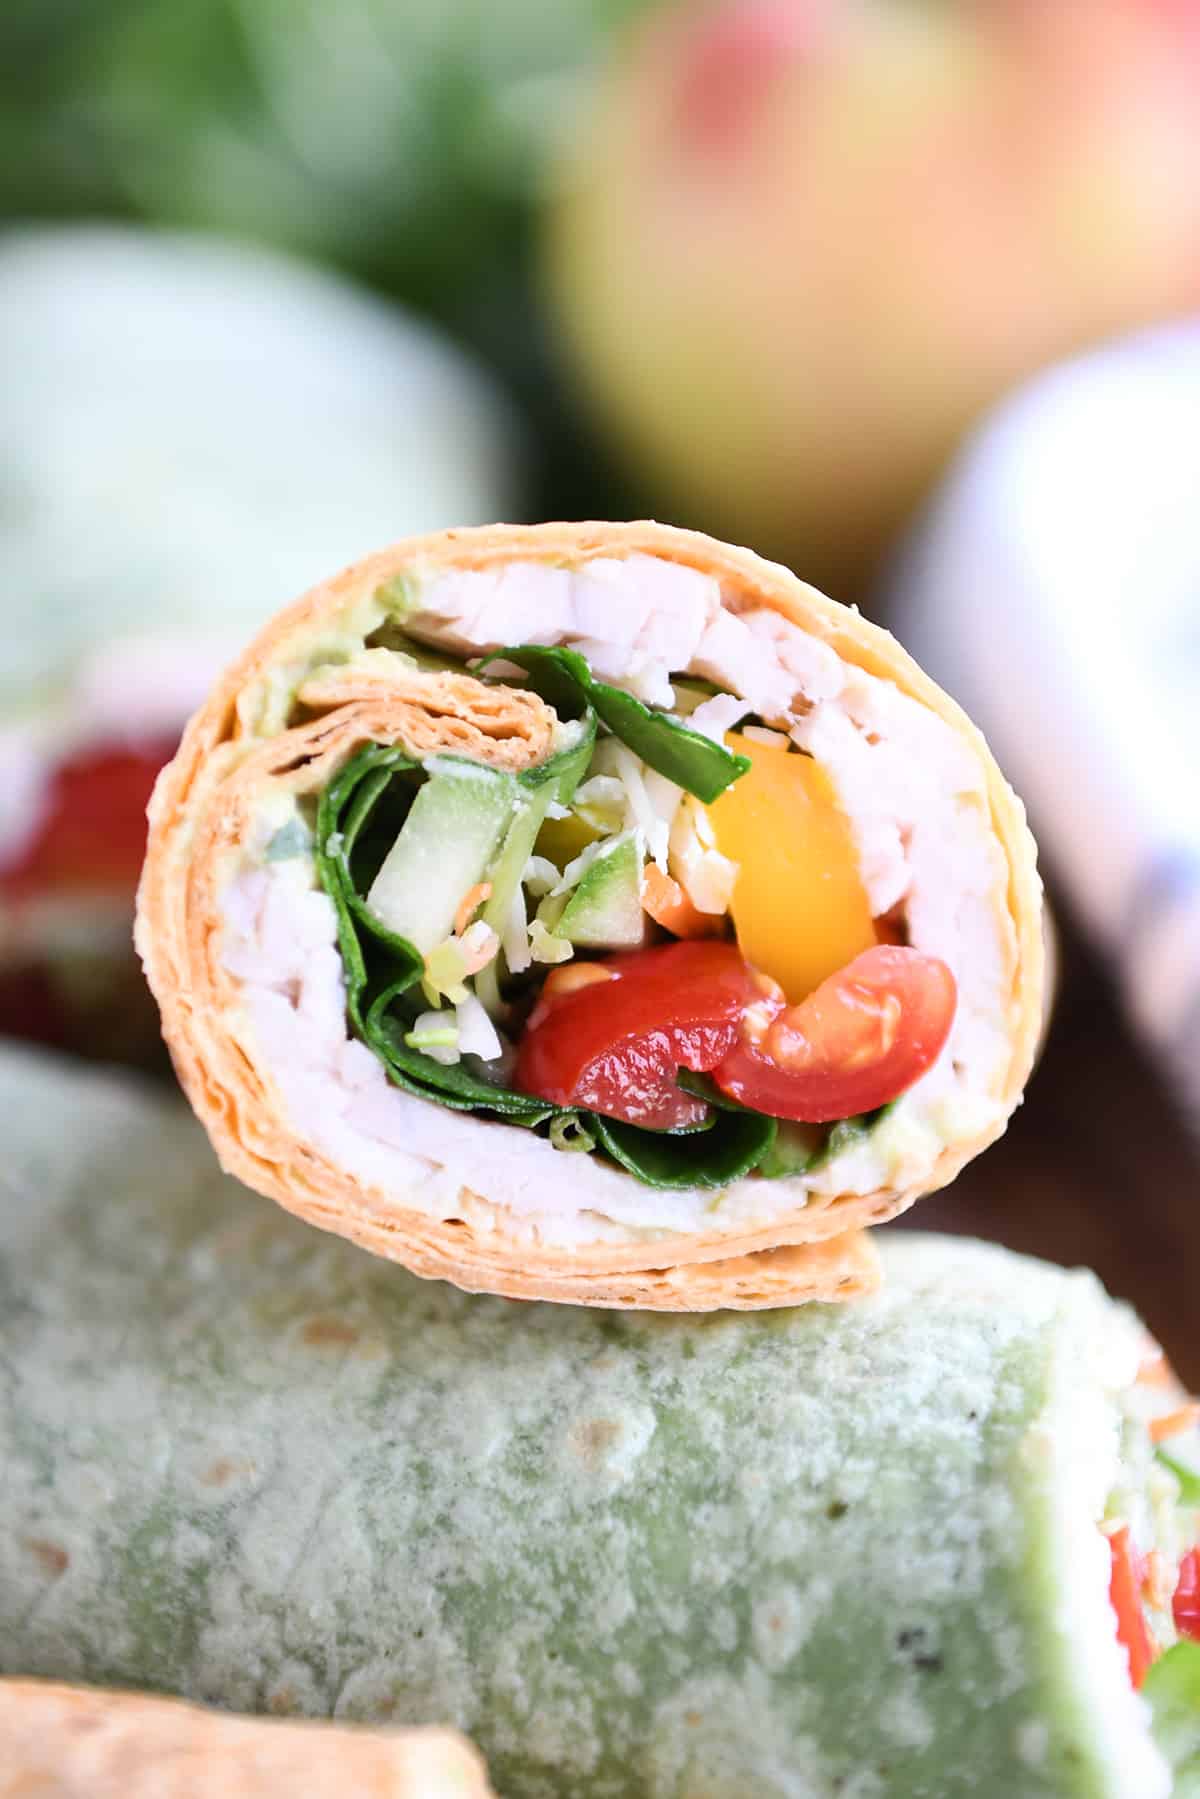
    These simple turkey avocado veggie wraps are crazy delicious! Shaved turkey, tons of fresh vegetables, and a creamy avocado spread – YUM!

    Meet your new favorite lunch OR easy dinner recipe!

    These wraps are loaded with crunch and flavor, and they only take a few minutes to roll up!

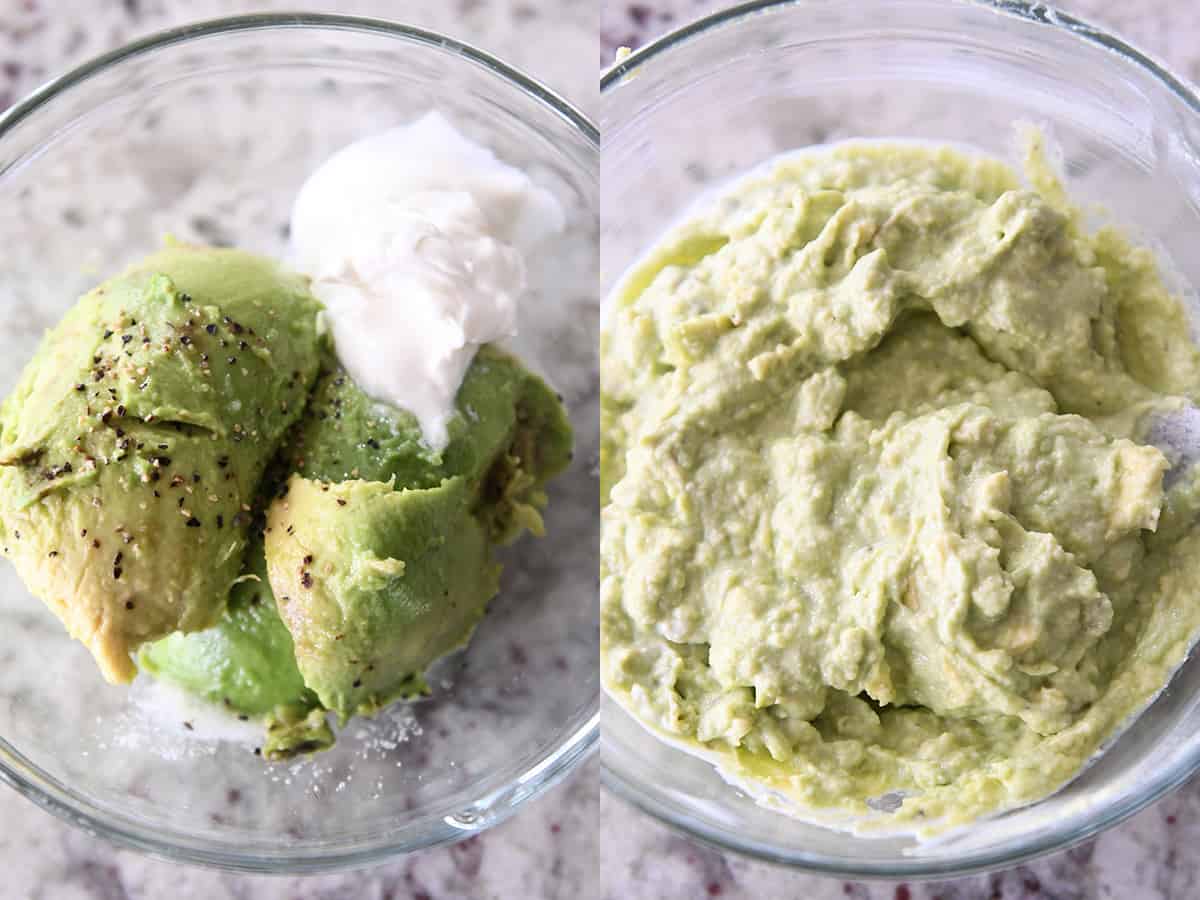
    Starts with Avocado Spread

    These tasty little wraps start with a simple avocado spread. Not only does it add a creamy element and yummy flavor, the spread is also the literal glue that keeps these wraps from unraveling.

    • ripe avocado
    • fresh lime juice
    • sour cream or mayo
    • salt and pepper

    It’s basically guacamole made creamy, and it is DELICIOUS.

    Best Veggies for the Turkey Wraps

    Fresh vegetables make a very notable appearance in these wraps.

    They add crunch, flavor, pops of juiciness, and an overall “pat-yourself-on-the-back-for-eating-so-many-veggies-at-lunch” element that will keep you beaming all the way to the pan of brownies for dessert.

    It goes without saying that the vegetables can be totally customized to your preferences or what you have on hand. I like to use the following:

    • fresh spinach
    • shredded carrots or broccoli slaw (the prepackaged mix in the salad section at the store – usually has shredded broccoli and shredded carrots)
    • cucumbers
    • bell peppers
    • cherry tomatoes

    Talk about a lesson in eating your colors! Gorgeous veggies 😍

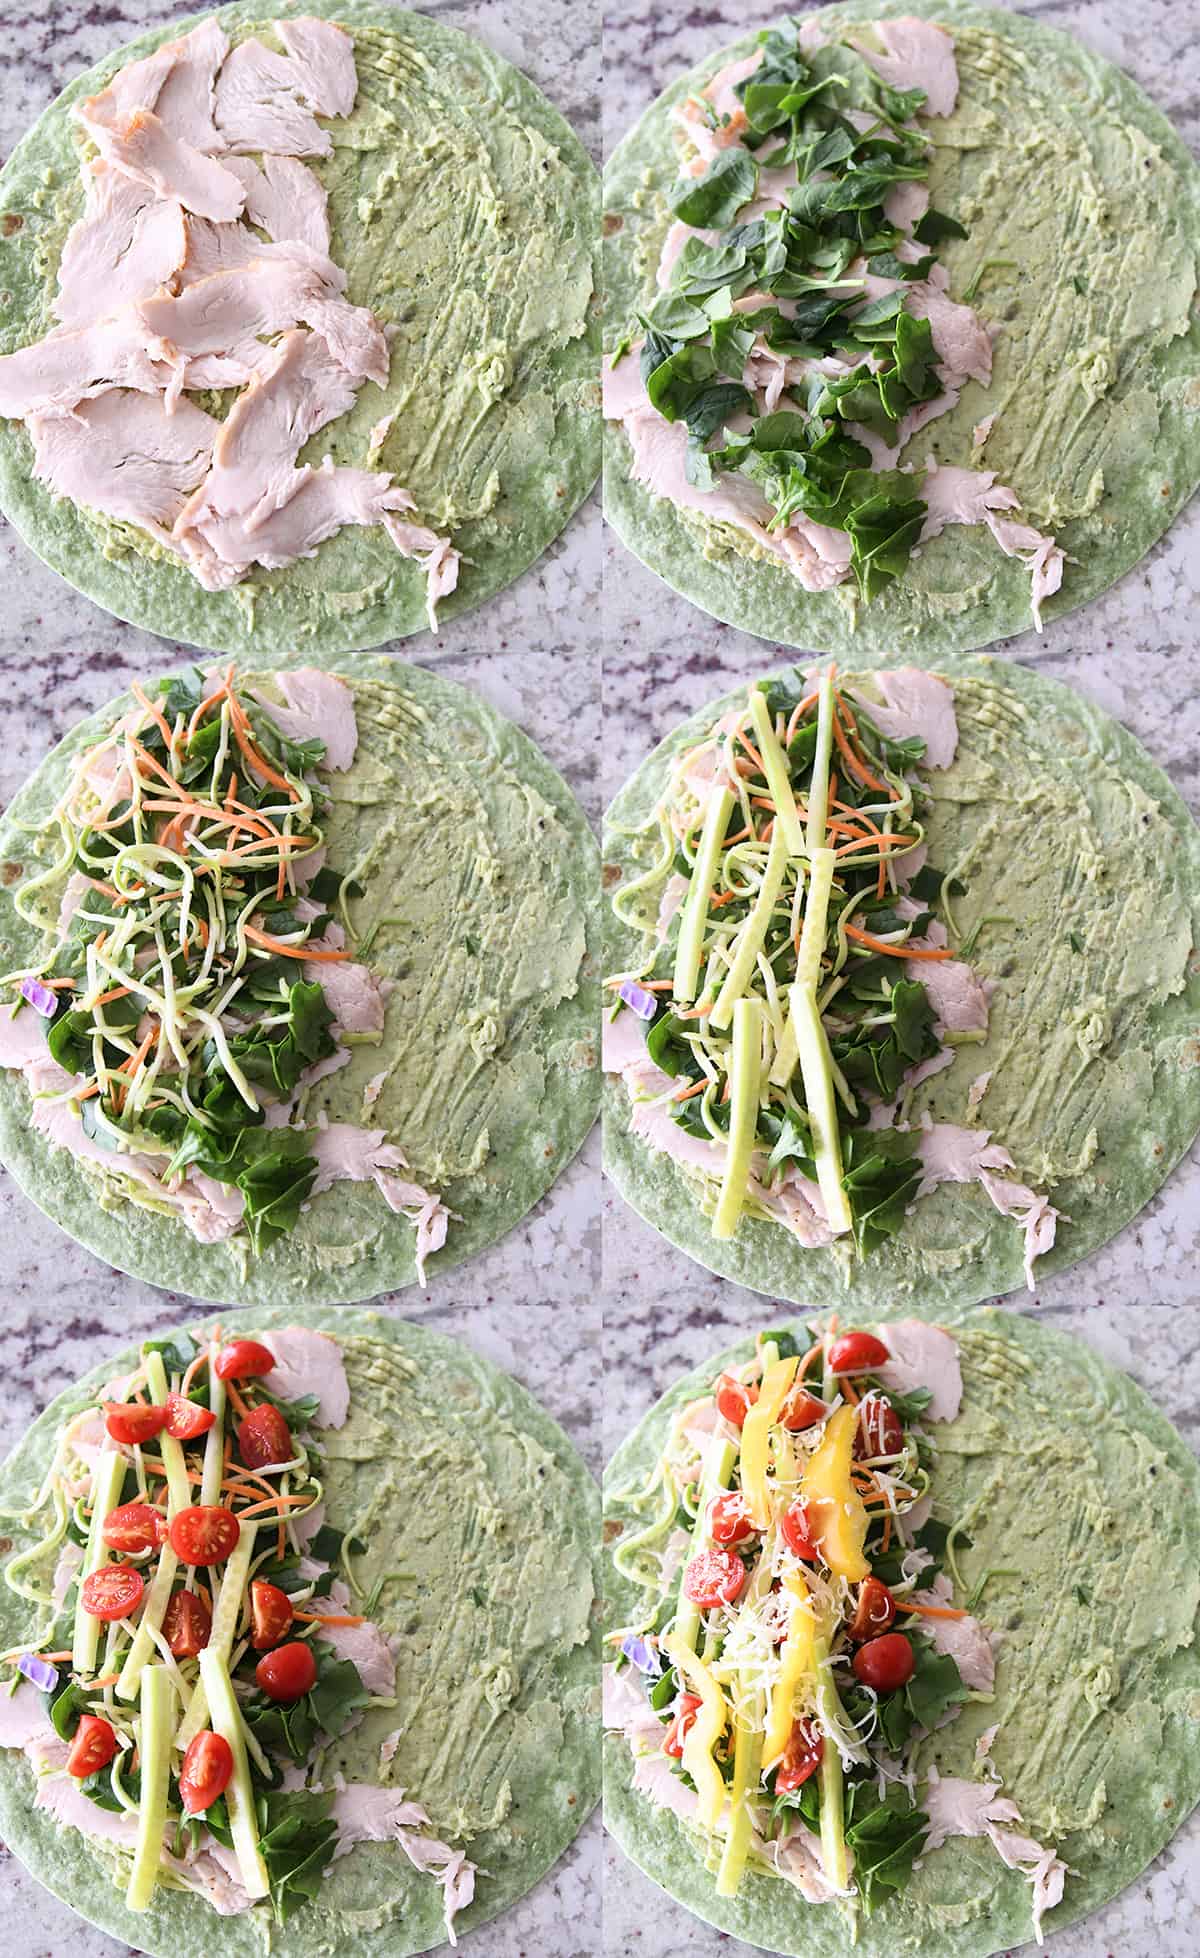
    How to Assemble the Wraps

    A very straightforward process, assembling these wraps is super quick!

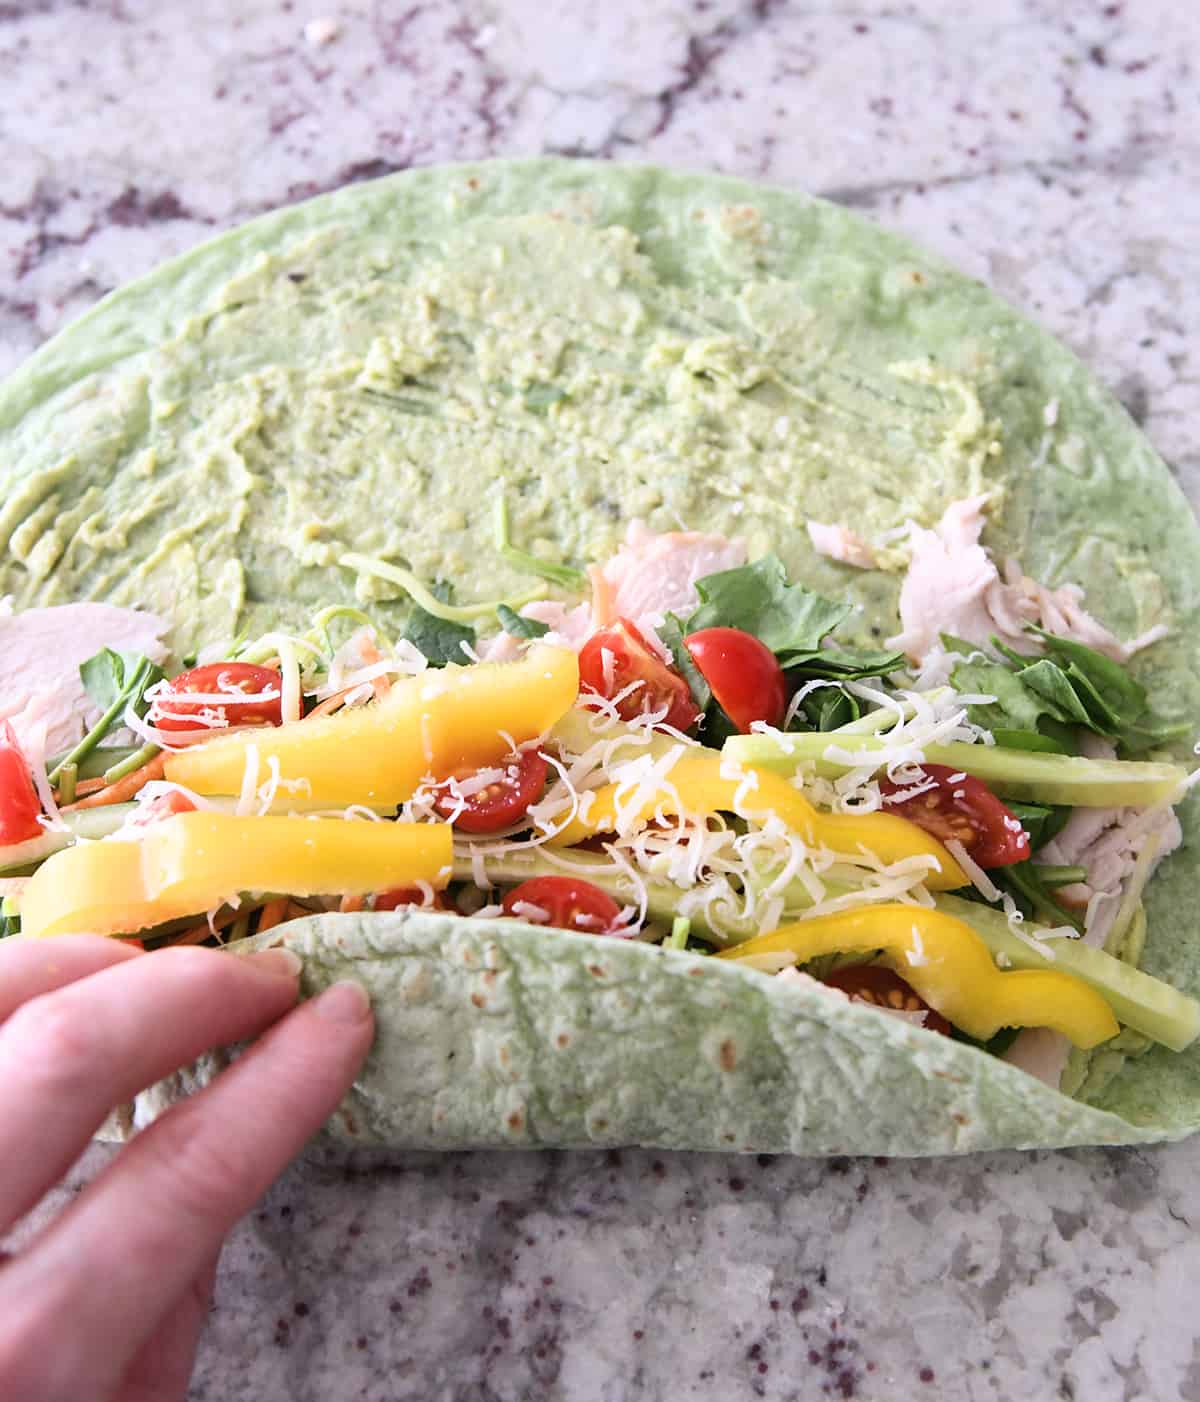
    The most important steps are:

    1. spreading the avocado spread over the entire wrap (leaving just a slight border around the edge)
    2. stacking the turkey and veggies only on one half of the wrap

    This makes it a lot easier to make sure all the veggies and turkey stay INSIDE when rolling up the wrap. It also allows that avocado spread to seal the wrap closed once it’s fully rolled up.

    Wrap Flavors

    You can use any variety of tortilla or wrap for these turkey avocado veggie wraps.

    The most common wrap flavors at my local grocery store are spinach and sun-dried tomato, and both of those are delicious with these ingredients.

    You can also use a plain flour tortilla, a low-carb wrap, or whatever type of flatbread catches your eye to be the vehicle for rolling up the avocado spread + turkey + veggies.

    Adding a sprinkle of salt and pepper and a splash of olive oil and vinegar to the veggies before rolling up adds an amazing boost of flavor!

    These fresh and flavorful wraps are one of my favorite things to make for lunch. Just for me. By myself. At home.

    The only downside is that when I know I have the ingredients for them, it leaves me wanting to eat lunch at, like, 9:06 a.m. Although, maybe these wouldn’t be half bad for breakfast either??

    They also make a wonderful grab-and-go, light and healthy dinner. For this option, I roll up the wraps, cut them in half, and wrap each half tightly in plastic wrap (could also use parchment or foil). We’ve schlepped them everywhere from wrestling meets to church youth night activities.

    Because they are customizable, that means you can make them with all YOUR favorite veggies and ingredients!

    One Year Ago: Cinnamon Roll Blondie Bars 
    Two Years Ago: Quick and Easy Greek Lettuce Wraps
    Three Years Ago: Dark Chocolate Brownie Granola Bars 
    Four Years Ago: Cheesy Sausage Wonton Bites
    Five Years Ago: Pull-Apart Cheesy Pepperoni Pizza Sliders
    Six Years Ago: Turkey and Swiss Sloppy Joes {30-Minute Meal}
    Seven Years Ago: S’Mores Hershey Kiss Blossom Cookies
    Eight Years Ago: Healthy and Delicious Broiled Tilapia Tacos {30-Minute Meal} 
    Nine Years Ago: Cinnamon and Sugar Breadstick Twists
    Ten Years Ago: Cheesecake Stuffed Chocolate Chip Cookie Bars

    Turkey Avocado Veggie Wraps

    • 1 medium avocado
    • 2 tablespoons mayonnaise or sour cream
    • 1 tablespoon fresh lime juice
    • Salt and pepper
    • 4 tortillas or wraps (10- to 12-inches)
    • 8 ounces shaved deli turkey
    • 4 cups torn or chopped fresh spinach
    • 1 cup shredded carrots or broccoli slaw mix
    • 1 English cucumber, cut into thin matchstick slices
    • 1 cup halved cherry or grape tomatoes
    • 2 bell peppers, orange, red, yellow or green, cut into thin slices
    • ½ cup finely shredded Parmesan cheese (optional)
    • Oil and vinegar (optional
    • Salt and pepper

    Prevent your screen from going dark

    • In a small bowl, mash the avocado, sour cream or mayo, lime juice, and a pinch of salt and pepper together until combined.

    • To assemble the wraps, spread a couple tablespoons of the avocado spread over the wrap (leaving a thin border around the edge).

    • Layer the following on one half of the wrap: turkey, spinach, carrots (or broccoli slaw), cucumbers, cherry tomatoes, bell peppers, Parmesan cheese.

    • Sprinkle with salt and pepper and a dash of olive oil and favorite vinegar (balsamic is delicious here), if desired.

    • Starting from the edge loaded with turkey and veggies, roll up tightly. The avocado spread should help “seal” the wrap closed on the long edge.

    • Cut in half. Serve immediately or refrigerate, well wrapped, for an hour or so before serving (any longer and the avocado spread may darken in color – doesn’t affect the taste).

    Serving: 1 wrap, Calories: 407kcal, Carbohydrates: 53g, Protein: 22g, Fat: 13g, Saturated Fat: 5g, Cholesterol: 29mg, Sodium: 1377mg, Fiber: 8g, Sugar: 9g

    Disclaimer: I am a participant in the Amazon Services LLC Associates Program, an affiliate advertising program designed to provide a means for me to earn fees by linking to Amazon.com and affiliated sites. As an Amazon Associate I earn from qualifying purchases.
    Source link

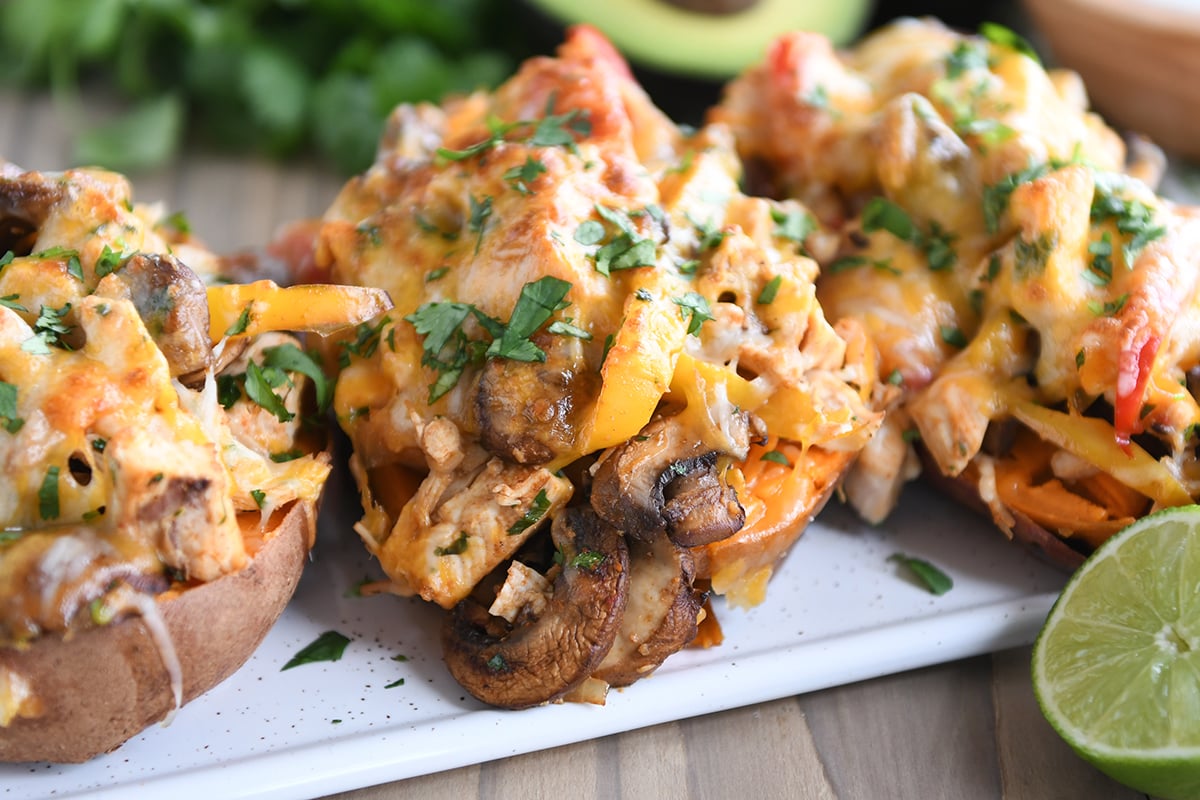
  • Loaded Chicken Fajita Sweet Potatoes

    Loaded Chicken Fajita Sweet Potatoes

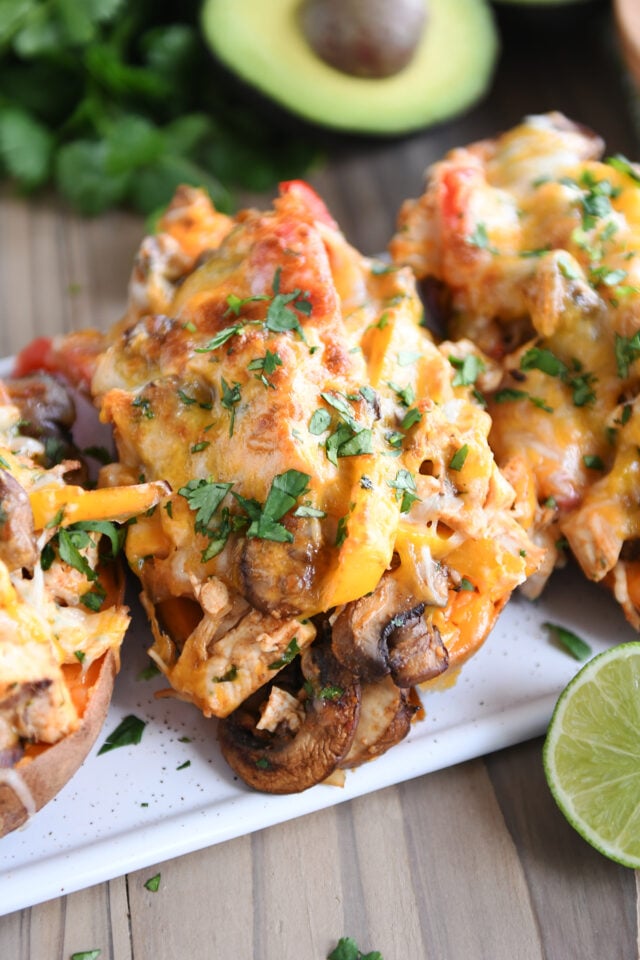
    With the veggies, chicken, sweet potato and simple seasonings, these loaded chicken fajita sweet potatoes are amazing! So much flavor!

    If fajita flavors are your jam, you are going to love this recipe!

    Veggies (customizable to your liking!), chicken and lots of smoky flavors are piled high on tender sweet potatoes, and the result is a combination that never gets old!

    Mushrooms and bell peppers and broiled cheese on sweet potatoes.

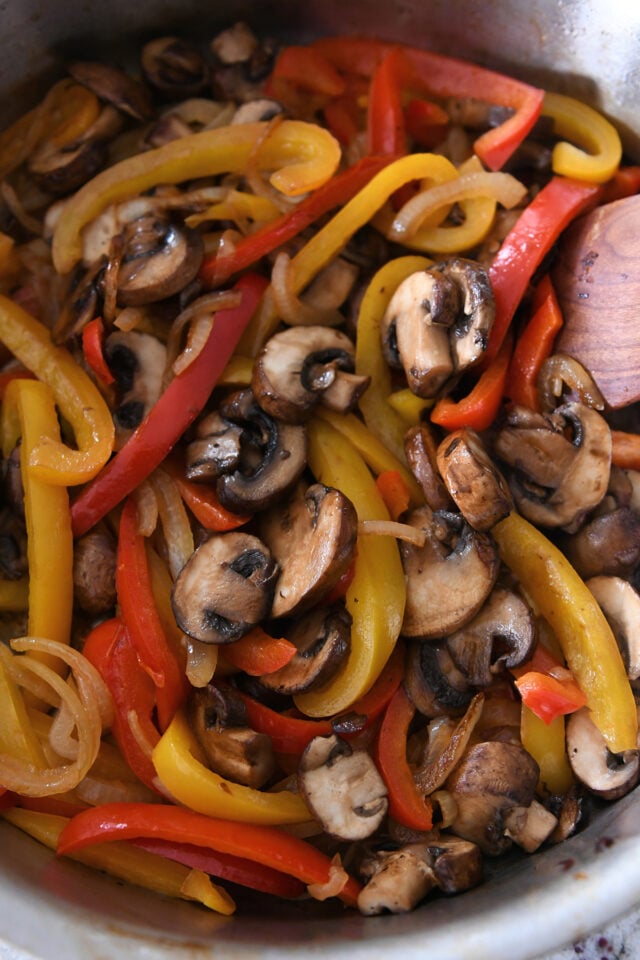
    Fajita Vegetables

    I like to stick with traditional fajita vegetables for this recipe;

    • onions
    • bell peppers (usually red, yellow and/or orange)
    • mushrooms

    But you can definitely (and easily) customize the vegetables to your liking, subbing in veggies you like or have on hand and nixing the veggies that cause you stress.

    The vegetables are sautéed in a skillet – and if you like lots of golden color on them, cook them in batches so they get maximum exposure to the bottom of the hot pan.

    Pan with bell peppers, onions and mushrooms.

    Everything Else for Fajitas

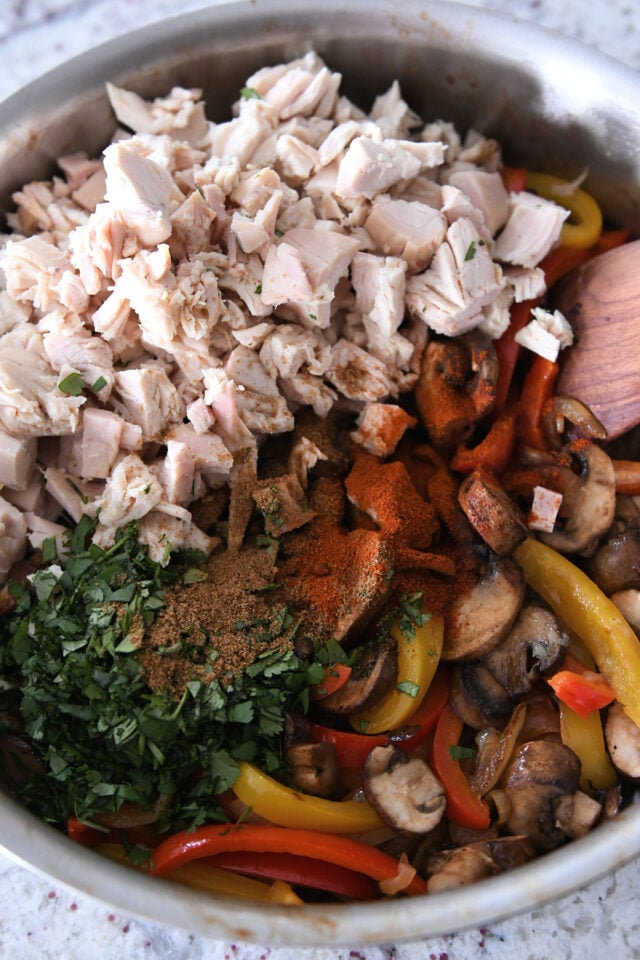
    Once the vegetables are cooked just until tender (say no to mushy veggies!), add in:

    • cooked chicken
    • cilantro
    • lime juice
    • seasonings: cumin, chili powder, smoked or regular paprika, garlic.

    Pro Tip: for a meatless version, sub the chicken with a can of rinsed and drained beans (or just a lot of extra veggies!).

    Pan filled with sauteed bell peppers, mushrooms, cilantro, cumin, chili powder, and cooked chicken.

    Cooking the Sweet Potatoes

    The base of this yummy recipe is, of course, sweet potatoes (or yams 😉). *See the note in the recipe below for sweet potato substitutions.

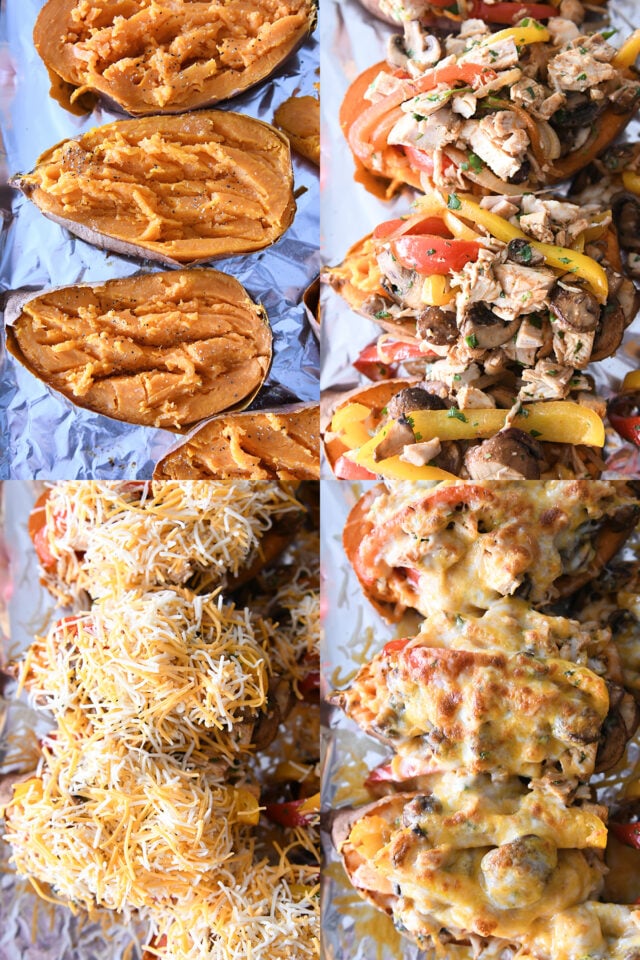
    Cook the sweet potatoes on a greased and foil-lined half sheet pan for about an hour at 375 degrees F. While they cook, prepare that fajita topping like we just talked about!

    Cut the sweet potatoes in half and mess them up a bit with a fork so that the flesh is lightly mashed. Then, sprinkle with salt and pepper. DO NOT FORGET THIS STEP. It’s very important for overall flavor.

    Top each sweet potato half with a very heaping (yes, this is scientific) scoop of the chicken fajita filling. And then douse with a healthy sprinkle of shredded cheese.

    Sweet potatoes on sheet pan; veggies and chicken on sweet potatoes; cheese on veggies; everything broiled until golden.

    Broil those loaded chicken fajita sweet potatoes until the cheese is melted and bubbly and golden.

    Ermagersh. SO YUMMY.

    One sweet potato half is a very satisfying and abundant serving. They can be served as is or loaded with toppings of your choice: sour cream, avocado, cilantro, salsa.

    I highly recommend going the load-up-the-already-loaded-sweet-potatoes-with-more-toppings route.

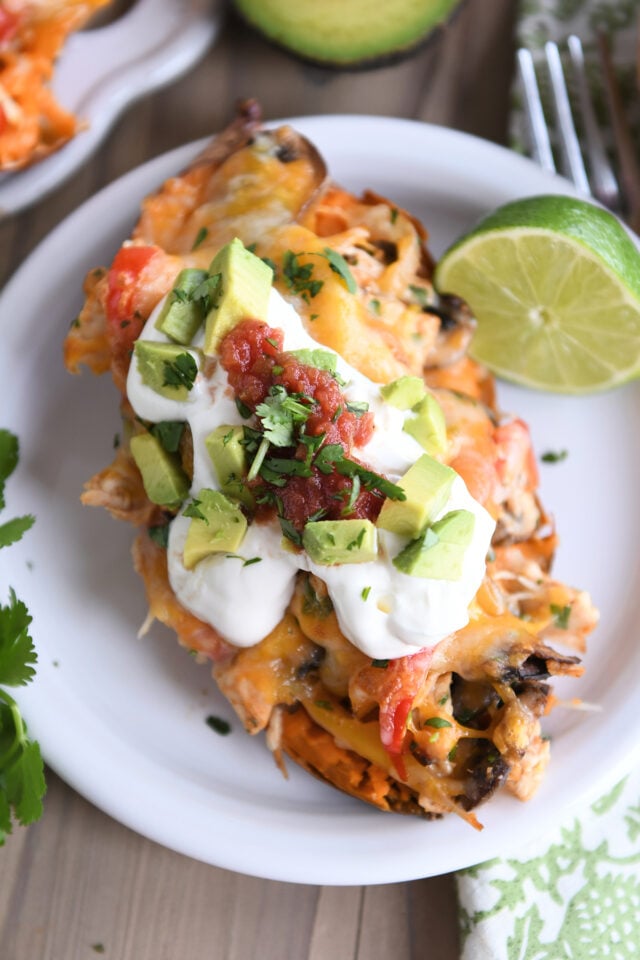
    Top down view of sweet potato loaded with chicken, veggies, sour cream, salsa, and avocado.

    Loaded Sweet Potatoes

    Digging into these flavor blasted sweet potato bombs is a bit chaotic and messy. It’s all part of the delicious journey.

    I am, admittedly, a huge fajita fan. But these loaded chicken fajita sweet potatoes are next level delicious.

    The leftovers (sans sour cream and avocados) reheat amazingly well and make for literally the best lunch in the history of ever. Which also means this recipe makes me a leftover hoarder for which I will not apologize.

    Can’t wait for you to make these! You’re going to love them!

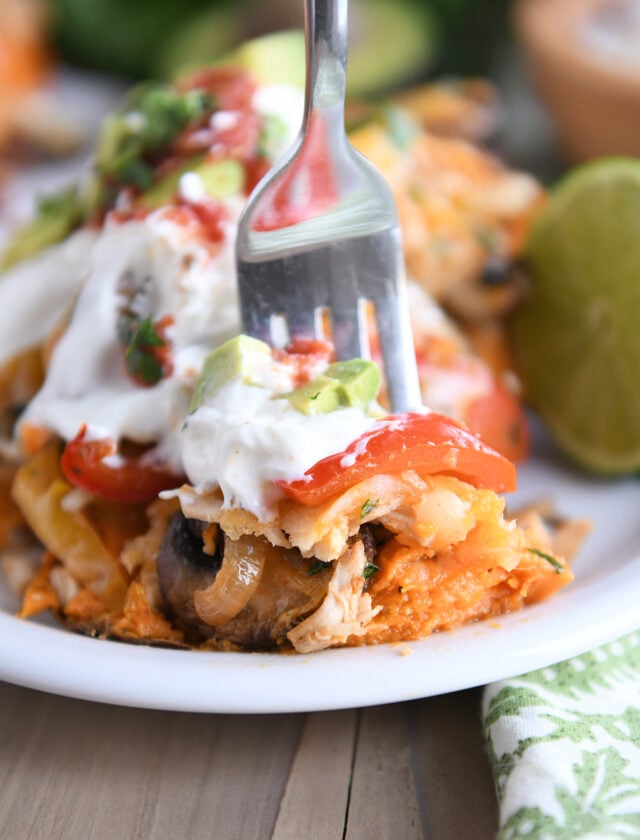
    Fork taking bite of sweet potato with bell peppers, mushrooms, sour cream and avocados.

    One Year Ago: Red Velvet Cheesecake Brownies
    Two Years Ago: Triple Chocolate Scones 
    Three Years Ago: Veggie Turkey Taco Lettuce Wraps 
    Four Years Ago: The Best Swig Sugar Cookies Copycat Recipe
    Five Years Ago: Amazing Instant Pot Indian Butter Chicken and Potato Curry
    Six Years Ago: One-Bowl Monster M&M Cookies Gluten-Free
    Seven Years Ago: Baked Garlic and Fontina Spaghetti
    Eight Years Ago: Curried Lentil and Sausage Soup with Toasted Almonds 
    Nine Years Ago: Classic Crème Brulee
    Ten Years Ago: Cheesecake Stuffed Strawberries 

    Several sweet potatoes on white tray with mushrooms, bell peppers, and cheese.

    Loaded Chicken Fajita Sweet Potatoes

    • 4 medium sweet potatoes (see note)
    • 1 tablespoon olive oil
    • ½ medium onion, cut into half moon slices
    • 2 large bell peppers, any color, cored and sliced into thin strips
    • 2 cups sliced mushrooms
    • 2 to 3 cups cooked, shredded or chopped chicken
    • 1 teaspoon ground cumin
    • ½ teaspoon chili powder
    • ½ teaspoon smoked or regular paprika
    • ½ teaspoon garlic powder
    • 1 to 2 tablespoons fresh lime juice
    • ½ cup chopped cilantro
    • 1 ½ cups shredded Mexican blend cheese (see note)
    • Toppings: sour cream, avocado, cilantro, salsa, etc.

    Prevent your screen from going dark

    • Preheat the oven to 375 degrees F. Line a half sheet pan with foil and grease with cooking spray. Poke a few holes in each sweet potato with the tines of a fork. Place the sweet potatoes on the sheet pan and bake until tender, about 1 hour.

    • While the sweet potatoes cook, heat the olive oil in a deep skillet over medium heat. Add the onion and peppers and cook until tender, 3-4 minutes, seasoning with a pinch of salt and pepper. Remove to a plate and return the skillet to the heat.

    • Add another splash of olive oil, if needed. Add the mushrooms and cook, without stirring (for more golden color), for 1-2 minutes. Stir or flip and continue cooking for a few more minutes until golden and tender. Season with a pinch of salt and pepper.

    • Add the onions and peppers back to the skillet with the mushrooms. Add the chicken, cumin, chili powder, paprika, garlic powder, lime juice and cilantro. Season to taste with salt and pepper!

    • Preheat the oven broiler and position a rack in the upper middle position in the oven.

    • Cut each sweet potato in half lengthwise and place on the baking sheet cut side up (replacing the foil, if needed). Scrape the flesh of the sweet potato with a fork until it is lightly mashed. Sprinkle with a pinch of salt and pepper.

    • Divide the chicken/veggie mixture evenly among the sweet potatoes, piling it high.

    • Sprinkle cheese over the top. Broil until the cheese is golden and bubbling (watch closely!), 2-3 minutes.

    • Serve immediately with toppings of your choice (sour cream, salsa, avocado, cilantro, etc).

    Potatoes: I haven’t tried subbing out the sweet potatoes for russets, yukon golds or another variety, but it’s worth a try if that’s your preference. And if you really want a wild potato variation, try the fajita topping over tater tots (top with cheese and broil per the recipe). 
    Veggies: the vegetables in this recipe are totally customizable. Veggies you don’t like or don’t have on hand can be swapped out for others (like zucchini, broccoli, carrots, etc). 
    Meatless: this meal can easily be made meatless just by leaving out the chicken. A can of beans, rinsed and drained, could also be added (with or without the meat). 
    Cheese: Monterey Jack and cheddar can be subbed for the Mexican cheese blend.

    Serving: 1 serving, Calories: 252kcal, Carbohydrates: 28g, Protein: 16g, Fat: 9g, Saturated Fat: 4g, Cholesterol: 44mg, Sodium: 239mg, Fiber: 5g, Sugar: 8g

    Disclaimer: I am a participant in the Amazon Services LLC Associates Program, an affiliate advertising program designed to provide a means for me to earn fees by linking to Amazon.com and affiliated sites. As an Amazon Associate I earn from qualifying purchases.
    Source link