Author: admin

  • Air Fryer Kielbasa

    Air Fryer Kielbasa

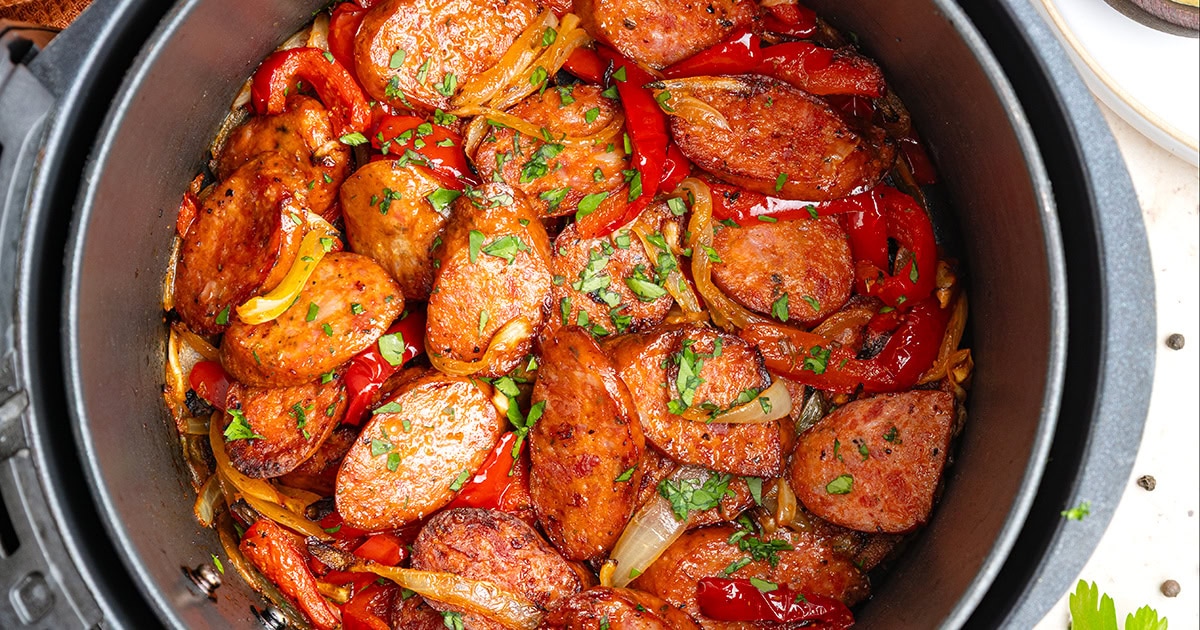
    Smoky, crispy, and done in under 15 minutes, this air fryer kielbasa with onions and peppers is your weeknight dinner (or breakfast!) lifesaver.


    Jump to: ℹ️ Overview | 🛒 Ingredients | 📷 How To Make | 👩‍🍳 Recipe Tips | 🥗 Serving Suggestions | 📝 Full Recipe Card | 🍽 Try These Slavic Recipes


    Kielbasa was a staple in my house growing up — smoky, garlicky, and always the star of a simple, hearty meal. This recipe brings that nostalgic flavor into a modern kitchen using the air fryer for maximum ease and speed.

    Kielbasa is a type of Polish smoked sausage (we have a similar one in Ukraine), already cooked and wonderfully rich, and it pairs perfectly with sweet onions and red bell peppers. The air fryer crisps the sausage just right while caramelizing the veggies, and a simple seasoning blend ties it all together.

    This air fryer kielbasa dish works for everything: weeknight dinners, lazy brunches, even game-day snacks. With around 15 minutes of cooking time and plenty of protein, it’s as practical as it is satisfying.

    👩‍🍳 You might like this smoked sausage, broccoli and shrimp skillet or this chorizo and roast vegetable salad, and also try my air-fried chicken popcorn bites (or bake them) and air fryer BBQ chicken wings.

    What You’ll Need

    Here is what you’ll need for this air fryer kielbasa recipe. Find the full measurements in the recipe card below.

    • Polish kielbasa – smoky, savory, and already cooked. Look for good-quality ones with simple ingredients, usually in the deli section You can use similar smoked sausage, like Kransky sausage.
    • Onion – adds sweetness when cooked, perfect contrast to the sausage.
    • Red bell pepper (capsicum) – sweet and slightly crisp when air-fried.
    • Olive oil – helps everything roast evenly, you only need a little bit.
    • Seasoning mix – smoked paprika (brings that cozy, wood-fired flavor, garlic powder for a quick, punchy flavor without mincing garlic, dried oregano (earthy and herby), plus a little black pepper and optional salt (based on kielbasa’s saltiness)
    • Fresh parsley – a little green to brighten it all up.
    • Dijon or spicy brown mustard – tangy, sharp, and the perfect dipping sauce.

    Swap suggestions: Use yellow or orange peppers instead of red, or add green for more contrast. Turkey kielbasa also works great if you’re looking to lighten it up.

    How To Make Air Fryer Kielbasa

    Find the full recipe and nutritional information below. Here are some handy step-by-step photos for air fryer kielbasa.

    • Preheat air fryer to 375°F (190°C).
    • Toss sliced onions and bell peppers with olive oil and seasonings.
    • Slice kielbasa on a diagonal for crisper edges.
    • Add everything to the air fryer basket in a mostly even layer.
    • Cook for 10–12 minutes, shaking halfway, until sausage is browned and veggies are tender.
    • Garnish with parsley and serve hot with mustard or in sandwich rolls.

    Recipe Tips

    • Make Ahead: Slice everything the night before and store in the fridge. Great for breakfast prep!
    • Storage: Leftovers keep well in the fridge for up to 3 days. Reheat in the air fryer or skillet to crisp things up again.
    • No Air Fryer? You can roast everything at 400°F (200°C) in the oven for 20–25 minutes, flipping halfway.
    • Add Heat: Toss in a pinch of chili flakes or serve with hot mustard if you like a kick.
    • Veggie Boost: Add mushrooms or zucchini for more bulk and nutrients.

    Serving Suggestions

    This kielbasa dish is super versatile. Serve it over buttered noodles, mashed potatoes, or rice for dinner. Or keep it breakfast-y with some scrambled or fried eggs and toast. It also makes a mean sandwich—just pile it into a crusty roll with a smear of mustard and maybe some melted cheese.

    💬 If you’ve tried this air fryer kielbasa or any other recipe on the blog then don’t forget to rate the recipe and let me know how you got on in the comments below, I love hearing from you! You can also FOLLOW ME on Instagram, Facebook, Pinterest, YouTube, and or sign up to my Newsletter to see more of my delicious food.

    Want to Save This Recipe?

    Enter your email & I’ll send it to your inbox. Plus, get great new recipes from me every week!

    By submitting this form, you consent to receive emails from Cooked & Loved

    Smoky, crispy, and done in under 15 minutes—this air fryer kielbasa with onions and peppers is your weeknight dinner (or breakfast!) lifesaver. Find step-by-step photos and more recipe tips above.

    • Preheat your air fryer to 375°F (190°C).

    • In a bowl, toss onion and pepper slices with olive oil, paprika, garlic powder, oregano, pepper, and salt if using.

    • Slice the kielbasa into ½-inch thick diagonal slices.

    • Place kielbasa and seasoned veggies into the air fryer basket in an even layer. Some overlap is fine.

    • Cook for 10–12 minutes, shaking the basket halfway through. The sausage should be browned and the veggies soft.

    • Sprinkle with fresh parsley and serve hot with mustard or in sandwich rolls.

    • Can I use turkey kielbasa? Yes! It works great and is a bit leaner. Just check the seasoning level—it might need a touch more salt.
    • What’s the best mustard for this? Dijon is classic, but spicy brown mustard adds a great kick. Wholegrain mustard is also delicious for texture.
    • Can I make this without an air fryer? Absolutely—roast in the oven at 400°F (200°C) for about 20–25 minutes, tossing halfway through.
    • Is kielbasa already cooked? Most kielbasa is smoked and pre-cooked. You’re just browning it and heating it through here, not cooking it from raw.
    • Make Ahead: Slice everything the night before and store in the fridge. Great for breakfast prep!
    • Storage: Leftovers keep well in the fridge for up to 3 days. Reheat in the air fryer or skillet to crisp things up again.
    • Add Heat: Toss in a pinch of chili flakes or serve with hot mustard if you like a kick.
    • Veggie Boost: Add mushrooms or zucchini for more bulk and nutrients.

    Calories: 331kcal | Carbohydrates: 7g | Protein: 13g | Fat: 28g | Saturated Fat: 9g | Polyunsaturated Fat: 3g | Monounsaturated Fat: 14g | Cholesterol: 60mg | Sodium: 1039mg | Potassium: 325mg | Fiber: 1g | Sugar: 2g | Vitamin A: 1183IU | Vitamin C: 41mg | Calcium: 25mg | Iron: 2mg
    Keywords: Air Fryer Kielbasa, Air Fryer Kielbasa With Onions & Peppers, Air Fryer Smoked Sausage

    Try These Slavic Recipes


    Source link

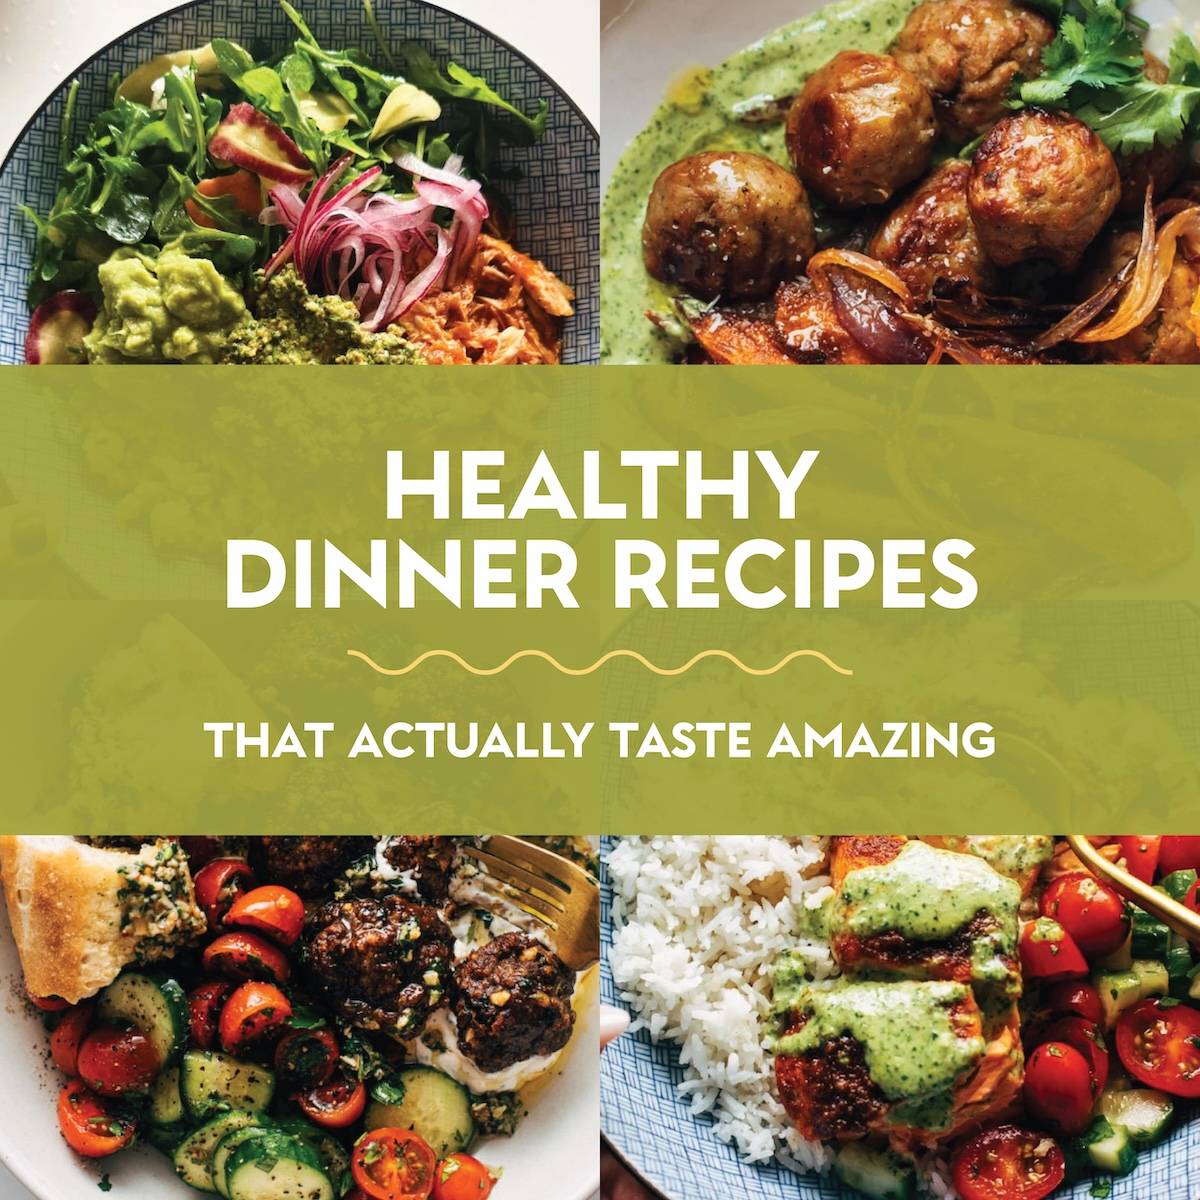
  • 36 Healthy Dinner Recipes That Actually Taste Amazing

    36 Healthy Dinner Recipes That Actually Taste Amazing

    A collection of healthy dinner recipes that actually taste amazing – flavorful, satisfying meals you’ll genuinely be excited to cook and eat!

    Eating well shouldn’t feel hard, and it definitely shouldn’t mean not being excited about dinner. These healthy dinner recipes are proof that food can be both nourishing and genuinely delicious! Think bold sauces, cozy bowls, bright flavors, and meals that leave you feeling good and happy. The kind of dinners you actually look forward to making, not ones you force yourself through because you “should.”

    This list is full of go-to recipes that prioritize flavor first, while still being balanced and feel-good. Whether you’re cooking for a busy weeknight, feeding a family, or just trying to get out of a dinner rut, these are healthy recipes that you’ll be excited to cook, happy to eat, and ready to make again and again.

    Want more dinner ideas? Here are the quickest and easiest around!


    Healthy Dinner Recipes

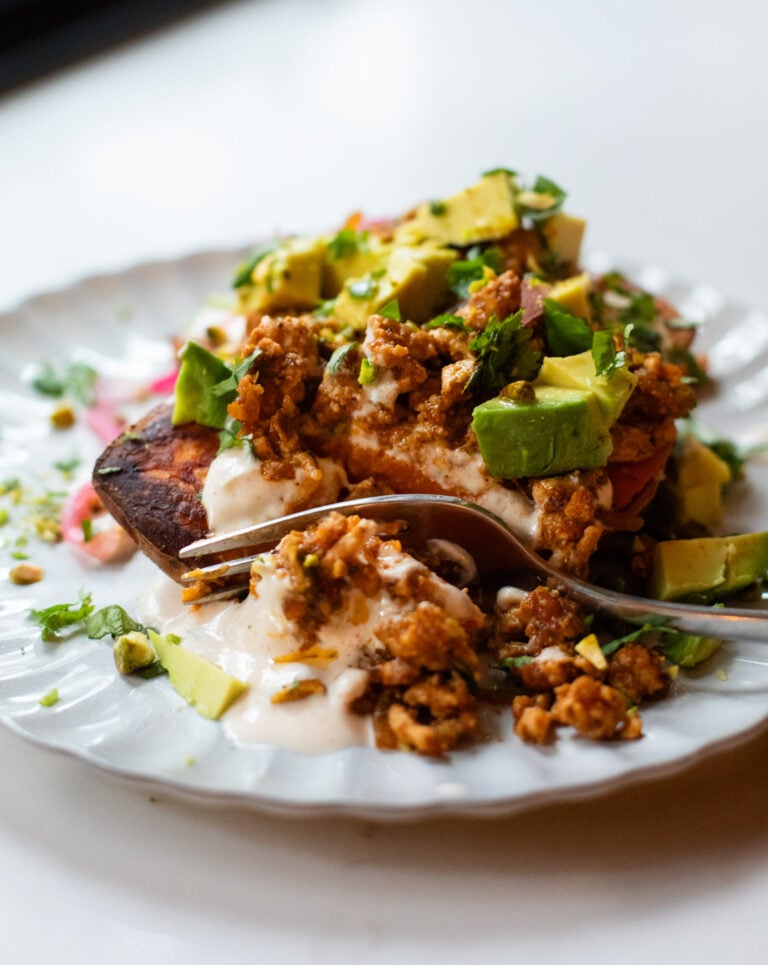
    Sweet potato stacks with avocado and chipotle sauce.

    Roasted Sweet Potato Stacks with Chipotle Sauce

    Roasted sweet potatoes topped with creamy chipotle sauce, spicy ground chicken, avocado, cilantro, and pickled onion. My family loves them!

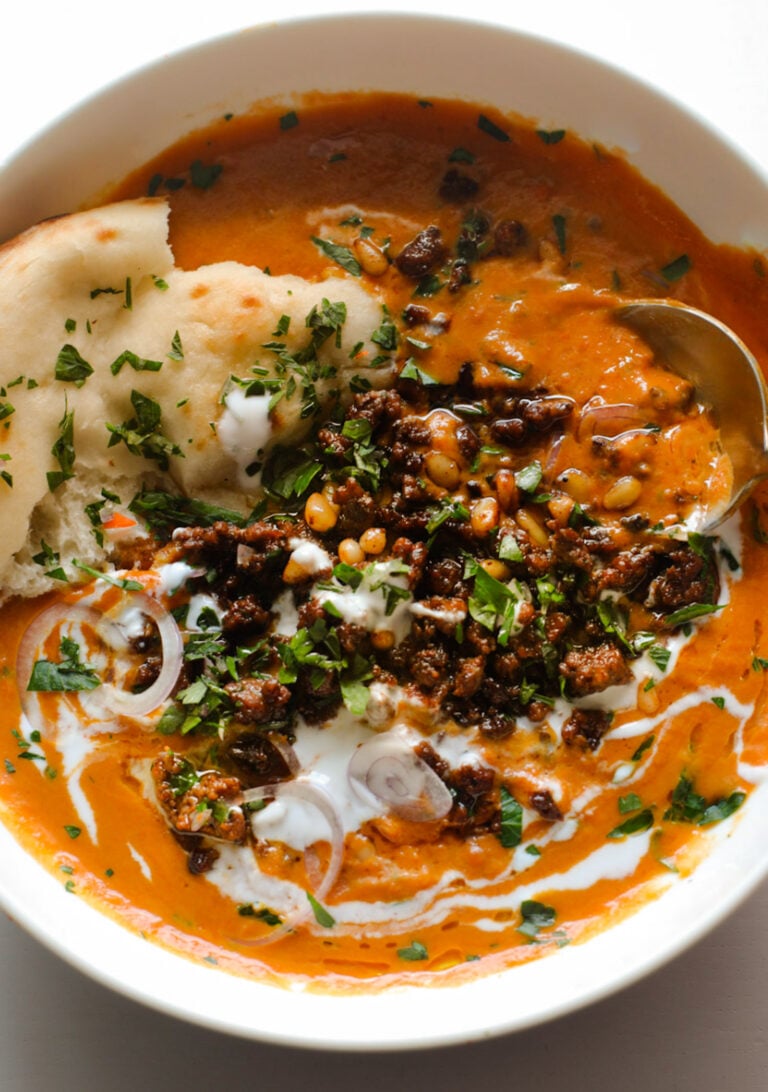
    Carrot soup with spiced ground beef on top.

    Carrot Soup with Spiced Ground Beef and Pine Nuts

    Silky carrot soup topped with spiced ground beef and toasty pine nuts! Bright, savory, warming, all the best things!

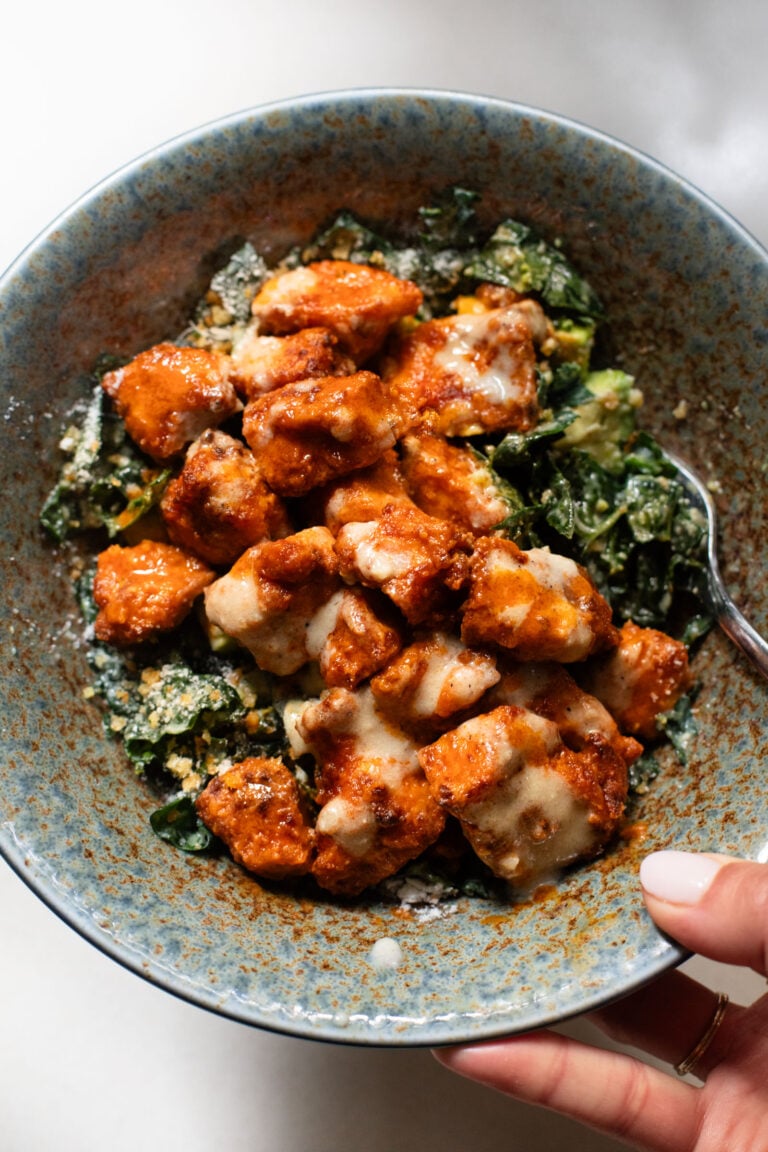
    Buffalo tofu on a caesar salad.

    Crispy Buffalo Tofu with Caesar Salad

    This Buffalo Tofu is SO EASY! A two-ingredient sauce tossed with air-fried crispy tofu, laid on top of a kale caesar salad.

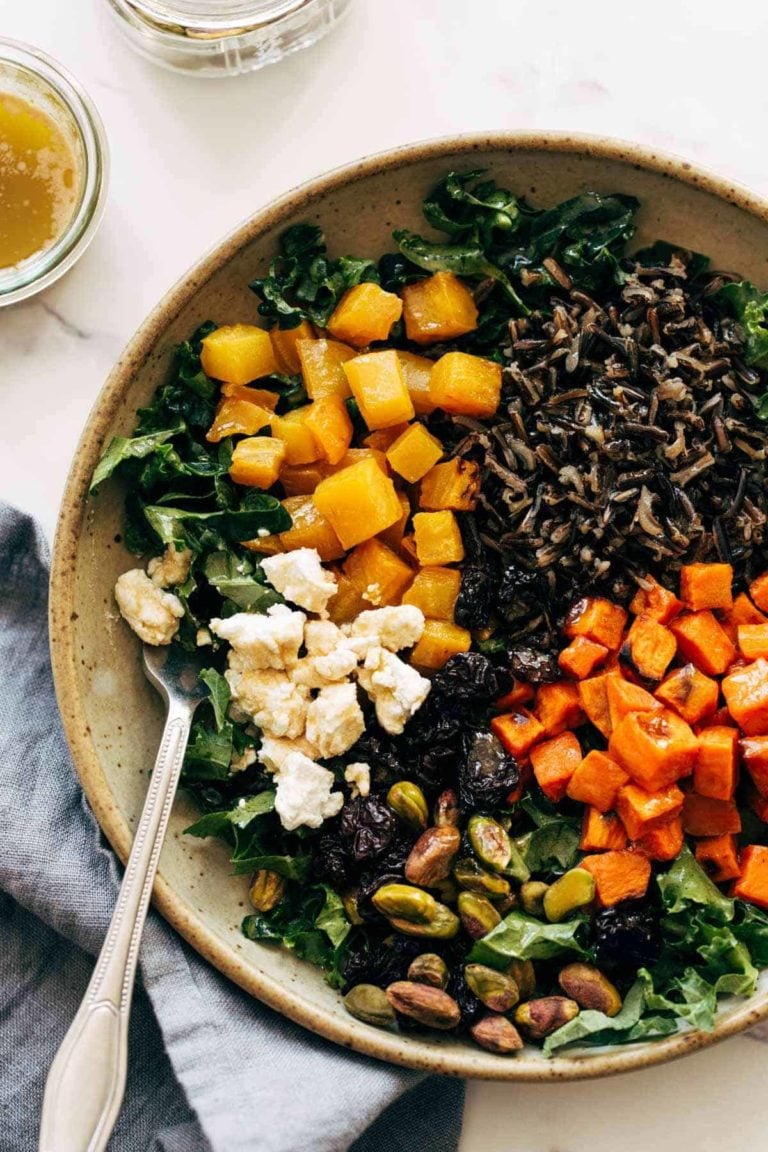
    Veggie grain bowl.

    Roasted Veggie Grain Bowl with Balsamic Dressing

    The BEST Grain Bowl! Roasted root vegetables, earthy grains, dried fruit, dark leafy greens, buttery goat cheese, and lusciously creamy balsamic dressing.

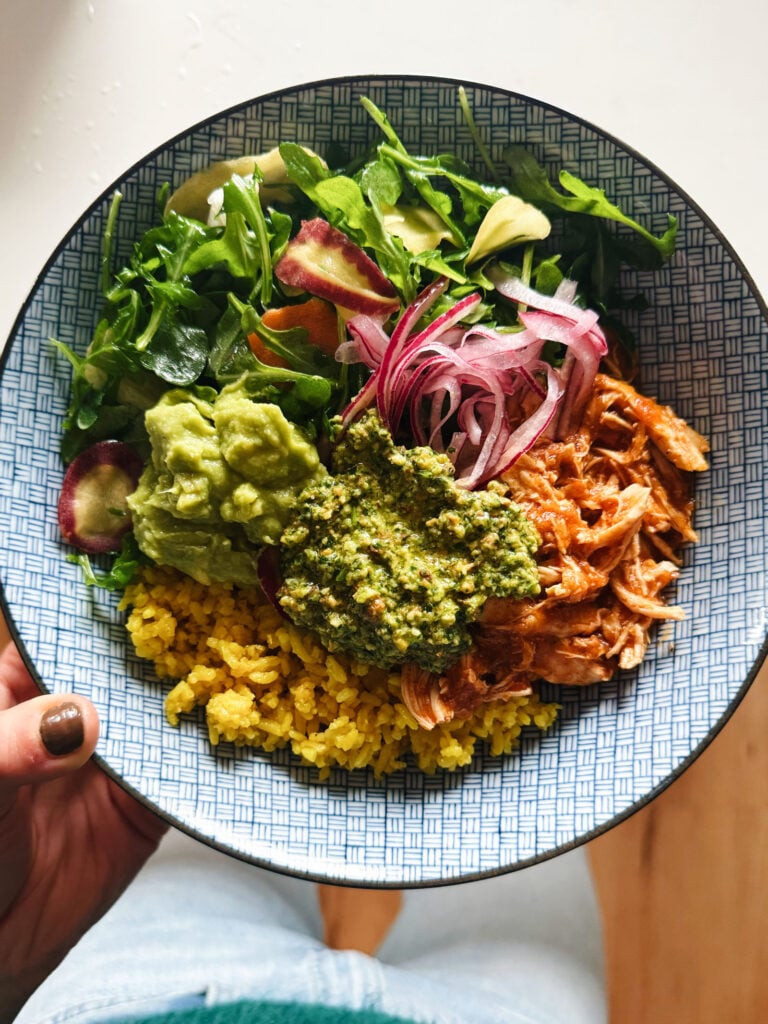
    Crockpot chicken in a bowl with rice and greens.

    Crockpot Chicken Bowls with Yellow Rice and Cilantro Pesto

    Saucy shredded chicken, yellow rice, pickled onions, greens, and cilantro pesto on top. It’s a flavor and color delight!

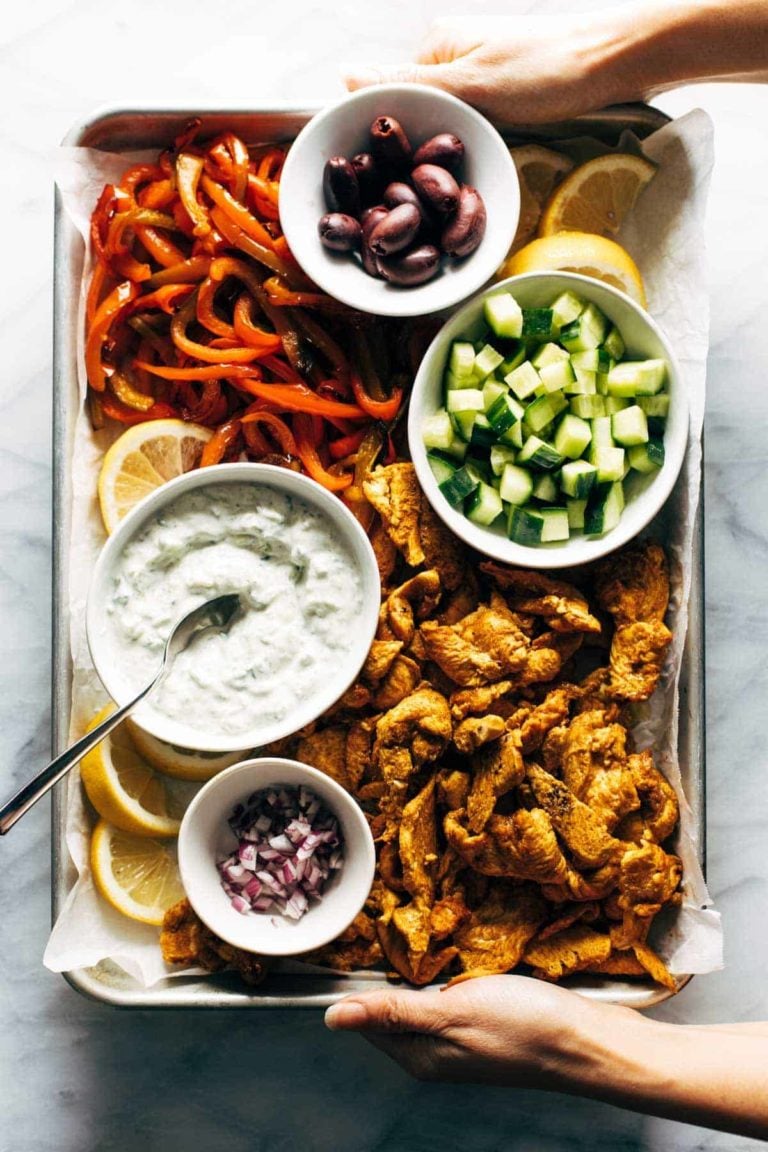
    Sheet pan chicken with peppers and veggies.

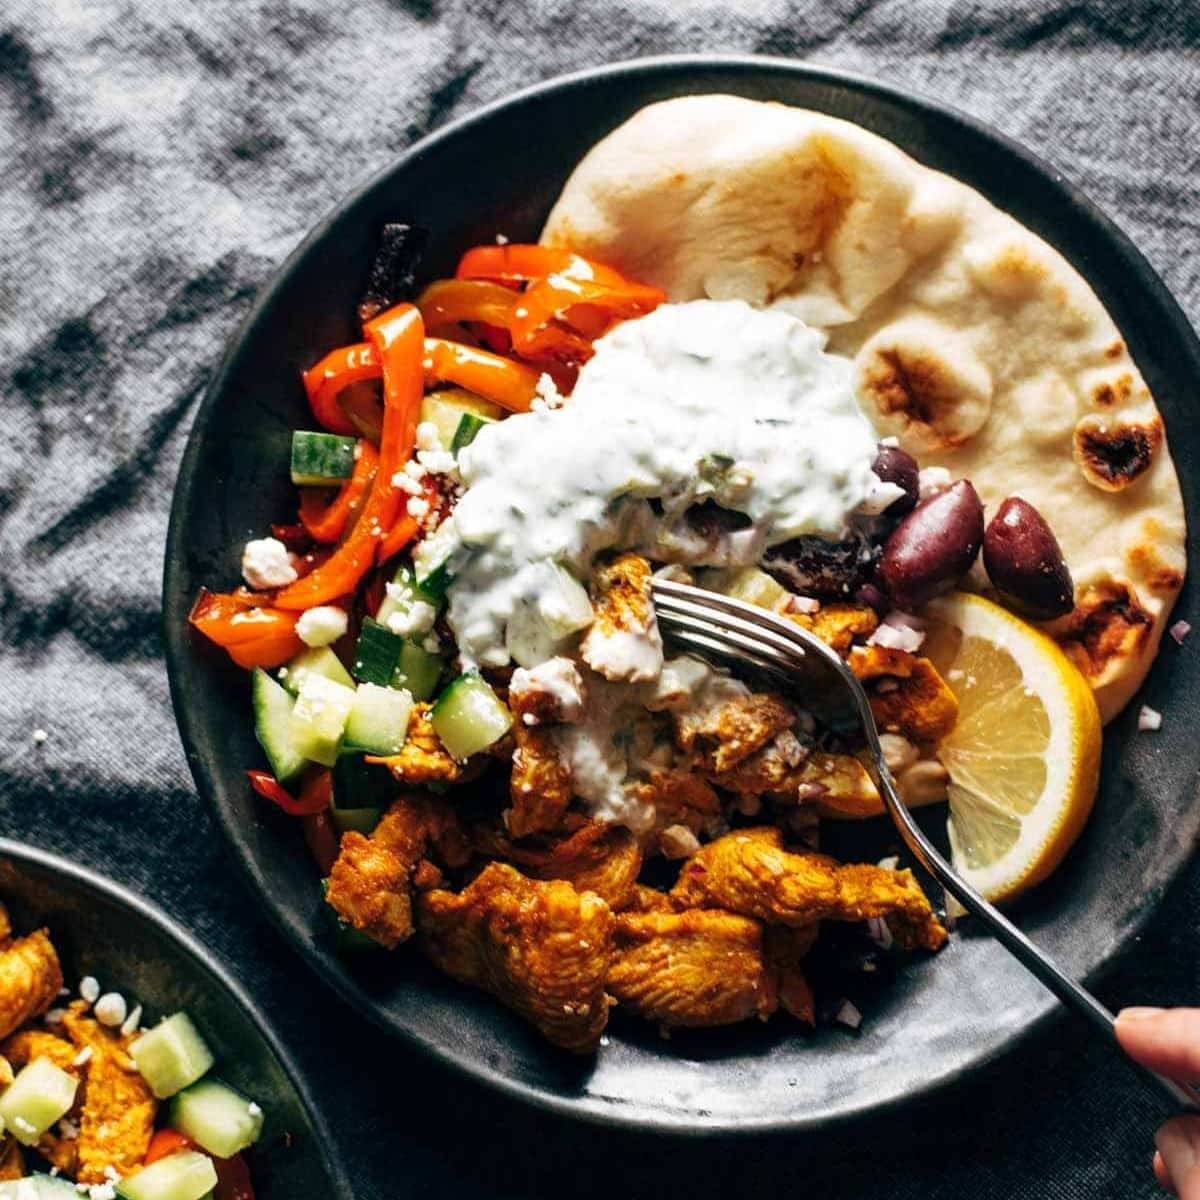
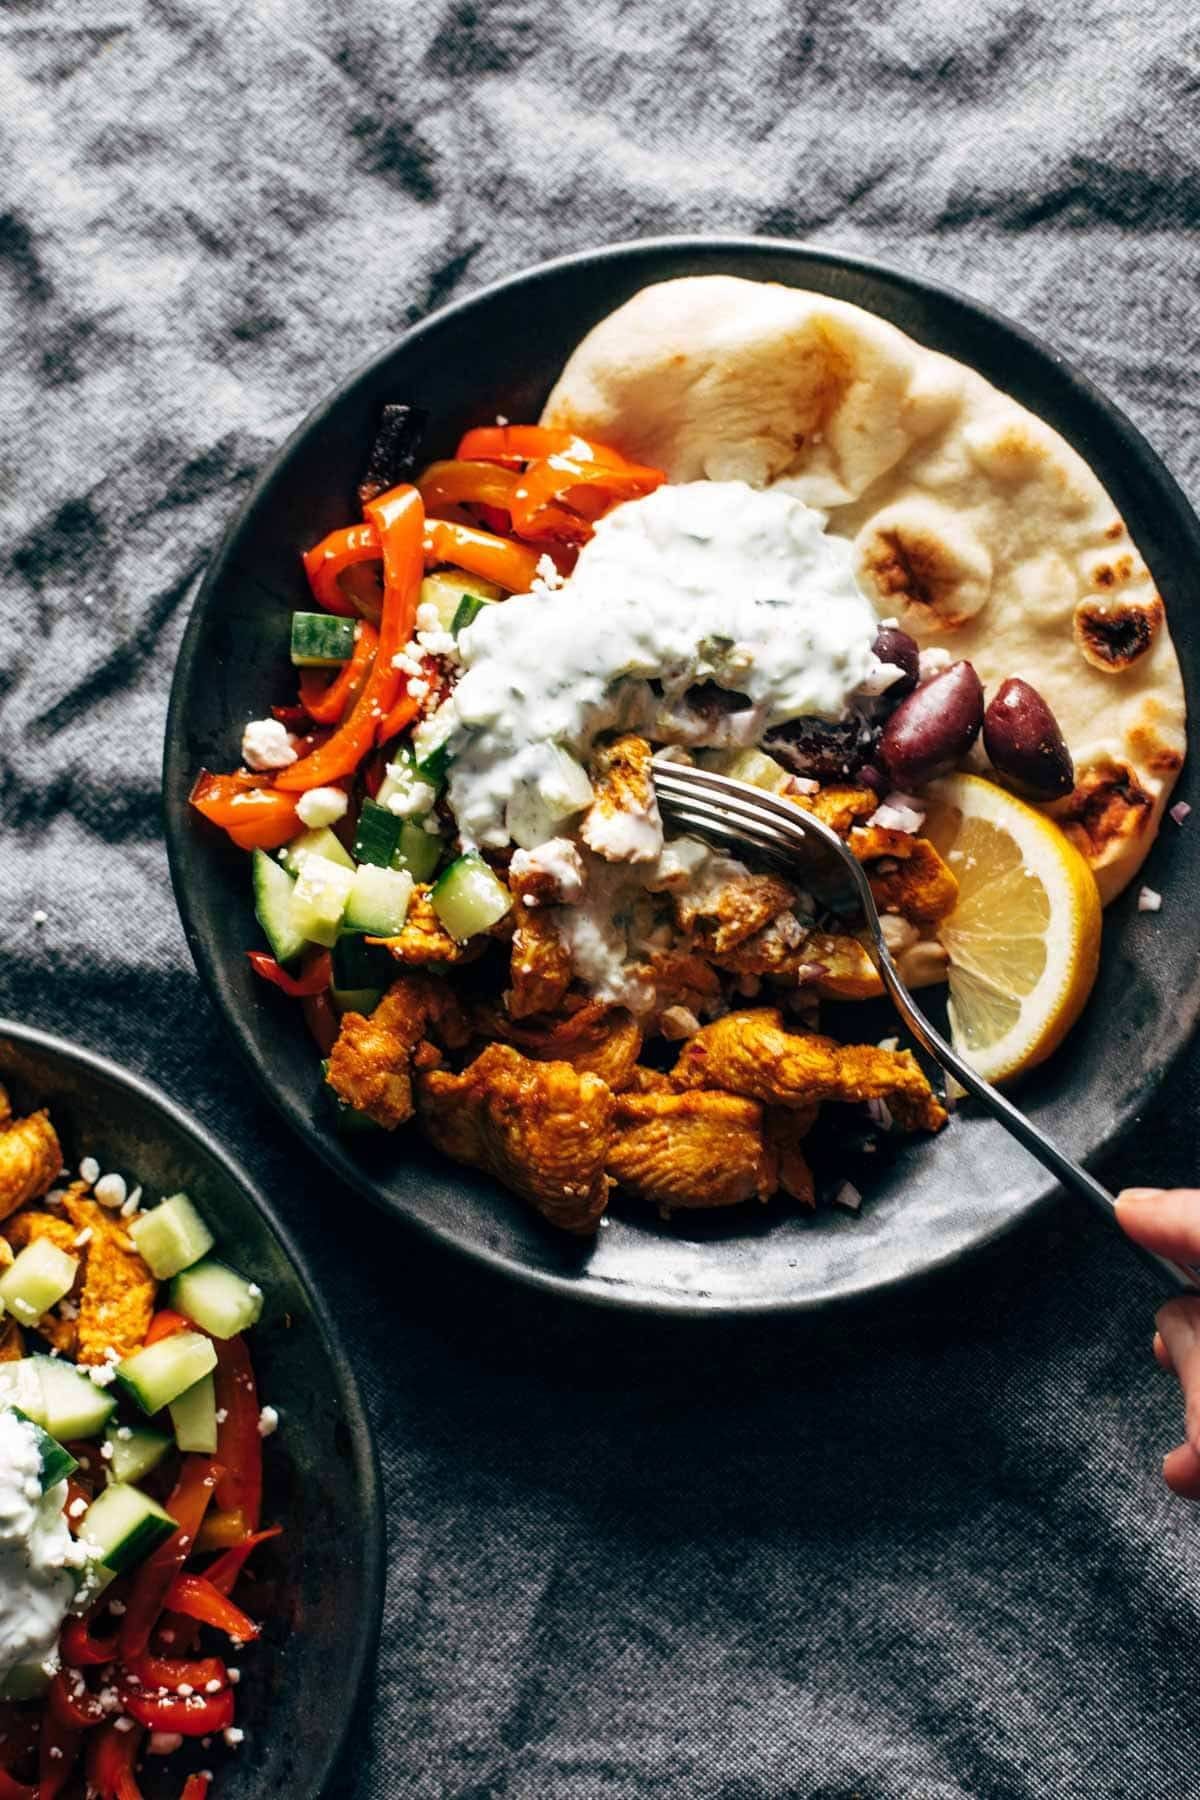
    Sheet Pan Chicken Pitas with Tzatziki

    Part bowl, part salad, part sandwich folded up into any kind of bread you like, and I’m here for it in every form.

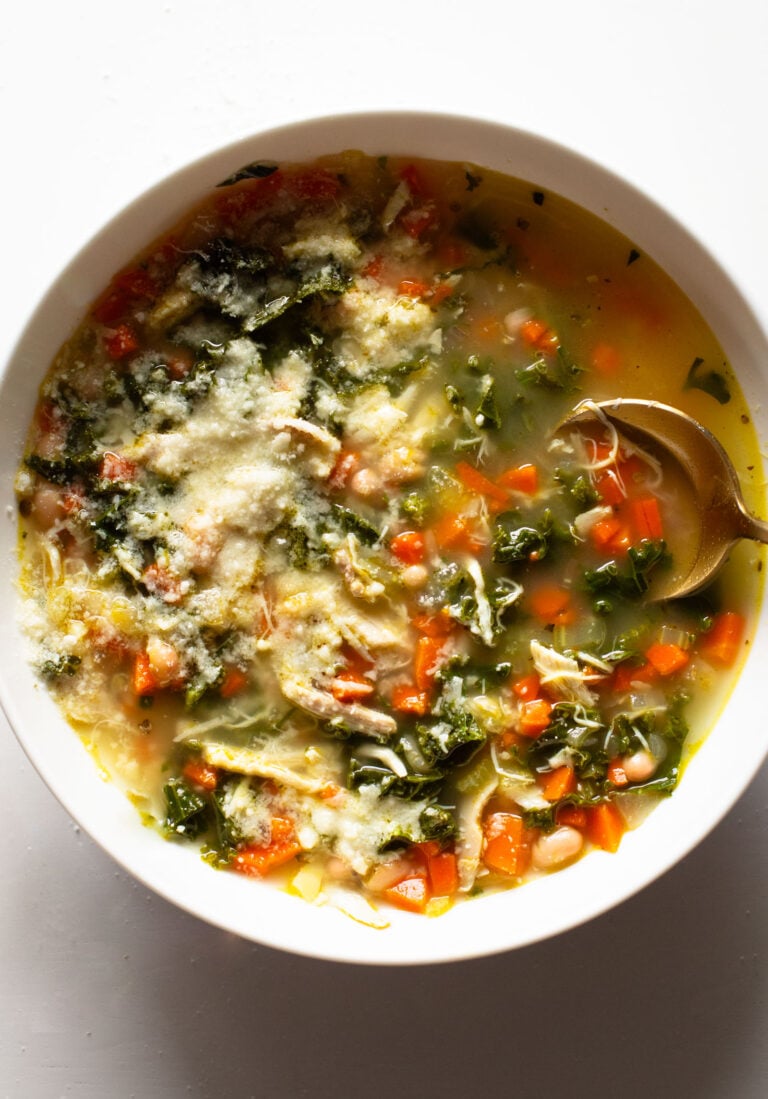
    Lemon chicken soup in a bowl.

    Lemon Rosemary Chicken Soup

    Lemon Rosemary Chicken Soup with loads of veggies like carrots and kale, beans, chicken, and a lemon rosemary broth. So cozy.

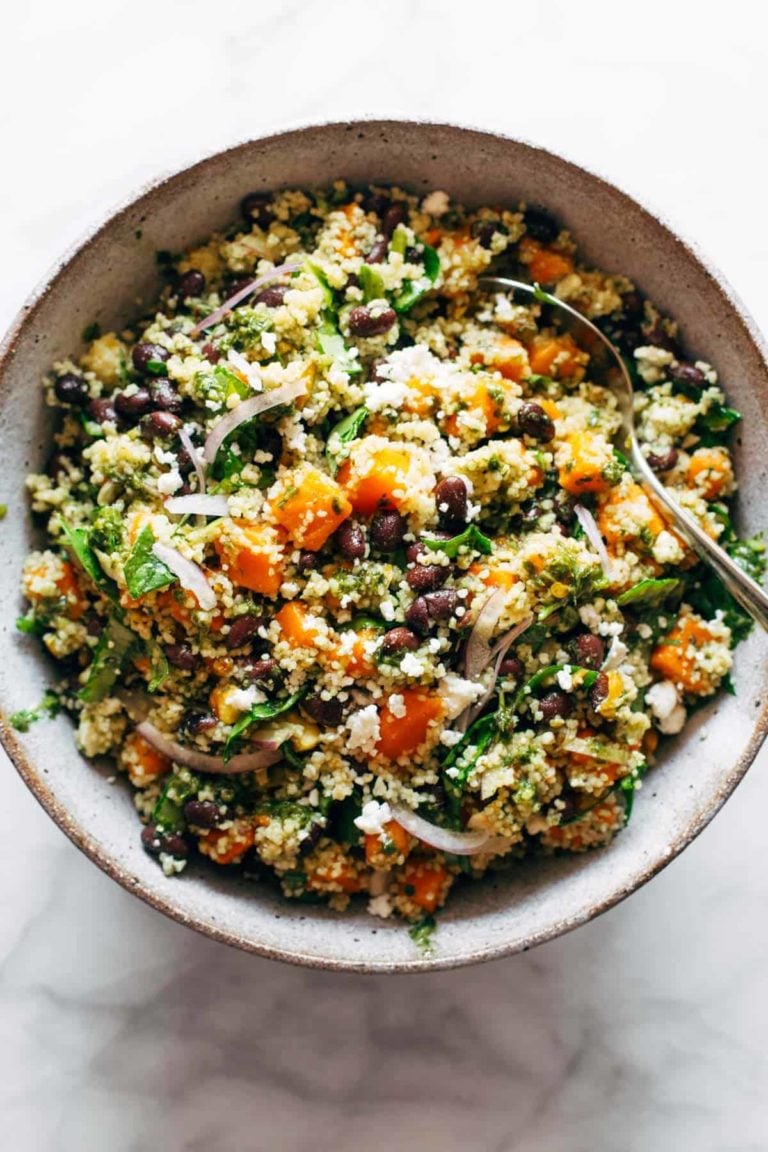
    Couscous salad in a bowl.

    Couscous Salad with Lime Basil Vinaigrette

    A bright, zippy, unexpectedly delicious couscous salad that’s packed with sweet potatoes, black beans, spinach, feta, and more – all tossed with a life-changing lime basil vinaigrette!

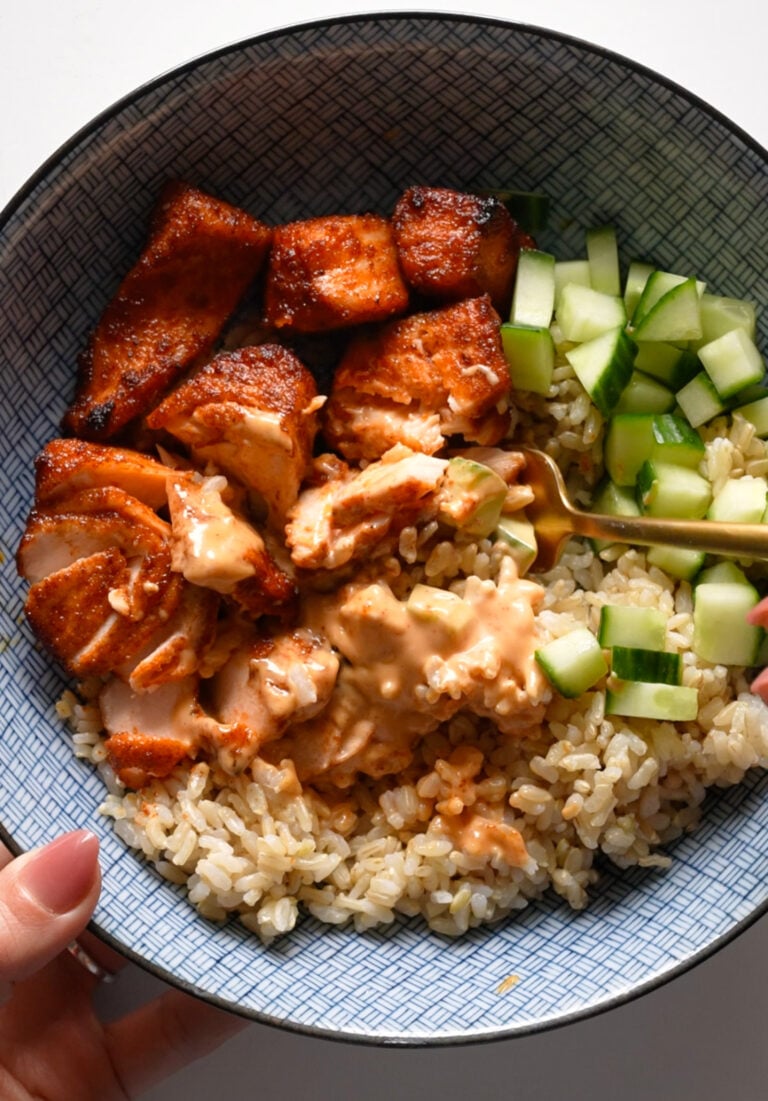
    Air fryer salmon in a bowl with rice and cucumbers.

    Ridiculously Good Air Fryer Salmon

    My go-to salmon recipe that’s perfect every time! Crisped and golden on the outside, buttery and juicy on the inside, and made in 15 minutes start to finish.

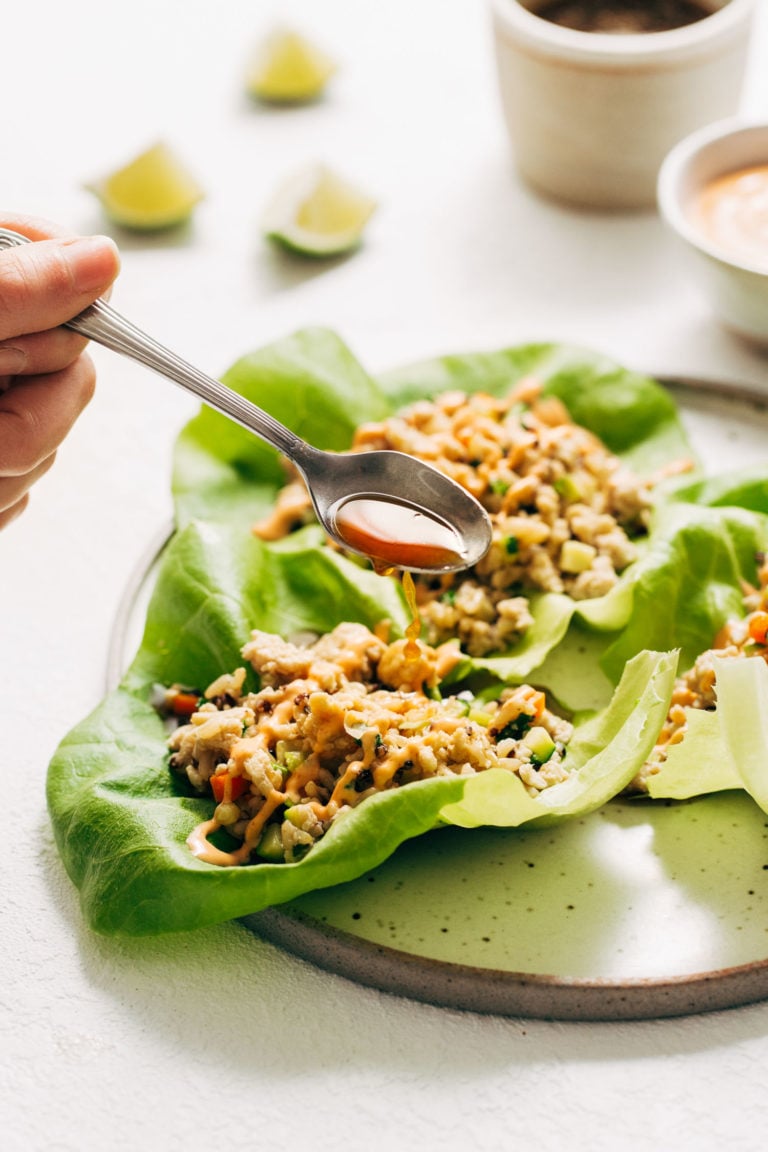
    Chicken lettuce wraps with sauce poured on top.

    Chicken Lettuce Wraps with Lime Drench

    These lettuce wraps are a SUMMER DREAM. Mountains of crumbled-crisp ground chicken, fluffy quinoa, and/or rice for added satisfaction, and garlicky gingery sautéed veggies in crisp butter lettuce leaves.

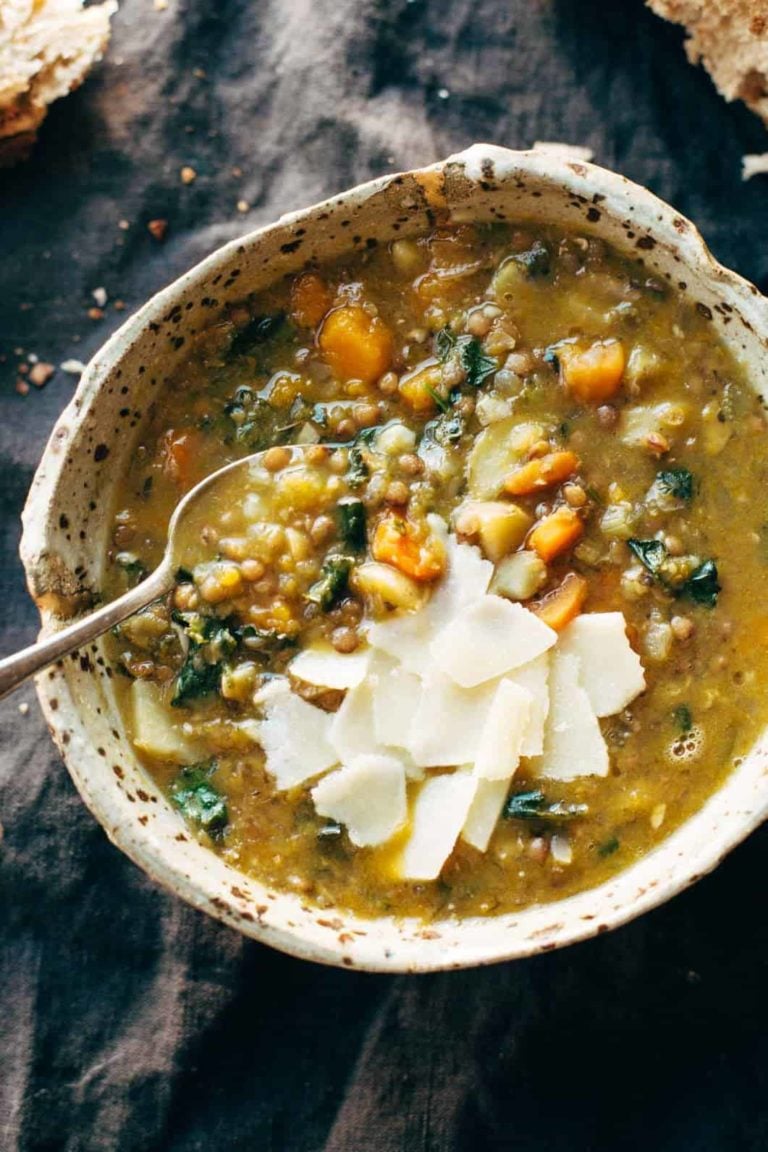
    Lentil soup in a bowl.

    The Best Detox Crockpot Lentil Soup

    Detox Crockpot Lentil Soup – a clean and simple soup made with onions, garlic, carrots, olive oil, squash, and LENTILS! Super healthy and easy to make.

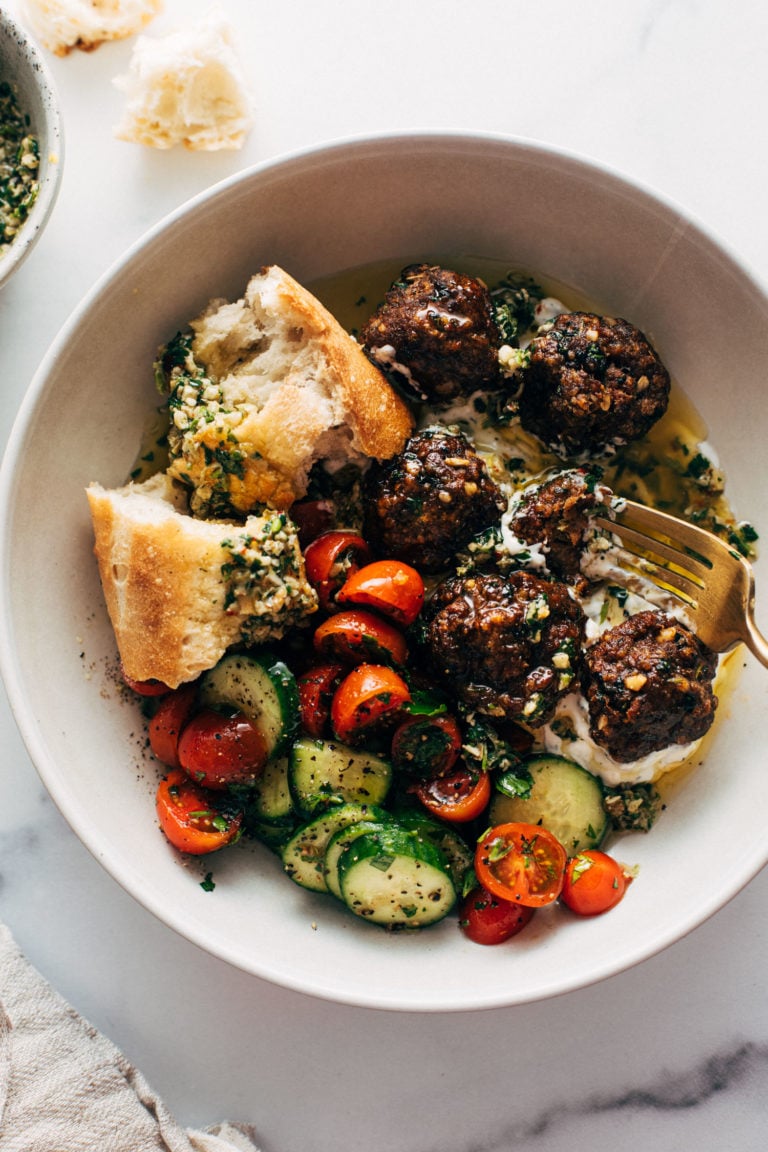
    Sheet pan meatballs in a bowl with bread and tomato salad.

    Sheet Pan Meatballs with Tomato Salad and Green Sauce

    Juicy little sheet pan meatballs that are salty, zesty, briney, and so so delicious. Pile them on tzatziki, spoon some punchy green sauce over top, and serve with a simple salad and crusty bread.

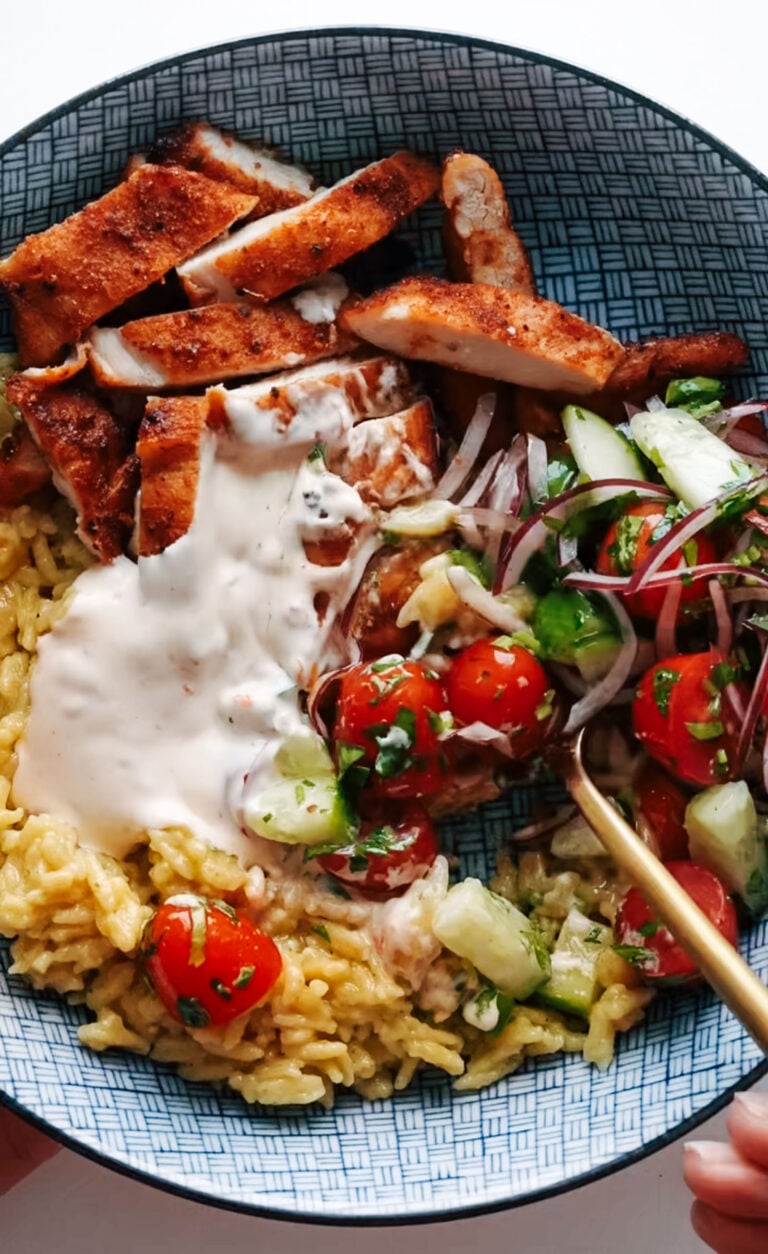
    Chicken in a bowl with Banza rice.

    Banza Chicken Bowls with Calabrian Chili Sauce

    This bowl has it all! The crunch of the tomato cucumber salad, the thin slips of bitey red onion, the golden crisped air fryer chicken cut into tender little strips, a big pile of perfectly chewy Banza, and a dollop of tangy calabrian chile sauce on top.

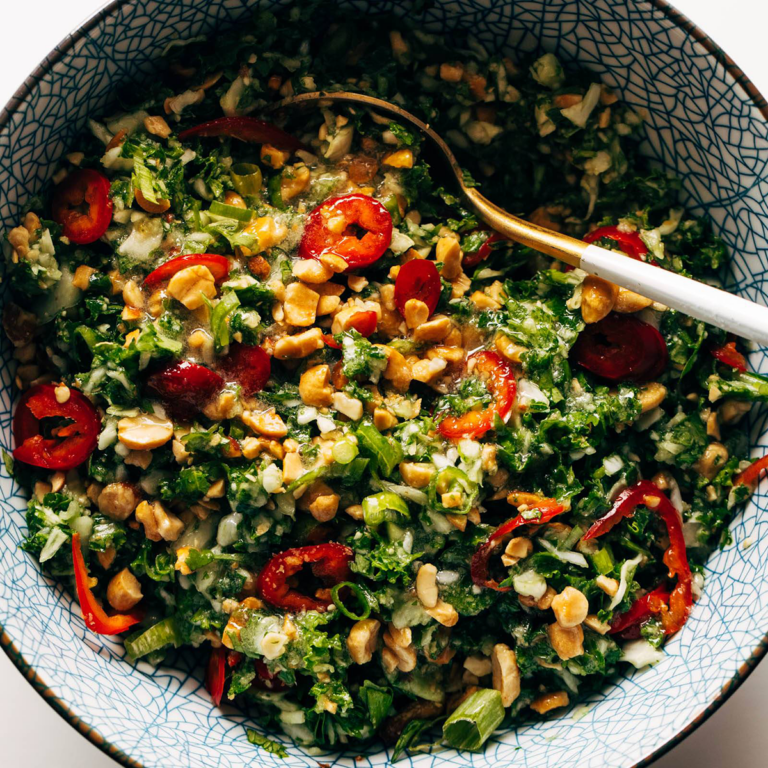
    Kale salad in a bowl.

    Roasted Peanut Kale Crunch Salad

    OOOH BABY, this salad is so good! Crunchy kale and cabbage, fresh herbs and fresno peppers, chopped peanuts, and a perfect roasted peanut vinaigrette that tucks into all the salad nooks and crannies.

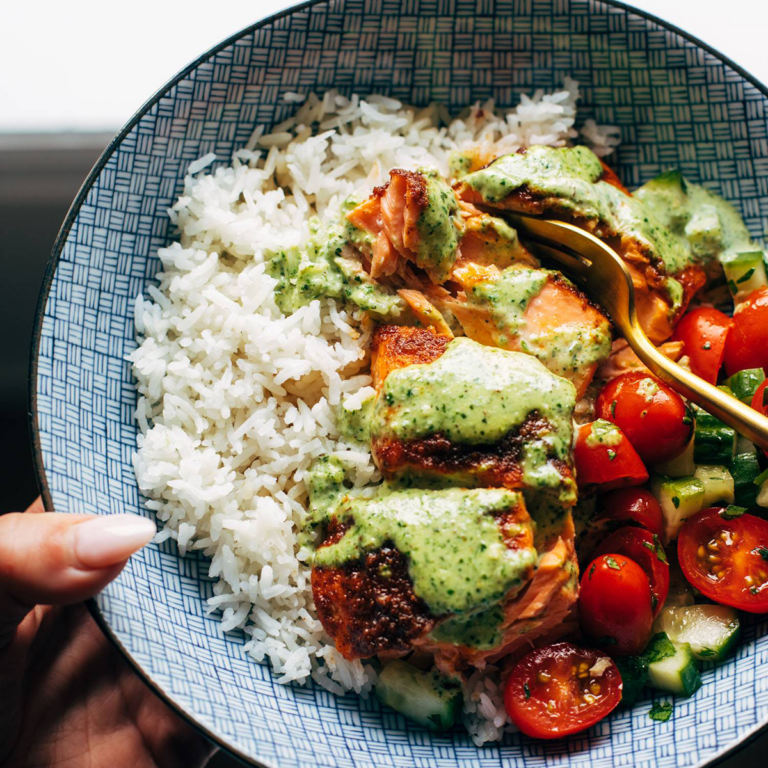
    Salmon in a bowl with rice and basil sauce.

    Salmon with Basil Sauce and Tomato Salad

    We’re making a summery salmon with a beautiful, big-flavored basil sauce that is so good, you’re going to want to just drink it. Perfectly-spiced, fresh, and a dinner for everyone!

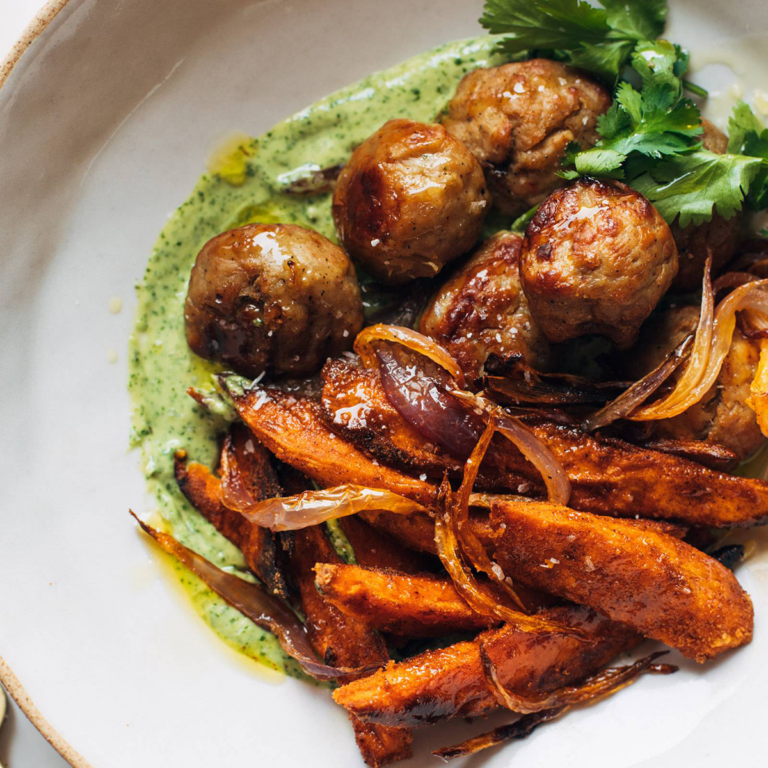
    Meatballs in a bowl with sweet potatoes and aji verde.

    Avocado Mojo Bowls with Sweet Potato and Chicken

    We are living our best bowl life this week. Seasoned sweet potato wedges and chicken meatballs or rotisserie chicken all piled onto a plate with a little puddle of punchy green avocado mojo sauce. Yes, wow, repeat.

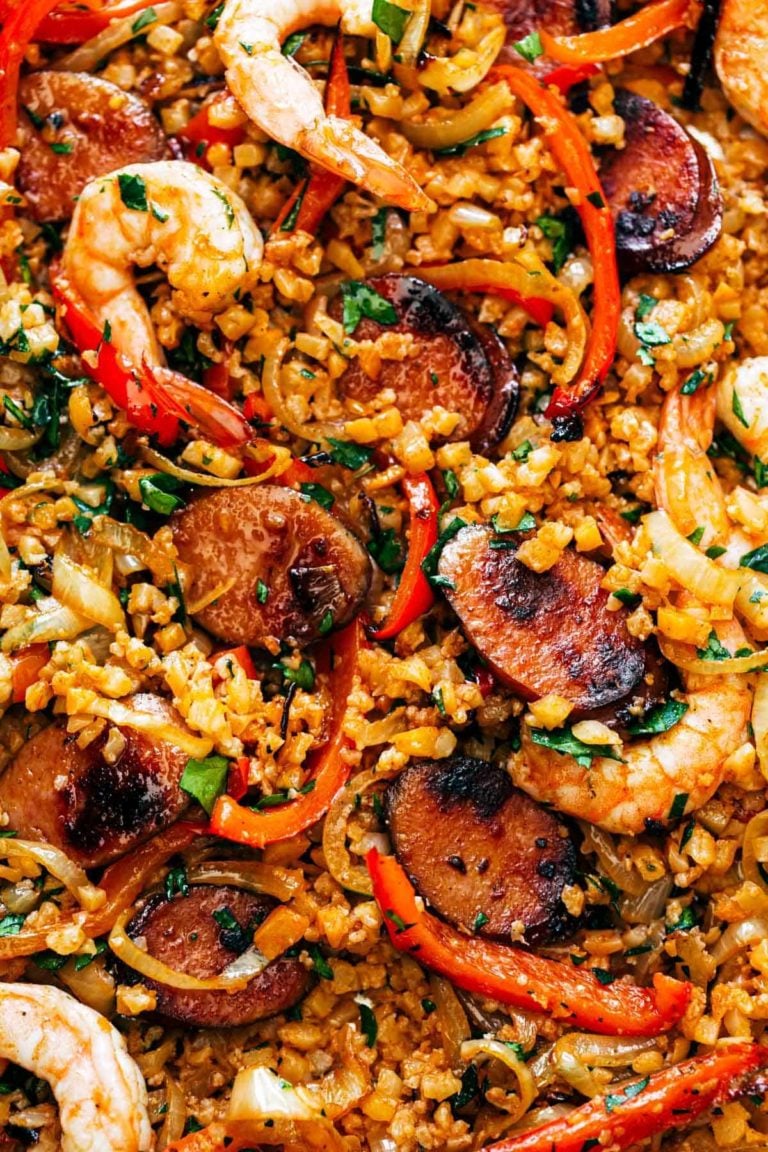
    Sheet pan jambalaya.

    Sheet Pan Jambalaya

    Sheet Pan Jambalaya: maximum flavor, minimal dishes. Sausage, peppers, onions, shrimp, and cauliflower rice all roasted up on a sheet pan. Big flavor, easy dinner!

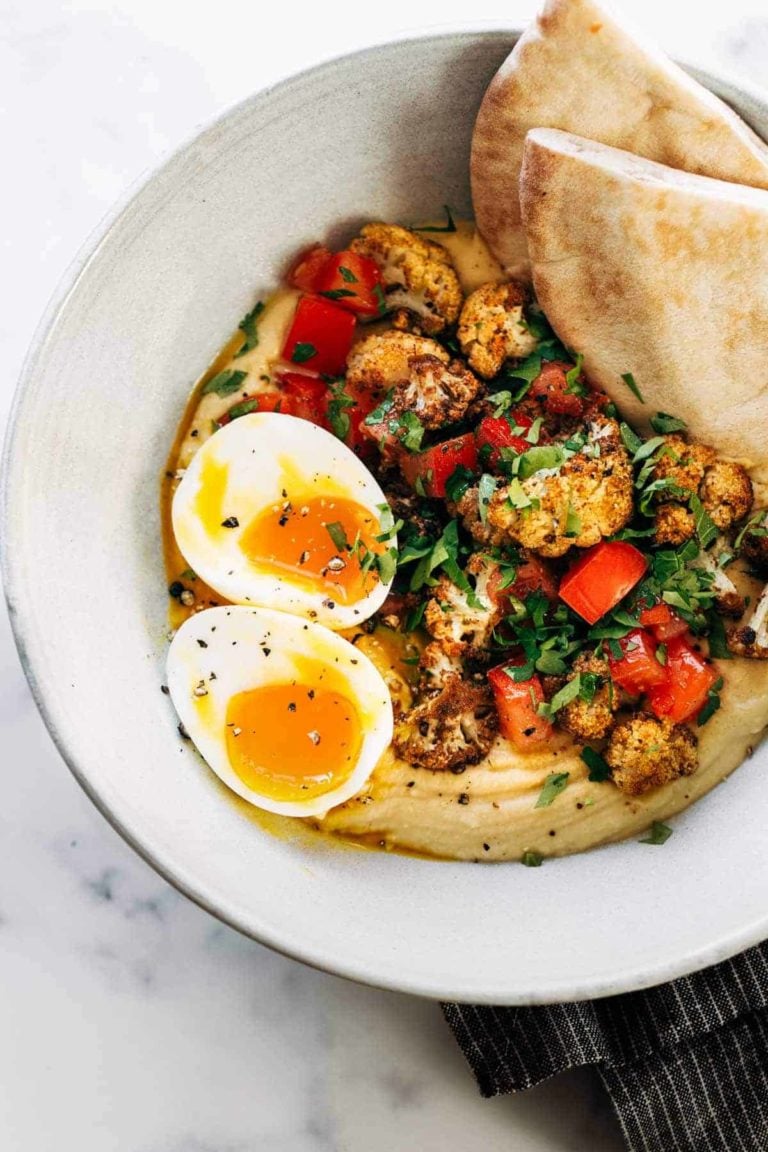
    Hummus in a bowl topped with cauliflower.

    Roasted Cauliflower Hummus Bowls

    These Roasted Cauliflower Hummus Bowls are LIFE-CHANGING. A bed of garlicky creamy hummus, piled high with spiced roasted cauliflower, and a speckling of fresh lemony tomatoes and herbs.

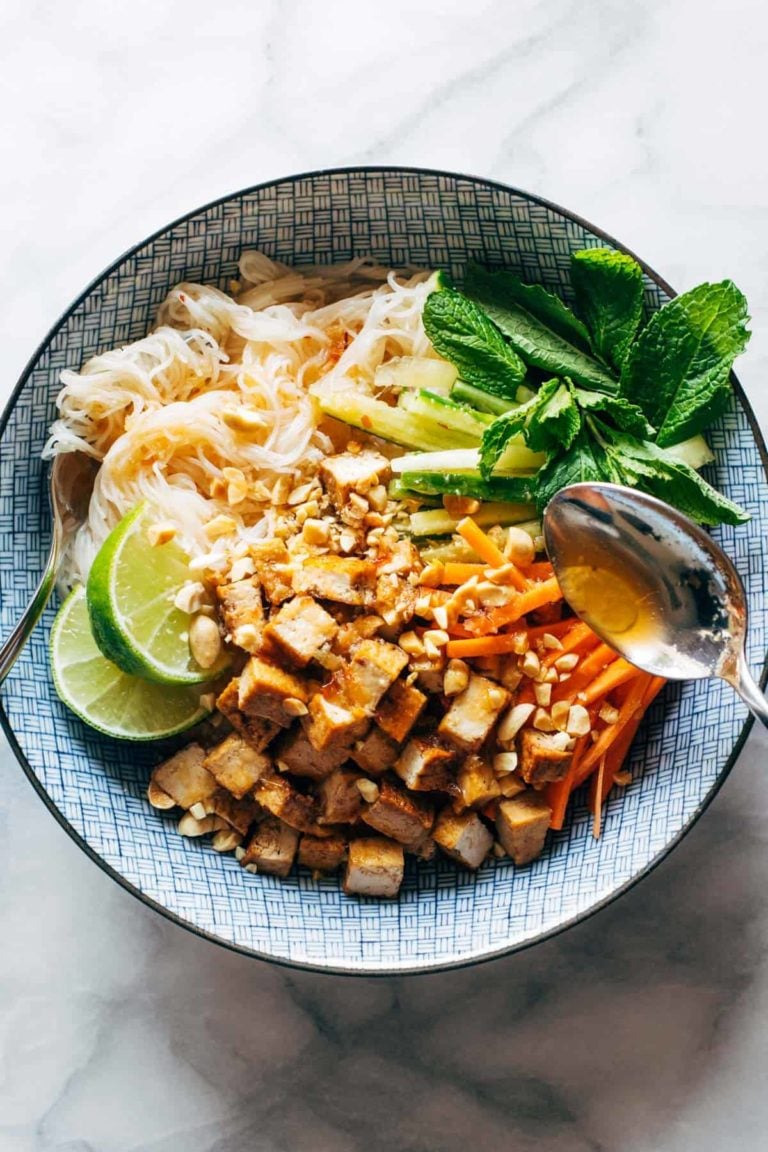
    Vermicelli salad in a bowl with tofu.

    Lemongrass Vermicelli Salad

    Lemongrass Vermicelli Salad – a summer showstopper! A twirl of vermicelli noodles, pan-fried tofu, fresh herbs and veggies, and a lime-and-lemongrass-based sauce that just slips all over the plate.

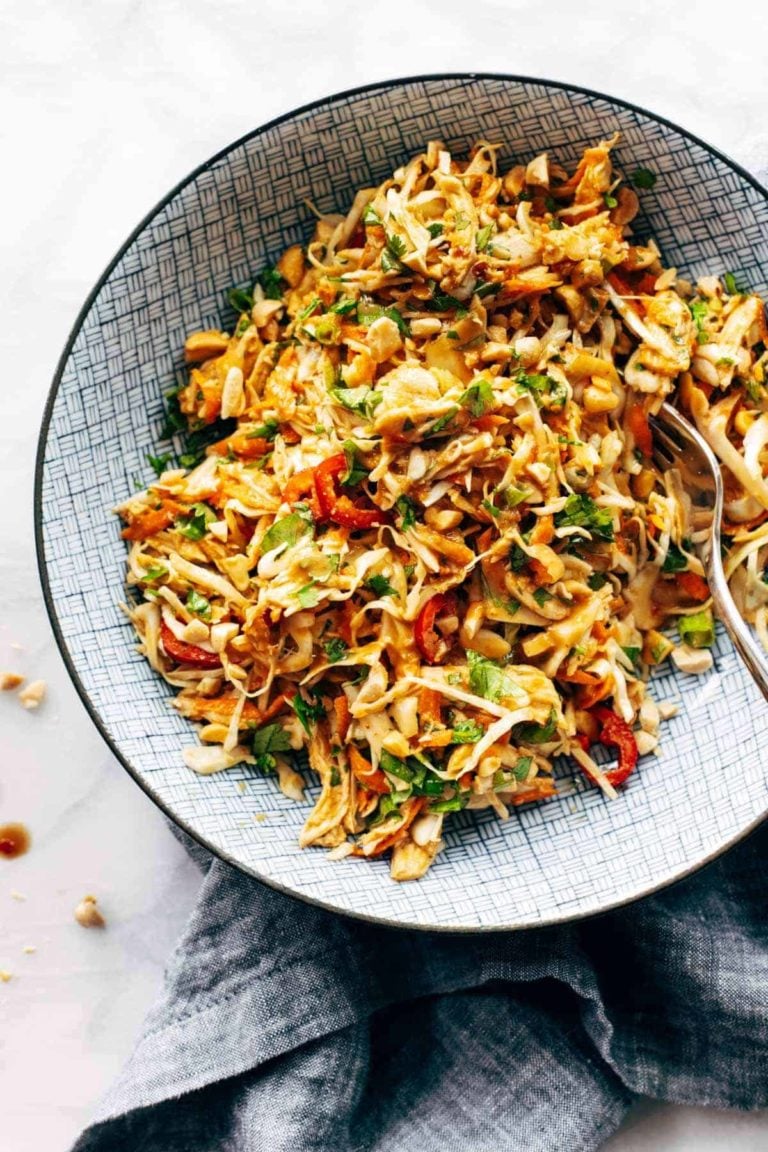
    Chopped salad in a bowl.

    Chopped Thai-Inspired Chicken Salad

    This simple chopped Thai chicken salad has BIG flavors – peanut, lime, soy, chili, cilantro. Topped with a homemade peanut dressing! Healthy and fresh.

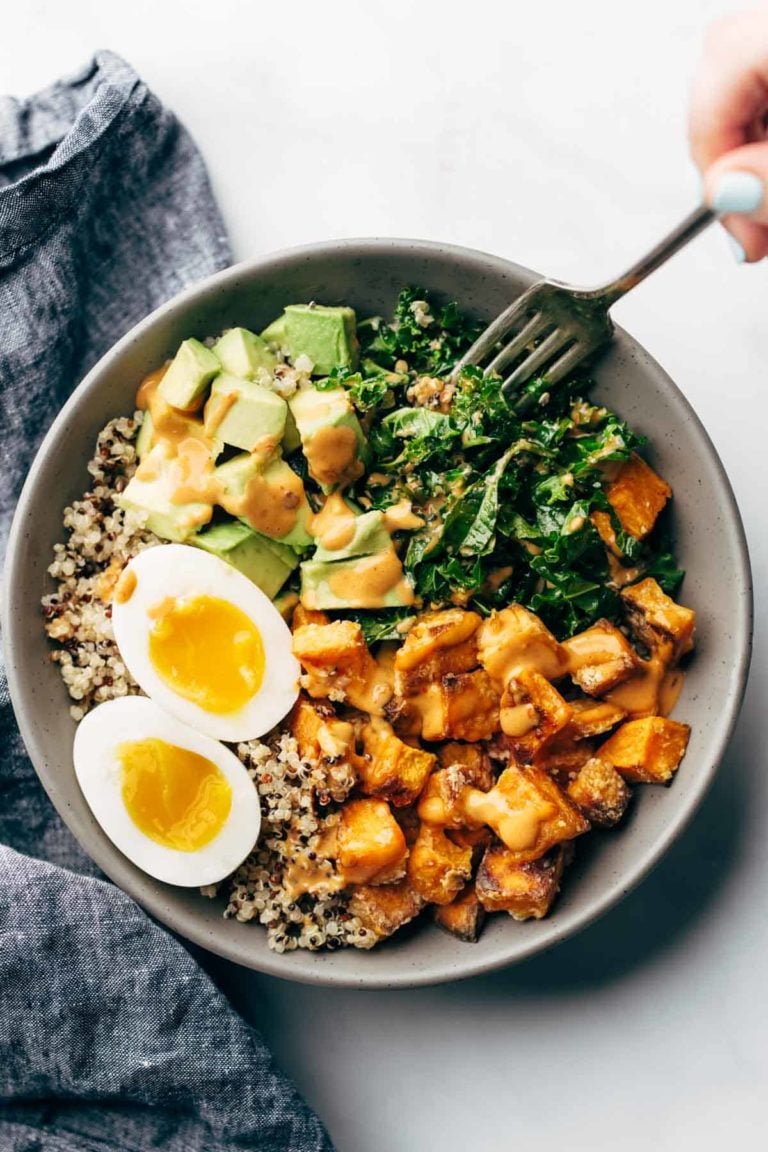
    Sweet potatoes, kale, avocado, and eggs in a bowl.

    Chipotle Tahini Bowls

    Healthy and versatile bowls that come together under a generous drizzle of addictingly creamy vegan chipotle tahini sauce.

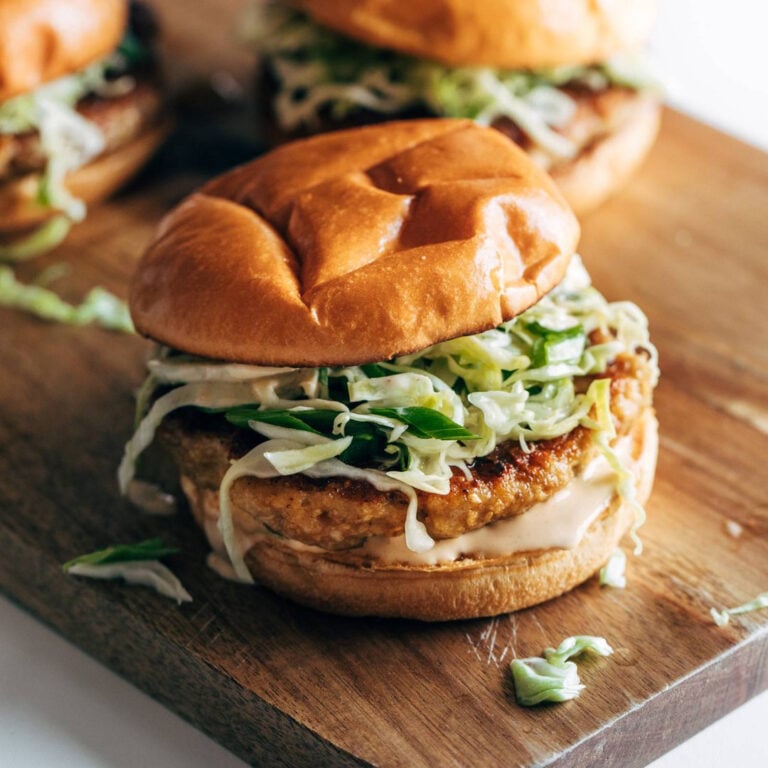
    Teriyaki chicken burger.

    Chicken Teriyaki Burgers with Sesame Slaw

    These Chicken Teriyaki Burgers are amazingly simple while also being ridiculously delicious. Caramelized burgers that are fried up in minutes, a pile of sesame slaw on top, and a perfectly toasted bun. YUM.

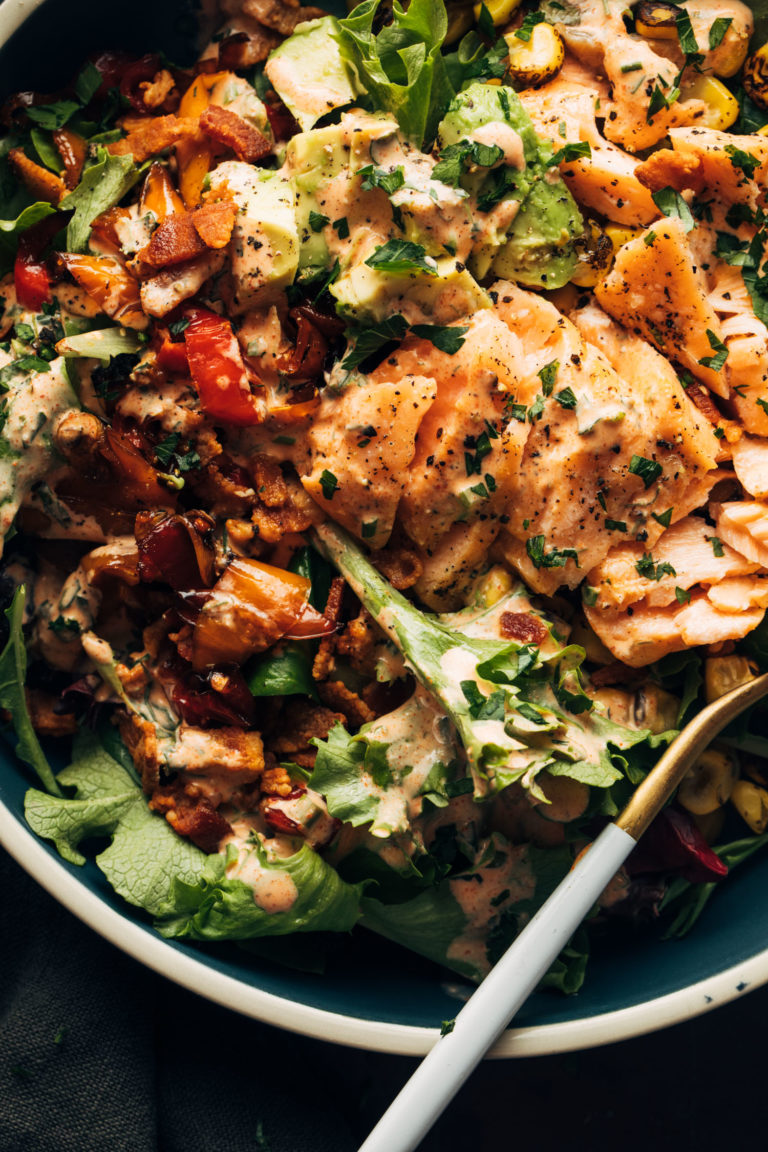
    Salad with salmon on top.

    The Oliver’s Salad

    We’re bringing you the most beautiful salad inspired by the restaurant Oliver’s in Minnesota. Tender salmon, savory peppers and garlic confit, buttery chunks of avocado, fire-roasted corn, bacon bits, and a river of homemade smoky ranch dressing.

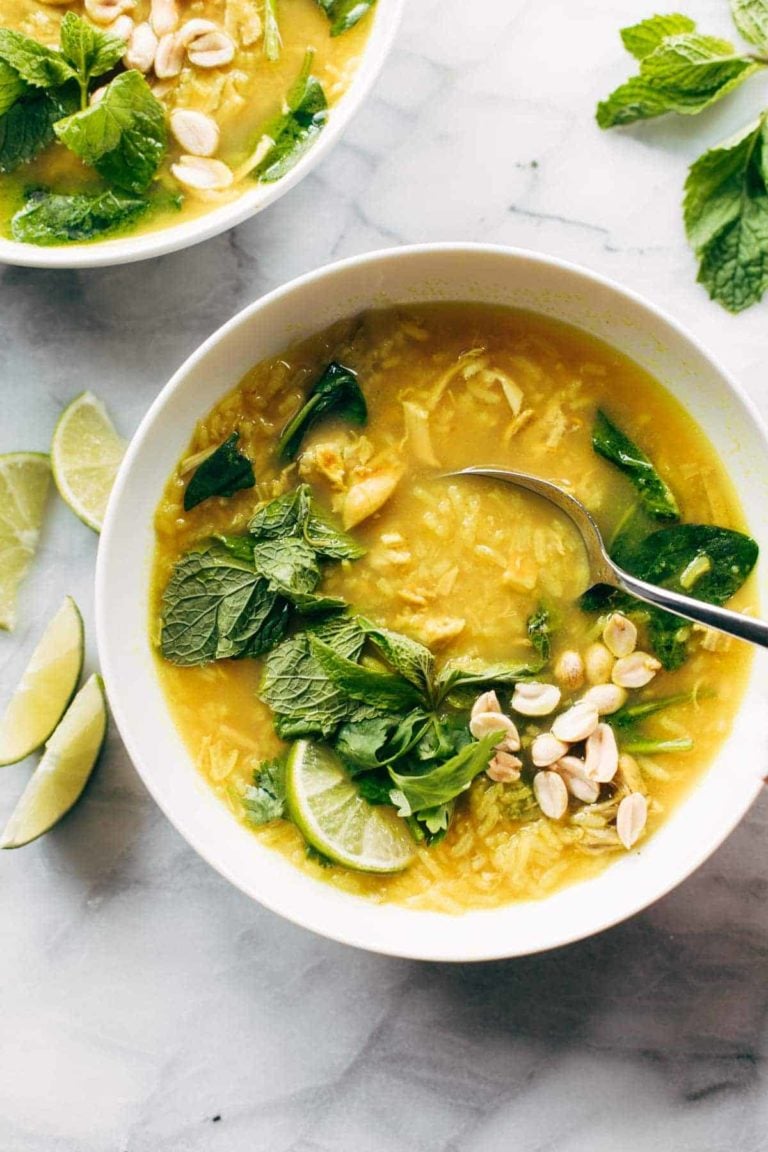
    Chicken and rice soup in a bowl.

    Healing Chicken and Rice Soup

    Healing Chicken and Rice Soup that is limey, salty, and so fresh! Garlic-ginger-infused broth, shredded chicken thighs, tender jasmine rice, fresh herbs, and peanuts. YUM.

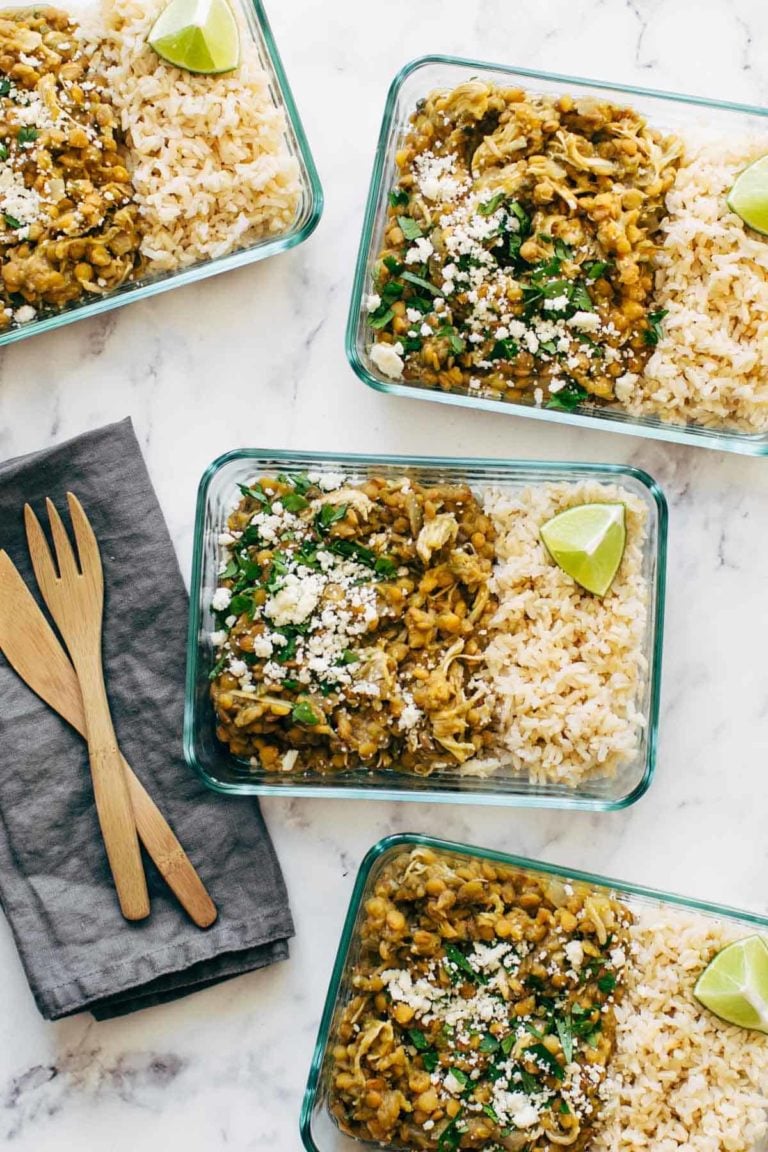
    Chicken and lentil rice bowls in containers.

    Cilantro Lime Chicken and Lentil Rice Bowls

    15 Minute Meal Prep Cilantro Lime Chicken and Lentils! The BEST easy protein powerhouse meal prep. Just 15 mins of prep and totally hands-off cooking!

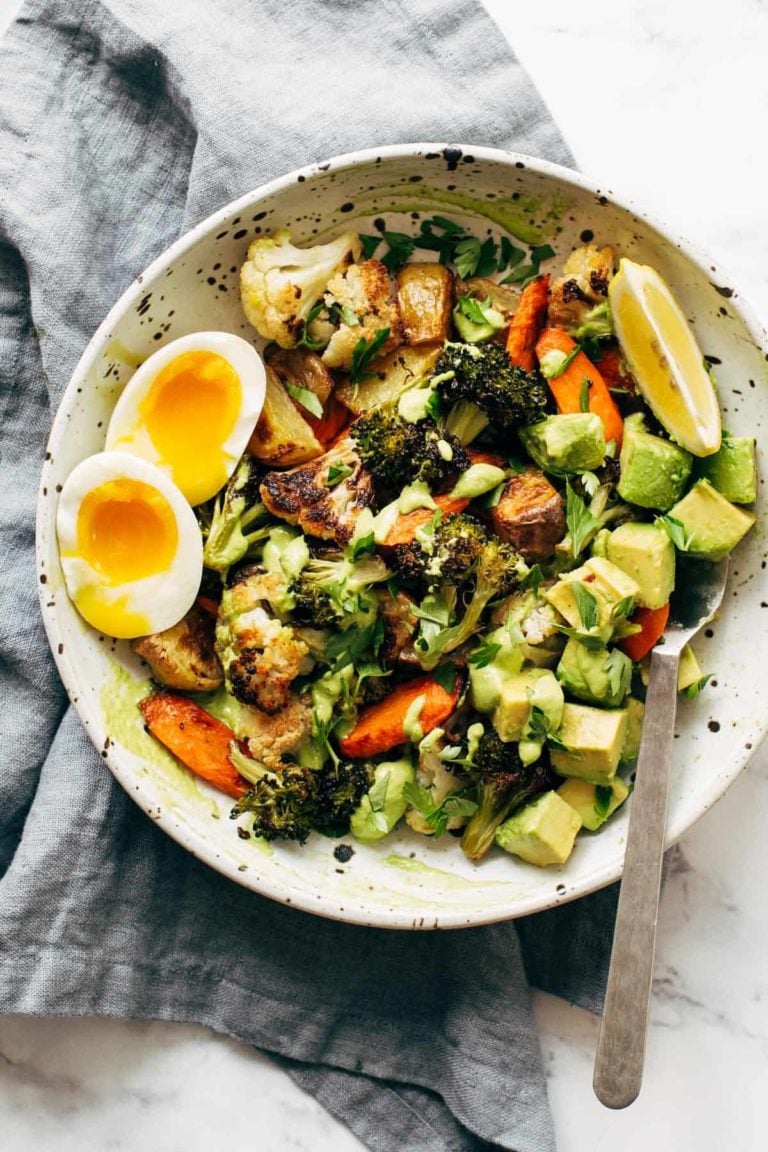
    Roasted vegetables in a bowl with green tahini.

    Roasted Vegetable Bowls with Green Tahini

    Roasted Vegetable Bowls! Crispy tender roasted veggies, buttery avocado, all together in a bowl with a drizzle of green tahini sauce.

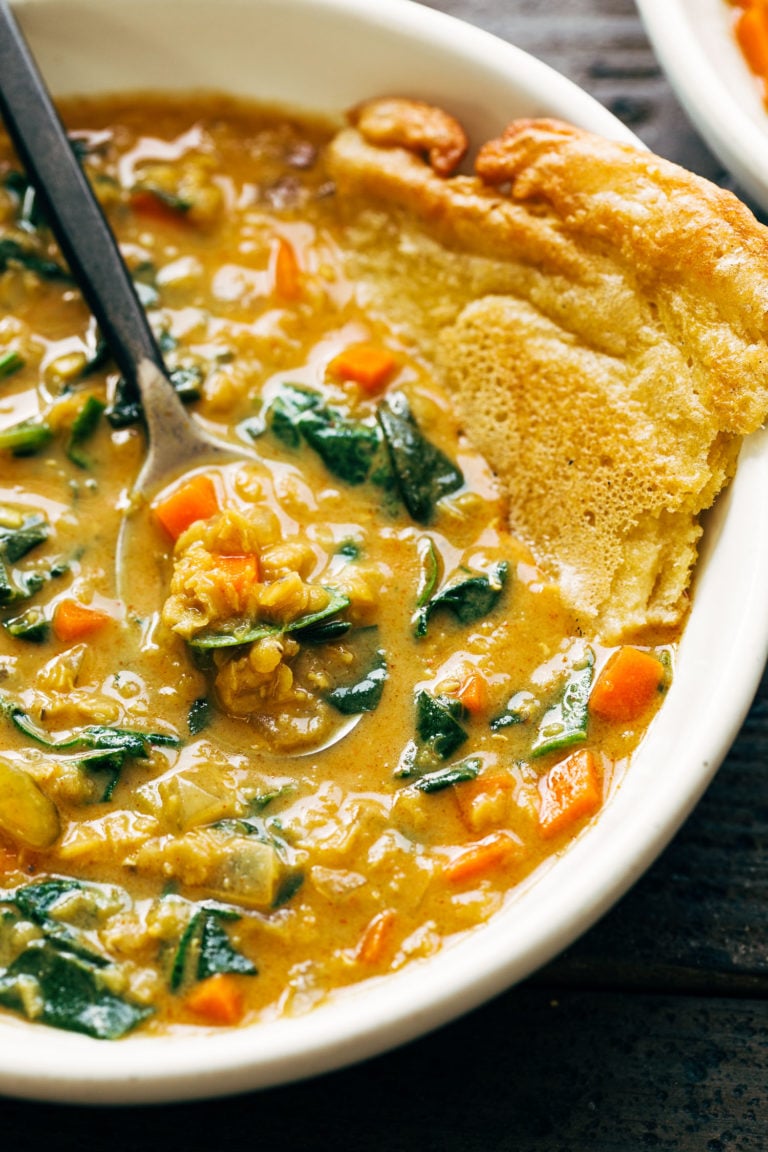
    Red lentil soup in a bowl.

    Smoky Red Lentil Soup with Spinach

    This Smoky Lentil Soup is ultra creamy and totally vegan! Packed to the brim with veggies, red lentils, coconut milk, and lots of spices, it’s a total win for the coziest months of the year!

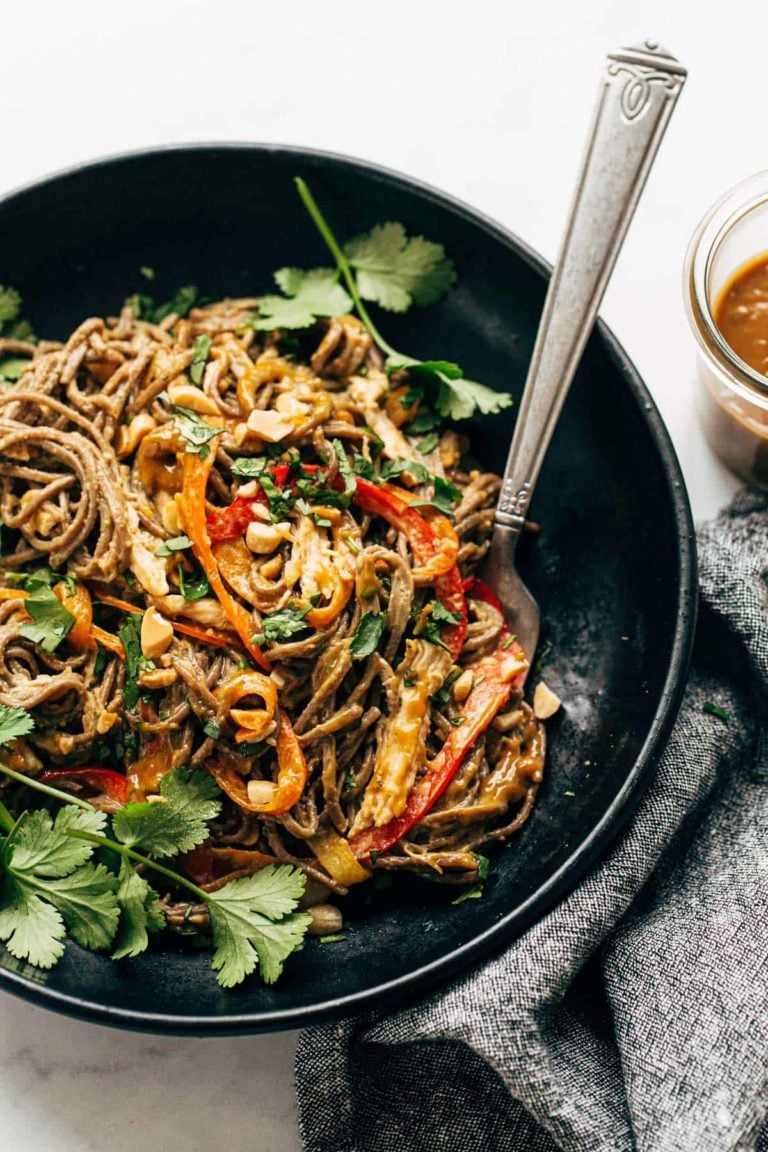
    Spicy peanut soba noodle salad.

    Spicy Peanut Soba Noodle Salad

    This Spicy Peanut Soba Noodle Salad features red peppers, cabbage, chicken, soba noodles, and a quick homemade spicy peanut sauce. Salads don’t get much yummier than this.

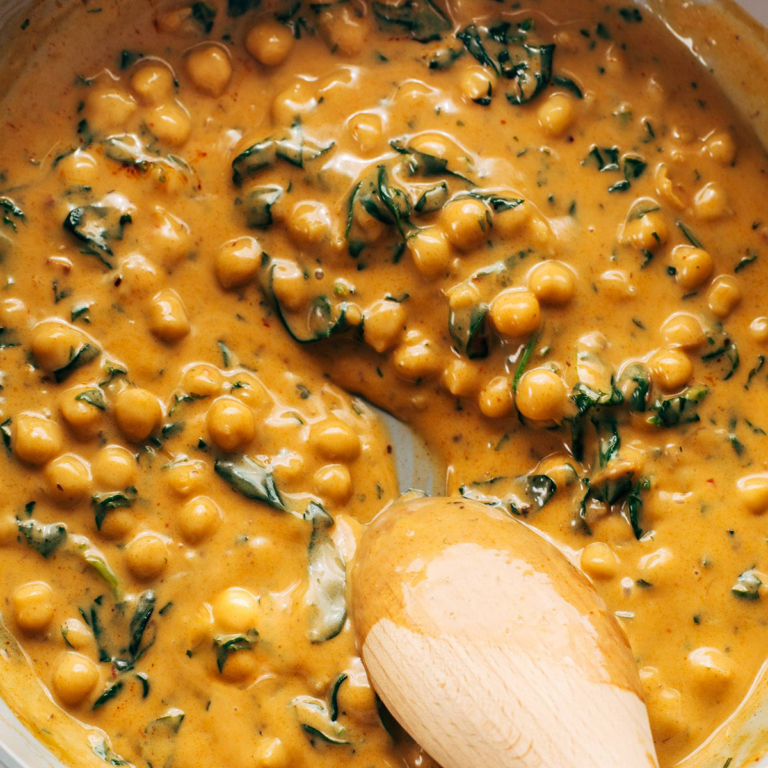
    Chickpea curry in a pan.

    Steph’s Chickpea Curry with Spinach and Rice

    Amazingly creamy, saucy chickpea curry served over rice with a dollop of chili crisp and a side of cucumber salad. Ready in 20 minutes!

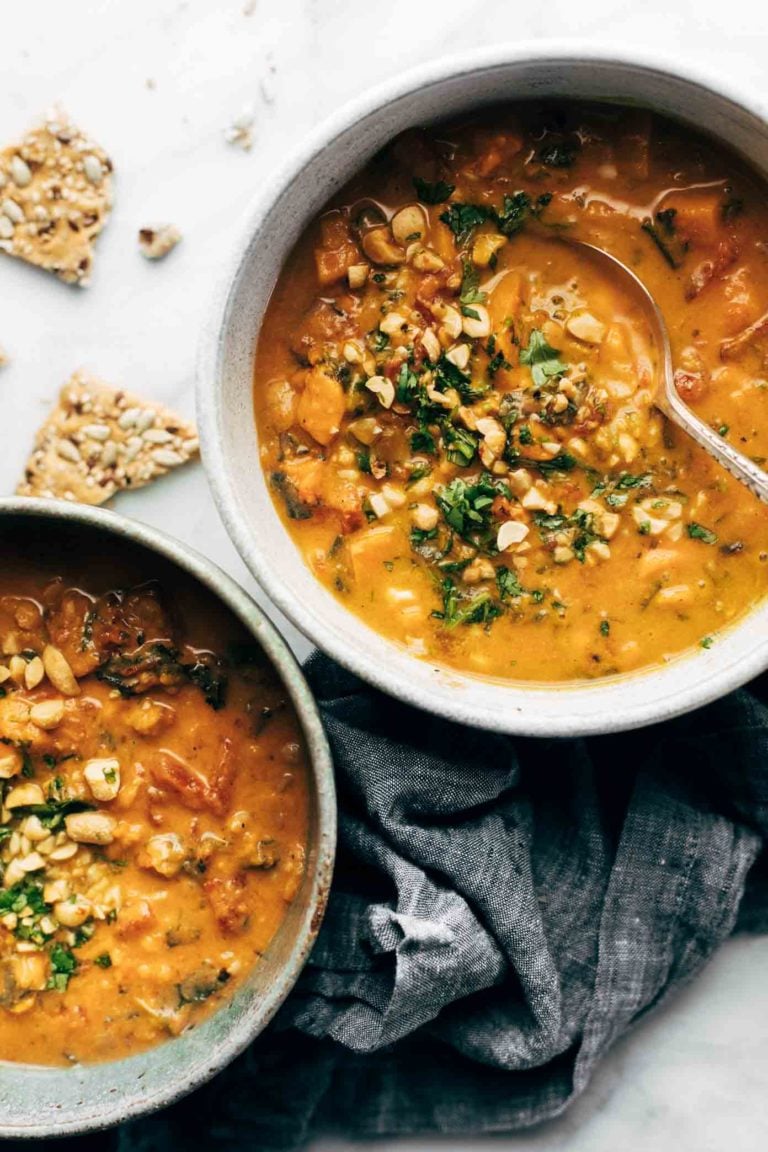
    Sweet potato peanut soup in a bowls.

    Spicy Peanut Soup with Sweet Potato + Kale

    Okay, YUMMMM. Spicy Peanut Soup with Sweet Potatoes + Kale! Comforting and SUPER nutritious. Naturally vegan, gluten free, refined sugar free, ALL THE GOOD THINGS.

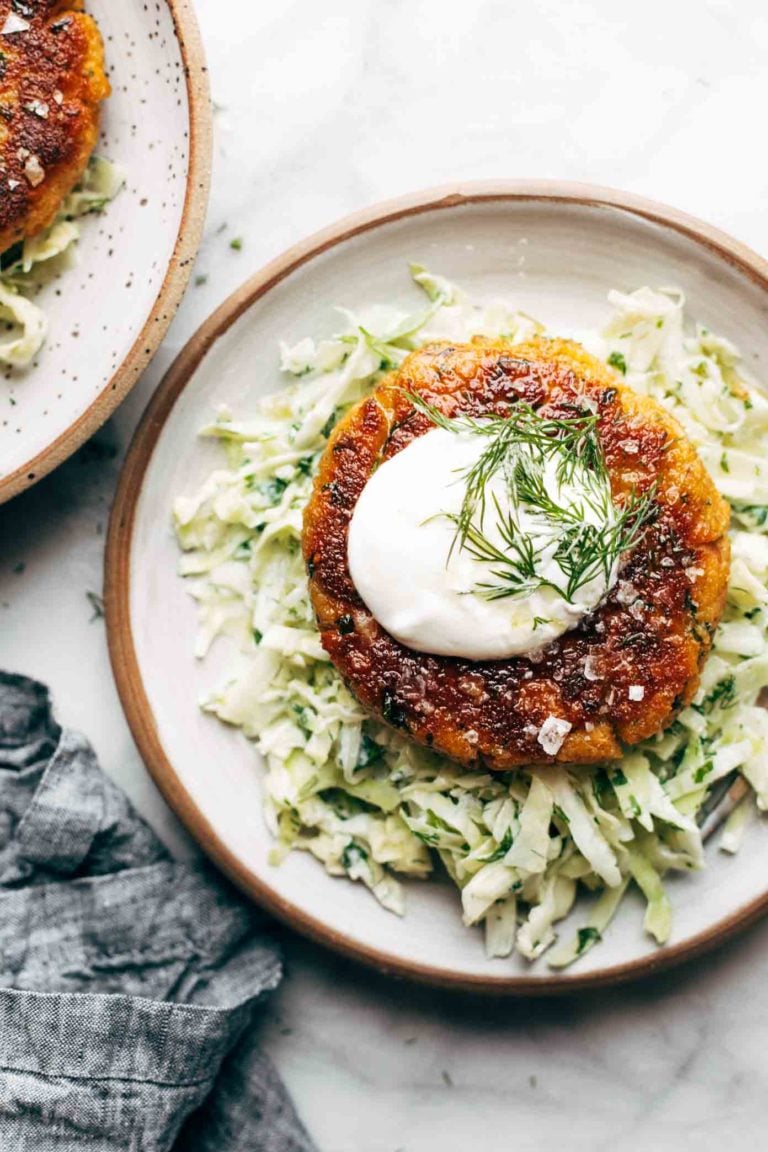
    Salmon burger on slaw.

    Yummy Salmon Burgers with Slaw

    These salmon burgers are THE YUMMIEST! and made with just five ingredients. The best for a quick + easy high protein lunch or dinner.

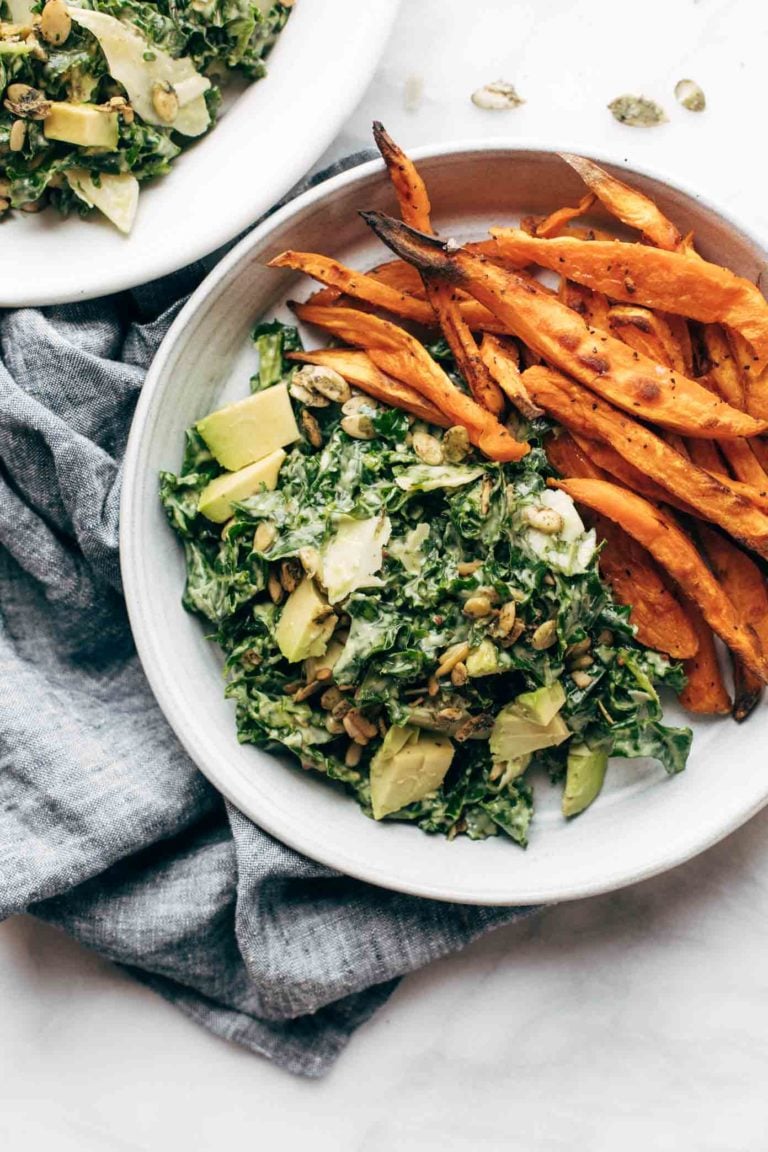
    Avocado kale caesar salad with sweet potato fries.

    Avocado Kale Caesar Salad + Sweet Potato Fries

    Avocado Kale Caesar Salad is a life-changer! Kale, avocado, and crunchy seeds drenched in a quick creamy avocado caesar dressing that can easily be made vegan, too. Toss some crispy sweet potato fries in are you are SET FOR LIFE.

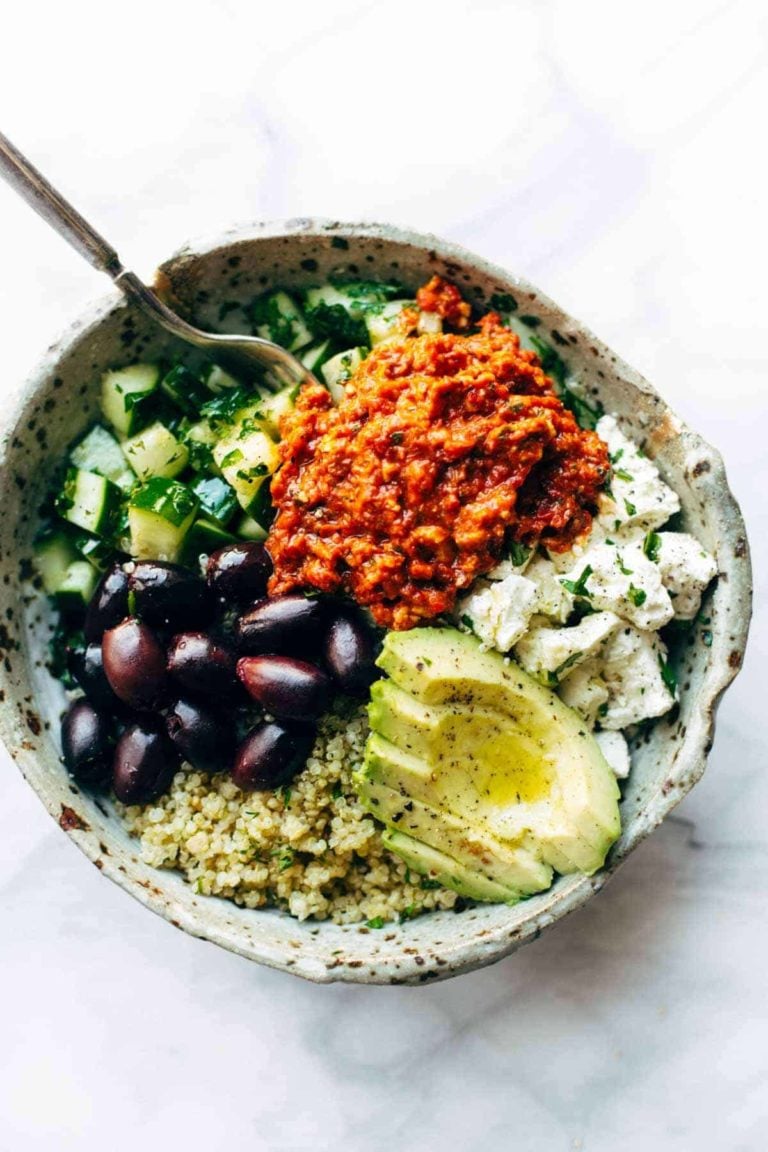
    Mediterranean quinoa bowl with red pepper sauce.

    Mediterranean Quinoa Bowls with Roasted Red Pepper Sauce

    Mediterranean Quinoa Bowls with Roasted Red Pepper Sauce! A mix of quinoa, cucumbers or kale or spinach, feta cheese, kalamata olives, and pepperoncini!

    Golden soup in a bowl with chickpeas.

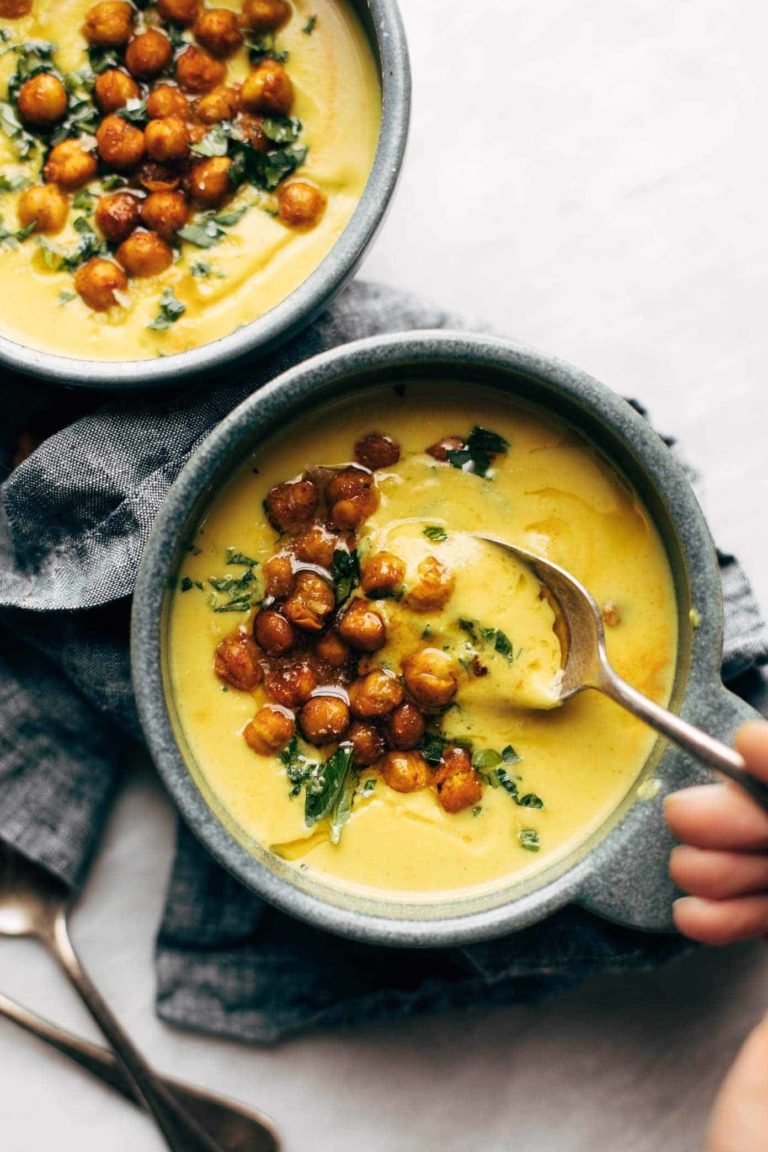
    Golden Soup

    Cozy, bright, and healing with power-foods like turmeric, cauliflower, and cashews. Topped with crispy chickpeas. Super creamy and SO GOOD.

    Tofu and brown rice lettuce wraps.

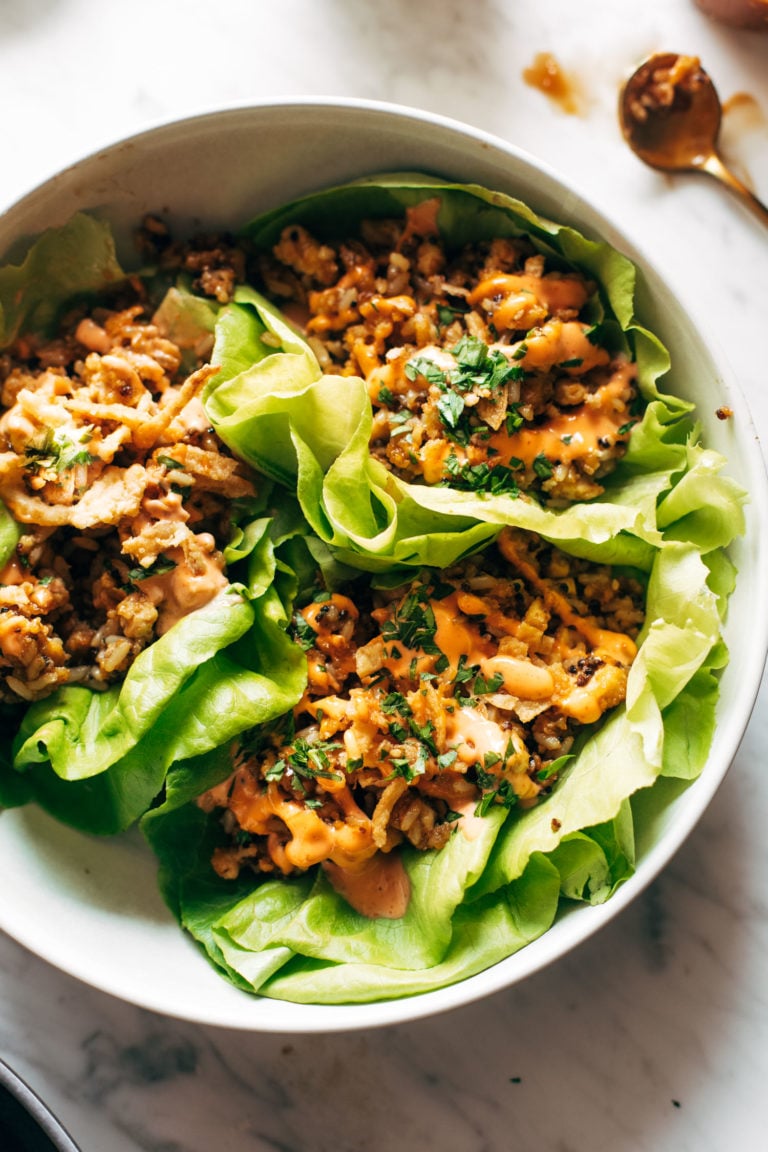
    Tofu and Brown Rice Lettuce Wraps with Peanut Sauce

    These lettuce wraps are ridiculously good! Crunchy, fresh, and packed with tofu, brown rice, crispy onions, plus a drizzle of peanut sauce and spicy mayo. Delicious!

    Crunchy roll bowls.

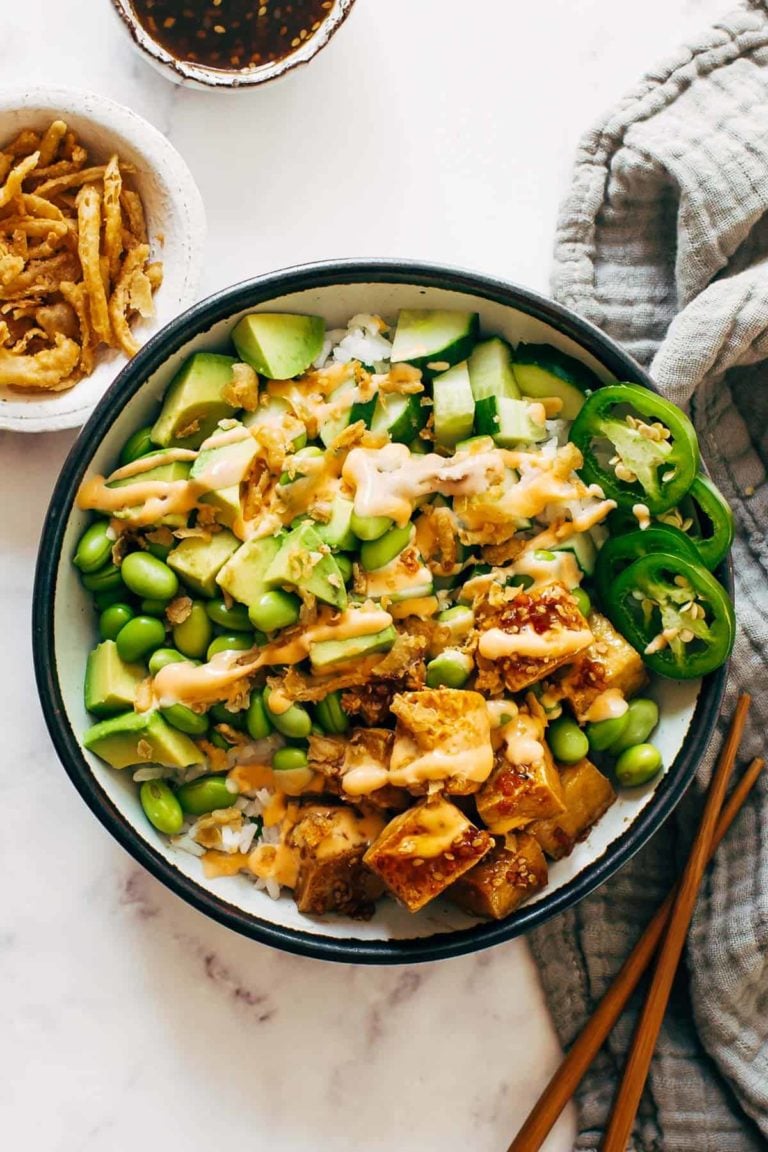
    Crunchy Roll Bowls

    A block of tofu, nicely browned in teriyaki sauce, served on a bed of sticky rice with edamame, cucumber, avocado, jalapeño, and a handful of crushed-up crunchy onions, buried under a thick drizzle of extra teriyaki and spicy mayo. 


    Healthy Dinner Sides

    One of my favorite go-to healthy dinner formulas is air fryer chicken or salmon served along a few sides. It’s simple, easy, light, and feels like a win all around. Here are my go-to sides to pair with dinner!

    • My Favorite Skillet: These healthy nonstick ceramic skillets are PFAS-free, made in the USA, and super versatile! Love them so much.
    • Air Fryer: My original dinnertime lifesaver is the Air Fryer Chicken, and there are several recipes above that use the air fryer as well! It cooks food quickly, makes it super crispy, and is easy to clean.
    • Instant Pot: I love to use an Instant Pot for healthy soups, but is also my go-to appliance for making perfect rice!
    • My Favorite Sheet Pans: Simple, affordable, and perfect for loading up proteins and veggies to roast!

    Source link

  • Keto Crack Chicken Bake

    Keto Crack Chicken Bake

    My Keto Crack Chicken Bake combines the method I use for chicken bake dinners with the flavorful crack chicken sauce so many people love! Even people who aren’t eating Keto will love this Crack Chicken recipe, and kids will devour it!

    Pin Keto Crack Chicken Bake to try the recipe later!

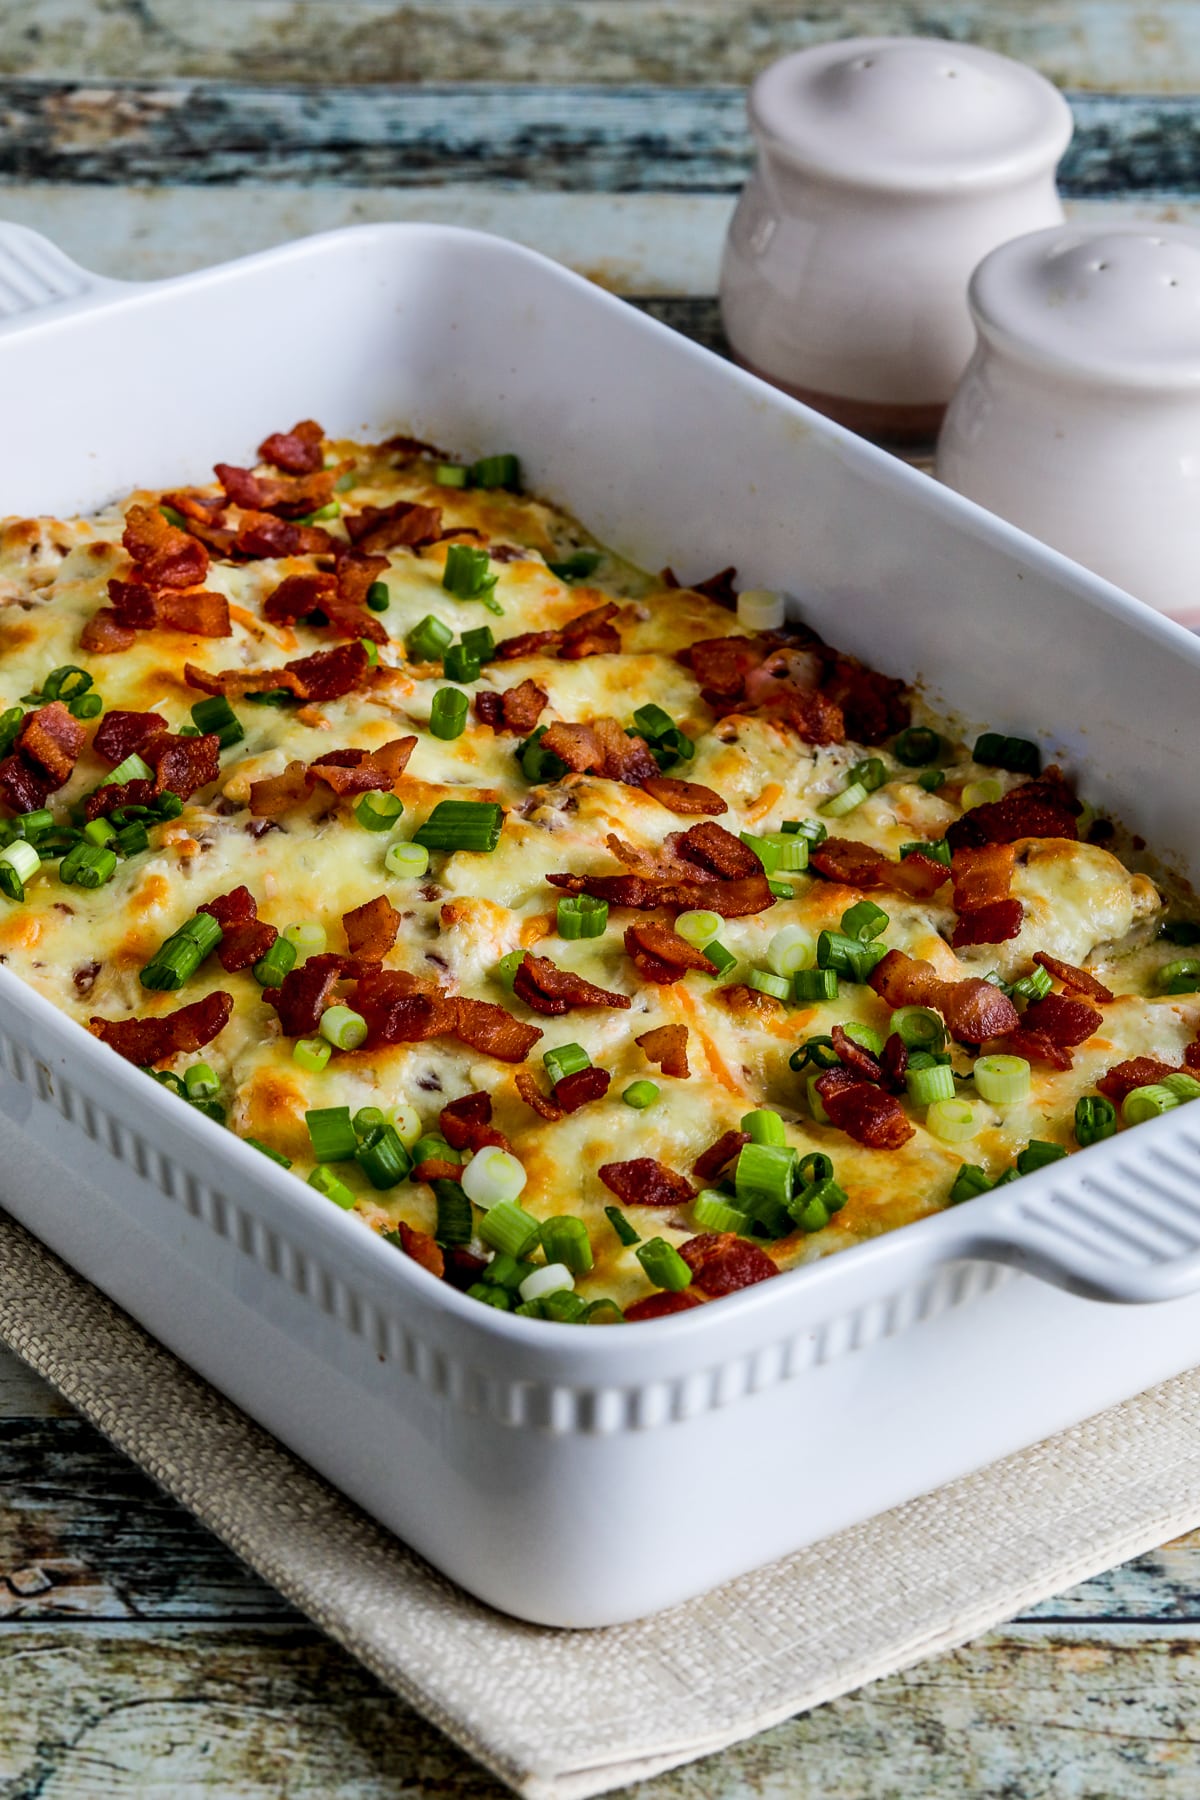
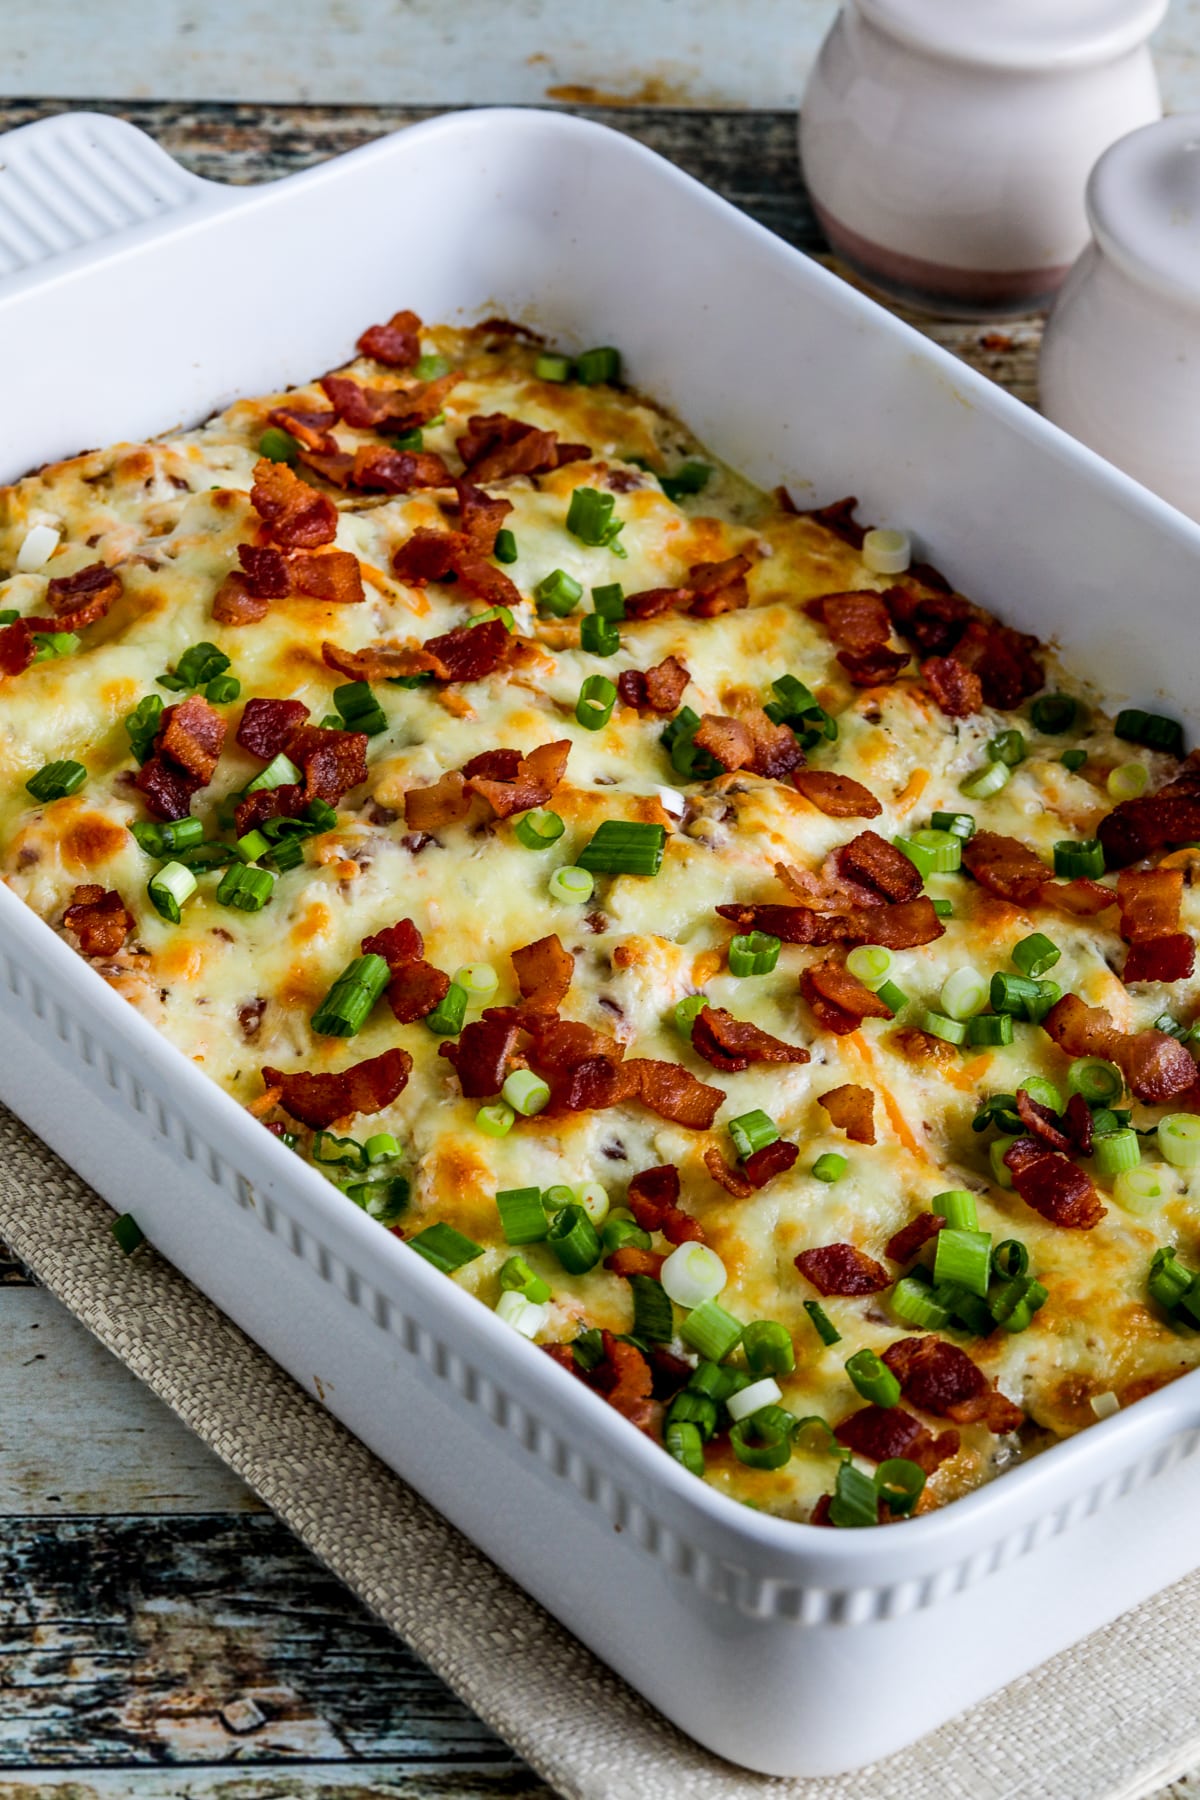
    Keto Crack Chicken Bake shown in baking dish with bacon and green onion sprinkled on

    This extra-delicious Keto Crack Chicken Bake is a perfect recipe for anyone who wants to start the new year eating fewer fewer carbs. This recipe is my variation of the famous Crack Chicken recipe you can see all over the web. For years I was intrigued with that idea, but so many of the recipes I saw were for shredded chicken with a creamy sauce and used Ranch Dressing mix, and that didn’t appeal to me.

    And then I had the idea of using my method for the dinners I call chicken bakes with a sauce inspired by the Crack Chicken ingredients. For the Ranch flavor I used the seasonings from Grandma Denny’s Homemade Ranch Dip. And Keto Crack Chicken Bake was the delicious result!

    Kara and I tested this recipe a few times to get it just right. And when we made the final version, I immediately sat down and devoured it for an early dinner! If you like chicken, bacon, cream cheese, cheese, and a touch of Ranch flavor, I bet you’ll enjoy this Keto Crack Chicken for an easy meal the whole family is going to love! Happy New Year everyone, and I hope you try the recipe!

    What ingredients do you need for this recipe?

    (This is only a list of ingredients; please scroll down for complete printable recipe. Or if you use the JUMP TO RECIPE link at the top of the page, it will take you directly to the complete recipe.)

    • thick-sliced bacon
    • boneless, skinless chicken breasts
    • Garlic Powder (affiliate link)
    • Onion Powder (affiliate link)
    • dried Dill Weed (affiliate link)
    • Beau Monde Seasoning (affiliate link)
    • black pepper
    • cream cheese
    • sour cream
    • mayo
    • shredded sharp cheddar cheese
    • shredded Monterey Jack cheese
    • green onions

    What do I mean by Chicken Bake Dinners?

    Recipes I call Chicken Bakes are quick dinners that start with four chicken breasts. The chicken is rubbed with seasoning, browned in a frying pan, cut into strips, covered with a flavorful sauce or topping, and baked in the oven for 20-25 minutes. The quick browning and then baking the chicken with flavor-adding ingredients always produces great results for me. (Look below for a list of other recipes where I’ve used this technique.)

    Why is this recipe called Keto Crack Chicken?

    The type of recipe is called Crack Chicken because it’s supposed to be addictive in the way drugs are. I don’t love the name, but I do think it conveys how absolutely delicious this creamy chicken and bacon recipe is!

    Can you make Keto Crack Chicken with less fat?

    Keto Crack Chicken Bake as written is a high fat dish, suitable for the Keto diet. If you’re not eating Keto and don’t want that much fat, I’d try variations like using less bacon, using reduced-fat cream cheese, sour cream, and mayo, and using less cheese. I haven’t tried making a version with less fat like that, but I’m betting it will still be very good.

    Can you use Ranch Mix to season this Keto Crack Chicken Bake?

    I love my Grandma Denny’s Homemade Ranch Dip and I was glad I could use the ingredients she uses to season the chicken and the sauce for this recipe. But I know that Beau Monde Seasoning (affiliate link) won’t be an ingredient everyone has on hand. If you don’t want to buy that, just substitute the spices used here for about 2 tablespoons of packaged Ranch mix, no problem!

    How low in carbs is my Keto Crack Chicken Bake?

    This tasty baked chicken casserole has only 5 net carbs per serving, with 74 grams of protein!

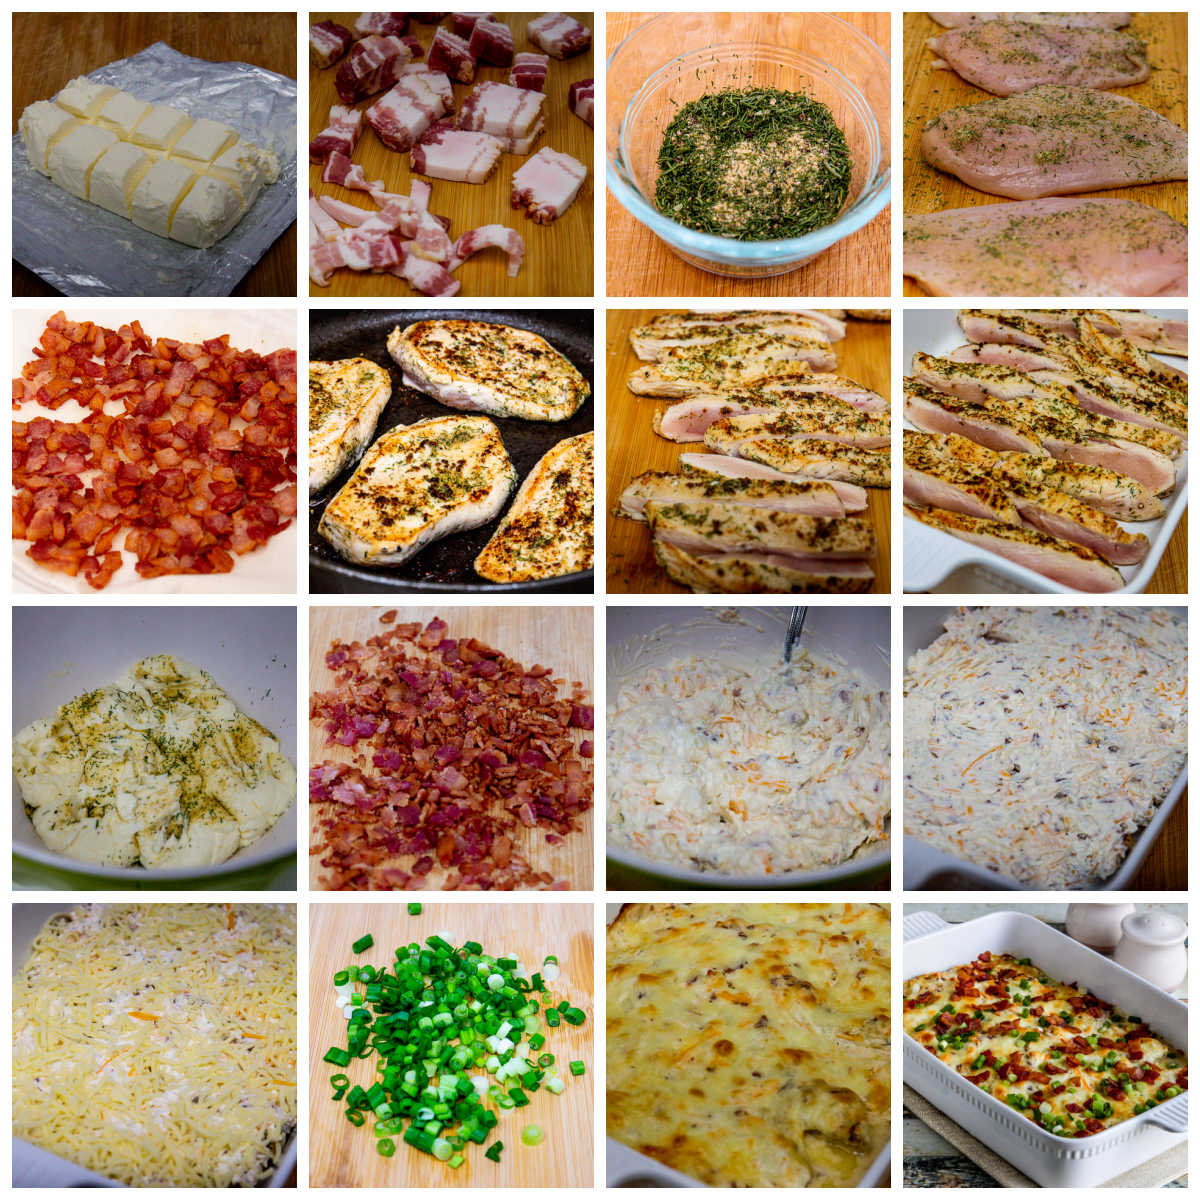
    Keto Crack Chicken Bake collage of recipe steps

    How to Make Keto Crack Chicken Bake:

    (This is only a summary of the steps for the recipe; please scroll down for complete printable recipe. Or if you use the JUMP TO RECIPE link at the top of the page, it will take you directly to the complete recipe.)<

    1. Preheat oven to 375F/190C.
    2. Take cream cheese out of the fridge.
    3. Slice bacon into strips and start cooking it in a frying pan over medium-high heat.
    4. While bacon cooks combine Garlic Powder, Onion Powder, Dill Weed, Beau Monde Seasoning, and black pepper.
    5. Trim chicken breasts and rub on both sides with seasoning mix, using about half of it.
    6. When bacon is done remove to a paper towel. Reserve 2 tablespoons bacon grease. 
    7. Heat bacon grease in the frying pan over medium-high heat, add chicken breasts and cook until both sides are browned but chicken isn’t cooked through.
    8. When chicken is browned, move to a cutting board. Cut each piece into 4 or 5 lengthwise strips.
    9. Spray a 9″ x 13″ casserole dish with non-stick spray and arrange chicken strips in the dish. 
    10. Put softened cream cheese in a bowl and microwave a few seconds.
    11. Chop up half of the cooked bacon.
    12. Mix together softened cream cheese, crumbled bacon, sour cream, mayo, sharp cheddar cheese, 1/2 cup of Monterey Jack cheese, and the other half of the seasoning mix.
    13. Spread mixture over the chicken.
    14. Sprinkle over the other 1/2 cup of Monterey Jack cheese.
    15. Bake chicken 20-25 minutes, or until it’s bubbling hot and starting to slightly brown.
    16. While chicken cooks, thinly slice green onions.
    17. When chicken is done, sprinkle with sliced green onions and other half of the cooked bacon.
    18. Serve the Crack Chicken Bake hot.
    19. This will stay good in the fridge for a few days and reheats well. I haven’t frozen any, but I’m confident it will freeze well, although I imagine most people won’t have many leftovers to freeze!

    Make it a low-carb meal:

    I would serve the Keto Crack Chicken Bake with a vegetable side dish like Stir-Fried Spinach with Garlic and Parmesan, Green Beans with Lemon, Parmesan, and Pine Nuts, or Garlicky Green Beans Stir Fry. It would also be delicious with a salad like Cucumber Salad with Balsamic Dressing, Kalyn’s Low-Carb Coleslaw, or Kalyn’s Favorite Baby Arugula Salad.

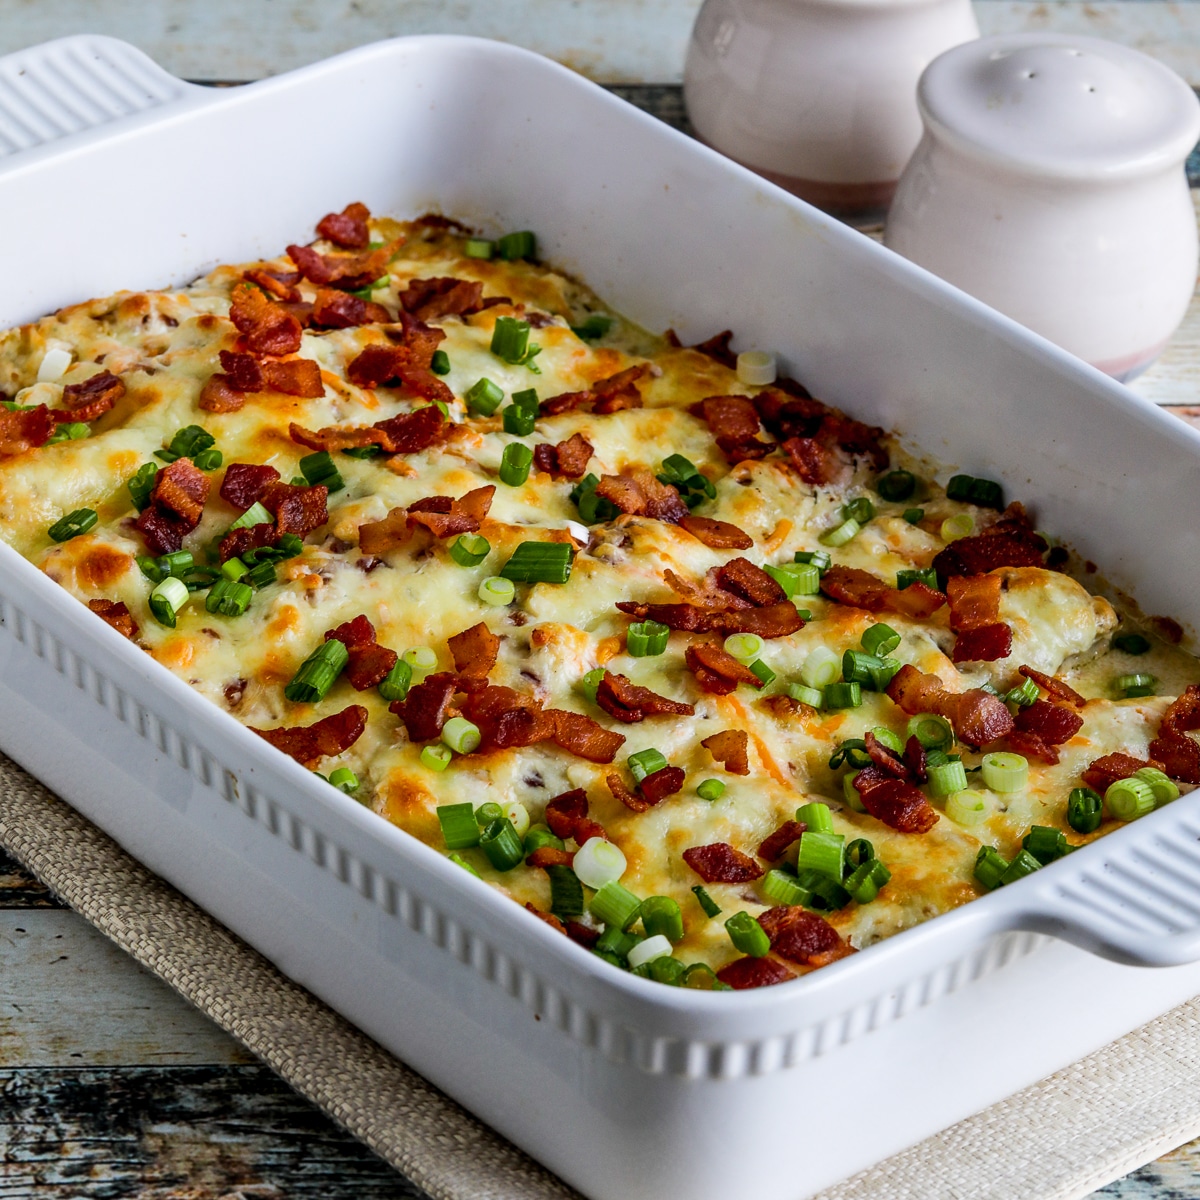
    Keto Crack Chicken Bake with salt-pepper in background, shown in baking dish

    More Tasty Chicken Bake Dinners You Might Like:

    Ingredients

    • 8 slices thick-sliced bacon
    • 4 boneless, skinless chicken breasts, about 2.5 pounds of chicken
    • 1 1/2 tsp. garlic powder
    • 1 1/2 tsp. onion powder
    • 2 tsp. dried dillweed
    • 3/4 tsp. Beau Monde Seasoning (see notes)
    • 1/4 tsp. black pepper
    • 8 oz. cream cheese
    • 1/2 cup sour cream
    • 1/4 cup mayo
    • 1/2 cup shredded sharp cheddar cheese
    • 1 cup shredded Monterey Jack cheese
    • 3 green onions

    Instructions

    1. Preheat oven to 375F/190C.
    2. Take cream cheese out of the fridge and cut into pieces so it will soften on the counter.
    3. Slice the bacon into thin strips and start cooking it in a large frying pan over medium-high heat. (Choose a pan that’s large enough to hold all the chicken breasts.
    4. While bacon cooks combine Garlic Powder, Onion Powder, Dill Weed, Beau Monde Seasoning, and black pepper to make the seasoning mix
    5. Trim any fat and undesirable parts from chicken breasts and rub the chicken on both sides with the seasoning mix, using about half of the seasoning mix
    6. When bacon is crisp and well-browned, remove it to a paper towel. Reserve 2 tablespoons bacon grease from the pan and discard the rest. (I would wipe out the pan if there are a lot of bacon crumbles.
    7. Heat the bacon grease in the frying pan over medium-high heat, add chicken breasts, and cook until both sides are browned but the chicken isn’t cooked through. (That should only take 2-3 minutes per side.)
    8. When chicken is browned, move it to a cutting board. Cut each piece or chicken into 4 or 5 lengthwise strips, depending on how large the piece is
    9. Spray a 9″ x 13″ casserole dish with non-stick spray and arrange the chicken strips in the dish. (I stagger them so most of the surface of the baking dish is covered.
    10. Put the softened cream cheese in a bowl and microwave 20 seconds, or until it’s quite soft
    11. Chop up half of the cooked bacon so it’s finely crumbled
    12. Mix together the softened cream cheese, crumbled bacon, sour cream, mayo, sharp cheddar cheese, 1/2 cup of the Monterey Jack cheese, and the other half of the seasoning mix
    13. Then spread that mixture over the chicken in the baking dish
    14. Sprinkle over the other 1/2 cup of Monterey Jack cheese
    15. Bake chicken 20-25 minutes, or until it’s bubbling hot and starting to slightly brown on top
    16. While chicken cooks, thinly slice the green onions
    17. When chicken is done, sprinkle with the sliced green onions and the other half of the cooked bacon
    18. Serve hot
    19. This will stay good in the fridge for quite a few days and reheats well. I haven’t frozen any yet, but I am confident it will freeze well, although I can’t imagine most people will have any leftovers to freeze!

    Notes

    If you don’t have Beau Monde Seasoning and don’t want to buy it for this recipe you can definitely season the chicken and the sauce with about 2 tablespoons of Ranch Dressing mix, divided as described.

    It’s hard to accurately calculate the amount of fat in this recipe because the bacon fat is mostly discarded. I have adjusted for that the best I could.

    This recipe adapted from many Crack Chicken recipes found online and inspired by my easy dinners called Chicken Bakes. It was tested and adapted by Kalyn and Kara.

    Nutrition Information

    Yield

    6

    Amount Per Serving

    Calories 736Total Fat 45gSaturated Fat 21gUnsaturated Fat 20.2gCholesterol 257mgSodium 879mgCarbohydrates 5.4gFiber .4gSugar 2.5gProtein 74g

    Did you make this recipe?

    Did you make this recipe? Please leave a star rating (under the PRINT button in the recipe) or share a photo of your results on Instagram! THANKS!

    square image of Keto Crack Chicken Bake in baking dish

    Low-Carb Diet / Low-Glycemic Diet / South Beach Diet Suggestions:
    This Keto Crack Chicken recipe is a good dinner option for any low-carb or Keto diet plan. It’s too high in fat for any phase of the original South Beach Diet, but if the idea really appeals to you I think you could make a version using lower-fat ingredients that would still be tasty.

    Find More Recipes Like This One:
    Use the Diet Type Index to find more recipes suitable for a specific eating plan. You might also like to follow Kalyn’s Kitchen on Pinterest, on Facebook, on Instagram, on TikTok, or on YouTube to see all the good recipes I’m sharing there.

    Historical Notes for this Recipe:
    This chicken bake recipe was first posted in 2023. Since then it’s been hugely popular on the website, and it was last updated with more information in 2025.

    Pinterest image of Keto Crack Chicken Bake

    We are a participant in the Amazon Services LLC Associates Program, an affiliate advertising program designed to provide a means for us to earn fees by linking to Amazon.com and affiliated sites. As an Amazon Associate, I earn from qualifying purchases.


    Source link

  • Smashed Chicken Tacos

    Smashed Chicken Tacos

    Crispy smashed chicken tacos with a cheesy corn chip crust and zesty slaw— your new go-to for high-protein, high-flavor Taco Tuesday wins.


    Jump to: ℹ️ Overview | 🛒 Ingredients | 📷 How To Make | 📹 Watch The Video | 👩‍🍳 Recipe Tips | 🥗 Serving Suggestions | 📝 Full Recipe Card | 🍽 More Tex-Mex Recipe Ideas


    This recipe takes the viral smashed tacos trend and gives it a McChicken-meets-Taco-Tuesday makeover. Instead of beef, we’re using seasoned ground chicken spread right onto mini tortillas and topped with crushed salted tortilla chips (or corn chips for Aussies) and cheese, then smashed into a hot pan until golden and crispy. Topped with tangy cabbage slaw and cilantro sauce mayo sauce. It’s a little Tex-Mex, a little Macca’s nostalgia, and a whole lot of high-protein.

    These are surprisingly filling, thanks to the lean chicken and the fiber-rich veg. Plus, the texture is on point: crispy edges, juicy center, creamy sauce, crunchy slaw. You can make these for two in under 30 minutes, and scale up for a crowd. They’re easy to customize and make ahead, and let’s be honest, who doesn’t love a taco that reminds you of a chicken burger?

    Nutrition (per serving, 2 tacos – they are filling!): 580 calories, 34 grams of protein, 7 grams of fiber

    👉 This recipe is part of my high-protein and high-fiber meals series. You might also like these: chicken taco soup, Mediterranean baked fish (with white bean puree), lentil mushroom Bolognese, chicken Shawarma with baked rice, or high-protein zucchini fritters.

    What You’ll Need

    Here is what you’ll need for these crispy smashed chicken tacos. Find the full measurements in the recipe card below.

    Chicken mixture:

    • Ground chicken – lean breast mince is great for a high-protein, low-fat option.
    • Garlic powder, cumin, smoked paprika – your flavor trifecta.
    • Salt & pepper – for balance and bite.

    Crunchy topping:

    • Corn tortilla chips – crushed for a crispy, salty crust. Sub with breadcrumbs or gluten-free chips if needed.
    • Cheddar cheese – use regular or low-fat; melts into golden, crispy edges.

    Tortillas:

    • Mini wheat tortillas – or swap for corn or gluten-free versions. Pick ones with fiber if you’re after macro-friendly.

    Sauce & veg:

    • Light mayo + low-fat Greek yogurt – creamy but lighter.
    • Fresh coriander – adds that herby pop.
    • Red cabbage & lettuce – for crunch, fiber, and a fresh contrast.
    • Hot sauce – for heat (optional, but delicious).

    How To Make Smashed Chicken Tacos

    Find the full recipe and nutritional information below. Here are some handy step-by-step photos for how to make smashed tacos with ground chicken, cheese and tortilla chips.

    • Crush corn chips and grate cheese. Set aside.
    • Mix mayo cilantro sauce ingredients. Set aside.
    • Mix chicken with spices and seasoning.
    • Spread chicken mix on each tortilla like pizza sauce.
    • Top with crushed chips and cheese, press down.
    • Fry chicken-side down until golden (2-3 minutes), then flip and toast the other side (quick on this side).
    • Top cooked tacos with slaw, sauce, and hot sauce. Serve hot!

    Watch The Video

    Recipe Tips

    • Make ahead: Mix the chicken and crush your chips earlier in the day. Keep in the fridge until ready to assemble.
    • Swap-ins: Ground turkey works well too. No tortilla chips? Use seasoned panko.
    • Fiber boost: Add black beans to the chicken mix or tuck them into the tacos after cooking.
    • Cooking options: Use two pans to speed things up or broil them chicken-side-up in the oven.
    • Storage: Best fresh, but leftovers can be stored in the fridge for 1–2 days. Reheat in a pan or oven for crispiness.

    Serving Suggestions

    These tacos shine on their own, but you can round things out with guacamole, extra slaw, or a side of black beans (check out these taco side dishes). If you’re making it a taco night, pair with a cucumber-lime agua fresca or a fizzy lime soda.

    💬 If you’ve tried these smashed chicken tacos or any other recipe on the blog then don’t forget to rate the recipe and let me know how you got on in the comments below, I love hearing from you! You can also FOLLOW ME on Instagram, Facebook, Pinterest, YouTube, and or sign up to my Newsletter to see more of my delicious food.

    Want to Save This Recipe?

    Enter your email & I’ll send it to your inbox. Plus, get great new recipes from me every week!

    By submitting this form, you consent to receive emails from Cooked & Loved

    Crispy smashed chicken tacos with a cheesy corn chip crust and zesty slaw— your new go-to for high-protein, high-flavor Taco Tuesday wins. Find step-by-step photos and more recipe tips above.

    • Crush corn chips in a ziplock bag using a rolling pin or can. Grate cheese. Set aside.

    • Mix mayo, yogurt, coriander, and salt in a bowl. Set aside.

    • In a bowl, mix chicken, garlic powder, cumin, smoked paprika, salt and pepper.

    • Lay tortillas flat and spread chicken mixture over each, like sauce on pizza.

    • Sprinkle with crushed chips and cheese, press down gently.

    • Heat a non-stick pan over medium-high. Spray with oil. Place tortilla chicken-side down, press with spatula, and cook 2–3 minutes until crispy and golden. Spray and flip, cooking another 30 sec to 1 minute.

    • To serve, top tacos with cabbage, lettuce, sauce and hot sauce. Eat while hot and crispy.

    • Can I make these ahead? You can prep the chicken and toppings ahead, but cook fresh for best texture. Keep in the fridge until ready to assemble.
    • How do I get more fiber in these? Use high-fiber tortillas, double the cabbage, or add ¼ cup black beans per serve. Add beans to chicken mix or tuck them into the tacos after cooking.
    • Can I bake these? Yes! Broil chicken-side-up on a tray until the top is crispy and golden, about 5–7 minutes.
    • Macros for the tortillas I used: 86 cal | Protein: 2.3g | Fat: 2.4g | Carbs: 13.5g | Fiber: <1g – I will maybe delete this later
    • Swap-ins: Ground turkey works well too. No tortilla chips? Use seasoned panko.
    • Cooking options: Use two pans to speed things up or broil them chicken-side-up in the oven.
    • Storage: Best fresh, but leftovers can be stored in the fridge for 1–2 days. Reheat in a pan or oven for crispiness.

    Serving: 2tacos | Calories: 580kcal | Carbohydrates: 56g | Protein: 34g | Fat: 26g | Saturated Fat: 7g | Polyunsaturated Fat: 7g | Monounsaturated Fat: 8g | Trans Fat: 0.1g | Cholesterol: 95mg | Sodium: 1706mg | Potassium: 754mg | Fiber: 7g | Sugar: 6g | Vitamin A: 853IU | Vitamin C: 18mg | Calcium: 298mg | Iron: 4mg
    Keywords: crispy tacos, Healthy Tacos, Smashed Chicken Tacos, taco tuesday

    More Tex-Mex Recipe Ideas


    Source link

  • Easy Roasted Cauliflower Soup Recipe

    Easy Roasted Cauliflower Soup Recipe

    This roasted cauliflower soup recipe is close to my heart. It’s rich and creamy, super easy to make, and tastes amazing!

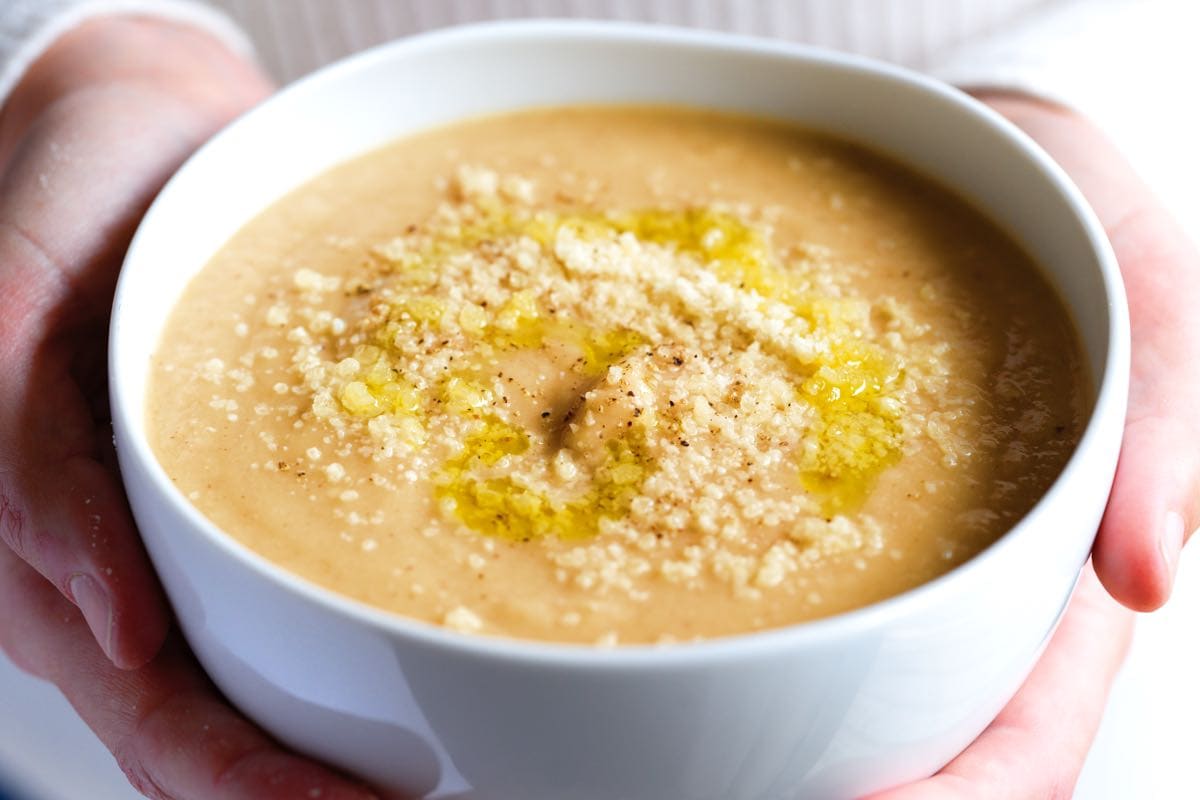
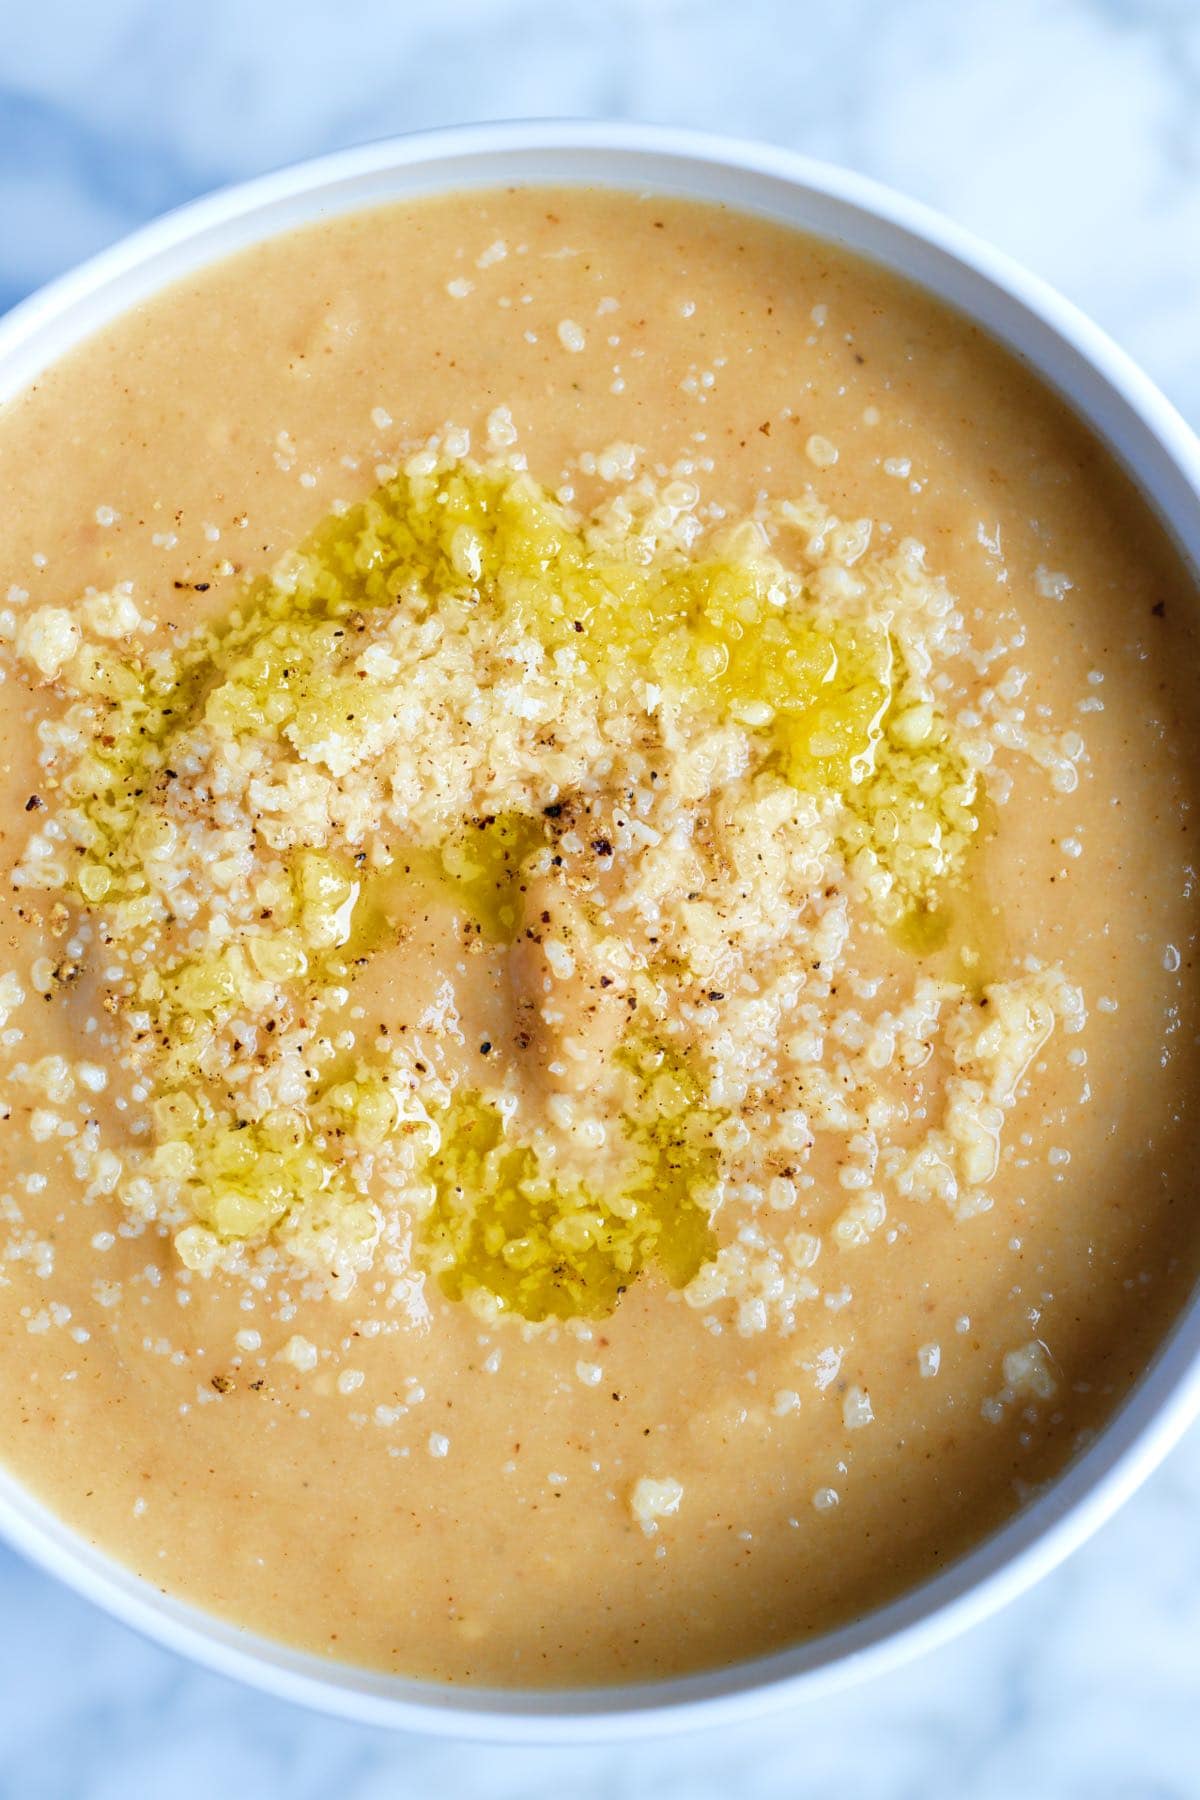
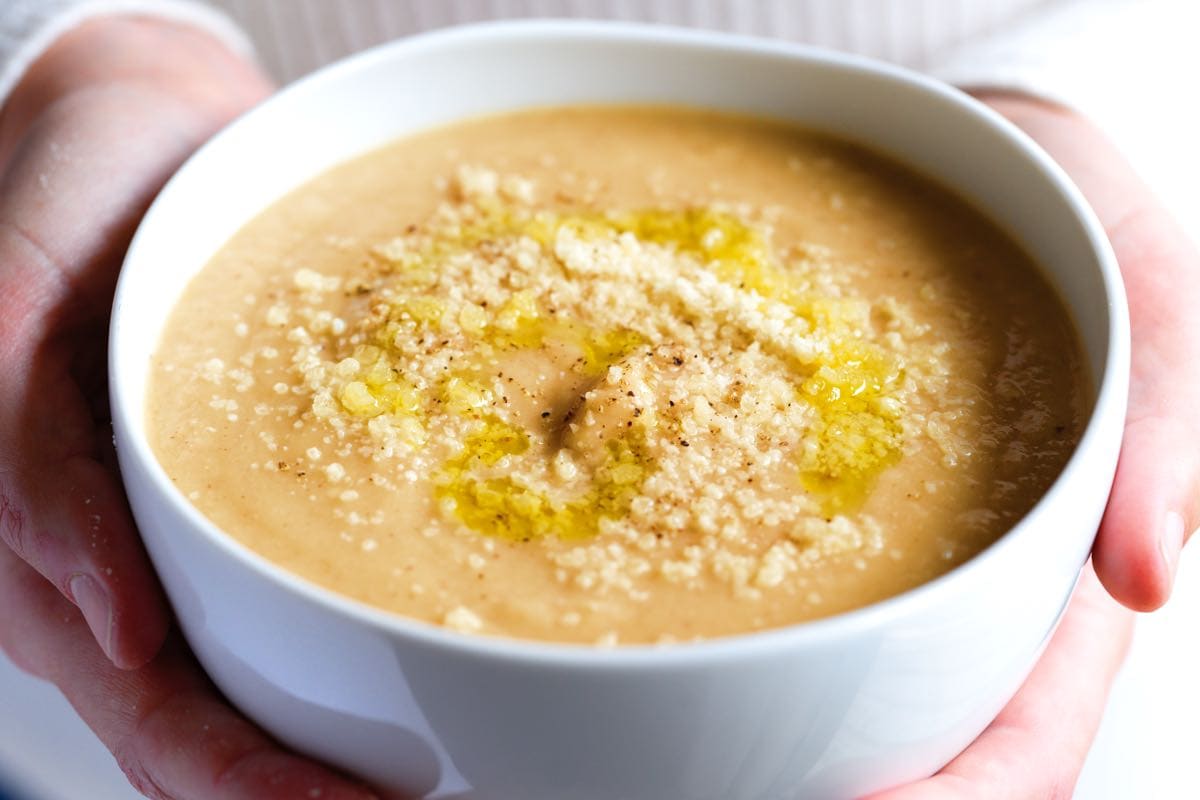
    Roasted Cauliflower Soup with parmesan on top

    For this easy cauliflower soup, we roast a whole head of cauliflower until golden brown and blend with onion, parmesan cheese, and broth until silky smooth.

    We have so many cauliflower recipes on Inspired Taste, and honestly, I love them all, but this soup is the one I go to when I need a little comfort. A big bowl of this soup makes the day melt away.

    Key Ingredients

    • Cauliflower: I use one large head of cauliflower for this soup, which means you’ll get 4 generous servings.
    • Garlic and Thyme: Since I roast the cauliflower for this soup, I take the opportunity to toss a few garlic cloves and fresh thyme onto the baking sheet. They add so much flavor!
    • Onion and Celery: Once the cauliflower has finished roasting in the oven, we cook onion and celery with a pinch of red pepper flakes and salt, adding more nutritious vegetables to the soup and flavor.
    • Broth: I love using a light broth so that the cauliflower shines. I especially love this easy chicken broth and this delicious veggie broth.
    • Butter: I don’t add cream to this cauliflower soup, but I do add butter. Use a good-quality European-style butter or your favorite plant-based butter.
    • Lemon Juice: A squeeze of fresh lemon juice brings this soup together. We highly recommend it.
    • Cheese: I love adding parmesan cheese, but you can substitute it for another kind of cheese or leave it out altogether.

    Find the full recipe with measurements below.

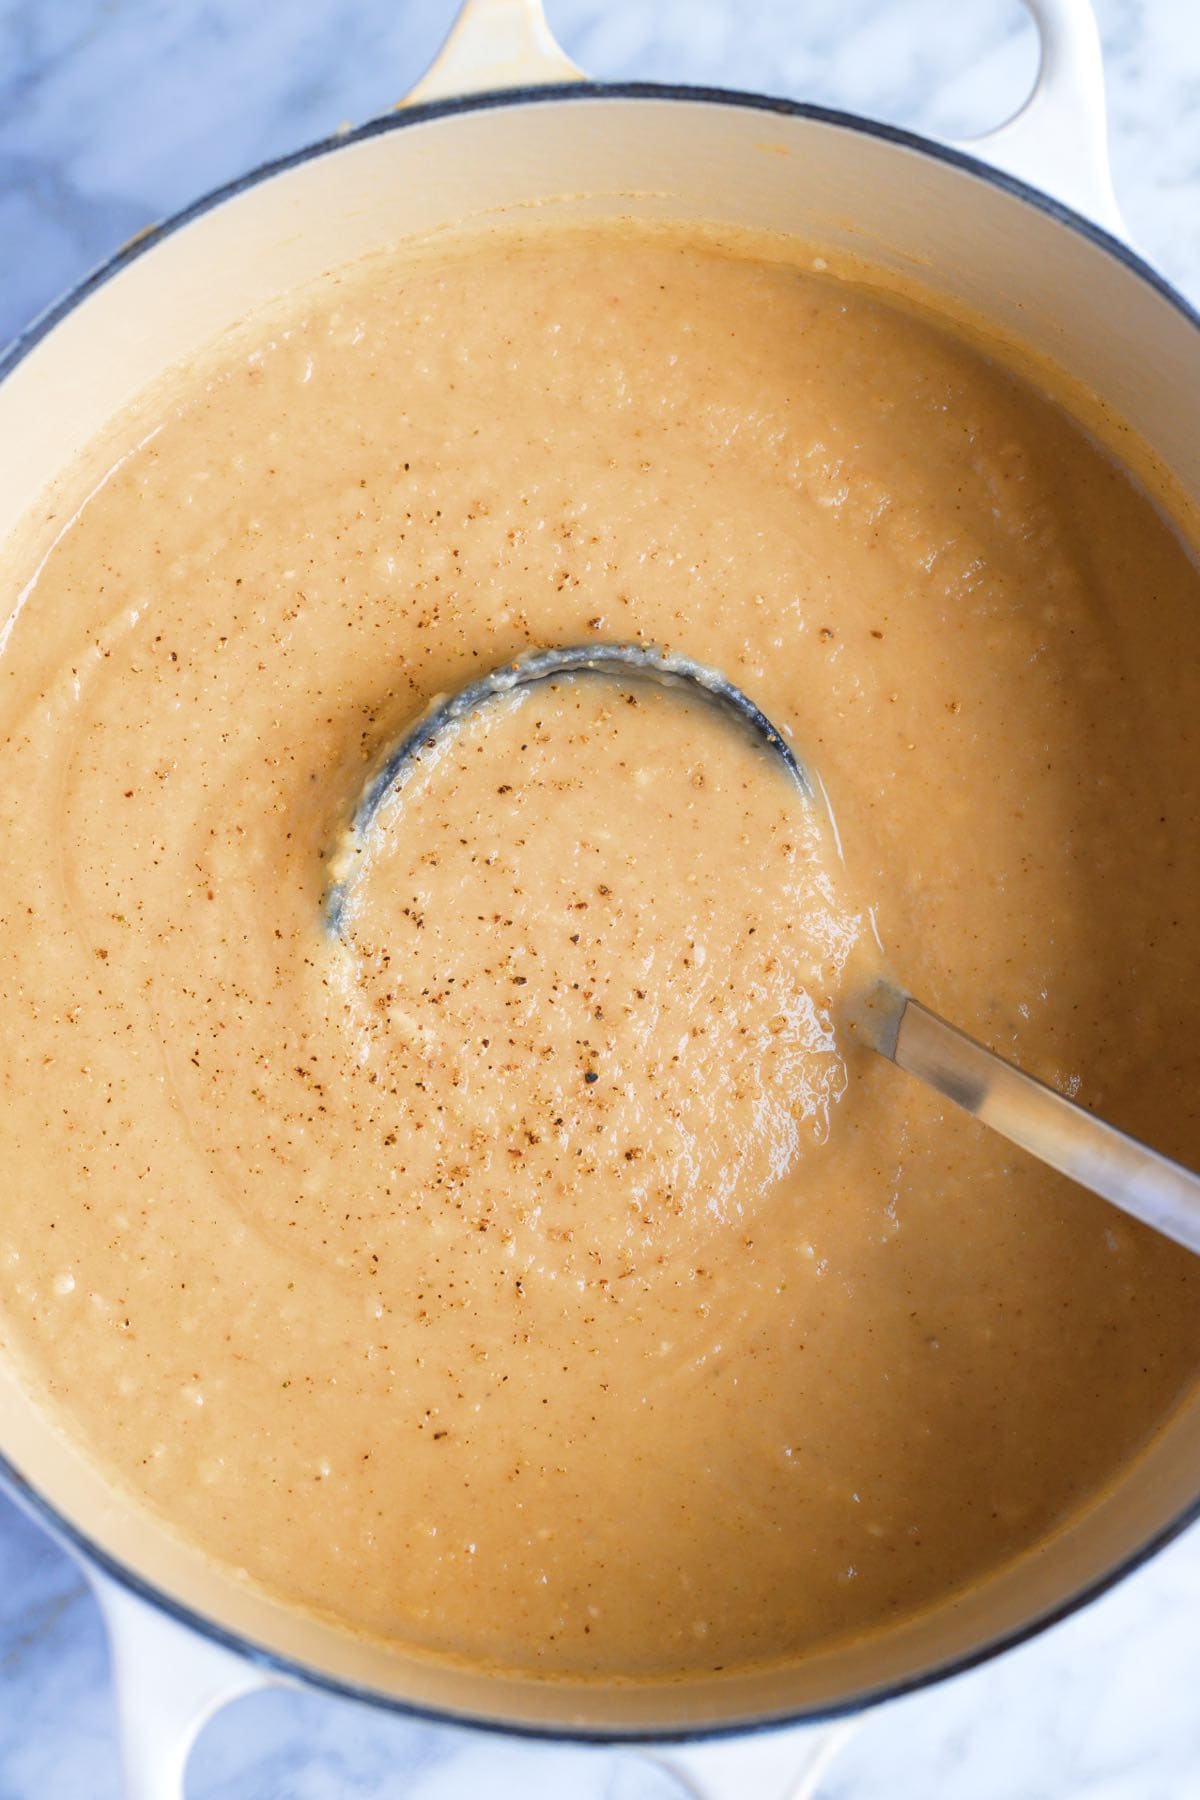
    A Pot of Creamy Cauliflower Soup

    How to Make the Best Roasted Cauliflower Soup

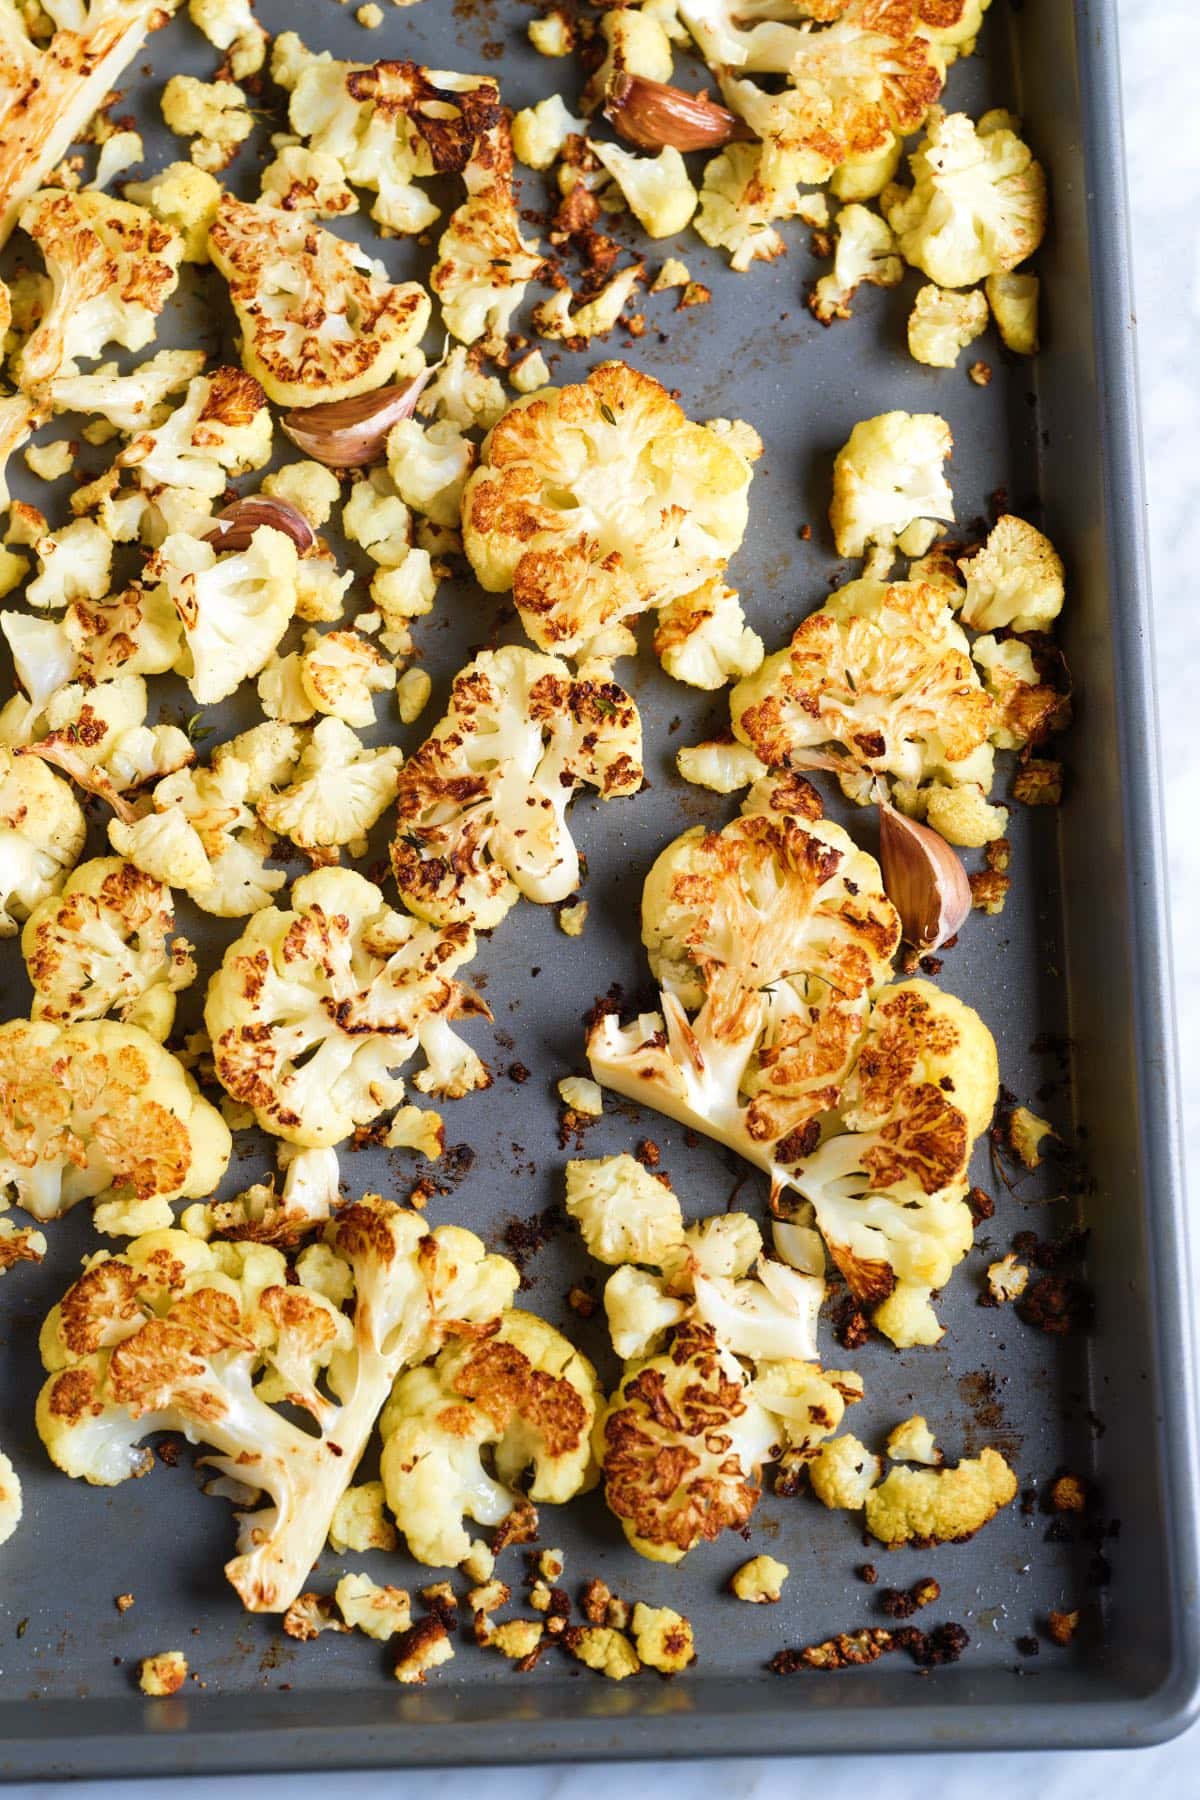
    Tip 1: Roast garlic and cauliflower. This cauliflower soup starts with roasting a whole head of cauliflower. I don’t pay too much attention to how well I chop the cauliflower. Slicing it into cauliflower steaks or slabs is the quickest way. Then we toss them with olive oil, salt, thyme, and whole garlic cloves (you can leave the peel on for now). As the garlic roasts in the oven, it softens and becomes sweet (like in our whole roasted garlic recipe)

    The cauliflower and garlic roast in a hot oven for 20 to 25 minutes, so it’s pretty quick. When it is nearly finished roasting, you can prepare the remaining ingredients.

    Roasted Cauliflower Ready for Cauliflower Soup

    Tip 2: Build flavors. Just as the cauliflower and garlic is finishing in the oven, in a soup pot, cook roughly chopped onion and celery in butter (or olive oil) until soft. The roasted garlic will have softened a lot, so you can easily squeeze the soft garlic cloves to the pot. Then, pour in broth and add the roasted cauliflower. I have two favorite homemade broths for this: veggie broth or chicken broth.

    Tip 3: Blend until creamy. Let the soup simmer for 10 minutes, then blend it into a smooth, decadent soup. I love adding some fresh lemon juice and parmesan cheese, but you can adjust the seasoning with fresh herbs, another kind of cheese, or leave it plain. You can see from the photos that the cauliflower soup is super creamy without having to add any cream!

    More Vegetable Soup Recipes

    More Cauliflower Recipes

    Roasted Cauliflower Soup

    Easy Roasted Cauliflower Soup

    • PREP
    • COOK
    • TOTAL

    For this easy cauliflower soup recipe, we roast a whole head of cauliflower until golden brown and then blend it with onion, parmesan cheese, and broth until silky smooth. This healthy soup is creamy, decadent, and delicious! For more crunch, try serving this soup topped with our homemade garlic croutons.

    4 Servings (makes 6 to 7 cups)

    Watch Us Make the Recipe

    You Will Need

    1 large head cauliflower, about 2 pounds

    4 tablespoons olive oil

    1 teaspoon fresh thyme leaves or 1/4 teaspoon dried thyme

    4 garlic cloves, left unpeeled

    1/2 large onion, chopped, about 1 ¼ cups

    1 celery stalk, chopped, about 1/2 cup

    Pinch crushed red pepper flakes, optional for heat

    4 cups (946ml) vegetable broth or chicken broth

    2 tablespoons butter

    1 tablespoon fresh lemon juice, or more if needed

    1/4 cup grated parmesan cheese, plus more for serving, optional (1/2 ounce)

    Directions

      1Preheat the oven to 425°F (220°C) and prepare a baking sheet. We roast the cauliflower directly on the baking sheet, but for easy cleanup, line it with parchment paper or a silicone baking mat.

      2Remove the larger leaves from the cauliflower and leave the core intact. (You can save the leaves to blend into the soup later.)

      3Slice the cauliflower in half and cut it into 3/4-inch thick slices.
      Drizzle two tablespoons of olive oil onto the baking sheet, then arrange the cauliflower on top of the oil.

      4Add the unpeeled garlic cloves (they will roast in their peels) and the thyme, then drizzle over two more tablespoons of olive oil. Move the cauliflower slices around so they each have a chance to touch some oil.

      5Roast for 20 minutes or until the bottom of each slice looks well browned. Flip each piece, and then roast for 5 minutes more.

      6Melt two tablespoons of butter in a deep soup pot over medium heat. Then, stir in the onions, celery, pinch of red pepper flakes, and 1/4 teaspoon salt. Cook until softened, about 5 minutes.

      7When they are cool enough to handle, squeeze the garlic from inside each clove and place it in the soup pot. Discard the garlic peel.

      8Transfer the roasted cauliflower to the pot and pour in the broth. If you saved any cauliflower leaves from earlier, add them to the pot. Bring to a simmer and cook for 10 minutes.

      9Turn off the heat, and add the cheese and two tablespoons of lemon juice.

      10Blend the soup until smooth. An immersion blender is the easiest, or you can use a blender. If you use a regular blender, it is best to blend in batches and fill the blender less than you usually would since the soup is so hot. We like to remove the lid’s center insert and cover it with a kitchen towel while blending. This helps to release some of the steam and prevents the blender lid from popping off (which can be a big, hot mess).

      11Taste the soup and add more lemon juice, salt, and pepper until the flavor pops (it should make you smile). Serve with more cheese, a few grinds of black pepper, and a drizzle of olive oil on top.

    Adam and Joanne’s Tips

    • Storing: This cauliflower soup lasts in your refrigerator for up to 5 days. It can also be frozen for up to one month, probably longer.
    • Soup is too thick: Add 1/4 cup to 1 cup of water. Add enough water to achieve your preferred thickness. The water will not water down the flavor of your soup, but if you are concerned or have more on hand, you can use stock or broth.
    • Vegetarian adaptations: Use vegetable broth, a vegetarian-friendly cheese or leave it out altogether.
    • Vegan adaptations: Use vegan broth, vegan butter and vegan cheese or a couple tablespoons of nutritional yeast instead (my preference).
    • The nutrition facts provided below are estimates.

    Nutrition Per Serving
    Serving Size
    1/4 of the recipe (1 of 4 servings)
    /
    Calories
    288
    /
    Total Fat
    23.2g
    /
    Saturated Fat
    7.5g
    /
    Cholesterol
    23.4mg
    /
    Sodium
    686.7mg
    /
    Carbohydrate
    18.1g
    /
    Dietary Fiber
    5.2g
    /
    Total Sugars
    7.5g
    /
    Protein
    6.8g


    AUTHOR:

    Joanne Gallagher

    Adam and Joanne of Inspired Taste

    We are Adam and Joanne Gallagher, the creators of Inspired Taste. Established in 2009, Inspired Taste grew from a childhood dream into one of the internet’s most trusted recipe sites with hundreds of reliable recipes, step-by-step videos, and expert tips.More About Us

    Source link

  • Sheet Pan Chicken Pitas with Tzatziki Recipe

    Sheet Pan Chicken Pitas with Tzatziki Recipe

    Part bowl, part salad, part sandwich folded up into any kind of bread you like, and I’m here for it in every form.

    Favorite thing I’ve been eating lately: these sheet pan chicken pitas.

    Er, can we call them pitas? They are part bowl, part salad, part sandwich folded up into any kind of bread you like including but not limited to pitas, and I’m here for it in every form.

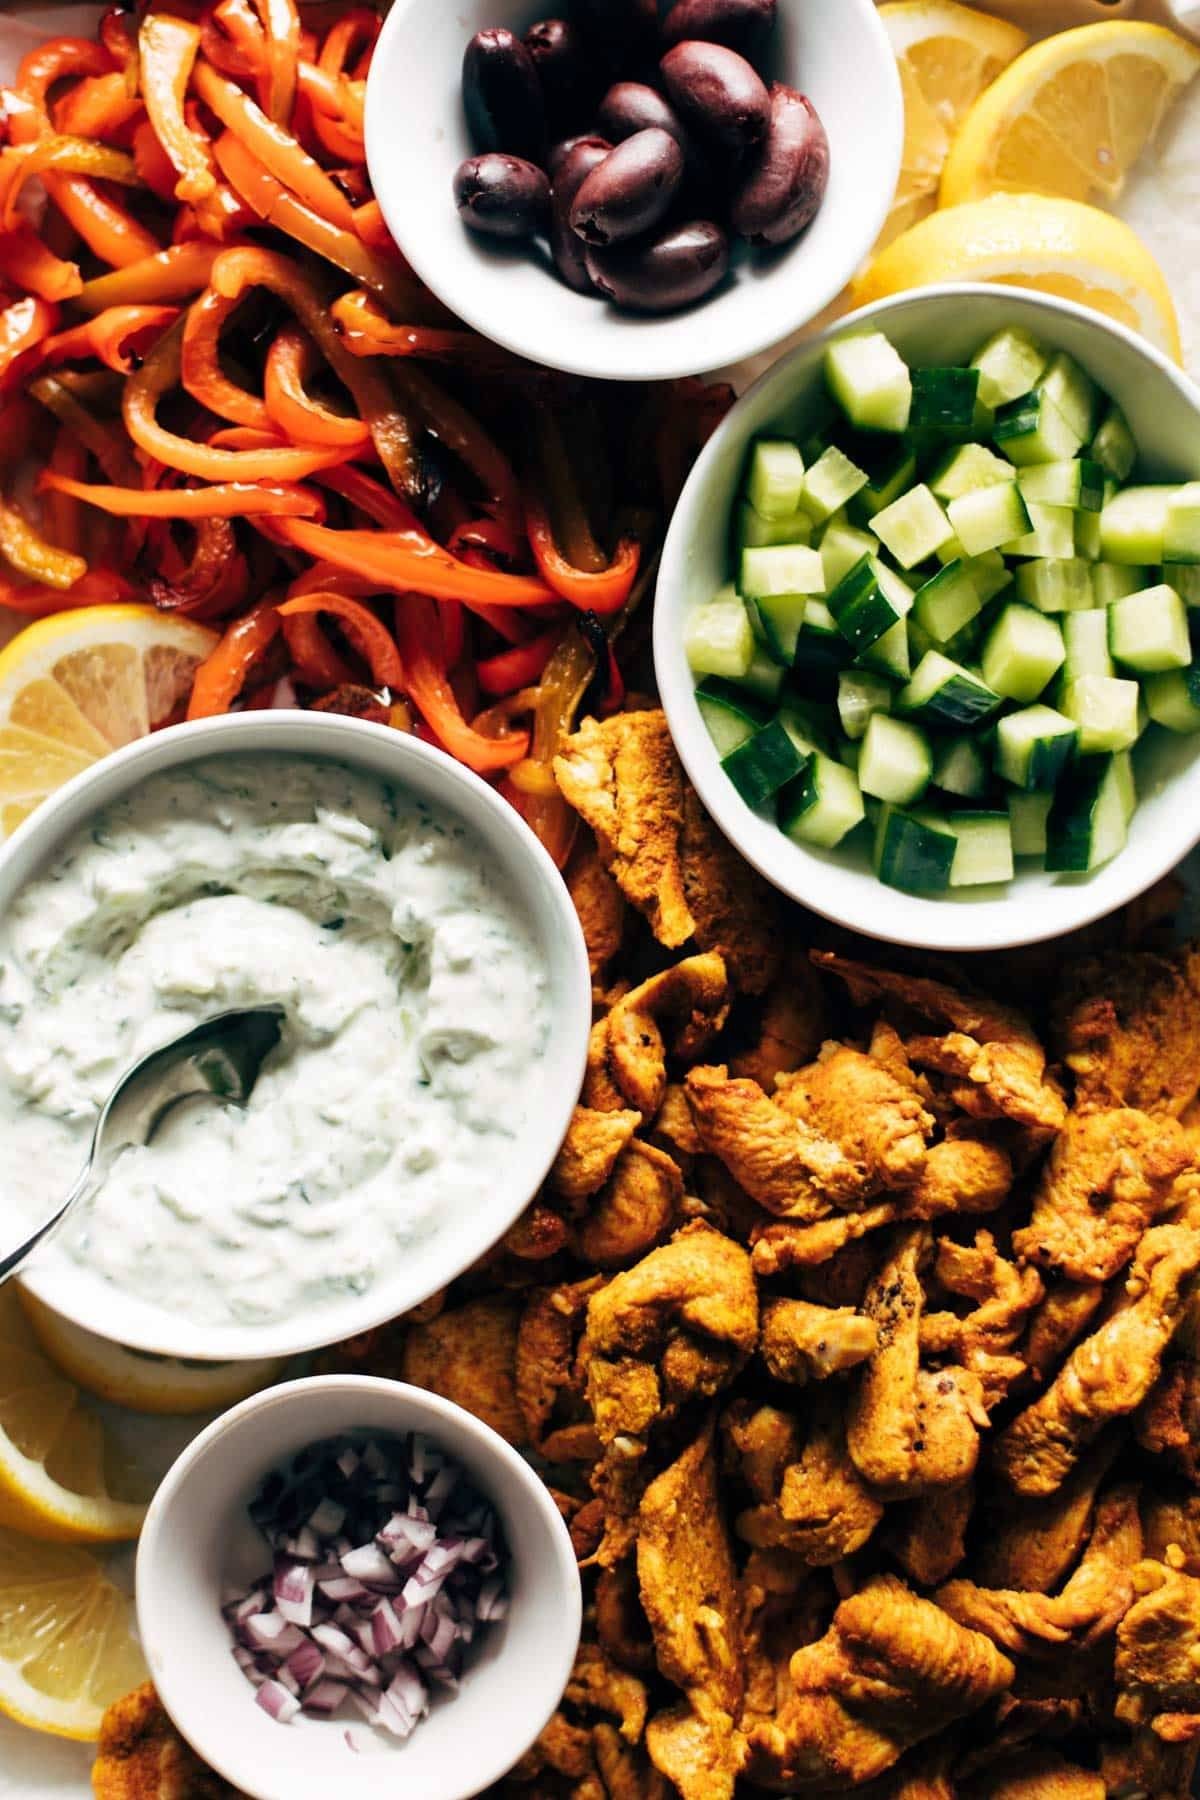
    Here’s our lineup:

    • marinated, spiced, flash-roasted chicken
    • roasted bell peppers
    • diced fresh cucumber
    • kalamata olives
    • feta cheese
    • olive oil, salt, pepper, lemon juice
    • tzatziki (that yogurt dill sauce that crowns the plate)

    Pile that on a plate and grab a fork – or grab a piece of warm, soft naan, or pita, or socca (YUM), and get to work. You’ve got the crunchy, and the cool-creamy, and the puckery-briney all happening in one big joyful bite.

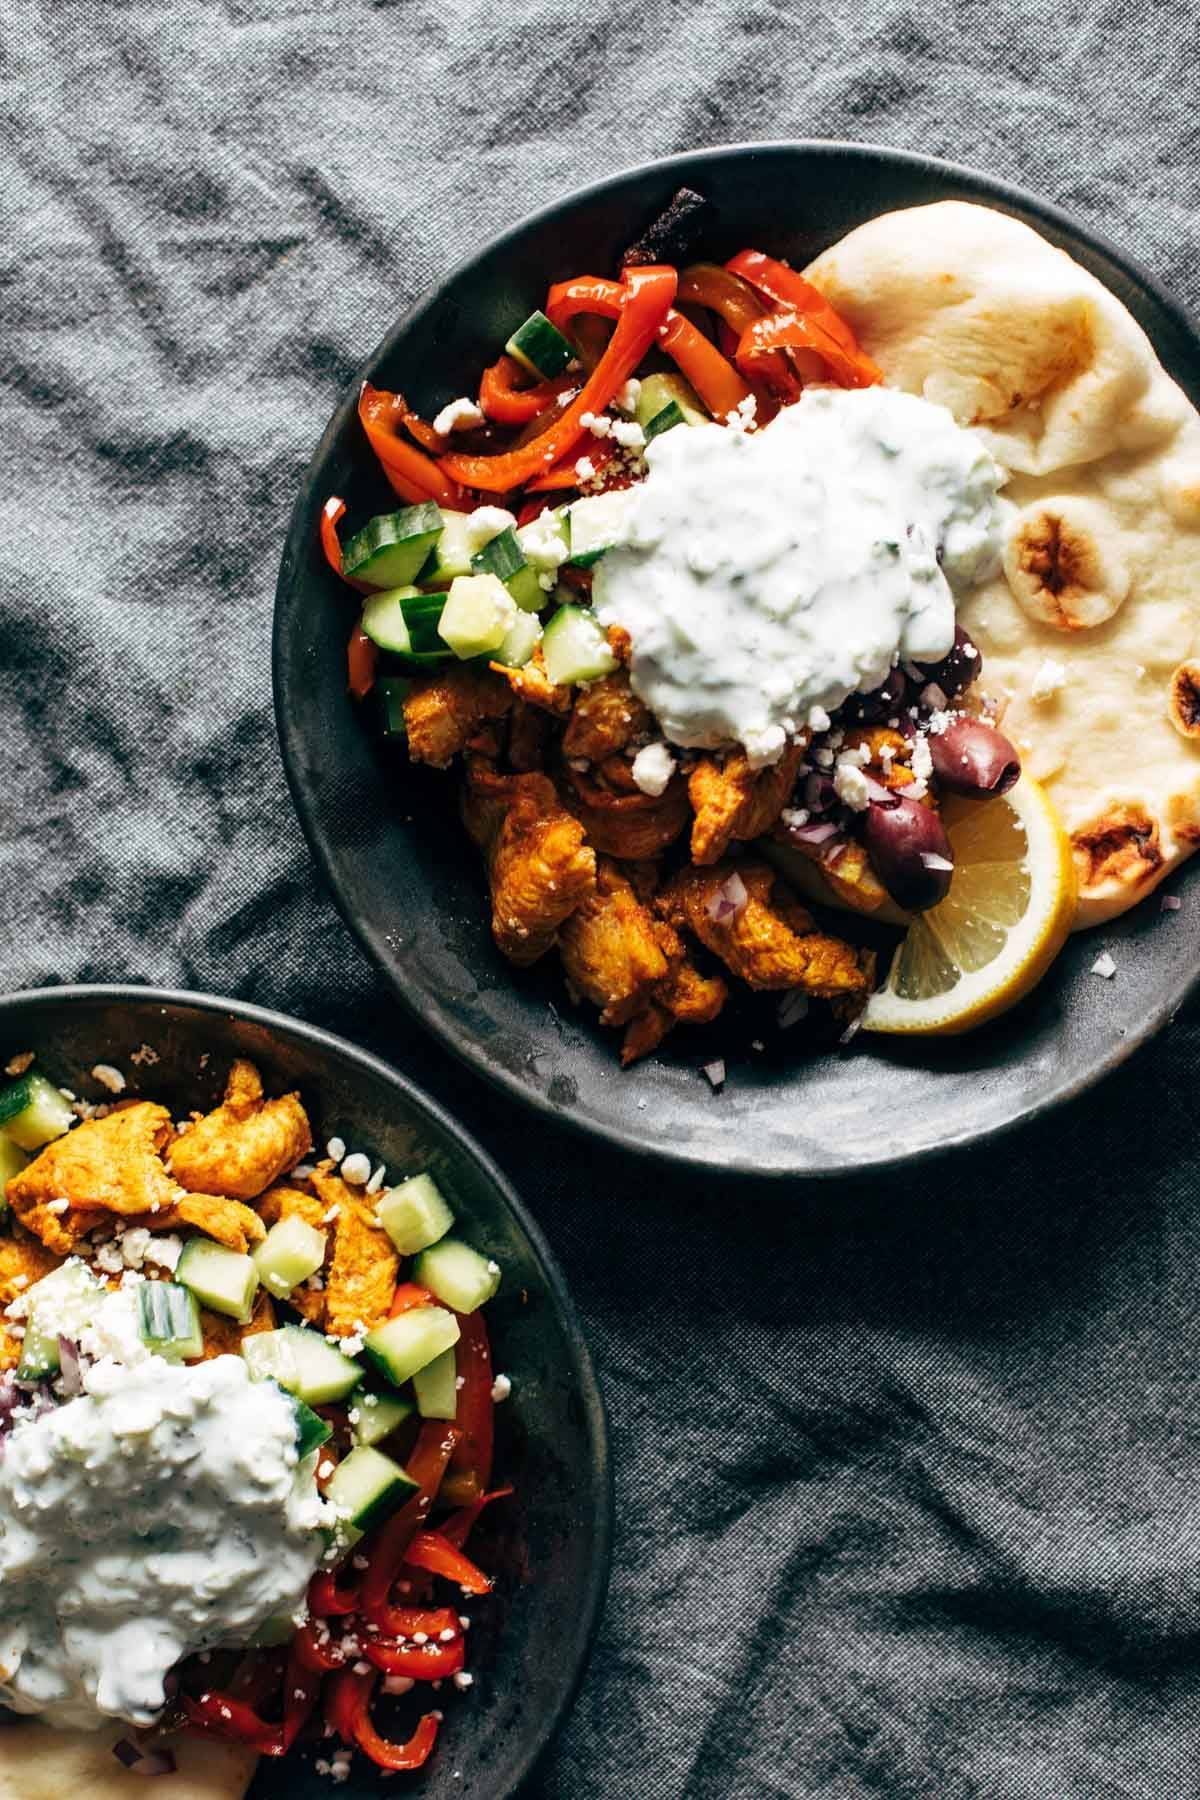
    A plate of chicken, red bell peppers, cucumber, and tzatziki sauce with a lemon wedge.
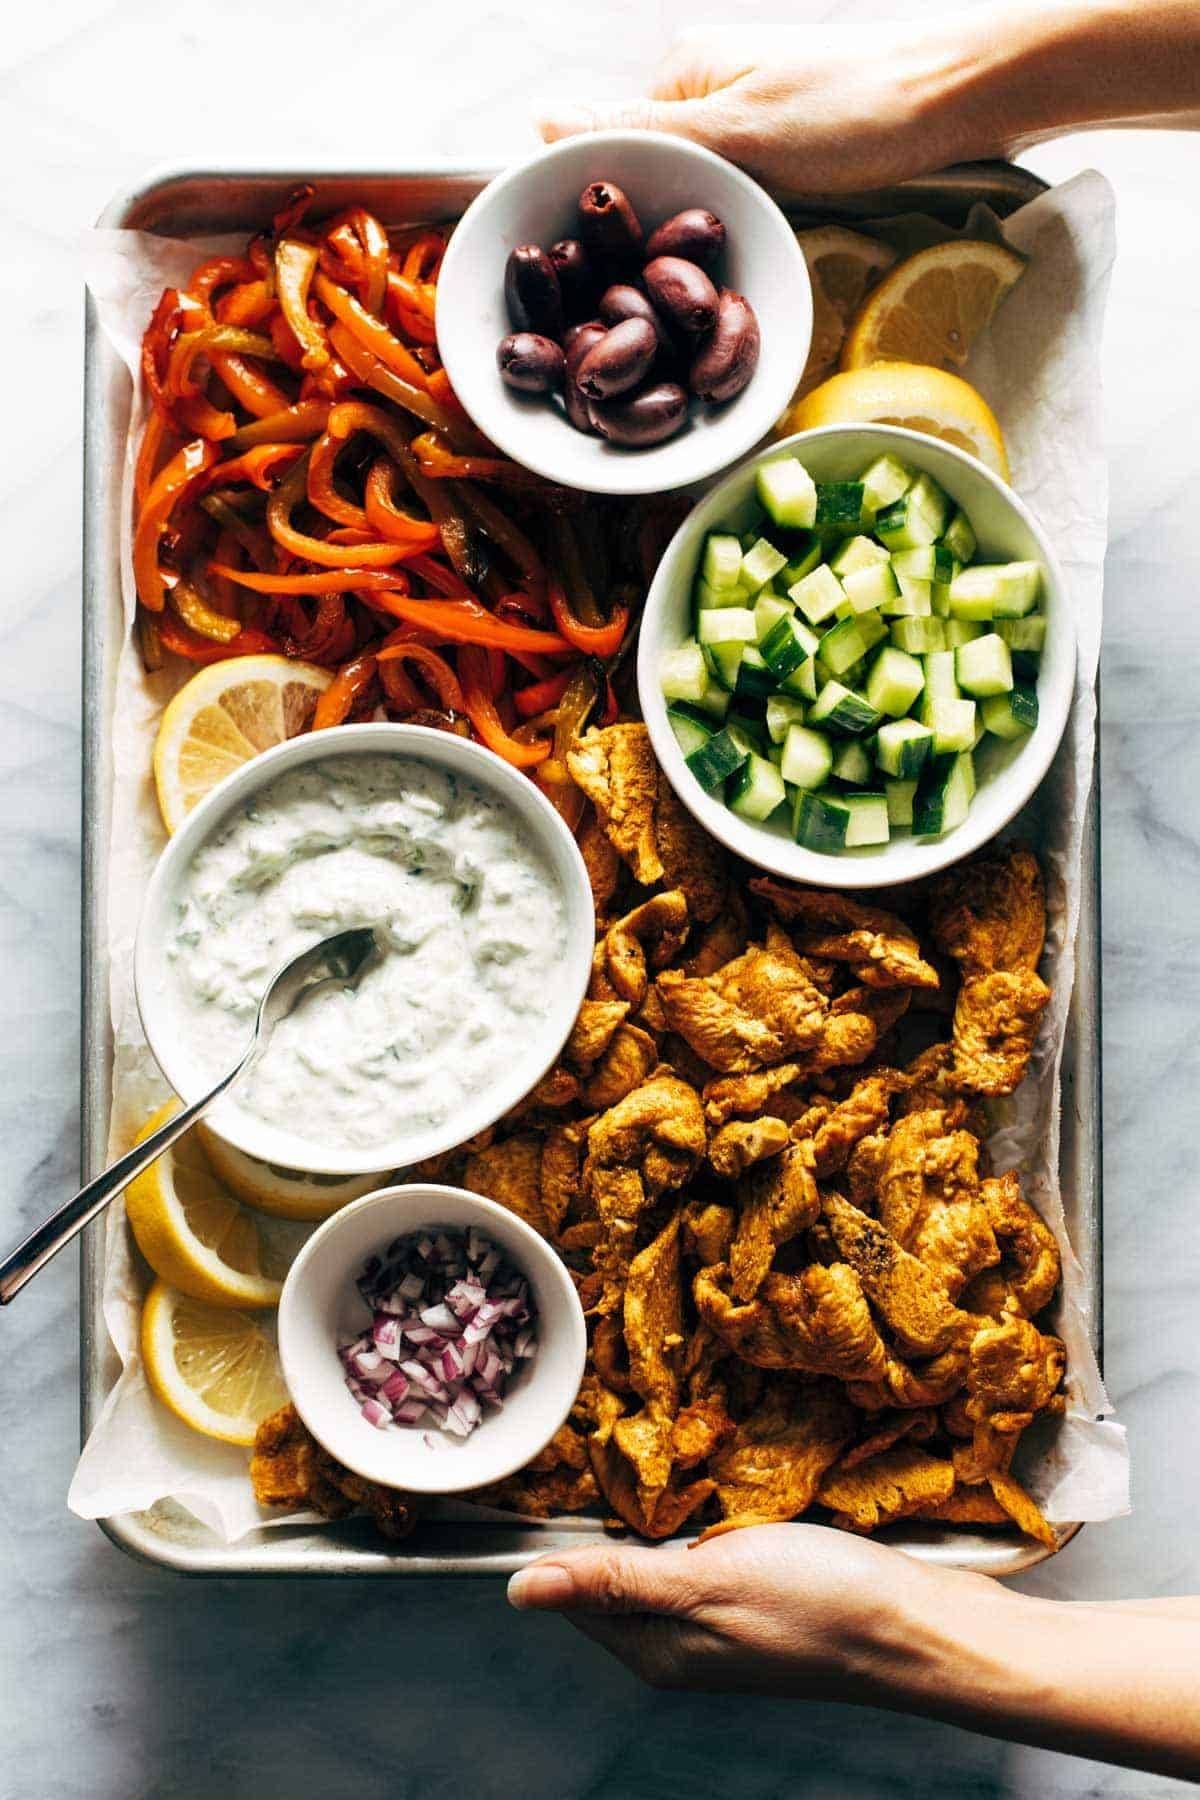
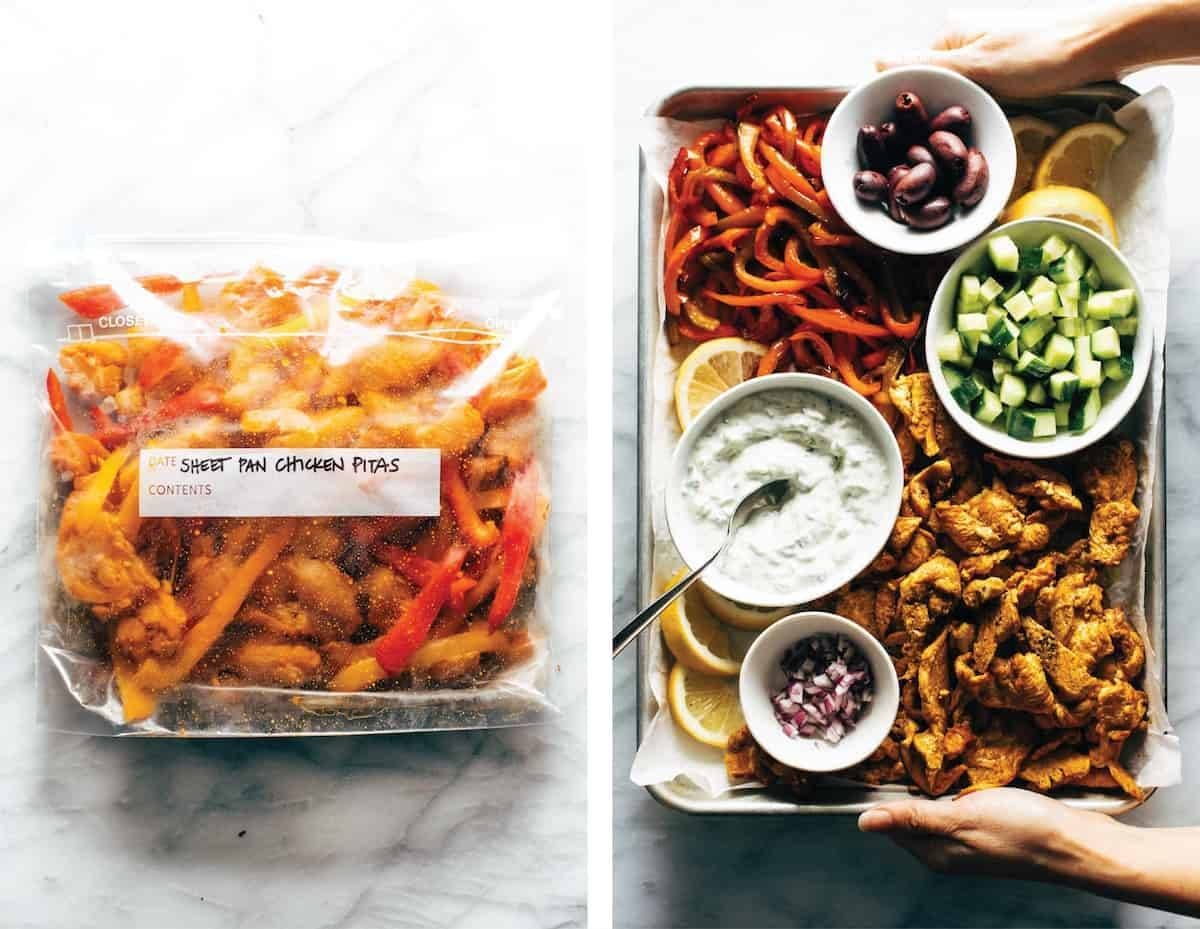
    Sheet pan chicken pitas served on a sheet pan.

    How To Serve Sheet Pan Chicken Pitas

    Here’s how I like to serve this: family style!

    Everything goes on a roasting pan, and you effortlessly carry your gourmet-looking roasting pan to the table, and you let your people feast.

    Sheet pan chicken pitas served on a sheet pan.

    It’s comforting and filling. But it’s also happy and crunchy and fresh, which is exactly what we need right now in the deep winter. Happy, fresh, filling, annnd go.

    Sheet pan chicken pitas in bowls.

    Check Out Our Video For How To Make Sheet Pan Chicken Pitas:


    Frequently Asked Questions For These Chicken Pitas

    How long will the tzatziki keep?

    The tzatziki will be best for about 3-4 days.

    Could you marinate the chicken for longer? Overnight?

    You can marinate the chicken for up to 24 hours in the fridge!

    How can I make this dairy-free?

    Omit the feta and use dairy-free Greek-style yogurt in the tzatziki (Kite Hill is a brand that makes this!).


    Print

    clock clock iconcutlery cutlery iconflag flag iconfolder folder iconinstagram instagram iconpinterest pinterest iconfacebook facebook iconprint print iconsquares squares iconheart heart iconheart solid heart solid icon

    Description

    Sheet Pan Chicken Pitas that are salty-briney-crunchy in all the right ways! Marinated chicken, roasted peppers, fresh cucumber, kalamata olives, feta cheese, and an easy homemade tzatziki.


    Chicken:

    Peppers:

    Tzatziki:

    Other:


    Notes

    Store bought tzatziki also works great in this recipe to save you a few steps!

    • Prep Time: 30 minutes
    • Cook Time: 15 minutes
    • Category: Dinner
    • Method: Bake
    • Cuisine: Mediterranean

    Keywords: sheet pan dinner, greek chicken, mediterranean chicken, chicken pitas, sheet pan chicken

    Three More Easy Sheet Pan Dinners

    Make It A Freezer Meal!

    Sheet pan chicken pitas in a freezer bag, and after cooking.

    Freeze Together:

    • 1 lb. boneless skinless chicken breasts, cut into very thin strips
    • 2–3 bell peppers, sliced
    • 3 cloves garlic, grated
    • 1 tablespoon olive oil
    • 1–2 tablespoons lemon juice
    • 1 teaspoon each: cumin, smoked paprika, kosher salt
    • 1/2 teaspoon curry powder
    • black pepper to taste

    FREEZE: Spread into a single layer on a parchment-lined baking sheet. Freeze until solid; transfer to a bag or container to store in the freezer. 

    To Cook:

    BAKE: From frozen, bake at 425 degrees for 20 minutes.

    FINAL STEP: Serve with pitas, tzatziki, hummus, cucumbers, tomatoes, feta, olives, red onion… sky’s the limit!

    View more healthy freezer meals here!


    One More Thing!

    This recipe is part of our collection of easy and delicious sheet pan dinners. Check it out!

    Source link

  • Breakfast Burger Recipe

    Breakfast Burger Recipe

    Enjoy breakfast for dinner or dinner for breakfast with this over-the-top delicious Breakfast Burger recipe. Juicy beef-and-sausage patties are topped with bacon, melty cheddar, and a runny egg with creamy maple sriracha sauce on toasted brioche buns. It doesn’t get much better than this!

    Juicy burgers with brunch-y vibes.

    These breakfast burgers come fully loaded with some of the best burger fixin’s (ahem, bacon), and their flavor is downright addictive too.

    Even though its title is “breakfast burger,” this recipe is appropriate at all times of day. We had ours for “brinner” with a simple Arugula Salad. Since the breakfast burger patties are made with ground beef, they are a protein-packed meal, and the “extras” (bacon, that glorious egg) keep them indulgent enough for bonafide weekend brunch or afternoon cookout.

    • A TRUE Brunch. Brunch = breakfast + lunch, but usually it just means eating breakfast foods a little bit later in the morning. But these burgers truly combine the best of both meals into one epic bite.
    • Ultra-Juicy Patties. Beef and sausage keep the burgers tender, juicy, and flavorful.
    • Epic Toppings. To complement those juicy patties, we go all out with a creamy sriracha maple sauce, peppery arugula, melty sharp cheddar, crispy bacon, and a fried egg (I like ’em runny, but you do you).
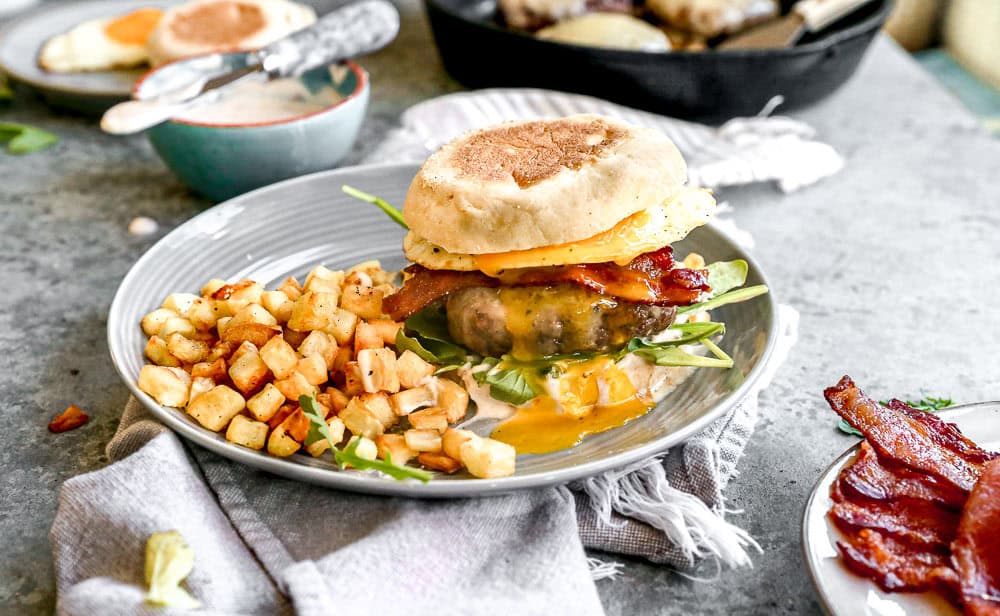
    Breakfast burger on plate topped with fried egg.

    Key Ingredients

    You’ll find the full list of ingredients in the recipe card below, but here are some notes to keep in mind.

    • Bacon. Brings the salty (and the smoky) to these beauties.
    • Ground Beef. Or ground turkey, if you prefer.
    • Breakfast Sausage. Adds flavor and richness to the patties.
    • Maple Syrup. Gives these burgers that breakfast flair with a touch or sweetness.
    • Whole Grain Mustard. Adds some zip and bite to balance out the salty bacon and sweet maple syrup.
    • White Cheddar Cheese. My motto for cheese with these breakfast burgers is the sharper the better.
    • Brioche Buns or English Muffins. Or go bunless if that’s more your style.
    • Eggs. Cook your eggs however you please.
    • Arugula. I feel like every burger needs just a little green and I love the bold, peppery freshness the arugula adds.
    • Sauce. Made with mayo or Greek yogurt, maple syrup, and sriracha for a sauce that’s creamy, sweet, and spicy all at the same time.

    How to Make a Breakfast Burger

    Cook the Bacon. Oven Baked Bacon is my favorite method.

    Make the Sauce. Set aside.

    Form the Patties (photo 1). Mix the burger patty ingredients together and shape into four patties.

    Cook the Patties (photo 2). Cook the burgers, flipping once, until cooked through either outside on your grill or inside on a grill pan over medium-high heat.

    Make Them Cheesy (photo 3). Top with cheese, let it melt, and then remove the burger from the grill.

    Fry the Eggs. Cook them to your desired level of doneness.

    Assemble (photo 4). Layer the sauce, arugula, patty, bacon, and egg on the buns or English muffins. ENJOY!

    Breakfast burger topped with fried egg on plate.

    What to Serve with Breakfast Burgers

    This breakfast burger recipe is topped with bacon, sriracha maple sauce and fried eggs for a satisfying meal you can enjoy anytime of day!

    For the Burgers:

    • 6 slices bacon
    • 1 pound lean ground beef or turkey
    • ½ pound breakfast-style sausage in bulk or casings removed
    • 1 tablespoon pure maple syrup
    • 1 tablespoon whole grain mustard
    • 2 cloves garlic minced (about 2 teaspoons)
    • 1 teaspoon kosher salt
    • ½ teaspoon ground black pepper
    • 6 ounces freshly grated white cheddar cheese
    • 6 brioche burger buns or English muffins
    • 6 large eggs
    • Fresh arugula
    • Canola oil for cooking the burgers

    For the Sauce:

    • cup mayo or plain Greek yogurt I used yogurt
    • 1 tablespoon pure maple syrup
    • 1 tablespoon Sriracha

    • Preheat your oven to 400 degrees F. Line a large, rimmed baking sheet with foil, then place an ovenproof baking rack on top. Arrange the bacon in a single layer on the baking rack, then bake until crisp, about 15 minutes depending upon the thickness of your bacon. Remove from the baking rack to a paper towel-lined plate and lightly pat dry.
    • In a small bowl, stir together the sauce ingredients: mayo, maple syrup, and sriracha. Set aside.
    • In a large bowl, lightly combine the ground beef, sausage, maple syrup, mustard, garlic, salt, and pepper just until combined. Shape into 6 patties that are about 4 1/2 in in diameter, being careful not to compact the meat.
    • Heat a large skillet over medium-high heat. Once it’s hot, add a little oil to the skillet to prevent sticking. Add the burger patties then cook on the first side for 3 minutes. Flip, and continue cooking on the second side until the meat reaches 165°F on an instant read thermometer, about 3-4 minutes more. In the last few minutes of cooking, add the cheese and allow to melt. Transfer to a plate and cover to keep warm.
    • If desired, lightly toast the buns while the burgers cook.
    • Fry the eggs over medium heat in the same skillet you used to cook the burgers, either sunny side up or over easy, cooking the yolks to your desired level of doneness (I like mine fairly runny).
    • To assemble the burgers, top the bottom of each bun with a bit of the sauce, then add the arugula, burger patties, bacon, and fried egg. Place the second half of the bun on top. Enjoy immediately.
    • TO STORE: Place patties in an airtight storage container in the refrigerator for up to 2 days.
    • TO MAKE AHEAD: Uncooked and tightly wrapped burger patties can be stored in the refrigerator for 1 day or frozen for 1 month. Let thaw overnight in the refrigerator. Allow uncooked patties to come to room temperature prior to grilling.

    Serving: 1burgerCalories: 964kcalCarbohydrates: 45gProtein: 47gFat: 66gSaturated Fat: 27gPolyunsaturated Fat: 10gMonounsaturated Fat: 16gTrans Fat: 0.4gCholesterol: 452mgSodium: 1628mgPotassium: 520mgFiber: 0.2gSugar: 4gVitamin A: 1325IUVitamin C: 2mgCalcium: 300mgIron: 4mg

    Source link

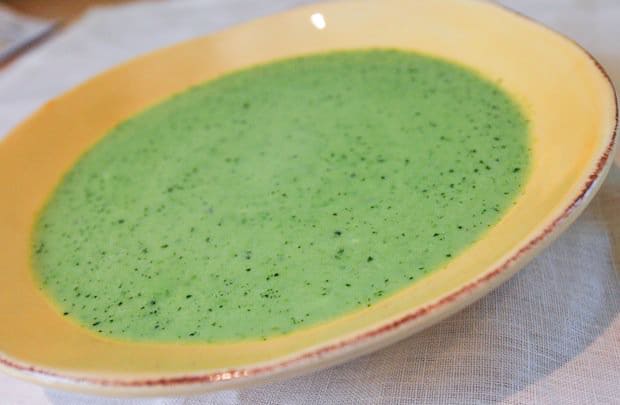
  • Creamy Pea Soup Recipe with Basil

    Creamy Pea Soup Recipe with Basil

    How to make creamy pea soup with fresh basil. Jump to the Creamy Pea Soup Recipe or read on to see our tips for making it.

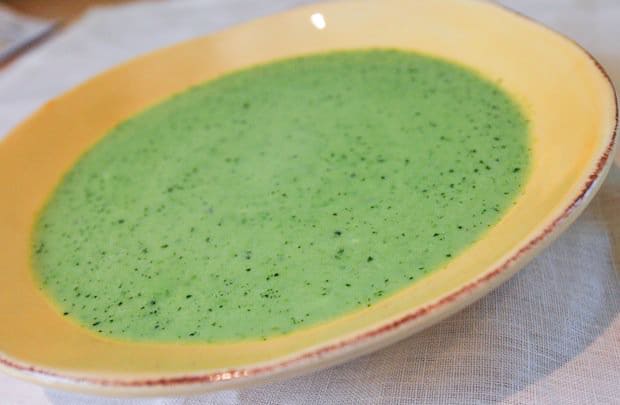
    Creamy Pea Soup Recipe with Basil

    This soup is perfect for spring and summer. We use frozen peas, but if you have access to them, fresh peas would be lovely.

    Just after blending, we stir in some cream. The soup is quite delicious without it, the cream just rounds out the flavors and makes it luxurious and creamy.

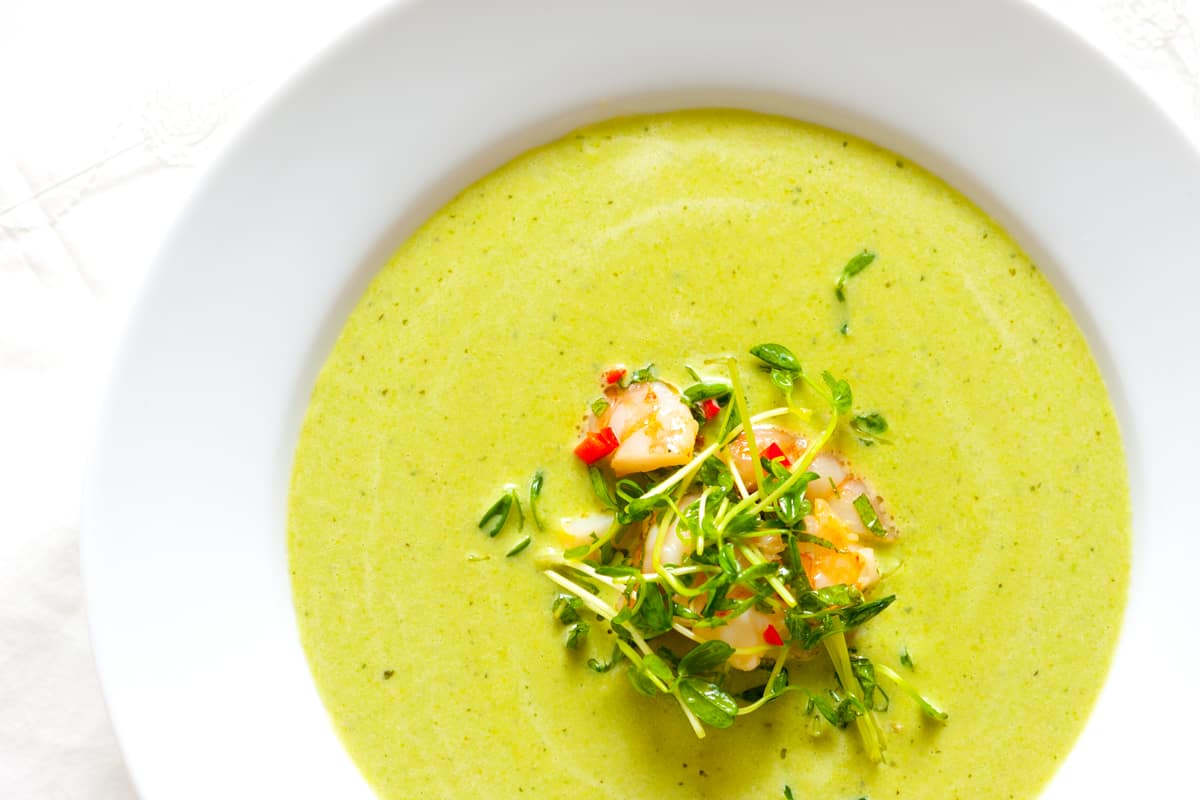
    Chilled Pea Soup Recipe with ShrimpYOU MAY ALSO LIKE: If you love chilled soups, try this soup with peas, creme fraiche and shrimp. Jump to the Chilled Pea Soup Recipe with Shrimp.
    Recipe updated, originally posted August 2009. Since posting this in 2009, we have tweaked the recipe to be more clear. – Adam and Joanne

    Creamy Pea Soup Recipe with Basil

    • PREP
    • COOK
    • TOTAL

    This simple pea soup is adapted from Giada De Laurentiis. We call for frozen peas, but if you are lucky enough to have fresh peas, use them. This is especially good when topped with a few crumbled of feta cheese or fresh goat cheese.

    Makes approximately 4 servings

    You Will Need

    2 tablespoons olive oil

    1 medium onion, chopped

    2 garlic cloves, minced

    1 teaspoon sea salt

    1/2 teaspoon fresh ground black pepper

    4 cups frozen peas (from two 10-ounce packages)

    3 cups chicken stock, see our homemade chicken stock recipe

    3/4 cup chopped fresh basil leaves

    1/2 cup cream

    Crumbled feta cheese or fresh goat cheese, for serving

    Directions

      1Heat the olive oil in a large soup pot or Dutch oven over medium heat. Add the onions and cook until softened, about 8 minutes. Stir in the garlic, salt and pepper then cook for 1 minute.

      2Add the peas and chicken stock then bring to a boil. Reduce the heat to medium-low and cook at a low simmer, uncovered, for about 5 minutes.

      3Remove the pot from the heat, add the basil and use an immersion blender to blend until smooth (or use regular blender). Stir in the cream, taste the soup and adjust with more salt and/or pepper. Divide between bowls and top with a little ricotta cheese or goat cheese crumbles.

    Adam and Joanne’s Tips

    If you make this recipe, snap a photo and hashtag it #inspiredtaste — We love to see your creations on Instagram and Facebook! Find us: @inspiredtaste


    AUTHOR:

    Joanne Gallagher

    Previous Post: Baked Ziti with Shrimp and Spinach
    Next Post: Rosemary Baked Chicken Drumsticks Recipe


    Source link

  • Instant Pot Lobster Tails that are Tender and Easy

    Instant Pot Lobster Tails that are Tender and Easy

    This website may contain affiliate links and advertising so that we can provide recipes to you. Read my disclosure policy.

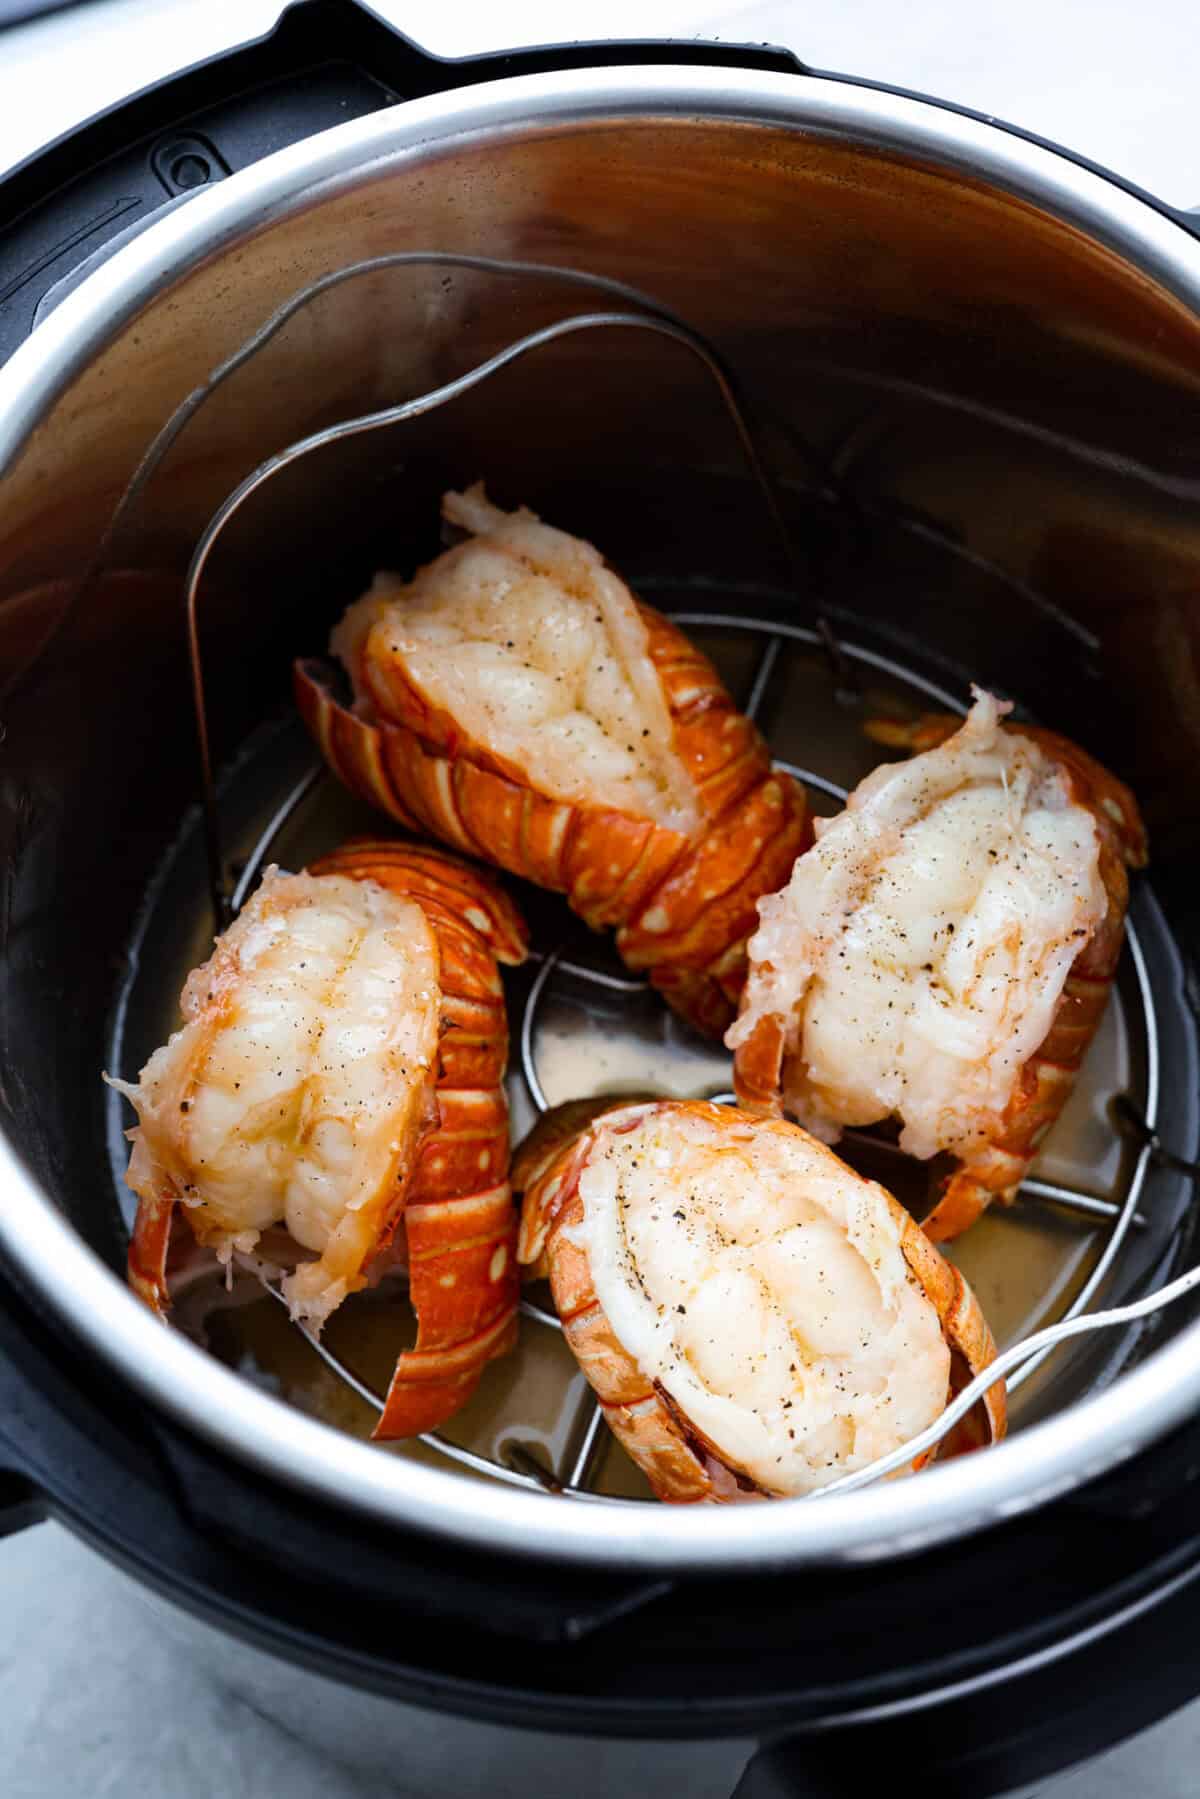
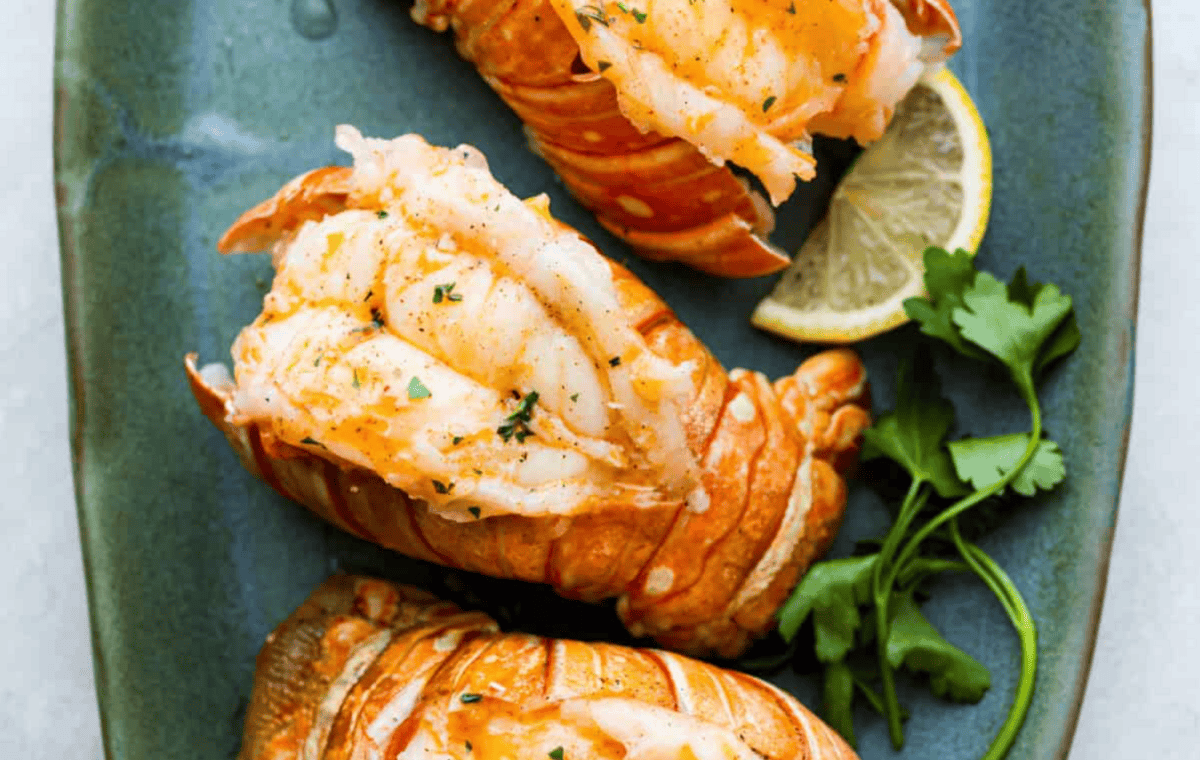
    Instant pot lobster is the easiest way to bring a little luxury to your dinner table, no boiling pots or fancy techniques needed! In just minutes, the lobster cooks up tender, juicy, and perfectly steamed, ready to soak up a rich garlic herb butter.

    Overhead shot of instant pot lobster tails inside the instant pot.

    Why This Recipe Is a Total Catch

    • Effortless Elegance: You get restaurant-style lobster with almost zero work! The Instant Pot handles the steaming, so you can just relax!
    • Flavor Boosted Butter: The warm garlic-herb butter melts into every bite, making each tail taste rich and luxurious without a long ingredient list.
    • Pairs Like a Dream: Serve it with lemon garlic cream fettuccini, roasted veggies, or a simple caesar salad for a dinner that looks fancy but takes hardly any time at all.

    Instant Pot Lobster Tail Ingredients

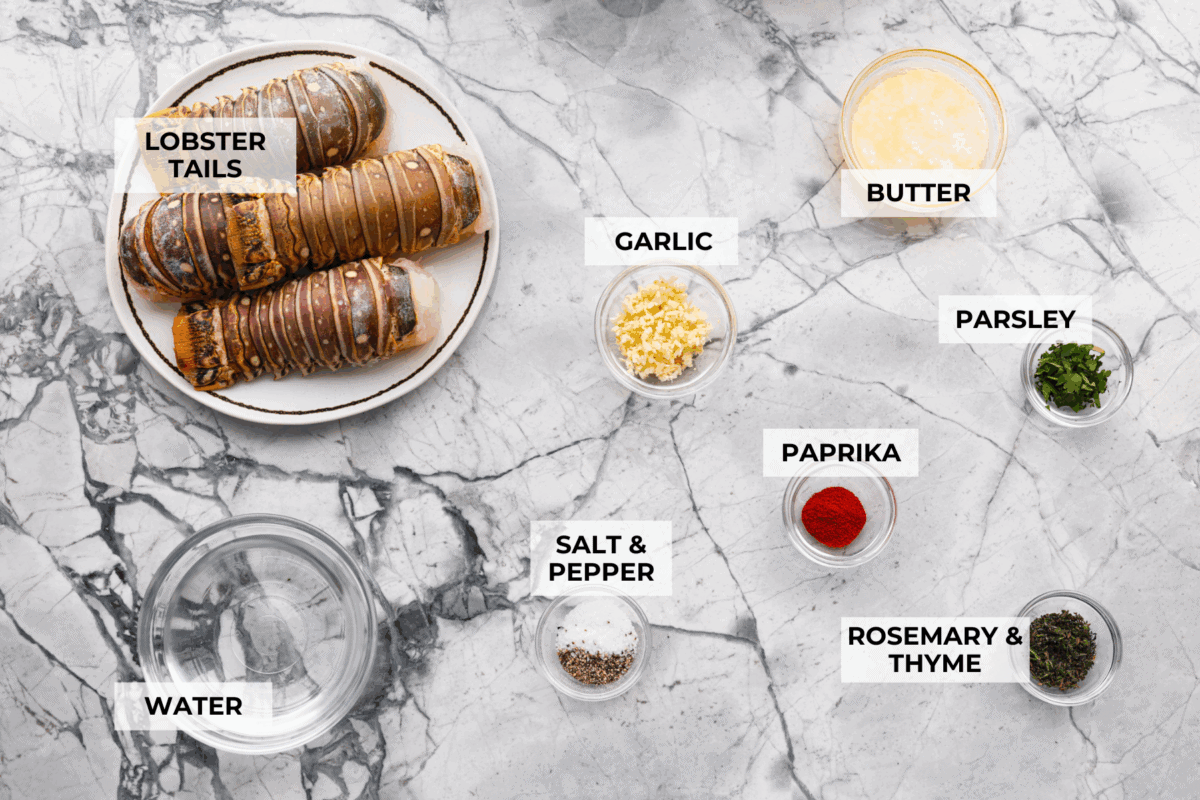
    Overhead shot of labeled instant pot lobster ingredients.Overhead shot of labeled instant pot lobster ingredients.
    • Lobster Tails: Pick similar sized tails so they cook evenly. Fresh or frozen work, just thaw frozen tails in the fridge for the best texture.
    • Water: Chicken broth is a great alternative and adds extra flavor as it steams!
    • Butter: Use good quality unsalted butter like Kerrygold or Plugra for a rich flavor. If you use salted butter, cut back on any extra salt.
    • Herbs: Fresh herbs make a big impact. If using dried, use about one third as much because they are more concentrated.

    How to Make Instant Pot Lobster Tails

    Lobster tails may look intimidating, but pressure cooking them makes them totally doable. It’s simple to prepare and turns any dinner or holiday meal into something really special.

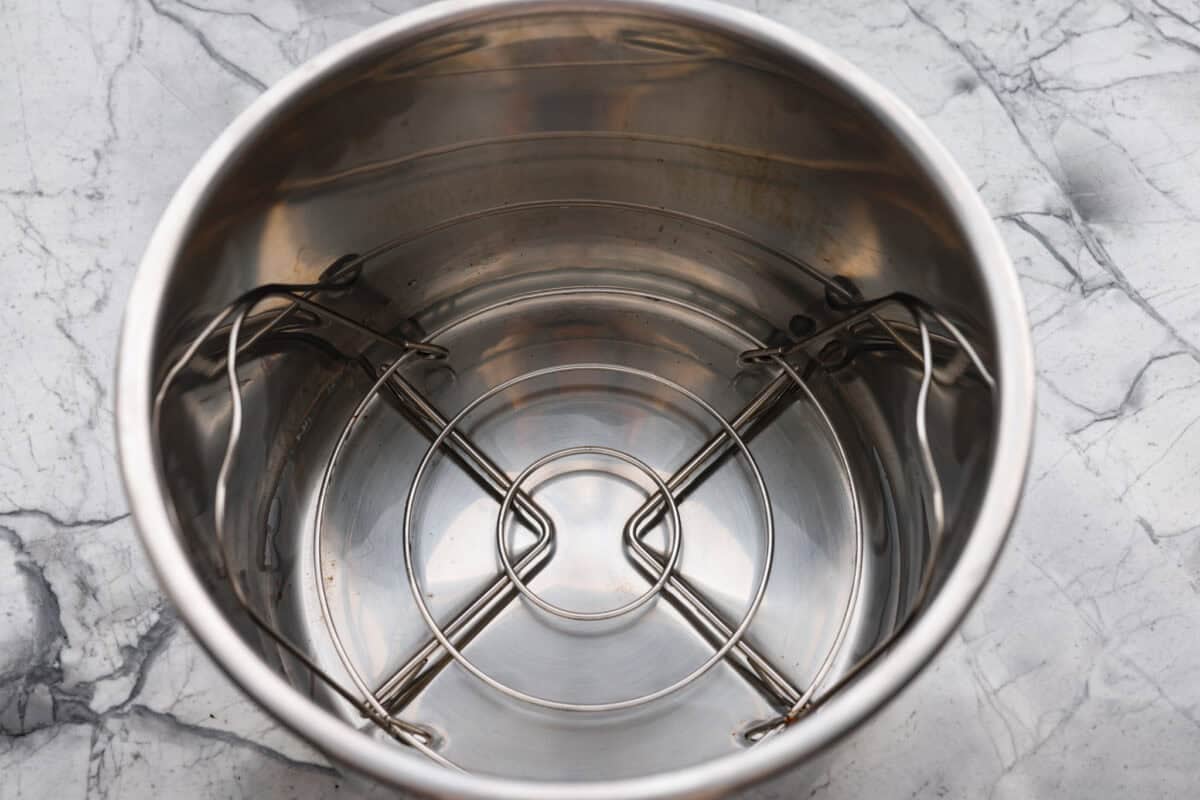
    1. Prepare: Add the trivet and water to the bottom of the Instant Pot.
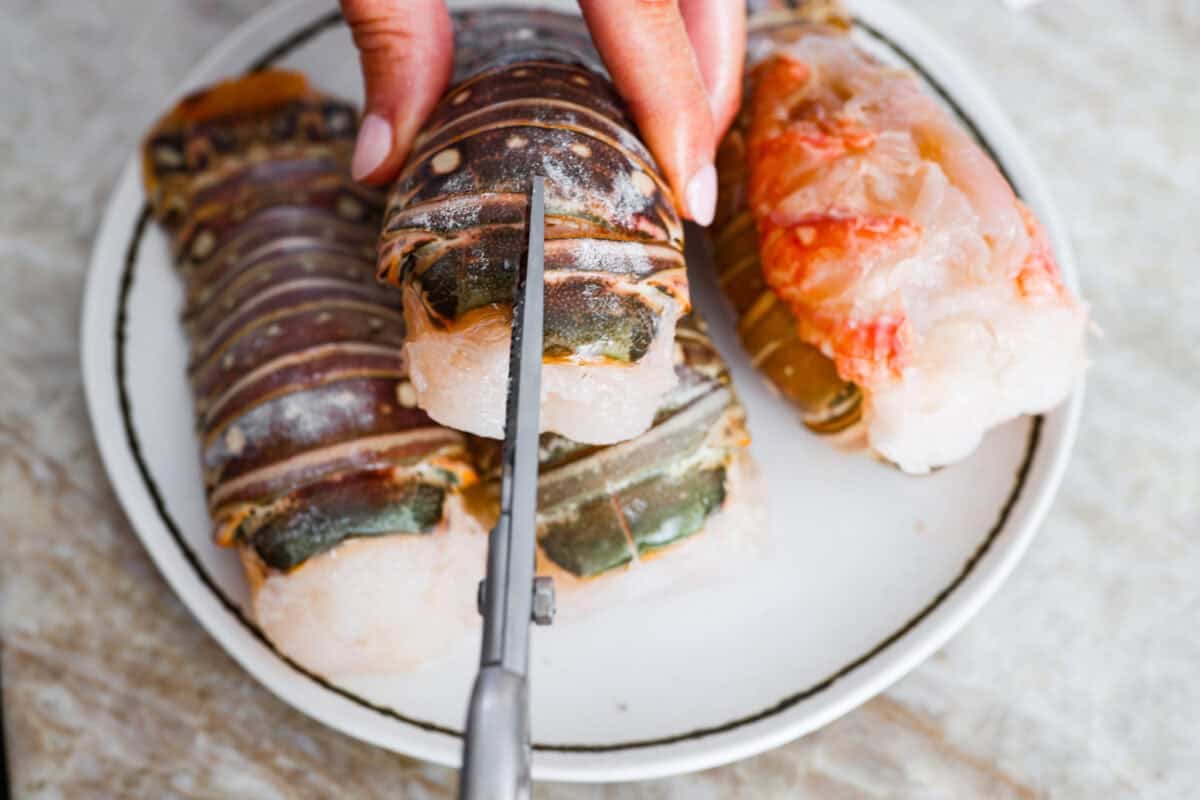
    2. Cut the Tails: Using kitchen shears, butterfly the tails of the lobster by cutting down the center.
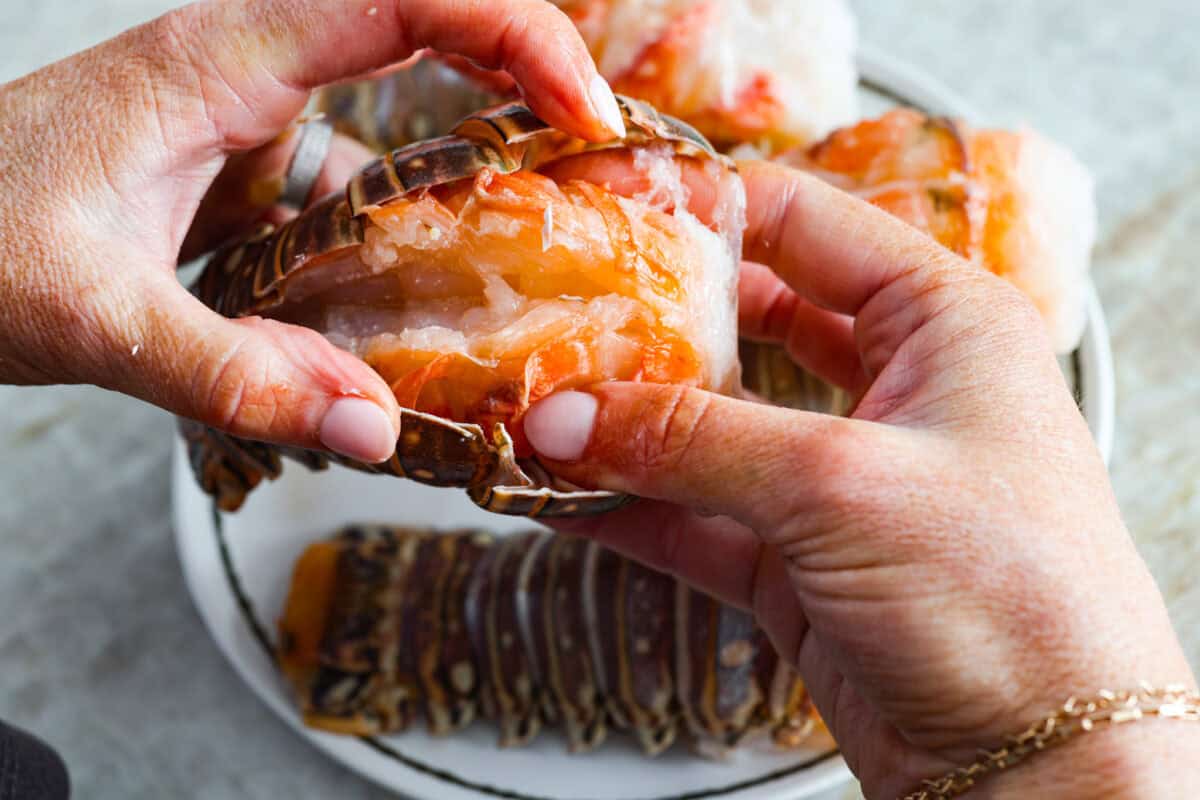
    3. Loosen the Meat: Loosen the meat, then pull the lobster meat upward.
    4. Steam: Place the lobster tails on top of the trivet, shell side down, then close the lid and lock it in place. Select the “SEAL” mode, then press “STEAM” and add 2 minutes to the cook time. Manually release the steam once the lobster has cooked.
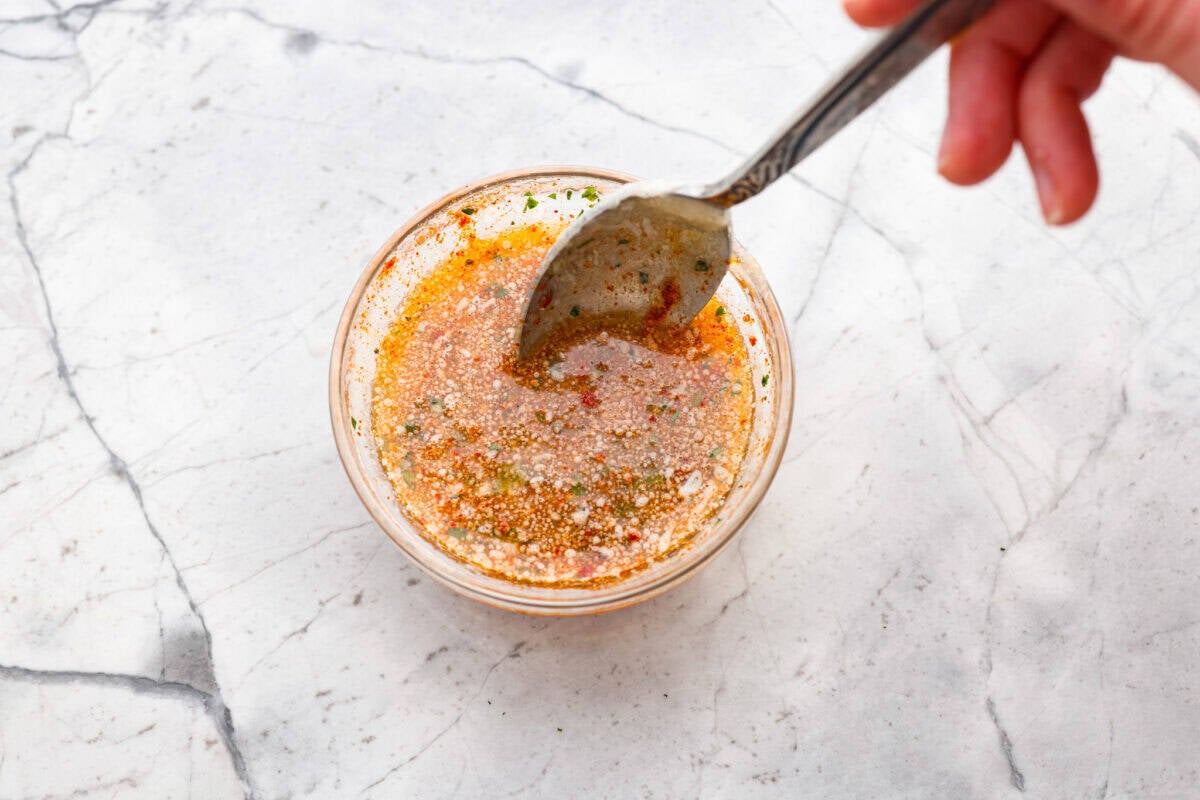
    5. Whisk the Butter Sauce: In a small bowl, whisk together the melted butter, garlic, paprika, thyme, rosemary, and parsley.
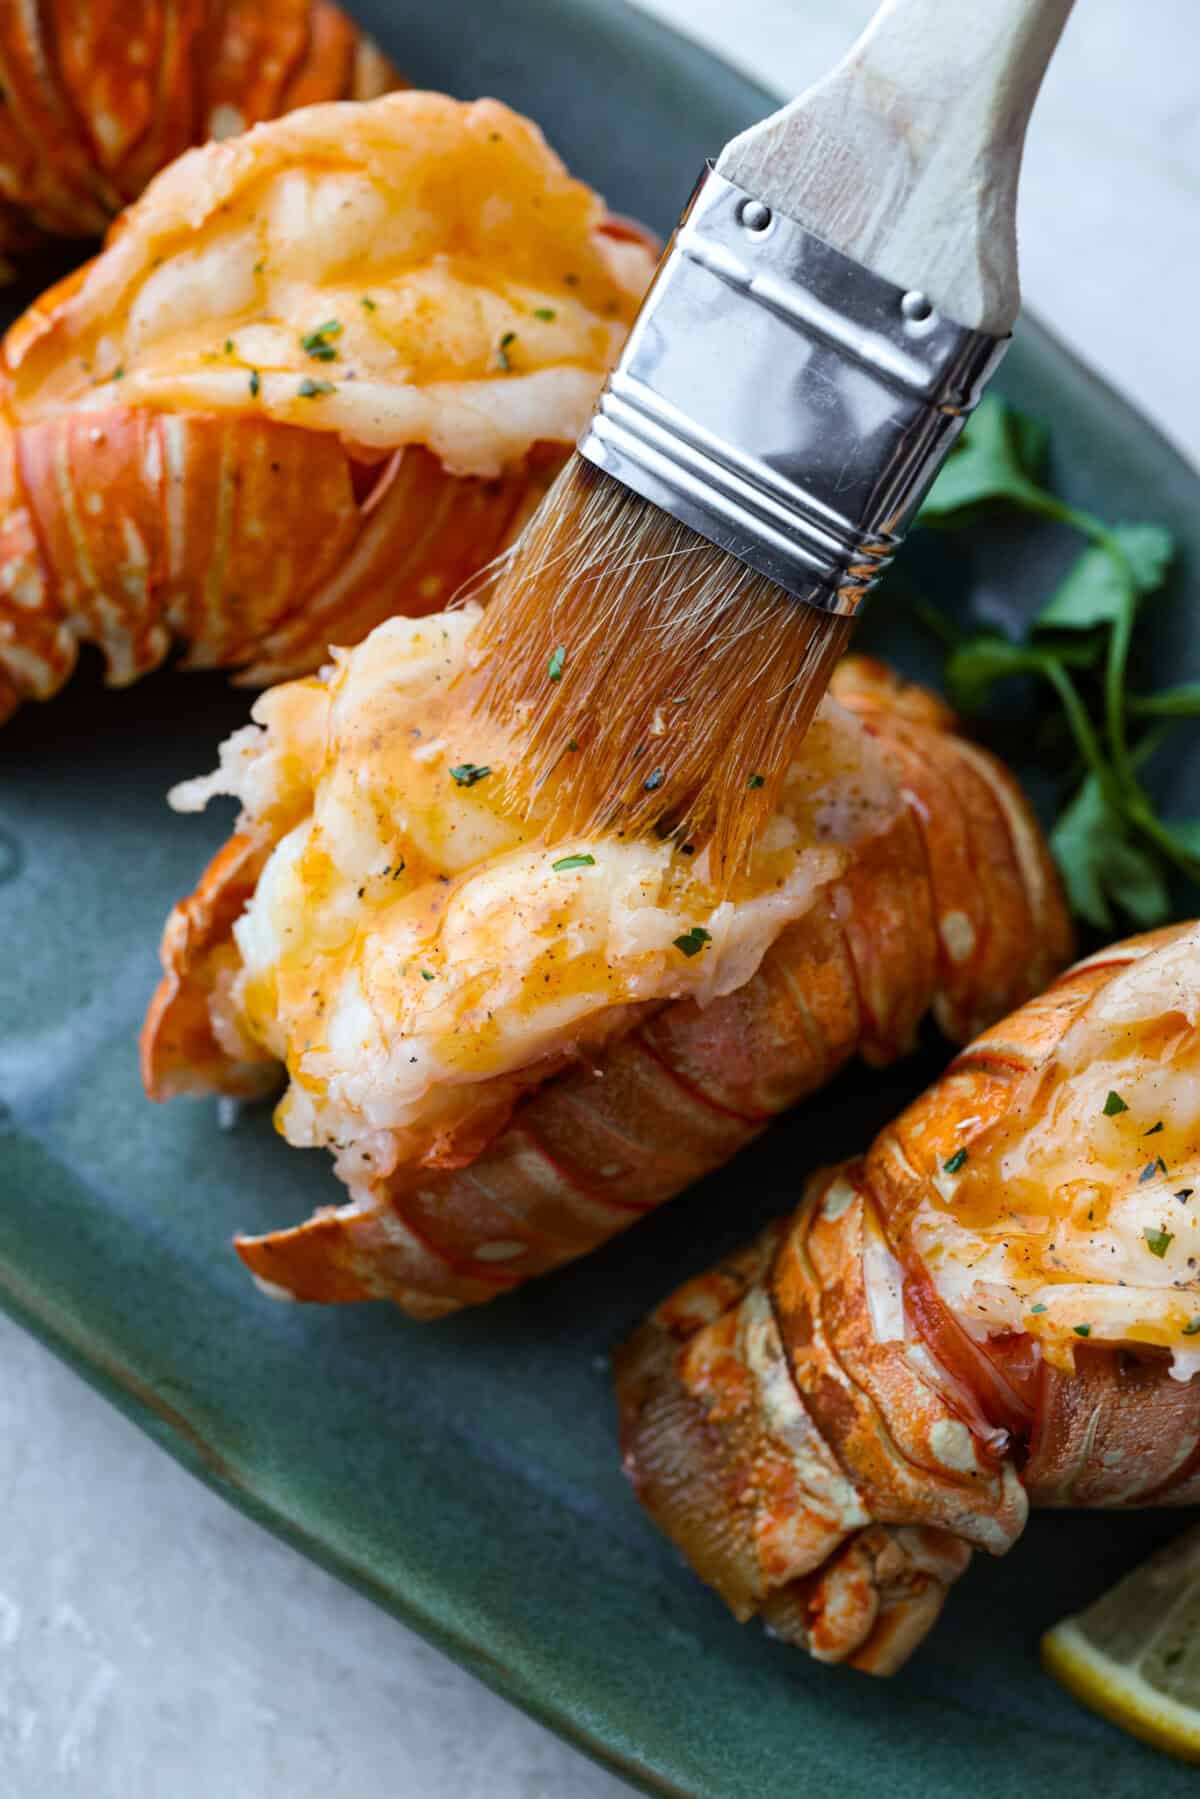
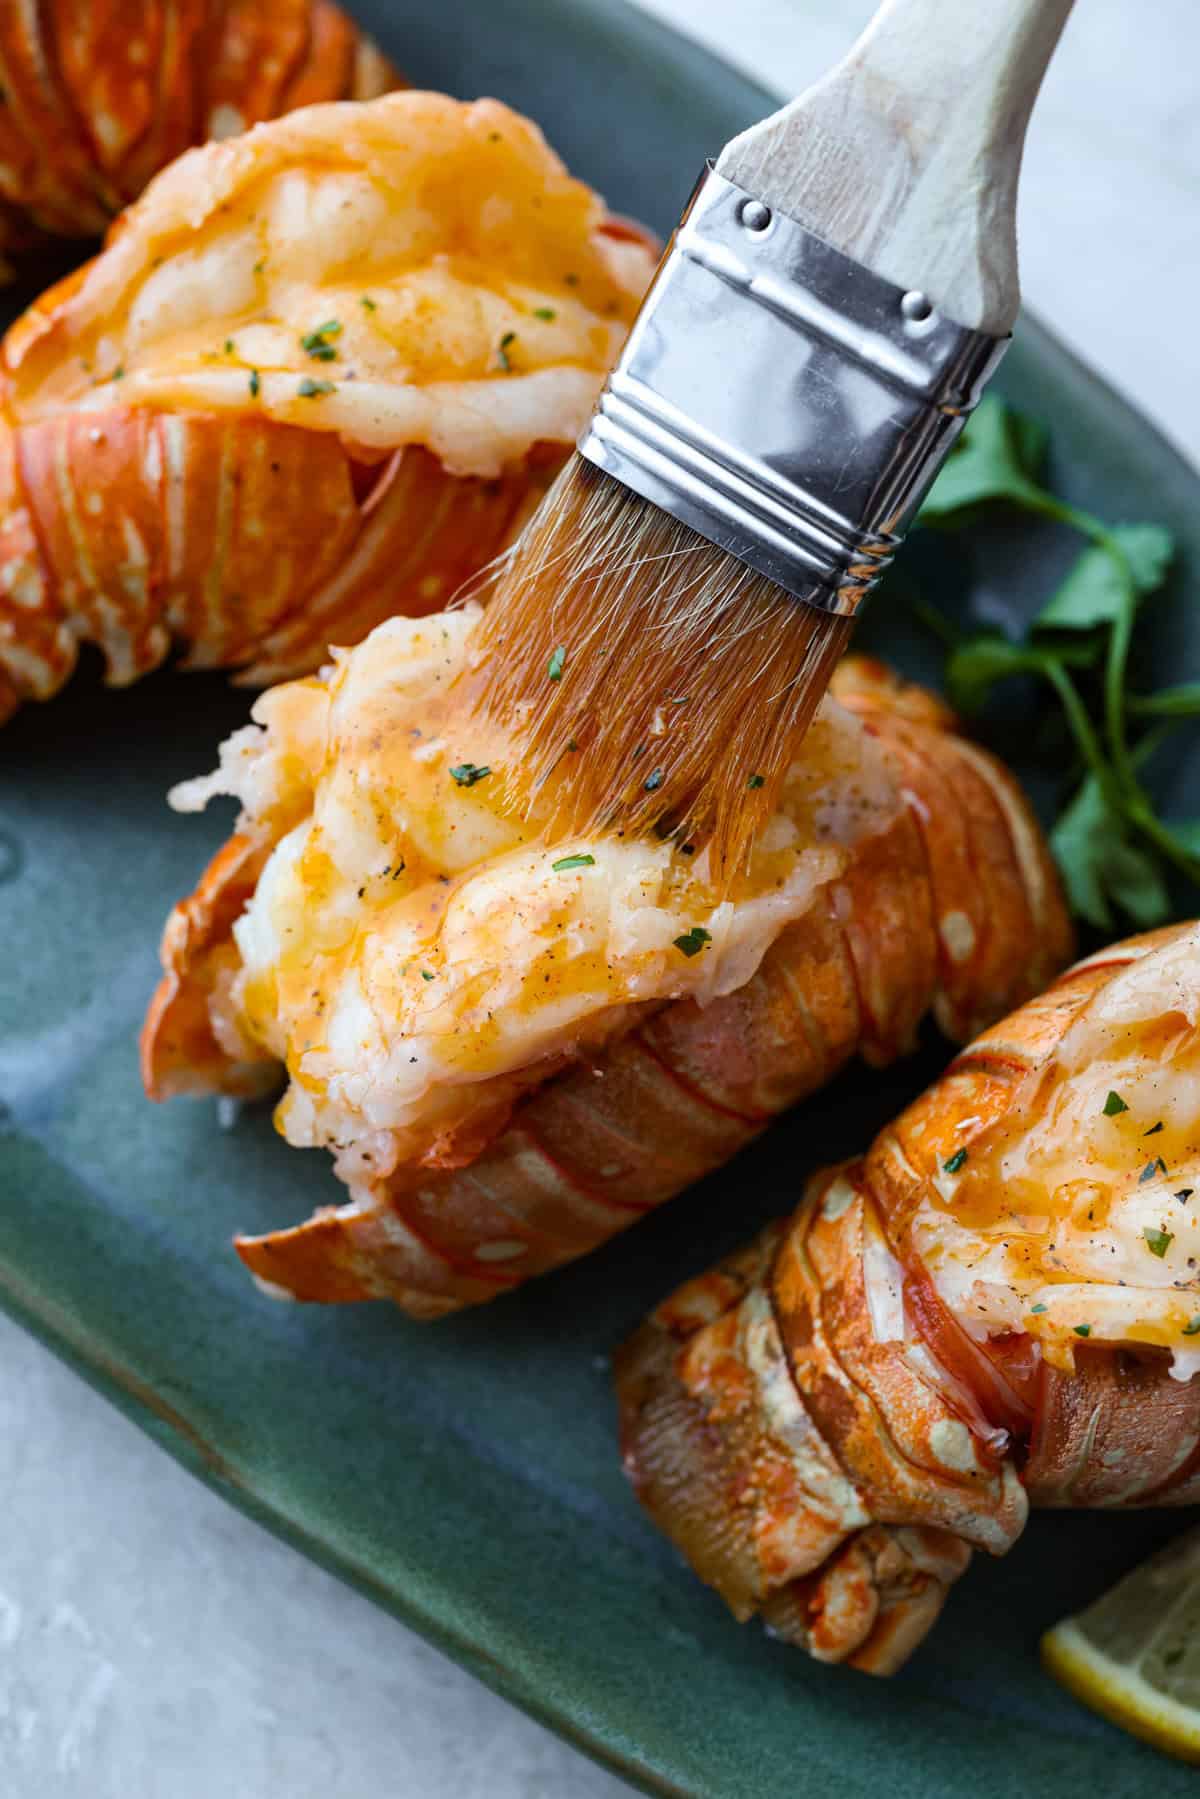
    6. Brush and Serve: Brush the sauce on the perfect Instant Pot lobster tails and enjoy!

    Alyssa’s Pro Tip

    Don’t Overcook! When checking for doneness, the lobster meat should be opaque and firm, with just a hint of pink near the tail. Avoid overcooking, as even a minute too long can make the beef rubbery and tough.

    Pin this now to find it later

    Pin It

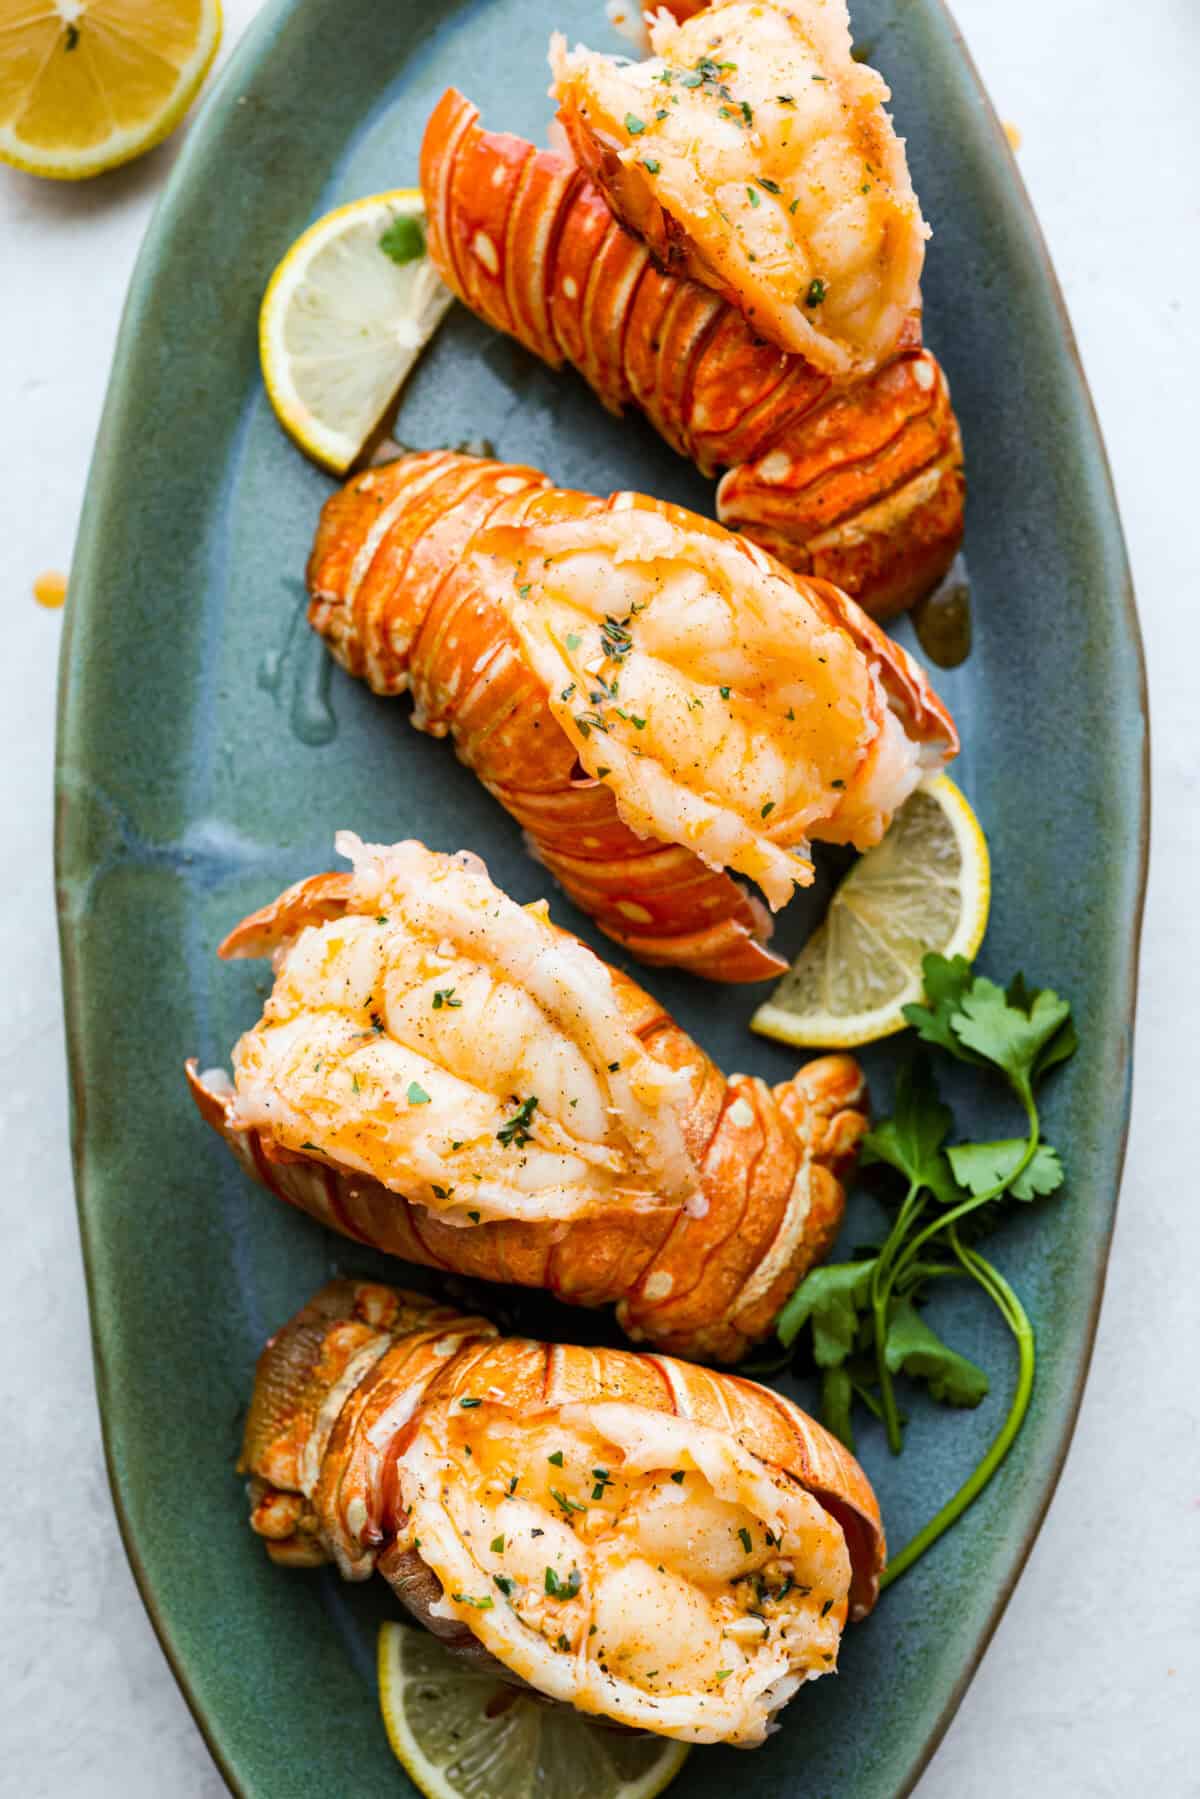
    Plated instant pot lobster tails. Plated instant pot lobster tails.

    More Delicious Lobster Recipes

    If you like seafood and want to make this Instant Pot lobster, check out more ways to make it. Each is simple and will wow your friends and family.


    Source link

  • Hot Shrimp Dip – All Day I Dream About Food

    Hot Shrimp Dip – All Day I Dream About Food

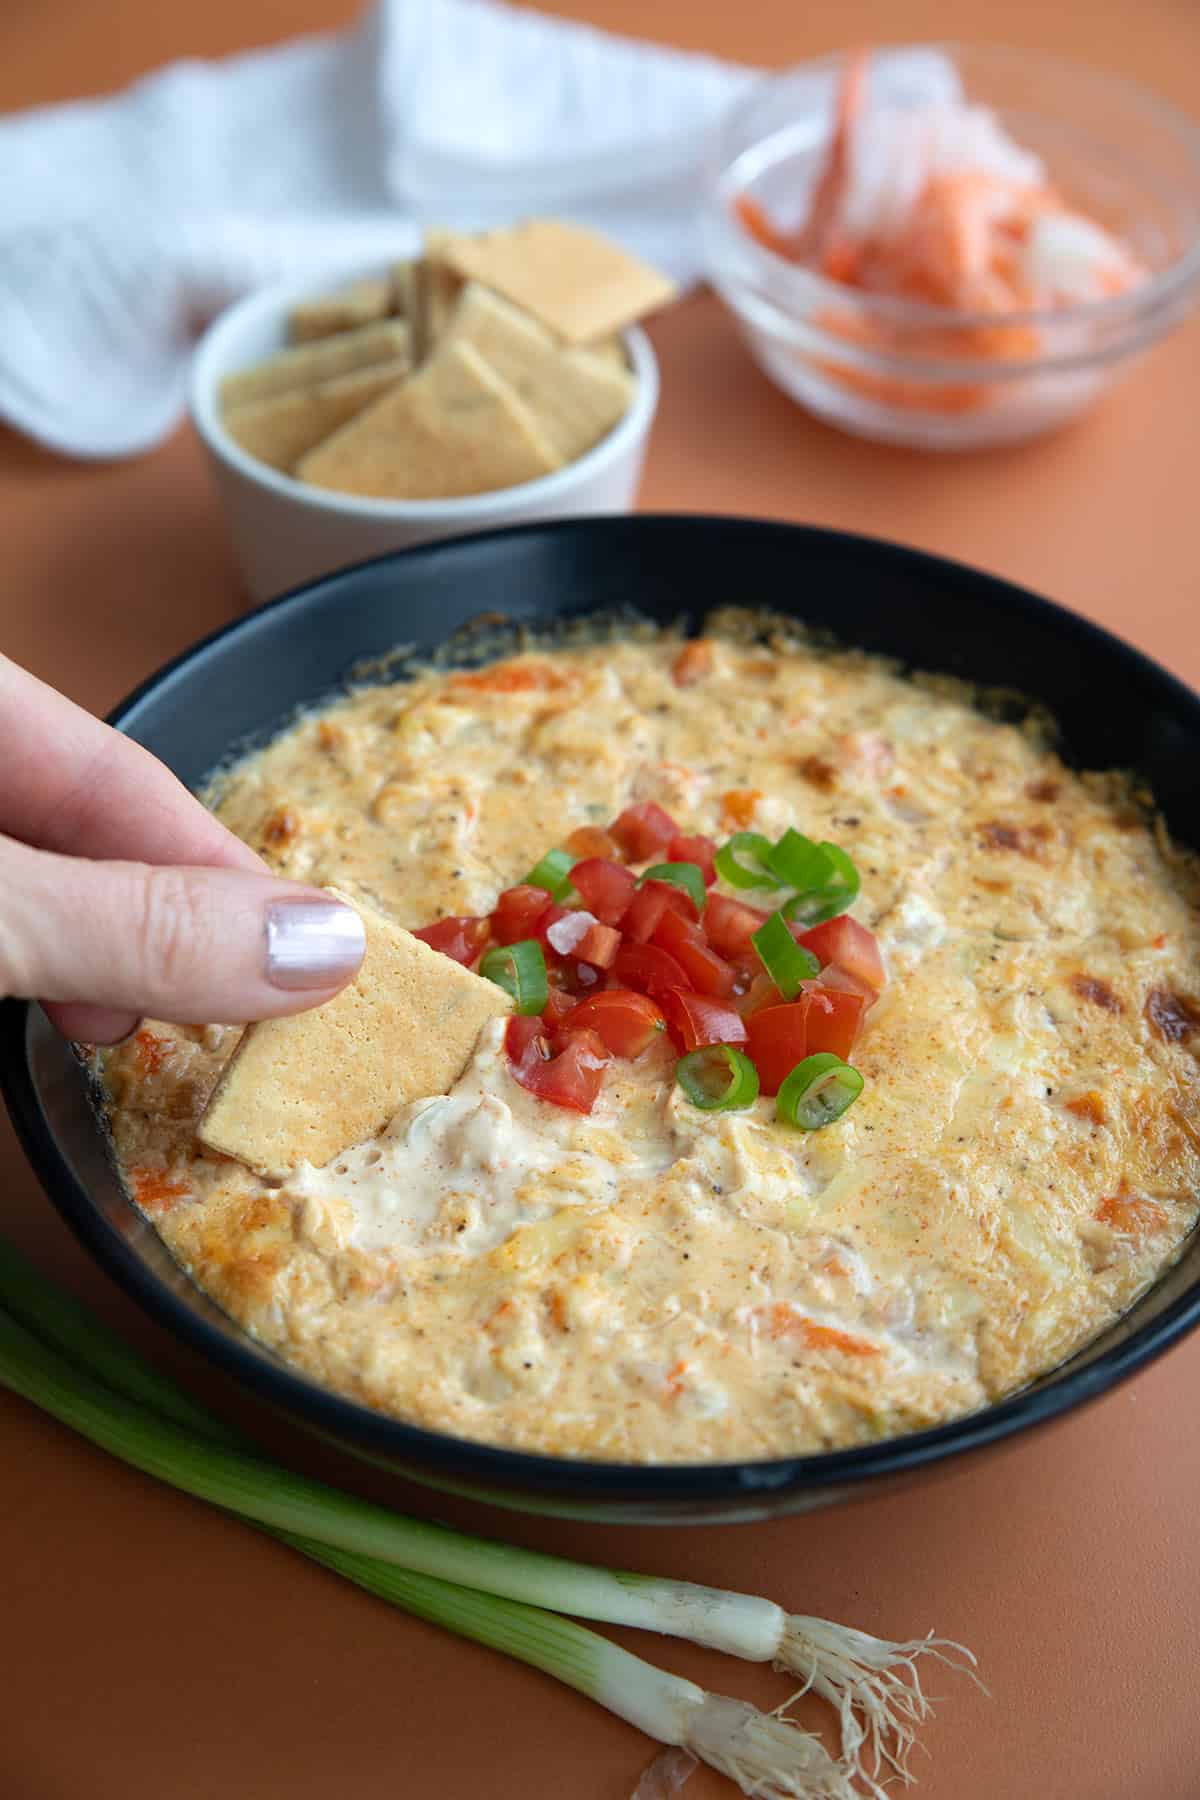
    This easy cheesy shrimp dip is the perfect keto party appetizer. With plenty of garlic and a kick of spice, this hot baked dip will please all of your guests. Perfect for game day!

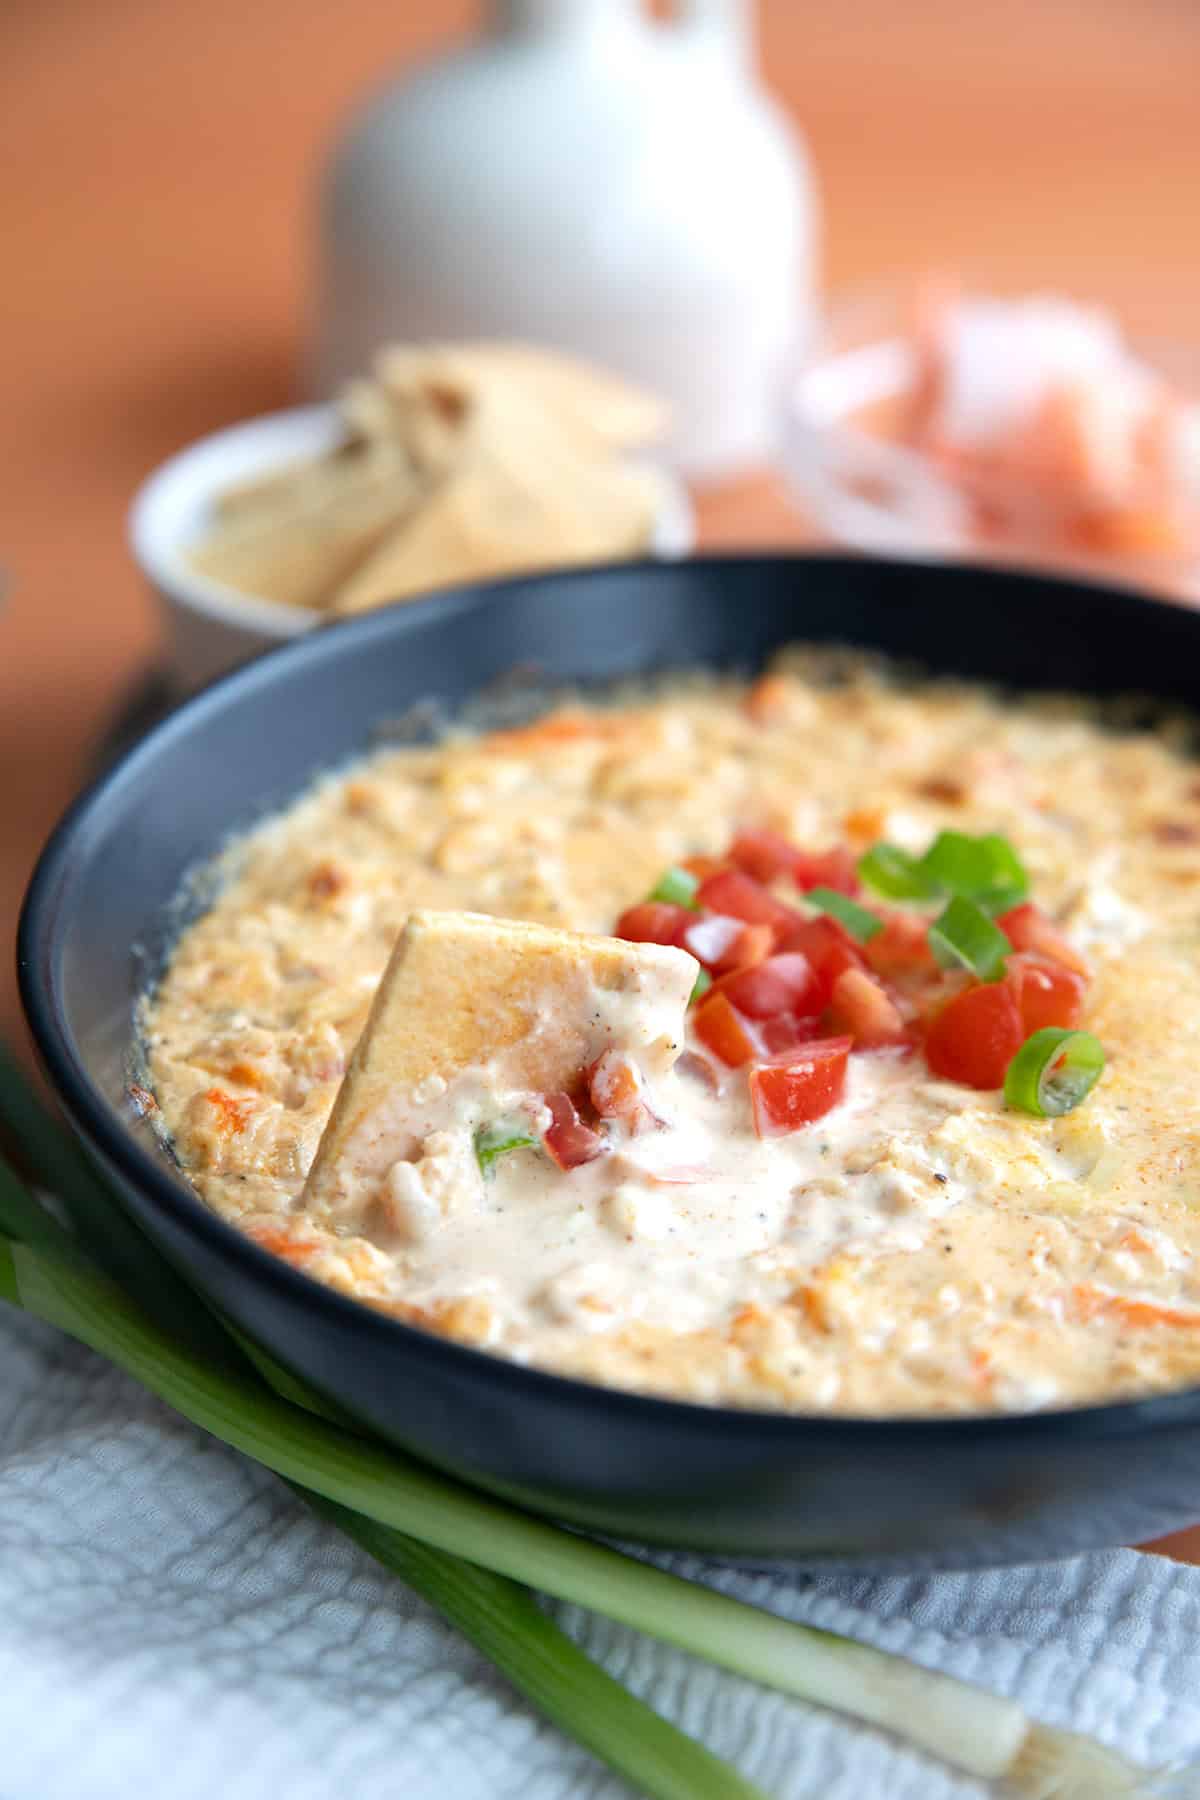
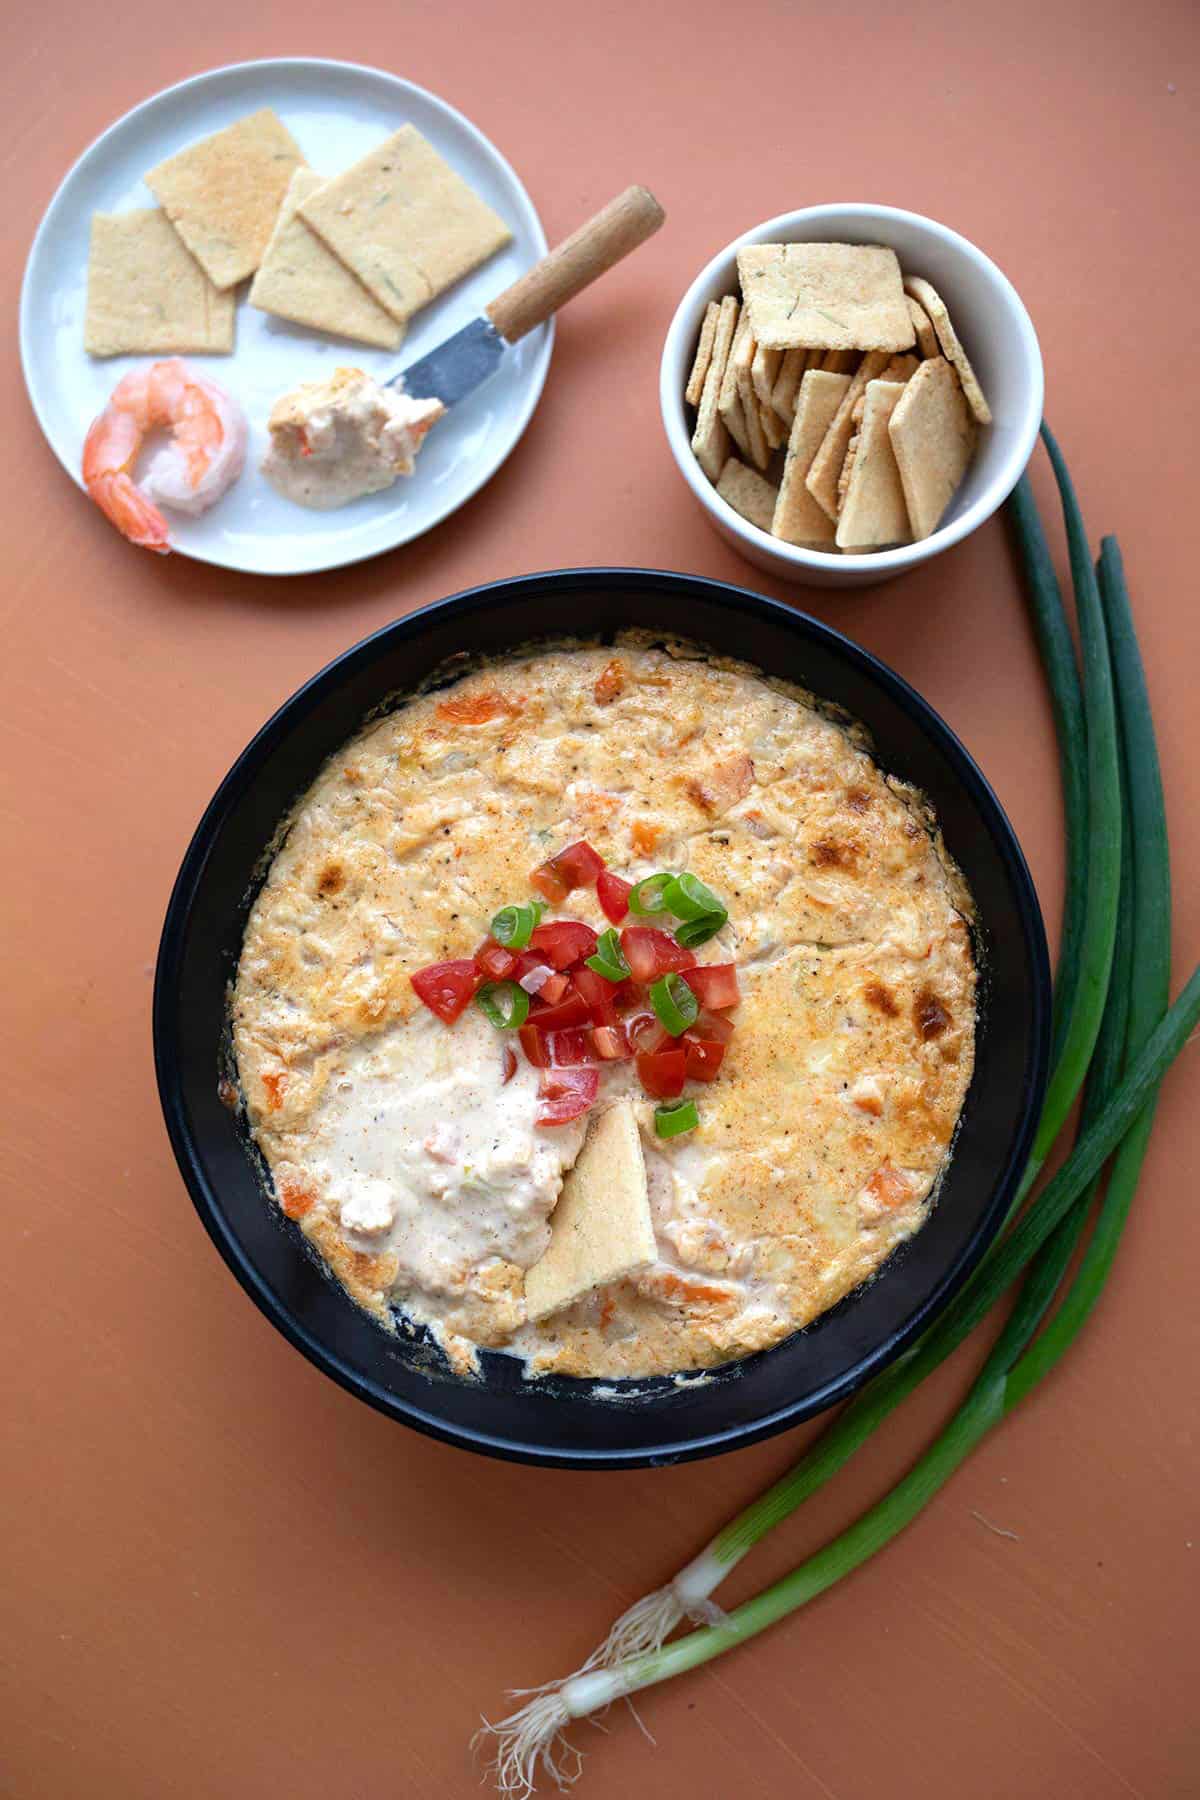
    A keto cracker digging into a bowl of Baked Shrimp Dip.
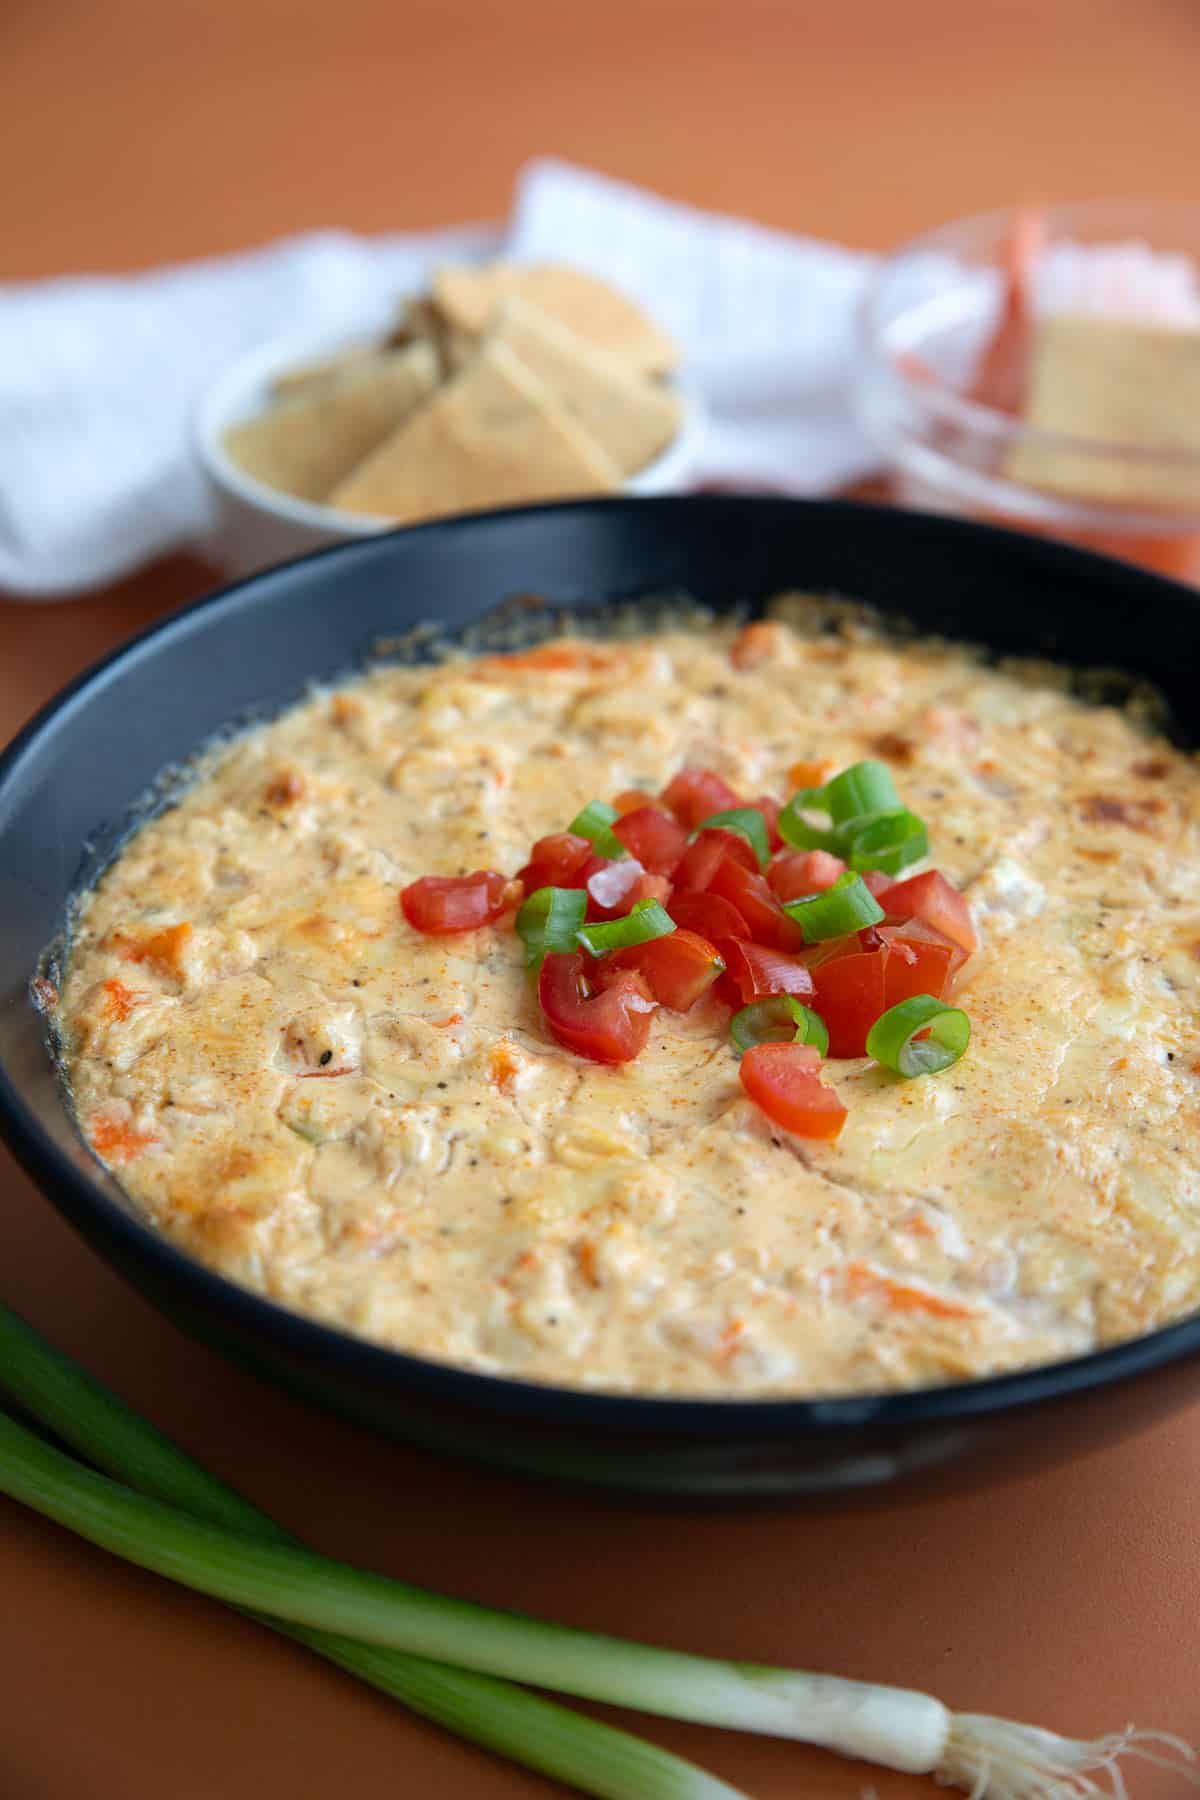
    Freshly baked Shrimp Dip in a black bowl on an orange background, with chopped tomatoes and green peppers on top.

    I love a good creamy dip. Particularly one that is gooey and baked, that you have to scoop up quickly into your mouths before it drips all over the counter. I’m talking Sausage Cheese Dip and Cheesy Green Chili Dip and tasty things like that.

    But this Hot Shrimp Dip is my latest keto appetizer obsession and I love it. Totally LOVE IT! I made a big batch for just my husband and me, and I thought it would be too much for us. But it disappeared within three days. I kept scooping keto crackers into it whenever I needed a quick snack.

    So satisfying, so flavorful, I can’t wait to make it again. It really is the perfect low carb game day recipe.

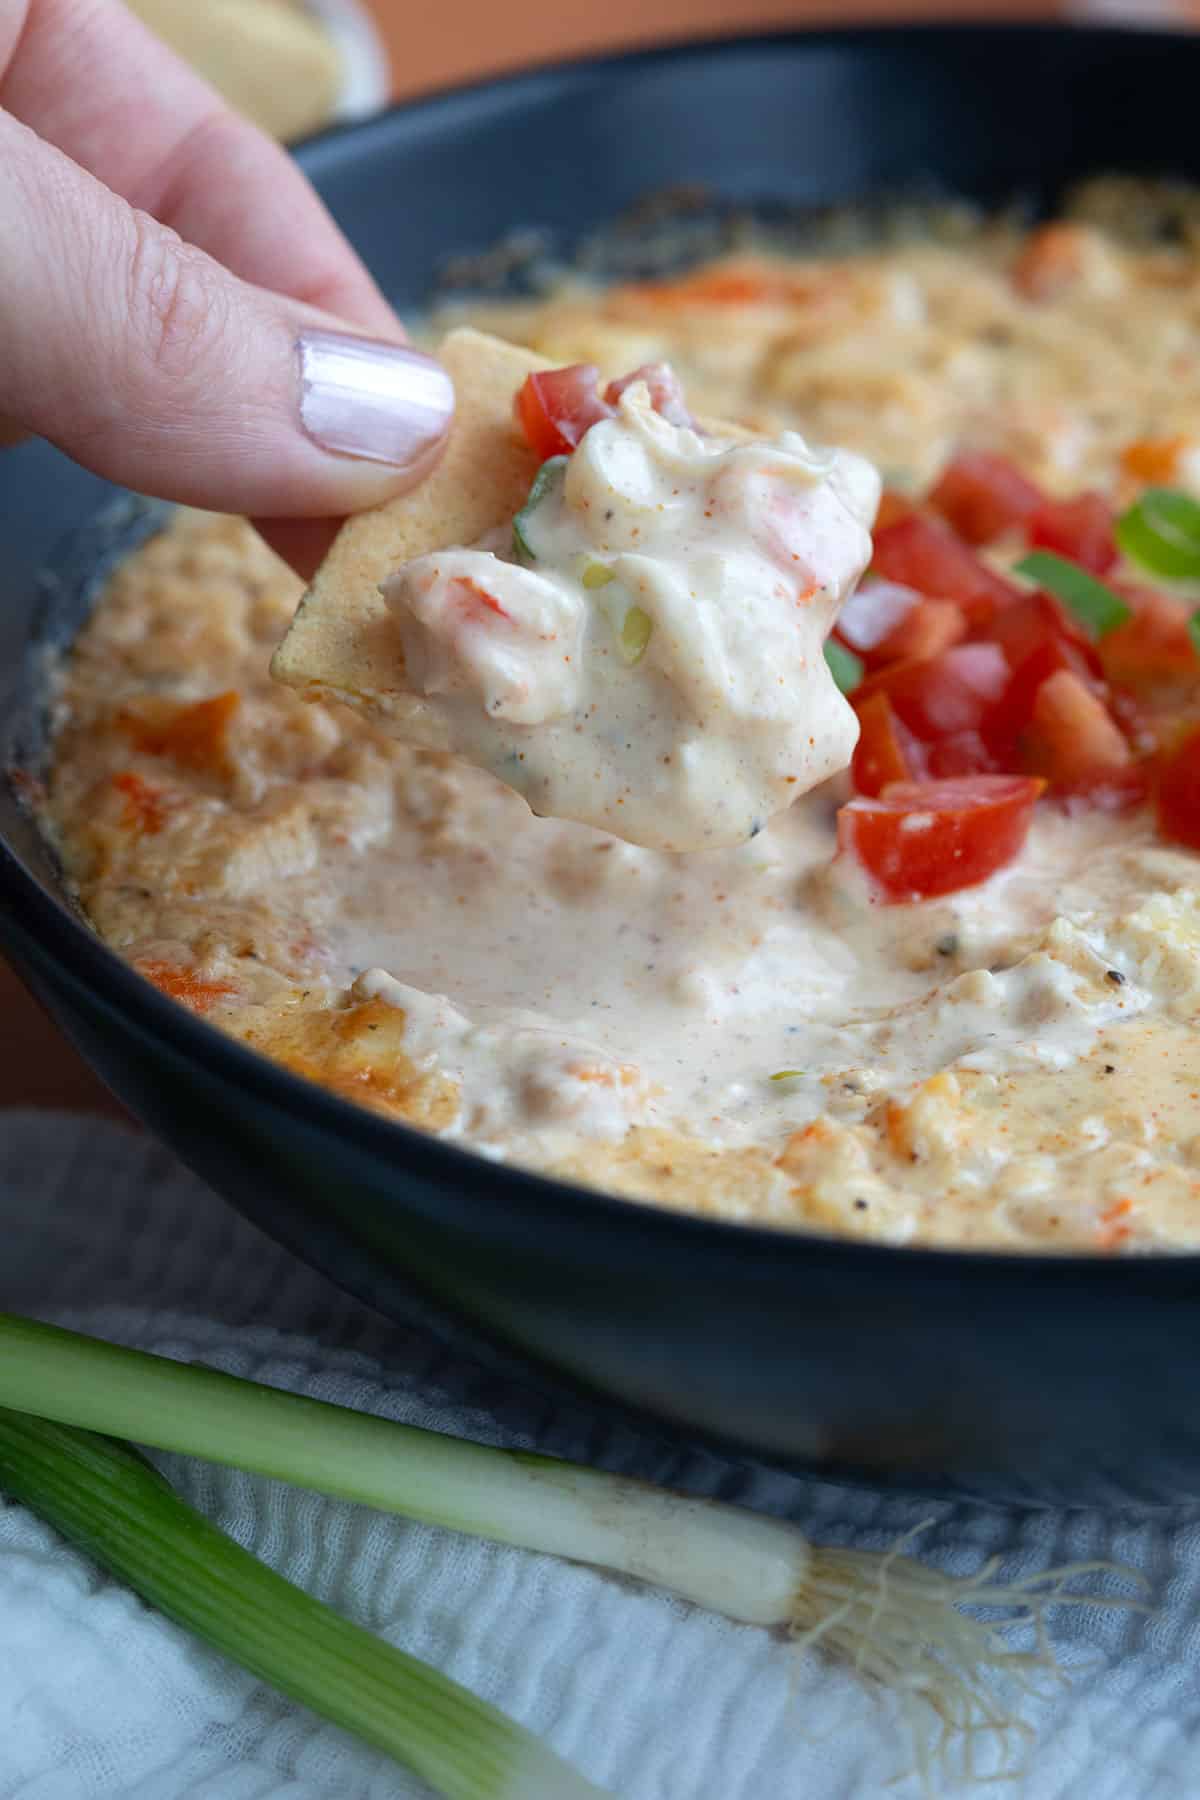
    A hand digging a cracker into a bowl of baked shrimp dip.

    Why you will love this recipe

    If you are planning to attend any Super Bowl parties, this is the recipe to make. Anyone on a low carb diet will appreciate the fact that it has only 1.6g of carbs. But it’s flavorful and rich enough for everyone to enjoy. This recipe is a crowd-pleaser

    It’s also super easy to make, especially if you purchase pre-cooked shrimp. Just chop up the shrimp, mix up with some cream cheese, sour cream, mayo, and seasonings, and bake until bubbly and browned.

    It’s so good served hot with some sliced veggies. But I found to my surprise that I liked it just as much cold, after it had been in the fridge for a day. So you have that option too!

    Ingredient Notes

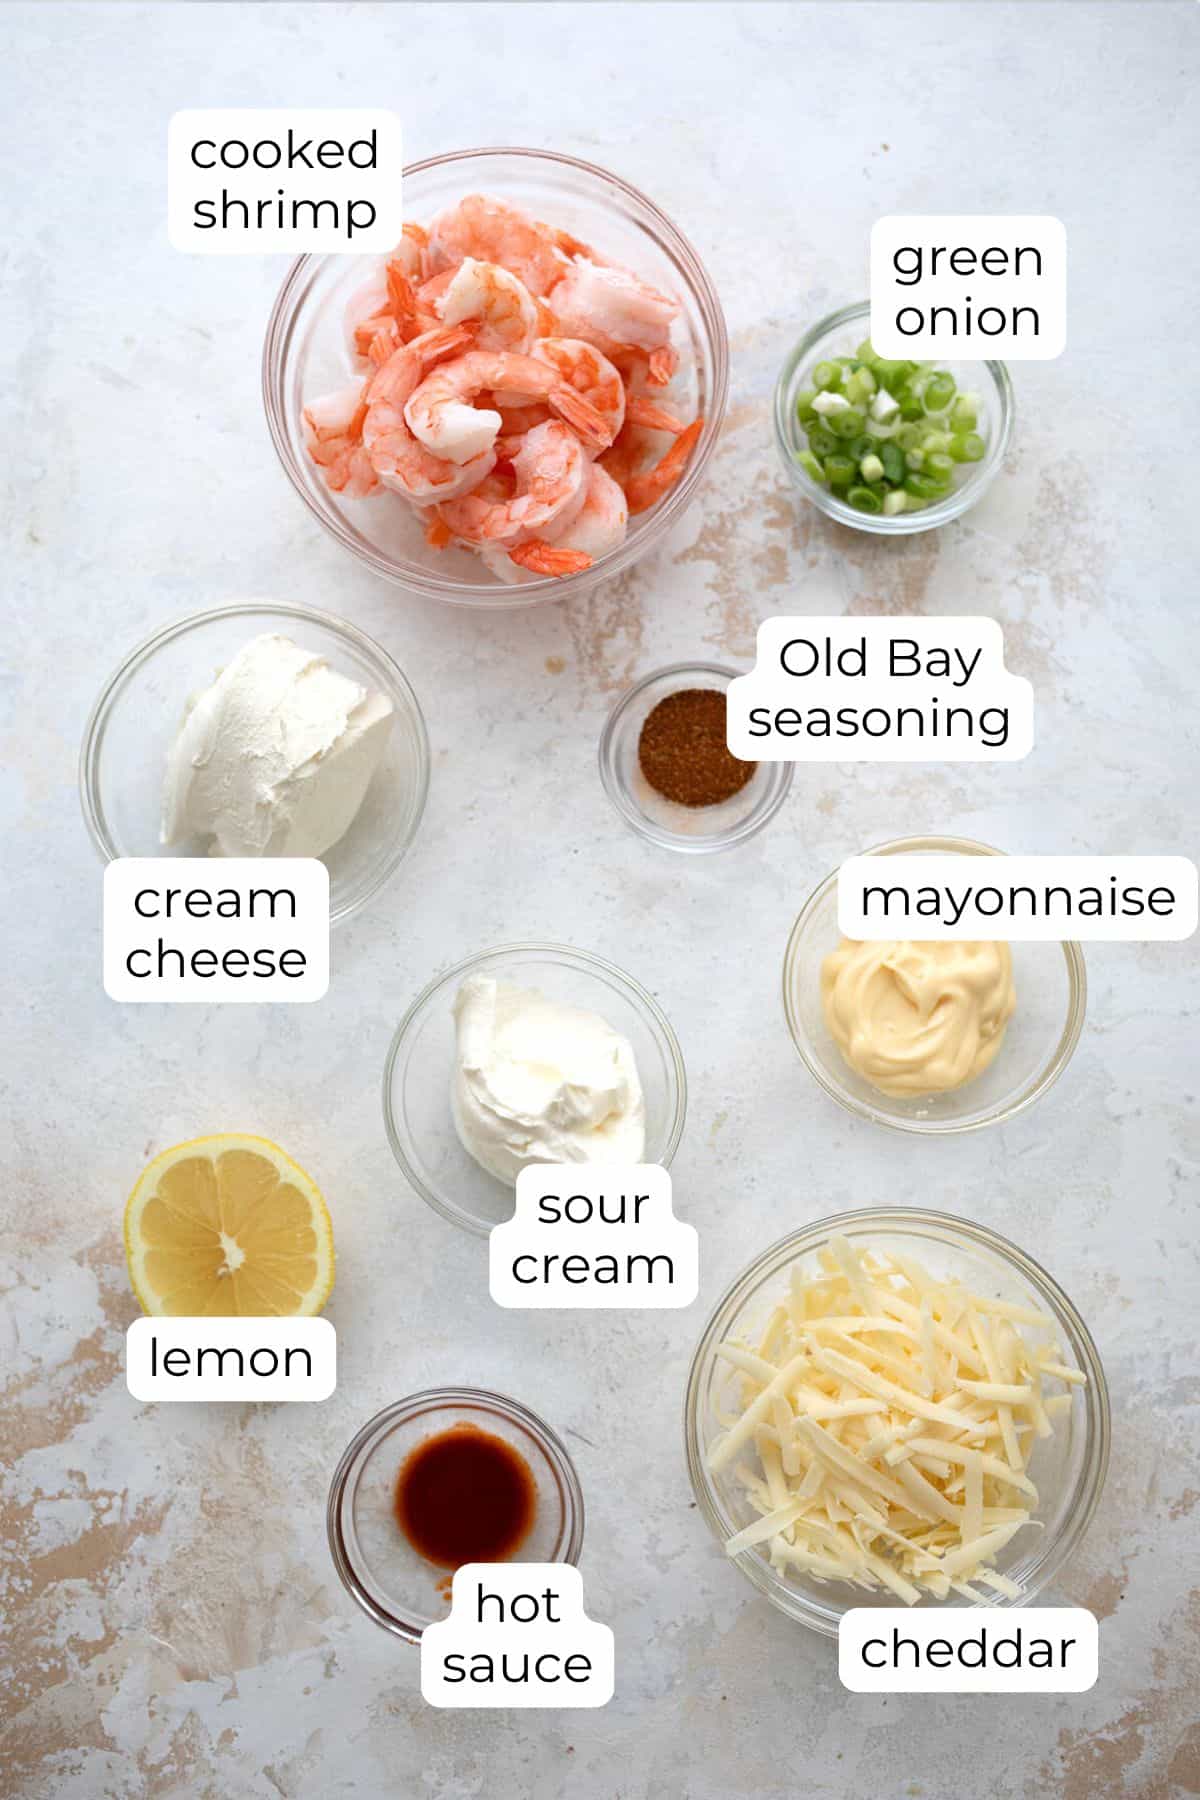
    Top down image of ingredients for Baked Shrimp Dip on a white table top.
    • Shrimp: You can purchase cooked shrimp or cook it yourself. Any size shrimp will work as you will chop them up for the dip.
    • Cream cheese: Cream cheese helps give the dip some structure and body, for better scooping. 
    • Sour cream: This adds creaminess and a little tang to the dip.
    • Mayonnaise: This will add some additional creaminess to the dip.
    • Cheddar cheese:  I recommend using a sharp cheddar for more flavor.
    • Lemon juice: This adds some zing to the dip. You can use fresh or bottled.
    • Old Bay Seasoning: Old Bay is a unique seasoning blend marketed by McCormick and usually used in seafood and poultry dishes. The main ingredients are celery salt and paprika. You can also use any seafood seasoning.
    • Hot sauce: You can make it as mild or as spicy as you like it.
    • Kitchen staples: Green onions, salt, and pepper.

    Step by Step Directions

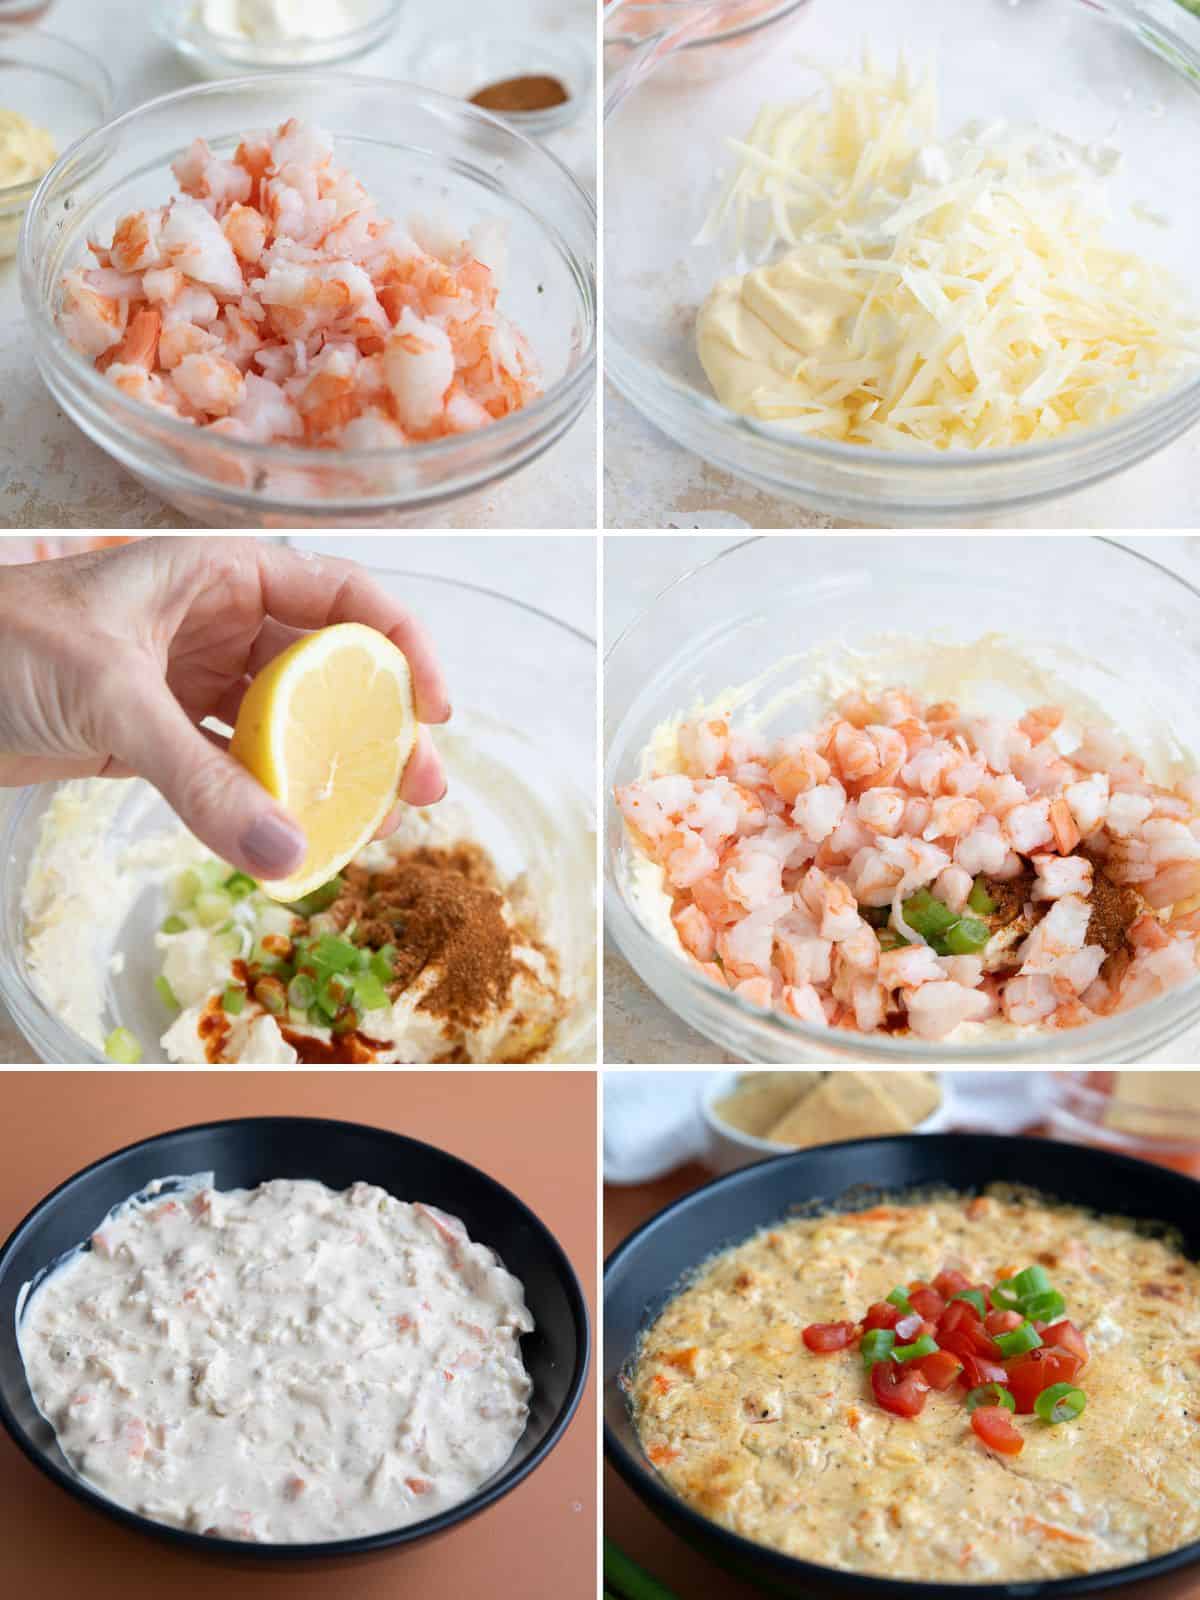
    A collage of 6 images showing the steps for making Baked Shrimp Dip.
    1. Prep the shrimp: Remove the tails from the shrimp and chop into 1/2 inch pieces.
    2. Mix the dip base: In a large bowl, combine the cream cheese, cheddar, sour cream, and mayonnaise. Mix until well combined and smooth.
    3. Combine the remaining ingredients: Add the chopped shrimp, green onion, lemon juice, Old Bay, and hot sauce. Stir until well combined, then taste and adjust seasoning as desired.
    4. Bake the dip: Transfer to a medium (about 1 quart) glass or ceramic baking dish and spread to the edges. Bake at 350ºF for 20 minutes, or until the top is browned and the mixture is bubbling. Serve warm.

    Tips for Success

    When I say “well softened” cream cheese, I mean really well softened. This usually means that room temperature isn’t sufficient. You want to be able to really mix it into the sour cream and mayo. I like to warm my cream cheese up a little in the microwave, for 10 seconds or so.

    Baked Shrimp Dip is delicious with so many things. I like sliced cucumber and red peppers, but it’s also good with keto crackers. If you have a favorite keto bread recipe, you can slice it thinly and toast it for dippers too. And my Keto Pull Apart Bread would be delicious with this dip as well!

    Top down image of baked shrimp dip in a black bowl on an orange tabletop, with green onions and a bowl of crackers.

    Frequently Asked Questions

    Can you make hot shrimp dip in advance?

    To prepare this dip in advance, follow the recipe through Step 4, but don’t bake it. Then simply cover with plastic wrap and refrigerate for up to 2 days.

    Can you reheat hot shrimp dip?

    Yes, this keto-friendly dip reheats really well. You can even make it a day ahead and re-warm it before serving. I recommend placing it in a 300ºF oven for 15 minutes, or until warmed through. Keep in mind that it’s also delicious served cold.

    How many carbs are in Hot Shrimp Dip?

    This keto hot shrimp dip recipe has 7.1g of carbs and 1.6g of fiber per serving. That comes to 5.5g net carbs per serving.

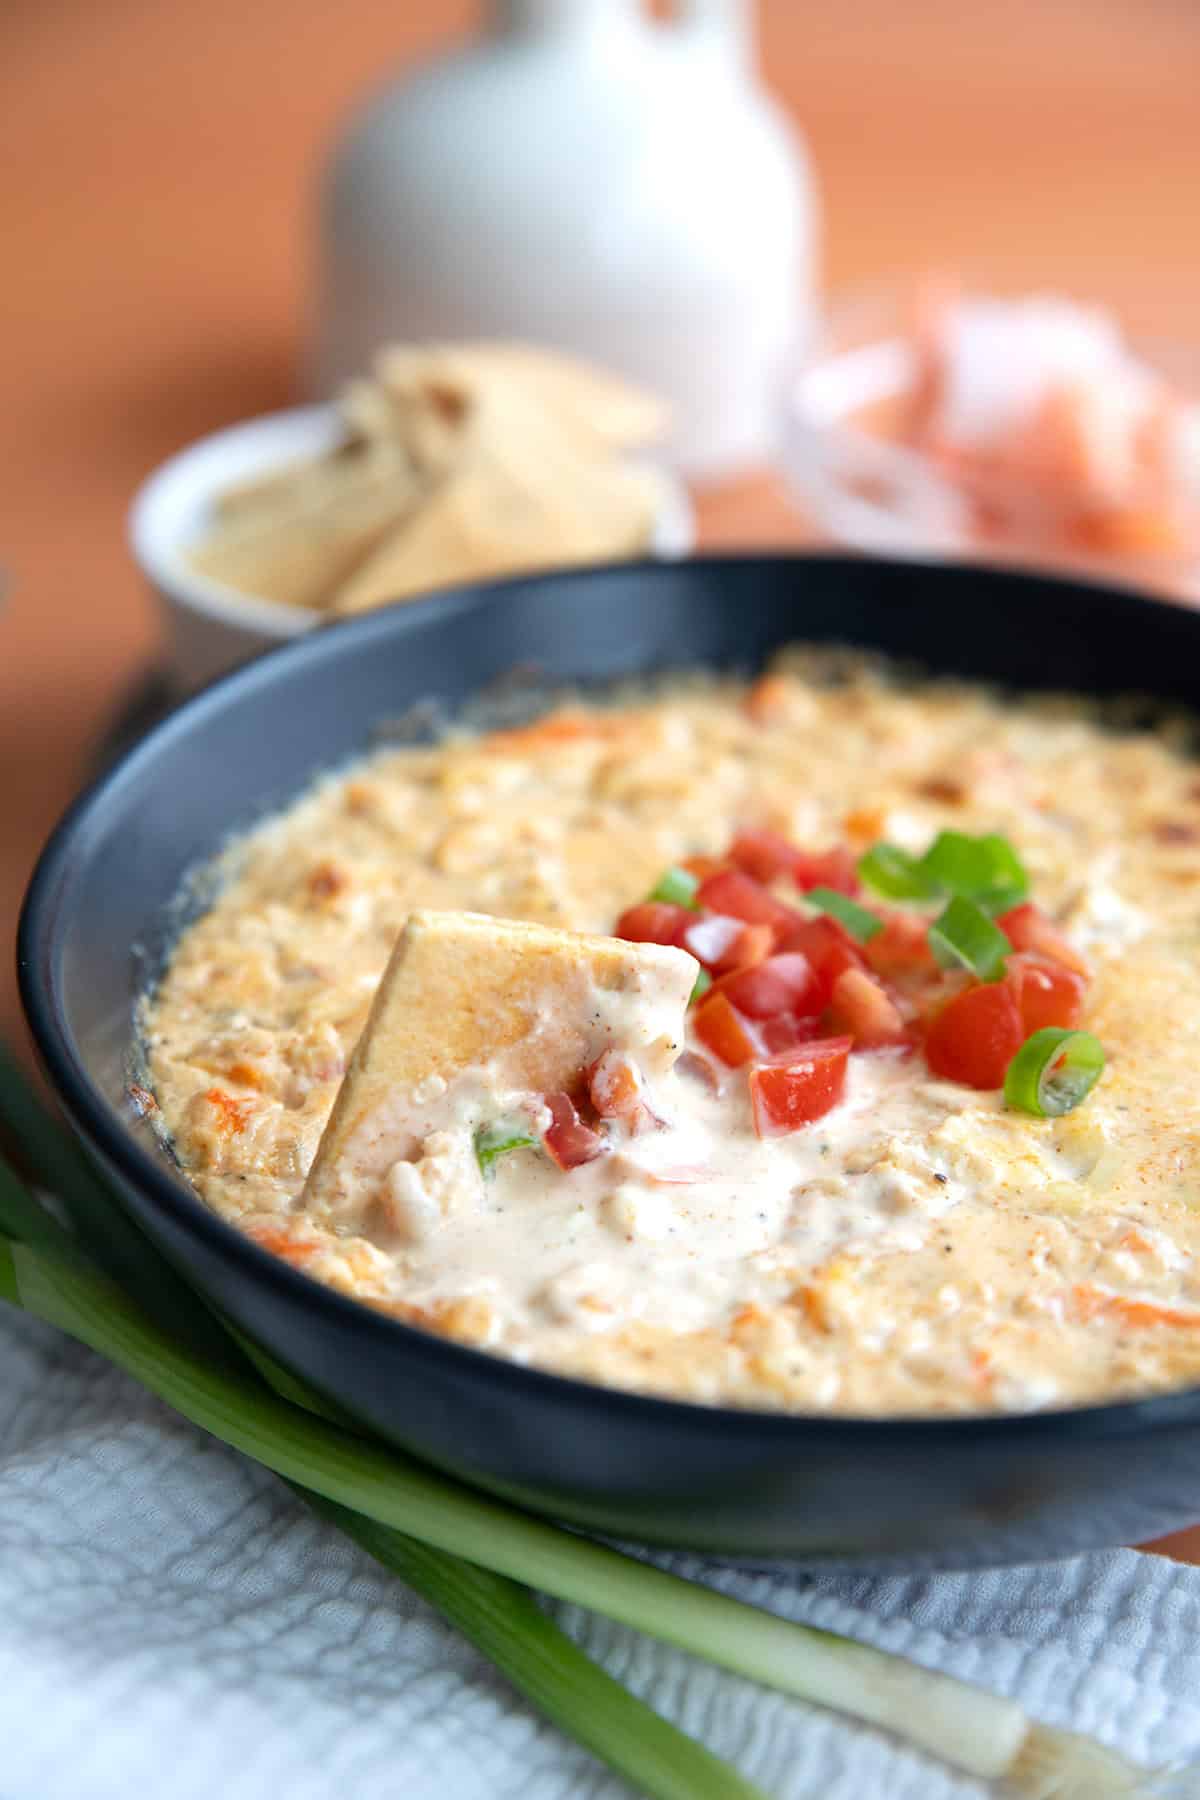
    Close up shot of keto baked shrimp dip being lifted out of a bowl on a cracker.

    More keto appetizers you will love

    A keto cracker digging into a bowl of Baked Shrimp Dip.

    Hot Shrimp Dip Recipe

    Servings: 12 servings

    Prep Time 10 minutes

    Cook Time 20 minutes

    Total Time 30 minutes

    This easy cheesy shrimp dip is the perfect keto party appetizer. With plenty of garlic and a kick of spice, this hot baked dip will please all of your guests. Perfect for game day!

    • 12 ounces (340.2 g) cooked shrimp
    • 6 ounces (170.1 g) cream cheese, well softened
    • 1 cup (113 g) shredded cheddar cheese
    • 1/3 cup (76.67 g) sour cream
    • 1/4 cup (56 g) mayonnaise
    • 2 medium green onion, chopped
    • 1 tbsp lemon juice
    • 2 tsp Old Bay seasoning
    • 1/2 tsp hot sauce, more to taste
    • Salt and pepper to taste

    Prevent your screen from going dark

    • Preheat the oven to 350ºF.

    • Remove the tails from the shrimp and chop into 1/2 inch pieces.

    • In a large bowl, combine the cream cheese, cheddar, sour cream, and mayonnaise. Mix until well combined and smooth.

    • Add the chopped shrimp, green onion, lemon juice, Old Bay, and hot sauce. Stir until well combined, then taste and adjust seasoning as desired.

    • Transfer to a medium (about 1 quart) glass or ceramic baking dish and spread to the edges.

    • Bake 20 minutes, or until the top is browned and the mixture is bubbling. Serve warm.

    Storage Information: Store the leftovers, tightly wrapped, in the fridge for up to 3 days. Reheat gently in a warm oven or simply eat it cold. 

    Serving: 0.25cup | Calories: 187kcal | Carbohydrates: 1.6g | Protein: 10.9g | Fat: 13.8g | Saturated Fat: 7.1g | Fiber: 0.1g

    Categories:

    Appetizers & Snacks,

    Nutritional Disclaimer

    Please note that I am not a medical or nutritional professional. I am simply recounting and sharing my own experiences on this blog. Nothing I express here should be taken as medical advice and you should consult with your doctor before starting any diet or exercise program. I provide nutritional information for my recipes simply as a courtesy to my readers. It is calculated using MacGourmet software and I remove erythritol from the final carb count and net carb count, as it does not affect my own blood glucose levels. I do my best to be as accurate as possible but you should independently calculate nutritional information on your own before relying on them. I expressly disclaim any and all liability of any kind with respect to any act or omission wholly or in part in reliance on anything contained in this website.

    Free Bonus: Secrets to Keto Baking!

    Sign up for your favorite recipes delivered straight to your inbox plus get our FREE bonus: Secrets to Keto Baking!


    Source link