Tag: Salad

  • Shrimp Caesar Salad

    Shrimp Caesar Salad

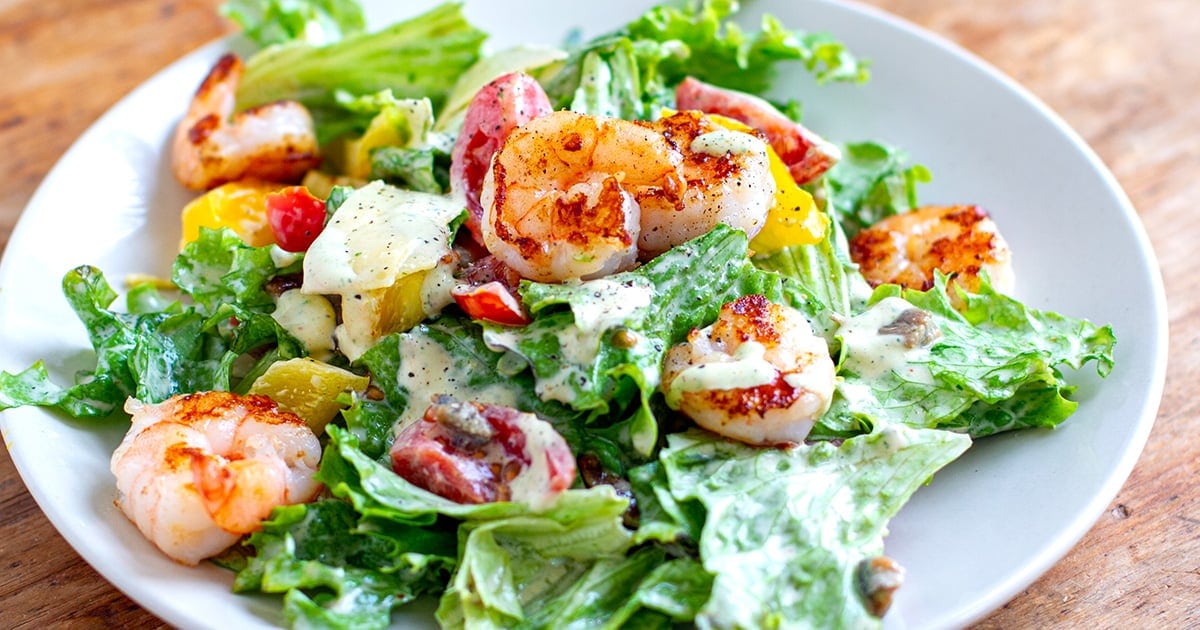
    This nutritious and tasty shrimp Caesar salad recipe nutritious, tasty, quick and easy to make – perfect for a weeknight dinner or lunch. Featuring juicy, sweet prawns/shrimp (chicken could also be used), crispy bacon, fresh lettuce, peppers and cherry tomatoes, this gluten-free and keto-friendly salad is smothered in the most delicious, creamy Caesar dressing. It’s high in protein and nutrients. Paleo & dairy-free modifications provided.


    Shrimp Caesar Salad Notes

    I’ve always loved a good Caesar salad and my favourite thing about it is probably the dressing. If the dressing is done well, then it doesn’t matter what veggies or protein you toss in it.

    I wanted to do a variation of a Caesar salad with grilled shrimp instead of chicken and add some extra colourful veggies like cherry tomatoes and sweet peppers.

    This recipe is for two servings and you simply increase the ingredients for a larger batch. You can use grilled chicken instead of shrimp/prawns or throw in some grilled tofu/tempeh or chickpeas for a vegetarian version.

    Feel free to use any other salad vegetables such as cucumber, radish, fennel or steamed asparagus. As I said, it’s more about the dressing than anything else.

    Recipe Tips

    I often make this shrimp Caesar salad for a quick, high-protein lunch. I make the dressing ahead of time as it keeps for up to 7 days in the refrigerator. I have a couple of bags or containers of pre-washed, pat-dried lettuce ready to go so that saves quite a bit of time.

    I keep a bag of frozen de-shelled shrimp in the freezer, so I take a handful of those out and place in a bowl of hot water 10 minutes before I want to grill or pan-fry them. If I work from home, I will cook the shrimp, cut the vegetables and shave Parmesan at lunchtime.

    If I have to take it somewhere, I will usually do these steps the night before and pack the salad ready to go (mind you, shrimp could be pan-fried in the morning as it only takes a few minutes). I take the dressing in a separate container.

    More Quick & Easy Salad Meals

    Full Recipe 

    Find the full list of ingredients, instructions, and nutritional breakdown below. If you have questions or cook this recipe, please let me know in the comments, and make sure to rate this shrimp Caesar salad recipe so it’s easy for others to find.

    Want to Save This Recipe?

    Enter your email & I’ll send it to your inbox. Plus, get great new recipes from me every week!

    By submitting this form, you consent to receive emails from Cooked & Loved

    Nutritious and tasty, this grilled shrimp Caesar salad is super quick and easy to make. It features crispy lettuce, bacon, grilled prawns, sweet peppers and cherry tomatoes. The best part is the delicious, creamy Caesar dressing! This recipe is gluten-free and low-carb and I provided dairy-free/paleo modifications below.

    • Heat the oil in a large skillet and add the bacon. Cook on both sides until crispy, then remove to a plate and add the prawns. Season with a little pepper and garlic powder and cook for 2 minutes on each side. Set aside.

    • Roughly slice the bacon and prepare other salad ingredients.

    • Whisk the dressing ingredients and toss through the salad in a large bowl. Stir through the bacon and shaved Parmesan if using. Top with the grilled shrimp. 

    Paleo or dairy-free Caesar dressing:

    • 3 tablespoons mayo
    • 1.5 tablespoons almond milk
    • 1 teaspoon Worcestershire sauce
    • 1 garlic clove
    • 2 anchovies
    • 1 tablespoon lemon juice
    • 1 tablespoon nutritional yeast flakes
    • Pinch of pepper

    In the salad, replace parmesan cheese with a sprinkle of nutritional yeast or try this paleo Parmesan cheese option. 

    • Keto modifications: The salad is gluten-free and low-carb but if you want to reduce the carbohydrates intake even further, replace peppers and cherry tomatoes with lower-carb veggies like cucumber, radish, celery, fennel or lightly grilled/blanched asparagus or snow peas.

    Calories: 541kcal | Carbohydrates: 19g | Protein: 25g | Fat: 41g | Saturated Fat: 12g | Polyunsaturated Fat: 10g | Monounsaturated Fat: 16g | Trans Fat: 0.1g | Cholesterol: 128mg | Sodium: 1108mg | Potassium: 796mg | Fiber: 4g | Sugar: 10g | Vitamin A: 3767IU | Vitamin C: 123mg | Calcium: 277mg | Iron: 2mg

    Keywords: Shrimp Recipes, Shrimp salad, Prawn Salad, prawn recipes, Prawn Caesar Salad

    [mv_playlist id=”224″ jsonLd=”false” ratio=”16:9″ thumbnail=”https://mediavine-res.cloudinary.com/v1599716598/plqh05ivvby851y7acqo.jpg” title=”WATCH MY TOP 10 HEALTHY VIDEO RECIPES”]
    Save This Shrimp Caesar Salad Recipe To Pinterest

    Source link

  • Grilled Salmon Salad with Kale, Corn & Parmesan

    Grilled Salmon Salad with Kale, Corn & Parmesan

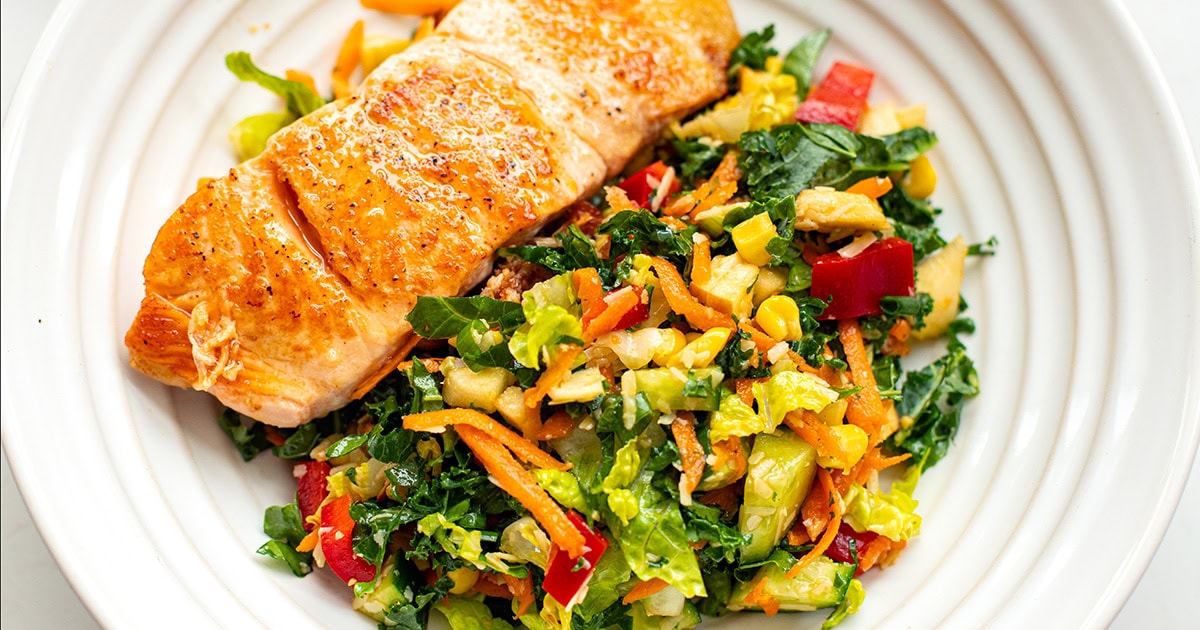
    Grilled maple salmon salad with kale, corn, apple, and Parmesan. A high-protein, healthy dinner or lunch idea, ready in 30 minutes. It’s sweet, savory, and packed with crunch.


    Jump to: ℹ️ Overview | 🛒 Ingredients | 📷 How To Make | 👩‍🍳 Recipe Tips | 🥗 Serving Suggestions | 📝 Full Recipe Card | 🍽 More Salmon Recipes And More Kale Recipes


    This is a grilled maple salmon salad bowl I make on a regular basis because it’s equal parts yummy and good for you.

    The salmon is simply pan-seared with a little maple syrup and lemon right at the end, so it gets this beautiful sweet-savory glaze that works so well with the rest of the bowl.

    The salad itself is a crunchy, colorful mix of kale, lettuce, red peppers, cucumber, sweet corn, apple, and Parmesan. There’s a real balance of flavors here: creamy, tangy, sweet, salty, and a little umami from the cheese.

    The first time I made this, it was one of those “what do I have in the fridge?” situations. I had a couple salmon fillets and a whole bunch of half-used produce: kale, corn, some crunchy lettuce, and half an apple. I tossed it all together, whipped up a quick dressing, and honestly… it was kind of magic. I loved the combo so much, I made it again a few days later—this time with grilled chicken—and it totally held up.

    This is one of those meals that hits that sweet spot between being really satisfying but not too heavy thanks to the fiber-rich kale and veggies, plus the lean protein in salmon. It’s naturally gluten-free and high in both protein and fiber, which helps support gut health and keep blood sugar levels steady.

    Nutrition (per serving): ~525 calories, 39 g protein and 6 g fiber.

    👩‍🍳 This recipe is part of my high-protein and fibre meals, you might also like these: Mediterranean fish with white bean purée, spicy tuna salad bites, chicken shawarma with baked rice, smashed chicken tacos, or Italian chopped salad with ham. Check out more salmon dinner ideas here.

    What You’ll Need

    Here is what you’ll need for this grilled salmon salad with kale, corn & Parmesan recipe. Find the full measurements in the recipe card below.

    • Salmon fillets – I used salmon fillets with skin off. Great source of protein and omega-3s. Plus, live oil spray for cooking, salt and pepper for seasoning and maple syrup and lemon juice for that glossy, tangy sweet glaze finish.

    For the Salad

    • Kale & lettuce – fiber-packed and crisp, the base of the salad. Swap kale for baby spinach or rocket if preferred.
    • Red pepper, cucumber, carrot, green onions – crunchy, colorful veg.
    • Apple – for a little sweet crunch that pairs surprisingly well with Parmesan.
    • Corn – adds sweetness and heartiness. I use frozen corn which I defrost in boiling water for a couple of minutes.
    • Freshly grated Parmesan – salty, umami, a must! Use feta instead of Parmesan for a tangier vibe. For dairy-free: skip the cheese or use a vegan option.
    • Add cooked quinoa or chickpeas to bulk it up.

    For the Dressing:

    • Lemon juice, maple syrup – bright and balanced.
    • Dijon mustard & balsamic vinegar – tangy depth.
    • Olive oil – richness and body.
    • Salt, garlic powder, black pepper – classic seasoning blend.

    How To Make Grilled Salmon Salad with Kale, Corn & Parmesan

    Find the full recipe and nutritional information below. Here are some handy step-by-step photos for grilled salmon salad with kale, corn & Parmesan.

    • Prep the veggies: Massage kale, chop lettuce, dice all the veg and apple, grate the cheese.
    • Make the dressing: Whisk all dressing ingredients in a big salad bowl.
    • Toss the salad: Add veggies, corn, and Parmesan. Mix well.
    • Cook the salmon: Heat a non-stick pan or a skillet, spray with olive oil, season salmon with salt and pepper. Cook 3–4 minutes on one side, then flip for 2 minutes.
    • Glaze the salmon: Drizzle with maple syrup and lemon juice right at the end of cooking.
    • Assemble: Divide salad between bowls and top with salmon.

    Recipe Tips/Variations

    • Make ahead: The dressing and chopped veggies (except apple) can be prepped a day ahead. Just toss fresh before serving.
    • Storage: Leftovers keep well in the fridge for up to 2 days, but store the salmon and salad separately for best texture.
    • Add crunch: Toasted seeds or croutons work great here.
    • Variations: Add a soft-boiled egg, avocado, or even swap the salmon for grilled chicken or tofu. You can swap veggies and leafy greens depending on what you like.

    Serving Suggestions

    This is a complete meal on its own, but if you want to stretch it out, serve with a slice of crusty sourdough or some roasted baby potatoes on the side. It’s also great cold the next day – perfect for lunch boxes!

    You Might Also Like These Salmon Bowls

    💬 If you’ve tried this grilled salmon salad with kale, corn & Parmesan or any other recipe on the blog then don’t forget to rate the recipe and let me know how you got on in the comments below, I love hearing from you! You can also FOLLOW ME on Instagram, Facebook, Pinterest, YouTube, and or sign up to my Newsletter to see more of my delicious food.

    Want to Save This Recipe?

    Enter your email & I’ll send it to your inbox. Plus, get great new recipes from me every week!

    By submitting this form, you consent to receive emails from Cooked & Loved

    Grilled maple salmon salad with kale, corn, apple, and Parmesan. A high-protein, healthy dinner or lunch idea, ready in 30 minutes. It’s sweet, savory, and packed with crunch. Find step-by-step photos and more recipe tips above.

    • Prepare the salad: Massage kale with a bit of olive oil or lemon juice to soften. Dice all other veggies and apple, grate the Parmesan.

    • Make the dressing: In a large salad bowl, whisk together all dressing ingredients.

    • Toss salad: Add kale, lettuce, chopped veggies, corn, and Parmesan to the bowl. Toss well to coat.

    • Cook the salmon: Heat a non-stick frying pan over medium-high heat. Spray with olive oil. Season salmon with salt and pepper. Cook for 3–4 minutes on one side, then flip and cook for another 2 minutes.

    • Glaze: Right at the end, drizzle each fillet with 1 teaspoon maple syrup and 1 teaspoon lemon juice. Let it sizzle for 30 seconds.

    • Assemble: Serve the salad in bowls and top with the warm maple-glazed salmon.

    • Can I use frozen salmon? Yes! Just make sure it’s fully thawed and patted dry before cooking.
    • What’s a good sub for kale? Spinach or rocket (arugula) work well – just skip the massaging step.
    • Is this good cold? Absolutely. It’s delicious as a cold salmon salad bowl for lunch the next day.
    • Can I bake the salmon instead? Totally. Bake at 400°F (200°C) for about 10–12 minutes, then glaze in the last 2 minutes.
    • Make ahead: The dressing and chopped veggies (except apple) can be prepped a day ahead. Just toss fresh before serving.
    • Storage: Leftovers keep well in the fridge for up to 2 days, but store the salmon and salad separately for best texture.
    • Add crunch: Toasted seeds or croutons work great here.
    • Variations: Add a soft-boiled egg, avocado, or even swap the salmon for grilled chicken or tofu. You can swap veggies and leafy greens depending on what you like.

    Calories: 527kcal | Carbohydrates: 40g | Protein: 39g | Fat: 24g | Saturated Fat: 6g | Polyunsaturated Fat: 5g | Monounsaturated Fat: 10g | Cholesterol: 99mg | Sodium: 1245mg | Potassium: 1339mg | Fiber: 6g | Sugar: 22g | Vitamin A: 8269IU | Vitamin C: 85mg | Calcium: 357mg | Iron: 3mg

    Keywords: salmon bowl recipes, Healthy Salmon Salad Bowl, Grilled Maple Salmon With Kale Salad, Salmon Salad

    More Salmon Recipes

    More Kale Recipes


    Source link

  • Grilled Chicken Caesar Salad | The Recipe Critic

    Grilled Chicken Caesar Salad | The Recipe Critic

    This website may contain affiliate links and advertising so that we can provide recipes to you. Read my disclosure policy.

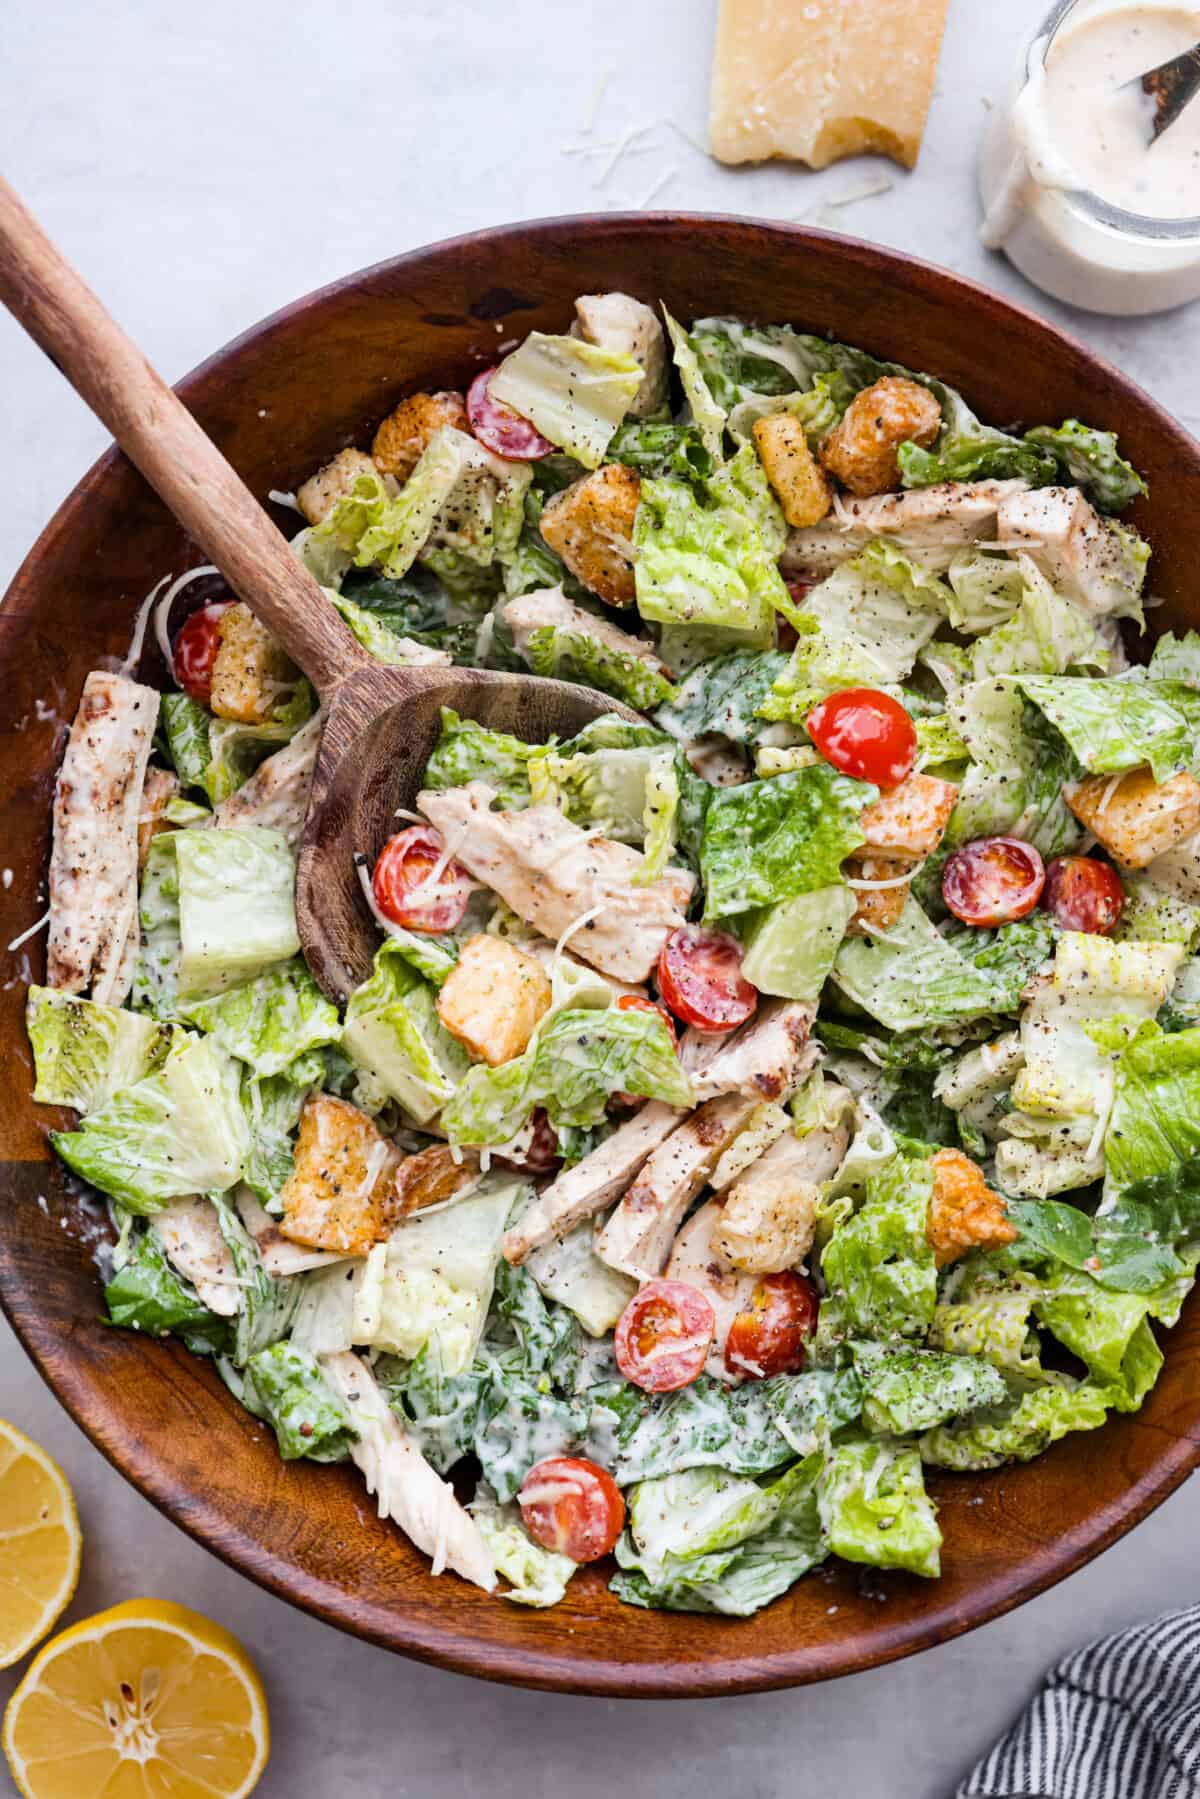
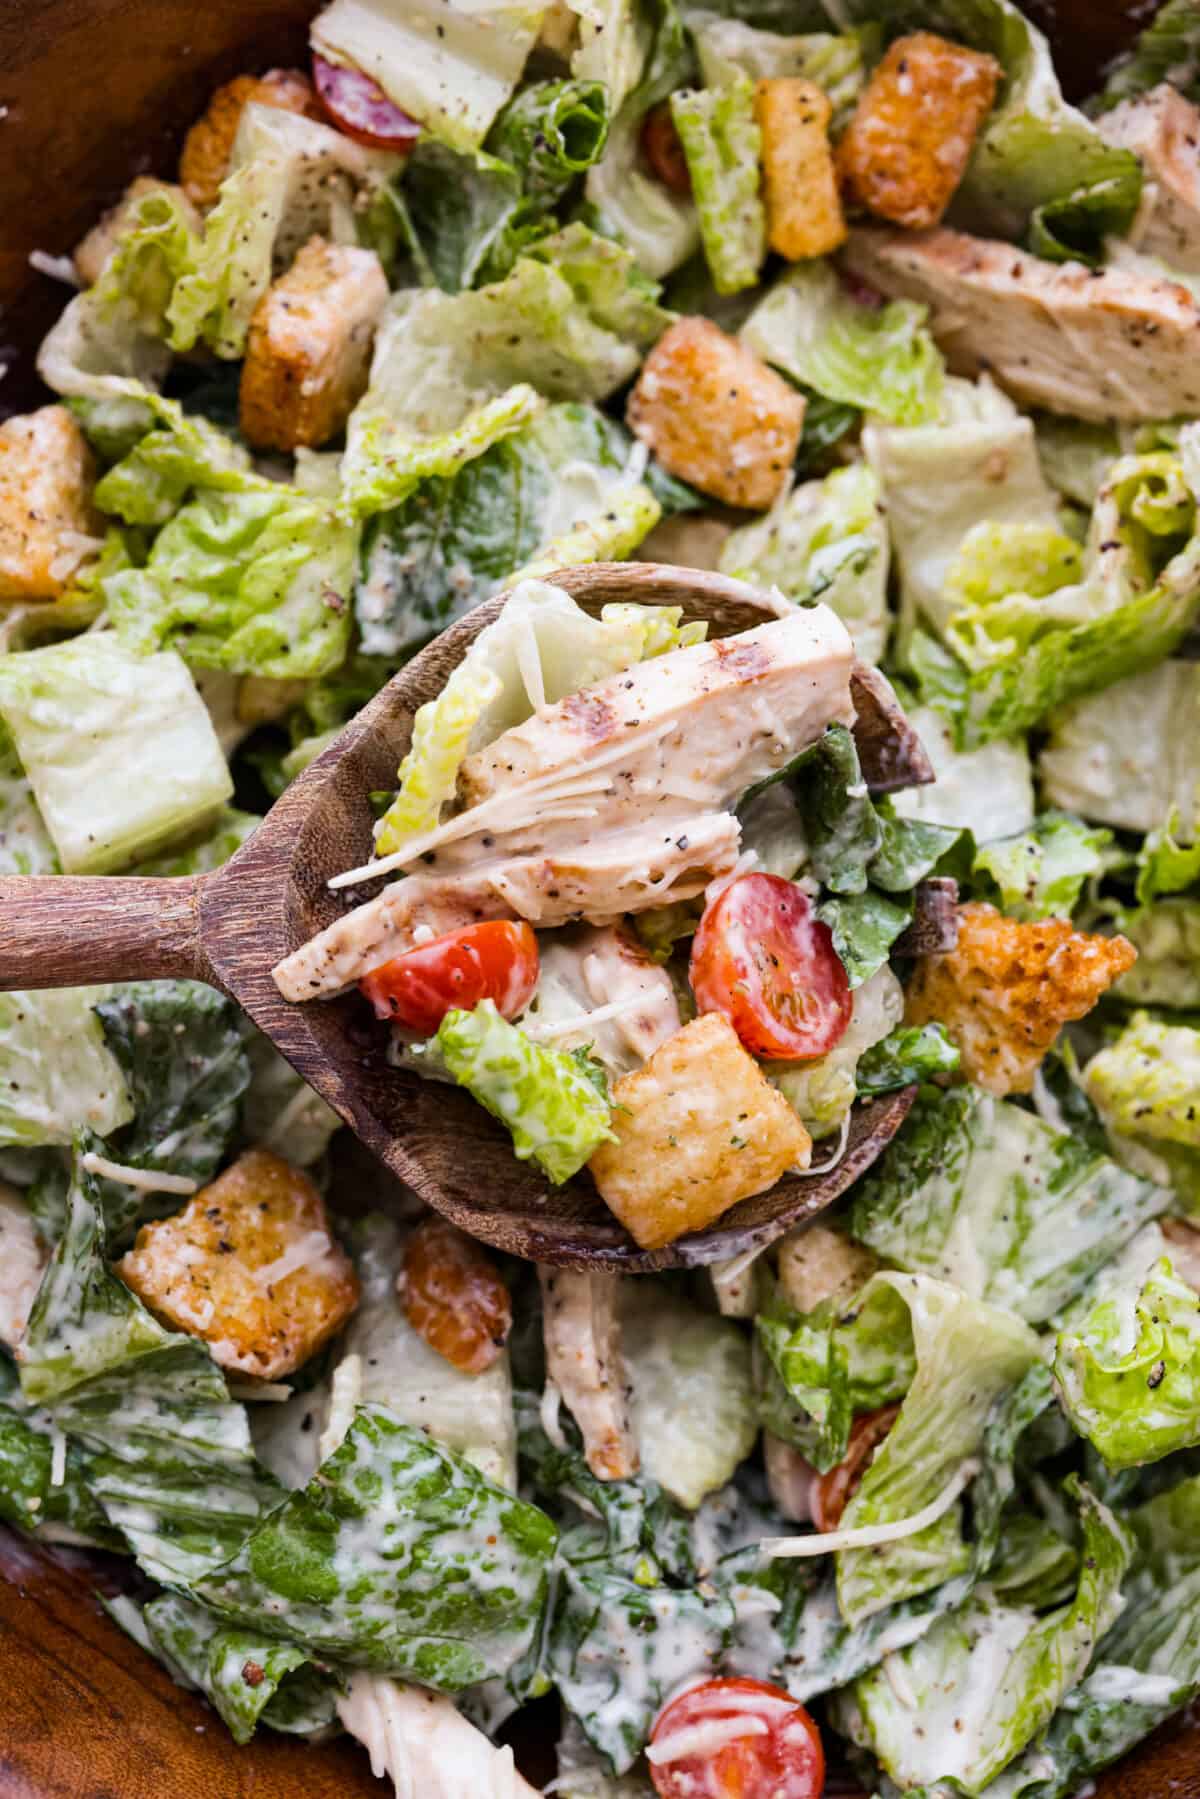
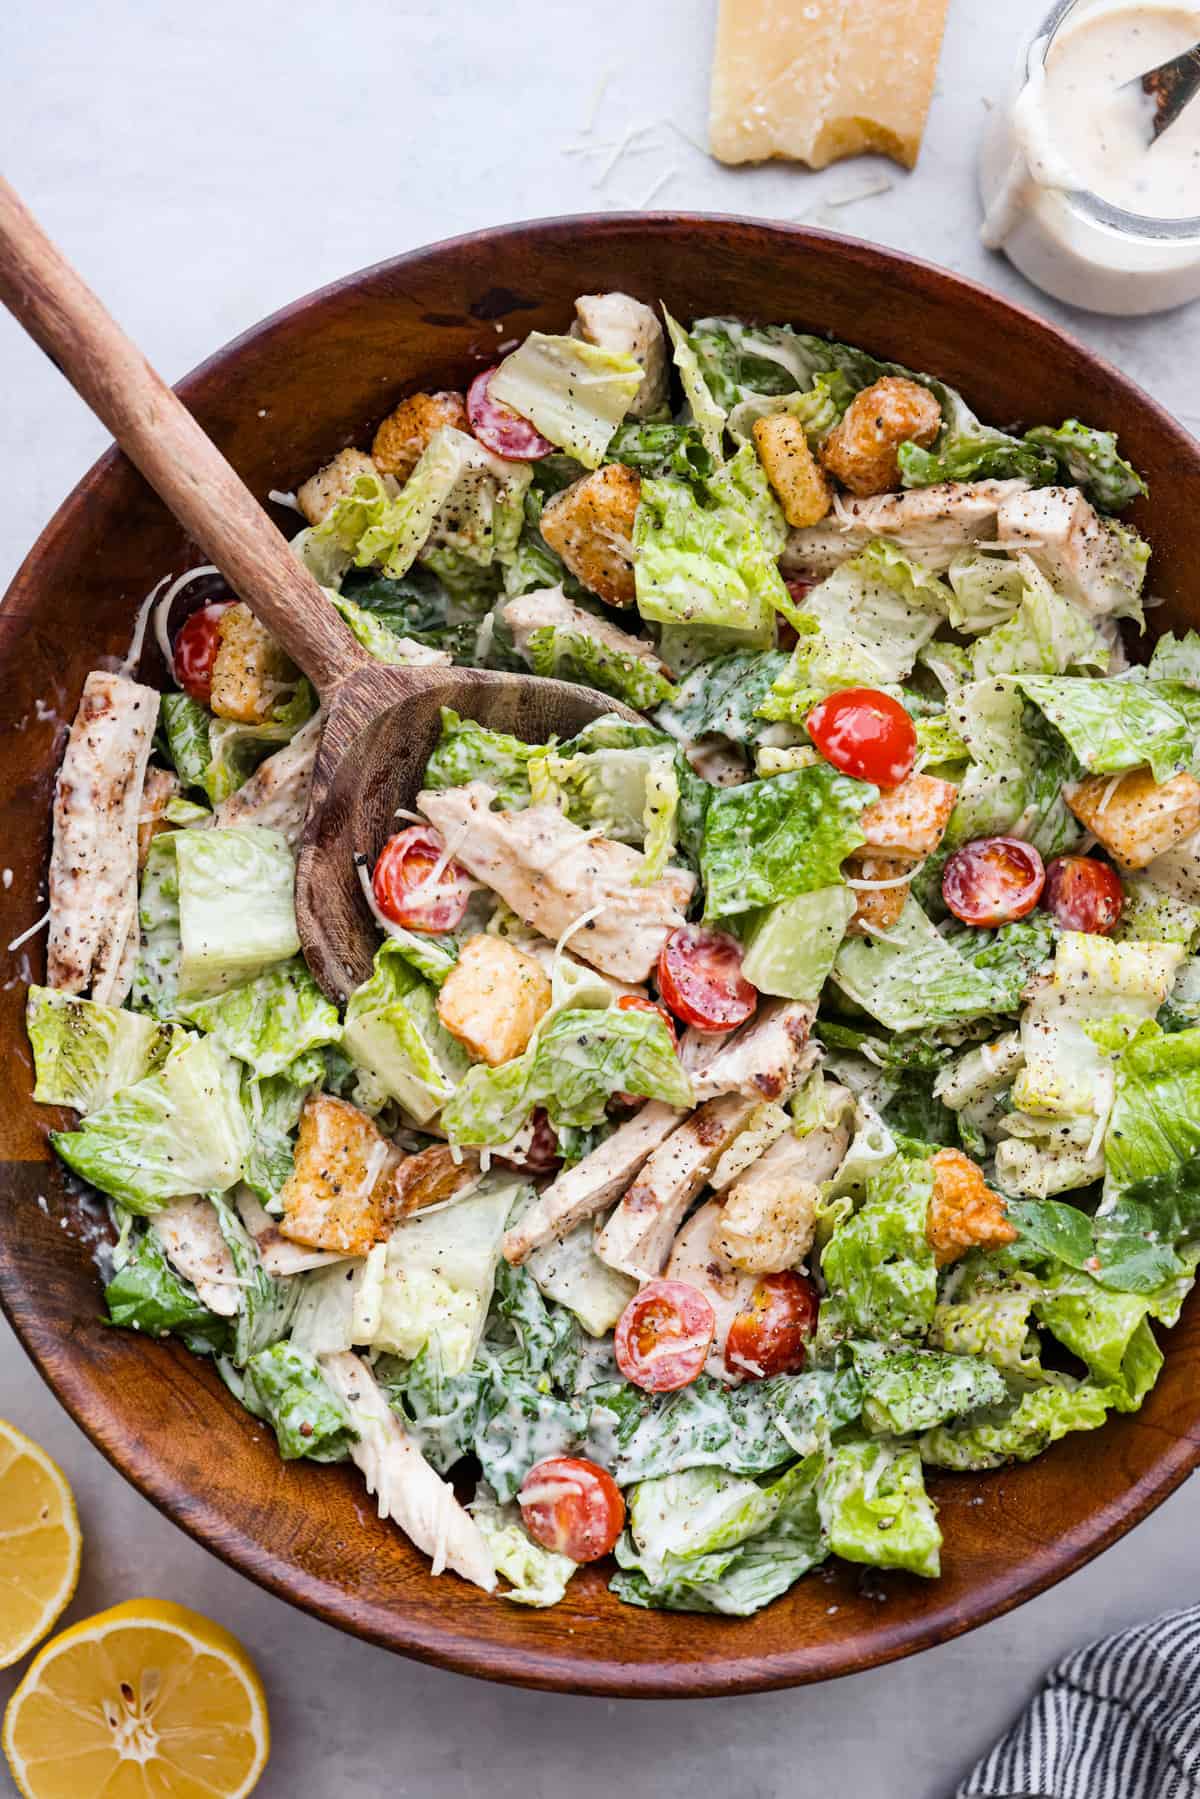
    Fresh and delicious Grilled Chicken Caesar Salad is a crowd-pleasing hearty salad with tender grilled chicken, crisp romaine lettuce, cherry tomatoes, shredded parmesan cheese, and crunchy croutons!

    Satisfying and flavorful salads like this one never go out of style. They make the perfect lunch or light dinner! Try out this greek broccoli pasta salad, this delicious honey mustard chicken salad, and this amazing Portillo’s chopped salad.

    Top view of a chicken caesar salad in a wooden bowl with a wooden spoon in it.

    Reasons to Make This Salad

    • It’s so filling: This chicken Caesar salad includes vegetables, lean protein, and many essential vitamins and minerals. It’s one of those salads that will fuel you for hours.
    • So delicious: The combination of crisp romaine, juicy tomatoes, flavorful chicken, delicious parmesan cheese, and crunchy croutons creates a mouthwatering flavor profile that’s a hit with almost everyone.

    Grilled Chicken Caesar Salad

    This grilled chicken Caesar salad is my favorite refreshing meal when the weather starts to warm up! I’ve always been a huge fan of a good classic Caesar salad, but this one with juicy, flavor-packed grilled chicken and juicy tomatoes is on a whole new level.

    It’s actually pretty easy to make, too! Let the chicken marinate in Caesar dressing to add plenty of that delicious Caesar flavor. Then, once the chicken is grilled, everything comes together in minutes. Serve it alone or with some crusty buttered sourdough bread on the side.

    Ingredients in Chicken Caesar Salad

    This grilled chicken salad recipe is the absolute best! The ingredients are simple and come together with very little effort. Check out the recipe card at the bottom of the post for exact measurements.

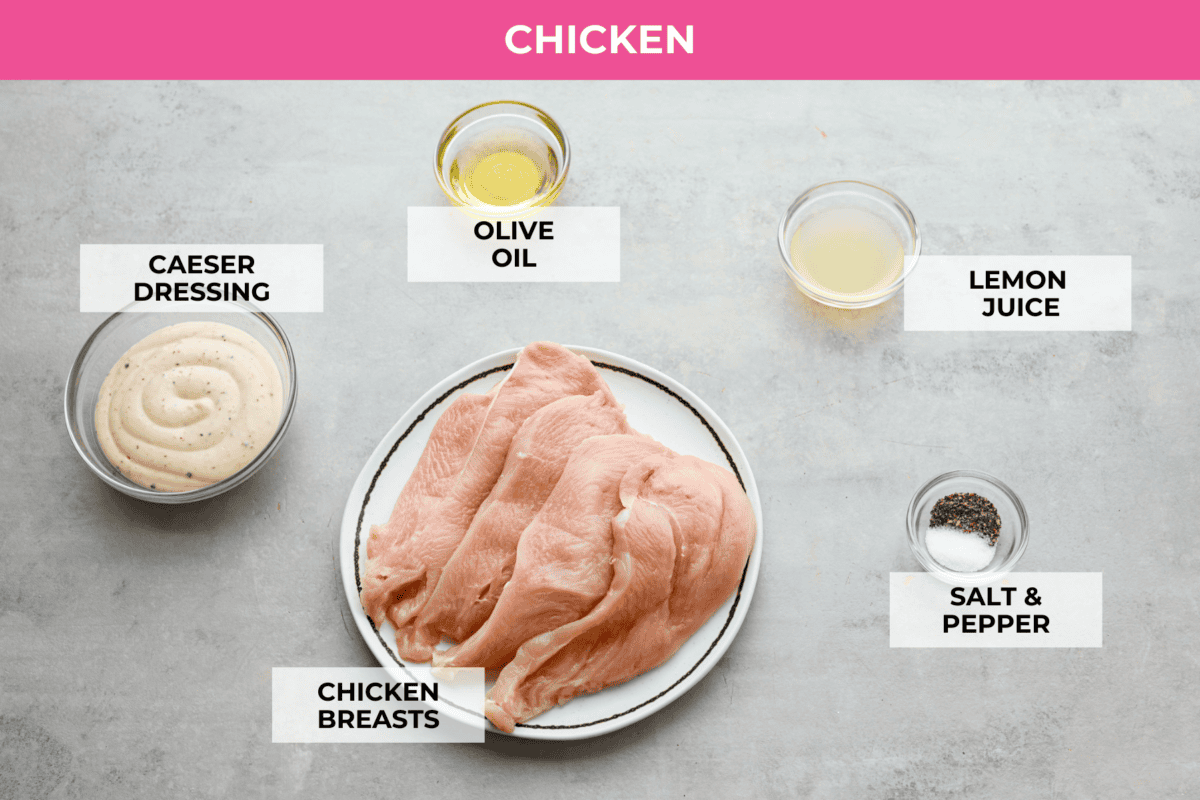
    Chicken

    • Caesar Dressing: You can use store-bought dressing, but we highly recommend this homemade Caesar Dressing. It’s perfectly creamy with incredible flavor!
    • Olive Oil: Smooths out the marinade and adds some necessary fat for juicy grilled chicken.
    • Lemon Juice: All good marinades have just enough acidity to tenderize the meat.
    • Salt & Pepper: Brings out all of the delicious flavor.
    • Chicken Breasts: These will marinate in the dressing for at least 1 hour making them tender, juicy and full of flavor.
    Top view of ingredients for chicken marinade.

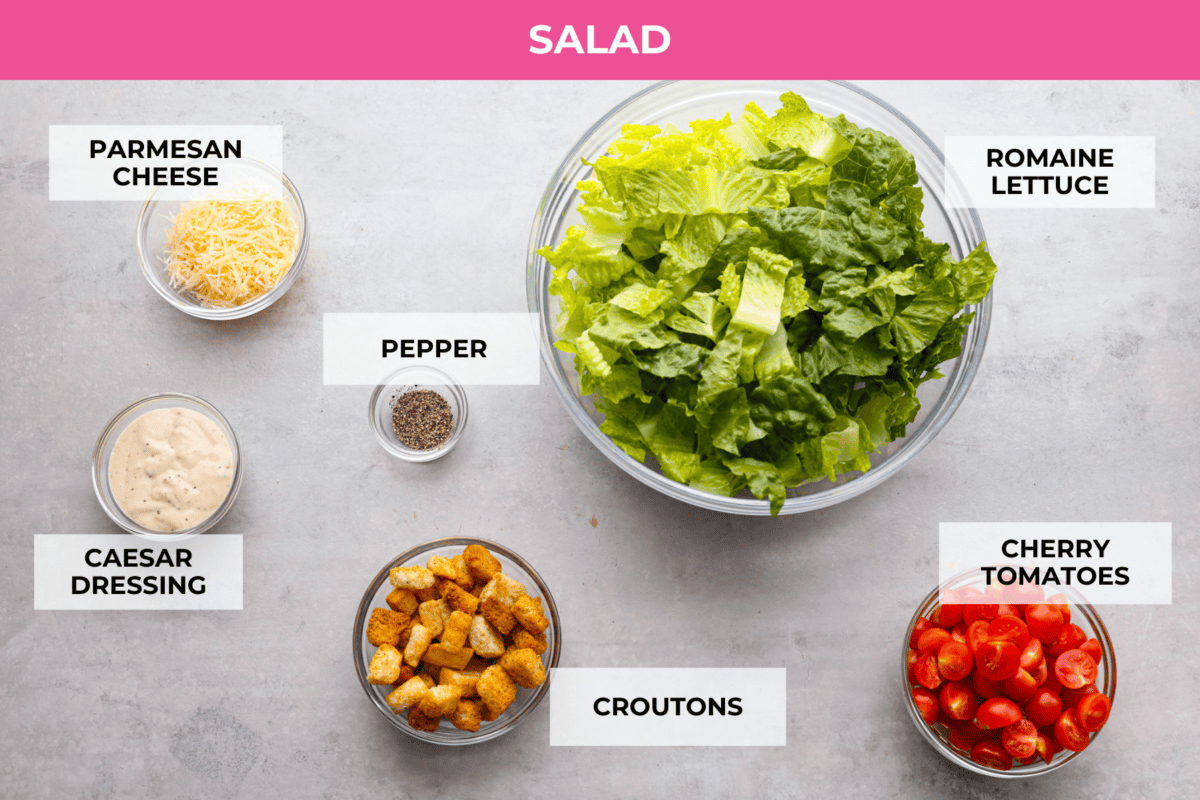
    Salad

    • Romaine: Chopped romaine adds bright green color and makes the salad fresh and crisp.
    • Cherry Tomatoes: For juicy bursts of sweetness.
    • Croutons: I love using my homemade croutons to add plenty of crunchy texture.
    • Parmesan Cheese: Add shredded or shaved parmesan cheese for a bit of nutty sharpness that enhances the flavor of the dressing.
    • Caesar Dressing: You can’t have a Caesar salad without Caesar Dressing! It adds the most wonderful briny, tangy and rich taste.
    • Black Pepper: Freshly cracked black pepper is the perfect finishing touch!
    Top view of labeled ingredients for the salad.

    How to Make a Grilled Chicken Caesar Salad

    Just five simple steps and you’re well on your way to the best salad of your life! This is one of those salads that even the kids will love. It’s that good! Here’s the easy process of how everything comes together:

    For the chicken

    1. Make the Marinade: In a large sealable bag or container, mix together the Caesar dressing, olive oil, lemon juice, and salt and pepper.
    2. Marinate the Chicken: Add the chicken breasts to the bag or container and coat each breast evenly. Place the chicken in the fridge to marinate for at least 1 hour.
    3. Grill: Heat a grill up to 375 degrees Fahrenheit. Once the chicken is ready, remove it from the marinade and grill for about 6-8 minutes on each side. Discard the marinade.

    For the salad.

    1. Slice Chicken: Once the chicken is grilled, let it rest at least 5 minutes before slicing into ½ inch strips.
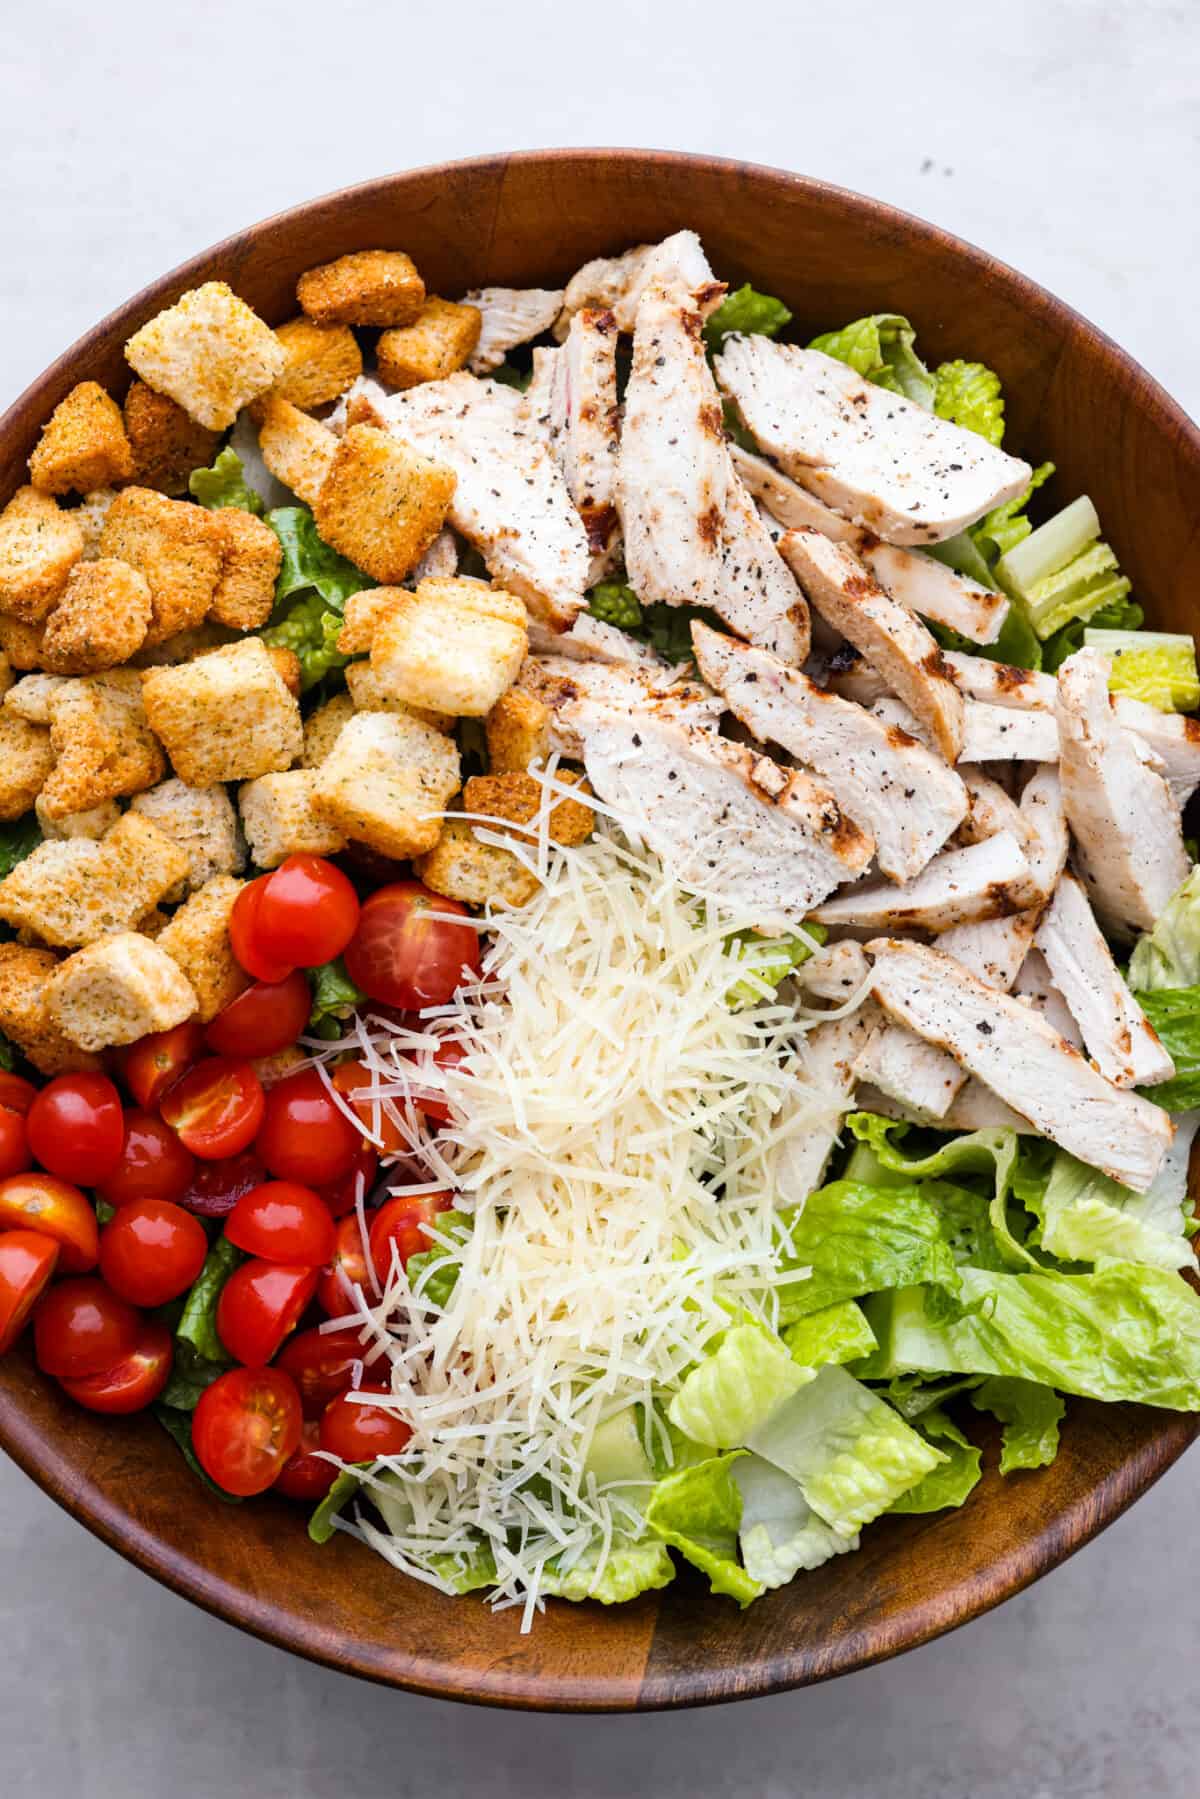
    2. Assemble and Toss Salad: To a large bowl add the chopped romaine, cherry tomatoes, croutons, parmesan cheese, sliced chicken and caesar dressing, top with freshly cracked black pepper and toss.
    Grilled chicken caesar salad in a bowl.  ready to be mixed.

    Tips and Variations

    With a joining of fresh ingredients and a flavorful, creamy salad dressing, this is definitely my new favorite salad recipe! Here are some helpful tips and ways to make it your own!

    • Using Homemade Dressing: I like to use my homemade dressing, but a store-bought dressing works just as well! The same goes for the croutons. 
    • Marinating the Chicken: Your chicken can marinate for up to 4 hours, but 1 hour is sufficient. If you’re in a hurry, even 30 minutes will be okay, but not quite as good.
    • Salad Greens: Romaine is classic in Caesar salads; however, any favorite greens will work. You can even use a combination of several varieties.
    • Precooked Chicken: You can totally use pre-cooked chicken or rotisserie chicken for this recipe, but what makes it special is the marinated grilled chicken.

    A close up of grilled chicken caesar salad in a bowl being scooped with a wooden spoon.

    Make Ahead & Storing Leftovers

    • Make Ahead: Get a head start by making the dressing and grilling the chicken a day or two ahead, and store each separately in airtight containers in the refrigerator. You can also chop the lettuce and tomatoes beforehand. Then, when it comes time to serve, pull everything out of the fridge, assemble, and enjoy!
    • Leftovers: Once the salad is tossed, it’s best enjoyed the day it’s made, but you can keep leftovers in an airtight container in the fridge for up to 3 days. It’s best to store the dressing separately from the salad.

    More Delicious Caesar Recipes

    The garlicky, smoky, salty and lemony flavors that make up that classic Caesar taste we all know and love is one of my favs. Anything with that delicious Caesar flavor and I’m bound to be obsessed!

    Grilled Caesar Salad

    19 minutes

    Pin this now to find it later

    Pin It


    Source link

  • Easy Cherry Tomato Salad Recipe

    Easy Cherry Tomato Salad Recipe

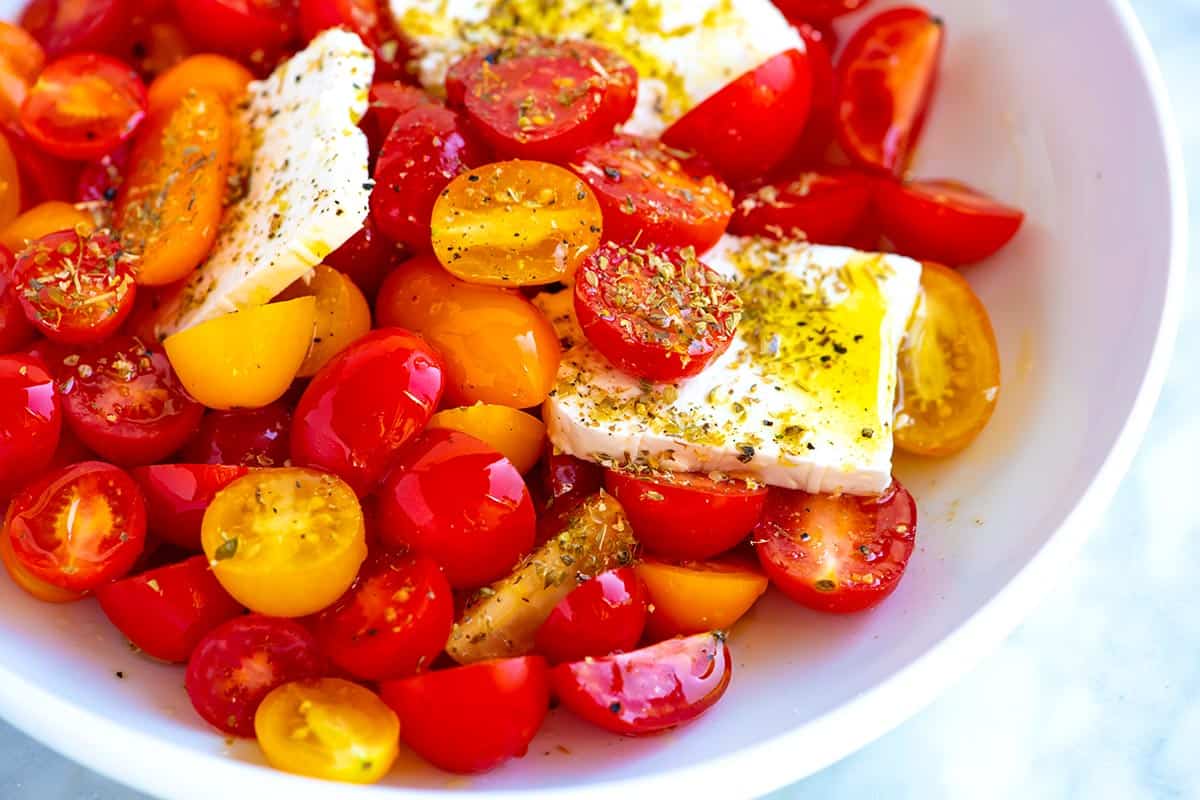
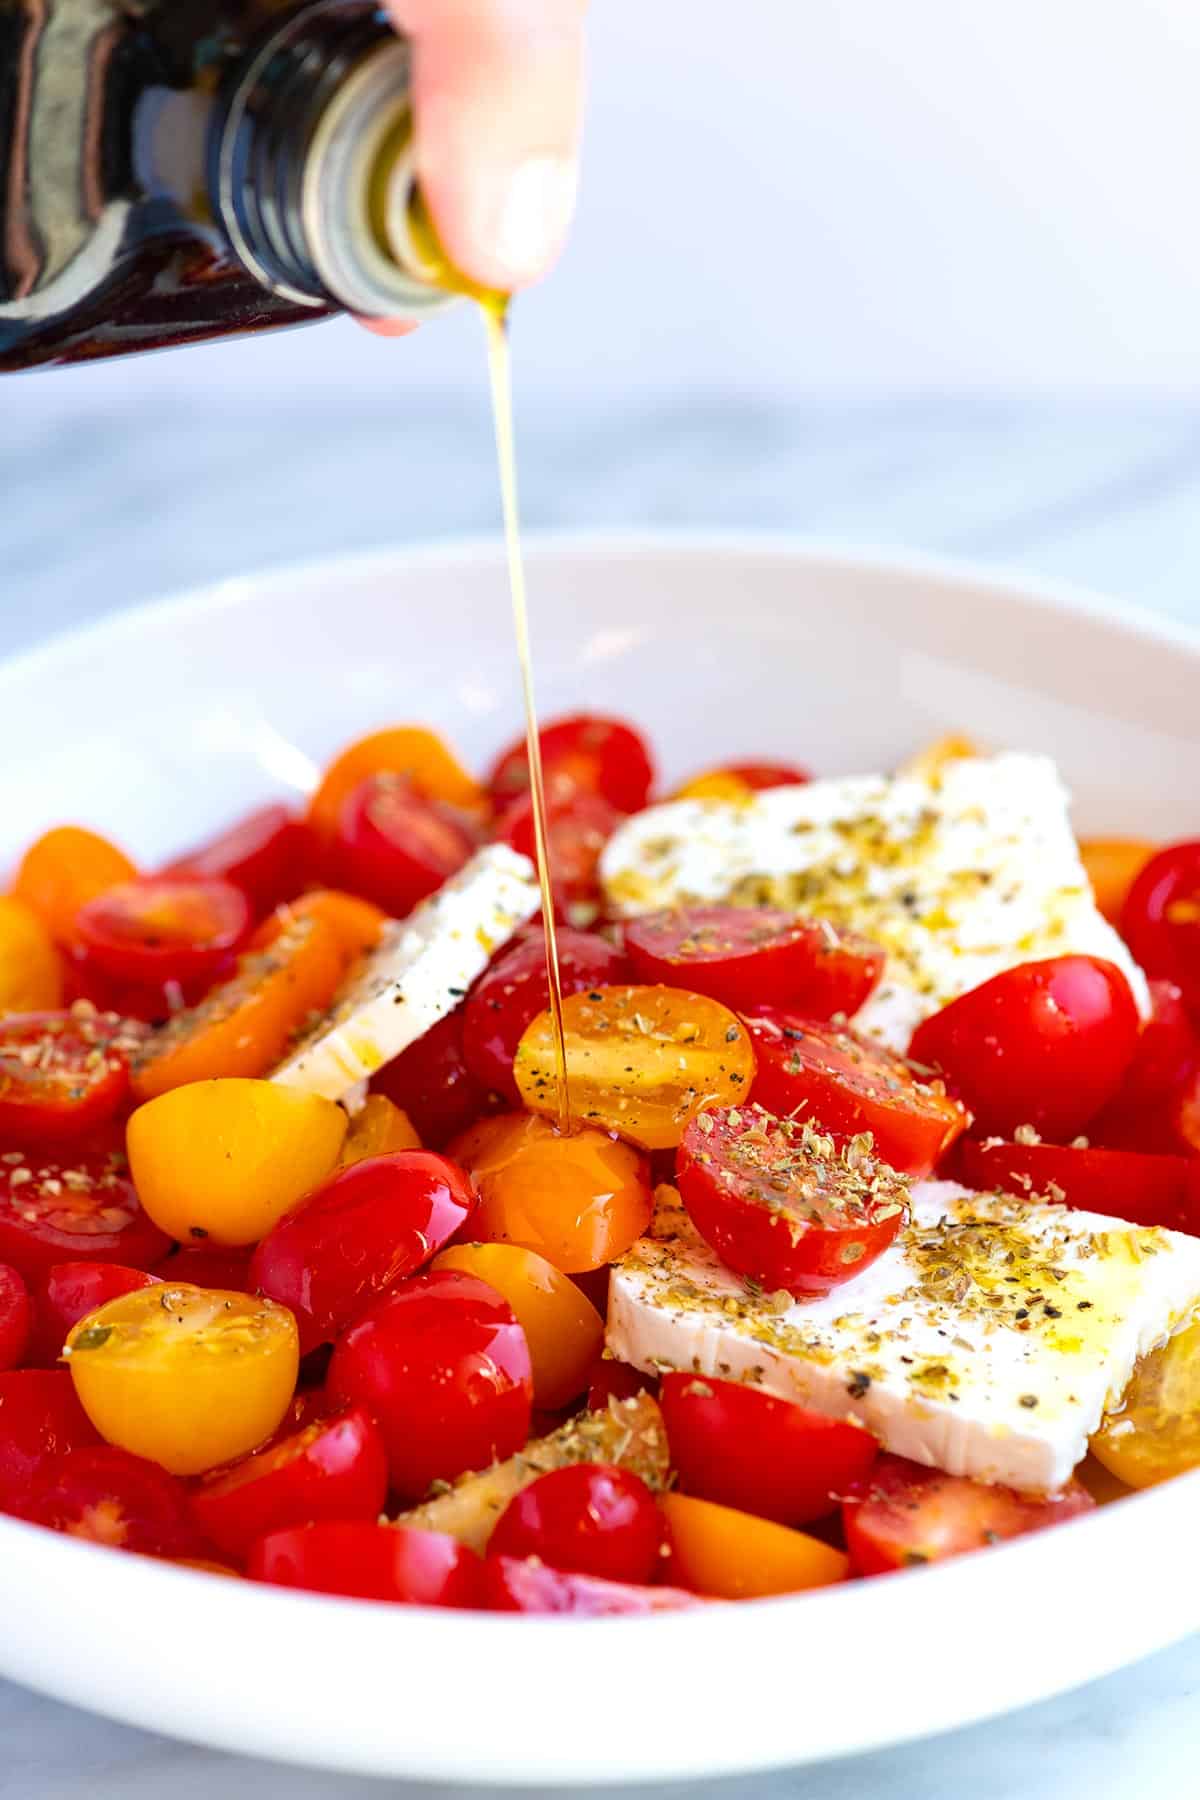
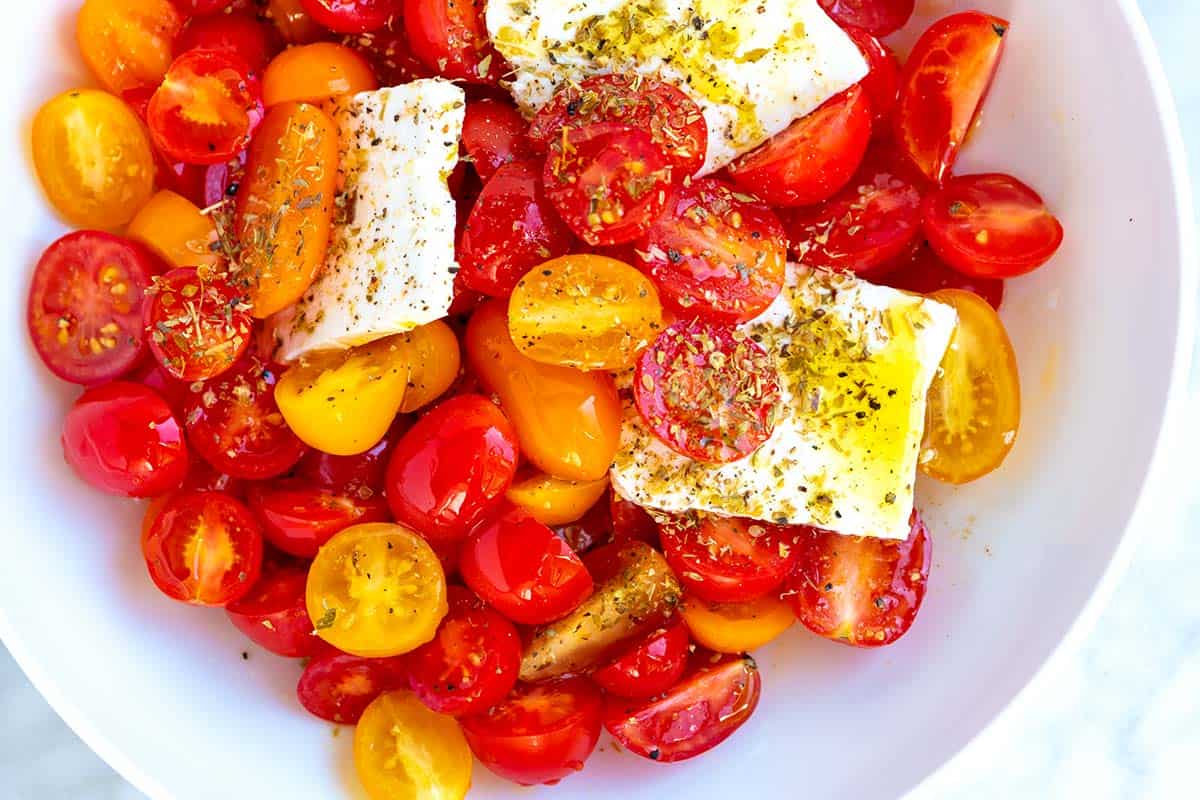
    My favorite cherry tomato salad is made with juicy cherry tomatoes, a simple olive oil dressing, and briny feta cheese! It’s super simple, absolutely delicious, and sure to be a hit!

    Easy Cherry Tomato Salad

    Whenever I have cherry tomatoes in the house, I save a handful to make this easy cherry tomato salad. It’s absolutely perfect. I love it so much that I could honestly eat it every day!

    The trick is quickly marinating the tomatoes in salt before adding the other salad ingredients. I use the same trick for this tomato mozzarella salad and our favorite caprese salad!

    Key Ingredients

    • Cherry tomatoes: We designed this as a cherry tomato salad, but you can use any variety of tomato. Make sure that they are ripe, sweet, and juicy.
    • Vinegar: Use red wine vinegar, white wine vinegar, champagne vinegar, or balsamic vinegar. They are all delicious!
    • Oregano: This cherry tomato salad is inspired by our Greek salad recipe, so I use a good amount of dried Oregano. I love it!
    • Olive Oil: Use your favorite kind. It will combine with the tomato juices to make a delicious dressing.
    • Salt and Pepper: The trick to the best tomato salad is to salt your tomatoes ahead of time. You’ll see me say the same thing on all the tomato salad recipes we’ve shared (this caprese salad being one example). The salt draws out the tomato juices, intensifying their flavor. Then, those juices mix with our olive oil to create a simple dressing.
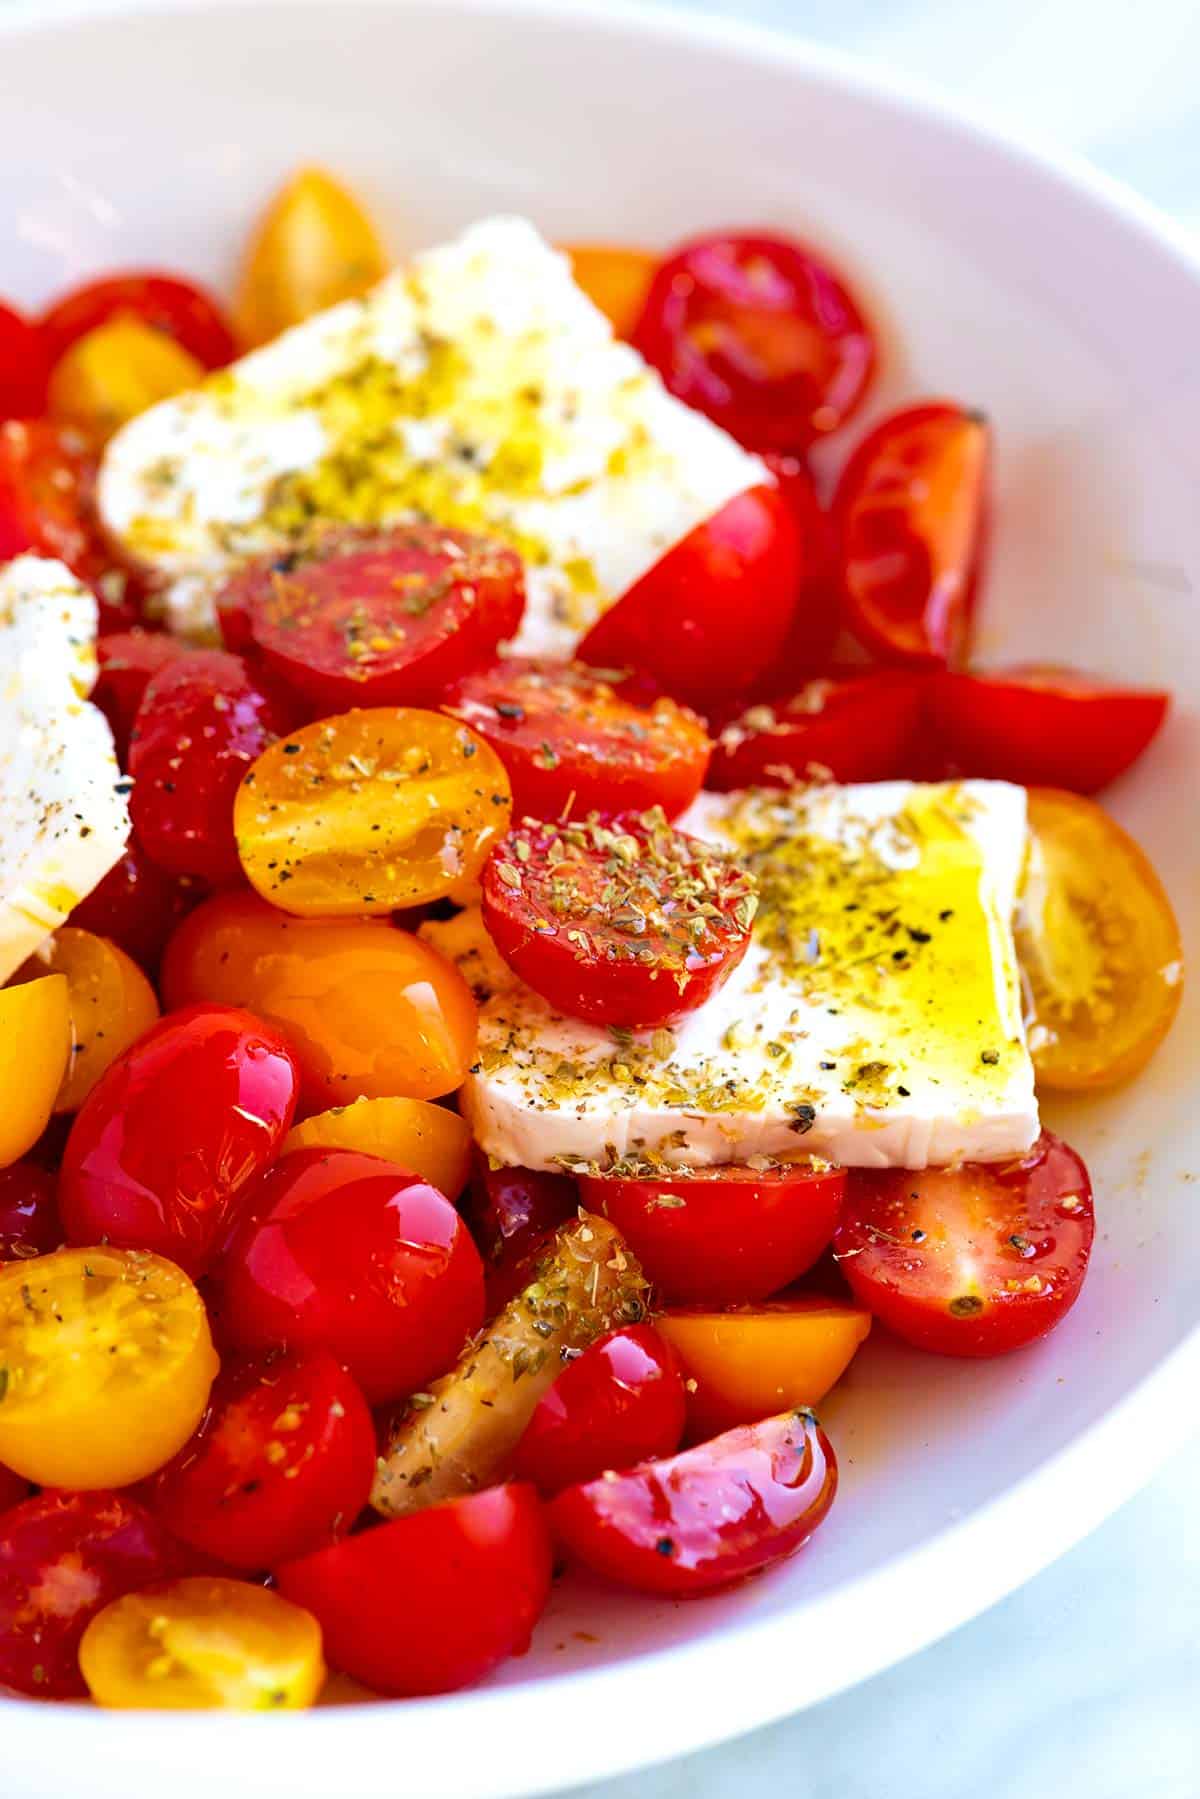
    • Feta: I love adding big slabs of feta cheese to this salad. They crumble and mix into the salad as you push your fork into them. Mozzarella or burrata cheese is also excellent.
    Drizzling Olive Oil over Cherry Tomato Salad

    How to Make My Favorite Cherry Tomato Salad

    The key to this cherry tomato salad is giving the salt and tomatoes time together before adding anything else. They taste great by themselves, but they are incredible after I allow the tomatoes to marinate in a little salt for a bit. Their sweetness and flavor intensify. (I also use this tip for the best bruschetta!)

    When you’re ready to eat the salad, stir in a bit of acid. I’ve been obsessed with champagne vinegar lately, but red wine vinegar or balsamic vinegar are fantastic with cherry tomatoes.

    As a nod to Greek salad, I add a slab of feta cheese. Then I scatter some oregano and pepper on top and finish with a drizzle of high-quality olive oil. It’s easy, fresh, and delicious. Make this one soon. I know you’ll love it!

    Easy Cherry Tomato Salad

    Easy Cherry Tomato Salad

    • PREP
    • TOTAL

    This cherry tomato salad recipe is undeniably simple, but that doesn’t mean it won’t blow you away. Salting the tomatoes for at least 10 minutes intensifies their sweetness and flavor. We call for cherry tomatoes, but all varieties, large and small, work.

    Makes 2 servings

    You Will Need

    2 cups cherry tomatoes, about 10 ounces

    1/4 teaspoon fine sea salt

    1 teaspoon vinegar like red wine, balsamic or champagne vinegar or use fresh lemon juice

    2 ounces feta cheese, cut into large slabs

    1/4 teaspoon dried oregano

    Generous pinch of fresh ground pepper

    1 tablespoon extra-virgin olive oil

    Directions

      1Halve or quarter the tomatoes so they are a variety of shapes and sizes.

      2Add to a serving bowl, then toss with salt. Set aside for at least 10 minutes.

      3Stir in the vinegar, and then nestle the feta cheese slabs into the pile of tomatoes.

      4Scatter the oregano and black pepper on top.

      5Finish with a drizzle of olive oil.

    Adam and Joanne’s Tips

    • Storing: This is best eaten the day you make it, but will keep, covered in the refrigerator, for a day or two.
    • The nutrition facts provided below are estimates.

    Nutrition Per Serving
    Serving Size
    1/2 of the recipe
    /
    Calories
    169
    /
    Total Fat
    13.4g
    /
    Saturated Fat
    5.3g
    /
    Cholesterol
    25.3mg
    /
    Sodium
    560.4mg
    /
    Carbohydrate
    8.5g
    /
    Dietary Fiber
    2.3g
    /
    Total Sugars
    5.9g
    /
    Protein
    5.7g


    AUTHOR:

    Adam Gallagher

    Adam and Joanne of Inspired Taste

    We are Adam and Joanne Gallagher, the creators of Inspired Taste. Established in 2009, Inspired Taste grew from a childhood dream into one of the internet’s most trusted recipe sites with hundreds of reliable recipes, step-by-step videos, and expert tips.More About Us

    Previous Post: Easy Ham and Cabbage Soup
    Next Post: Homemade Red Curry Paste

    Source link

  • No Mayo Herb Potato Salad Recipe

    No Mayo Herb Potato Salad Recipe

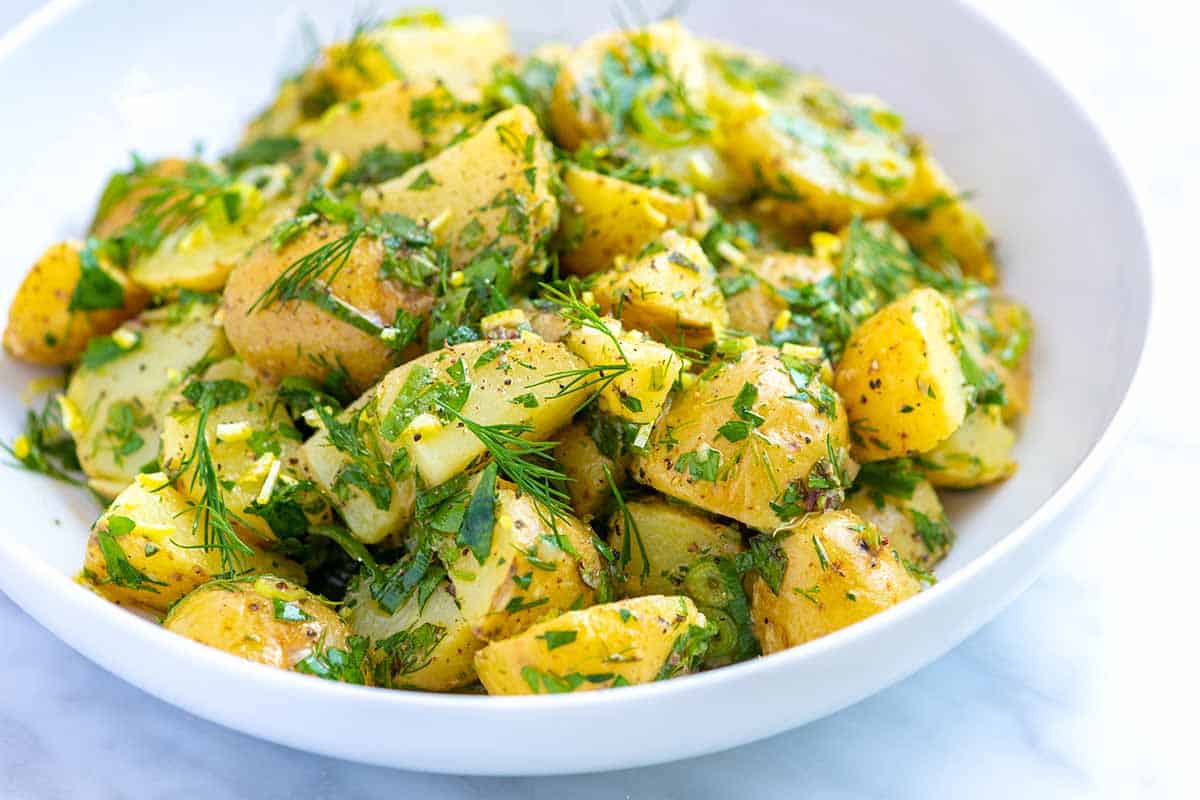
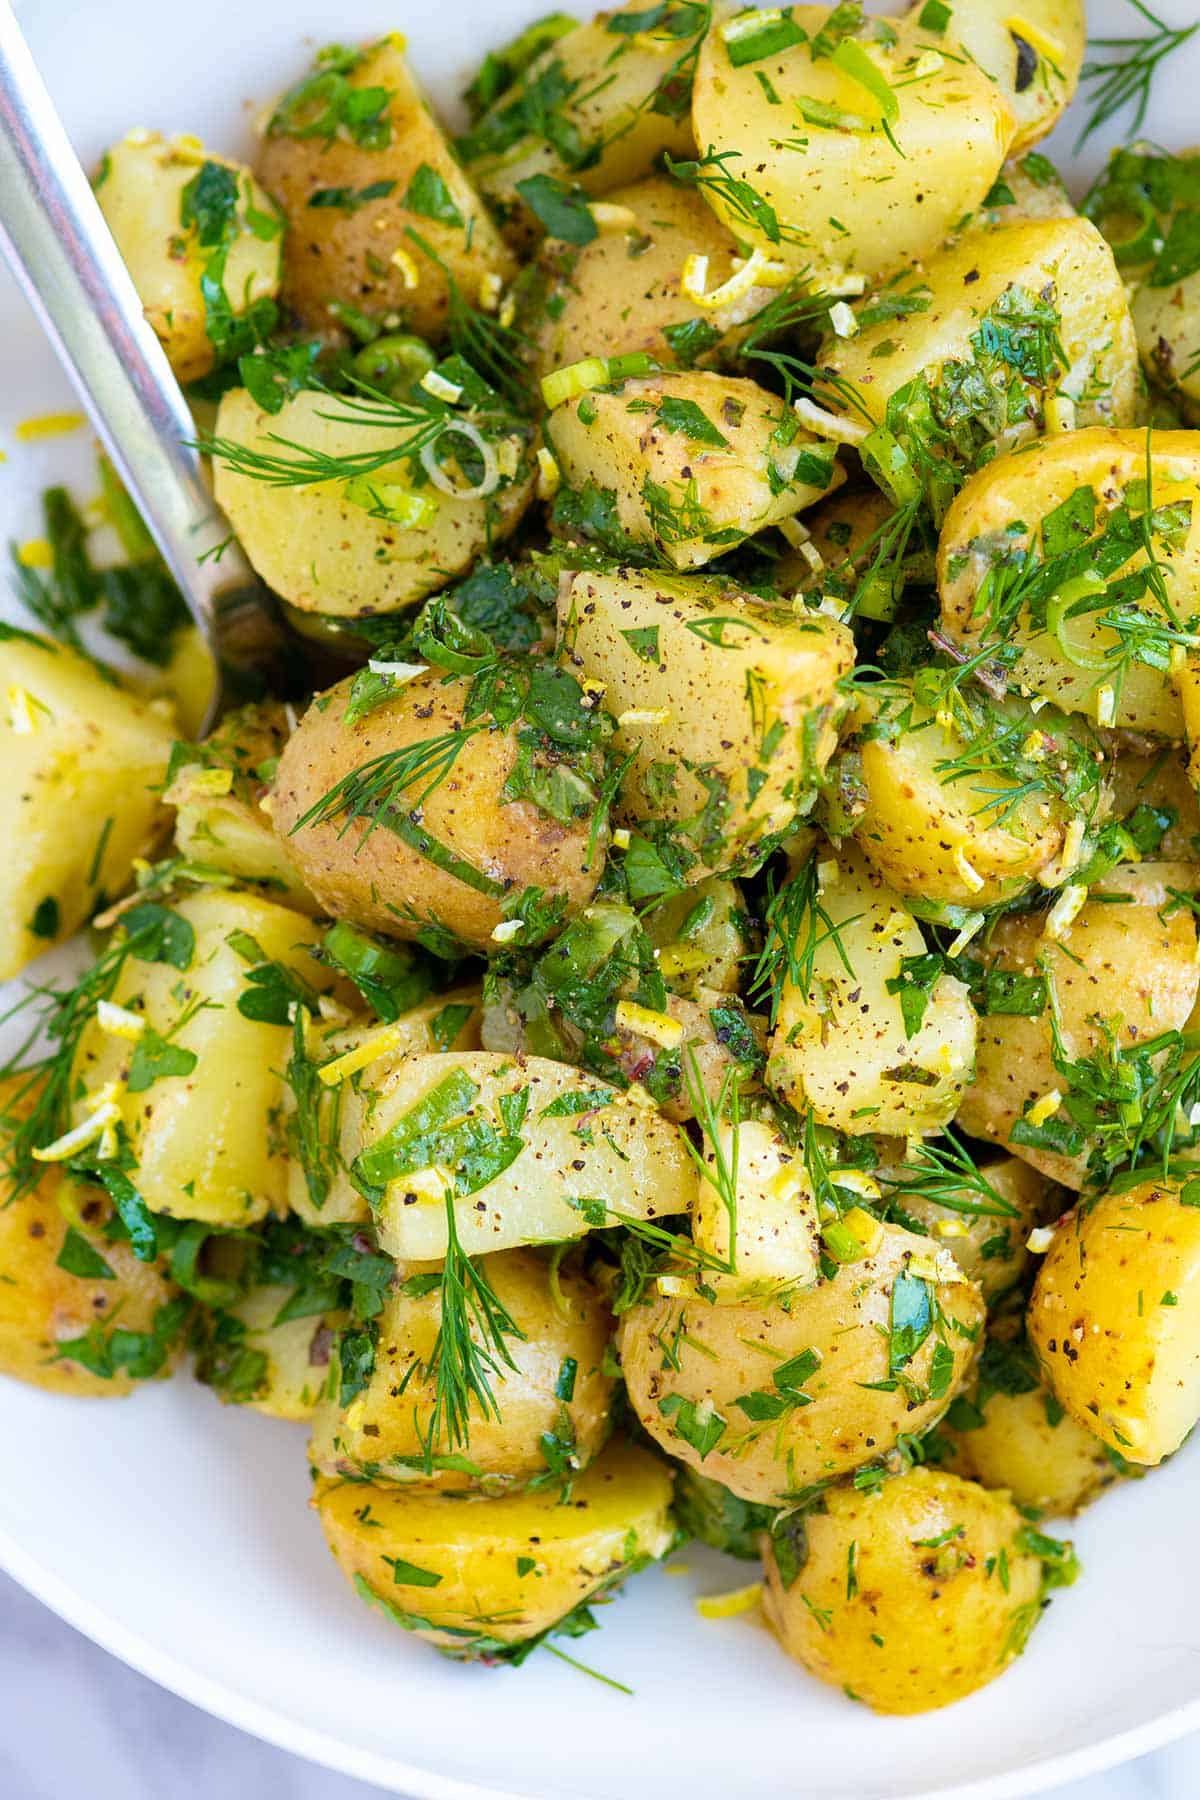
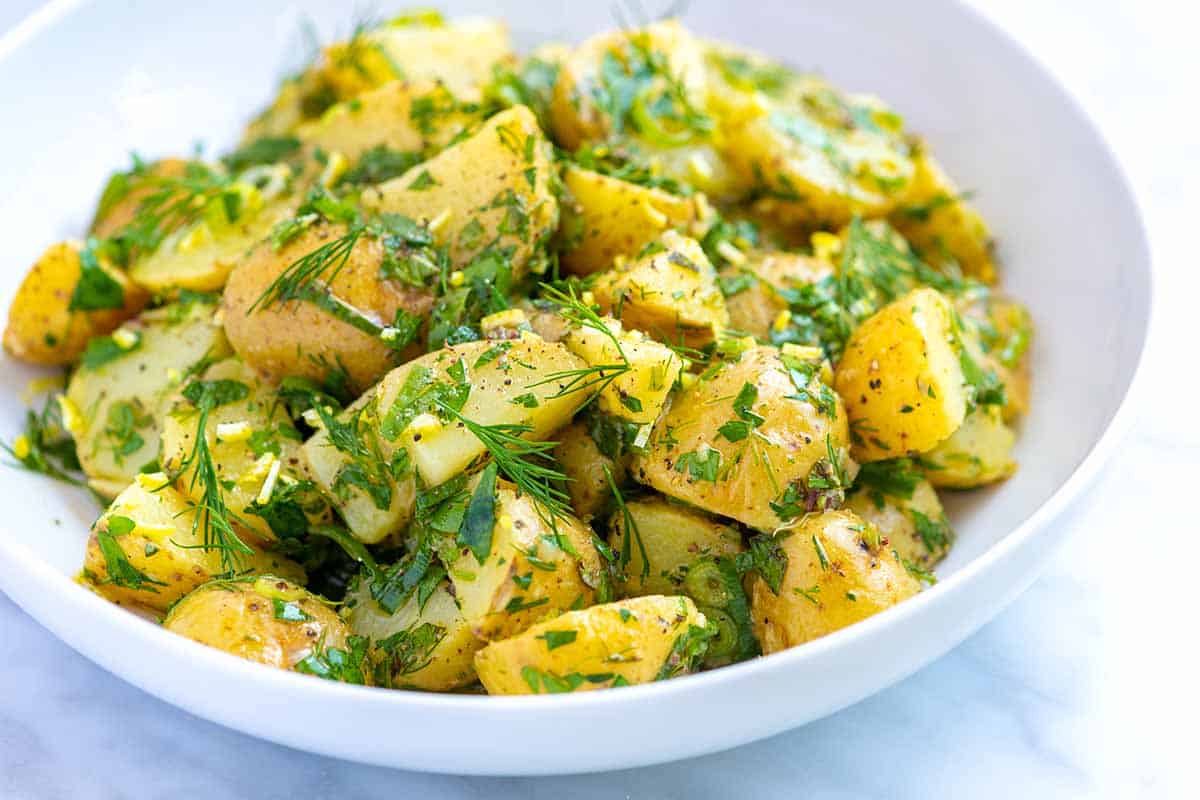
    My favorite no mayo herb potato salad recipe calls for lots of fresh herbs and swaps a creamy dressing for one made with lemon juice and olive oil.

    Herb Potato Salad (no mayo)

    In this salad, I toss warm potatoes with our zesty lemon Dijon vinaigrette. This salad is reminiscent of a French potato salad. Since the potatoes are warm, they absorb all the delicious flavors of the dressing.

    Our mayonnaise-free herb potato salad dressing is quick to make, a bit healthier, and tastes fantastic! If you prefer a more traditional creamy dressing, see our creamy potato salad.

    Key Ingredients

    • Potatoes: I love using small waxy potatoes for this herbed potato salad. Red bliss potatoes or fingerlings are also excellent options. The smaller the potatoes, the better since they cook quickly and don’t require extra time chopping.
    • Lemon and red wine vinegar: I love the combination of fresh lemon juice and red wine vinegar for the potato salad vinaigrette. You can use just one if you don’t have both in the kitchen.
    • Dijon mustard: I use Dijon mustard a lot when making salad dressings. It’s tangy and helps to make vinaigrettes creamy and emulsified.
    • Olive oil: Mayonnaise is a popular ingredient in classic American potato salad, but for this recipe, we leave the mayo out and make a simple olive oil dressing. The combination of olive oil and mustard helps to make it a creamy (dairy-free) vinaigrette.
    • Fresh herbs and scallions: This is my favorite part of this recipe. I’ve said it before, and I’ll say it again. When it comes to fresh salads, I honestly don’t think you can add too many herbs! I usually end up adding parsley, dill, and mint, but basil, chives, or tarragon would also be wonderful.

    Find the full recipe with measurements below.

    Tips for Making Our Herb Potato Salad

    Tip 1: Cook potatoes in salted water. I like to start cooking my potatoes in cold water and add about 1 tablespoon of salt to the water to help season the potatoes as they cook. When I can easily pierce them with a fork, I drain them and set them aside to cool down a bit. I cut the potatoes in halves or quarters when I can handle them.

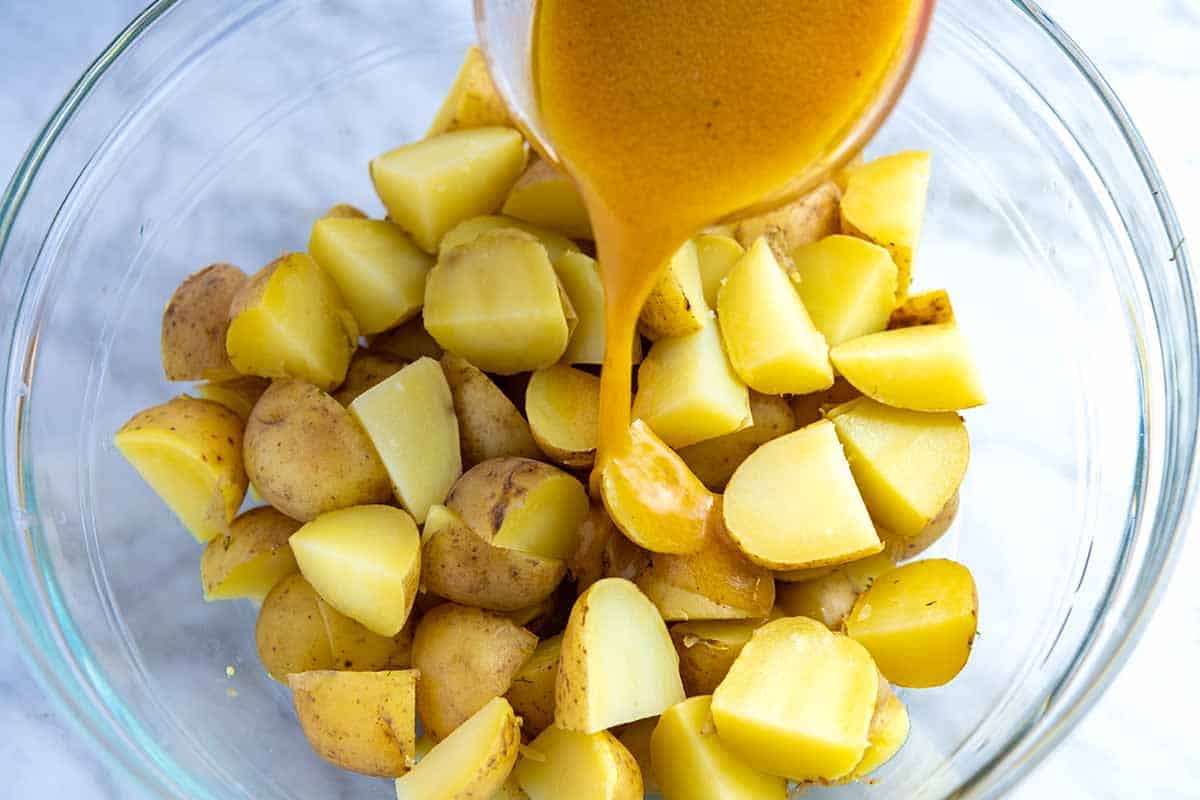
    Tip 2: Pour our dressing over warm potatoes. My olive oil dressing is quick and simple. I whisk lemon zest, lemon juice, red wine vinegar, Dijon mustard, a pinch of salt, pepper, and olive oil together until emulsified and creamy. Then, pour the dressing over the warm potatoes. The warm potatoes will soak up the dressing much better than cold potatoes.

    Add olive oil dressing to warm potatoes

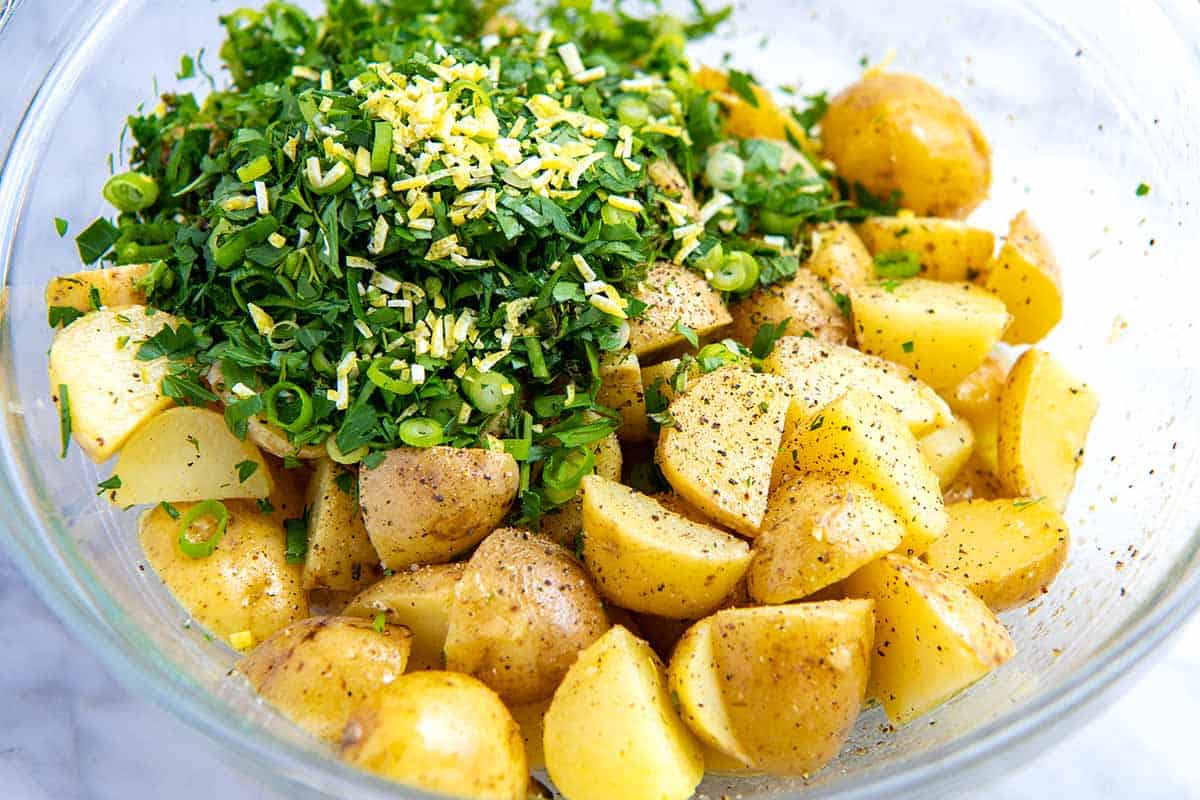
    Tip 3: Add fresh herbs and serve warm. Finally, I carefully toss the potatoes with lots of fresh herbs and scallions. I love serving this mayo-free potato salad warm or at room temperature. It’s delicious!

    Adding herbs to potato salad

    Serving Suggestions

    This no mayo potato salad works well for summer cookouts and picnics, but I really love it as a side dish for dinner. I especially love serving this herby salad next to my garlic caper baked salmon, this incredible shrimp scampi, and our perfectly roasted chicken. It’s also excellent served next to tuna steaks, tuna salad, and chicken salad.

    More Potato Salad Recipes

    Herb Potato Salad without Mayo

    No Mayo Herb Potato Salad

    • PREP
    • COOK
    • TOTAL

    Our no mayo herb potato salad is packed with flavor thanks to a simple olive oil vinaigrette, lots of fresh herbs, and lemon. We prefer to use small baby potatoes (sometimes labeled New Potatoes), fingerling potatoes, or Red Bliss potatoes for this salad.

    Makes 6 servings (side portions)

    Watch Us Make the Recipe

    You Will Need

    2 pounds (907g) small yellow or red potatoes

    2 teaspoons Dijon mustard

    1 ½ teaspoons finely grated lemon zest

    2 tablespoons fresh lemon juice

    2 tablespoons red wine vinegar or champagne vinegar

    6 tablespoons extra virgin olive oil

    3 medium green onions, thinly sliced

    1/4 cup chopped fresh parsley

    2 tablespoons chopped fresh mint

    2 tablespoons chopped fresh dill

    Salt and freshly ground black pepper, to taste

    Directions

      1Add the potatoes to a large stockpot and cover with water by 2 inches. Add 1 tablespoon of salt to the water and bring to a boil.

      2Reduce to a simmer and cook until the potatoes are fork tender, 15 to 20 minutes. Drain, then set aside to cool.

      3When the potatoes are cool enough to handle, cut them into bite-sized chunks or slice them into thin rounds. Add them to a large salad bowl.

      4Whisk the mustard, lemon zest, lemon juice, vinegar, and olive oil until creamy and emulsified. Season to taste with salt and pepper.

      5Pour all but 1/4 cup of the dressing over the potatoes and toss. Set the potatoes aside for five minutes to absorb the dressing (it will look like a lot at first, but the potatoes will soak it up).

      6Add the scallions and fresh herbs. Toss gently but thoroughly. If the potato salad seems dry, add a splash of the remaining dressing.

      7Serve warm or cover and refrigerate, and then serve cold.

    Adam and Joanne’s Tips

    • Storing: Store herb potato salad in an airtight container in the fridge for up to 3 days. As the herbs sit in the dressing, they will lose some color.
    • Make ahead: Since the herbs lose color over time, toss the potatoes with the dressing and store them in an airtight container in the fridge. When you are ready to serve it, toss in fresh herbs, scallions, and lemon zest.
    • The nutrition facts provided below are estimates.

    Nutrition Per Serving
    Serving Size
    1/6 of the recipe
    /
    Calories
    235
    /
    Total Fat
    14.5g
    /
    Saturated Fat
    2.1g
    /
    Cholesterol
    0mg
    /
    Sodium
    224.6mg
    /
    Carbohydrate
    25.4g
    /
    Dietary Fiber
    4.3g
    /
    Sugars
    2.2g
    /
    Protein
    3.1g


    AUTHOR:

    Joanne Gallagher

    Adam and Joanne of Inspired Taste

    We are Adam and Joanne Gallagher, the creators of Inspired Taste. Established in 2009, Inspired Taste grew from a childhood dream into one of the internet’s most trusted recipe sites with hundreds of reliable recipes, step-by-step videos, and expert tips.More About Us

    Source link

  • Grilled Shrimp Salad

    Grilled Shrimp Salad

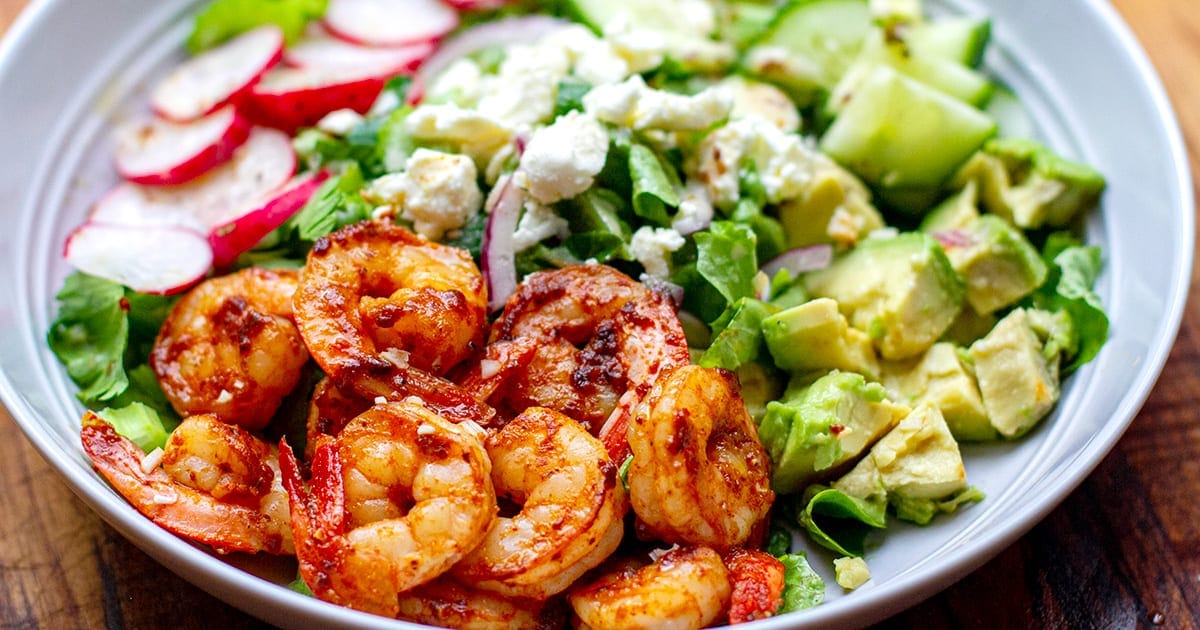
    My spice-rubbed, grilled shrimp salad recipe is paired with avocado, crunchy vegetables like radish, cucumbers and celery, and topped with feta cheese for extra flavour. The shrimp is seasoned with a delicious smokey rub and can be grilled in a skillet, on a barbecue or under a broil. This recipe is gluten-free, low-carb and keto-friendly.


    This is a grilled shrimp salad I often make for lunch or a light dinner. When I say light, I mean healthy, as this dish is actually quite satiating. Shrimp, or prawns for my Aussies, is high in protein and with plenty of fibre from all the vegetables and healthy fats in avocado and feta, this salad is a hearty one.

    What I love about it is that you can use it as a template and swap out vegetables based on what you have on hand. It also goes with a variety of dressings. I have enjoyed it with lemon honey and mustard vinaigrette (in the recipe), my yogurt ranch dressing, a Mexican-inspired lime and coriander based sauce, or with a few drizzles of Balsamic and olive oil.

    This shrimp salad is low-carb and keto-friendly and can be served without feta for a Whole30 and Paleo version. 

    Grilled Shrimp Salad Tips

    • I recommend getting large shrimp, without the shell, to save you on prep time. 
    • You can use frozen shrimp to cut on costs. To defrost quickly, add a handful or as many pieces as you need to a bowl of warm water and leave for 5 minutes. Once the water is cold, replace it with more warm water. The shrimp will defrost in no time! Alternatively, you can thaw it out overnight in the fridge.
    • The spice rub is the key to deliciosu grilled shrimp and the smoked paprika is a must here. It gives the shrimp lovely smokey flavour. 
    • Make sure the skillet or BBQ are hot! If it’s still heating up when you add the shrimp, it will start to stew rather than sizzle and brown. 
    • Don’t overcook the shrimp or the meat will get tough and rubbery. 

    More Shrimp Salad Recipes


    Full Recipe 

    Find the full list of ingredients, instructions, and a nutritional breakdown below. If you have questions or cook this recipe, please let me know in the comments, and make sure to rate this recipe so it’s easy for others to find.

    Want to Save This Recipe?

    Enter your email & I’ll send it to your inbox. Plus, get great new recipes from me every week!

    By submitting this form, you consent to receive emails from Cooked & Loved

    Learn how to make a delicious and healthy grilled shrimp salad with avocado, crunchy vegetables, and feta. Top with your favourite dressing like the lemon honey and mustard vinaigrette in this recipe, and enjoy a protein-rich meal that’s great for you. The recipe is for 2 satiating servings so double up or divide down if you need to adjust.

    • Prepare the shrimp.Remove the shell if needed but can leave the tail. Pat dry the shrimp.
    • Season the shrimp.Add the rub ingredients to a large bowl and mix in the shrimp. Rub the spices and oil all over using your hands. Set aside. You can do this ahead of time and store the shrimp in an airtight container in the fridge for up to 24 hours.
    • Grill the shrimp.Preheat a large skillet or the barbecue over high heat (e.g. 8 on the Induction stove). Add about 2 tablespoons of oil to a skillet and spray or brush the barbecue griddle with a little oil. Once hot, add the prawns and cook for 2-3 minutes on each side depending on size, or until just cooked through. Once both sides are done, toss them in a pan a few times and remove them from heat. I like to let them sit in a bowl for a few minutes to finish cooking.
    • Make the salad.Prepare the salad ingredients and whisk the dressing. You can do this before you cook the prawns or during the time. Assemble the salad bowls by dividing all ingredients evenly. Dress the salad with the dressing, then top it with the shrimp and some feta.

    Calories: 537kcal | Carbohydrates: 19g | Protein: 26g | Fat: 42g | Saturated Fat: 8g | Polyunsaturated Fat: 4g | Monounsaturated Fat: 27g | Trans Fat: 0.01g | Cholesterol: 183mg | Sodium: 1310mg | Potassium: 805mg | Fiber: 6g | Sugar: 9g | Vitamin A: 607IU | Vitamin C: 12mg | Calcium: 234mg | Iron: 2mg

    Keywords: shrimp avocado salad, shrimp salad with lettuce, prawn recipes, Low-Carb, Gluten-Free, Keto, Shrimp Recipes, Shrimp salad, Prawn Salad, Grilled shrimp recipes, spiced shrimp, shrimp rub

    More Shrimp Recipes You Might Like

    [mv_video doNotAutoplayNorOptimizePlacement=”false” doNotOptimizePlacement=”true” jsonLd=”true” key=”bmwep0qptjsellvvhxwh” ratio=”16:9″ thumbnail=”https://mediavine-res.cloudinary.com/v1576707923/b0rgnnmdabk1fxknxgu0.jpg” title=”Grilled Shrimp With Three Sauces” volume=”70″]

    Source link

  • Herbed Shrimp Salad Recipe on Endive Spears

    Herbed Shrimp Salad Recipe on Endive Spears

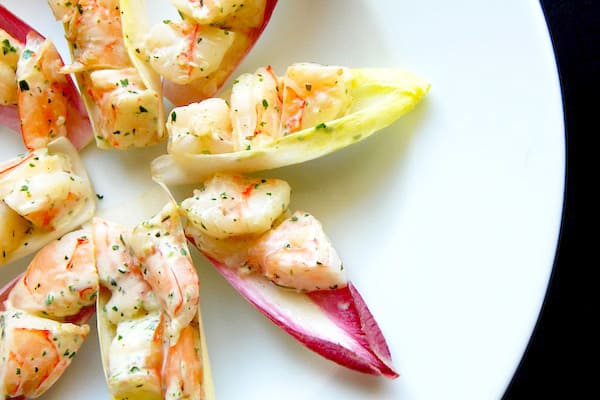
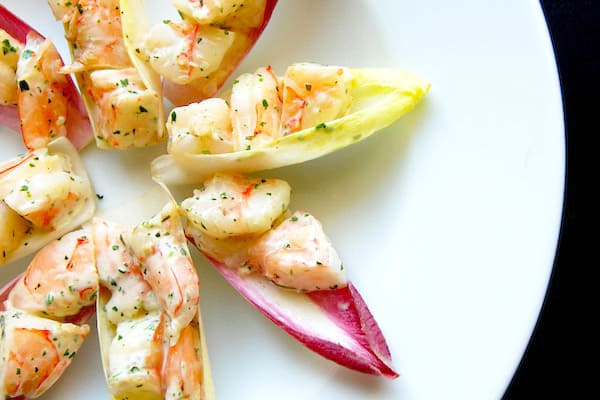
    How to make shrimp salad with a dressing made of sour cream, mayonnaise and lots of fresh herbs. Jump to the Herbed Shrimp Salad Recipe on Endive Spears or read on to see our tips for making.

    Herbed Shrimp Salad Recipe on Endive Spears

    Let me start by saying the dressing recipe below is one you need in your life. It’s equally delicious as a veggie dip, dressing for salads or used as a dressing for chicken. We pack in lots of fresh herbs like tarragon, mint and parsley. If you’re short on one, not to worry other fresh green herbs like basil or cilantro will work nicely. The key is keeping the dressing creamy with a nice punch of fresh from the herbs and citrus.

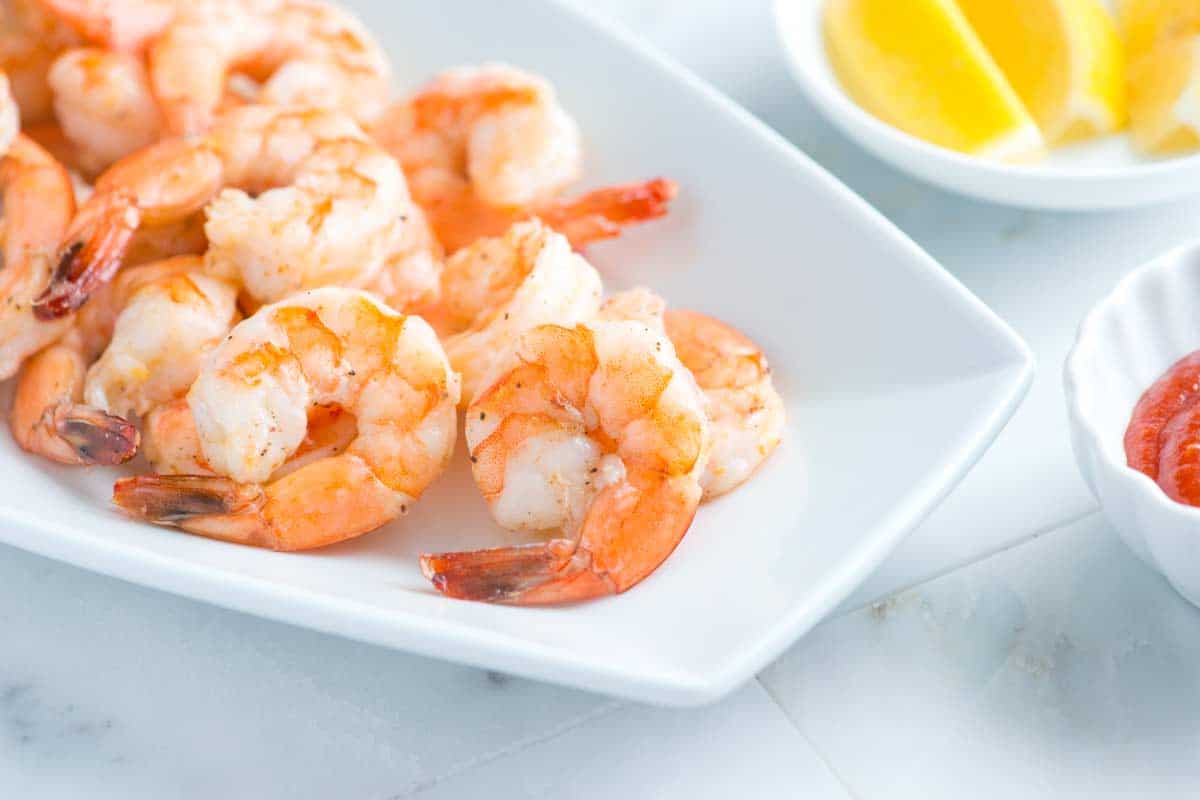
    Roasted Shrimp Cocktail RecipeYOU MAY ALSO LIKE: Forget poaching and try this easy roasted shrimp cocktail. Instead of poaching, quickly roast shrimp in a hot oven until sweet and tender. Jump to the Easy Roasted Shrimp Cocktail Recipe.
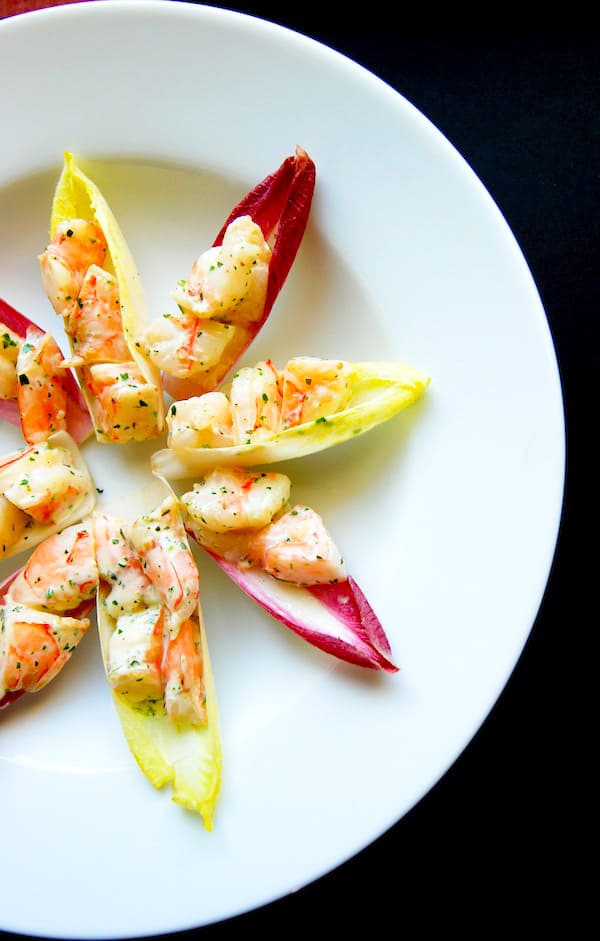
    This shrimp salad can be served alone or on just about anything. I love the look and taste of it with endive leaves. The slightly bitter and crunchy endive works nicely with the shrimp.

    Herbed Shrimp Salad Recipe on Endive Spears

    This is great for parties, but I’m kind of in love with the idea of turning these into dinner and calling them lettuce wraps. If you were to whip out a head of Boston or Bibb lettuce, sliced avocado and a few vegetables like carrot or cucumber this would be excellent as dinner.

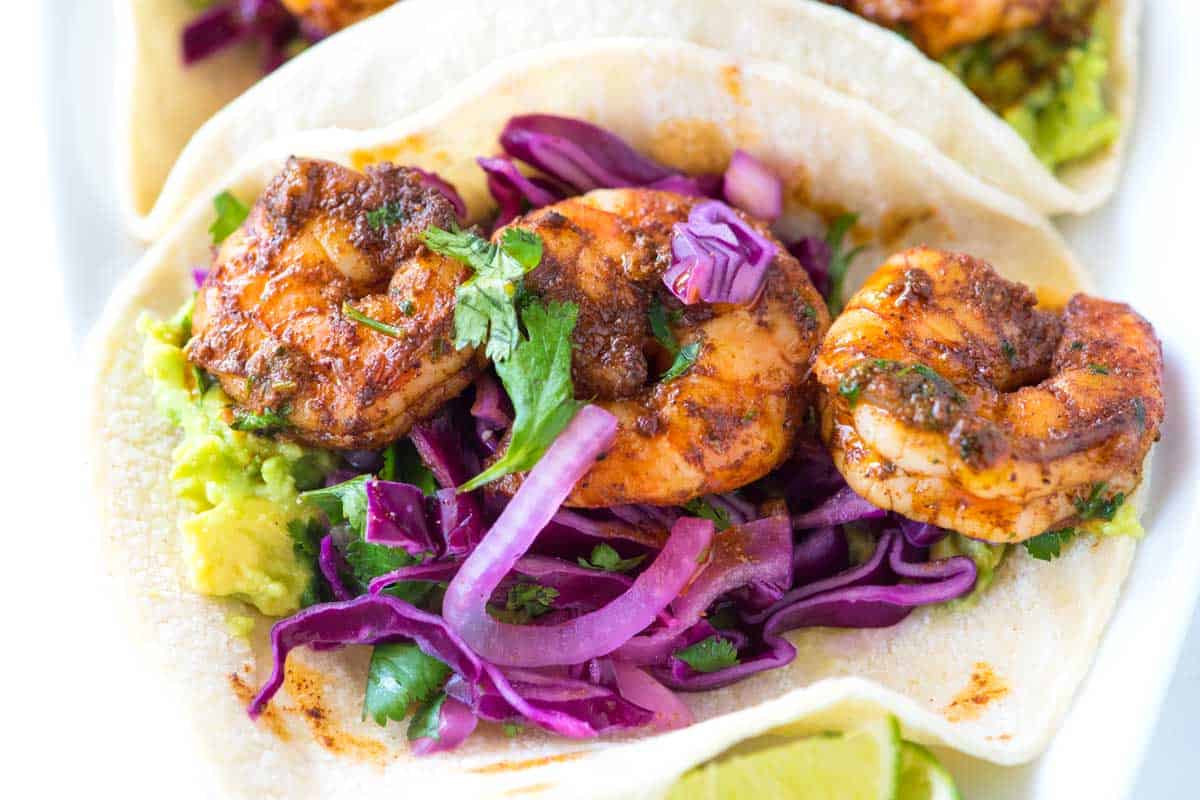
    Chile Butter Shrimp Tacos RecipeYOU MAY ALSO LIKE: Meet your new favorite shrimp taco recipe. There’s chile butter shrimp, mashed avocado and a quick and crunchy slaw. Jump to the Chile Butter Shrimp Tacos Recipe.
    Recipe updated, originally posted January 2010. Since posting this in 2010, we have tweaked the recipe to be more clear. – Adam and Joanne

    Herbed Shrimp Salad Recipe on Endive Spears

    • PREP
    • COOK
    • TOTAL

    Shrimp is excellent, but chicken, lobster and crab will all work nicely. The dressing below is versatile, too. Use it as a vegetable dip or salad dressing. You will need lime for both the shrimp and dressing. The dressing calls for lime zest, it is best to remove the zest before juicing the lime.

    Makes 4 to 6 servings

    You Will Need

    Shrimp

    1 pound shrimp, shelled and deveined

    2 tablespoons olive oil

    1/2 teaspoon sea salt

    1/8 teaspoon fresh ground black pepper

    2 tablespoons lime juice


    Salad

    1/2 cup sour cream

    2 tablespoons mayonnaise

    1 teaspoon lime zest

    1 tablespoon lime juice or more to taste

    1 tablespoon chopped tarragon leaves

    2 teaspoons chopped mint leaves

    3 tablespoons chopped parsley

    Salt and fresh ground black pepper

    3 medium-size endive, leaves pulled apart

    Directions

      1Heat oven to 400 degrees F. Line a baking sheet with aluminum foil.

      2Toss the shrimp with olive oil, salt, and the pepper. Tumble shrimp onto the baking sheet and spread into one layer. Roast the shrimp for 5 to 10 minutes until pink, firm, and cooked through. Immediately toss with lime juice.

      3Meanwhile, make the dressing. In a large bowl, stir the sour cream, mayonnaise, lime zest, lime juice, herbs, a pinch of salt and a few grinds of black pepper. Or use a food processor to blend. Taste then adjust with salt, pepper or more lime juice.

      4Chop the shrimp into bite-size chunks then add to the bowl with dressing. Toss then serve spooned onto endive leaves.

    Adam and Joanne’s Tips

    If you make this recipe, snap a photo and hashtag it #inspiredtaste — We love to see your creations on Instagram and Facebook! Find us: @inspiredtaste


    AUTHOR:

    Joanne Gallagher

    Previous Post: Pasta with Roasted Tomato Sauce, Mint and Feta
    Next Post: Brownie Pie Recipe with Sliced Almonds


    Source link

  • Sheet Pan Meatballs with Tomato Salad and Green Sauce Recipe

    Sheet Pan Meatballs with Tomato Salad and Green Sauce Recipe

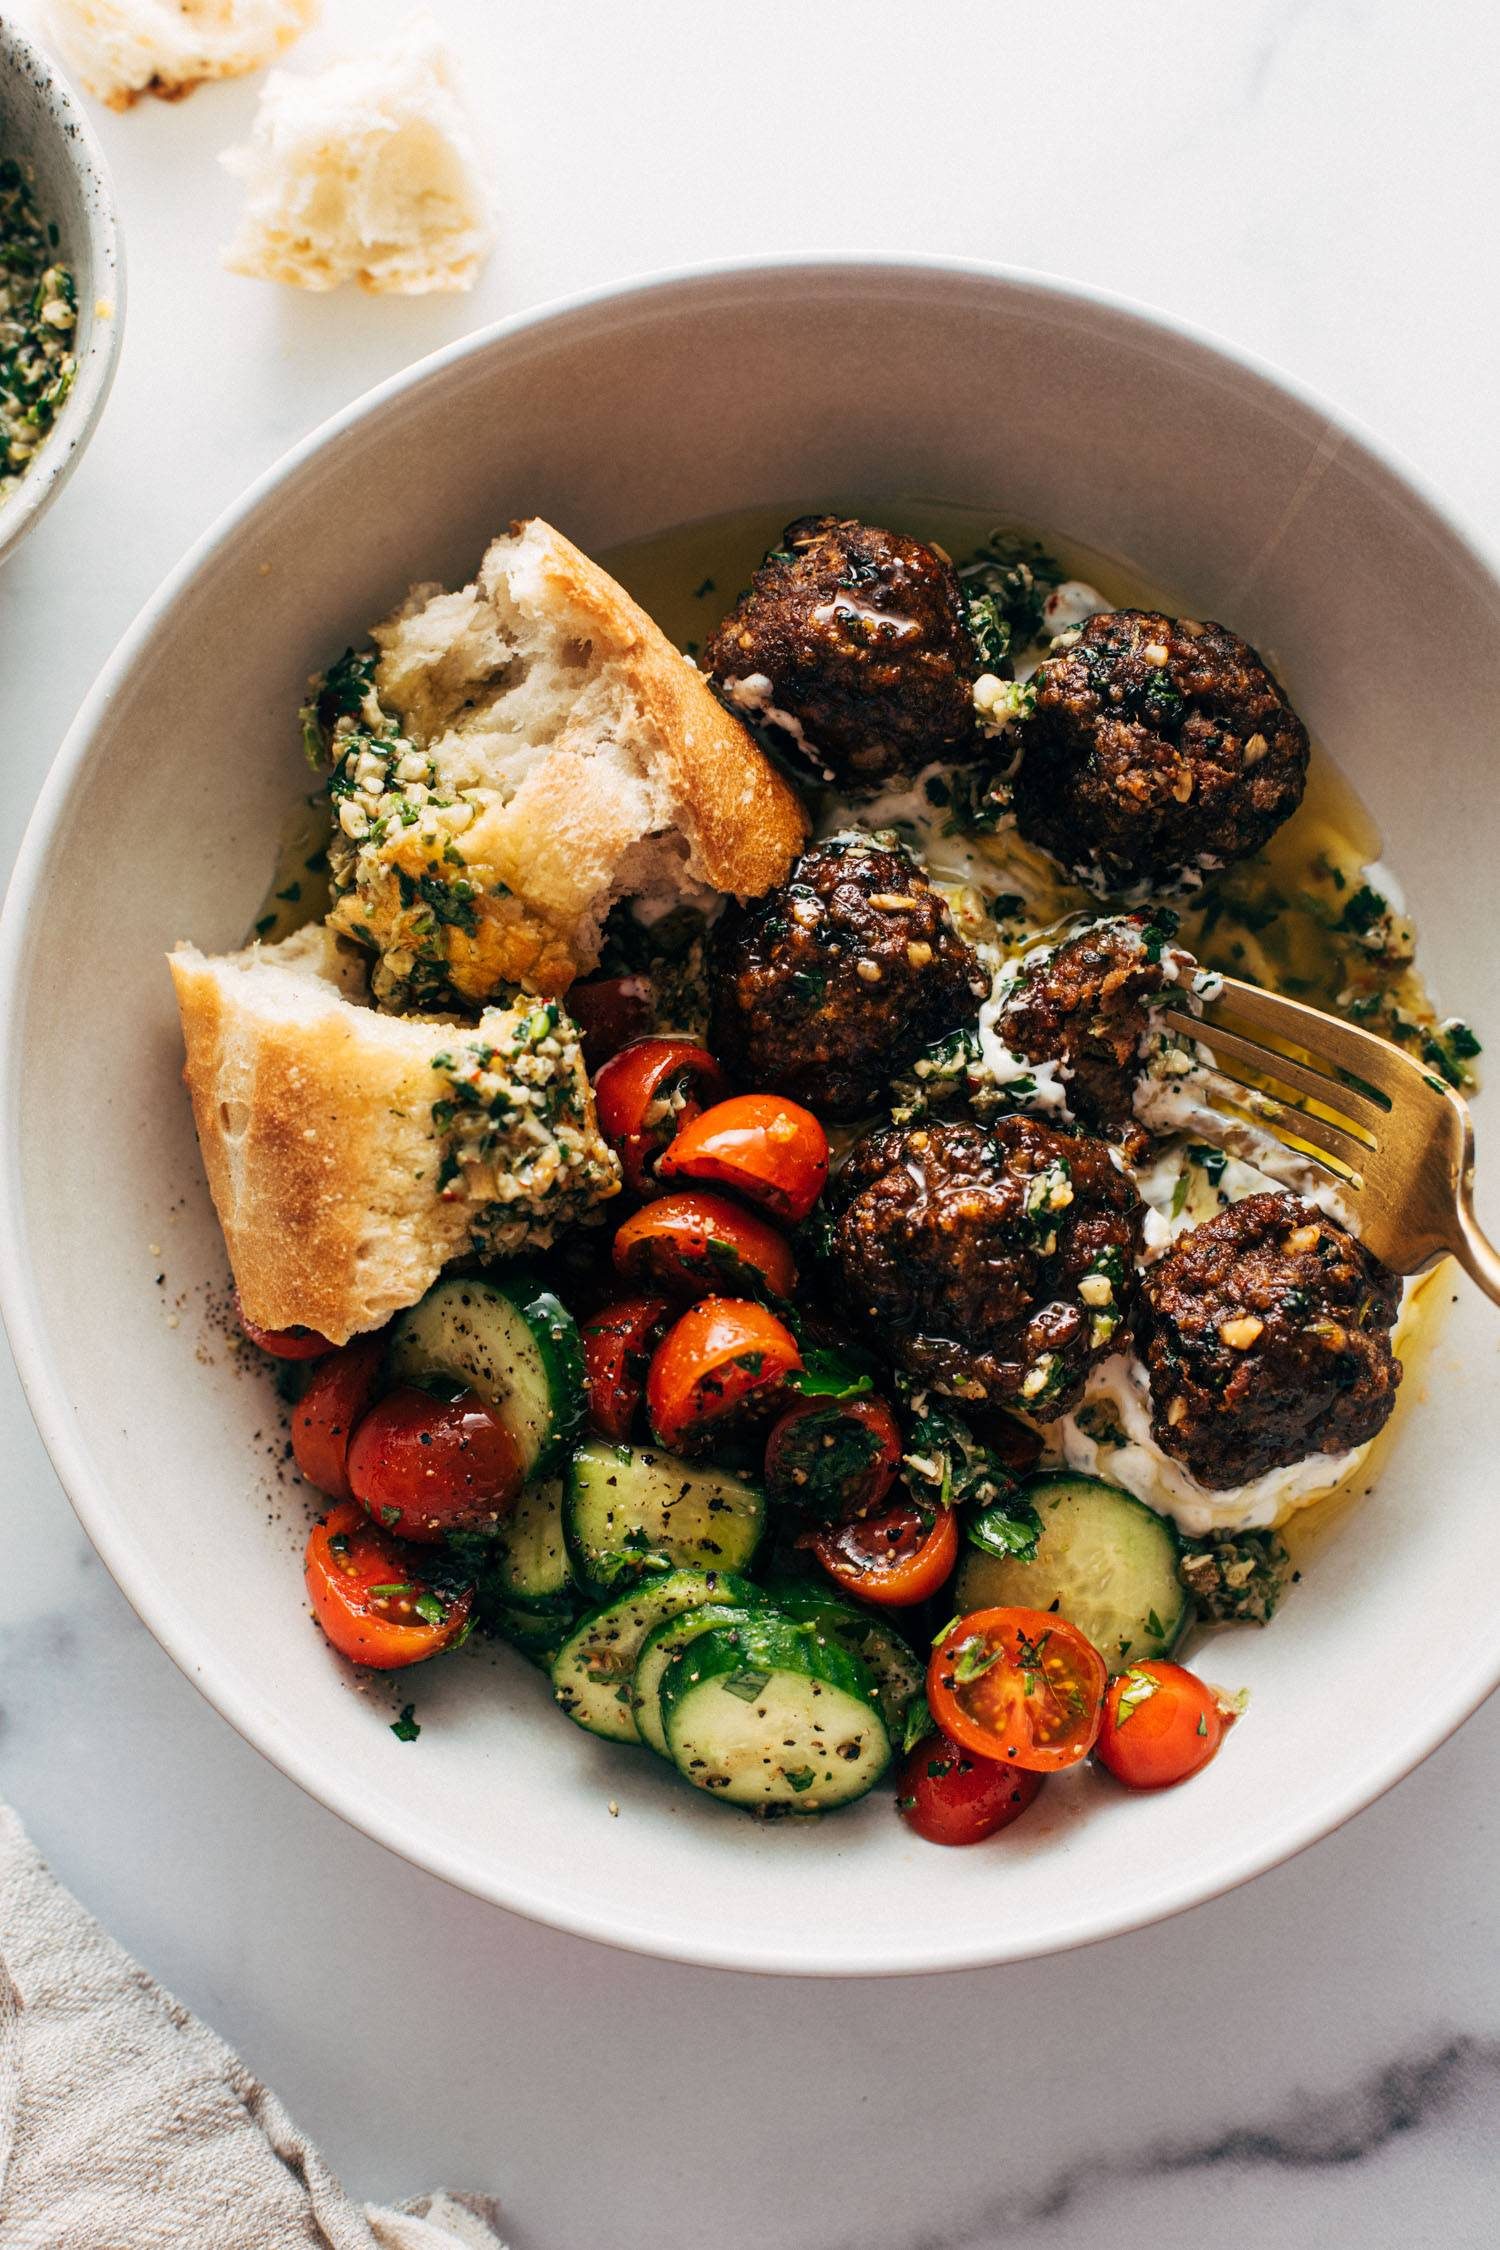
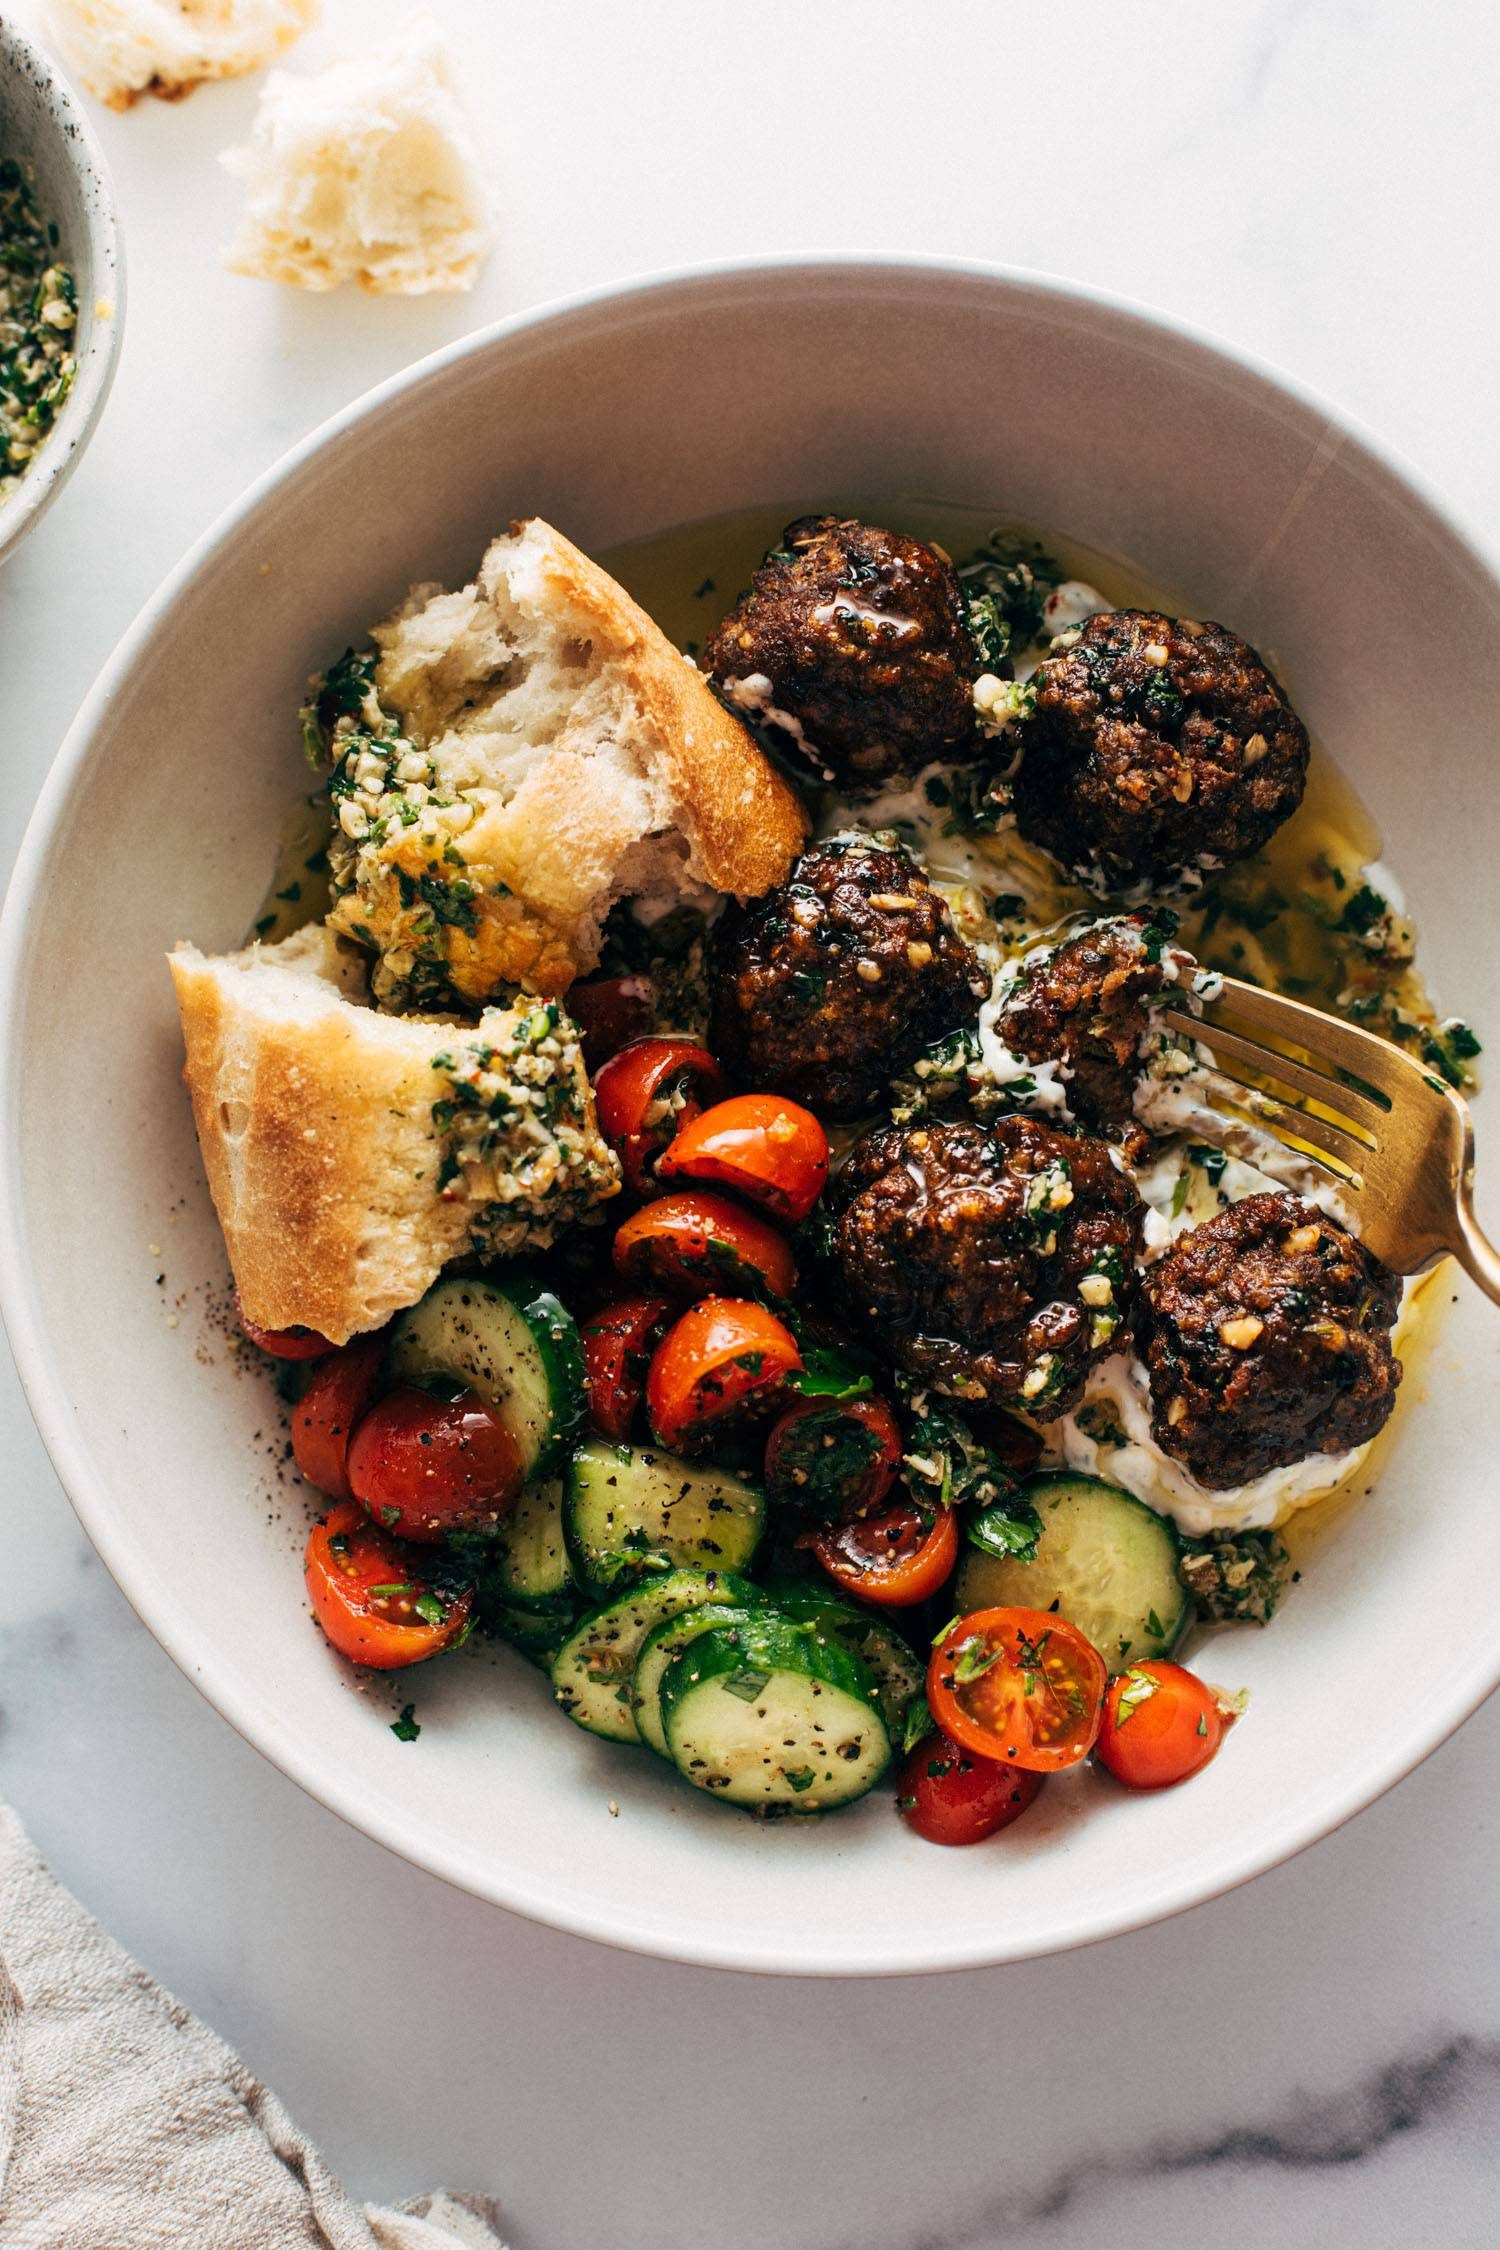
    Juicy little sheet pan meatballs that are salty, zesty, briney, and so so delicious. Pile them on tzatziki, spoon some punchy green sauce over top, and serve with a simple salad and crusty bread.

    This post is sponsored by ButcherBox

    We’re no strangers to sheet pan meatballs around here. We love to love them! Easy clean-up, no frying mess, but still oven-crisp goodness, and they’re always the easiest option for straight-off-the-pan sneaks.

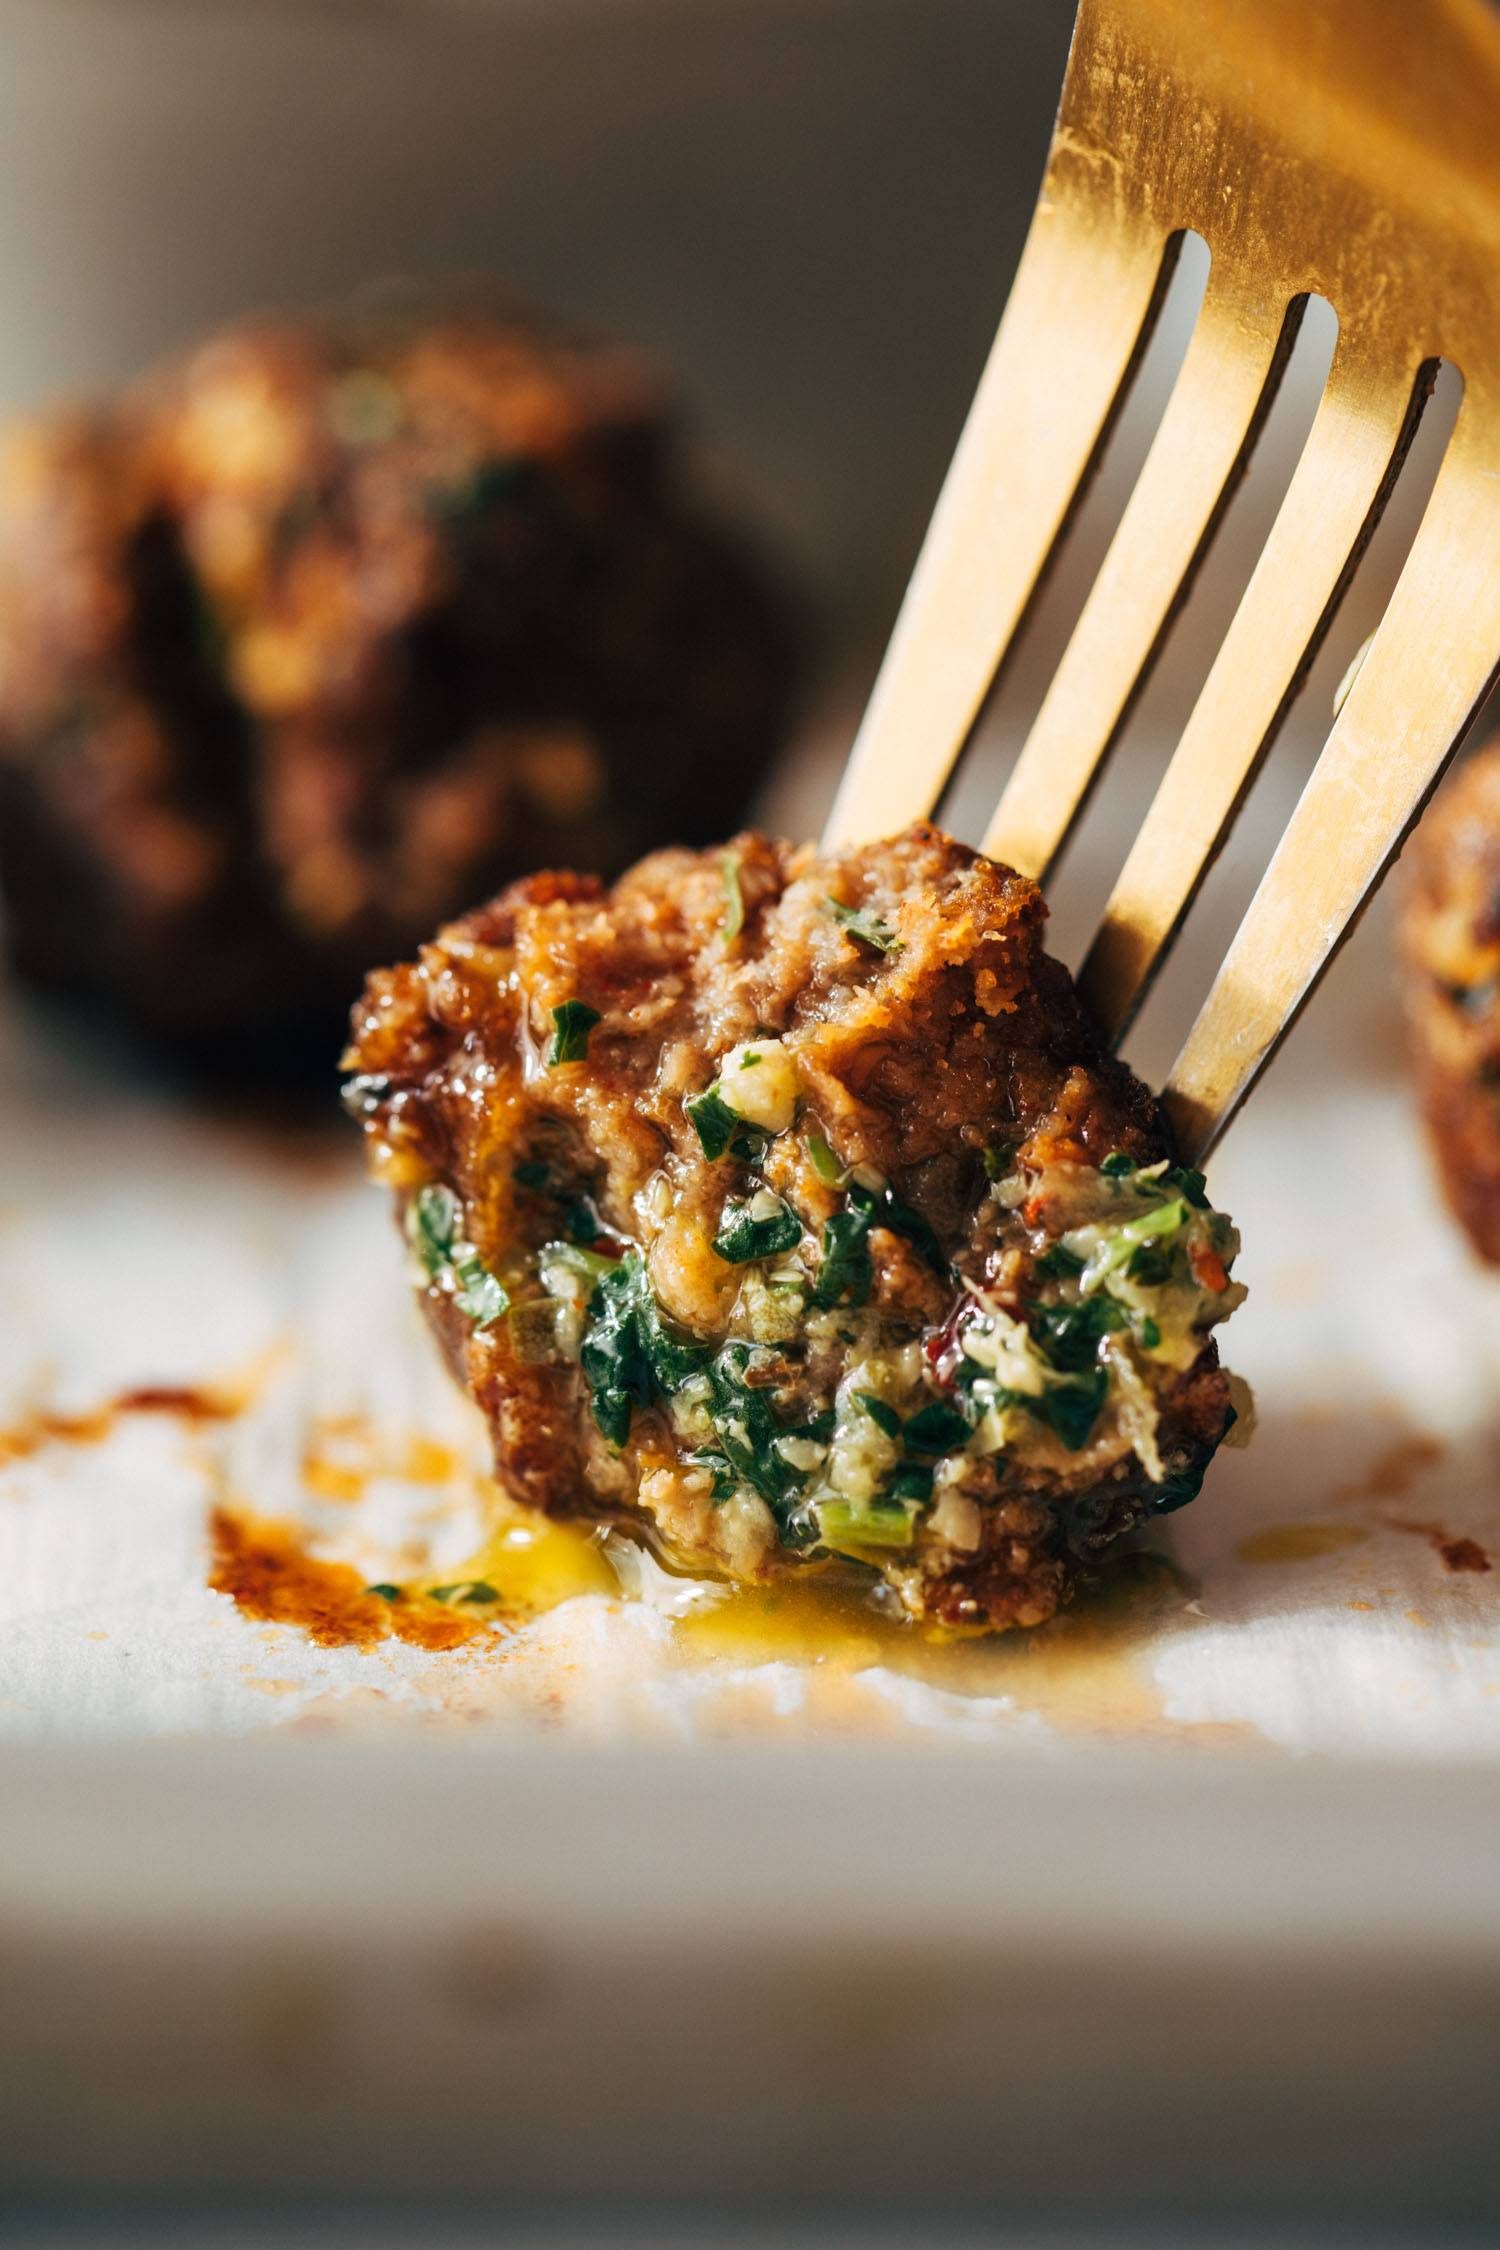
    Super juicy and deeply flavored thanks to some delicious briney green sauce – made with parsley, cilantro, walnuts, capers, garlic, and more – that will go not only inside but also on top of these little beauties. Serve them alongside some juicy marinated tomatoes, swoop them through tzatziki, douse them in that green sauce, grab yourself a buttery hunk of crusty bread, and let’s have the best meatball party in town, shall we?

    Salty, Zesty, Briney Goodness

    This isn’t just any old meatball. Not only is the quality of beef A+ (we’re using ButcherBox Grass-Fed Grass-Finished – more on that later), but that little green sauce magic concoction in the mixture brings a whole explosion of flavor with salty brininess from the capers, a little zest from the lemon, and our favorite punch of all punches, the garlic punch. It all just sort of swims together to bring maximum flavor to this little guy. It’s like a whole meal of tastes in one bite!

    And you better believe you save some of that green sauce to put on top of your meatballs, and bread, and any kind of veggies. We’re nothing if not sauce hogs.

    Prefer To Watch Instead Of Read?

    Fork piercing a meatball

    A Word About This ButcherBox Beef

    Okay, if you’re not on the ButcherBox train yet, we highly recommend you climb aboard! The quality of their meat and seafood is top-notch.

    This is why we love them:

    • They are a certified B Corp company, which means they are mission-driven to do some environmental good in this world and that is always something we can get behind.
    • They source from family farms and are committed to humane practices, and have a focus on sustainability for their seafood offerings which we also feel really good about!
    • Plus, sustainable and recyclable insulation and packaging whenever possible? Yes, please.

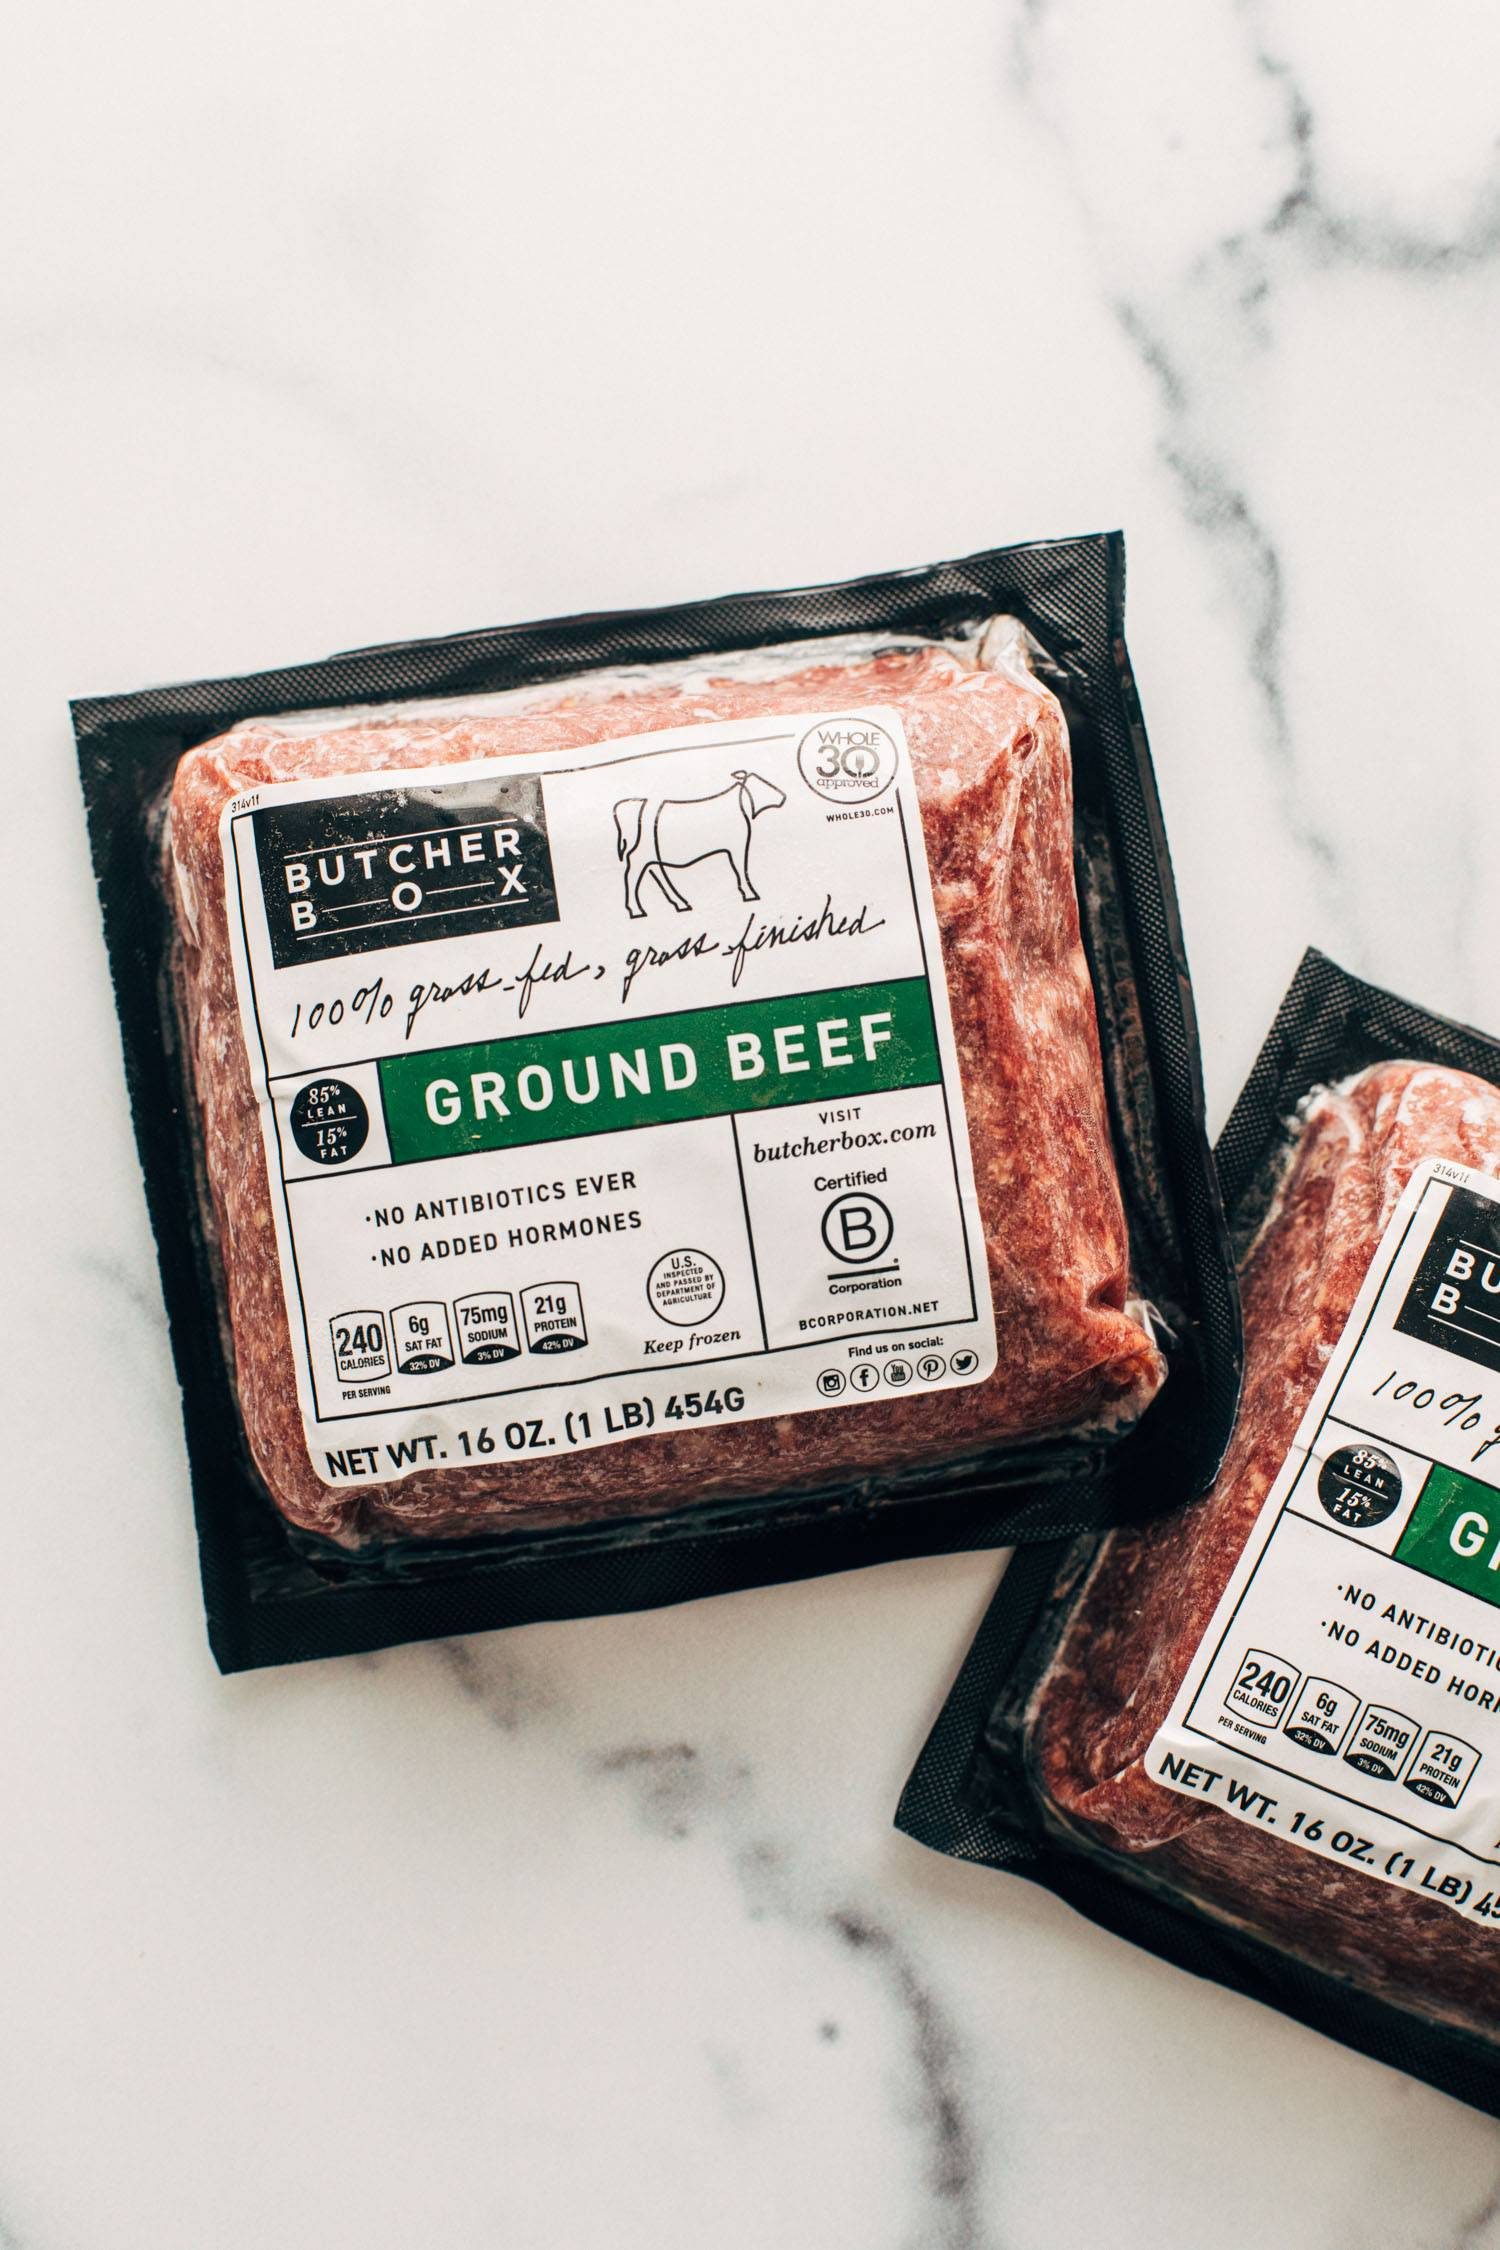
    There is so much care put behind their product and it really shows. And, ultimately, this grass-fed, grass-finished ground beef is SO flavorful and cooks up beautifully.

    ButcherBox has a deal going right now where you get two pounds of free (yes, FREE) grass-fed grass-finished ground beef in every single box for the life of your membership. WHAT.

    Click here to learn more about the boxes (or add this deal to your existing membership)!

    For burgers, for spaghetti, for meatballs, and everything else in between, this ground beef is such good quality and it is a total freezer essential. And it’s free in every box right now. Do not miss this deal!

    ButcherBox ground beef packages

    How To Make These Meatballs (Sheet Pan FTW!)

    Get your sheet pans and your food processor at the ready and let’s get down to business.

    1. Green Sauce. Pulse everything up in a food processor until chopped very finely (but not a paste). This is your flavor base! Transfer half of the flavor base to a large bowl for the meatballs and then use the rest make your sauce.
    2. Meatballs. Mix the egg, paprika, salt, panko, ground beef, and reserved flavor base green sauce in a bowl until evenly distributed. Roll into balls. Place the rolled meatballs on sheet pan, brush with olive oil, and bake!

    Then serve those meatballs over creamy tzatziki, heavily dolloped with your green sauce, along with a pile of tzatziki and simple tomato salad, add a big torn-off hunk of rustic bread, and oof, what a satisfying flavor extravaganza you’re in for!

    Meatballs in a bowl with a tomato salad, fork, and bread

    Will these juicy delicious little sheet pan meatballs absolutely steal your hearts? Yes. Does green sauce, just in general, make the world better? Also yes. Let’s get to it, pals.


    Print

    clock clock iconcutlery cutlery iconflag flag iconfolder folder iconinstagram instagram iconpinterest pinterest iconfacebook facebook iconprint print iconsquares squares iconheart heart iconheart solid heart solid icon

    Description

    Juicy little sheet pan meatballs that are salty, zesty, briney, and so so delicious. Pile them on tzatziki, spoon some punchy green sauce over top, and serve with a simple salad and crusty bread.


    1. Preheat the oven to 425 degrees. 
    2. Make your tomato salad and throw in some sliced cucumbers too!
    3. Pulse the garlic, parsley, cilantro, capers, and walnuts in a food processor until chopped very finely (but not creamy / not a paste – you just want a fine chop! and you could do this by hand as well). This is your flavor base!
    4. Transfer half of the flavor base to a large bowl for the meatballs. Add all other meatball ingredients and mix thoroughly with your hands to combine. Roll into balls and bake for 10-12 minutes.
    5. Add the other half of the flavor base to a smaller bowl; add lemon zest and lemon juice, olive oil, and salt and pepper to taste to make your sauce. Add red pepper flakes for heat if you want. It should look similar to a loose pesto or chimichurri.
    6. Serve meatballs over a swipe of tzatziki, with a hunk of rustic bread and a scoop of tomato salad. And drizzle, dip, and swish all of it through that punchy green sauce! BIG, BIG FLAVORS! So good!

    • Prep Time: 15 minutes
    • Cook Time: 30 minutes
    • Category: Dinner
    • Method: Bake
    • Cuisine: Mediterranean-Inspired

    Keywords: sheet pan meatballs, meatball bowls, green sauce

    Thank you to ButcherBox for sponsoring this recipe!


    More Meatball Recipes We Can’t Stop Talking About

    Source link

  • Pan-Fried Salmon With Pea Salad

    Pan-Fried Salmon With Pea Salad

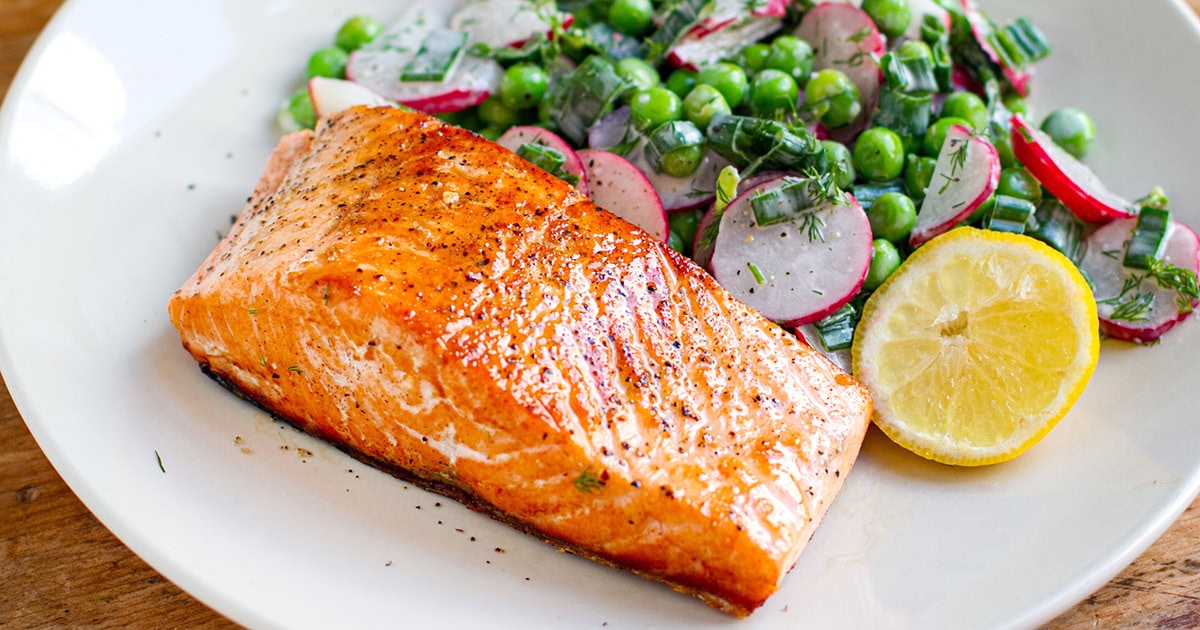
    Crispy skin pan-fried salmon paired with a fresh, creamy green pea and radish salad—this is a healthy dinner recipe that’s quick, flavorful, and perfect any time of year, but especially spring.


    Jump to: ℹ️ Overview | 🛒 Ingredients | 📷 How To Make | 👩‍🍳 Recipe Tips | 🥗 Serving Suggestions | 📝 Full Recipe Card | 🍽 More Healthy Dinner Recipes


    This pan-fried salmon with green pea salad is one of those meals that feels like spring on a plate but works beautifully year-round.

    The salmon is pan-fried until the skin turns super crispy, while the inside stays tender, pink, and flaky. The salad balances it out with crunchy radishes, sweet peas, and a creamy dill dressing that’s like a lighter, fresher ranch.

    I’ve made this plenty of times, and it’s the kind of recipe that makes you feel both satisfied and light at the same time. Packed with protein, healthy fats, and fiber, it’s as nutrient-dense as it is delicious. Plus, the whole dish comes together in under 30 minutes—weeknight win!

    👩‍🍳 You might also like these salmon dinner recipes: teriyaki salmon bowls, Mediterranean salmon bowl, orange teriyaki baked salmon, salmon bites with sweet chili glaze, sheet pan salmon & veggies, or these salmon dinner ideas. For high-protein and high-fiber recipes, check out my Mediterranean fish with white bean purée.

    What You’ll Need

    Here is what you’ll need for this pan-fried salmon recipe. Find the full measurements in the recipe card below.

    Salmon fillets – Choose skin-on for that golden, crispy finish. Plus, olive oil to achieve that perfect sear, salt and pepper for seasoning, and lemon wedges for a final squeeze to lift the whole dish.

    • For the salad: Green peas (sweet and slightly starchy, they add a pop of freshness. Frozen works perfectly here), radishes (peppery crunch for balance), fresh dill & green onions (herbal, fresh, and a little oniony bite).
    • For the dressing: Greek yogurt & mayonnaise (creamy base for the dressing, like a lighter ranch. Swap sour cream if you prefer), lemon juice to brighten things up, salt, and pepper for seasoning.

    How To Make Pan-Fried Salmon With Pea Salad

    Find the full recipe and nutritional information below. Here are some handy step-by-step photos for how to make crispy skin salmon in a frying pan. Plus, that lovely pea and radish salad.

    • Defrost peas in boiling water, then drain and cool.
    • Slice radishes thinly and add to a bowl with peas, dill, green onions, yogurt, mayo, lemon juice, salt, and pepper. Mix and taste.
    • Bring the salmon to room temperature before cooking. Pat dry the salmon fillets, especially the skin.
    • Heat olive oil in a skillet until hot.
    • Cook salmon skin-side down for 5–6 minutes, sprinkle flesh with salt and pepper.
    • Flip and cook for another 3 minutes, then quickly sear the sides.
    • Serve salmon with salad and a squeeze of lemon.

    Recipe Tips

    • Crispy skin secret: Make sure your salmon is patted dry and the pan is hot before adding the fish.
    • Make-ahead salad: You can prep the salad 1 day in advance. Keep dressing separate until ready to serve.
    • Storage: Leftover salmon keeps in the fridge for 2 days. The salad is best fresh but can hold up for 24 hours.
    • Variations: Add cucumber for extra crunch, swap dill for parsley, or mix in a little Dijon mustard for punchier dressing.

    Serving Suggestions

    Pan-fried salmon pairs with so many dishes. While I love it with this vibrant radish and pea salad, you can also serve it with any of these side dishes:

    💬 If you’ve tried this pan-fried salmon with pea salad or any other recipe on the blog then don’t forget to rate the recipe and let me know how you got on in the comments below, I love hearing from you! You can also FOLLOW ME on Instagram, Facebook, Pinterest, YouTube, and or sign up to my Newsletter to see more of my delicious food.

    Want to Save This Recipe?

    Enter your email & I’ll send it to your inbox. Plus, get great new recipes from me every week!

    By submitting this form, you consent to receive emails from Cooked & Loved

    Crispy skin pan-fried salmon paired with a fresh, creamy green pea and radish salad—this is a healthy dinner recipe that’s quick, flavorful, and perfect any time of year but especially spring.

    • Remove salmon from the fridge and let it come to room temperature. Pat dry with some kitchen paper towels.

    • Place peas in a bowl of boiling water for a few minutes to defrost, then drain and rinse under cold water.

    • Slice radishes thinly, halving larger ones. Add to a large mixing bowl with peas, dill, green onions, yogurt, mayo, lemon juice, salt, and pepper. Mix well and adjust seasoning to taste. Set aside.

    • Heat olive oil in a large skillet over high heat. Once hot, place salmon fillets skin-side down. Reduce heat to medium-high.

    • Season the flesh with salt and pepper, and cook skin-side down for 5–6 minutes until crispy.

    • Flip and cook for another 3 minutes, then briefly sear the sides (10–20 seconds) if needed.

    • Serve salmon with the green pea salad and lemon wedges.

    • Can I use fresh peas? Yes! Just blanch them briefly until tender.
    • Do I need skin-on salmon? For the crispiest texture, yes. But skinless will still taste great.
    • How do I know when salmon is done? The flesh should be opaque and flake easily but still slightly pink inside.
    • What’s the best pan for crispy salmon? A cast-iron or stainless steel skillet works best for that golden sear.
    • Crispy skin secret: Make sure your salmon is patted dry and the pan is hot before adding the fish.
    • Make-ahead salad: You can prep the salad 1 day in advance. Keep dressing separate until ready to serve.
    • Storage: Leftover salmon keeps in the fridge for 2 days. The salad is best fresh but can hold up for 24 hours.
    • Variations: Add cucumber for extra crunch, swap dill for parsley, or mix in a little Dijon mustard for punchier dressing.

    Calories: 332kcal | Carbohydrates: 14g | Protein: 30g | Fat: 17g | Saturated Fat: 3g | Polyunsaturated Fat: 7g | Monounsaturated Fat: 6g | Trans Fat: 0.01g | Cholesterol: 72mg | Sodium: 404mg | Potassium: 898mg | Fiber: 5g | Sugar: 5g | Vitamin A: 763IU | Vitamin C: 44mg | Calcium: 60mg | Iron: 2mg

    Keywords: Pan-Fried Salmon With Pea Salad, Pan-fried salmon, crispy skin salmon with green pea salad, Pan-Fried Salmon With Radish Pea Salad

    More Healthy Dinner Recipes


    Source link

  • Greek Pasta Salad Recipe

    Greek Pasta Salad Recipe

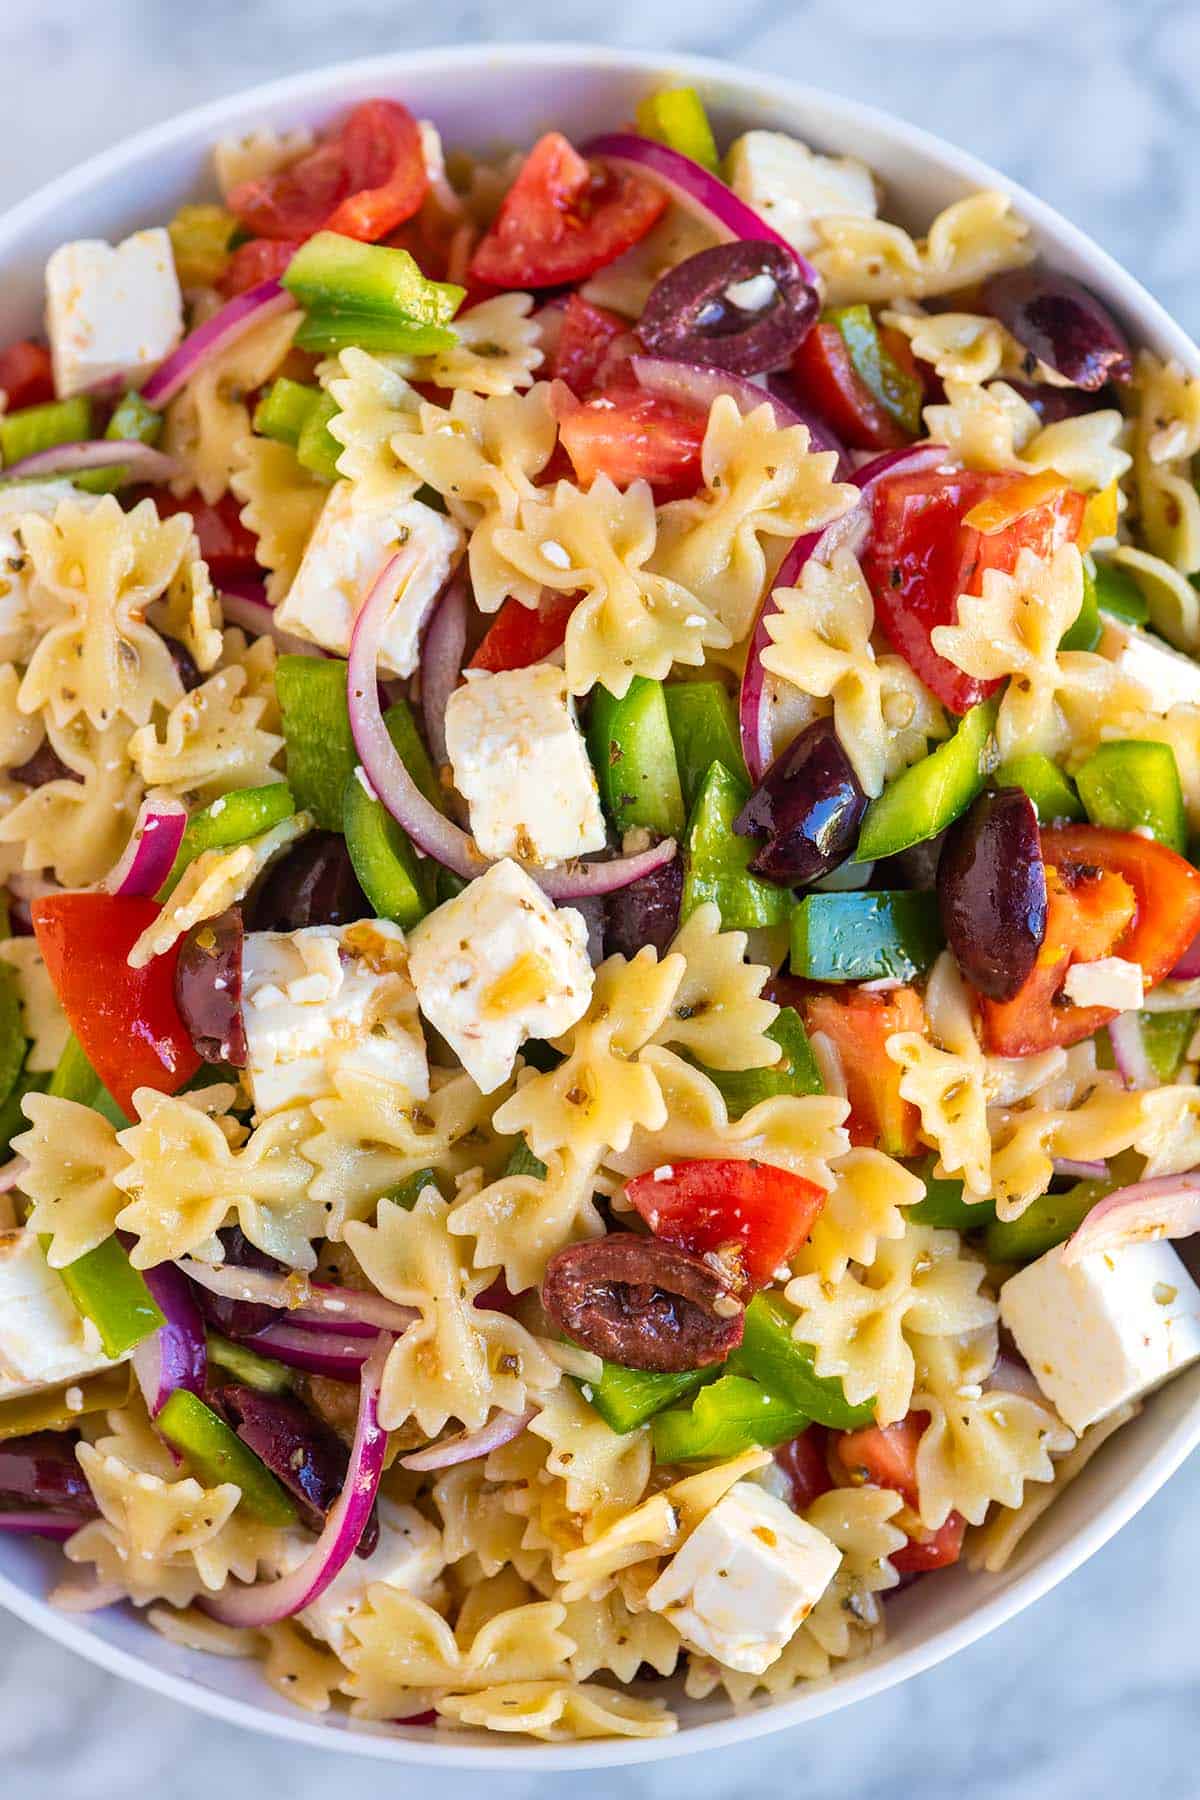
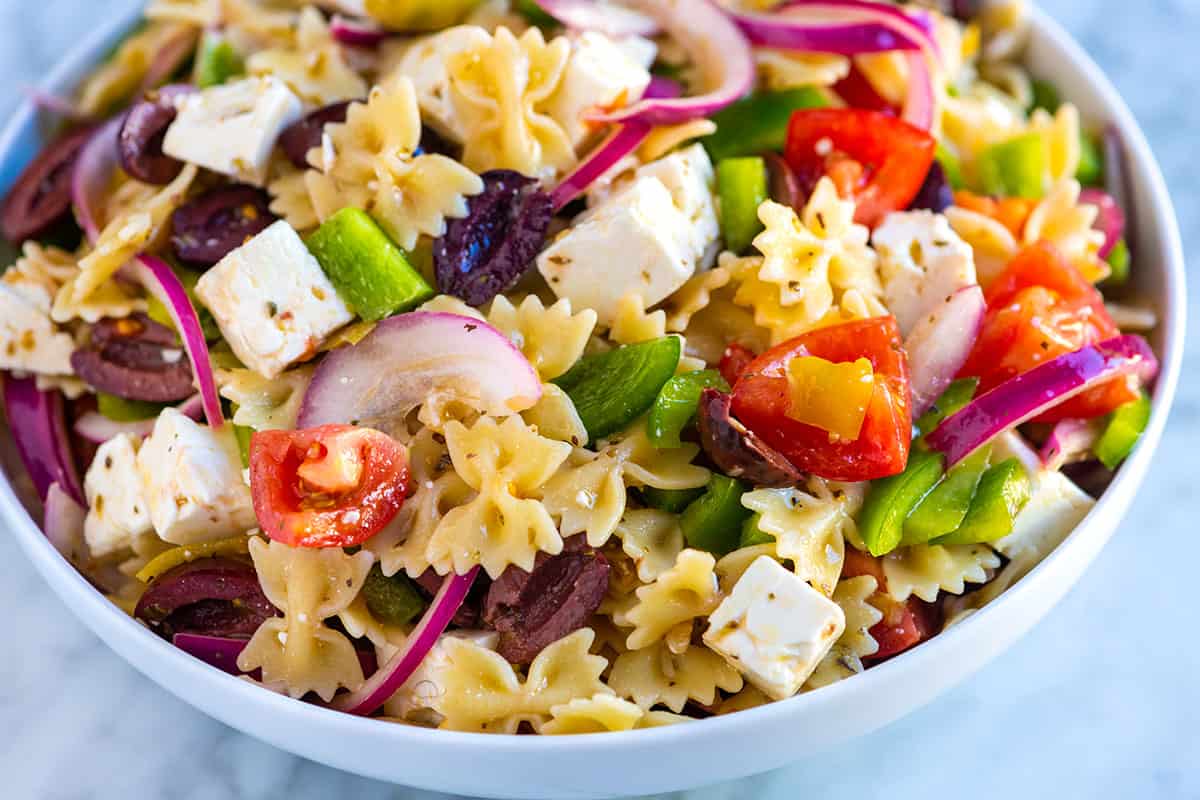
    This Greek pasta salad recipe is fresh, colorful, and made with the most irresistible homemade dressing. Perfect for summer entertaining and potlucks!

    Greek Pasta Salad

    Inspired by our favorite Greek salad, this easy pasta salad combines fresh tomatoes, red onion, olives, and creamy feta cheese. It’s simple to shop for, comes together quickly, and always tastes like summer.

    Serve it as a side dish, or make it a full meal by topping it with grilled chicken, shrimp scampi, or your favorite protein. For an Italian twist, try our Italian pasta salad with salami. It’s just as easy and just as delicious.

    Key Ingredients

    • Pasta: I used mini farfalle in the photos, but choose a shape that has plenty of nooks and crannies to catch the dressing. Penne, fusilli, rotini, farfalle (bow tie), and orzo are all great options.
    • Veggies: This calls for the same veggies as a traditional Greek salad, except for the cucumber, which doesn’t hold up as well over time. I add tomatoes, red onion, and green bell pepper.
    • Olives: I’ve used pitted Kalamata olives in the photos, but feel free to use your favorite olives instead. Consider black, green, or Castelvetrano olives.
    • Feta Cheese: Choose feta sold in brine if you can. It tastes better than pre-crumbled feta, and you can even add a spoonful of the brine to the dressing for more flavor.
    • Pepperoncini Peppers: These are optional, but I love them. I like to slice them thin and mix them into the salad, plus add a splash of the pepperoncini brine to the dressing for even more flavor. I do the same with our classic pasta salad.
    • Greek Salad Dressing: You’ll make it with olive oil, red wine vinegar, dried oregano, salt, and pepper. I also add a bit of feta brine and pepperoncini brine (trust me, it’s delicious!).

    Find the full recipe with measurements below.

    How to Make Seriously Good Greek Pasta Salad

    Tip 1: Make everything in one bowl. I’m always looking for ways to reduce the number of dirty dishes, so I make this pasta salad directly in the serving bowl. Start by whisking the dressing in the bottom, then add the cooked pasta and other ingredients on top. Toss it all together, and you’re done.

    Greek pasta salad ingredients in a bowl ready to be tossed

    Tip 2: Let it sit. This pasta salad actually gets better as it rests. Let the pasta and veggies sit in the dressing for at least 30 minutes before serving so the flavors have time to mingle. It makes a big difference.

    Serving Suggestions

    This Greek salad is perfect for bringing to your next get-together. It’s fresh, colorful, and tasty. I’ve also been enjoying it myself as a base for something else. Add chickpeas, poached salmon, baked tofu, or juicy chicken breasts for a complete meal.

    Greek Pasta Salad

    Greek Pasta Salad

    • PREP
    • COOK
    • TOTAL

    To make this Greek pasta salad really flavorful, we use brine in two ways. First, we add a few tablespoons of juice from a jar of pepperoncini peppers, which adds a touch of spice. Second, we use feta cheese packed in brine and stir a couple of tablespoons of that cloudy, salty liquid into the dressing.

    6 Servings

    You Will Need

    Greek Pasta Salad

    8 ounces short-cut pasta, such as bow-tie, fusilli, or penne (226g)

    1/2 cup thinly sliced red onion

    3 small tomatoes, chopped, 1 ¼ cups

    1 green bell pepper, chopped

    1 ¼ cups Kalamata olives, pitted and halved

    8 ounces feta cheese, cut into ½-inch cubes (226g)

    4 pepperoncini peppers, thinly sliced, optional


    Salad Dressing

    1/4 cup extra-virgin olive oil (60ml)

    1/4 cup red wine vinegar (60ml)

    2 tablespoons brine from jar of pepperoncini peppers or use fresh lemon juice (30ml)

    2 tablespoons brine from feta, optional (30ml)

    1 ½ teaspoons dried oregano

    1/4 teaspoon fine sea salt plus more to taste

    Directions

      1Place the sliced onion in a small bowl and cover with cold water. Set the bowl aside for 10 minutes so that the raw flavor of the onion calms a little. Drain and rinse the onions before adding them to the salad.

      2Bring a large pot of salted water to a boil. Add pasta and cook until tender, 6 to 10 minutes (check the package for recommended cook time). Drain and rinse well under cold water.

      3While the pasta cooks, in the bottom of a large bowl, make the dressing. Whisk the olive oil, red wine vinegar, pepperoncini brine, feta brine, oregano, salt, and black pepper until well blended.

      4Add the drained and rinsed pasta to the dressing and mix well.

      5Stir in the drained and rinsed red onion, tomatoes, bell pepper, olives, feta cheese, and sliced pepperoncini peppers.

      6Taste for seasoning and adjust with salt and pepper as needed. Serve or, for the best results, cover and refrigerate for at least 30 minutes and up to 5 days.

    Adam and Joanne’s Tips

    • Feta brine: We buy feta cheese that’s packaged in brine. That cloudy liquid is salty, creamy, and delicious whisked into our dressing. If you don’t find feta sold in brine, that’s okay. The salad still tastes great, but if you can find it, buy it. The feta is better, and you can use the brine to season all sorts of things (this pasta salad, included).
    • The nutrition facts provided below are estimates.

    Nutrition Per Serving
    Serving Size
    1/6 of the recipe
    /
    Calories
    381
    /
    Total Fat
    21.2g
    /
    Saturated Fat
    7.5g
    /
    Cholesterol
    33.6mg
    /
    Sodium
    661.4mg
    /
    Carbohydrate
    37.4g
    /
    Dietary Fiber
    4.2g
    /
    Total Sugars
    5.5g
    /
    Protein
    11.7g


    AUTHOR:

    Joanne Gallagher

    Adam and Joanne of Inspired Taste

    We are Adam and Joanne Gallagher, the creators of Inspired Taste. Established in 2009, Inspired Taste grew from a childhood dream into one of the internet’s most trusted recipe sites with hundreds of reliable recipes, step-by-step videos, and expert tips.More About Us

    Source link