Tag: Salad

  • Cold Spaghetti Pasta Salad with Homemade Italian Dressing

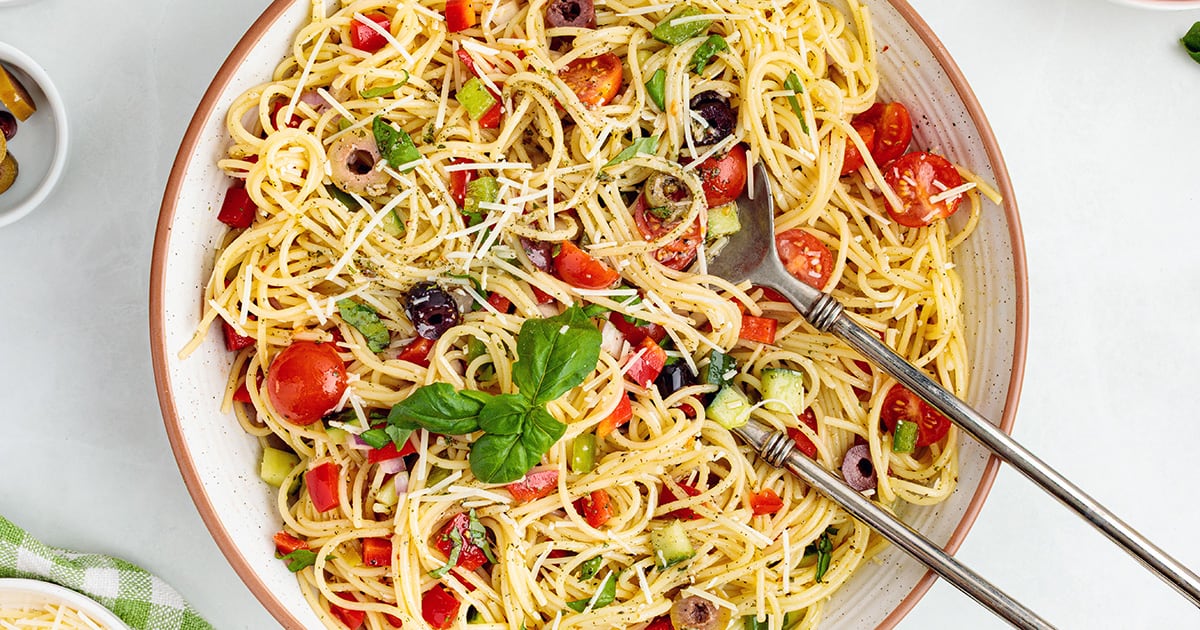
    Cold Spaghetti Pasta Salad with Homemade Italian Dressing

    This cold spaghetti pasta salad is a fun dish for potlucks and BBQs, and is also great as a summertime meal. It has an Italian feel with a delicious homemade dressing that makes all the difference, coating every noodle with bright, savory flavor that actually tastes good the next day.


    Jump to: ℹ️ Overview | 🛒 Ingredients | 👩‍🍳 Recipe Tips | 📝Full Recipe Card | 📷 How To Make | 🥗 Serving Suggestions | 🍽 More Summer Salad Recipes


    At A Glance

    • ⏱ Ready In: About 1.5 hours (mostly chilling time)
    • 🍽 Serves: 6–8
    • 🌱 Diet: Vegetarian, Mediterranean-inspired
    • 💪 Nutrition Highlights: Fresh vegetables, good fats from olive oil, calcium from cheese
    • 🥕 Main Ingredients: Spaghetti, fresh vegetables, olives, Italian cheeses, homemade herb dressing
    • 🔥 Flavor Profile: Bright, savory, slightly sweet, tangy, zesty, with a hint of heat
    • 🧊 Meal-Prep Friendly: Keeps 3–4 days in the fridge; actually tastes better the next day
    • Best Served With: Summer entertaining, potlucks, picnics, casual summer dinners

    I first had cold spaghetti pasta salad at a friend’s backyard BBQ in the US, and I was immediately hooked. There’s something about slurping tender spaghetti coated in a tangy, garlicky dressing that just hits different than other pasta salads. But here’s the thing—most versions rely on bottled Italian dressing and seasoning packets, which gets the job done but can taste a little flat and overly processed. This homemade version achieves that same nostalgic, addictive flavor from scratch using pantry spices, good olive oil, and a few smart upgrades. You get the bright, savory, slightly sweet profile you’re craving, but with so much more depth and balance.

    It’s especially perfect for those summer days when you want something cold, refreshing, and satisfying—something that actually tastes good the next day, which is honestly half the appeal for potlucks and entertaining. Once you make your own dressing, you’ll never look back.

    👩‍🍳 You might also like these pasta salads:
    ⭐️ Cold Chicken Pasta Salad
    🌿 Mediterranean Pasta Salad
    💪 High-Protein Pasta Salad
    🌽 Elote Pasta Salad
    🥓 Chicken Bacon Ranch Pasta Salad
    👉 More Pasta Salad Ideas

    What You’ll Need

    Here is what you’ll need for this spaghetti pasta salad recipe. Find the full measurements in the recipe card below.

    For the Salad:

    • Spaghetti (broken in half)—the star of the show; there’s something special about the way spaghetti strands take on dressing compared to other pasta shapes
    • Cucumber (seeded and diced)—adds crisp, refreshing crunch
    • Red bell pepper/capsicum (finely diced)—sweet, slightly tangy flavor and bright color
    • Cherry tomatoes (halved)—juicy, bright, and fresh
    • Red onion (finely minced)—adds bite and savory depth without overpowering
    • Sliced olives—briny punch that pulls everything together; you can use black, Kalamata, or a mix
    • Pepperoncini (finely minced)—delivers a gentle heat and vinegary tang; Golden Greek peppers can also be used
    • Shredded Asiago cheese —milder, slightly creamy bite throughout the salad; Manchego or Comté cheese are also great options
    • Finely grated Parmesan—melts into the dressing to help emulsify it while adding salty, savory depth. If you don’t have Asiago or other slightly softer aged cheeses, just add more Parmesan
    • Fresh basil (thinly sliced)—bright, herbaceous finishing touch that keeps the salad feeling fresh

    For the Dressing:

    • Olive oil (good quality)—the base; good oil makes a real difference in flavor
    • Red wine vinegar—provides acidity and tang
    • Lemon juice—extra brightness and helps balance the sweetness
    • Sugar—rounds out the flavors; don’t skip this
    • Kosher salt—brings everything into focus
    • Dried oregano, basil, and parsley—these dried herbs replace the seasoning packet and give you control over flavor depth
    • Garlic powder and onion powder—savory umami without the harshness of fresh
    • Celery seed—adds an unexpected herbal note that blooms as it sits, but can be left out
    • Crushed red pepper flakes (optional)—gentle heat without taking over
    • Dijon mustard—helps emulsify the dressing and adds subtle depth
    • Finely grated Parmesan—helps the dressing emulsify and cling to the noodles
    • Pepperoncini brine—the secret ingredient that ties everything together

    Recipe Tips

    • About that long ingredient list: At first glance, the dressing might look intimidating, but it’s mostly dried herbs and pantry staples you likely already have. They come together in just a couple of minutes. This homemade version replaces both the bottled dressing and the seasoning packet, giving you the same layered flavor (tangy, savory, well-balanced), but without the preservatives and fillers. It’s worth it.
    • Why pepperoncini two ways? The brine adds acid and salt; the minced pepperoncini add gentle heat without overpowering everything. Together, they’re the secret to that addictive tang.
    • Why both Asiago and Parmesan? The finely grated Parmesan melts into the dressing, helping to emulsify it while adding salty, savory depth. The Asiago is added in larger shreds, bringing a milder, slightly creamy bite throughout the salad. You can also use Manchego or Comte cheeses. You can use all Parmesan if you prefer, but the combination adds nice balance of flavor and texture.
    • Flexible vegetables: This recipe is beautifully flexible. The base uses crisp, fresh vegetables for contrast, but you can swap or add based on what you have on hand or what’s in season. Think crunchy (celery, radishes, carrots), juicy (zucchini, green beans, corn), briny (artichoke hearts, sun-dried tomatoes, capers), or roasted (roasted red peppers, grilled zucchini, roasted cherry tomatoes).
    • Make-ahead tip: You can prep everything the day before—chop vegetables, make the dressing, cook and chill the pasta. Just hold back the fresh basil until just before serving so it stays vibrant. Add a drizzle of olive oil or a splash of vinegar before serving if the salad looks a little dry.
    • Storage: Store leftovers in an airtight container in the fridge for up to 3–4 days. The pasta will absorb the dressing as it sits, which is normal—just refresh it with a bit more olive oil or a splash of red wine vinegar or pepperoncini brine before serving. Keep it chilled (it shouldn’t sit out for more than about 2 hours). Don’t freeze—the vegetables lose their texture, and the dressing separates.

    Want to Save This Recipe?

    Enter your email & I’ll send it to your inbox. Plus, get great new recipes from me every week!

    By submitting this form, you consent to receive emails from Cooked & Loved

    This vibrant cold spaghetti pasta salad features a tangy, garlicky homemade dressing that coats every noodle. Fresh, bright, and perfect for summer entertaining—it actually tastes better the next day. Find step-by-step photos below and more recipe tips above.

    For the Salad:

    • 12 oz spaghetti, broken in half 340 grams
    • 1 cucumber seeded and diced, English/Telegraph is best as has fewer seeds
    • 1 red bell pepper capsicum, finely diced, or ½ red and ½ green pepper
    • 1 cup cherry tomatoes, halved 150 grams
    • cup red onion, finely minced 40 grams
    • ⅓–½ cup sliced olives (black, Kalamata, or mixed) 50–75 grams
    • 1–2 tablespoons pepperoncini, very finely minced 8–16 grams
    • ½ cup shredded Asiago 50 grams
    • ¼ cup finely grated Parmesan 25 grams
    • ½ cup fresh basil, thinly sliced 12 grams
    • Cook spaghetti in well-salted water until just al dente. Drain and rinse briefly under cold water (or dunk into iced water) to stop cooking. Shake off excess water thoroughly.

    • While the pasta cools, whisk all dressing ingredients together until emulsified. Taste it—it should be bright, savory, slightly sweet, and assertive. Let it sit 5 minutes, then taste again (the heat and celery seed will bloom and become more noticeable).

    • Transfer the cooled pasta to a large bowl and toss with about ⅔ of the dressing while the pasta is cool but not ice-cold. Let it absorb for 5–10 minutes.

    • Add cucumber, bell pepper, tomatoes, red onion, olives, and minced pepperoncini. Toss gently.

    • Fold in Asiago, Parmesan, and fresh basil. Add the remaining dressing as needed; you may not need it all.

    • Cover and refrigerate at least 1 hour. Before serving, taste and adjust with a splash of vinegar, extra olive oil, or a pinch of salt if needed.

    • Important Ingredient Tips: Use good-quality olive oil, it really shines in the dressing. If your grocery store has a deli counter, look for mixed olives, which are great for getting a small quantity of colorful, varied olives without buying a whole jar.
    • Key Recipe Tips: The dressing ingredient list looks long, but it uses pantry staples. The combination of dried herbs, spices, Parmesan, and pepperoncini brine replaces bottled dressing and seasoning packets. Pepperoncini works two ways: the brine adds acid and salt; the minced peppers add gentle heat. Asiago and Parmesan together create better texture and flavor balance than using just one cheese.
    • Storage Tips: Store leftovers in an airtight container in the fridge for 3–4 days. The pasta will absorb the dressing as it sits, which is normal. Refresh before serving with a bit of olive oil or a splash of vinegar. Keep chilled and don’t leave at room temperature for more than 2 hours (less on very warm days).
    • Make-Ahead Tips: Prep all vegetables and make the dressing the day before. Cook and chill the pasta ahead. Just hold back the fresh basil until just before serving so it stays vibrant and bright.
    • Can I use regular pasta instead of spaghetti? Yes, though spaghetti really is special here—the way it slurps and the noodles take on the dressing is part of the appeal. Linguine would be a good substitute.
    • Is this vegan? Not as written (it has cheese), but you could omit or replace the cheeses with vegan alternatives.
    • Can I make this ahead for a potluck? Absolutely! Make it the day before, store it covered in the fridge, and bring it in an airtight container. Add fresh basil and a refreshing drizzle of olive oil right before serving.
    • Why is my salad dry the next day? The pasta absorbs the dressing—it’s normal! Just toss with a bit more olive oil or a splash of vinegar before serving.

    Calories: 350kcal | Carbohydrates: 37g | Protein: 10g | Fat: 18g | Saturated Fat: 4g | Polyunsaturated Fat: 2g | Monounsaturated Fat: 11g | Cholesterol: 8mg | Sodium: 567mg | Potassium: 263mg | Fiber: 3g | Sugar: 4g | Vitamin A: 795IU | Vitamin C: 26mg | Calcium: 145mg | Iron: 1mg

    Keywords: spaghetti salad with Italian dressing, potluck recipe, make-ahead salad, summer pasta salad, Vegetarian Pasta Salad, Cold spaghetti pasta salad, spaghetti salad recipe, pasta salad with spaghetti noodles, cold pasta spaghetti salad

    💬 If you’ve tried this cold spaghetti pasta salad or any other recipe on the blog then don’t forget to rate the recipe and let me know how you got on in the comments below, I love hearing from you! You can also FOLLOW ME on Instagram, Facebook, Pinterest, YouTube, and or sign up to my Newsletter to see more of my delicious food.

    How To Make Cold Spaghetti Pasta Salad

    Find the full recipe and nutritional information below. Here are some handy step-by-step photos for making this cold spaghetti pasta salad.

    • Cook spaghetti in well-salted water until just al dente. Don’t overcook—you want it to have a little bite because it will soften as it sits.
    • Drain and rinse briefly under cold water (or dunk into iced water) to stop the cooking. Shake off excess water thoroughly so the dressing clings properly.
    • While the pasta cools, whisk all dressing ingredients together until emulsified. Taste it. It should be bright, savory, slightly sweet, and assertive. Let it sit for 5 minutes—the heat and celery seed will bloom and become more noticeable. Taste again and adjust as needed.
    • Transfer the cooled pasta to a large bowl and toss with about ⅔ of the dressing while the pasta is cool but not ice-cold. This helps it absorb the flavors properly. Let it sit for 5–10 minutes.
    • Add the cucumber, bell pepper, tomatoes, red onion, olives, and minced pepperoncini. Toss gently so you don’t break anything up.
    • Fold in the Asiago, Parmesan, and fresh basil. Add the remaining dressing as needed—you may not need it all, and it’s easier to add more than to take away.
    • Cover and refrigerate for at least 1 hour. Before serving, taste and adjust with a splash of vinegar, extra olive oil, or a pinch of salt if needed. The flavors meld beautifully as it sits.

    Serving Suggestions

    Honestly, this is one of those recipes that works for just about every occasion. Bring it to potlucks and picnics—it travels beautifully and tastes even better the next day. Serve it at summer BBQs alongside grilled meats and vegetables, or make it a main dish on a warm evening when you don’t feel like cooking. It’s also perfect for meal prep; divide it into containers and grab it for a cold, satisfying lunch. Pair it with crusty bread, a crisp white wine, or a cold beer. The fresh, tangy flavors work well with just about anything summery.
    More Summer Salad Recipes


    Source link

  • Epic Taco Salad Recipe

    Epic Taco Salad Recipe

    Our favorite taco salad recipe is an easy weeknight meal with fresh lettuce, tortilla chips, seasoned ground beef, cheese, and a creamy cilantro lime dressing.

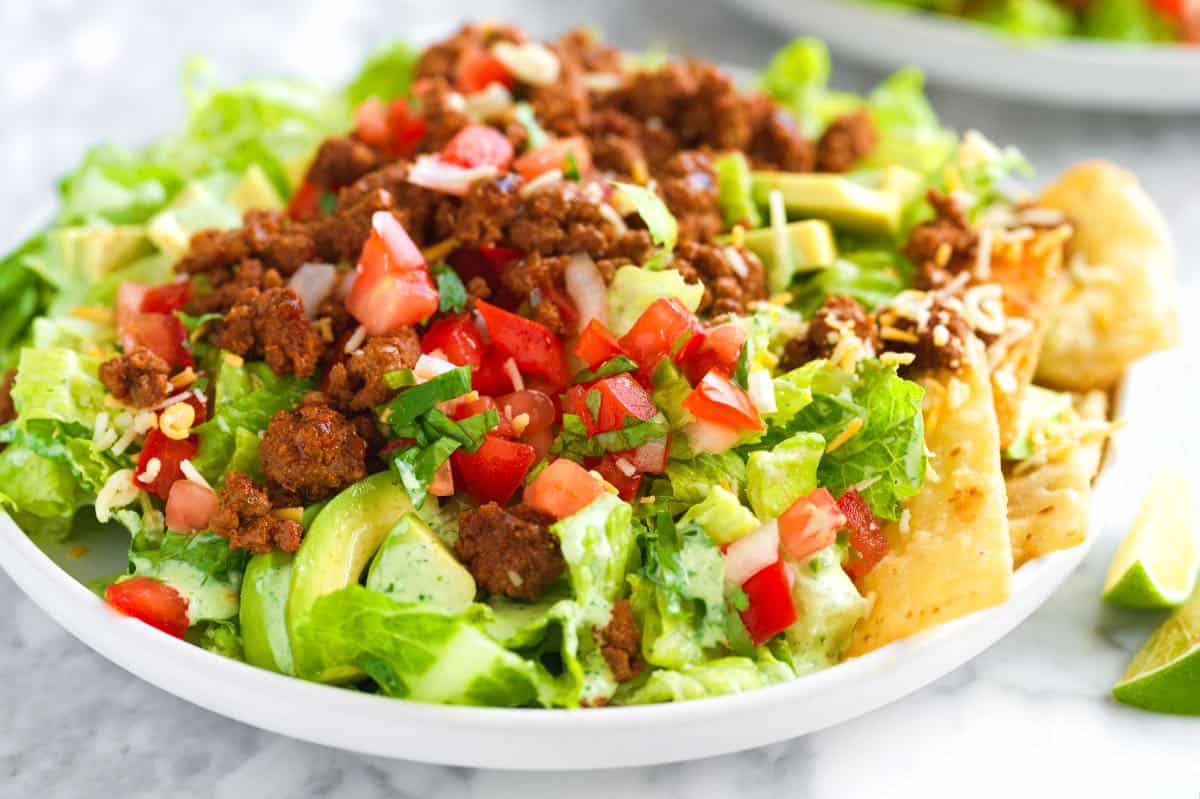
    Taco Salad

    We love tacos of all kinds (see all of our taco recipes as proof), but we really love taco salad. It’s fast, fresh, and super easy! You’ve got perfectly seasoned ground beef made with our homemade taco mix, crisp fresh lettuce, and all the best taco toppings.

    You have a lot of play with when it comes to making this taco salad recipe, but I’ll walk you our favorite way to make it! It’s healthy, but doesn’t feel that way, so it feels like a splurge. We love topping this salad with our cilantro lime dressing!

    Key Ingredients

    • Taco Meat: I’ve used lean ground beef (90/10) for my salad in the photos, but you can substitute ground turkey, ground pork, or ground chicken without any changes. Instead of using a store-bought seasoning, we make our own with chili powder, cumin, smoked paprika, garlic powder, dried oregano, and salt. When we cook the meat, we also add a couple of tablespoons of tomato paste, which helps make the meat extra tasty. You can also swap our seasoning below for our homemade taco seasoning, which is equally as delicious. (Here’s more about how to make taco meat if you are interested.)
    • Lettuce: You want crisp, crunchy lettuce for this salad, so Iceberg or Romaine is perfect.
    • All the Toppings: So this is where you get to have fun. Think of your favorite taco toppings, and then add them to this salad. I love pico de gallo, avocado or guacamole, and shredded cheese, but add your favorite toppings as you see fit!
    • Taco Salad Dressing: My favorite dressing for this is our creamy cilantro lime dressing. Still, you can substitute your favorite store-bought dressing or go with another homemade dressing like this easy ranch dressing.
    • Tortilla Chips: So these are optional and take away a little bit from the healthy angle, but I do love them! Make homemade tortilla chips or use some from your favorite store-bought bag, and add them to the top right before digging in. They add that corn tortilla flavor and lots of crunch. Some people prefer Fritos, but to be honest, I like to stick with regular chips. I’m such a fan!

    Find the full recipe with measurements below.

    Homemade Taco Salad with Ground Beef

    How to Make the Best Taco Salad

    Tip 1: Generously season the ground meat. I’m extra generous with the salt and seasonings for my taco meat. It may taste slightly too seasoned on its own, but when you scatter it all over the salad, it works! If you like spicy tacos, add a pinch or two of cayenne pepper to the spice blend.

    Tip 2: Add lots of different textures. My favorite part about this salad is the variety of textures. We want to keep the prep to a minimum since this is very likely something you are making on a weeknight, but that doesn’t mean we can’t pack in lots of goodies. Avocado is creamy, tomato or pico de gallo is fresh, and the chips add some crunch. Think about other fridge staples like sour cream, salsa, guacamole, or pickled red onions. They will all work well in this salad!

    Tip 3: Make the taco meat ahead of time. You can cook the ground beef with the spices, then keep it in an airtight container for up to 4 days. This way, it’s ready for you when you are craving this taco salad. The dressing is great for making ahead, too!

    Taco Salad

    Epic Taco Salad

    • PREP
    • COOK
    • TOTAL

    This easy taco salad recipe with ground beef is such an easy weeknight dinner. Make our recommended cilantro lime dressing recipe (which is sort of like a cilantro ranch) or skip that step and use your favorite store-bought ranch.

    4 Servings

    Watch Us Make the Recipe

    You Will Need

    For the Taco Meat

    1 ½ teaspoons chili powder

    1 teaspoon ground cumin

    ½ teaspoon smoked paprika

    1 teaspoon garlic powder

    ¼ teaspoon dried oregano

    ¾ teaspoon fine sea salt, plus more as needed

    1 ½ tablespoons avocado oil

    1 pound lean ground beef, 90/10 (450g)

    2 tablespoons tomato paste (35g)

    ½ cup chicken stock or water


    For the Taco Salad

    12 cups shredded crispy lettuce, like romaine or iceberg lettuce

    1 cup homemade pico de gallo or chopped tomatoes

    ½ cup Mexican blend shredded cheese (113g)

    1 large avocado, pitted and sliced

    1 cup tortilla chips, try homemade tortilla chips, optional

    Cilantro Lime Dressing, Homemade Ranch, or your favorite store-bought ranch

    Directions

      1Make spice mix: In a small bowl, stir together the chili powder, cumin, smoked paprika, garlic powder, dried oregano, and salt.

      2Cook the seasoned beef: Heat the avocado oil in a medium skillet over medium-high heat. Add the ground beef and sprinkle the spice mixture over it. Use a wooden spoon to break up the meat as it cooks, stirring until it begins to brown. Stir in the tomato paste and cook for 2 more minutes. Add the chicken stock (or water) and let it simmer for a few minutes until the sauce has thickened. Taste, and then add more salt if you think it needs it (since this will top a salad, keeping this well seasoned works really well with the rest of the salad.)

      3Make the salad: In a large salad bowl, toss the lettuce with 4 to 8 tablespoons of the dressing (adjust depending on how dressed you like your salad). Divide the lettuce between four bowls or plates, then top each with a generous ½ cup of the beef mixture, pico de gallo, shredded cheese, and the avocado. Sneak some tortilla chips on the side, then enjoy!

    Adam and Joanne’s Tips

    • More toppings: Feel free to add more of your favorite taco toppings like sour cream, salsa, chopped tomatoes, queso fresco, red onion, black olives, and more!
    • Seasoning: I prefer the spice blend above to your average packet of taco seasoning from the store; however, if you have a favorite, feel free to swap our blend for the packet. Of all the options I have tried, Siete Foods has the tastiest.
    • Lettuce: I usually buy the romaine hearts sold in threes at the store. For 4 servings (12 cups), you will need two 12-ounce bags of romaine hearts.
    • The nutrition facts are estimates.

    Nutrition Per Serving
    Serving Size
    1/4 of the recipe (1/2 cup beef)
    /
    Calories
    534
    /
    Total Fat
    40.7
    /
    Saturated Fat
    10.6g
    /
    Cholesterol
    95.2mg
    /
    Sodium
    1069.8mg
    /
    Carbohydrate
    14.3g
    /
    Dietary Fiber
    6.7g
    /
    Total Sugar
    5.4g
    /
    Protein
    29.7g


    AUTHOR:

    Joanne Gallagher

    Adam and Joanne of Inspired Taste

    We are Adam and Joanne Gallagher, the creators of Inspired Taste. Established in 2009, Inspired Taste grew from a childhood dream into one of the internet’s most trusted recipe sites with hundreds of reliable recipes, step-by-step videos, and expert tips.More About Us

    Source link

  • Seriously Good Apple Salad Recipe

    Seriously Good Apple Salad Recipe

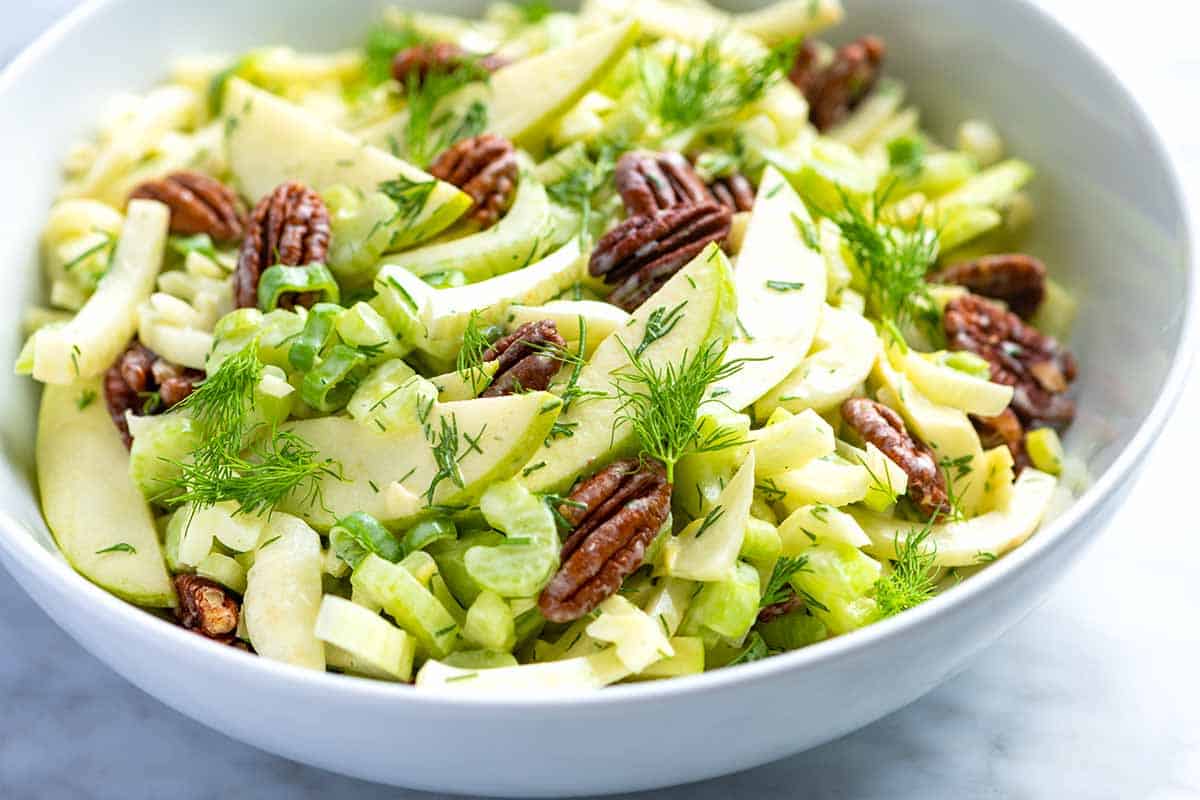
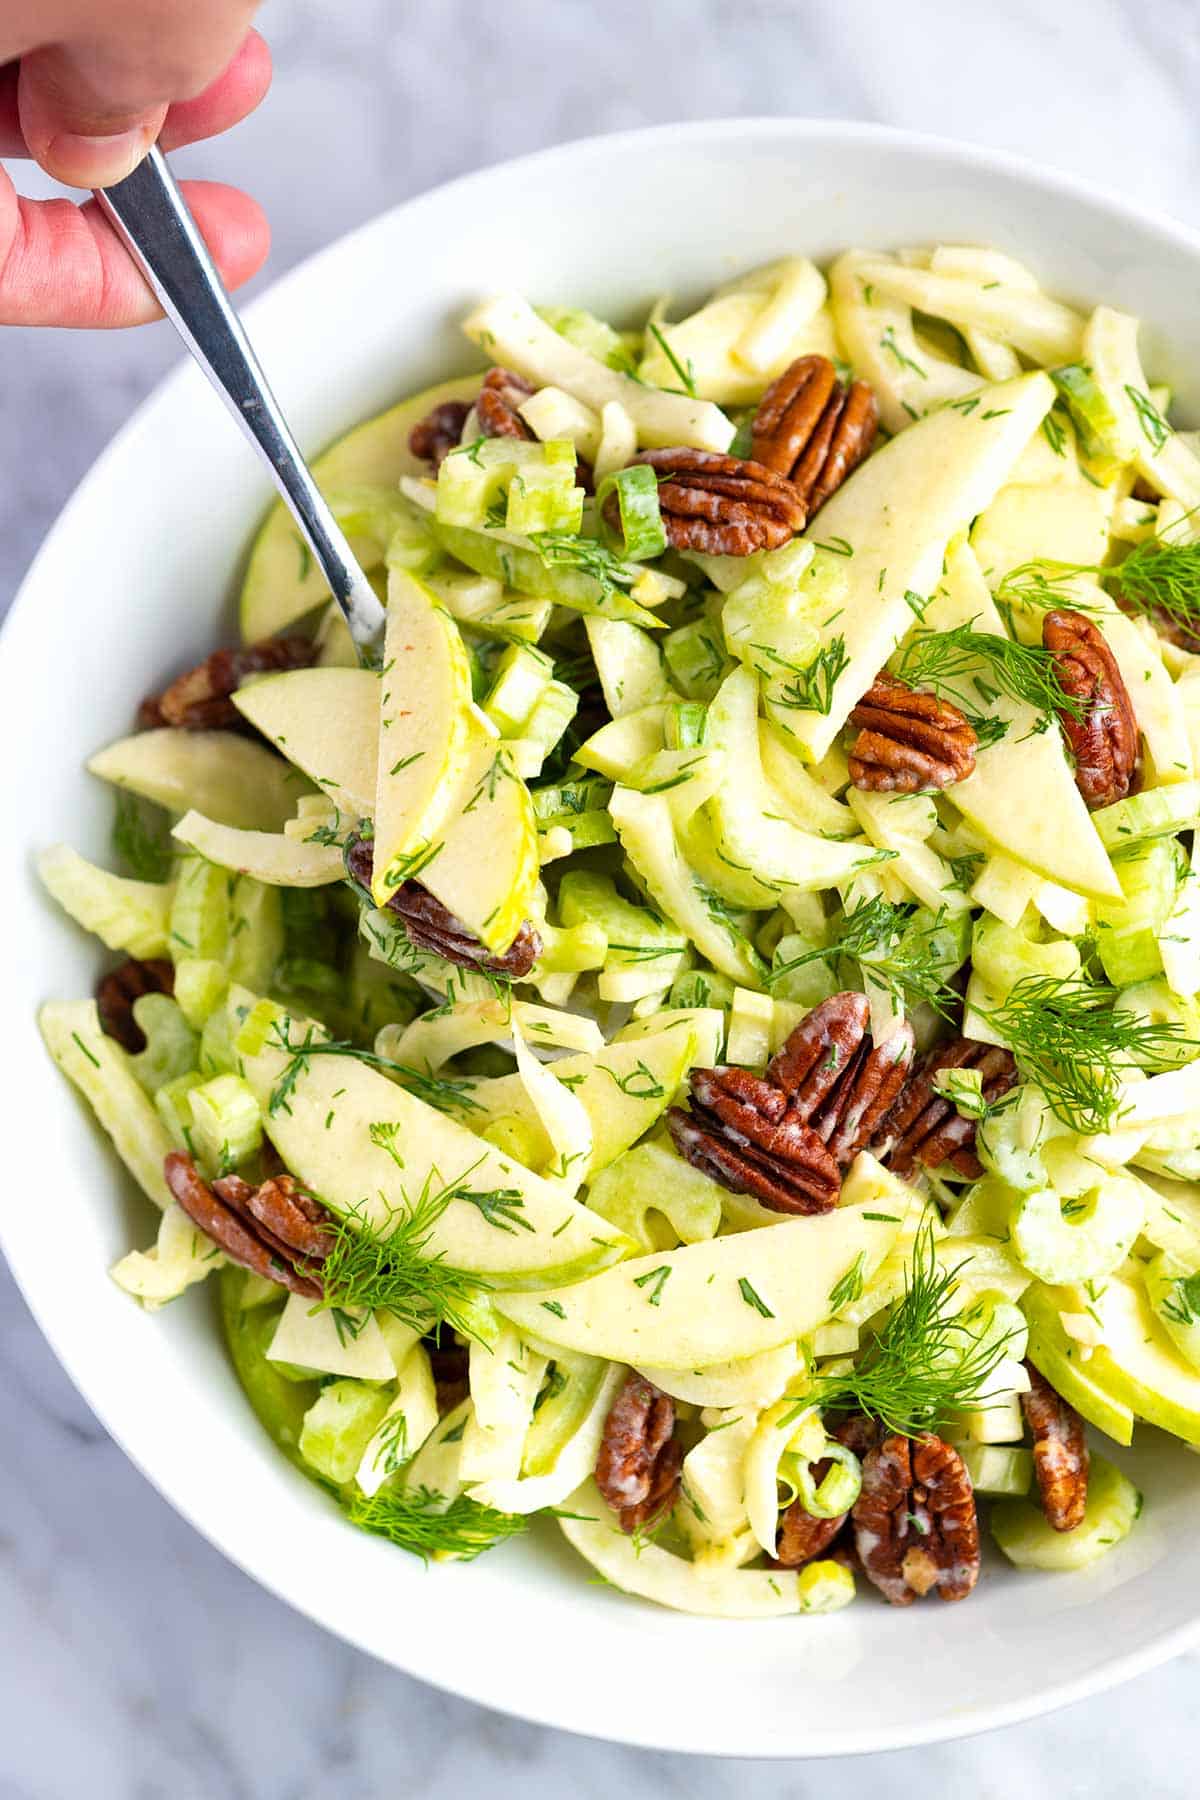
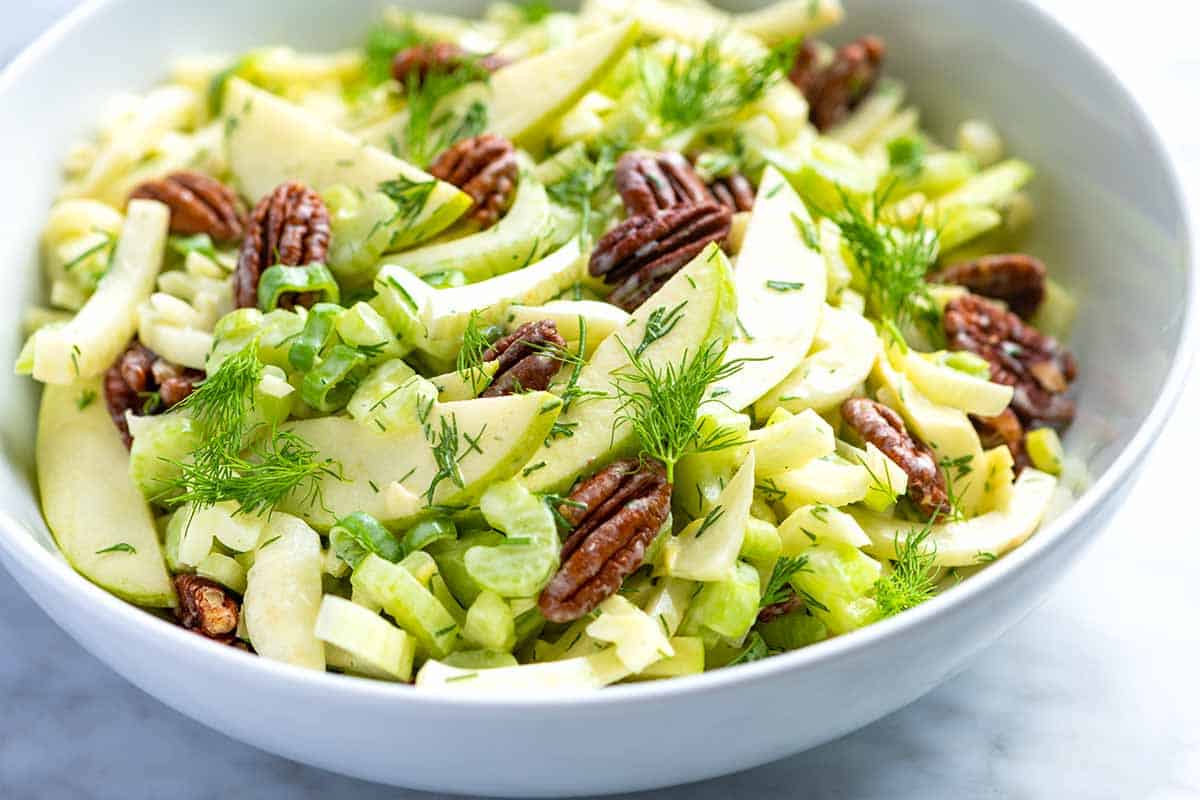
    This apple salad recipe is one of my favorite fall salad recipes. Its creamy dressing and toasted pecans make it a perfect side dish or holiday salad!

    Apple Salad

    When fall hits, I start craving this crispy green apple salad with fennel. It’s incredibly easy to make and has one of my favorite creamy salad dressings. It’s great throughout the fall and absolutely perfect on the table for Thanksgiving.

    I cannot wait for you to try this easy recipe. For more like this, see our arugula fennel salad or farro salad with apples.

    Key Ingredients

    • Apples: I love tart Granny Smith apples for this salad, but any variety of crunchy apples works well.
    • Celery and Fennel: If you aren’t familiar with raw celery and fennel in salads, hear me out. It’s delicious! You’ll quickly peel the celery, which removes any stringy bits, and then slice them thin for the salad. The fennel adds a light licorice (or anise) crunch. Seriously, it’s one of my favorite salads right here!
    • Green Onion and Fresh Dill: I love tossing chopped fresh dill and sliced green onions for even more fresh flavor. You can also use chives or mint.
    • Nuts: I use pecans in the photos, but pistachios, walnuts, and hazelnuts are great here. Toast them briefly first before you add them to the apples. Candied pecans would be amazing, too!
    • Creamy Dressing: This salad dressing is zippy and creamy. I make it with Dijon mustard, apple cider vinegar, maple syrup, olive oil, and crème fraîche. Crème fraîche tastes like a creamy, slightly less tangy sour cream. If you don’t have it on hand, mayonnaise, sour cream, and even plain yogurt will work in its place.

    Find the full recipe with measurements below.

    How to Make Apple Salad

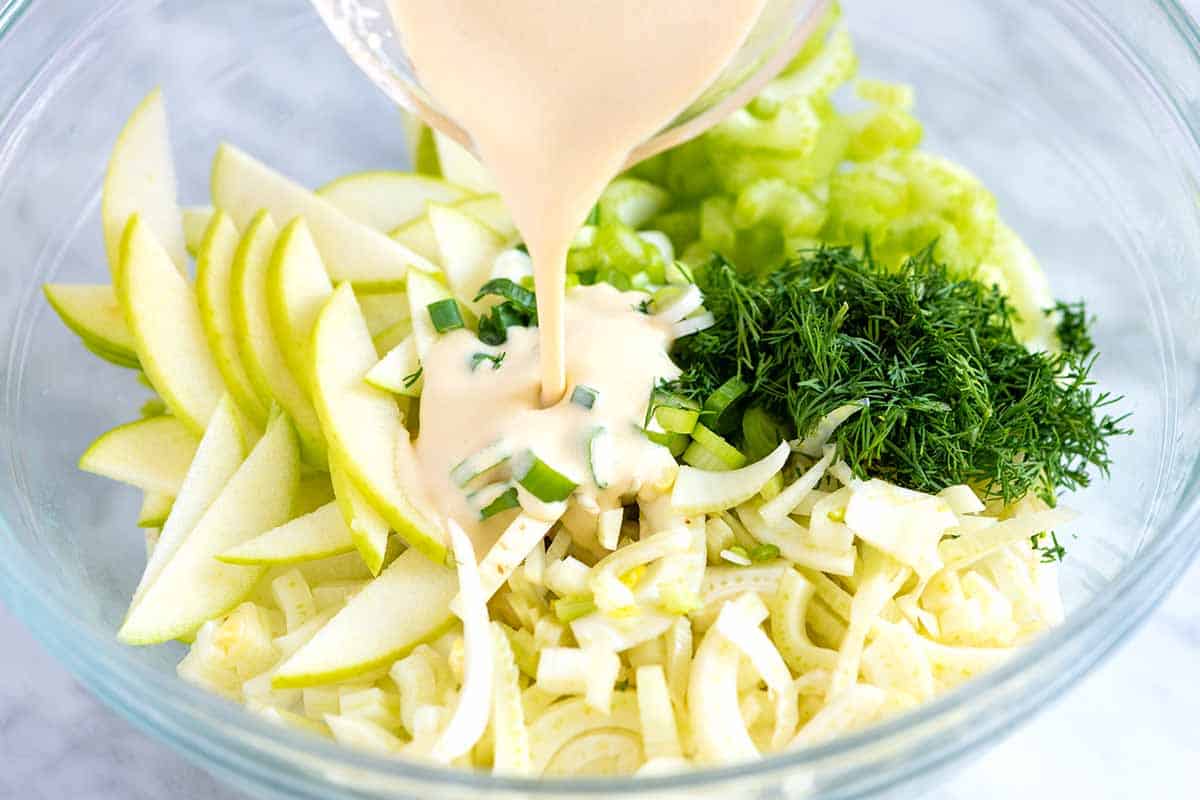
    Tip 1: Make the creamy dressing. I genuinely love the salad dressing for this apple salad. It’s easy to make and requires whisking Dijon, cider vinegar, maple syrup, olive oil, and crème fraîche together until creamy. It’s light, creamy, and incredible with the apples.

    Tip 2: Prepping the apples, fennel, and celery. To bring this salad together, you’ll slice the apples (I keep the peel on). Then, for the celery, use a vegetable peeler to remove the tougher, stringy outer layers, and finally thinly slice the fennel. When prepping the fennel, remove the core first, then thinly slice from there.

    Adding dressing to apples, celery, and fennel to make salad

    Serving Suggestions

    This creamy, crunchy salad is incredible with all your favorite fall or holiday dishes. For a simple weeknight dinner, serve it alongside baked pork chops or chicken milanese (instead of the typical arugula salad). It’s also incredible next to roast chicken or pan-roasted chicken breasts. I’ve even served it with this balsamic pear pizza and loved it!

    For the holidays, this works beautifully on the table next to a roast turkey or a roasted turkey breast. It’s also amazing with glazed ham. Really, anytime your meal can stand a little extra freshness and crunch, this is your salad!

    More Fall Salad Recipes

    Apple Salad

    Seriously Good Apple Salad

    • PREP
    • TOTAL

    Who said you need lettuce to make a salad? This apple salad with celery and fennel is crisp, fresh, creamy, and delicious. Serve this on the side or as a bed for grilled or roasted meats. We love using a crisp apple like Honeycrisp or Pink Lady.

    4 Servings

    You Will Need

    For the salad

    2 medium apples, cored and thinly sliced

    3 celery stalks, peeled and sliced

    1 fennel bulb, cored and thinly sliced

    1 scallion, finely chopped

    ¼ cup fresh dill, finely chopped

    ½ cup pecans, hazelnuts, or walnuts, lightly toasted


    For the dressing

    1 tablespoon Dijon mustard

    3 tablespoons apple cider vinegar

    1 teaspoon maple syrup

    3 tablespoons extra-virgin olive oil

    2 tablespoons crème fraîche

    Salt and fresh ground pepper to taste

    Directions

      1Make the dressing: Whisk together the mustard, vinegar, and maple syrup in a large salad bowl until blended. Gradually add the oil, whisking constantly, until the dressing looks well blended and creamy. Whisk in the crème fraîche, a pinch of salt, and a few grinds of fresh ground black pepper. Taste and adjust with additional salt, vinegar, or maple syrup if necessary.

      2Make the salad: Add the sliced apples, celery, fennel, scallion, dill, and the nuts. Toss well. If you have any fennel fronds (the wispy tops of the fennel stalk that look similar to dill), scatter a few over the salad, then serve.

    Adam and Joanne’s Tips

    • Storing: Make sure the apples are well coated with the dressing, then store the salad in an airtight container in the fridge for up to 2 days. The apples may soften a little as they sit. Use crisp apples that aren’t as prone to browning, like Honeycrisp or Pink Lady.
    • Prepping the celery: Peeling celery removes the tough, sometimes stringy outer surface. Use a vegetable peeler to peel each stalk until the outer layer is smooth.
    • Substituting crème fraîche: Use mayo, sour cream, or plain yogurt. You may need to adjust the maple syrup slightly.
    • Toasting the nuts: Spread them in an even layer on a sheet pan and slide them into a 350°F oven. Toast 6 to 8 minutes or until they smell toasty, shaking the pan halfway during cooking.
    • Optional add-ins: Try tossing in some chopped kale or spinach, adding extra punch and creaminess with cheese (blue cheese or goat cheese is perfect), or crumble in some cooked bacon or pancetta.
    • The nutrition facts provided below are estimates.

    Nutrition Per Serving
    Serving Size
    1/4 of the recipe
    /
    Calories
    226
    /
    Total Fat
    17.3g
    /
    Saturated Fat
    2.4g
    /
    Cholesterol
    3.5g
    /
    Sodium
    123g
    /
    Carbohydrate
    18.2g
    /
    Dietary Fiber
    4.3g
    /
    Total Sugars
    12.7g
    /
    Protein
    1.9g


    AUTHOR:

    Joanne Gallagher

    Adam and Joanne of Inspired Taste

    We are Adam and Joanne Gallagher, the creators of Inspired Taste. Established in 2009, Inspired Taste grew from a childhood dream into one of the internet’s most trusted recipe sites with hundreds of reliable recipes, step-by-step videos, and expert tips.More About Us

    Source link

  • Fresh Green Bean Salad Recipe

    Fresh Green Bean Salad Recipe

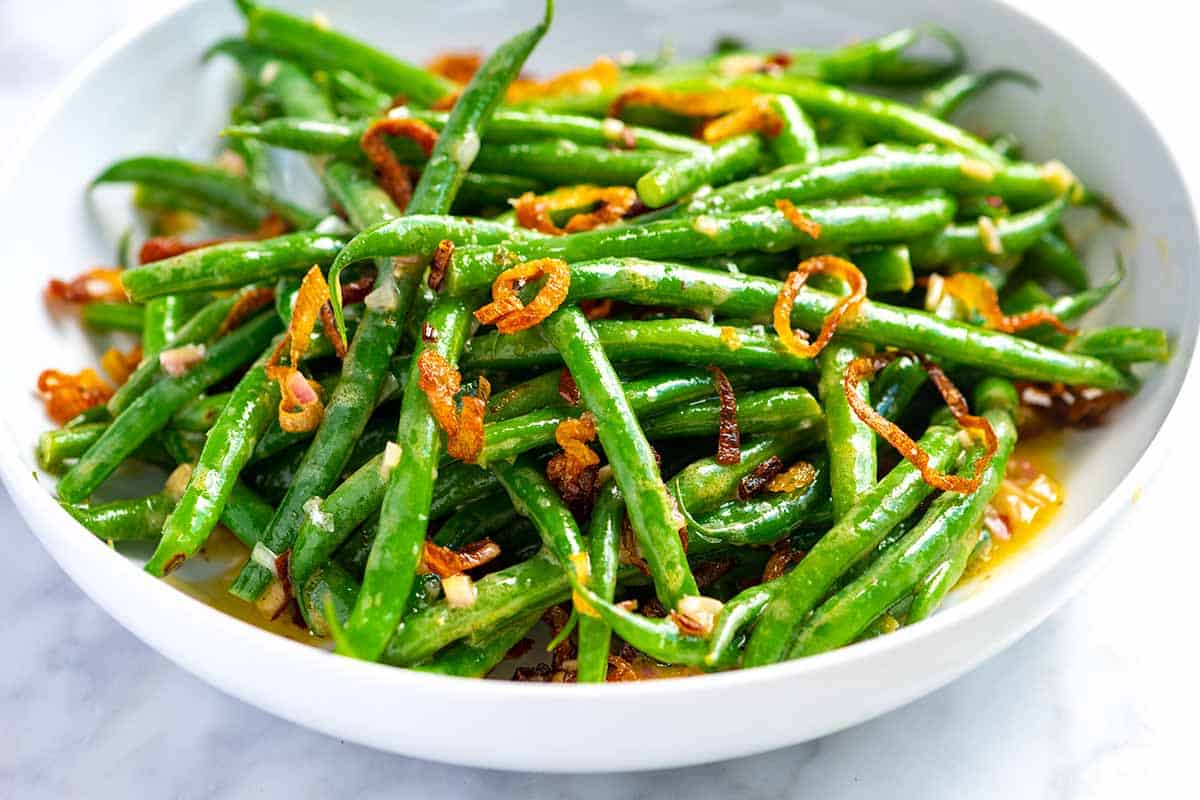
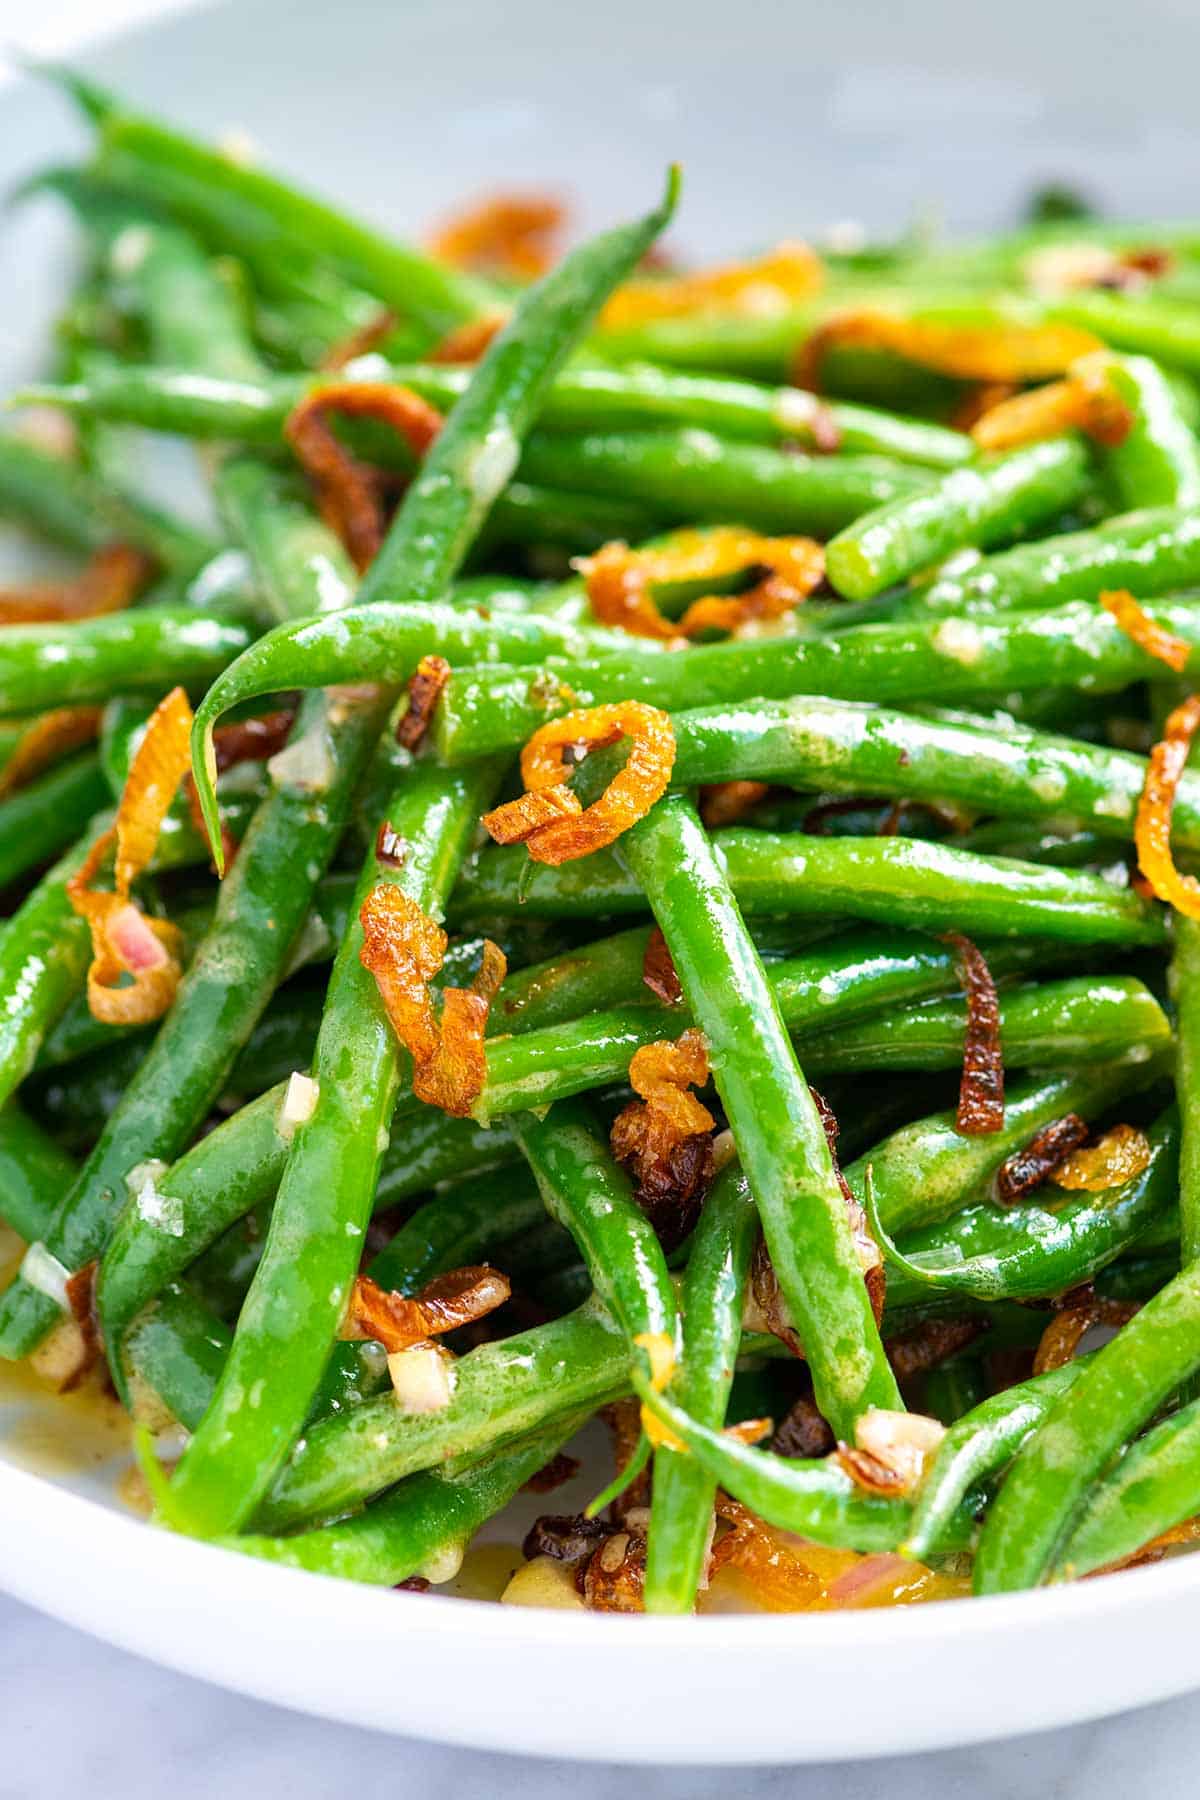
    This green bean salad recipe is one of my favorites. It combines fresh green beans, a simple shallot dressing, and crispy fried shallots!

    Cold green bean salad

    When fresh green beans are in season, I jump to make this simple salad! I serve it cold, which means the beans are nice and crisp. You’ll love the shallot vinaigrette, and those crispy shallots are so delicious.

    This salad is a nod to green bean casserole. You can use store-bought fried shallots, fried onions, or make your own like me. Here’s my 15-minute fried shallots recipe.

    Key Ingredients

    • Green Beans: Fresh green beans are in season from summer through early fall. I look for crispy, firm beans without any bruised spots. To prepare my green beans for this salad, I trim the ends. I leave them whole, but if you prefer them cut into smaller pieces, feel free!
    • Shallot Vinaigrette: Everyone needs a good shallot dressing recipe in their back pocket, and this is mine. I whisk finely minced shallots with mustard, red wine vinegar, olive oil, salt, and pepper. It’s easy and so delicious!
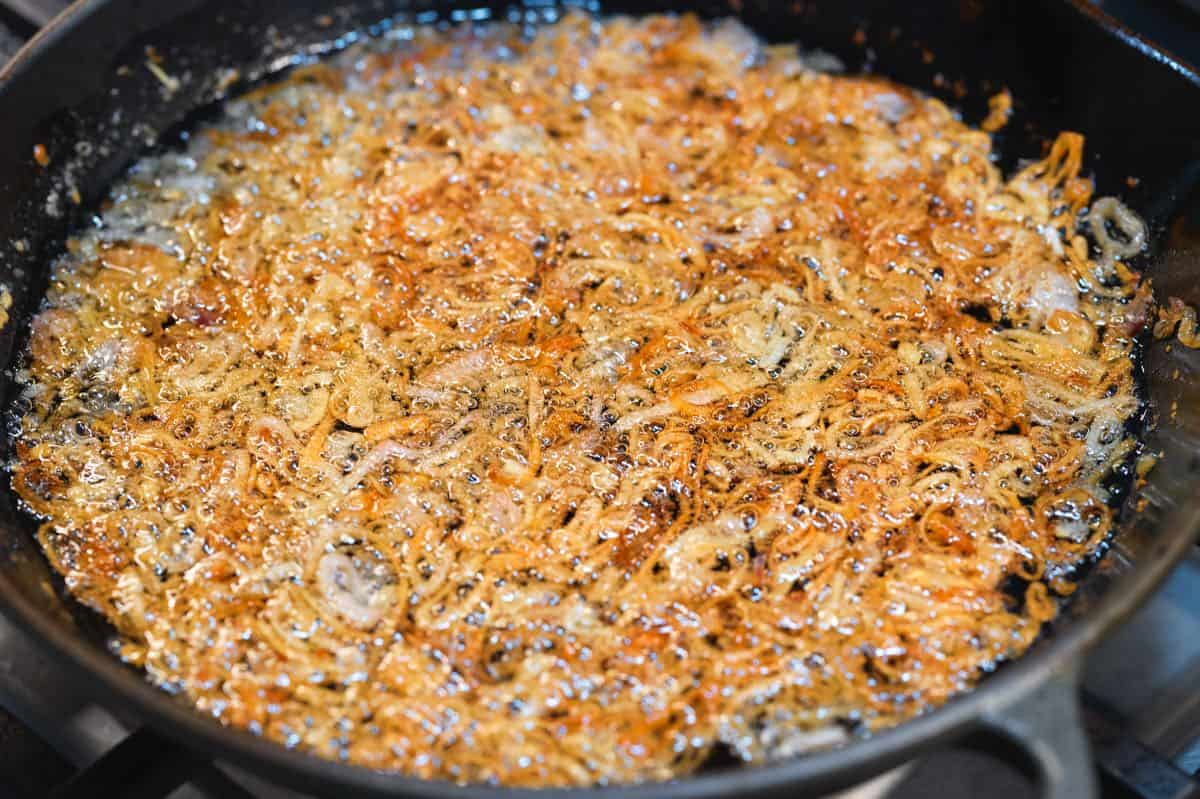
    • Fried Shallots: I love salads with different textures, and this cold green bean salad totally hits that mark. You can find fried onions or shallots in the store, but they are simple to make yourself. They last a while, and you can use them in other dishes throughout the week. Here’s my tutorial for how to make fried shallots.

    Find the full recipe with measurements below.

    How to Make the Best Green Bean Salad

    Tip 1: Blanch your green beans. For the best salad, blanch your green beans. To do this, add them to a large pot with boiling salted water and cook for a few minutes. You want them to turn bright green. I always try one before draining and look for it to be tender, with a little crunch left.

    Tip 2: Use ice to stop cooking. When ready, plunge them into icy water to stop the cooking. Then toss them with the simple shallot dressing and top with crispy fried shallots. The combo of green beans and crispy fried shallots is a classic one.

    Tip 3: Making fried shallots. It’s easy! To fry shallots, add them to oil in a skillet and cook slowly, stirring occasionally, until light brown and crispy, about 10 minutes. Let them drain on paper towels, then toss them onto your salad. If you have some leftover, add them to other dishes like mashed potatoes, sautéed green beans, and soups.

    Making crispy fried shallots for green bean salad

    Tip 4: Make it your own. This recipe is incredibly versatile. Here are a few of my favorite variations:

    • Add cheese like crumbled feta, shaved parmesan, or creamy goat cheese.
    • Toss in some cooked and sliced potatoes, like this potato and green bean salad.
    • Toss in a few handfuls of greens like arugula, spinach, or baby kale.
    • Serve the salad alongside seared tuna or your favorite tuna salad, hard-boiled egg, and some olives for a French Nicoise-inspired salad.
    • Add extra protein with juicy chicken breast, poached salmon, crumbled cooked bacon, or poached shrimp.
    Green Bean Salad

    Fresh Green Bean Salad

    • PREP
    • COOK
    • TOTAL

    This incredible cold green bean salad recipe has been a family favorite for years. It’s one of the best ways to enjoy fresh green beans. We toss the beans with a simple shallot vinaigrette and finish with crispy fried shallots (optional). You can buy fried shallots or make them. Here’s our crispy fried shallots recipe.

    Makes 6 servings

    You Will Need

    1 pound (450g) green beans or small haricots verts

    1 tablespoon minced shallots

    1 tablespoon Dijon mustard

    2 tablespoons red-wine vinegar, white wine vinegar or champagne vinegar

    1/4 cup (60ml) olive oil

    Salt and freshly ground pepper

    Crispy fried shallots, optional, our recipe for fried shallots

    Directions

      1Trim ends from green beans and leave them whole. Prepare a bowl filled with cold water and ice.

      2Bring a large pot of salted water to a boil, then add the green beans. Cook until bright green but still crisp. I check for doneness after 2 minutes, then add additional time as needed. Depending on how thin the beans are, they will need 2 to 4 minutes.

      3Drain the beans and toss them into the ice water.

      4Whisk the minced shallots, mustard, vinegar, olive oil, a pinch of salt, and pepper in the bottom of a salad bowl. Taste, then adjust with more salt and pepper if needed.

      5Toss in the green beans, then serve with crispy shallots sprinkled on top (optional).

    Adam and Joanne’s Tips

    • Frozen green beans: Fresh beans are crisper, but you can substitute them for frozen ones. Add the frozen beans to the salted boiling water and cook until heated through and tender. Transfer to the ice bath and then use in the salad as directed above.
    • Storing: The salad will last up to a day in the fridge, after that, it will still taste delicious, but the beans will lose some of their bright green color.
    • Instead of crispy shallots, try frying up some minced or sliced garlic for a green bean salad with crispy garlic.
    • The nutrition facts provided below are estimates.

    Nutrition Per Serving
    Serving Size
    1/6 of the dish
    /
    Calories
    127
    /
    Total Fat
    10g
    /
    Saturated Fat
    1.4g
    /
    Cholesterol
    0mg
    /
    Sodium
    105.2mg
    /
    Carbohydrate
    9.6g
    /
    Dietary Fiber
    3.5g
    /
    Total Sugars
    4.4g
    /
    Protein
    2.6g


    AUTHOR:

    Joanne Gallagher

    Adam and Joanne of Inspired Taste

    We are Adam and Joanne Gallagher, the creators of Inspired Taste. Established in 2009, Inspired Taste grew from a childhood dream into one of the internet’s most trusted recipe sites with hundreds of reliable recipes, step-by-step videos, and expert tips.More About Us

    Source link

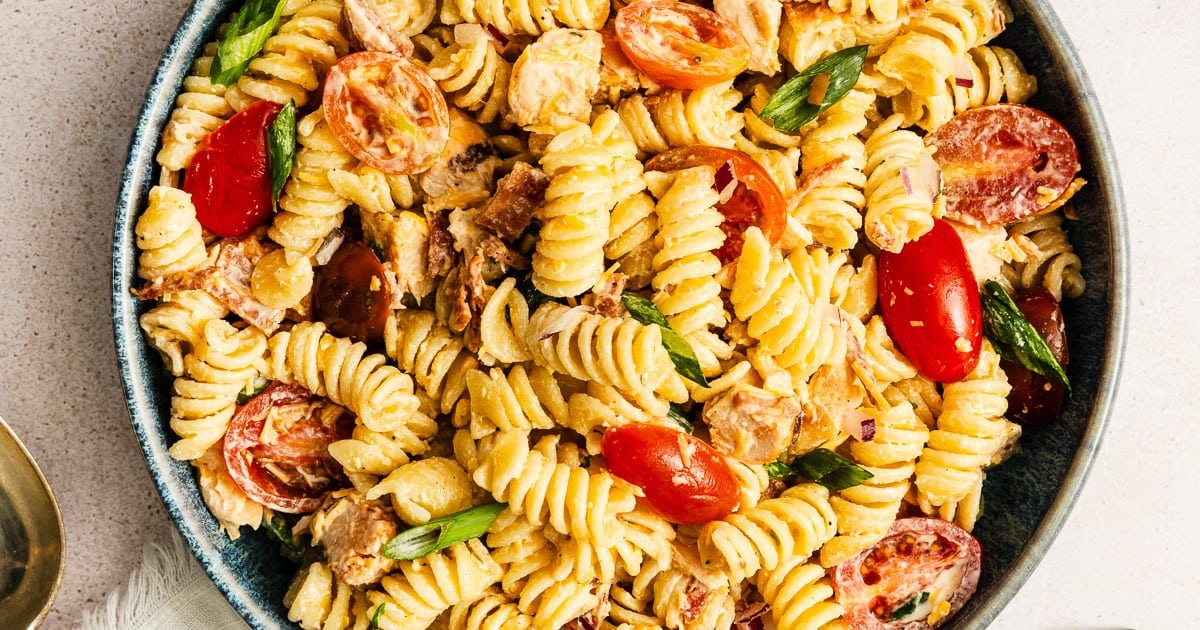
  • Chicken Bacon Ranch Pasta Salad

    Chicken Bacon Ranch Pasta Salad

    This chicken bacon ranch pasta salad is creamy, smoky, and packed with flavor. It’s perfect for BBQs, meal prep, or an easy crowd-pleasing side.


    Jump to: ℹ️ Overview | 🛒 Ingredients | 📷 How To Make | 👩‍🍳 Recipe Tips | 🥗 Serving Suggestions | 📝Full Recipe Card | 🍽 More Chicken Pasta Recipes


    At A Glance

    • Ready In: 55 minutes
    • 🍽 Serves: 6–8
    • 🌱 Diet: Nut-free
    • 💪 Nutrition Highlights: High in protein from chicken, satisfying, and filling
    • 🥕 Main Ingredients: Pasta, chicken, bacon, cheddar, ranch dressing
    • 🔥 Flavor Profile: Creamy, smoky, tangy, savory
    • 🧊 Meal-Prep Friendly: Keeps 3–4 days in the fridge
    • Best Served With: BBQ meats, grilled veggies, or as a standalone lunch

    This is one of those pasta salads that actually feels like a full meal. You’ve got tender pasta coated in a creamy ranch dressing, smoky, crispy bacon, and juicy chicken that makes it extra satisfying. The little pops of freshness from tomatoes and green onions keep it from feeling too heavy.

    What I really like about this version is the balance—it’s rich, yes, but not over-the-top. The ranch dressing has just enough tang to cut through the bacon and cheese, and chilling it gives everything time to come together properly (don’t skip that part). It’s the kind of dish that works just as well for meal prep as it does on a big sharing table.

    👩‍🍳 You might also like these pasta salads:
    ⭐️ Chicken Pasta Salad
    🌿 Mediterranean Pasta Salad
    💪 High-Protein Pasta Salad
    🐟 Tuna And Pasta Salad
    🌽 Elote Pasta Salad
    👉 More Pasta Salad Ideas

    What You’ll Need

    Here is what you’ll need for this chicken bacon ranch pasta salad recipe. Find the full measurements in the recipe card below.

    • Pasta (rotini or bowtie): Holds onto the dressing nicely
    • Cooked chicken: Adds protein and makes it filling (rotisserie works great)
    • Bacon: Smoky, salty crunch, honestly, the backbone of flavor here. Use turkey bacon if preferred
    • Cheddar cheese: Adds richness and a sharp bite, you can also use freshly grated Parmesan. Try Monterey Jack or Colby for a milder cheese
    • Cherry tomatoes: Freshness and a little sweetness. Add peas or avocado for extra texture
    • Red onion: Sharpness to balance the creamy dressing
    • Green onions: Mild onion flavor and color

    Creamy Ranch Dressing

    • Mayonnaise: Rich, creamy base. I use light mayonnaise, but you can also swap sour cream for Greek yogurt to lighten it up or use less of it.
    • Sour cream: Adds tang and lightens the mayo slightly, I typically use light sour cream.
    • Ranch seasoning: Herby, garlicky, classic ranch flavor; you can pick up a pack from most supermarkets.

    How To Make Chicken Bacon Ranch Pasta Salad

    Find the full recipe and nutritional information below. Here are some handy step-by-step photos for how to make this ranch pasta salad.

    • Cook pasta in salted water until al dente (don’t overcook!)
    • Drain and rinse under cold water to cool completely
    • Whisk together light mayo, light sour cream, and ranch seasoning
    • Add pasta, chicken, bacon, cheese, tomatoes, and onions
    • Toss until everything is well coated
    • Chill for at least 30–60 minutes
    • Stir, adjust seasoning, and serve

    Recipe Tips

    • Rinse your pasta well after cooking: This stops cooking and keeps it from going gummy
    • Chill time matters: The flavor gets noticeably better after 30+ minutes
    • Even chopping: Small, even pieces = better bites every time
    • Tone down raw onion: Soak diced onion in cold water for 5–10 minutes
    • Make it saucier: Double the dressing if you like it extra creamy. Or reserve some dressing to stir through before serving
    • Storage: Store in an airtight container in the fridge for 3–4 days. Stir before serving—dressing thickens as it sits
    • Make-ahead: Make up to 24 hours ahead. Add a splash of milk or extra mayo before serving to refresh texture

    Serving Suggestions

    I usually serve this straight from the fridge, slightly chilled—it just tastes better that way. It’s perfect alongside grilled chicken, burgers, or anything off the BBQ.

    If I’m being honest though, I’ve eaten this straight out of the container for lunch more times than I’d admit. It holds up well, fills you up, and doesn’t feel like “just a side.”

    💬 If you’ve tried this chicken bacon ranch pasta salad or any other recipe on the blog then don’t forget to rate the recipe and let me know how you got on in the comments below, I love hearing from you! You can also FOLLOW ME on Instagram, Facebook, Pinterest, YouTube, and or sign up to my Newsletter to see more of my delicious food.

    Want to Save This Recipe?

    Enter your email & I’ll send it to your inbox. Plus, get great new recipes from me every week!

    By submitting this form, you consent to receive emails from Cooked & Loved

    This chicken bacon ranch pasta salad is creamy, smoky, and packed with flavor. It’s perfect for BBQs, meal prep, or an easy crowd-pleasing side. Find step-by-step photos and more recipe tips above.

    • Bring a large pot of salted water to a boil and cook pasta according to package directions until al dente.

    • Drain and rinse under cold water until completely cooled. Shake off excess water.

    • In a large bowl, whisk together mayonnaise, sour cream, and ranch seasoning until smooth.

    • Add pasta, chicken, bacon, cheddar cheese, tomatoes, red onion, and green onions.

    • Toss until everything is evenly coated in the dressing.

    • Cover and refrigerate for at least 30–60 minutes.

    • Stir before serving and adjust seasoning if needed.

    • Rinse your pasta well after cooking: This stops cooking and keeps it from going gummy
    • Chill time matters: The flavor gets noticeably better after 30+ minutes
    • Even chopping: Small, even pieces = better bites every time
    • Tone down raw onion: Soak diced onion in cold water for 5–10 minutes
    • Make it saucier: Double the dressing if you like it extra creamy. Or reserve some dressing to stir through before serving
    • Storage: Store in an airtight container in the fridge for 3–4 days. Stir before serving—dressing thickens as it sits
    • Make-ahead: Make up to 24 hours ahead. Add a splash of milk or extra mayo before serving to refresh texture
    • Why does my pasta salad dry out? Pasta absorbs dressing as it sits. Just stir in a bit more mayo, sour cream, or a splash of milk before serving.
    • Can I make this ahead? Yes! Up to 24 hours ahead. Either toss with dressing just before serving, or refresh it with extra dressing.
    • Can I serve it warm? It’s best chilled or at room temp. Avoid leaving it out longer than 2 hours.
    • Flavor tip (from experience): Bacon really carries a lot of the flavor here. Cooking it fresh makes a noticeable difference—it adds that smoky, salty depth that ties everything together

    Calories: 556kcal | Carbohydrates: 62g | Protein: 30g | Fat: 20g | Saturated Fat: 7g | Polyunsaturated Fat: 5g | Monounsaturated Fat: 6g | Trans Fat: 0.02g | Cholesterol: 72mg | Sodium: 523mg | Potassium: 456mg | Fiber: 3g | Sugar: 4g | Vitamin A: 448IU | Vitamin C: 7mg | Calcium: 184mg | Iron: 2mg

    Keywords: Rotisserie Chicken, bacon, Ranch dressing, cold pasta salad, ranch pasta salad, chicken bacon pasta salad, chicken pasta salad recipes

    More Chicken Pasta Recipes


    Source link

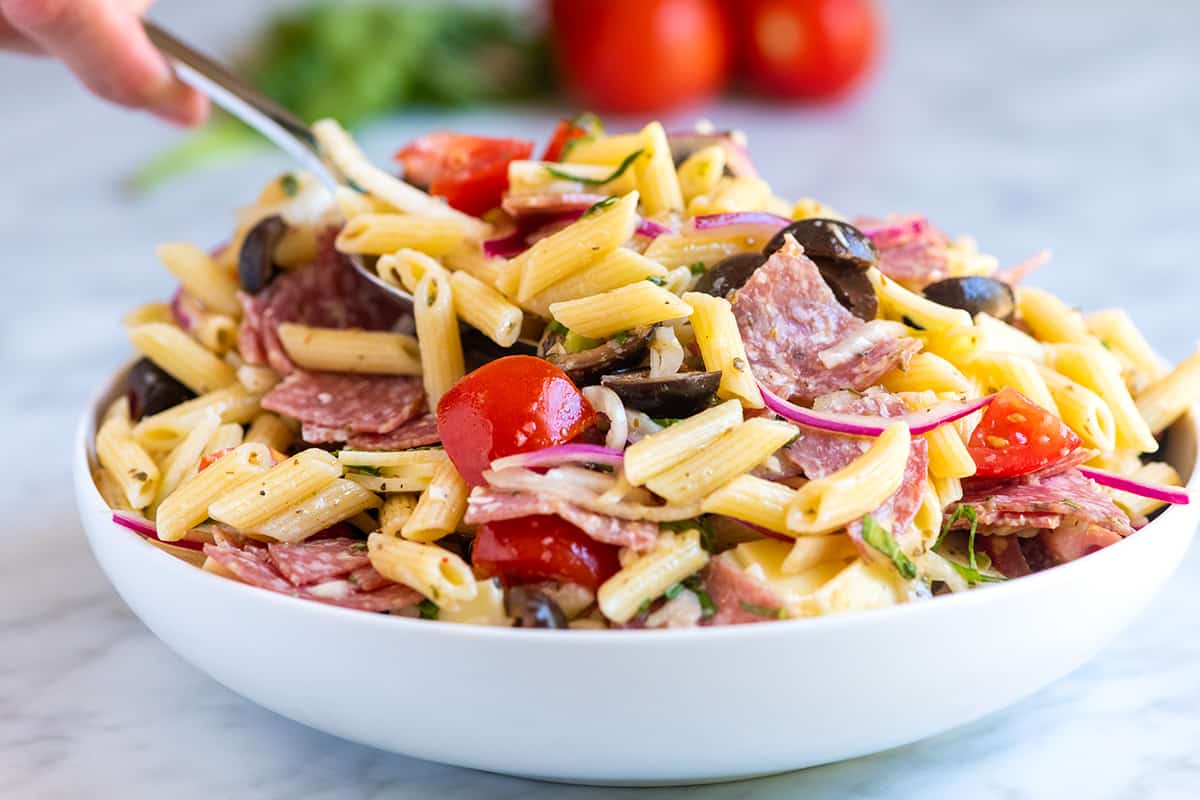
  • Easy Italian Pasta Salad Recipe

    Easy Italian Pasta Salad Recipe

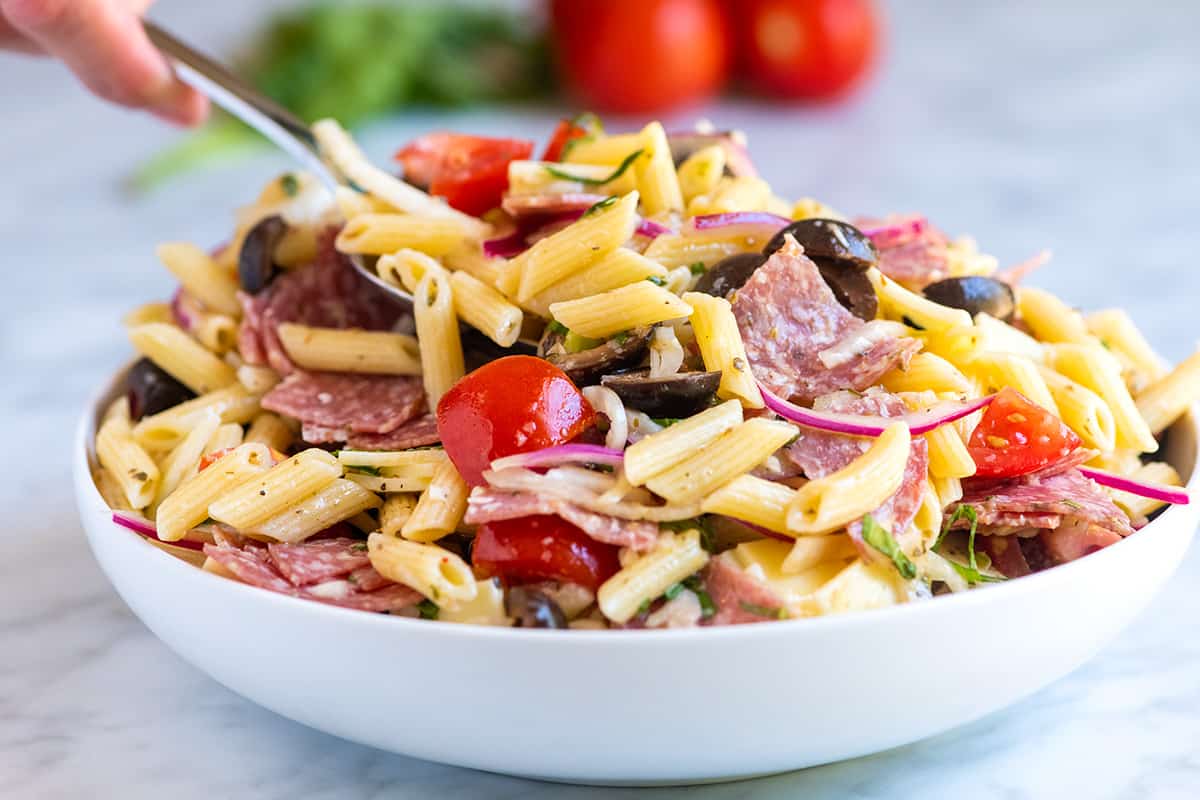
    Our Italian pasta salad recipe has a fresh and flavorful dressing, two kinds of cheese, salami, olives, and the perfect blend of Italian herbs. Take one bite, and you won’t be able to stop!

    A bowl of Italian pasta salad

    Just like our easy pasta salad, we pack in as many textures and flavors to this Italian-inspired salad as we can. There’s not one, but two kinds of cheese, salami, briny olives, fresh tomatoes, and a generous handful of fresh basil. (If you love briny salads, take a look at this briny Greek pasta salad made with the brine from a jar of pepperoncini peppers.)

    The dressing is a winner, too. It’s not all that different from the dressing we use for the other pasta salad, with the exception of an extra pop of flavor from lemon juice, Dijon mustard, and minced garlic.

    Key Ingredients

    • Pasta: Choose hearty pasta shapes like penne, fusilli, rotini, and farfalle (bow tie). They also have the advantage of lots of nooks and crannies, which trap the dressing and bits of cheese.
    • Red Onion, Tomatoes, and Basil: I love red onion for its bite and tomatoes and basil for their freshness.
    • Salami and Cheese: I love a sweeter salami in this, but for a spicy option, use pepperoni. For the cheese, use shredded parmesan and provolone. The parmesan is salty and the provolone is creamy.
    • Olives: I used black olives in the photos, but feel free to substitute green olives or Kalamata olives. They all add a salty, briny flavor.
    • Italian Salad Dressing: This pasta salad’s dressing is inspired by our homemade Italian dressing. It’s bright, herby, and much better than anything you can buy at the store.

    How to Make Italian Pasta Salad

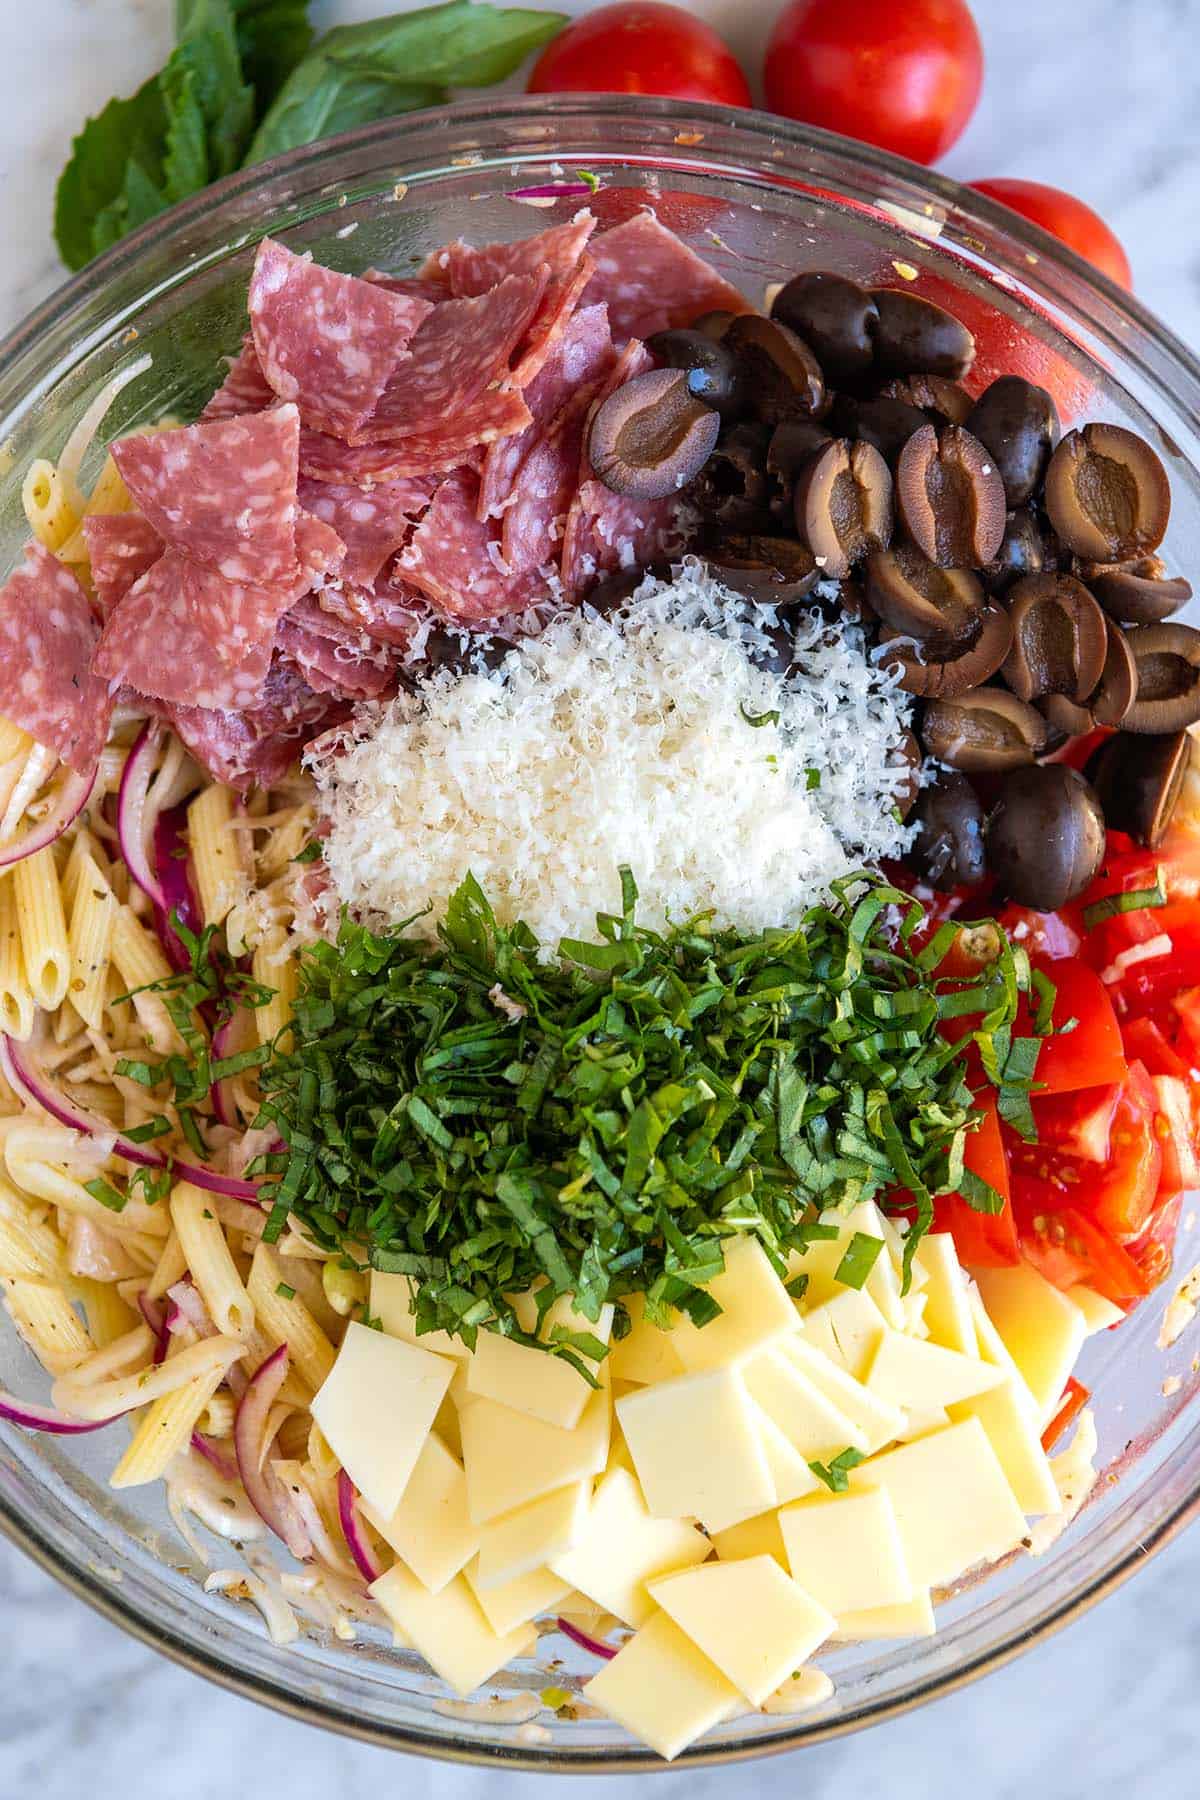
    We’ve got a few pasta salad recipes already on Inspired Taste so you might be wondering why we needed another one, but trust me, this hearty salad with salami and cheese is a keeper. It’s super simple to make, too! Whisk the dressing ingredients together in the bottom of a big serving bowl, then pile in everything else.

    Italian Pasta Salad Ingredients -- Pasta, cheese, basil, tomatoes, onions, olives

    Letting the salad sit in the dressing for a while makes a huge difference in flavor. We take the same approach when making potato salad. Make pasta salad and keep it in the fridge for up to 5 days.

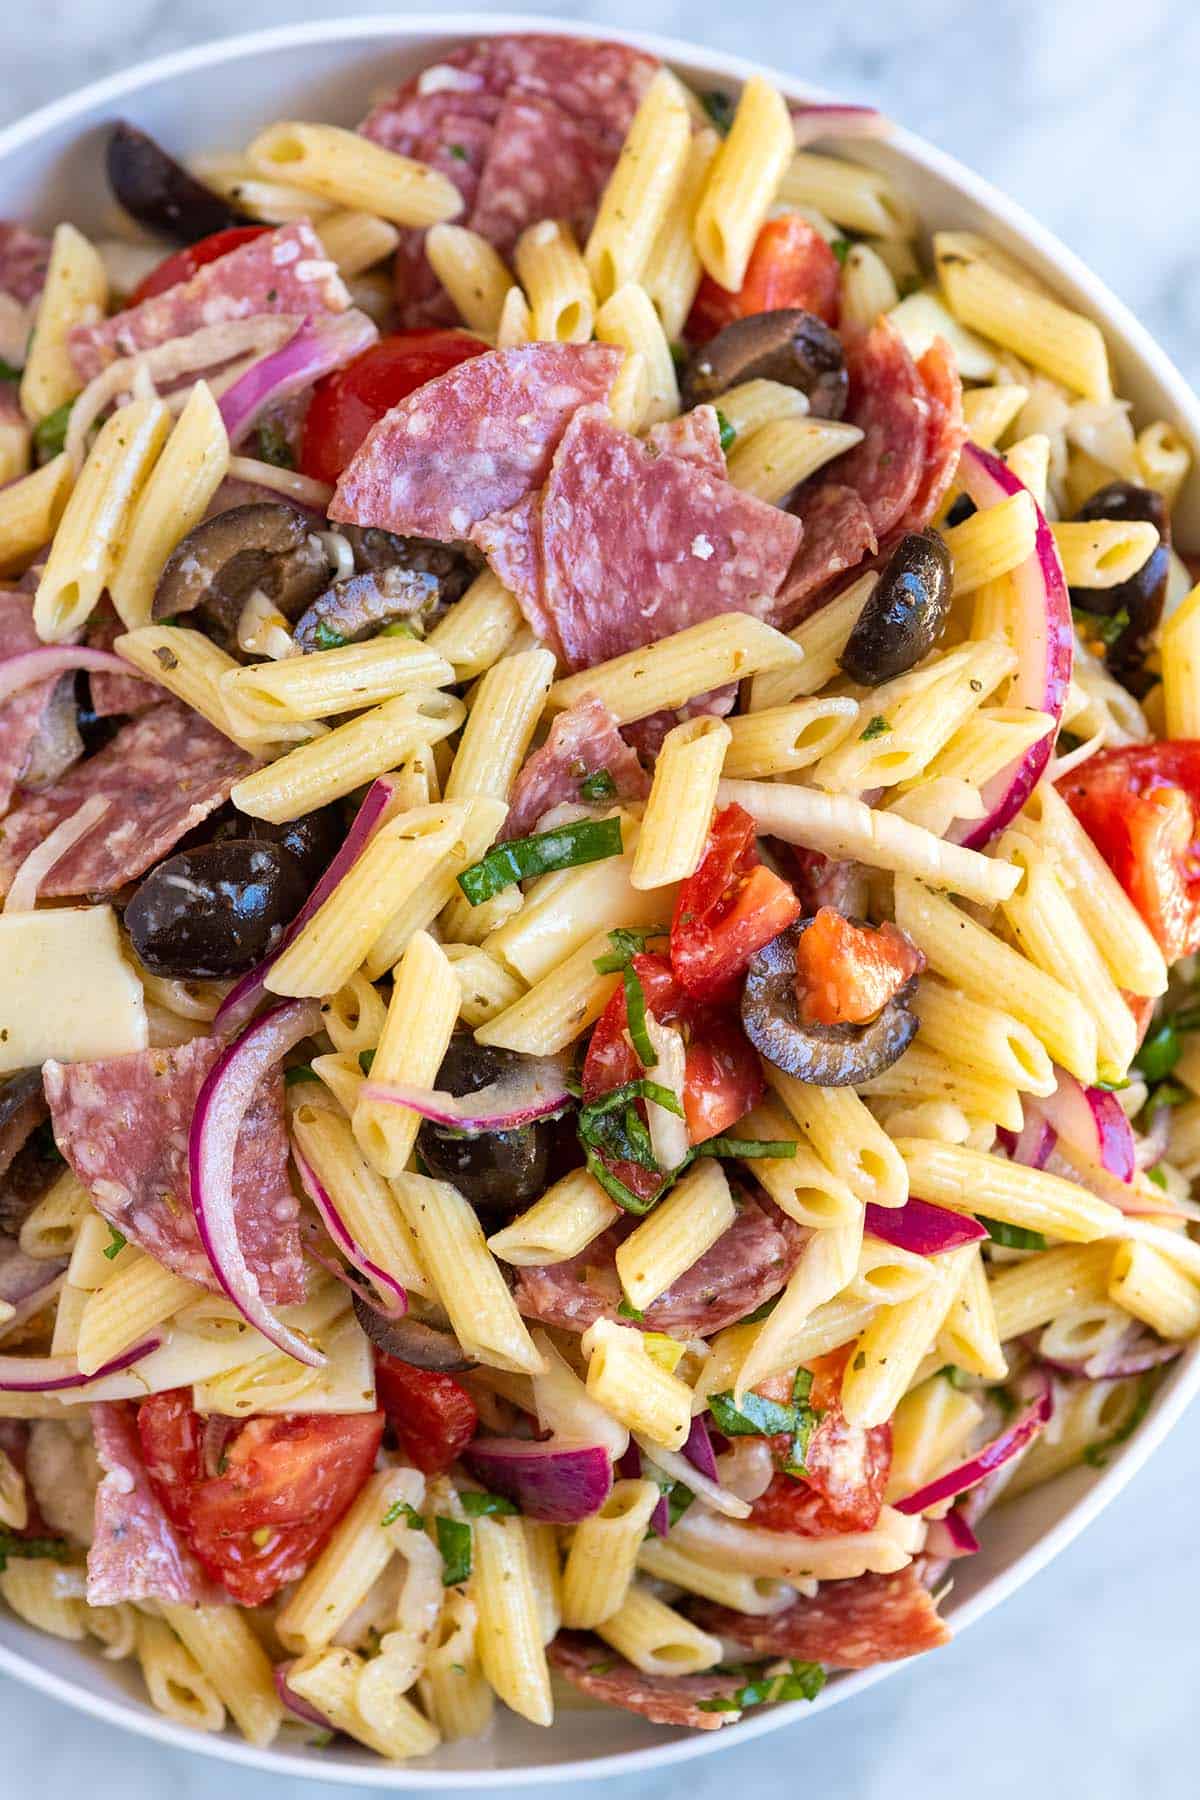
    Italian Pasta Salad with salami, tomatoes, and cheese

    Easy Italian Pasta Salad

    • PREP
    • COOK
    • TOTAL

    Italian pasta salad made with a fresh and flavorful dressing, two kinds of cheese, salami, olives, and the perfect blend of Italian herbs. Take one bite of this pasta salad, and you won’t be able to stop.

    Start with a hearty pasta shape that has nooks and crannies to hold onto the dressing like penne or rotini. We love adding parmesan cheese, which melts into the dressing as well as provolone cheese and salami, but you can always adjust the ingredient list based on your favorite Italian cheeses and meats.

    6 Servings

    You Will Need

    Pasta Salad

    8 ounces dried pasta like penne, fusilli or rotini

    1/2 medium red onion, thinly sliced

    4 ounces sliced provolone cheese, cut into 1-inch pieces

    1/3 cup finely grated parmesan cheese

    4 ounces Italian-style salami, sliced and quartered

    6 ounces tomatoes, chopped, about 1 cup

    1 cup olives, pitted and halved

    1/4 cup fresh basil leaves, chopped


    Salad Dressing

    1/4 cup (60ml) extra-virgin olive oil

    1/4 cup (60ml) fresh lemon juice

    2 tablespoons (30ml) red wine vinegar

    1 small garlic clove, finely grated or minced, about 1/2 teaspoon

    1 teaspoon Dijon mustard

    1 teaspoon honey

    1 teaspoon dried oregano

    1 teaspoon chopped fresh thyme or use 1/4 teaspoon dried thyme

    1/2 teaspoon fine sea salt plus more to taste

    1/2 teaspoon fresh ground black pepper

    Directions

      1Place the sliced onion into a small bowl and cover with cold water. Set the bowl aside for 10 minutes so that the raw flavor on the onion calms a little. Drain, and then rinse the onions before adding them to the salad.

      2Bring a large pot of salted water to a boil. Add pasta and cook until tender, 6 to 10 minutes (check the package for recommended cook time). Drain and rinse well under cold water.

      3While the pasta cooks, in the bottom of a large bowl, make the dressing. Whisk the olive oil, lemon juice, red wine vinegar, garlic, mustard, honey, oregano, thyme, salt, and black pepper together until well blended.

      4Add the drained and rinsed pasta to the dressing and mix well.

      5Stir in the drained and rinsed red onion, provolone cheese, parmesan cheese, salami, tomatoes, olives, and basil.

      6Taste for seasoning and adjust with salt and pepper as needed. Serve or for the best results, cover and refrigerate for at least 30 minutes and up to 5 days.

    Adam and Joanne’s Tips

    • Pasta salad gets better and better over time so making it a day in advance is a great idea.
    • The nutrition facts provided below are estimates.

    Nutrition Per Serving
    Serving Size
    1/6 of the recipe
    /
    Calories
    424
    /
    Total Fat
    24.4g
    /
    Saturated Fat
    7.8g
    /
    Cholesterol
    33.3mg
    /
    Sodium
    743.5mg
    /
    Carbohydrate
    37.1g
    /
    Dietary Fiber
    2.7g
    /
    Total Sugars
    4.6g
    /
    Protein
    14.9g


    AUTHOR:

    Joanne Gallagher

    Adam and Joanne of Inspired Taste

    We are Adam and Joanne Gallagher, the creators of Inspired Taste. Established in 2009, Inspired Taste grew from a childhood dream into one of the internet’s most trusted recipe sites with hundreds of reliable recipes, step-by-step videos, and expert tips.More About Us

    Source link

  • High Protein Pasta Salad

    High Protein Pasta Salad

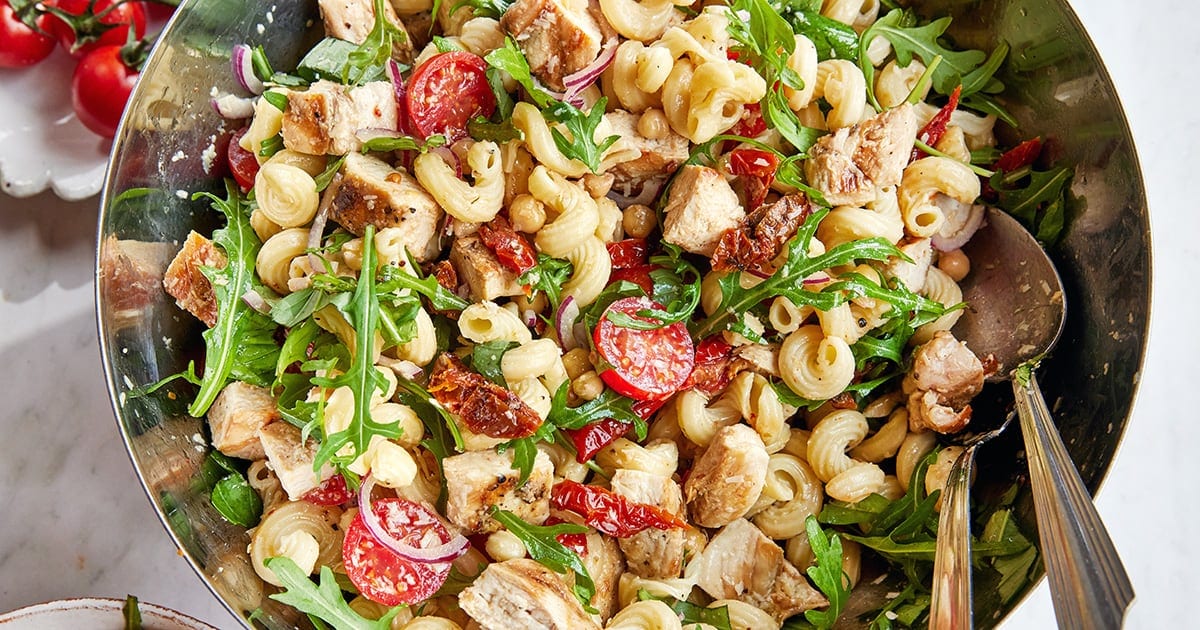
    This high-protein pasta salad is fresh, filling, and packed with chicken, chickpeas, arugula and sun-dried tomatoes — perfect for easy lunches or meal prep.


    Jump to: ℹ️ Overview | 🛒 Ingredients | 📷 How To Make | 📹 Watch The Video | 👩‍🍳 Recipe Tips | 🥗 Serving Suggestions | 📝Full Recipe Card | 🍽 More High-Protein Salad Recipes


    At A Glance

    • Ready In: 35 minutes
    • 🍽 Serves: 6
    • 🌱 Diet: High-protein, high-fiber, gluten-free (if using GF pasta)
    • 💪 Nutrition Highlights: High in protein and fiber, balanced and satisfying
    • 🥕 Main Ingredients: Chicken, chickpea or lentil pasta, chickpeas, sun-dried tomatoes, Parmesan, fresh tomatoes, arugula (rocket)
    • 🔥 Flavor Profile: Savory, tangy, slightly creamy, fresh herbs
    • 🧊 Meal-Prep Friendly: Keeps 4 days in the fridge
    • Best Served With: Crusty bread, wraps, or as a standalone meal

    This is one of those pasta salads that will keep you full for hours. You’ve got tender chicken, protein-rich pasta, and chickpeas all working together, plus those punchy little hits of sun-dried tomatoes and cherry tomatoes that make everything taste a bit more interesting. The dressing is lemony, slightly creamy (without being heavy), and full of savory depth thanks to the Parmesan — which, honestly, does a lot of the heavy lifting here.

    It’s the kind of salad that holds up beautifully in the fridge, making it ideal for meal prep, but it’s also fresh enough to serve for a casual lunch or dinner.

    Macros per (generous, filling serving): 590 calories, 43 grams of protein and 16 grams fiber. As this salad is very filling, you can serve smaller portions and still get lots of protein and fiber.

    👩‍🍳 You might also like these pasta salad recipes:
    ⭐️ Chicken Pasta Salad
    🌿 Mediterranean Pasta Salad
    🐟 Tuna And Pasta Salad
    🌽 Elote Pasta Salad
    🥓 Chicken Bacon Ranch Pasta Salad
    👉 More Pasta Salad Ideas

    What You’ll Need

    Here is what you’ll need for this high-protein pasta recipe. Find the full measurements in the recipe card below.

    Pasta & Protein

    • High-protein pasta (chickpea or lentil): boosts both protein and fibre
    • Chicken breast: lean protein that makes this properly filling
    • Chickpeas: extra protein + fiber, plus a nice soft bite
    • Olive oil, salt, pepper for cooking chicken

    Veg & Fresh Add-Ins

    • Sun-dried tomatoes: intense, tangy flavor (a little goes a long way — and worth it)
    • Cherry tomatoes: juicy freshness to balance the richness
    • Red onion: sharpness and crunch
    • Arugula (rocket): peppery bite
    • Basil: fresh, slightly sweet finish

    Parmesan Lemon Dressing

    • Parmesan: adds salty, nutty, umami depth
    • Olive oil: richness and body
    • Dijon mustard: tang + helps emulsify
    • Lemon juice: brightness (this is key — don’t skip)
    • Red wine vinegar: extra acidity for balance
    • Garlic: subtle punch
    • Sugar: just enough to round it out

    How To Make High Protein Pasta Salad

    Find the full recipe and nutritional information below. Here are some handy step-by-step photos for how to make this protein-packed chicken salad.

    • Cook pasta in well-salted water until al dente, drain, lightly rinse (if using legume pasta), and cool
    • Grill or pan-cook seasoned chicken until done, rest, then dice
    • Whisk together dressing ingredients until thick and creamy
    • In a large bowl, combine pasta, chicken, chickpeas, tomatoes, onion, and sun-dried tomatoes
    • Toss with dressing until well coated
    • Fold in arugula and basil just before serving
    • Taste and adjust with lemon, salt, or pepper

    Watch The Video

    Recipe Tips

    • Salt your pasta water properly: It should taste like the sea — this makes a big difference
    • Don’t overcook the pasta: High-protein pasta can go mushy quickly
    • Use finely grated Parmesan: It melts into the dressing and makes it creamy without mayo
    • Add sun-dried tomato oil: Just a tablespoon ties the whole salad together beautifully
    • Add greens last: Keeps them fresh and not wilted
    • Variations: Swap chicken for grilled tofu or tuna. Add cucumber or capsicum for extra crunch. Use feta instead of Parmesan for a different vibe
    • Storage: Keeps well in the fridge for up to 4 days. Store in an airtight container
    • Make-Ahead Tip: Reserve a little dressing and stir it through before serving to freshen it up

    Serving Suggestions

    I usually serve this straight from the fridge or slightly at room temp — that’s when the flavors really come through. It’s great on its own, but if you’re feeding a crowd, add some warm crusty bread or wrap it up in a flatbread for an easy lunch. It also works really well as part of a bigger spread with grilled veggies or a simple green salad.

    💬 If you’ve tried this high protein pasta salad with chicken & sun-dried tomatoes or any other recipe on the blog then don’t forget to rate the recipe and let me know how you got on in the comments below, I love hearing from you! You can also FOLLOW ME on Instagram, Facebook, Pinterest, YouTube, and or sign up to my Newsletter to see more of my delicious food.

    Want to Save This Recipe?

    Enter your email & I’ll send it to your inbox. Plus, get great new recipes from me every week!

    By submitting this form, you consent to receive emails from Cooked & Loved

    This high protein pasta salad is fresh, filling, and packed with chicken, chickpeas, arugula and sun-dried tomatoes — perfect for easy lunches or meal prep. Find step-by-step photos and more recipe tips above.

    • Cook the Pasta. Bring salted water to a boil. Cook pasta until al dente. Drain and lightly rinse if using legume pasta. Toss with a little olive oil and cool.

    • Cook the Chicken. Slice chicken horizontally for even thickness. Season with salt and pepper. Cook in a pan or grill over medium-high heat for 5–6 minutes per side until cooked through (internal temp 165°F / 75°C). Rest, then dice.

    • Make the Dressing. Whisk together Parmesan, olive oil, Dijon, lemon juice, vinegar, garlic, sugar, and pepper. Add water to loosen slightly. Taste and adjust seasoning.

    • Assemble. Combine pasta, chicken, chickpeas, sun-dried tomatoes, cherry tomatoes, and onion. Add dressing and toss well.

    • Finish. Fold in arugula and basil just before serving. Taste and adjust.

    • Salt your pasta water properly: It should taste like the sea — this makes a big difference
    • Don’t overcook the pasta: High-protein pasta can go mushy quickly
    • Use finely grated Parmesan: It melts into the dressing and makes it creamy without mayo
    • Add sun-dried tomato oil: Just a tablespoon ties the whole salad together beautifully
    • Add greens last: Keeps them fresh and not wilted
    • Variations: Swap chicken for grilled tofu or tuna. Add cucumber or capsicum for extra crunch. Use feta instead of Parmesan for a different vibe
    • Storage: Keeps well in the fridge for up to 4 days. Store in an airtight container
    • Make-Ahead Tip: Reserve a little dressing and stir it through before serving to freshen it up
    • Can I use regular pasta? Yes, but you’ll lose some protein — still delicious though
    • Why rinse chickpea pasta? It removes excess starch and keeps it from going sticky
    • Can I make it dairy-free? Skip Parmesan or use a dairy-free alternative
    • Why does it taste better later? The flavors settle and develop after a few hours in the fridge
    • Too dry the next day? Just add a splash of olive oil or lemon juice to bring it back

    Calories: 592kcal | Carbohydrates: 66g | Protein: 43g | Fat: 22g | Saturated Fat: 4g | Polyunsaturated Fat: 3g | Monounsaturated Fat: 9g | Trans Fat: 0.01g | Cholesterol: 59mg | Sodium: 810mg | Potassium: 1263mg | Fiber: 16g | Sugar: 17g | Vitamin A: 758IU | Vitamin C: 22mg | Calcium: 231mg | Iron: 10mg

    Keywords: summer pasta salad, cold pasta salad, chicken pasta salad, protein pasta, chickpeas

    More High-Protein Salad Recipes


    Source link

  • Easy Quinoa Black Bean Salad Recipe

    Easy Quinoa Black Bean Salad Recipe

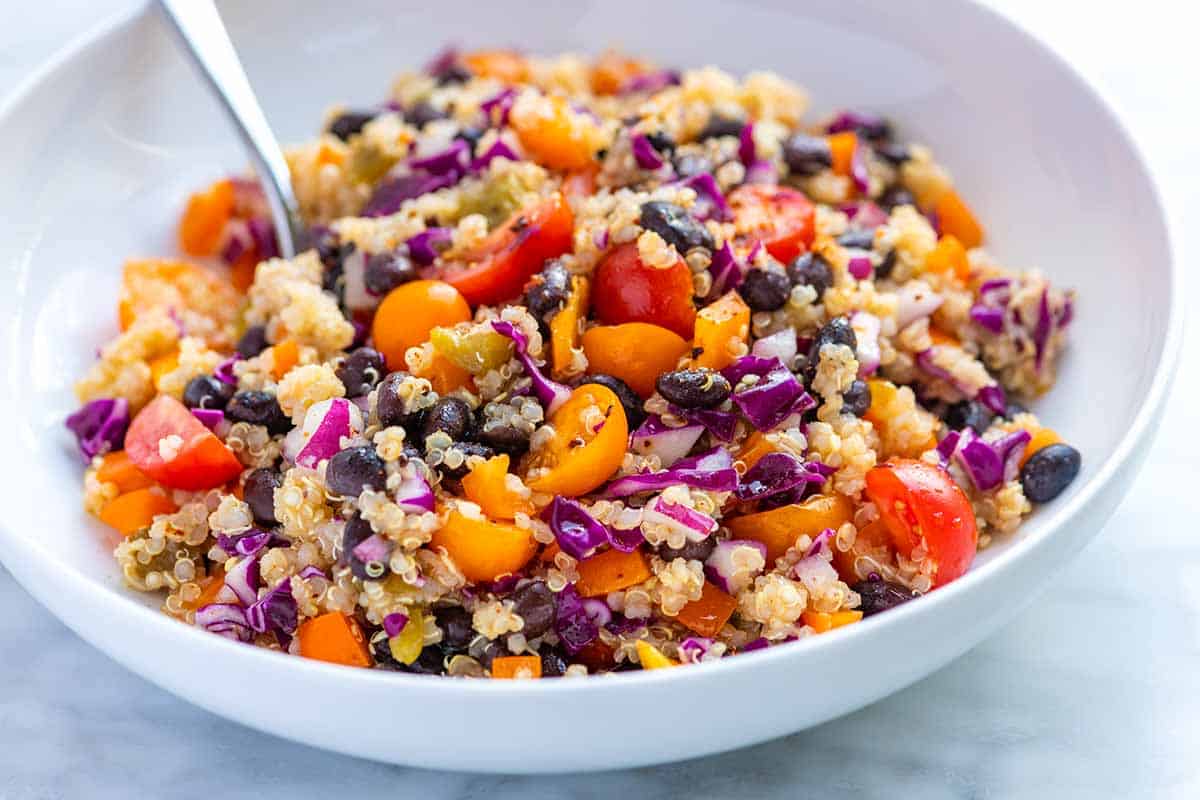
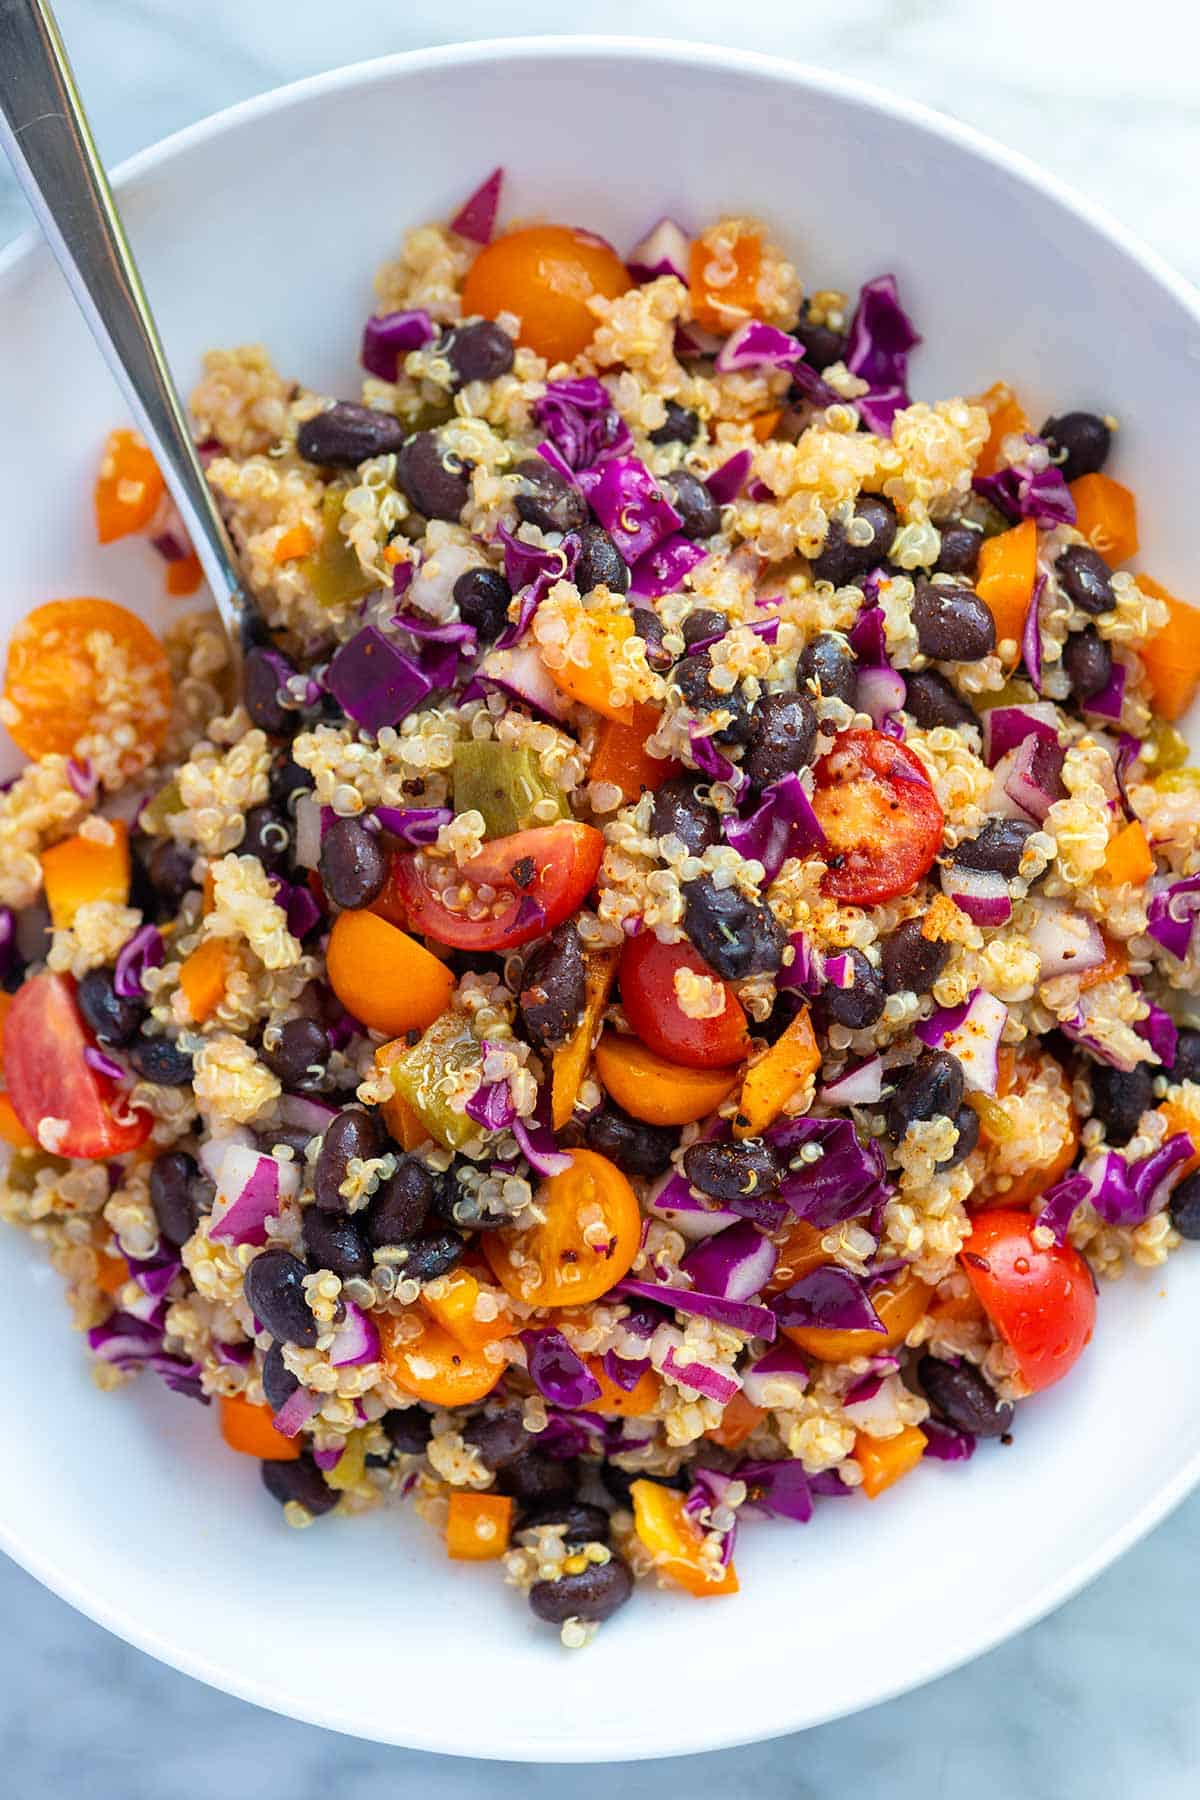
    Our quinoa black bean salad is hearty and delicious, thanks to its colorful veggies and bright and zesty dressing. It’s naturally vegan, super simple, and lasts for days in the fridge!

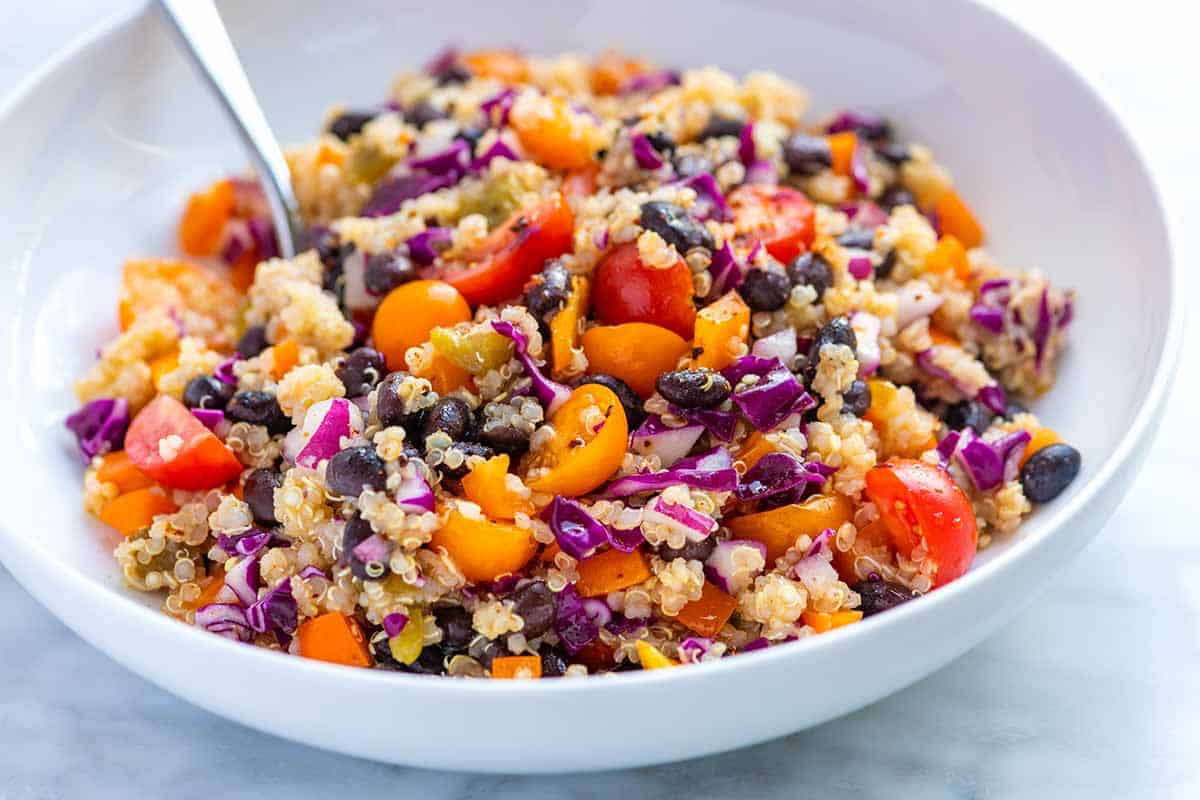
    Black Bean Quinoa Salad

    I’m always so happy when this easy quinoa black bean salad is in our fridge. It’s hearty, packed with plant protein (7g per cup), and tastes amazing. I love it served all by itself or with a bit more protein (my favorites are this easy baked tofu or these roasted shrimp).

    If you are looking for more ways to combine quinoa and beans, try this vegetarian chili or this superfood quinoa salad (it’s packed with veggies, chickpeas, and dried fruit).

    Key Ingredients

    • Quinoa: I cook it from scratch (it takes 10 to 15 minutes). My number one tip for perfectly cooked quinoa is to rinse it thoroughly under cold water before cooking. This removes the natural coating of saponins, which can make the quinoa taste bitter. For more tips, see how to cook quinoa.
    • Black Beans: You can use canned or home-cooked beans in this recipe. If you want to cook them from scratch, here’s our tried-and-true black beans recipe.
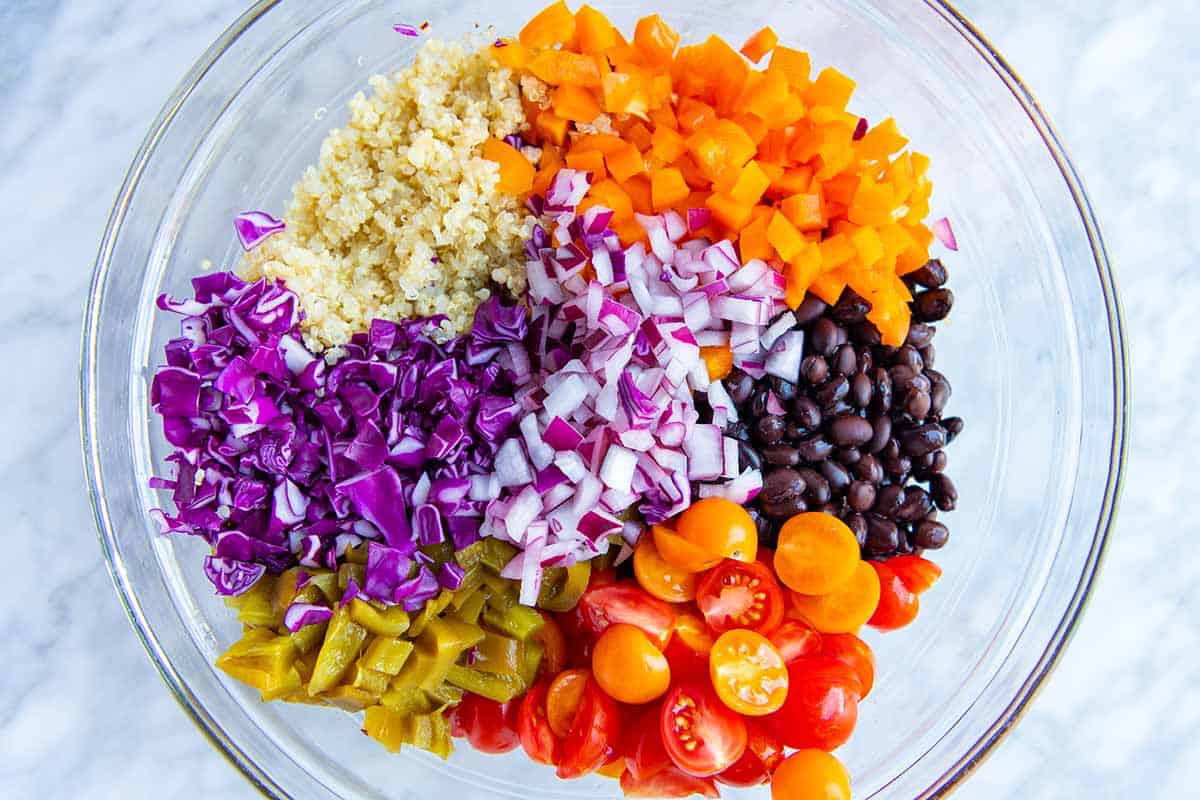
    • Veggies: I love the vibrant colors and textures that fresh vegetables bring to this salad. My go-to combination includes juicy tomatoes, crisp red onion, colorful bell peppers, sweet cherry tomatoes, crunchy red cabbage, and corn (when it’s in season). I also like to add a can of diced green chiles for an extra kick, which gives the salad a delicious Southwestern flair. Hatch green chiles are my personal favorite.
    • Dressing: The dressing I use for this black bean and quinoa salad is one of my favorites, especially for grain and bean salads. It starts with a simple apple cider vinegar and freshly squeezed lime juice. You can use either, but combining both creates the most well-rounded and balanced flavor profile. Next, I add some warmth and depth with cumin and chili powder (I highly recommend using a homemade chili powder if you have it). To finish it off, I whisk in a generous amount of olive oil and season to taste with salt and pepper.

    How to Make Quinoa Black Bean Salad

    This quinoa and bean salad is super simple to put together. I make my dressing in the bottom of a big bowl and then toss in the rest of the salad ingredients (quinoa, beans, and veggies).

    Black Bean and Quinoa Salad Ingredients

    This salad is perfect eaten right after making it, or you can store it in the fridge for up to 5 days! Because of this, it’s an ideal make-ahead dish. I love keeping it in the fridge for an easy lunch or dinner throughout the week.

    Thanks to 7 grams of protein and over 5 grams of fiber, it has plenty of sticking power. You can add some extra protein with crumbled feta cheese, grilled chicken, juicy pork chops, pan-fried halloumi cheese, baked tofu, or even a few of these easy chicken nuggets (trust me!).

    Easy Quinoa Black Bean Salad

    Easy Quinoa Black Bean Salad

    • PREP
    • COOK
    • TOTAL

    Our quinoa black bean salad is hearty and delicious, thanks to its colorful veggies and bright and zesty dressing. Serve it alone or with a bit of extra protein on top. I love baked tofu or roasted shrimp!

    Makes 8 cups

    You Will Need

    For Salad

    1 cup (190g) uncooked quinoa, rinsed (about 3 cups cooked)

    2 cups water or broth, see our chicken broth or veggie broth

    1 (15oz) can black beans, drained and rinsed, or 1 ½ cups cooked black beans

    1/2 cup finely chopped red onion (half small onion)

    1 red bell pepper, finely chopped

    1 cup (150g) cherry tomatoes, halved

    1 cup (100g) finely chopped red cabbage

    2 medium ears corn, kernels cut off the cobs, 1 cup

    1 (4oz) can Hatch green chili peppers, chopped

    Optional: chopped avocado, crumbled feta, or queso fresco


    For Dressing

    3 tablespoons (44ml) apple cider vinegar

    2 tablespoons (30ml) fresh lime juice

    1/2 teaspoon ancho chili powder

    1/2 teaspoon ground cumin

    1/3 cup (78g) extra virgin olive oil

    Salt and fresh ground black pepper

    Directions

      1Combine the rinsed quinoa, water, and 1/4 teaspoon sea salt in a medium saucepan over medium-high heat. Bring to a boil, then reduce to a low simmer and cook uncovered until the quinoa absorbs the liquid for 10 to 15 minutes.

      2Move the saucepan off of the heat and cover for 5 minutes. This extra time allows the quinoa to steam and “fluff up.”

      3Uncover, and then fluff the quinoa with a fork.

      4In a large bowl, whisk the apple cider vinegar, lime juice, 1/2 teaspoon of sea salt, chili powder, cumin, and a pinch of black pepper together. Slowly add the olive oil, whisking until blended.

      5Add the quinoa, black beans, red onion, bell peppers, tomatoes, cabbage, corn, and chili peppers. Toss to combine, and then season to taste with additional salt and pepper as needed.

      6Store in an airtight container in the refrigerator for 3 to 4 days. If the salad seems a little dry after a day or two, add an extra squeeze of lime juice and a slight drizzle of olive oil.

    Adam and Joanne’s Tips

    • Storing: This quinoa black bean salad lasts in an airtight container in the fridge for up to 5 days. Over time, the color from the red cabbage seeps out into the salad (it looks quite pretty).
    • Canned green chili peppers: These are often sold next to salsas in most grocery stores. There are a variety of brands, including Ortega, Old El Paso, and Hatch. When we can find it, we love the Hatch brand.
    • The nutrition facts provided below are estimates.

    Nutrition Per Serving
    Serving Size
    1 cup
    /
    Calories
    235
    /
    Total Fat
    11.5g
    /
    Saturated Fat
    1.7g
    /
    Cholesterol
    0mg
    /
    Sodium
    234.3mg
    /
    Carbohydrate
    28.3g
    /
    Dietary Fiber
    5.6g
    /
    Total Sugars
    3g
    /
    Protein
    7.1g


    AUTHOR:

    Joanne Gallagher

    Adam and Joanne of Inspired Taste

    We are Adam and Joanne Gallagher, the creators of Inspired Taste. Established in 2009, Inspired Taste grew from a childhood dream into one of the internet’s most trusted recipe sites with hundreds of reliable recipes, step-by-step videos, and expert tips.More About Us

    Source link

  • The Best Shrimp Salad Recipe

    The Best Shrimp Salad Recipe

    This is my favorite shrimp salad recipe. It’s absolutely delicious, thanks to perfectly cooked shrimp, fresh dill, and an out of this world homemade dressing.

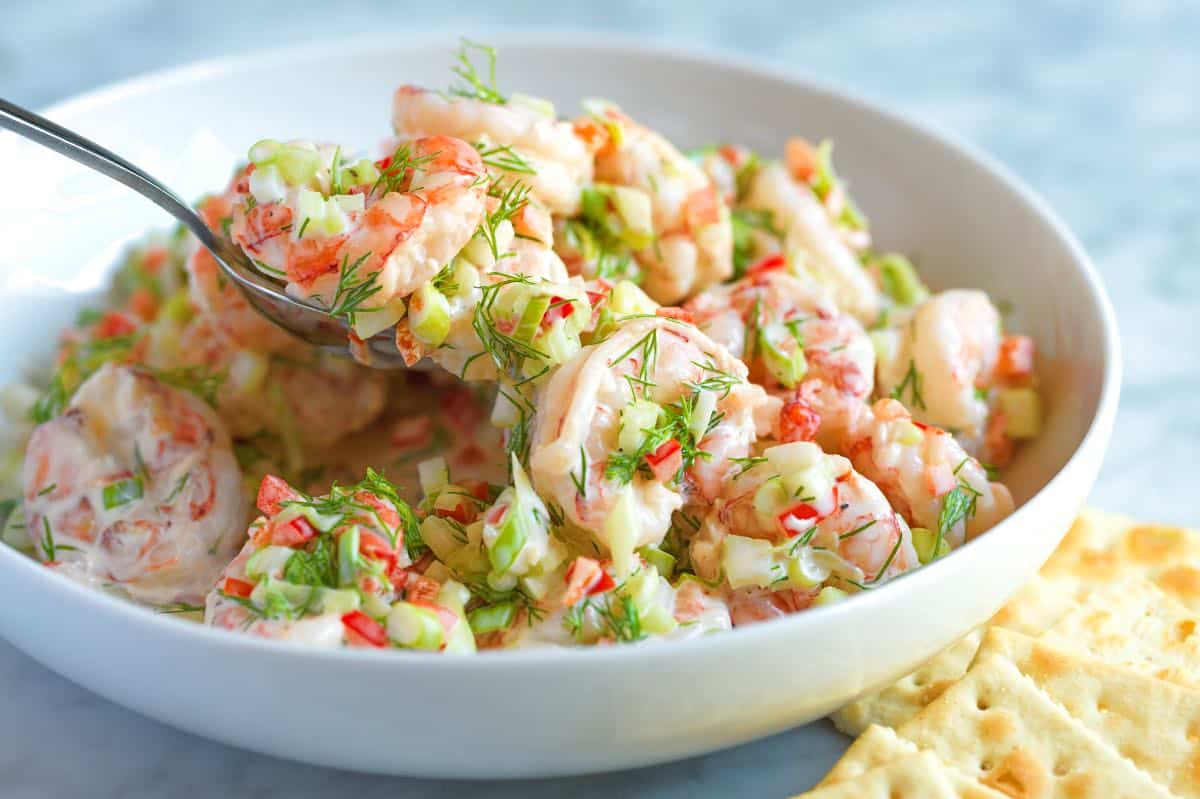
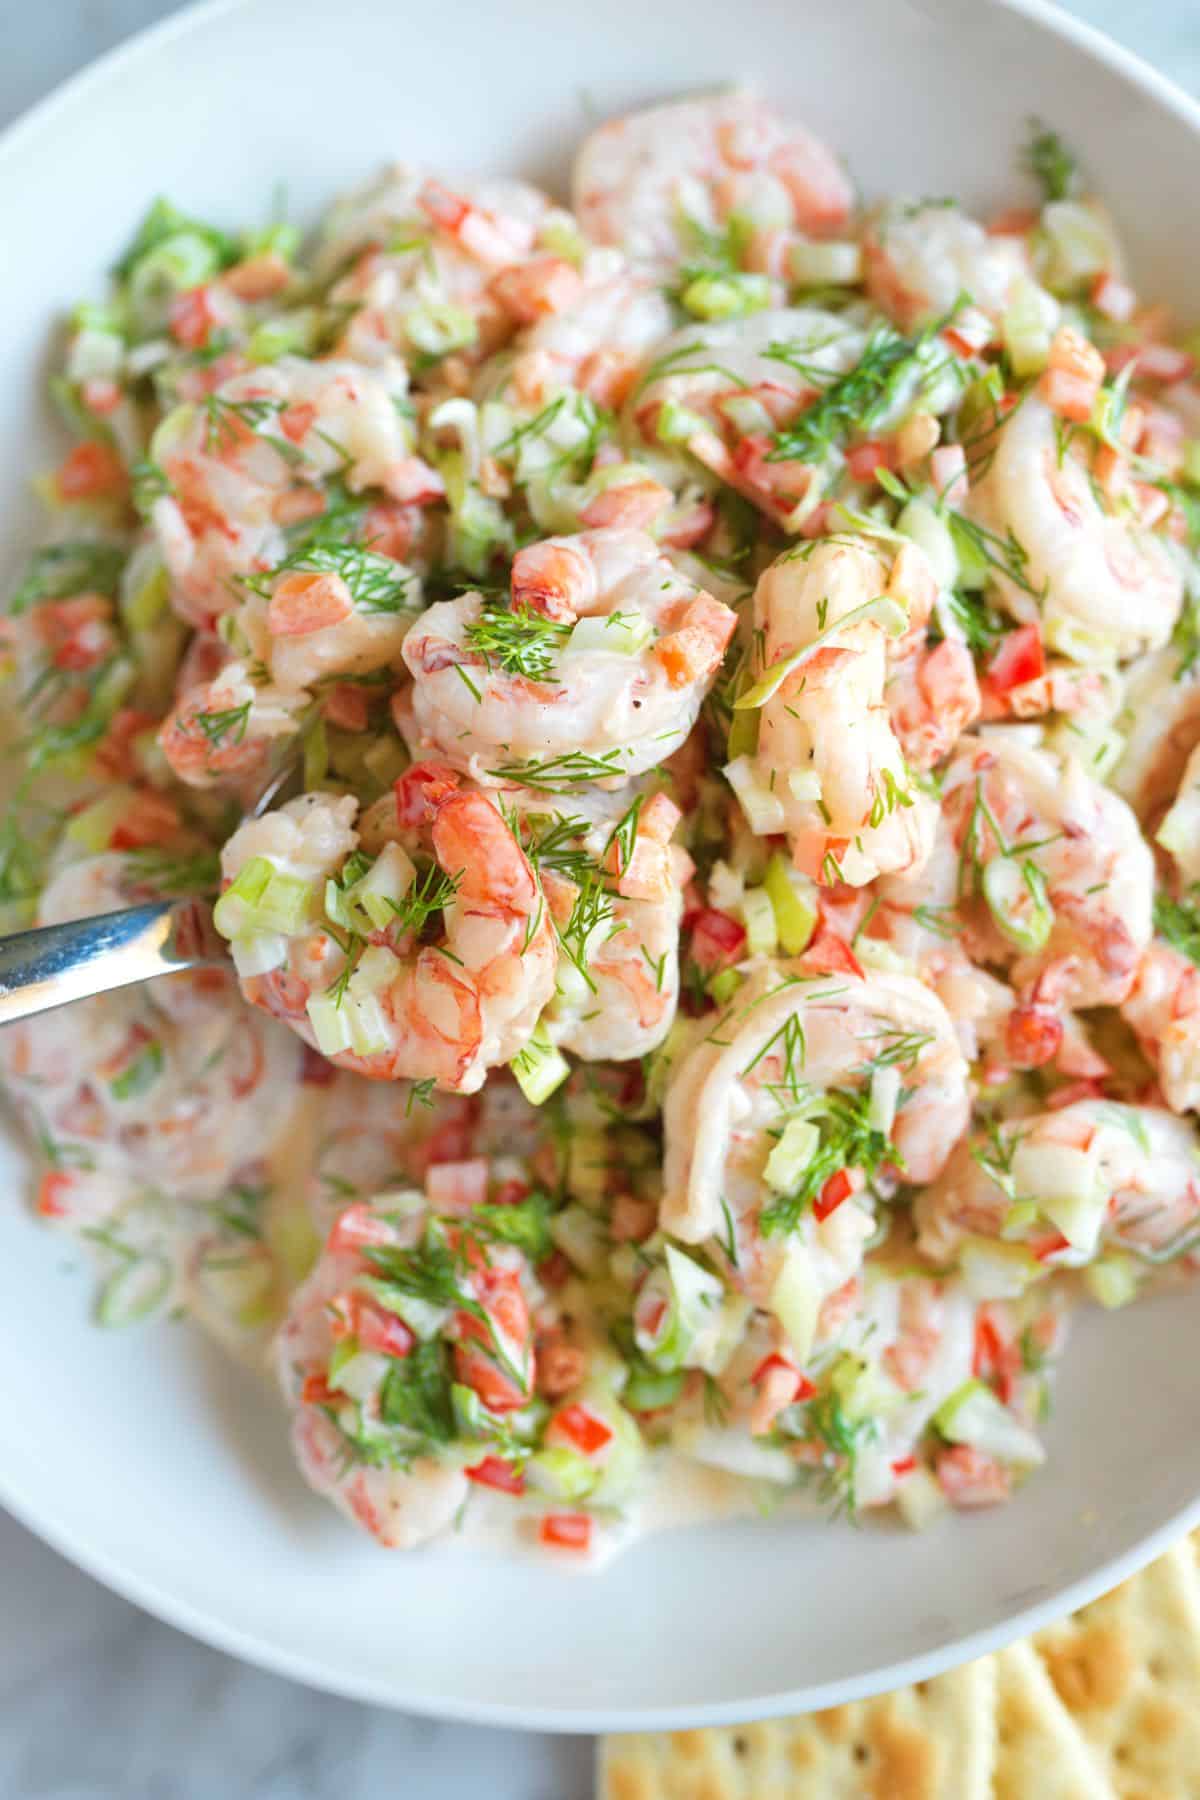
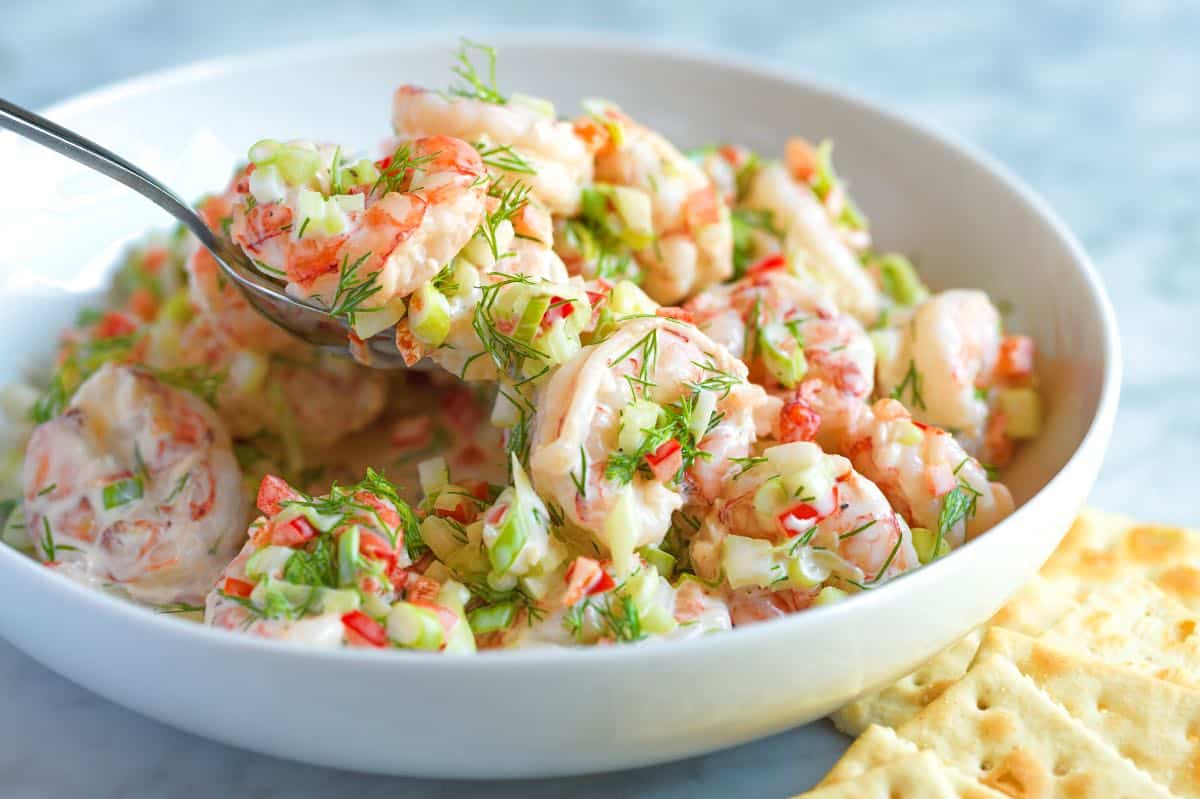
    Shrimp Salad in a bowl.

    This is the best shrimp salad I’ve made in a long time. Our easy poaching method guarantees perfectly cooked shrimp, and the simple lemon and dill dressing makes this salad insanely good.

    This cold shrimp salad keeps in the fridge for three days, which is perfect since it is amazing for lunch the next day! I can’t wait for you to try this recipe. It’s a keeper! For more easy shrimp recipes, see my easy shrimp scampi or this fresh shrimp ceviche.

    Key Ingredients

    • Shrimp: For the best results, cook your shrimp. I poach shrimp for this salad and love how gently poaching keeps the shrimp succulent. I use large shrimp and have shown how to poach shrimp them below. (You can use pre-cooked shrimp, but cooking the shrimp yourself only takes a few minutes.)
    • Bell pepper, celery, and green onion: Add flavor, color, and crunch. I especially love the added sweetness of the bell pepper in this salad.
    • Mayonnaise: Is the base for our creamy shrimp salad dressing. Use a good-quality store-bought brand or make your own (here’s our recipe for homemade mayo).
    • Lemon juice: Keeps our salad fresh and cuts through any heaviness of the mayo.
    • Dill: A classic herb with shrimp. I add a lot of dill to this salad and love it!

    Find the full recipe with measurements below.

    Tips for Making Our Favorite Shrimp Salad

    Tip 1: Poach your shrimp. You can use pre-cooked shrimp or cook them yourself. We highly recommend poaching the shrimp for the most flavorful and perfectly textured salad, it only takes a few minutes. To poach the shrimp, I follow a similar process to poaching chicken:

    1. Bring water to a boil with a few aromatics (garlic, lemon, and salt).
    2. Once it boils, turn off the heat and add the shrimp. The hot water will poach large shrimp, like the shrimp shown in our photos, to perfection in approximately 3 minutes. Note that in the photo below and in our video, I am using Patagonia pink shrimp, which are pink when raw and when cooked.
    Poached shrimp for shrimp salad

    Tip 2: Let your salad sit. You will toss your poached shrimp with mayonnaise, lemon juice, drill, bell pepper, celery, green onion, salt, and pepper. If you are in a rush, enjoy the salad now but if you can wait an hour, the flavors will develop even more (I cover it and store in the fridge).

    Shrimp salad ingredients

    Serving Suggestions

    I love serving shrimp salad with saltine crackers, but you can enjoy it in so many different ways. Add to buttered rolls for a sandwich (like a lobster roll), roll up in flour tortillas, or spoon into lettuce like we do for this shrimp salad on endive.

    More Shrimp Recipes

    Best Creamy Shrimp Salad

    The Best Shrimp Salad

    • PREP
    • COOK
    • TOTAL

    This is the best shrimp salad we’ve made! It’s also very simple to make. You can use pre-cooked shrimp from the store or cook it yourself. We highly recommend cooking the shrimp for the most flavorful and perfectly textured salad, which only takes a few minutes.

    Makes 4 servings

    Watch Us Make the Recipe

    You Will Need

    Shrimp Salad

    1 pound poached shrimp, recipe below

    1/2 cup finely diced red bell pepper (Half of a large pepper)

    1/2 cup finely diced celery (1 large stalk)

    1/2 cup thinly sliced green onion (3 to 4)

    1/2 cup (100 grams) mayonnaise, try homemade mayo

    2 tablespoons fresh lemon juice

    1/4 cup roughly chopped fresh dill

    1/4 teaspoon fine sea salt

    4 twists of pepper grinder


    Poached Shrimp

    1 pound large raw shrimp (31-40 per pound), peeled and deveined

    2 quarts water

    1 lemon, cut in half

    2 cloves garlic, peeled and gently smashed

    1 bay leaf

    3 twists pepper grinder

    1 ½ tablespoon salt

    1/2 teaspoon Cajun seasoning, optional

    Directions

    • Poach the Shrimp
    • 1Add 2 quarts of water to a large pot and place it on the stove over high heat. Squeeze a little lemon juice into the water and drop the lemon halves into the pot. Add the garlic, bay leaf, pepper, salt, and Cajun seasoning. Bring the liquid to a rolling boil.

      2Once the water reaches a rolling boil, remove the pot from the heat and immediately submerge the shrimp into the hot water. Poach them for three minutes.

      3Using tongs or a slotted spoon, carefully transfer the cooked shrimp to a plate. Allow them to cool by placing them in the refrigerator.

    • Make the Salad
    • 1Once the shrimp have cooled, place them in a large bowl with the bell pepper, celery, green onion, mayonnaise, lemon juice, dill, salt, and pepper.

      2Gently mix the ingredients until they are well combined.

      3Allow the salad to sit in the refrigerator for at least one hour before serving, which allows the flavors to marinate and develop.

    Adam and Joanne’s Tips

    • Storing: Shrimp salad lasts up to 3 days in the refrigerator. Store it in an airtight container. I love having this salad ready in the fridge for an easy lunch or dinner! We do not recommend freezing shrimp salad.
    • Bell pepper substitute: If you do not want to add bell peppers, leave them out.
    • The nutrition facts provided below are estimates.

    Nutrition Per Serving
    Serving Size
    1/4 of the recipe
    /
    Calories
    319
    /
    Total Fat
    21.2g
    /
    Saturated Fat
    3.3g
    /
    Cholesterol
    225.8mg
    /
    Sodium
    464.3mg
    /
    Carbohydrate
    4.7g
    /
    Dietary Fiber
    1.2g
    /
    Total Sugars
    1.6g
    /
    Protein
    28.4g


    AUTHOR:

    Joanne Gallagher

    Adam and Joanne of Inspired Taste

    We are Adam and Joanne Gallagher, the creators of Inspired Taste. Established in 2009, Inspired Taste grew from a childhood dream into one of the internet’s most trusted recipe sites with hundreds of reliable recipes, step-by-step videos, and expert tips.More About Us

    Source link

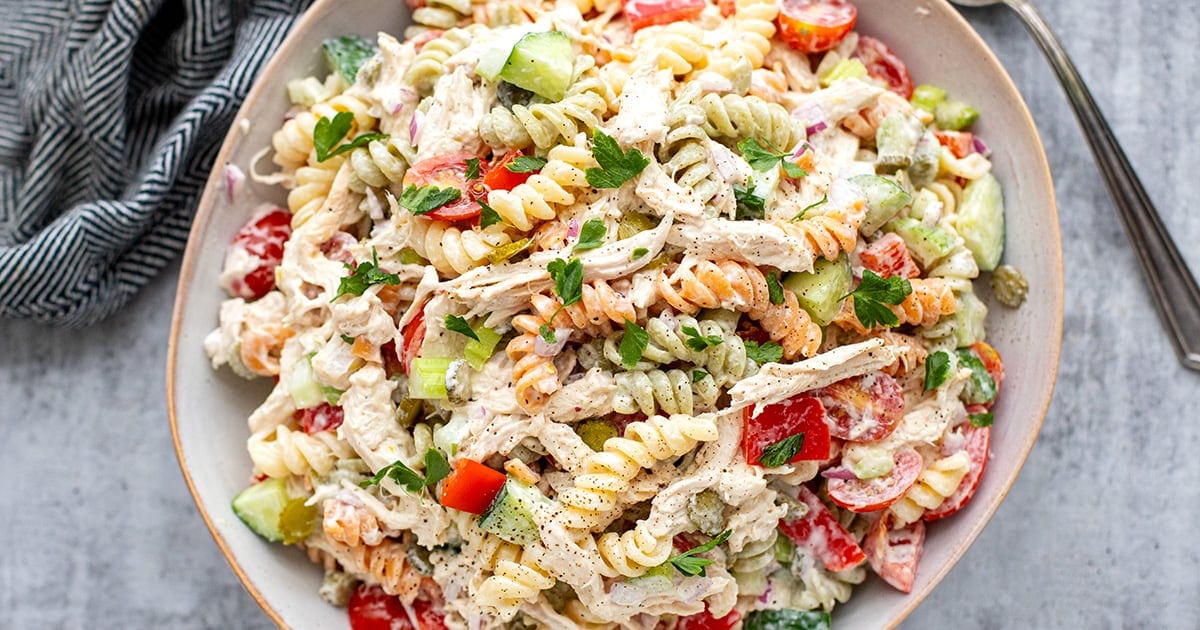
  • Chicken Pasta Salad

    Chicken Pasta Salad

    This creamy chicken pasta salad is fresh, flavor-packed, brightened with lemon, and not overly heavy. It’s perfect for BBQs, meal prep, or an easy chicken and pasta cold salad.


    Jump to: ℹ️ Overview | 🛒 Ingredients | 📷 How To Make | 📹 Watch The Video | 👩‍🍳 Recipe Tips | 🥗 Serving Suggestions | 📝Full Recipe Card | 🍽 More Chicken Recipes


    At A Glance:

    • Ready In: 30 minutes (+ chilling)
    • 🍽 Serves: 6–8 (4 as a main)
    • 🌱 Diet: High-protein, can be gluten-free (with GF pasta)
    • 💪 Nutrition Highlights: High in protein, balanced fats, veggie-packed
    • 🥕 Main Ingredients: Chicken, pasta, Greek yogurt, mayonnaise, fresh vegetables
    • 🔥 Flavor Profile: Creamy, tangy, fresh, slightly zesty, fresh crunch from veggies
    • 🧊 Meal-Prep Friendly: Keeps 3–4 days in the fridge, flavor improves over time
    • Best Served With: BBQ mains, grilled meats, or as a make-ahead lunch, great for potlucks.

    This chicken pasta salad is one of my lunchtime heroes, and it also quietly steals the show at BBQs. It’s creamy, yes, but not heavy. I lighten the dressing with Greek yogurt and fresh lemon so it tastes bright and balanced instead of thick and gloopy.

    The tri-colour fusilli catches all that creamy Dijon dressing in its little spirals, and the rotisserie or shredded chicken makes this weeknight easy. Crunchy celery, cucumber, red onion, and red bell pepper keep every bite fresh, while pickles add that subtle tangy-sweet pop that makes you go back for seconds.

    It’s high in protein thanks to the chicken and yogurt, packed with fibre from the veggies, and perfect for making ahead. The flavor actually improves once it chills — just remember to re-season before serving (cold food needs a little extra love).

    This one sits right between classic comfort and fresh modern salad. Familiar enough for everyone to love, but layered enough to taste intentional.

    👩‍🍳 You might also like these pasta salads: Mediterranean pasta salad, elote pasta salad, tuna and pasta salad, or healthy Rotisserie chicken salad.

    What You’ll Need

    Here is what you’ll need for this shredded chicken pasta salad recipe. Find the full measurements in the recipe card below.

    • Tri-colour fusilli pasta – Holds dressing beautifully and adds visual appeal.
    • Rotisserie chicken (shredded) – Saves time and boosts protein. You can cook your own if preferred, check out my slow cooker shredded chicken here.
    • Cherry tomatoes – Natural sweetness and juiciness.
    • Cucumber – Fresh crunch and hydration.
    • Red onion – Sharpness (soak briefly to mellow).
    • Celery – Classic creamy-salad crunch.
    • Red bell pepper – Sweetness and color.
    • Pickles (finely chopped) – Tangy-sweet bite that balances the creaminess.

    Creamy Dressing

    • Mayonnaise – Creamy base.
    • Parmesan cheese – Salty, nutty depth.
    • Greek yogurt – Lightens the dressing and adds protein.
    • Dijon mustard – Gentle heat and complexity.
    • Lemon juice + zest – Brightness.
    • Red wine vinegar or apple cider vinegar – Extra acidity.
    • Garlic (grated) – Subtle sharpness.
    • Salt & black pepper – Essential seasoning.
    • Water – Loosens dressing without extra oil.

    How To Make Chicken Pasta Salad

    Find the full recipe and nutritional information below. Here are some handy step-by-step photos for how to make this pasta salad.

    • Cook pasta in well-salted water until al dente. Drain and cool completely.
    • Soak sliced red onion in cold water for 10 minutes, then drain.
    • In a bowl, whisk together mayo, Greek yogurt, Parmesan, Dijon, lemon juice, zest, vinegar, garlic, salt, pepper, and a little water until smooth.
    • Toss cooled pasta with shredded chicken, vegetables, and pickles.
    • Fold through dressing. Chill for at least 30 minutes.
    • Taste and adjust salt and lemon before serving.

    Watch The Video

    Recipe Tips

    • Salt your pasta water properly. This is your only chance to season the pasta itself.
    • Re-season after chilling. Cold dulls flavor — add a pinch of salt or squeeze of lemon before serving.
    • Shred, don’t cube, the chicken for better dressing cling.
    • Make ahead: Best made 2–24 hours ahead. Store covered in the fridge.
    • Storage: Keeps well for 3–4 days refrigerated. Stir before serving.
    • Want more crunch? Add toasted almonds right before serving.
    • Variation ideas: Add crispy bacon. Stir in chopped parsley or fresh herbs. Swap pickles for capers. Turn it into a pesto chicken pasta salad (save that for its own post 😉).

    Serving Suggestions

    Serve this chicken pasta salad cold or slightly chilled. It’s perfect alongside grilled a green salad, corn on the cob, or as part of a summer spread. It also works beautifully packed for lunches — just keep it chilled.

    💬 If you’ve tried this chicken pasta salad or any other recipe on the blog then don’t forget to rate the recipe and let me know how you got on in the comments below, I love hearing from you! You can also FOLLOW ME on Instagram, Facebook, Pinterest, YouTube, and or sign up to my Newsletter to see more of my delicious food.

    Want to Save This Recipe?

    Enter your email & I’ll send it to your inbox. Plus, get great new recipes from me every week!

    By submitting this form, you consent to receive emails from Cooked & Loved

    This creamy chicken pasta salad is fresh, flavor-packed, brightened with lemon, and not overly heavy. It’s perfect for BBQs, meal prep or an easy chicken and pasta cold salad. Find step-by-step photos and more recipe tips above.

    • Bring a large pot of water to a boil. Salt generously. Cook pasta until al dente according to package instructions. Drain and rinse briefly with cool water. Let cool completely.

    • If needed, soak sliced red onion in cold water for 10 minutes, then drain.

    • In a medium bowl, whisk together mayonnaise, Greek yogurt, Dijon mustard, Parmesan, lemon juice, zest, vinegar, garlic, salt and pepper. Add water a tablespoon at a time until the dressing is creamy but pourable.

    • In a large bowl, combine cooled pasta, shredded chicken, tomatoes, cucumber, celery, red bell pepper, chopped pickles and red onion.

    • Pour dressing over the salad and toss until evenly coated.

    • Chill for at least 30 minutes before serving.

    • Taste and adjust seasoning with extra salt or lemon juice if needed.

    • Salt your pasta water properly. This is your only chance to season the pasta itself.
    • Re-season after chilling. Cold dulls flavor — add a pinch of salt or squeeze of lemon before serving.
    • Shred, don’t cube, the chicken for better dressing cling.
    • Make ahead: Best made 2–24 hours ahead. Store covered in the fridge.
    • Storage: Keeps well for 3–4 days refrigerated. Stir before serving.
    • Want more crunch? Add toasted almonds right before serving.
    • Variation ideas: Add crispy bacon. Stir in chopped parsley or fresh herbs. Swap pickles for capers. Turn it into a pesto chicken pasta salad (save that for its own post 😉).
    • Can I cook my own chicken? Yes. Season chicken breasts with salt, pepper, and paprika. Bake at 400°F (200°C) for 18–22 minutes until cooked through, then shred.
    • Can I make this ahead? Absolutely. It tastes even better after a few hours in the fridge. Just re-season before serving.
    • Can I use a different pasta? Yes — bowtie, penne, or rotini work well. Choose a shape that holds dressing. 
    • Is this gluten-free? Use gluten-free pasta and check labels on mustard and pickles.

    Calories: 381kcal | Carbohydrates: 36g | Protein: 32g | Fat: 12g | Saturated Fat: 3g | Polyunsaturated Fat: 2g | Monounsaturated Fat: 1g | Trans Fat: 0.01g | Cholesterol: 87mg | Sodium: 764mg | Potassium: 251mg | Fiber: 2g | Sugar: 4g | Vitamin A: 539IU | Vitamin C: 21mg | Calcium: 83mg | Iron: 1mg

    Keywords: healthy pasta salad, Chicken salad, pasta salad, cold pasta salad, shredded chicken

    More Chicken Recipes


    Source link