Tag: Recipe

  • Easy Homemade Croutons Recipe

    Easy Homemade Croutons Recipe

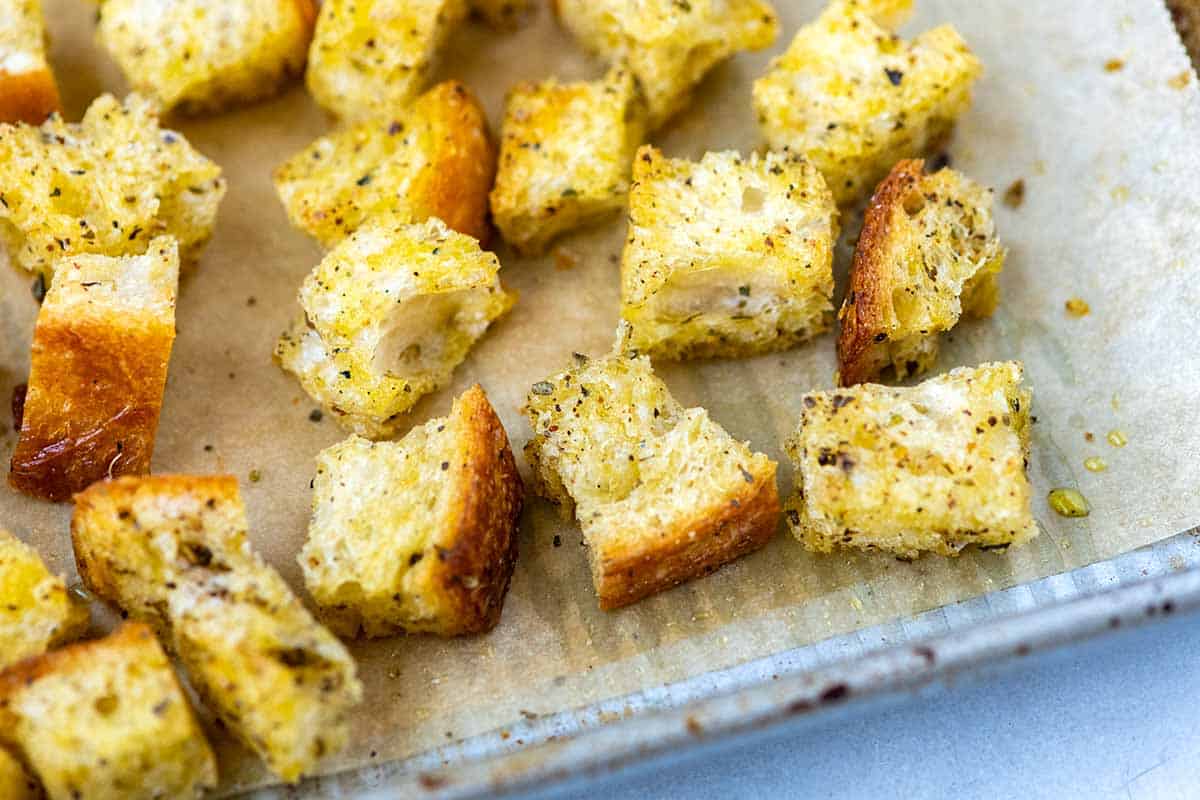
    Homemade croutons are so much tastier than store-bought! They’re perfectly crunchy, and you can customize them with your favorite herbs and spices. A batch of these easy croutons can be ready in 15 to 20 minutes using your favorite herbs and spice blends.
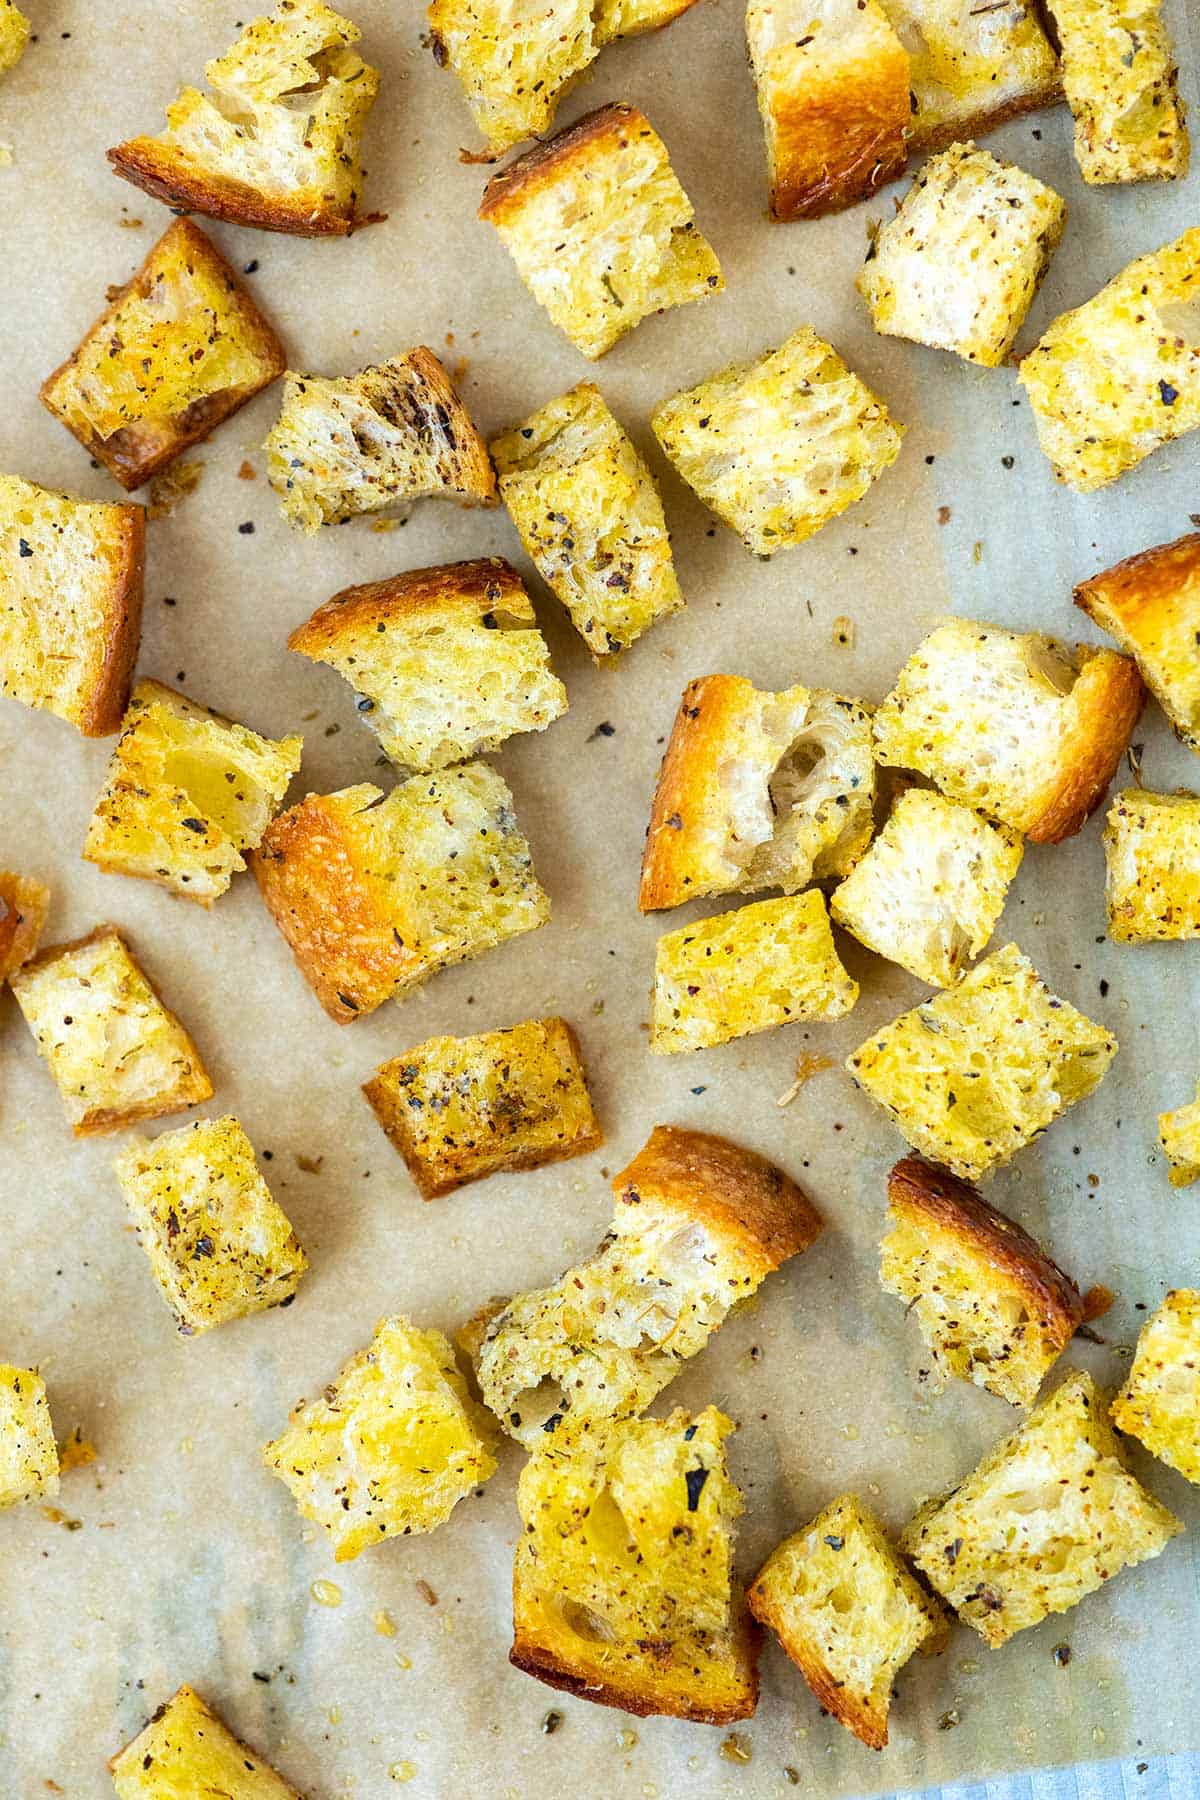
    Homemade Croutons

    I love adding croutons to my salads, but don’t really enjoy store-bought options. That’s why I’m in love with these easy homemade croutons! They’re the perfect topping for salads or soups, like Caesar salad or this easy tomato soup.

    You can make a double batch and have them for another day or use them to top your favorite pasta dishes or casseroles. Store them in an airtight container at room temperature for up to 5 days, or freeze them for up to 3 months.

    Key Ingredients

    • Bread: Use a quality bread. I love using bread from my local bakery. Day-old bread crisps up quicker, but fresh bread will still work.
    • Olive Oil: Use a tasty olive oil or substitute for melted butter.
    • Herbs: When the croutons are crisp and you’ve removed them from the oven, throw in your favorite dried herb blend or toss with chopped fresh herbs (see the notes section of the recipe for suggestions). If you love garlic, take a look at our garlic croutons!

    Find the full recipe with measurements below.

    How to Make Croutons

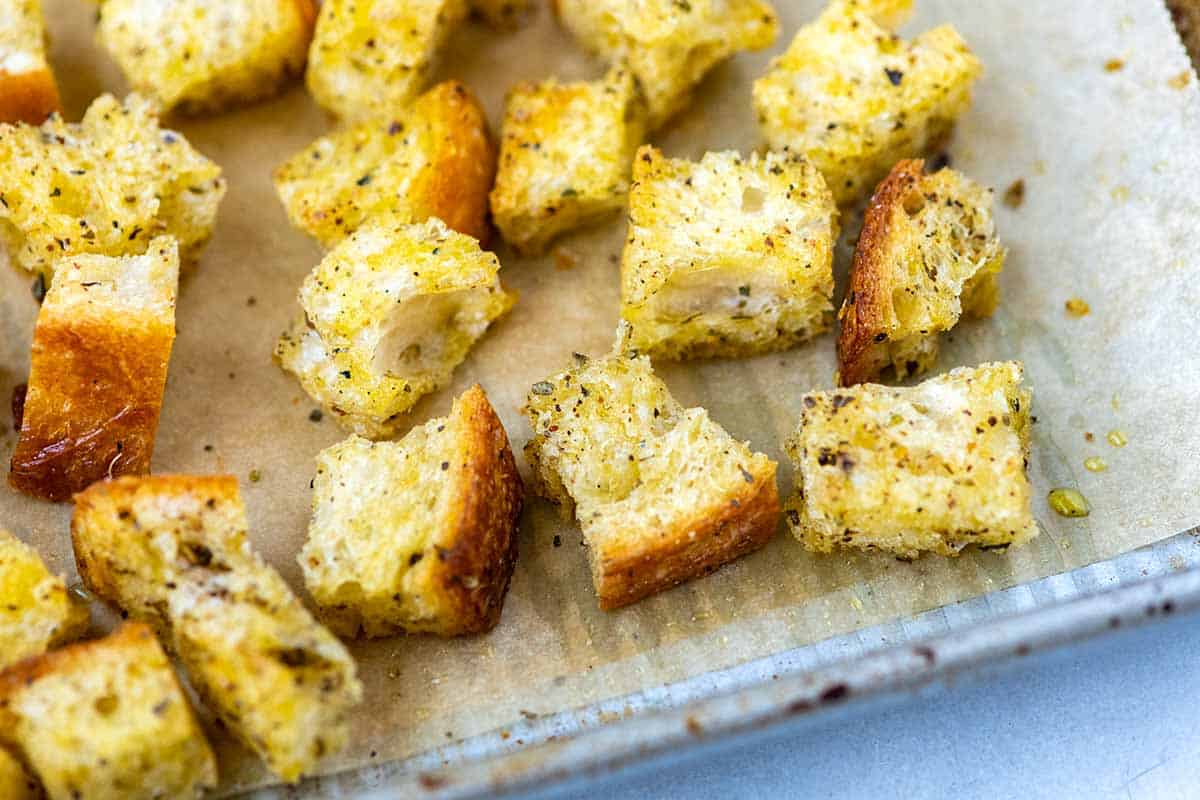
    To make croutons from scratch, simply tear or slice bread into small chunks and toss with olive oil, salt, pepper, and, if you’d like to add them, some herbs. Bake the seasoned bread in the oven until crisp. They usually take somewhere between 10 and 20 minutes, depending on how large they are and how fresh the bread is.
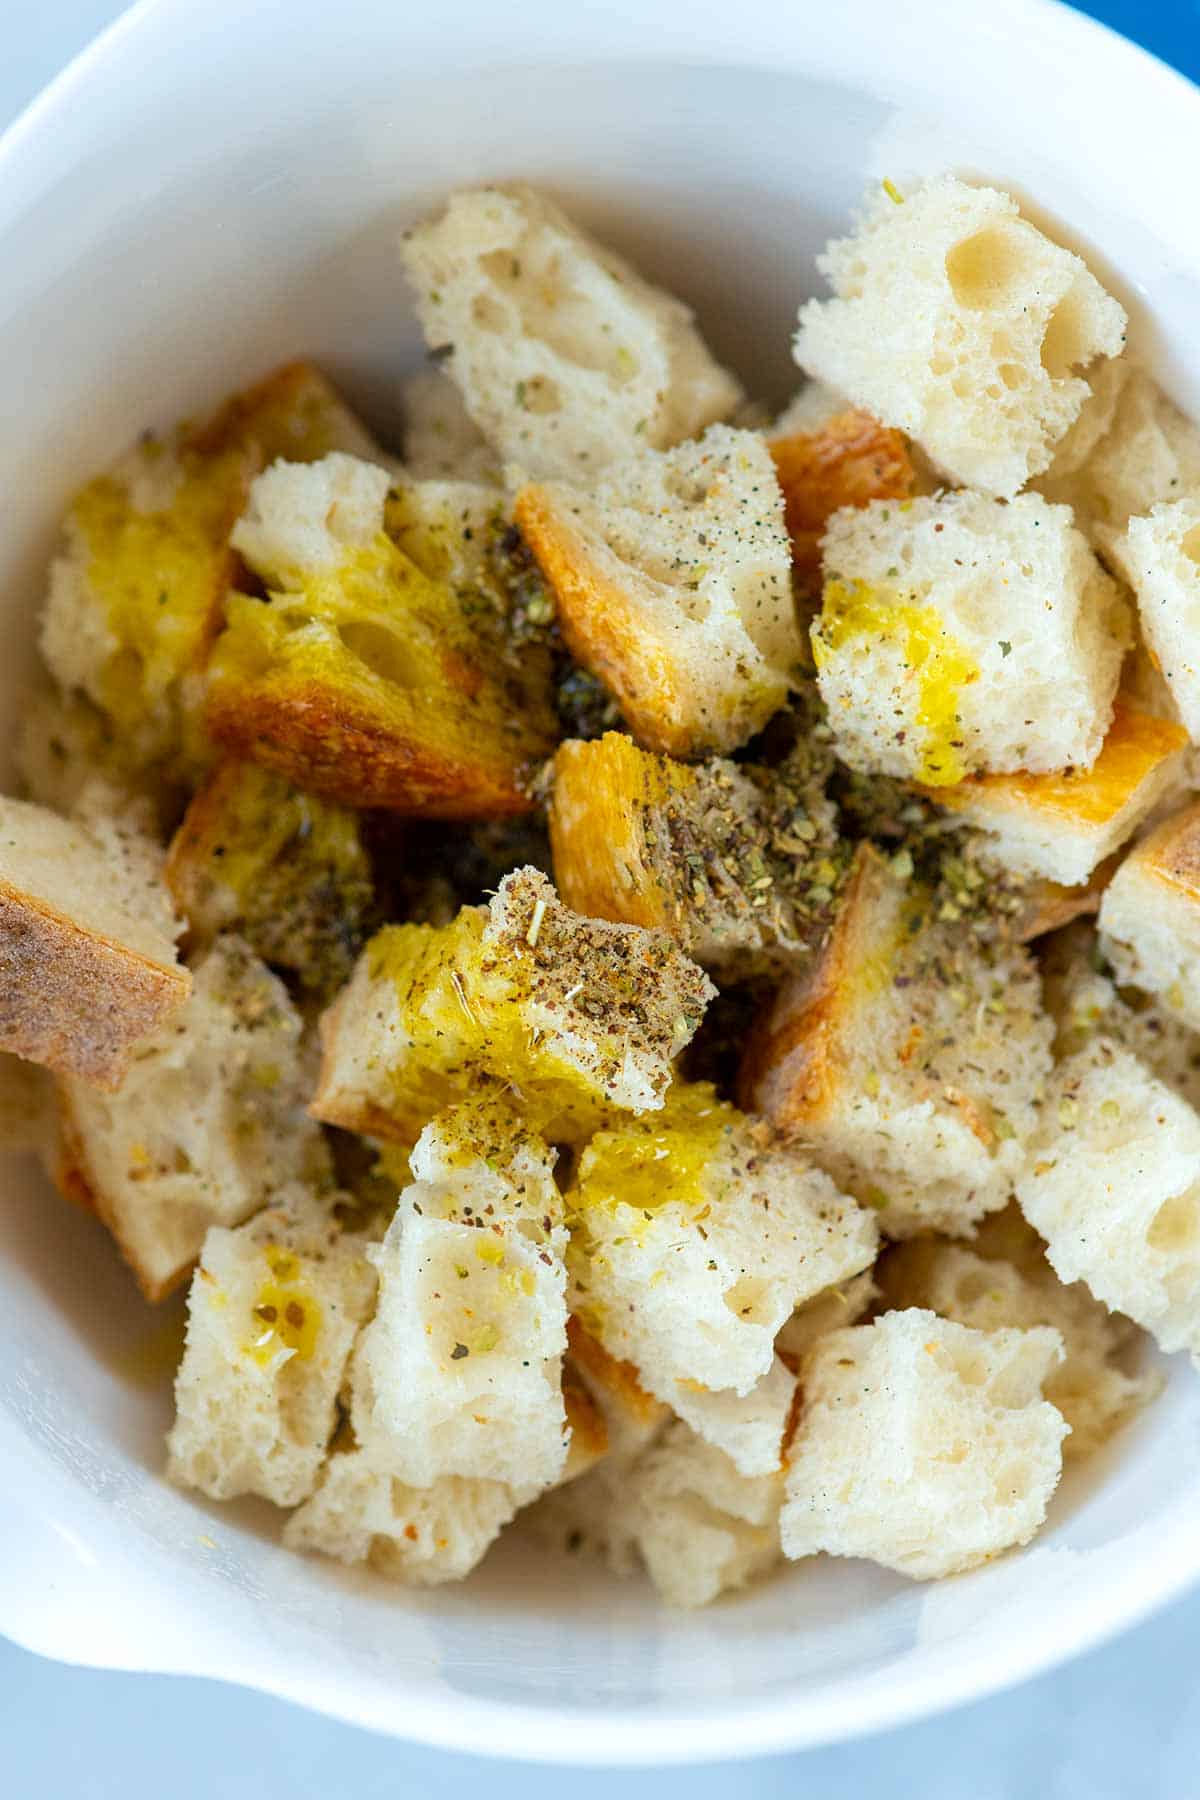
    How to Make Croutons: Cubed bread tossed with olive oil, salt, pepper and herbs.

    Ways to Use Homemade Croutons

    You may think that croutons are only for scattering onto salads, but that’s just the start. I love adding them to homemade soups and stews. This tomato soup and this creamy vegetable soup are my favorite.

    Knowing how to make your own croutons is useful around the holidays, especially if you are tasked with making stuffing! In this mushroom stuffing recipe, we start by crisping the bread into croutons before mixing with the remaining ingredients.

    Then, of course, there is the obvious option of adding homemade, perfectly crispy croutons to salads (see our favorite Caesar salad to see it in action).
    Homemade Croutons

    Easy Homemade Croutons

    • PREP
    • COOK
    • TOTAL

    Making your own homemade croutons is so easy! They can be made in minutes and made with your favorite herbs and spice blends. Both dried and fresh herbs can be used in this recipe. See the notes section below for our tips.

    Makes 4 cups

    Watch Us Make the Recipe

    You Will Need

    4 cups torn or cubed day old bread, about 1-inch pieces

    3 tablespoons olive oil or melted butter

    Salt and fresh ground black pepper

    1/2 teaspoon to 1 teaspoon dried herbs or 2 tablespoons chopped fresh fine herbs, see notes

    Directions

      1Preheat the oven to 375°F (190°C).

      2Toss the bread with olive oil, a pinch of salt, and a few grinds of black pepper in a medium bowl.

      3Add dried herbs, if using, and toss well. Transfer to a parchment paper-lined baking sheet.

      4Bake, stirring once, until crisp and lightly golden around the edges, 10 to 15 minutes.

      5If using fresh herbs, chop them small and toss them with the croutons after baking while they are still warm.

      6Cool and then store in an airtight bag for 2 to 3 days or freeze for up to 3 months.

    Adam and Joanne’s Tips

    • We typically reach for dried herb blends like Italian seasoning, chili powder (see our homemade chili powder), Za’atar, and Mediterranean/Greek blends. For fresh herbs, try finer herbs like chopped fresh oregano, dill, basil, tarragon, chives, parsley and cilantro. If using woodier herbs like rosemary or thyme, you can toss them in before baking as if they were dried herbs.
    • The nutrition facts provided below are estimates.

    Nutrition Per Serving
    Serving Size
    About 1/4 cup
    /
    Calories
    93
    /
    Total Fat
    3.1g
    /
    Saturated Fat
    0.5g
    /
    Cholesterol
    0mg
    /
    Sodium
    231.1mg
    /
    Carbohydrate
    13.6g
    /
    Dietary Fiber
    0.7g
    /
    Total Sugars
    0.8g
    /
    Protein
    2.9g


    AUTHOR:

    Joanne Gallagher

    Adam and Joanne of Inspired Taste

    We are Adam and Joanne Gallagher, the creators of Inspired Taste. Established in 2009, Inspired Taste grew from a childhood dream into one of the internet’s most trusted recipe sites with hundreds of reliable recipes, step-by-step videos, and expert tips.More About Us
    Source link

  • The Best Gazpacho Recipe

    The Best Gazpacho Recipe

    This is hands down my favorite gazpacho recipe! The secret is lightly roasting the tomatoes with onions and garlic, which adds incredible flavor!

    Tomato Gazpacho

    Gazpacho, a chilled soup (sometimes called a salad in Spanish cookbooks) from Andalusia, Spain, is traditionally made with tomatoes, garlic, onion, and cucumber, and often thickened with bread. While authentic gazpacho recipes rely on raw ingredients, our version takes a slightly different approach.

    We developed this with Chef Richard and discovered that lightly roasting the tomatoes, onions, and garlic enhances the tomato flavor and softens the bite of the raw aromatics. The result is a seriously delicious, refreshing gazpacho that still feels true to its roots.

    Key Ingredients

    • Tomatoes: For the best gazpacho, I use ripe, juicy tomatoes. Summertime is ideal for finding them, but if you’re craving gazpacho out of season, don’t worry! While fresh garden-grown tomatoes usually have way more flavor, since this recipe roasts the tomatoes before blending, store-bought tomatoes work fine.
    • Bell Pepper: I add one roasted red bell pepper to the blender. You can buy jarred roasted peppers or roast your own (I’ve included instructions in the recipe).
    • Onion and Garlic: Roasting the tomatoes with olive oil, onion, and garlic mellows their flavors, making the soup extra delicious.
    • Croutons: Authentic Spanish gazpacho often includes bread blended into the soup for creaminess and thickness. Rustic bread works well, but try my garlic croutons for extra flavor! They’re made with garlic, shallot, and herbs and are also amazing on top of the soup for a nice crunch.
    • Sherry Vinegar: This aged vinegar is traditionally used in Spanish gazpacho (called Vinagre de Jerez in Spain). I love it as an all-purpose vinegar for salad dressings, too.
    • Cucumber: Another classic gazpacho ingredient, I peel and use seedless cucumbers. If your cucumber has seeds, remove them before blending.

    Find the full recipe with measurements below.

    How to Make My Favorite Gazpacho

    Tip 1: Prepare the tomatoes. While it’s not 100% necessary, when I make gazpacho, I peel and remove the cores of my tomatoes. After making this recipe a few times, I’ve found that it improves the soup’s texture (especially if you don’t have a high-powered blender).

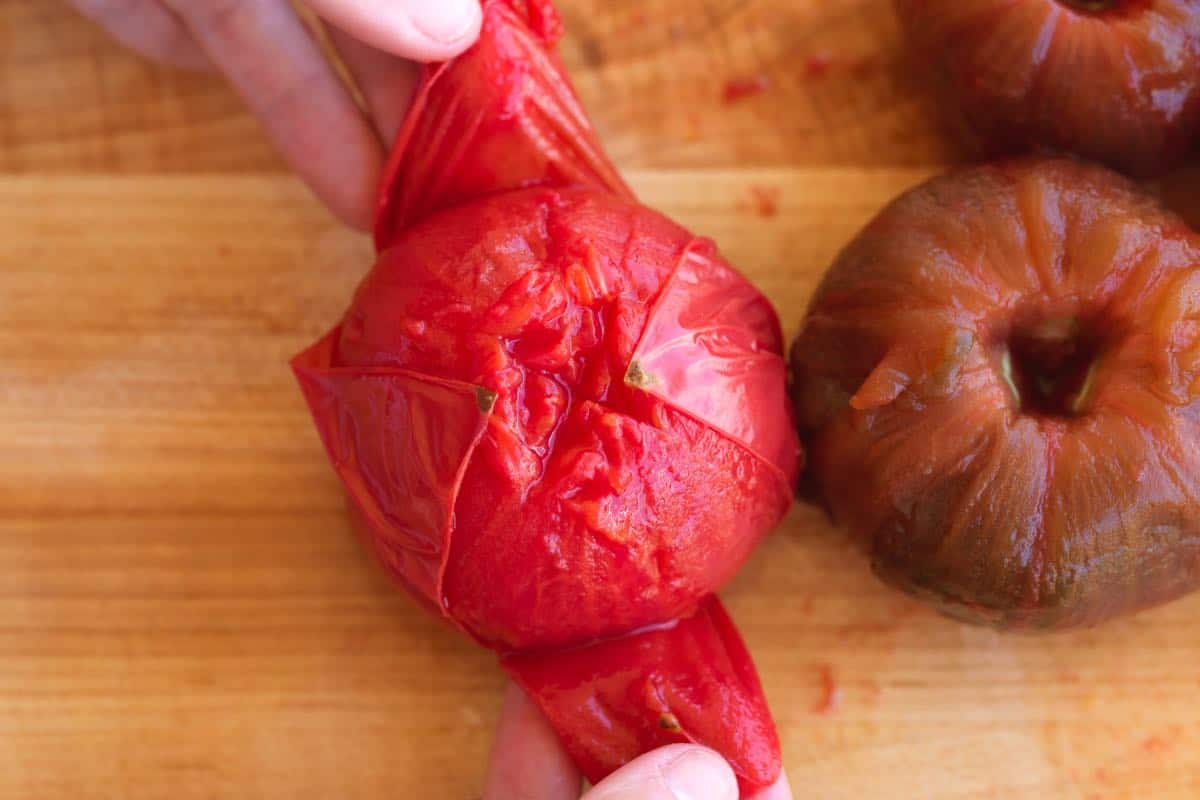
    To peel them easily, score a shallow “X” on the bottom of each tomato, boil for 30 seconds, then transfer to an ice bath. The skins will slip right off.

    Peeling tomatoes for gazpacho

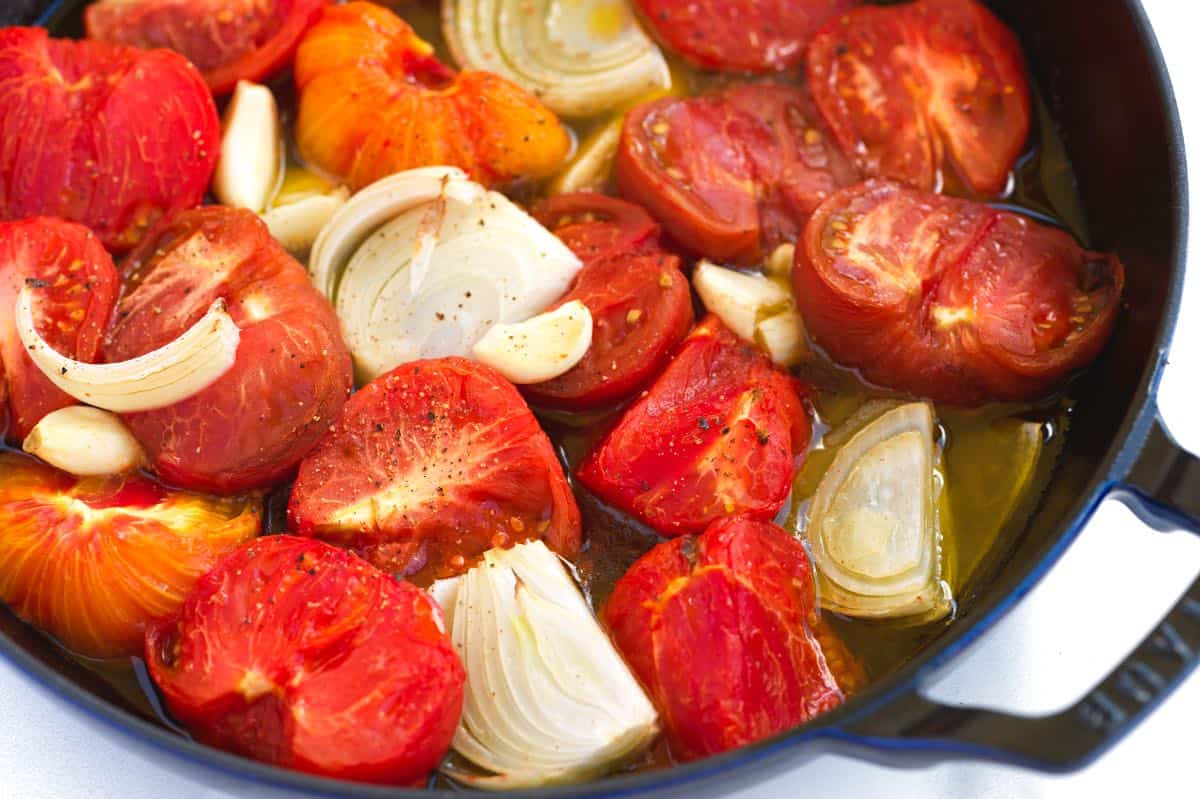
    Tip 2: Lightly roast the vegetables. Roast the tomatoes, garlic, and onion for about 20 minutes to deepen their flavors and mellow any sharp edges. Sometimes, raw gazpacho is slightly overpowering, so roasting tones things down a bit. While the oven’s on, roast a red bell pepper next to the tomatoes, as it softens and peels easily once cooled.

    Lightly roasted tomatoes, onion and garlic

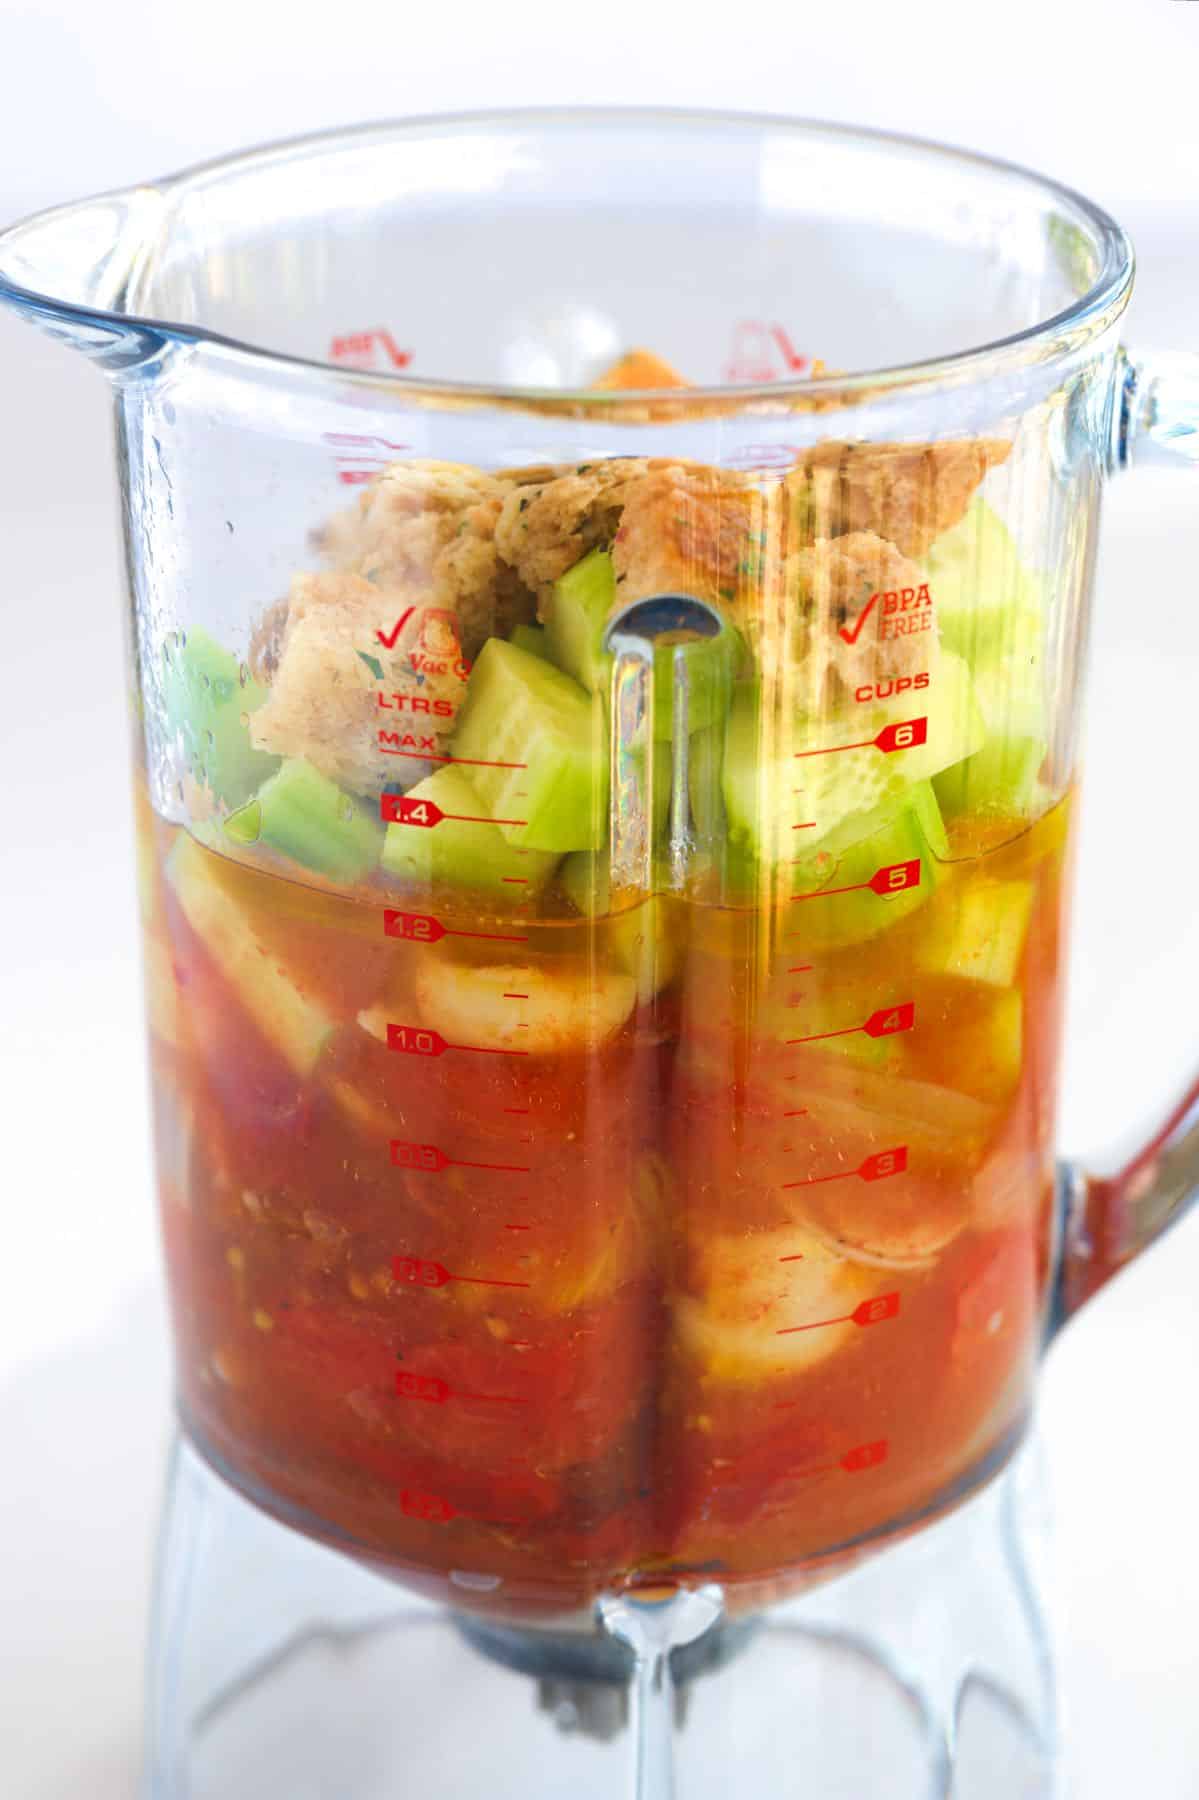
    Tip 3: Blend until smooth (or not!). Add the tomatoes, garlic, onion, and pepper to your blender. Then, toss a peeled cucumber and a few croutons, which have been soaked briefly in water and vinegar to soften. Season with salt and pepper, then blend until smooth, or leave it slightly chunky if you prefer more texture.

    Gazpacho ingredients in a blender

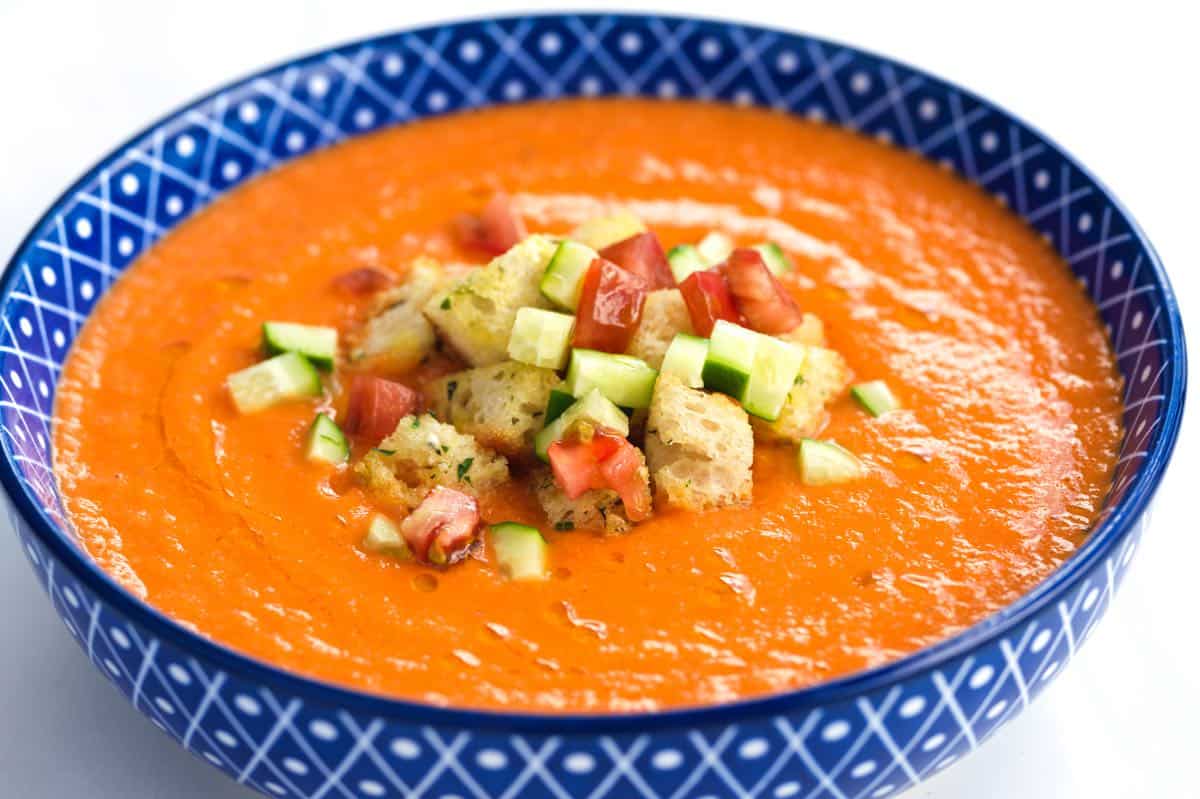
    Tip 4: Chill before serving. Gazpacho tastes best after it chills for a few hours (or overnight) to let the flavors bloom. I make it the day before and leave it in the refrigerator overnight. To serve, add it to a bowl or glass (yep, you can drink it, too). Then, top with some chopped cucumber, tomato, and more croutons.

    More Tomato Soup Recipes

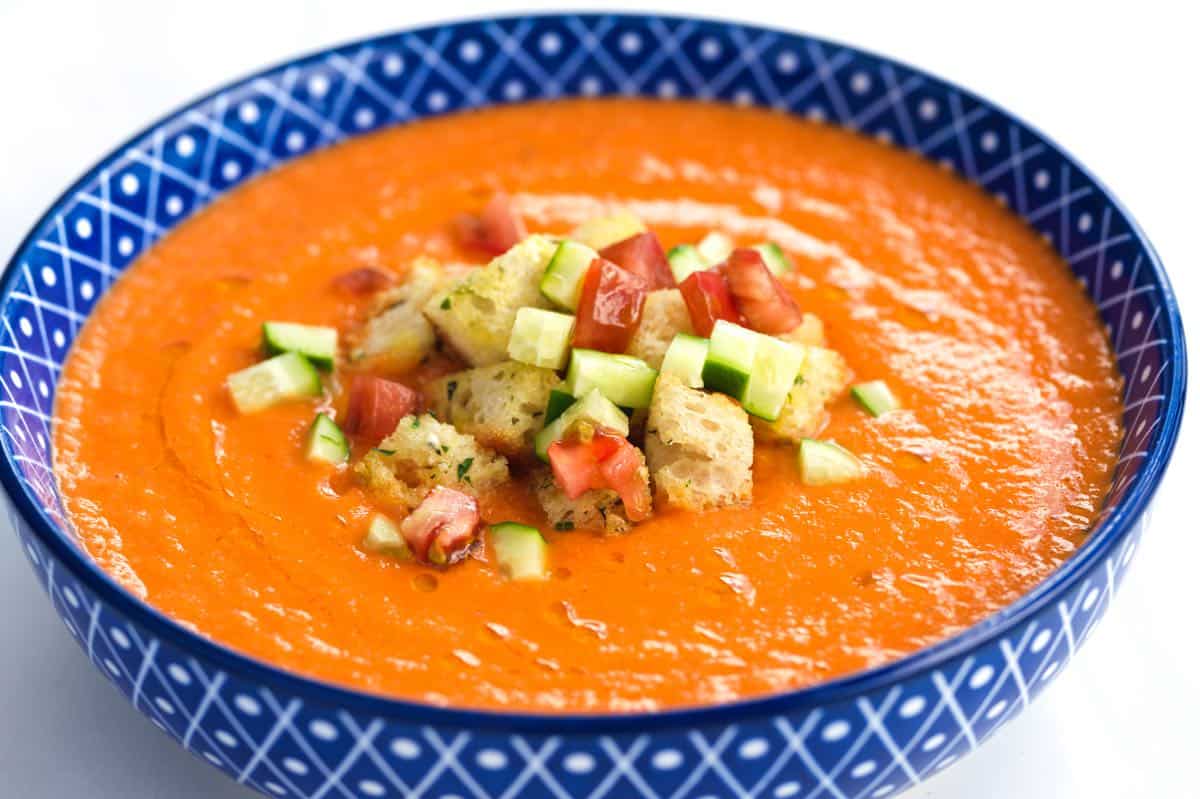
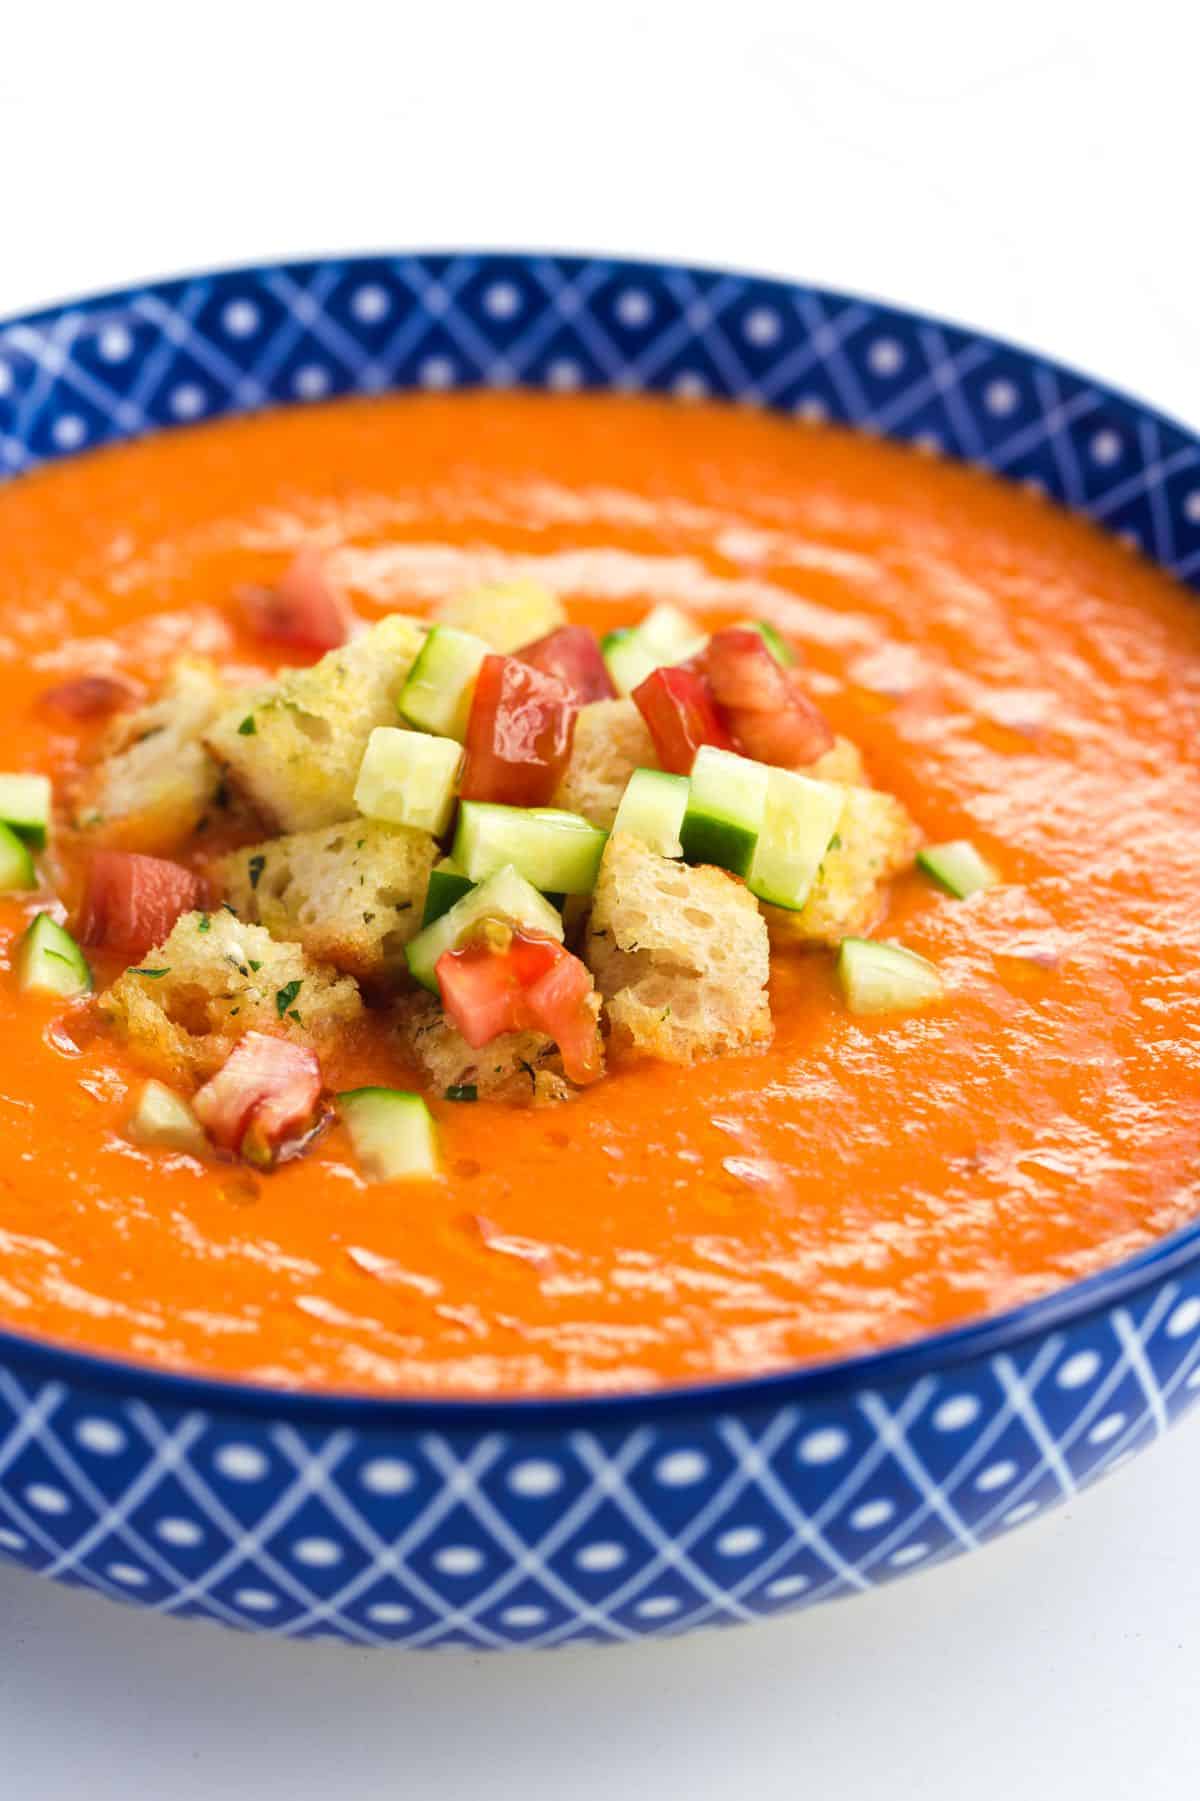
    A bowl of Gazpacho

    The Best Gazpacho

    • PREP
    • COOK
    • TOTAL

    This tomato gazpacho recipe is unbelievably delicious! We peel our tomatoes. It’s easy and develops a much better texture (especially if you don’t have a high-powered blender). It’s not 100% necessary, but after making quite a few batches of this soup, we’ve noticed that those made with peeled tomatoes have a much more pleasant texture.

    We use this recipe for garlic croutons. If you do not want to make your own, you can substitute store-bought croutons or cubed rustic bread.

    Makes 6 cups

    You Will Need

    2 ½ pounds ripe tomatoes, 6 to 7 medium tomatoes (1130g)

    1 red bell pepper

    6 cloves garlic, smashed and peeled

    Quarter of a large onion, sliced

    3 tablespoons olive oil, plus more for serving

    ½ cup garlic croutons, use garlic croutons recipe, or substitute cubed rustic bread

    ¼ cup water (60ml)

    1 teaspoon sherry vinegar or balsamic vinegar

    1 medium cucumber, peeled and cut into 1-inch pieces

    Salt and fresh ground black pepper

    Directions

      1Prep: Heat the oven to 400°F (204°C). Set aside a wide baking dish as well as a small baking sheet.

      2Roast the bell pepper: Rub the pepper with a bit of olive oil, then place it on the small baking sheet. Roast for 20 to 30 minutes, or until the skin looks wrinkly and you see dark spots. Remove from the oven. When cool enough to handle, peel away the skin, remove the stem and seeds, and discard them.

      3Prep the tomatoes (optional, but recommended): While the pepper roasts, fill a large bowl with ice water to make an ice bath. Bring a medium pot of water to a boil. Cut a shallow “X” into the bottom of each tomato, then carefully submerge them in the boiling water for 30 seconds. Transfer to the ice bath to cool. Once cooled, peel away the skins.

      4Core and roast tomatoes: Remove the tomato cores and slice each tomato in half. Place them into the large baking dish (it’s okay if they touch). Scatter the smashed garlic cloves and sliced onion around the tomatoes. Drizzle with 2 to 3 tablespoons of olive oil, sprinkle with ½ teaspoon of salt, and finish with a few twists of black pepper. Roast for 20 minutes.

      5Soak the croutons: In a small bowl, combine the croutons with water and vinegar. Set aside until the croutons absorb all the liquid and look soggy.

      6Blend: Transfer the roasted tomato mixture (including onions, garlic, and juices) to a blender. Add the roasted pepper, soaked croutons, cucumber, ¼ teaspoon salt, and a few twists of black pepper. Blend on high until smooth or to your preferred texture. Taste and adjust with more salt, pepper, or vinegar as needed.

      7Chill before serving: Gazpacho tastes best when chilled. If you can, refrigerate for a few hours, if not overnight, to let the flavors bloom. Serve cold, drizzled with olive oil and topped with chopped cucumber, tomato, and more croutons.

    Adam and Joanne’s Tips

    • Storing: Homemade gazpacho keeps up to 4 days in the refrigerator when stored in an airtight container. You can also freeze it for up to 3 months (the texture may thin a bit, so consider re-blending it briefly before serving).
    • Gluten-free / bread-free: Croutons and bread add a silkiness and thickness to the soup, but you can leave them out and still make excellent gazpacho.
    • The nutrition facts provided below are estimates.

    Nutrition Per Serving
    Serving Size
    1/4 of the recipe (1 1/2 cups)
    /
    Calories
    218
    /
    Total Fat
    11.6g
    /
    Saturated Fat
    1.7g
    /
    Cholesterol
    0mg
    /
    Sodium
    560.6mg
    /
    Carbohydrate
    26.7g
    /
    Dietary Fiber
    5.2g
    /
    Total Sugars
    10.9g
    /
    Protein
    5.5g


    AUTHOR:

    Joanne Gallagher

    Adam and Joanne of Inspired Taste

    We are Adam and Joanne Gallagher, the creators of Inspired Taste. Established in 2009, Inspired Taste grew from a childhood dream into one of the internet’s most trusted recipe sites with hundreds of reliable recipes, step-by-step videos, and expert tips.More About Us
    Source link

  • Perfect Lobster Rolls Recipe

    Perfect Lobster Rolls Recipe

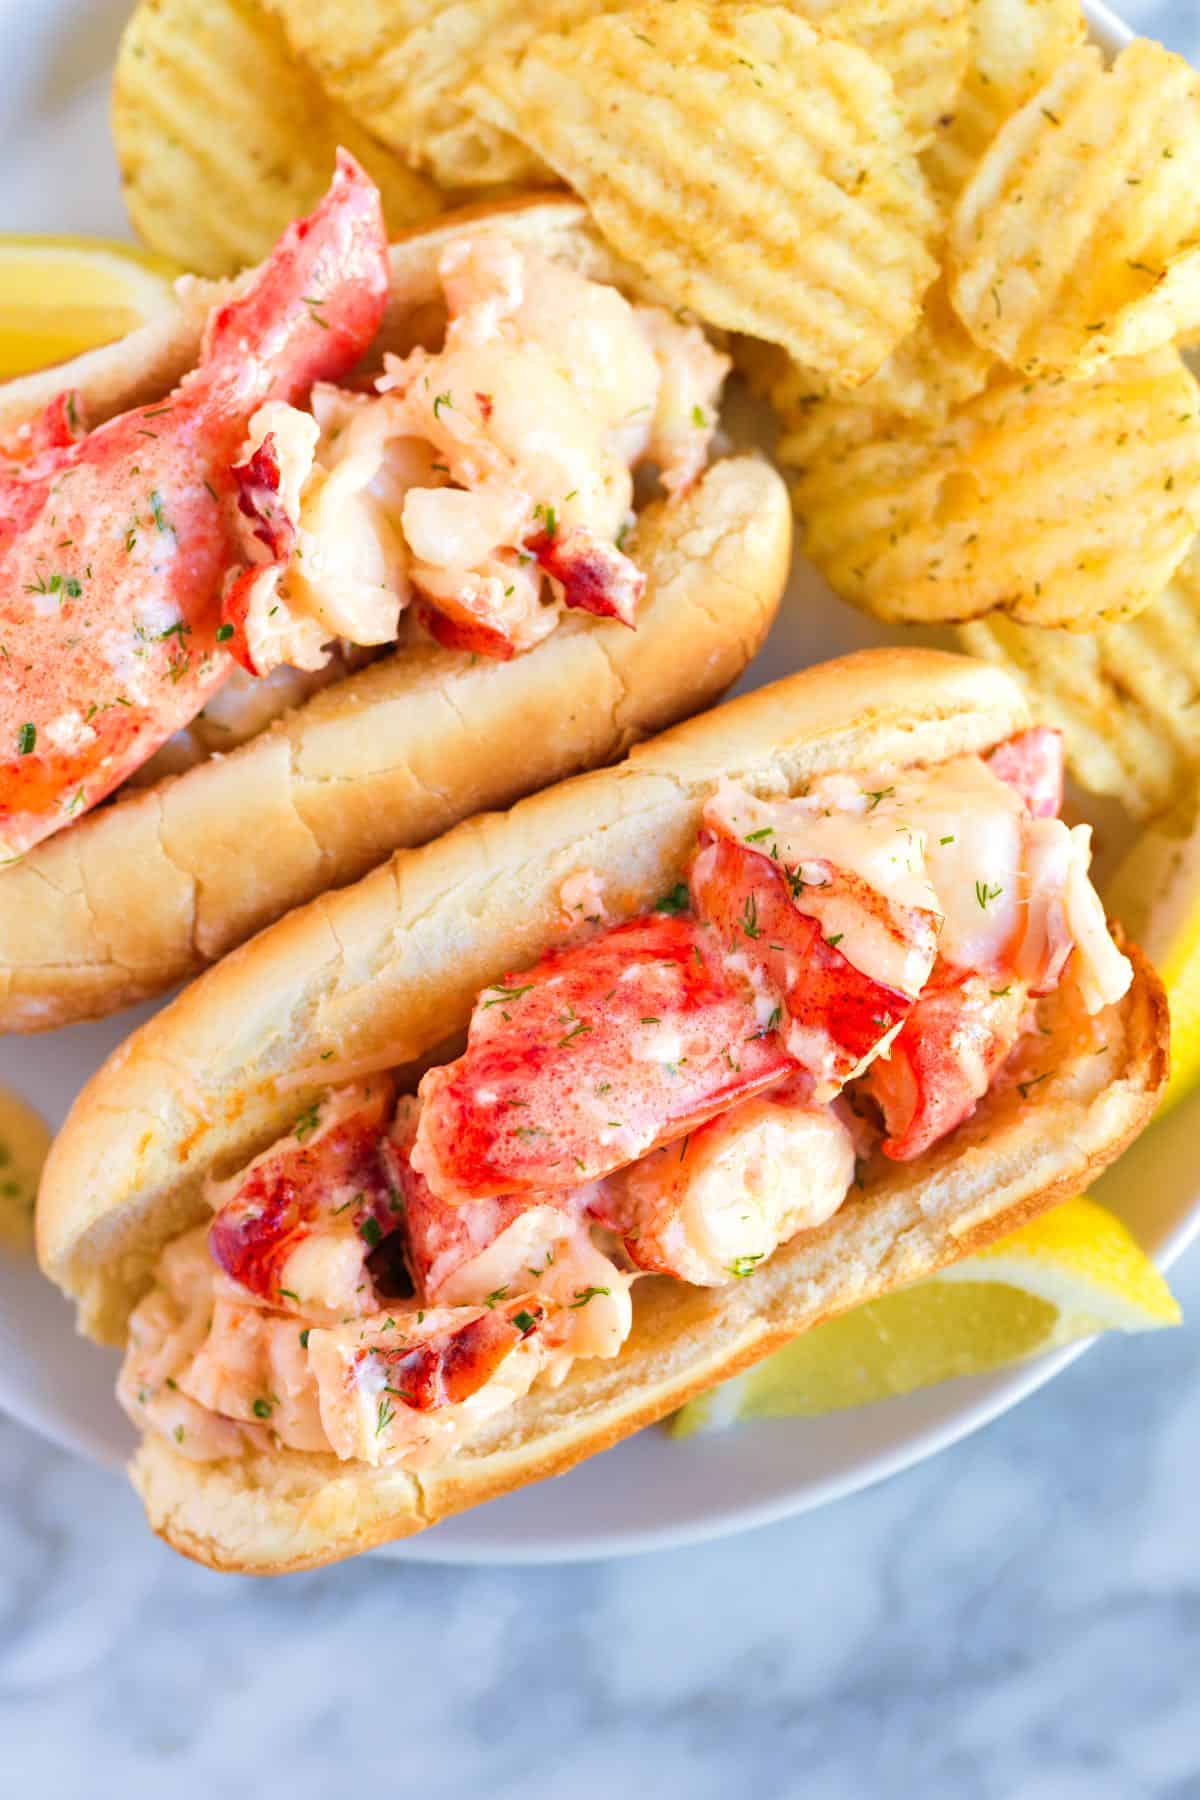
    These are the best homemade lobster rolls we’ve ever had! Our recipe combines perfectly cooked lobster with the most incredible warm butter and mayonnaise dressing. These are almost too good!

    Best Homemade Lobster Rolls

    Lobster rolls come with a lot of opinions. Mayo, butter, celery, hot, warm, the bun, it goes on. In Maine, you’ll see chilled lobster dressed in mayonnaise, while in Connecticut, it’s common to see the lobster tossed in warm melted butter.

    These homemade lobster rolls are amazing and made with warm melted butter AND creamy mayonnaise. You might also enjoy our easy shrimp salad or these Maryland crab cakes.

    Key Ingredients

    • Lobster: We start with live lobsters and cook them ourselves. For the best lobster roll, you should cook your own lobsters too! I’ve shared Richard’s method below to guide you through it. If you already have cooked lobster meat, you’ll just need to toss it into the butter and mayo sauce.
    • Butter: We toss our perfectly cooked lobster meat into a warm bath of melted butter (yum!).
    • Mayonnaise: To finish the sauce, we add a little bit of mayo to the warm butter. It makes it a bit creamier (it’s so incredibly good!). When I have it on hand, I use homemade mayo.
    • Fresh Herbs: We love the lobster flavor to come through, so we only add a little bit of fresh herbs. I usually stir in a couple of teaspoons of fresh chopped chives and dill.

    How to Make Lobster Rolls

    We highly recommend starting with live lobsters to make the best lobster rolls at home. This way, you have complete control over the cooking process, ensuring the lobster meat is perfectly cooked. If you prefer to skip handling live lobsters, our lobster roll recipe below specifies the amount of cooked lobster meat needed.

    While killing a lobster may seem daunting, it’s a necessary step. Our method is quick and effective. Place the lobster on a cutting board and find the faint cross on its shell where the head and body connect. Quickly and firmly insert a large, sharp knife into this cross, pushing down through the head and between the eyes. This severs the spinal cord, causing instant death. (The legs may still twitch, but this is a natural reflex.)

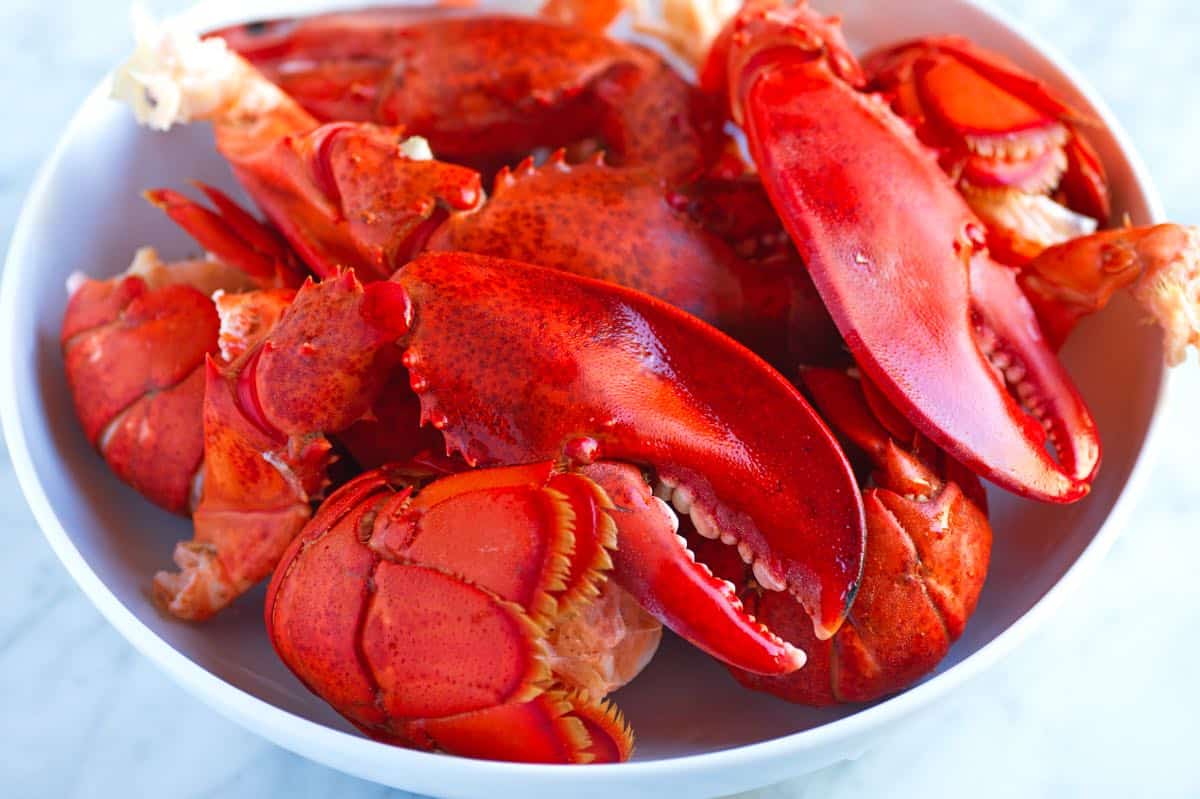
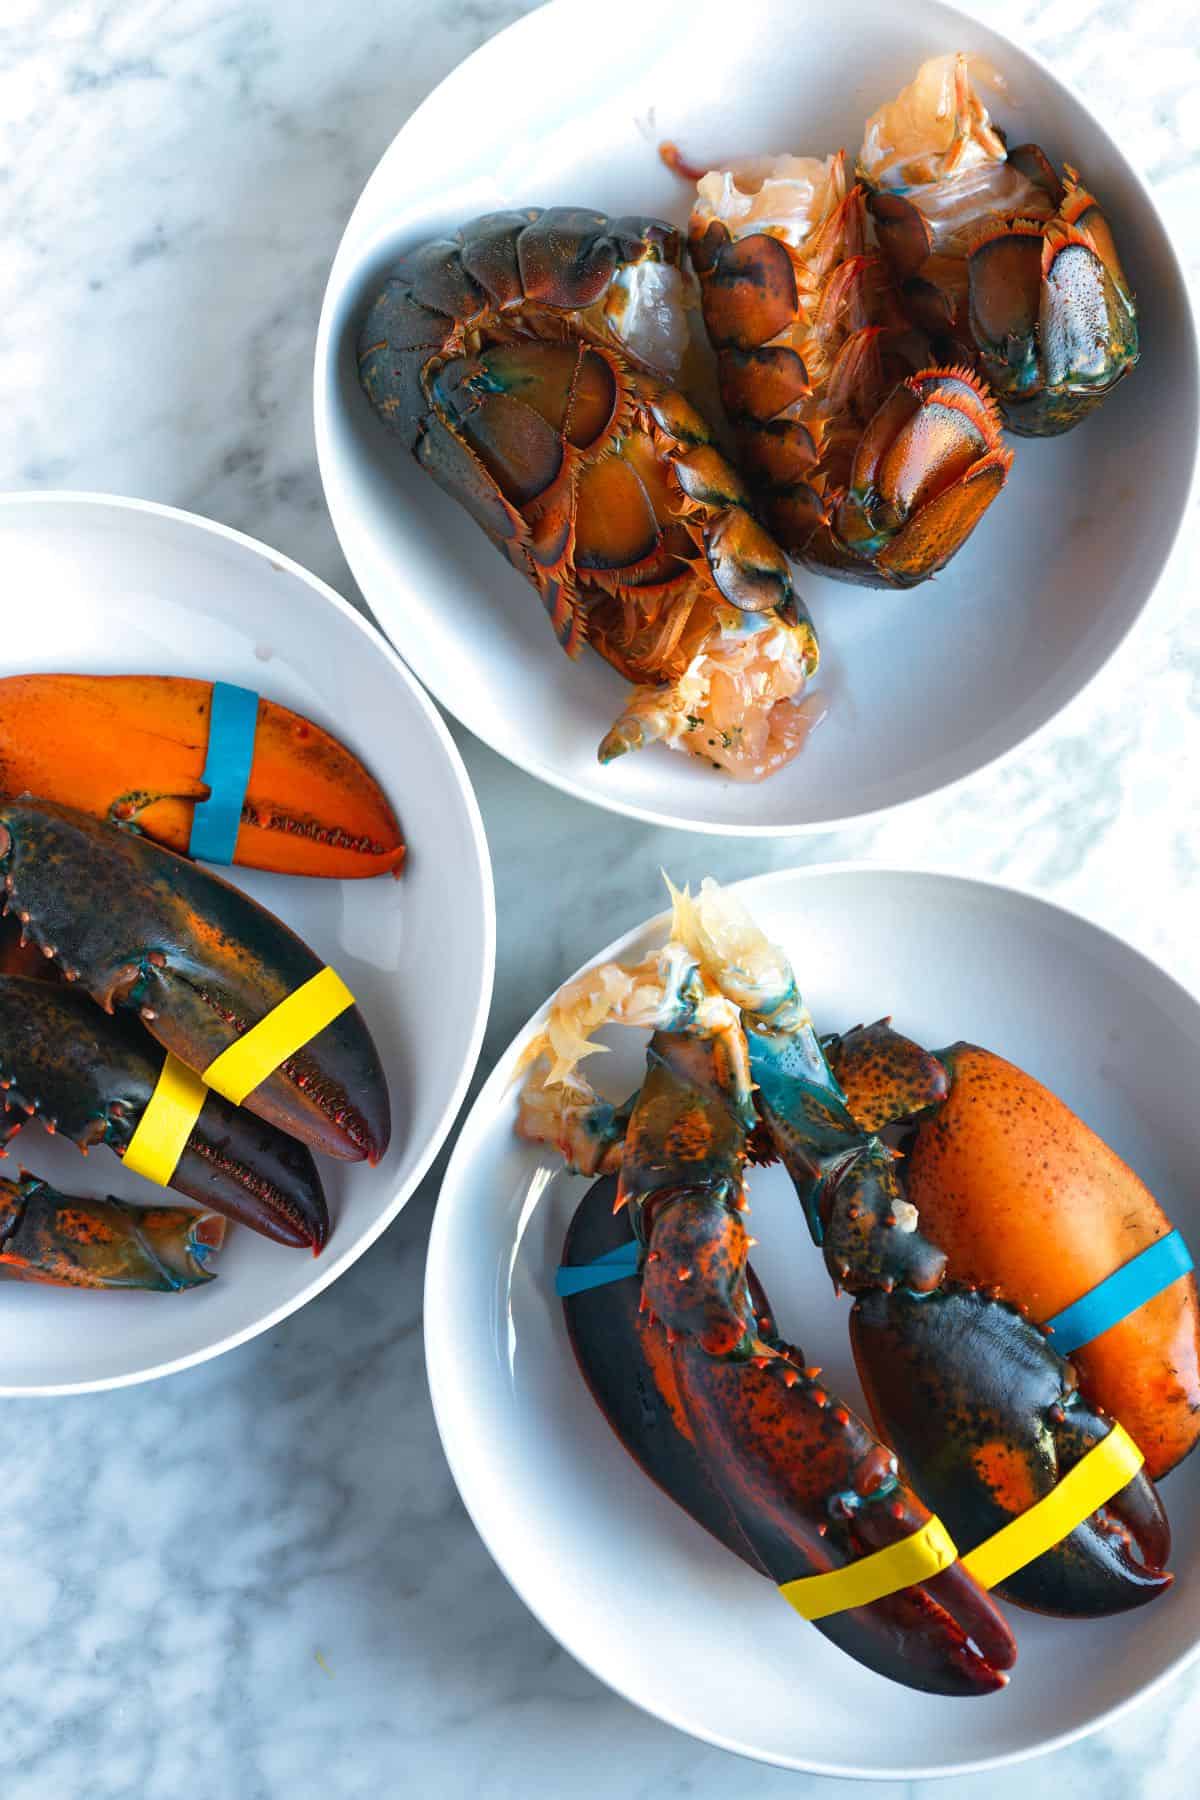
    Lobster tails and claws ready to cook for lobster rolls

    Remove the tails and claws from the body. You can save the bodies for another time for dishes like lobster stock, bisque, or mac and cheese. I freeze them.

    Cooked lobster

    Boil the tails and larger claws for 5 minutes and the smaller claws for 4 minutes. Allow the cooked lobster pieces to cool completely.

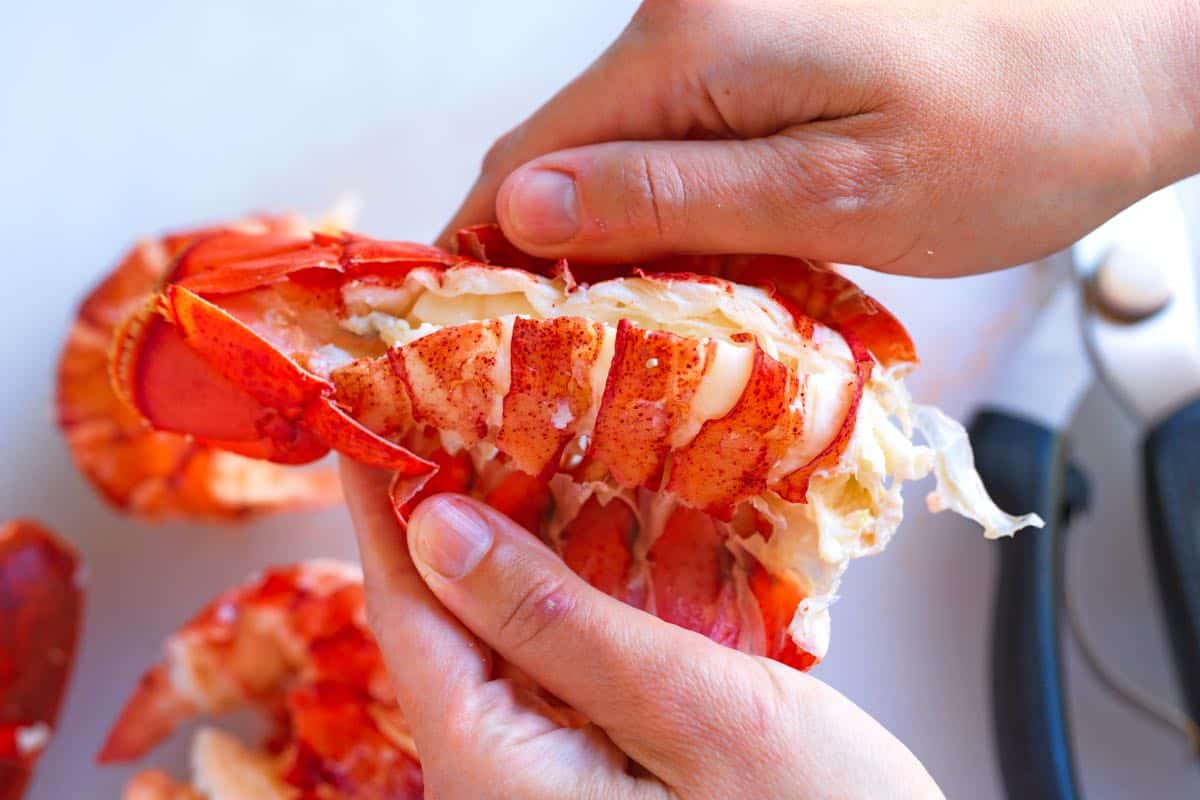
    Removing the Meat from Tails: Use kitchen shears to cut down the top of the tail, then pull back the sides to crack the shell. Gently pull out the tail meat.

    Removing meat from lobster tails

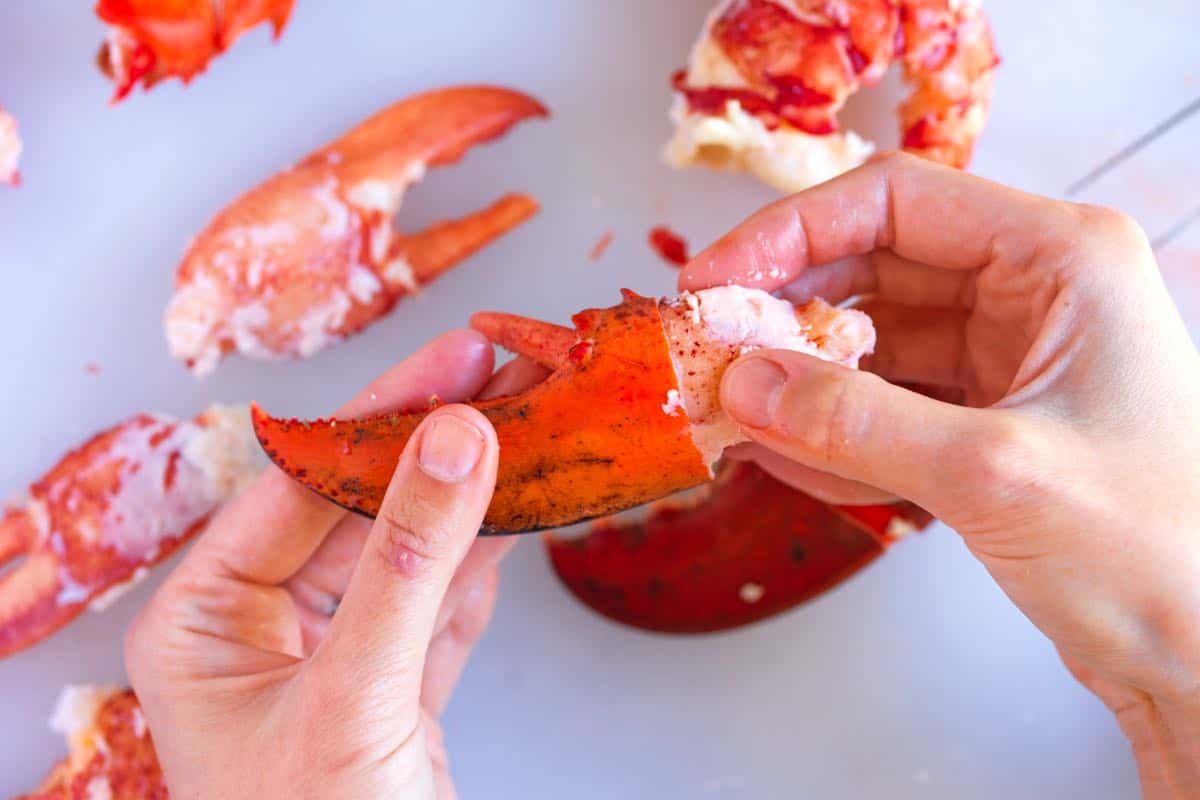
    Removing the Meat from Claws: Twist off the knuckles, then use a knife or mallet to crack the claw shells.

    Removing claw meat from lobsters

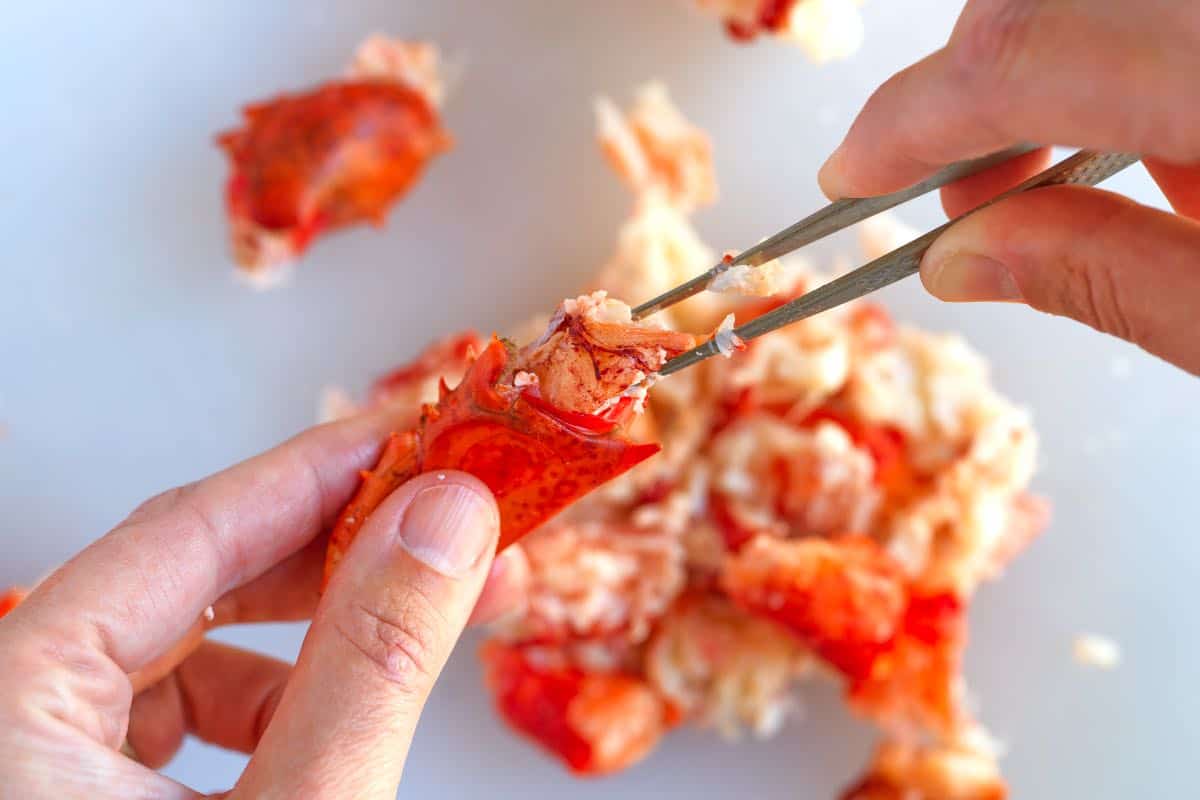
    For smaller legs or pieces, carefully remove the meat, using tweezers or chopsticks if necessary.

    Pulling lobster knuckle meat out of the shells

    Now that you have perfectly cooked lobster meat, you can create mouthwatering homemade lobster rolls!

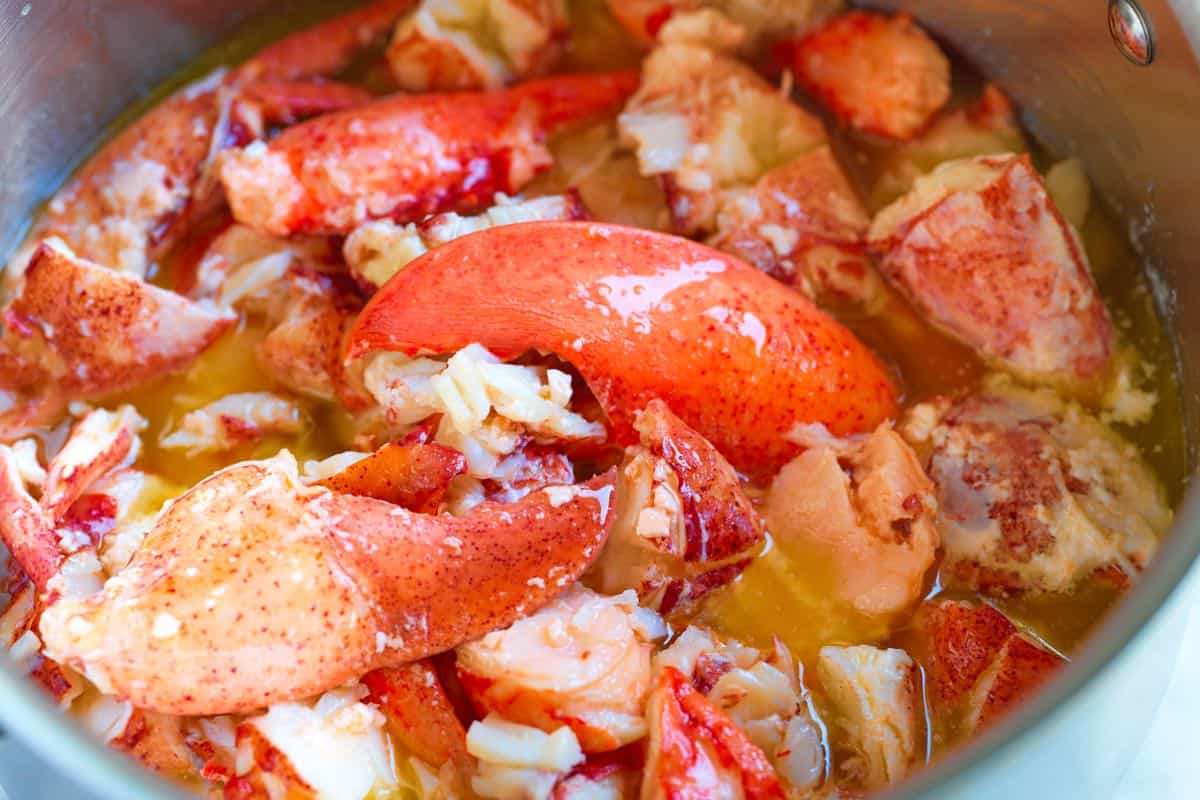
    When you’ve removed all the meat from the shells, toss it into a bath of melted butter (yum). Stop yourself from eating all of the lobster in the butter, and allow it to sit for a few minutes until it’s warmed through. Then, toss the butter-basted lobster meat with some mayonnaise, herbs, and pepper. Then spoon onto lightly toasted rolls and enjoy.

    Lobster in a bath of melted butter ready for lobster rolls

    What to Serve with Lobster Rolls

    I love serving lobster rolls on a soft bun with a summer side like our creamy potato salad, this herb potato salad, or my creamy pasta salad. A handful of potato chips is a good idea, too. For more ideas, try homemade coleslaw or my favorite broccoli slaw.

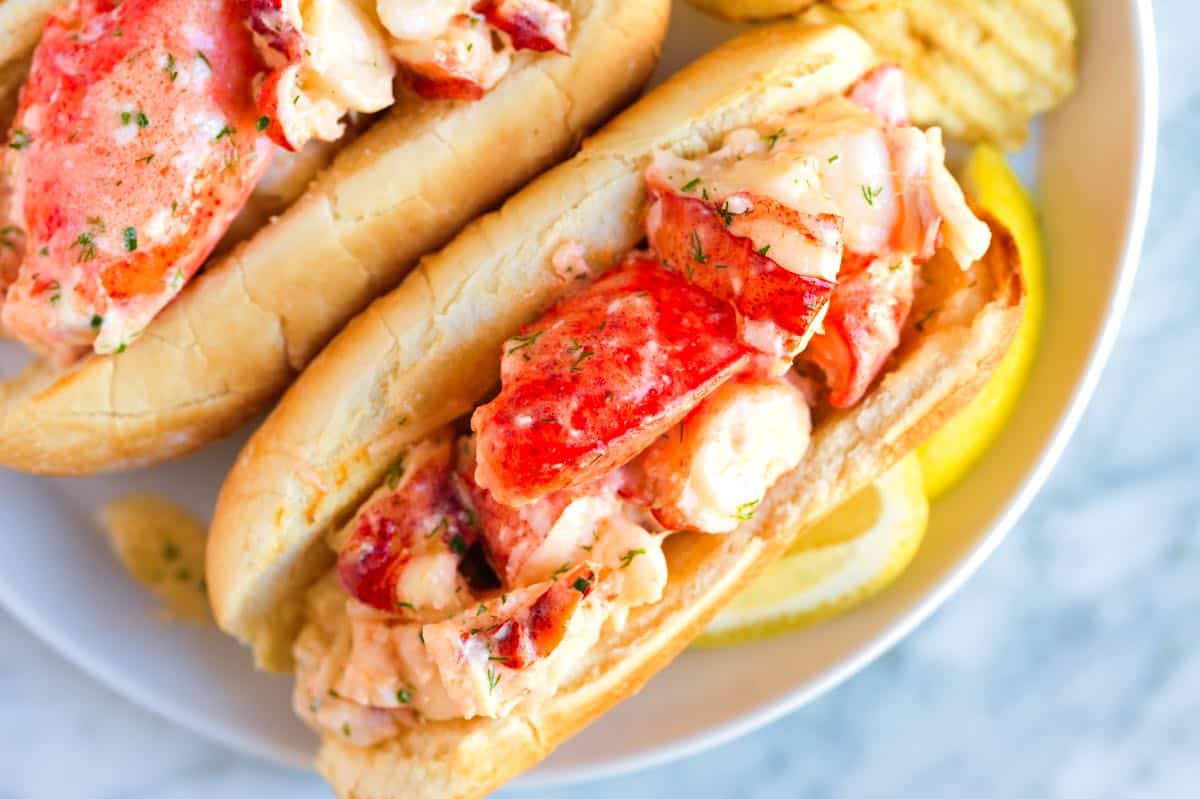
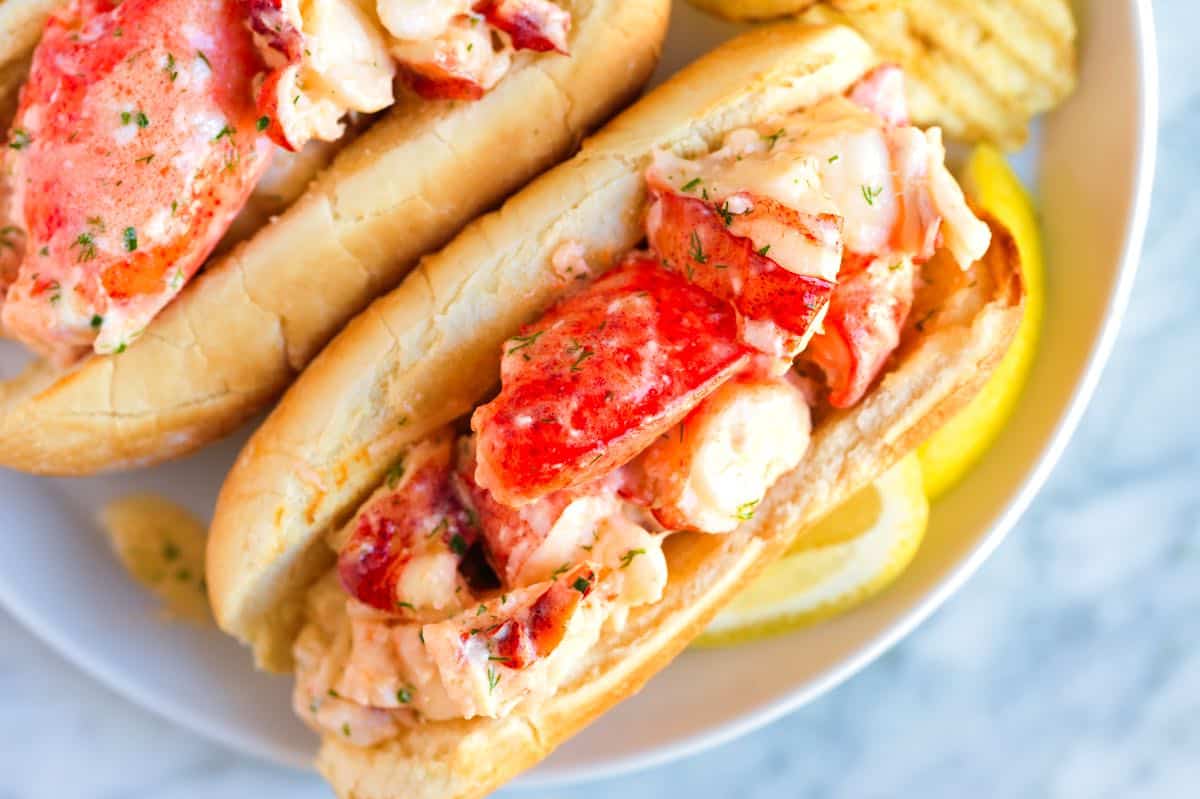
    Homemade Lobster Rolls with butter and mayo

    Perfect Lobster Rolls

    • PREP
    • COOK
    • TOTAL

    I’m not exaggerating when I say that these homemade lobster rolls with perfectly cooked lobster tossed in a butter and mayo dressing are the best we’ve had. For the most mouthwatering texture, start with live lobsters. Our method for cooking the lobster guarantees perfectly cooked lobster. If you are uncomfortable killing live lobsters, buy whole steamed lobsters or lobster meat.

    For this recipe, we separate the claws and tail from the bodies. We won’t use the lobster bodies in this recipe, but you can save them in the freezer for another day (they make incredibly delicious lobster mac and cheese–coming soon).

    Makes 4 rolls

    You Will Need

    4 whole lobsters, 1 ½ pounds each, or 20 ounces cooked lobster meat

    2 tablespoons salt

    6 ounces salted butter

    1/4 cup mayonnaise, see homemade mayo

    1 teaspoon chopped fresh dill

    1 teaspoon finely chopped chives

    3 to 4 twists fresh ground pepper

    4 hoagie or sausage rolls

    Directions

    • Prepare Lobsters for Cooking
    • 1If your lobsters are live, pick up a lobster by holding it right behind the head, and lay the lobster on a cutting board. To protect your hand, use a clean dish towel to hold the lobster in place.

      2Find the faint cross on the shell (carapace) where the lobster’s head attaches to the body. With a large sharp knife, firmly insert the tip into this cross and push it down through the head, between the eyes. This action severs the spinal cord, instantly killing the lobster. The legs might twitch a little afterward, but the lobster is dead.

      3Remove the claws and tails. Separate the lobster parts by size: tails in one pile, large claws in another, and finally, all the small claws together in a third pile.

      4Discard or save the lobster bodies for another recipe. The bodies can be placed into a freezer-safe container and stored in the freezer for up to 6 months.

    • Cook Lobster
    • 1Bring a large pot of water to a boil with two tablespoons of salt.

      2Cook the tails for five minutes, transfer them to a plate to cool. Next, cook the large claws for 5 minutes. Transfer them to a plate to cool, and finish by cooking the small claws for four minutes.

      3Remove the lobster meat from the shells when the tails and claws are cool enough to handle. For the tails, use kitchen shears to cut down the top of the tails, pull to open, cracking the back slightly, and then pull out the meat. For the claws, use a knife or mallet to crack open the claws and then remove the meat. Use tweezers or chopsticks to remove smaller bits of meat from legs and knuckles.

    • Make Rolls
    • 1Lightly toast four rolls.

      2Melt the butter in a small saucepan over medium-low heat. Reduce the heat to low, then place all of the lobster meat into the warm butter.

      3After five minutes of sitting in the warm butter, spoon the buttery lobster meat into a bowl along with a few spoonfuls of the butter. The remaining butter can be saved in the fridge for other recipes (it’s lovely tossed with pasta).

      4Gently mix in the mayonnaise, dill, chives, and pepper. Divide the lobster between lightly toasted rolls and enjoy.

    Adam and Joanne’s Tips

    • The nutrition facts provided below are estimates. Fat and calories are likely too high since these calculations include all of the butter in the ingredients list. Not all of this butter is actually used in the rolls.

    Nutrition Per Serving
    Calories
    652
    /
    Total Fat
    47.8g
    /
    Saturated Fat
    24.1g
    /
    Cholesterol
    304mg
    /
    Sodium
    1267.5mg
    /
    Carbohydrate
    23.4g
    /
    Dietary Fiber
    1.3g
    /
    Total Sugars
    3.3g
    /
    Protein
    31.9g


    AUTHOR:

    Joanne Gallagher

    Source link

  • Essential Mushroom Powder Recipe

    Essential Mushroom Powder Recipe

    This mushroom powder seasoning recipe is our secret to making almost any savory dish taste better. We stir it into soups, stews, beans, taco fillings, and more!

    Homemade Mushroom Powder Seasoning

    A jar of this homemade seasoning sits next to the salt and pepper in our kitchen. We first tried it after visiting Seattle’s World Spice Merchants. They sell their own version, and it blew us away. The moment we tried it, we knew we needed to figure out how to make it at home. That was years ago, and we’ve been making it for ourselves ever since.

    We’ve shared our love for this umami packed seasoning before and use it in the following recipes: homemade taco seasoning, mushroom stuffing, spaghetti and meat sauce, vegan meatballs, and gravy.

    How to Make Homemade Mushroom Powder

    Tip 1: Use a blender or food processor. If you have a blender or food processor, this really could not be any easier. The base is made from dried mushrooms, which can be found in most larger or specialty grocery stores. Use one variety or mix several together. We love porcini mushrooms for their deep, aromatic flavor.

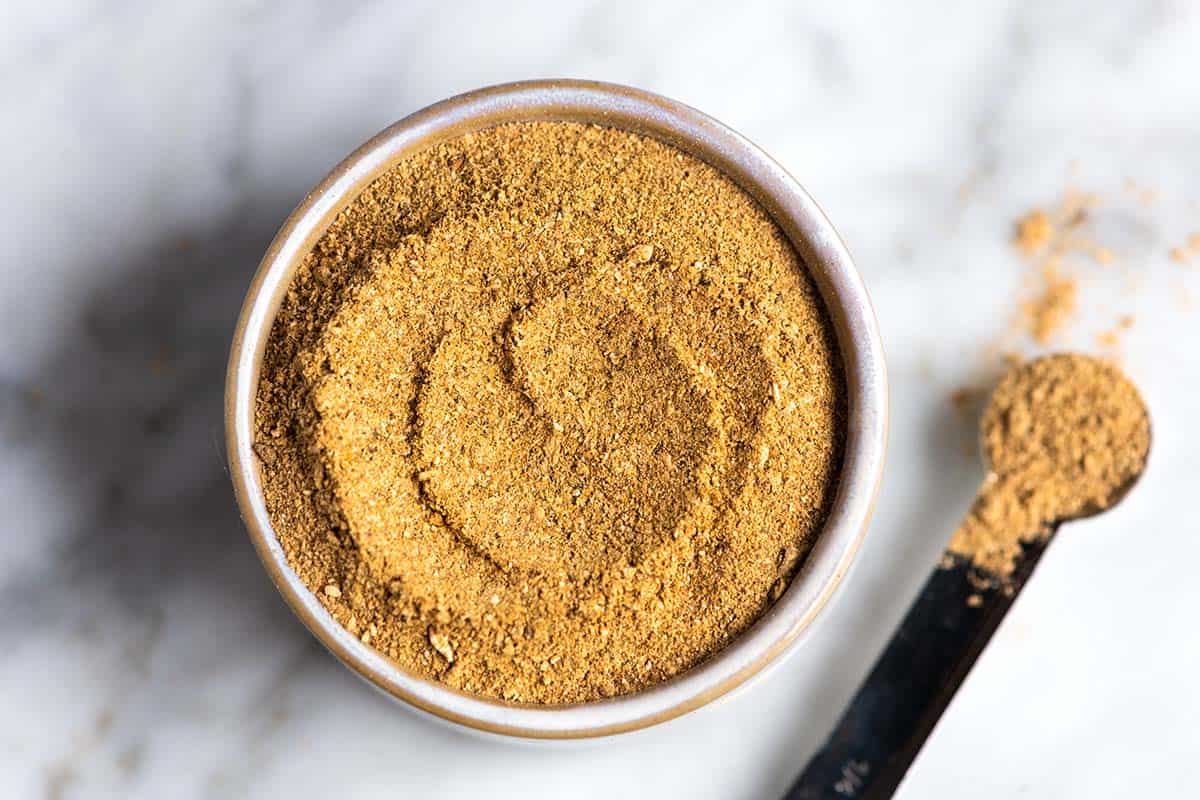
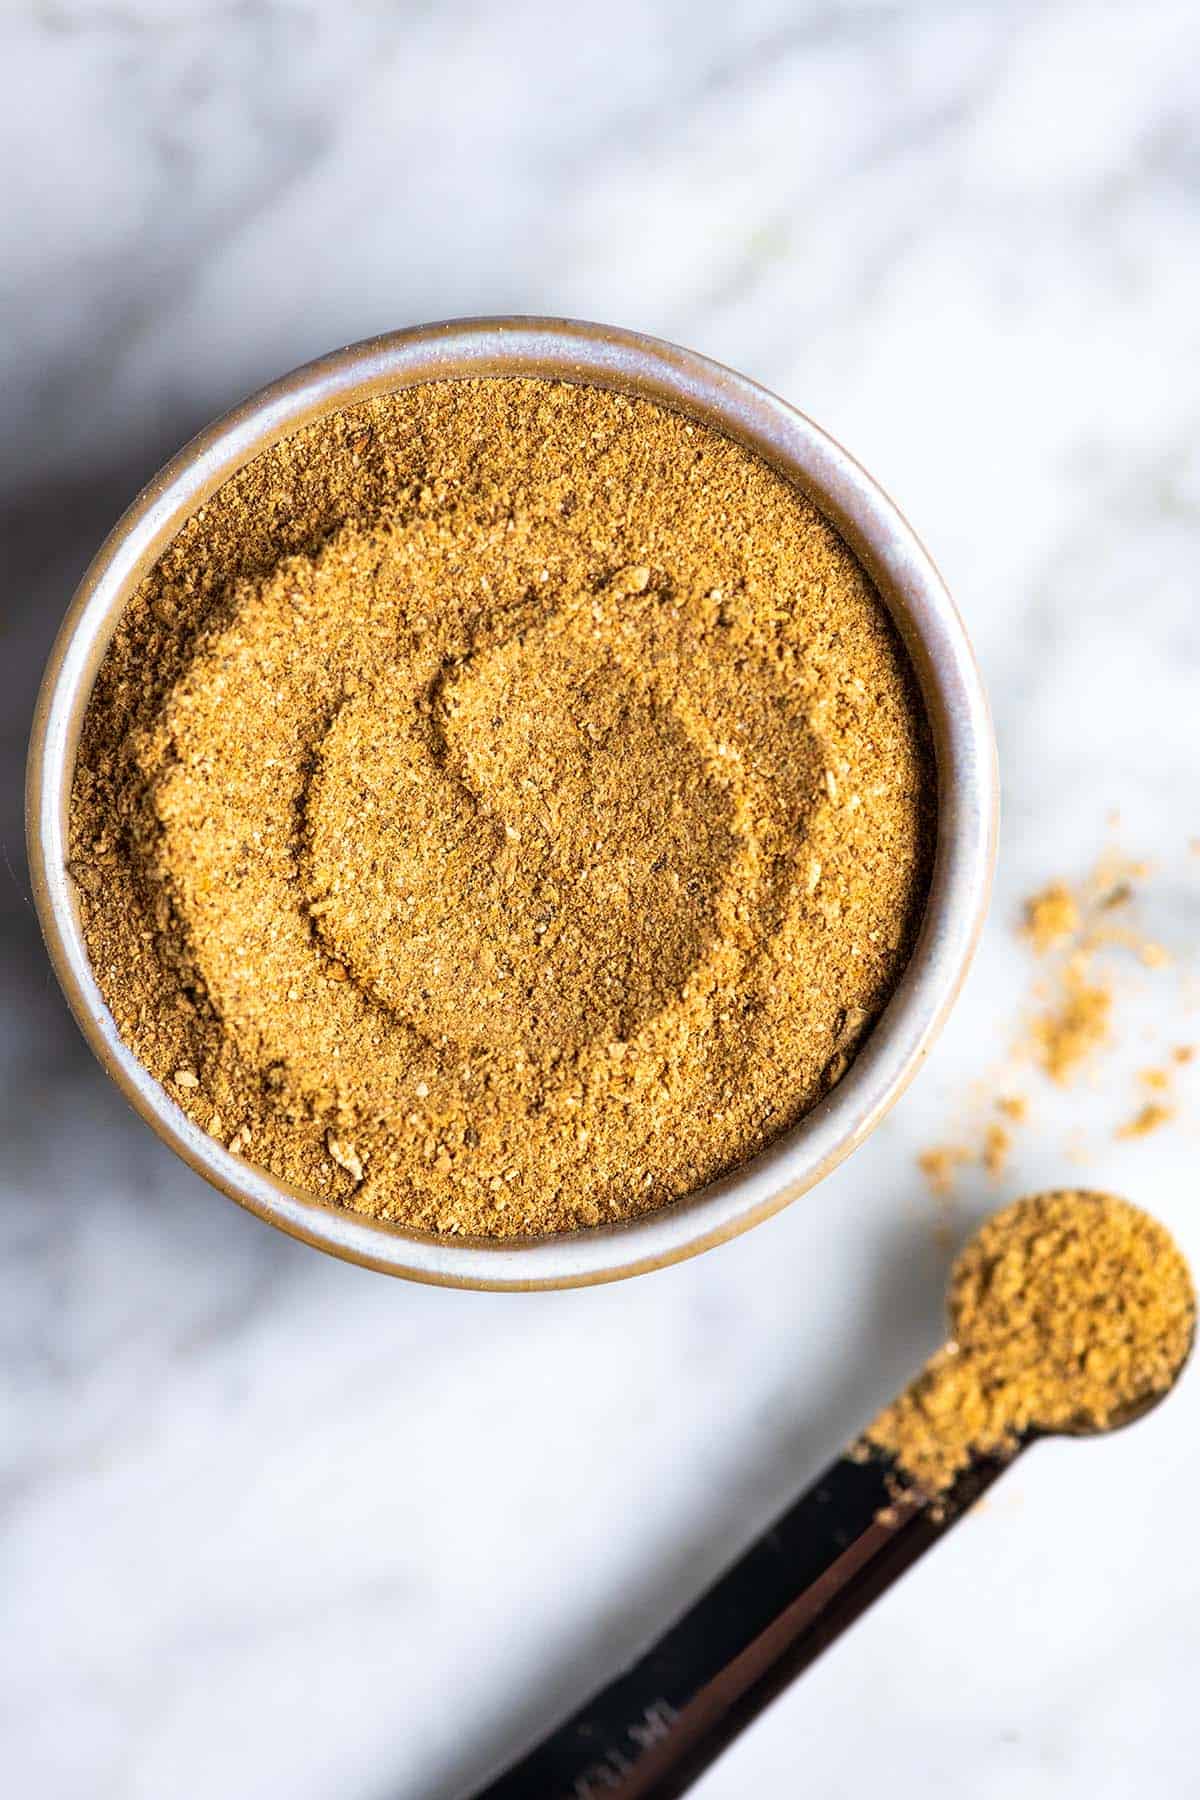
    To make the powder, place the dried mushrooms into a food processor or blender and process until they become a fine powder. That’s it!

    Dried Porcini Mushrooms in a Food Processor
    Mushroom Powder in a food processor

    Tip 2: Make it an all-purpose seasoning. For extra flavor, turn this into a simple all-purpose seasoning blend. After blending the mushrooms, stir in onion powder, garlic powder, pepper, and salt. I’ve shared exact amounts in the recipe below!

    Ways to Use Mushroom Powder

    Homemade Mushroom Powder Seasoning

    Essential Mushroom Powder

    • PREP
    • TOTAL

    This mushroom seasoning is our secret to making almost any savory dish taste better. We stir it into soups, stews, beans, taco fillings, and more! Keep this seasoning blend next to your salt and pepper. Anytime you find a dish that needs a boost of flavor, add a teaspoon or two and then see how magical this blend can be.

    Makes about 1/4 cup

    You Will Need

    1 ounce dried porcini mushrooms, substitute dried shiitake mushrooms

    Directions

      1Place the dried porcini mushrooms into the bowl of a food processor or blender. Close the lid, and then blend until a very fine powder. Do not open the lid. Wait for the fine powder to settle before opening.

      2When the dust has settled, transfer to an airtight container. The mushroom seasoning will keep for up to 6 months.

    Adam and Joanne’s Tips

    • All-purpose seasoning: You can stir additional spices into the blended mushrooms: 1 teaspoon onion powder, 1 teaspoon garlic powder, 1 teaspoon ground black or white pepper, and 1 tablespoon fine sea salt.
    • When blending, don’t be surprised if some mushroom dust comes out of the food processor or blender. A damp dishtowel covering the top of the processor or blender lid can help a little. Even with this, you will likely need to clean up some mushroom dust around the work area.
    • The nutrition facts provided below are estimates.

    Nutrition Per Serving
    Serving Size
    1 tablespoon
    /
    Calories
    21
    /
    Total Fat
    0.1g
    /
    Saturated Fat
    0g
    /
    Cholesterol
    0mg
    /
    Sodium
    0.9mg
    /
    Carbohydrate
    5.3g
    /
    Dietary Fiber
    0.8g
    /
    Total Sugars
    0.2g
    /
    Protein
    0.7g


    AUTHOR:

    Joanne Gallagher

    Adam and Joanne of Inspired Taste

    We are Adam and Joanne Gallagher, the creators of Inspired Taste. Established in 2009, Inspired Taste grew from a childhood dream into one of the internet’s most trusted recipe sites with hundreds of reliable recipes, step-by-step videos, and expert tips.More About Us
    Source link

  • Honey Chicken Bites Recipe

    Honey Chicken Bites Recipe

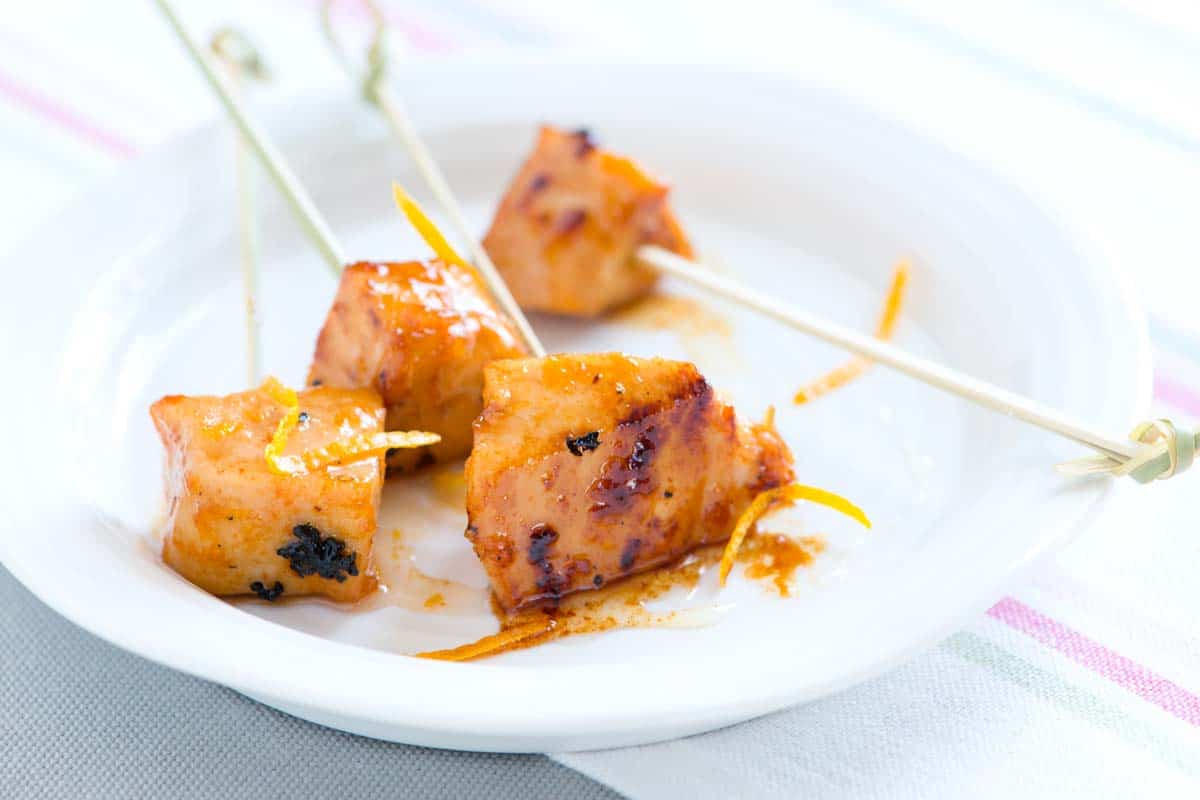
    These easy honey chicken bites are perfect for a simple dinner or appetizer! You can enjoy them over salads, with veggies, or skewered on toothpicks for easy finger food.

    Honey Chicken Bites

    These honey chicken bites are the perfect trifecta of deliciousness: sweet honey, tender chicken, and a bright burst of fresh orange. They’re so easy to make, even the kids can help! Make them for a party or a quick weeknight dinner.

    Serve these chicken bites next to cilantro lime rice, alongside roasted broccoli, tucked into warm corn tortillas, or on top of one of our favorite salad recipes.

    Key Ingredients

    • Chicken: I usually make this recipe with boneless, skinless chicken breasts, but it works just as well with chicken thighs. Whichever you use, cut the chicken into 1-inch pieces to make them bite-size.
    • Butter: I love the flavor of butter in this recipe, but olive oil works just fine if that is all that you have. If you plan to marinate your chicken longer than my suggested 15 minutes, you may find that the butter hardens again. Don’t worry about this, as it will melt again and help the chicken brown as it bakes in the oven.
    • Honey: Honey baked chicken is super delicious (especially with the butter), but maple syrup is an excellent substitute!
    • Orange: I love fresh orange zest in this recipe and use my fine grater (often called a Microplane) to grate it. Lime or lemon are also great options.
    • Hot Sauce (optional): When making this for my son, I leave the hot sauce out, but if it’s just for me or Adam, I go all in with four or five dashes of hot sauce.
    Honey Chicken Bites

    Honey Chicken Bites

    • PREP
    • COOK
    • TOTAL

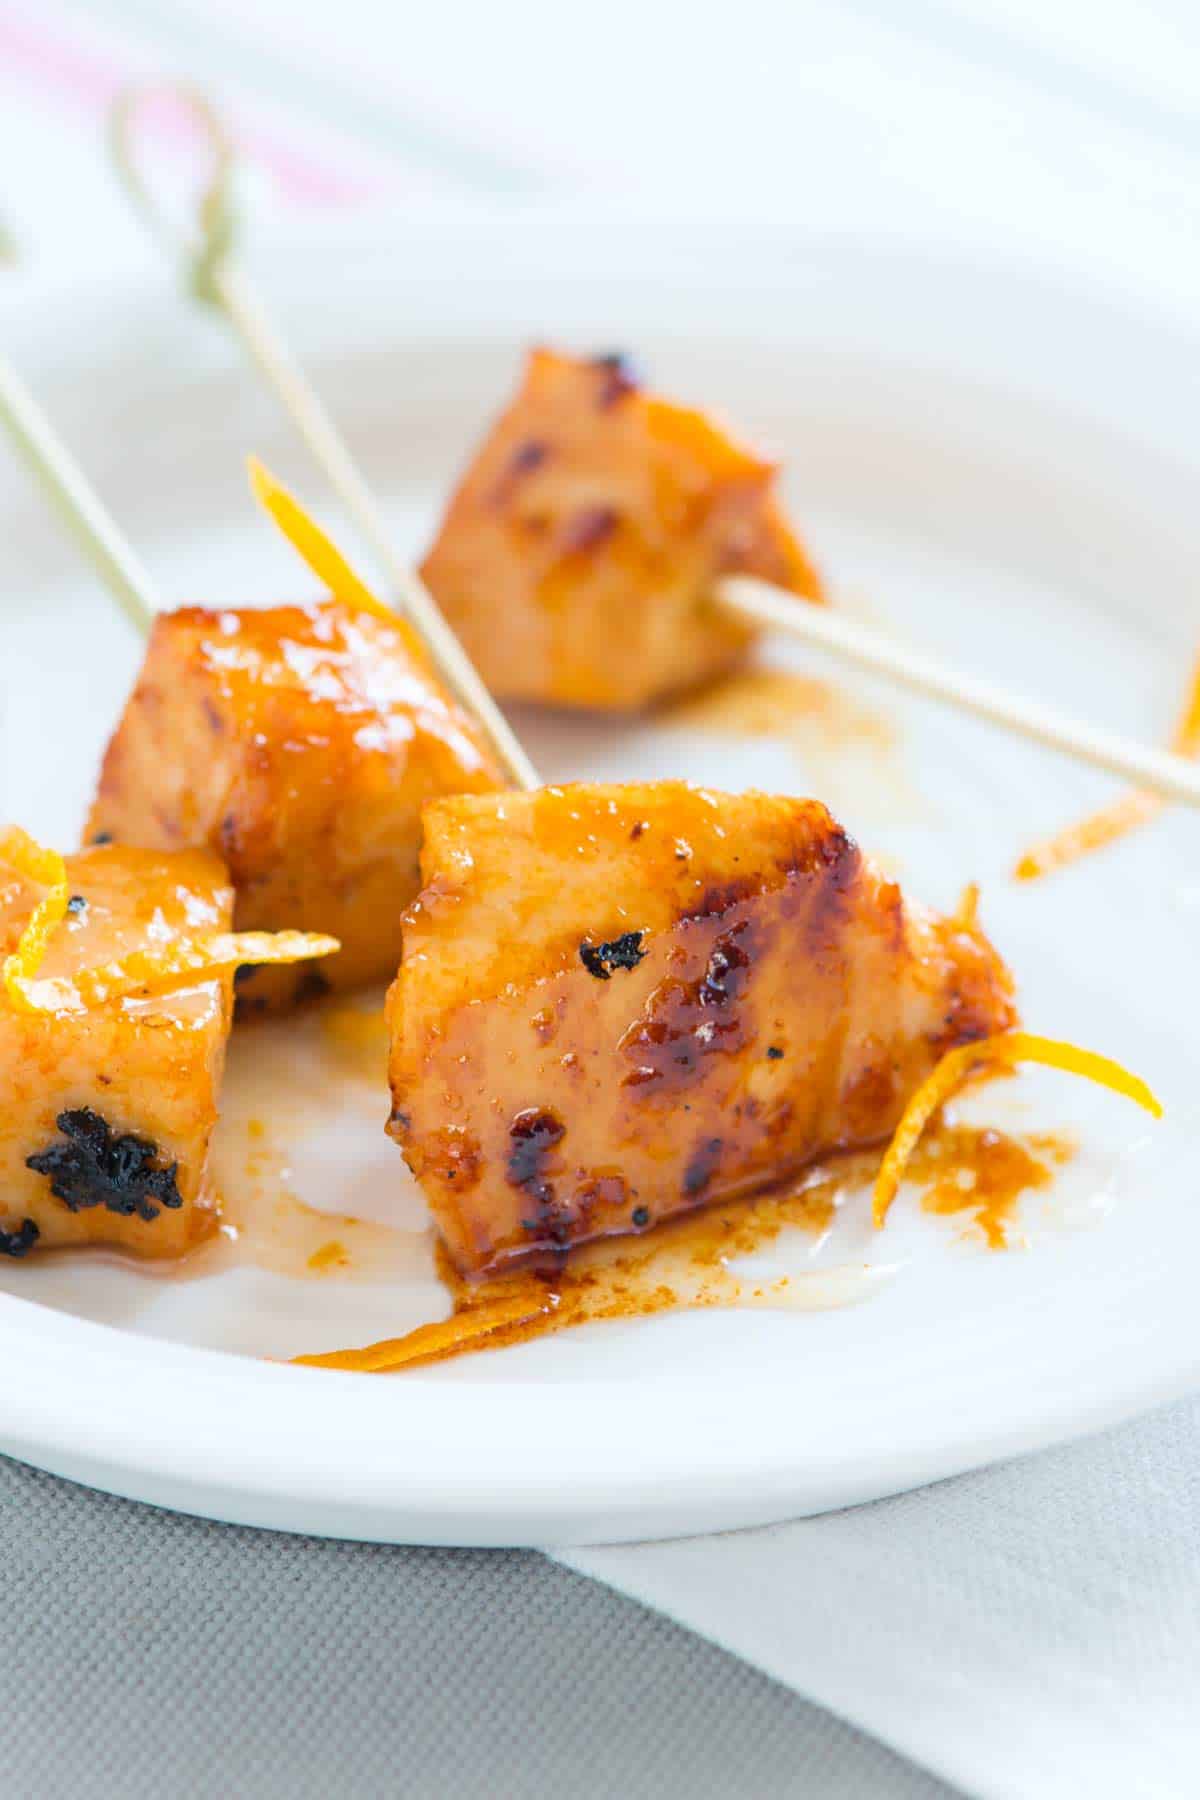
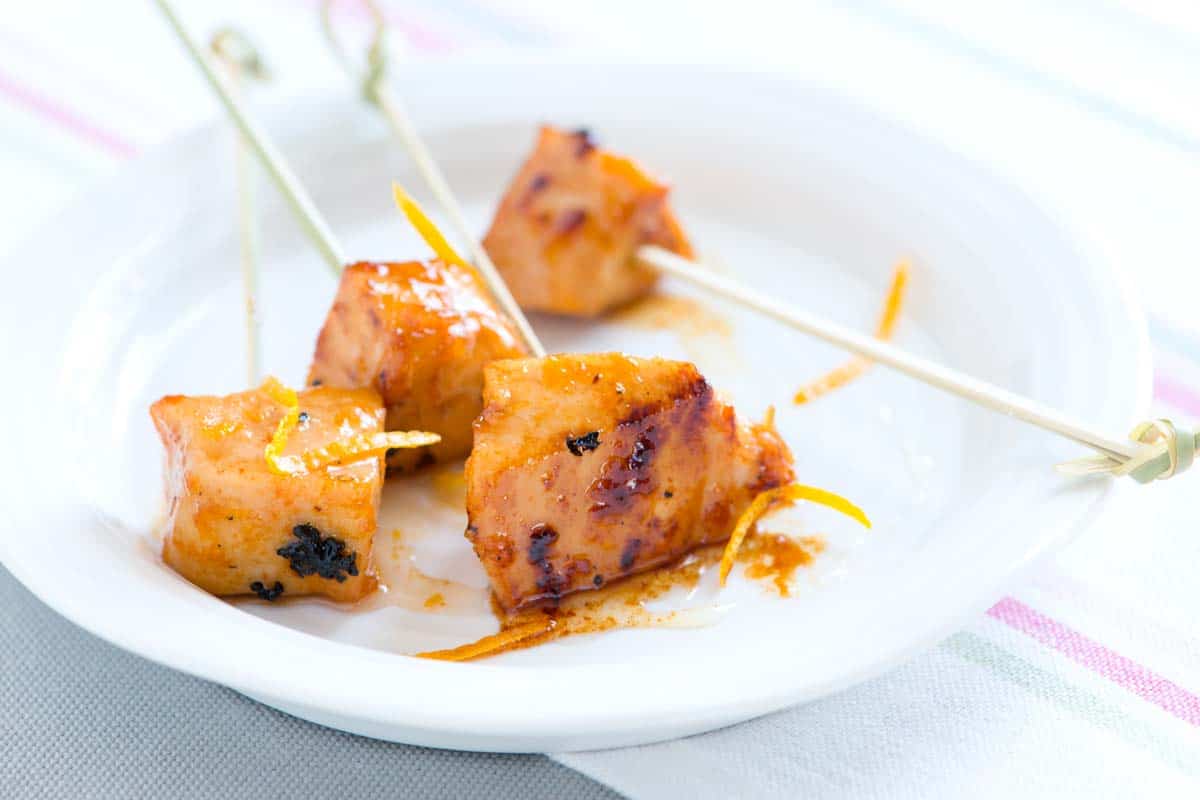
    These little chicken bites make the perfect easy dinner or simple chicken appetizer! I love them on top of a salad or with a side of veggies. To serve as an appetizer, skewer each chicken bite with a toothpick to turn them into finger food!

    4 Servings

    You Will Need

    1 ½ pounds skinless, boneless chicken breast or thighs

    2 tablespoons butter, melted

    2 tablespoons honey

    1 tablespoon orange zest

    1/2 teaspoon fine sea salt

    1/4 teaspoon fresh ground black pepper

    Hot sauce, optional

    Directions

      1Cut the chicken into 1-inch chunks.

      2Combine the melted butter, honey, orange peel, salt, pepper, and 2 or more dashes of hot sauce (optional) in a medium bowl.

      3Add the chicken and toss well. Set aside for 15 minutes to marinate.

      4Preheat the oven to 375°F (190°C) and line a baking sheet with foil or parchment paper.

      5Arrange the chicken on the baking sheet. Drizzle any marinade left in the bowl over the chicken. Bake until the internal temperature of the chicken reaches 165°F, 15 to 20 minutes.

    Adam and Joanne’s Tips

    • Butter: I love the flavor of butter in this dish. If you plan to marinate your chicken in the fridge, the butter will harden again. This is fine and it will melt as you bake the chicken in the oven later. If you’d prefer a substitute, use olive oil.
    • Nutrition facts are estimates.

    Nutrition Per Serving
    Serving Size
    1/4 of the recipe (about 6 ounces)
    /
    Calories
    290
    /
    Total Fat
    10.2g
    /
    Saturated Fat
    4.5g
    /
    Cholesterol
    139.4mg
    /
    Sodium
    392.3mg
    /
    Carbohydrate
    9.4g
    /
    Dietary Fiber
    0.3g
    /
    Total Sugars
    8.9g
    /
    Protein
    38.4g


    AUTHOR:

    Joanne Gallagher

    Previous Post: Easy Italian Pasta Salad
    Next Post: Maple Soy Glazed Salmon

    Source link

  • Easy Quinoa Black Bean Salad Recipe

    Easy Quinoa Black Bean Salad Recipe

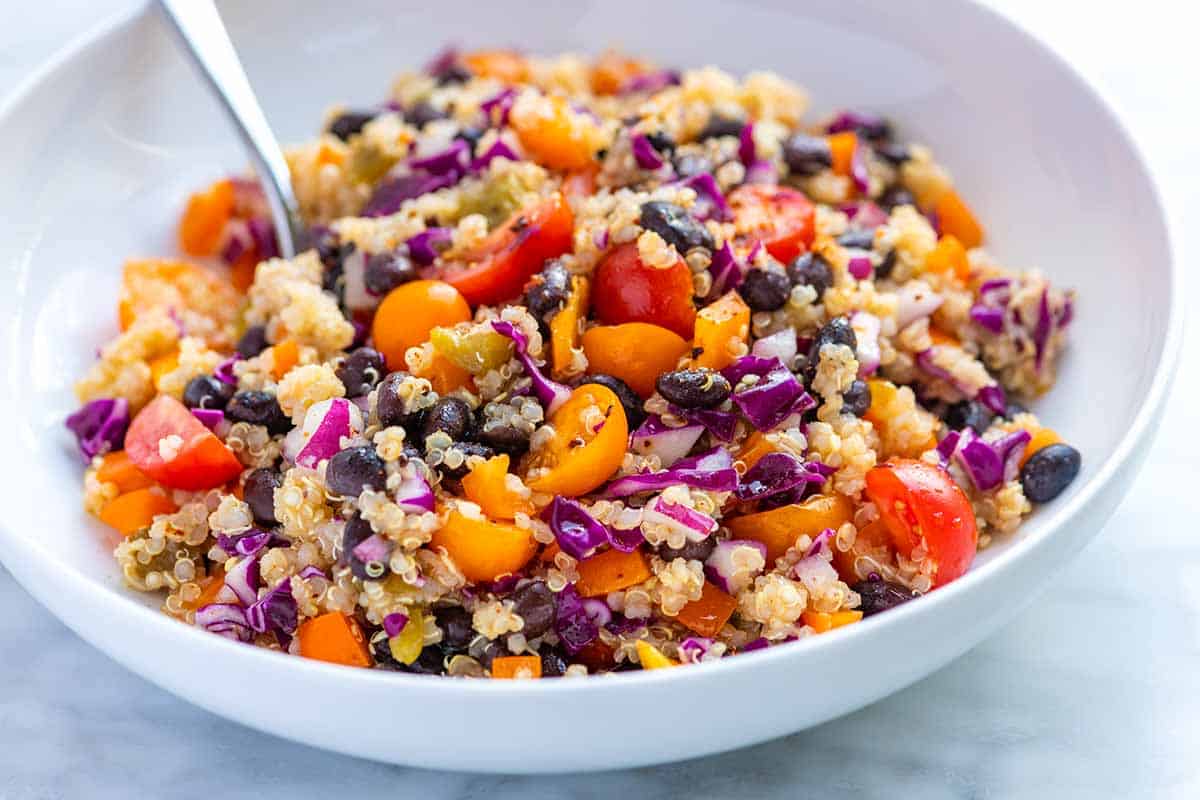
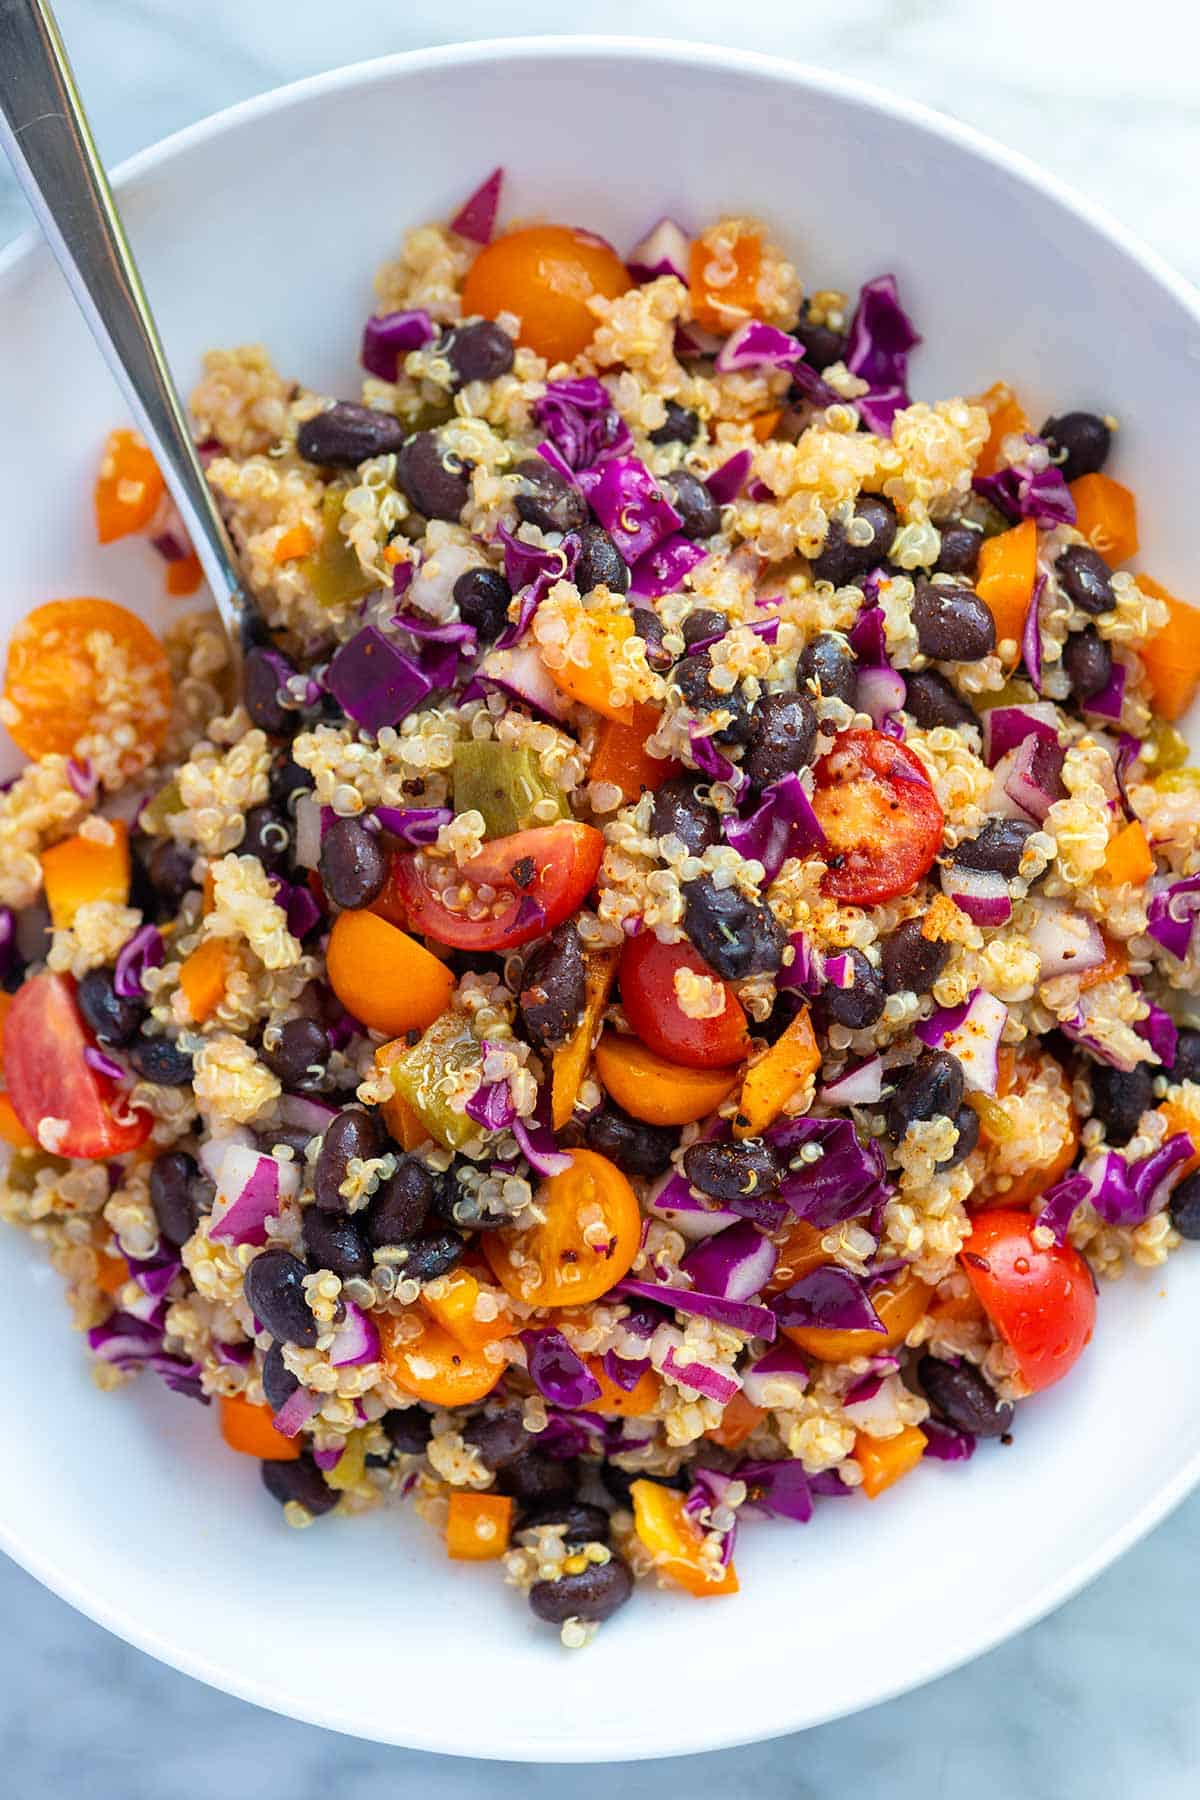
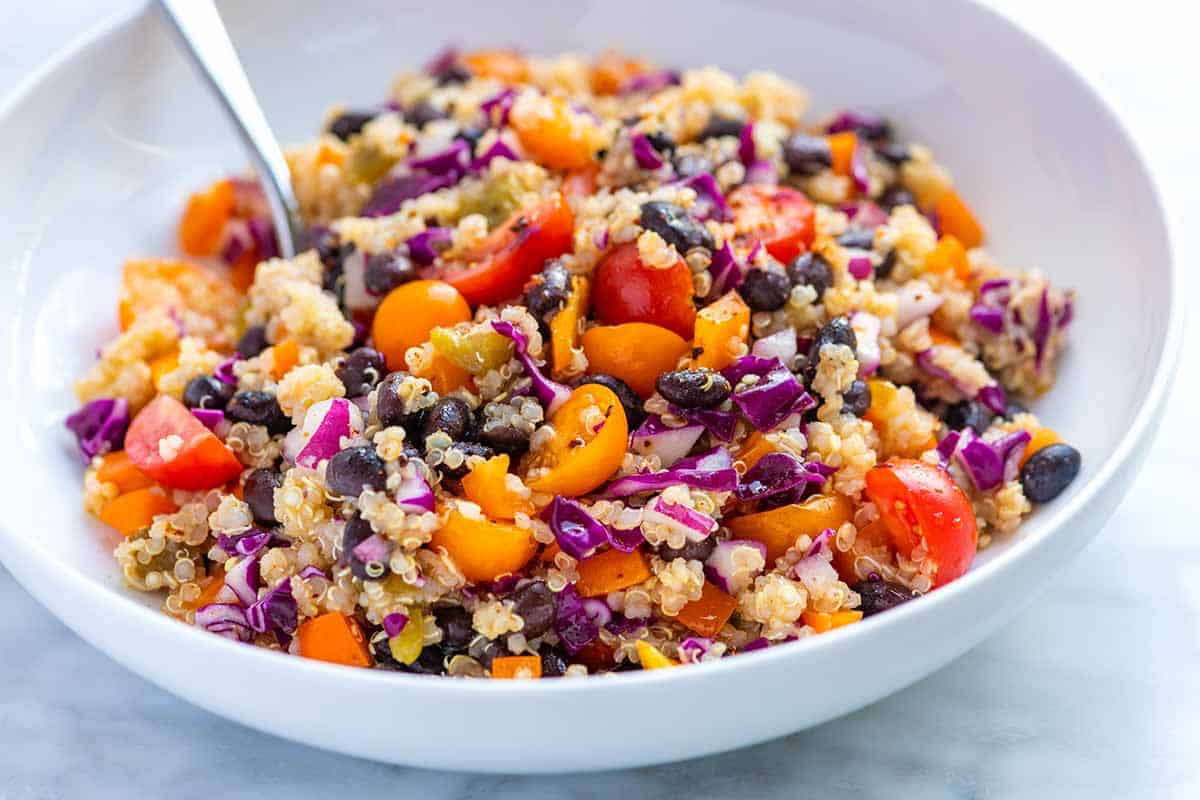
    Our quinoa black bean salad is hearty and delicious, thanks to its colorful veggies and bright and zesty dressing. It’s naturally vegan, super simple, and lasts for days in the fridge!

    Black Bean Quinoa Salad

    I’m always so happy when this easy quinoa black bean salad is in our fridge. It’s hearty, packed with plant protein (7g per cup), and tastes amazing. I love it served all by itself or with a bit more protein (my favorites are this easy baked tofu or these roasted shrimp).

    If you are looking for more ways to combine quinoa and beans, try this vegetarian chili or this superfood quinoa salad (it’s packed with veggies, chickpeas, and dried fruit).

    Key Ingredients

    • Quinoa: I cook it from scratch (it takes 10 to 15 minutes). My number one tip for perfectly cooked quinoa is to rinse it thoroughly under cold water before cooking. This removes the natural coating of saponins, which can make the quinoa taste bitter. For more tips, see how to cook quinoa.
    • Black Beans: You can use canned or home-cooked beans in this recipe. If you want to cook them from scratch, here’s our tried-and-true black beans recipe.
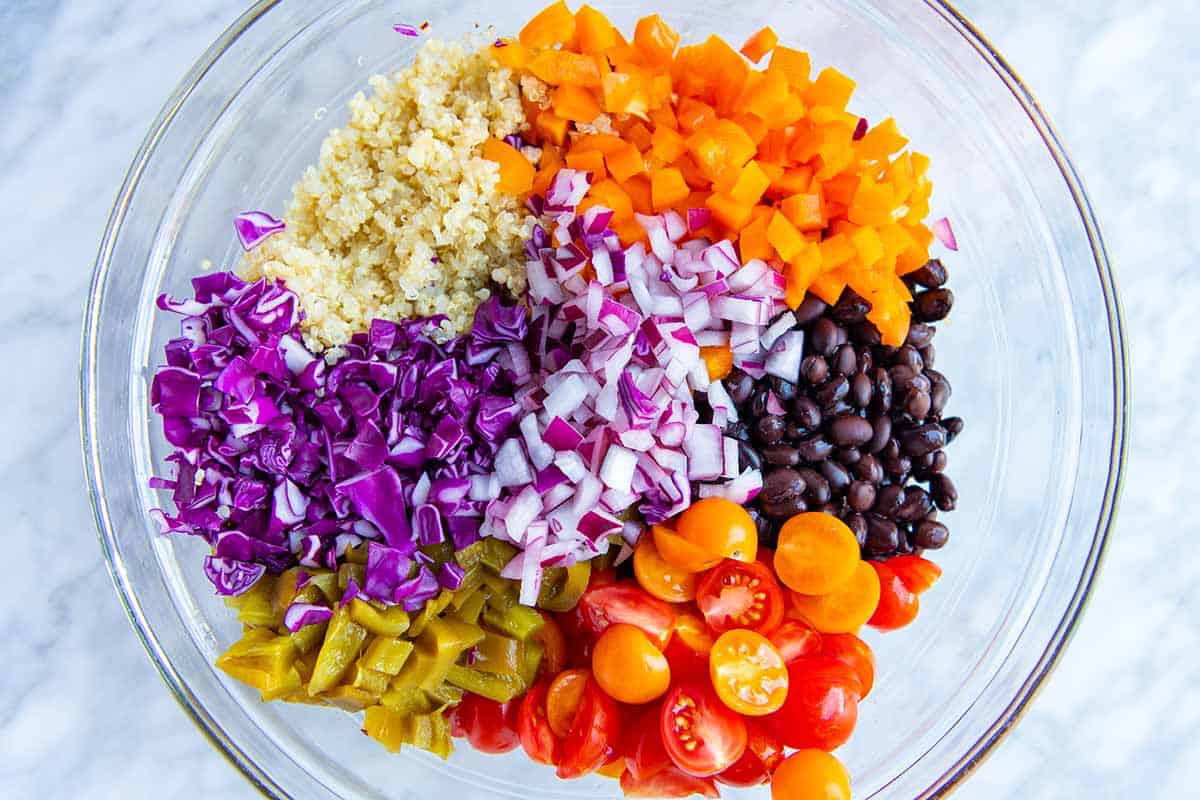
    • Veggies: I love the vibrant colors and textures that fresh vegetables bring to this salad. My go-to combination includes juicy tomatoes, crisp red onion, colorful bell peppers, sweet cherry tomatoes, crunchy red cabbage, and corn (when it’s in season). I also like to add a can of diced green chiles for an extra kick, which gives the salad a delicious Southwestern flair. Hatch green chiles are my personal favorite.
    • Dressing: The dressing I use for this black bean and quinoa salad is one of my favorites, especially for grain and bean salads. It starts with a simple apple cider vinegar and freshly squeezed lime juice. You can use either, but combining both creates the most well-rounded and balanced flavor profile. Next, I add some warmth and depth with cumin and chili powder (I highly recommend using a homemade chili powder if you have it). To finish it off, I whisk in a generous amount of olive oil and season to taste with salt and pepper.

    How to Make Quinoa Black Bean Salad

    This quinoa and bean salad is super simple to put together. I make my dressing in the bottom of a big bowl and then toss in the rest of the salad ingredients (quinoa, beans, and veggies).

    Black Bean and Quinoa Salad Ingredients

    This salad is perfect eaten right after making it, or you can store it in the fridge for up to 5 days! Because of this, it’s an ideal make-ahead dish. I love keeping it in the fridge for an easy lunch or dinner throughout the week.

    Thanks to 7 grams of protein and over 5 grams of fiber, it has plenty of sticking power. You can add some extra protein with crumbled feta cheese, grilled chicken, juicy pork chops, pan-fried halloumi cheese, baked tofu, or even a few of these easy chicken nuggets (trust me!).

    Easy Quinoa Black Bean Salad

    Easy Quinoa Black Bean Salad

    • PREP
    • COOK
    • TOTAL

    Our quinoa black bean salad is hearty and delicious, thanks to its colorful veggies and bright and zesty dressing. Serve it alone or with a bit of extra protein on top. I love baked tofu or roasted shrimp!

    Makes 8 cups

    You Will Need

    For Salad

    1 cup (190g) uncooked quinoa, rinsed (about 3 cups cooked)

    2 cups water or broth, see our chicken broth or veggie broth

    1 (15oz) can black beans, drained and rinsed, or 1 ½ cups cooked black beans

    1/2 cup finely chopped red onion (half small onion)

    1 red bell pepper, finely chopped

    1 cup (150g) cherry tomatoes, halved

    1 cup (100g) finely chopped red cabbage

    2 medium ears corn, kernels cut off the cobs, 1 cup

    1 (4oz) can Hatch green chili peppers, chopped

    Optional: chopped avocado, crumbled feta, or queso fresco


    For Dressing

    3 tablespoons (44ml) apple cider vinegar

    2 tablespoons (30ml) fresh lime juice

    1/2 teaspoon ancho chili powder

    1/2 teaspoon ground cumin

    1/3 cup (78g) extra virgin olive oil

    Salt and fresh ground black pepper

    Directions

      1Combine the rinsed quinoa, water, and 1/4 teaspoon sea salt in a medium saucepan over medium-high heat. Bring to a boil, then reduce to a low simmer and cook uncovered until the quinoa absorbs the liquid for 10 to 15 minutes.

      2Move the saucepan off of the heat and cover for 5 minutes. This extra time allows the quinoa to steam and “fluff up.”

      3Uncover, and then fluff the quinoa with a fork.

      4In a large bowl, whisk the apple cider vinegar, lime juice, 1/2 teaspoon of sea salt, chili powder, cumin, and a pinch of black pepper together. Slowly add the olive oil, whisking until blended.

      5Add the quinoa, black beans, red onion, bell peppers, tomatoes, cabbage, corn, and chili peppers. Toss to combine, and then season to taste with additional salt and pepper as needed.

      6Store in an airtight container in the refrigerator for 3 to 4 days. If the salad seems a little dry after a day or two, add an extra squeeze of lime juice and a slight drizzle of olive oil.

    Adam and Joanne’s Tips

    • Storing: This quinoa black bean salad lasts in an airtight container in the fridge for up to 5 days. Over time, the color from the red cabbage seeps out into the salad (it looks quite pretty).
    • Canned green chili peppers: These are often sold next to salsas in most grocery stores. There are a variety of brands, including Ortega, Old El Paso, and Hatch. When we can find it, we love the Hatch brand.
    • The nutrition facts provided below are estimates.

    Nutrition Per Serving
    Serving Size
    1 cup
    /
    Calories
    235
    /
    Total Fat
    11.5g
    /
    Saturated Fat
    1.7g
    /
    Cholesterol
    0mg
    /
    Sodium
    234.3mg
    /
    Carbohydrate
    28.3g
    /
    Dietary Fiber
    5.6g
    /
    Total Sugars
    3g
    /
    Protein
    7.1g


    AUTHOR:

    Joanne Gallagher

    Adam and Joanne of Inspired Taste

    We are Adam and Joanne Gallagher, the creators of Inspired Taste. Established in 2009, Inspired Taste grew from a childhood dream into one of the internet’s most trusted recipe sites with hundreds of reliable recipes, step-by-step videos, and expert tips.More About Us
    Source link

  • Easy Chicken Enchiladas Recipe

    Easy Chicken Enchiladas Recipe

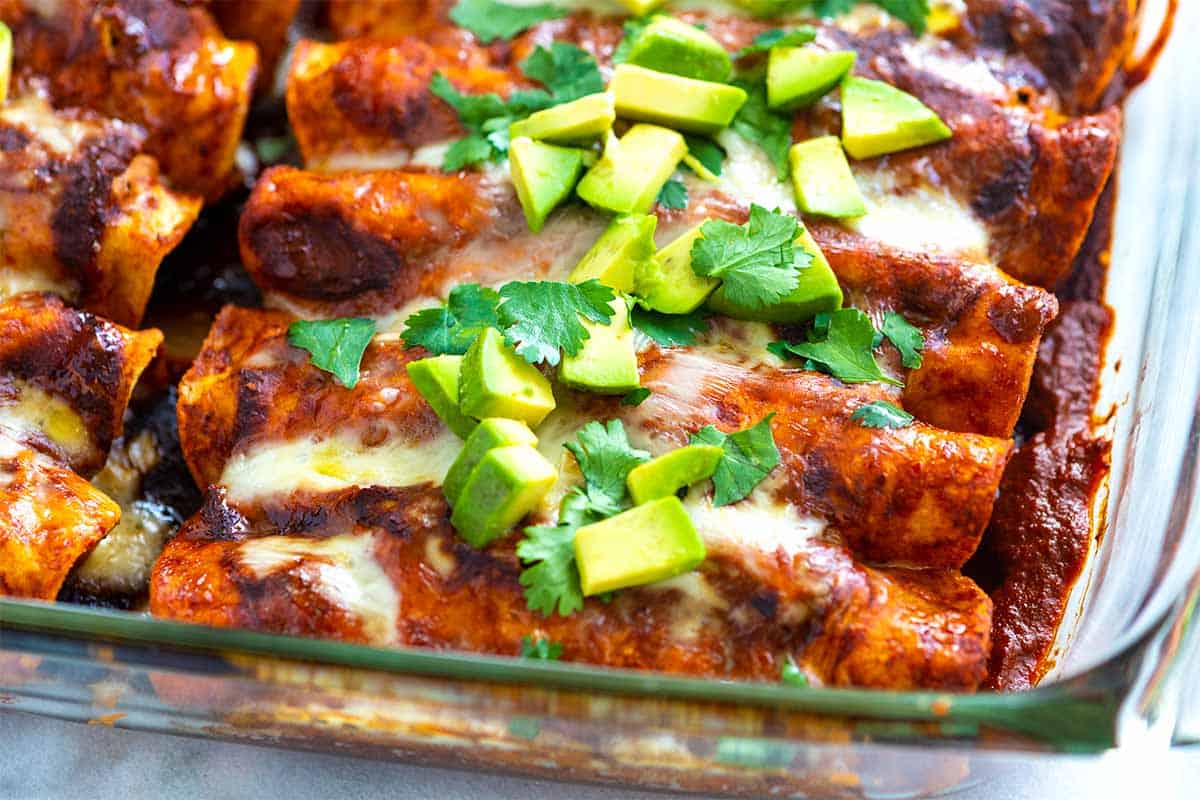
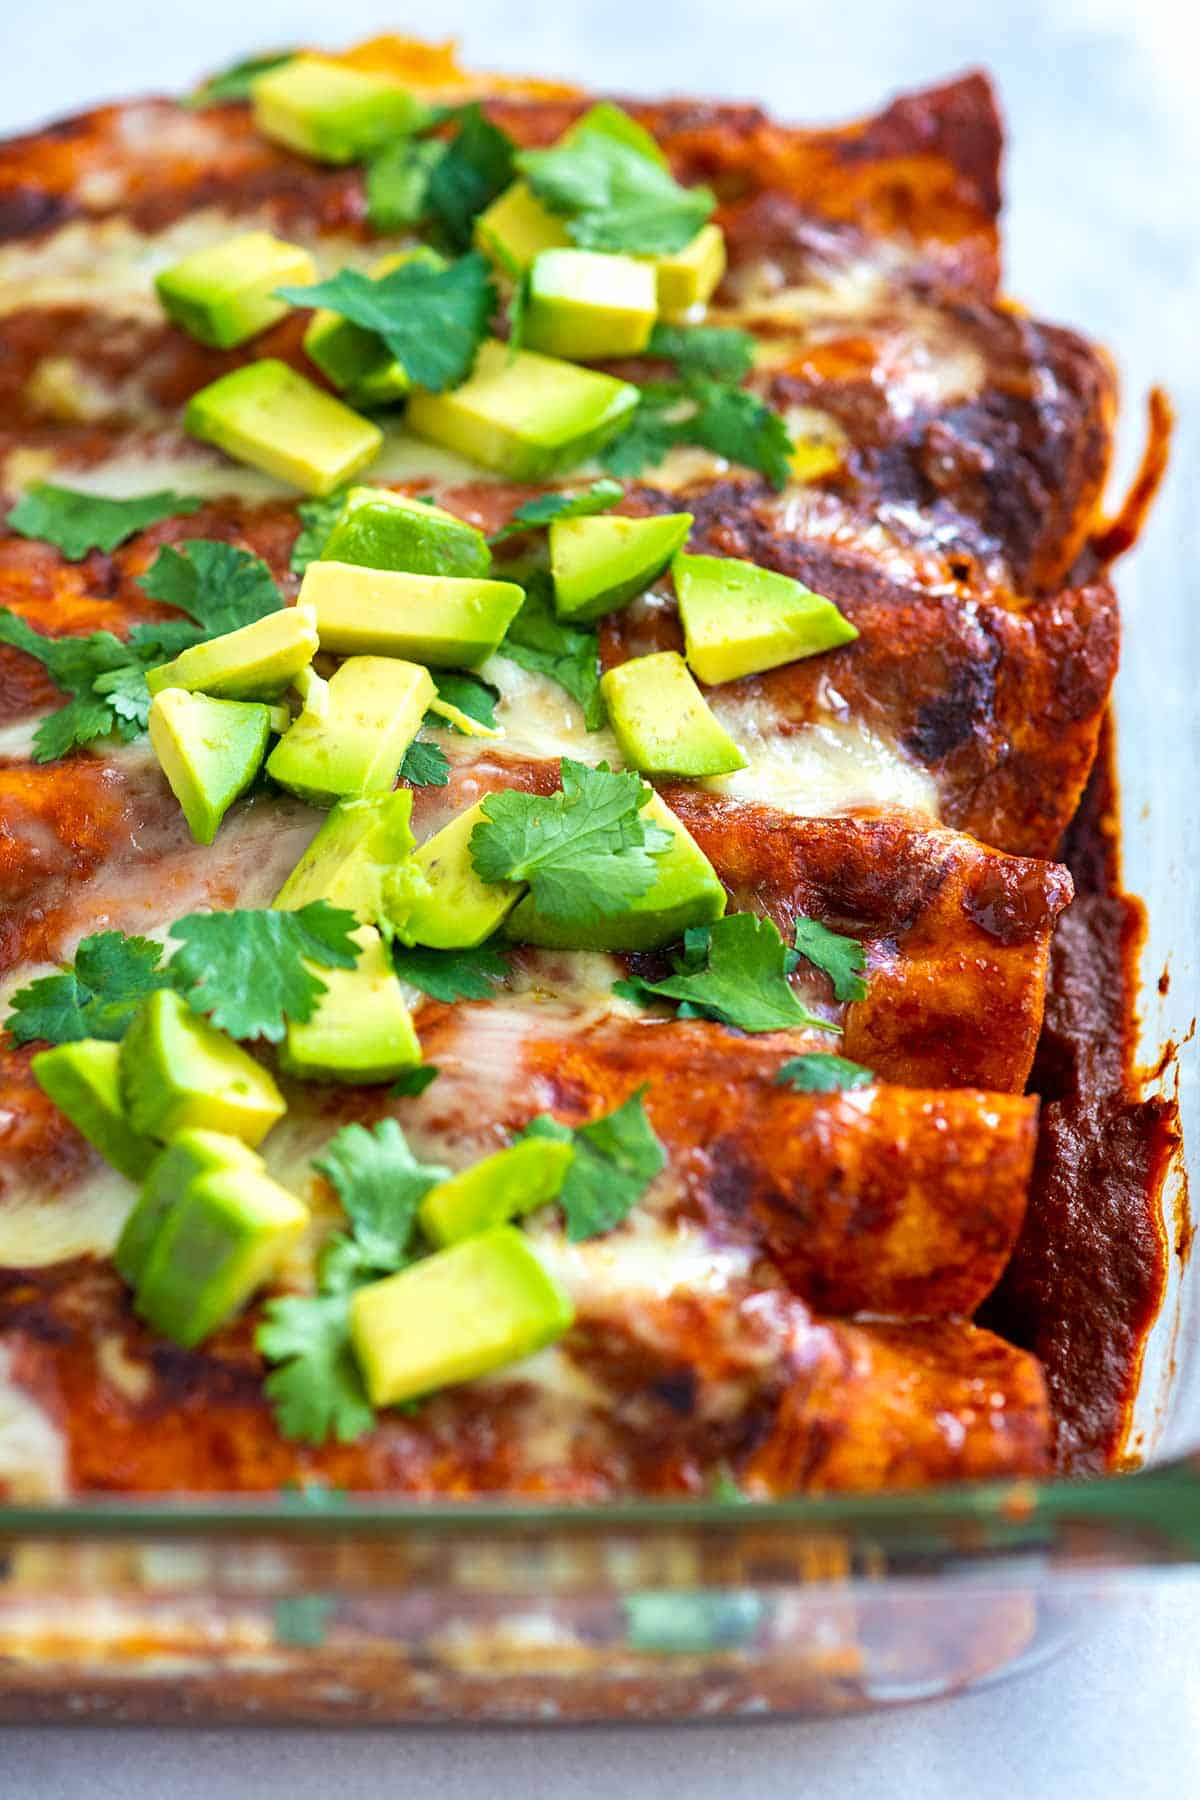
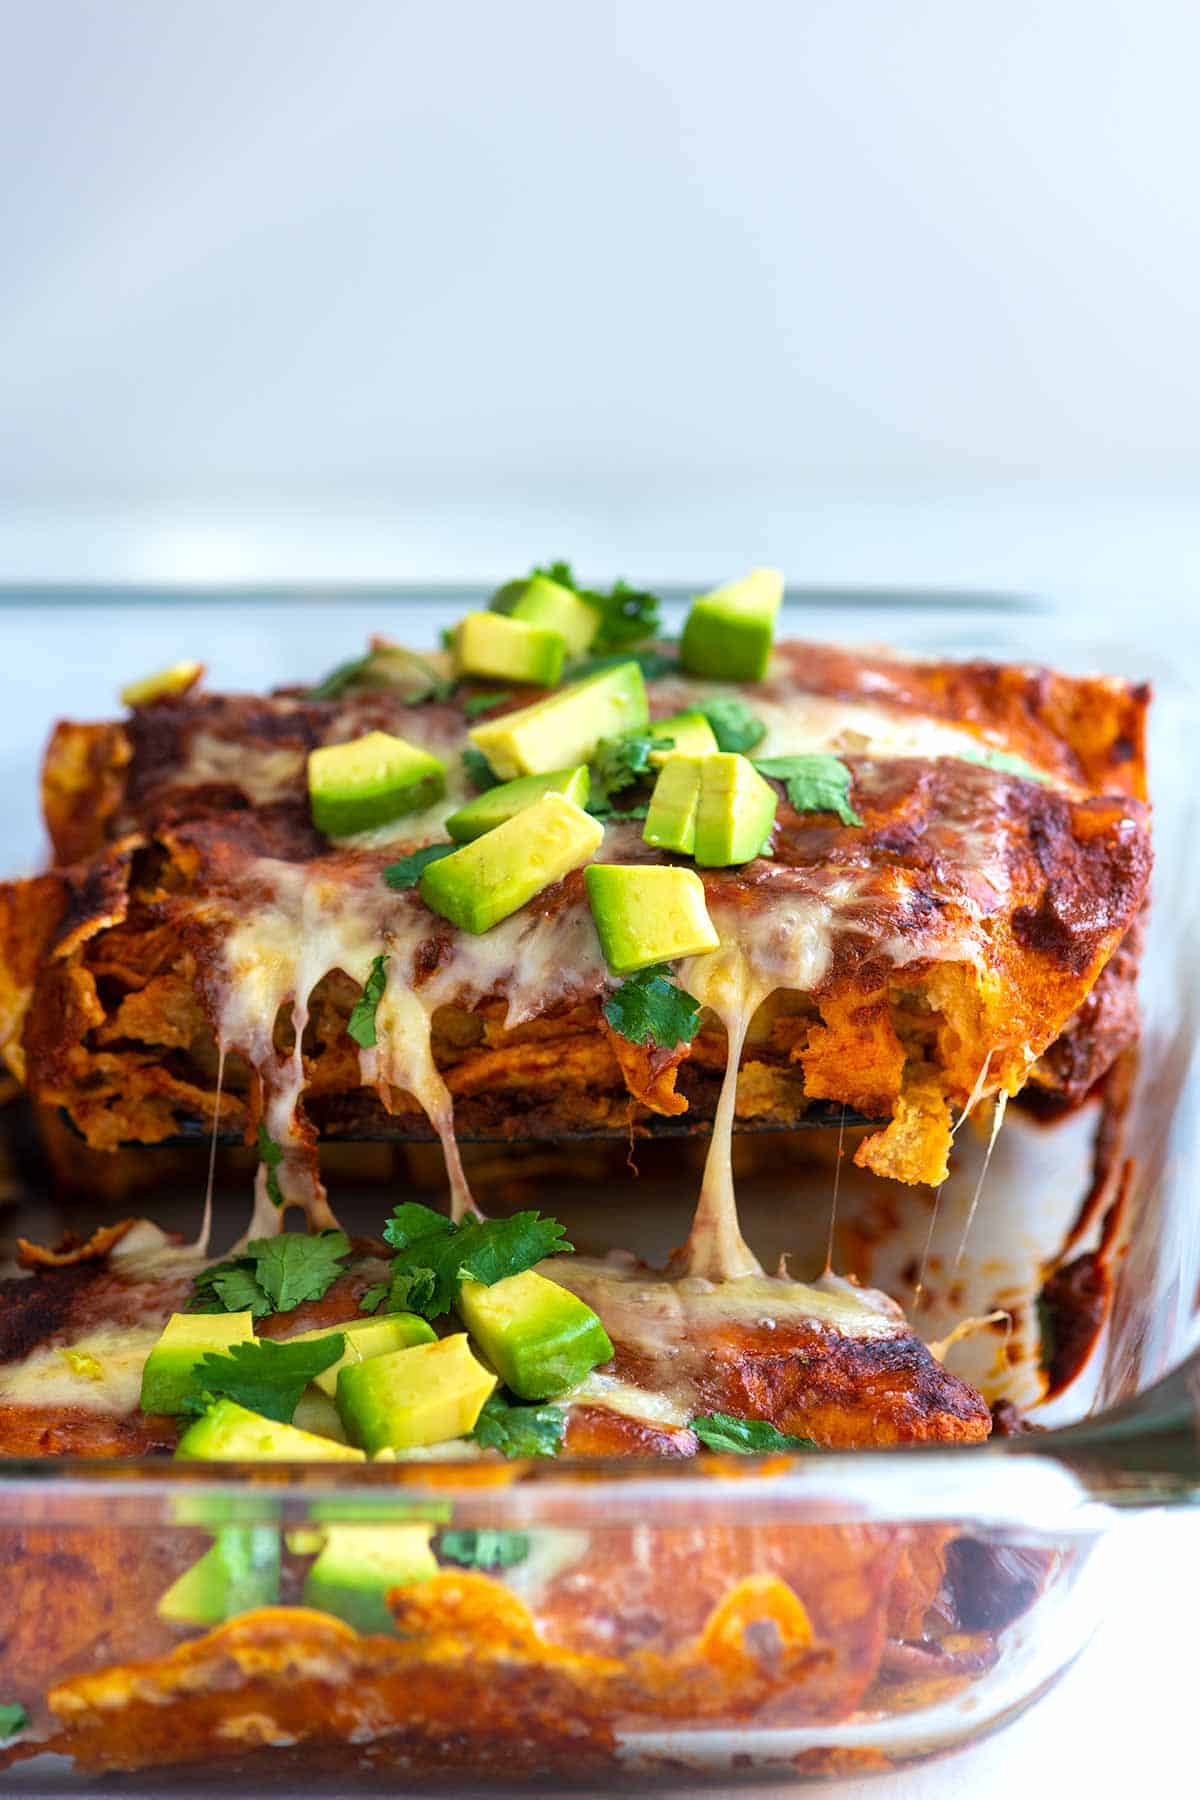
    This easy chicken enchilada recipe has tender, shredded chicken in a rich, homemade red sauce, all rolled in corn tortillas and baked with bubbly, melted cheese.

    Easy Chicken Enchiladas

    These enchiladas filled with chicken and cheese are the very definition of a delicious, feel-good meal and are guaranteed to be a hit with everyone at the table. This is the kind of Mexican-inspired dinner you’ll want to make again and again.

    If you can’t get enough of this dish, you’re in luck! We also have these green chicken enchiladas made with salsa verde. Or, for a hearty meatless option, be sure to try our veggie enchiladas.

    Key Ingredients

    • Tortillas: Use store-bought or homemade corn tortillas for authentic enchiladas. I love how the corn flavor of the tortillas mingles with the sauce. If you prefer flour, here’s our recipe for flour tortillas.
    • Enchilada Sauce: Use store-bought (I like Hatch) or try one of our homemade sauces. Our authentic red enchilada sauce, which calls for dried chilies, is simple to make and is what we used in our photos. I also love this homemade enchilada sauce, which uses dried spices and chili powder, and takes minutes to throw together.
    • Chicken: You will need cooked and shredded chicken. Use rotisserie chicken, leftover roasted chicken, or cook it using one of these easy methods: stovetop shredded chicken (1 hour), slow cooker shredded chicken (4 to 6 hours), or poached chicken (15 minutes).
    • Cheese: Use mild, melty cheese like Oaxaca cheese, white cheddar cheese, or Monterey Jack.

    Find the full recipe with measurements below.

    Homemade Chicken Enchiladas

    My Tips for Making the Best Enchiladas

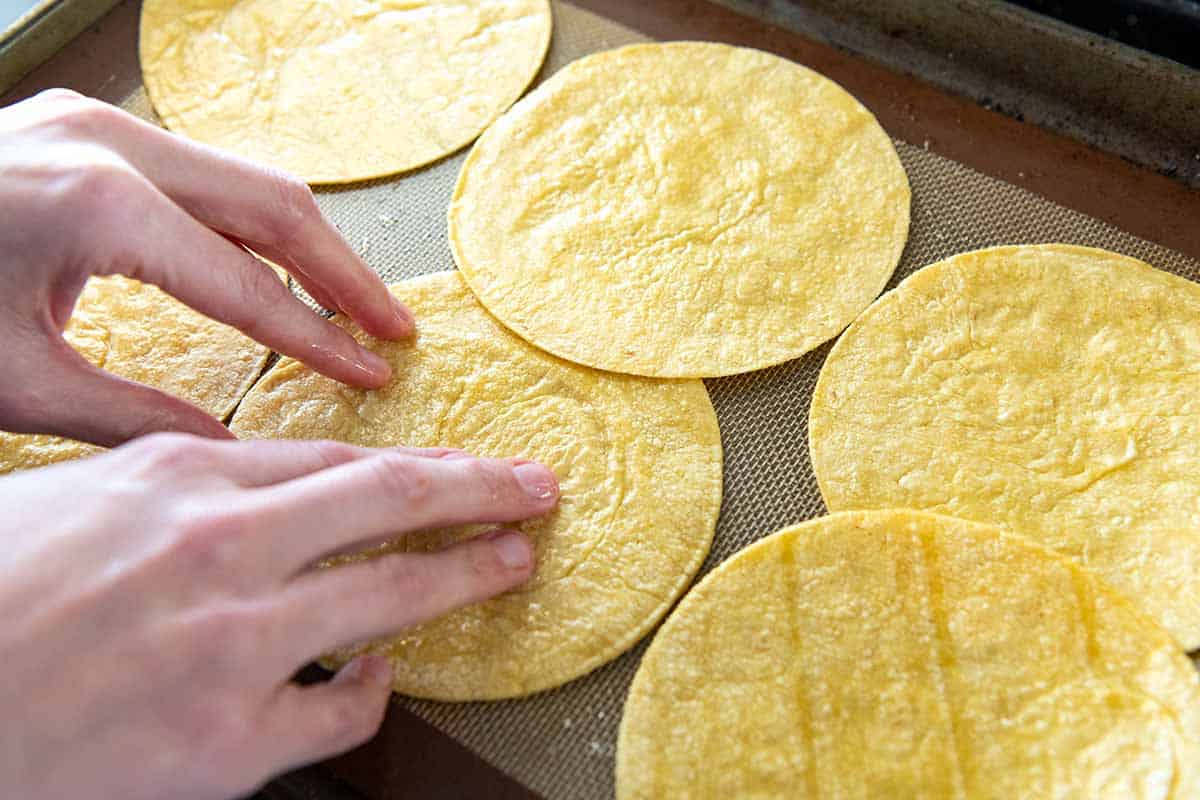
    Tip 1: Soften the tortillas. Corn tortillas can crack easily. To make them soft and pliable, you need to warm them up. While you can fry them in oil, I prefer to oven-fry them. Lightly coat the tortillas with oil and bake them until warm. This easy method lets you prepare a large batch at once.

    Softening corn tortillas to make them soft and pliable

    Tip 2: Dip the tortillas in sauce. For an extra layer of flavor, quickly dip the warm tortillas into your enchilada sauce before filling them with the filling.

    Tip 3: Place them seam-side down. Roll your tortillas up as tightly as possible and place them seam-side down in a baking dish. Since the seam is on the bottom, the enchiladas will stay tightly rolled while baking in the oven.

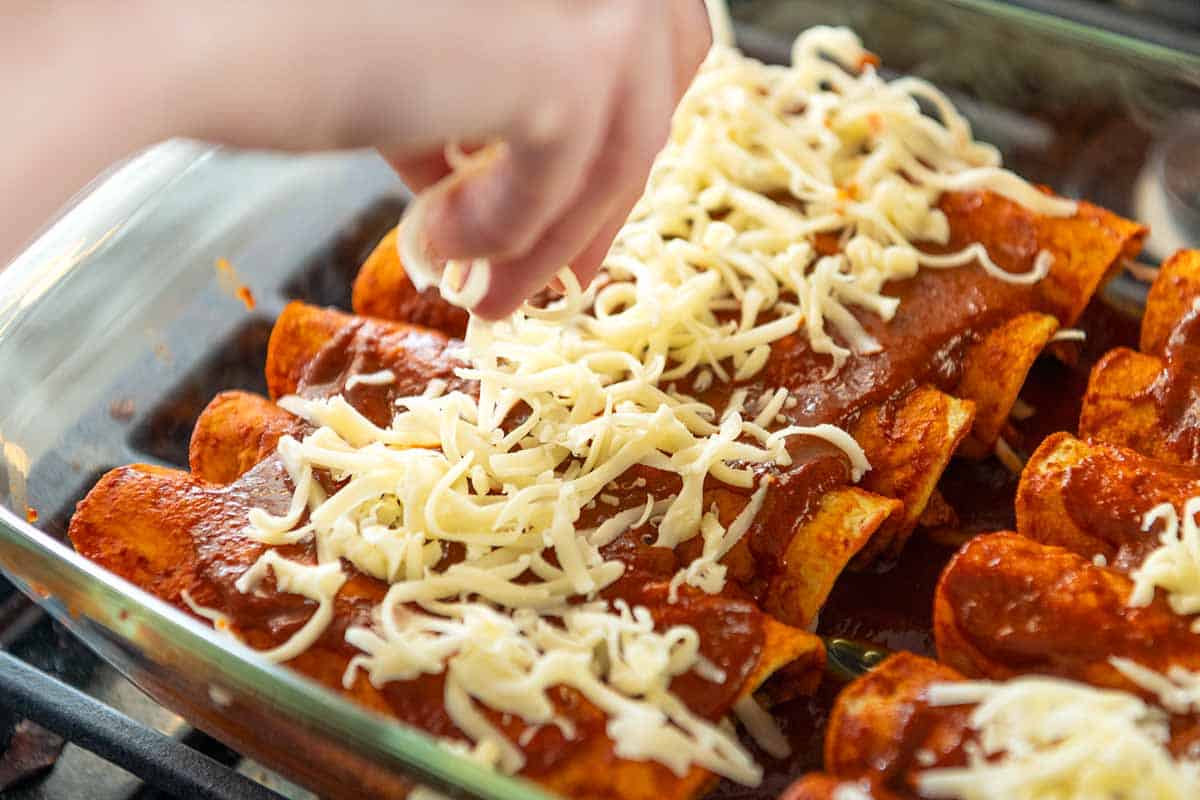
    Tip 4: Finish with more sauce and cheese. Once the enchiladas are in the pan, spoon more sauce on top and add a final layer of cheese. For the best result, bake them covered for 15 minutes, then uncover and bake for another 10 minutes to get that perfect golden crust. Let them cool for a few minutes before serving, and dig in!

    Adding cheese to rolled chicken enchiladas before baking

    Tip 5: More variations. We love this as-written, but don’t be afraid to make it your own! Stir in some pinto beans or sautéed veggies like bell peppers, onions, and zucchini. You can make beef enchiladas by swapping the chicken for shredded beef, or a pork version by using leftover pork carnitas. Finally, for a different flavor, use green enchilada sauce or a homemade salsa verde (made with tomatillos) instead of the red sauce.

    Serving Suggestions

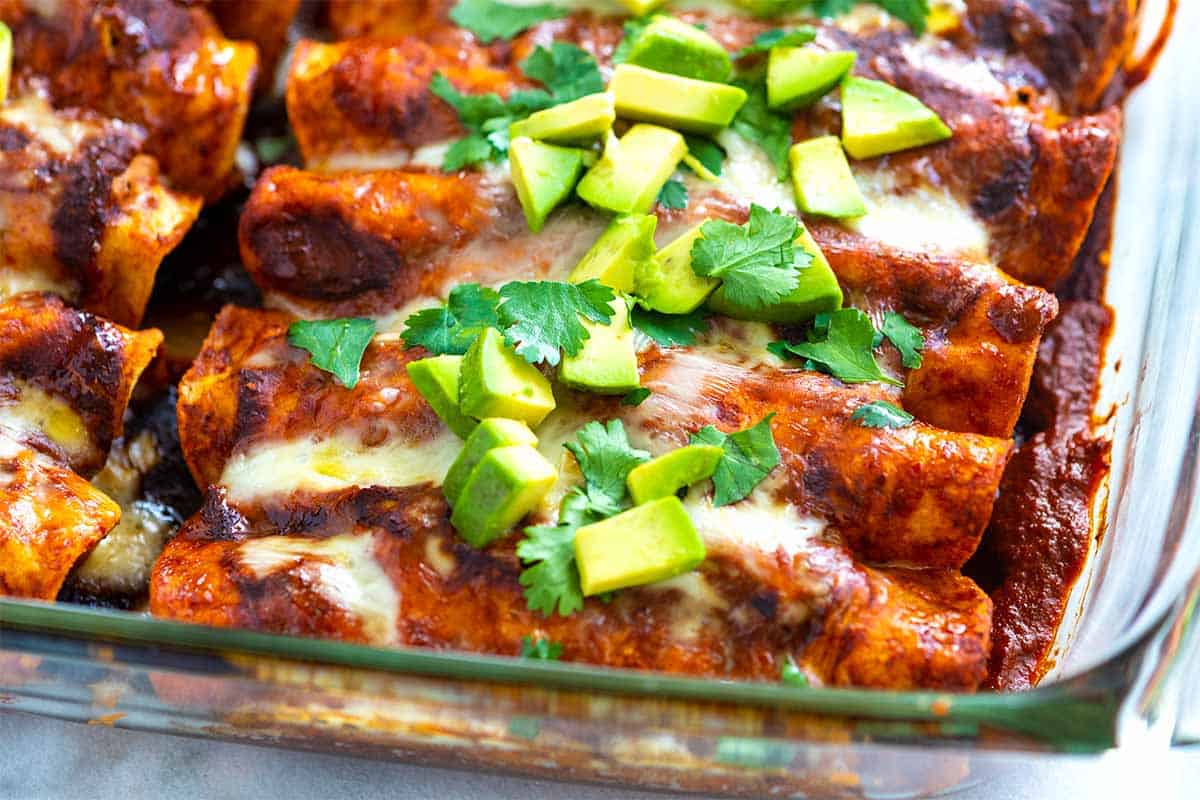
    I love serving these enchiladas with some chopped avocado and fresh cilantro, but there are so many ways to top them. For a little crunch, try scattering some chopped tomatoes, diced onions, diced jalapeños, sliced green onions, black olives, or even shredded cabbage or lettuce over the top.

    To make a complete meal, serve them alongside classic Mexican side dishes. Our Mexican rice and refried beans are perfect for this, as are our creamy black beans. And you can never go wrong with a bowl of homemade guacamole or pico de gallo with a side of homemade tortilla chips!

    Red chicken enchiladas made with homemade sauce

    Easy Chicken Enchiladas

    • PREP
    • COOK
    • TOTAL

    Our chicken enchiladas are easy to make with a simple filling of shredded chicken, cheese, and sauce. Corn tortillas hold up better in this recipe, but if you prefer flour tortillas, use them! You have the option to use store-bought enchilada sauce or use one of our homemade sauces (both linked in the recipe below).

    Makes 12 enchiladas

    Directions

      1Heat oven: Place an oven rack in the middle of the oven and heat to 375°F (190°C).

      2Soften tortillas (for corn tortillas): Line a baking sheet with parchment paper or a silicone baking mat. Place six tortillas on the baking sheet so they lie flat and barely touch each other. Lightly spray or rub both sides of the tortillas with oil. Bake until they are warm, but before they start to crisp, 2 to 3 minutes. Transfer the baked tortillas to a plate lined with a paper towel, and then repeat with the remaining six tortillas.

      3Prepare filling: Add ½ cup of the sauce, the shredded chicken, and 1 ¼ cups of cheese to a bowl, and then toss until the chicken and cheese are well coated.

      4Prepare baking dish: Spread ¾ cup of the sauce down the center of a 13×9-inch baking dish.

      5Dip tortillas: Add ¾ cup of the sauce to a low-sided, wide bowl, and then quickly dip each baked tortilla into the sauce to coat it lightly.

      6Fill and roll: Divide the filling between the tortillas, adding about ⅓ cup of filling. Roll the tortillas up and place them seam-side down into the baking dish. They will be pretty close to each other.

      7Finish and bake: Spoon the remaining sauce over the enchiladas and sprinkle the remaining cheese down the middle. Cover the dish with aluminum foil or parchment paper by tucking the sides and corners. Bake, covered, for 15 minutes. Uncover, then bake another 10 minutes until the cheese is melted and bubbling.

    Adam and Joanne’s Tips

    • Storing: Keep them in an airtight container in the fridge for up to 4 days.
    • Freezing: Let them cool, transfer to a freezer-safe container or freezer-safe bag, and freeze for up to 1 month. Thaw in the refrigerator overnight, then reheat before serving.
    • Make-ahead tips: The sauce and shredded chicken can be made and frozen.
    • Preparing the tortillas: Our method for prepping the tortillas is a little different from other recipes since we use the oven instead of frying the tortillas on the stove. If you prefer to prep the tortillas by shallow frying in oil, you can.
    • The nutrition facts provided below are estimates. We have assumed this red enchilada sauce for the calculations.

    Nutrition Per Serving
    Serving Size
    2 enchiladas
    /
    Calories
    291
    /
    Total Fat
    14g
    /
    Saturated Fat
    5.7g
    /
    Cholesterol
    38.5mg
    /
    Sodium
    292mg
    /
    Carbohydrate
    30.1g
    /
    Dietary Fiber
    5.1g
    /
    Total Sugars
    3.8g
    /
    Protein
    13.7g


    AUTHOR:

    Joanne Gallagher

    Adam and Joanne of Inspired Taste

    We are Adam and Joanne Gallagher, the creators of Inspired Taste. Established in 2009, Inspired Taste grew from a childhood dream into one of the internet’s most trusted recipe sites with hundreds of reliable recipes, step-by-step videos, and expert tips.More About Us
    Source link

  • Easy Breakfast Burritos Recipe

    Easy Breakfast Burritos Recipe

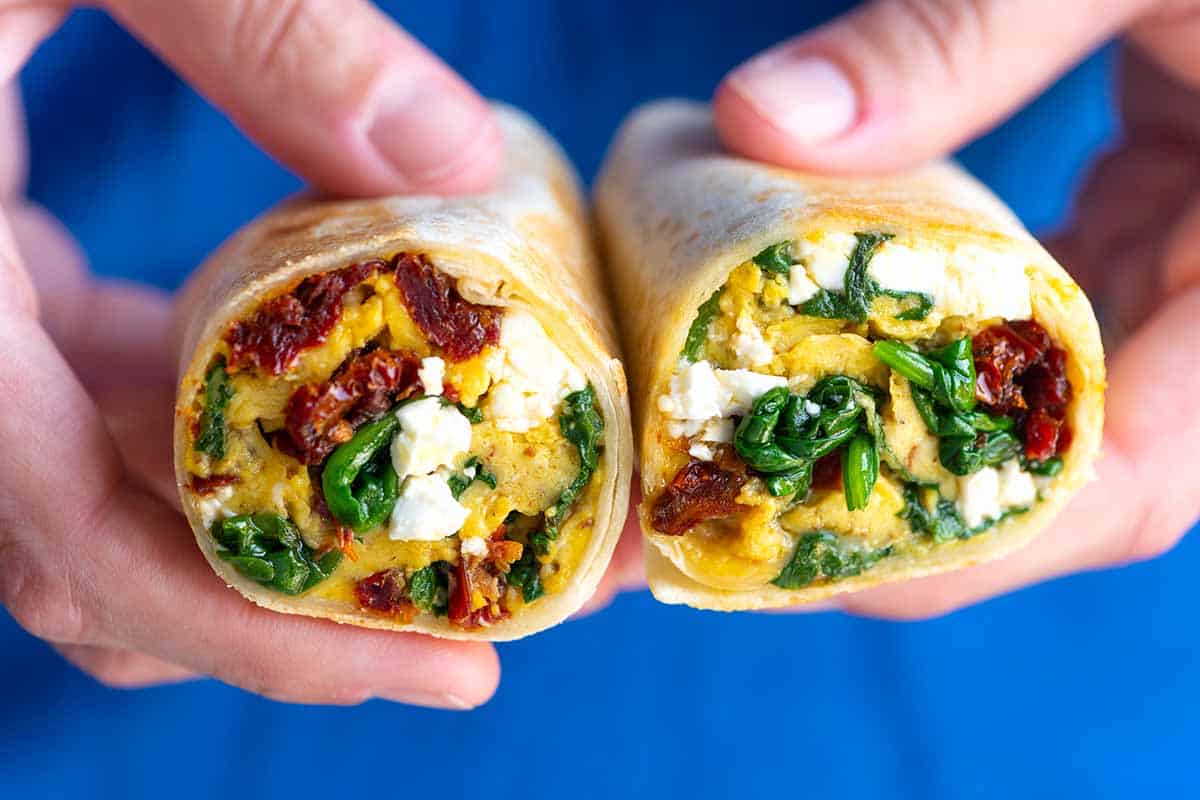
    I love these easy breakfast burritos inspired by Starbucks spinach, feta, and egg white wraps! They are quick to make and can be made ahead of time and kept in the freezer for an easy breakfast another day!

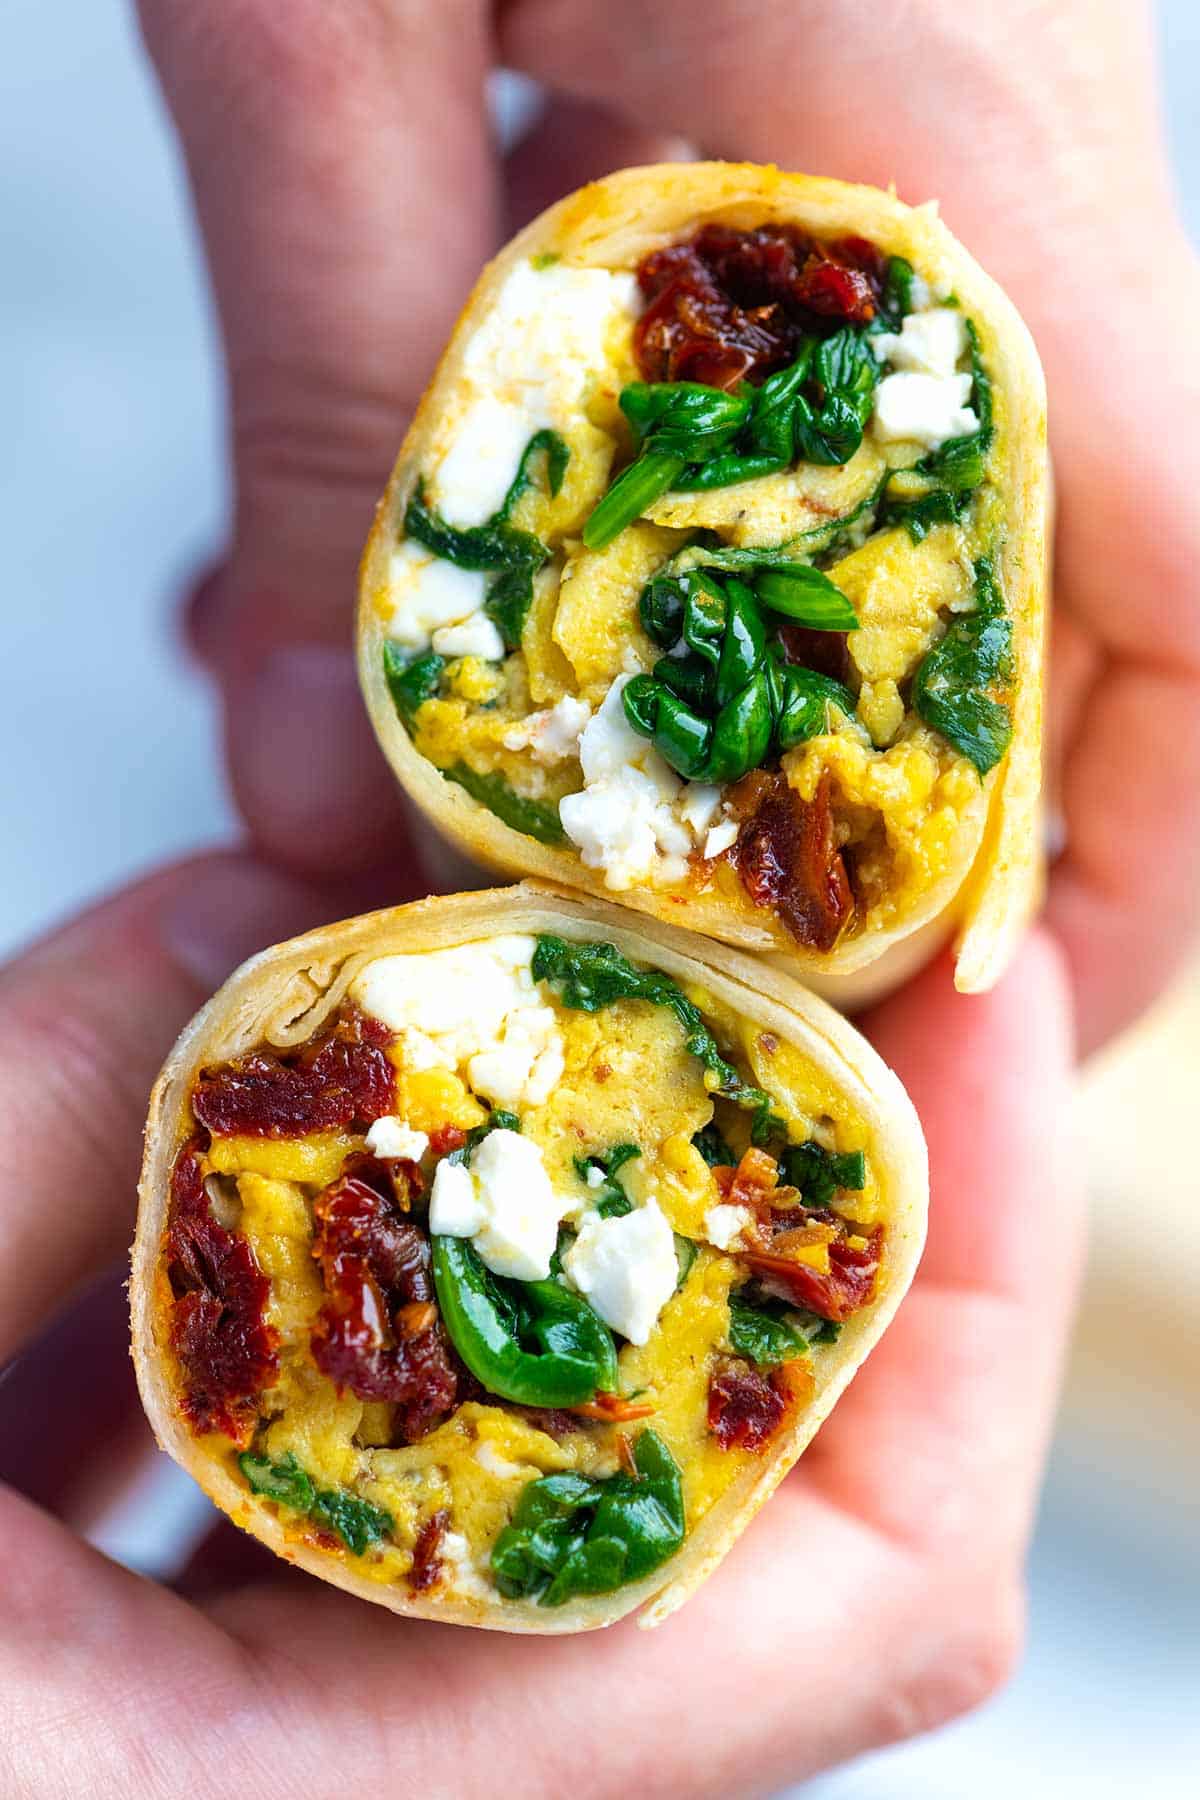
    Easy Breakfast Burritos with Spinach, Eggs, and Feta

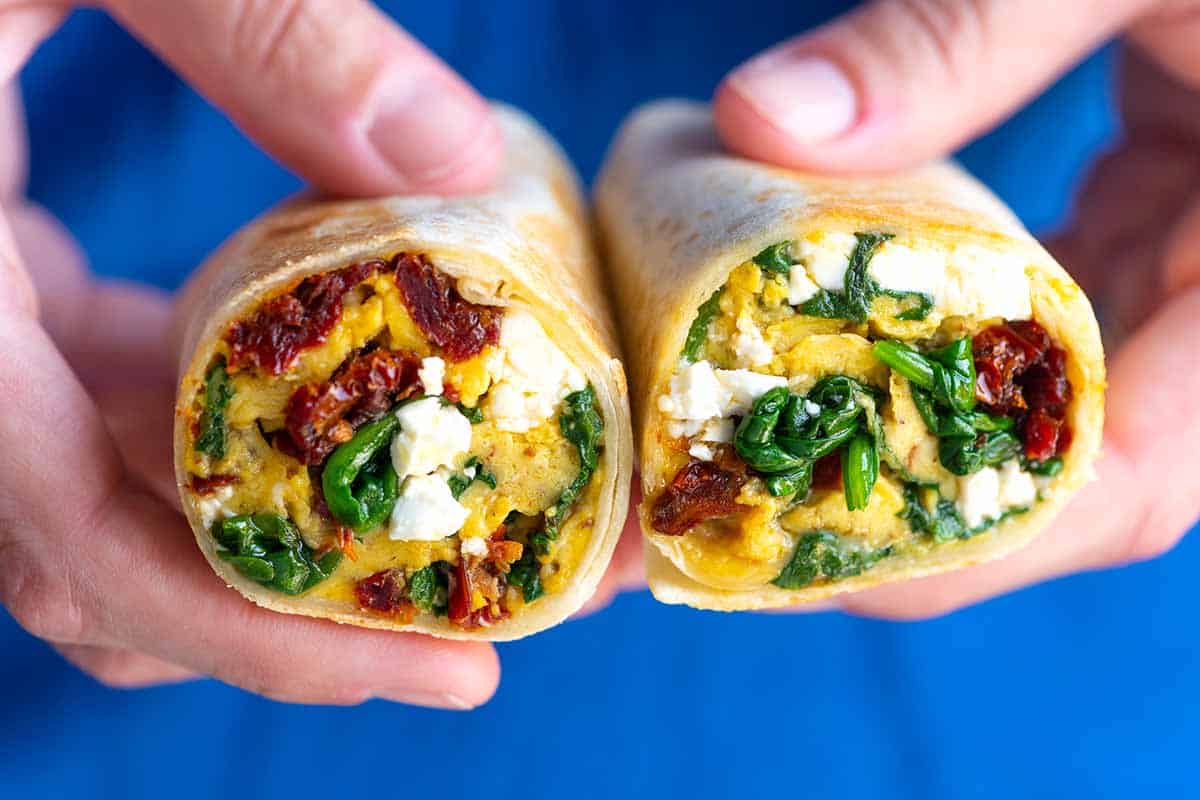
    These easy breakfast wraps are inspired by the spinach and feta wraps sold at Starbucks. They are loaded with protein and taste incredible, thanks to flavorful sun-dried tomatoes, spinach, and feta.

    I am such a fan and love making an extra batch to store in the freezer for another day. For more easy breakfast recipes, try our make-ahead breakfast sandwiches or these green chile breakfast quesadillas!

    Key Ingredients

    • Sun-Dried Tomatoes: I love sun-dried tomatoes for this recipe since they are super flavorful and don’t make the burrito soggy. I buy the ones packed in oil and prefer their texture.
    • Spinach: Fresh spinach is perfect, or you can thaw frozen spinach and squeeze it dry.
    • Egg: I use whole eggs (yolks and whites), but you can substitute 100% egg whites for fewer calories.
    • Feta Cheese: I love briny feta and crumble it into these breakfast burritos. Other cheeses are fine, too. Try goat cheese or shredded cheese like sharp cheddar.
    • Tortillas: For the best results, use large flour tortillas. I love homemade flour tortillas when I have time to make them.

    How to Make Breakfast Burritos

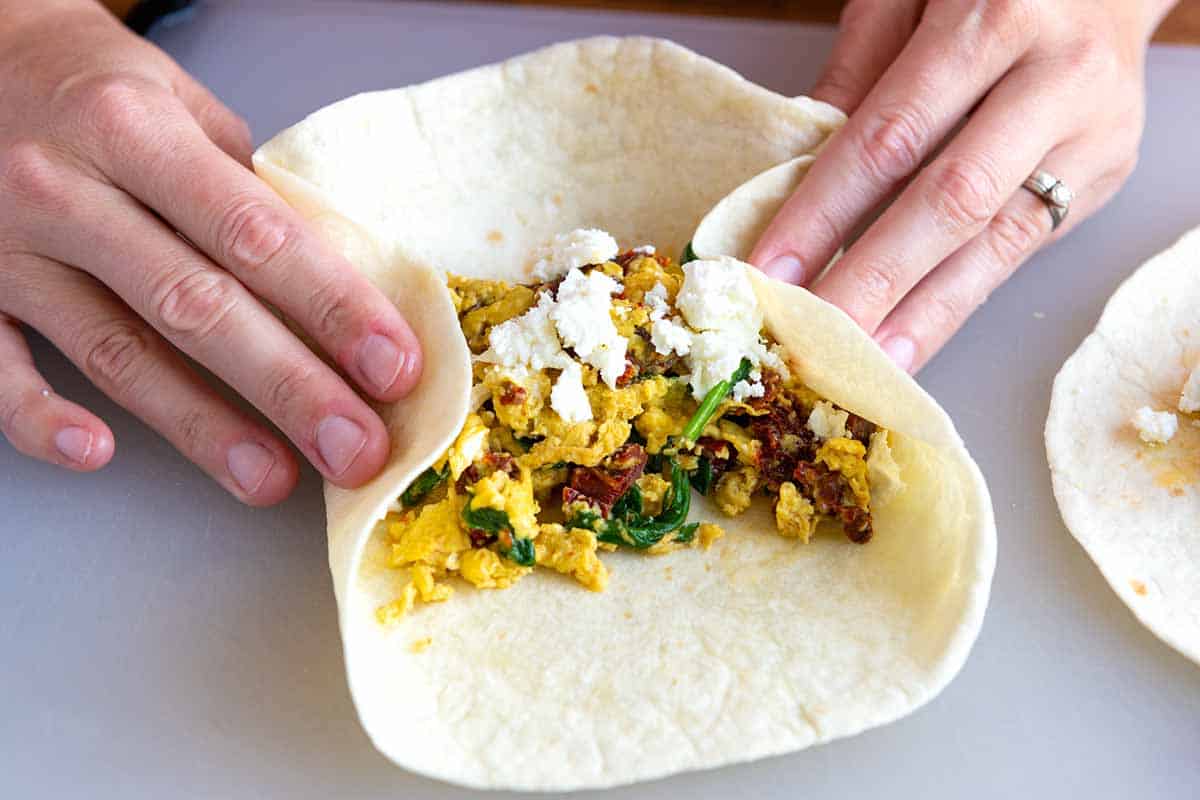
    I love how quick these breakfast burritos are to make. You’ll start by warming the sun-dried tomatoes in a skillet, then pour in whisked eggs. Scramble the eggs (here are my tips for scrambled eggs), then stir in the spinach.

    How to Make Breakfast Burritos: Rolling up the eggs in the tortilla

    To assemble these, spoon the egg mixture into the middle of your tortillas, scatter feta on top, and then roll up. To toast the outside, add the tortillas to a hot pan to get a little color and crisp the outside. You can make these in under 15 minutes!

    Easy Breakfast Burritos

    Easy Breakfast Burritos

    • PREP
    • COOK
    • TOTAL

    I love these easy breakfast burritos inspired by Starbucks spinach, feta, and egg white wraps. We make them with whole eggs, but tips for using egg whites are below the recipe. They can be made ahead of time and kept in the freezer for a quick breakfast another day.

    2 Burritos

    You Will Need

    2 teaspoons olive oil

    1/4 cup (70g) sun-dried tomatoes packed in oil, drained and chopped

    1 cup (40g) packed fresh spinach leaves

    4 large eggs, see notes for substituting egg white

    1/4 cup (28g) crumbled feta cheese, 1 ounce

    2 large flour tortillas, 8 inches or larger in diameter

    Salt and fresh ground black pepper

    Directions

    • Make Breakfast Burritos
    • 1Crack eggs into a bowl, add a pinch of salt, and whisk until well blended.

      2Heat the oil in a medium non-stick pan over medium-low heat. Add the chopped sun-dried tomatoes and cook until warm and fragrant, about 30 seconds.

      3Pour the eggs into the skillet and immediately use a silicone spatula to swirl in small circles around the pan, without stopping, until the eggs look slightly thickened and very small curds begin to form, about 30 seconds.

      4Add the spinach leaves, and then change from making circles to making long sweeps across the pan until you see larger, creamy curds and the spinach turns bright green and wilts, about 20 seconds.

      5When the eggs are softly set and slightly runny in places, remove the pan from the heat and leave for a few seconds to finish cooking. Give a final stir and assemble burritos.

      6Place the tortillas on a flat work surface. Then, spoon half of the egg and spinach mixture down the center of each tortilla. Divide the cheese between each burrito and scatter it over the egg.

      7Fold the sides of the tortillas over the filling, and then tightly roll the end closest to you up and around the filling, pushing any bits that fall out back into the middle of the burrito. Place the burrito seam-side down.

      8For toasted burritos: Heat a medium skillet over medium heat. Place burritos seam-side down into the hot pan and toast until the underside is lightly browned and crisp, 20 to 60 seconds. Rotate the burrito and repeat on all sides.

    • Make Ahead Burritos
    • 1Wrap and refrigerate for up to 3 days, or tightly wrap each burrito individually in foil and then place in a resealable freezer bag or container. Freeze for up to 3 months.

      2To reheat frozen burritos, unwrap the burrito, place it onto a microwave-safe plate, cover it with a paper towel, and microwave for one minute. Flip and microwave for another 1 to 2 minutes, or until the center is hot. Enjoy immediately, or add a crunchy exterior by following the directions for toasted burritos above.

    Adam and Joanne’s Tips

    • Use eggs whites only: Use 6 egg whites or a generous 1/2 cup of egg whites. Using egg whites reduces the calories per burrito to 307 and the total fat to 13.6g.
    • The nutrition facts provided below are estimates.

    Nutrition Per Serving
    Serving Size
    1 Burrito
    /
    Calories
    399
    /
    Total Fat
    22.9g
    /
    Saturated Fat
    6.8g
    /
    Cholesterol
    384.6mg
    /
    Sodium
    839.3mg
    /
    Carbohydrate
    29.2g
    /
    Dietary Fiber
    2.3g
    /
    Total Sugars
    2.3g
    /
    Protein
    19.6g


    AUTHOR:

    Joanne Gallagher

    Adam and Joanne of Inspired Taste

    We are Adam and Joanne Gallagher, the creators of Inspired Taste. Established in 2009, Inspired Taste grew from a childhood dream into one of the internet’s most trusted recipe sites with hundreds of reliable recipes, step-by-step videos, and expert tips.More About Us
    Previous Post: Green Goddess Dressing
    Next Post: Dark and Stormy

    Source link

  • Easy Roasted Tomato Soup Recipe

    Easy Roasted Tomato Soup Recipe

    This easy roasted tomato soup recipe gets its incredible flavor from roasting the tomatoes with onion and whole garlic cloves.

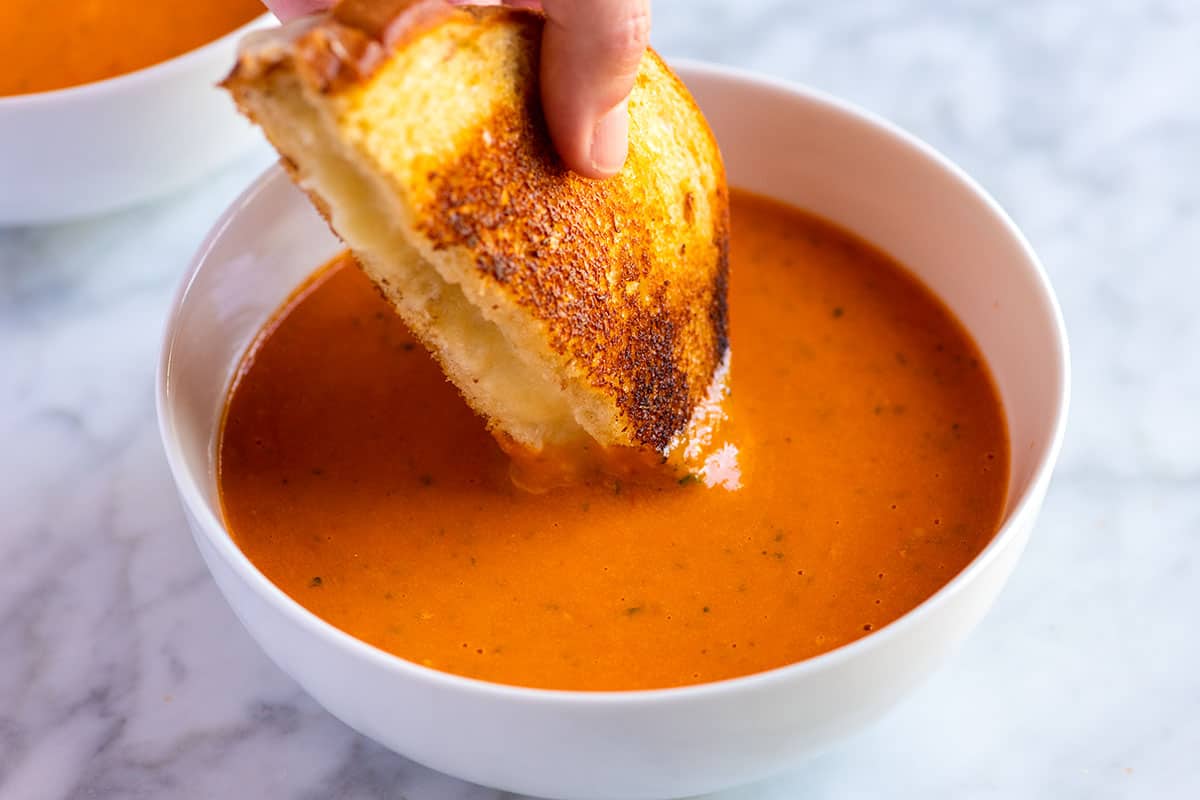
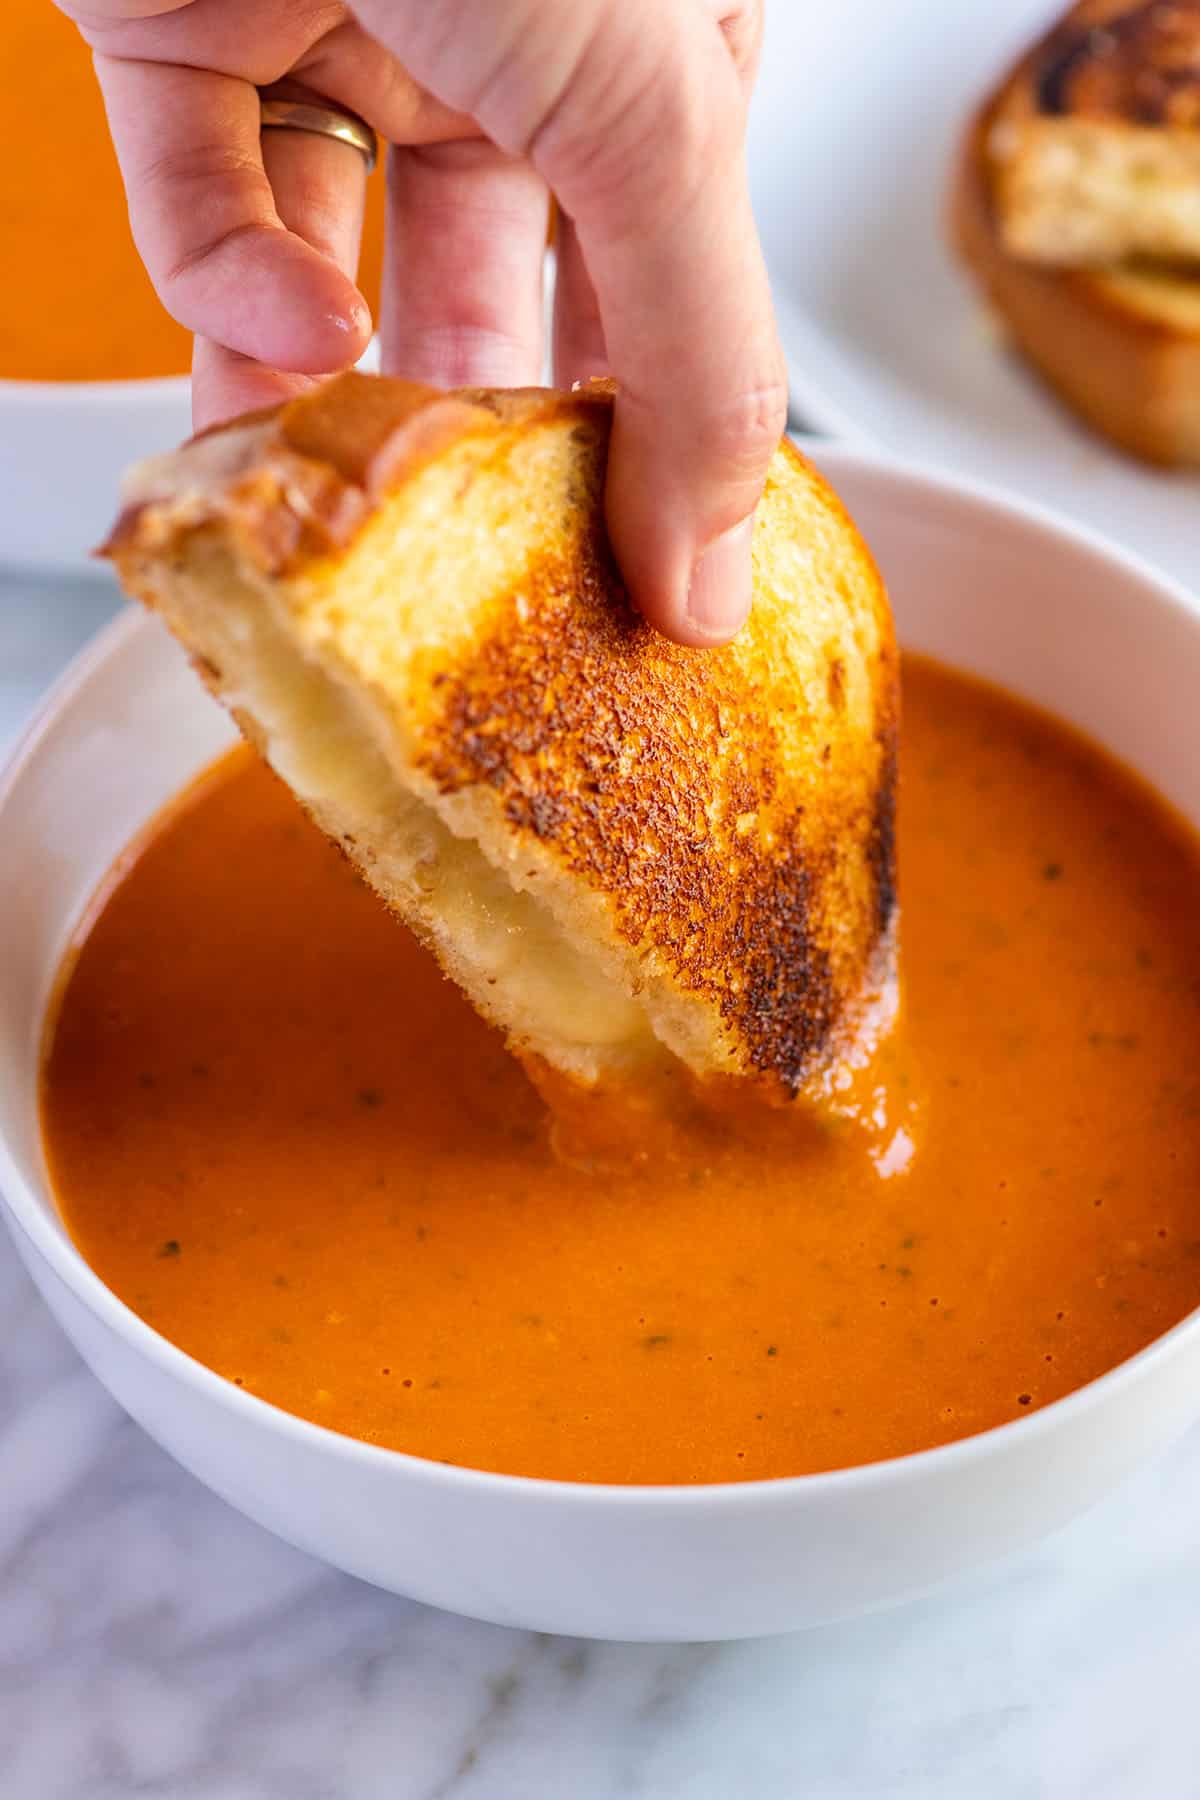
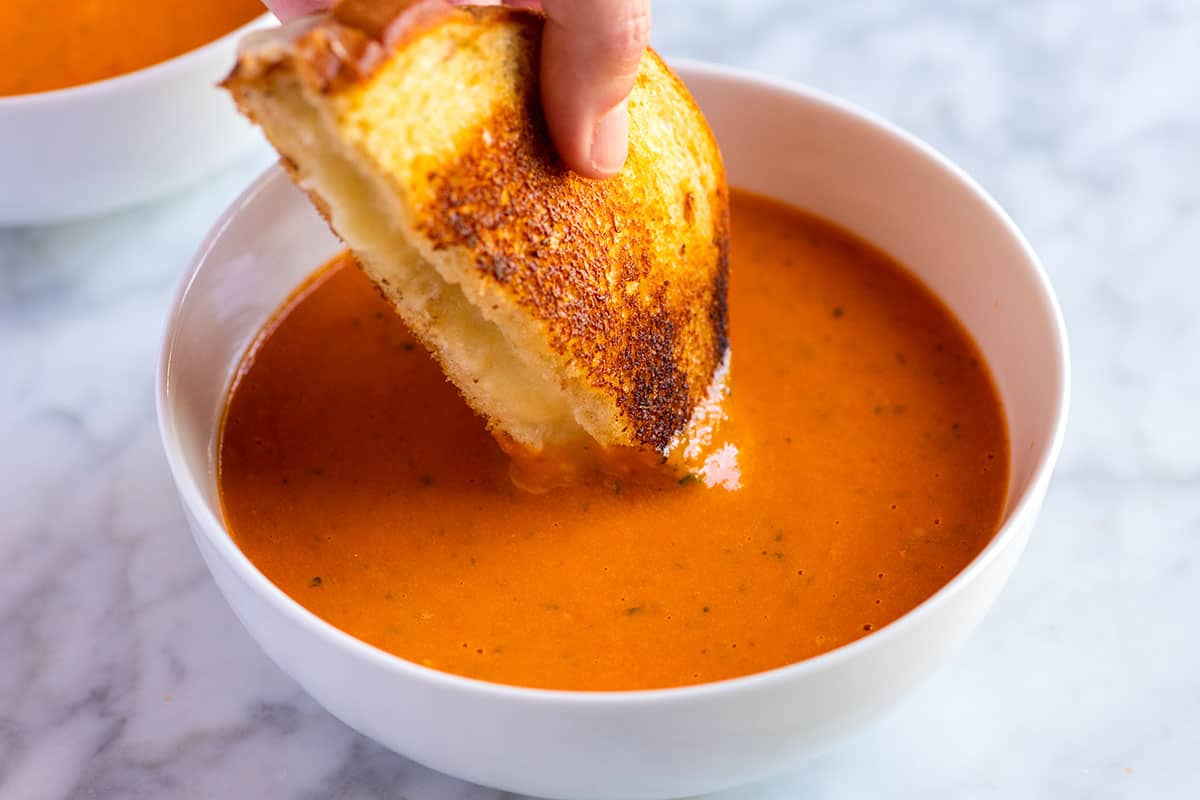
    A Bowl of Roasted Tomato Soup with Grilled Cheese

    When we’re overflowing with tomatoes, this roasted tomato soup with garlic and basil is our go-to. Roasting transforms the tomatoes, making them incredibly sweet and flavorful (it’s the perfect way to use them).

    We roast our tomatoes in a hot oven for half an hour. Then, we blend them with a few simple ingredients to create one of our favorite soups!

    Key Ingredients

    • Fresh tomatoes: Use whatever you’ve got! Roasting concentrates the flavor, making this soup great for using less-than-perfect tomatoes. In the summer, I love a mix of heirlooms, cherry, and plum tomatoes for extra sweetness. For a recipe using canned tomatoes, try our popular three ingredient tomato soup (delicious!)
    • Onion and Garlic: Roast these alongside the tomatoes. Roasted garlic adds a delicious richness, while the onion becomes sweet and tender.
    • Broth: For a vegetarian option, choose veggie broth. You can also use your favorite chicken broth or stock. For even more tomato flavor, try homemade tomato broth.
    • Fresh basil: It wouldn’t be tomato basil soup without it! Blend in a generous cup of fresh basil leaves for that classic flavor. For another tomato-basil recipe, try our fresh tomato bruschetta.
    • Cream and butter: These make a smooth and creamy texture. I like just 1/4 cup of cream (enough to balance the acidity without being too rich). (See the recipe notes for vegan options!)

    Find the full recipe with measurements below.

    How to Make Roasted Tomato Soup

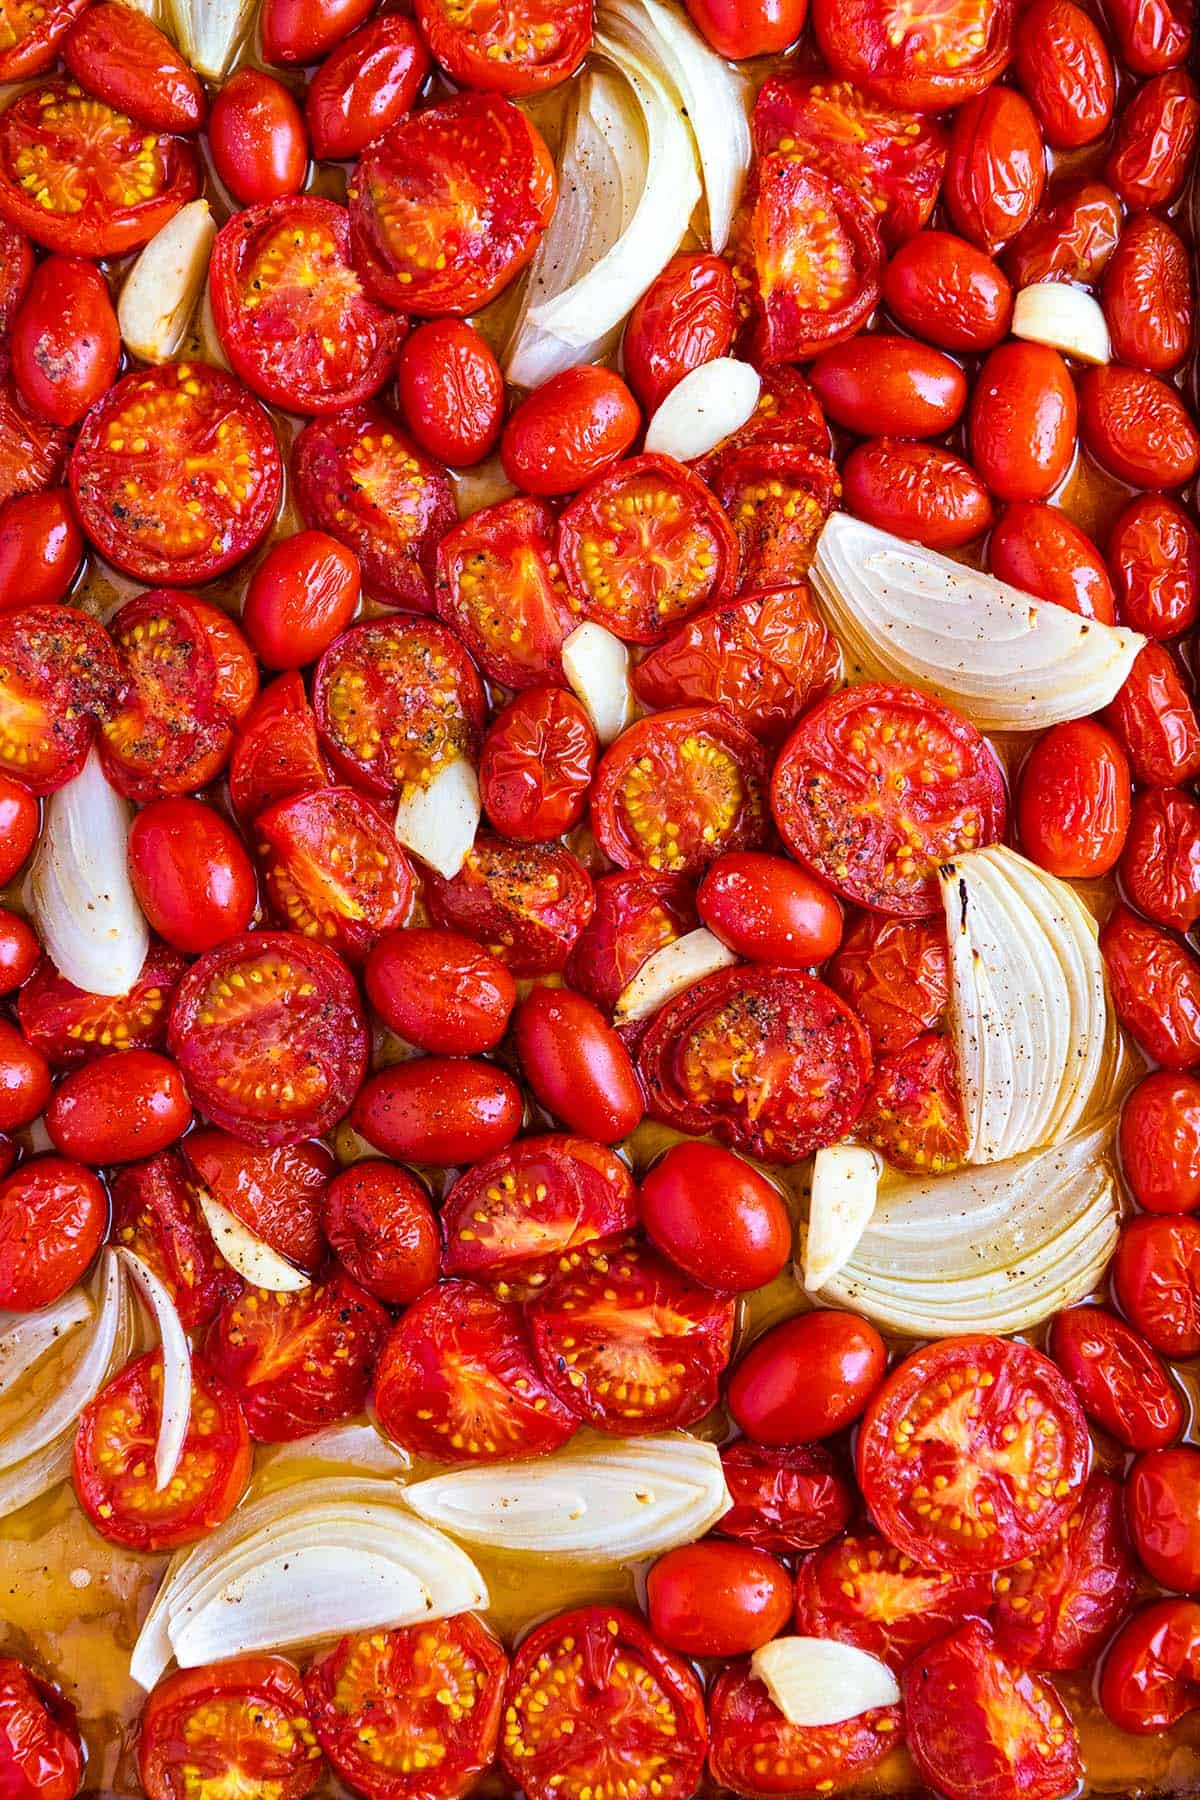
    Tip 1: Roast tomatoes, onion, and garlic. To make the best roasted tomato soup, we roast fresh tomatoes, quartered onions, and whole garlic cloves on a sheet pan. The tomatoes soften, burst, and release their delicious juices.

    Baking sheet of roasted tomatoes, onion, and garlic.

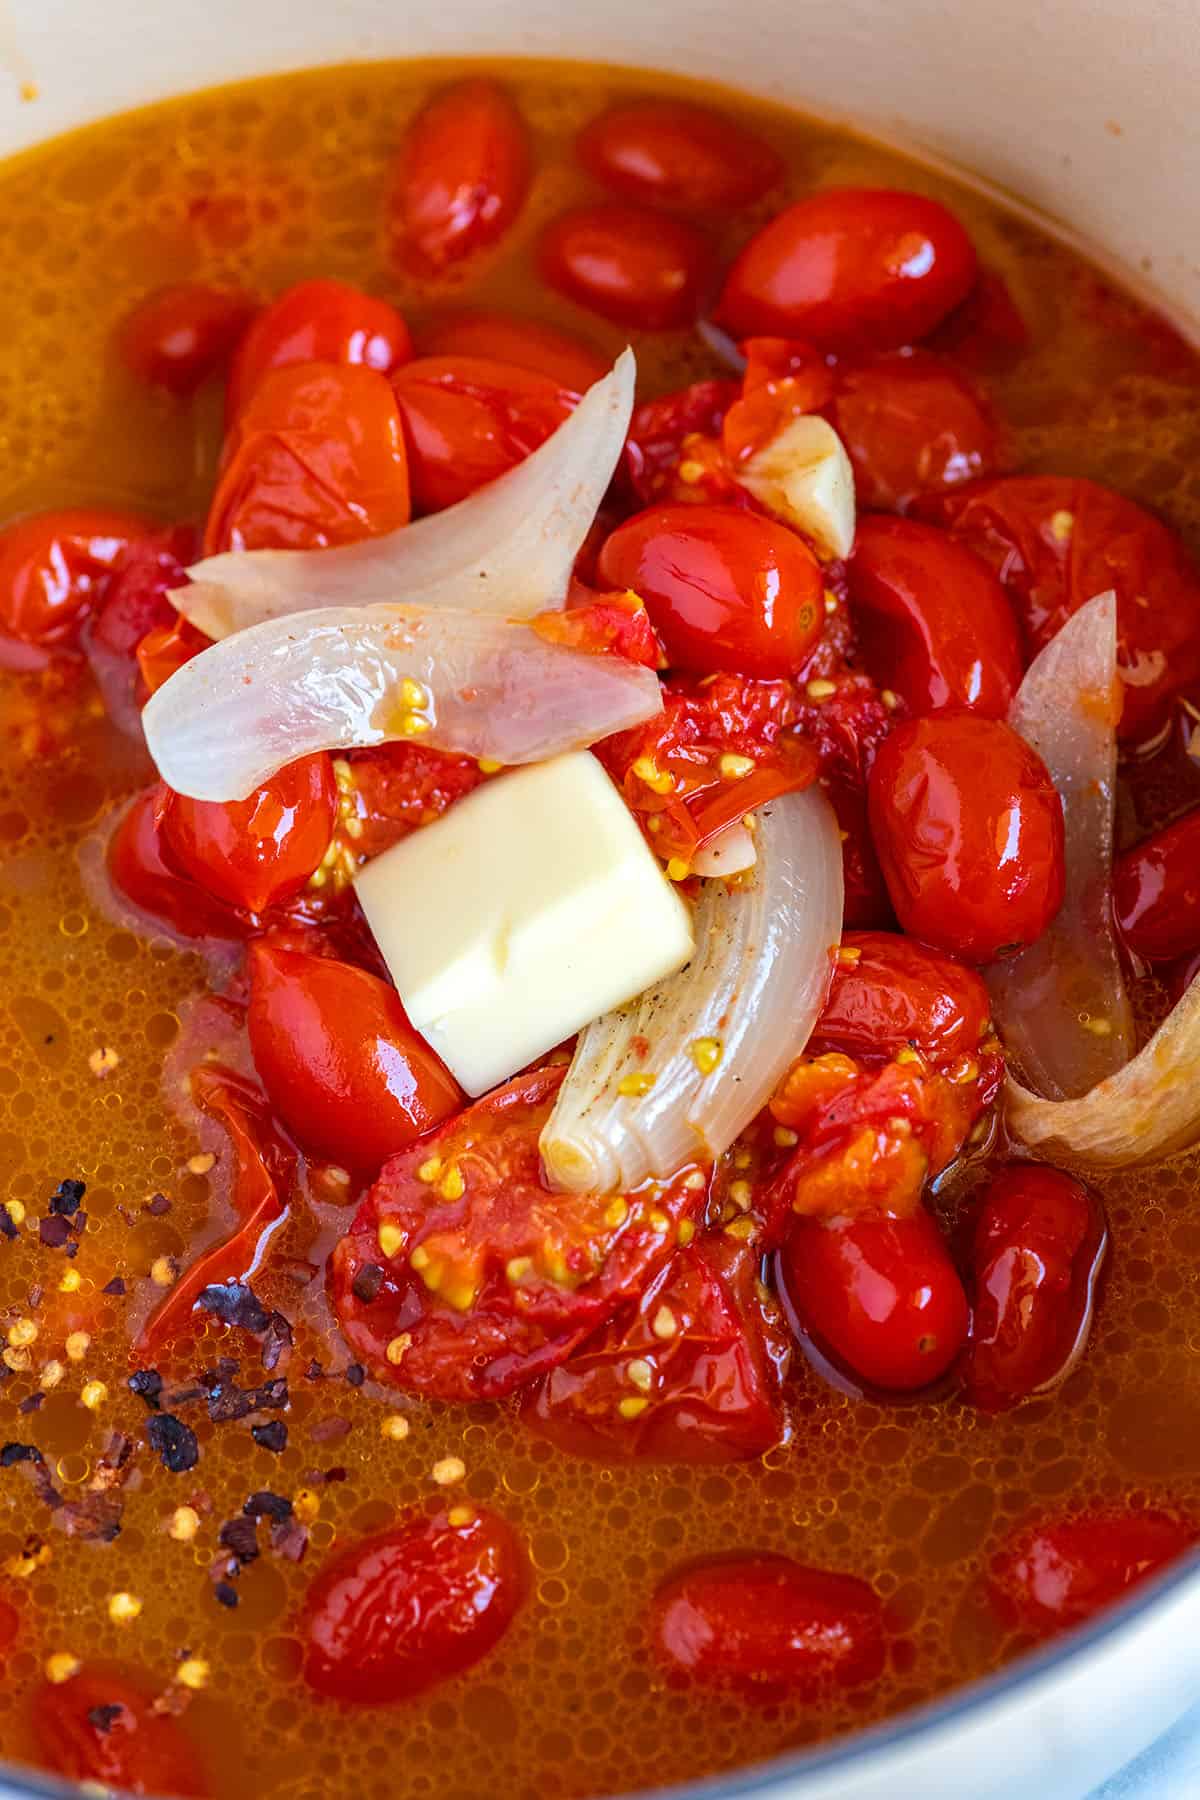
    Tip 2: Simmer for more flavor. When the tomatoes have finished roasting, we transfer everything to a soup pot with some broth and a couple of tablespoons of butter. The soup simmers for about half an hour.

    Roasted tomatoes with broth in a soup pot.

    Tip 3: Finish with cream and basil. We blend the soup with fresh basil until it’s rich and creamy. Then, a splash of cream at the end makes our soup extra creamy and balances the tomatoes acidity.

    Serving Suggestions

    It’s impossible to serve this soup without grilled cheese sandwiches in our house (Adam’s request!). I also love dunking crusty bread, garlic focaccia bread, or freshly made garlic bread into it. You can also top this soup with croutons, store-bought or homemade.

    Salads are great with soup. Try our favorite Greek salad, this good-for-you quinoa salad, or our easy tomato salad. For some sandwich options, try this vegetarian-friendly smashed chickpea sandwich. I also love tuna salad sandwiches and this avocado egg salad sandwich.

    More Roasted Tomato Recipes

    A bowl of Roasted Tomato Soup made with roasted tomatoes, basil, and garlic.

    Easy Roasted Tomato Soup

    • PREP
    • COOK
    • TOTAL

    Whether you have an abundance of peak summer tomatoes or the less flavorful ones found in winter, this roasted tomato soup with garlic and basil is the perfect solution. Roasting transforms even lackluster tomatoes, bringing out their sweetness and creating a delicious base for the soup.

    Makes 4 to 6 servings

    Watch Us Make the Recipe

    You Will Need

    3 pounds fresh tomatoes, try a mix of tomatoes like heirlooms, cherry, vine, or plum tomatoes

    6 medium cloves garlic, peeled

    1 medium onion, peeled and quartered

    1/3 cup olive oil

    Salt and freshly ground black pepper

    2 cups vegetable broth or chicken broth

    2 tablespoons butter

    Pinch of red pepper flakes, optional for a bit of heat

    1 cup fresh basil leaves

    1/4 cup heavy cream, see our tips for using non-dairy or lower fat milk

    Directions

    • Roast Tomatoes
    • 1Heat the oven to 450°F (232°C).

      2Cherry or grape tomatoes can be left whole. For larger tomatoes, core and cut them into halves, or if they are large, cut them into quarters.

      3Spread the tomatoes, onion, and garlic cloves onto a baking sheet (see notes for pan suggestions). Pour over the olive oil, and then season with 1/2 teaspoon salt and 1/2 teaspoon fresh ground black pepper. Toss well.

      4Roast the tomatoes until they soften, burst, and release some of their juices, 20 to 30 minutes. Some tomatoes will be caramelized and brown in spots.

    • Make Soup
    • 1Transfer the roasted tomatoes, onion, garlic cloves, and all the pan juices to a large soup pot or Dutch oven. Place the pot over medium-high heat.

      2Stir in the broth, butter, and a pinch of red pepper flakes (if using), and then bring to a simmer. Reduce to a low simmer, and cook until the liquid has reduced by one-third, about 30 minutes.

      3Turn off the heat, add the basil leaves, and then blend the soup until smooth. An immersion blender is the easiest, or you can use a blender. When using a regular blender, work in smaller batches, and don’t fill it too high – hot soup expands! For safety, remove the lid’s center insert and cover the opening with a kitchen towel while blending. This releases steam and prevents messy splatters.

      4Taste the soup, and then add salt and pepper until the flavor pops — it should make you smile. Finally, stir in the cream and serve.

    Adam and Joanne’s Tips

    • Milk as a Substitute: While you can use milk instead of cream, be aware that tomato soup can be acidic and might cause curdling. To prevent this, stir in 1/2 teaspoon of baking soda to neutralize the acidity before adding the milk.
    • My soup is too acidic: If your soup is too tart, try adding 1/4 to 1/2 teaspoon of baking soda to balance the flavors. Cream also helps with this.
    • Vegan Tomato Soup: Our recipe is easily adaptable! Substitute vegan butter for regular butter and use cashew cream (here’s our recipe) or full-fat coconut milk instead of cream. Coconut milk adds a slightly nutty flavor but works well.
    • Roasting Pan Tip: Tomatoes are acidic, so avoid aluminum pans. For best results, opt for anodized aluminum, ceramic-coated, or glass baking dishes.
    • Nutrition facts are estimates.

    Nutrition Per Serving
    Serving Size
    1 of 4 servings
    /
    Calories
    317
    /
    Total Fat
    27.9g
    /
    Saturated Fat
    8.1g
    /
    Cholesterol
    23.7mg
    /
    Sodium
    586.9mg
    /
    Carbohydrate
    17.9g
    /
    Dietary Fiber
    4.7g
    /
    Total Sugars
    11.4g
    /
    Protein
    3.8g


    AUTHOR:

    Joanne Gallagher

    Adam and Joanne of Inspired Taste

    We are Adam and Joanne Gallagher, the creators of Inspired Taste. Established in 2009, Inspired Taste grew from a childhood dream into one of the internet’s most trusted recipe sites with hundreds of reliable recipes, step-by-step videos, and expert tips.More About Us
    Source link

  • Cedar Plank Salmon Recipe with Citrus Rub

    Cedar Plank Salmon Recipe with Citrus Rub

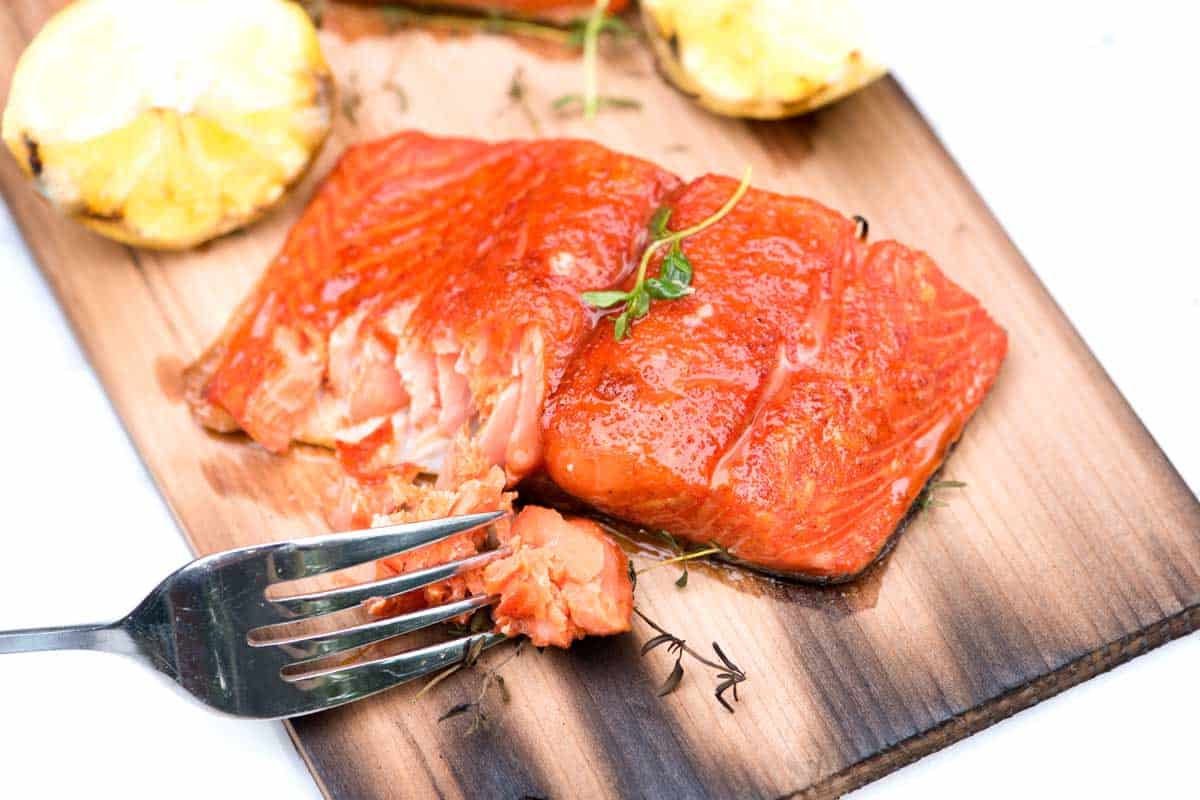
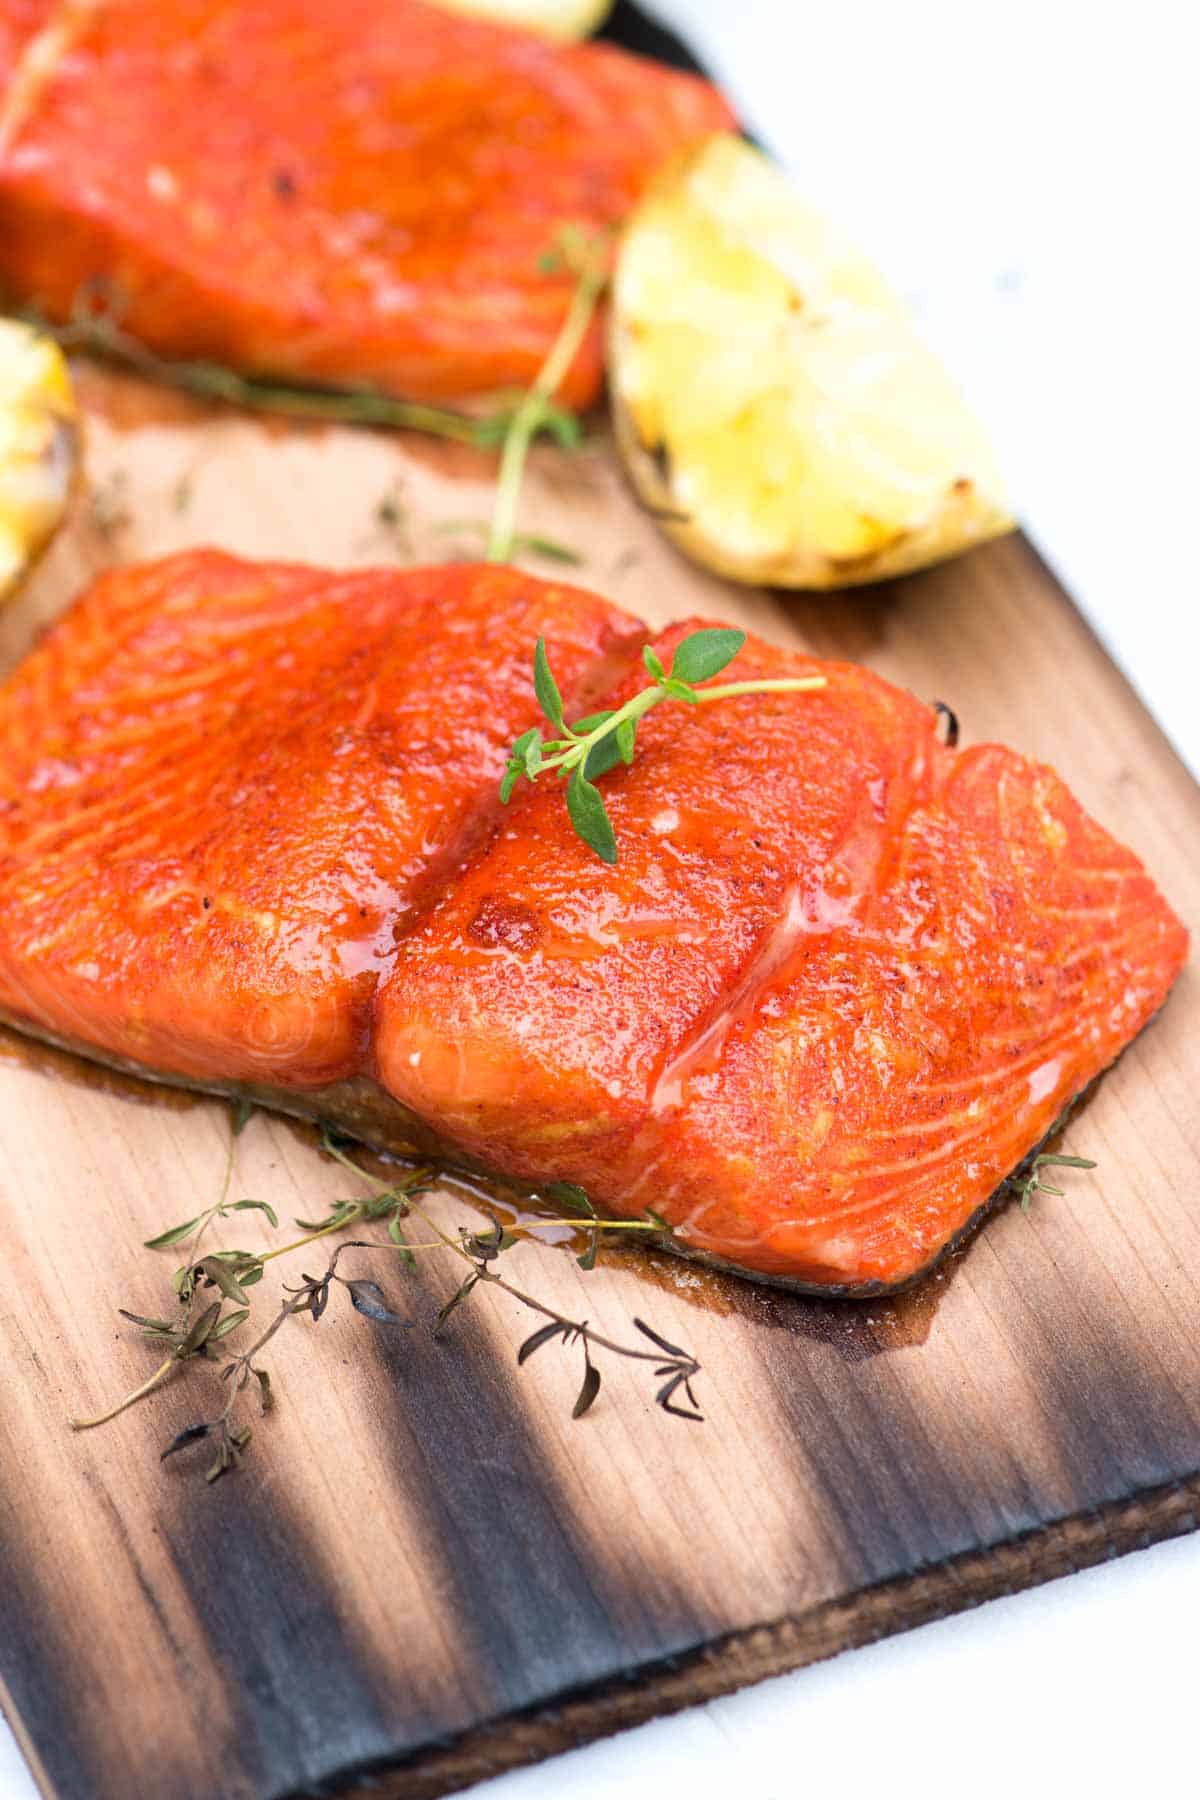
    My family loves this cedar plank salmon made with the easiest citrus and brown sugar rub! The salmon stays soft and juicy in the middle and takes on the most delicious smoky flavor from the cedar plank.

    Cedar Plank Salmon

    I love cooking salmon fillets on cedar planks. They add a delicious smoky flavor and make clean-up so easy! The rub used for this recipe is similar to the one used for our brown sugar baked salmon. It’s fast to put together and works perfectly with salmon!

    I use my outdoor grill for this cedar plank recipe, but you can adapt this recipe for your oven. See my tips below for how to do it! This salmon makes me think of summer, so I love serving it next to some of my favorite summery sides, like this incredible corn salad, our avocado salad, or these roasted fingerling potatoes with a potato salad-inspired dipping sauce.

    Key Ingredients

    • Cedar Plank: When choosing a cedar plank for cooking salmon, make sure it’s untreated, large enough for your fillet, and sold specifically for cooking. It’s essential to soak the plank in water for at least 30 minutes before cooking. This allows the plank to absorb moisture and create the fragrant steam that flavors the salmon.
    • Salmon: Any salmon fillet will work for this cedar plank salmon recipe. I especially love salmon with higher fat content, like sockeye, king, and coho. After cooking, salmon with a higher fat content stays soft and moist. I also prefer using skin-on salmon. The skin acts as an extra barrier to the heat below and easily slides off once the salmon is cooked.
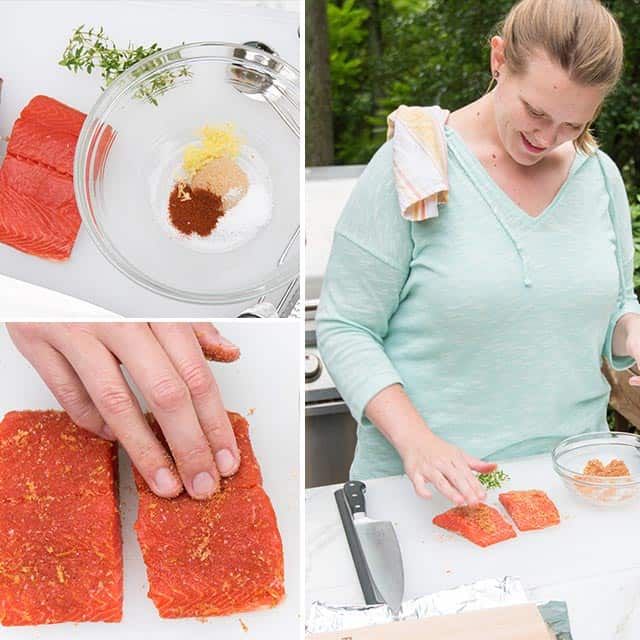
    • Homemade Citrus Rub: I love this easy rub made with brown sugar, lemon zest, salt, and smoked paprika. It’s amazing with the salmon! I like rubbing it all over my salmon and letting it sit for 15 minutes before cooking.
    • Thyme: This is optional, but I love sneaking a few thyme sprigs underneath the salmon. It adds a bit more flavor to the fish and works really well with the flavors in the rub.

    How to Make Cedar Plank Salmon

    Grilled salmon can be tricky, so I am excited to share this practically no-fail way of cooking salmon on the grill. The cedar plank protects the fish from the heat and prevents it from sticking to the grill grates, which, if you’ve experienced it, is a real pain!

    You’ll prepare the cedar plank first. Remember, you really want to soak it before using it. Thirty minutes is a minimum. You need the plank wet inside so it steams and releases all the smoky, cedar flavors.

    How to Make Cedar Plank Salmon: Rubbing the salmon with our sweet citrus rub before the grill

    Add the rub about 15 minutes before you cook your salmon. I use my fingers to massage it into the salmon, then set it aside for 15 minutes to let things marinate a bit. While the salmon sits, get the grill ready. You are looking for medium-high heat.

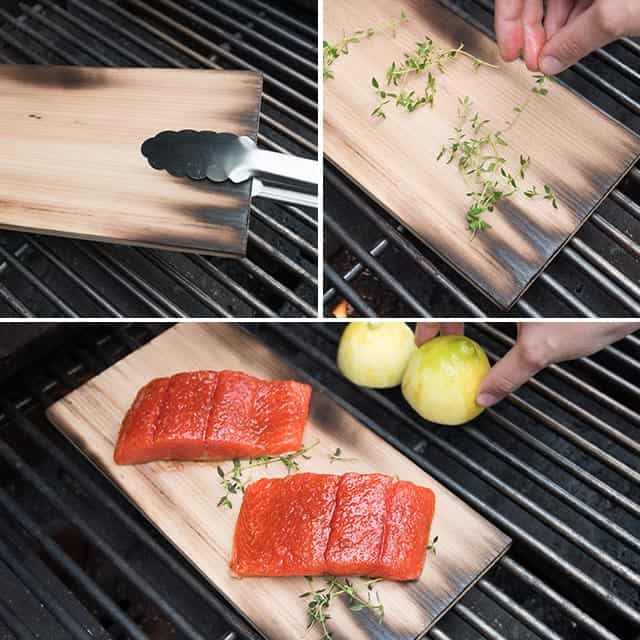
    How to Make Cedar Plank Salmon: Preparing cedar planks for salmon

    Since the salmon only takes 15 to 20 minutes to cook, I like putting the previously soaked cedar plank on the grill for a few minutes before adding the salmon. This way, the plank gets a little color and begins to smoke.

    Once the grill smells like smoky cedar (amazing, by the way), I flip the plank, add a few sprigs of fresh thyme, and then lay the salmon right on top.

    You’ll also notice lemon halves to the side of the plank. If you’ve never roasted or grilled lemon, you are missing out. In the time it takes for the salmon to cook, the lemon halves become lightly charred and sweet. They are perfect for squeezing over the cooked salmon.

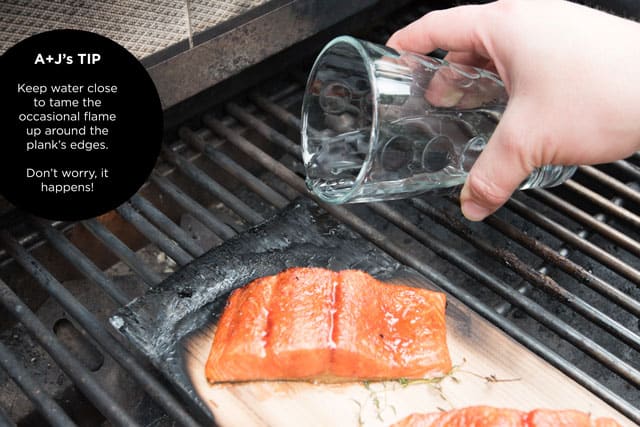
    How to Make Cedar Plank Salmon: Dealing with flare ups, keep a glass of water near by

    The salmon should take between 15 and 20 minutes, depending on the type of salmon you choose and the thickness. And that’s it! The salmon is tender, incredibly moist, and so flavorful. The sweet citrus rub on top works so nicely against the woodsy cedar smoke.

    Cedar Plank Salmon with Citrus Rub

    Cedar Plank Salmon with Citrus Rub

    • PREP
    • COOK
    • TOTAL

    Since the salmon cooks slowly, cedar plank salmon is ridiculously tender, moist, and flavorful. We love this sweet citrus rub. It works beautifully with the woodsy cedar smoke the salmon soaks up from the plank below. Hands-on time for this recipe is low, and the extra 30 minutes called for in the prep time are for soaking the cedar plank in water.

    4 Servings

    You Will Need

    1 cedar plank, soaked in water for at least 30 minutes

    1 pound (450g) skin-on salmon, cut into 4 fillets

    1 tablespoon brown sugar

    1 lemon

    1/4 teaspoon fine sea salt

    1/2 teaspoon smoked paprika

    3 to 4 thyme sprigs, optional

    Directions

      1Prepare the rub: zest the lemon to get about 1 teaspoon of zest, then combine it in a small bowl with brown sugar, salt, and smoked paprika. Set the lemon aside.

      2Pat your salmon dry and rub the spice mixture all over it. Let the salmon sit with the rub for 15 minutes.

      3While the salmon marinates, preheat your grill to medium heat.

      4Once the grill is ready, place your soaked cedar plank directly on the grill grates, cover the grill, and let it heat for about 5 minutes or until you can smell the cedar smoking.

      5Flip the plank over, scatter a few sprigs of fresh thyme on top, and then place the salmon skin-side down on the plank. Close the grill lid and cook until the salmon reaches an internal temperature of 135°F, about 15 to 20 minutes, depending on the thickness.

      6While the salmon cooks, cut the lemon in half and place the halves cut-side down on the grill grates. Grill the lemon until it softens and browns slightly. Serve the grilled lemon halves with the cooked salmon.

    Adam and Joanne’s Tips

    • Grilling with a cedar plank: Check the plank occasionally, if the edges start to catch fire, mist with a little water (or, pour a little out of a glass over the singed area of the plank) and move the plank to a cooler part of the grill with more indirect heat.
    • Adapt this recipe for the oven: To bake cedar plank salmon, soak the plank in water for at least 30 minutes. Preheat your oven to 400°F and prepare the rub as directed. Rub the salmon with the spice mixture and let it sit for 15 minutes. Place the soaked plank on the oven rack and arrange the salmon on top. Bake for 12 to 15 minutes or until the salmon reaches an internal temperature of 135°F. Roast lemon halves alongside the salmon if desired.
    • The nutrition facts provided below are estimates.

    Nutrition Per Serving
    Serving Size
    4 ounces (1/4 of recipe)
    /
    Calories
    179
    /
    Protein
    24.7 g
    /
    Carbohydrate
    3.7 g
    /
    Dietary Fiber
    0.5 g
    /
    Total Sugars
    2.6 g
    /
    Total Fat
    6.8 g
    /
    Saturated Fat
    1.5 g
    /
    Cholesterol
    51 mg
    /
    Sodium
    344 mg


    AUTHOR:

    Adam Gallagher

    Adam and Joanne of Inspired Taste

    We are Adam and Joanne Gallagher, the creators of Inspired Taste. Established in 2009, Inspired Taste grew from a childhood dream into one of the internet’s most trusted recipe sites with hundreds of reliable recipes, step-by-step videos, and expert tips.More About Us
    Source link