Tag: Perfect

  • Perfect Poached Salmon Recipe

    Perfect Poached Salmon Recipe

    I’m convinced this poached salmon recipe makes some of the most tender, mouth-watering salmon. It’s also ridiculously easy!
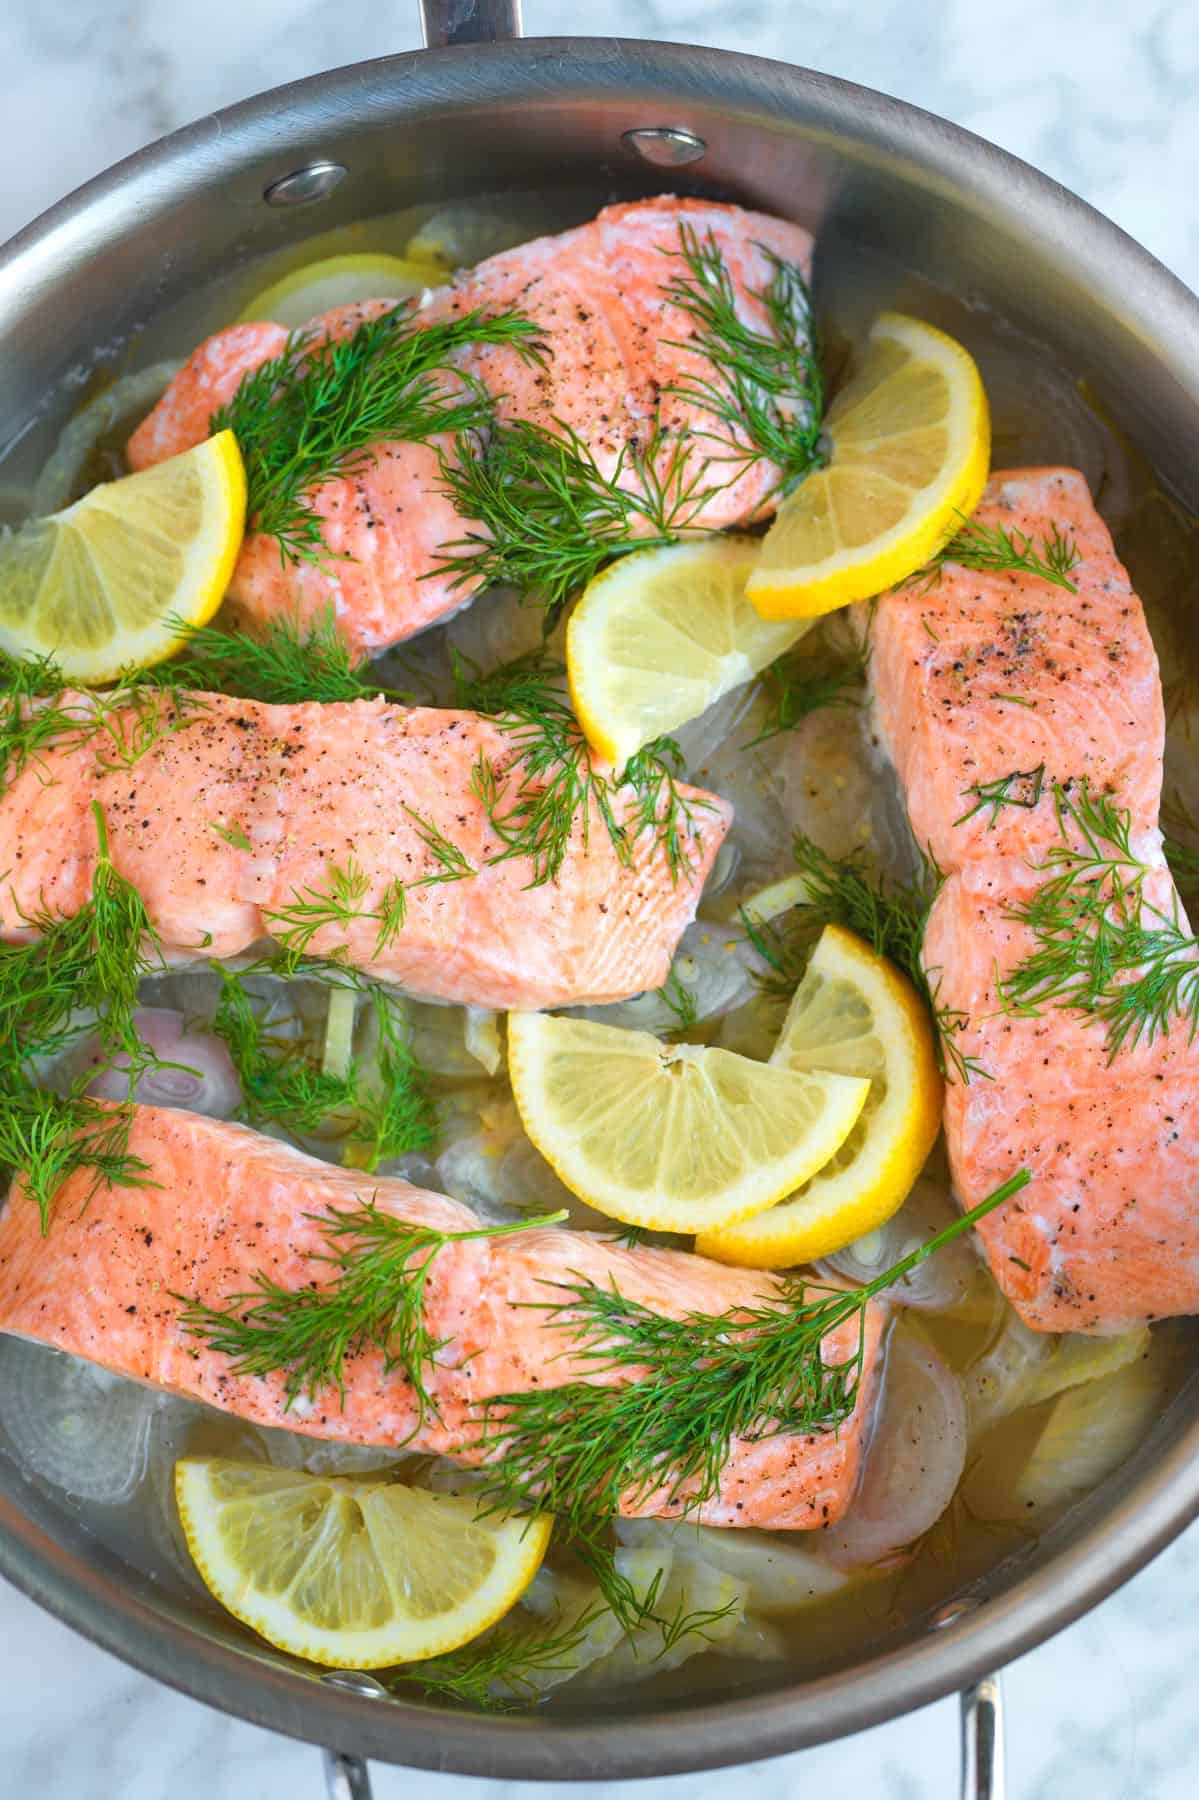
    Perfect Poached Salmon with Lemon and Dill

    Poaching is genuinely one of the best ways to cook salmon. Here’s my go-to recipe, which once you try it, I’m betting you’ll become just as obsessed as I am. And while we are on the subject, I also LOVE poached chicken and poached shrimp!

    This salmon turns out incredibly moist, soft, and not at all fishy. It’s perfect for topping your favorite salad recipes, flaked over toast, on top of creamy polenta and grits, or with veggies like my favorite roasted broccolini. It’s also incredible with a spoonful of hollandaise sauce or this dill sauce.

    Key Ingredients

    • Salmon: I use salmon fillets around 1 inch thick (the thicker fillets stay more tender and succulent). I also like fattier varieties of salmon, such as King, Coho, and Sockeye. We also love Steelhead in this recipe (similar to Atlantic salmon).
    • Wine or Broth: I use a combination of wine and water for this recipe. A splash of white wine adds a lovely flavor. I’ve even used leftover Lillet Blanc with excellent results (I usually have it on hand to make this French onion soup)! If you’re out of wine, broth is a delicious substitute. Vegetable broth or a light chicken broth works well, and seafood stock is even better.
    • Lemon: Sliced lemon is the classic choice for poaching salmon. Try limes or oranges for a fun twist.
    • Shallot: I prefer shallots over onion for poaching. They have a gentle sweetness that works well with the salmon. Smashed garlic cloves or sliced sweet onion are great alternatives.
    • Fennel: My favorite aromatic for salmon! Fresh fennel adds a lovely licorice flavor. I wish more people cooked with fennel. If you’re feeling fancy, toss some extra fennel into your cart to make our fennel and apple salad (it pairs perfectly with this).
    • Fresh dill: Dill and salmon are a match made in heaven! I like scattering a lot of fresh dill into the pan. Other herbs like thyme, bay leaf, mint, and parsley are all great options.

    Find the full recipe with measurements below.

    How to Poach Salmon

    Tip 1: Keep the skin on. I keep the skin on my salmon fillets. The skin is much easier to remove after cooking and is a barrier to heat from below, protecting the salmon from overcooking.

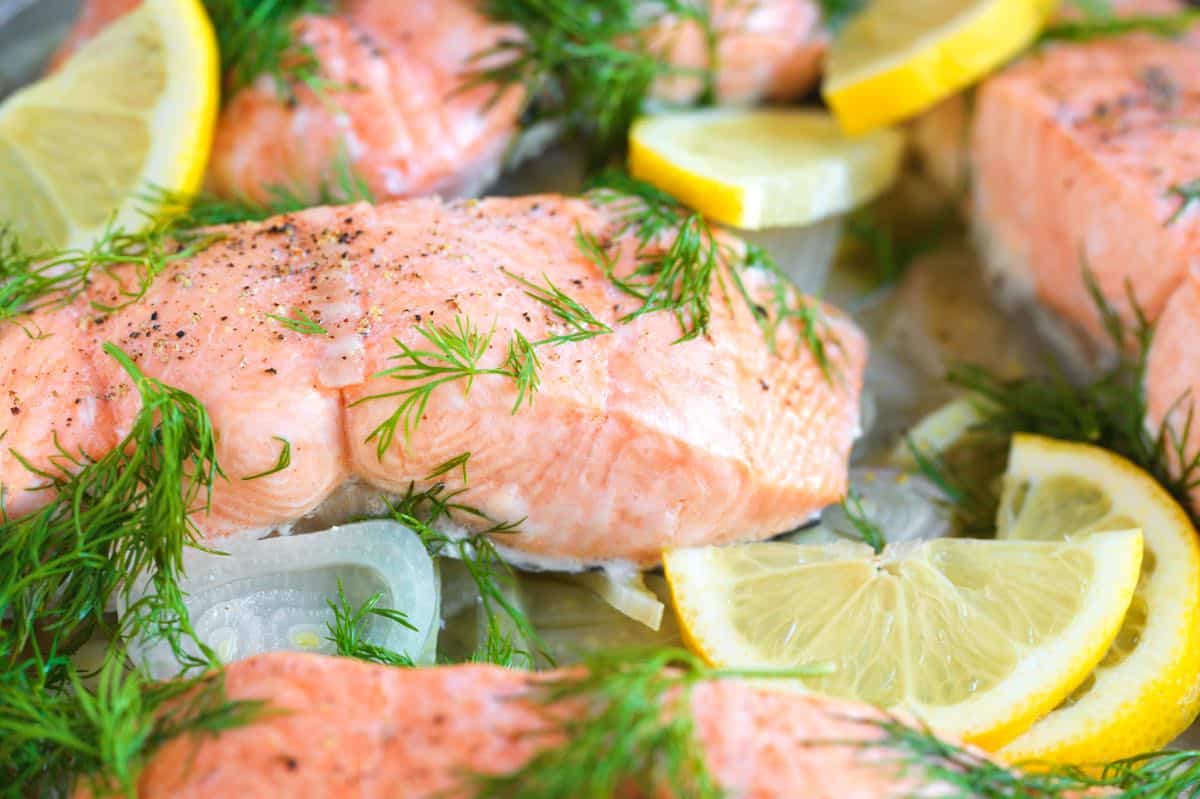
    Skillet with lemon slices, shallot, fennel and salmon fillets almost ready for poaching

    Tip 2: Use a skillet with a lid. You’ll need a skillet with a lid for this recipe. The poaching liquid does not need to cover the salmon. The lid will trap all the moisture in the skillet and help to gently cook your salmon. As the fish cooks, the aromatics will infuse their flavor into the fish. I just love it!
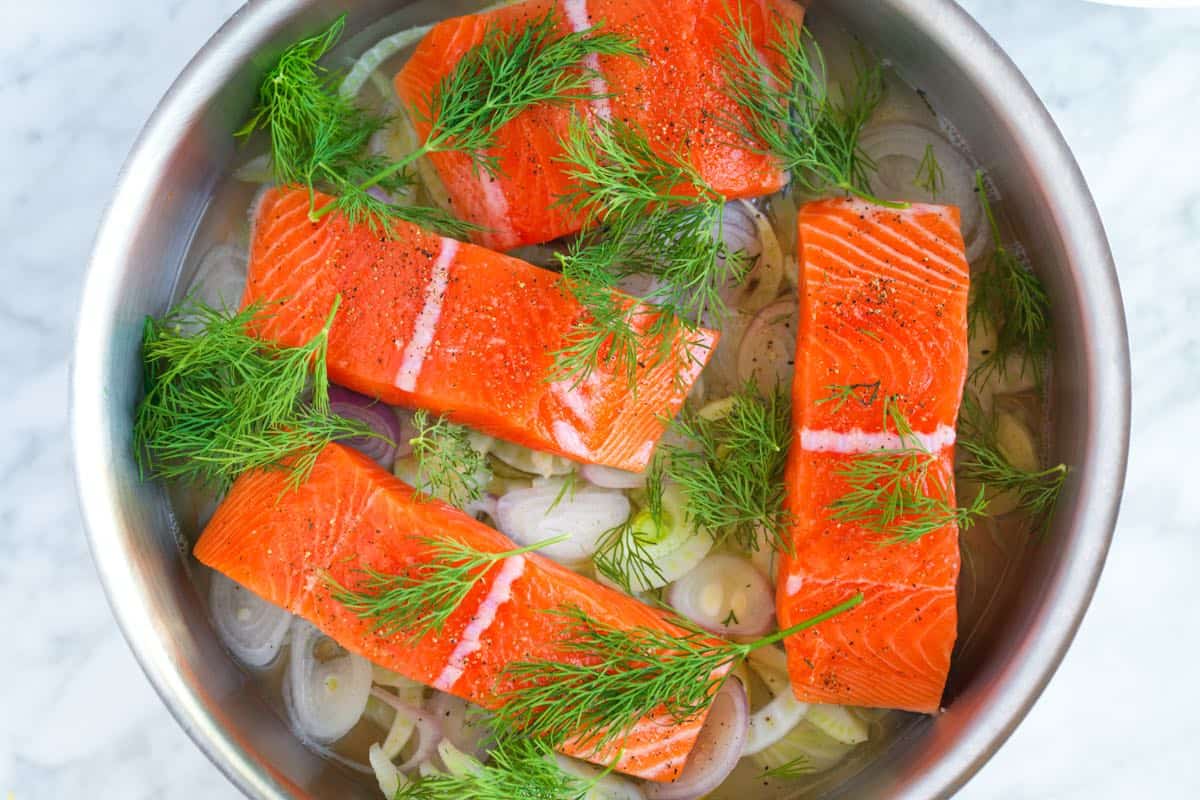
    Adding fresh dill to the salmon in the skillet for poached salmon fillets

    Serving Suggestions

    This salmon is fantastic on salads. Try salads like my broccoli slaw, kale salad, or a classic Caesar. Cucumber and salmon are meant for each other, so I love this creamy cucumber salad, zippy vinegar cucumber salad, or avocado and cucumber salad.

    This is also amazing, added to sandwiches and wraps. Consider this homemade pita, salad greens, and a drizzle of Tzatziki sauce! Leftover poached salmon would also be lovely in our salmon patties recipe (which usually calls for canned salmon).

    More Light Seafood Dishes
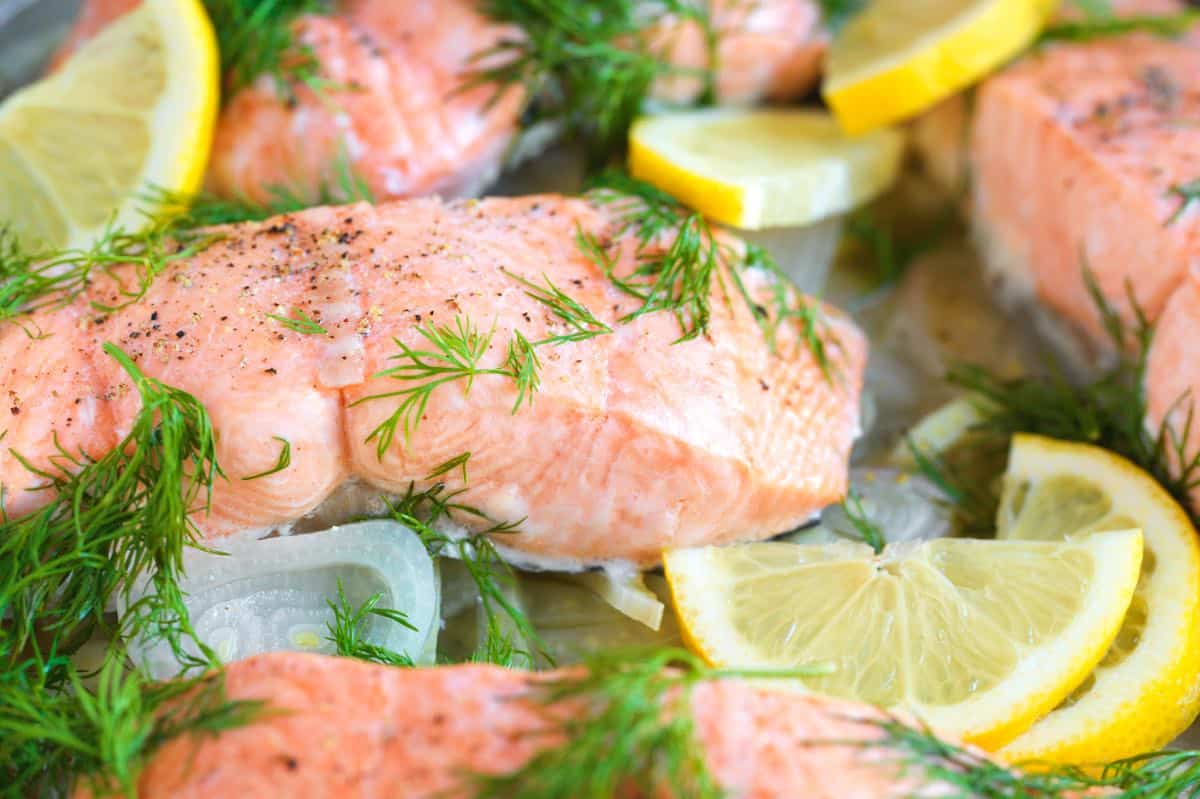
    Perfect Poached Salmon with Dill

    Perfect Poached Salmon

    • PREP
    • COOK
    • TOTAL

    Poaching salmon is one of our favorite ways to cook salmon! It cooks quickly and stays moist, flaky, and tender. The aromatics (lemon, shallot, fennel, and dill) are optional but add lots of delicious flavor. You can use water, broth, or a combination of water and white wine for the poaching liquid. If you love this recipe, you may also love my poached chicken and poached shrimp!

    Serves 4

    Watch Us Make the Recipe

    You Will Need

    4 skin-on salmon fillets, 6 ounces each

    1 cup water

    1/2 cup white wine or broth

    1 lemon, sliced

    1 shallot, sliced

    1 medium fennel bulb, sliced

    6 sprigs fresh dill or other fine herb like parsley, cilantro or mint

    Salt and fresh ground black pepper

    Directions

      1Make a bed of lemon slices, shallot, and fennel in the bottom of a wide skillet with a lid.

      2Lightly season the salmon fillets with salt and pepper, then place them, skin side down, on the lemon slices, shallot, and fennel.

      3Scatter fresh dill around the pan and on top of the salmon.

      4Pour in the water and wine. The liquid does not need to cover the salmon. Since we are cooking it with the lid on, the salmon will poach, even if the liquid does not cover them.

      5Place the skillet over medium-high heat and bring to a simmer. When the liquid is aggressively simmering, turn the heat to low and cover the skillet with its lid.

      6Cook until an internal temperature thermometer reads between 125°F to 130°F or when you pierce the thickest part of the salmon with a fork, 5 to 12 minutes, depending on how thick the salmon fillets are. Serve.

    • Storing
    • 1Your salmon will last in an airtight container in the fridge for up to 4 days or frozen for up to 1 month. Thaw in the refrigerator overnight before reheating.

      2To reheat, place it in an oven-safe dish. Add a splash of water or broth for extra moisture. Cover the dish with aluminum foil to prevent drying. Bake for about 15 minutes, or until it reaches an internal temperature of 125°F to 130°F.

    Adam and Joanne’s Tips

    • Skin-on fillets: The skin is much easier to remove after cooking, and it acts as a barrier for heat coming from below the fillets, protecting them from overcooking.
    • Your poaching liquid does not need to cover the fish: Aim for the liquid to come about a quarter of the way up the sides of the salmon fillet. The gentle heat and the lid will create a steamy environment, poaching the salmon beautifully.
    • Seasoning the salmon: I use a simple seasoning of salt and pepper or this seasoned salt and lightly sprinkle it on both sides of the fish. If you have a favorite seafood rub, feel free to add it.
    • The nutrition facts provided below are estimates.

    Nutrition Per Serving
    Serving Size
    1 fillet
    /
    Calories
    280
    /
    Total Fat
    10.1g
    /
    Saturated Fat
    2.2g
    /
    Cholesterol
    76.5mg
    /
    Sodium
    203.6mg
    /
    Carbohydrate
    2.6g
    /
    Dietary Fiber
    0.8g
    /
    Total Sugars
    1.1g
    /
    Protein
    37.1g


    AUTHOR:

    Joanne Gallagher

    Adam and Joanne of Inspired Taste

    We are Adam and Joanne Gallagher, the creators of Inspired Taste. Established in 2009, Inspired Taste grew from a childhood dream into one of the internet’s most trusted recipe sites with hundreds of reliable recipes, step-by-step videos, and expert tips.More About Us


    Source link

  • Perfect Lobster Rolls Recipe

    Perfect Lobster Rolls Recipe

    These are the best homemade lobster rolls we’ve ever had! Our recipe combines perfectly cooked lobster with the most incredible warm butter and mayonnaise dressing. These are almost too good!

    Best Homemade Lobster Rolls

    Lobster rolls come with a lot of opinions. Mayo, butter, celery, hot, warm, the bun, it goes on. In Maine, you’ll see chilled lobster dressed in mayonnaise, while in Connecticut, it’s common to see the lobster tossed in warm melted butter.

    These homemade lobster rolls are amazing and made with warm melted butter AND creamy mayonnaise. You might also enjoy our easy shrimp salad or these Maryland crab cakes.

    Key Ingredients

    • Lobster: We start with live lobsters and cook them ourselves. For the best lobster roll, you should cook your own lobsters too! I’ve shared Richard’s method below to guide you through it. If you already have cooked lobster meat, you’ll just need to toss it into the butter and mayo sauce.
    • Butter: We toss our perfectly cooked lobster meat into a warm bath of melted butter (yum!).
    • Mayonnaise: To finish the sauce, we add a little bit of mayo to the warm butter. It makes it a bit creamier (it’s so incredibly good!). When I have it on hand, I use homemade mayo.
    • Fresh Herbs: We love the lobster flavor to come through, so we only add a little bit of fresh herbs. I usually stir in a couple of teaspoons of fresh chopped chives and dill.

    How to Make Lobster Rolls

    We highly recommend starting with live lobsters to make the best lobster rolls at home. This way, you have complete control over the cooking process, ensuring the lobster meat is perfectly cooked. If you prefer to skip handling live lobsters, our lobster roll recipe below specifies the amount of cooked lobster meat needed.

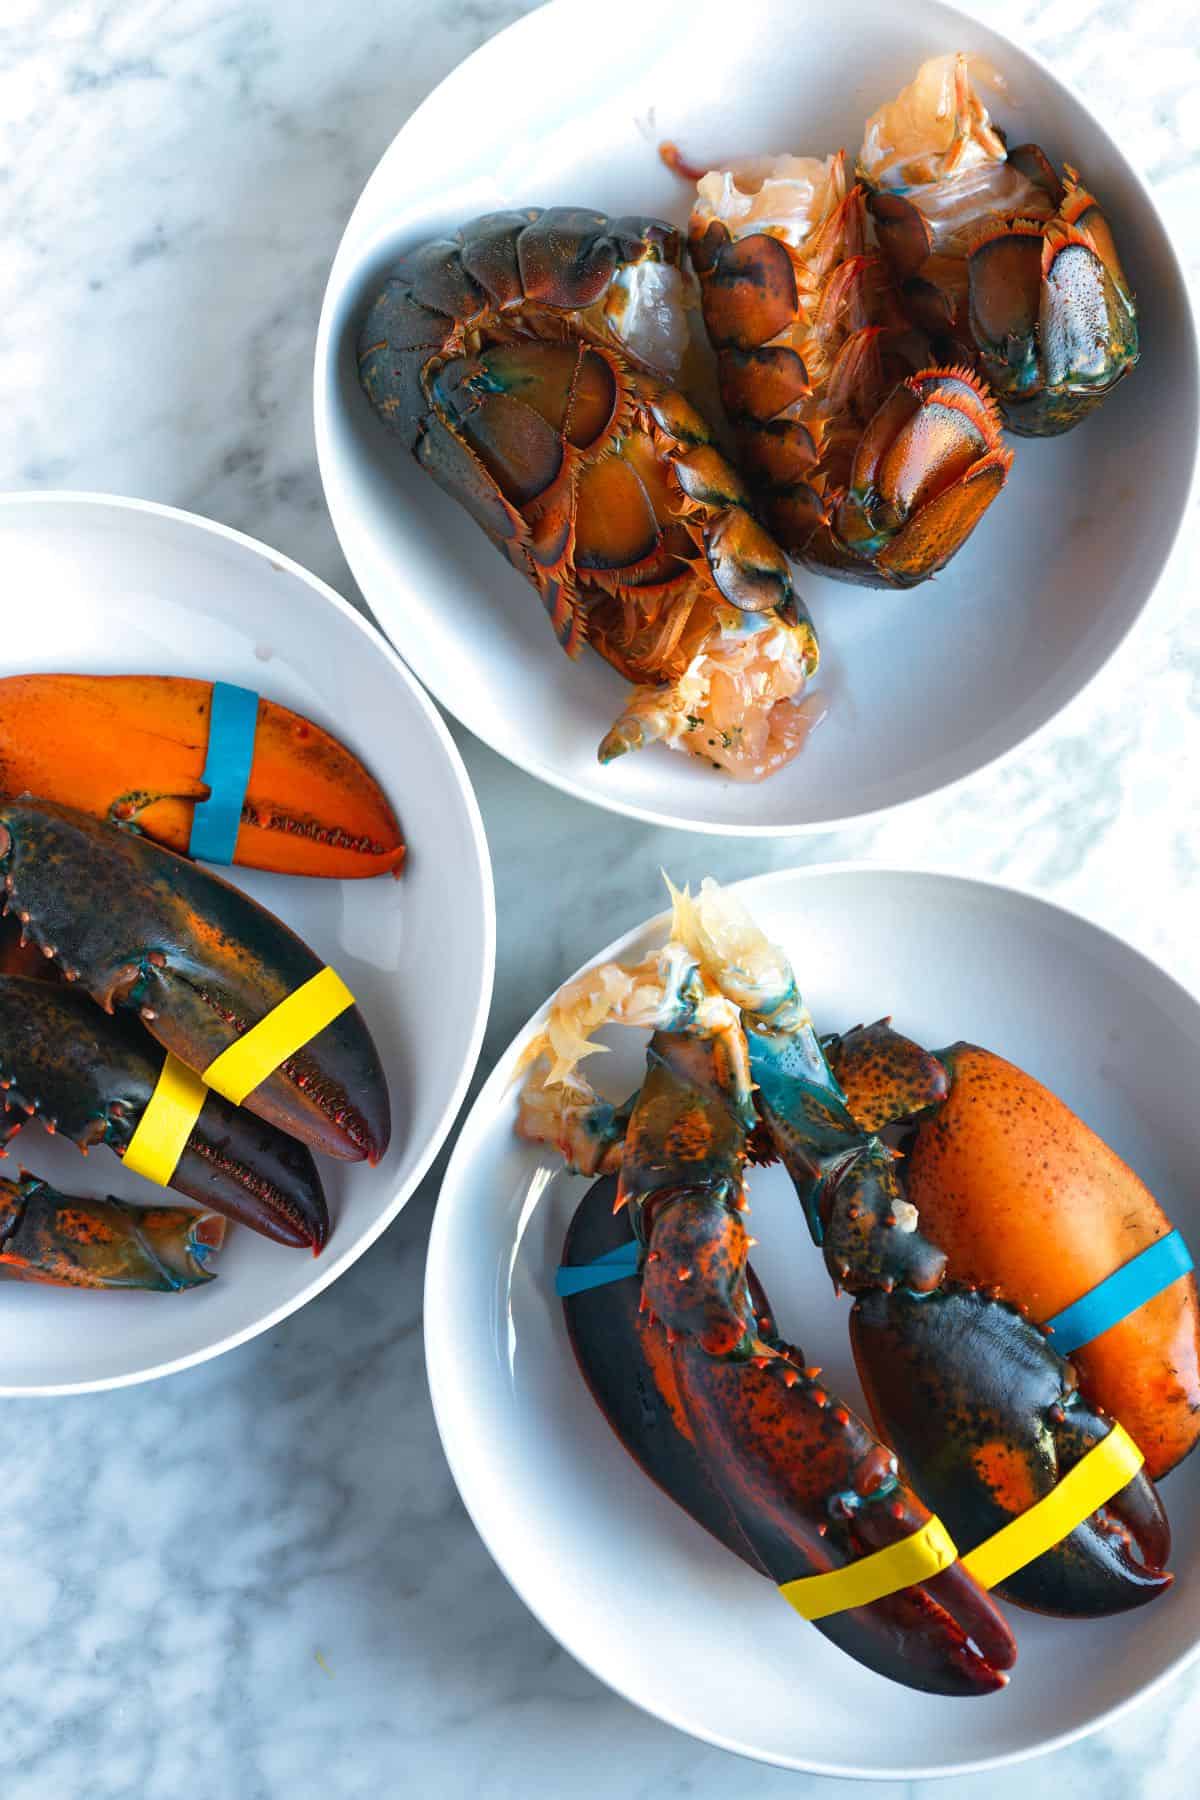
    While killing a lobster may seem daunting, it’s a necessary step. Our method is quick and effective. Place the lobster on a cutting board and find the faint cross on its shell where the head and body connect. Quickly and firmly insert a large, sharp knife into this cross, pushing down through the head and between the eyes. This severs the spinal cord, causing instant death. (The legs may still twitch, but this is a natural reflex.)

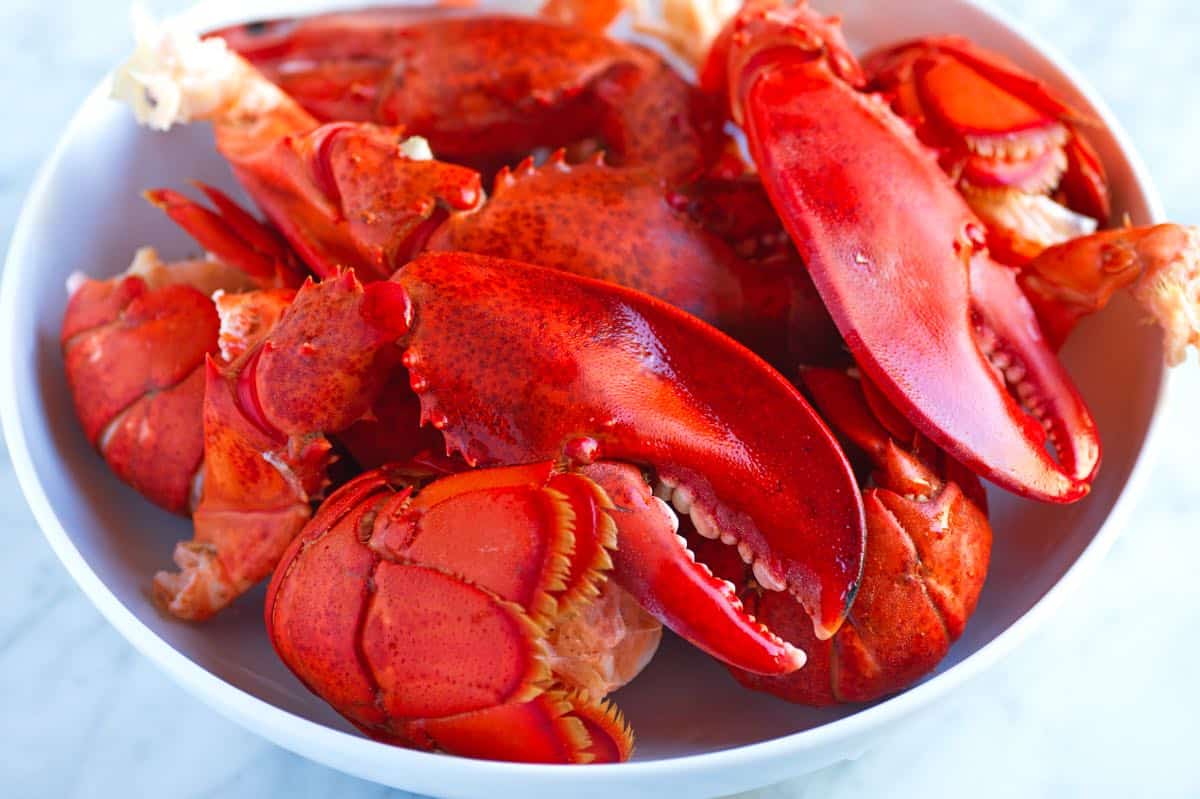
    Lobster tails and claws ready to cook for lobster rolls

    Remove the tails and claws from the body. You can save the bodies for another time for dishes like lobster stock, bisque, or mac and cheese. I freeze them.

    Cooked lobster

    Boil the tails and larger claws for 5 minutes and the smaller claws for 4 minutes. Allow the cooked lobster pieces to cool completely.

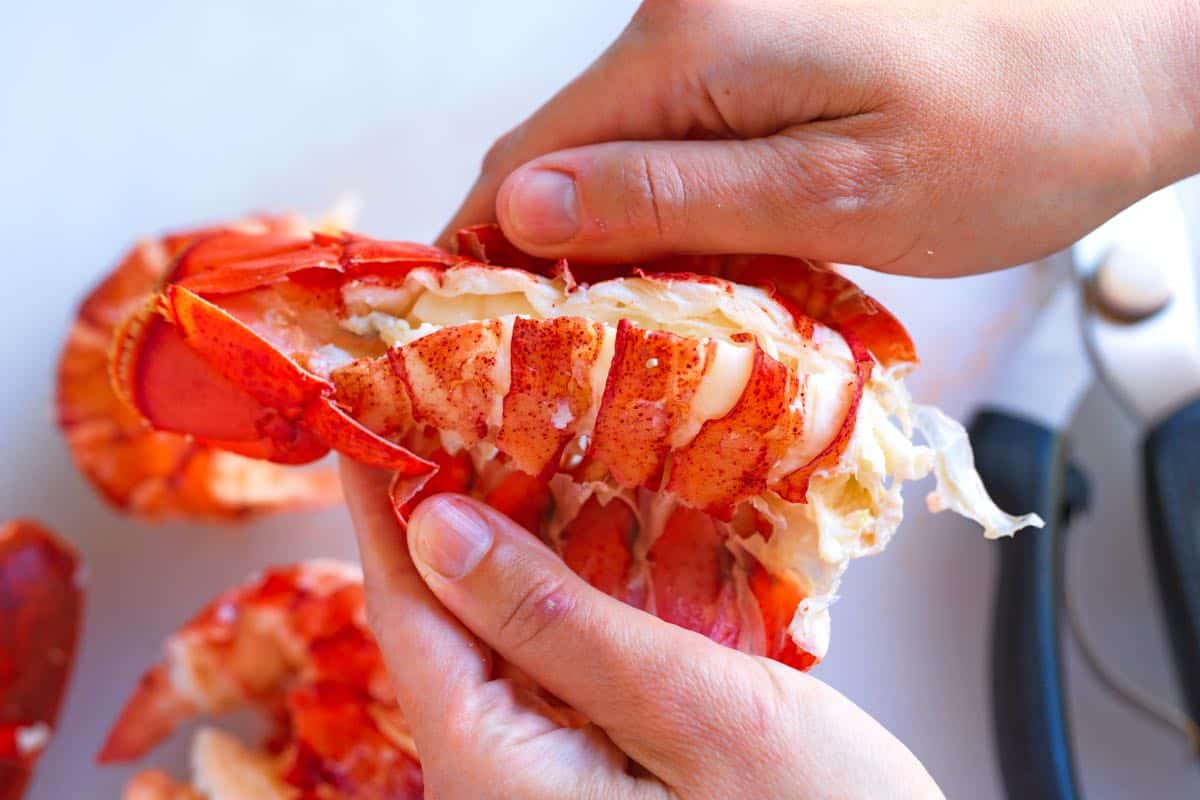
    Removing the Meat from Tails: Use kitchen shears to cut down the top of the tail, then pull back the sides to crack the shell. Gently pull out the tail meat.

    Removing meat from lobster tails

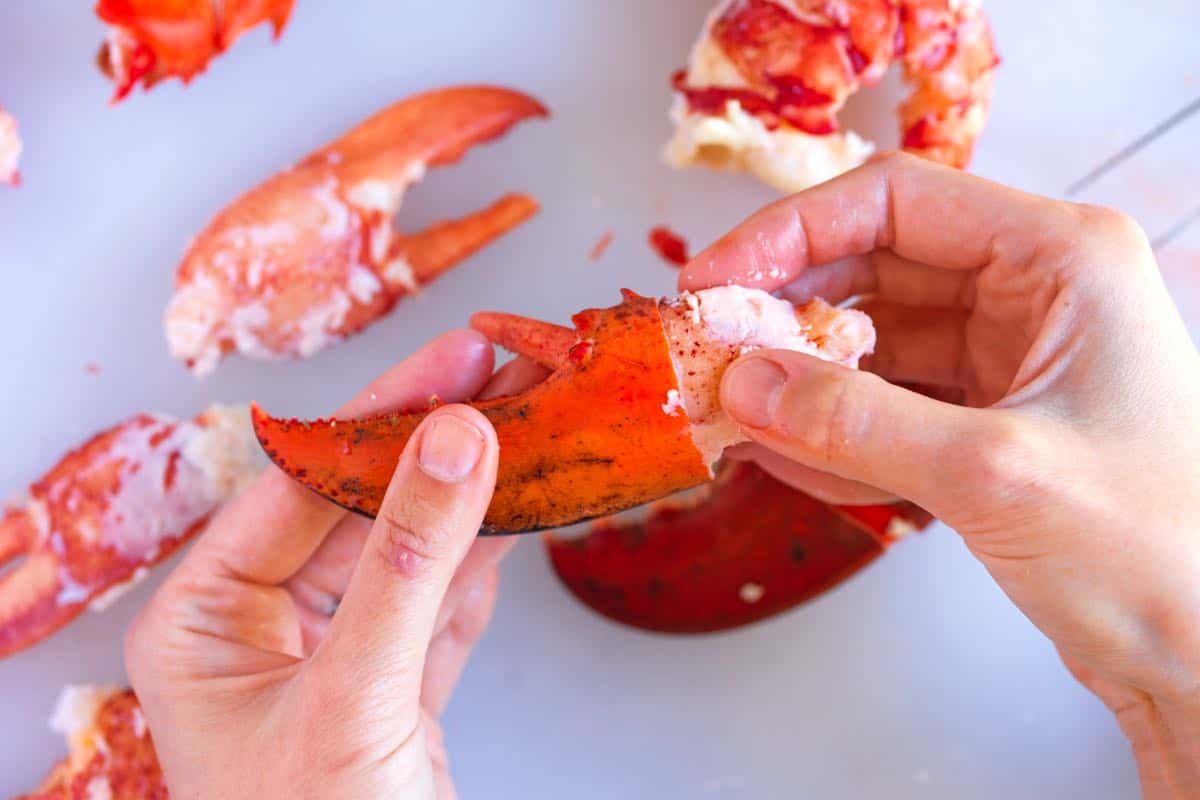
    Removing the Meat from Claws: Twist off the knuckles, then use a knife or mallet to crack the claw shells.

    Removing claw meat from lobsters

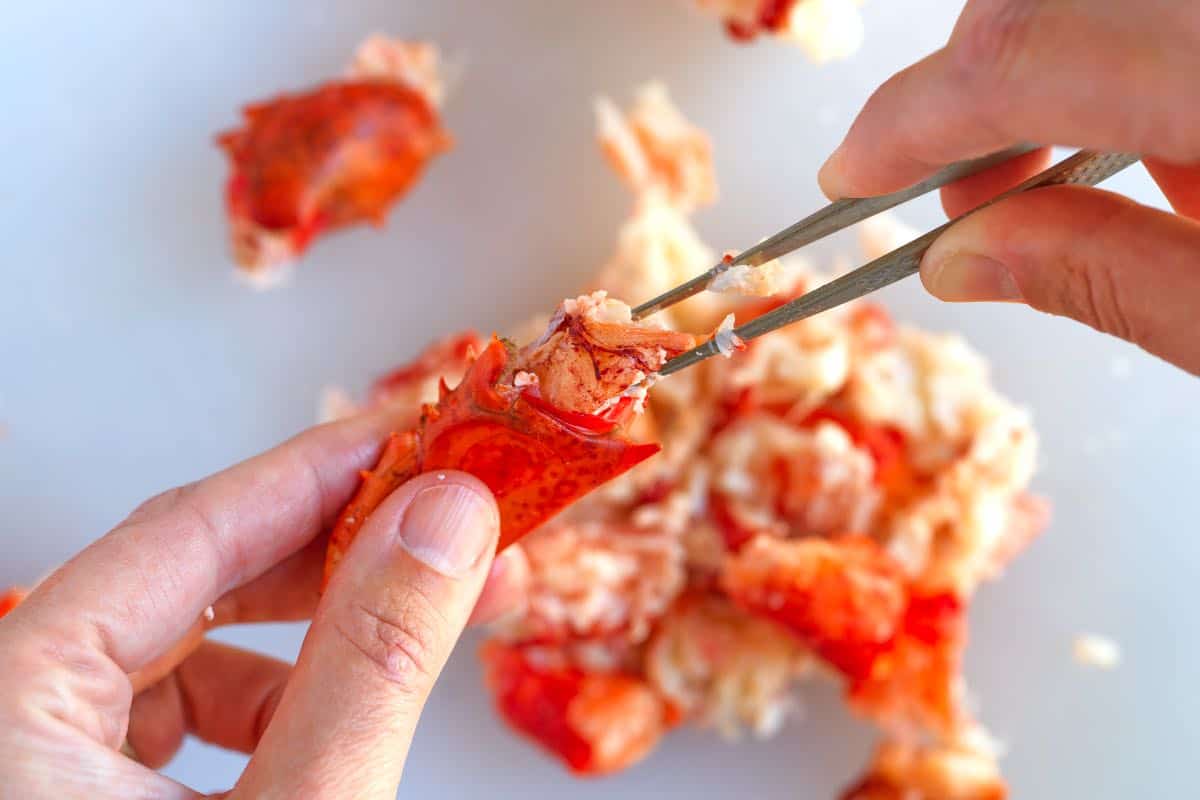
    For smaller legs or pieces, carefully remove the meat, using tweezers or chopsticks if necessary.

    Pulling lobster knuckle meat out of the shells

    Now that you have perfectly cooked lobster meat, you can create mouthwatering homemade lobster rolls!

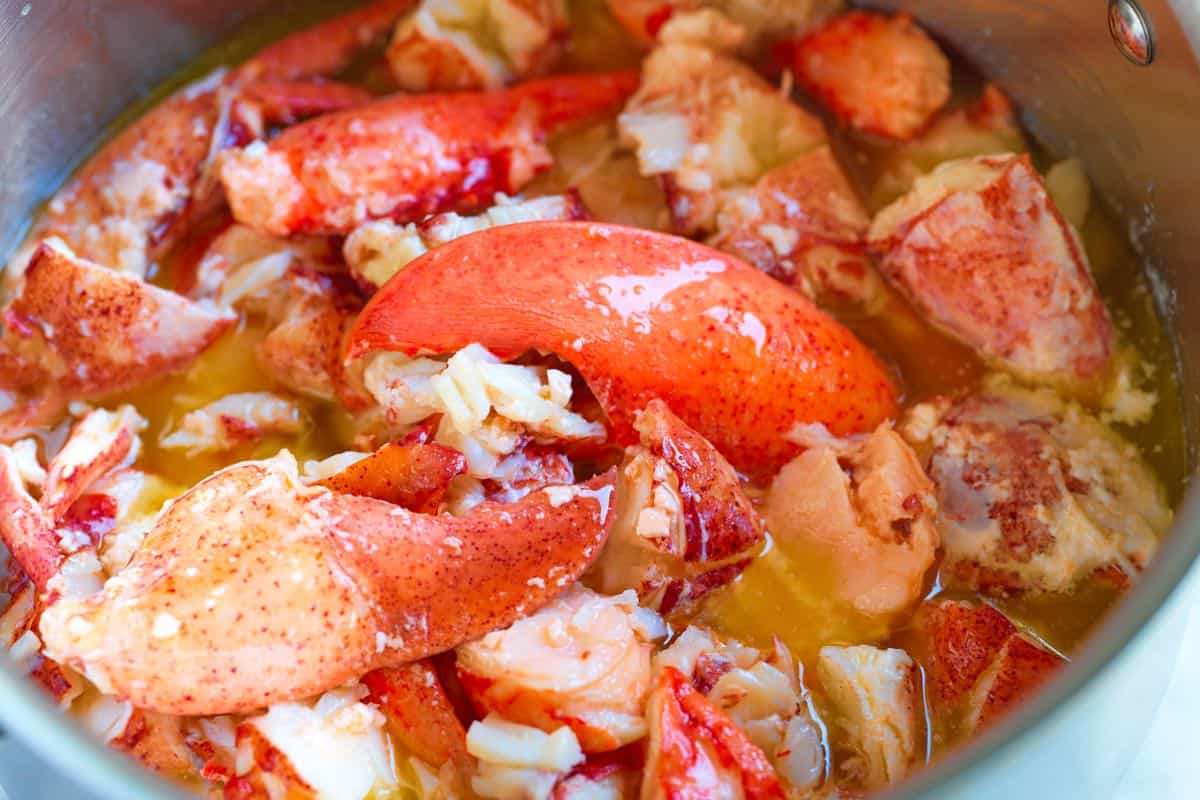
    When you’ve removed all the meat from the shells, toss it into a bath of melted butter (yum). Stop yourself from eating all of the lobster in the butter, and allow it to sit for a few minutes until it’s warmed through. Then, toss the butter-basted lobster meat with some mayonnaise, herbs, and pepper. Then spoon onto lightly toasted rolls and enjoy.

    Lobster in a bath of melted butter ready for lobster rolls

    What to Serve with Lobster Rolls

    I love serving lobster rolls on a soft bun with a summer side like our creamy potato salad, this herb potato salad, or my creamy pasta salad. A handful of potato chips is a good idea, too. For more ideas, try homemade coleslaw or my favorite broccoli slaw.

    Homemade Lobster Rolls with butter and mayo

    Perfect Lobster Rolls

    • PREP
    • COOK
    • TOTAL

    I’m not exaggerating when I say that these homemade lobster rolls with perfectly cooked lobster tossed in a butter and mayo dressing are the best we’ve had. For the most mouthwatering texture, start with live lobsters. Our method for cooking the lobster guarantees perfectly cooked lobster. If you are uncomfortable killing live lobsters, buy whole steamed lobsters or lobster meat.

    For this recipe, we separate the claws and tail from the bodies. We won’t use the lobster bodies in this recipe, but you can save them in the freezer for another day (they make incredibly delicious lobster mac and cheese–coming soon).

    Makes 4 rolls

    You Will Need

    4 whole lobsters, 1 ½ pounds each, or 20 ounces cooked lobster meat

    2 tablespoons salt

    6 ounces salted butter

    1/4 cup mayonnaise, see homemade mayo

    1 teaspoon chopped fresh dill

    1 teaspoon finely chopped chives

    3 to 4 twists fresh ground pepper

    4 hoagie or sausage rolls

    Directions

    • Prepare Lobsters for Cooking
    • 1If your lobsters are live, pick up a lobster by holding it right behind the head, and lay the lobster on a cutting board. To protect your hand, use a clean dish towel to hold the lobster in place.

      2Find the faint cross on the shell (carapace) where the lobster’s head attaches to the body. With a large sharp knife, firmly insert the tip into this cross and push it down through the head, between the eyes. This action severs the spinal cord, instantly killing the lobster. The legs might twitch a little afterward, but the lobster is dead.

      3Remove the claws and tails. Separate the lobster parts by size: tails in one pile, large claws in another, and finally, all the small claws together in a third pile.

      4Discard or save the lobster bodies for another recipe. The bodies can be placed into a freezer-safe container and stored in the freezer for up to 6 months.

    • Cook Lobster
    • 1Bring a large pot of water to a boil with two tablespoons of salt.

      2Cook the tails for five minutes, transfer them to a plate to cool. Next, cook the large claws for 5 minutes. Transfer them to a plate to cool, and finish by cooking the small claws for four minutes.

      3Remove the lobster meat from the shells when the tails and claws are cool enough to handle. For the tails, use kitchen shears to cut down the top of the tails, pull to open, cracking the back slightly, and then pull out the meat. For the claws, use a knife or mallet to crack open the claws and then remove the meat. Use tweezers or chopsticks to remove smaller bits of meat from legs and knuckles.

    • Make Rolls
    • 1Lightly toast four rolls.

      2Melt the butter in a small saucepan over medium-low heat. Reduce the heat to low, then place all of the lobster meat into the warm butter.

      3After five minutes of sitting in the warm butter, spoon the buttery lobster meat into a bowl along with a few spoonfuls of the butter. The remaining butter can be saved in the fridge for other recipes (it’s lovely tossed with pasta).

      4Gently mix in the mayonnaise, dill, chives, and pepper. Divide the lobster between lightly toasted rolls and enjoy.

    Adam and Joanne’s Tips

    • The nutrition facts provided below are estimates. Fat and calories are likely too high since these calculations include all of the butter in the ingredients list. Not all of this butter is actually used in the rolls.

    Nutrition Per Serving
    Calories
    652
    /
    Total Fat
    47.8g
    /
    Saturated Fat
    24.1g
    /
    Cholesterol
    304mg
    /
    Sodium
    1267.5mg
    /
    Carbohydrate
    23.4g
    /
    Dietary Fiber
    1.3g
    /
    Total Sugars
    3.3g
    /
    Protein
    31.9g


    AUTHOR:

    Joanne Gallagher

    Source link

  • Perfect Asparagus Soup Recipe

    Perfect Asparagus Soup Recipe

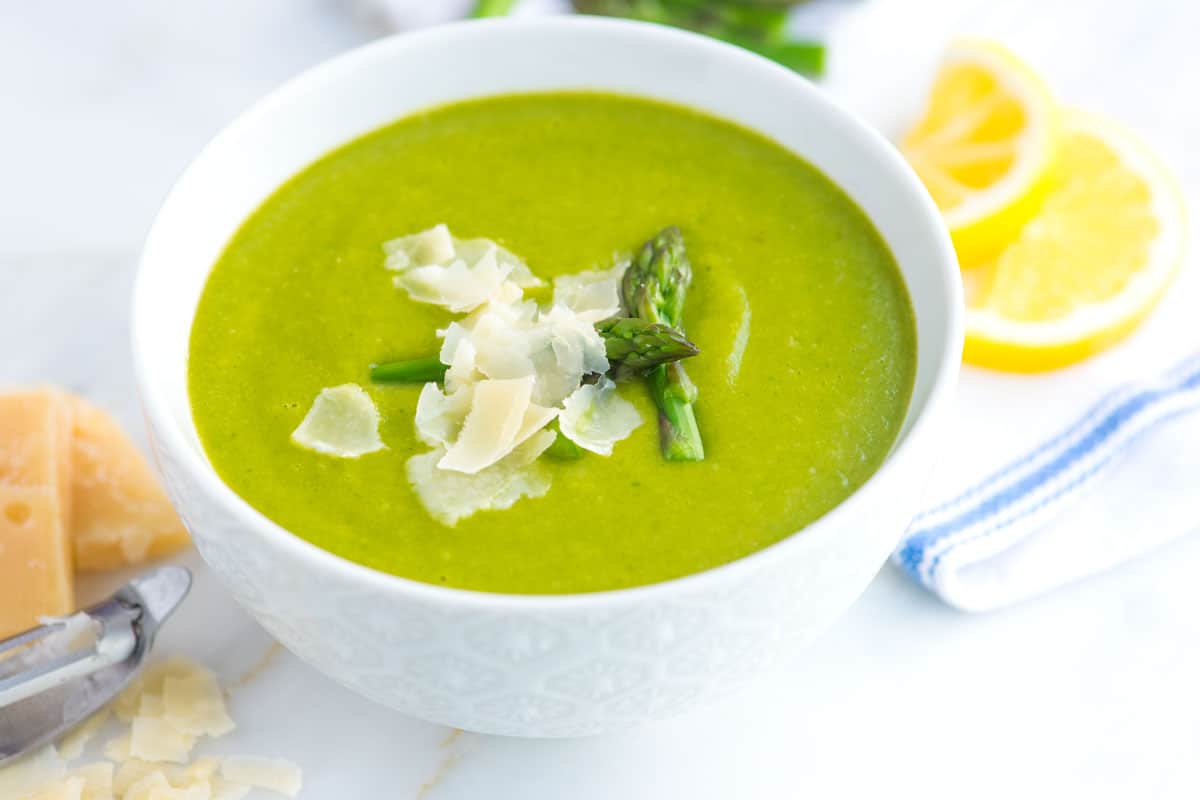
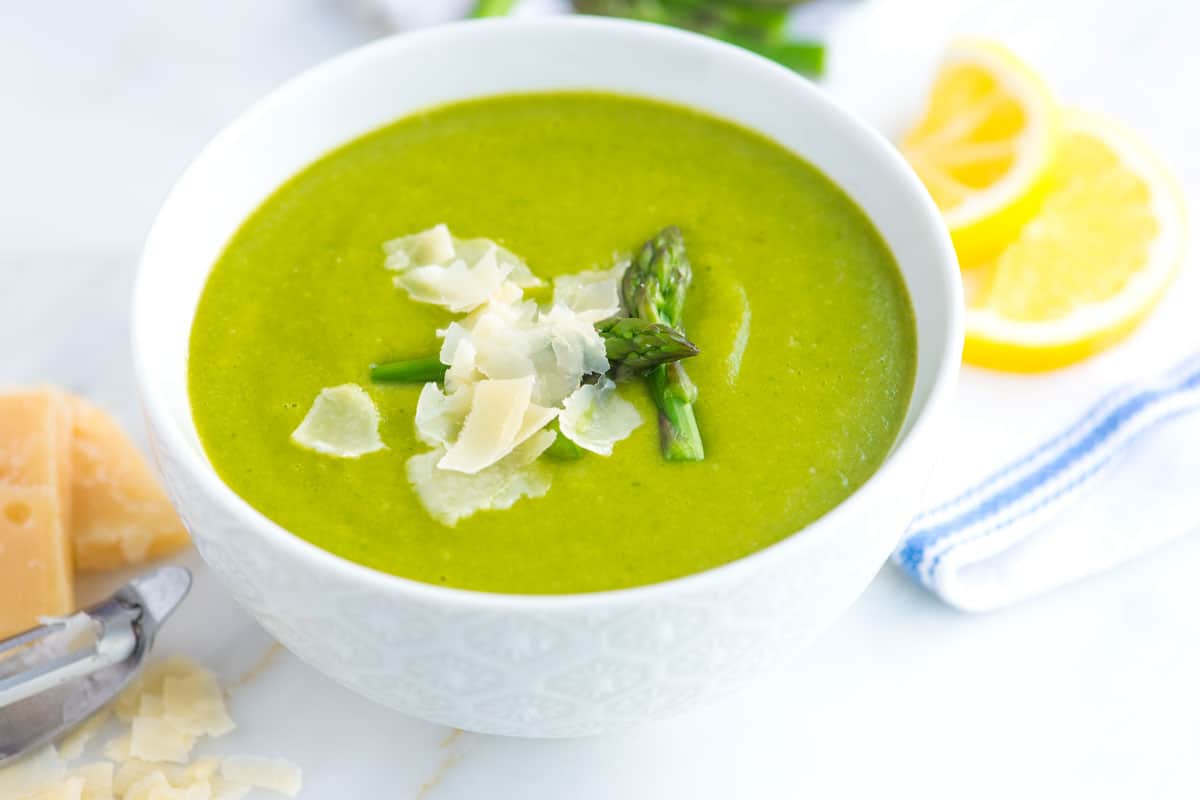
    This incredible asparagus soup recipe turns out perfectly silky and creamy, and that’s without cream. We blend asparagus, potatoes, and a simple homemade broth. It’s healthy, super satisfying, and vegetarian!

    Creamy Asparagus Soup

    This asparagus soup is pure Spring in a bowl, and honestly, it’s one of my favorite ways to cook with asparagus! It’s light on calories but big on flavor. Don’t get me wrong, I love a rich, creamy soup, but sometimes you just want something a little lighter. That’s where this recipe comes in. Substituting potatoes for cream thickens the soup and adds a silky texture without any heaviness. I use this trick in our creamy vegetable soup and broccoli cheddar soup, too!

    This soup is also resourceful! We use the parts of asparagus and leeks that usually get tossed (like the tough ends and dark green tops) to make a really flavorful broth. It’s such a tasty way to cut down on food waste while boosting flavor. For more asparagus recipes, I bet you’ll love this roasted asparagus or my go-to asparagus omelet.

    Key Ingredients

    • Asparagus: When shopping, look for bright green asparagus spears with tightly closed tips. A little purple on the tips is also a good thing. Skip any asparagus that looks dull, yellow, or has open, flowery tips. They should also feel firm and snap when bent. If they’re limp or bendy, they’re past their prime.
    • Leeks: Leeks are like onions, but taste a bit more sweet and delicate. We’ll use the white and light green parts in the soup, and save the dark green tops for our broth. To clean them, just trim off the root and dark green tops, slice the leek lengthwise, and rinse well under running water to get rid of any grit hiding inside. If you want more tips, check out our tutorial for how to clean leeks!
    • Carrot: Just one carrot brings a little sweetness and a bit of color to the broth.
    • Garlic: I like to use garlic in both the broth and the soup for extra flavor.
    • Potatoes: Here’s the secret to that creamy texture! No cream needed. Just potatoes (russet or Yukon Gold work great) to give this soup body and silkiness.
    • Spinach: Toss in a few handfuls of baby spinach at the end for a bit more green and a little extra nutrition.
    • Lemon: A squeeze of fresh lemon juice on top is my favorite finishing touch. It makes all the flavors pop!
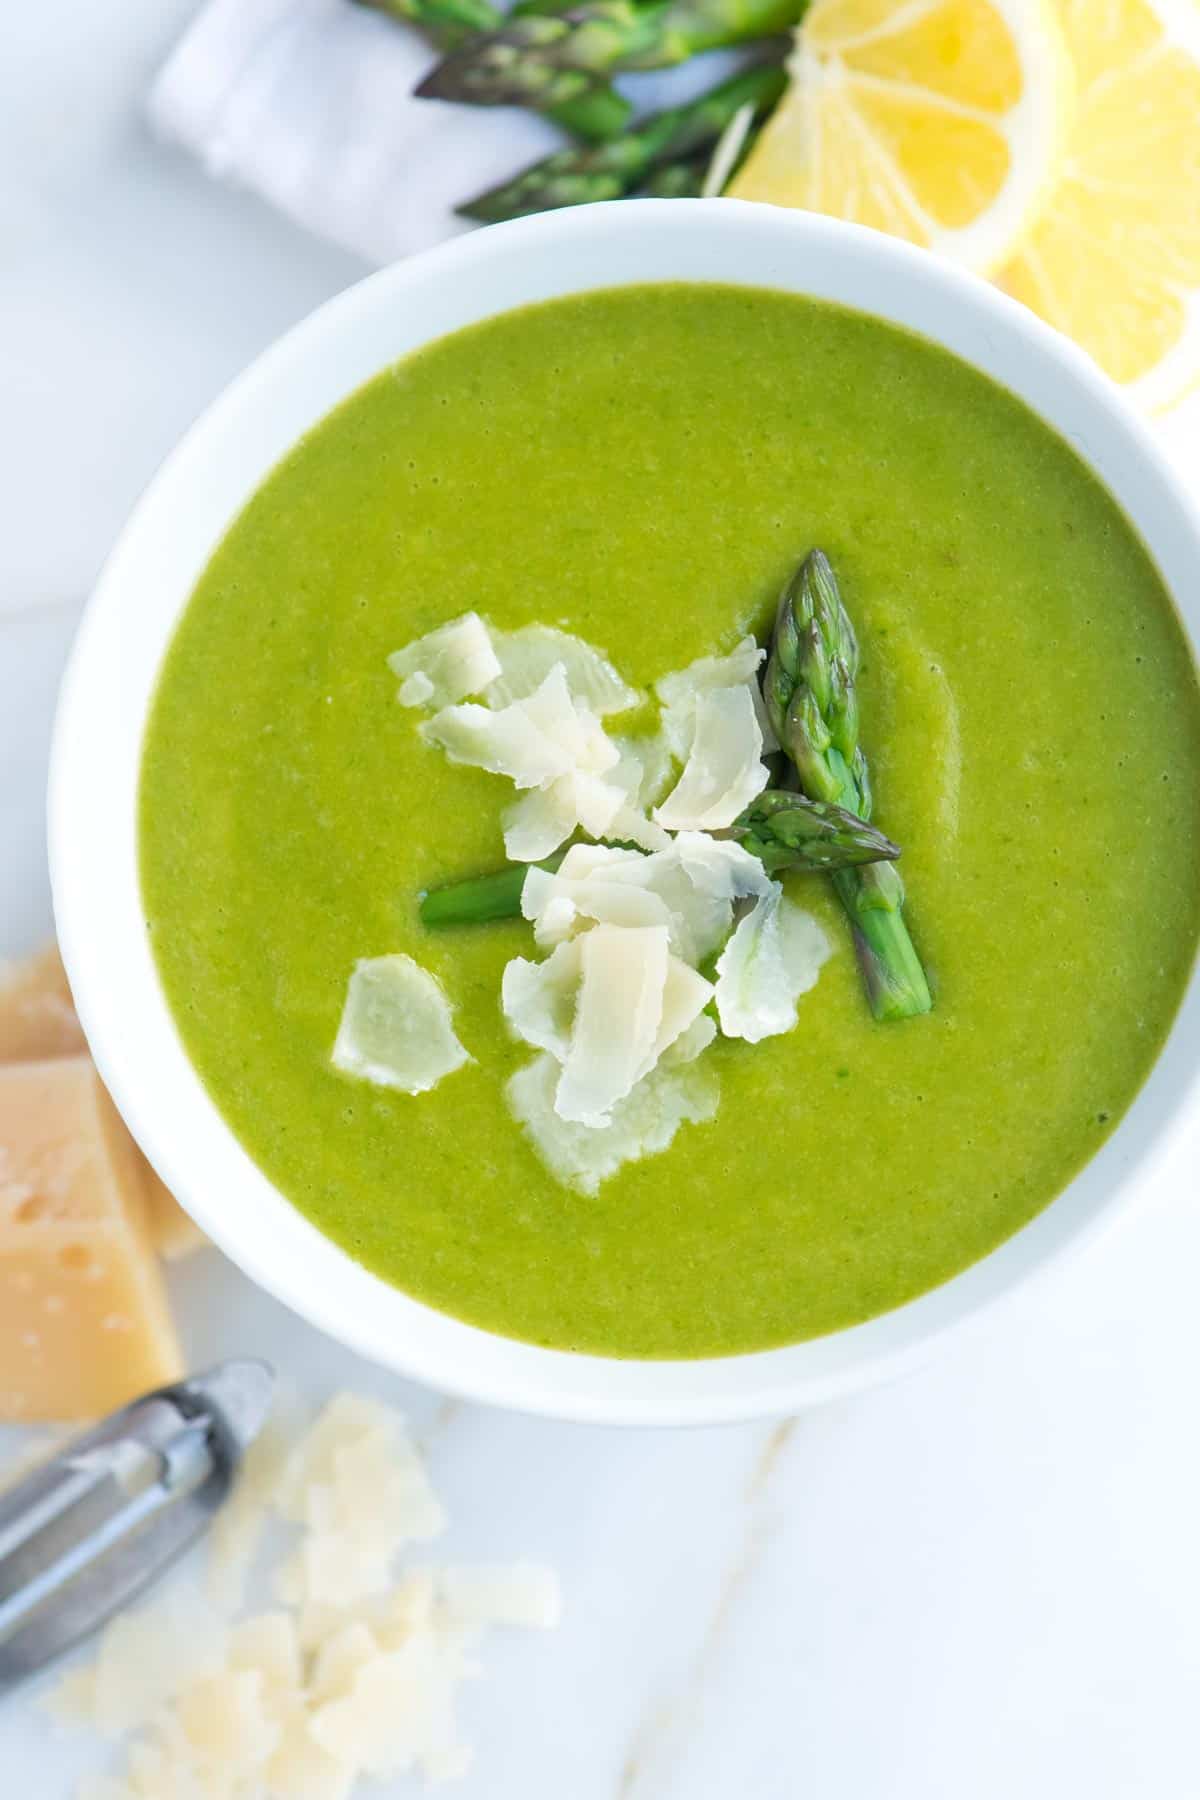
    • Cheese (optional): We used parmesan in the photos, but feta or a spoonful of ricotta or mascarpone is amazing too.

    Find the full recipe with measurements below.

    How to Make Asparagus Soup

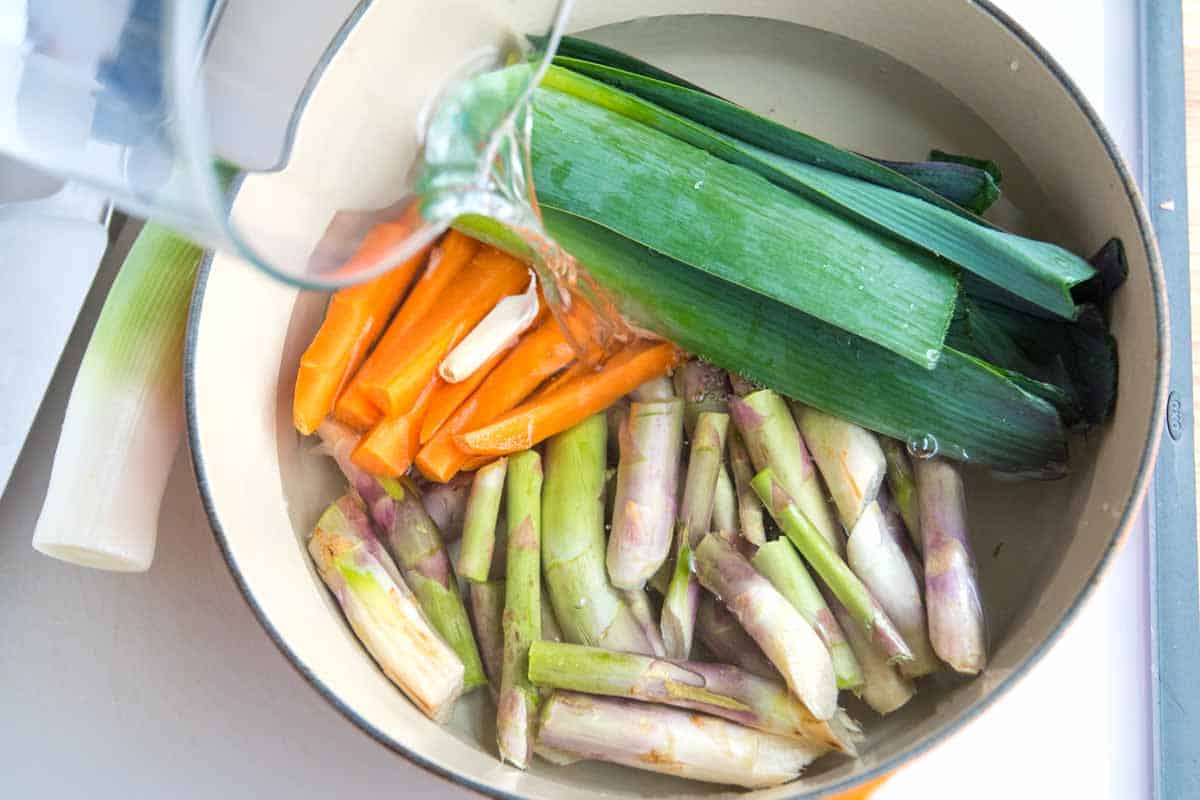
    Tip 1: Make the asparagus broth. My favorite part about this soup recipe is that the base is a broth made with ingredients you would normally just toss in the trash. For this asparagus soup, combine the trimmed ends of the asparagus, dark green tops of the leeks, a carrot, a garlic clove, a bay leaf, salt, and pepper in a pot. Cover with water (or a light chicken broth), then simmer for about 25 minutes.

    Making a veggie broth for Asparagus Soup

    Tip 2: Cook the leeks until soft. Whenever you use leeks, you really want to cook them long enough for them to soften and sweeten. We do this in a bit of olive oil in a Dutch oven, then build our soup from there. I cook my leeks the same way when making potato leek soup.

    Tip 3: Add potatoes. Once your leeks are soft and sweet, stir in garlic and potatoes. Then, pour in some of that asparagus broth from earlier. Let everything simmer until the potatoes are soft (about 20 minutes).

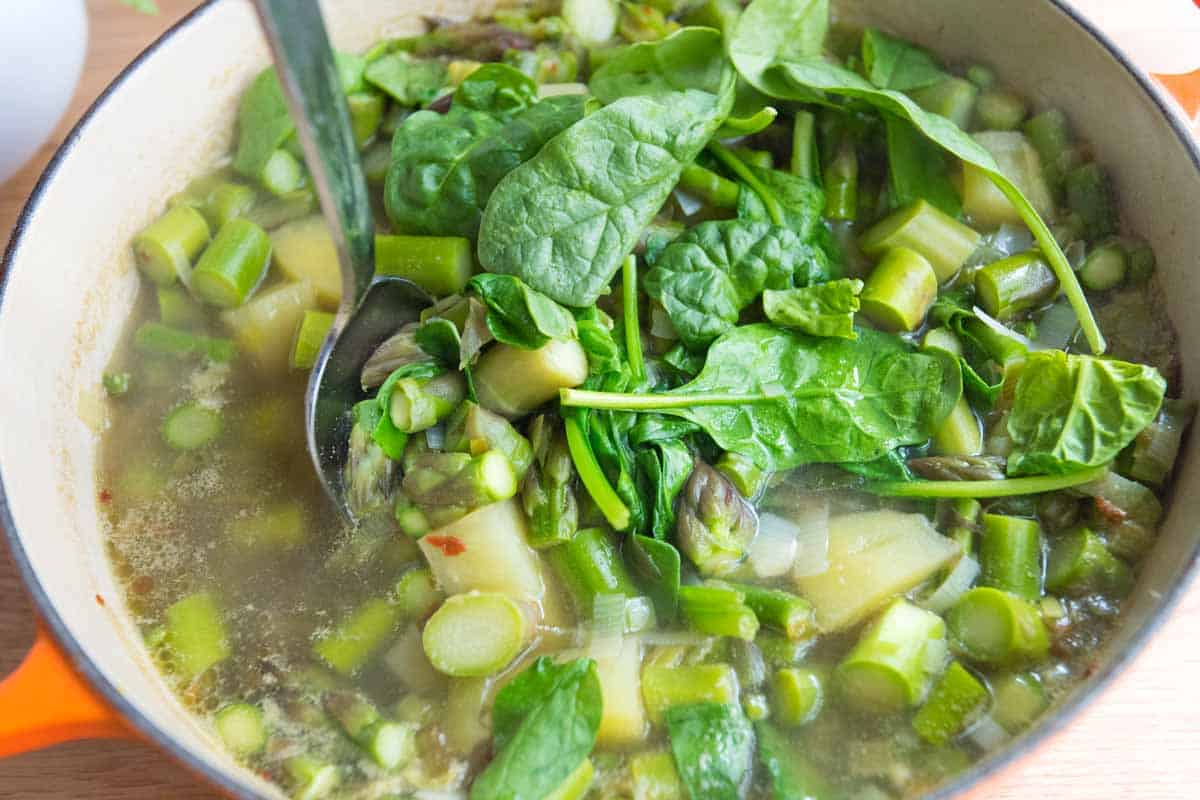
    Tip 4: Finish with the asparagus and spinach. The asparagus does not need much time to cook, so we wait until the potatoes are soft before adding it. When they are tender and bright green, we take the soup off of the heat and then stir in spinach. This adds flavor and nutrition, but most importantly, it makes our soup a bit greener.

    Adding chopped asparagus to the soup pot.
    Finishing with fresh spinach to make the soup more green.

    Tip 5: Blend and thin as needed. I usually use my immersion blender right in the soup pot, but for a completely smooth soup, transfer to a stand blender and blend. Depending on how thick you’d like the soup, you can thin it with a bit more of the asparagus broth. Then season to taste and serve.

    More Vegetable Soup Recipes

    Asparagus Soup

    Perfect Asparagus Soup

    • PREP
    • COOK
    • TOTAL

    This simple asparagus soup is delicious, vegetarian, and minimizes waste. Instead of using stock to make the soup, we make a quick asparagus broth using the asparagus and leek trimmings. The broth is delicate and fragrant and is the perfect way to make use of trimmings instead of throwing them away.

    6 Servings

    You Will Need

    2 pounds asparagus (907 g)

    1 large leek

    1 medium carrot

    2 garlic cloves, gently smashed

    1 bay leaf

    2 tablespoons extra-virgin olive oil

    2 medium russet potatoes, peeled and diced, about 1 pound (450 g)

    3 cups baby spinach, about 4 ounces (113 g)

    Half of a lemon, cut into wedges

    Salt and fresh ground black pepper

    Parmesan cheese, feta, ricotta, or mascarpone for garnish, optional

    Directions

    • Make Asparagus Broth
    • 1Trim the dry, woody bottoms of the asparagus. To find where to trim, bend the stalks until they naturally snap. Cut or snap at that point. Save the tops for the soup and add the stems to a large pot.

      2Cut the dark green tops from the leek and rinse them well to remove any grit. Add these to the pot with the asparagus stems. Rinse the leek’s lighter green and white parts and set them aside.

      3Add the carrot, smashed garlic clove, bay leaf, 1/2 teaspoon of salt, and 1/4 teaspoon of pepper to the pot. Cover with 9 cups of water and bring to a boil. Reduce the heat, cover, and simmer for 25 minutes. Season to taste with salt, adding a little at a time until you can taste the broth’s flavors without it being overly salty. Strain the broth and reserve the garlic cloves.

    • Make Asparagus Soup
    • 1Thinly slice the reserved white and light green parts of the leek.

      2Heat the olive oil in a large soup pot or Dutch oven over medium heat. Add the sliced leeks and 1/4 teaspoon of salt. Cook, stirring often, until softened and fragrant, about 5 minutes.

      3Stir in the reserved garlic cloves and cook for one more minute. Add the potatoes and 6 cups of the asparagus broth (save the rest for thinning later). Bring to a boil, then reduce heat and simmer, covered, until the potatoes are very tender, about 20 minutes.

      4Meanwhile, cut the tips from 12 asparagus spears measuring about 1 ½ inches from the top. Set these aside for garnish. Roughly chop the remaining asparagus.

      5Once the potatoes are tender, stir in the chopped asparagus (not the reserved tips) and simmer until tender-crisp and bright green.

      6Remove from the heat and stir in the spinach until wilted but still bright green, about 1 minute. Blend the soup until smooth using an immersion blender (or a regular blender in batches).

      7Taste and season with more salt and pepper as needed. If the soup is too thick, thin it with the reserved asparagus broth, 1/4 cup at a time.

      8Just before serving, cook the reserved asparagus tips in boiling salted water until tender-crisp and bright green (about 3 minutes). Rinse with cold water to stop the cooking.

      9Ladle the soup into bowls and garnish with the asparagus tips and cheese (optional). Serve with a lemon wedge for squeezing over the top.

    Adam and Joanne’s Tips

    • Storing: The soup’s bright green color may dull slightly over time, but you can store this in an airtight container in the fridge for up to 4 days.
    • Blending the soup: I use an immersion blender. If you use a stand blender, remember to blend in batches. If your soup is hot while blending, you want to remove the lid’s center insert and cover it with a kitchen towel while blending, helping some of the steam release and preventing the lid from popping off (which can be a big, hot mess).
    • Leftover broth: Use it in other soups to cook rice or grains or make risotto.
    • The nutrition facts provided below are estimates. We did include 1 tablespoon of parmesan cheese in the calculations for each serving (there are 6 servings total). We omitted salt from the calculations since you must add to your tastes.

    Nutrition Per Serving
    Serving Size
    1 of 6 servings
    /
    Calories
    149
    /
    Protein
    6g
    /
    Carbohydrate
    20g
    /
    Dietary Fiber
    4g
    /
    Sugars
    3g
    /
    Total Fat
    6g
    /
    Saturated Fat
    2g
    /
    Cholesterol
    3mg


    AUTHOR:

    Joanne Gallagher

    Adam and Joanne of Inspired Taste

    We are Adam and Joanne Gallagher, the creators of Inspired Taste. Established in 2009, Inspired Taste grew from a childhood dream into one of the internet’s most trusted recipe sites with hundreds of reliable recipes, step-by-step videos, and expert tips.More About Us
    Source link

  • Perfect Cinnamon Apples Recipe

    Perfect Cinnamon Apples Recipe

    This stovetop cinnamon apples recipe can be whipped up in about 15 minutes and are a perfect topping for oatmeal, pancakes, ice cream, and more!

    Cinnamon Apples

    This might be one of the easiest apple recipes on our site. I love them with my everyday oatmeal, as a side for breakfast, and spooned over vanilla ice cream with caramel sauce for dessert. My son even loves them added to his school lunchbox!

    Warm cinnamon apples are the best, especially during the fall!

    Key Ingredients

    • Apples: You can use any variety of apples for this recipe. I love crispier varieties like Honeycrisp, Granny Smith, and Pink Lady apples. These are the same apples I use for apple cobbler. You can peel them or leave the peel on. I love the peel, but my toddler prefers this recipe when made with peeled apples since the apples turn out a little softer.
    • Lemon Juice or Apple Cider Vinegar: A little acid, like lemon juice or vinegar, balances the sweetness of the apples and maple syrup. It makes everything pop.
    • Butter: I love cooking the apples in a bit of butter since it turns into a silky sauce. Plant-based butter or coconut oil is an excellent substitute.
    • Cinnamon: We are pretty generous with the cinnamon in this recipe. You can add or reduce as you see fit.
    • Optional Spices: I love adding extra spices like cardamom and nutmeg. They bump up the cozy factor and taste wonderful.
    • Vanilla and Maple Syrup: These make the apples taste more rich and add a bit of sweetness.

    Find the full recipe with measurements below.

    How to Make Cinnamon Apples

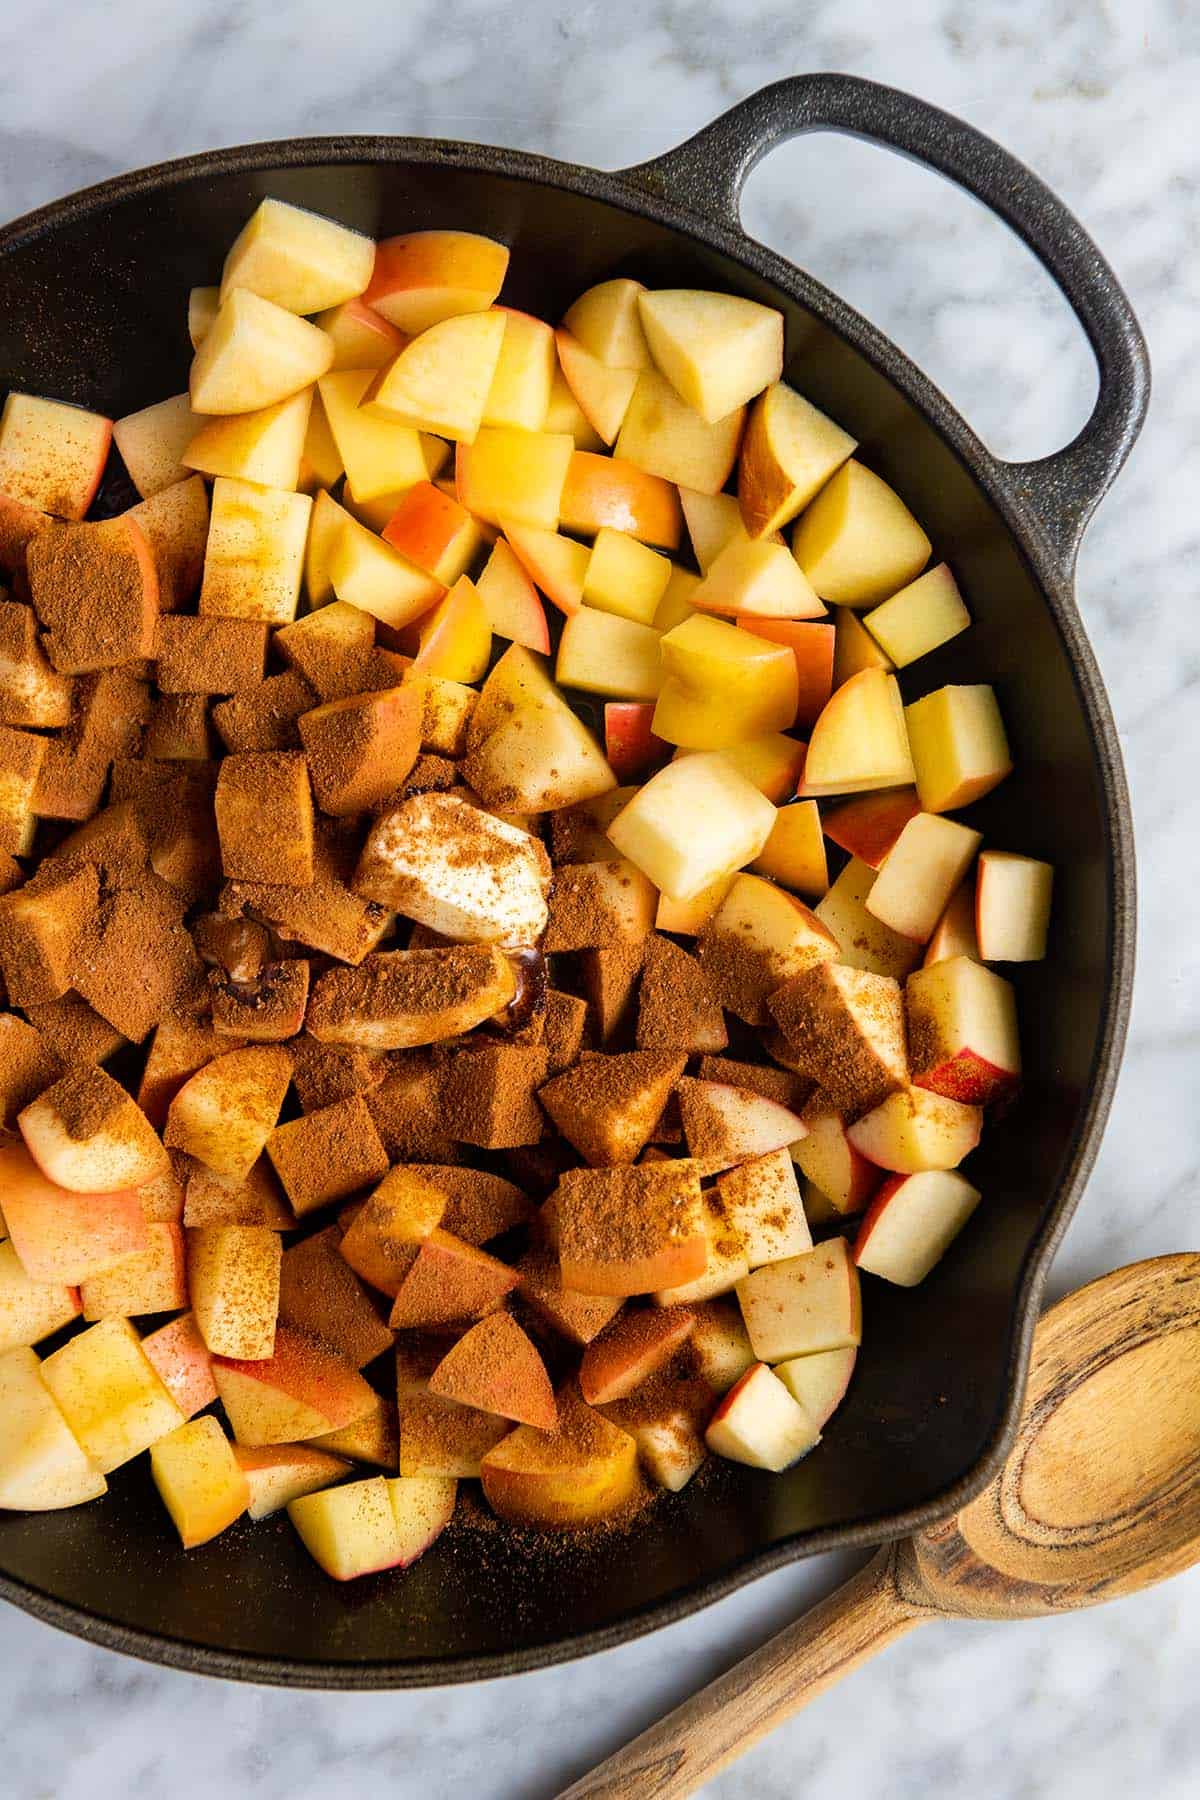
    Tip 1: Lemon is your best friend. We love the balance and brightness that lemon adds to the party. When adding the chopped apples to a skillet we add lemon juice and a bit of water. Cover the skillet with a lid and cook over medium-high heat until the apples soften. When they are soft, toss in your butter, cinnamon, extra spices, vanilla, and maple syrup.

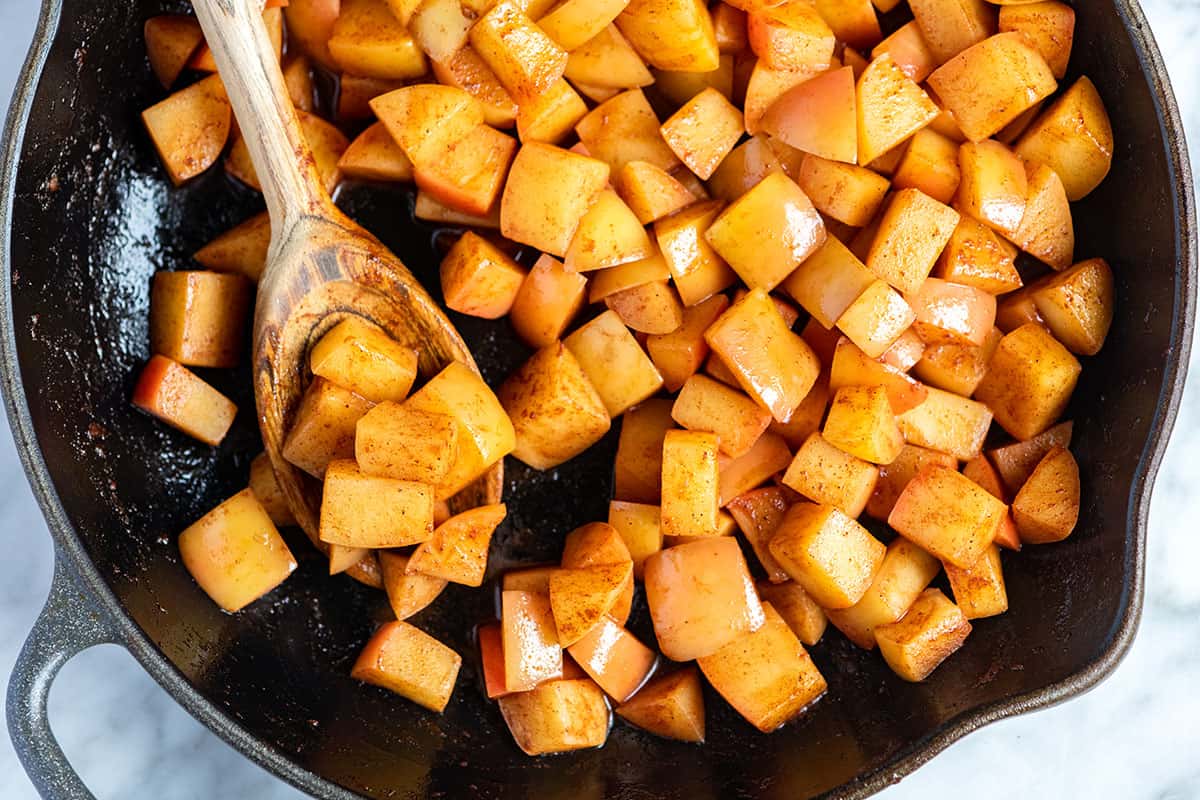
    Apples in a Skillet with Cinnamon, and other baking spices.

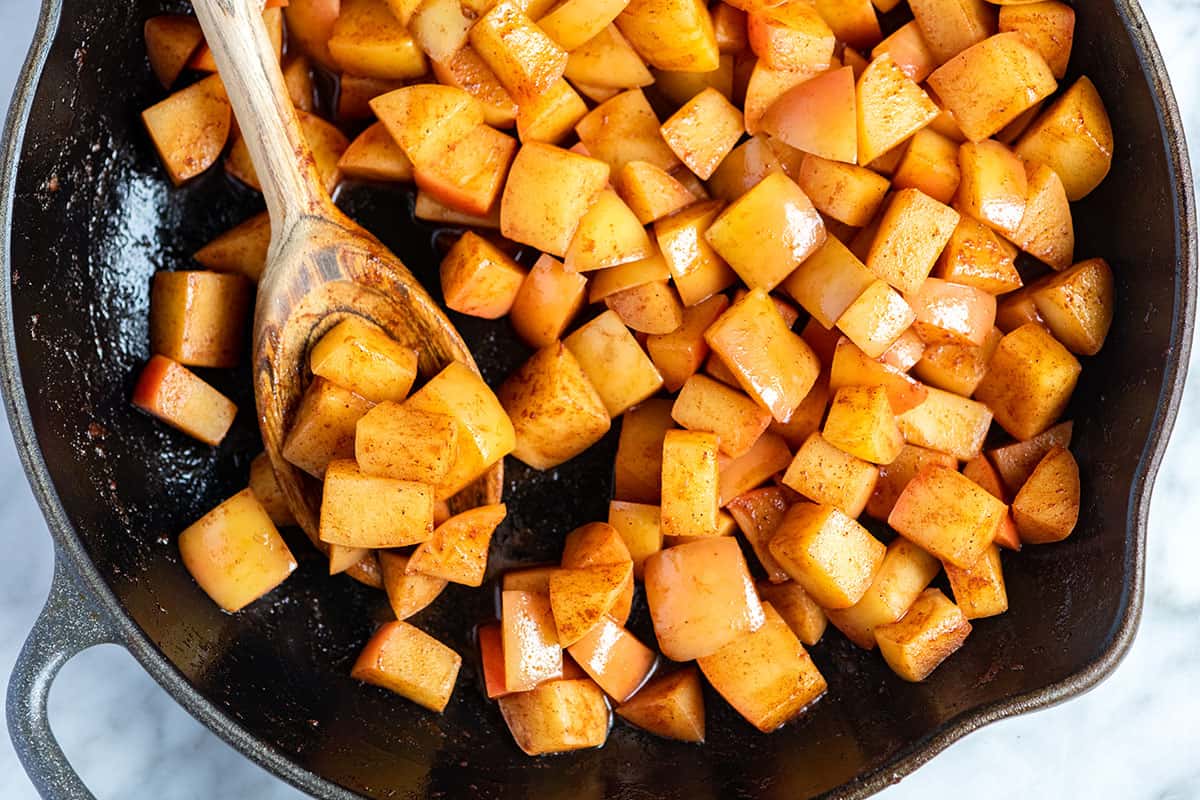
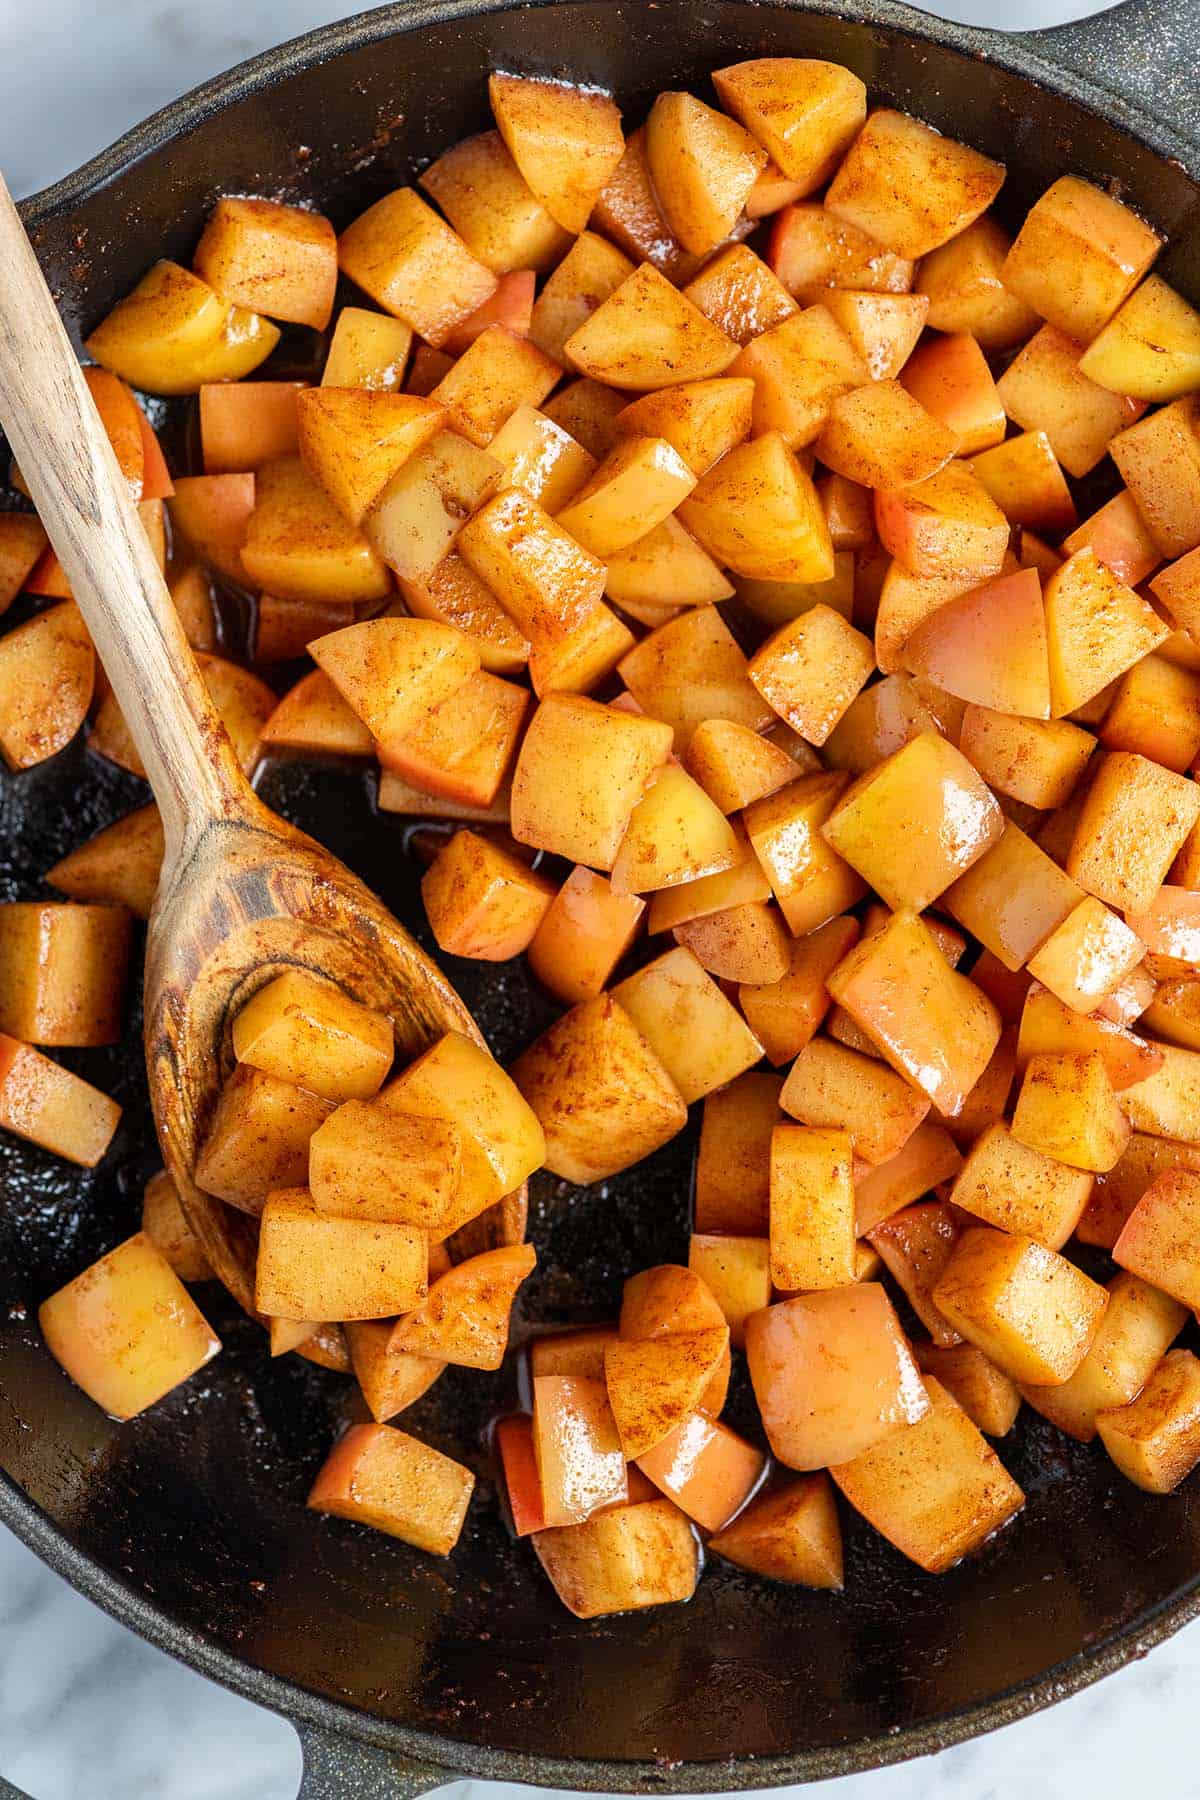
    Tip 2: Stir until the butter turns into a butter sauce. Stir the apples around the pan until the butter melts and turns into a silky cinnamon butter sauce that coats the apples. When it does, the apples are ready!

    Tip 3: Serving ideas. I love serving them with pumpkin pancakes and on top of steel-cut oats. My toddler also loves these and happily eats them with a spoon (or, more often, his fingers).

    More Easy Apple Recipes

    Easy Stovetop Cinnamon Apples

    Perfect Cinnamon Apples

    • PREP
    • COOK
    • TOTAL

    Extra easy cinnamon apples made on the stovetop in about 15 minutes! Enjoy these buttery spiced apples over ice cream for dessert, spooned over pancakes and waffles for breakfast, or as a deliciously sweet side.

    Makes 4 cups

    You Will Need

    1 ¾ pounds apples, 5 to 6 small

    1 teaspoon lemon juice or apple cider vinegar

    2 tablespoons water, plus more as needed

    2 tablespoons butter or vegan butter

    1 ½ teaspoons ground cinnamon

    1/4 teaspoon ground cardamom, optional

    1/8 teaspoon fresh grated nutmeg, optional

    1/2 teaspoon vanilla extract

    1/2 tablespoon to 1 tablespoon maple syrup, optional

    Directions

      1Choose whether or not you want to peel the apples. We prefer our apples with the peel. However, for softer cinnamon apples, peel them.

      2Core and cut the apples into bite-size pieces, 3/4-inch to 1-inch cubes. For slices, slice the apples into 1/4-inch thick slices.

      3Toss the apples, lemon juice (or vinegar), and two tablespoons of water into a wide skillet over medium-high heat. Cover the skillet with a lid (or tent them with aluminum foil). Cook, covered, for 3 to 4 minutes.

      4Uncover the apples, and stir in the butter, cinnamon, optional spices (cardamom and nutmeg), vanilla, and maple syrup (optional).

      5Cook, while stirring, until the butter melts and the apples soften to your liking, 3 to 5 minutes more. For more saucy apples, stir in 2 to 3 tablespoons more water. Simmer the water until it thickens and coats the apples. Taste, and then adjust with more maple syrup.

    Adam and Joanne’s Tips

    • Storing: These apples can be stored in an airtight container in the fridge for up to 5 days. You can also freeze them for a few months.
    • The nutrition facts provided below are estimates.

    Nutrition Per Serving
    Serving Size
    1/2 cup
    /
    Calories
    80
    /
    Total Fat
    3.1g
    /
    Saturated Fat
    1.8g
    /
    Cholesterol
    7.6mg
    /
    Sodium
    1.5mg
    /
    Carbohydrate
    14.2g
    /
    Dietary Fiber
    2.7g
    /
    Total Sugars
    10.4g
    /
    Protein
    0.3g


    AUTHOR:

    Joanne Gallagher

    Previous Post: Easy Pumpkin Cupcakes
    Next Post: Crispy Tofu Fingers

    Source link

  • Perfect Lobster Mac and Cheese Recipe

    Perfect Lobster Mac and Cheese Recipe

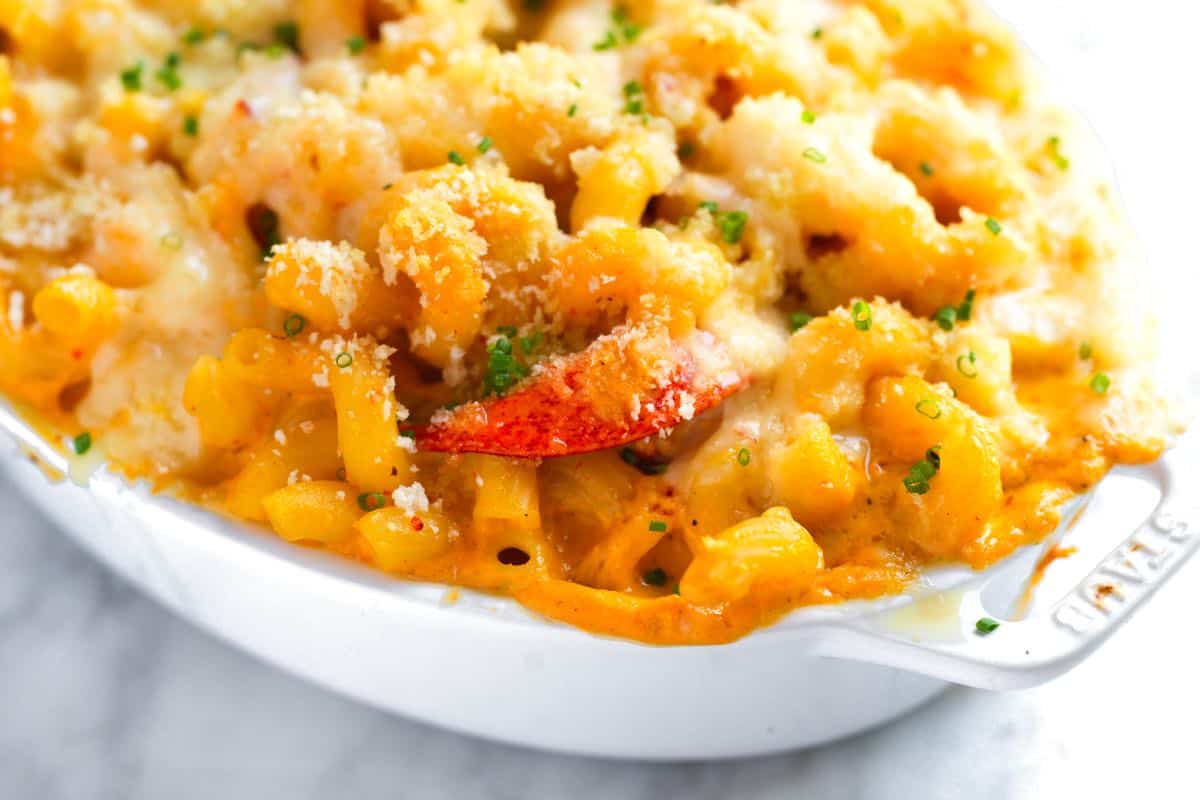
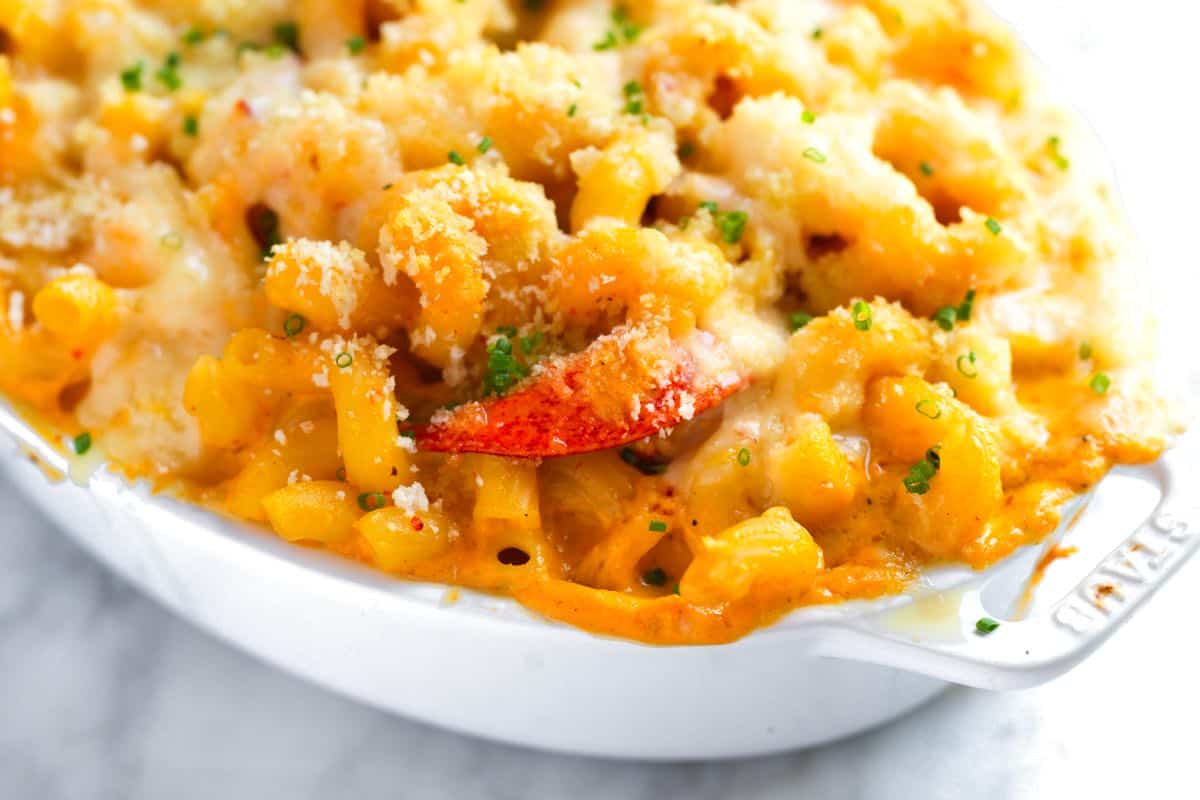
    This lobster mac and cheese is outrageously delicious! The rich lobster cheese sauce is the star of the show, packed with lobster flavor and perfect for any special occasion, from date night to the holidays.

    Lobster Mac and Cheese

    We don’t skimp on flavor in this lobster mac and cheese. Unlike other recipes that simply add lobster meat to a standard mac and cheese, we take it a step further. We create a deeply flavorful lobster cheese sauce using the lobster bodies, similar to how lobster bisque is made.

    This results in an intensely flavorful mac and cheese, so much so that adding lobster meat is entirely optional! The sauce itself delivers incredible lobster flavor. You can absolutely add cooked lobster meat if you wish, but you might prefer to save it for other delicious dishes like lobster rolls.

    Key Ingredients

    • Lobster: We will start with 2 live lobsters, then cook them so that you have perfectly cooked lobster meat and lobster bodies ready to make our cheese sauce. If you prefer, you can ask your local fishmonger to cook your lobster, but don’t forget to ask for the lobster bodies back (the main shells with the head and tiny legs attached), as this makes our lobster cheese sauce so delicious. Remember, adding lobster meat to the mac and cheese is up to you. The bodies in our sauce add plenty of rich lobster flavor, so you may prefer to use the meat for another lobster recipe instead.
    • Aromatics: Since this is a classy dish, we bring in a few more ingredients than our basic macaroni and cheese. We use onion, carrot, garlic, fresh thyme, bay leaf, and tomato paste in our sauce. When they are all soft and sweet, they are blended into the cheese sauce, adding lots of flavor.
    • Butter and Flour: These help thicken our sauce.
    • White Wine: A dry white wine like Pinot Grigio, Sauvignon Blanc, or unoaked Chardonnay adds complexity. For a non-alcoholic option, substitute vegetable broth.
    • Milk: For the creamiest sauce, use whole milk.
    • Cheese: A high-quality white cheddar, such as Beecher’s or English cheddar, is my favorite for this mac and cheese. Gruyère would also be lovely!
    • Pasta: Use your favorite short pasta shape. Since this is a special recipe, it can take a fancier shape like cavatappi or torchiette.

    How to Make Lobster Mac and Cheese

    Step one for lobster mac and cheese is to prepare your lobsters. I know working with live lobsters might sound overwhelming, but I walk you through everything you need to know in our recipe. You can also learn more about working with live lobsters in our lobster roll recipe!

    Our method for dispatching the lobster is quick and effective. Place the lobster on a cutting board and find the faint cross on its shell where the head and body connect. Quickly and firmly insert a large, sharp knife into this cross, pushing down through the head and between the eyes. This severs the spinal cord, killing the lobster instantly.

    From there, you can separate the bodies from the tail, claws, and legs. We want to keep the bodies uncooked, so we can use them to make our lobster cheese sauce. Then, we will cook the lobster meat in boiling salted water. Once cooked, you can pull the meat from the shells and save it for adding to our lobster mac and cheese or save it for another dish. It keeps in the fridge for up to 4 days.

    How to Make Lobster Mac and Cheese: Simmering lobster bodies in our sauce

    The trick to the best lobster mac and cheese is to cook the lobster bodies with butter, aromatics, and milk for about 30 minutes. In this time, the bodies perfume the mixture with rich lobster flavor (more than any meat ever could). After 30 minutes, you’ll discard the bodies and blend your sauce with some cheese.

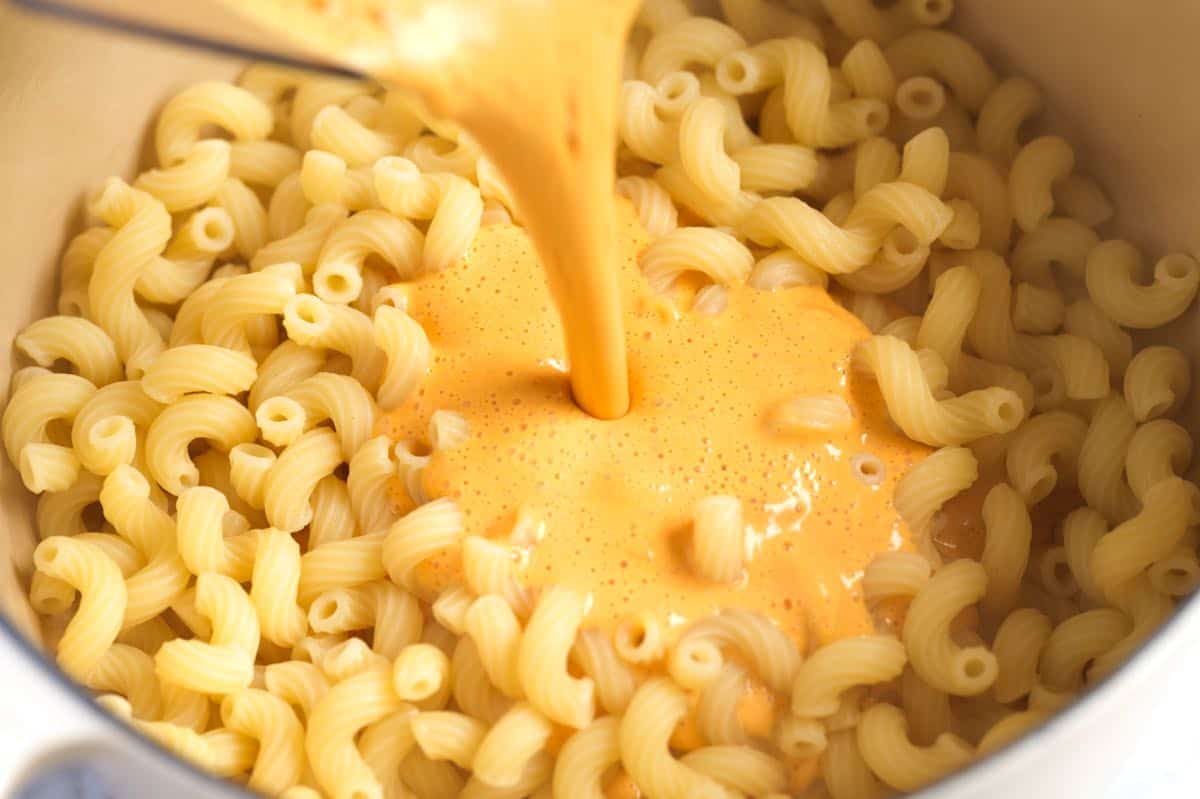
    How to Make Lobster Mac and Cheese: Tossing pasta with the lobster cheese sauce

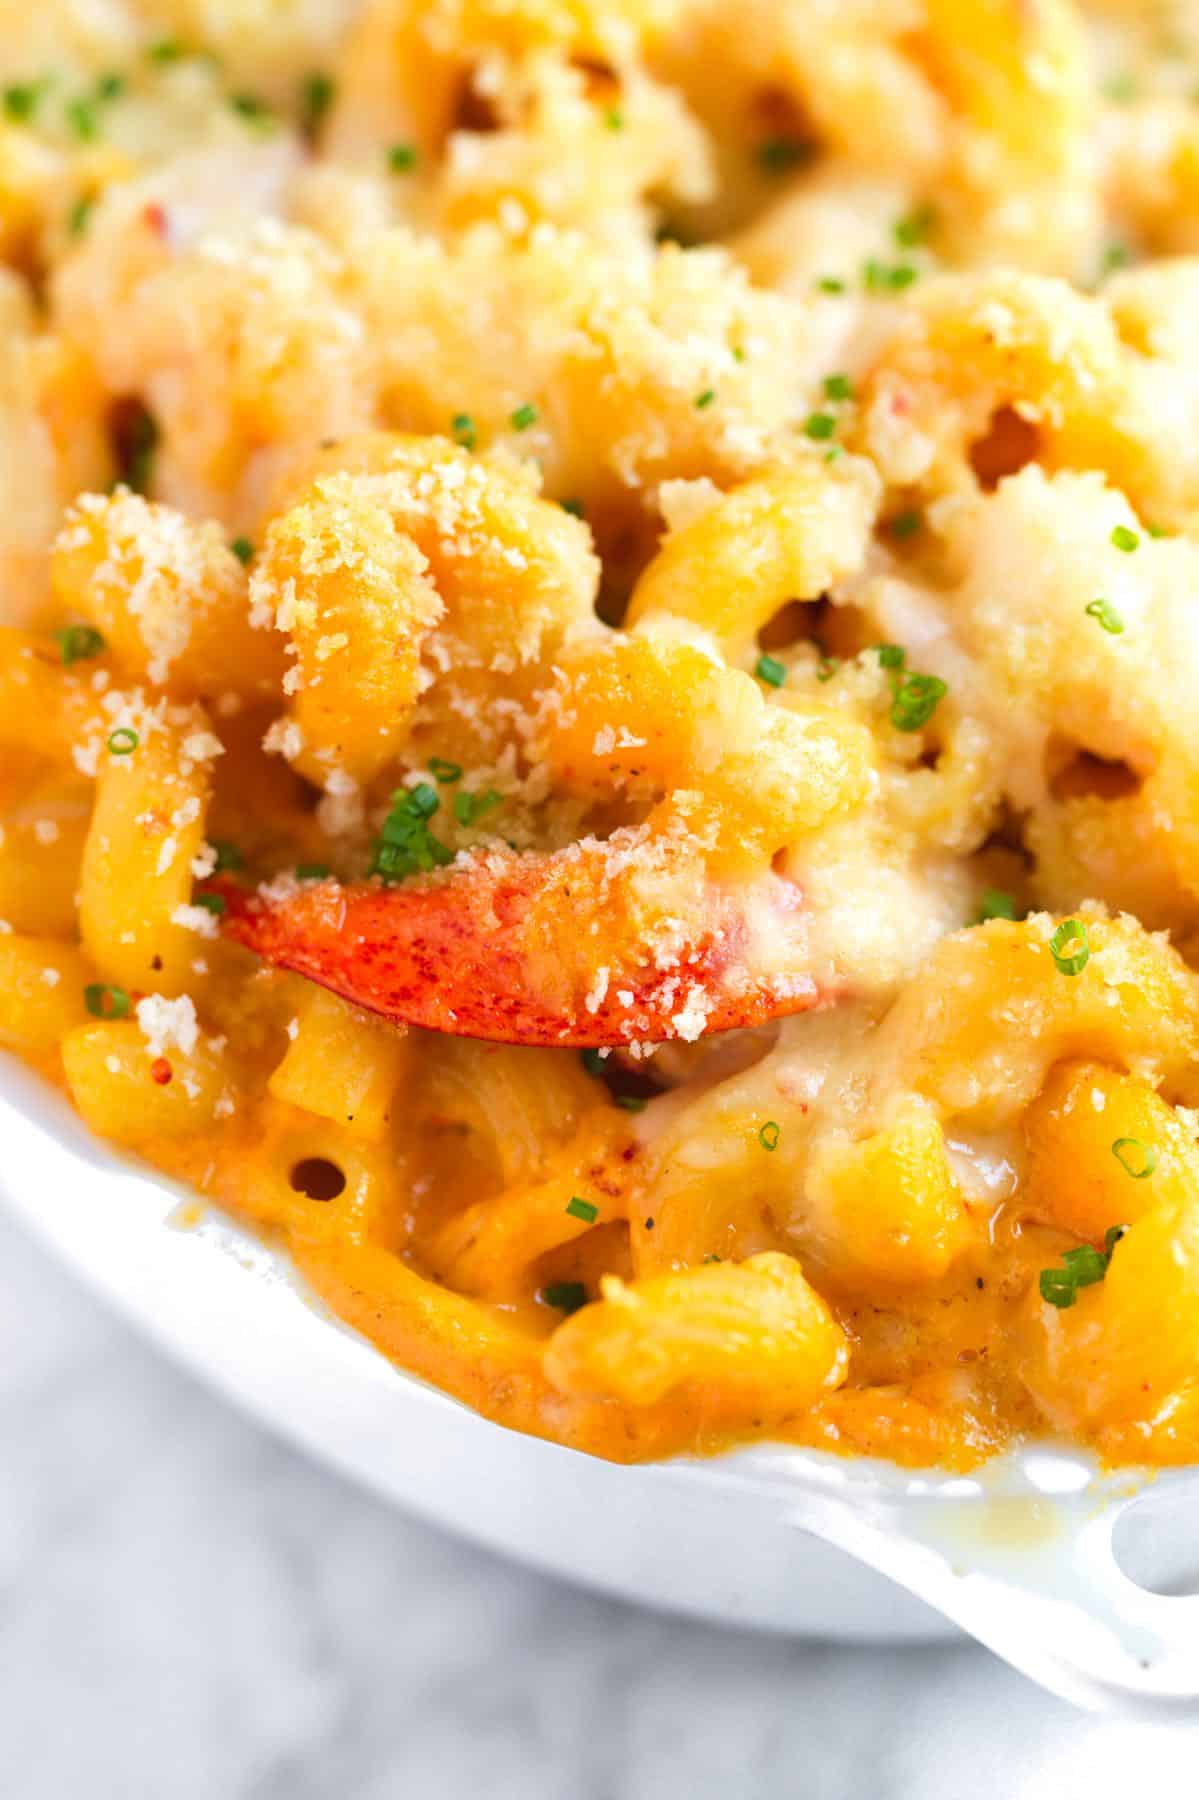
    Finally, toss the sauce with cooked pasta, add optional lobster meat, and bake in a casserole dish until bubbly. It’s incredible!

    Lobster Mac and Cheese

    Perfect Lobster Mac and Cheese

    • PREP
    • COOK
    • TOTAL

    There are two ways to make lobster mac and cheese: with or without lobster meat. In both cases, you’ll use the lobster shells to create the signature lobster flavor in the sauce. We’ll guide you through each step, from humanely dispatching and cooking live lobsters to making the rich lobster cheese sauce. Then, you can decide whether to fold the cooked lobster meat into your mac and cheese or enjoy it separately (it’s fantastic with melted butter or in lobster rolls!). The lobster bodies (the main shells with the head and tiny legs attached) release a rich, savory lobster flavor into the sauce, making them essential for this recipe.

    Make Ahead Tip: Cooked lobster meat can be refrigerated for up to 3 days, meaning you can prepare the meat in advance. You can also freeze the lobster bodies for up to 6 months. This lets you prepare the lobsters, enjoy the meat in another meal, and save the bodies for later.

    4 to 6 Servings

    You Will Need

    2 whole lobsters, 1 ½ pounds each

    2 tablespoons butter

    Half a sweet onion, finely chopped, about 1 cup

    1 medium carrot, finely chopped, about ½ cup

    2 cloves garlic, roughly chopped

    2 sprigs thyme

    1 tablespoon flour

    1 tablespoon tomato paste

    1/2 cup (60ml) white wine

    2 cups (473ml) whole milk

    1 bay leaf

    12 ounces (340g) white cheddar cheese, grated, about 3 cups

    8 ounces (226g) short pasta like fusilli, cavatappi, or torchiette

    1/4 cup (28g) panko breadcrumbs

    Salt and fresh ground black pepper

    Directions

    • Prepare Lobsters
    • 1If starting with live lobsters, handle them with care. Hold a lobster firmly just behind its head and place it on a cutting board, using a clean kitchen towel to keep it steady. Look for a small, cross-shaped mark on the shell where the head joins the body. Using a large, sharp knife, swiftly and firmly insert the tip into this mark and cut downwards through the head, between the eyes. This method dispatches the lobster quickly. The legs might twitch a little afterward, but the lobster is dead.

      2Separate the lobster parts by size: tails in one pile, large claws in another, and finally, all the small claws together in a third pile. You will cook these in the next step for lobster meat.

      3The lobster bodies (the main shells, including the head and tiny legs) are essential for the sauce. Set them aside. You will use them in our lobster sauce to create its rich flavor.

      4Bring a large pot of water to a boil with two tablespoons of salt.

      5Cook the tails for five minutes and transfer them to a plate to cool. Next, cook the large claws for 5 minutes. Transfer them to a plate to cool, and finish by cooking the small claws for four minutes.

      6Remove the lobster meat from the shells when the tails and claws are cool enough to handle. For the tails, use kitchen shears to cut down the top of the tails, pull them open, crack the back slightly, and then pull out the meat. For the claws, use a knife or mallet to crack open the claws and then remove the meat. Use tweezers or chopsticks to remove smaller bits of meat from legs and knuckles. Store the lobster meat in an airtight container in the fridge. If you plan to add some to the mac and cheese, you will need about 1 cup, which means you will likely have some extra lobster meat, which is never a bad thing.

    • Make Lobster Mac and Cheese
    • 1For lobster mac and cheese, you’ll need 2 lobster bodies and, optionally, 1 cup of cooked lobster meat. Cut the lobster bodies in half with a heavy knife.

      2In a wide pan at least 3 inches deep, like a rondo, melt the butter over medium heat. Ideally, use a pan with a lid, as you will need the lid later on.

      3Add the lobster bodies, onion, carrot, garlic, and thyme to the pan. Cook for about 10 minutes, stirring occasionally. The goal is not to brown the vegetables, just soften them. The lobster bodies will also turn red.

      4Add the flour and stir it around the pan, then do the same with the tomato paste.

      5Pour in the white wine and stir well. Once it begins to stick to the bottom, add the milk and bay leaf. Season with salt and pepper, then cook at a low and gentle simmer, partially covered, for 30 minutes. During this time, check that the milk is not bubbling too much or sticking to the bottom of the pan. Turn the heat down if necessary. The milk may look slightly curdled, but in the next step, we will blend everything, which brings the sauce back together.

      6Remove the lobster bodies and discard them. Then, pour the liquid into a blender. Add 6 ounces of cheese (1 ½ cups), and puree until smooth.  Chill the sauce in the fridge until ready to toss with the pasta. Blending tip: for safety remove the blender lid center insert and hold a kitchen towel over the hole while blending. This releases steam and prevents messy splatters.

      7Bring a pot of salted water to a boil, then cook the pasta until al dente. Strain.

      8Preheat the oven to 350°F (177°C). Lightly grease a casserole dish, that holds at least 2 quarts.

      9In a mixing bowl, combine the hot pasta with the lobster sauce and half the remaining cheese (2 ounces or 1/2 cup). Stir well to combine. If you are adding lobster meat, fold it in.

      10Transfer the pasta mixture to the casserole dish.

      11In a small bowl, mix the panko bread crumbs with the remaining cheese, and then scatter it over the top of the mac and cheese.

      12Bake for 40 to 50 minutes, until the middle is hot and the top is golden brown.

    Adam and Joanne’s Tips

    • Storing: Store baked lobster mac and cheese in an airtight container for up to 4 days.
    • Precooked lobster: If you prefer, you can ask your local fishmonger to cook your lobster, but don’t forget to ask for the lobster bodies back (the main shells with the head and tiny legs attached), as this makes our lobster cheese sauce so delicious. Starting with uncooked bodies adds a bit more flavor to our sauce, but you can still make it with cooked lobster bodies.
    • Nutrition facts are estimates. We included 1 cup of lobster meat and 1/2 teaspoon salt.

    Nutrition Per Serving
    Serving Size
    1/6 of the recipe
    /
    Calories
    530
    /
    Total Fat
    26.5g
    /
    Saturated Fat
    14.8g
    /
    Cholesterol
    109.8mg
    /
    Sodium
    763.9mg
    /
    Carbohydrate
    42.5g
    /
    Dietary Fiber
    2.2g
    /
    Total Sugars
    7.9g
    /
    Protein
    26.4g


    AUTHOR:

    Joanne Gallagher

    Adam and Joanne of Inspired Taste

    We are Adam and Joanne Gallagher, the creators of Inspired Taste. Established in 2009, Inspired Taste grew from a childhood dream into one of the internet’s most trusted recipe sites with hundreds of reliable recipes, step-by-step videos, and expert tips.More About Us
    Source link

  • Perfect Roasted Broccoli Recipe

    Perfect Roasted Broccoli Recipe

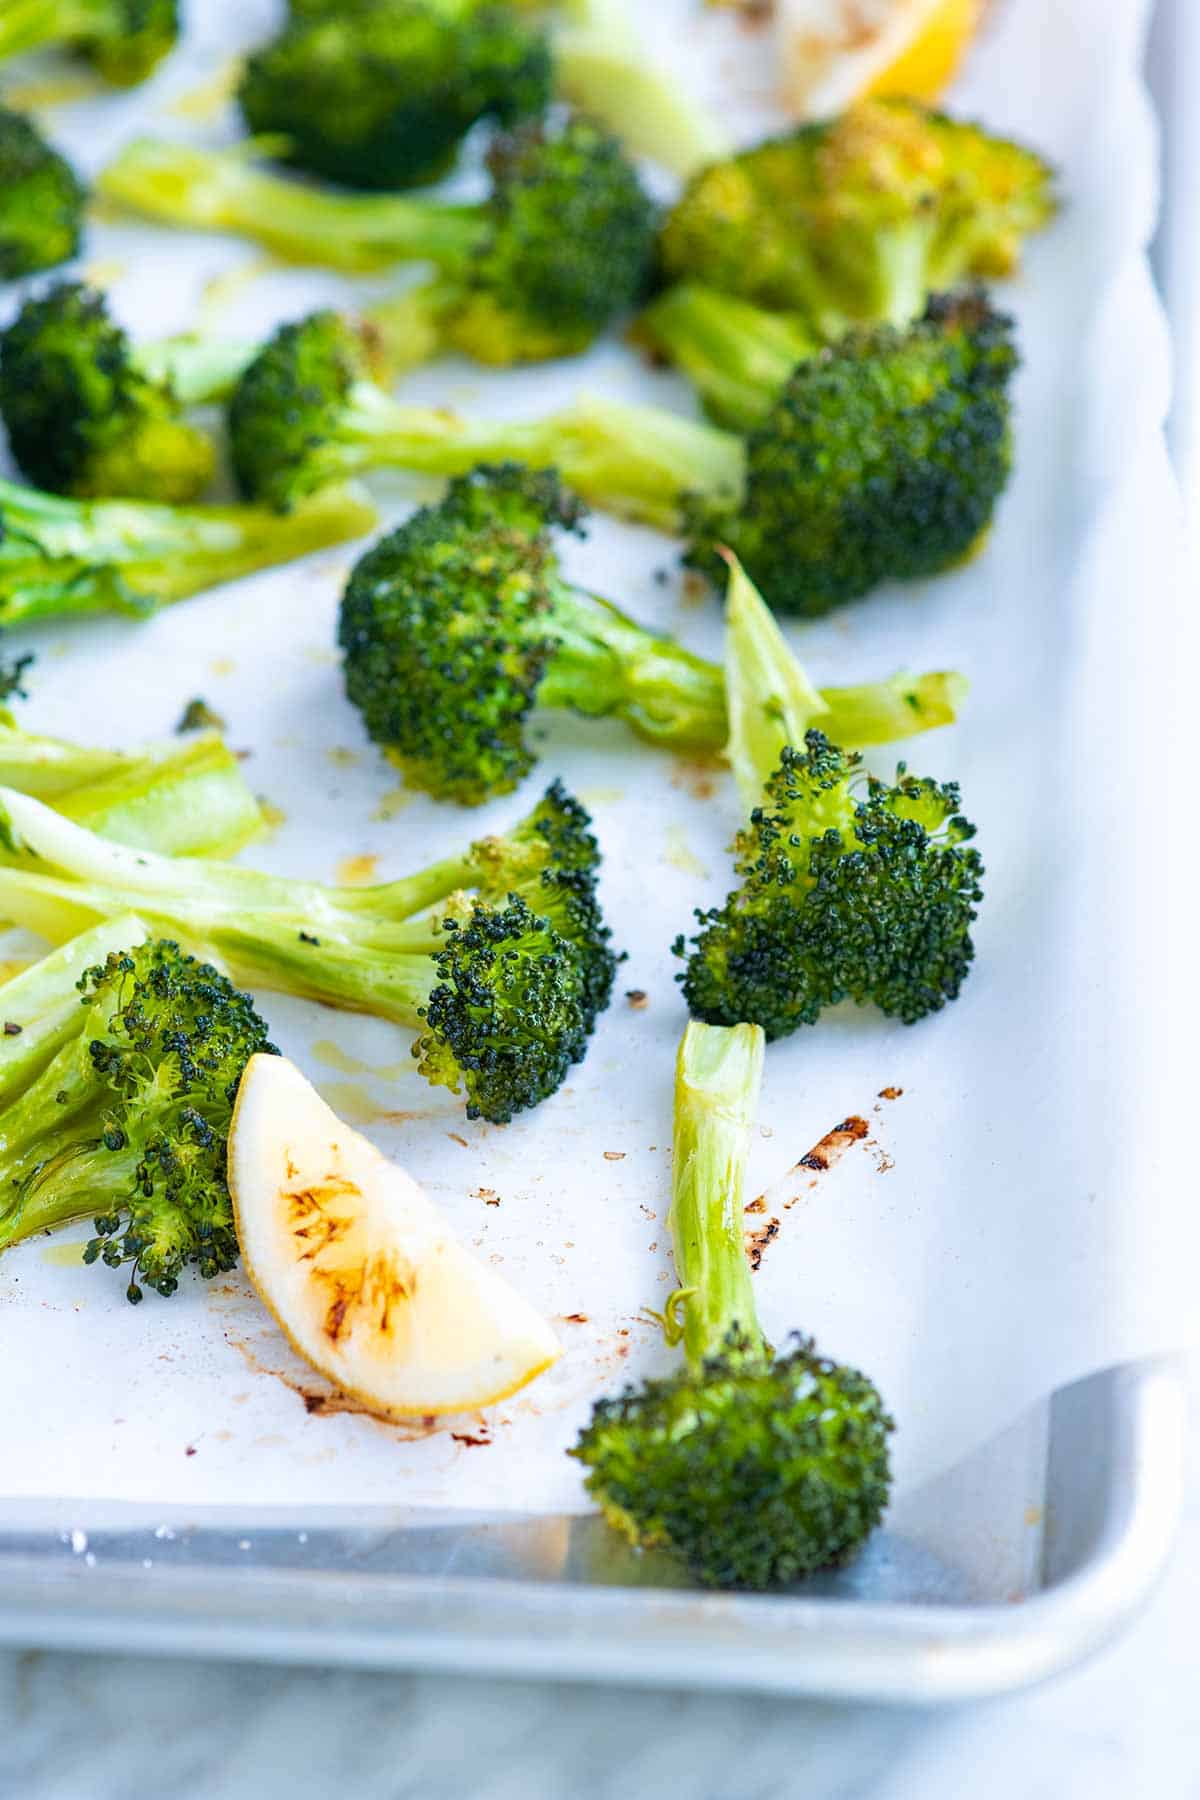
    My oven roasted broccoli recipe guarantees perfectly tender florets with the most delicious golden-brown crispy tips. It’s such a simple, perfect side dish!

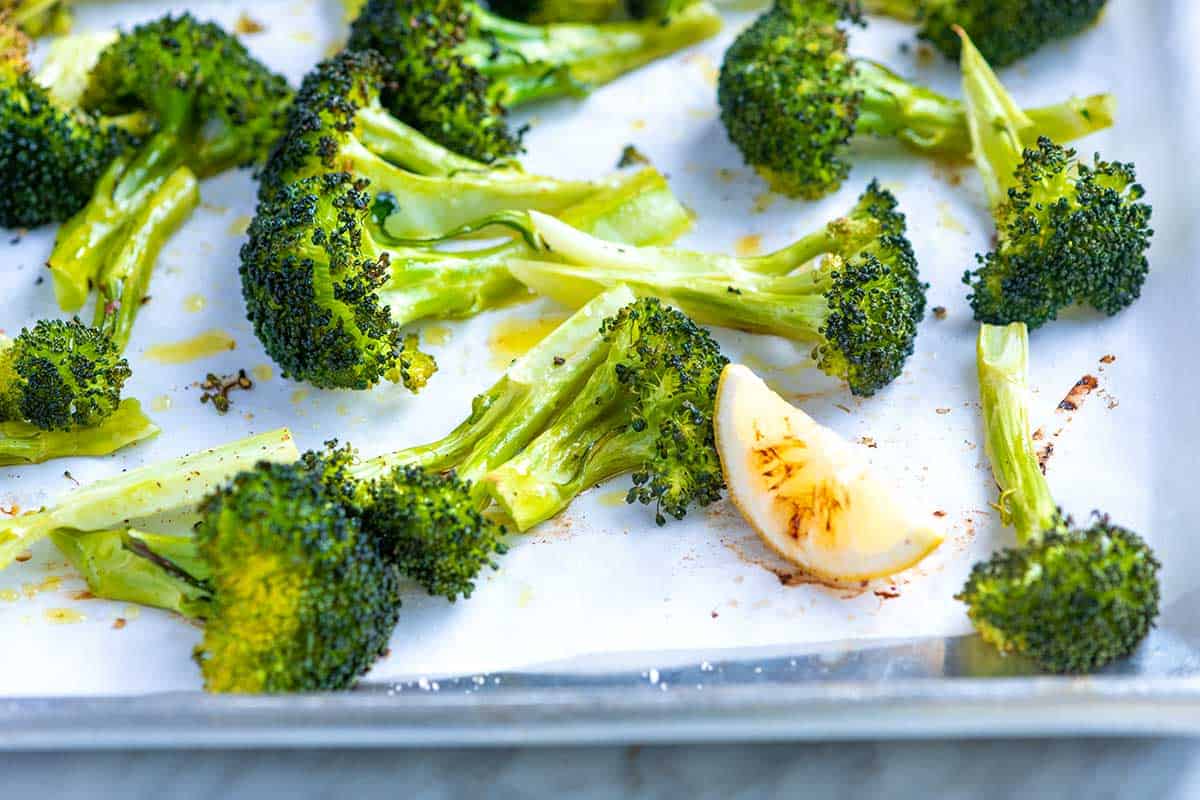
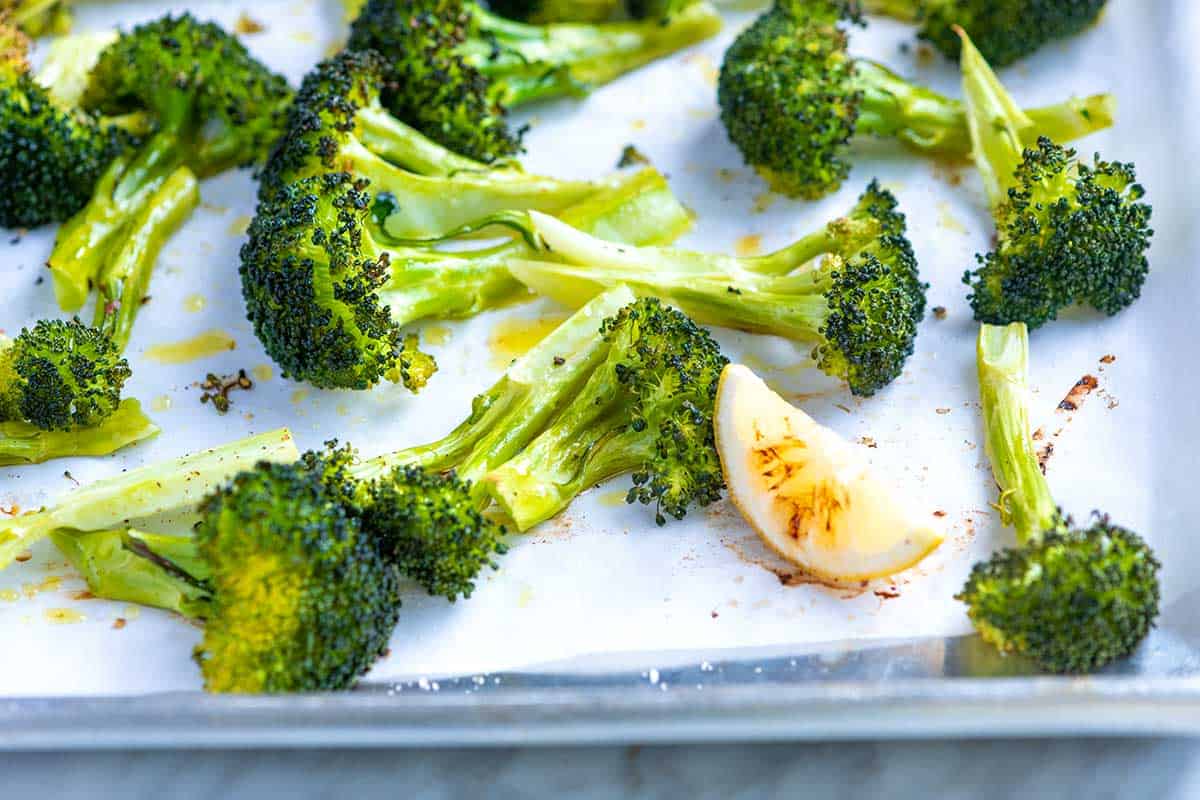
    Roasted Broccoli on a sheet pan

    Our family loves roasting broccoli in the oven, but we’re picky about it. You won’t find any mushy or overcooked broccoli here. My favorite method guarantees tender stems, crisp edges, and most importantly, really tasty broccoli!

    The secret to the best roasted broccoli is high heat and a few small tricks we’ve learned over the years. With the right pan, a drizzle of oil, and a bit of patience, you’ll have broccoli so good you’ll want to eat it straight from the sheet pan. For more, see our roasted broccolini recipe!

    Key Ingredients

    • Broccoli: Look for florets that are tightly closed and a deep, vibrant green color. If they appear loose, pale, or have yellowing or small yellow flowers, the broccoli is likely past its peak and can taste bitter. If you only have frozen broccoli, don’t worry. We’ve included tips in the recipe for roasting frozen broccoli so it still turns out crispy and delicious.
    • Oil: We like to roast vegetables with olive oil or avocado oil, both of which have great flavor and a higher smoke point. Avoid extra-virgin olive oi; since it burns more easily at high oven temperatures.
    • Salt and Pepper: As with all of our roasted vegetable recipes, we season generously with salt and pepper. Once roasted, you can add extra flavor with your favorite spice blends or seasoning mixes.
    • Lemon (Optional): I like to slice a lemon and toss the wedges right onto the baking sheet with the broccoli. The lemons roast and turn slightly sweet, and the broccoli tastes amazing with a squeeze of that roasted lemon juice over the top.

    Find the full recipe with measurements below.

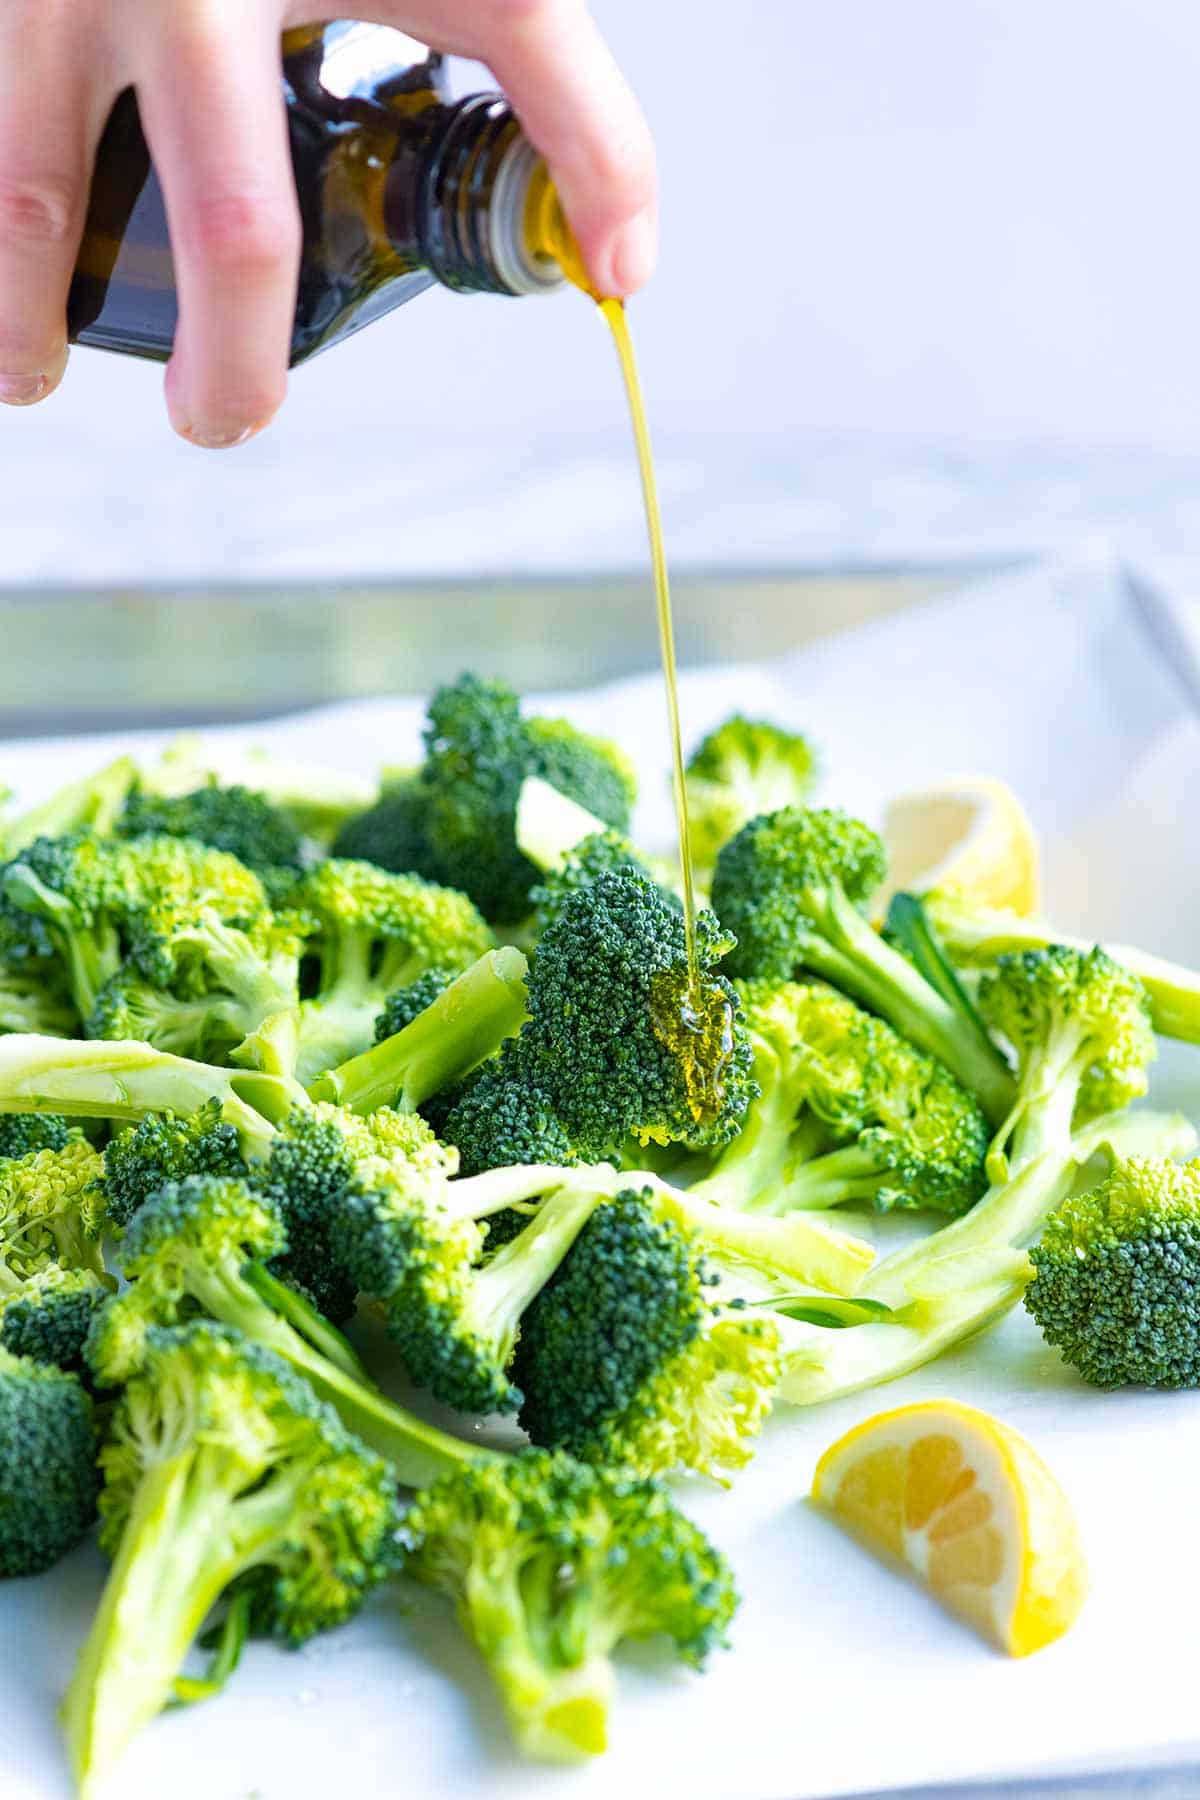
    Adding olive oil to raw broccoli before roasting in the oven

    How to Make Roasted Broccoli in the Oven

    Tip 1: Cut the broccoli into similarly sized pieces. So that all your broccoli roasts at the same speed, try to cut your broccoli into similar sizes. It’s up to you how big they are, but make sure everything in the pan looks similar in size. This way, everything roasts evenly. I use the same tip for roasted cauliflower, too.

    Tip 2: Create lots of flat edges. Instead of pulling the florets apart to look like the tops of round trees, slice them in half or quarters to create a flat side. Place the flatter edge down when you arrange the broccoli on the baking sheet. As the broccoli roasts, the flat edge will get nice and brown.

    Tip 3: Don’t overcrowd it on the pan. Be careful not to overcrowd the broccoli, and give them some space. Roasting the broccoli too close together causes it to steam rather than roast. This tip also applies to roasted mushrooms!

    Tip 4: Use a high oven temperature. For those crispy brown tips and caramelized stems, roast broccoli at 425°F for 20 to 30 minutes. Check the broccoli towards the end of roasting, and don’t take it out until the tips of the florets are browned and crisp and the stems are tender.

    Serving Suggestions

    This broccoli might be one of the most made veggie sides in our house. We’re happy to serve it next to almost anything. Some of our favorites are next to mac and cheese, chicken nuggets (my son’s request), these lemon chicken thighs, our baked lemon dill salmon, and adding to rice or grain bowls.

    I also love adding a dipping sauce to the side, like our tahini sauce, ranch dressing, or this creamy honey mustard.

    More Broccoli Recipes

    Perfect Roasted Broccoli

    Perfect Roasted Broccoli

    • PREP
    • COOK
    • TOTAL

    Roasted broccoli is such a classic side, and for good reason! It goes with almost anything. The lemon in our recipe is optional, but really lovely with the broccoli.

    4 Servings

    You Will Need

    1 bunch broccoli, about 1 ½ pounds

    2 tablespoons olive oil or avocado oil

    ½ teaspoon fine sea salt

    ¼ teaspoon fresh ground black pepper

    3 lemon wedges, optional

    Directions

      1Prep: Preheat the oven to 425°F (218°C). Line a large baking sheet with parchment paper or a silicone baking mat.

      2Prepare the broccoli: Cut the broccoli crown into individual florets, separating them from the main stem. If any florets are really big, cut them in half lengthwise to create flat edges, which helps them roast evenly and brown. Use a vegetable peeler to remove the tough outer layer of the broccoli stems. Cut the peeled stems into bite-sized pieces, about 1 inch long.

      3Season: Toss the broccoli florets and stems with the olive oil, salt, and pepper on the baking sheet. Spread them out, facing as many flatter edges down onto the baking sheet so they brown nicely. Then, scatter lemon wedges around the broccoli.

      4Bake: Roast the broccoli, without stirring, until the edges are crisp and brown and the stems are tender, 20 to 25 minutes. Serve warm with some juice from the roasted lemon wedges squeezed on top.

    Adam and Joanne’s Tips

    • Storing: Let cool. Transfer the cooled broccoli to an airtight container or resealable bag. Store in the refrigerator for 3 to 5 days, or freeze for up to 12 months. To freeze, spread the broccoli on a baking sheet lined with parchment paper and freeze for about an hour (preventing them from sticking together later). Transfer to a freezer-safe container.
    • Broccoli stems: I love buying broccoli with long stems that are still attached. The outer layer of the stem can be tough, so I use a vegetable peeler to remove it. Cut 1/2 inch from the end and discard (this can be tough). Slice or dice the rest and throw onto the baking sheet with the florets.
    • Roasted frozen broccoli: Roast it frozen (do not thaw). Add to a baking sheet and roast at 425°F without oil. After 5 minutes, drizzle the broccoli with oil, then continue to roast for 10 to 15 minutes, or until the edges start to turn crisp. Season with salt and pepper, then serve. The broccoli will turn out softer than when using fresh, but it will still be delicious.
    • The nutrition facts provided below are estimates.

    Nutrition Per Serving
    Serving Size
    1/4 of the baking sheet
    /
    Calories
    119
    /
    Total Fat
    7.6g
    /
    Saturated Fat
    1.1g
    /
    Cholesterol
    0mg
    /
    Sodium
    346.9mg
    /
    Carbohydrate
    11.6g
    /
    Dietary Fiber
    4.4g
    /
    Total Sugars
    3g
    /
    Protein
    4.8g


    AUTHOR:

    Adam Gallagher

    Adam and Joanne of Inspired Taste

    We are Adam and Joanne Gallagher, the creators of Inspired Taste. Established in 2009, Inspired Taste grew from a childhood dream into one of the internet’s most trusted recipe sites with hundreds of reliable recipes, step-by-step videos, and expert tips.More About Us
    Source link

  • Perfect Black Bean Dip Recipe

    Perfect Black Bean Dip Recipe

    Think of this black bean dip as a mash-up of black bean puree and onion dip. Thanks to the addition of cooked sweet onions, this easy bean dip is absolutely delicious and perfect served with pita wedges or chips.

    Perfect Black Bean Dip

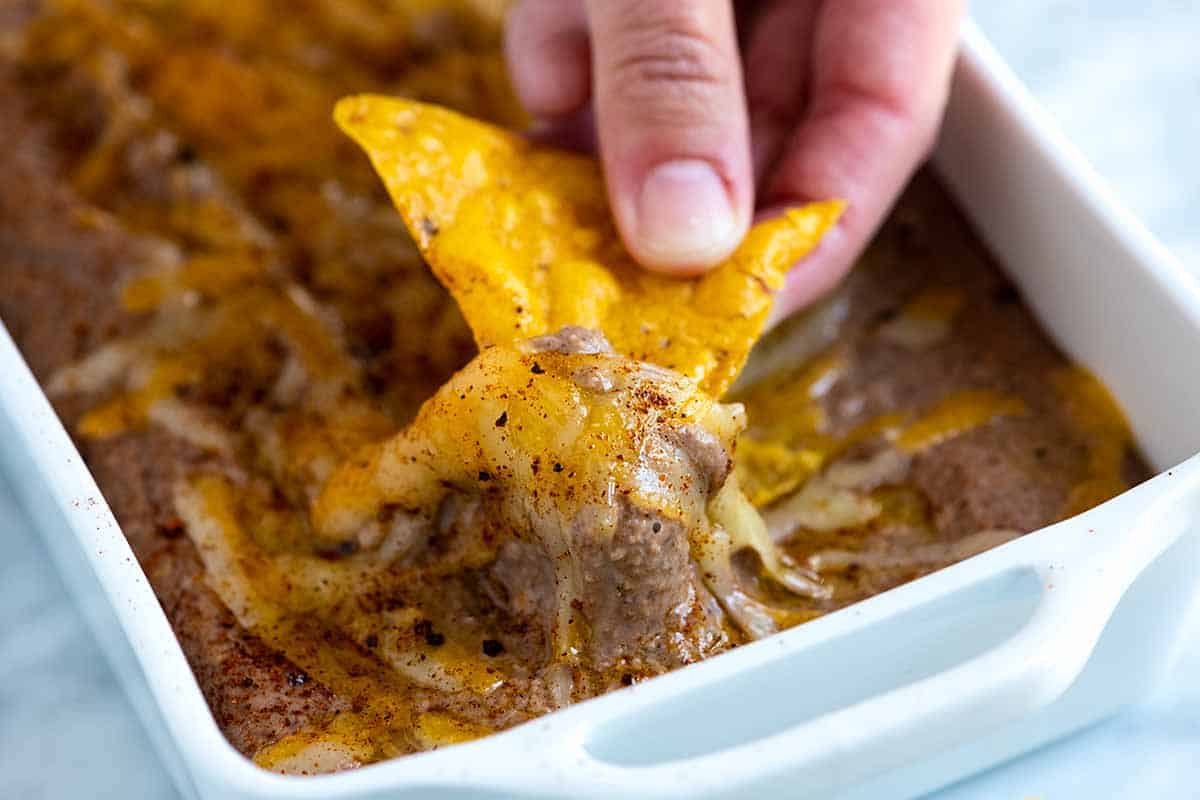
    This black bean dip is truly a slam-dunk appetizer, hitting the mark with its super creamy, almost airy texture. We blend sweet onions, fragrant spices, and sour cream directly into the black beans, creating an irresistible dip.

    Beyond tortilla chips and veggies, I love using it as a spread for wraps and sandwiches. Picture it over a warm corn tortilla, topped with fresh lettuce and pico de gallo—truly incredible! For more bean dips, try our cheesy bean dip (made with pinto beans) or our popular hummus recipe.

    Key Ingredients

    • Black Beans: For the easiest dip, use canned, drained, and rinsed black beans. For the absolute best flavor, start with our recipe for cooking black beans from scratch.
    • Onion: Cooked sweet onions are the secret weapon here. They add a natural sweetness and are essential for that ultra-creamy texture once everything is blended.
    • Spices: You won’t find this dip lacking in flavor! We use a generous blend of garlic powder, ground cumin, chili powder, and cayenne pepper. Our homemade chili powder or store-bought ancho chili powder takes it to the next level when you have it on hand!
    • Sour Cream: A half cup of sour cream is crucial for making this dip light and wonderfully creamy, giving it an almost airy texture. Feel free to substitute with crème fraiche or cream cheese.
    • Lime: Fresh lime juice is the non-negotiable ingredient that ties all the flavors together. Don’t skip it!
    • Cheese (optional): If you’re baking your dip, choose a good melting cheese, such as Monterey Jack, cheddar, or Oaxaca. Just add it to the top and bake until it’s bubbly and golden.

    Find the full recipe with measurements below.

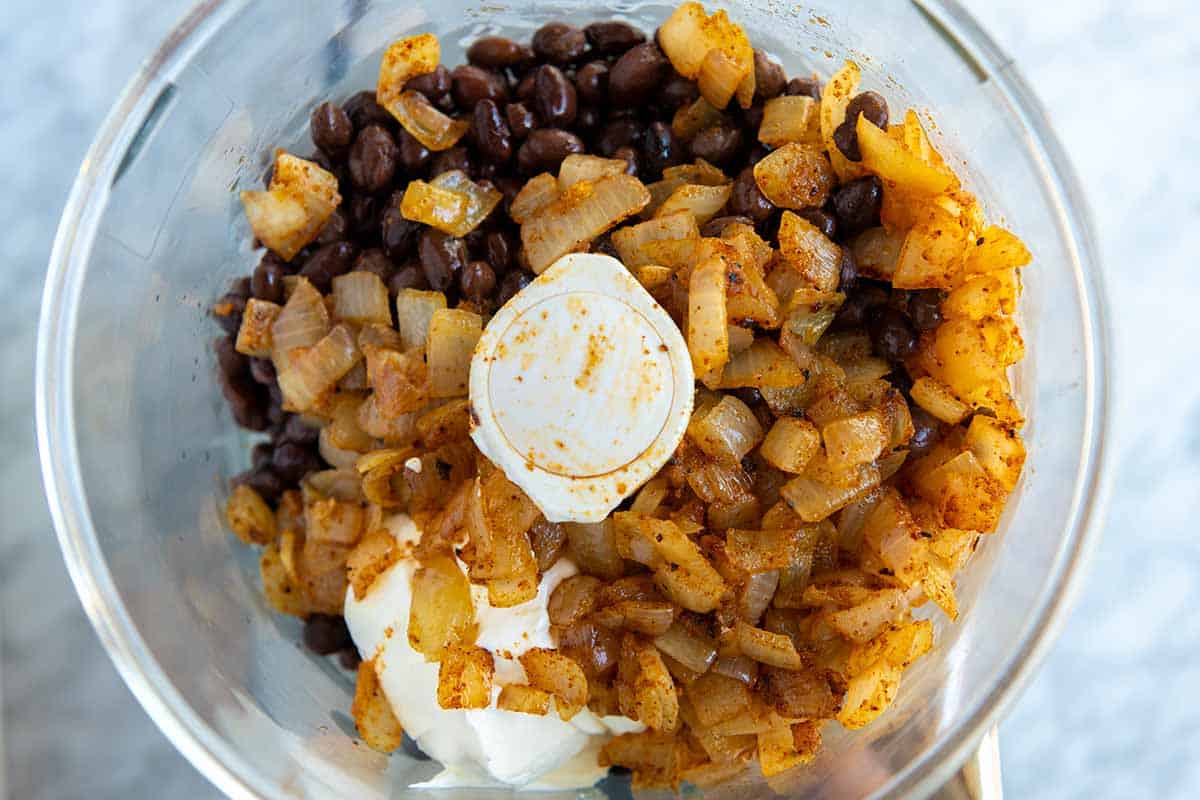
    How to make black bean dip: Ingredients in a food processor

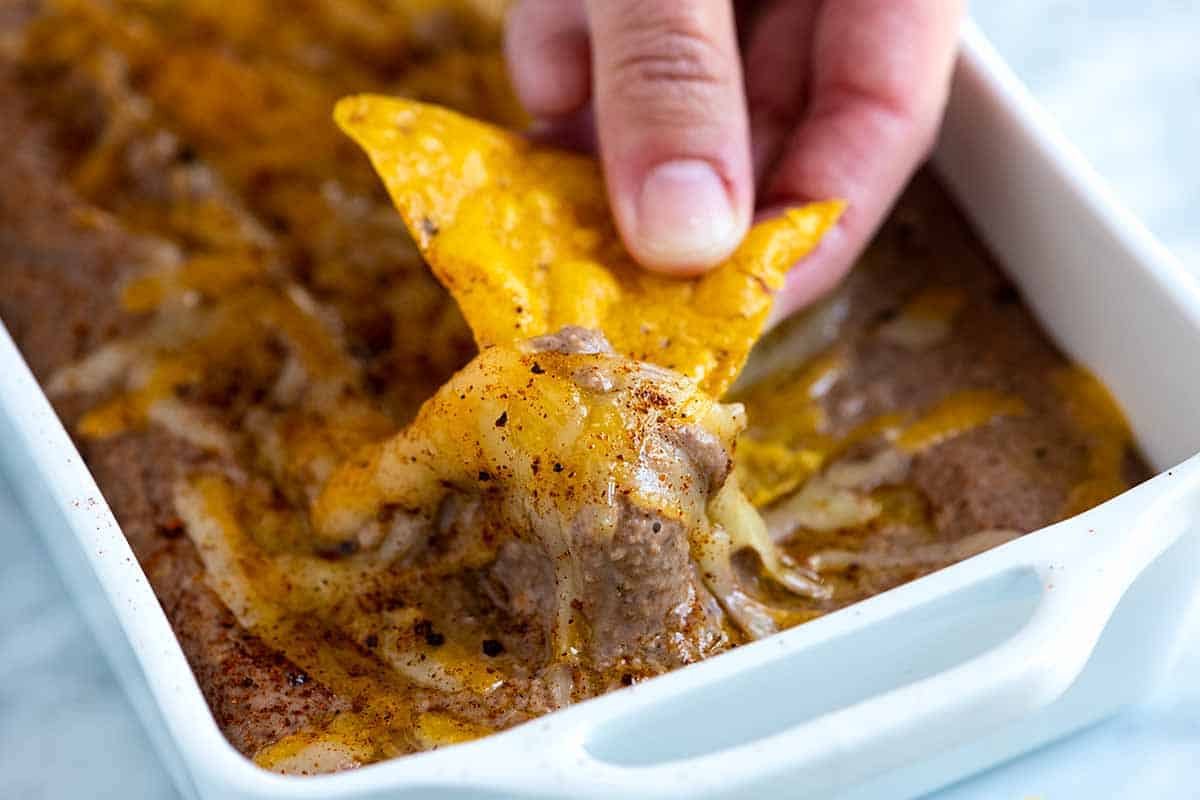
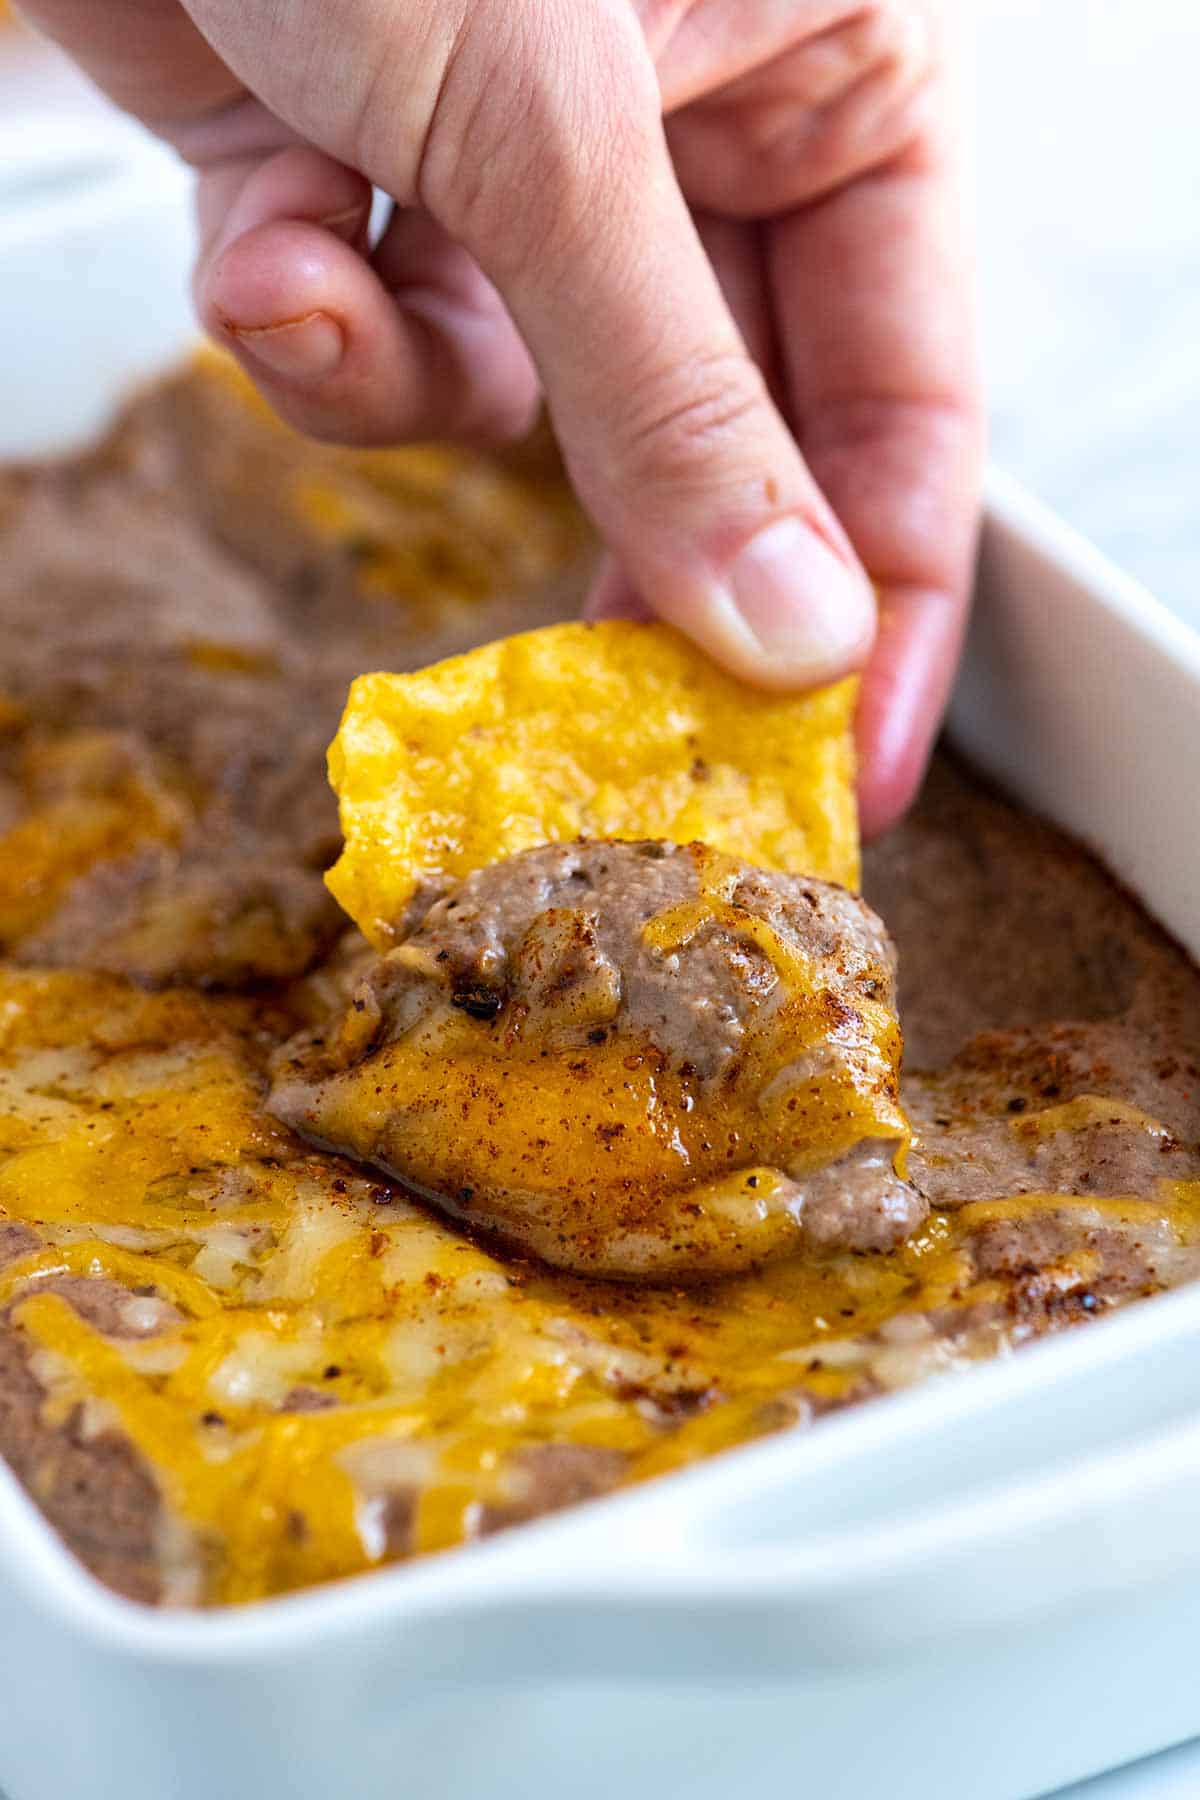
    For the best results, blend the dip ingredients using a blender or food processor. Once blended, you can serve it at room temperature like hummus, or transfer it to a baking dish, top with cheese, and bake until warm and the cheese is bubbly.

    Perfect Black Bean Dip

    Perfect Black Bean Dip

    • PREP
    • COOK
    • TOTAL

    Think of this as a mash-up of black bean dip and onion dip. Thanks to the addition of cooked sweet onions, this easy bean dip is delicious and perfect when served with pita wedges or chips. While you can serve this at room temperature (more like a hummus), I prefer it baked with cheese on top. For a more traditional sour cream-based dip, see our recipe for creamy onion dip.

    8 Servings

    Watch Us Make the Recipe

    You Will Need

    2 tablespoons olive oil

    1 medium sweet onion, chopped, like Walla Walla or Vidalia, about 2 cups

    1/2 teaspoon garlic powder

    1/2 teaspoon ground cumin

    1/2 teaspoon chili powder, see our chili powder recipe

    1/8 teaspoon to 1/4 teaspoon cayenne pepper

    2 (15oz) cans black beans, drained and rinsed or 3 cups cooked black beans

    1/2 cup sour cream

    2 to 3 tablespoons water

    Spritz of fresh lime

    Salt and fresh ground black pepper

    1/3 cup shredded cheese, optional for baked dip

    Directions

      1Cook the onions: In a skillet over medium heat, add the oil, onions, and 1/4 teaspoon of salt. Cook until they are very soft and smell sweet, 15 to 20 minutes. Stir in the garlic powder, cumin, chili powder, and cayenne pepper. Remove from heat and set aside for 5 minutes.

      2Make black bean puree: In a blender or the bowl of a food processor, combine the cooked onions, drained black beans, and sour cream. Add 2 tablespoons of water, and then blend. If the mixture is having trouble blending, add one or two more tablespoons of water to help it along.

      3Taste, and then season with salt and lime to taste. Serve now, or follow the directions for baked black bean dip below.

      4Baked black bean and onion dip: For a baked dip, transfer the bean dip to a small baking dish and top with shredded cheese. Bake in a 350°F (177°C) oven until heated through and the cheese has melted, about 10 minutes.

    Adam and Joanne’s Tips

    • Vegan modifications: Leave out the sour cream and increase the water by a tablespoon or so. The dip will still be delicious. You can also substitute the sour cream with a plant-based sour cream or cream cheese.
    • The nutrition facts provided below are estimates.

    Nutrition Per Serving
    Serving Size
    1/8 servings
    /
    Calories
    173
    /
    Total Fat
    6.9g
    /
    Saturated Fat
    2.4g
    /
    Cholesterol
    7.4mg
    /
    Sodium
    146.7mg
    /
    Carbohydrate
    20.4g
    /
    Dietary Fiber
    6.4g
    /
    Total Sugars
    2g
    /
    Protein
    8.5g


    AUTHOR:

    Joanne Gallagher

    Previous Post: Creamy Vegan Queso
    Next Post: Baked Red Pepper Chicken Breast

    Source link

  • Perfect Steamed Mussels Recipe

    Perfect Steamed Mussels Recipe

    This incredible steamed mussels recipe is my favorite way to cook mussels! We cook them in a flavorful broth made with white wine and garlic. It is easy, quick, and delicious.

    Steamed Mussels Recipe Video

    I love making steamed mussels in white wine at home. I prefer the mussels I’ve made at home to those I’ve ordered at restaurants. As the mussels steam, the broth gets trapped inside the shells.

    It’s divine, plus the leftover broth is fantastic for soaking up with a good loaf of bread.

    Key Ingredients

    • Mussels: I use fresh mussels in this recipe. Buy them from a trusted seafood counter. The nice thing about mussels is their price. Even at a gourmet or pricy store, they cost $7 to $8 a pound. Cleaning and storing tips for mussels are below.
    • White wine and broth: Mussels and white wine are a classic combination. Use a dry white wine like Pinot Grigio, Sauvignon Blanc, or unoaked chardonnay. In addition to the white wine, we add a splash of broth. I use chicken broth, but vegetable or seafood stock works, too.
    • Shallot and garlic: We want lots of cooked shallot and garlic. As the mussels cook, the shallot and garlic fall into the shells.
    • Cream: It is optional, but I always add a splash. It mellows out the broth and makes it more luxurious.
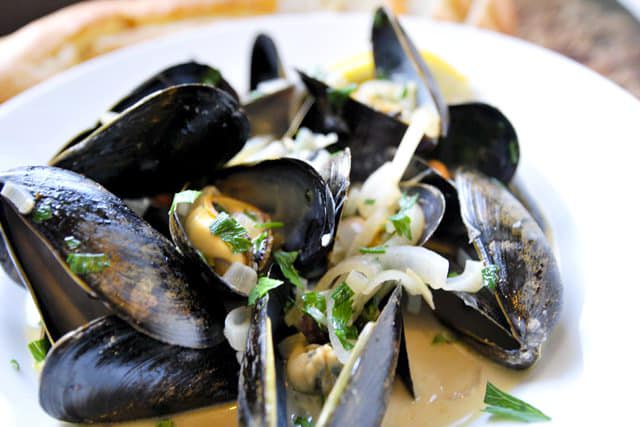
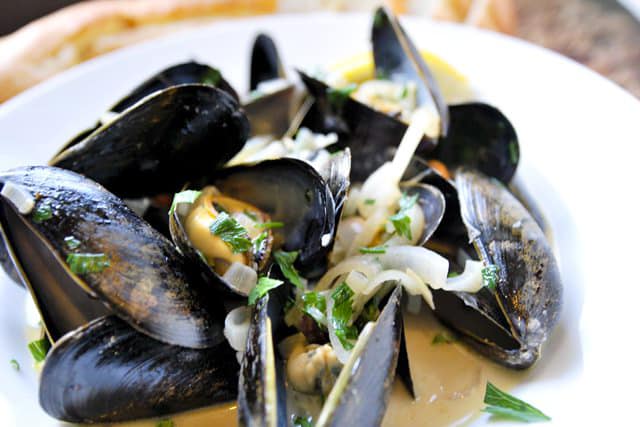
    Steamed Mussels with shallots, garlic, parsley and a white wine broth

    How to Prepare Mussels for Cooking

    Remember that mussels are alive when you buy them. When stored properly, live mussels will last 2 to 3 days in the refrigerator (sometimes longer). Do not store live mussels in water. When you get home from the store, remove them from any ice and airtight bags (the mesh bags are okay). Store the mussels in a colander set over a large bowl. Cover the colander with damp dish towels. Check on the mussels daily (or more often, if possible). Do not let the mussels sit in water, and keep the dishtowel damp so they do not dry out.

    Look through your mussels. If you find any cracked or chipped shells, discard them. If any mussels are open, give them a quick tap on the counter and watch if they close again. If they do not close, discard them.

    I remove the beard. Most mussels have a beard (the fibers that emerge from the shell). It’s not great to eat, so I remove it. To debeard mussels, hold a mussel in one hand using a dry towel. Then, pull the beard out and away from the mussel with your other hand. Sometimes, removing it can be tricky, but with a good wiggle, it will eventually come out.

    Clean your mussels before you cook them. Use a firm brush to remove extra sand and the odd barnacle. Then, rinse the cleaned mussels under cold water.

    How to Steam Mussels

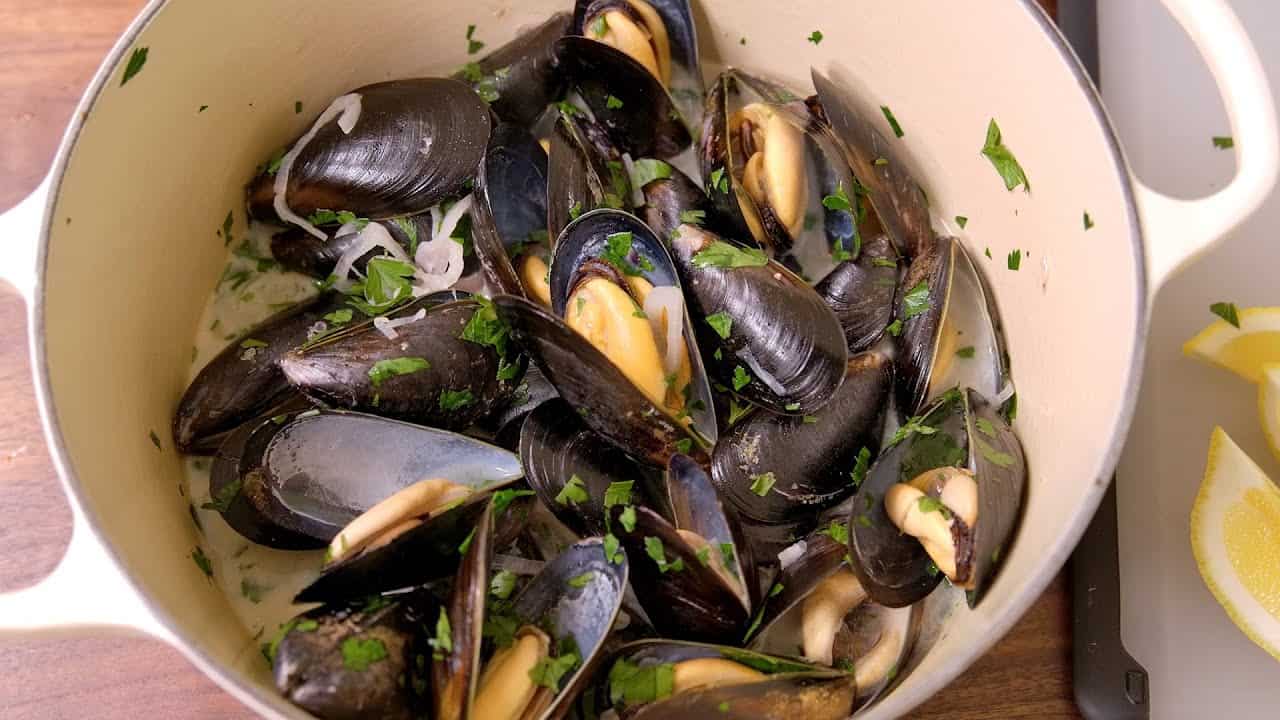
    This steamed mussels recipe is easy and quick to prepare. Start by cooking shallots and garlic in butter, then add white wine and a bit of broth. Stir in the mussels, cover the pot, and let them steam.

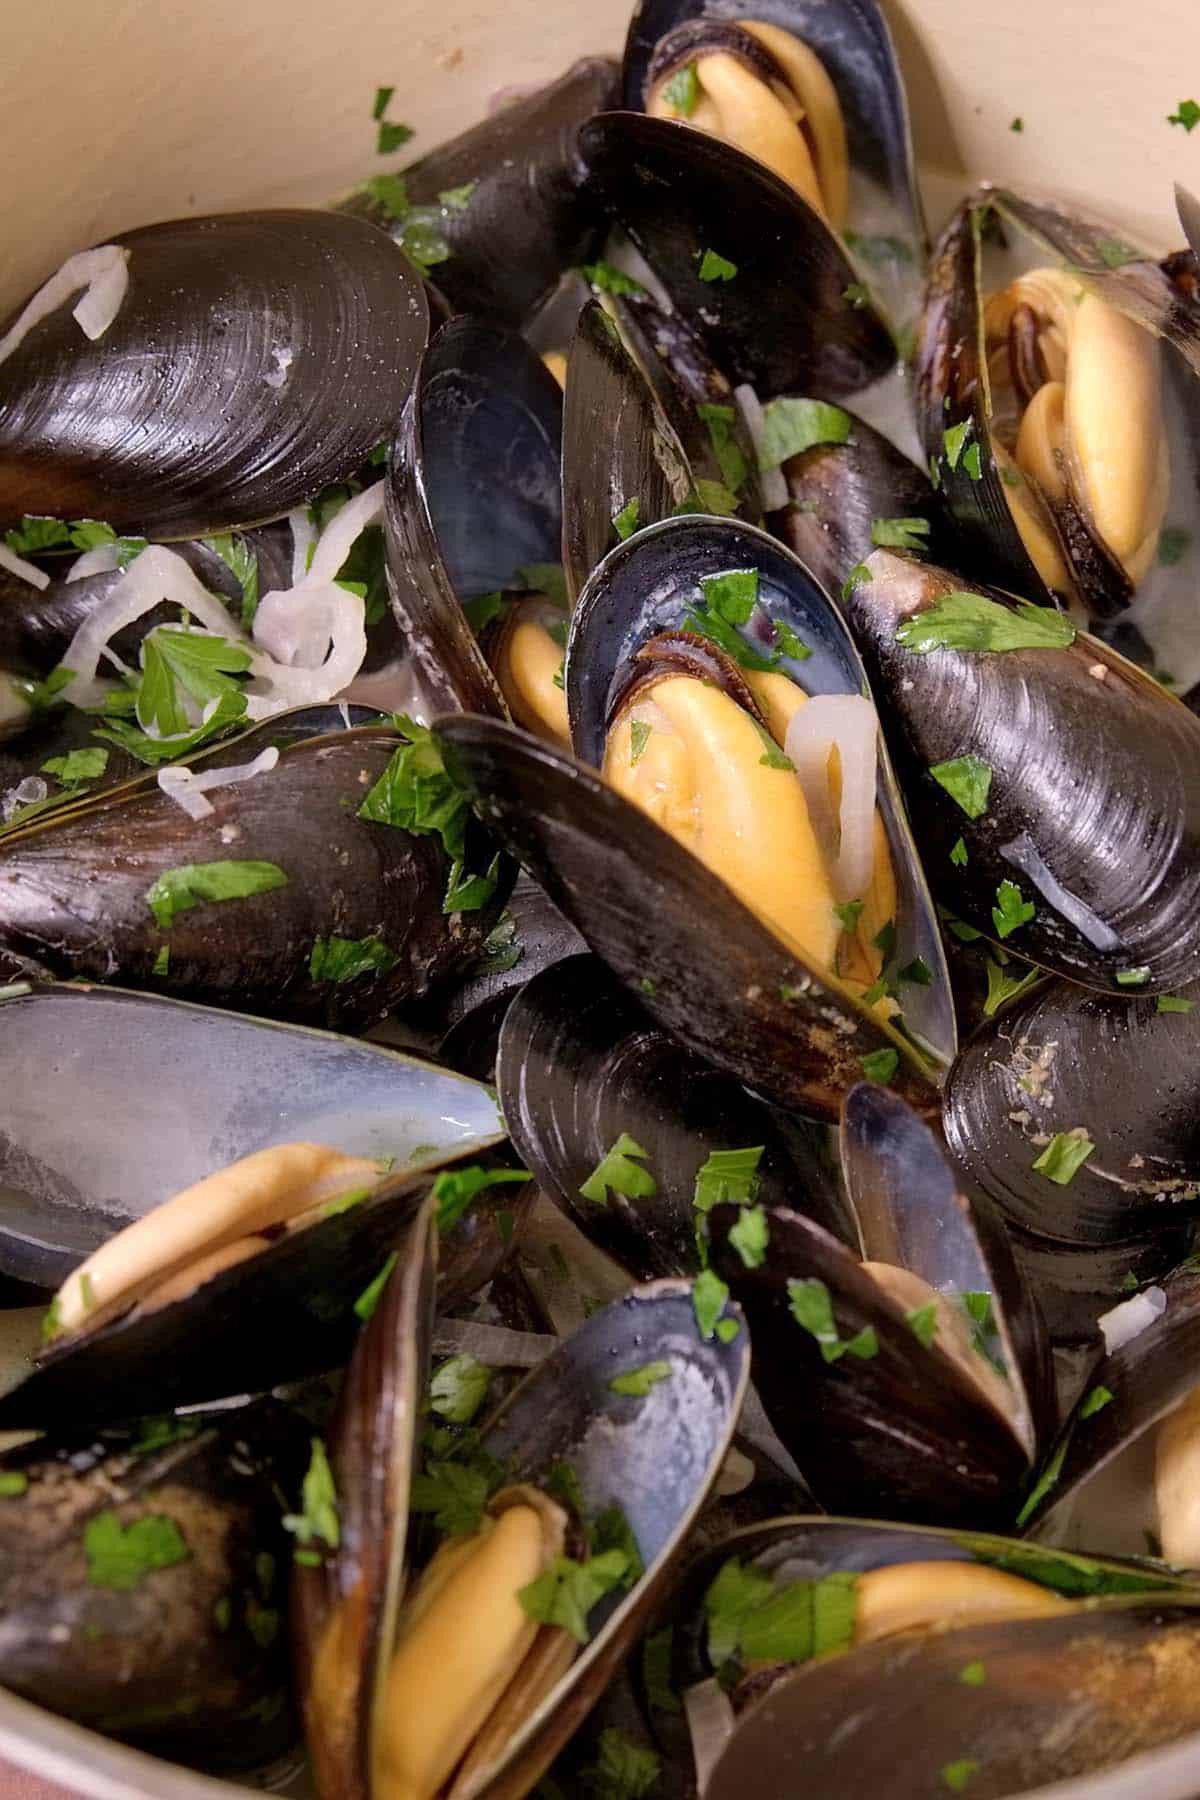
    You know the mussels are cooked when most of the shells are open. It takes 6 to 10 minutes. If you notice any that have not opened, discard them. To finish, I take the pot off the heat, then stir in a splash of cream and parsley, and squeeze over a little fresh lemon juice. So easy and so delicious.

    Make sure that you have some crusty bread to soak up all the wonderful white wine broth.

    Steamed Mussels in White Wine Broth

    Perfect Steamed Mussels

    • PREP
    • COOK
    • TOTAL

    Shallots, garlic, and white wine make the perfect broth for steamed mussels. Serve the mussels in a big bowl with bread on the side so you can sop up all that delicious broth. The article above has tips on storing live mussels and cleaning them.

    Makes 2 Servings

    Watch Us Make the Recipe

    You Will Need

    2 pounds mussels, cleaned

    1 tablespoon butter

    2 small shallots, thinly sliced

    2 garlic cloves, finely chopped

    1 cup (236ml) low-sodium chicken stock

    1/2 cup (118ml) dry white wine

    Splash heavy cream

    1/4 cup roughly chopped fresh parsley

    Salt and fresh ground black pepper

    Lemon wedges, for serving

    1 baguette, warmed for serving

    Directions

      1Melt butter in a large pot with a lid over medium heat. When the butter begins to bubble, stir in the shallot and garlic. Cook until softened, about 5 minutes.

      2Add the chicken stock, white wine, and mussels, then give them a good toss. Cover the pot with its lid and cook until the mussels have opened 6 to 10 minutes. If any mussels do not open, discard them.

      3Remove the pot from the heat, then stir in the cream and parsley. Taste the broth, and then adjust to taste with salt, pepper, or more cream.

      4Serve in big bowls with lemon wedges and plenty of warmed bread to sop up the broth.

    Adam and Joanne’s Tips

    • The nutrition facts provided below are estimates.

    Nutrition Per Serving
    Serving Size
    1/2 the recipe
    /
    Calories
    510
    /
    Protein
    48 g
    /
    Carbohydrate
    28 g
    /
    Dietary Fiber
    2 g
    /
    Total Sugars
    6 g
    /
    Total Fat
    17 g
    /
    Saturated Fat
    7 g
    /
    Cholesterol
    133 mg


    AUTHOR:

    Adam Gallagher

    Adam and Joanne of Inspired Taste

    We are Adam and Joanne Gallagher, the creators of Inspired Taste. Established in 2009, Inspired Taste grew from a childhood dream into one of the internet’s most trusted recipe sites with hundreds of reliable recipes, step-by-step videos, and expert tips.More About Us
    Source link

  • Perfect Vegetable Risotto Recipe

    Perfect Vegetable Risotto Recipe

    This vegetable risotto recipe combines two of our favorite things: fresh veggies and super creamy risotto rice. It’s fun to make and with our tips to guide you, it’s easy!

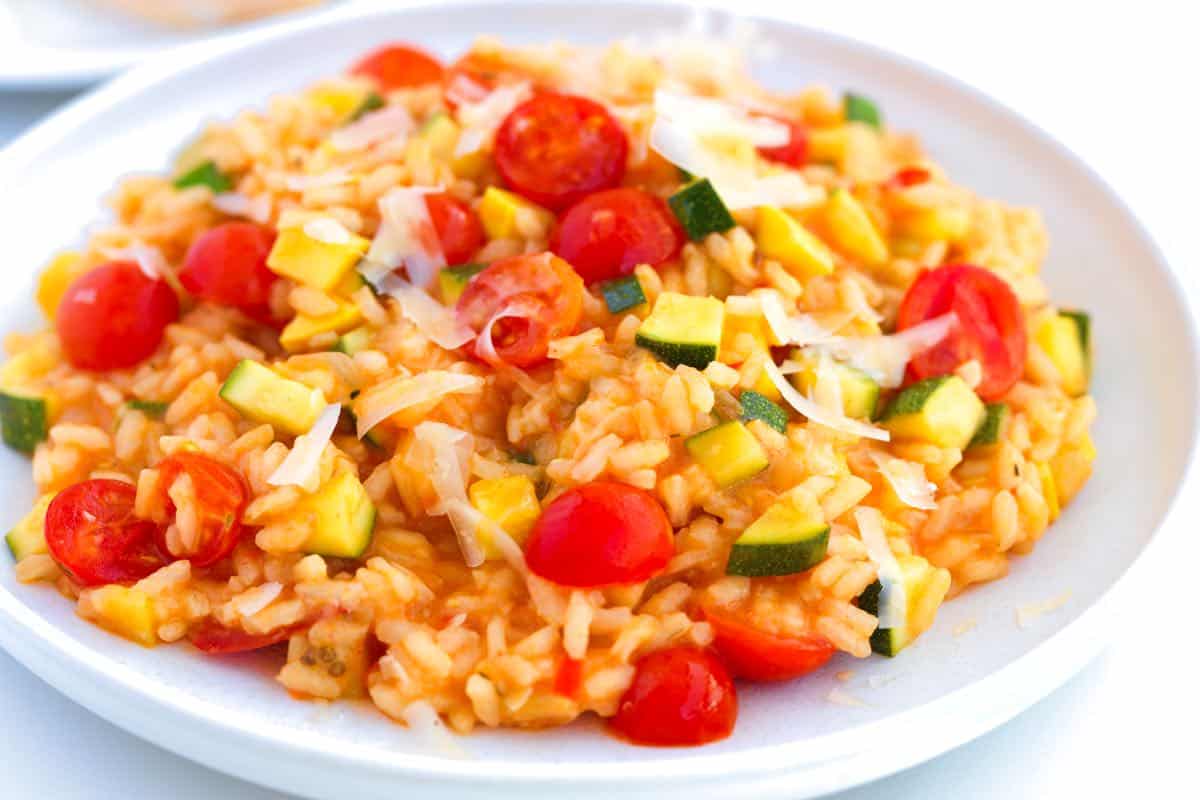
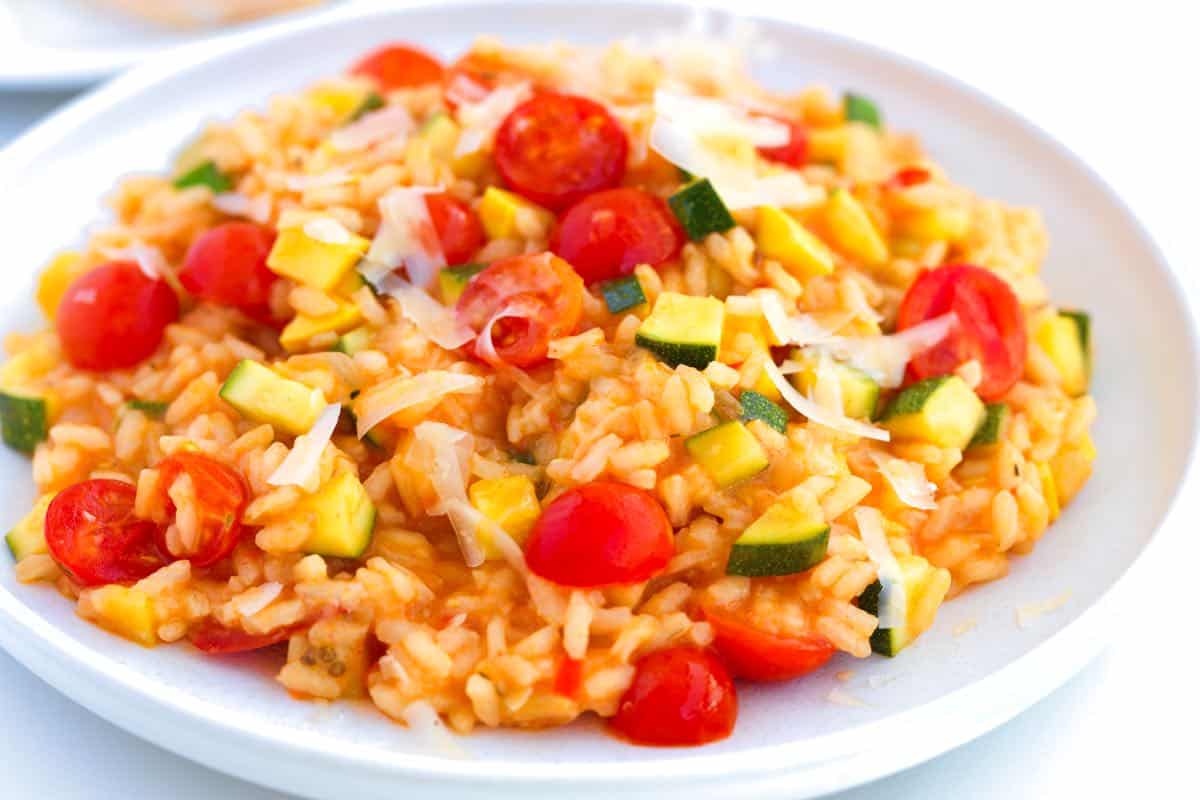
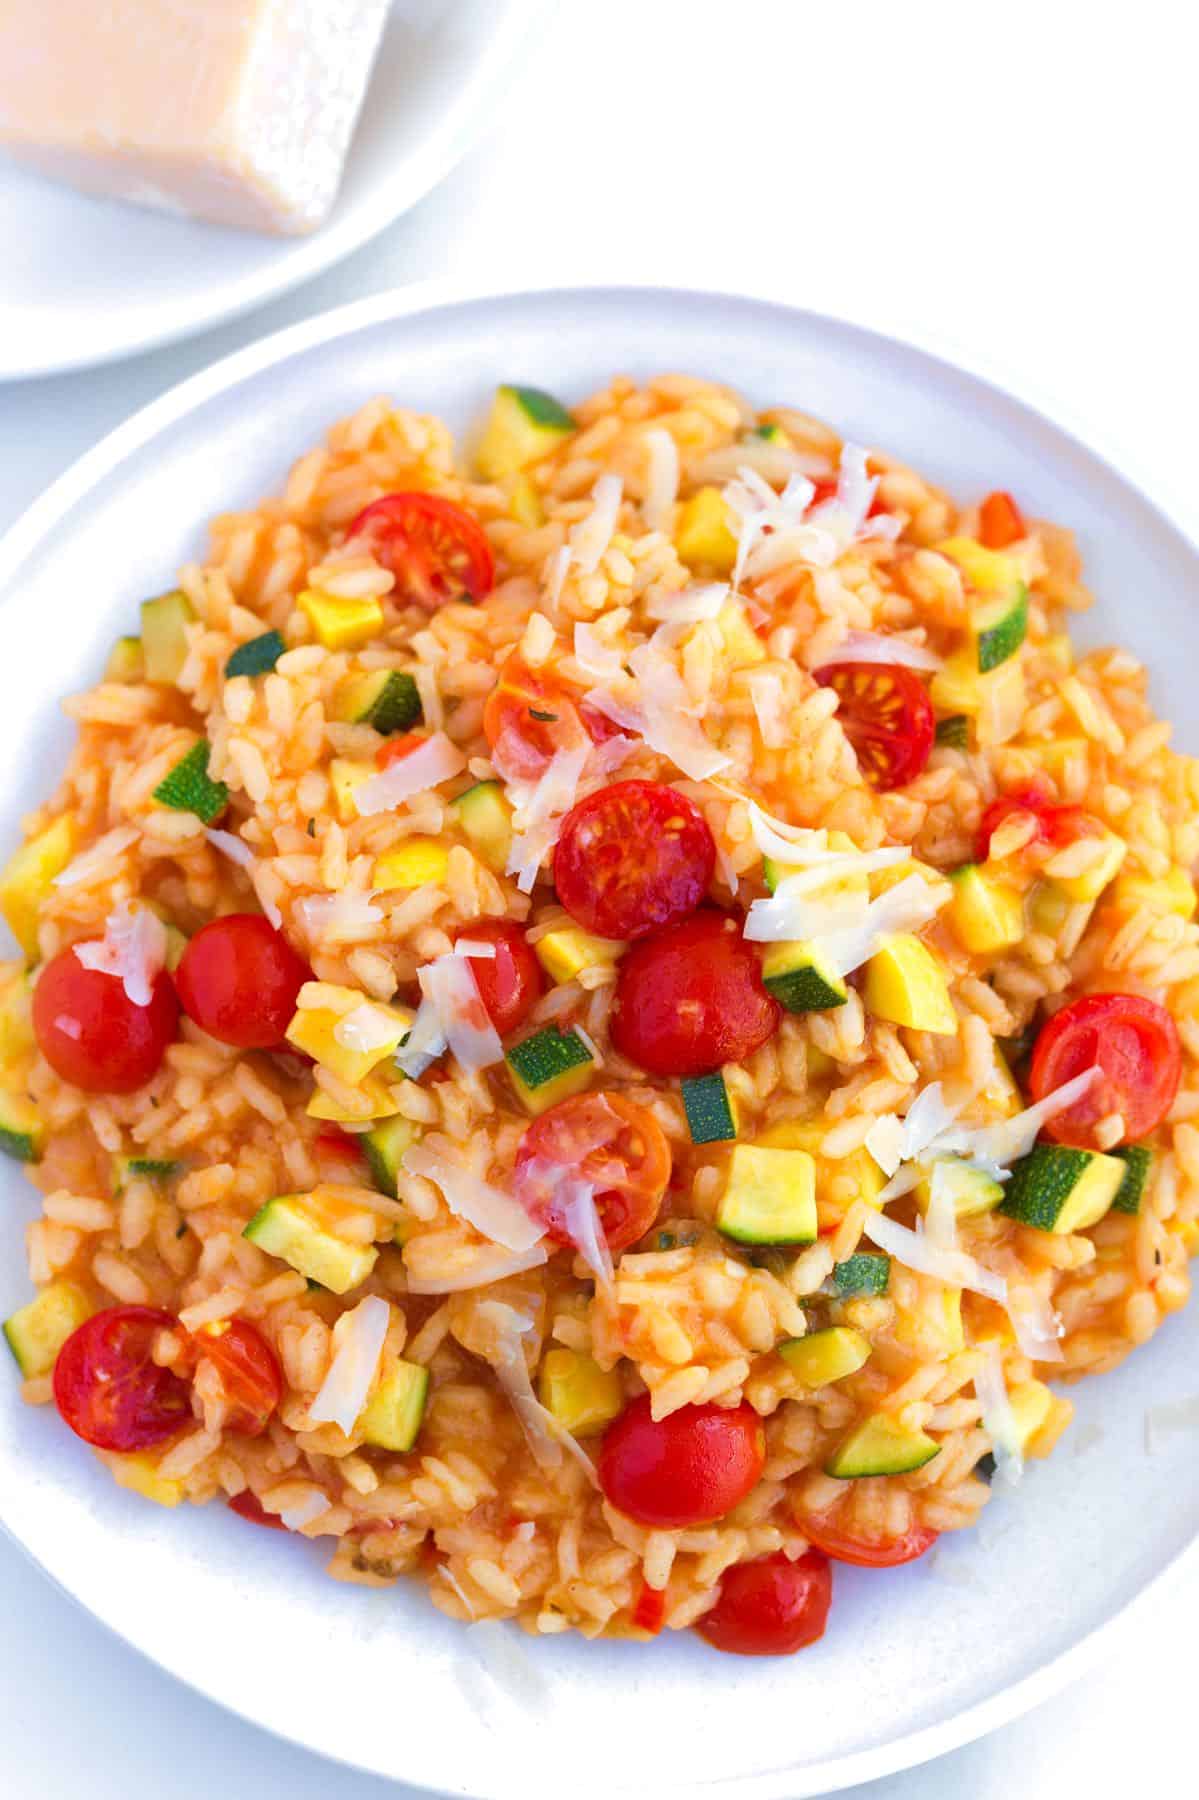
    Homemade Veggie Risotto

    We’re excited to share this recipe developed with our chef friend, Richard Hattaway. Thanks to Richard’s restaurant trick, making risotto at home is now easier than ever. Instead of the usual continuous cooking, this recipe breaks the process into two stages. You can do most of the cooking up to 4 days ahead, then finish it in just 10 minutes right before serving.

    Of course, you can still make the recipe all at once if you prefer, but this two-stage method makes risotto much more convenient for busy schedules. For another risotto recipe, see our mushroom risotto.

    Key Ingredients

    • Rice: The best rice for risotto are Arborio, Carnaroli, and Vialone Nano since they are all short-grain rice varieties with a high starch content. We use Carnaroli in our kitchen since it makes creamy risotto and is more forgiving when it comes to overcooking.
    • Broth: A good vegetable broth and even chicken broth work perfectly well in this recipe, but we love our easy tomato broth for a summery tomato risotto base (that is what we have used in our photos).
    • White Wine: Whenever you cook with wine, the most important thing to remember is to use something you enjoy. We use a light, dry white wine like Pino Gris, Albariño, Grüner Veltliner, or Sauvignon Blanc for this veggie risotto. Wine adds flavor and some acidity. If you prefer to leave it out, replace it with more broth and sprinkle a little fresh lemon juice over the risotto before serving.
    • Veggies: We love risotto with veggies. You have some leeway when it comes to the vegetables. We use yellow squash, zucchini, tomatoes, eggplant, and fresh herbs. These are the same veggies we use to make our reader favorite veggie lasagna.
    • Butter: There’s no cream in this risotto (thanks to the rice, it is creamy enough), but a generous pat of butter adds to the creamy, luxurious texture. For vegan risotto, use plant-based butter.
    • Parmigiano-Reggiano: I’m generous with the cheese and recommend you do the same. For a vegetarian risotto, swap the Parmigiano-Reggiano for a vegetarian-friendly cheese like mozzarella, ricotta, or vegetarian parmesan. For vegan risotto, swap for a bit of nutritional yeast.

    Find the full recipe with measurements below.

    How to Make Vegetable Risotto

    Tip 1: How to make risotto (a quick overview). Making risotto gets a bad rap for being complicated and fussy, but with a reliable method, it’s very doable. Here’s what happens step-by-step:

    1. Cook aromatics (onion, bell pepper, garlic).
    2. Toast the rice.
    3. Add wine and simmer until it reduces.
    4. Add broth gradually, stirring occasionally to prevent the rice from sticking.
    5. Finish with quick-cooking vegetables (like zucchini and yellow squash).
    6. Stir in butter and cheese, and serve.
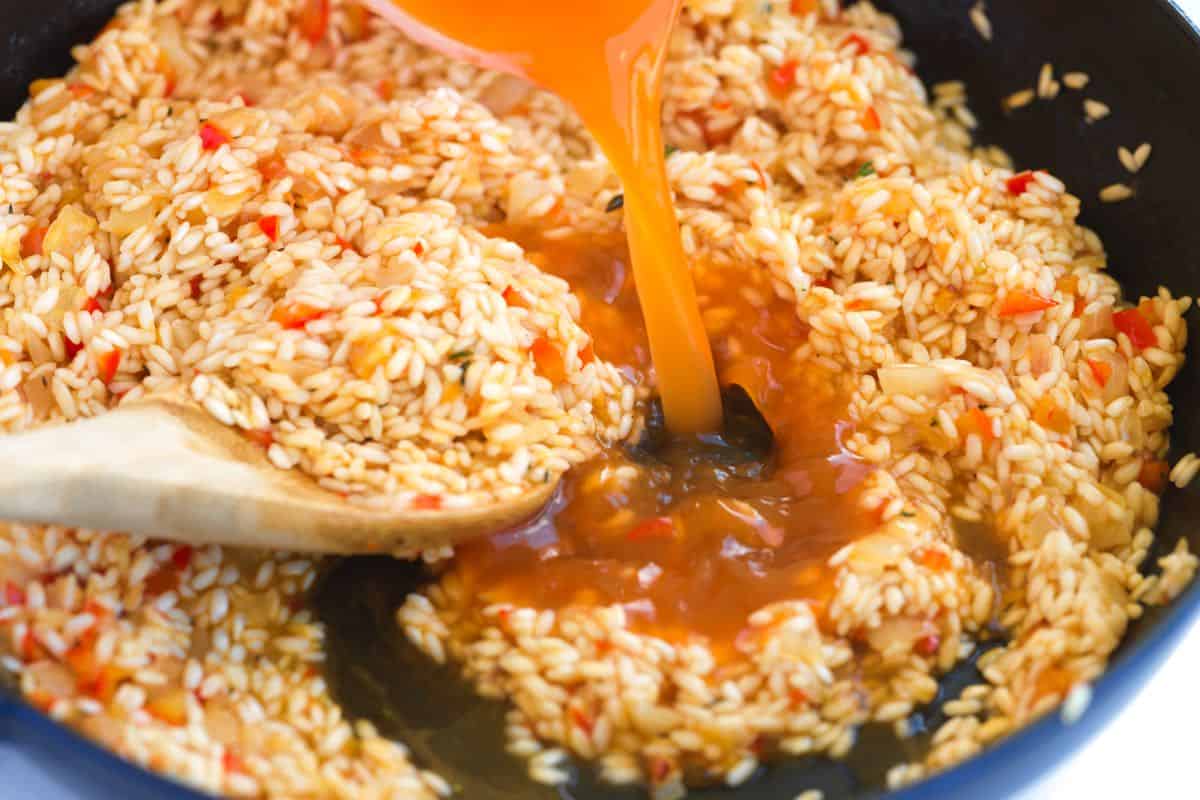
    Adding broth to risotto rice

    Tip 2: Use a heavy-bottomed pan and a wooden spoon. Choose a wide, heavy-bottomed pan so you have room to stir. A wooden spoon is ideal for risotto (a tip from Richard, who says it helps create a creamier texture).

    Tip 3: Continue adding broth as the rice cooks. Let the rice absorb liquid slowly. When the broth is mostly absorbed, add more. Stir occasionally, not constantly. Just enough to keep the rice from sticking. When the rice is almost tender but still firm in the center, it’s about 75% cooked.

    Tip 4: Use the two-part method (excellent for entertaining). When the rice is tender but still firm in the center (about 75% done), you can finish and serve, or pause and store the risotto for later.

    1. Part 1, store for later: Spread the partially cooked risotto on a baking sheet and cool quickly in the freezer. Transfer to containers and refrigerate for up to 4 days.
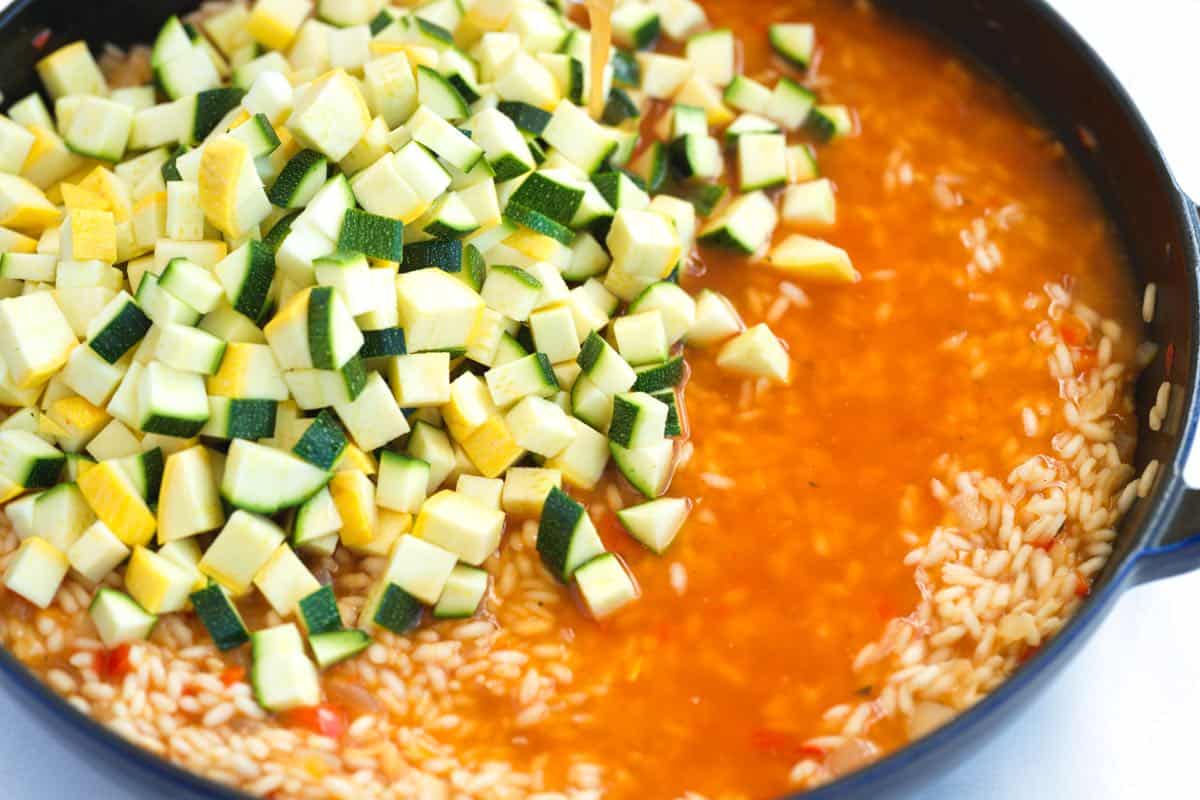
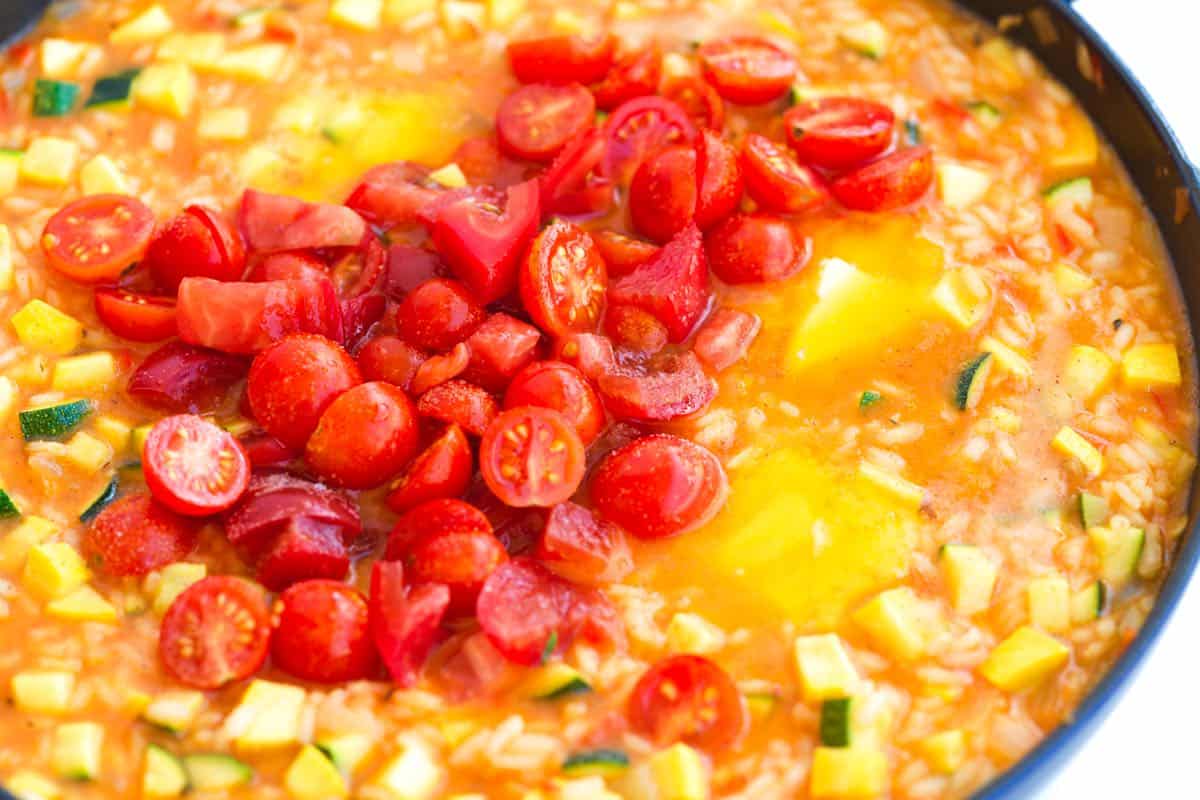
    2. Part 2, finish when ready to serve: Return the rice to your wide pan with chopped zucchini/yellow squash and a splash of broth. Stir often, adding more broth as needed, until the risotto is creamy and the rice is just tender. Season with salt and pepper, stir in chopped tomatoes, then finish with butter and Parmigiano-Reggiano.
    How to Make Vegetable Risotto: Cooking vegetables in risotto
    How to Make Vegetable Risotto: Adding tomatoes to risotto

    Tip 5: Add the optional eggplant puree. Roasted eggplant adds even more savory flavor and extra creaminess. We’ve included instructions below if you’d like to use it.

    Serving Suggestions

    This dish works really well on its own, but you can always add more to round out the meal. Consider a simple green salad with lemon vinaigrette or a homemade Caesar on the side.

    You can add some protein with poached shrimp, simple baked salmon, or these lemon chicken thighs. And, I love a nice slice of roasted garlic bread or focaccia with this olive oil bread dip.

    More Vegetable Recipes

    Vegetable Risotto

    Perfect Vegetable Risotto

    • PREP
    • COOK
    • TOTAL

    This vegetable risotto combines two of our favorite things: fresh veggies and super creamy risotto rice. It’s also fun to make. We use a wide, heavy-bottomed pan and wooden spoon for risotto. A stainless steel rondeau or a wide Dutch oven is excellent. For the broth, we love our tomato broth (it takes 30 minutes), but you can use your favorite homemade or store-bought broth in its place. You will need about 6 cups.

    If you are entertaining, we highly recommend making the risotto in stages. First, cook it until 75% done, cool the rice mixture, and then about 10 minutes before serving, reheat and finish the risotto. This way, you are not standing over a hot stove for 30+ minutes when your guests are there. This method is written into the recipe below.

    Makes 6 servings

    You Will Need

    6 cups vegetable broth, we highly recommend this tomato broth (1420ml)

    2 cups arborio rice or carnaroli rice (380g)

    1 cup dry white wine, see notes (236ml)

    ¼ cup olive oil (60ml)

    1 cup finely chopped onion, half large onion

    ¾ cup finely chopped red bell pepper, half large pepper

    3 cloves garlic, minced

    1 teaspoon fresh thyme leaves, chopped

    1 medium yellow squash, chopped small

    1 medium zucchini, chopped small

    1 ¼ cups cherry tomatoes or use chopped tomatoes, 6 ounces

    3 tablespoons salted butter

    Handful chopped fresh herbs like basil, chives, and green onion

    Parmigiano-Reggiano cheese for serving

    Directions

    • Make Rice Mixture
    • 1Cook aromatics: In a wide, heavy-bottom pan over medium heat, cook the garlic, onion, and bell pepper in olive oil until the onions turn translucent, about 3 minutes.

      2Toast the rice: Add the rice and thyme and cook, stirring for 3 to 5 minutes. When the rice sticks a little, pour 1 cup of white wine into the pot. Stir the rice and wine around the pan with a wooden spoon until mostly dry.

      3Add the broth: This step will take about 15 minutes. Begin by measuring out 3 ½ cups of broth, setting aside the remaining 2 ½ cups for later. Pour one third of the measured broth into the pan and keep the risotto at a low simmer while stirring often to prevent the rice from sticking. Once the pot becomes mostly dry, add another one third of the broth and repeat the process until all of the remaining stock has been added.

      4The rice will be about 75% done and will be somewhat tender while still having a raw bite in the center. This is the end of stage one. Either cool the partially cooked risotto to finish later or move on to finishing the risotto.

    • Cool Rice Mixture (optional for entertaining or making ahead)
    • 1You can skip this step if making the risotto from start to finish. When the rice mixture is 75% done, cool the risotto rice by spreading thin on a baking sheet and placing it in the refrigerator. When it is cool, transfer the risotto rice to a container or resealable bags, and store it in the fridge for up to 4 days. If you have a smaller family, like me, you can divide the rice mixture into two batches.

    • Finish Risotto
    • 1Add the squash and zucchini: About 10 minutes before serving, heat a wide, heavy-bottomed pan over medium heat. Add the cooled rice mixture, chopped yellow squash, and zucchini. If you skipped cooling the rice, simply add the squash and zucchini to your pan with the hot rice mixture.

      2Add the broth: Grab the remaining 2 ½ cups of broth. Pour in a third of the broth. Then, with the wooden spoon, stir the rice mixture constantly, ensuring it doesn’t stick to the pan. Once the pot is mostly dry, add another one third of the broth and repeat the process until all of the remaining stock has been added.

      3Season and add the tomatoes: Season the vegetable risotto with 1 ½ teaspoons of fine sea salt, and stir in the tomatoes.

      4To finish: Grate enough parmesan cheese over the top to cover the rice, add the butter, and finish with 5 twists of black pepper. Stir until the butter melts and the tomatoes are hot. The risotto should be creamy, the squash tender, and the tomatoes heated through. Serve immediately with fresh green herbs, green onion, and extra parmesan cheese on top.

    Adam and Joanne’s Tips

    • Eggplant puree: For even more flavor, stir in 1/2 cup of eggplant puree to the risotto at the same time as the tomatoes. To make eggplant puree, char the outside of a medium eggplant over a gas flame or under the broiler for about 10 minutes. Then, roast the eggplant in a 425°F (220°C) oven for 12 minutes or until the eggplant is completely soft. Remove the eggplant from the oven and let it cool. Scrape the softened eggplant flesh into a blender and puree until smooth.
    • Wine to use: Choose a lighter dry white wine like Pino Gris, Albariño, Grüner Veltliner, or Sauvignon Blanc
    • Wine substitution: If you prefer to leave the wine out, replace it with more broth and sprinkle a little fresh lemon juice over the risotto before serving.
    • Alternate methods: For the best, creamiest result, we do not recommend using a slow cooker or pressure cooker (Instant Pot) for making risotto.
    • The nutrition facts provided below are estimates.

    Nutrition Per Serving
    Serving Size
    1/6 of the recipe
    /
    Calories
    430
    /
    Total Fat
    16.4g
    /
    Saturated Fat
    5.7g
    /
    Cholesterol
    18.8mg
    /
    Sodium
    647.3mg
    /
    Carbohydrate
    57.8g
    /
    Dietary Fiber
    1.3g
    /
    Total Sugars
    4.7g
    /
    Protein
    6.2g


    AUTHOR:

    Joanne Gallagher

    Adam and Joanne of Inspired Taste

    We are Adam and Joanne Gallagher, the creators of Inspired Taste. Established in 2009, Inspired Taste grew from a childhood dream into one of the internet’s most trusted recipe sites with hundreds of reliable recipes, step-by-step videos, and expert tips.More About Us
    Source link

  • Perfect Cheese Pizza Recipe

    Perfect Cheese Pizza Recipe

    My family loves this homemade cheese pizza recipe! Made with two types of cheese, it’s been on repeat in our home for years. This extra cheesy pizza is perfect for any pizza lover and occasion.

    Homemade Cheese Pizza

    Are you ready to make the best homemade cheese pizza we have ever made? This recipe has become our family’s go-to homemade pizza. It’s super simple and so good!

    We have lots of pizza recipes on Inspired Taste. Check out our Margherita pizza, this easy flatbread pizza, or if you are looking for homemade dough, this pizza dough.

    Key Ingredients

    • Dough: I love using my homemade pizza dough recipe, but any store-bought dough will work.
    • Sauce: Your favorite store-bought pizza sauce is perfect! In a pinch, I’ve even used spaghetti sauce. This homemade pizza sauce is great, too.
    • Cheese: I use shredded mozzarella (not fresh mozzarella) for that classic pizza melt. A sprinkle of shredded Parmigiano-Reggiano adds a nice salty kick!
    • Toppings: Fresh chives and dried oregano are my go-to toppings for this cheese pizza. Chives add a subtle onion-garlic flavor, while oregano gives it that classic pizzeria taste.

    How to Make Cheese Pizza

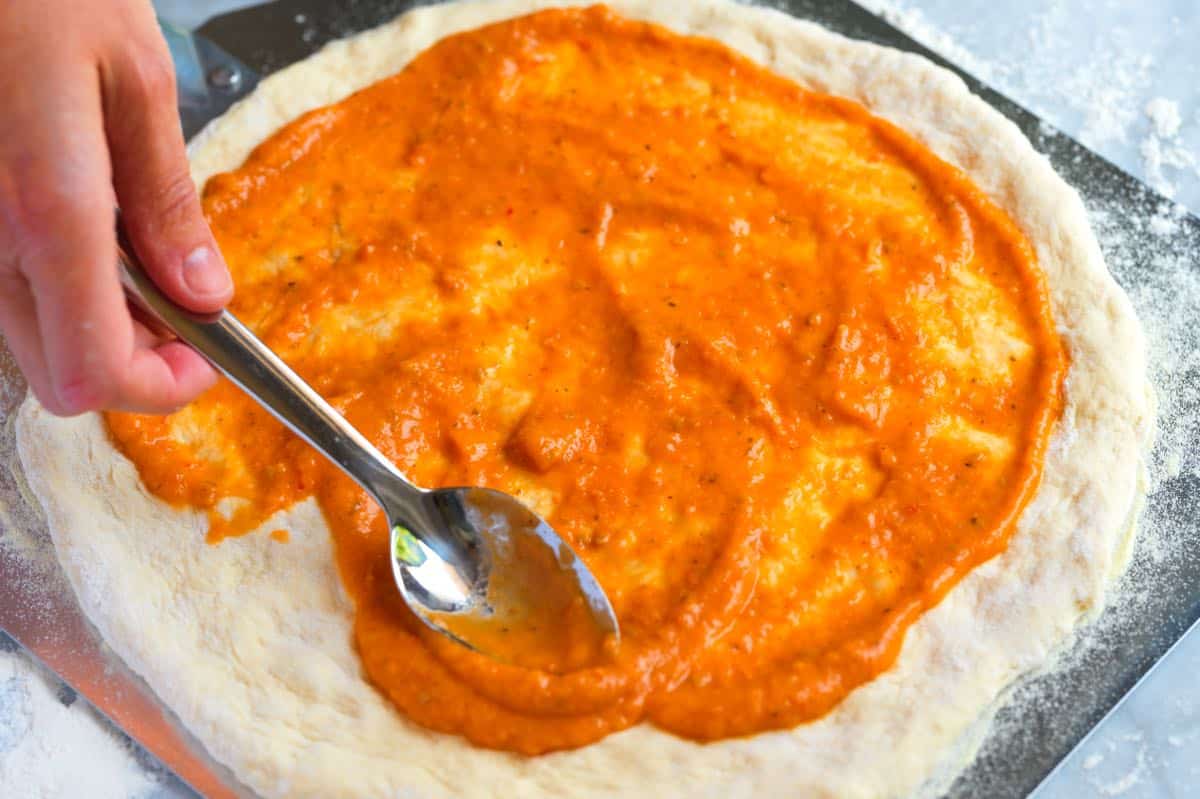
    Here’s how to make my family’s favorite cheese pizza! First, we use a good pizza dough and leave it on the counter to warm up a bit before patting it into a thin disc. Then, I’m pretty generous with my sauce (I love this pizza sauce).

    How to Make Cheese Pizza: Adding sauce to pizza crust

    Now grab a bowl and toss together shredded mozzarella, parmesan cheese, chives, and oregano. Then, generously scatter the mixture all over the pizza. Last but not least, bake it!

    How to Make Cheese Pizza: Cheese pizza ready to be baked

    I bake my pizzas in a very hot oven and use a pizza steel. Since not everyone has one, I’ve included all my tips in the recipe below. By the way, I love this pizza topped with a spoonful of giardiniera (which is an herby pickled vegetable relish-so good!).

    Best Homemade Cheese Pizza

    Perfect Cheese Pizza

    • PREP
    • COOK
    • TOTAL

    Our best recipe for cheese pizza! We use our favorite homemade pizza dough, a garlicky pizza sauce, two types of cheese, and herbs.

    Makes 1 large pizza

    You Will Need

    1 batch homemade pizza dough or use store-bought dough

    4 to 6 tablespoons pizza sauce, try homemade pizza sauce

    1 cup (57g) shredded mozzarella, not fresh mozzarella

    1/2 cup (28g) shredded parmesan

    1 tablespoon chopped fresh chives

    1/4 teaspoon dried oregano

    All-purpose flour, for forming dough disc

    Semolina flour, for dusting pan

    Directions

      1At least 30 minutes before you plan to bake your pizza, preheat the oven to 450° Fahrenheit (232°C). If you have one, place a pizza steel or pizza stone into the oven before preheating. Personally, we use a higher temperature, see the tips section for our thoughts on what temperature is best for baking pizza at home.

      2If your pizza dough is cold, allow it to warm at room temperature for 20 to 30 minutes.

      3When ready to bake your pizza, prepare a pizza peel or pizza pan by dusting it with semolina flour.

      4In a medium bowl, mix the shredded mozzarella, parmesan, chives, and oregano together.

      5Dust a clean work surface with all-purpose flour, and then form your pizza dough into a round, large enough to fit your pizza peel or pan. To stretch the dough, avoid rolling it out, as this can flatten the bubbles that have formed. Instead, use your fingers to make dimples in the dough, starting from the center and working outwards. Carefully stretch and push the dough to fit your pizza pan or peel. Use a light touch to maintain as many air pockets in the dough as possible.

      6Transfer the dough round to your pizza peel or pan, and reform it if it shrinks back a bit.

      7Spread pizza sauce over the pizza, leaving a thin edge untouched for the crust. Scatter the cheese mixture over the sauce.

      8Bake until the crust is set and golden brown and the cheese has melted with golden spots all over, 6 to 15 minutes, depending on oven temperature. Remove from the oven, cut, and serve.

    Adam and Joanne’s Tips

    • Oven temperature: We recommend 450° Fahrenheit (232°C) in the recipe, but if you are comfortable with it, increasing the temperature to 550° Fahrenheit (288°C) will provide even better results. If you have a vented hood above your oven, turn it on high. When our oven is heated to such a high temperature, the fire alarm occasionally goes off due to the hot air that escapes when we open our oven door. It’s not a problem, other than the noise, and in our experience, it is remedied with a few fans of a dish towel near the alarm, but it is something to consider. If 550° Fahrenheit (288°C) is too high for you, feel free to use a lower temperature. However, keep in mind that this pizza bakes best between 425° Fahrenheit and 550° Fahrenheit (218°C to 288°C). The lower the temperature, the longer it will take to bake and the less bubbly it will be.
    • The nutrition facts provided below are estimates.

    Nutrition Per Serving
    Serving Size
    1/4 of the recipe
    /
    Calories
    330
    /
    Total Fat
    9.1g
    /
    Saturated Fat
    5.1g
    /
    Cholesterol
    27.2mg
    /
    Sodium
    934.4mg
    /
    Carbohydrate
    45.5g
    /
    Dietary Fiber
    2.5g
    /
    Total Sugars
    1.7g
    /
    Protein
    15.8g


    AUTHOR:

    Joanne Gallagher

    Adam and Joanne of Inspired Taste

    We are Adam and Joanne Gallagher, the creators of Inspired Taste. Established in 2009, Inspired Taste grew from a childhood dream into one of the internet’s most trusted recipe sites with hundreds of reliable recipes, step-by-step videos, and expert tips.More About Us
    Previous Post: The Best Vegetable Broth
    Next Post: Fluffy Buttermilk Pancakes

    Source link