Tag: Chicken

  • Chicken Bacon Ranch Pasta Salad

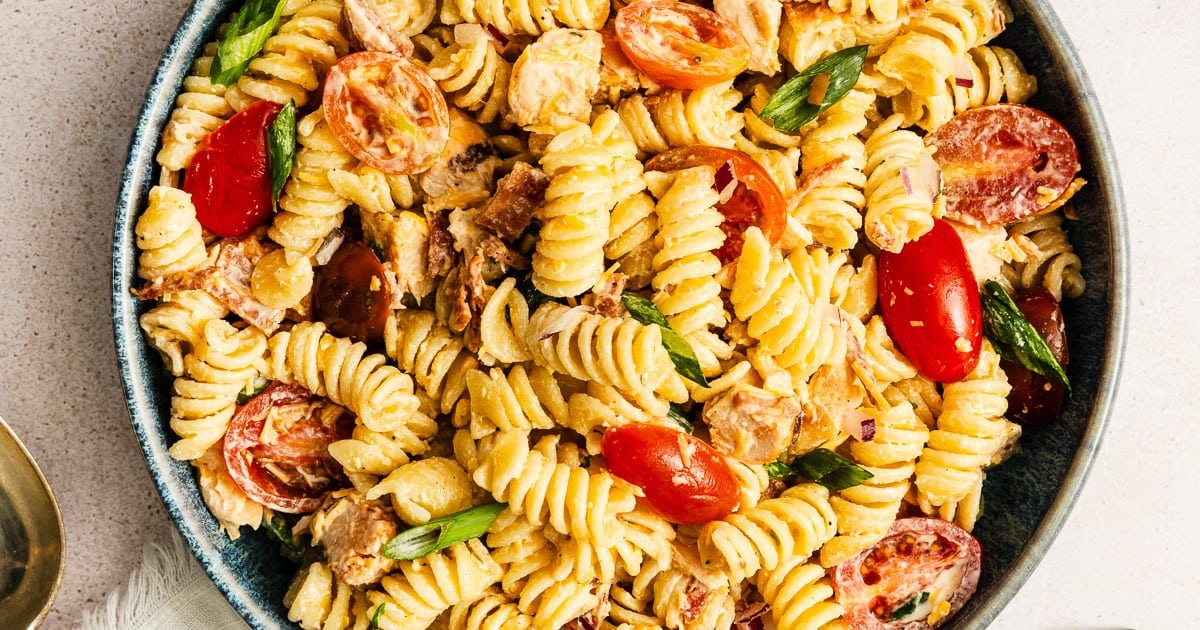
    Chicken Bacon Ranch Pasta Salad

    This chicken bacon ranch pasta salad is creamy, smoky, and packed with flavor. It’s perfect for BBQs, meal prep, or an easy crowd-pleasing side.


    Jump to: ℹ️ Overview | 🛒 Ingredients | 📷 How To Make | 👩‍🍳 Recipe Tips | 🥗 Serving Suggestions | 📝Full Recipe Card | 🍽 More Chicken Pasta Recipes


    At A Glance

    • Ready In: 55 minutes
    • 🍽 Serves: 6–8
    • 🌱 Diet: Nut-free
    • 💪 Nutrition Highlights: High in protein from chicken, satisfying, and filling
    • 🥕 Main Ingredients: Pasta, chicken, bacon, cheddar, ranch dressing
    • 🔥 Flavor Profile: Creamy, smoky, tangy, savory
    • 🧊 Meal-Prep Friendly: Keeps 3–4 days in the fridge
    • Best Served With: BBQ meats, grilled veggies, or as a standalone lunch

    This is one of those pasta salads that actually feels like a full meal. You’ve got tender pasta coated in a creamy ranch dressing, smoky, crispy bacon, and juicy chicken that makes it extra satisfying. The little pops of freshness from tomatoes and green onions keep it from feeling too heavy.

    What I really like about this version is the balance—it’s rich, yes, but not over-the-top. The ranch dressing has just enough tang to cut through the bacon and cheese, and chilling it gives everything time to come together properly (don’t skip that part). It’s the kind of dish that works just as well for meal prep as it does on a big sharing table.

    👩‍🍳 You might also like these pasta salads:
    ⭐️ Chicken Pasta Salad
    🌿 Mediterranean Pasta Salad
    💪 High-Protein Pasta Salad
    🐟 Tuna And Pasta Salad
    🌽 Elote Pasta Salad
    👉 More Pasta Salad Ideas

    What You’ll Need

    Here is what you’ll need for this chicken bacon ranch pasta salad recipe. Find the full measurements in the recipe card below.

    • Pasta (rotini or bowtie): Holds onto the dressing nicely
    • Cooked chicken: Adds protein and makes it filling (rotisserie works great)
    • Bacon: Smoky, salty crunch, honestly, the backbone of flavor here. Use turkey bacon if preferred
    • Cheddar cheese: Adds richness and a sharp bite, you can also use freshly grated Parmesan. Try Monterey Jack or Colby for a milder cheese
    • Cherry tomatoes: Freshness and a little sweetness. Add peas or avocado for extra texture
    • Red onion: Sharpness to balance the creamy dressing
    • Green onions: Mild onion flavor and color

    Creamy Ranch Dressing

    • Mayonnaise: Rich, creamy base. I use light mayonnaise, but you can also swap sour cream for Greek yogurt to lighten it up or use less of it.
    • Sour cream: Adds tang and lightens the mayo slightly, I typically use light sour cream.
    • Ranch seasoning: Herby, garlicky, classic ranch flavor; you can pick up a pack from most supermarkets.

    How To Make Chicken Bacon Ranch Pasta Salad

    Find the full recipe and nutritional information below. Here are some handy step-by-step photos for how to make this ranch pasta salad.

    • Cook pasta in salted water until al dente (don’t overcook!)
    • Drain and rinse under cold water to cool completely
    • Whisk together light mayo, light sour cream, and ranch seasoning
    • Add pasta, chicken, bacon, cheese, tomatoes, and onions
    • Toss until everything is well coated
    • Chill for at least 30–60 minutes
    • Stir, adjust seasoning, and serve

    Recipe Tips

    • Rinse your pasta well after cooking: This stops cooking and keeps it from going gummy
    • Chill time matters: The flavor gets noticeably better after 30+ minutes
    • Even chopping: Small, even pieces = better bites every time
    • Tone down raw onion: Soak diced onion in cold water for 5–10 minutes
    • Make it saucier: Double the dressing if you like it extra creamy. Or reserve some dressing to stir through before serving
    • Storage: Store in an airtight container in the fridge for 3–4 days. Stir before serving—dressing thickens as it sits
    • Make-ahead: Make up to 24 hours ahead. Add a splash of milk or extra mayo before serving to refresh texture

    Serving Suggestions

    I usually serve this straight from the fridge, slightly chilled—it just tastes better that way. It’s perfect alongside grilled chicken, burgers, or anything off the BBQ.

    If I’m being honest though, I’ve eaten this straight out of the container for lunch more times than I’d admit. It holds up well, fills you up, and doesn’t feel like “just a side.”

    💬 If you’ve tried this chicken bacon ranch pasta salad or any other recipe on the blog then don’t forget to rate the recipe and let me know how you got on in the comments below, I love hearing from you! You can also FOLLOW ME on Instagram, Facebook, Pinterest, YouTube, and or sign up to my Newsletter to see more of my delicious food.

    Want to Save This Recipe?

    Enter your email & I’ll send it to your inbox. Plus, get great new recipes from me every week!

    By submitting this form, you consent to receive emails from Cooked & Loved

    This chicken bacon ranch pasta salad is creamy, smoky, and packed with flavor. It’s perfect for BBQs, meal prep, or an easy crowd-pleasing side. Find step-by-step photos and more recipe tips above.

    • Bring a large pot of salted water to a boil and cook pasta according to package directions until al dente.

    • Drain and rinse under cold water until completely cooled. Shake off excess water.

    • In a large bowl, whisk together mayonnaise, sour cream, and ranch seasoning until smooth.

    • Add pasta, chicken, bacon, cheddar cheese, tomatoes, red onion, and green onions.

    • Toss until everything is evenly coated in the dressing.

    • Cover and refrigerate for at least 30–60 minutes.

    • Stir before serving and adjust seasoning if needed.

    • Rinse your pasta well after cooking: This stops cooking and keeps it from going gummy
    • Chill time matters: The flavor gets noticeably better after 30+ minutes
    • Even chopping: Small, even pieces = better bites every time
    • Tone down raw onion: Soak diced onion in cold water for 5–10 minutes
    • Make it saucier: Double the dressing if you like it extra creamy. Or reserve some dressing to stir through before serving
    • Storage: Store in an airtight container in the fridge for 3–4 days. Stir before serving—dressing thickens as it sits
    • Make-ahead: Make up to 24 hours ahead. Add a splash of milk or extra mayo before serving to refresh texture
    • Why does my pasta salad dry out? Pasta absorbs dressing as it sits. Just stir in a bit more mayo, sour cream, or a splash of milk before serving.
    • Can I make this ahead? Yes! Up to 24 hours ahead. Either toss with dressing just before serving, or refresh it with extra dressing.
    • Can I serve it warm? It’s best chilled or at room temp. Avoid leaving it out longer than 2 hours.
    • Flavor tip (from experience): Bacon really carries a lot of the flavor here. Cooking it fresh makes a noticeable difference—it adds that smoky, salty depth that ties everything together

    Calories: 556kcal | Carbohydrates: 62g | Protein: 30g | Fat: 20g | Saturated Fat: 7g | Polyunsaturated Fat: 5g | Monounsaturated Fat: 6g | Trans Fat: 0.02g | Cholesterol: 72mg | Sodium: 523mg | Potassium: 456mg | Fiber: 3g | Sugar: 4g | Vitamin A: 448IU | Vitamin C: 7mg | Calcium: 184mg | Iron: 2mg
    Keywords: Rotisserie Chicken, bacon, Ranch dressing, cold pasta salad, ranch pasta salad, chicken bacon pasta salad, chicken pasta salad recipes

    More Chicken Pasta Recipes


    Source link

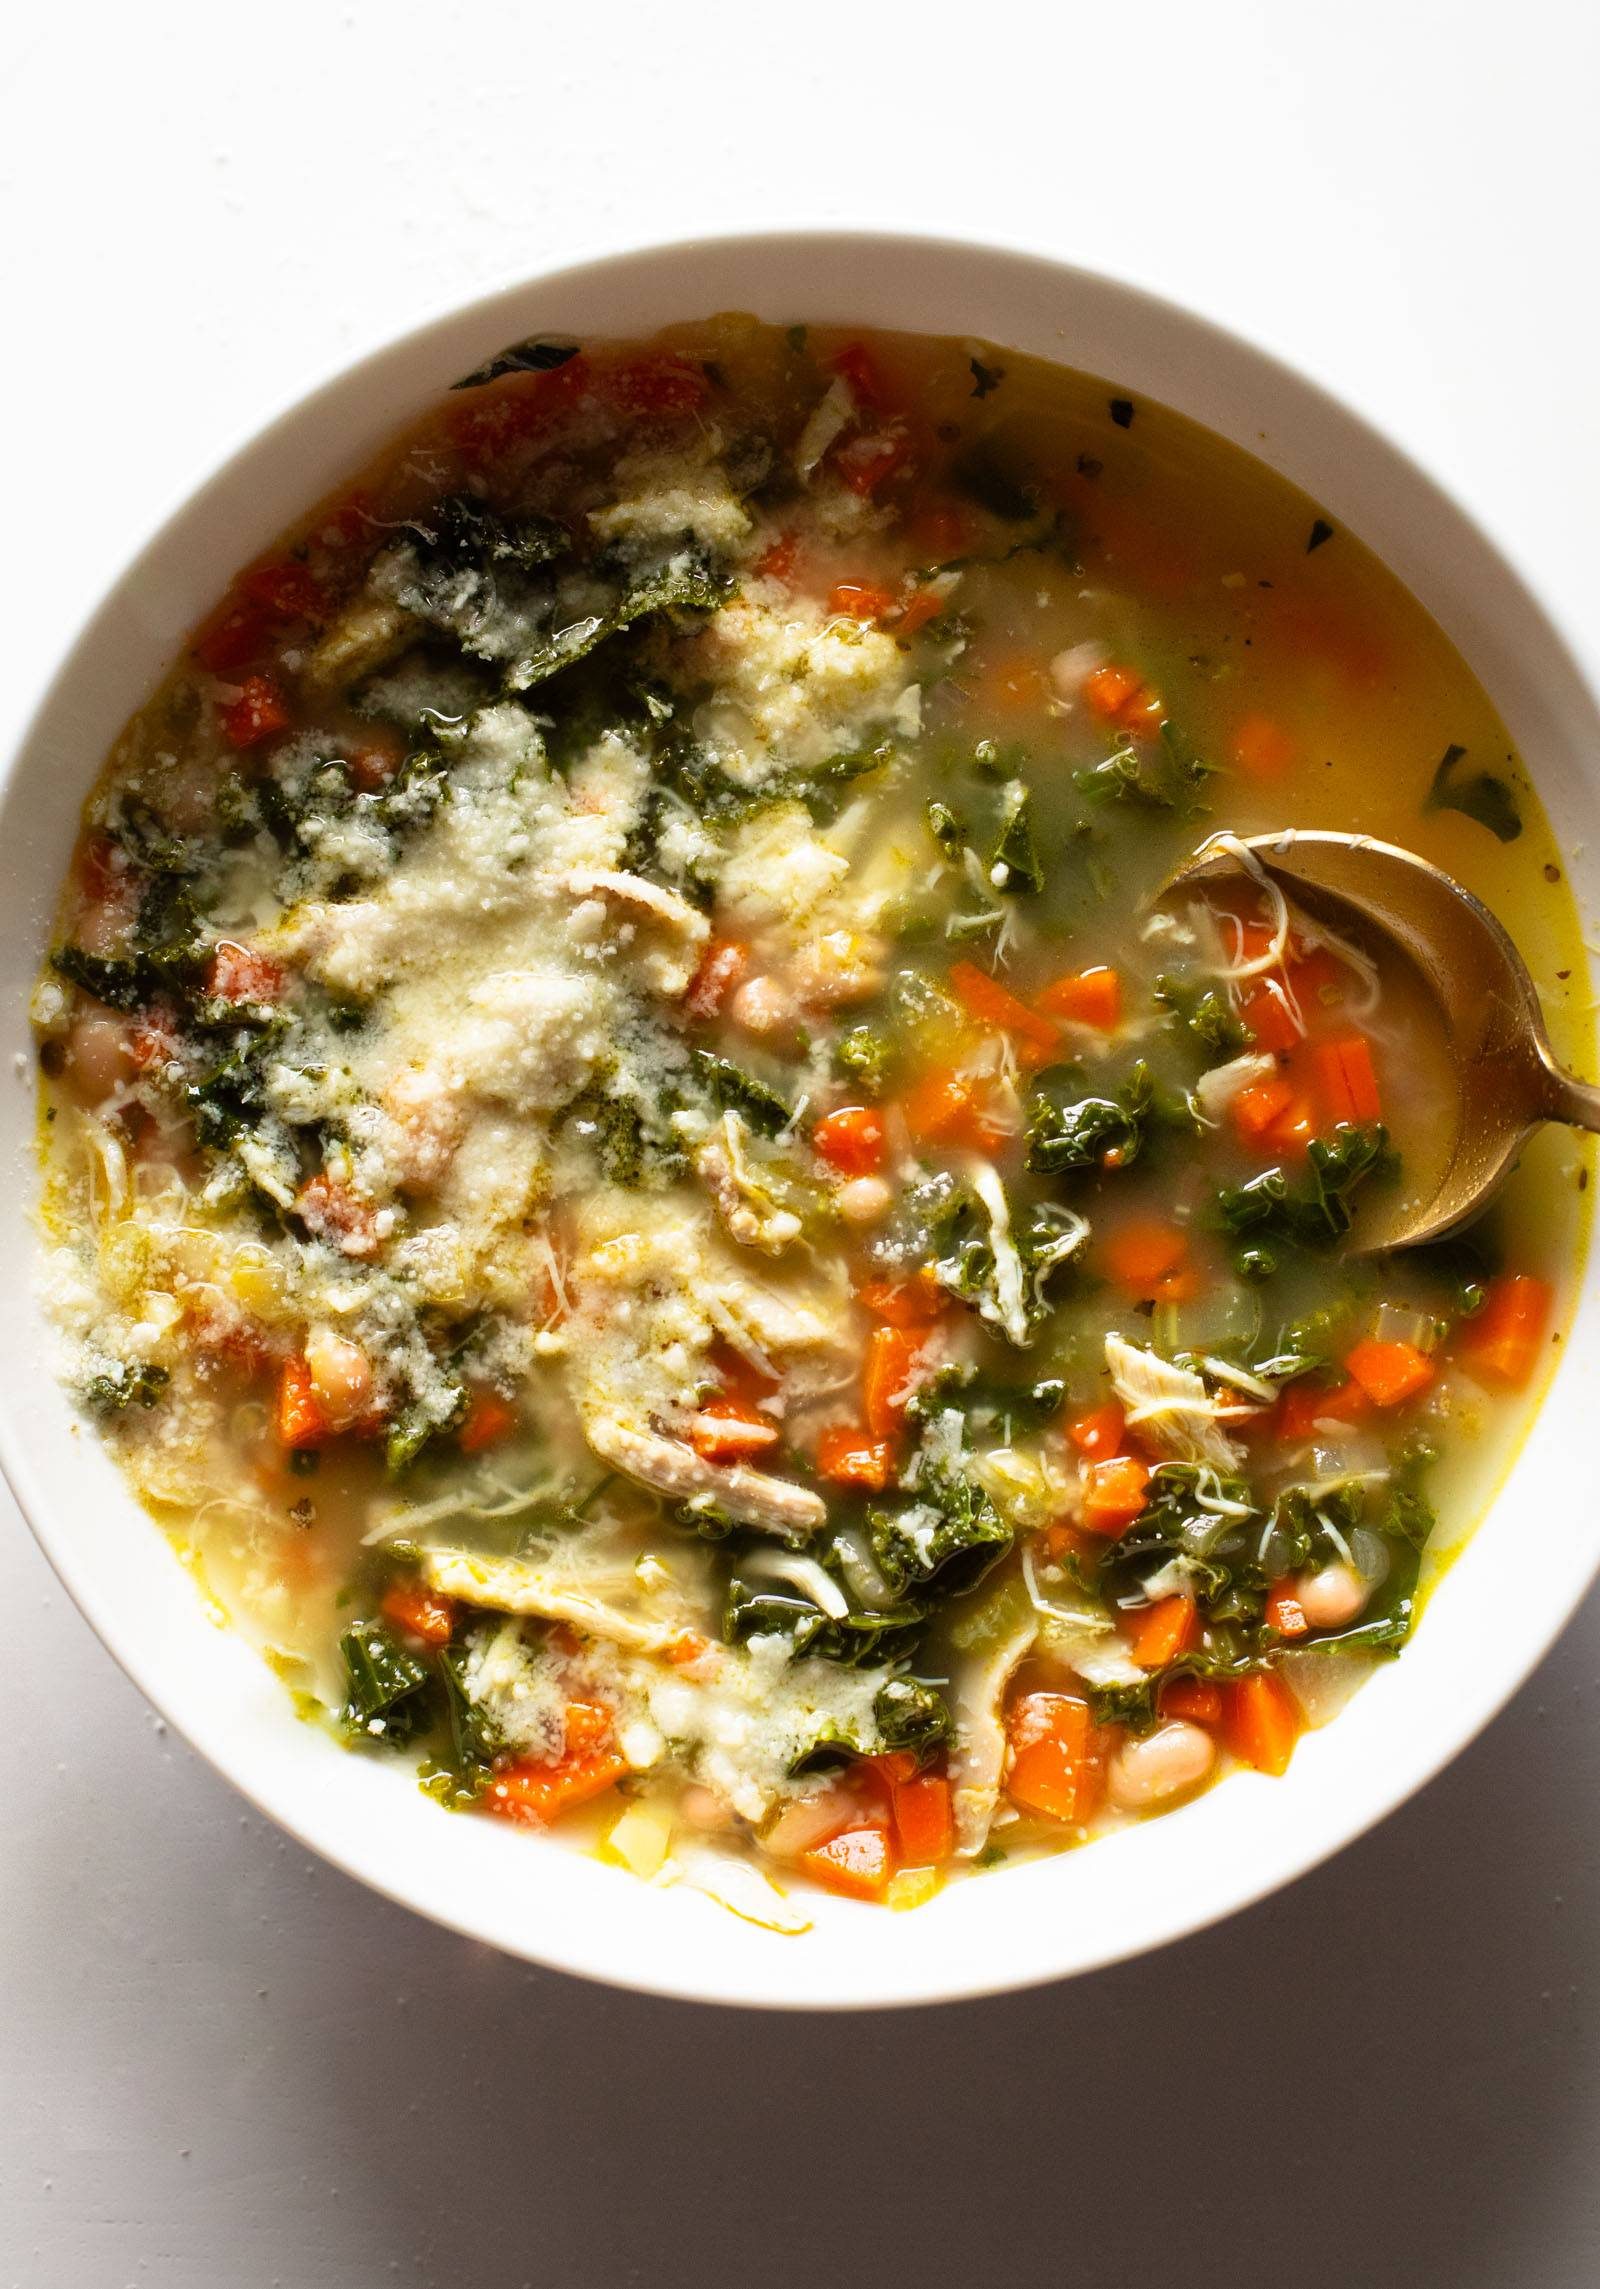
  • Lemon Rosemary Chicken Soup Recipe

    Lemon Rosemary Chicken Soup Recipe

    Chicken: I typically use pulled and shredded rotisserie chicken. You can also use raw chicken breasts or thighs, add them to the pot with the simmering broth, and let them cook for about 10-12 minutes or until 165 degrees. Remove, shred, and return to pot. This would also work great with leftover Thanksgiving turkey!

    Olive oil: The extra olive oil that gets added in Step 3 is there to make it taste a little extra luscious. Without it, there isn’t a lot of fat in this soup – it’s just broth and veggies and chicken. And adding a good fat to this soup, I think, helps it really go from “brothy boring soup” to “wow, that’s really good soup”. That said, the extra oil is not necessary if you’re using a homemade broth, which typically already has a nice silky feel to it because of the fat content.

    Instant Pot: I have made this in my Instant Pot and it’s great. I sautéed everything as directed in steps 1-2, then for step 3 I set it to high pressure for about 3 minutes and let it natural pressure release. (If you add raw chicken to the soup, you’ll need to cook at high pressure for 10-12 minutes.)

    Source link

  • Easy Chicken Ragu Recipe

    Easy Chicken Ragu Recipe

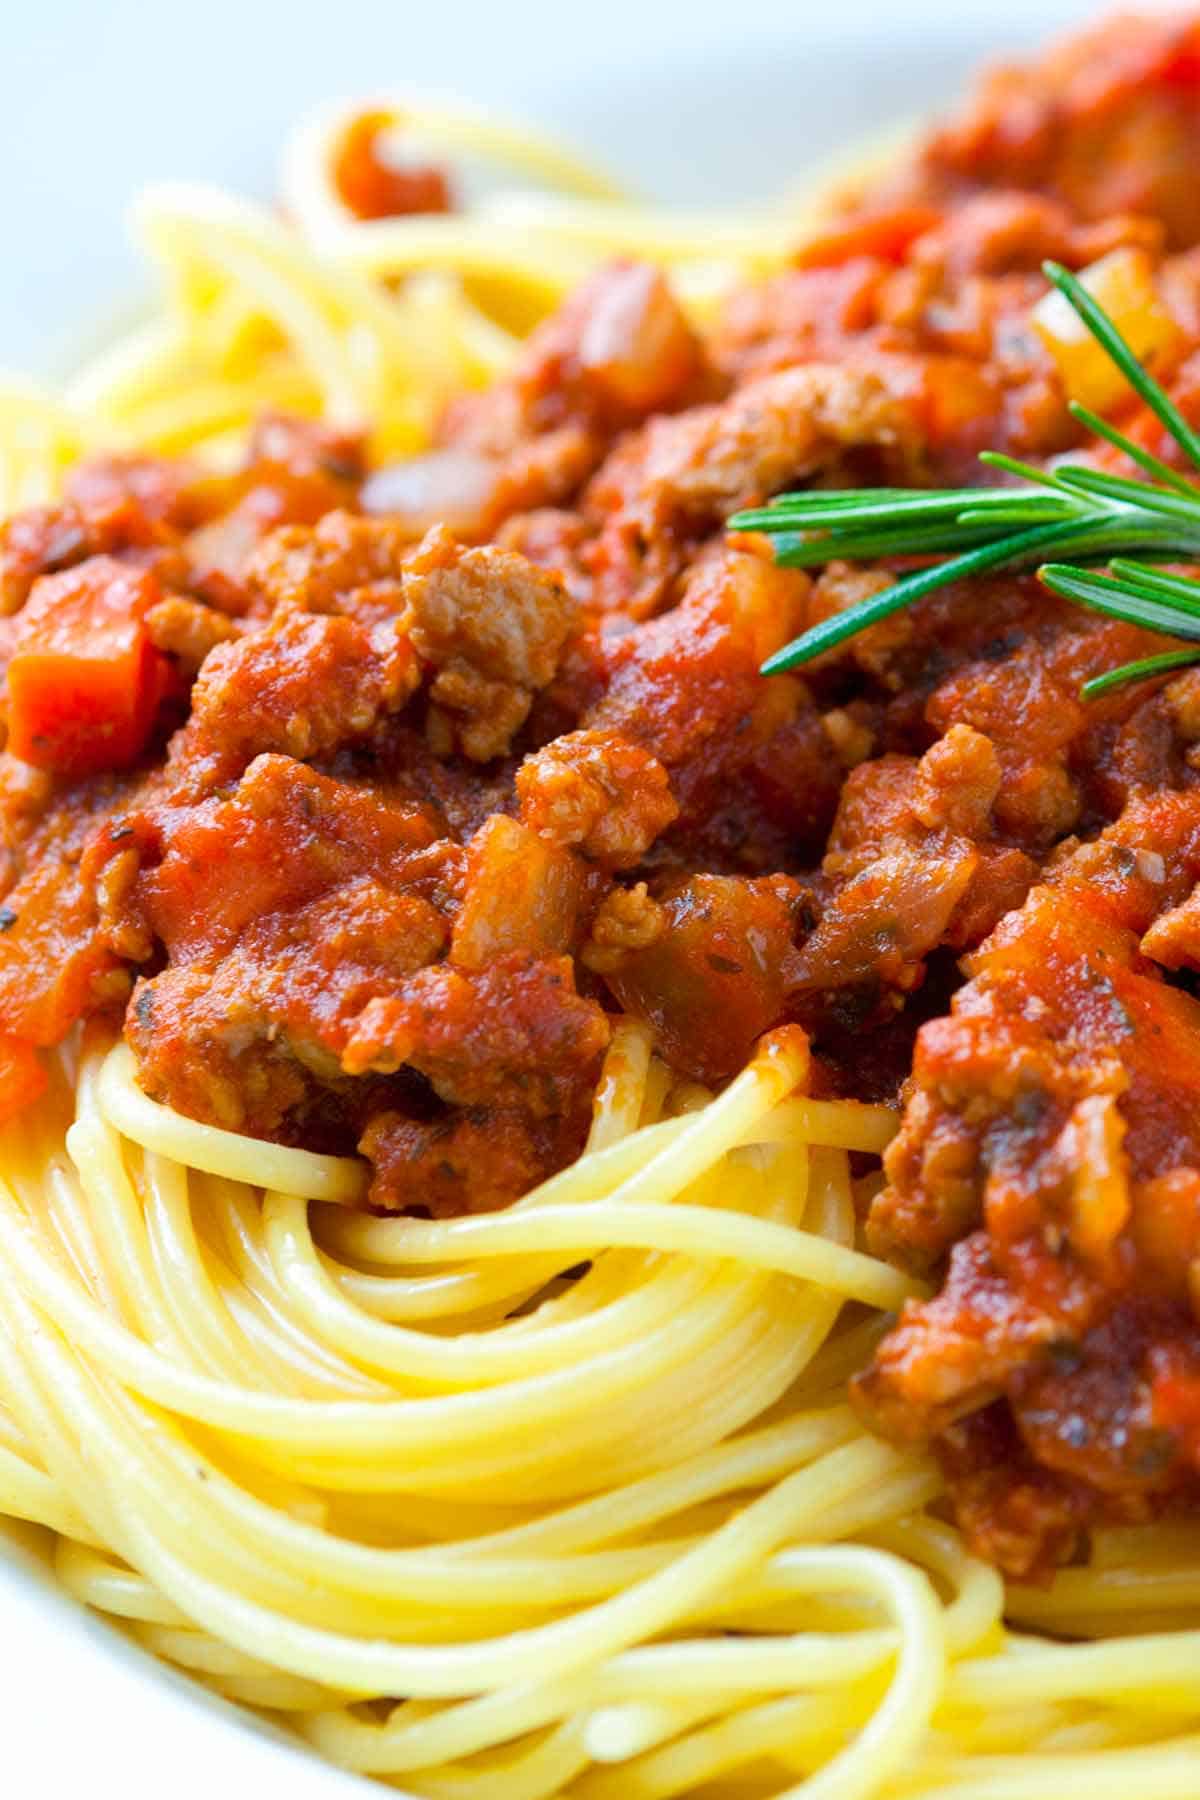
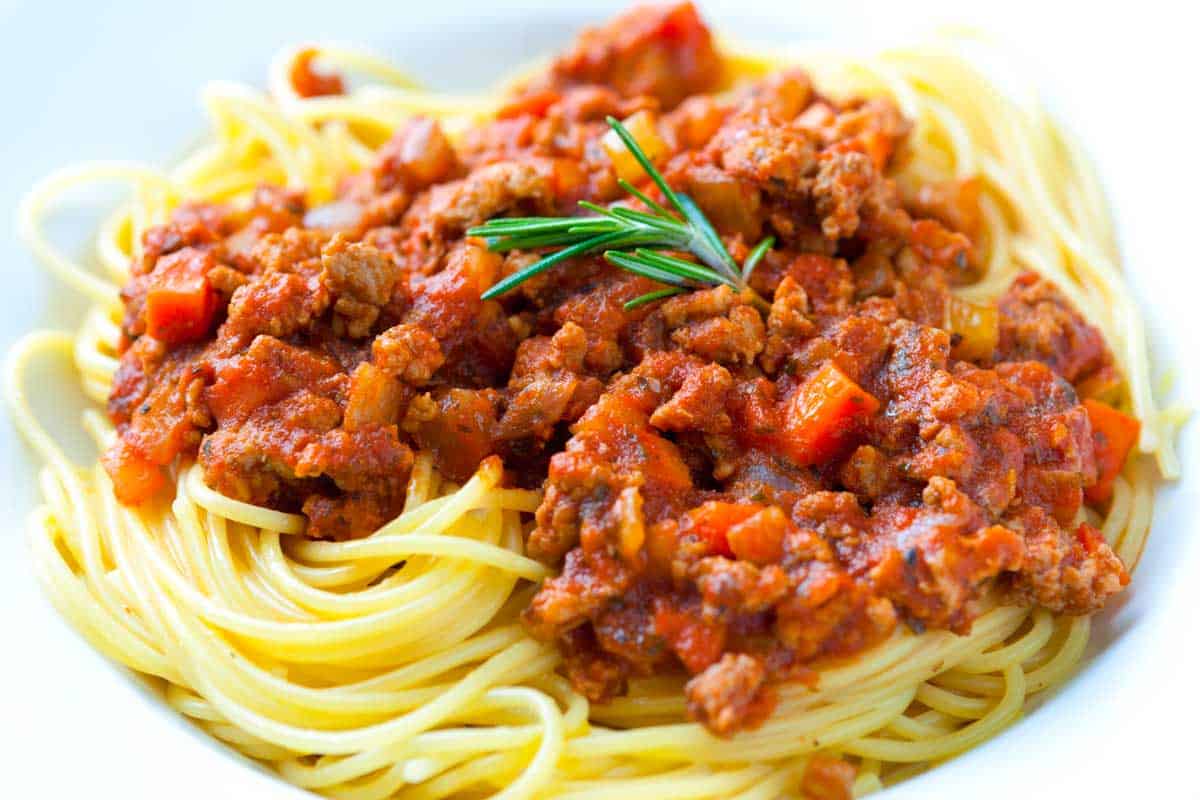
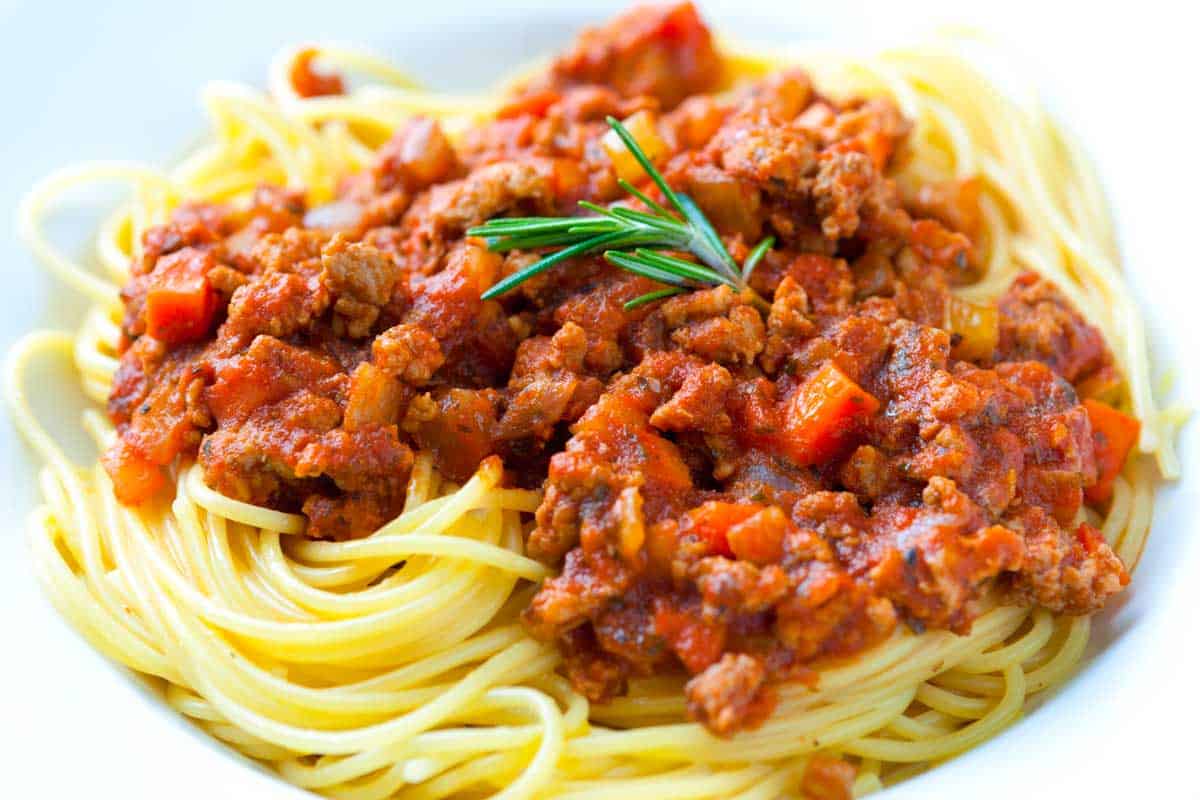
    My family’s easy and budget-friendly chicken ragu is super simple to make and ready in under 30 minutes! This ground chicken spaghetti recipe is perfect for busy days!

    Ragu made with Ground Chicken over Spaghetti

    You could call this my shortcut ragu. I use store-bought sauce but add a few smart ingredients to make it taste more homemade. I also use ground chicken for this recipe, which keeps the cooking time low.

    I make this recipe once a month (the whole family loves it). For more easy dinner recipes with ground chicken, see these incredible chicken lettuce wraps or this easy white chicken chili!

    Key Ingredients

    • Pasta: I love serving this ragu with spaghetti, but feel free to use your favorite pasta.
    • Ground Chicken: I use ground chicken in this recipe, but you can substitute ground turkey, lean ground beef, or ground lamb.
    • Pasta Sauce: You can use your favorite store-bought spaghetti sauce (I like Rao’s). Or try this homemade marinara or this red pasta sauce.
    • Wine: This is optional, but it adds a lot of extra flavor. Use a dry red or dry white wine. If you don’t have wine on hand, don’t worry! You can substitute it with chicken broth or veggie broth.
    • Aromatics: To make this ragu taste more homemade, I cook the chicken with onion, carrots, celery, garlic, and fresh (or dried) chopped rosemary. I make a similar sauce for this easy weeknight spaghetti, but that recipe has a from-scratch sauce with basil instead of rosemary.

    How to Make Chicken Ragu

    To prepare the sauce, I cook the onions, carrots, and celery until tender and sweet. I then stir in the rosemary and garlic, letting their flavors become fragrant. Once the vegetables are ready, I add the ground chicken and cook it until it’s no longer pink.

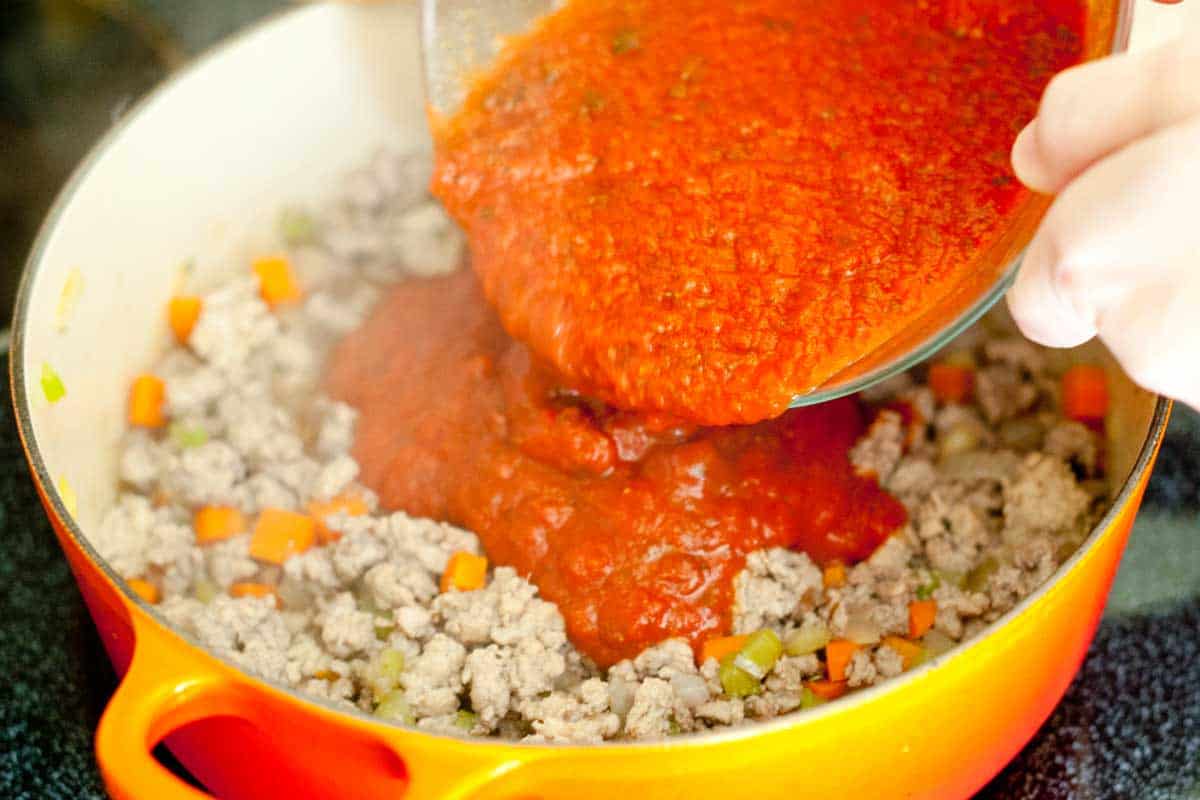
    How to Make Chicken Ragu: Adding the Sauce

    I deglaze with wine (or broth) and stir in the pasta sauce. I let the sauce simmer for about 10 minutes or until the chicken is cooked. Then, it’s ready to serve over spaghetti. Easy!

    Chicken Ragu over Spaghetti

    Easy Chicken Ragu

    • PREP
    • COOK
    • TOTAL

    This delicious chicken ragu can be made in less than 30 minutes and is perfect served over spaghetti. While our recipe calls for ground chicken, you can substitute ground beef, turkey, pork, or fresh sausage. If you prefer not to include wine, you can easily substitute it with chicken, vegetable, or turkey broth.

    Makes 4 servings

    You Will Need

    8 ounces dry pasta, such as spaghetti or linguini

    1 pound (450g) ground chicken

    1 tablespoon extra-virgin olive oil

    1/2 medium onion, chopped

    2 medium carrots, peeled and chopped

    1 medium stalk celery, chopped

    1 teaspoon finely chopped fresh rosemary or 1/4 teaspoon dried rosemary leaves

    1 clove garlic, finely minced

    1/4 cup (60ml) dry red or white wine

    3 cups (709ml) marinara sauce or use 1 (26oz) jar of store-bought sauce

    Salt and fresh ground pepper to taste

    Directions

      1Bring a large pot of salted water to a boil. Add the pasta and cook according to the package directions. Once cooked, drain the pasta.

      2In the meantime, heat olive oil in a large skillet with high sides. Add onions, carrots, and celery, and cook until the onions become soft and smell sweet, about 5 minutes.

      3Stir in the garlic and rosemary, then add the ground chicken. Cook the chicken until it is no longer pink, about 10 minutes.

      4While cooking, use a wooden spoon to break the chicken into small pieces in the pan.

      5Season with 1/4 teaspoon of salt and a few grinds of black pepper. Then, pour in the wine (or broth) and cook for 1 minute.

      6Add the marinara sauce to the skillet and cook until it reduces slightly, around 10 minutes.

      7Taste the sauce and adjust the seasoning with salt and pepper. Serve the sauce over the cooked pasta.

    Adam and Joanne’s Tips

    • The nutrition facts provided below are estimates.

    Nutrition Per Serving
    Serving Size
    1/4 of the recipe
    /
    Calories
    555
    /
    Total Fat
    20.3g
    /
    Saturated Fat
    3.3g
    /
    Cholesterol
    96.3mg
    /
    Sodium
    861mg
    /
    Carbohydrate
    59.9g
    /
    Dietary Fiber
    6.3g
    /
    Total Sugars
    9.8g
    /
    Protein
    30.5g


    AUTHOR:

    Joanne Gallagher

    Adam and Joanne of Inspired Taste

    We are Adam and Joanne Gallagher, the creators of Inspired Taste. Established in 2009, Inspired Taste grew from a childhood dream into one of the internet’s most trusted recipe sites with hundreds of reliable recipes, step-by-step videos, and expert tips.More About Us

    Previous Post: Chorizo and Eggs
    Next Post: Slow Cooker Chicken Meatballs

    Source link

  • Honey Chicken Bites Recipe

    Honey Chicken Bites Recipe

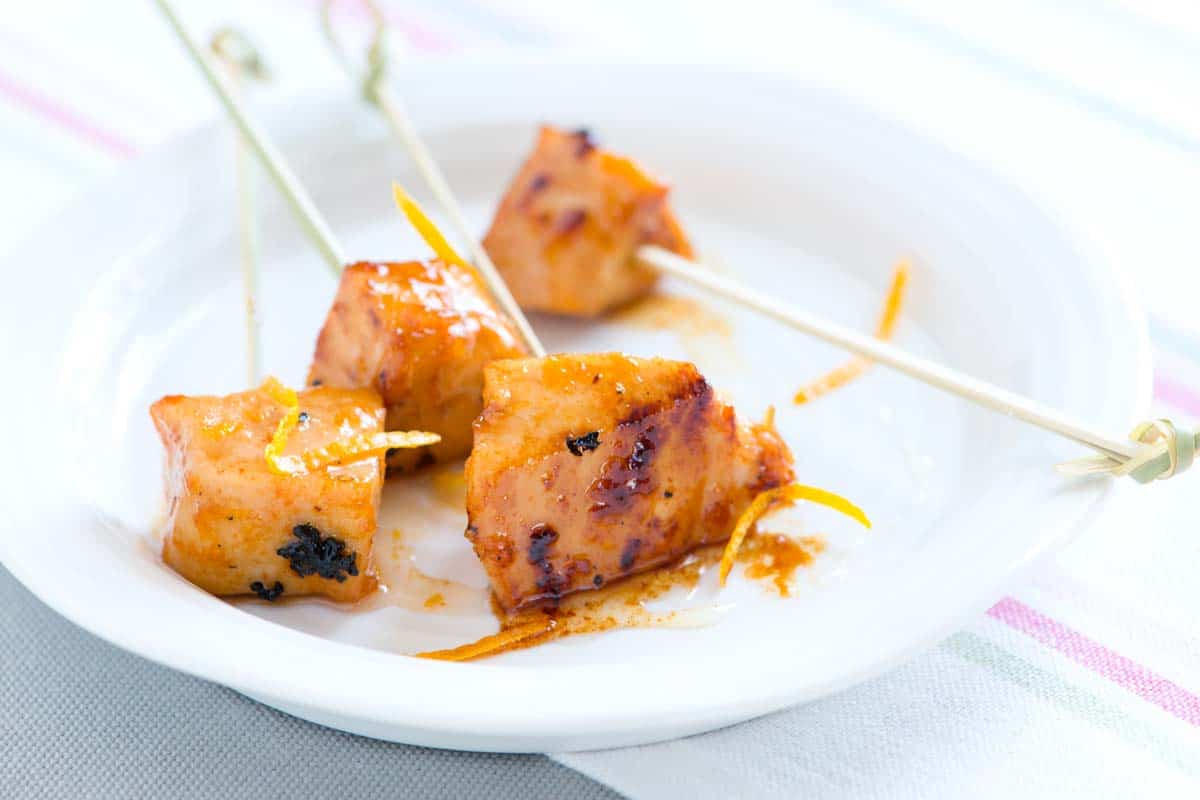
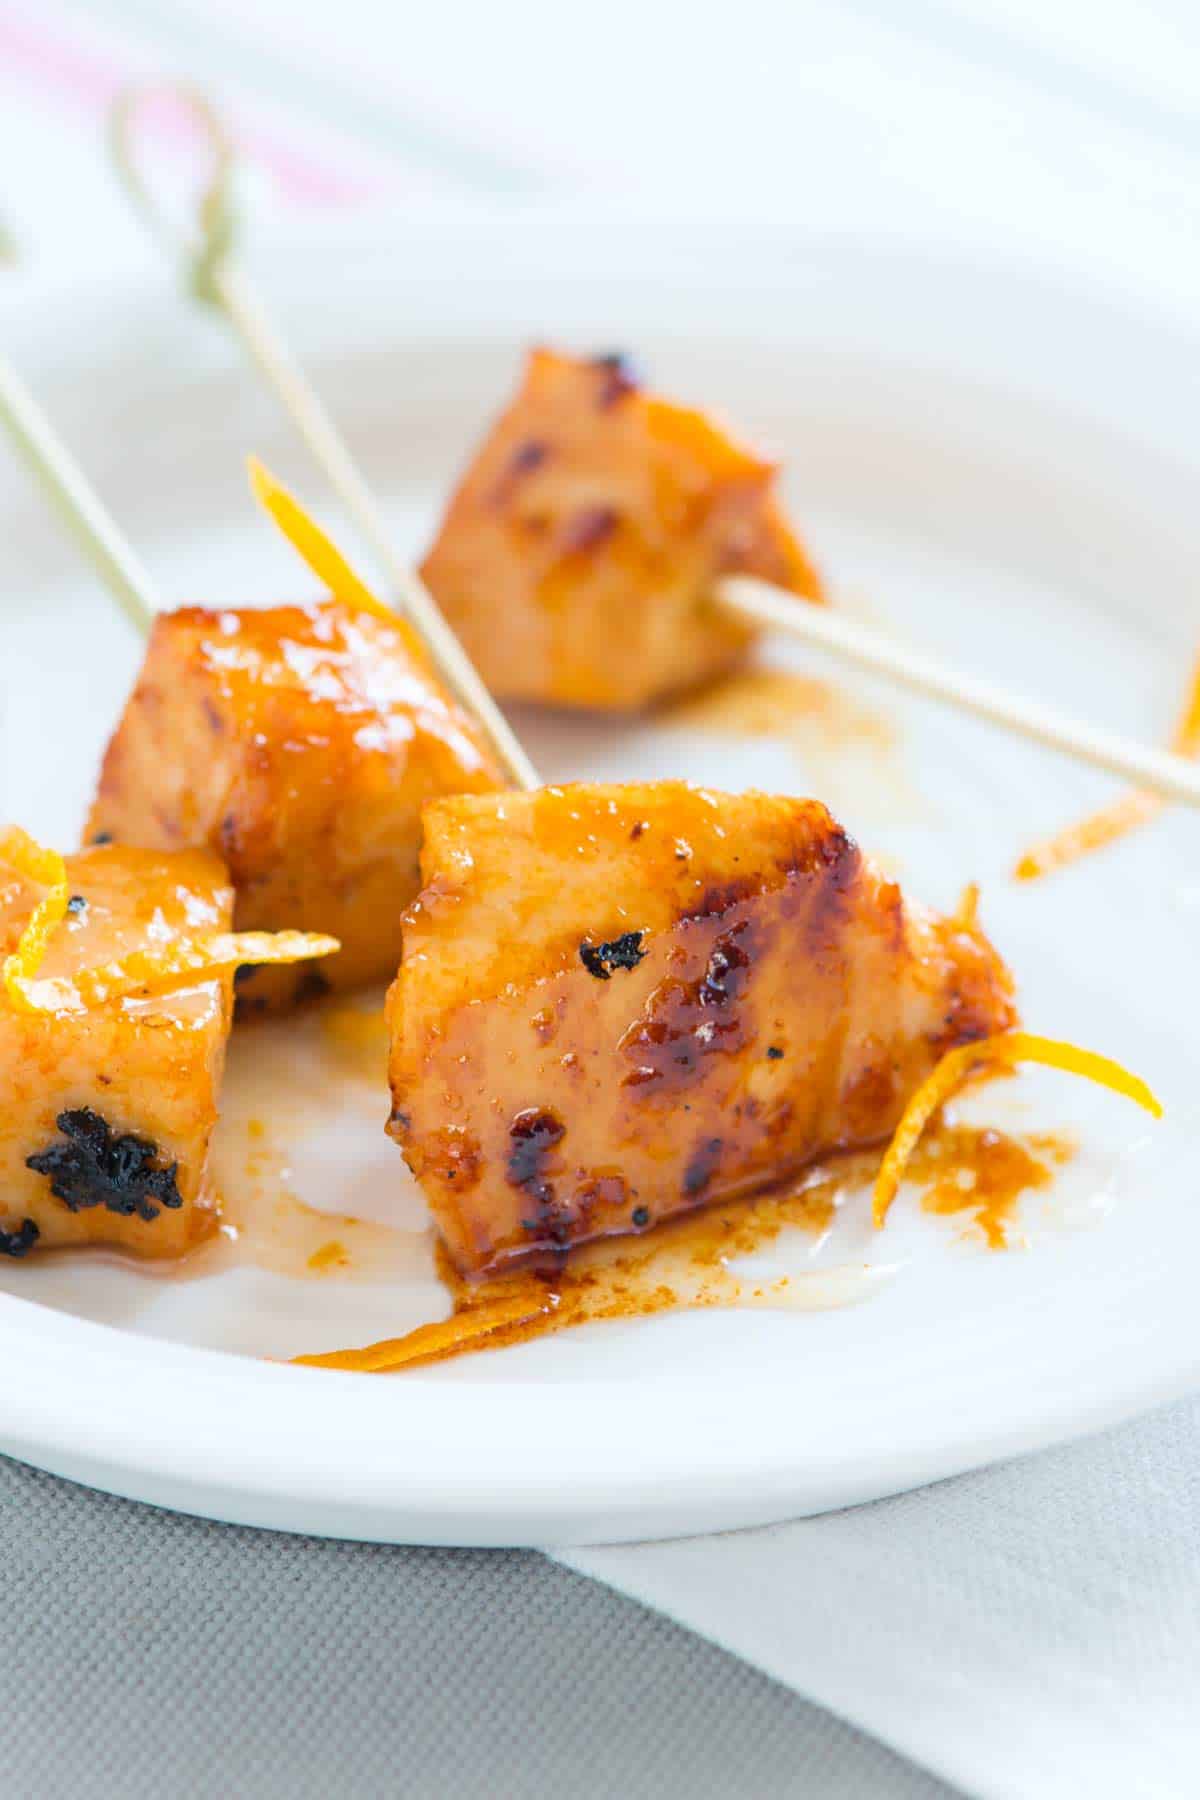
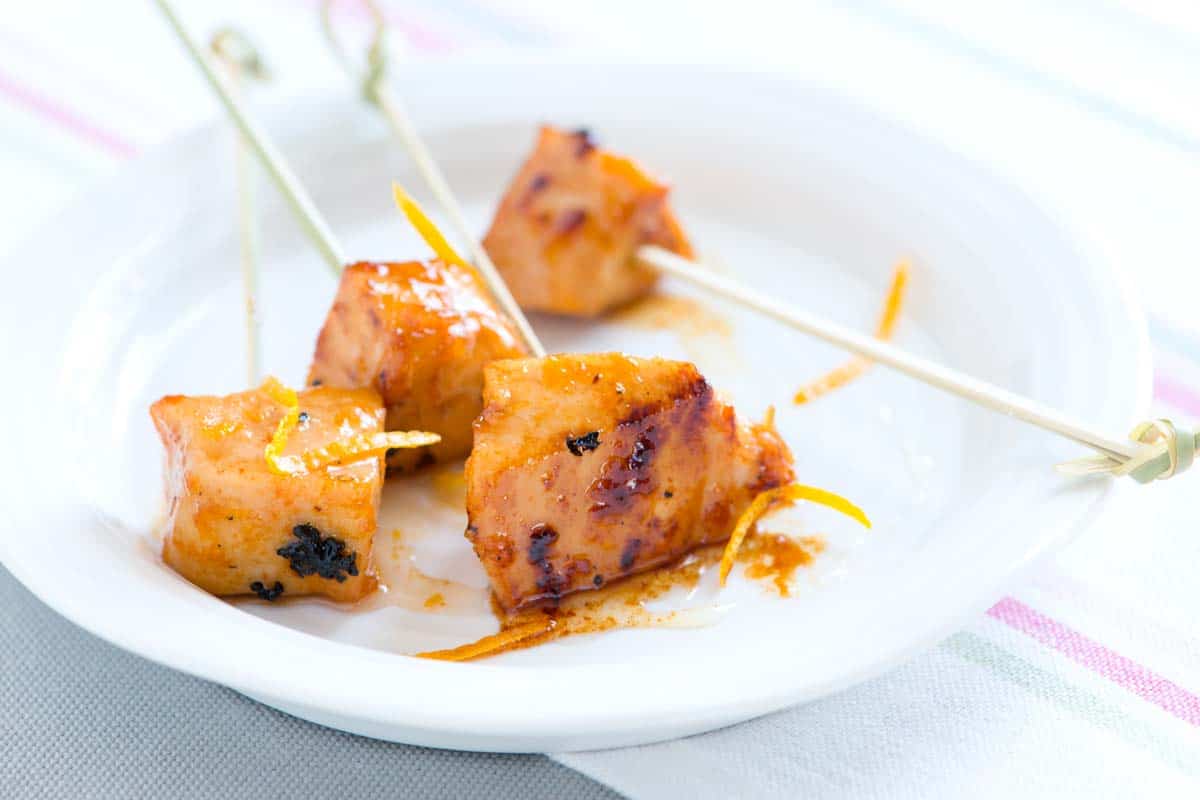
    These easy honey chicken bites are perfect for a simple dinner or appetizer! You can enjoy them over salads, with veggies, or skewered on toothpicks for easy finger food.

    Honey Chicken Bites

    These honey chicken bites are the perfect trifecta of deliciousness: sweet honey, tender chicken, and a bright burst of fresh orange. They’re so easy to make, even the kids can help! Make them for a party or a quick weeknight dinner.

    Serve these chicken bites next to cilantro lime rice, alongside roasted broccoli, tucked into warm corn tortillas, or on top of one of our favorite salad recipes.

    Key Ingredients

    • Chicken: I usually make this recipe with boneless, skinless chicken breasts, but it works just as well with chicken thighs. Whichever you use, cut the chicken into 1-inch pieces to make them bite-size.
    • Butter: I love the flavor of butter in this recipe, but olive oil works just fine if that is all that you have. If you plan to marinate your chicken longer than my suggested 15 minutes, you may find that the butter hardens again. Don’t worry about this, as it will melt again and help the chicken brown as it bakes in the oven.
    • Honey: Honey baked chicken is super delicious (especially with the butter), but maple syrup is an excellent substitute!
    • Orange: I love fresh orange zest in this recipe and use my fine grater (often called a Microplane) to grate it. Lime or lemon are also great options.
    • Hot Sauce (optional): When making this for my son, I leave the hot sauce out, but if it’s just for me or Adam, I go all in with four or five dashes of hot sauce.
    Honey Chicken Bites

    Honey Chicken Bites

    • PREP
    • COOK
    • TOTAL

    These little chicken bites make the perfect easy dinner or simple chicken appetizer! I love them on top of a salad or with a side of veggies. To serve as an appetizer, skewer each chicken bite with a toothpick to turn them into finger food!

    4 Servings

    You Will Need

    1 ½ pounds skinless, boneless chicken breast or thighs

    2 tablespoons butter, melted

    2 tablespoons honey

    1 tablespoon orange zest

    1/2 teaspoon fine sea salt

    1/4 teaspoon fresh ground black pepper

    Hot sauce, optional

    Directions

      1Cut the chicken into 1-inch chunks.

      2Combine the melted butter, honey, orange peel, salt, pepper, and 2 or more dashes of hot sauce (optional) in a medium bowl.

      3Add the chicken and toss well. Set aside for 15 minutes to marinate.

      4Preheat the oven to 375°F (190°C) and line a baking sheet with foil or parchment paper.

      5Arrange the chicken on the baking sheet. Drizzle any marinade left in the bowl over the chicken. Bake until the internal temperature of the chicken reaches 165°F, 15 to 20 minutes.

    Adam and Joanne’s Tips

    • Butter: I love the flavor of butter in this dish. If you plan to marinate your chicken in the fridge, the butter will harden again. This is fine and it will melt as you bake the chicken in the oven later. If you’d prefer a substitute, use olive oil.
    • Nutrition facts are estimates.

    Nutrition Per Serving
    Serving Size
    1/4 of the recipe (about 6 ounces)
    /
    Calories
    290
    /
    Total Fat
    10.2g
    /
    Saturated Fat
    4.5g
    /
    Cholesterol
    139.4mg
    /
    Sodium
    392.3mg
    /
    Carbohydrate
    9.4g
    /
    Dietary Fiber
    0.3g
    /
    Total Sugars
    8.9g
    /
    Protein
    38.4g


    AUTHOR:

    Joanne Gallagher

    Previous Post: Easy Italian Pasta Salad
    Next Post: Maple Soy Glazed Salmon

    Source link

  • Easy Chicken Enchiladas Recipe

    Easy Chicken Enchiladas Recipe

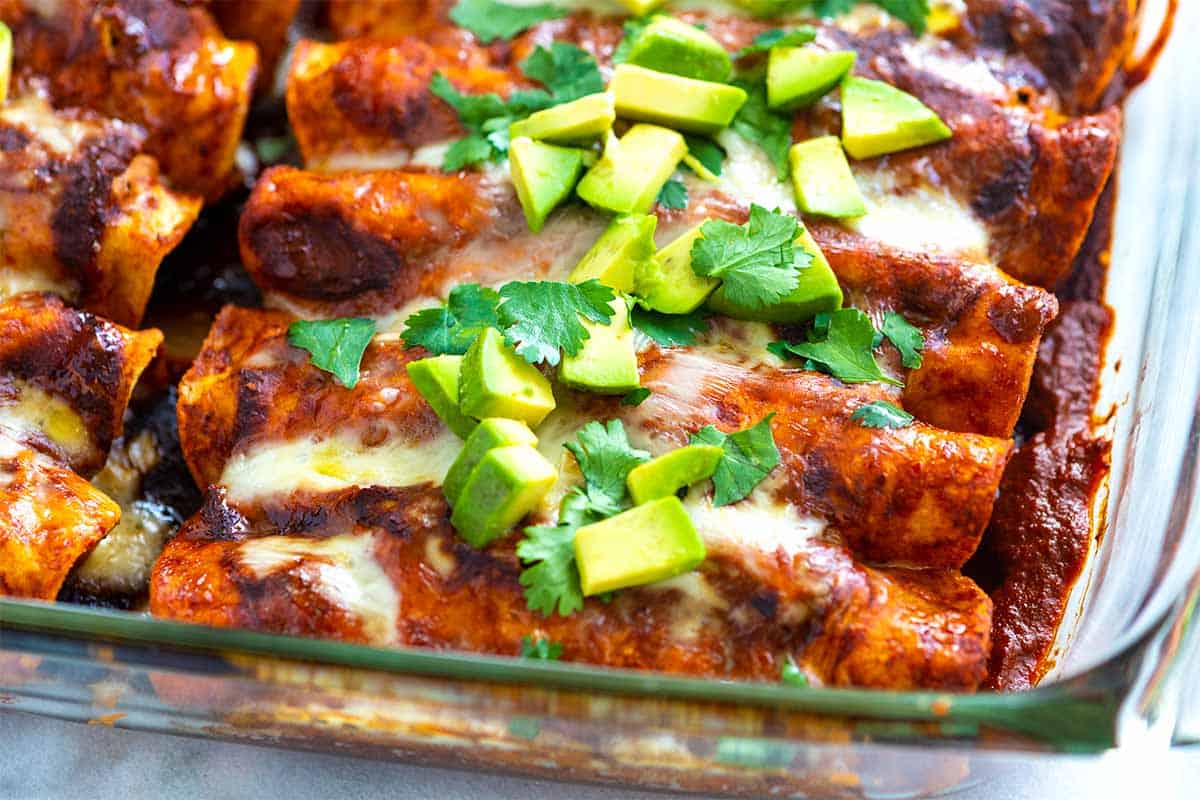
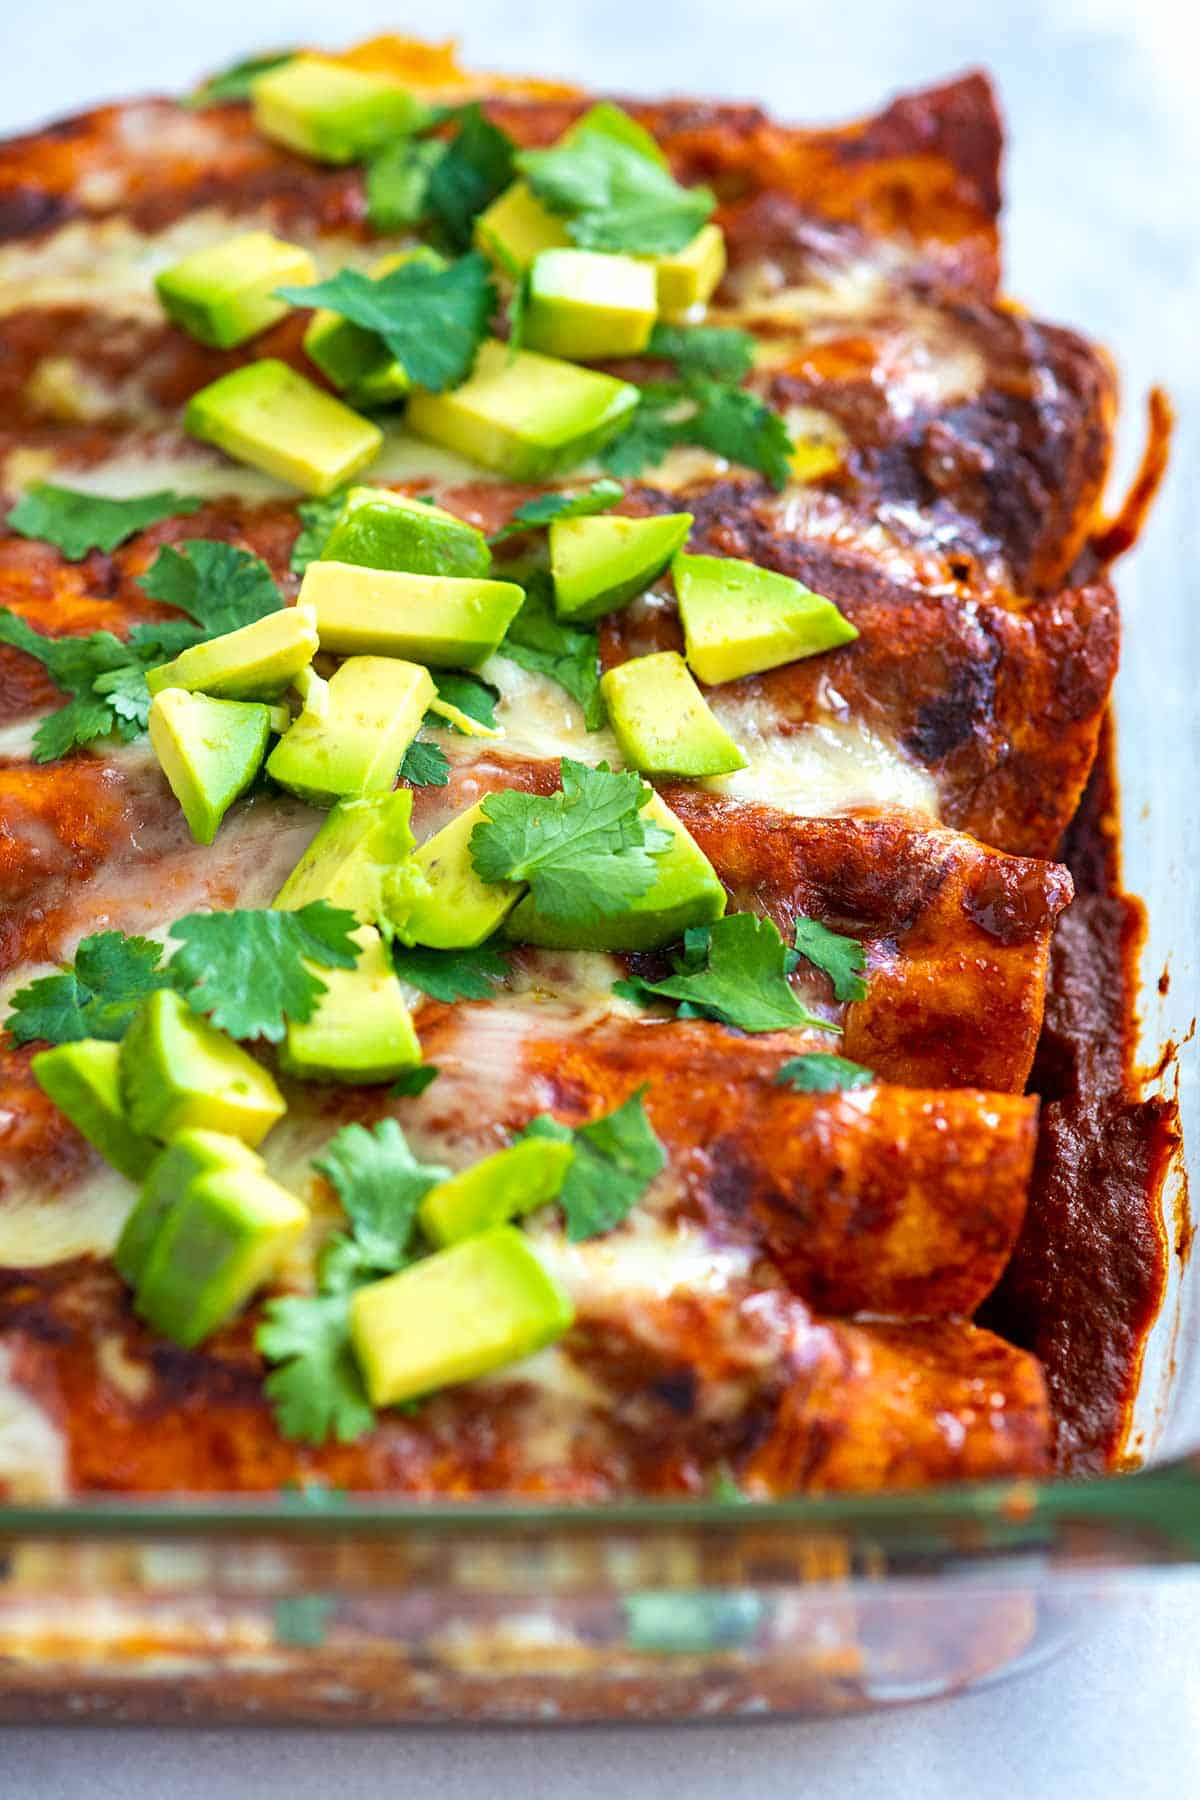
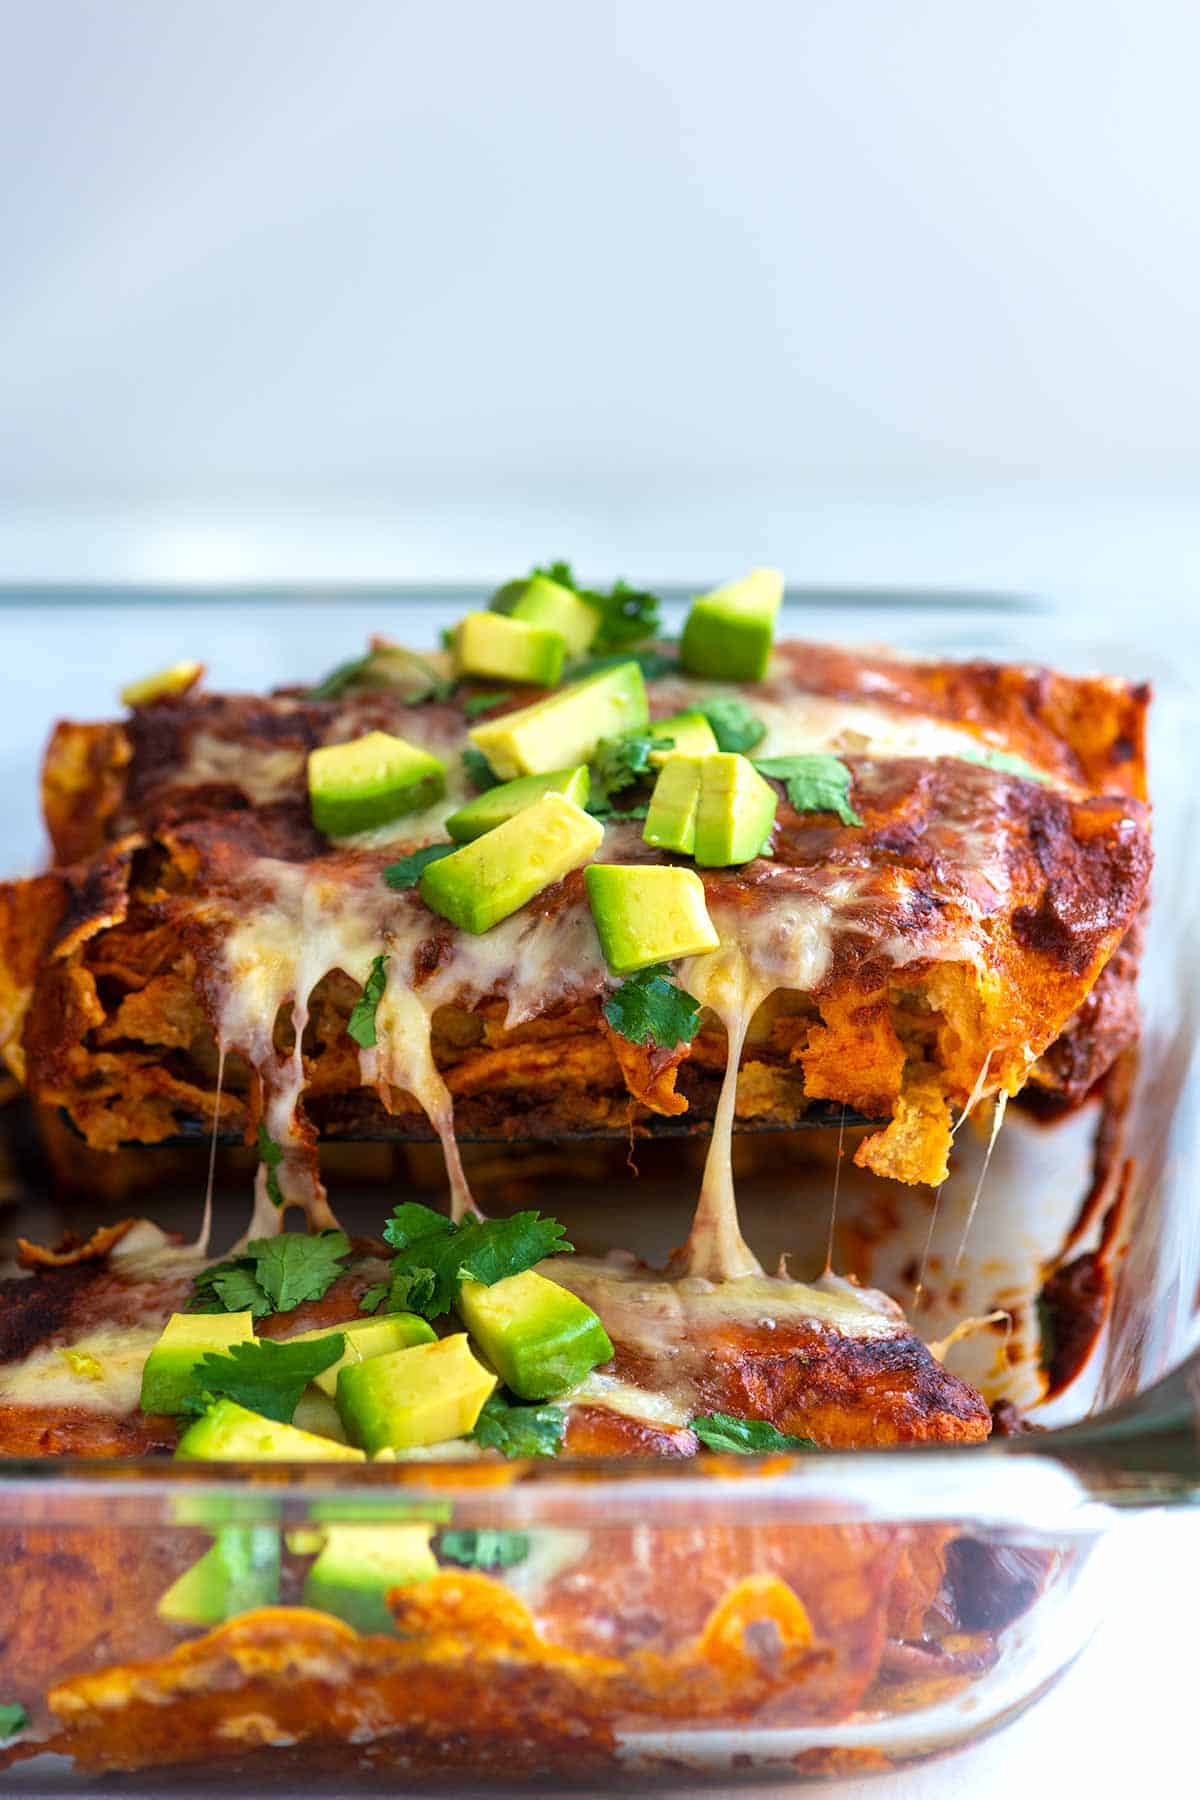
    This easy chicken enchilada recipe has tender, shredded chicken in a rich, homemade red sauce, all rolled in corn tortillas and baked with bubbly, melted cheese.

    Easy Chicken Enchiladas

    These enchiladas filled with chicken and cheese are the very definition of a delicious, feel-good meal and are guaranteed to be a hit with everyone at the table. This is the kind of Mexican-inspired dinner you’ll want to make again and again.

    If you can’t get enough of this dish, you’re in luck! We also have these green chicken enchiladas made with salsa verde. Or, for a hearty meatless option, be sure to try our veggie enchiladas.

    Key Ingredients

    • Tortillas: Use store-bought or homemade corn tortillas for authentic enchiladas. I love how the corn flavor of the tortillas mingles with the sauce. If you prefer flour, here’s our recipe for flour tortillas.
    • Enchilada Sauce: Use store-bought (I like Hatch) or try one of our homemade sauces. Our authentic red enchilada sauce, which calls for dried chilies, is simple to make and is what we used in our photos. I also love this homemade enchilada sauce, which uses dried spices and chili powder, and takes minutes to throw together.
    • Chicken: You will need cooked and shredded chicken. Use rotisserie chicken, leftover roasted chicken, or cook it using one of these easy methods: stovetop shredded chicken (1 hour), slow cooker shredded chicken (4 to 6 hours), or poached chicken (15 minutes).
    • Cheese: Use mild, melty cheese like Oaxaca cheese, white cheddar cheese, or Monterey Jack.

    Find the full recipe with measurements below.

    Homemade Chicken Enchiladas

    My Tips for Making the Best Enchiladas

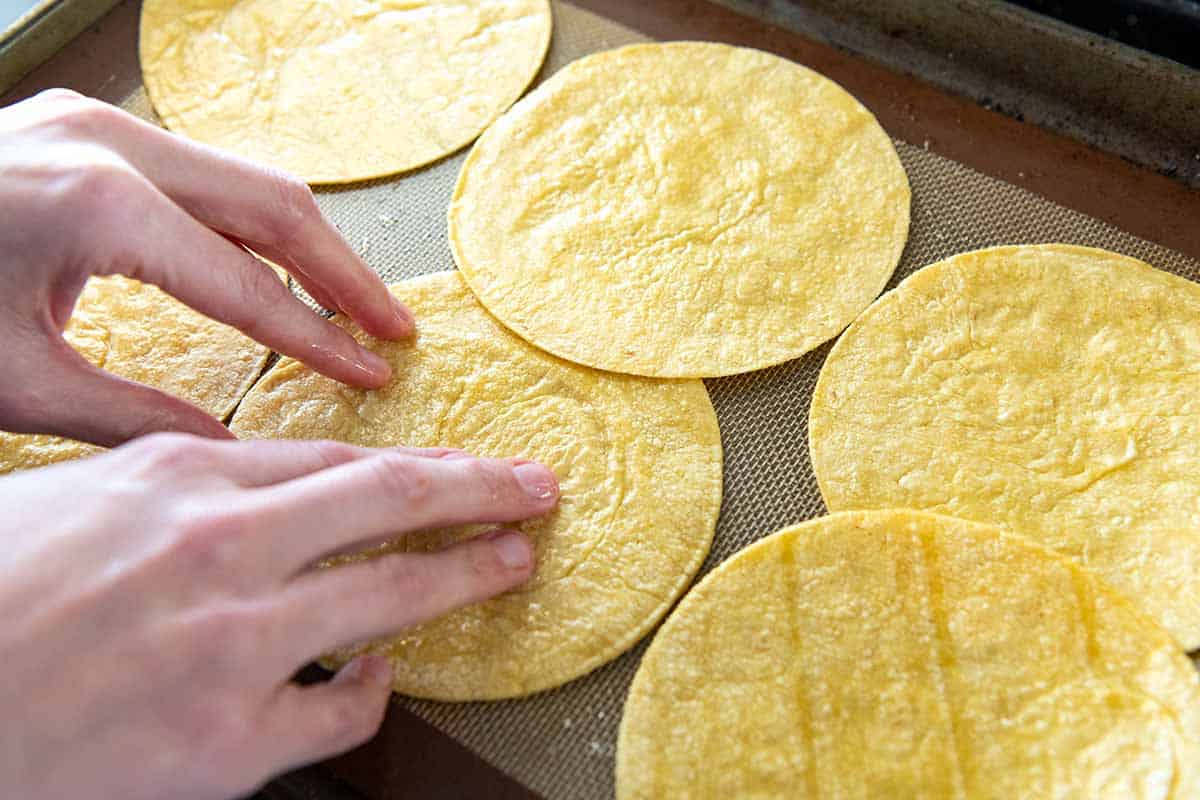
    Tip 1: Soften the tortillas. Corn tortillas can crack easily. To make them soft and pliable, you need to warm them up. While you can fry them in oil, I prefer to oven-fry them. Lightly coat the tortillas with oil and bake them until warm. This easy method lets you prepare a large batch at once.

    Softening corn tortillas to make them soft and pliable

    Tip 2: Dip the tortillas in sauce. For an extra layer of flavor, quickly dip the warm tortillas into your enchilada sauce before filling them with the filling.

    Tip 3: Place them seam-side down. Roll your tortillas up as tightly as possible and place them seam-side down in a baking dish. Since the seam is on the bottom, the enchiladas will stay tightly rolled while baking in the oven.

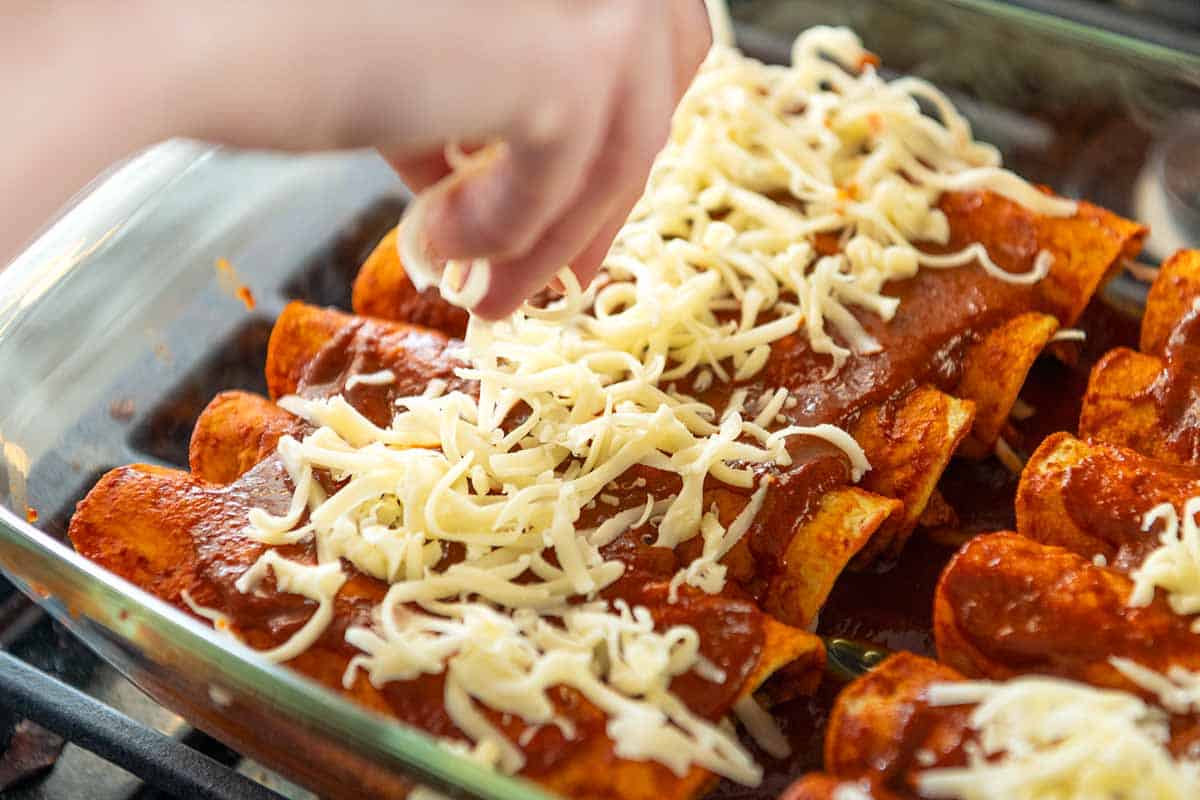
    Tip 4: Finish with more sauce and cheese. Once the enchiladas are in the pan, spoon more sauce on top and add a final layer of cheese. For the best result, bake them covered for 15 minutes, then uncover and bake for another 10 minutes to get that perfect golden crust. Let them cool for a few minutes before serving, and dig in!

    Adding cheese to rolled chicken enchiladas before baking

    Tip 5: More variations. We love this as-written, but don’t be afraid to make it your own! Stir in some pinto beans or sautéed veggies like bell peppers, onions, and zucchini. You can make beef enchiladas by swapping the chicken for shredded beef, or a pork version by using leftover pork carnitas. Finally, for a different flavor, use green enchilada sauce or a homemade salsa verde (made with tomatillos) instead of the red sauce.

    Serving Suggestions

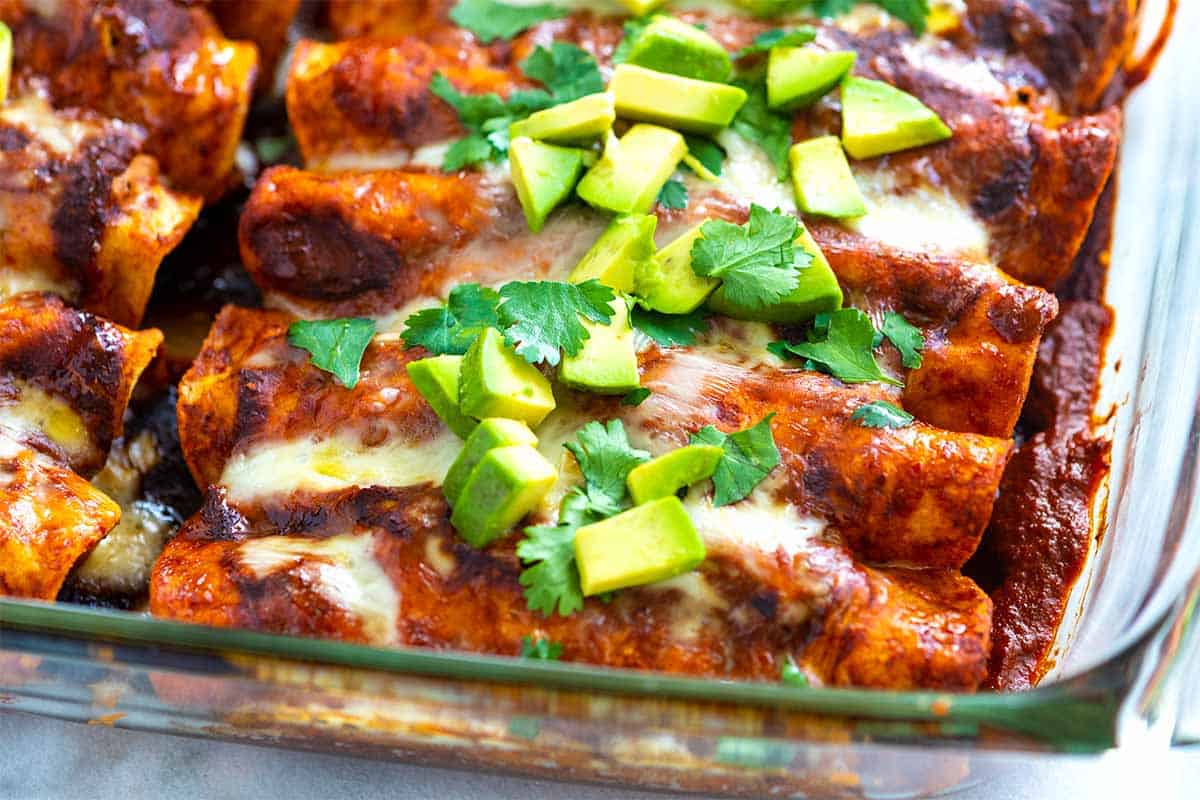
    I love serving these enchiladas with some chopped avocado and fresh cilantro, but there are so many ways to top them. For a little crunch, try scattering some chopped tomatoes, diced onions, diced jalapeños, sliced green onions, black olives, or even shredded cabbage or lettuce over the top.

    To make a complete meal, serve them alongside classic Mexican side dishes. Our Mexican rice and refried beans are perfect for this, as are our creamy black beans. And you can never go wrong with a bowl of homemade guacamole or pico de gallo with a side of homemade tortilla chips!

    Red chicken enchiladas made with homemade sauce

    Easy Chicken Enchiladas

    • PREP
    • COOK
    • TOTAL

    Our chicken enchiladas are easy to make with a simple filling of shredded chicken, cheese, and sauce. Corn tortillas hold up better in this recipe, but if you prefer flour tortillas, use them! You have the option to use store-bought enchilada sauce or use one of our homemade sauces (both linked in the recipe below).

    Makes 12 enchiladas

    Directions

      1Heat oven: Place an oven rack in the middle of the oven and heat to 375°F (190°C).

      2Soften tortillas (for corn tortillas): Line a baking sheet with parchment paper or a silicone baking mat. Place six tortillas on the baking sheet so they lie flat and barely touch each other. Lightly spray or rub both sides of the tortillas with oil. Bake until they are warm, but before they start to crisp, 2 to 3 minutes. Transfer the baked tortillas to a plate lined with a paper towel, and then repeat with the remaining six tortillas.

      3Prepare filling: Add ½ cup of the sauce, the shredded chicken, and 1 ¼ cups of cheese to a bowl, and then toss until the chicken and cheese are well coated.

      4Prepare baking dish: Spread ¾ cup of the sauce down the center of a 13×9-inch baking dish.

      5Dip tortillas: Add ¾ cup of the sauce to a low-sided, wide bowl, and then quickly dip each baked tortilla into the sauce to coat it lightly.

      6Fill and roll: Divide the filling between the tortillas, adding about ⅓ cup of filling. Roll the tortillas up and place them seam-side down into the baking dish. They will be pretty close to each other.

      7Finish and bake: Spoon the remaining sauce over the enchiladas and sprinkle the remaining cheese down the middle. Cover the dish with aluminum foil or parchment paper by tucking the sides and corners. Bake, covered, for 15 minutes. Uncover, then bake another 10 minutes until the cheese is melted and bubbling.

    Adam and Joanne’s Tips

    • Storing: Keep them in an airtight container in the fridge for up to 4 days.
    • Freezing: Let them cool, transfer to a freezer-safe container or freezer-safe bag, and freeze for up to 1 month. Thaw in the refrigerator overnight, then reheat before serving.
    • Make-ahead tips: The sauce and shredded chicken can be made and frozen.
    • Preparing the tortillas: Our method for prepping the tortillas is a little different from other recipes since we use the oven instead of frying the tortillas on the stove. If you prefer to prep the tortillas by shallow frying in oil, you can.
    • The nutrition facts provided below are estimates. We have assumed this red enchilada sauce for the calculations.

    Nutrition Per Serving
    Serving Size
    2 enchiladas
    /
    Calories
    291
    /
    Total Fat
    14g
    /
    Saturated Fat
    5.7g
    /
    Cholesterol
    38.5mg
    /
    Sodium
    292mg
    /
    Carbohydrate
    30.1g
    /
    Dietary Fiber
    5.1g
    /
    Total Sugars
    3.8g
    /
    Protein
    13.7g


    AUTHOR:

    Joanne Gallagher

    Adam and Joanne of Inspired Taste

    We are Adam and Joanne Gallagher, the creators of Inspired Taste. Established in 2009, Inspired Taste grew from a childhood dream into one of the internet’s most trusted recipe sites with hundreds of reliable recipes, step-by-step videos, and expert tips.More About Us

    Source link

  • 35+ Baked Chicken Recipes

    35+ Baked Chicken Recipes

    If you’re looking for reliable baked chicken recipes, you’re in the right place. From juicy chicken breasts and crispy drumsticks to easy one-pan dinners, these recipes are simple, flavorful, and perfect for busy weeknights.


    Jump to: ℹ️ Overview | 🍽️ Chicken Breast | 🍚 Chicken and Rice | 🍲 Saucy & Comfort | 🥘 One-Pan & Sheet Pan Dinners | 🥗 Healthy & Light Options | 🍗 Wings & Drumsticks


    I’ll be honest, when someone mentions baked chicken, the first thing I think of is dry, overcooked chicken breast. But, baking chicken goes beyond the breast meat, and with the right recipe, it can be one of those dependable, healthy, low-effort meals that still feels like you tried (even when you didn’t 😅).

    What makes baked chicken recipes so popular is how flexible they are. You can go classic with garlic and herbs, lean into something saucy and comforting, or throw everything onto one pan and call it dinner. Minimal mess, maximum payoff.

    In this roundup, you’ll find a mix of:

    • Quick weeknight chicken dinners
    • Juicy baked chicken breast recipes with sauce
    • Crispy wings and drumsticks
    • Hearty baked chicken and rice meals
    • Easy sheet pan dinners with veggies built right in

    Whether you’re cooking for family, meal prepping for the week, or just trying not to overthink dinner (been there), there’s something here you’ll actually want to make.


    Baked Chicken Breast Recipes (Juicy & Flavorful)

    Chicken breasts don’t have to be boring or dry—I promise. These recipes focus on keeping things juicy, with plenty of sauces, marinades, and simple tricks that make a big difference.


    Baked Chicken and Rice Recipes (Comfort in One Dish)

    If you want a full meal with minimal effort, this is your section. Chicken and rice baked together means flavor soaks into every bite, and fewer dishes to wash.


    Saucy & Comfort Baked Chicken Recipes

    Creamy, cheesy, rich, and cozy, these are the dinners you make when you want something a little extra comforting (or when it’s been a long day).

    Baked Saucy Chicken

    If you love extra sauce for spooning over rice or veggies, this one definitely delivers on that cozy, saucy goodness. Recipe from Fig Jar.


    One-Pan & Sheet Pan Baked Chicken Dinners

    This is where convenience really shines. Toss everything onto a tray, pop it in the oven, and let it do its thing. Easy cleanup is the real hero here.


    Healthy & Light Baked Chicken Recipes

    Lighter meals that still feel satisfying. Think lean protein, fresh herbs, bright flavors, and plenty of veggie-packed options.

    Chicken Bites

    Cooked & Loved recipe: These chicken bites are simple, versatile, and great when you want something lighter but still satisfying.


    Baked Chicken Wings & Drumsticks (Crispy & Crowd-Pleasing)

    Perfect for game nights, casual dinners, or when you just want something fun. These baked versions give you that crispy finish without needing a deep fryer.


    Save These Baked Chicken Recipes To Pinterest

    Source link

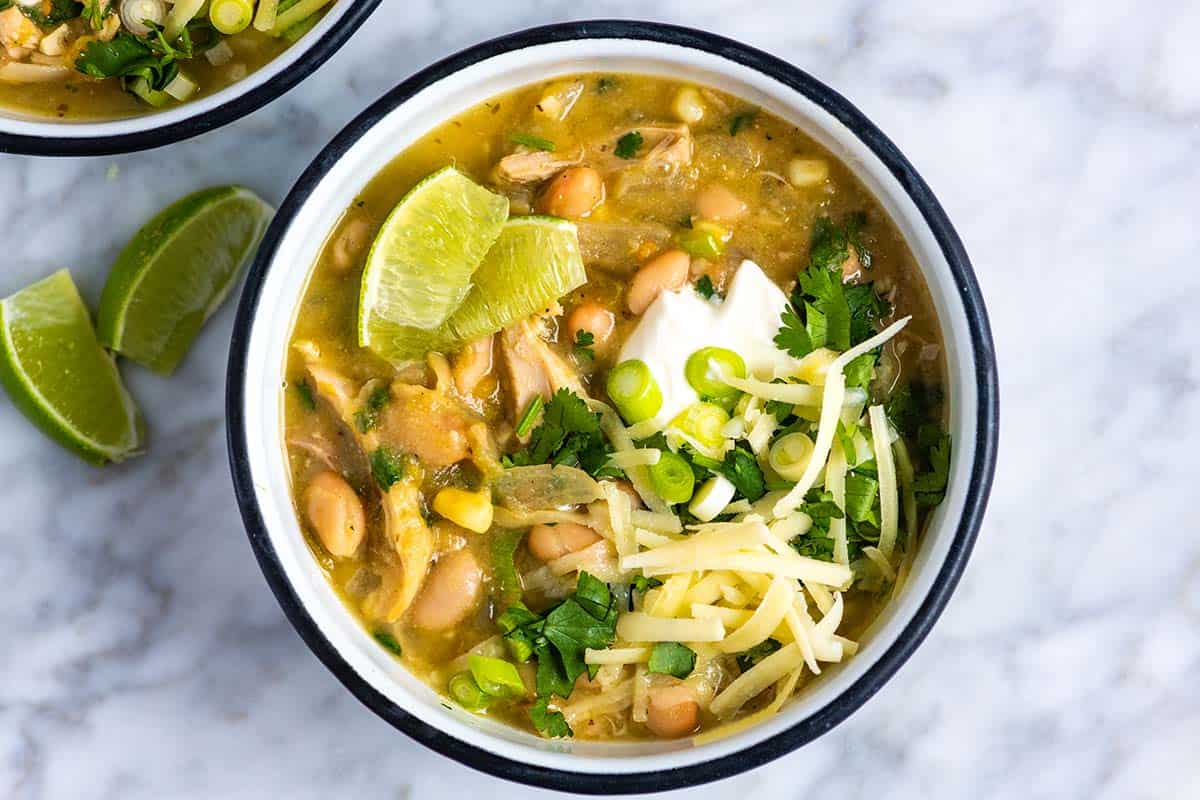
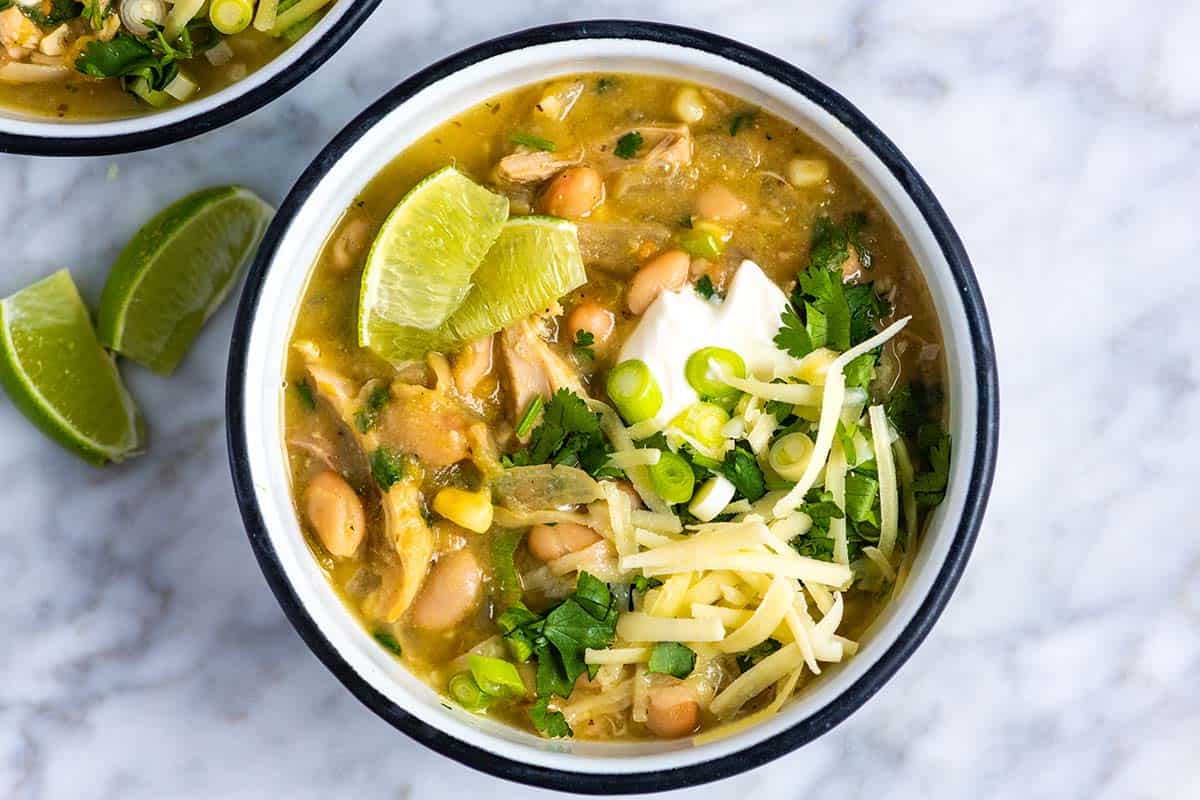
  • Easy White Chicken Chili Recipe

    Easy White Chicken Chili Recipe

    This easy white chicken chili recipe is creamy, flavorful, and comforting. Made with tender chicken, white beans, and a silky broth, it’s the perfect cozy dinner.

    Easy White Chicken Chili

    I’ve always loved a big bowl of classic chili, but this white bean chicken chili is one I return to again and again. It’s cozy and so satisfying, with just the right balance of hearty and fresh.

    What makes this version extra special is the addition of canned green chiles. They are one of my favorite ingredients and add so much flavor to this chicken chili. For more, see our white turkey chili made with ground turkey, beans, and cream cheese.

    Key Ingredients

    • Chicken: Use chicken thighs or breasts for this chili. I usually go with thighs since they turn out soft and tender. If you are short on time, rotisserie chicken or leftover roast chicken works, too (just stir it in near the end).
    • White Beans: Canned or cooked white beans are both great. Great Northern, cannellini, or navy beans are all good choices. You can use other beans, such as pinto or black beans, but I prefer the appearance of white beans in this chili.
    • Canned Green Chiles: I love Hatch green chiles (they come in small cans). Choose mild or hot depending on your taste. If you can’t find them, try a small can of salsa verde or chopped roasted poblano peppers.
    • Onion and Garlic: I’m generous with both in this recipe (and think you should be, too!). Six cloves of garlic add so much flavor.
    • Spices: Ground cumin, onion powder, oregano, salt, and a touch of cayenne or chipotle powder bring this chili to life. No need for regular chili powder, the canned green chiles do the job.
    • Broth: Chicken, turkey, or veggie broth all work well. Use what you have on hand.
    • Corn: I usually make this chili in cooler months, so I use frozen corn. Fresh corn is wonderful when it’s in season, and canned corn works if that’s what you’ve got.
    • Masa Harina or Tortillas: Masa harina (the flour for corn tortillas) thickens the chili beautifully and adds a subtle corn flavor. You can also use chopped corn tortillas and stir them in (they’ll break down in the chili).
    • Cilantro and Lime: I love fresh chopped cilantro and a squeeze of lime at the end. Optional toppings, such as sour cream, shredded cheese, pickled onions, or crushed tortilla chips, make it even better.

    Find the full recipe with measurements below.

    My Tips for Making the Best White Chicken Chili

    Tip 1: Make the flavorful base. This white chicken chili is incredibly easy to prepare. You’ll start with a simple yet flavorful base of sautéed onions, garlic, spices, broth, and canned green chilies.

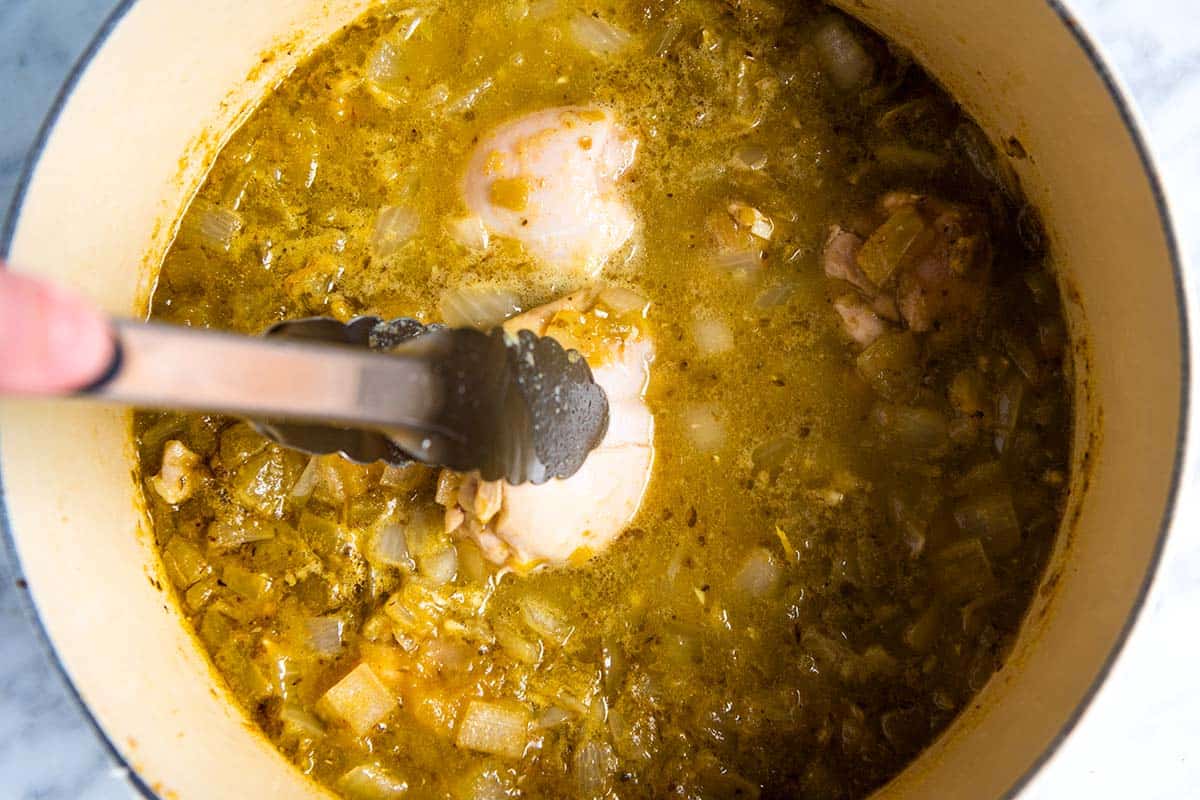
    Tip 2: Gently cook the chicken. Submerge the chicken in the broth and let it simmer until just cooked through (similar to the method I use for shredded chicken). Cooking it this way keeps the meat tender and juicy.

    Cooking chicken for white chicken chili

    Tip 3: Remove and shred the chicken. Once the chicken is cooked, remove it from the pot, let it cool slightly, then shred. Hold it aside until the chili is ready, so the chicken stays moist when you stir it back in.

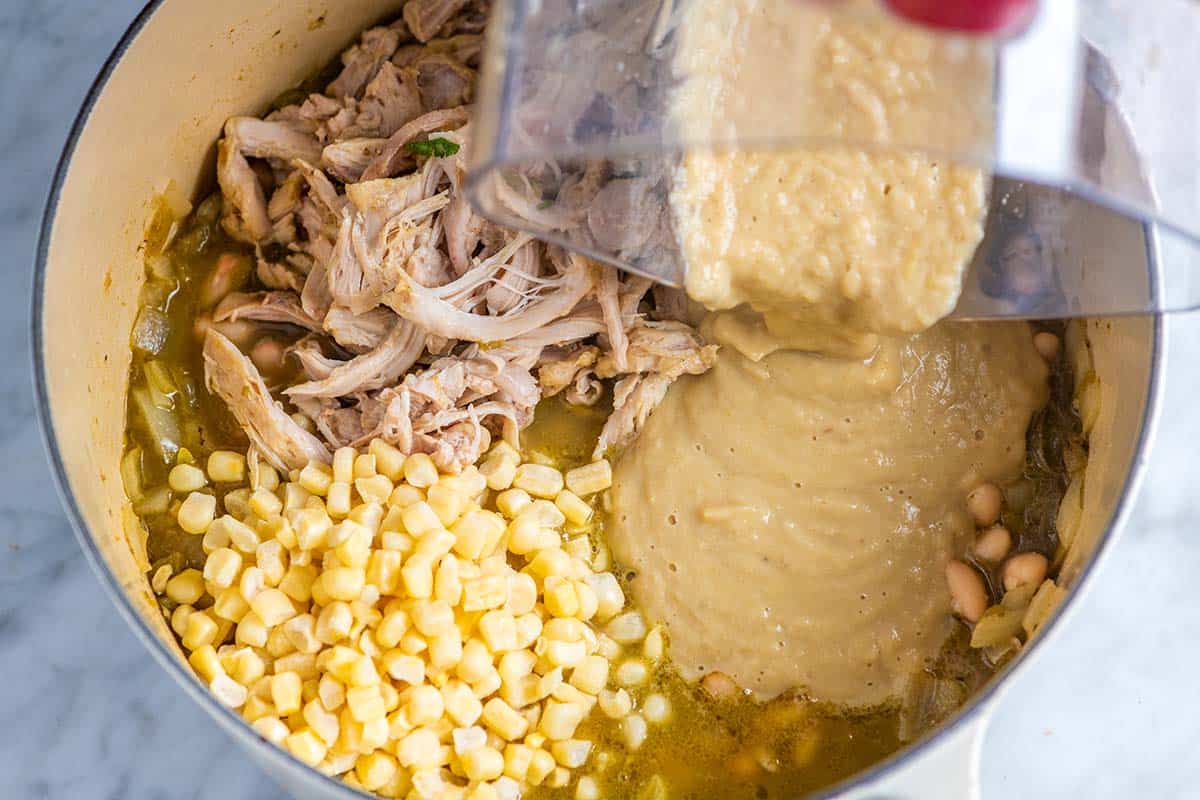
    Tip 4: Blend for creaminess. Stir in the beans, then scoop out about a cup of the beans and broth. Blend until smooth, and add the puree back to the pot. This step gives you that silky, creamy texture without adding cream or sour cream.

    Stirring pureed white beans back into white bean chicken chili.

    Tip 5: Finish with masa harina. Just before serving, whisk in a spoonful of masa harina. This is my favorite trick! It thickens the chili slightly and adds a subtle corn flavor that pairs perfectly with the chicken and white beans.

    Serving Suggestions

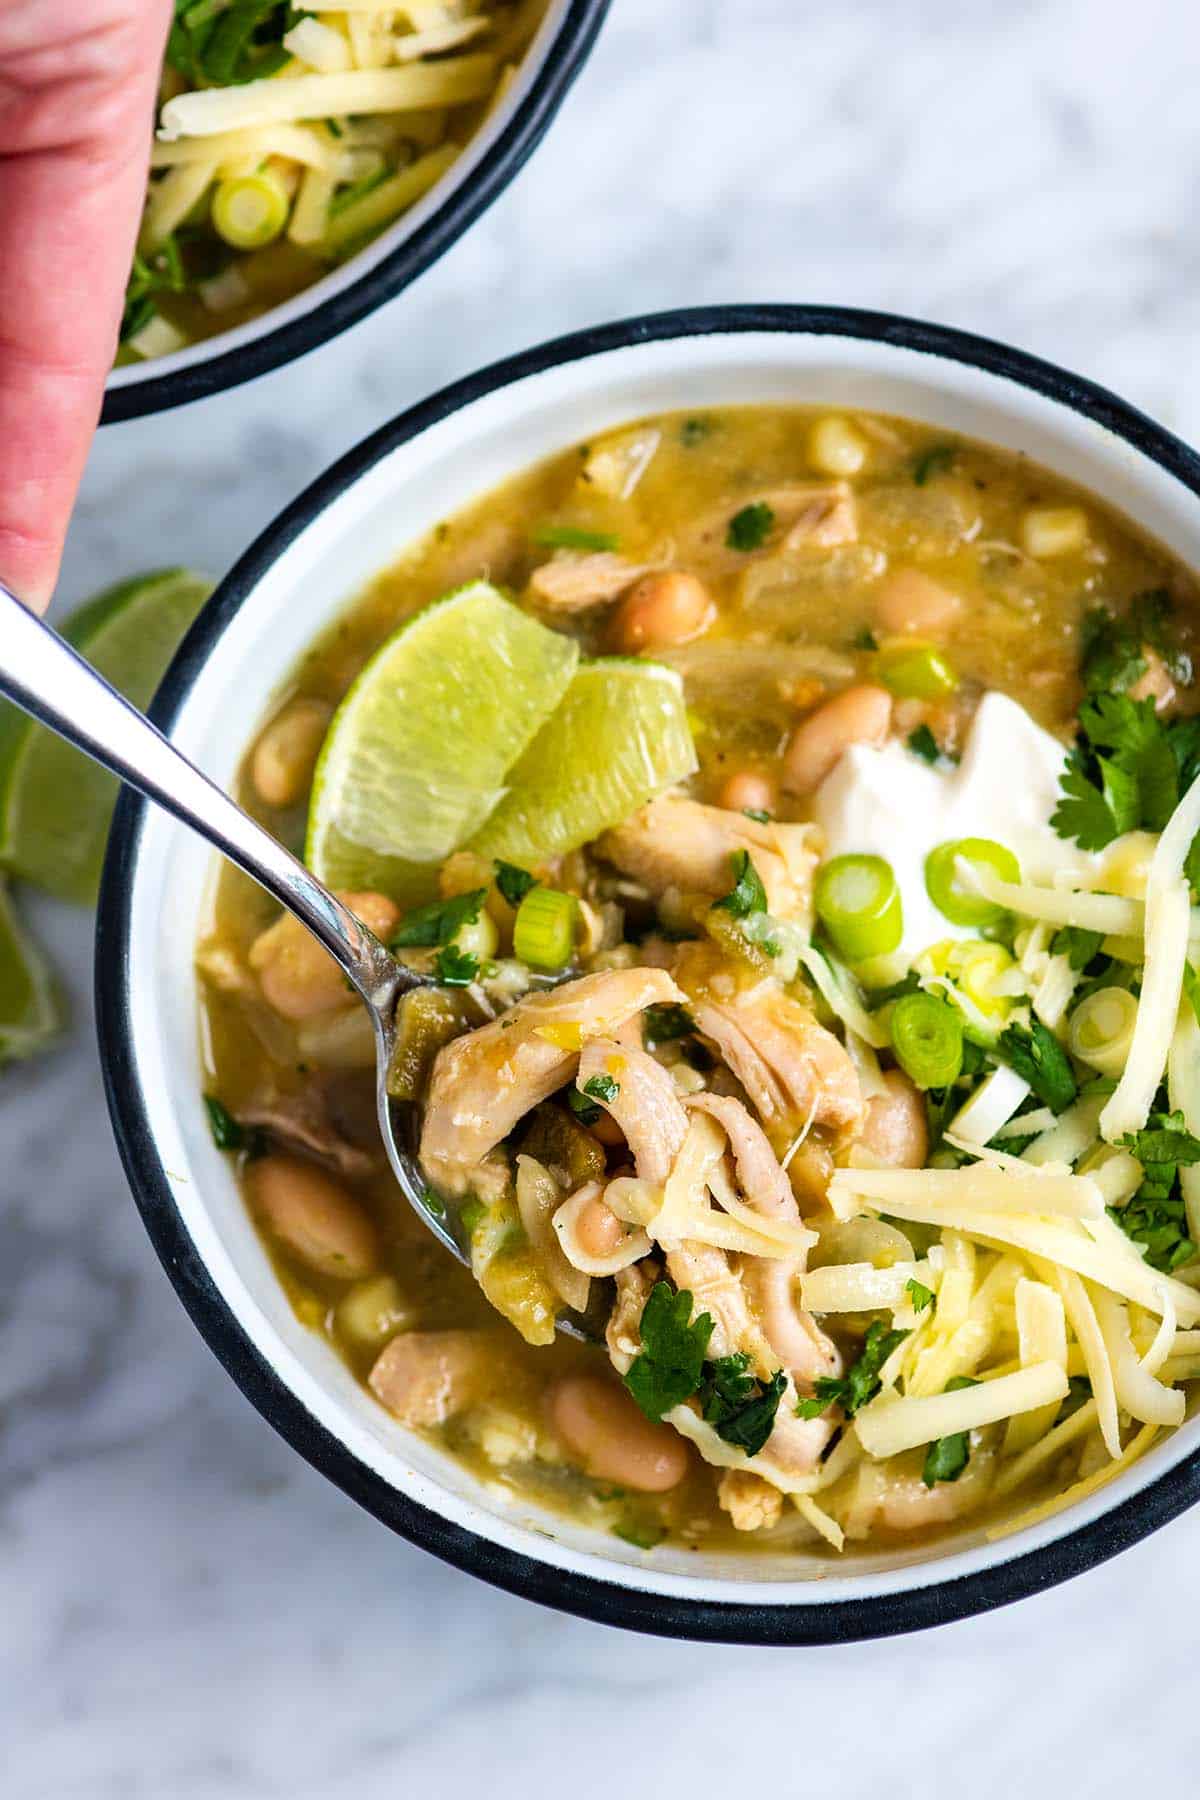
    This white chicken chili is incredible when served in a big bowl, topped with a spoonful of sour cream, a sprinkle of shredded cheddar cheese, sliced green onions, fresh lime juice, and cilantro. For more toppings, consider a spoonful of guacamole or handful of homemade tortilla chips. I also love a side of homemade cornbread.

    More Chili Recipes

    Easy White Chicken Chili

    Easy White Chicken Chili

    • PREP
    • COOK
    • TOTAL

    White chicken chili is pure comfort food. The base is perfectly spiced and creamy and filled with tender shredded chicken, white beans, green chilies, and corn.

    4 Servings

    You Will Need

    1 ¼ pound boneless, skinless chicken thighs or breast

    2 tablespoons butter or oil

    1 medium onion, finely chopped

    6 medium garlic cloves, minced, about 2 tablespoons

    1 ¼ teaspoons ground cumin

    1 ¼ teaspoons onion powder

    1 teaspoon dried oregano

    1/2 teaspoon fine sea salt

    1/4 teaspoon cayenne or chipotle powder, optional for heat

    2 cups low sodium chicken stock, try homemade chicken stock

    3 (4-ounce) cans mild chopped green chilies

    2 (15-ounce) cans white beans like great northern beans or cannellini beans, drained and rinsed

    1 cup frozen corn

    1 tablespoon masa harina or 1 to 2 small corn tortillas torn into small pieces, optional

    1/2 small bunch cilantro, roughly chopped

    1 lime, juiced, plus more to taste

    Scallions, sour cream, avocado, shredded cheese for serving

    Directions

      1Heat the butter or oil in a large pot (like a Dutch oven). Stir in the onions and cook until softened, about 5 minutes.

      2Stir in the garlic, ground cumin, onion powder, oregano, salt, and cayenne pepper. After one minute, pour in the chicken stock and diced green chilies with their juices.

      3Bring the broth to a simmer, then submerge the chicken into it. Adjust the heat so that the broth is gently simmering around the chicken. Partially cover the pot with its lid and cook until the chicken is cooked through and tender, 25 to 30 minutes.

      4Transfer the chicken to a clean work surface and allow it to cool enough so that you can shred it. Use two forks to shred the chicken into smaller pieces.

      5Adjust the broth to a low simmer and stir in the beans. Use a measuring cup or jug to steal about one cup of beans and broth from the pot, and then pour it into a blender. Blend into a smooth puree.

      6Pour the blended beans back into the pot. Add the shredded chicken and corn, then stir everything together and allow it to reheat.

      7Mix the tablespoon of masa with three tablespoons of water into a smooth paste and stir it into the chili. If you are using corn tortillas instead of masa paste, tear the tortillas into small pieces and stir them into the chili. After a minute or so, the tortillas will disintegrate into the chili.

      8Taste the chili and then adjust with salt, pepper, or cayenne pepper.

      9Remove the chili from the heat and serve with fresh lime, cilantro, and any other chili toppings you love.

    Adam and Joanne’s Tips

    • Storing: This is perfect for making in advance. Store white chicken chili in airtight containers and refrigerate for up to 4 days or freeze for up to 6 months.
    • Canned green chilies: You can buy mild and hot canned green chilies. The one you choose is up to how spicy you enjoy your food. I typically purchase mild and add spice with cayenne pepper or chipotle powder. I love to purchase the Hatch brand.
    • The nutrition facts provided below are estimates. We used 1/2 teaspoon of salt in our calculations and assumed a generous serving (about 1/4 of the pot).

    Nutrition Per Serving
    Serving Size
    1/4 of the pot (4 servings total)
    /
    Calories
    316 Calories
    /
    Total Fat
    10.2g
    /
    Saturated Fat
    4.5g
    /
    Cholesterol
    59mg
    /
    Sodium
    710.7mg
    /
    Carbohydrate
    38.9g
    /
    Dietary Fiber
    9.8g
    /
    Total Sugars
    7.8g
    /
    Protein
    19.9g


    AUTHOR:

    Joanne Gallagher

    Adam and Joanne of Inspired Taste

    We are Adam and Joanne Gallagher, the creators of Inspired Taste. Established in 2009, Inspired Taste grew from a childhood dream into one of the internet’s most trusted recipe sites with hundreds of reliable recipes, step-by-step videos, and expert tips.More About Us

    Source link

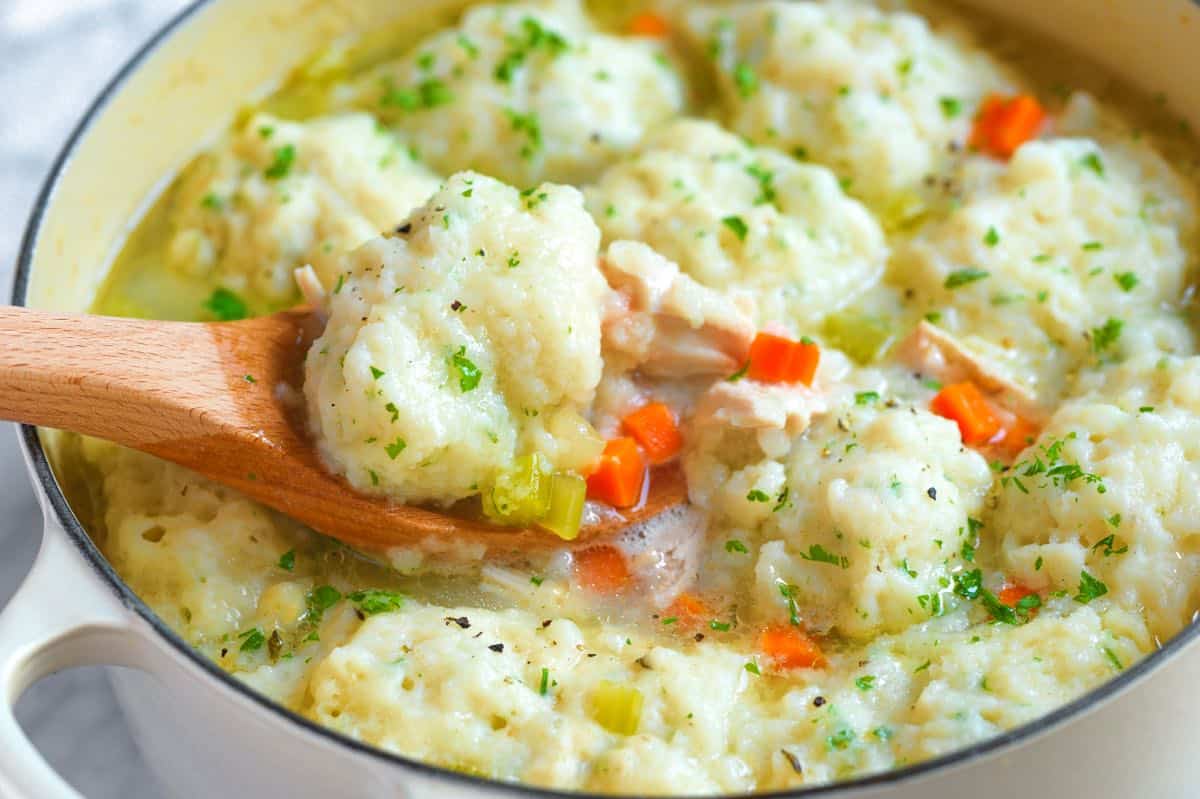
  • The Best Chicken and Dumplings Recipe

    The Best Chicken and Dumplings Recipe

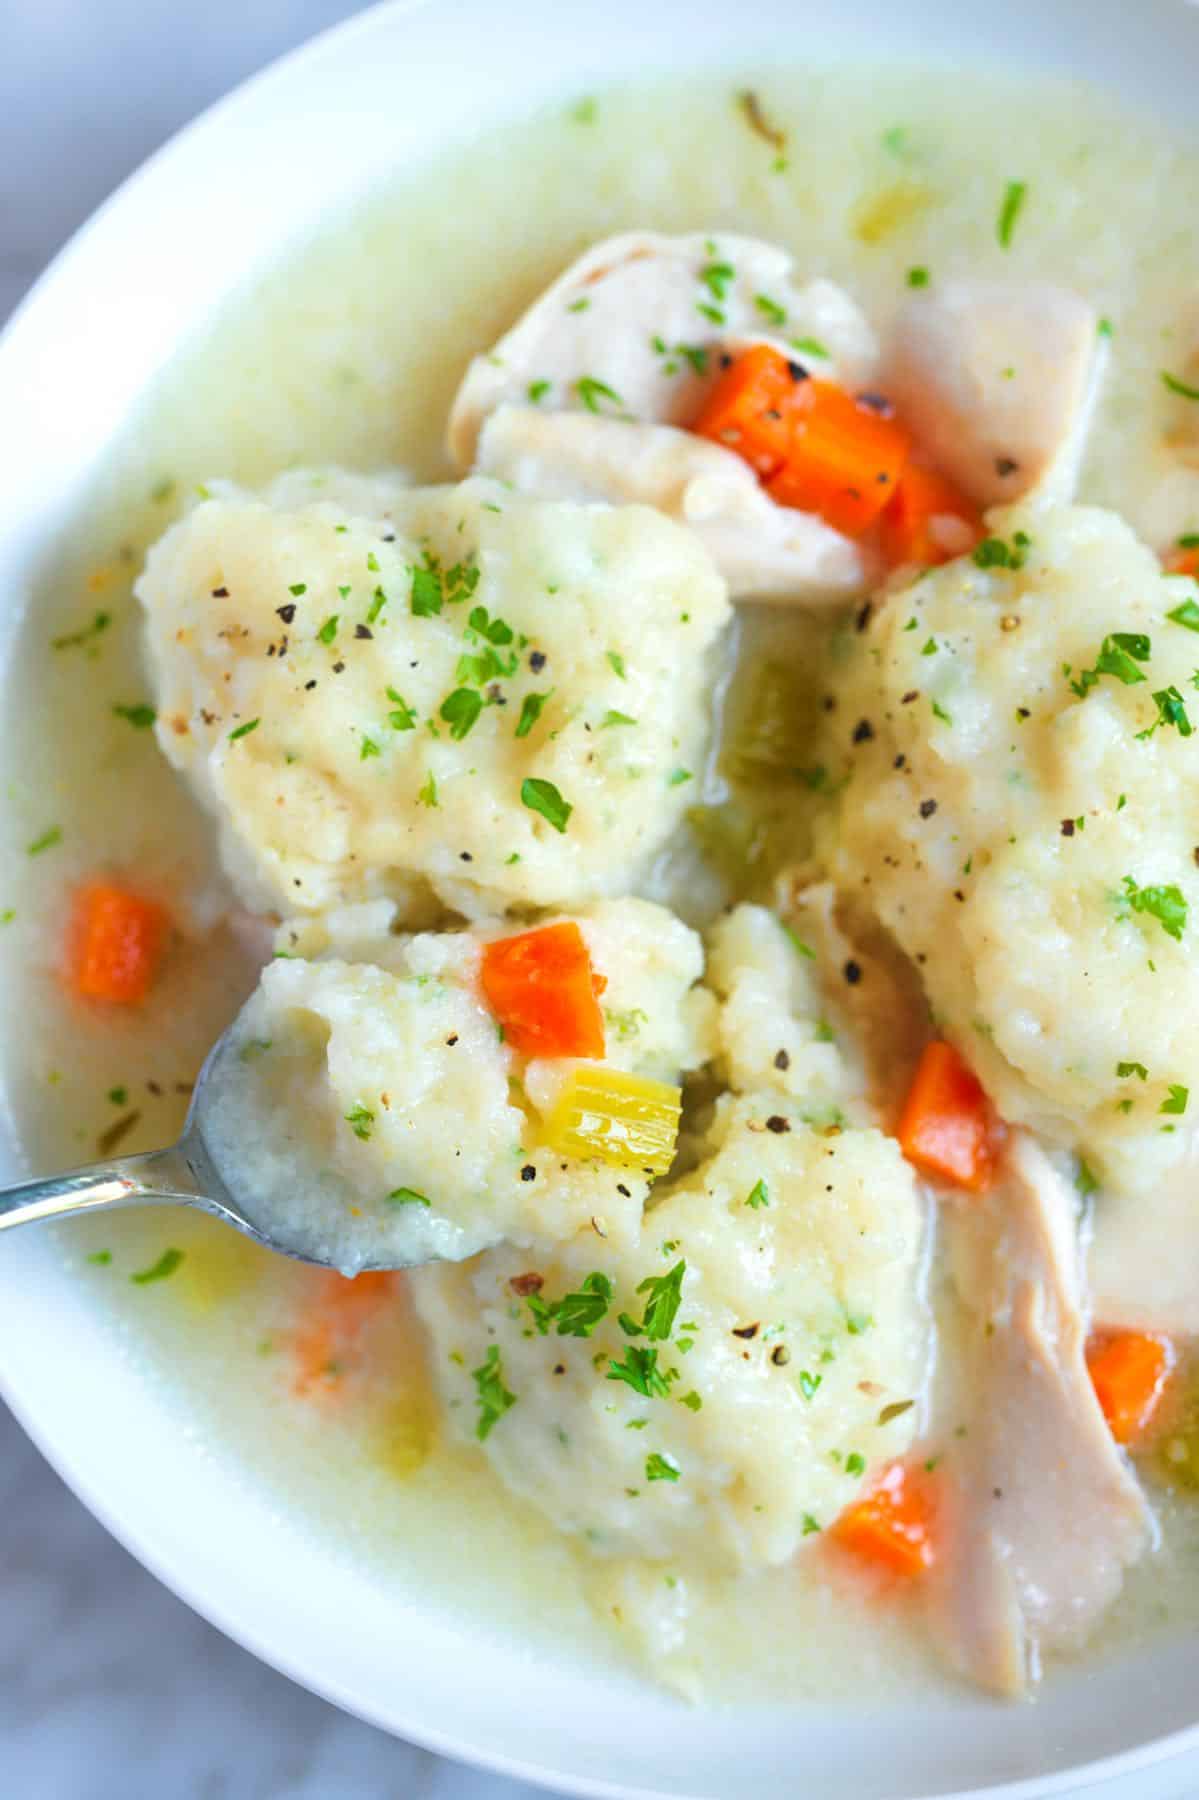
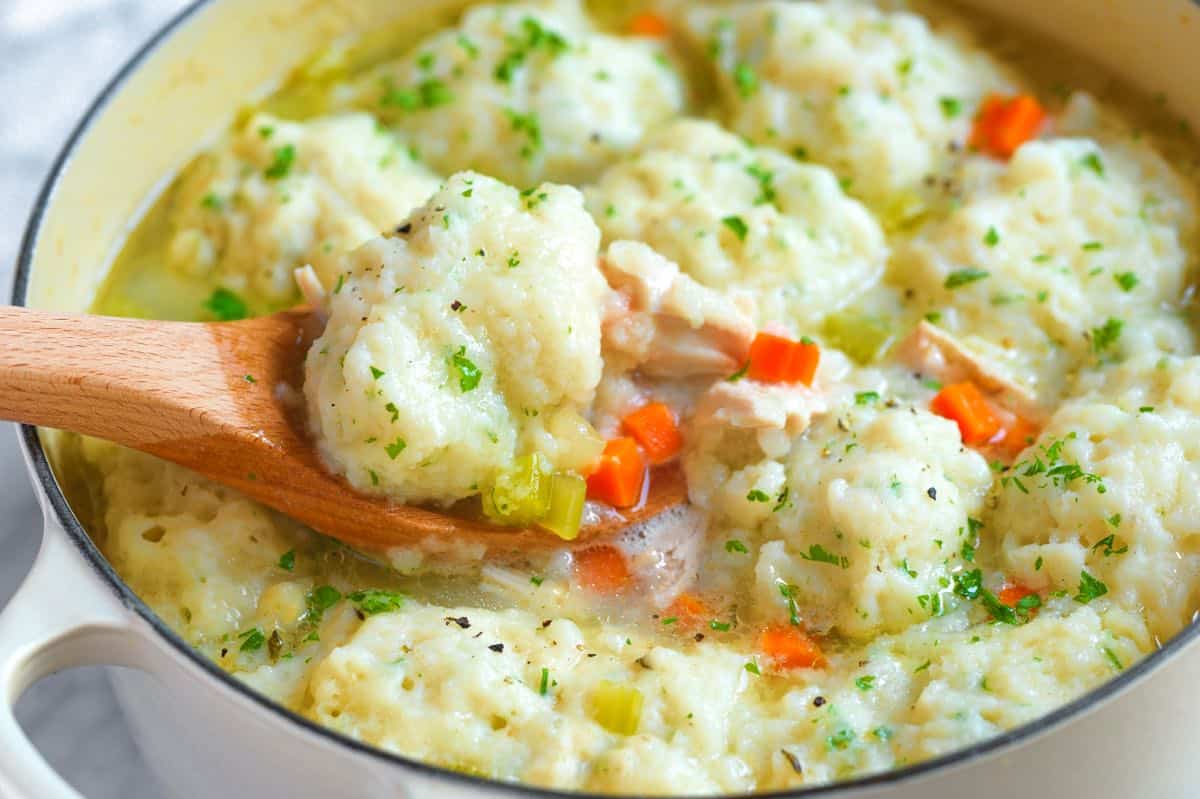
    This homemade chicken and dumplings recipe features light, fluffy drop dumplings, soft and tender chicken, and an incredibly flavorful broth.

    Homemade Chicken and Dumplings

    This simple, one-pot chicken and dumplings is made entirely from scratch. The dumplings come together in minutes, and you’ll cook the chicken and make the incredible broth all in a single step.

    This recipe comes from our friend Richard, who was inspired by his grandmother. His recipe makes a truly incredible, flavorful broth and tender drop dumplings. I can’t wait for you to make it!

    Key Ingredients

    • Whole chicken: I simmer a whole chicken with aromatics for about 1 hour, which produces the most delicious chicken broth and tender, moist chicken. Once you try making it this way, you’ll never go back. I use the same process to make our easy chicken broth. For making this with leftover chicken, see tips below the recipe.
    • Aromatics: For the classic broth, we add an onion top (the part you usually throw away — you can see what I mean by looking at our photos or watching the video), carrot, celery, garlic, bay leaves, peppercorns, thyme, and salt. These are similar ingredients used for our popular chicken noodle soup recipe.
    • Self-rising flour: I use self-rising flour for the drop dumplings. Baking powder and salt have already been added, making the dumpling batter so easy! If you do not have it, I have included a DIY version in the tips section of the recipe.
    • Milk: I use whole milk, which brings our dumpling batter together and helps make them tender.
    • Butter: Adds flavor and keeps the dumplings moist.
    • Spices: I add ground pepper, a bit of extra salt, and fresh parsley to the dumpling batter.

    Find the full recipe with measurements below.

    How to Make Chicken and Dumplings from Scratch

    Tip 1: Cook the chicken and make broth in a one step. For the best chicken and dumplings, we make a broth similar to this chicken broth. It’s easy and so worth it.

    Gently simmer a whole chicken in water with a few simple ingredients. It takes 1 hour, but if you are short on time, I have included a speedier option using store-bought broth below.

    Making chicken broth for chicken and dumplings from scratch

    Tip 2: Use our wet, drop dumpling batter. This Southern-style recipe uses drop dumplings (similar to our easy drop biscuits). I love how light and fluffy the drop-style dumplings turn out. They also make the soup thicker and creamier because some batter will fall into the broth, helping to thicken it. We also have this recipe for more traditional biscuits, but I’d keep those for dipping into the broth, not for cooking on top.

    Shredded batter for chicken and dumplings
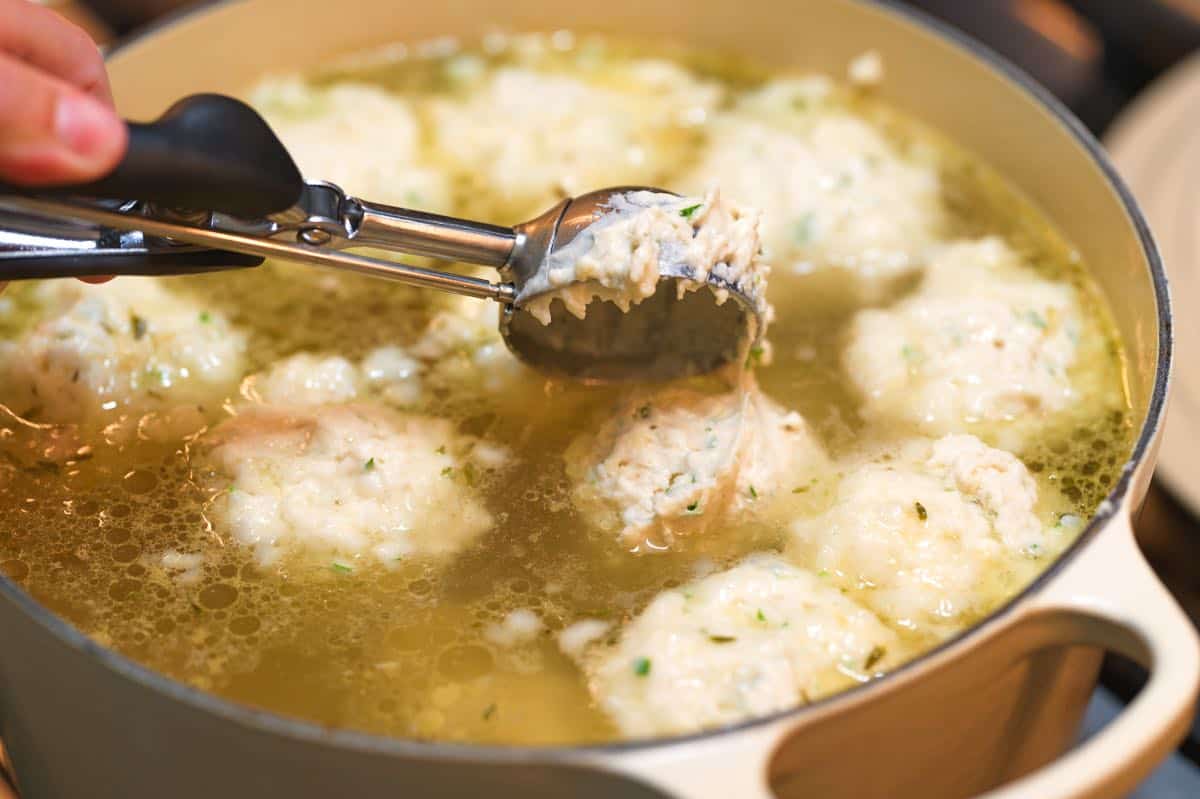
    Dropping dumpling batter into chicken soup

    Tip 3: Cooking the dumplings. To cook the dumplings, you will drop the batter by the spoonful into simmering broth. It’s easy, here are a few tips to help you out:

    1. Use a cookie scoop or spoon to gently drop your dumplings into the gently simmering broth. Don’t worry if the pot looks crowded. Depending on your pot shape, you might even have a few dumplings on top of each other.
    2. If the dumplings fully cover your soup, use a spoon to make a small hole in the middle to allow steam and some of the simmering bubbles to release.
    3. Covering the pot with a lid helps the dumplings steam.
    4. Keep the pot at a gentle simmer. An aggressive simmer or boiling will break the dumplings apart.

    More Comforting Chicken Recipes

    Homemade Chicken and Dumplings

    The Best Chicken and Dumplings

    • PREP
    • COOK
    • TOTAL

    Our recipe for chicken and dumplings starts with a whole chicken simmered with aromatics to create a rich and flavorful broth. We use self-raising flour for the drop dumplings (DIY self-raising flour is shared in the tips if needed).

    Makes 6 servings

    Watch Us Make the Recipe

    You Will Need

    Chicken and Broth

    1 whole chicken, about 4 pounds

    1 onion top, see notes

    1 garlic clove, smashed

    1 large carrot

    2 stalks celery

    3 bay leaves

    8 whole peppercorns

    1 tablespoon fine sea salt

    12 to 14 cups (3 liters) water

    1 bunch fresh thyme


    Dumplings

    2 ½ cups (325g) self-rising flour, spooned and leveled, see notes

    8 twists black pepper

    3/4 teaspoon fine sea salt

    2 tablespoons chopped fresh parsley

    1 ½ cups (350ml) whole milk

    1/4 cup (60g) butter, melted

    Directions

    • Make Broth and Cook Chicken
    • 1Cut a 3-inch section of the carrot, about 1/4 the size of the whole carrot, and set aside. Chop the remaining carrot into small cubes. Cut a 4-inch piece of celery stalk and set aside with the carrot. Chop the remaining celery into small cubes. Save the chopped carrot and celery for later.

      2Place the chicken, breast facing up, in a large pot (we use a 9-quart Dutch oven). Then, toss the 1/4 carrot, 4-inch piece of celery, onion top, smashed garlic clove, bay leaves, peppercorns, and 1 tablespoon of salt around the chicken.

      3Pour in 12 to 14 cups of water, depending on the size of your pot. In the video, we used 14 cups. It is okay if the chicken is not fully covered; an inch or so of chicken breast above the water is okay.

      4Cover the pot with a lid, turn the heat to medium-high, and bring to a simmer. Once the broth is at a simmer, reduce it so that it’s a gentle simmer — the bubbles should be slowly dancing around in the pot.

      5Cook at a gentle simmer for 50 minutes. Peek under the lid occasionally to see if the heat needs to be reduced.

      6After 50 minutes, the broth will be aromatic, and the chicken will be cooked through (you can test this with an internal temperature thermometer — it should read above 165 °F).

      7Carefully transfer the chicken to a plate and allow it to cool until you can handle it.

      8Strain the broth, wipe any foam stuck to the sides of the pot, and then pour the strained broth back into the pot used to make it. Place the pot back over medium heat, add the thyme, chopped carrots, and chopped celery.

    • Finish Chicken and Dumplings
    • 1When it is cool enough to handle, shred the chicken by hand, removing all the bones and skin. Shred as big/little as you like. We keep the chicken in larger pieces.

      2To make the dumpling batter, melt the butter. In a medium bowl, stir the flour, pepper, 3/4 teaspoon of salt, parsley, milk, and melted butter until mixed.

      3Remove the thyme from the soup, scraping a few leaves off the bundle as you remove it.

      4Stir the shredded chicken and any juices left on the plate into the soup.

      5Bring the broth to a gentle simmer, and then use a spoon to scoop golf ball-sized portions of the batter into the soup, scraping them off with your finger. (If you have a large cookie scoop, scoop balls of batter into the soup.) Do this until all the batter is in the soup — it will look crowded. Some might sink.

      6Cover with a lid and cook the dumplings at a low simmer for 5 to 7 minutes or until they look like they are firming up on the bottom. Then, carefully turn each one over to simmer the other side. If there’s no space for the liquid to bubble up past the dumplings, use a spoon and make a small hole in the middle of the pot.

      7Once they are all turned over, simmer over low heat with the lid on for another 8 to 10 minutes. You can test a dumpling to check they are done — The center should look cooked through and fluffy, not doughy. When cooking the dumplings, keep the pot at a gentle simmer. An aggressive simmer or boiling will break them apart. Keep the heat low and keep your pot covered so that they steam. The dumplings can cook longer than the suggested times without issues, but agitating them with an aggressive simmer will make them fall apart.

    Adam and Joanne’s Tips

    • Onion top: We are only looking for a mild onion flavor in our broth. Slice an onion at the top, keeping the skins on. Use the top (what you would normally throw away) to make the broth, and save the onion for another recipe. You can also use a 1-inch slice of onion in its place.
    • Self-rising flour: Unlike all-purpose flour, self-rising flour adds baking powder and salt. For 2 ½ cups of homemade self-rising flour (what you need for this recipe), whisk 2 ½ cups all-purpose flour with 3 ¾ teaspoons baking powder and 1/2 teaspoon salt.
    • Measuring your flour: Fluff the flour in its container, then gently scoop it into your measuring cup until slightly mounded. Level off the top with a knife for accurate measuring. For even more accuracy, use a scale and measure the flour by weight (in grams).
    • Pot size: The perfect size for this recipe is a 9-quart Dutch oven, which is large enough to make the broth and cook all the dumplings. I have also used a 7 ½-quart Dutch oven with this recipe and found that I could only fit 12 cups of water with my chicken. If you don’t have either of these, make sure the pot is large enough to hold at least 12 cups of water with the chicken.
    • Shortcut with leftover chicken: I highly recommend the homemade broth, but if you are short on time, use 10-12 cups of store-bought broth. Bring your chicken broth to a low simmer, and add chopped carrot and celery. Stir in 3 to 4 cups of shredded cooked chicken. Make the dumpling batter and cook by gently simmering them covered with a lid, per our instructions above.
    • Storing: This dish is best when fresh, but you can store it in the fridge for a couple of days and gently reheat. The dumplings will be slightly more moist and might fall apart, but the flavors will all be there. We do not recommend freezing them.
    • Make ahead tips: To reduce the preparation time of the recipe, you can make the broth and chicken up to three days in advance. When you are ready to serve, reheat the broth, add your carrots and celery, and then make your dumpling batter.
    • The nutrition facts provided below are estimates.

    Nutrition Per Serving
    Serving Size
    1/6 of the recipe
    /
    Calories
    501
    /
    Total Fat
    14.4g
    /
    Saturated Fat
    7g
    /
    Cholesterol
    136.8mg
    /
    Sodium
    1599.2mg
    /
    Carbohydrate
    48.7g
    /
    Dietary Fiber
    3.8g
    /
    Total Sugars
    4.1g
    /
    Protein
    42.4g


    AUTHOR:

    Joanne Gallagher

    Adam and Joanne of Inspired Taste

    We are Adam and Joanne Gallagher, the creators of Inspired Taste. Established in 2009, Inspired Taste grew from a childhood dream into one of the internet’s most trusted recipe sites with hundreds of reliable recipes, step-by-step videos, and expert tips.More About Us

    Source link

  • Grilled Chicken with Pepperoncini Garlic Butter Recipe

    Grilled Chicken with Pepperoncini Garlic Butter Recipe

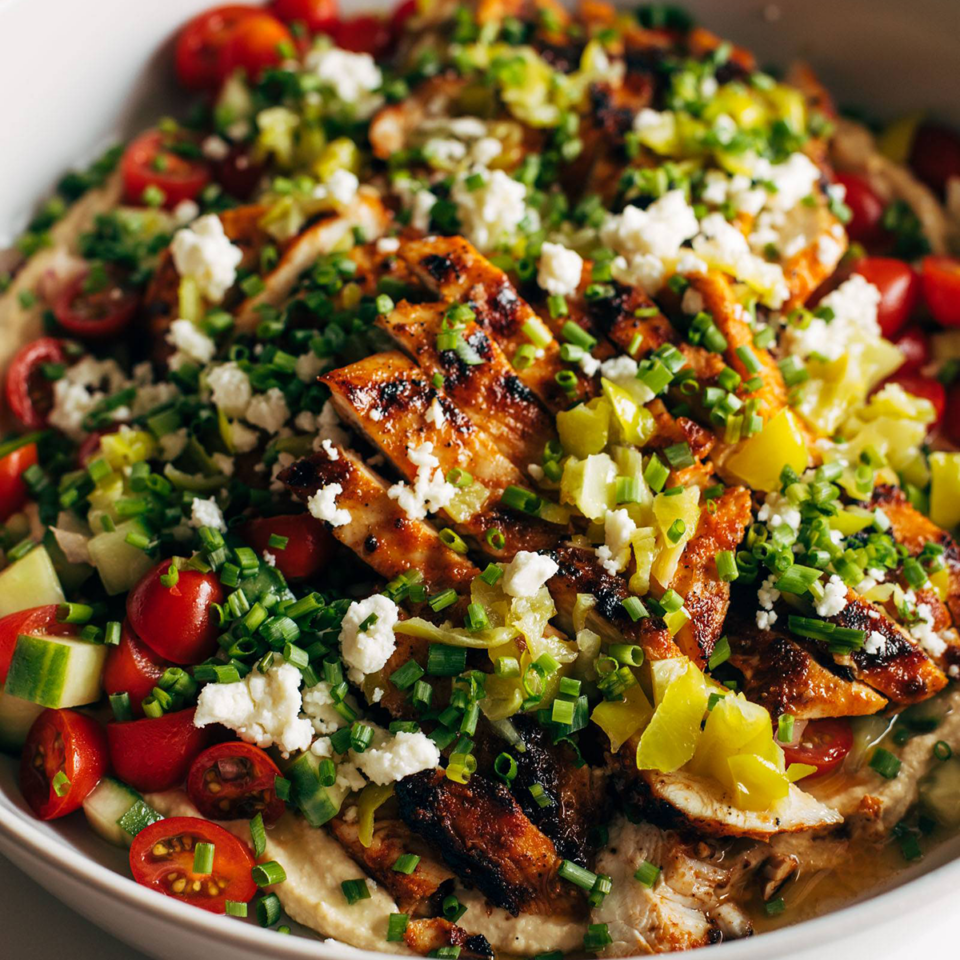
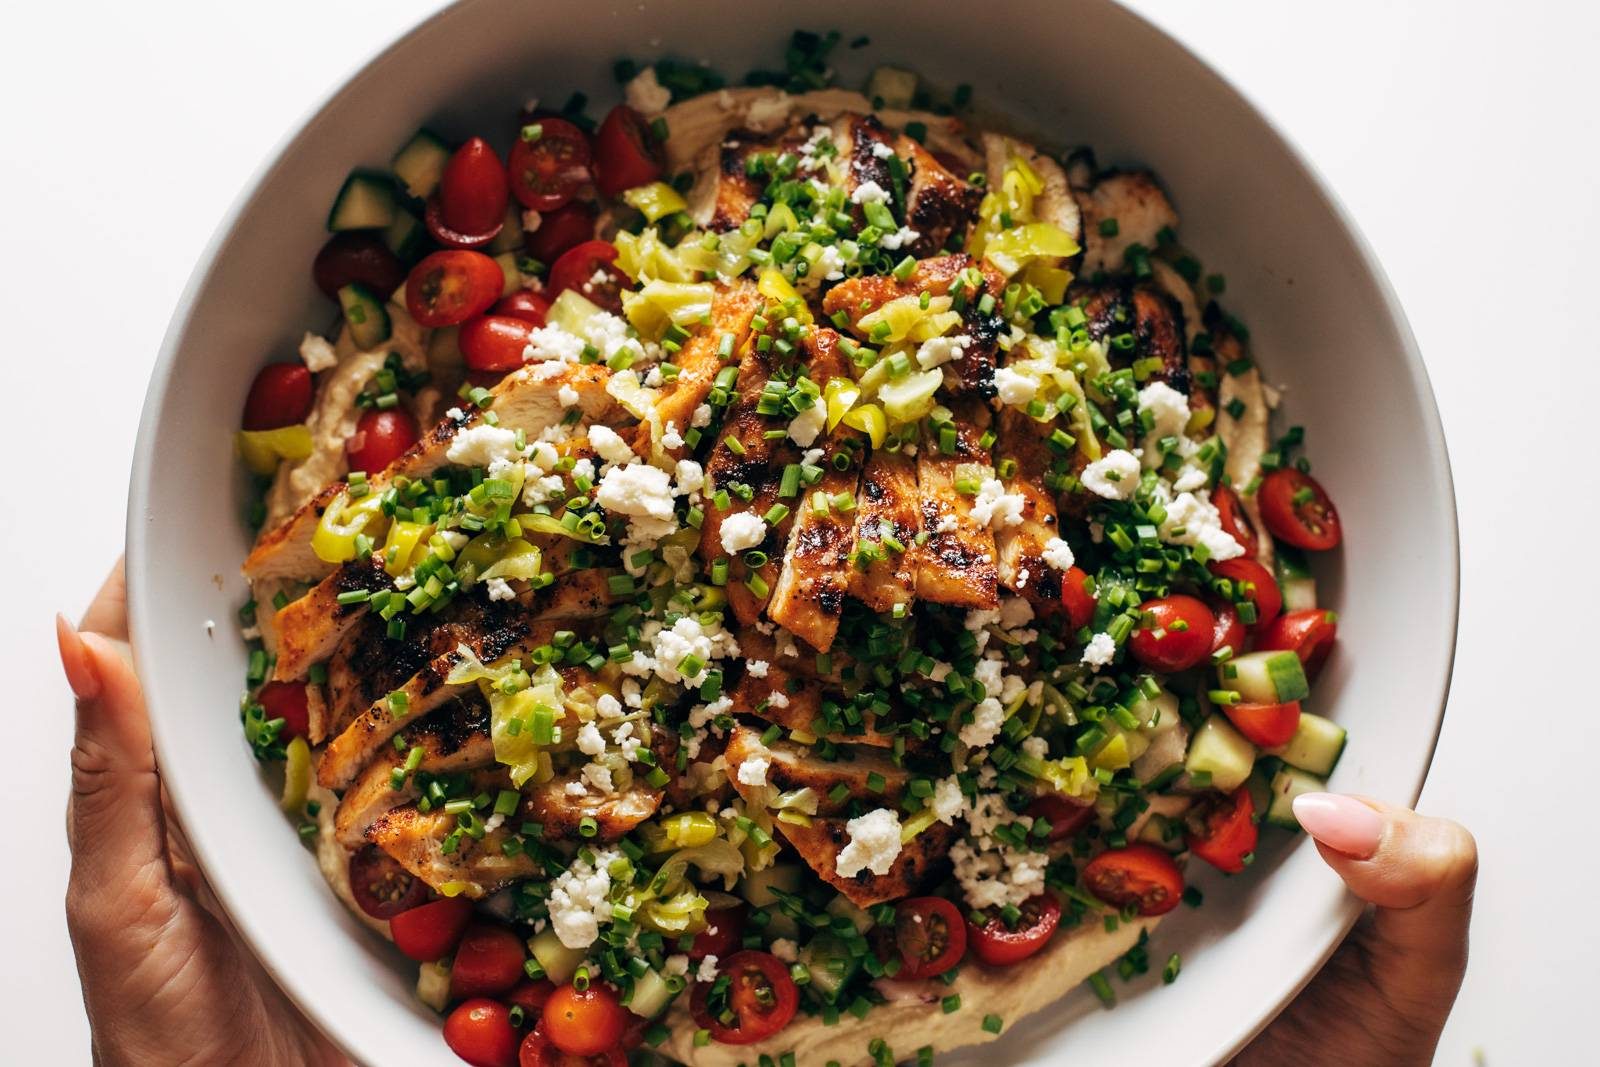
    This is such a fun one! Grilled marinated chicken, a quick tomato cucumber salad, tangy bits of feta, and a zippy pepperoncini garlic butter sauce poured over the whole thing.

    Grilled marinated chicken, cucumber tomato salad, hummus, feta, and a pepperoncini garlic butter sauce. What a showstopper! This is hands-down my new favorite meal!


    In This Post: Everything You Need For Grilled Chicken with Pepperoncini Garlic Butter


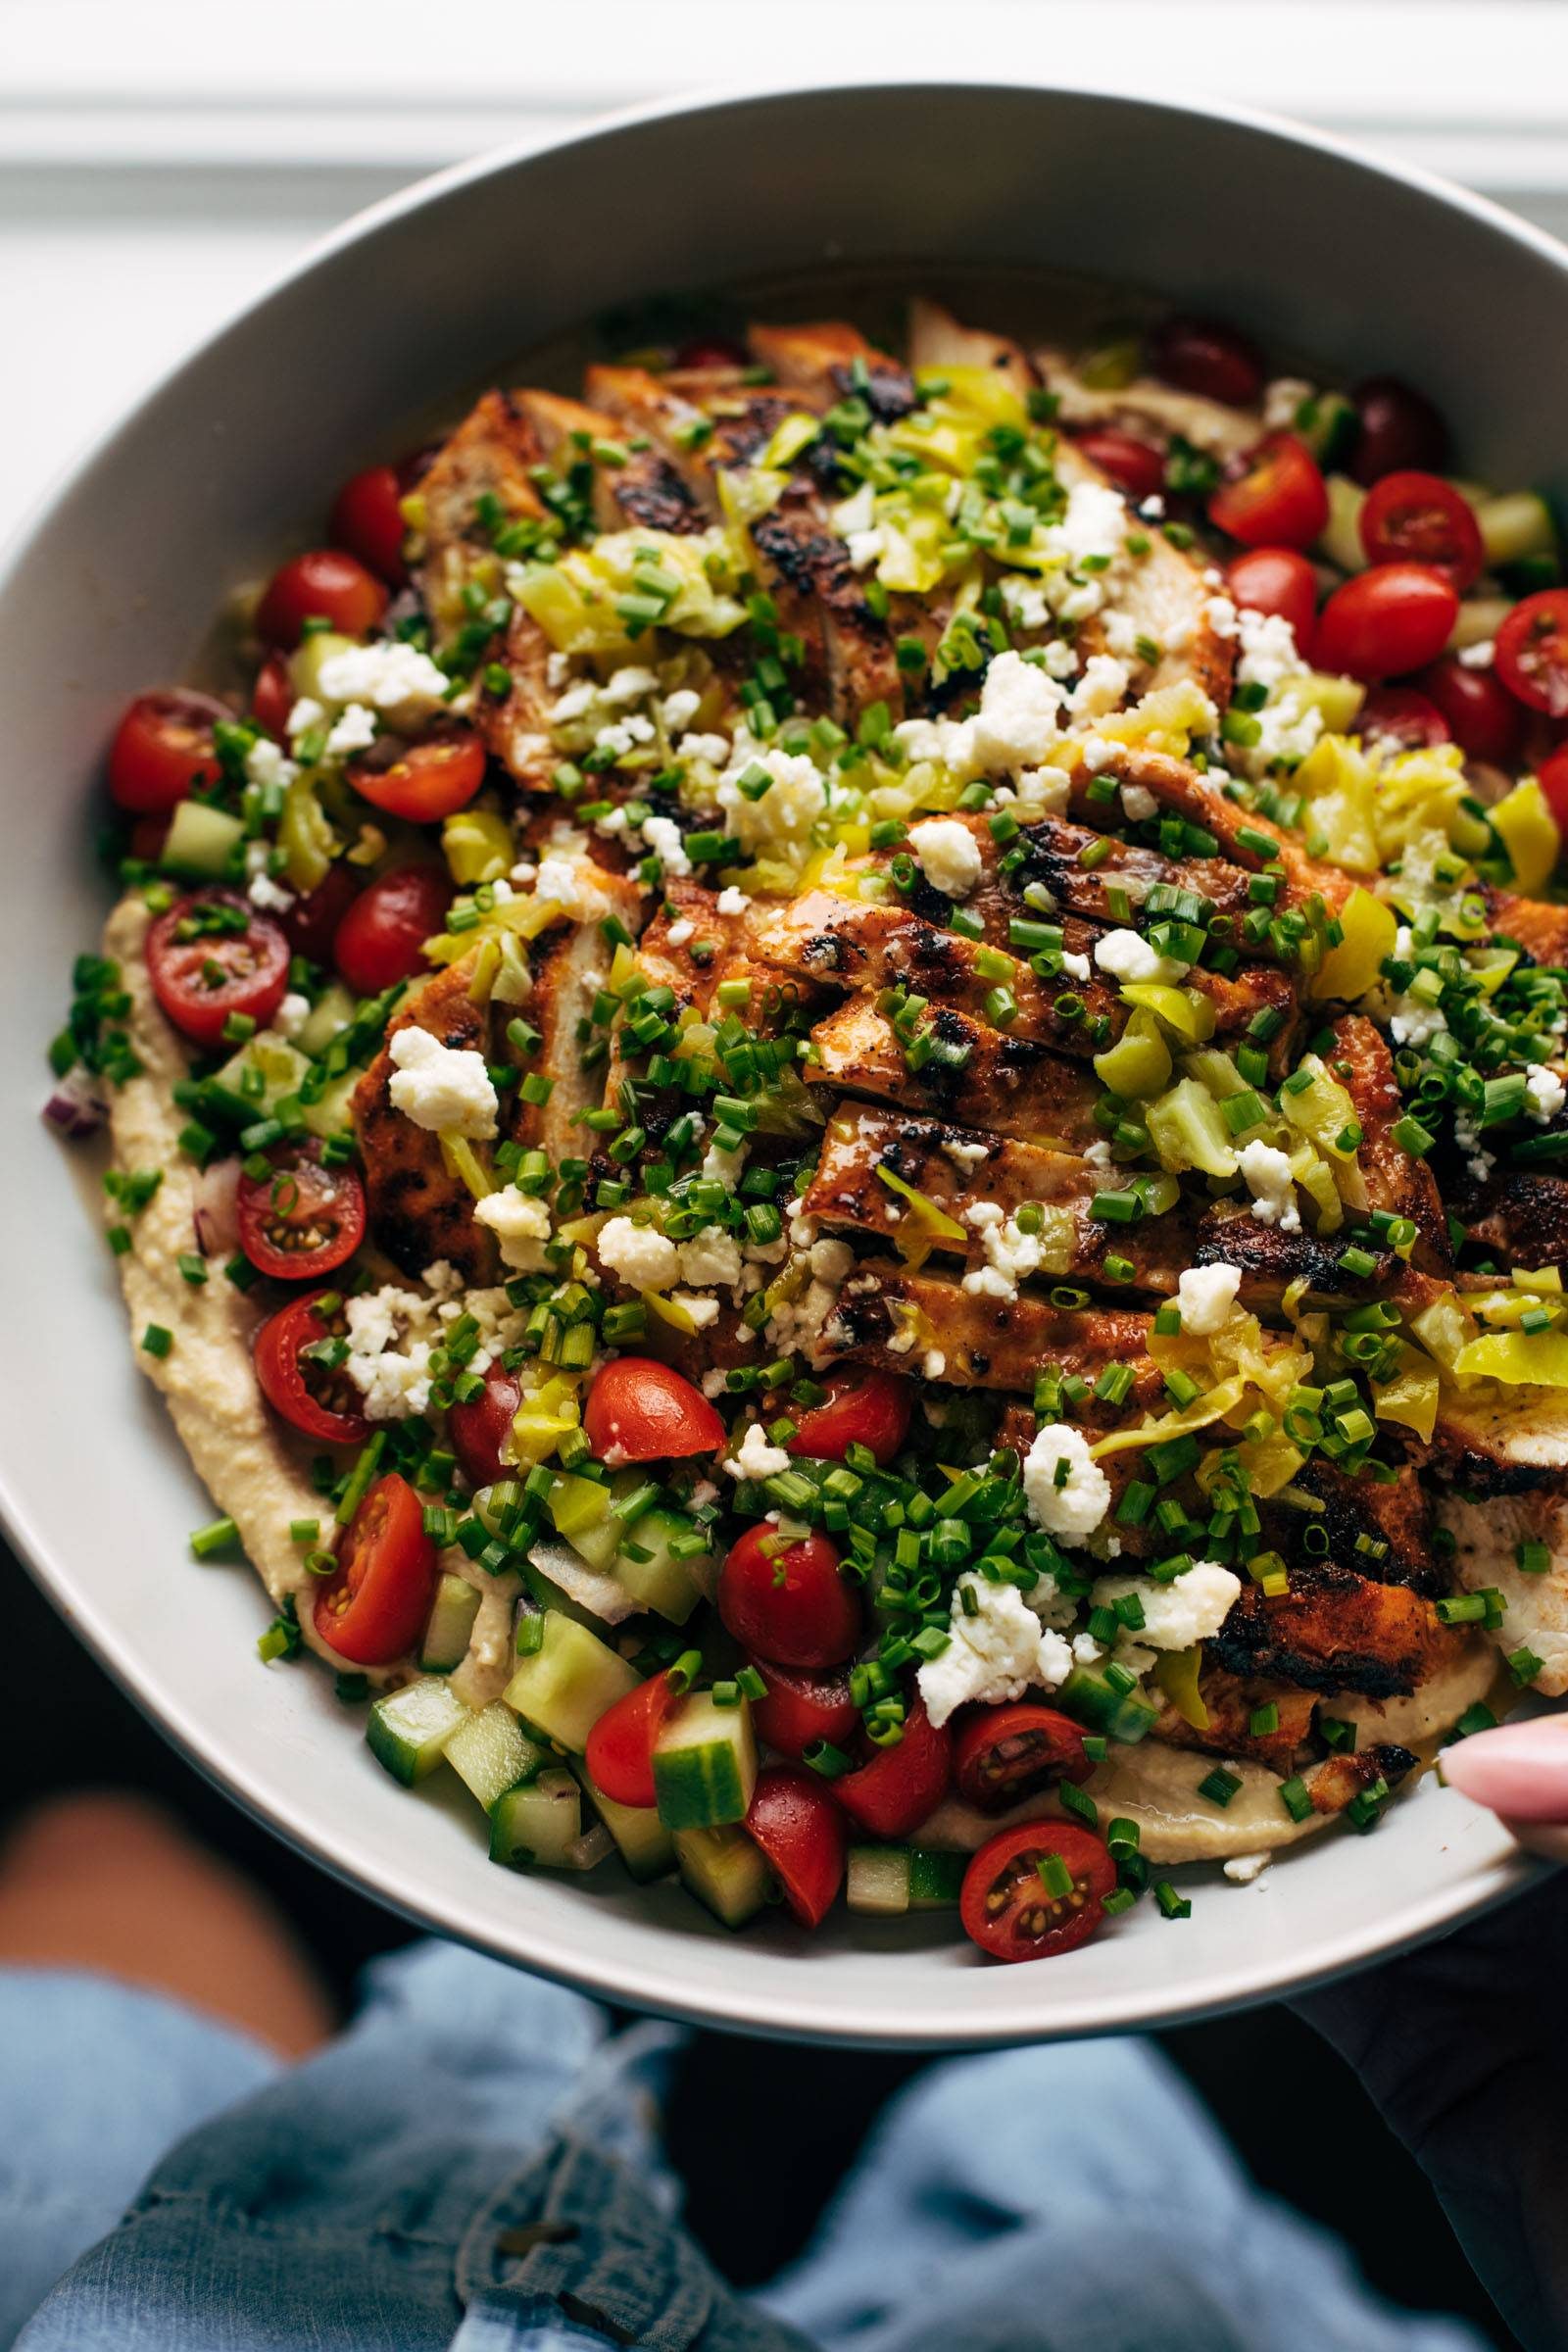
    White hand holding a plate of pepperoncini chicken

    How To Make This Chicken

    Step 1: Marinate the Chicken

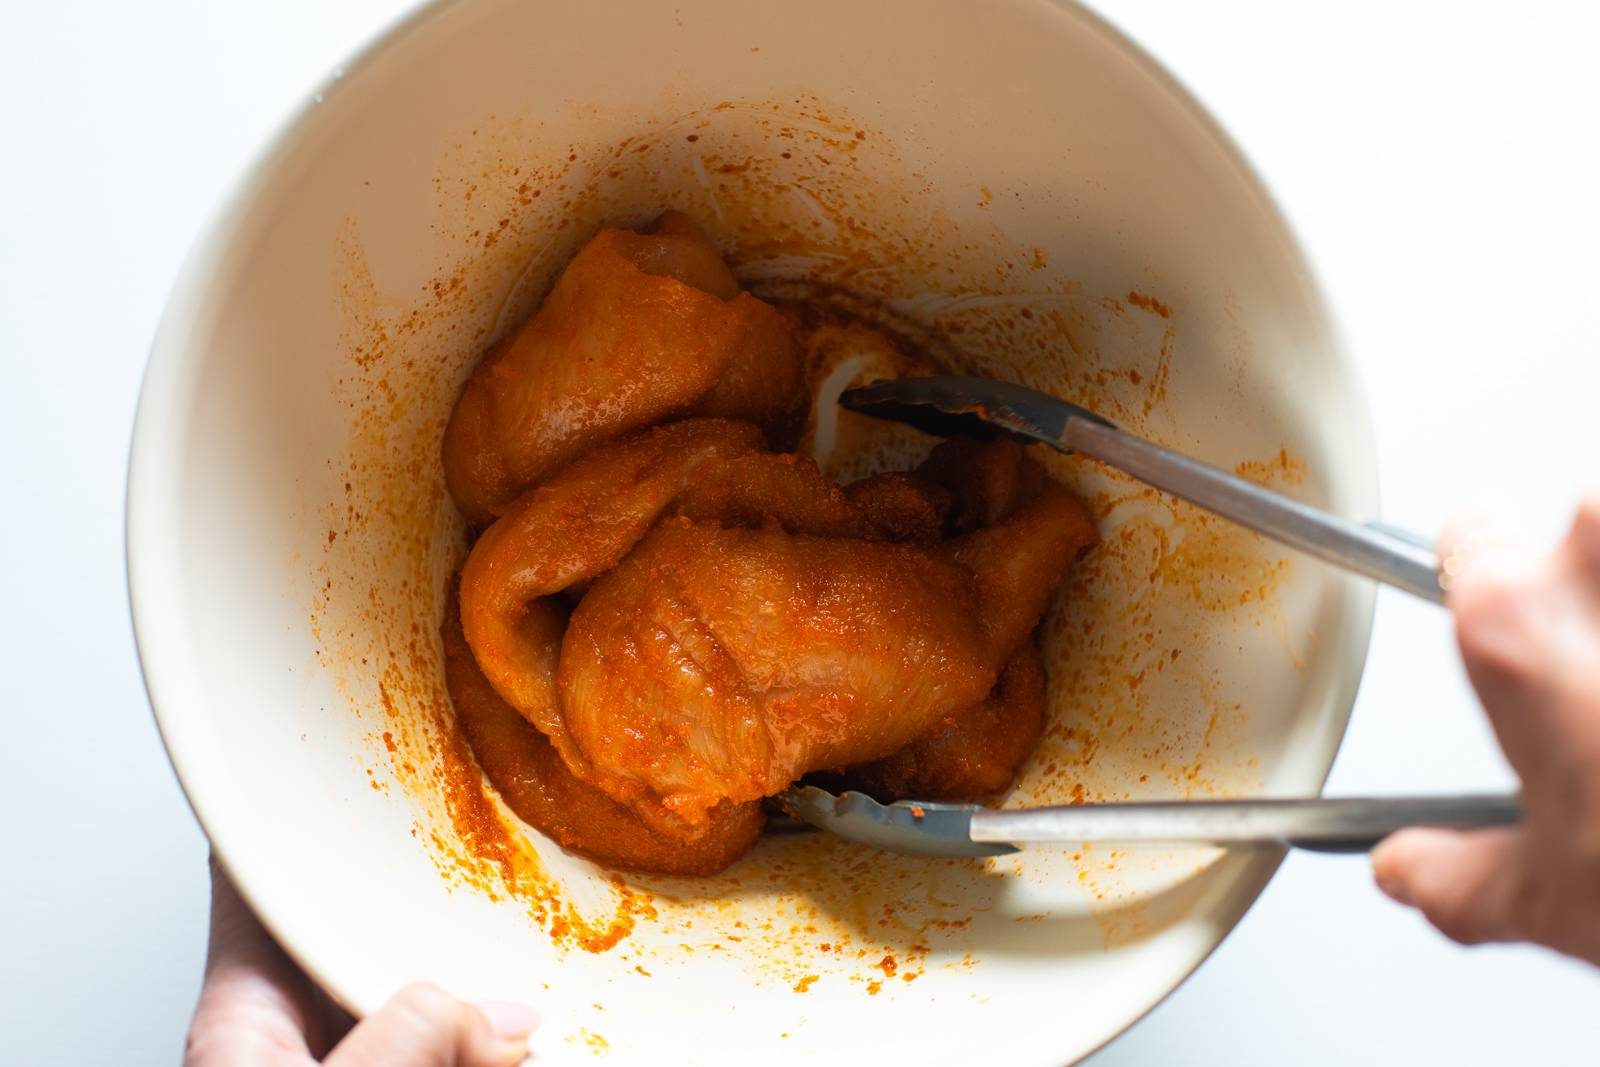
    Paprika, onion powder, garlic powder, salt, and olive oil. Let it hang out while you prep the other stuff.

    Raw chicken being tossed with spices in a bowl.

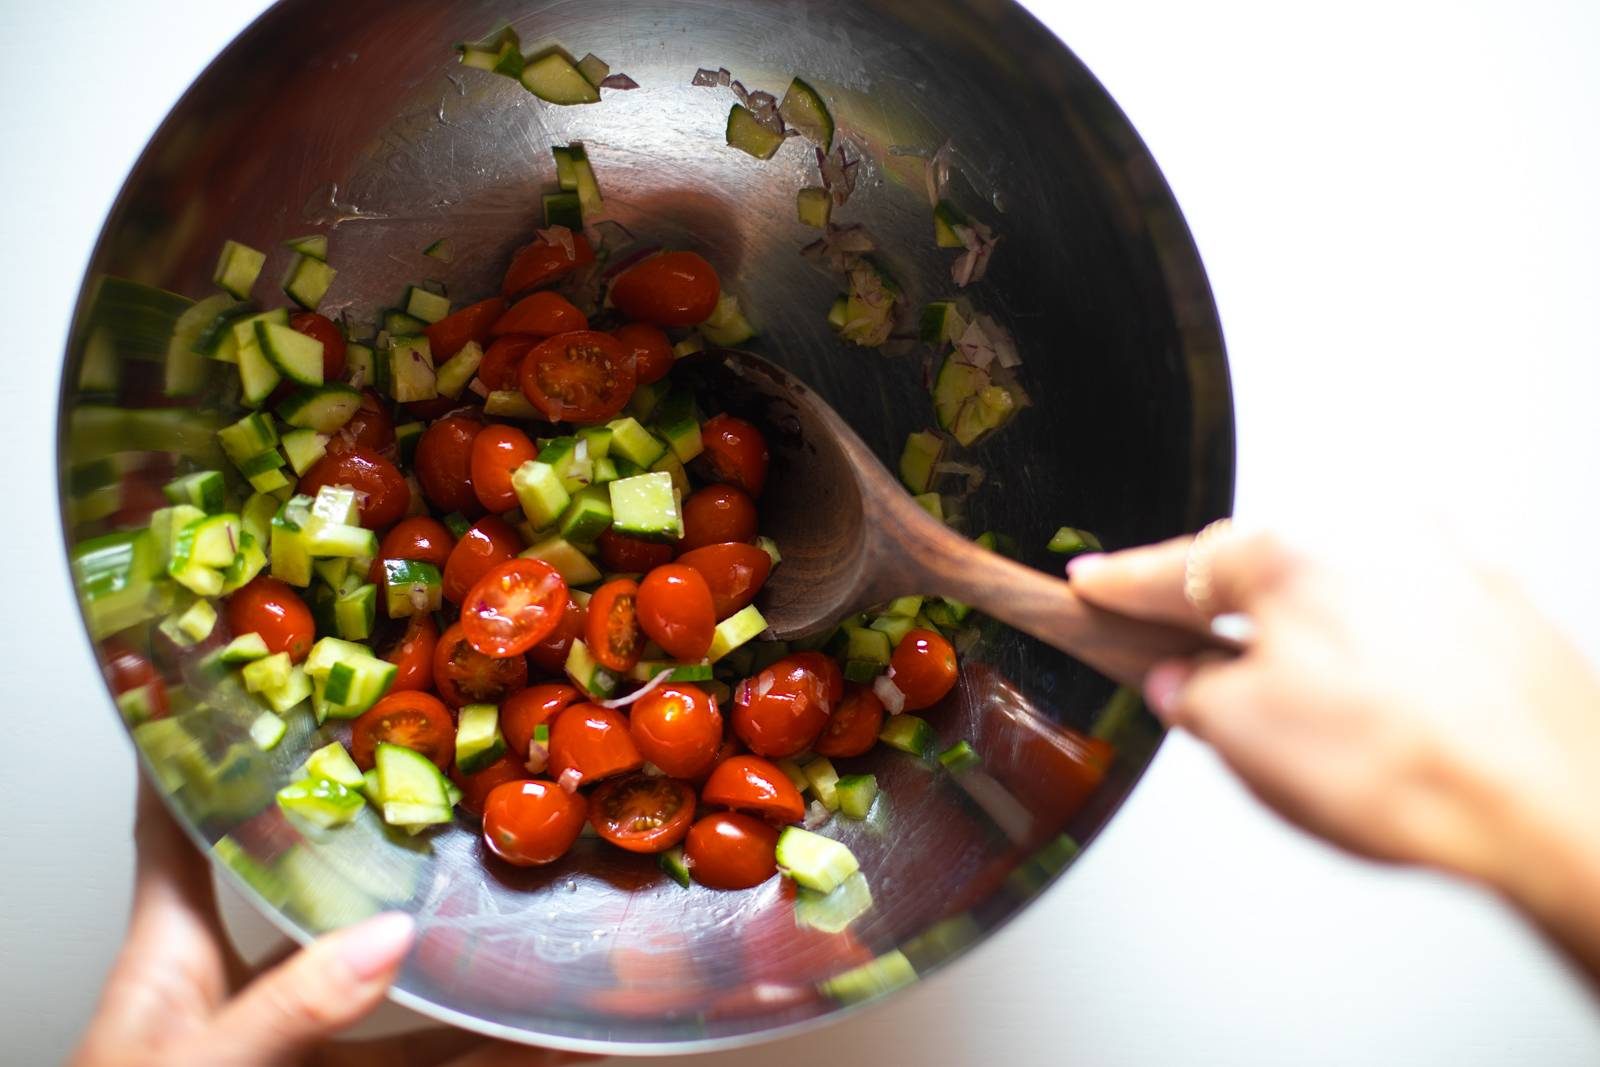
    Step 2: Make a Cucumber Tomato Salad

    Cucumbers, tomatoes, red onion, and a tiny bit of olive oil, salt, and vinegar.

    Cucumber and tomato salad being tossed in a bowl.

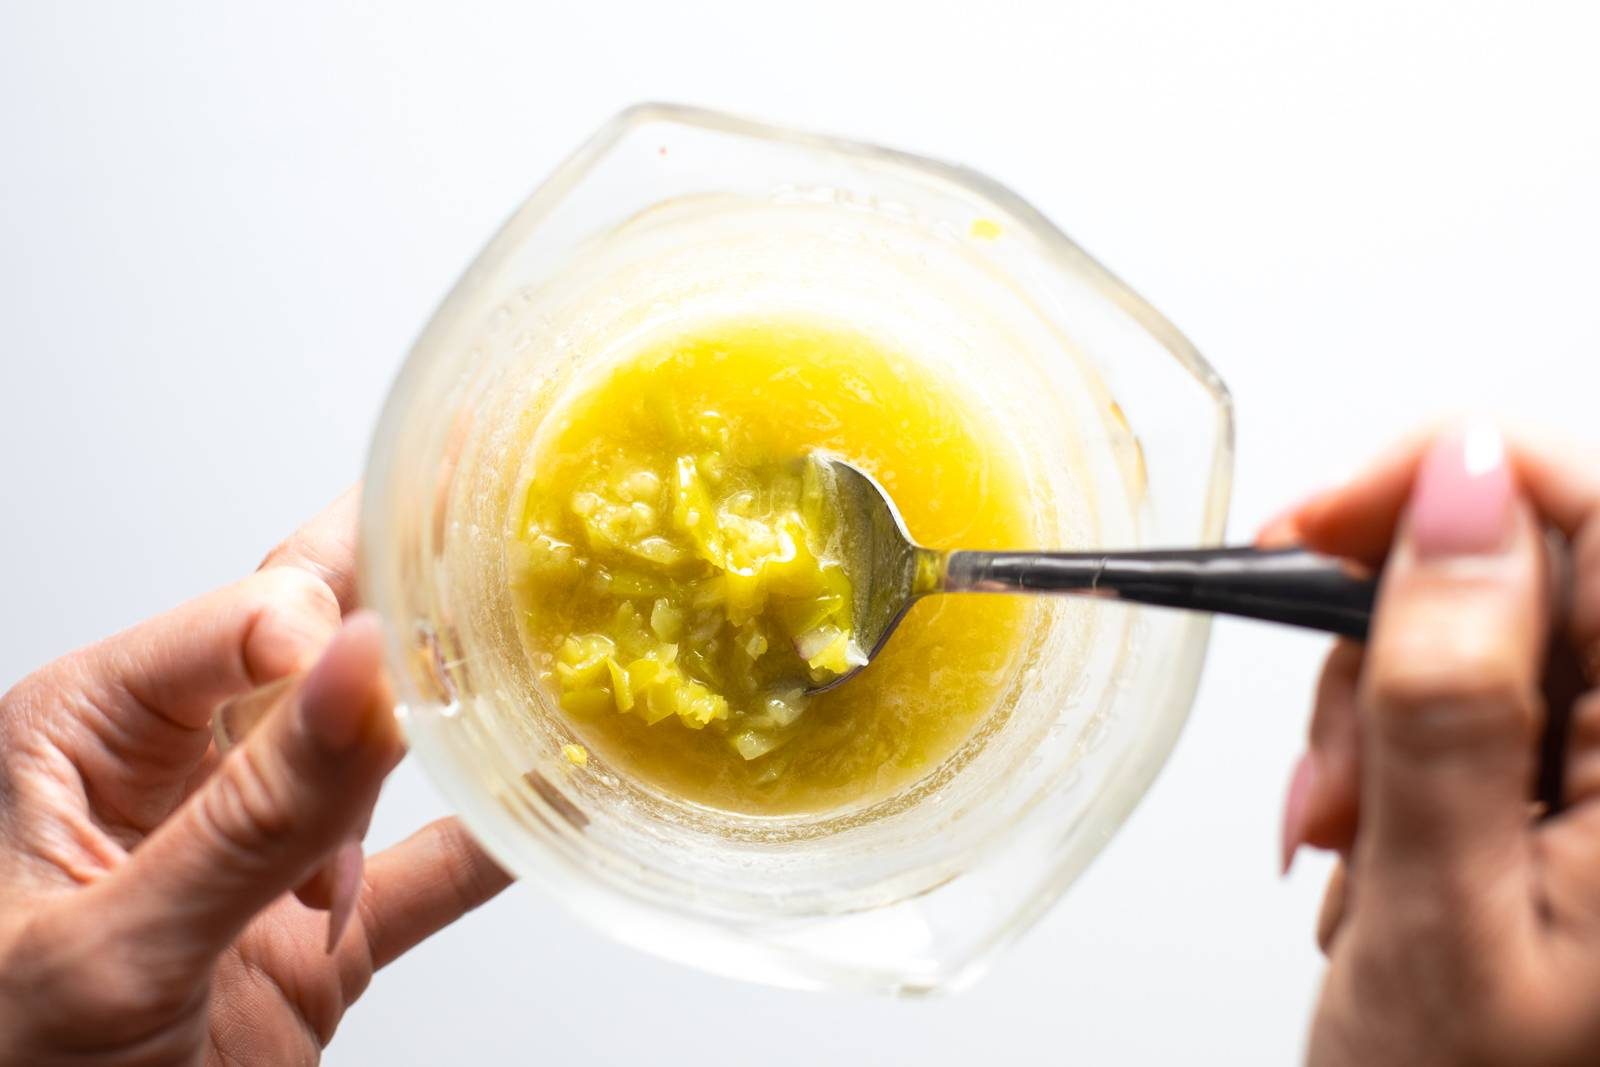
    Step 3: Make Pepperoncini Garlic Butter Sauce

    Garlic, melted butter, pepperoncini brine, and some pepperoncini peppers get mixed up to make a sauce.

    White hand mixing up pepperoncini butter

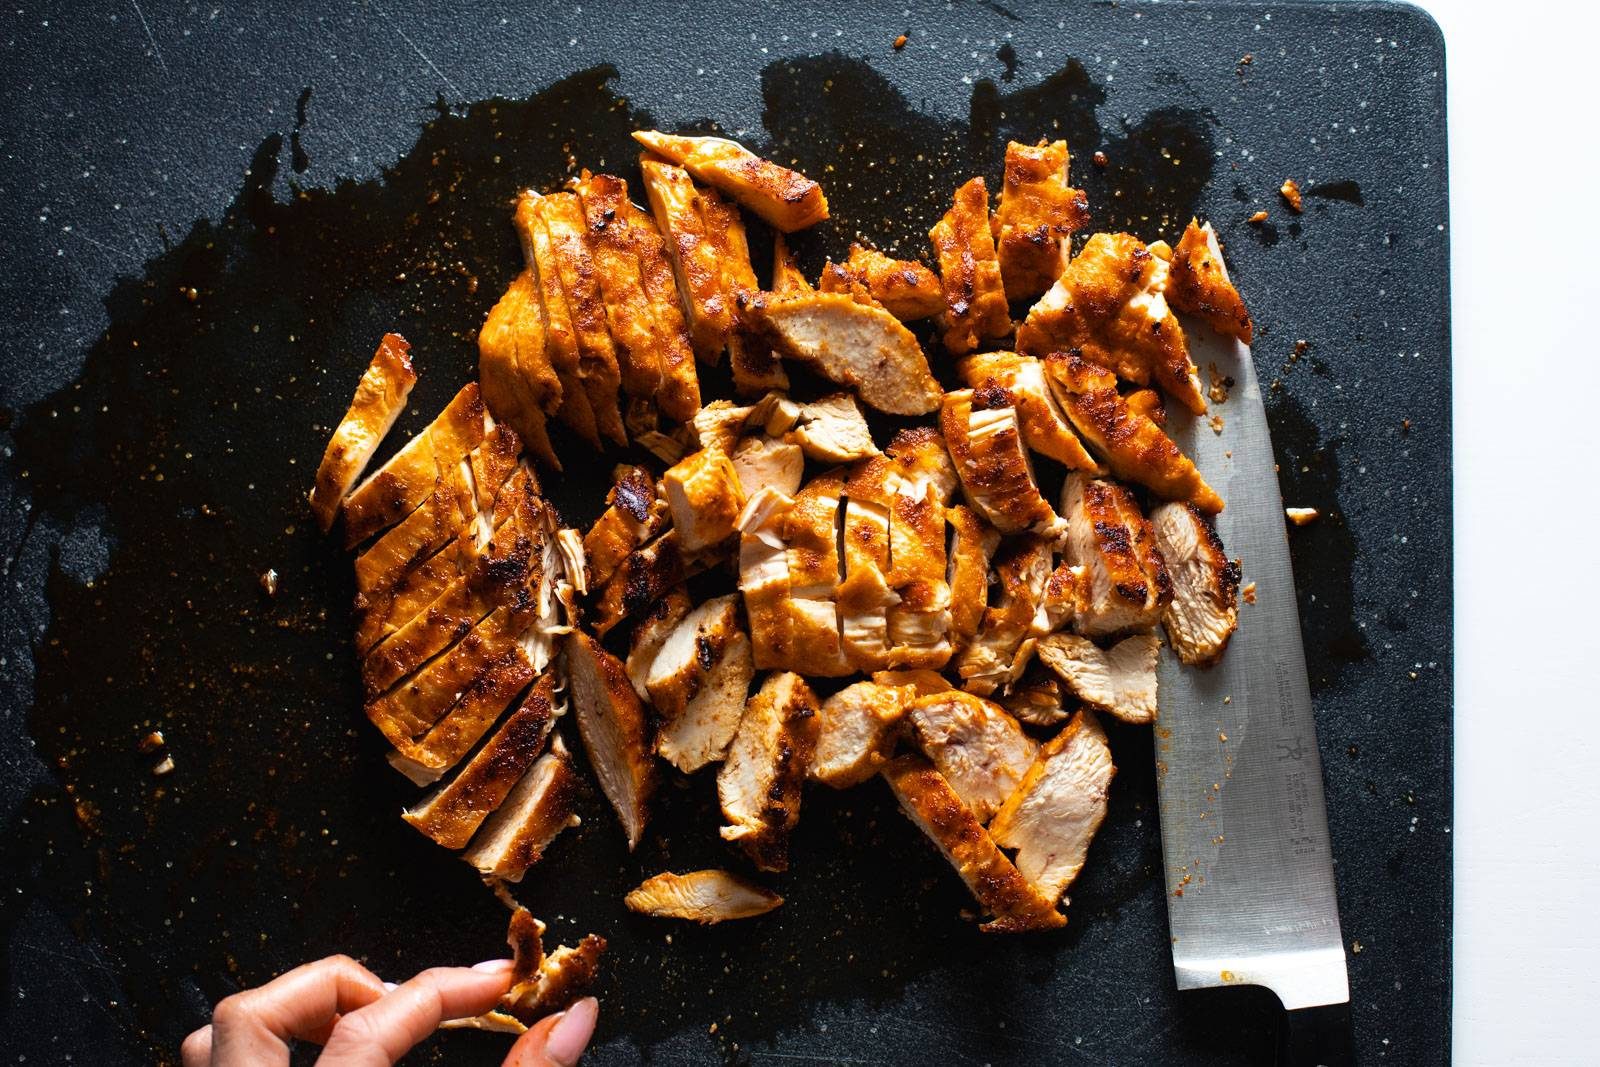
    Step 4: Grill the Chicken

    I usually use a grill pan because I’m too lazy to get my grill out. But an actual grill (or a regular skillet) will work perfectly.

    Grilled chicken chopped up on a cutting board

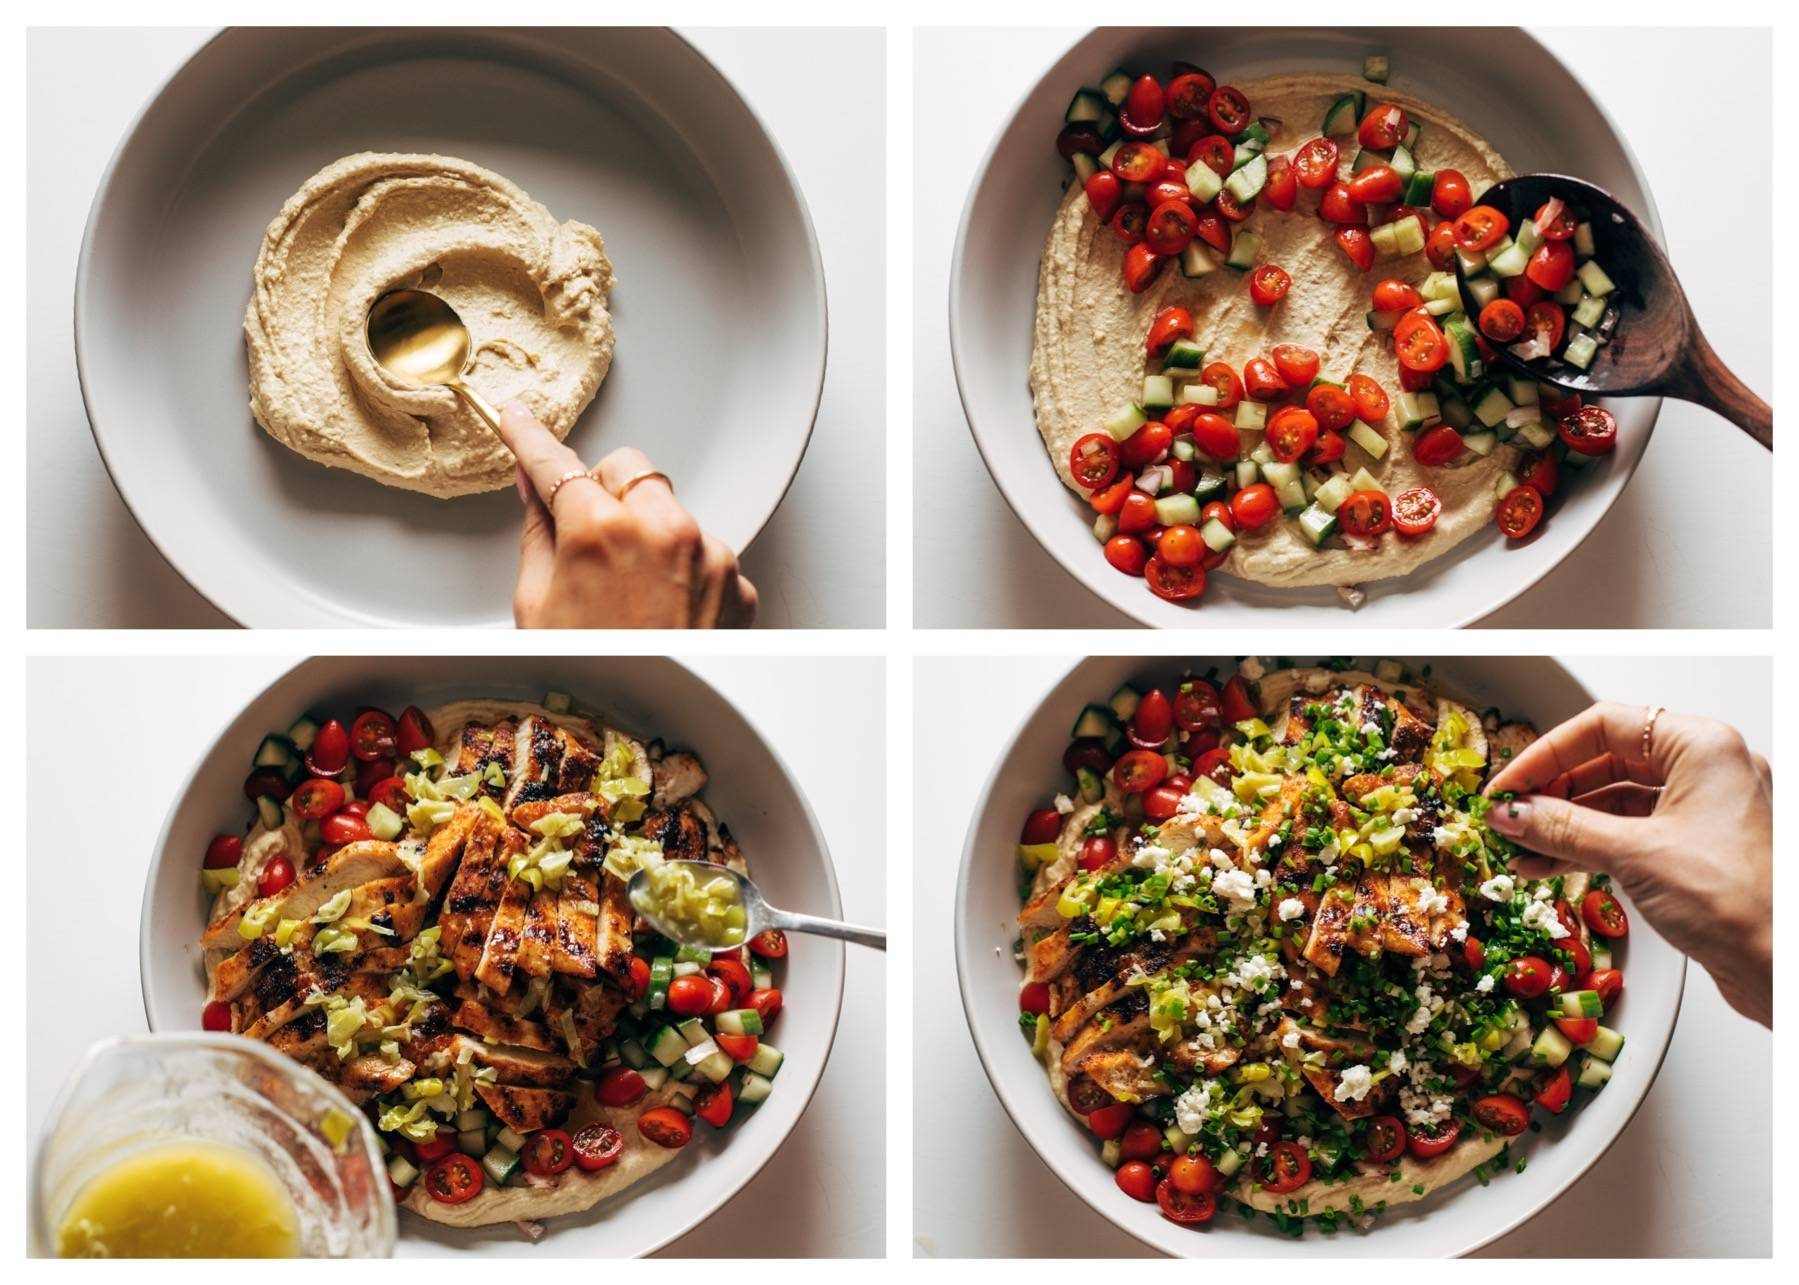
    Step 5: Assemble

    This is the fun part! Hummus goes first, then tomato cucumber salad, then chicken and sauce.

    Finish it off with feta and chives!

    Collage of the pepperoncini chicken platter being built in steps

    Lindsay’s Notes

    Grilled marinated chicken, tomato cucumber salad, feta, hummus, and a pepperoncini garlic butter sauce. OH BABY, I love this recipe!

    I got the idea for this from Sara Tane – got to her site randomly via Threads (okay Threads! coming in clutch with recipe inspo!) and immediately knew it was going to be a banger.

    This particular grilled marinated chicken is so simple (just dry spices and olive oil) and yet somehow so good. I honestly think the biggest challenge of this recipe is trying not to eat all of the chicken before it makes its way onto the plate.

    And as if that wasn’t enough, get it all laced up with some freshly grated garlic, melted butter, and pepperoncini brine and you’ve got one killer combo.

    White hand holding platter of pepperoncini chicken

    Watch How To Make This Grilled Chicken with Pepperoncini


    Print

    clock clock iconcutlery cutlery iconflag flag iconfolder folder iconinstagram instagram iconpinterest pinterest iconfacebook facebook iconprint print iconsquares squares iconheart heart iconheart solid heart solid icon

    Description

    This is such a fun one! Grilled marinated chicken, a quick tomato cucumber salad, tangy bits of feta, and a zippy pepperoncini garlic butter sauce poured over the whole thing.


    Grilled Chicken: 

    Pepperoncini Butter Sauce:

    Cucumber Salad:

    Extras:


    1. Marinate the Chicken: Place the chicken, spices, and olive oil together in a large bowl or plastic bag. Mix until well-coated; set aside in the fridge while you prep the other elements (30 minutes up to several hours).
    2. Make the Cucumber Salad: Toss veggies with a small amount of salt, pepper, olive oil, and vinegar. (If you add too much it becomes watery, so use a light hand!)
    3. Make the Pepperoncini Butter Sauce: Melt the butter (I just do this in the microwave). Stir in the garlic, brine, and pepperoncini pieces. Set aside.
    4. Grill the Chicken: Using a grill, grill pan, or skillet, cook the chicken until cooked through and golden brown on both sides. If you have a meat thermometer, I highly recommend using it so you don’t overcook the chicken! We’re looking for 160 degrees. Let it rest for a moment, then cut into slices.
    5. Assemble: If you want to serve it as a family-style meal – layer the hummus on a large platter. Add the cucumber salad in 3-4 little mounds around the outside of the plate. Add the chicken right in the middle and drizzle with the pepperoncini butter sauce. Add feta, chives, and s&p to finish. Scoop onto plates or dip into the whole thing with pita bread. SO good!

    Notes

    The garlic butter will start to congeal as it rests, so I would suggest warming that right before serving (if it’s been sitting out for a while) so it’s nice and silky, and then enjoying the whole thing while the butter and chicken are still warm for best mouthfeel! *texture nerd smile*

    Nutrition facts do not include extras. 

    For tips on how to cook chicken, see our guide here!

    • Prep Time: 20 minutes
    • Cook Time: 15 minutes
    • Category: Dinner
    • Method: Grill
    • Cuisine: Mediterranean-Inspired

    Keywords: pepperoncini chicken, grilled chicken, garlic butter pepperoncini sauce

    Frequently Asked Questions For Grilled Chicken with Pepperoncini Garlic Butter

    What can I use instead of chicken?

    Shrimp would be awesome!

    How do you serve this?

    As written, the recipe will serve like a family-style platter! It is a gloriously beautiful thing to set down on a table for a group meal. I put scoops of everything on individual plates and we dip into it with bread and eat it with forks. For individual servings, I would do the same thing, but just layer it onto a plate with amounts for one person.

    What else would you serve with this?

    To me, this is a complete meal! Veggies, protein, carbs, fiber, and FLAVOR! But if you wanted to throw something else on the table to round it out even more, this bistro salad would be amazing with all the fresh herbs in there! Yum. And of course, the simple green salad never fails me. We make it weekly!

    How long do the leftovers last?

    The chicken will last for 2-3 days in the fridge. If you’re making this for meal prep, I would suggest storing each element separately until just before serving so it doesn’t all get soggy in the hummus.

    Can you make this vegetarian / meatless?

    Yes! I think cauliflower would be delicious – just coat the cauliflower florets with the same spices that are written here and roast at 425 for 20 minutes or so.

    How do you make this gluten-free and/or dairy-free?

    This recipe is naturally gluten-free! To make this dairy free, omit the feta cheese and use vegan butter.

    Three More Of My Favorite Chicken Recipes

    Source link

  • Easy Teriyaki Chicken Recipe

    Easy Teriyaki Chicken Recipe

    We’re confident that this recipe guarantees some of the best teriyaki chicken you’ll ever make at home!

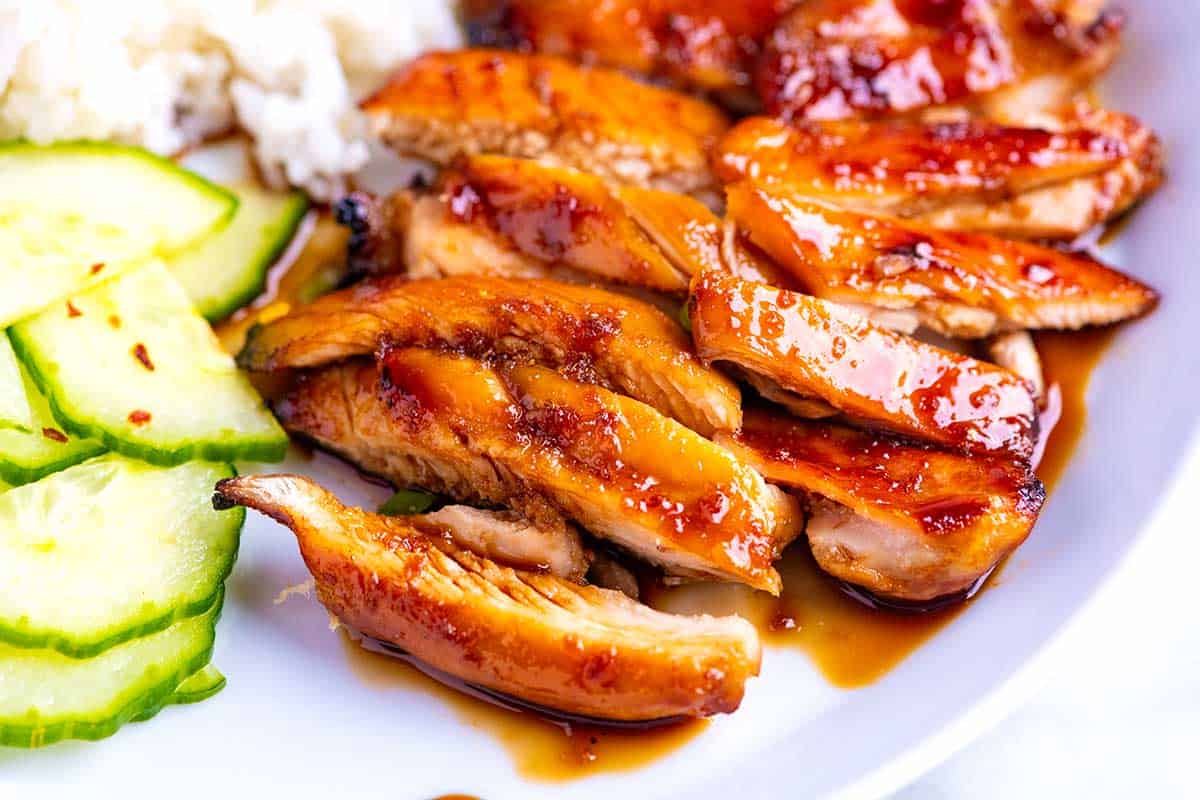
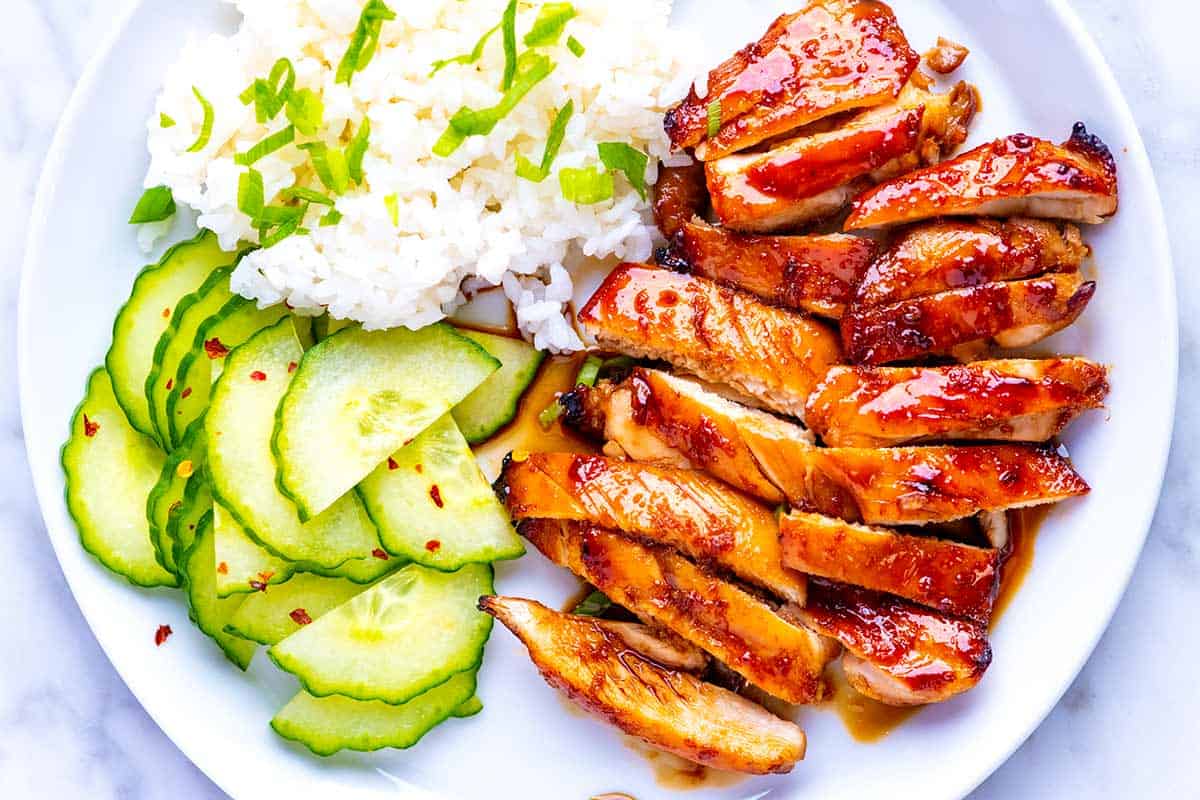
    Teriyaki chicken on a plate

    Our family used to live in Seattle next to some amazing teriyaki restaurants. We wanted to recreate that authentic flavor using simple, readily available ingredients.

    We use our favorite homemade teriyaki sauce for this dish. It’s made with five simple ingredients and lasts weeks in the fridge. I love serving this over rice with cucumbers tossed in vinegar, but our cilantro lime rice or coconut rice would also be excellent.

    Key Ingredients

    • Chicken: I love boneless, skinless chicken thighs for this recipe since they stay tender but cook quickly. They also soak up the teriyaki flavor beautifully! Skin-on chicken thighs would also be great if you prefer. Chicken breasts are also fine, but as with many of our chicken recipes, I love thighs!
    • Low-Sodium Soy Sauce: I use low-sodium soy sauce as the base of my sauce. It might seem salty at first, but trust me. It’ll blend beautifully with the other ingredients to create a perfectly balanced teriyaki flavor. You can substitute with light tamari with no changes.
    • Sugar: Granulated sugar balances the soy sauce and makes the teriyaki sauce thick and glossy when cooked. Feel free to experiment with brown sugar, coconut sugar, or even honey, but remember that these might make the sauce taste sweeter. If you love honey, you may enjoy this honey teriyaki chicken!
    • Sake: Don’t stress about buying expensive sake for teriyaki sauce! Use something you’d enjoy drinking. If you can’t find sake, mirin (a sweeter rice wine) works well too. You can swap it in directly or slightly reduce the sugar in the recipe.
    • Rice Vinegar: This adds a little zing to the sauce. You can usually find it near other vinegars at the grocery store. For substitutes, try white wine vinegar or plain white vinegar. Don’t worry if the sauce seems a bit strong after adding the vinegar, the flavors will mellow as it cooks.
    • Fresh Ginger (optional): I like to grate fresh ginger finely so it melts into the sauce. Ginger adds a bright, spicy note that complements the other flavors beautifully.

    Find the full recipe with measurements below.

    How to Make the Best Teriyaki Chicken

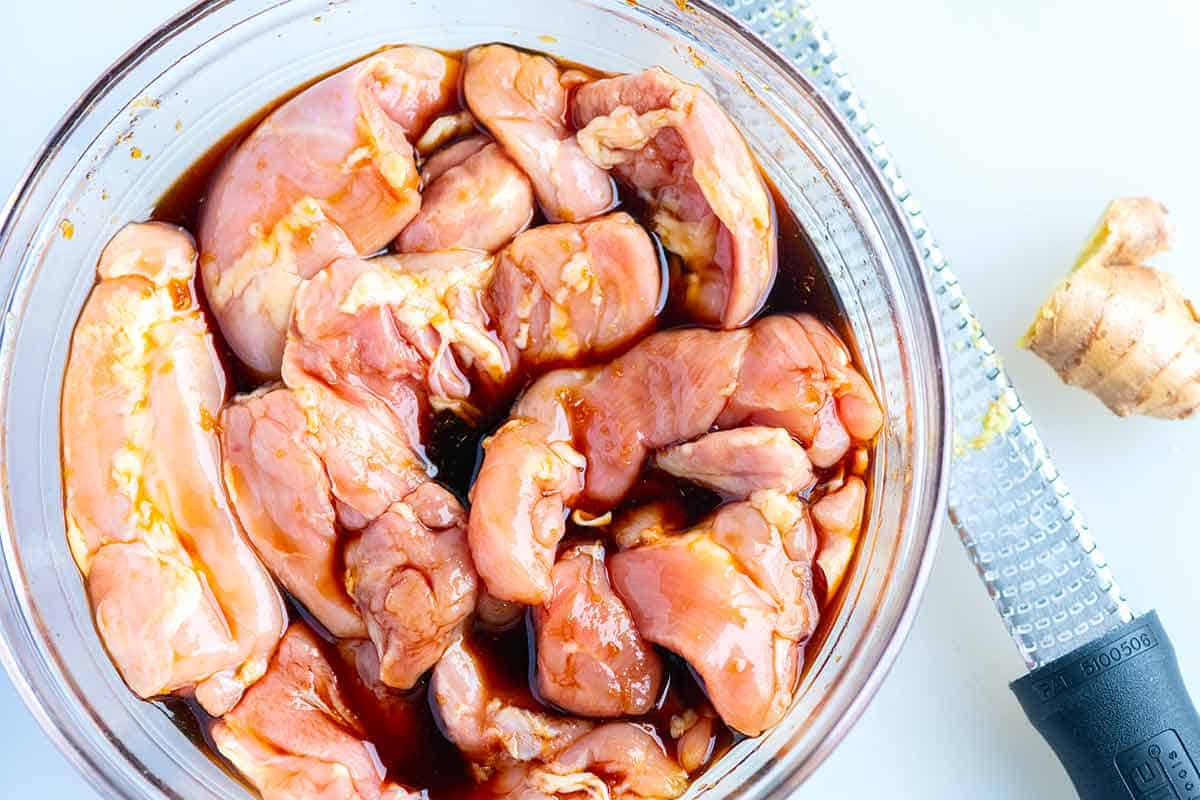
    Tip 1: Use our homemade sauce. The first step to making chicken teriyaki is making our homemade teriyaki sauce. Then, use some of it to marinate the chicken and reduce the rest until it is thick and glossy, which you spoon over as a glaze later. Marinate your chicken for as long as possible (up to 12 hours). Thirty minutes will do, but longer is always better.

    Marinating the chicken

    Tip 2: Broil your chicken. Teriyaki chicken is often cooked on a grill, imparting a smoky char. While you could certainly use an outdoor grill for this recipe, we wanted to make it possible to achieve delicious results indoors. So we use our oven’s broiler! Think of it as an upside-down grill, providing intense heat from above.

    1. Position an oven rack towards the top of your oven, about six inches from the burner.
    2. Put the marinated chicken on a baking sheet and place it under the broiler.
    3. Broil the chicken until it is beautifully browned and starting to firm up, then flip and continue broiling until cooked through.
    4. Stay close to make sure the chicken isn’t burning or smoking too much. You can also spoon or brush extra sauce over the chicken as it cooks, transforming the sauce into a shiny glaze.
    Broiled chicken for teriyaki chicken

    More Chicken Recipes

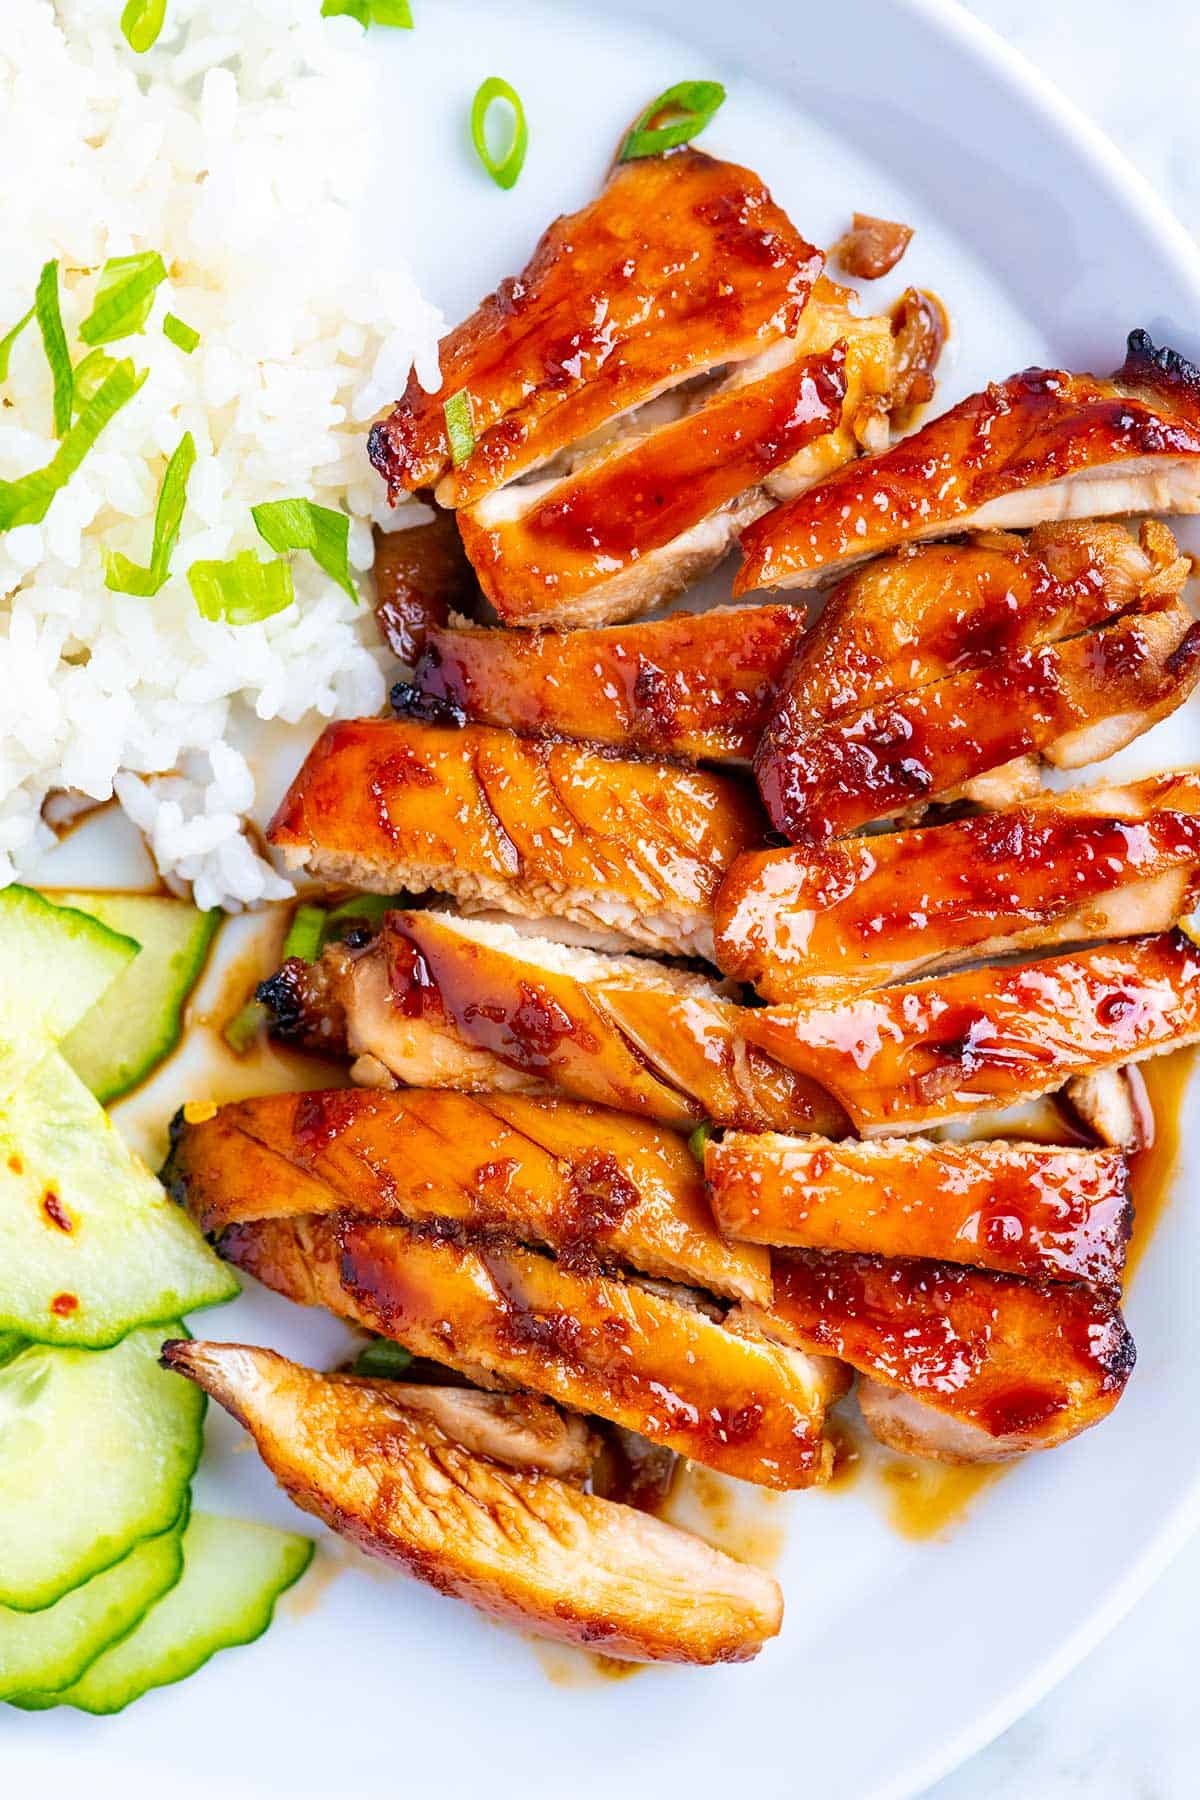
    Homemade Teriyaki Chicken

    Easy Teriyaki Chicken

    • PREP
    • COOK
    • TOTAL

    This easy homemade teriyaki chicken recipe rivals my favorite teriyaki restaurants. The chicken is best when marinated for a while, but you can get away with a shorter marinating period if you’re short on time.

    In our recipe, we’ve shared the ingredients to make one batch of teriyaki sauce, perfect for 1 ½ pounds of chicken. We highly recommend making a larger batch of sauce (it’s that good). You can find the instructions for a larger batch in our teriyaki sauce recipe, which makes 2 cups and provides enough sauce for two batches of chicken.

    4 Servings

    You Will Need

    1 ½ pounds boneless, skinless chicken thighs

    1/2 cup (120ml) light soy sauce

    1/2 cup (100g) granulated sugar

    1/4 cup (60ml) sake, see tips

    2 tablespoons (30ml) rice vinegar

    2 teaspoons finely grated ginger, see tips

    Directions

    • Marinate the Chicken
    • 1Combine the soy sauce, sugar, sake, vinegar, and ginger in a small bowl. Stir until the sugar completely dissolves. Transfer 6 tablespoons of the sauce to a resealable plastic bag or container and add the chicken. Marinate the chicken in the refrigerator, turning once, for at least 30 minutes and up to 12 hours.

      2Add the remaining sauce to a small saucepan over medium heat. Bring it to a simmer and cook until the sauce reduces slightly and looks shiny, 3 to 5 minutes. If it reduces too much, add a bit of water to bring it back to a pourable consistency. Cool, and then save this in the refrigerator to use as a sauce for the cooked chicken.

    • Cook the Chicken
    • 1Position an oven rack towards the top, about 6 inches from the broiler. Heat the broiler to high.

      2Line a baking sheet with foil, then arrange the chicken so that the side that would have had skin faces down. Spoon a bit of the marinade with the chicken on top and discard the rest. Broil for 5 minutes. Stay close to the oven to keep an eye on the chicken as it cooks.

      3Flip the chicken, and then spoon or brush juices or sauce pooling on the pan back onto the chicken. Doing this a few times during cooking helps to add a shiny, browned crust to the chicken. Alternatively, you can steal some of the sauce saved for serving to spoon or brush over the chicken.

      4Broil another 5 to 10 minutes or until the outside of the chicken looks brown and caramelized and the inside is cooked through.

      5Meanwhile, reheat the sauce from earlier, adding a bit of water if it seems too thick. (This is the sauce that has not touched raw chicken, not the sauce used to marinate.)

      6To serve, slice the chicken into strips, place onto plates, and drizzle with the warmed sauce. Leftover sauce can be stored in the refrigerator for a few weeks (I like drizzling it over rice and vegetables.)

    Adam and Joanne’s Tips

    • Storing: Keep chicken teriyaki in an airtight container for up to 4 days.
    • Leftover sauce: The reduced teriyaki sauce (not sauce that’s sat with raw chicken) can be stored in the refrigerator for a few weeks. I like drizzling it over rice and vegetables.
    • Broiling the chicken: Depending on your oven, broil times may differ. Keep an eye on the chicken. Move the sheet pan down a rack if it looks like or smells like it is burning. If the chicken is cooking slower than expected, continue to broil until cooked through.
    • Use a grill pan: If you don’t have a broiler an outdoor grill or a grill pan on the stovetop are excellent alternatives. You can also bake the chicken, but you won’t get the same glazed look. That’s okay, though, because the flavor will still be incredible!
    • Ginger: We use a Microplane rasp grater, which helps the ginger to “melt” into the sauce. You can finely mince, but you will be left with bits of ginger in the sauce.
    • Substitute for Sake: We love the delicate flavor of sake for teriyaki sauce, but if you cannot find it, there are some alternatives. Mirin is a sweeter version of sake. You can either swap it for the sake and leave the sugar amount as is or pull back on the amount of sugar slightly to accommodate the extra sweetness. Dry vermouth or dry sherry can also work as a substitute. As a last resort, you can leave it out altogether, but keep in mind that this will change the taste of the sauce dramatically (taste the sauce before using it as you may find that without sake/mirin, you will need to adjust with additional vinegar or sugar).
    • Gluten-free: Check that all ingredients are certified gluten-free before using. Specifically, watch out for the soy sauce. You should look for gluten-free tamari.
    • The nutrition facts provided below are estimates. You will likely have leftover sauce, so the actual nutritional data may be less.

    Nutrition Per Serving
    Serving Size
    1/4 of the recipe (about 1 1/2 medium thighs)
    /
    Calories
    370
    /
    Total Fat
    7.1g
    /
    Saturated Fat
    1.9g
    /
    Cholesterol
    159.8mg
    /
    Sodium
    1000.9mg
    /
    Total Carbohydrate
    30.9g
    /
    Dietary Fiber
    0g
    /
    Total Sugars
    26.6g
    /
    Protein
    36g


    AUTHOR:

    Joanne Gallagher

    Adam and Joanne of Inspired Taste

    We are Adam and Joanne Gallagher, the creators of Inspired Taste. Established in 2009, Inspired Taste grew from a childhood dream into one of the internet’s most trusted recipe sites with hundreds of reliable recipes, step-by-step videos, and expert tips.More About Us

    Previous Post: Easy Taco Soup
    Next Post: Easy Tomato Broth

    Source link