Tag: Chicken

  • How to Make the Best Chicken Stock

    How to Make the Best Chicken Stock

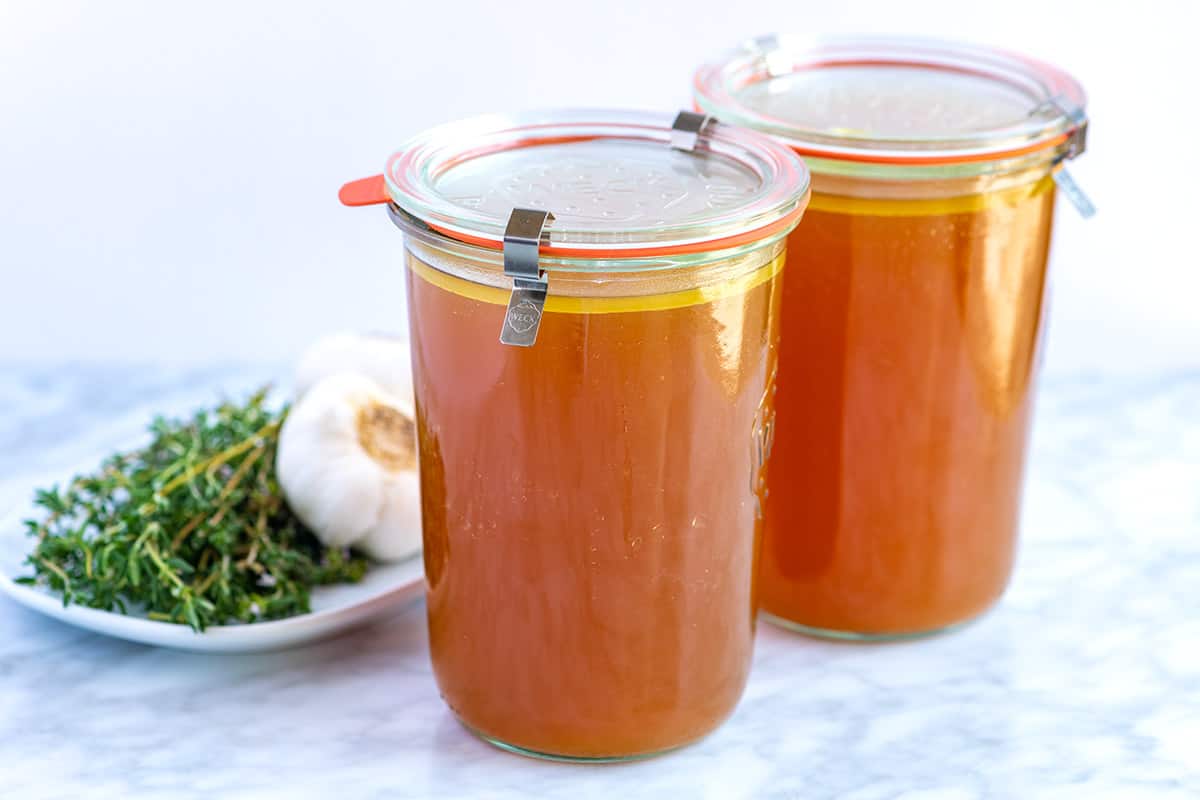
    My favorite homemade chicken stock recipe will knock the socks off of anything you buy at the store. You can use chicken bones or chicken parts for this easy recipe.
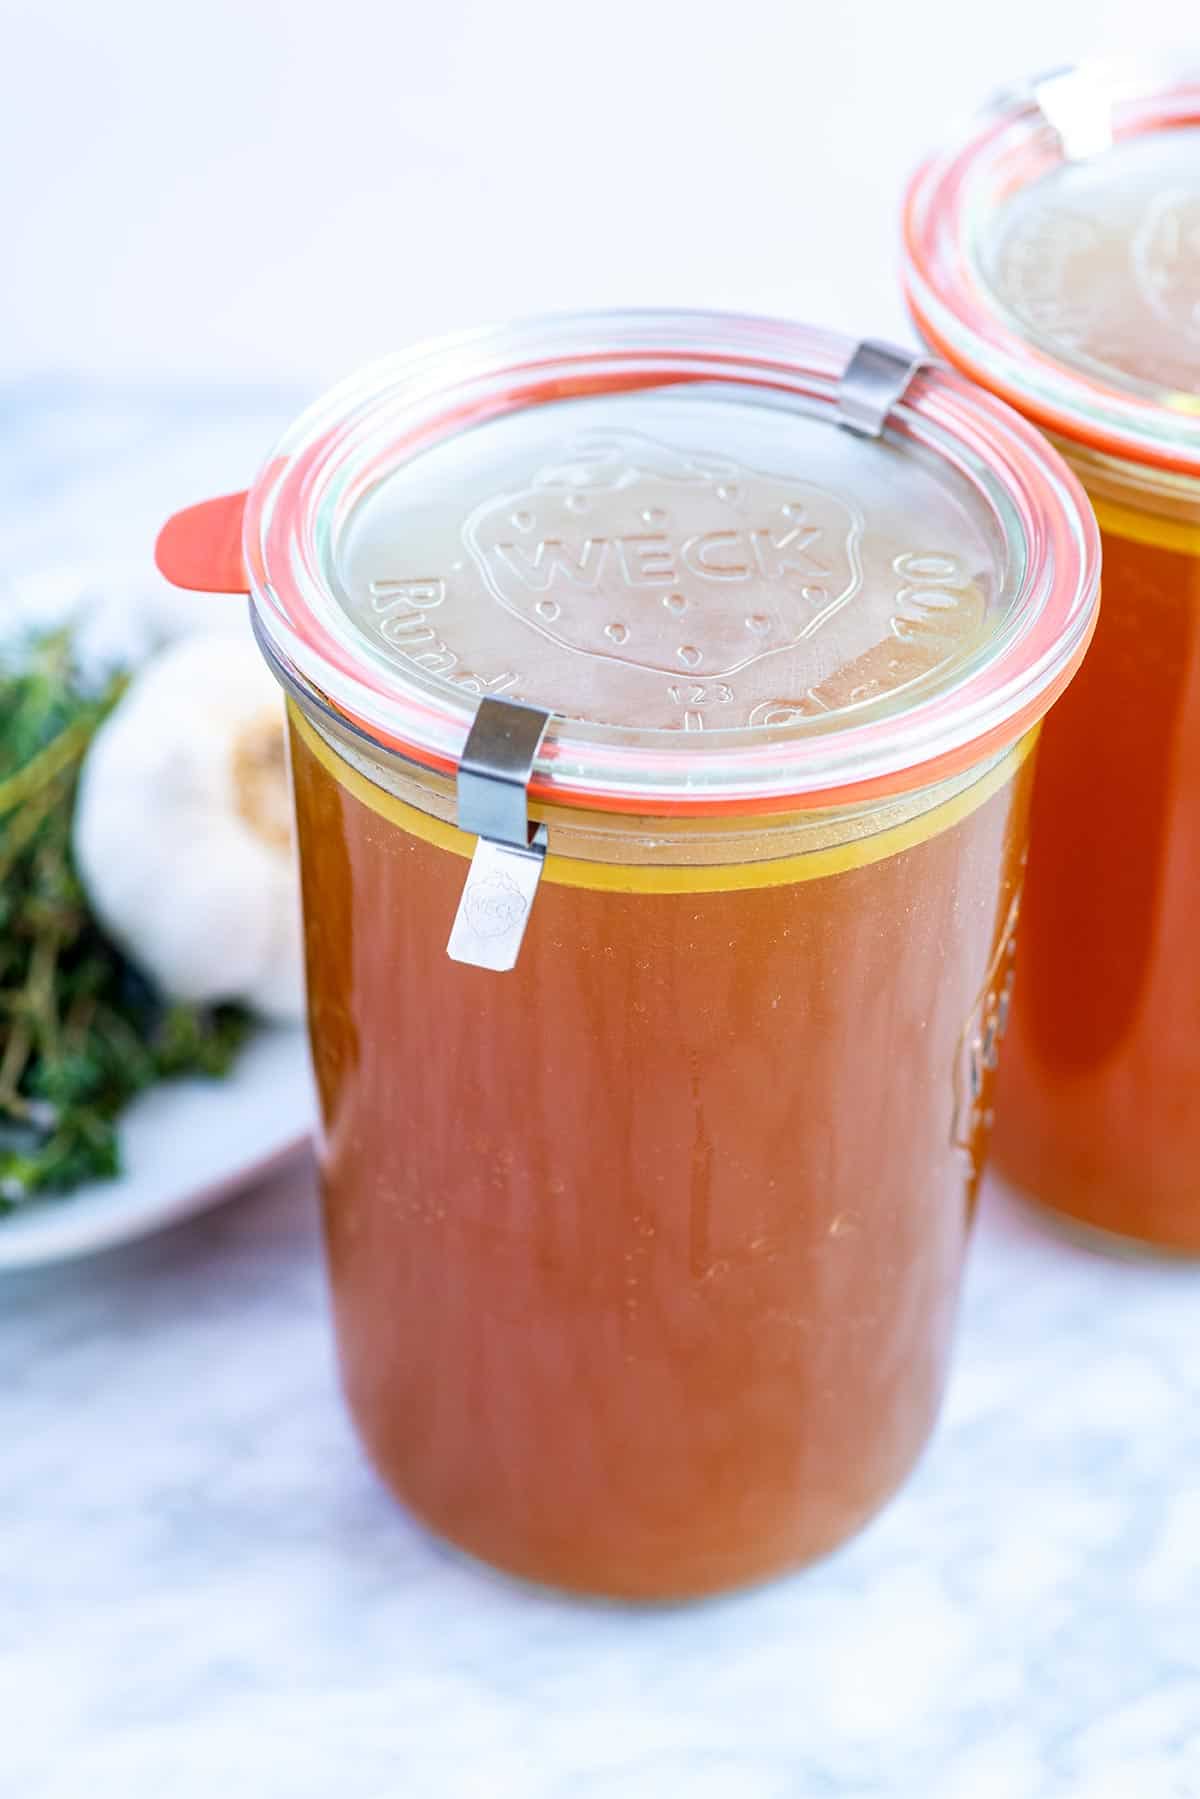
    Homemade chicken stock

    Not only does this chicken stock taste better than the box, but it is also easy to make and lasts in the freezer for up to 3 months. I especially love making chicken stock after making our roasted chicken.

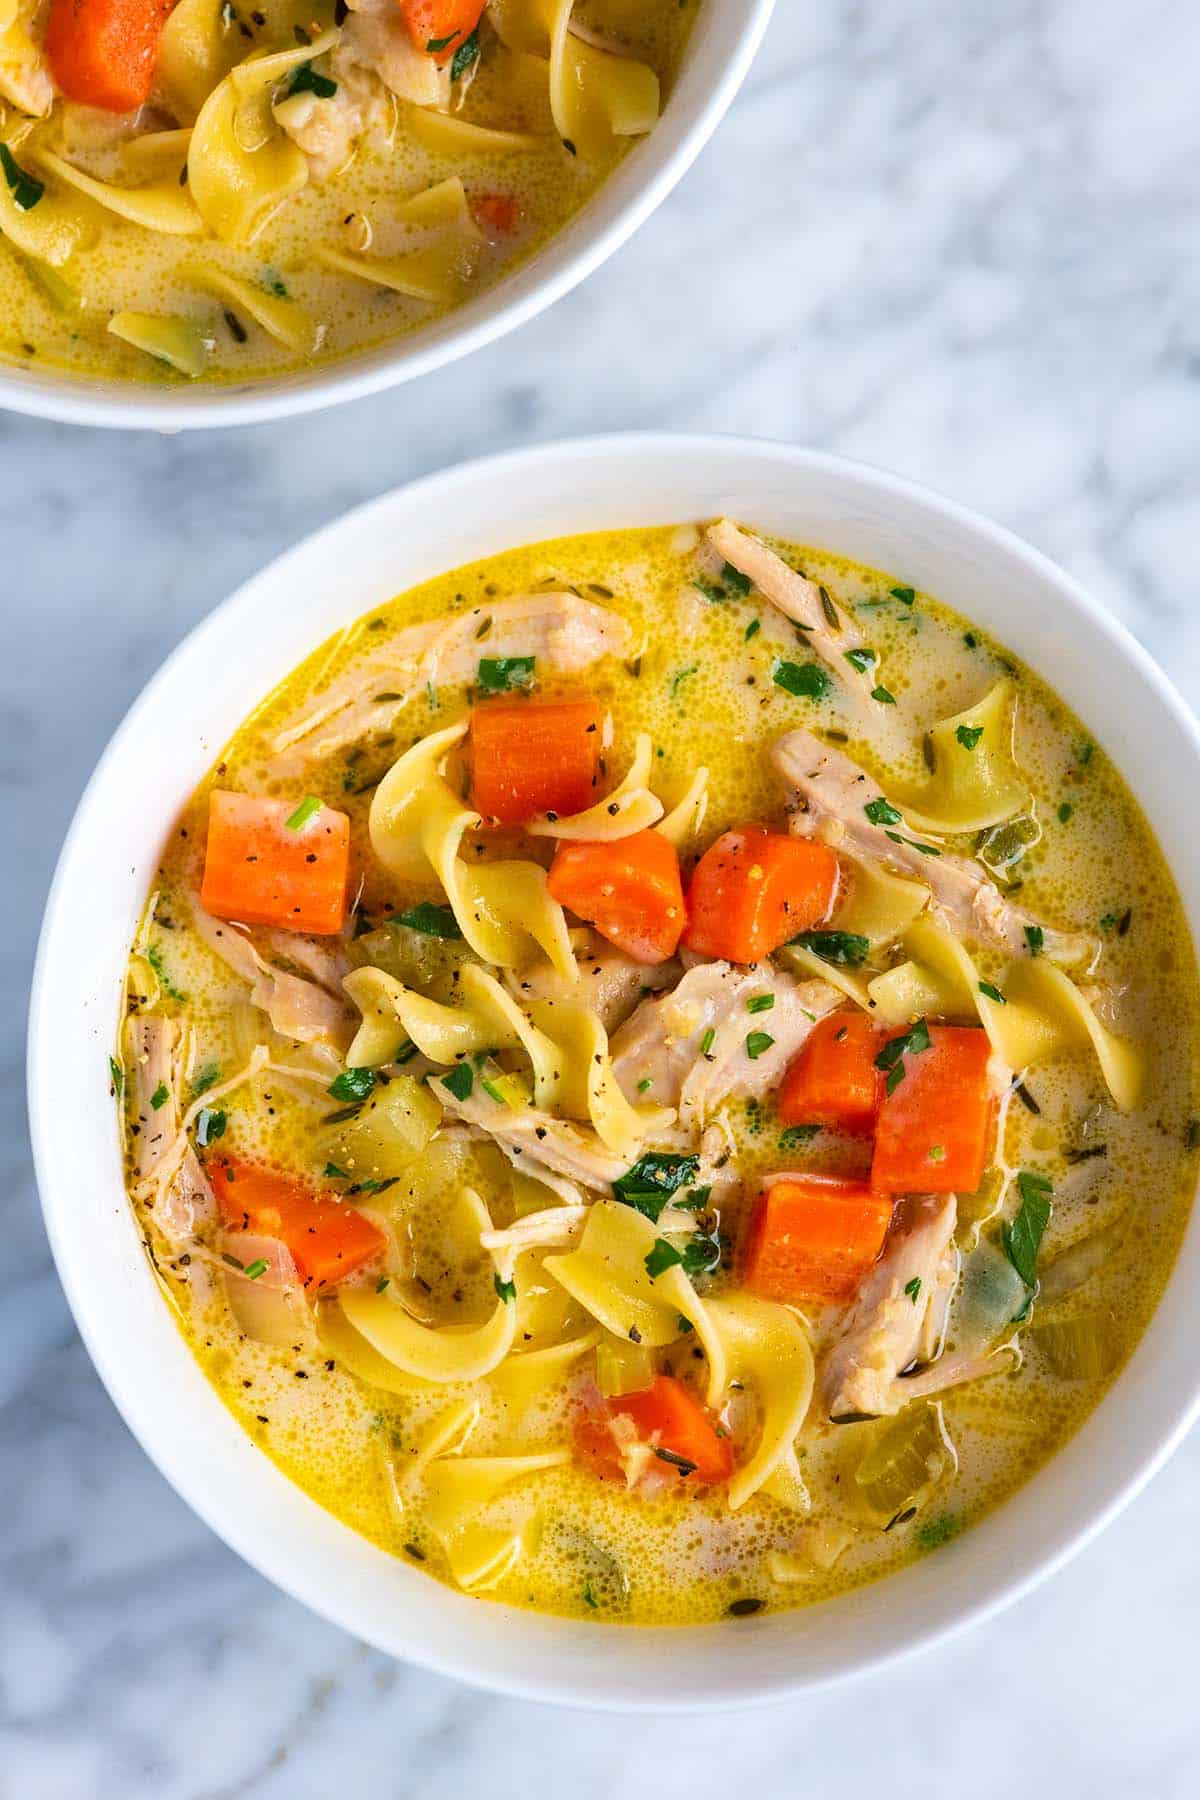
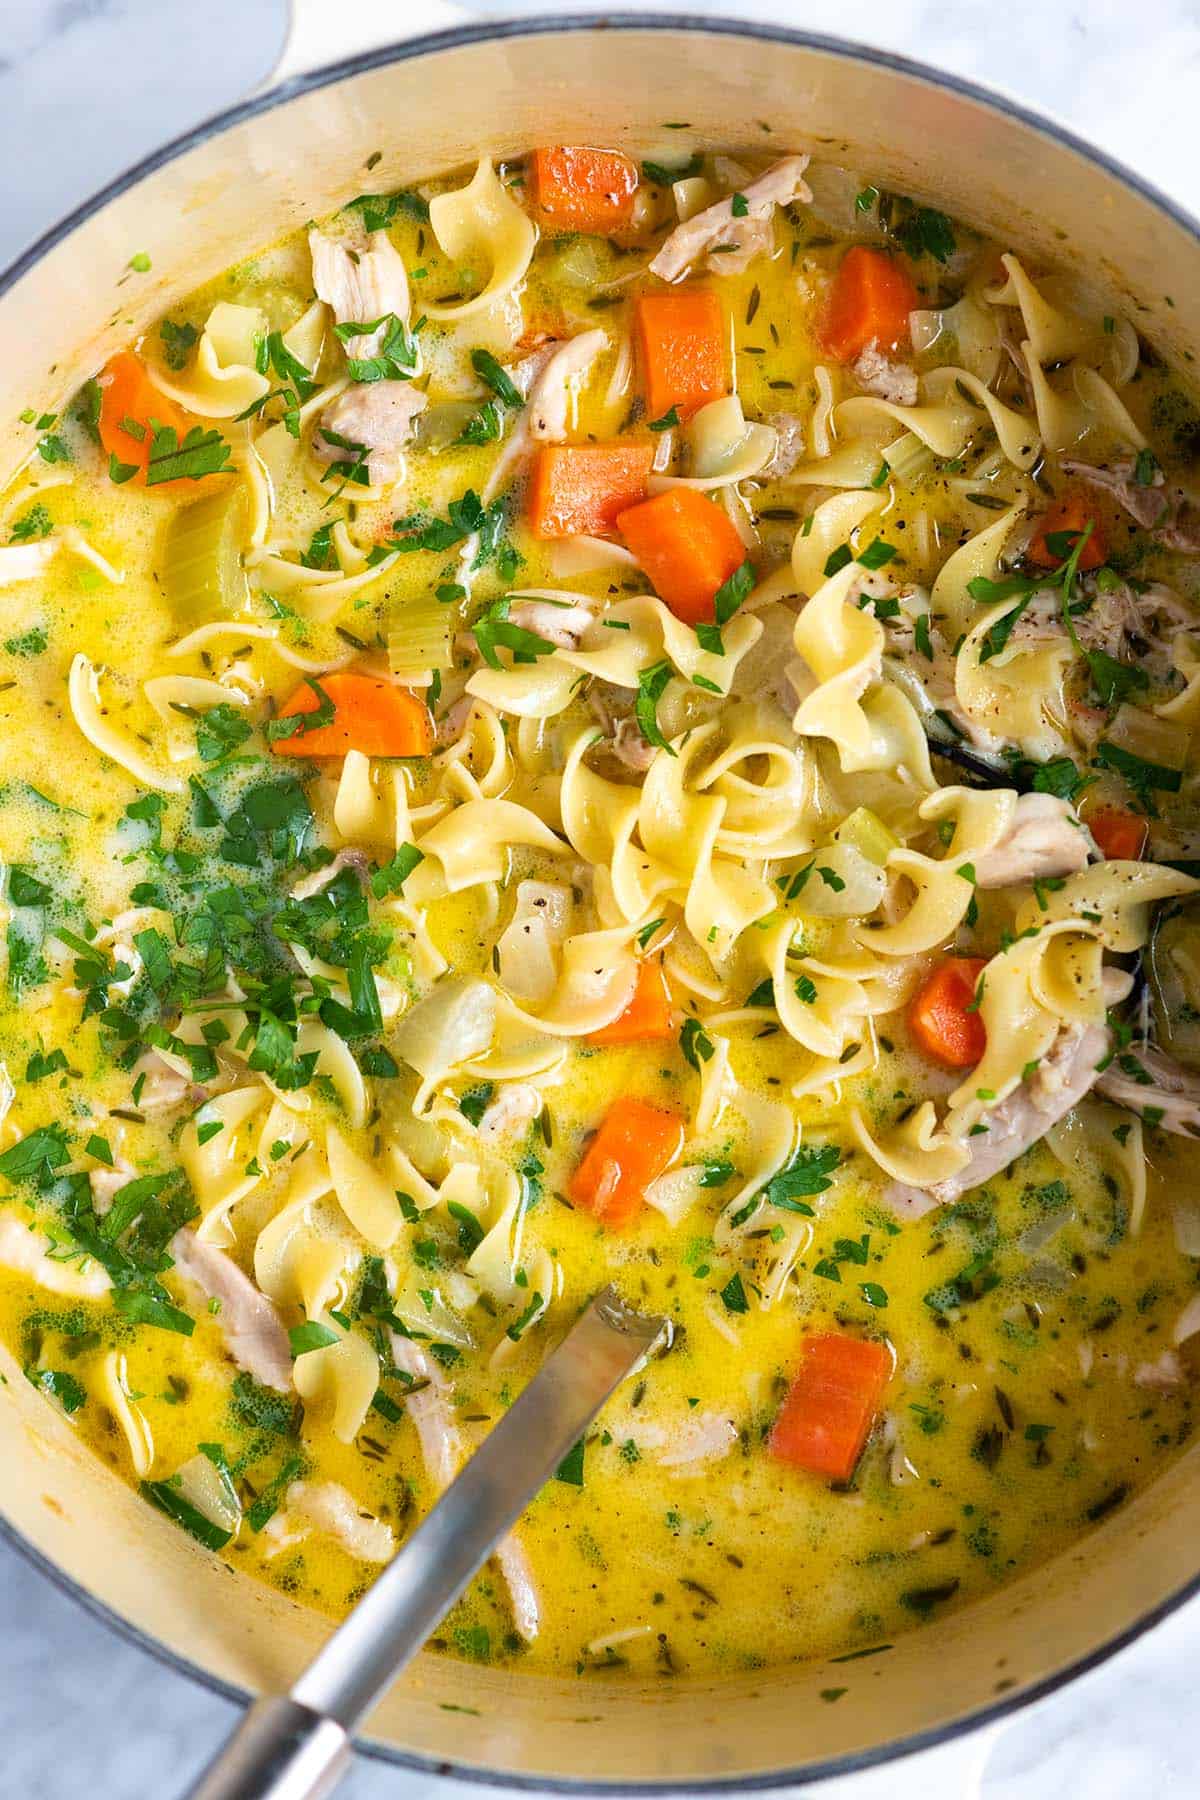
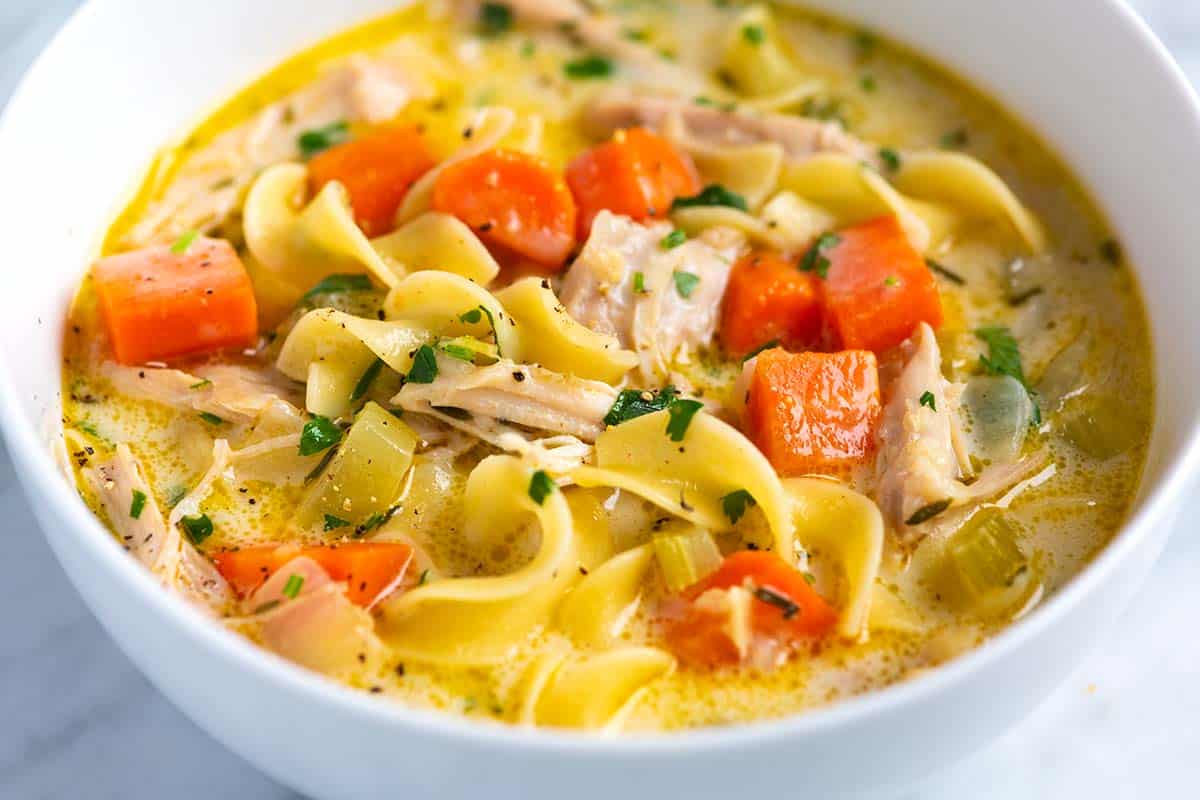
    I use this chicken stock to make many of the soup recipes on Inspired Taste, including our highly-rated chicken noodle soup! For a more delicately flavored broth, see my easy chicken broth, or for richer flavor, try our homemade bone broth.

    Key Ingredients

    • Chicken parts: Make this recipe using chicken parts or leftover bones (say from roasted chicken or a rotisserie chicken). My favorite way to make chicken stock is using chicken wings. They are inexpensive and have lots of cartilage and connective tissue, which are rich in collagen. As they simmer in the stock, the collagen breaks down into gelatin, giving our chicken stock a rich flavor and silky texture.
    • Aromatics: For classic chicken stock, use onion, carrots, celery, and garlic.
    • Herbs: Using a variety of herbs makes the best stock, tasting better than store-bought. I love bay leaves, thyme, parsley, dill, and peppercorns.
    • Salt: I season my homemade chicken stock with salt early on, adding more to taste as it simmers.

    Find the full recipe with measurements below.

    Tips for Making the Best Chicken Stock

    Tip 1: Use any part of the chicken. I love chicken wings, but whole chickens, leftover bones, and legs are all excellent options. Add more or less chicken, depending on how rich and flavorful you want the stock. Our recipe calls for 12 cups of water. Use 4 pounds of chicken parts for a light but flavorful chicken stock. For a rich ultra-flavorful broth, use 8 pounds of chicken.

    Tip 2: Add plenty of aromatics. Add chopped onion, carrots, celery, garlic, bay leaves, peppercorns, and fresh herbs for the most flavorful stock. Other vegetables like fennel and leek are also excellent.
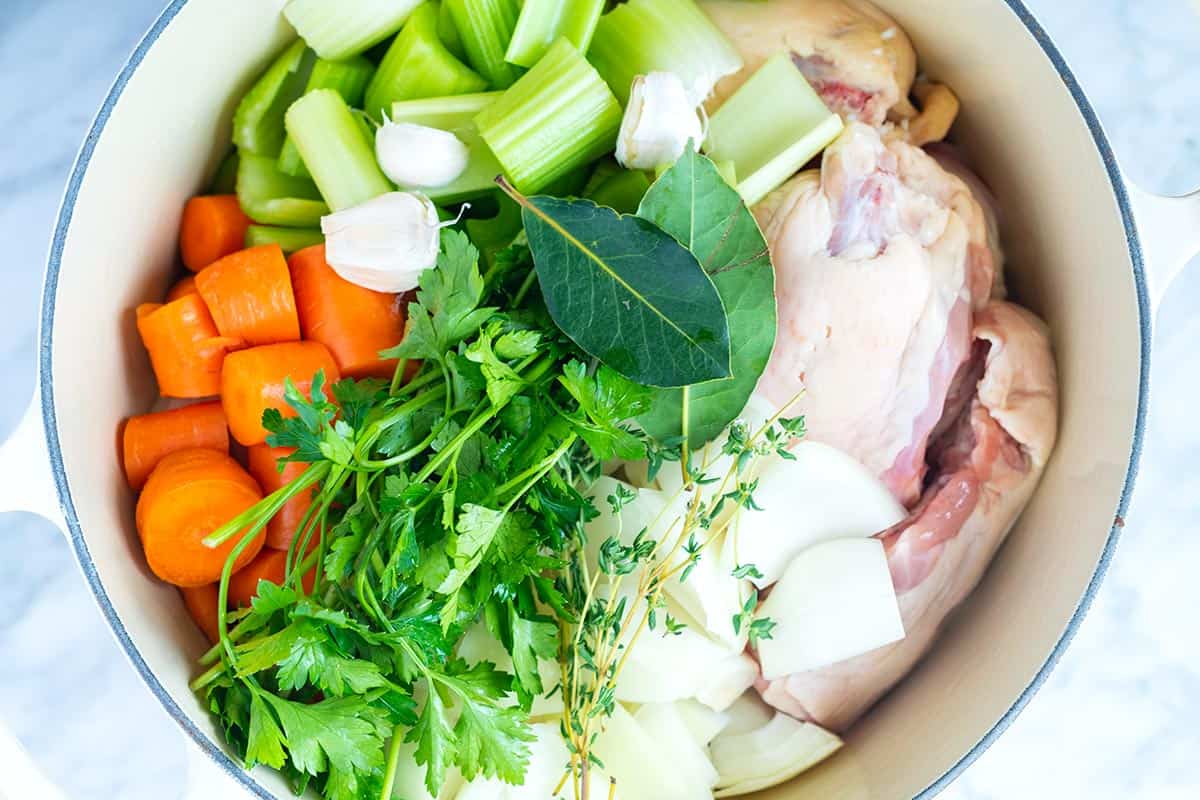
    Chicken Stock ingredients in a stock pot.

    Tip 3: Skim the foamy layer. Making chicken stock is super simple! Add everything to a large pot, cover with cold water, and bring to a boil. As it heats up, you’ll notice some foam, sometimes called scum, rise to the surface. I scrape that away and discard it. Removing the foam keeps the chicken stock clear with more of a clean flavor.

    Tip 4: Simmer on low. Keep the stock at a gentle simmer. Staying at a low simmer helps keep the stock as clear as possible. Reduce the heat so that the water is gently simmering, and then cook for about 4 hours before straining and storing in the fridge or freezer.

    My Favorite Ways to Use Chicken Stock

    You can use homemade chicken stock in so many delicious recipes. I love it for creamy chicken noodle soup and my favorite vegetable soup. It’s great for homemade chicken and dumplings, and I also use it as a base for sauces and gravy, like in this gravy recipe.

    You can also use it as a cooking liquid for rice and grains. It makes this cilantro lime rice and Mexican rice extra flavorful, and I love it for this mushroom risotto.
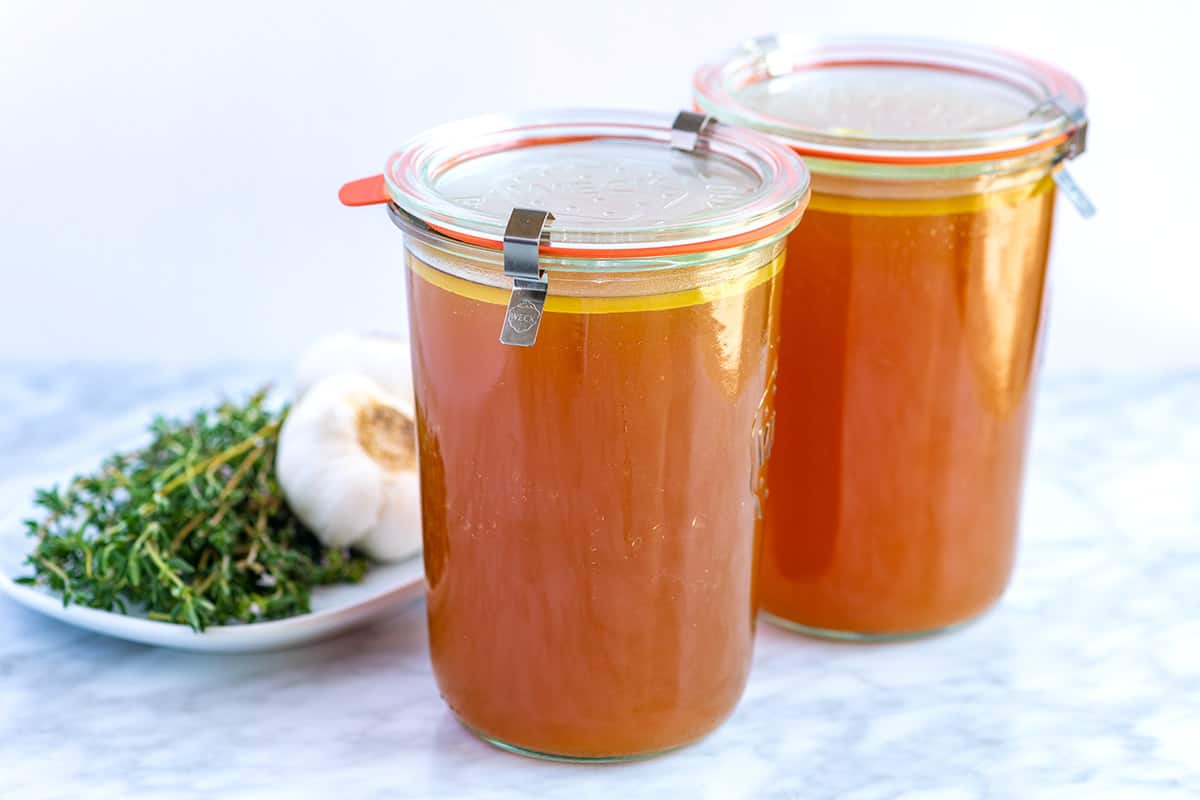
    Homemade Chicken Stock

    How to Make the Best Chicken Stock

    • PREP
    • COOK
    • TOTAL

    Thanks to the aromatics and fresh herbs, our chicken stock has so much flavor. Add more or less chicken, depending on how rich you want the stock. For a light but flavorful chicken stock, use about 4 pounds of chicken parts. For a rich, ultra-flavorful broth, use about 8 pounds of chicken.

    Makes about 10 cups

    Watch Us Make the Recipe

    You Will Need

    4 to 8 pounds chicken parts, such as whole chicken, bones, wings, breast, and legs

    1 pound onion, peeled and chopped (2 large)

    1/2 pound carrots, chopped (4 to 5 medium)

    1/2 pound celery, chopped (3 to 4 celery ribs)

    6 medium cloves garlic, crushed with the back of a knife

    2 bay leaves

    6 sprigs fresh thyme

    Small bunch of fresh parsley, dill, or both

    2 teaspoons whole peppercorns

    2 teaspoons sea salt, or more to taste

    12 cups cold water

    Directions

      1Place the chicken, onions, carrots, celery, garlic, bay leaves, thyme, parsley or dill, peppercorns, and salt in a large stockpot.

      2Add 12 cups of water and bring to a boil. If the water does not cover the contents of the pot, add a cup or two more water.

      3Reduce the heat to low and cook at a gentle simmer, uncovered, for about 4 hours. As it simmers, it is normal for some foam or scum to rise to the top. Use a spoon to remove it.

      4After three hours, taste and adjust the broth with more salt.

      5To strain the stock, use a slotted spoon to remove the larger pieces of bone and vegetables. Then, pour the stock through a fine-mesh strainer to catch all the smaller bits.

      6Transfer to containers and refrigerate for up to five days or freeze for up to 3 months.

      7After the stock has chilled, fat will rise to the surface. We usually leave this, but you can remove the fat for a leaner broth.

    Adam and Joanne’s Tips

    • Storing: Homemade chicken stock will last up to 4 days in the refrigerator. Freeze for up to 6 months. When filling your freezer-friendly containers, leave a little headspace for the stock to expand as it freezes.
    • The nutrition facts provided below are estimates. It was difficult to estimate actual numbers for this recipe, but we have done our best.

    Nutrition Per Serving
    Serving Size
    1 cup
    /
    Calories
    12
    /
    Protein
    1 g
    /
    Carbohydrate
    1 g
    /
    Dietary Fiber
    0 g
    /
    Total Sugars
    0 g
    /
    Total Fat
    0 g
    /
    Saturated Fat
    0 g
    /
    Cholesterol
    0 mg
    /
    Sodium
    343 mg


    AUTHOR:

    Joanne Gallagher

    Adam and Joanne of Inspired Taste

    We are Adam and Joanne Gallagher, the creators of Inspired Taste. Established in 2009, Inspired Taste grew from a childhood dream into one of the internet’s most trusted recipe sites with hundreds of reliable recipes, step-by-step videos, and expert tips.More About Us
    Source link

  • Low-Carb Green Chile Chicken Enchiladas

    Low-Carb Green Chile Chicken Enchiladas

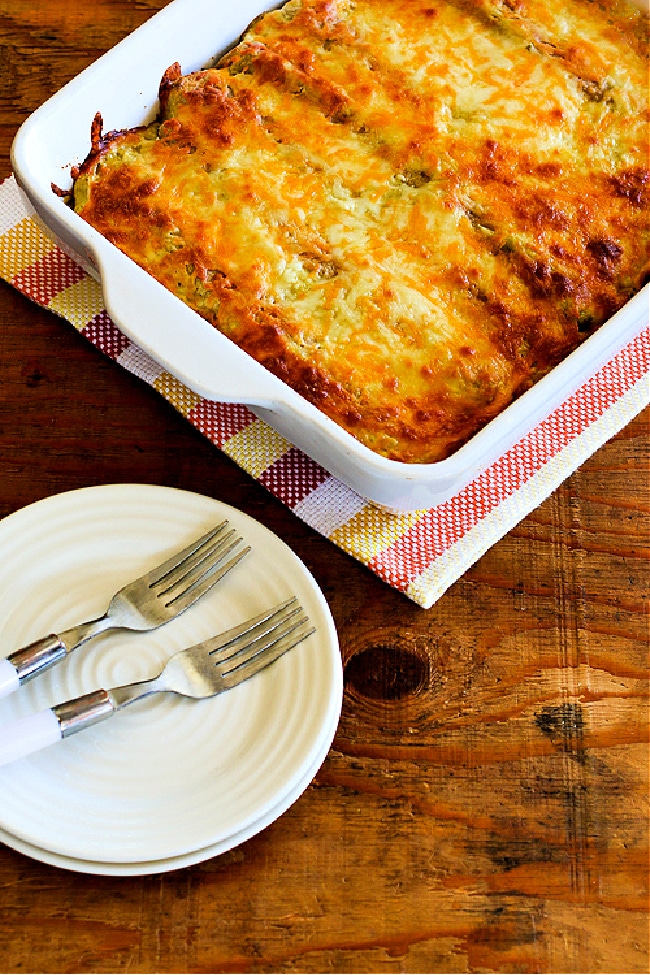
    These Low-Carb Chicken Enchiladas use low-carb tortillas for a version of green chile chicken enchiladas that’s much lower in carbs! And this recipe uses canned green chile enchilada sauce, so it’s quick and easy to make!

    PIN the Low-Carb Chicken Enchiladas to try them later!

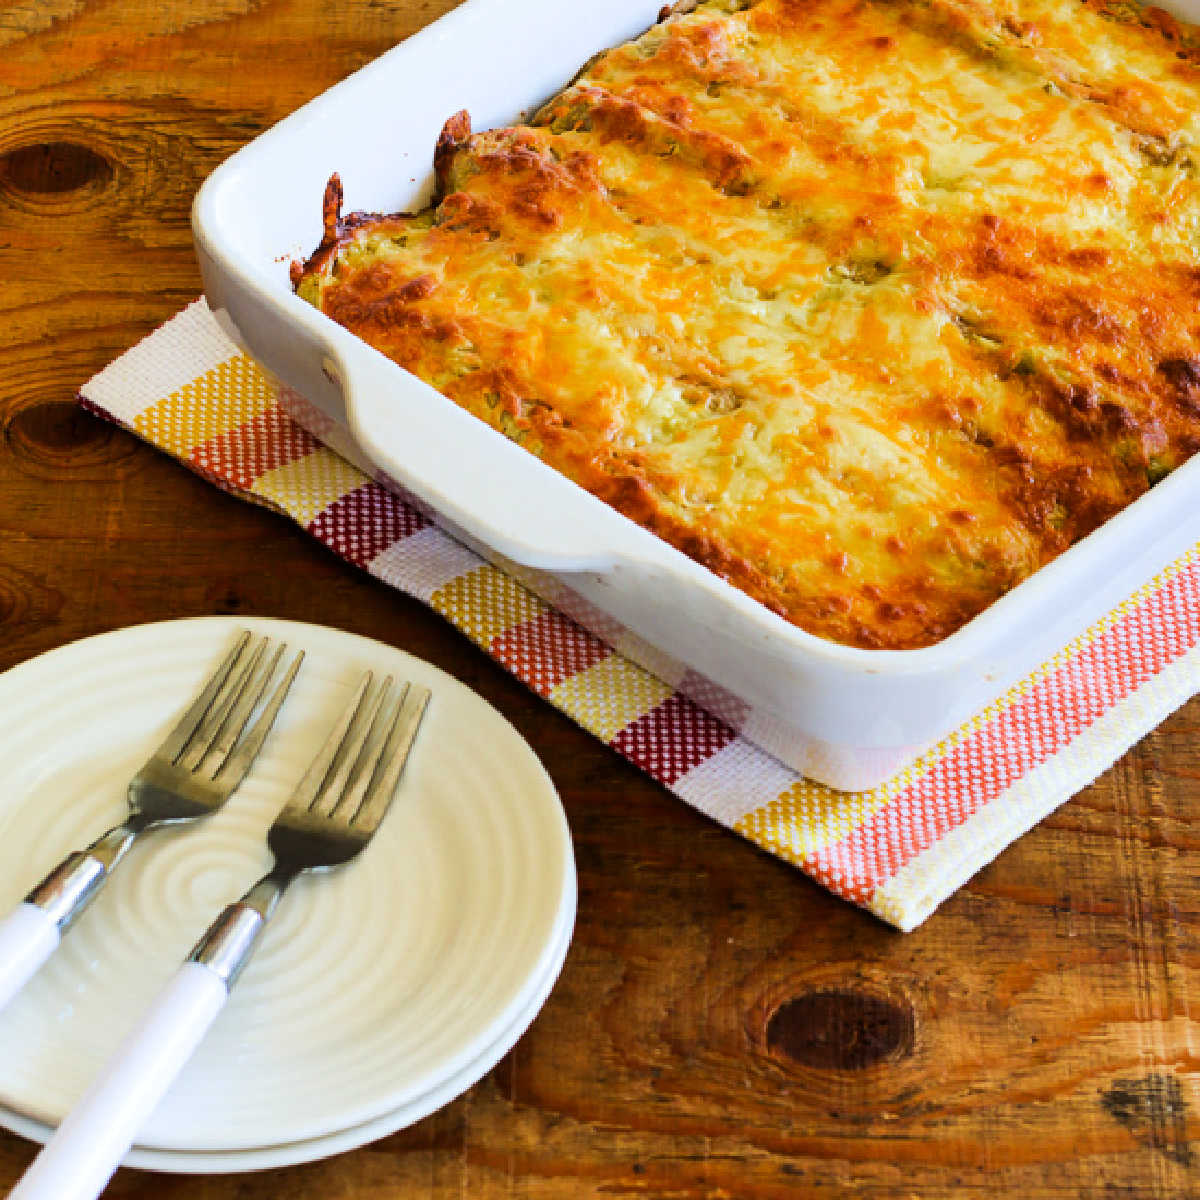
    Low-Carb Green Chile Chicken Enchilada Casserole finished casserole in baking dish

    These Low-Carb Chicken Enchiladas are a favorite recipe I’m reminding you about for Friday Favorites this week. I bet this is a Mexican dinner you’re going to love! And recently I discovered the nutritional calculator I first used didn’t always calculated the carbs correctly for low-carb tortillas. So these enchiladas are even lower in carbs than I first thought!

    This is one of those Denny Family Recipes that has good memories for me. Years ago my nephew Jake and I made a canned soup version of Green Chile Chicken Enchiladas when I was visiting my sister and her family. Of course that was delicious, but loaded with carbs!

    Fast forward to when Jake had moved to Salt Lake and was coming to cook with me every other week, and we decided to create a low-carb version of chicken enchiladas to share on Kalyn’s Kitchen. And after quite a few tries we ended up with this delicious recipe. And if you’re looking for something to make for Cinco de Mayo in a few weeks, this will be just the thing!

    What ingredients do you need for this recipe?

    (This is only a list of ingredients; please scroll down for complete printable recipe. Or if you use the JUMP TO RECIPE link at the top of the page, it will take you directly to the complete recipe.)

    What kind of enchilada sauce did I use?

    I love Hatch Green Chile Enchilada Sauce (affiliate link) for this chicken enchilada recipe, but you can make it with any green chile sauce that’s low in carbs.

    What tortillas did I use for Low-Carb Chicken Enchiladas?

    I used Mission Carb Balance Whole Wheat Burrito Size Tortillas (affiliate link) for this recipe, but you can use any low-carb tortillas you prefer. Two other brands I have enjoyed are Mr. Tortilla 2 Net Carb Multigrain Tortillas (affiliate link) and La Banderita Low-Carb Tortillas (affiliate link).

    Can you make this chicken enchilada recipe with leftover chicken or turkey?

    This recipe calls for chicken breasts that you cook in water or stock with seasonings, but if you have leftover rotisserie chicken or leftover turkey you can use about 4 cups of diced leftover chicken or turkey.

    How low in carbs are the Green Chile Chicken Enchiladas?

    I recently discovered that the nutritional information had been calculated incorrectly for some of my recipes with low-carb tortillas. With the improved nutrition analyzer I am now using, these enchiladas have only 10 net carbs each, with 22 grams of protein!

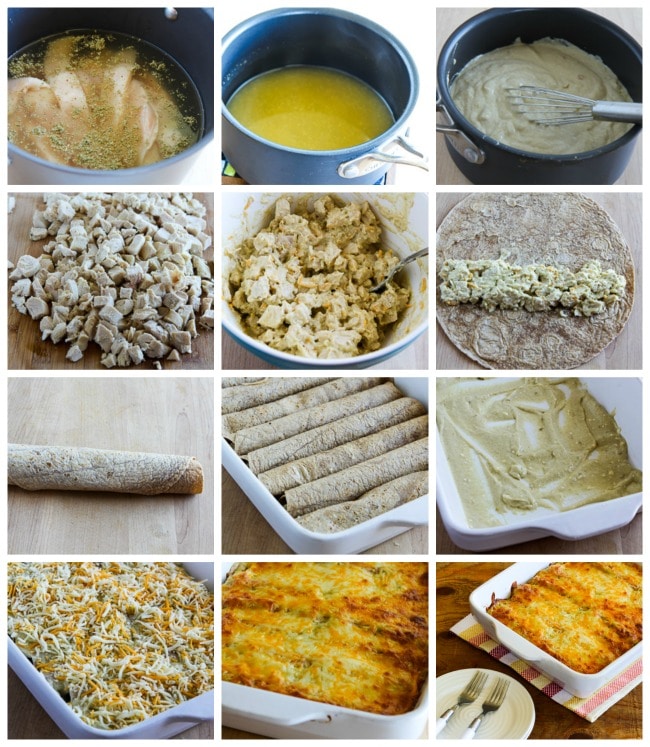
    Low-Carb Green Chile Chicken Enchilada Casserole process shots collage

    How to make Low-Carb Chicken Enchiladas:

    (This is only a summary of the steps for the recipe; please scroll down for complete printable recipe. Or if you use the JUMP TO RECIPE link at the top of the page, it will take you directly to the complete recipe.)

    1. Trim chicken breasts and cut into 3 or 4 strips. Simmer the chicken in seasoned stock. 
    2. Simmer two cans of green chile enchilada sauce over low heat until it’s thickened and reduced to 2 cups. I used Hatch Green Chile Enchilada Sauce (affiliate link), but there are many good brands. Check the carb count if that’s important to you.
    3. When sauce has reduced and cooled a little, whisk in cream cheese and sour cream. 
    4. When it’s cool enough to handle, shred or cut the chicken into small pieces.
    5. Put chicken into a bowl and mix in 1 1/2 cups of the sauce mixture and 1 cup of the cheese. 
    6. Divide chicken mixture among the 8 tortillas, and roll up enchilada style. I used Mission Carb Balance Whole Wheat Burrito Size Tortillas (affiliate link) with only 5 net carbs per tortilla.
    7. Spray the casserole dish with non-stick spray and spread a layer of sauce on the bottom. 
    8. Put the rolled enchiladas in a single layer in the dish and top with remaining sauce and cheese.
    9. Bake 375F/190C for 30-40 minutes, or until the casserole is bubbling and cheese is lightly browned on top.

    Make it a Low-Carb Mexican Meal:

    Here are some ideas for things I think would taste great with the enchiladas:

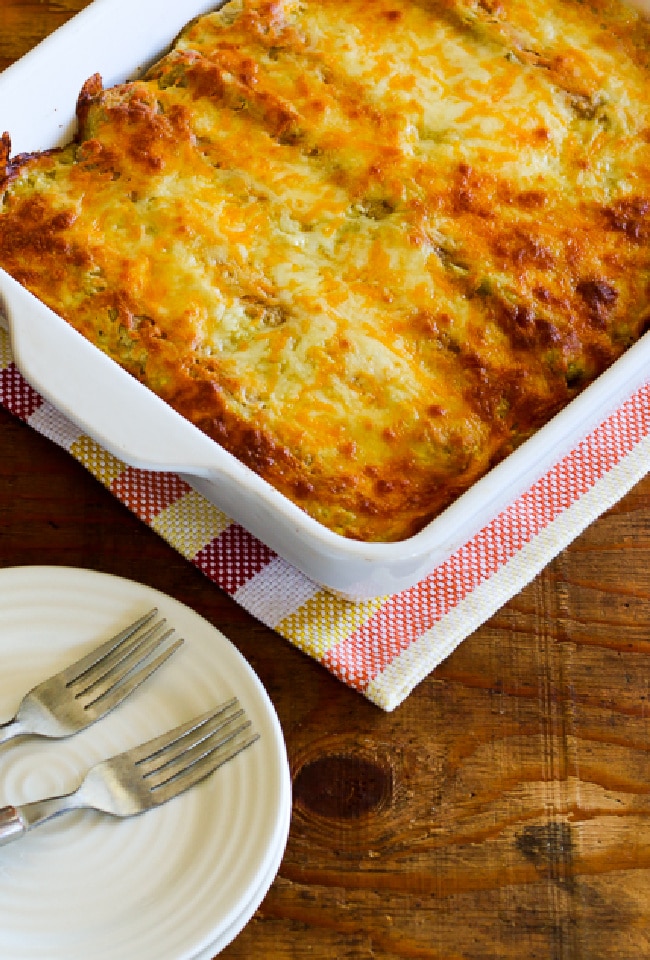
    close-up photo Green Chile Chicken Enchilada Casserole

    More Low Carb Mexican Food:

    Check out my collections of Keto Mexican Food Dinners and Low-Carb Mexican Food Favorites for lots more ideas to satisfy that craving for Mexican food! And if you’re a fan of low-carb tortillas to expand your options for low-carb Mexican food, here are my favorite recipes with low-carb tortillas.

    Weekend Food Prep:

    This recipe for Low-Carb Chicken Enchiladas has been added to a category called Weekend Food Prep where you’ll find recipes you can prep or cook on the weekend and eat during the week! And if I made this on the weekend, I would LOVE to have some left over for another meal.

    Ingredients

    • 2 15 oz. cans Green Chile Enchilada Sauce, simmered to reduce to 2 cups. (see notes)
    • 4 boneless skinless chicken breasts
    • 2 cups chicken broth (see notes)
    • 1 tsp. poultry seasoning
    • 4 oz. cream cheese
    • 1/2 cup sour cream
    • 1 1/2 cups grated Four Cheese Mexican Blend cheese
    • 1/2 cup grated Mozzarella cheese
    • 8 Mission Carb Balance Whole Wheat Tortillas (see notes)

    Instructions

    1. Trim the chicken breasts and cut lengthwise into 3 or 4 strips, depending on how big each piece of chicken is.
    2. Put the chicken breasts into a small pan with about 2 cups chicken chicken broth, the poultry seasoning, and enough water to cover the chicken and simmer on very low heat until chicken is barely cooked through, about 15 minutes.  (I use a Wire Mesh Fat Skimmer to remove the scum that accumulates as chicken cooks in water, but you can rinse it off as well.) Remove chicken and let it drain well until it’s cool enough to handle.
    3. Put the enchilada sauce into a small non-stick saucepan and simmer on low until it’s reduced to 2 cups, stirring occasionally.  (This will take 40-45 minutes.)
    4. Let sauce cool a few minutes, then whisk in the softened cream cheese and sour cream.
    5. Cut or shred the chicken into small pieces.
    6. Preheat oven to 375F/190C.  Spray a 10″ x 12″ glass or crockery casserole dish with olive oil or nonstick spray.  (The 8 enchiladas fit perfectly into that size, but if you have something similar you can make it work.)
    7. Put the diced chicken in a bowl and gently mix in 1 1/2 cups of the sauce mixture and 1 cup of the grated Mexican Blend cheese.
    8. Divide the mixture among the 8 flour tortillas, spreading a line of chicken/sauce mixture down the center and then rolling the tortilla around it.
    9. Spread 1/2 cup of sauce across the bottom of the casserole dish; then lay the enchiladas in a single layer in the dish.
    10. Top enchiladas with the remaining sauce, the remaining 1/2 cup Mexican Blend Cheese, and the 1/2 cup grated Mozzarella cheese.
    11. Bake 30-40 minutes, or until the enchiladas are bubbling and cheese is starting to slightly brown on top. Serve hot.
    12. The Low-Carb Chicken Enchiladas freeze well can be thawed and reheated in a microwave or toaster oven.

    Notes

    I used Hatch Green Chile Enchilada Sauce (affiliate link) and Mission Carb Balance Whole Wheat Burrito Size Tortillas (affiliate link). Check the carb count on the brand you find if that’s important to you.

    You can use canned chicken broth + a little water for simmering chicken.

    Nutritional information is based on the Enchilada Sauce and low-carb tortillas I us288.

    This recipe created by Kalyn and Jake with memories of canned soup chicken enchilada casserole from the past.

    Nutrition Information

    Yield

    8

    Serving Size

    1

    Amount Per Serving

    Calories 288Total Fat 17gSaturated Fat 9gUnsaturated Fat 8gCholesterol 86mgSodium 1432mgCarbohydrates 12gFiber 2gSugar 9gProtein 22g

    Nutrition information is automatically calculated by the Recipe Plug-In I am using. I am not a nutritionist and cannot guarantee 100% accuracy, since many variables affect those calculations.

    Did you make this recipe?

    Did you make this recipe? Please leave a star rating (under the PRINT button in the recipe) or share a photo of your results on Instagram! THANKS!

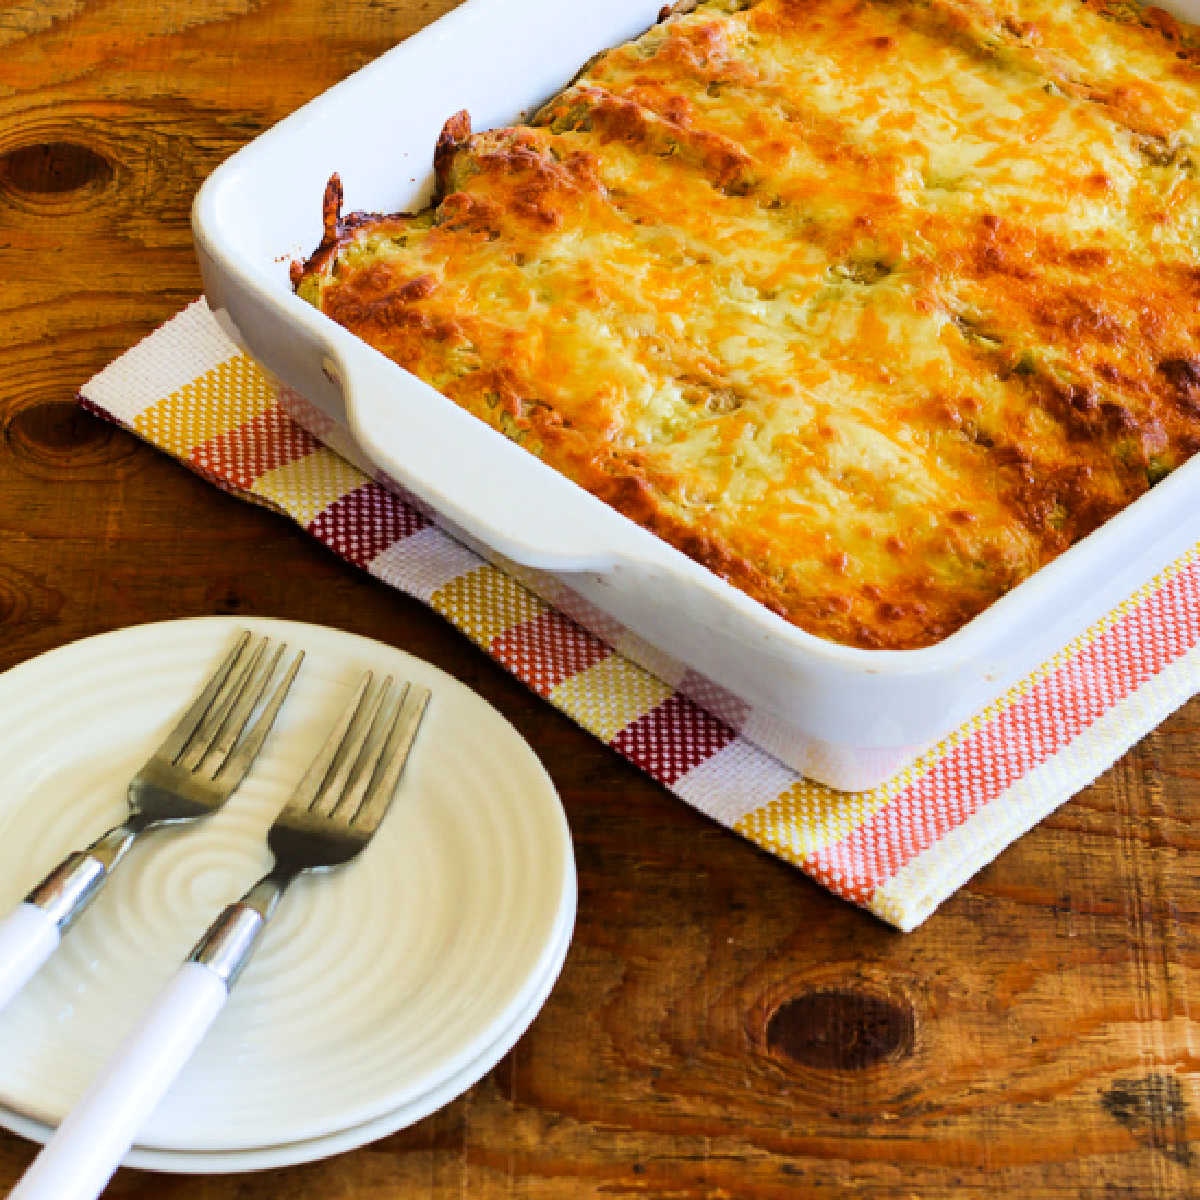
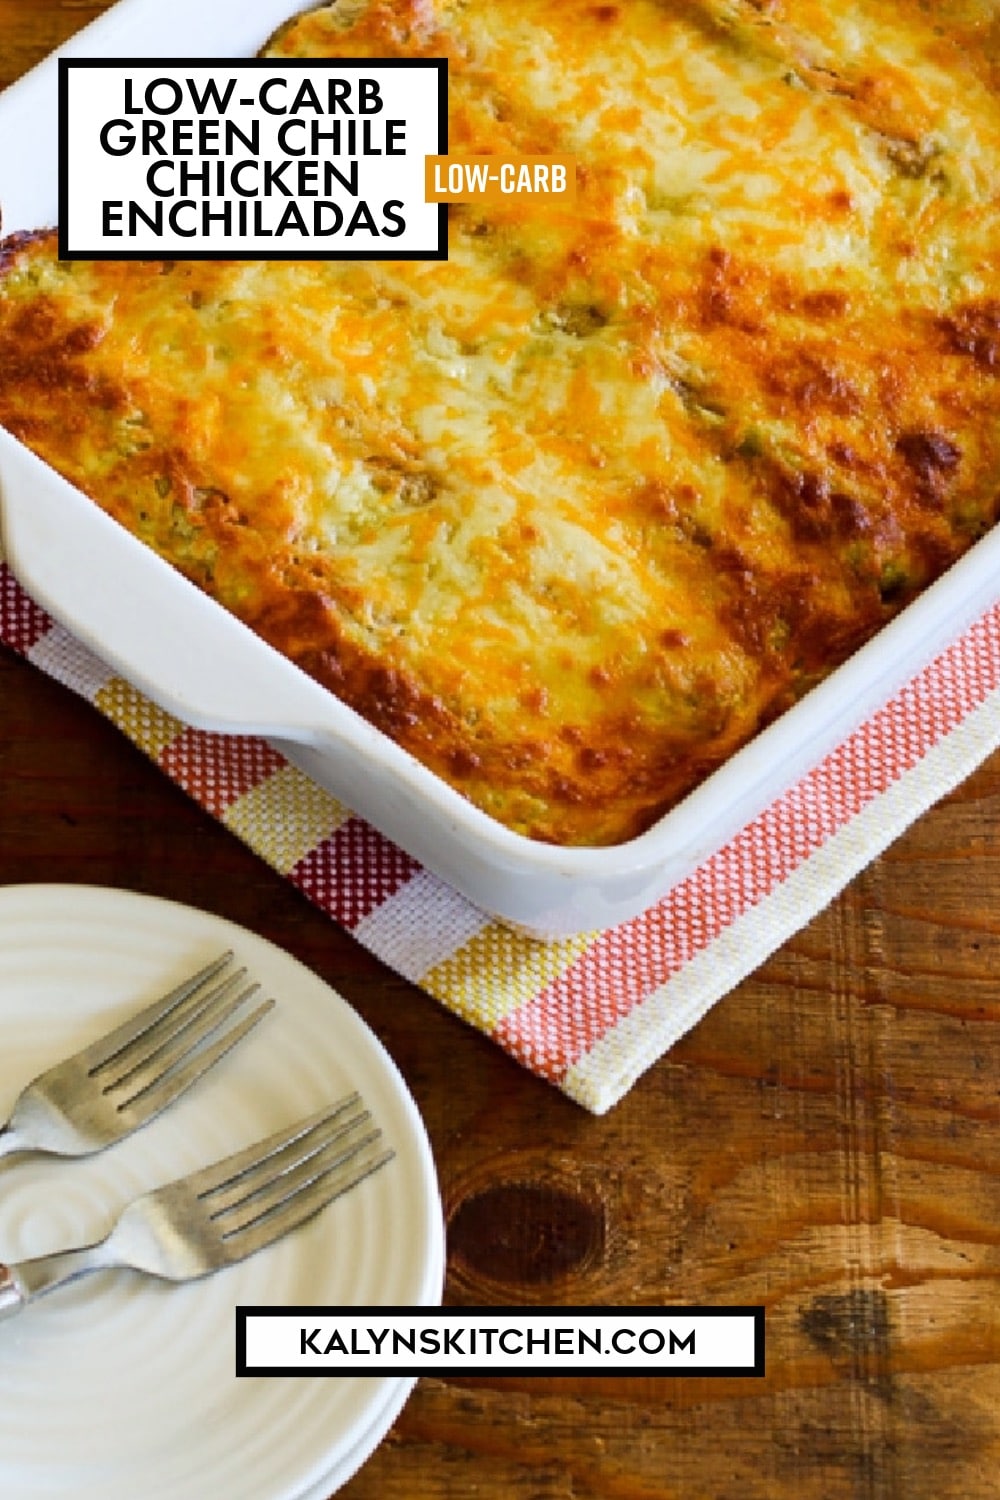
    Square image of Low-Carb Green Chile Chicken Enchiladas shown in baking dish on napkin, with plates and forks in front.

    Low-Carb Diet / Low-Glycemic Diet / South Beach Diet Suggestions:
    These Chicken Enchiladas have low-carb ingredients like low-carb tortillas, chicken, cheese, cream cheese, and sour cream, and they are great for low-carb diets. I’m not tagging them Keto, but see the nutritional information based on the low-carb tortillas I used. This recipe is calorie dense and probably best for Phase 3 for the original South Beach Diet, or maybe an occasional treat for Phase 2.

    Find More Recipes Like This One:
    Use Casserole Recipes to find more recipes like this one. Use the Diet Type Index to find more recipes suitable for a specific eating plan. You might also like to follow Kalyn’s Kitchen on Pinterest, on Facebook, on Instagram, on TikTok, or on YouTube to see all the good recipes I’m sharing there.

    Historical Notes for this Recipe:
    This recipe for Low-Carb Green Chile Chicken Enchiladas was first posted in October 2014. It was updated and improved in 2021 and last updated with more information in 2026.

    Pinterest image of Low-Carb Green Chile Chicken Enchiladas

    We are a participant in the Amazon Services LLC Associates Program, an affiliate advertising program designed to provide a means for us to earn fees by linking to Amazon.com and affiliated sites. As an Amazon Associate, I earn from qualifying purchases.


    Source link

  • Banza Chicken Bowls with Calabrian Chili Sauce Recipe

    Banza Chicken Bowls with Calabrian Chili Sauce Recipe

    I Honestly Wake Up In The Morning Thinking About These Chicken Bowls.

    Lindsay headshot

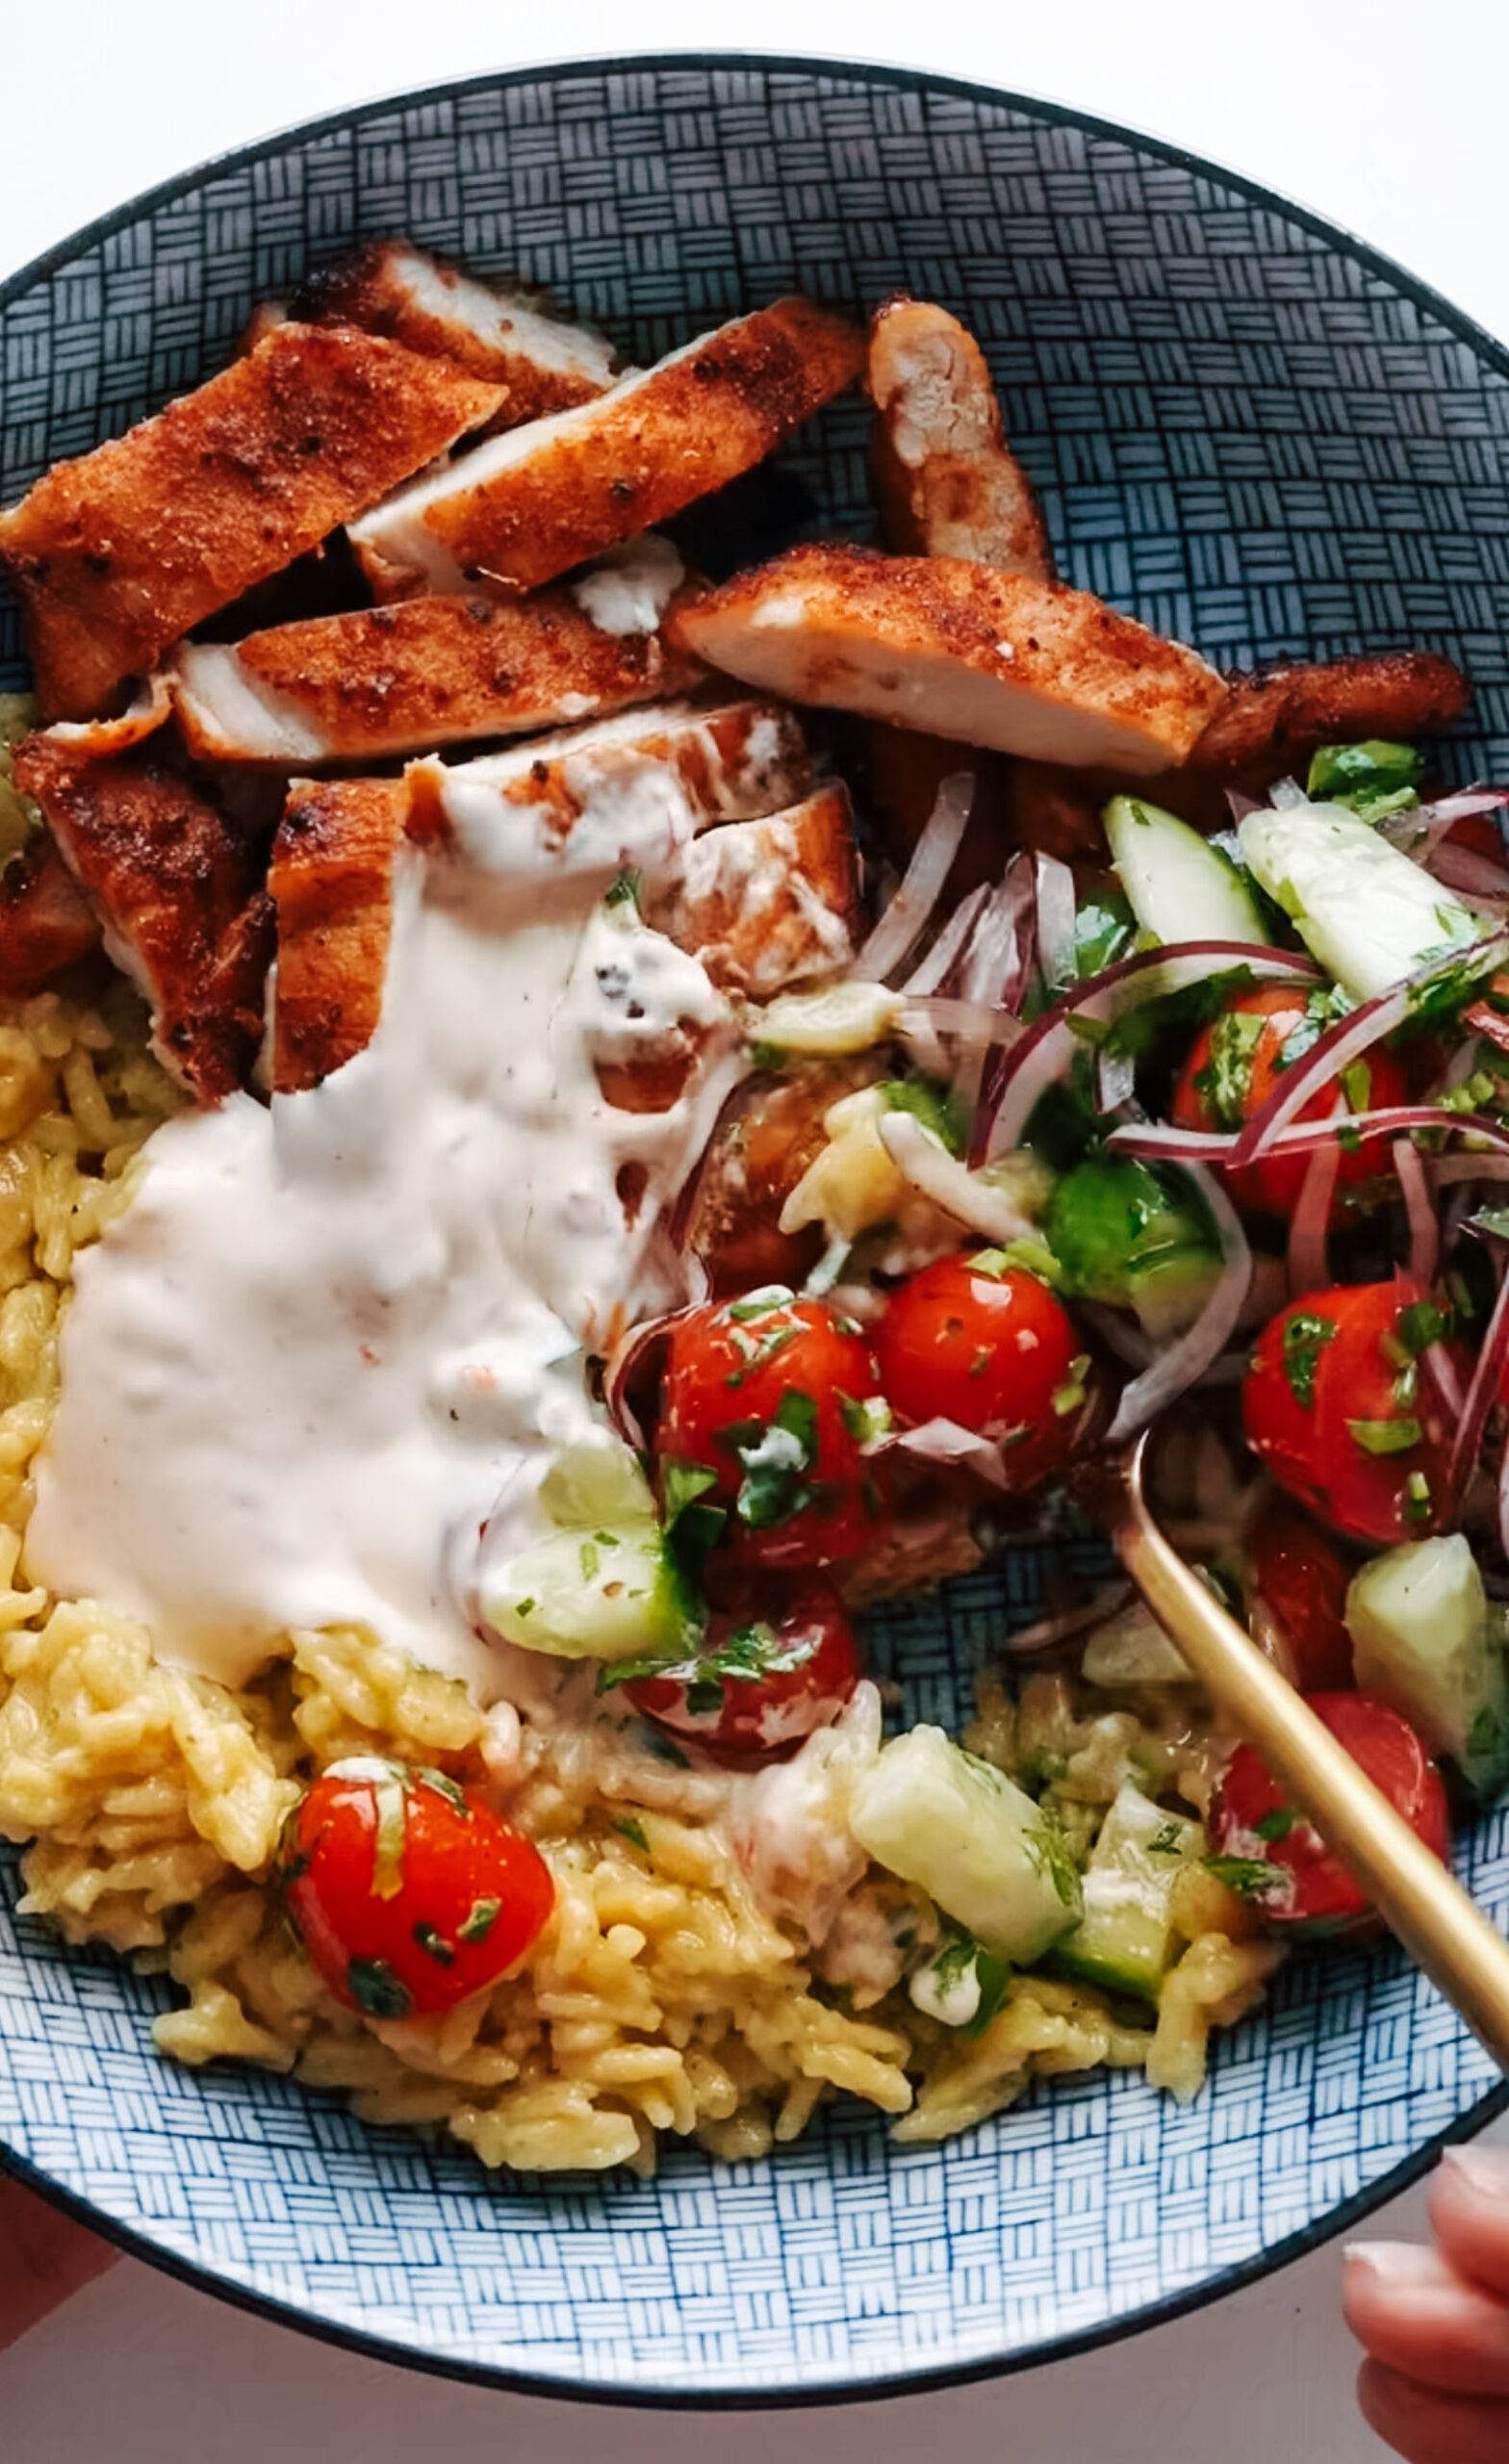
    Yep, still here, still talking about that air fryer chicken but this time it’s in bowl form and there’s a new sauce in town.

    Tonight we had these chicken bowls for dinner, and Bjork smothered his still-warm, juicy, golden chicken strips with that spicy tangy Calabrian chile sauce and declared it the best chicken he’s ever had. And as soon as I open my eyes in the morning, one of my first waking thoughts is: “YES I get to eat that bowl again for lunch today.”

    This bowl is like a little symphony – the crunch of the tomato cucumber salad, the thin slips of bitey red onion, the golden crisped air fryer chicken cut into tender little strips, a big pile of perfectly chewy Banza, and a heavy pour of tangy Calabrian chile sauce on top. I am drooling.

    If you need to scale it back and make it easier with fewer elements, just go for the chicken with the sauce and the salad. Or the chicken with the sauce and the Banza.

    Or, really, just the chicken with the sauce. That Calabrian chile sauce is at the heart of it all.

    January is long, but this bowl, for me, has been one of those super happy meals where I’m excited to eat it AND I feel good about the actual nutrition in it. Like, one of those meals that I look forward to and it becomes the highlight of my day. Belly full, tastebuds so exceptionally happy. Hope you like it!

    Lindsay signature

    Source link

  • Green Chile Chicken Tacos

    Green Chile Chicken Tacos

    Green Chile Chicken Tacos are a perfect family-friendly dinner, and you can make the chicken in the Instant Pot or the slow cooker. These tacos will be low in carbs when you use low-carb tortillas, or eat the slightly-spicy green chile chicken in lettuce wraps for an option that’s Keto or gluten-free!

    PIN Green Chile Chicken Tacos to try them later!

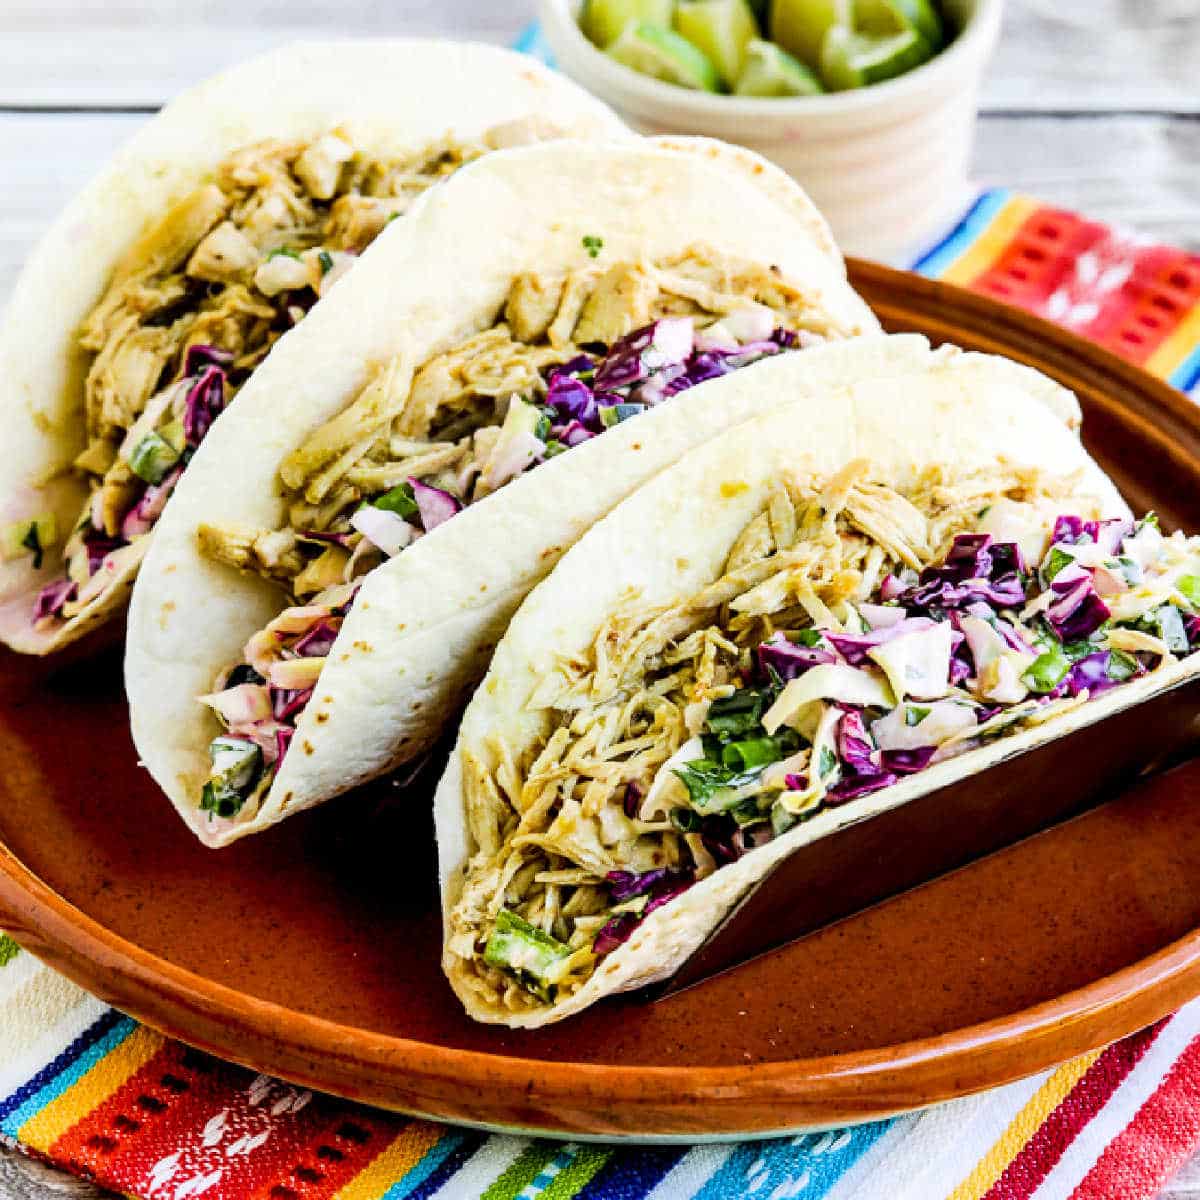
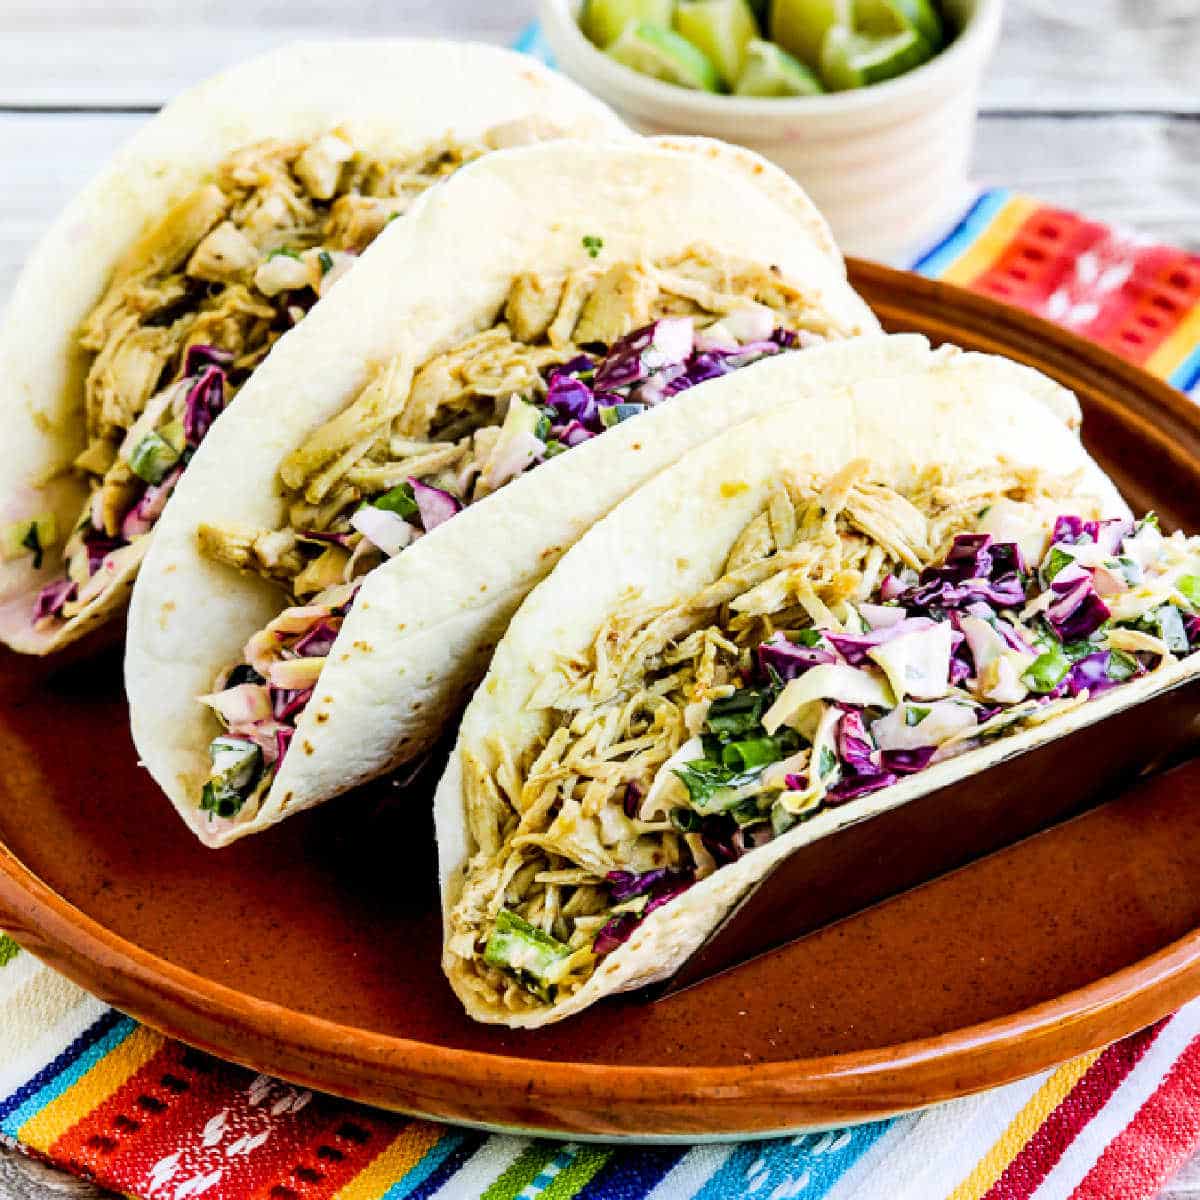
    Green Chile Chicken Tacos close-up photo of finished tacos on plate

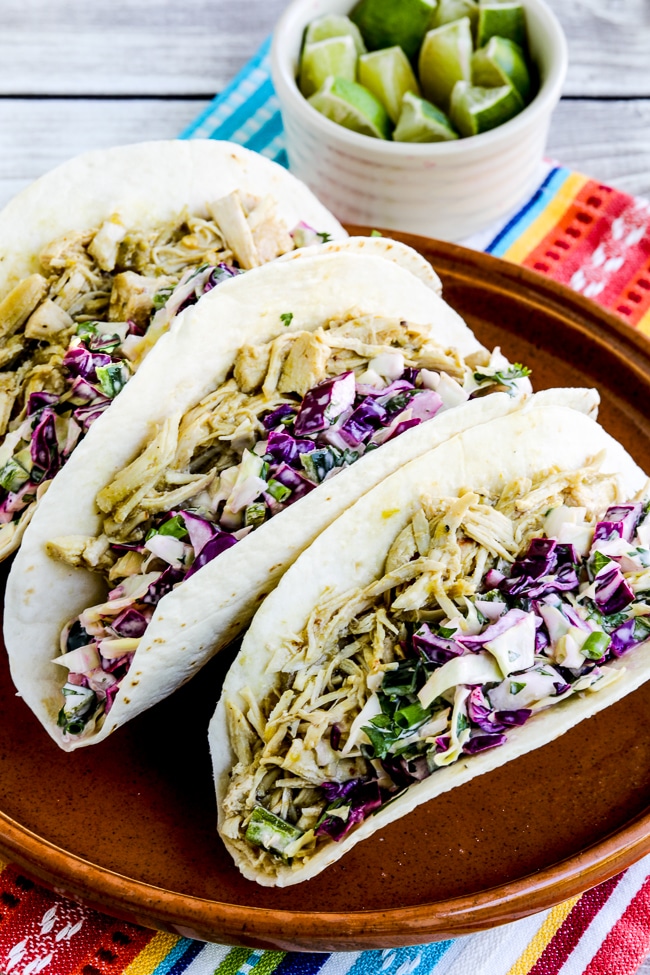
    These Green Chile Chicken Tacos are going to be perfect for Cinco de Mayo, and Kara and I really enjoyed this when we worked on the recipe! We loved the spicy green chile chicken, the slightly-spicy slaw with chopped Poblano peppers, and the squeeze of lime we added at the table. And when Kara took leftovers home, her family devoured the tacos too.

    And I’m happy to have both an Instant Pot and a Slow Cooker version of this recipe. The tacos were originally inspired by my love of Hatch Green Chile Enchilada Sauce, something I’ve used often since I first tried it. Any recipe with that sauce is going to be something I’ll enjoy! And recently I discovered that my original nutrition calculator sometimes was not accurate for low-carb tortillas, and I’m happy to say these tacos are even lower in carbs than I thought, see more below about that.

    Either version of Green Chile Chicken Tacos will be tasty, and even the slow cooker method only takes a little over three hours to cook. So this is pretty easy for a chicken taco dinner no matter which method you choose! I hope you enjoy trying it.

    What ingredients do you need for this recipe?

    (This is only a list of ingredients; please scroll down for complete printable recipe. Or if you use the JUMP TO RECIPE link at the top of the page, it will take you directly to the complete recipe.)

    What are Poblano Chile Peppers?

    Poblano chile peppers are large dark green peppers that are mild but have a really delicious flavor. In U.S. grocery stores they are sometimes called Pasilla Peppers.

    Making Green Chile Tacos for Weekend Food Prep:

    If you’re making this for Weekend Food Prep and planning on leftovers to eat later, it would be best to only put dressing on half the slaw if you want it to stay crisp. Refrigerate slaw ingredients and taco meat separately, then heat the chicken and tortillas and add dressing to the rest of the slaw right before you eat the rest of the tacos.

    Which method did we like best for Green Chile Chicken Tacos?

    For the slow cooker version we recommend reducing the sauce so the finished result isn’t too watery, and using the Instant Pot made it super-easy to reduce the sauce after the chicken had cooked. So for that feature only I’d say I liked the Instant Pot method a bit better.

    What Instant Pot or Slow Cooker Did I Use?

    I use a 6 Quart Instant Pot (affiliate link) for all my Instant Pot Recipes! For the slow cooker version I used my favorite 3.5 Quart Slow Cooker (affiliate link) but any size that’s close to that will work.

    How low in carbs are the Green Chile Chicken Tacos?

    With the Mission Carb Balance Low-Carb Tortillas (affiliate link) I used, these tacos have only 7 net carbs each, with 13 grams of protein.

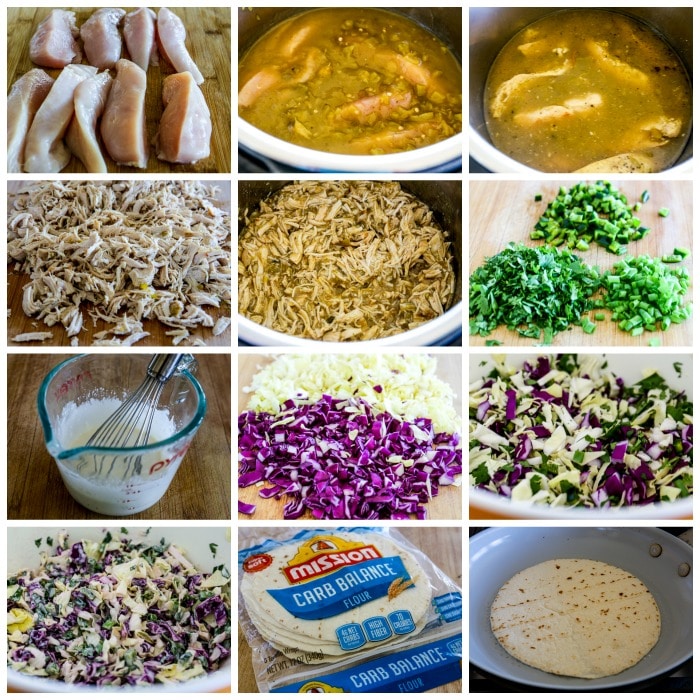
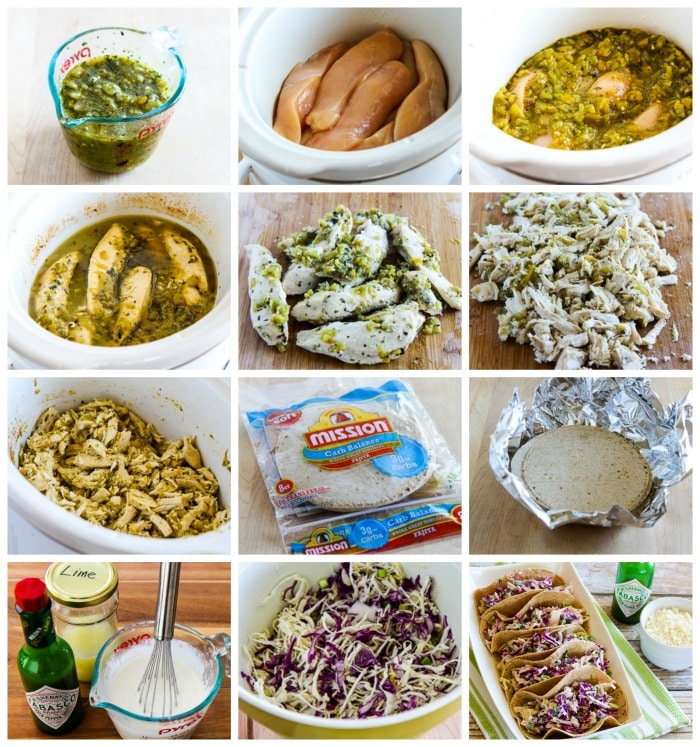
    Green Chile Chicken Tacos Instant Pot version process shots collage

    How to Make Instant Pot Green Chile Chicken Tacos:

    (This is only a summary of the steps for the recipe; please scroll down for complete printable recipe. Or if you use the JUMP TO RECIPE link at the top of the page, it will take you directly to the complete recipe.)

    1. Trim chicken, put in Instant Pot, and season with salt and pepper. 
    2. Pour Hatch Green Chile Enchilada Sauce (affiliate link) over the chicken, along with diced green chiles (affiliate link) if using.
    3. Lock lid on the Instant Pot and set to MANUAL, HIGH, 10 MINUTES. 
    4. When time is up let pressure release naturally for 20 minutes, then release remaining pressure.
    5. Remove chicken to cutting board and shred, leaving sauce in the Instant Pot.
    6. Turn Instant Pot to SAUTE, MEDIUM and reduce the sauce for about 10 minutes while you shred the chicken apart.
    7. Then put shredded chicken back in the Instant Pot to keep warm and let chicken absorb the sauce.
    8. While chicken cooks, chop the poblanos, green onions, and cilantro.
    9. Whisk together mayo, lime juice, and Green Tabasco Sauce (affiliate link) to make the dressing.
    10. Chop up green and red cabbage, and mix in the chopped poblano, green onion, and cilantro (if using).
    11. Then toss slaw with dressing until it’s a wet as you prefer.
    12. We used Mission Carb Balance Low-Carb Tortillas (affiliate link) with 4 carbs each. (The package has changed.)
    13. We heated each tortilla in a hot dry pan, just about 10-15 seconds per side.
    14. Fill each taco shell with 1/8 of the spicy chicken and 1/8 of the slaw, and serve right away.
    15. We loved this with a squeeze of lime to add at the table!

    Low-Carb Slow Cooker Green Chile Chicken Tacos process shots collage

    How to Make Slow Cooker Green Chile Chicken Tacos:

    (This is only a summary; scroll down for complete printable recipe.)

    1. Simmer Hatch Green Chile Enchilada Sauce (affiliate link) until it’s reduced to 3/4 cup, about 45 minutes. 
    2. While sauce reduces, trim chicken breasts, cut in half lengthwise, put in slow cooker, and season with salt and pepper.
    3. Put the reduced sauce (and 1 can additional diced green chiles if desired) over the chicken. 
    4. Cook on high in slow cooker for about 2 1/2 hours.  
    5. When the chicken is tender and starting to fall apart, remove to a cutting board and shred, leaving the sauce in the slow cooker.
    6. Put the shredded chicken back in the slow cooker and turn to low to keep warm and let the chicken absorb the sauce.
    7. I used Mission Carb Balance Whole Wheat Fajita Shells with 3 carbs each for this version, and heated the foil-wrapped tortillas in a toaster oven.
    8. Mix together ingredients to make dressing for the spicy slaw.
    9. Chop poblanos, green onions, cabbage, and cilantro and make the spicy slaw right before you’re ready to eat the tacos.
    10. To serve, fill each taco shell with 1/8 of the spicy chicken and 1/8 of the slaw.
    11. The original version was served with Cotija cheese. (Through the years I’ve made these tacos more often without it, but it’s tasty if you have some.)

    Make it a Low-Carb Meal:

    Here are some tasty things to serve with the Green Chile Chicken Tacos:

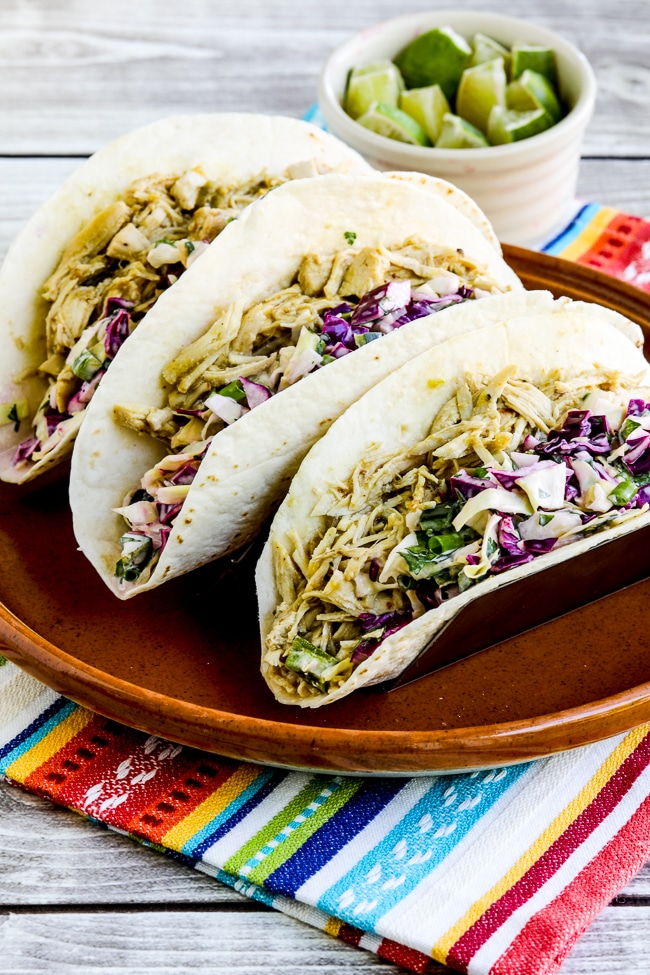
    Green Chile Chicken Tacos shown on serving plate with cut limes on the side.

    More Low-Carb Mexican Dinners:

    Check out my collections of Keto Mexican Food Dinners and Low-Carb Mexican Food Favorites for more ideas to satisfy that craving for Mexican food! And if want more recipes using low-carb tortillas, here are my favorite recipes with low-carb tortillas.

    Ingredients

    • 4 boneless-skinless chicken breasts
    • salt and fresh-ground black pepper to taste
    • one 15 oz. can Hatch Green Chile Enchilada Sauce (see notes)
    • one 3.5 oz. can diced green chiles plus juice (optional)
    • 8 Mission Carb Balance Low-Carb tortillas or Mr. Tortilla 2 Net Carb Multigrain Tortillas
    • 1/2 large fresh Poblano chile, finely chopped (see notes)
    • 1/4 cup thinly sliced green onion
    • 2 cups thinly sliced green cabbage
    • 1 cup thinly sliced red cabbage
    • 1/2 cup chopped cilantro (optional)
    • 3 T mayo
    • 2 T fresh-squeezed lime juice (I used my fresh-frozen lime juice)
    • 1 1/2 tsp. Green Tabasco Sauce (or more if you like it spicy)
    • Salt to taste, preferably Vege-Sal

    Instructions

    INSTANT POT INSTRUCTIONS:

    1. Trim chicken breasts, cut each one in half lengthwise, put in Instant Pot, and season with salt and pepper.  Pour Hatch Green Chile Enchilada Sauce (affiliate link) over the chicken, along with the diced green chiles (affiliate link) if using. Lock lid on the Instant Pot and set to MANUAL, HIGH, 10 MINUTES.
    2. When the cooking time is up let the pressure release naturally for at least 20 minutes, then release any remaining pressure. Remove the chicken to a cutting board and shred, leaving the sauce in the Instant Pot.
    3. Turn Instant Pot to SAUTE, MEDIUM and reduce the sauce for about 20 minutes while you shred the chicken apart. Then put the shredded chicken back in the Instant Pot to keep warm and let the chicken absorb the sauce. 
    4. While chicken cooks, chop the poblanos, green onions, and cilantro. Whisk together mayo, lime juice, and Green Tabasco Sauce (affiliate link) to make the dressing. Chop up green and red cabbage, and mix in the chopped poblano, green onion, and cilantro (if using). Then toss the slaw with dressing until it’s a wet as you prefer. 
    5. We used Mission Carb Balance Low-Carb Tortillas (affiliate link) with 4 carbs each. (The package has changed since I made these tacos in the slow cooker.) We heated each tortilla in a hot dry pan, just about 10-15 seconds per side.
    6. Fill each taco shell with 1/8 of the spicy chicken and 1/8 of the slaw, and serve right away. We loved this with a squeeze of lime to add at the table!

    SLOW COOKER INSTRUCTIONS:

    1. Put the green chile enchilada sauce into a small non-stick saucepan and cook over low heat, stirring occasionally, until enough liquid has evaporated that the sauce has reduced to 3/4 cup.  This will take about 45 minutes, or less if you’re watching it carefully and use higher heat. While the sauce is reducing, trim chicken breasts and cut each breast lengthwise into 2 or 3 long strips.  (Cut larger breasts into 3 strips and smaller ones into 2.)
    2. Spray the inside of slow cooker with olive oil or non-stick spray and put the chicken strips in the bottom. When the sauce has reduced to 3/4 cup, spread sauce over the chicken pieces and add the small can of diced green chiles if you want a bit more heat. Cook on high for about 2 1/2 hours, or until the chicken shreds apart easily with a fork.
    3. When the chicken is done, use a slotted spoon to remove chicken pieces to a cutting board, leaving the sauce in the bottom of  the slow cooker. Use 2 forks to shred the chicken apart into bite-sized pieces and put shredded chicken back in the slow cooker, stirring to coat the chicken with sauce. Turn slow cooker to low to keep the chicken warm while you prepare the rest of the tacos.
    4. Preheat oven or toaster oven to 400F/200C. Remove plastic packaging from the low-carb tortilla shells, wrap in foil, and heat the tortillas in the toaster oven while you make the slaw.
    5. Whisk together the mayo, lime juice, and Green Tabasco sauce to make the dressing. Cut the Poblano chile in half, remove seeds, and finely chop half the chile (reserving the other half for another use.) Thinly slice green onions, green cabbage, red cabbage, and chop cilantro (if using.) Put the slaw ingredients in a bowl and toss with the dressing.
    6. To serve, fill a heated tortilla with 1/8 of the chicken mixture and top with a generous scoop of slaw.

    Nutrition Information

    Yield

    8

    Serving Size

    1

    Amount Per Serving

    Calories 171Total Fat 9gSaturated Fat 2gUnsaturated Fat 7gCholesterol 38mgSodium 612mgCarbohydrates 9gFiber 2gSugar 5gProtein 13g

    Nutrition information is automatically calculated by the Recipe Plug-In I am using. I am not a nutritionist and cannot guarantee 100% accuracy, since many variables affect those calculations.

    Did you make this recipe?

    Did you make this recipe? Please leave a star rating (under the PRINT button in the recipe) or share a photo of your results on Instagram! THANKS!

    Square image of Green Chile Chicken Tacos shown on serving plate with limes in back.

    Low-Carb Diet / Low-Glycemic Diet / South Beach Diet Suggestions:
    The small low-carb flour tortillas used in these Green Chile Chicken Tacos have only 2 – 4 net carbs each (depending on which brand you choose), making them a good choice for low-carb diet plans. If you’re following the original South Beach diet choose a low-carb tortilla that fits that plan and look for Green Chile Enchilada Sauce with the lowest amount of carbs you can find. You can eat the Green Chile Chicken inside lettuce wraps for an option that’s Keto or gluten-free.

    Find More Recipes Like This One:
    Use Slow Cooker Recipes or Instant Pot Recipes to find more recipes like this one. Use the Diet Type Index to find recipes suitable for a specific eating plan. You might also like to follow Kalyn’s Kitchen on Pinterest, on Facebook, on Instagram, on TikTok, or on YouTube to see all the good recipes I’m sharing there.

    Historical Notes for this Recipe:
    The Green Chile Tacos were first posted in 2014, and I’ve made this recipe many times since then. The post was last updated with more information and corrected nutritional information in 2026.

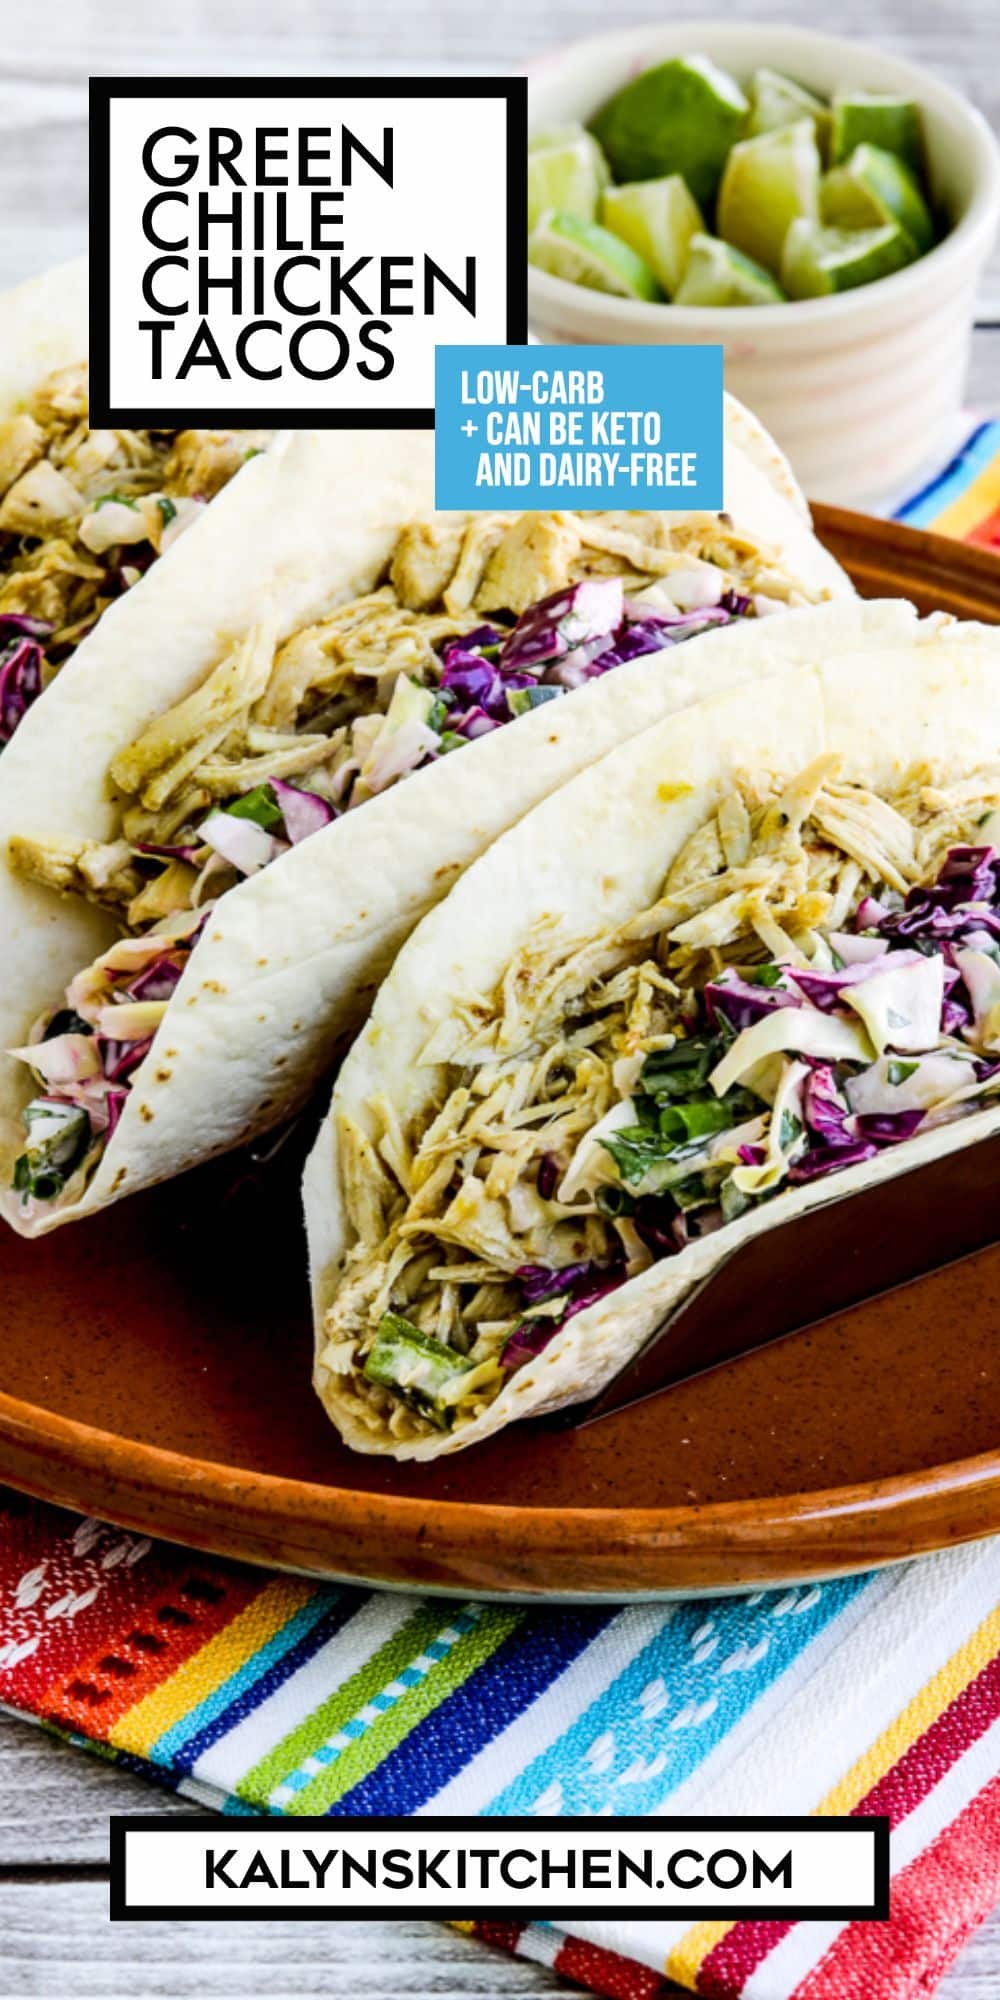
    Pinterest image for Green Chile Chicken Tacos, showing three tacos in taco holder.

    We are a participant in the Amazon Services LLC Associates Program, an affiliate advertising program designed to provide a means for us to earn fees by linking to Amazon.com and affiliated sites. As an Amazon Associate, I earn from qualifying purchases.


    Source link

  • Baked Red Pepper Chicken Breast Recipe

    Baked Red Pepper Chicken Breast Recipe

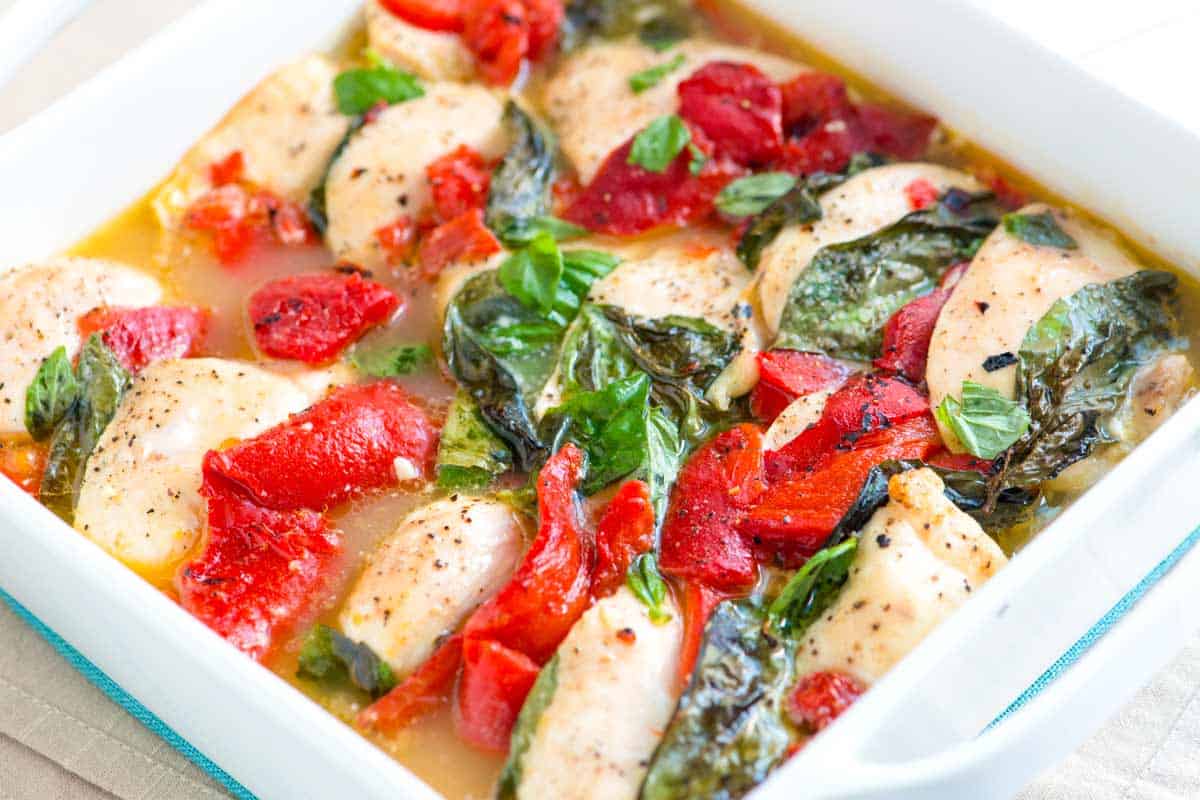
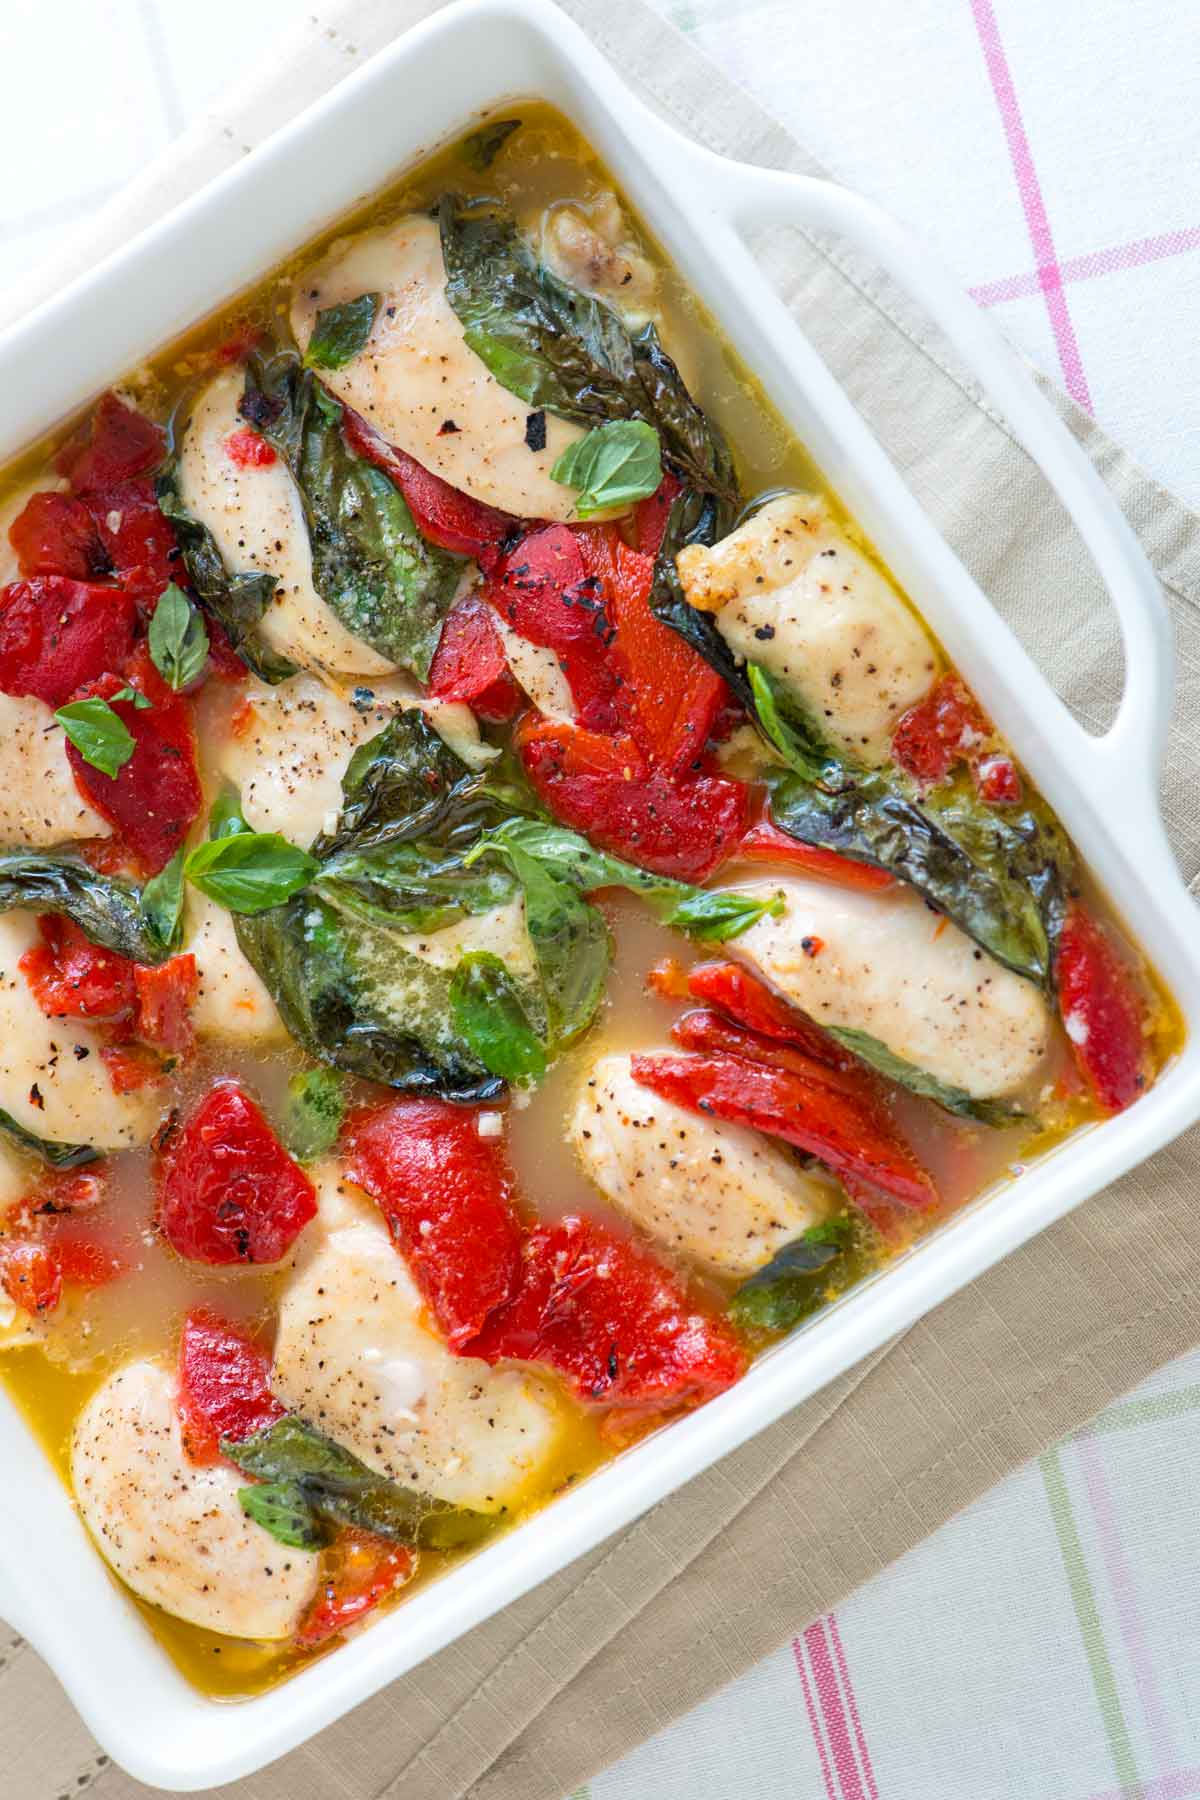
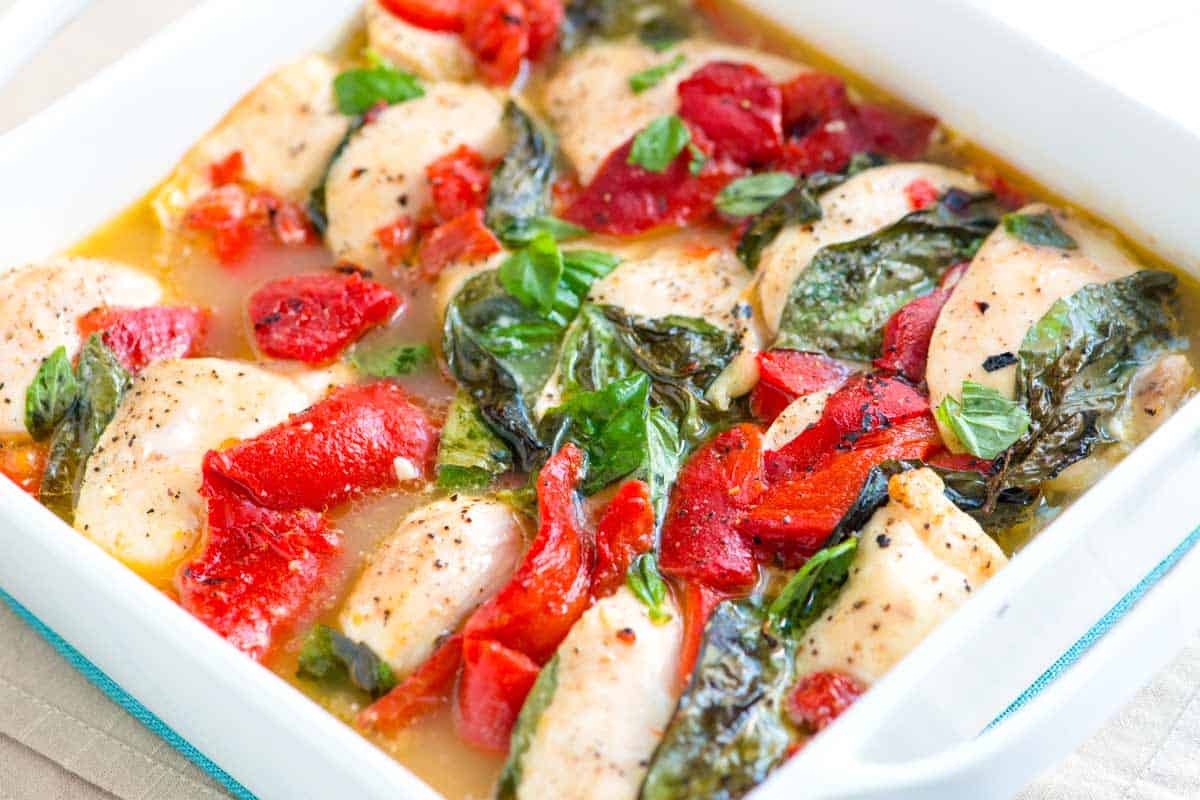
    Our family loves this baked chicken breast with roasted red peppers and basil, all gently cooked in a citrus broth.

    Baked Red Pepper Chicken Breast

    A pantry staple in our home is always a jar of roasted red peppers. They’re so versatile, colorful, and packed with flavor, making them perfect for everything from salads and sandwiches to dips and casseroles. In fact, one of those jars inspired the creation of this recipe. Their bright red color makes the dish truly pop!

    Beyond the peppers, we add fresh basil, orange juice, lemon juice, and garlic. This casserole comes together in minutes and is fantastic served with cilantro lime rice, cooked quinoa, or mashed cauliflower, all of which are great for soaking up the delicious cooking liquid.

    Key Ingredients

    • Chicken Breasts: I use skinless, boneless chicken breasts in this recipe. They work perfectly, staying incredibly juicy because they gently simmer in the citrus broth, almost like poached chicken.
    • Roasted Red Peppers: For convenience, jarred roasted red peppers are a great option. However, if you’re feeling ambitious, you can certainly roast your own (we show you how in our roasted red pepper hummus recipe!).
    • Garlic: We only need one clove, but it perfumes the citrus broth nicely.
    • Orange and Lemon Juice: If you can, use freshly squeezed orange and lemon juice. They will be less sweet.
    • Basil: I love the pop of red from the peppers and the pop of green from fresh basil. It also perfumes the citrus broth, making this a super summery chicken dish. I love it.
    • Butter: This recipe is really light on its feet (and totally works as a high-protein chicken recipe, by the way!). A small amount of butter adds just enough fat to give the citrus broth a wonderfully silky texture. It truly transforms the broth without making the dish heavy.

    Find the full recipe with measurements below.

    How to Make Baked Chicken with Roasted Red Peppers

    Initially, I referred to this as a chicken casserole since we’re using a casserole dish, but I realized that might be confusing, as casseroles are typically heartier than this light and summery dish.

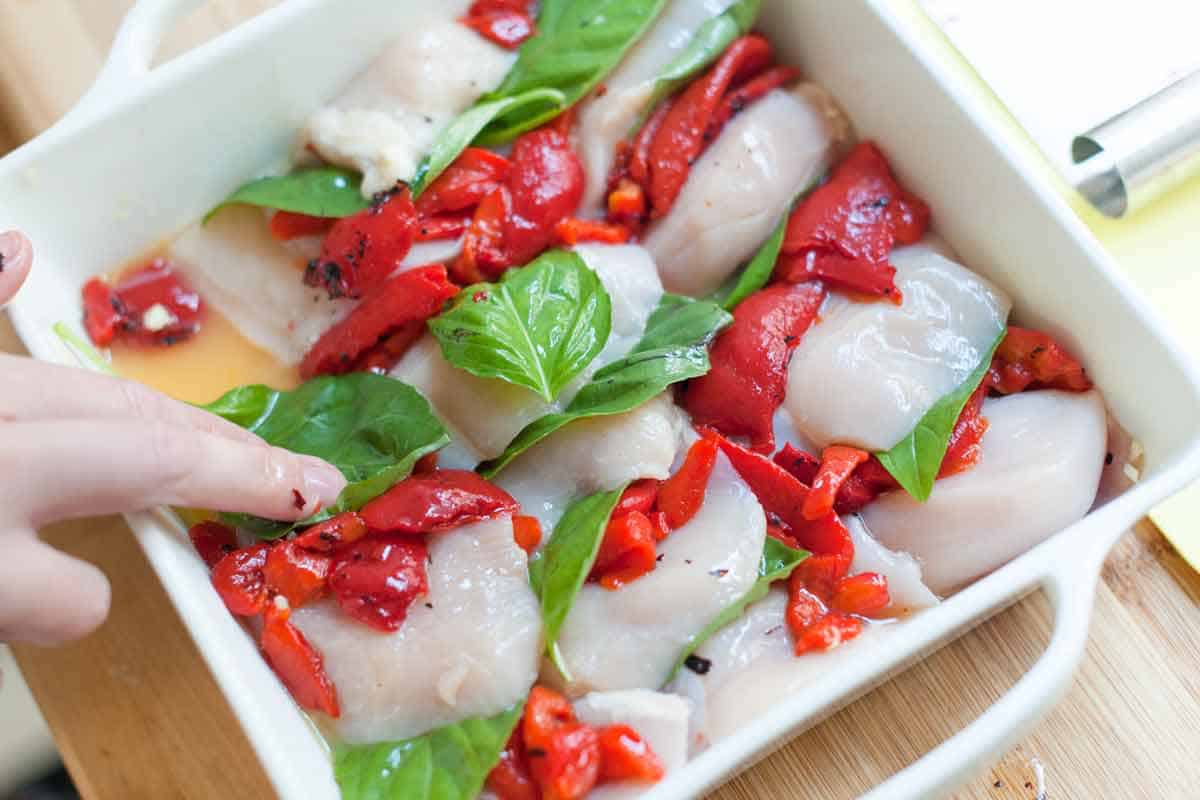
    Assembling the casserole dish to bake chicken breast

    Whatever we call it, you’ll line up sliced chicken breasts, alternating them with roasted red peppers and basil, then pour over your citrus broth and bake. You can see how in our photo above. So easy, and that liquid you see around the chicken is pure gold! Don’t leave it behind. It’s great over rice or just slurped with a spoon.

    Baked Red Pepper Chicken Breast

    Baked Red Pepper Chicken Breast

    • PREP
    • COOK
    • TOTAL

    Our family is always on the hunt for new and interesting ways to cook chicken breasts, and this baked chicken with roasted red peppers, basil, and citrus is a perfect fit. The chicken slowly braises in a mixture of orange and lemon juice, which keeps it nice and juicy, preventing it from drying out. The cooking liquid is also quite delicious spooned over the chicken for serving. I especially love this over rice, like our cilantro lime rice.

    4 Servings

    You Will Need

    1 ½ pounds boneless, skinless chicken breasts

    1 (12oz) jar roasted red peppers

    1 garlic clove, minced

    1/2 cup (120ml) orange juice, freshly squeezed is best

    1/4 cup (60ml) fresh lemon juice

    1 bunch fresh basil, leaves picked off the stems

    2 tablespoons butter

    Salt and fresh ground black pepper

    Directions

      1Prepare oven and baking dish: Preheat the oven to 350°F (177°C) and set aside a 2-quart baking dish.

      2Prepare the chicken: Slice each chicken breast, on an angle, into 1-inch slices and season all over with salt and pepper.

      3Prepare the peppers: Open the jar of roasted red peppers, drain the liquid, and then cut the peppers into smaller chunks, similar in size to basil leaves.

      4Assemble the casserole: Scatter minced garlic in the bottom of the baking dish. Pour half of the orange juice and half of the lemon juice mixture over the garlic.

      5Starting in one corner of the baking dish, alternate chicken slices with pieces of roasted red pepper and basil leaves, then pour the remaining orange and lemon juice over the chicken. Cut the butter into small squares, then scatter them over the chicken.

      6Bake the casserole: Bake the chicken until a thermometer inserted into the chicken reads 165°F, 20 to 30 minutes.

      7Serve the chicken over mashed potatoes, with rice, or vegetables. There will be lots of extra cooking liquid to spoon over the chicken.

    Adam and Joanne’s Tips

    • Roasted peppers: One 12-ounce jar of roasted red peppers usually contains 1 very large or 2 medium peppers. To learn how to roast them yourself, refer to our roasted red pepper hummus recipe for tips.
    • Nutrition facts provided are estimates.

    Nutrition Per Serving
    Serving Size
    1/4 of the recipe
    /
    Calories
    286
    /
    Total Fat
    10.5g
    /
    Saturated Fat
    4.6g
    /
    Cholesterol
    139.4mg
    /
    Sodium
    370.3mg
    /
    Carbohydrate
    6.9g
    /
    Dietary Fiber
    1g
    /
    Total Sugars
    4.6g
    /
    Protein
    39.2g


    AUTHOR:

    Joanne Gallagher

    Adam and Joanne of Inspired Taste

    We are Adam and Joanne Gallagher, the creators of Inspired Taste. Established in 2009, Inspired Taste grew from a childhood dream into one of the internet’s most trusted recipe sites with hundreds of reliable recipes, step-by-step videos, and expert tips.More About Us
    Source link

  • Layered Mexican Casserole with Chicken and Cauliflower Rice

    Layered Mexican Casserole with Chicken and Cauliflower Rice

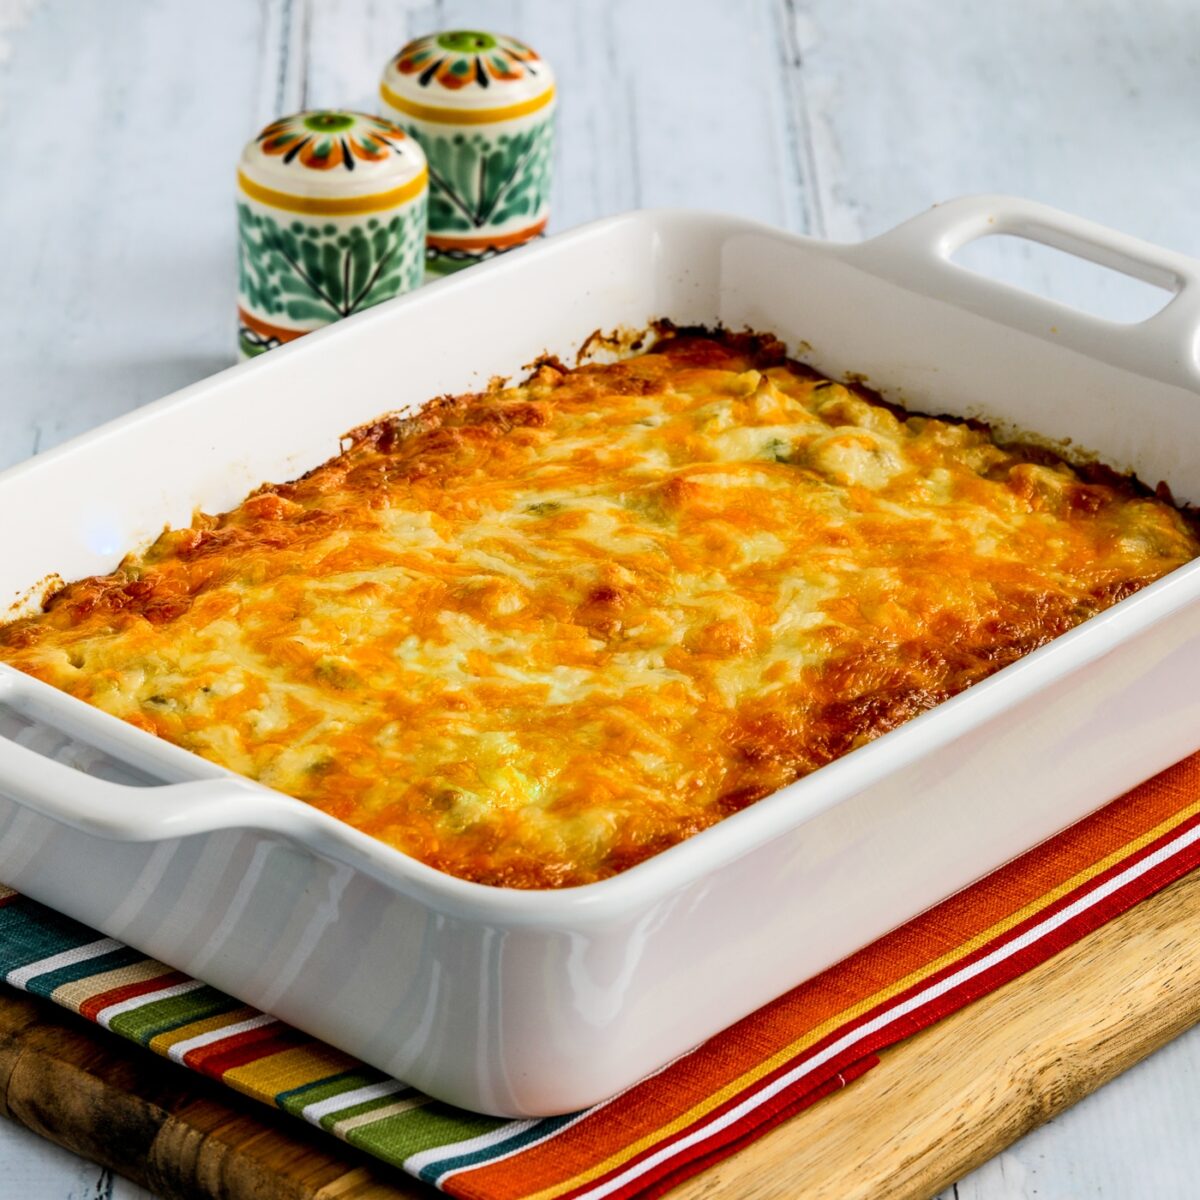
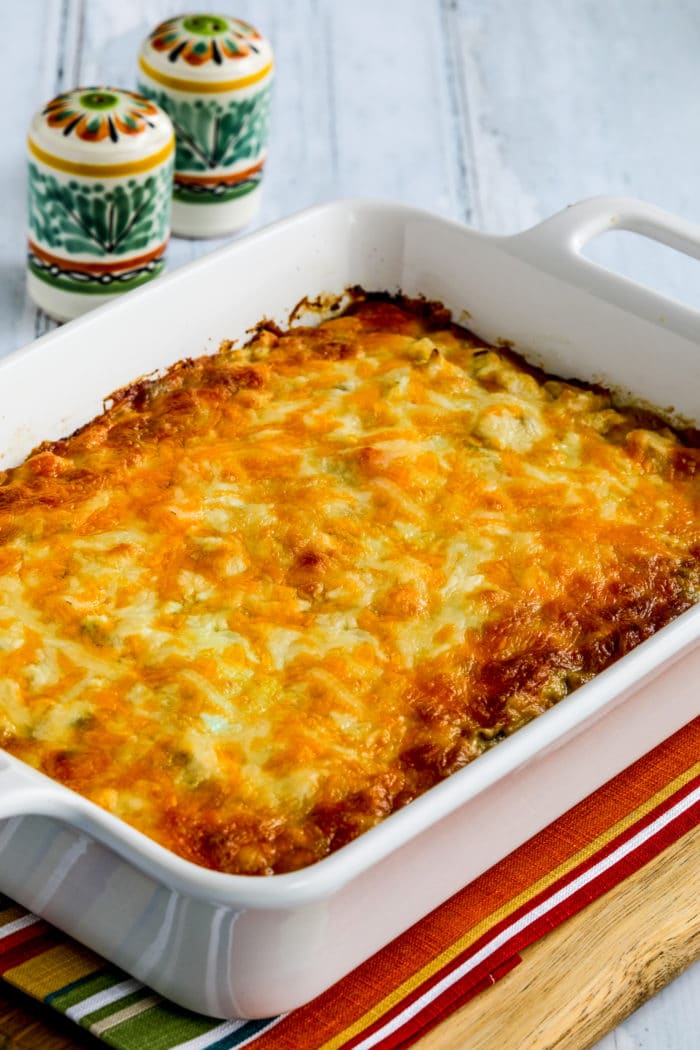
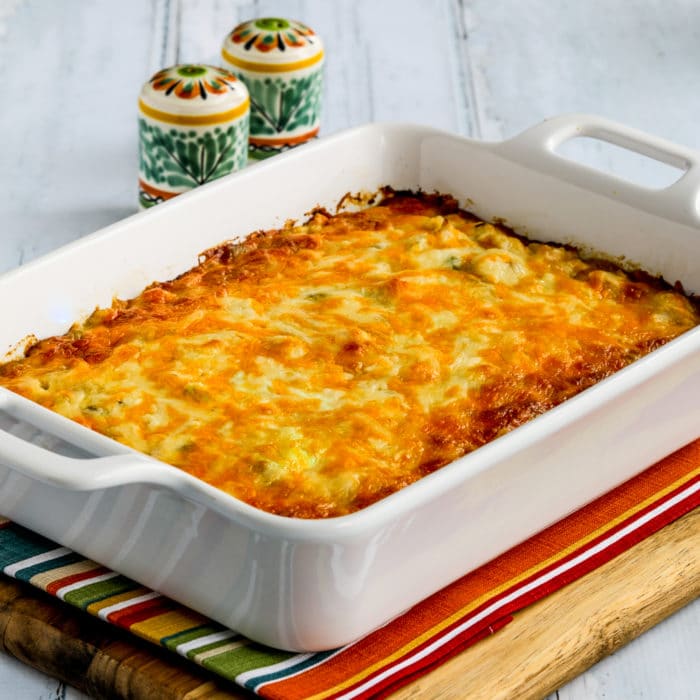
    Layered Mexican Casserole has Green Chile Enchilada Sauce, sour cream, green chiles, chicken, cauliflower rice, and cheese. And everyone who loves those Mexican flavors will love them in this cheesy creamy casserole!

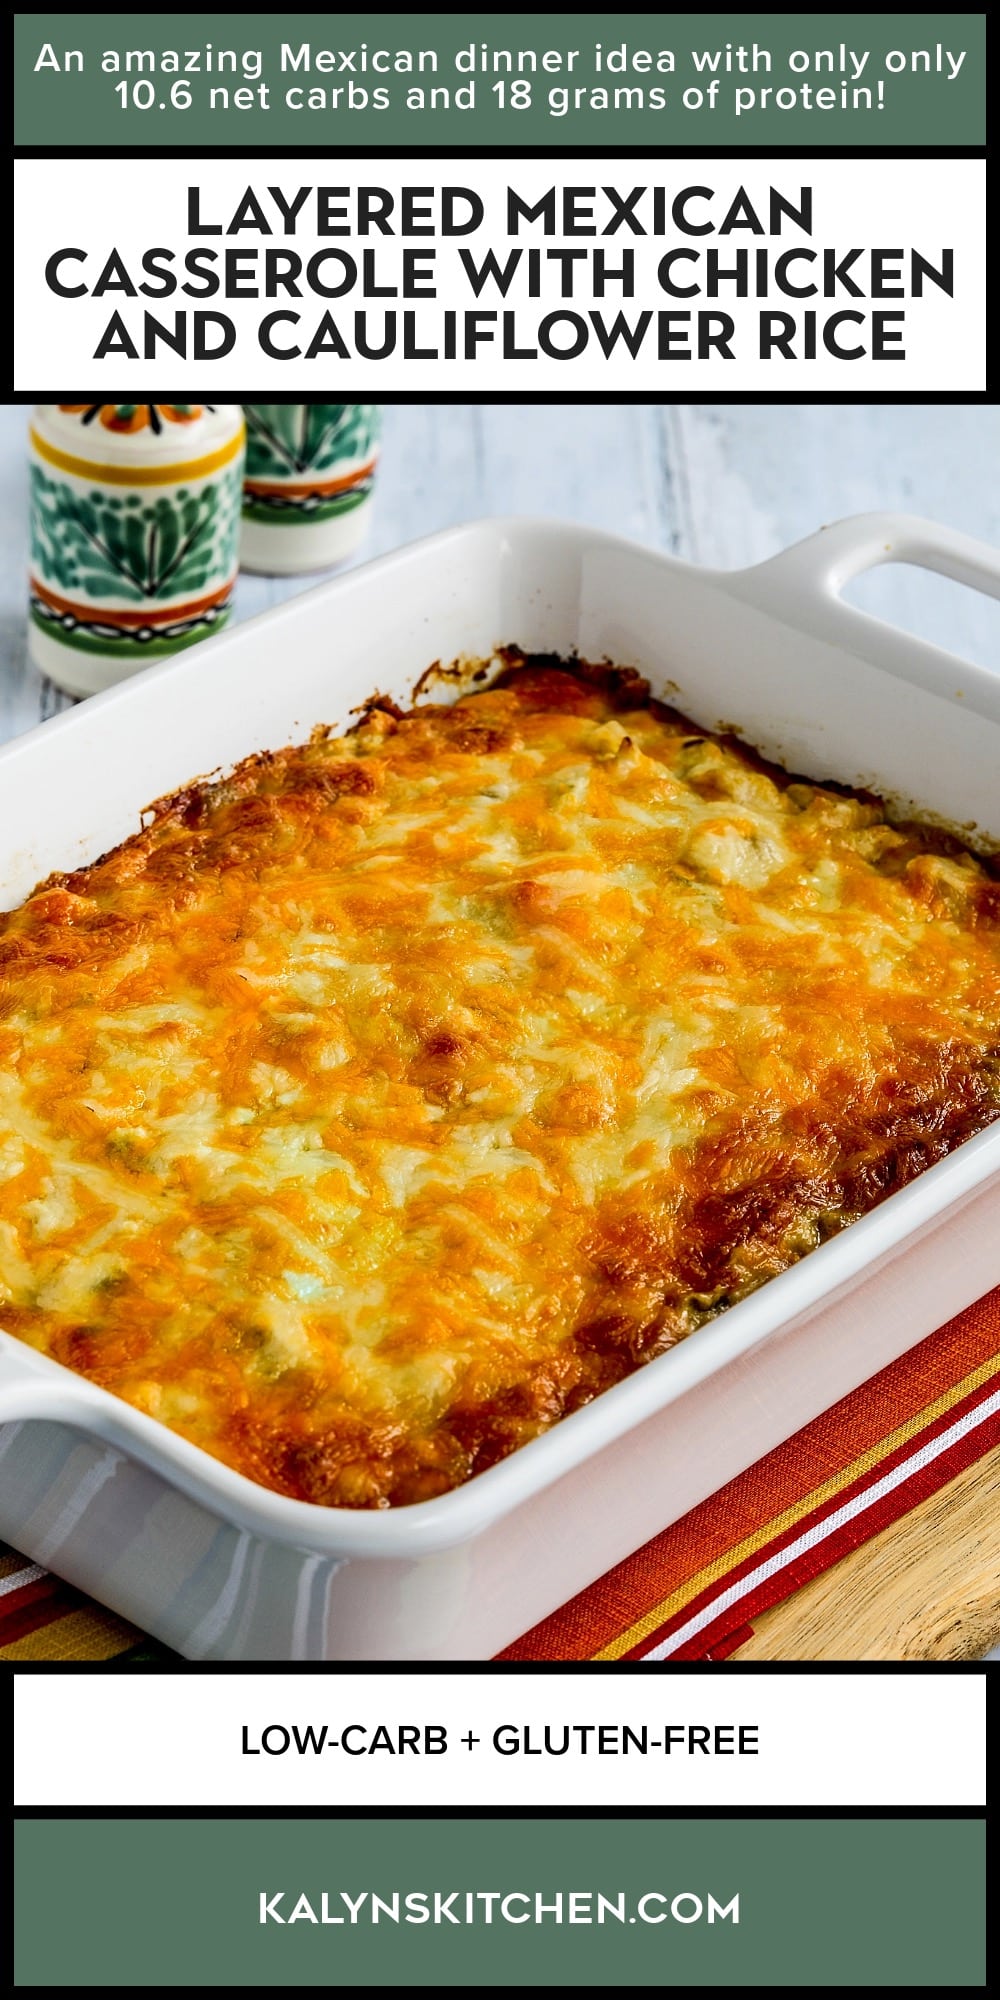
    PIN the Layered Mexican Casserole to make it later!

    Layered Mexican Casserole with Chicken and Cauliflower Rice finished casserole in baking dish

    Layered Mexican Casserole with Chicken and Cauliflower Rice is a recipe that would be a winner for a Cinco de Mayo dinner! We loved this low-carb and gluten-free casserole when we tested the recipe. And the recipe was inspired by a comment on an old favorite casserole complaining that the recipe wasn’t low in carbs!

    That comment got me wondering about what I could come up with for a low-carb version of a layered Mexican casserole with chicken. And this recipe is the happy result of a few experiments with Kara to create this recipe that we thought was amazing! I hope you try it soon.

    What ingredients do you need for this recipe?

    (This is only a list of ingredients; please scroll down for complete printable recipe. Or if you use the JUMP TO RECIPE link at the top of the page, it will take you directly to the complete recipe with ingredients.)

    How did we make the Layered Mexican Casserole low in carbs?

    This Mexican chicken casserole recipe has a layer with Green Chile Enchilada sauce reduced on the stove and combined with green chiles, sour cream, diced chicken, and sliced green onions. The other layer has a cauliflower rice mixture that also has onions, cumin, and green bell pepper. And of course, all the layers have cheese. I promise this recipe will be a hit with all the Mexican food fans who are watching their carbs!

    Why I use Hatch Green Chile Enchilada Sauce for the Layered Mexican Casserole:

    I’m a long-time fan of Hatch Green Chile Enchilada Sauce (affiliate link), a delicious canned green enchilada sauce that’s gluten-free. Even though the ingredient list has tiny amounts of sugar and cornstarch, the sauce adds only 3.5 carbs per serving to this recipe. And this sauce is so flavorful and convenient that for me it’s a product worth using. If you find other canned Green Chile Enchilada Sauce that’s also low in sugar, by all means use the sauce you prefer!

    How low in carbs is this Layered Mexican Casserole?

    This tasty casserole has only 10.6 net carbs in a serving, with 18 grams of protein!

    Want more low-carb Mexican Food?

    Check out Keto Mexican Food Dinners for more tasty Mexican dishes that are low in carbs!

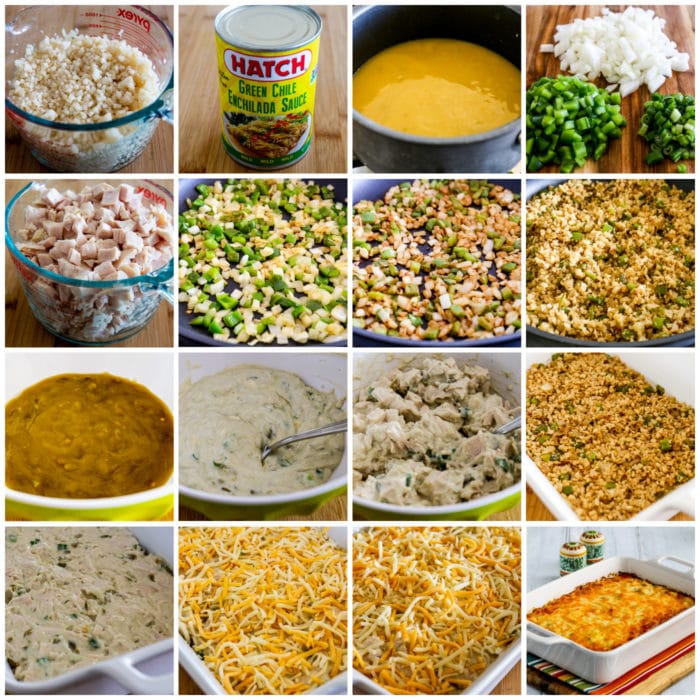
    Layered Mexican Casserole with Chicken and Cauliflower Rice process shots collage

    How to make Layered Mexican Casserole:

    (This is only a summary of the steps for the recipe; please scroll down for complete printable recipe. Or if you use the JUMP TO RECIPE link at the top of the page, it will take you directly to the complete recipe with ingredient amounts.)

    1. Preheat oven to 375 F/190C. Spray a casserole dish with non-stick spray.
    2. Take frozen cauliflower rice out of the freezer.
    3. Put Green Chile Enchilada Sauce  in a small saucepan and simmer until it’s reduced to one cup.
    4. Dice onion and green bell pepper and slice green onions, and cut chicken into small dice. 
    5. Heat olive oil in a big frying pan, add onion and green pepper and cook until they’re starting to brown. Add ground cumin and cook a few minutes more.
    6. Add frozen cauliflower rice and cook over high heat until rice is hot and some steam has evaporated, about 4 minutes.
    7. When Green Chile Enchilada Sauce is reduced to one cup, put it in a medium-sized bowl and stir in diced green chiles. Taste to see if you want some Green Tabasco Sauce.)
    8. When the mixture is still warm but not hot, stir in the sour cream, diced chiles, and green onions.
    9. Make a layer in the casserole dish with half the cauliflower rice mixture.
    10. Add half the chicken/sour cream mixture by spoonfuls, and spread it over the cauliflower rice.
    11. Add half the grated cheese over the chicken mixture.
    12. Make another layer each of cauliflower rice mixture, chicken mixture, and grated cheese.
    13. Bake uncovered about 30-35 minutes. 
    14. Let the Layered Mexican Casserole stand 5-10 minutes before cutting, and then serve!

    Make it a Low-Carb Meal:

    I’d love this Mexican Casserole served with any of these side dishes for a low-carb meal:

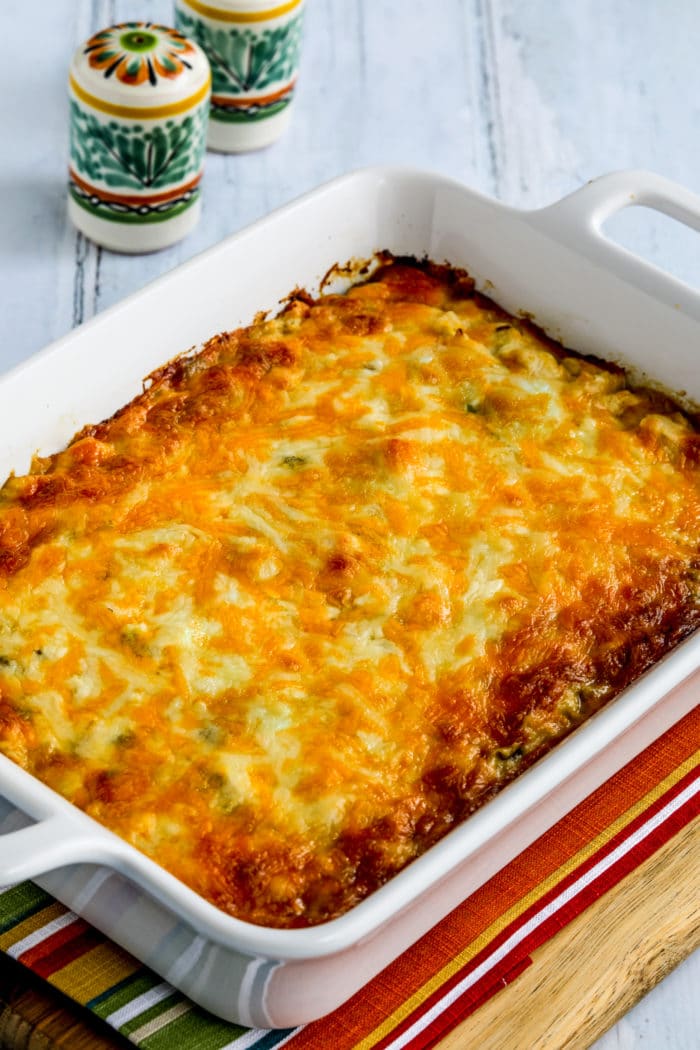
    Layered Mexican Casserole with Chicken and Cauliflower Rice shown in baking dish

    Weekend Food Prep:

    This Layered Mexican Casserole recipe has been added to a category called Weekend Food Prep where you’ll find recipes you can prep or cook on the weekend and eat during the week!

    Ingredients

    • 3 cups frozen cauliflower rice (see notes)
    • one 15 oz. can Hatch Green Chile Enchilada Sauce
    • 1 medium onion
    • 1 green bell pepper
    • 1 T olive oil
    • 1 T ground cumin (see notes)
    • one 4 oz. can diced green chiles (see notes)
    • 1 T Green Tabasco Sauce (optional)
    • 3/4 cup sour cream
    • 2 cups diced cooked chicken
    • 1/4 cup sliced green onion
    • 2 cups grated Mexican Cheese Blend

    Instructions

    1. Preheat oven to 375 F/190C. Spray a 9″ x 12″ x 3″ casserole dish with non-stick spray. (You need a dish close to that size to hold this recipe.)
    2. Take frozen cauliflower rice out of the freezer and let it start to thaw on the counter.
    3. Put Hatch Green Chile Enchilada Sauce (or sauce of your choice) in a small saucepan and simmer until it’s reduced to one cup.
    4. Dice onion and green bell pepper and slice green onions.
    5. Cut chicken into small dice. (We used cooked rotisserie chicken from Costco, which made it easy.)
    6. Heat olive oil in a frying pan big enough to hold the cauliflower rice, add onion and green pepper and cook until they’re barely starting to brown, about 5 minutes.
    7. Add ground cumin and cook a few minutes more.
    8. Then add frozen cauliflower rice and cook over high heat until rice is hot and liquid has evaporated, about 4 minutes.
    9. When Green Chile Enchilada Sauce has reduced to one cup, put it in a bowl that’s big enough to hold the chicken, and stir in diced green chiles. (Taste to see if you want the optional Green Tabasco Sauce.)
    10. When the mixture is still warm but no longer hot, stir in the sour cream, diced chiles, and green onions.
    11. Make a layer in the bottom of the casserole dish with half the cauliflower rice mixture.
    12. Add half the chicken/sour cream mixture by spoonfuls, and spread over the cauliflower rice.
    13. Add half the grated cheese over the chicken mixture.
    14. Make another layer each of cauliflower rice mixture, chicken mixture, and grated cheese.
    15. Bake uncovered 30-35 minutes, or until casserole is bubbling hot and the top is nicely browned. 
    16. Let the Layered Mexican Casserole stand 5-10 minutes before cutting, and serve!

    Notes

    We made this Layered Mexican Casserole with 3 cups cauliflower rice, but if you’d like a thicker cauliflower rice layer you can use a bit more.

    If you’re not a huge cumin fan, you might want a bit less cumin.

    The diced green chiles are mild Anaheim chiles, not Jalapenos!

    Nutrition Information

    Yield

    8

    Serving Size

    1

    Amount Per Serving

    Calories 285Total Fat 19gSaturated Fat 9gTrans Fat 0gUnsaturated Fat 8gCholesterol 71mgSodium 257mgCarbohydrates 13gFiber 2.4gSugar 7gProtein 18g

    Nutrition information is automatically calculated by the Recipe Plug-In I am using. I am not a nutritionist and cannot guarantee 100% accuracy, since many variables affect those calculations.

    Did you make this recipe?

    Did you make this recipe? Please leave a star rating (under the PRINT button in the recipe) or share a photo of your results on Instagram! THANKS!

    Layered Mexican Casserole with Chicken and Cauliflower Rice thumbnail square image of finished casserole in baking dish

    Low-Carb Diet / Low-Glycemic Diet / South Beach Diet Suggestions:
    This recipe for a layered Mexican casserole uses a Green Chile Enchilada Sauce that does have teeny-tiny amounts of cornstarch and sugar. But those amounts are so low that this recipe should be low enough in net carbs for most low-carb diets. I’m not tagging it as Keto, although it wouldn’t be bad for a one-dish meal. For the original South Beach Diet it would be recommended to use low-fat dairy products.

    Find More Recipes Like This One:
    Use Casserole Recipes to find more recipes like this one. Use the Diet Type Index to find more recipes suitable for a specific eating plan. You might also like to follow Kalyn’s Kitchen on Pinterest, on Facebook, on Instagram, on TikTok, or on YouTube to see all the good recipes I’m sharing there.

    Historical Notes for this Recipe:
    Layered Mexican Casserole was created in 2021 as a lower-carb version of a favorite Mexican Chicken Casserole from the past! It was last updated with more information in 2026.

    Pinterest image of Layered Mexican Casserole with Chicken and Cauliflower Rice

    We are a participant in the Amazon Services LLC Associates Program, an affiliate advertising program designed to provide a means for us to earn fees by linking to Amazon.com and affiliated sites. As an Amazon Associate, I earn from qualifying purchases.


    Source link

  • Easy Chicken Nuggets Recipe

    Easy Chicken Nuggets Recipe

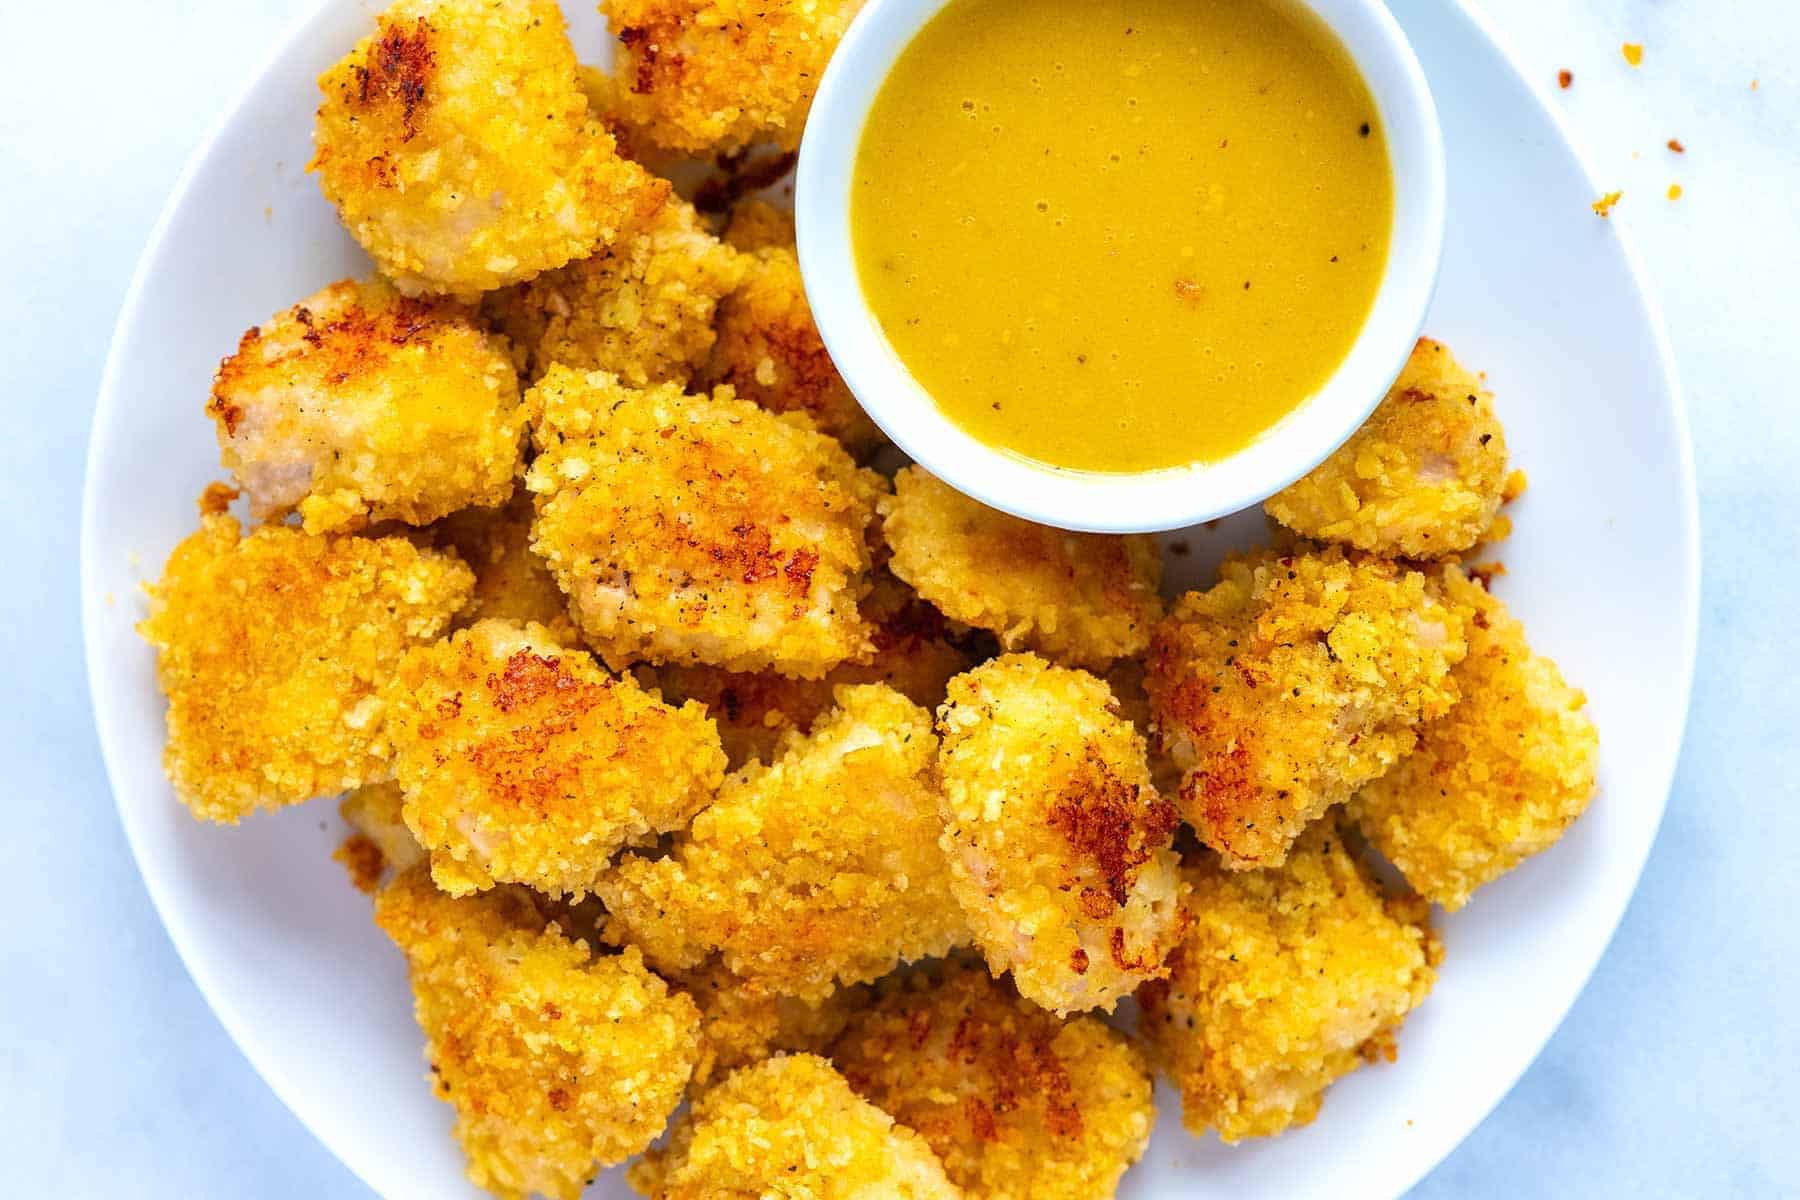
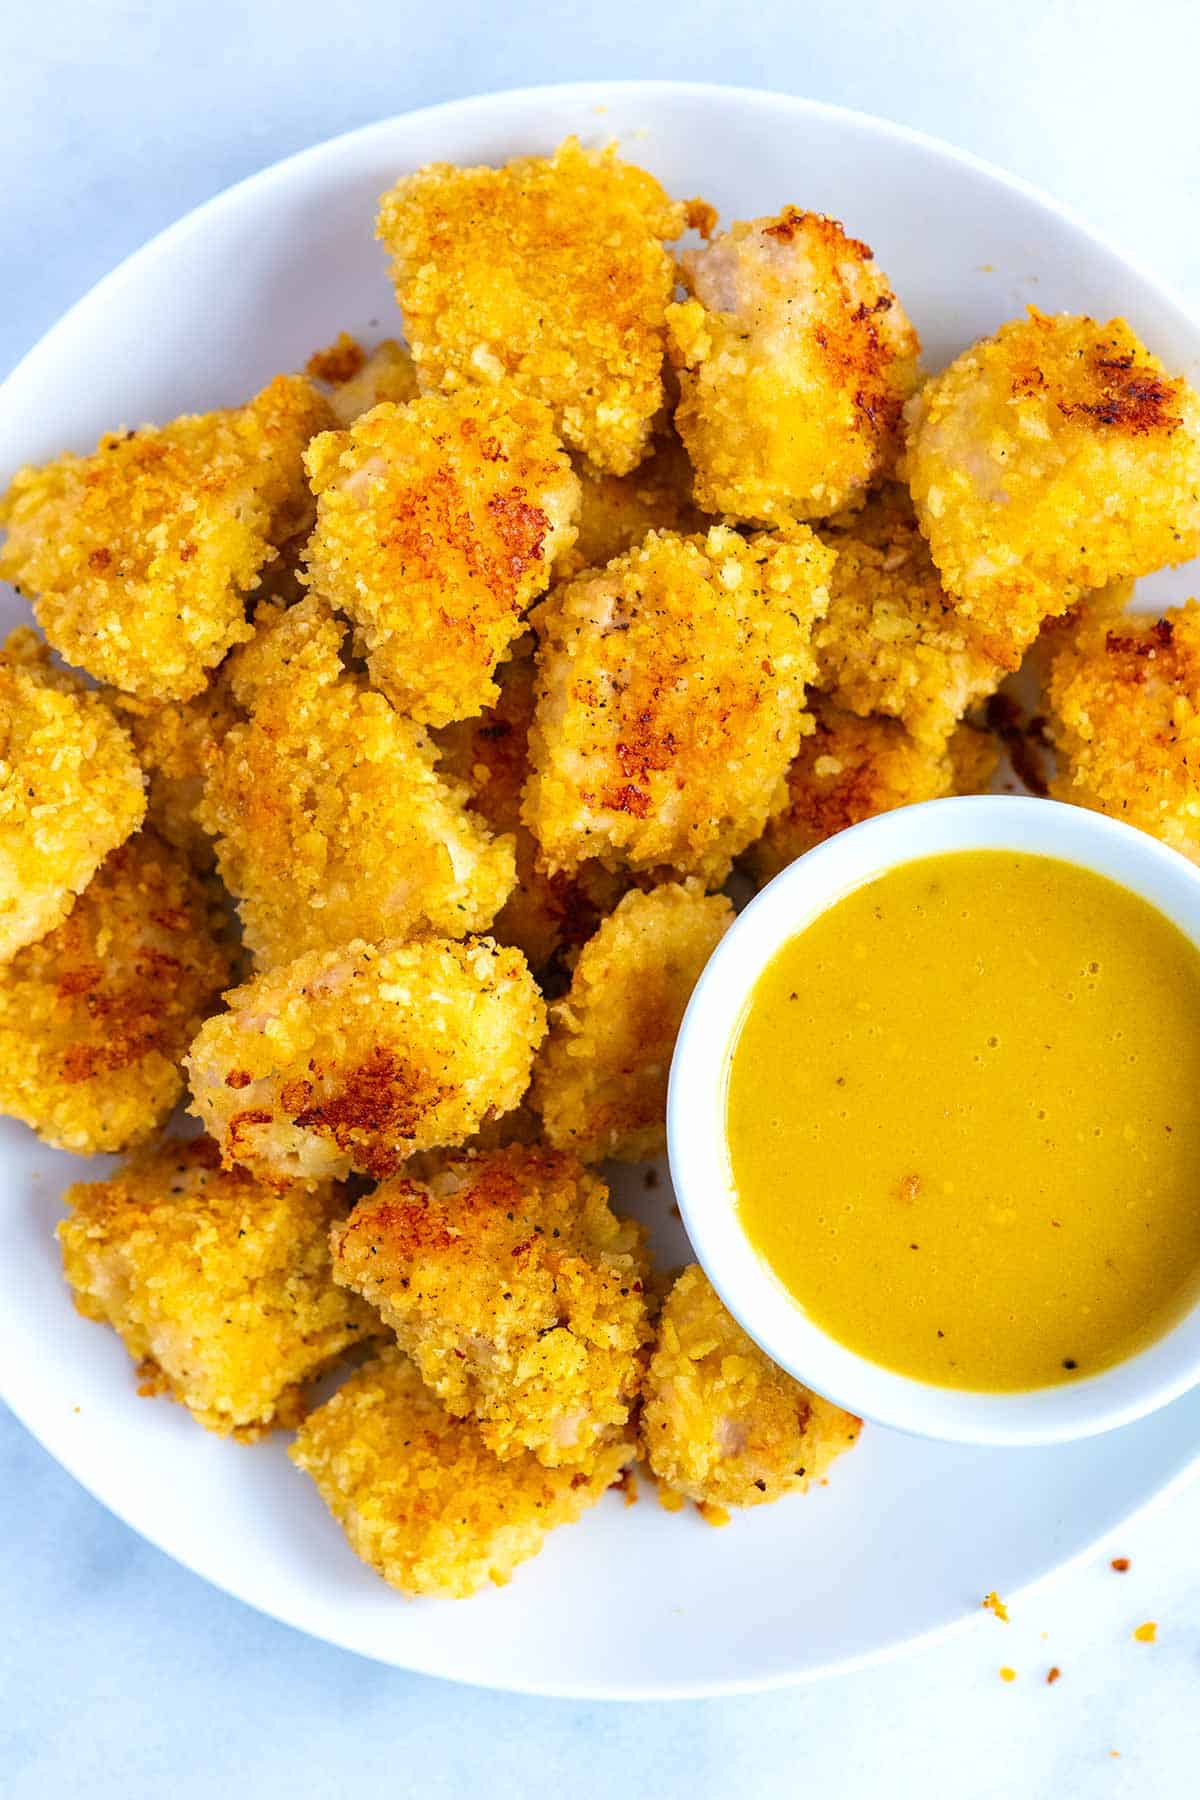
    This homemade chicken nugget recipe is a lifesaver (my son loves them!). To make things extra easy, we use potato chips for the coating, then bake until crispy.

    Crispy Baked Homemade Chicken Nuggets with honey mustard sauce.

    You only need three ingredients (really!). And instead of frying them in oil, which can be messy, we bake them right in the oven for that same satisfying crunch.

    Before kids, I already loved this recipe. But once my son came along, it quickly became one of my go-tos. I love that I can make homemade nuggets in minutes, with almost no cleanup, and I know he’ll eat every bite. For more like this, see our homemade popcorn chicken!

    Key Ingredients

    • Chicken: You can use either chicken breasts or thighs for this recipe. Chicken thighs are a bit more tender and flavorful, but both work nicely.
    • Potato Chips: Use your favorite kind! I love dill pickle or sour cream and onion for extra flavor. The chips make this a naturally gluten-free breading (double-check the package to be sure they’re certified GF). You can also choose between baked and fried chips, depending on how light or indulgent you want them.
    • Egg: The egg helps the crushed chips stick to the chicken. Since we’re skipping the traditional three-step breading (flour, egg, breadcrumbs), one beaten egg is all you need.

    Find the full recipe with measurements below.

    How to Make Chicken Nuggets at Home

    Tip 1: Crush potato chips. The more crushed the chips, the better they will coat your chicken. Crush them right in the bag they came in (I open the corner, releasing the air inside, and then go to town with a heavy can). Another option is to pulse them in a blender or food processor.

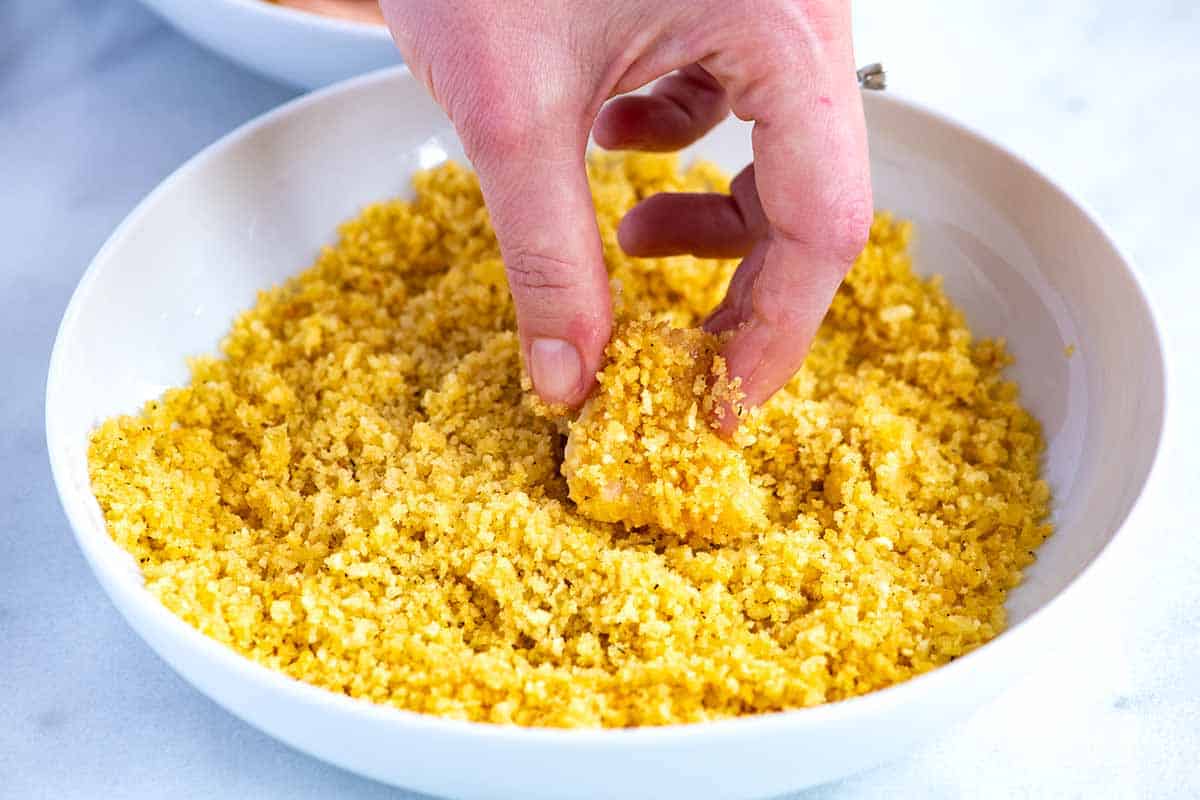
    Tip 2: Bread them. Cut your chicken into bite-sized pieces, dip them in beaten egg, then roll them in crushed potato chips.

    Breading chicken nuggets in crushed potato chips

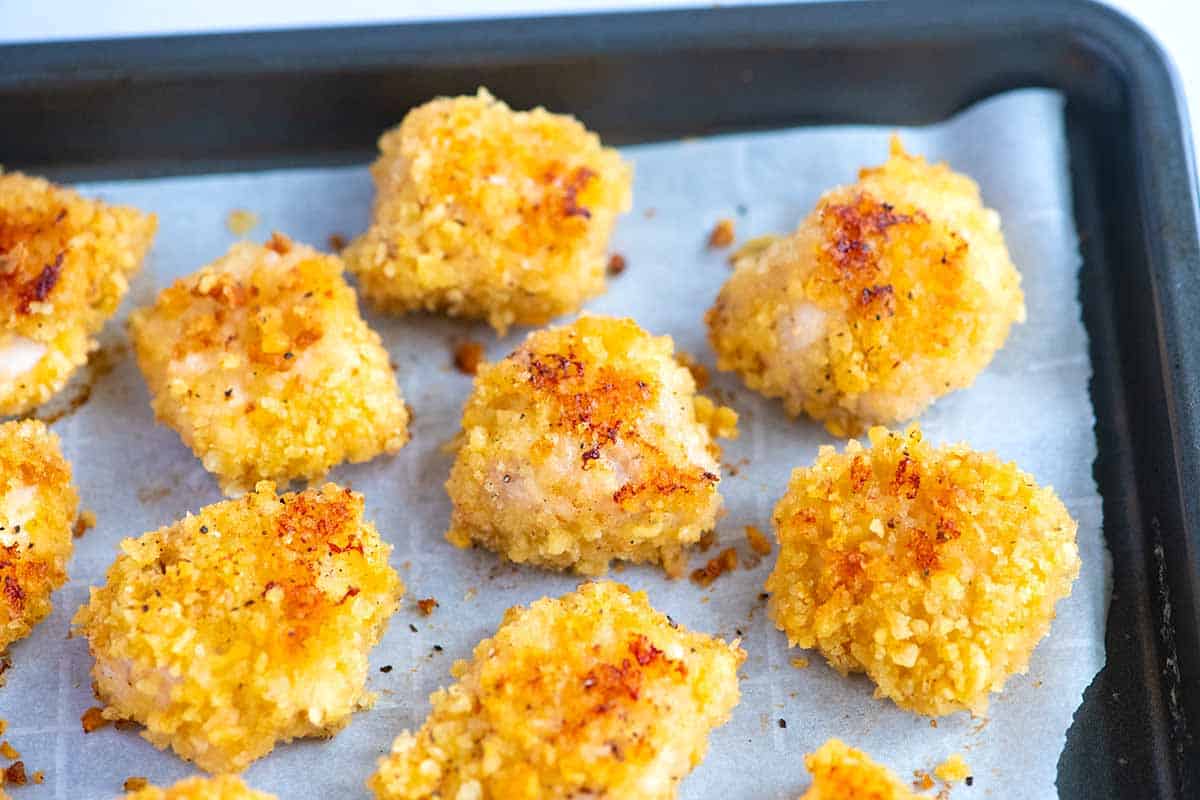
    Tip 3: Bake them. Line the chicken nuggets on a baking sheet, spray with a bit of cooking oil, then bake until they are cooked through in the middle and golden on the outside. I like flipping them halfway for even browning.

    Homemade Chicken Nuggets

    Tip 4: Air fry them. When we first shared this recipe, air fryers weren’t a big deal, but now that’s a whole different story. You can make these chicken nuggets in the air fryer. Add them to your basket, give them a spritz of cooking oil, then air fry until golden and crispy, 8 to 10 minutes.

    Serving Suggestions

    These are classic with some ketchup or BBQ sauce on the side. Add a side of roasted potato wedges or baked fries and some roasted broccoli with homemade ranch, fry sauce, or creamy honey mustard.

    I also love a side of sweet potato fries or serving these on top of a fresh salad. They are also amazing tossed with buffalo sauce!

    More Easy Chicken Recipes

    Homemade chicken nuggets

    Easy Chicken Nuggets

    • PREP
    • COOK
    • TOTAL

    Forget store-bought, frozen nuggets! These kid (and adult) approved homemade chicken nuggets is so easy, and the secret is that crispy potato chip coating!

    Makes 4 servings

    You Will Need

    1 ¼ pounds skinless, boneless chicken breast or thighs (566g)

    5 ounces favorite potato chips, 3 heaping cups (140g)

    1 large egg, see notes

    Nonstick cooking spray or olive oil

    Directions

      1Prep: Preheat the oven to 400°F (204°C). Line a baking sheet with parchment paper, foil, or a silicone baking mat. See below for using an air fryer.

      2Prepare breading: Add the potato chips to a resealable bag, then crush them into bits using a rolling pin. You can also add to a food processor and pulse until crumbled. Add the crushed potato chip crumbles to a wide bowl. Beat the egg in a separate bowl.

      3Bread the chicken: Cut the chicken into 1-inch pieces (about 24 pieces). With one hand, dip a piece of chicken into the beaten egg. Shake any excess egg off to prevent soggy nuggets. Roll the chicken into the crushed potato chips with your other hand or kitchen tongs and place them onto the prepared baking sheet. Repeat with the remaining pieces of chicken.

      4Bake: Spray the tops of the chicken with nonstick cooking spray or add a drizzle of olive oil. Bake for 15 minutes, flip, and then bake until an internal thermometer inserted into the chicken reads 165°F, another 8 to 12 minutes more.

      5Air Fry (optional): Instead of baking them, place the coated chicken nuggets in your air fryer basket in a single layer. Spray them lightly with cooking spray. Air fry at 390°F for 4 minutes. Shake the basket, spray lightly again, then air fry for another 3 to 5 minutes (or until golden brown and cooked in the middle).

    Adam and Joanne’s Tips

    • Storing: Store leftover nuggets in an airtight container in the fridge for up to 4 days. Or, freeze the cooked, cooled nuggets on a sheet pan for an hour or two until solid. Then, transfer them to an airtight container and freeze them for up to 3 months. To reheat, bake in a preheated 400°F oven for 10 to 15 minutes or air fry at 390°F for 4 to 7 minutes.
    • One egg is usually enough. If you run out, whisk a second egg into the bowl.
    • For crispier chicken nuggets, insert a wire baking rack into a rimmed baking sheet. Then, bake the nuggets on top of the wire rack. Since air flows around the chicken, there is no need to flip the chicken.
    • Recipe inspired by Gimme Some Oven.
    • The nutrition facts provided below are estimates. We assumed full-fat salted potato chips. For fewer calories and fat, use baked chips.

    Nutrition Per Serving
    Serving Size
    1/6 of the recipe, 4 nuggets
    /
    Calories
    277
    /
    Total Fat
    13g
    /
    Saturated Fat
    1.8g
    /
    Cholesterol
    99.9g
    /
    Sodium
    204mg
    /
    Carbohydrate
    15.4g
    /
    Dietary Fiber
    0.9g
    /
    Total Sugars
    0.1g
    /
    Protein
    24.1g


    AUTHOR:

    Adam Gallagher

    Adam and Joanne of Inspired Taste

    We are Adam and Joanne Gallagher, the creators of Inspired Taste. Established in 2009, Inspired Taste grew from a childhood dream into one of the internet’s most trusted recipe sites with hundreds of reliable recipes, step-by-step videos, and expert tips.More About Us
    Source link

  • Honey Bourbon Chicken

    Honey Bourbon Chicken

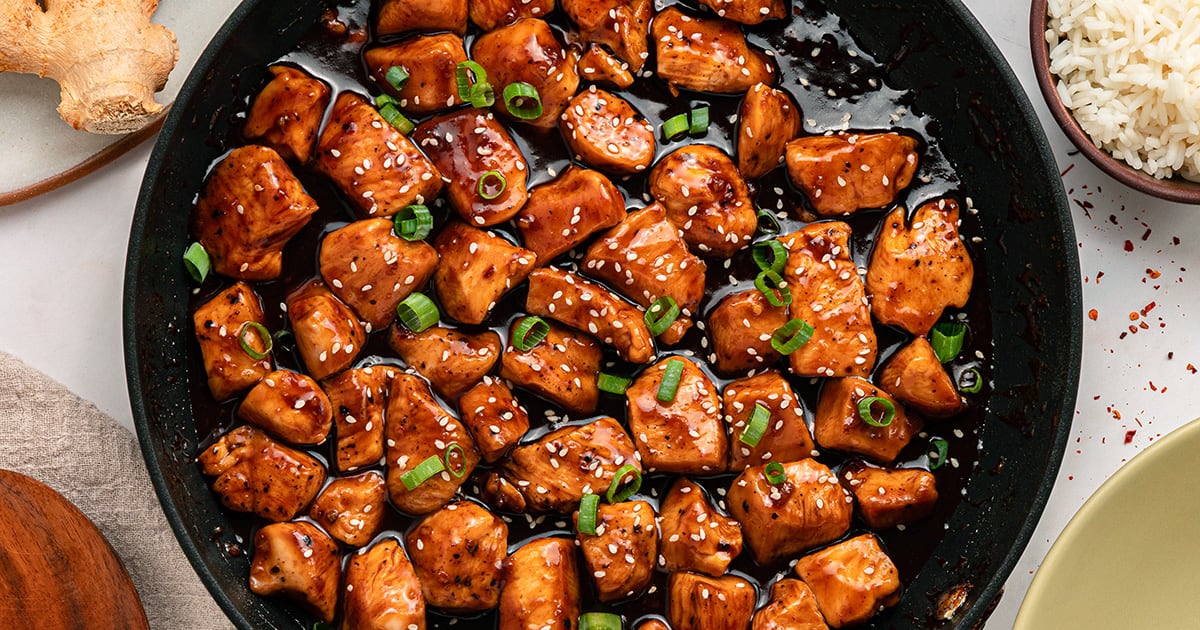
    This bourbon chicken is sticky, sweet, and packed with bold flavor—an easy homemade version that tastes better than takeout.


    Jump to: ℹ️ Overview | 🛒 Ingredients | 👩‍🍳 Recipe Tips | 📝Full Recipe Card | 📷 How To Make | 🥗 Serving Suggestions | | 🍽 More Chicken Dinner Recipes


    At A Glance:

    • Ready In: 30 minutes
    • 🍽 Serves: 4
    • 🌱 Diet: Dairy-free
    • 💪 Nutrition Highlights: High in protein, balanced with natural sugars
    • 🥕 Main Ingredients: Chicken breast, bourbon, honey, soy sauce, garlic, ginger
    • 🔥 Flavor Profile: Sweet, savory, slightly smoky with a gentle heat
    • 🧊 Meal-Prep Friendly: Keeps 3–4 days in the fridge
    • Best Served With: Steamed rice, broccoli, or fried rice

    If you’ve ever tried bourbon chicken, you would know that the sauce is the real star here. It’s sweet from the honey, savory from the soy sauce, and layered with garlic and ginger so it doesn’t tip into overly sweet territory. Letting the bourbon simmer briefly gives you that subtle caramel-like depth without any harshness. And yes, you can make this without bourbon!

    What I like about this version is how approachable it is. No complicated techniques, just a good sear on the chicken and a sauce that comes together in the same pan. It’s very similar to the classic mall-style bourbon chicken, but the flavor is more balanced and less sugary. You end up with tender chicken coated in a glossy, sticky sauce that actually clings (not watery or overly thick).

    If you’re after a reliable weeknight dinner that feels a bit indulgent but still straightforward, this one delivers every time.

    👩‍🍳 You might also like these recipes: honey soy ground chicken rice bowls, gochujang chicken, baked honey soy chicken wings, chicken meatballs with honey garlic soy sauce, or honey sriracha chicken.

    What You’ll Need

    Here is what you’ll need for this honey bourbon chicken recipe. Find the full measurements in the recipe card below.

    • Chicken breast – lean and cooks quickly; cut evenly so it cooks at the same rate. Chicken thighs = juicier, slightly more forgiving
    • Cornstarch – helps create that light crust and gives the sauce something to cling to
    • Olive oil – neutral oil for searing
    • Bourbon – adds depth and a slightly smoky, caramel note (don’t skip simmering it first). Can I make this without bourbon? Yes—use apple juice or chicken stock, but you’ll miss some of the depth
    • Honey – brings sweetness and helps create that sticky finish
    • Soy sauce – adds salt and umami; this is what balances the sweetness. Low-sodium soy sauce works well if you prefer less salt.
    • Brown sugar – deepens the flavor rather than just making it sweet
    • Ketchup – sounds simple, but adds tang and body
    • Apple cider vinegar – cuts through the richness (this is key for balance)
    • Garlic & ginger – essential for that classic savory base. Fresh ginger really makes a difference here—worth using if you can.
    • Smoked paprika – adds a subtle smoky layer
    • Red pepper flakes – gentle heat that builds slightly
    • Dijon mustard – small amount, but rounds everything out
    • Cornstarch slurry – thickens the sauce to that glossy consistency

    Recipe Tips

    • Dry chicken properly: This is one of the biggest differences between good and great texture
    • Use a hot pan: If the pan isn’t hot enough, the chicken will release moisture and won’t brown
    • Don’t overcrowd: Cook in batches if needed—this keeps the sear intact
    • Taste the sauce: Before adding the chicken back, adjust sweetness or acidity if needed
    • Watch the sauce: It thickens quickly once the slurry is added
    • Storage & Make-Ahead: Store in an airtight container for up to 4 days. Reheat on the stove or microwave with a splash of water. Freeze up to 2 months (texture is still good after reheating). Sauce can be made ahead and stored separately for up to 3 days

    💬 If you’ve tried this bourbon chicken or any other recipe on the blog then don’t forget to rate the recipe and let me know how you got on in the comments below, I love hearing from you! You can also FOLLOW ME on Instagram, Facebook, Pinterest, YouTube, and or sign up to my Newsletter to see more of my delicious food.

    Want to Save This Recipe?

    Enter your email & I’ll send it to your inbox. Plus, get great new recipes from me every week!

    By submitting this form, you consent to receive emails from Cooked & Loved

    This bourbon chicken is sticky, sweet, and packed with bold flavor—an easy homemade version that tastes better than takeout. FIND STEP-BY-STEP PHOTOS BELOW THIS CARD.

    • Pat chicken dry and season with salt and pepper. Toss with cornstarch.

    • Heat olive oil in a large skillet over medium-high heat.

    • Cook chicken for 4–5 minutes per side until golden and nearly cooked through. Remove and set aside.

    • Lower heat slightly. Add garlic and ginger, cook for 30 seconds.

    • Carefully pour in bourbon and simmer for 1–2 minutes.

    • Add honey, soy sauce, brown sugar, ketchup, vinegar, paprika, and chili flakes. Simmer 3–4 minutes.

    • Stir in cornstarch slurry and cook until thickened and glossy.

    • Return chicken to the pan and coat in sauce. Simmer 3 minutes until sticky.

    • Serve warm over rice and garnish as desired.

    • Dry chicken properly: This is one of the biggest differences between good and great texture
    • Don’t overcrowd: Cook in batches if needed—this keeps the sear intact
    • Taste the sauce: Before adding the chicken back, adjust the sweetness or acidity if needed
    • Watch the sauce: It thickens quickly once the slurry is added
    • Use a hot pan: If the pan isn’t hot enough, the chicken will release moisture and won’t brown
    • Storage & Make-Ahead: Store in an airtight container for up to 4 days. Reheat on the stove or microwave with a splash of water. Freeze up to 2 months (texture is still good after reheating). Sauce can be made ahead and stored separately for up to 3 days
    • Does the alcohol cook off? Most of it cooks off during simmering, leaving behind flavor rather than alcohol taste
    • Can I make this without bourbon? Yes—use apple juice or chicken stock, but you’ll miss some of the depth
    • Why is my chicken not browning? Usually, too much moisture or the pan isn’t hot enough. Make sure to pat the chicken dry well.
    • Why is my sauce too thin? Let it simmer longer or add a little more cornstarch slurry

    Calories: 374kcal | Carbohydrates: 30g | Protein: 38g | Fat: 6g | Saturated Fat: 1g | Polyunsaturated Fat: 1g | Monounsaturated Fat: 3g | Trans Fat: 0.02g | Cholesterol: 109mg | Sodium: 1032mg | Potassium: 721mg | Fiber: 0.4g | Sugar: 25g | Vitamin A: 250IU | Vitamin C: 3mg | Calcium: 24mg | Iron: 1mg

    Keywords: honey, Garlic, Chicken Dinner, Asian bourbon chicken, honey bourbon chicken, bourbon, ginger

    How To Make Bourbon Chicken (Step-By-Step Photos)

    Find the full recipe and nutritional information below. Here are some handy step-by-step photos for how to make bourbon honey chicken.

    • Pat chicken dry, season well, and lightly coat with cornstarch
    • Sear in a hot pan until deeply golden (don’t move it too soon)
    • Remove chicken and set aside
    • Cook garlic and ginger briefly until fragrant
    • Add bourbon and let it simmer to reduce and mellow
    • Stir in remaining sauce ingredients and simmer
    • Add cornstarch slurry and cook until glossy and thick
    • Return chicken and toss until fully coated
    • Simmer until the sauce clings to the chicken

    Serving Suggestions

    I usually serve this over jasmine rice because it soaks up all that sauce, but honestly, anything that can catch the extra glaze works. Fried rice or noodles are great if you want something a bit heartier.

    For balance, I like adding something green on the side—simple sautéed broccoli or steamed green beans work really well. If you want to stretch the meal, toss the chicken with vegetables right at the end and let everything coat in the sauce together.

    More Chicken Dinner Recipes


    Source link

  • Easy Honey Teriyaki Chicken Recipe

    Easy Honey Teriyaki Chicken Recipe

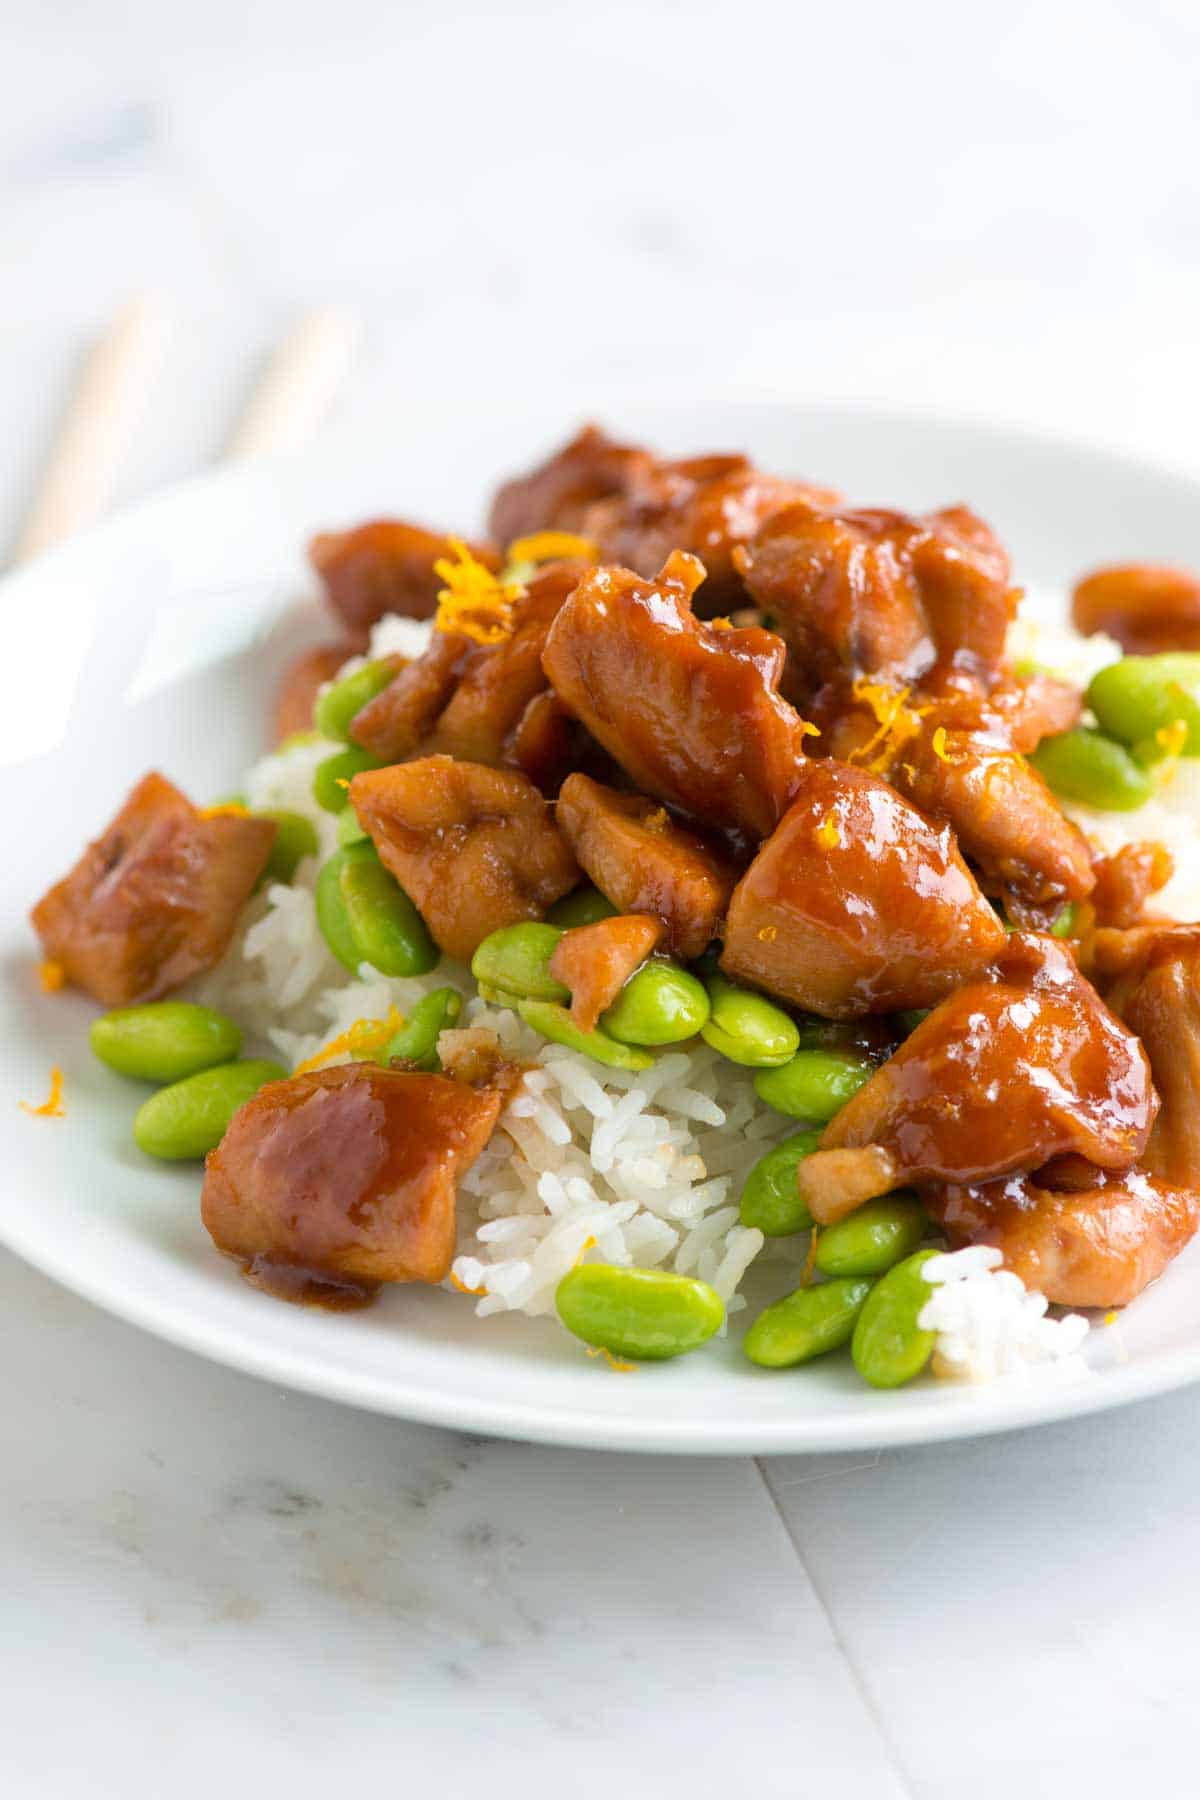
    This delicious honey teriyaki chicken recipe is naturally sweetened with fresh orange and honey, and comes together in under 30 minutes!

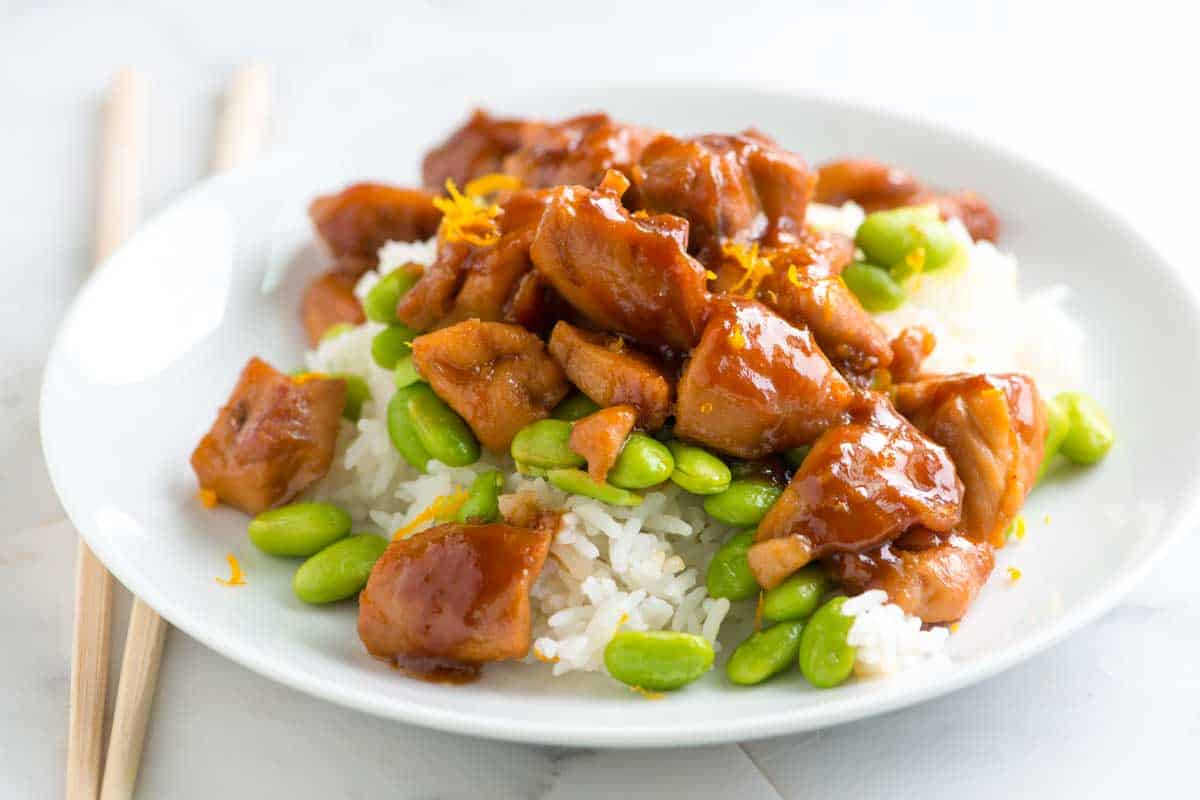
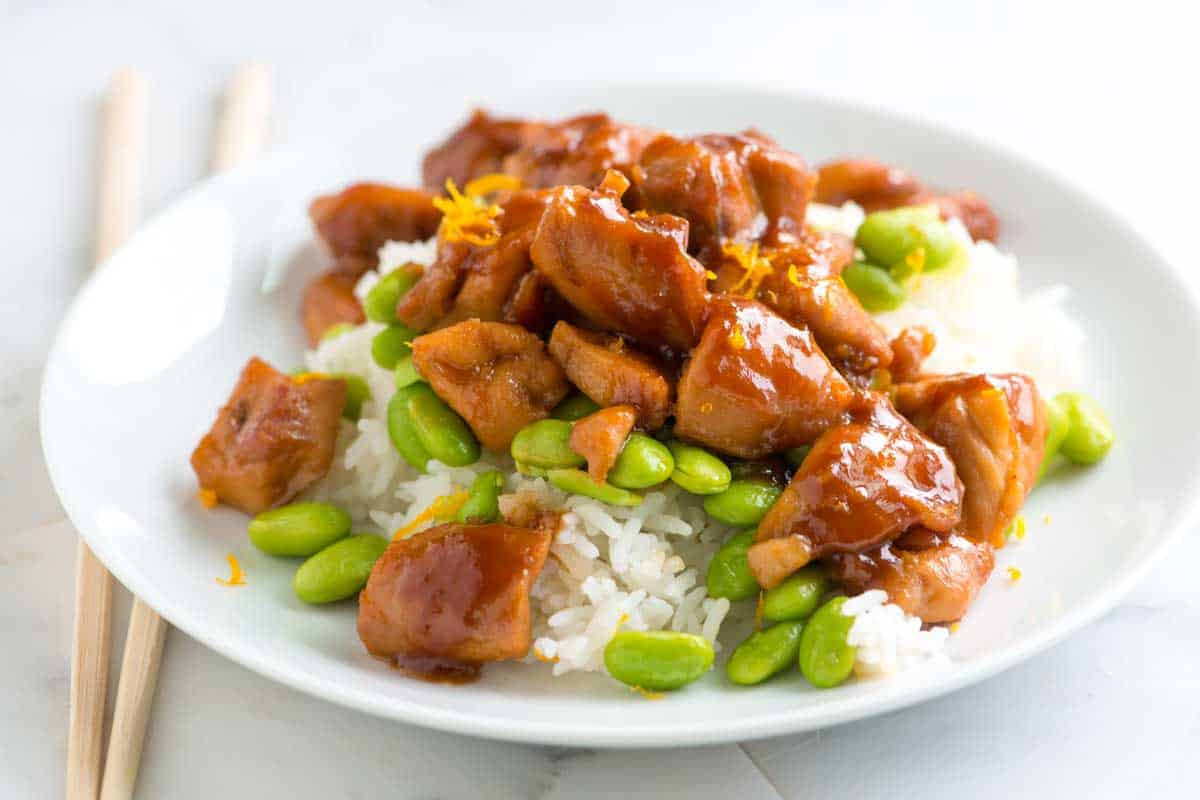
    Honey Teriyaki Chicken served over rice.

    I’m always looking for quick chicken recipes bursting with flavor, and this recipe delivers! We’ve already shared our homemade teriyaki sauce and this sticky teriyaki chicken, so if you liked those recipes, you are sure to love this spin. The sauce does double duty as a quick marinade and requires only 6 simple ingredients.

    I love serving this dish over plain white rice or, my personal favorite, coconut rice. It’s also fantastic paired with veggies like our sautéed bok choy, roasted green beans, or roasted broccoli.

    Key Ingredients

    • Chicken: I love boneless, skinless chicken thighs for this recipe. They cook quickly and turn out so juicy and tender. Feel free to substitute chicken breasts.
    • Honey: I usually use plain sugar for my homemade teriyaki sauce, but in this recipe, I swap the sugar for honey, adding a floral, sweet flavor.
    • Soy Sauce: Use light soy sauce or light tamari. Dark soy sauce or tamari will make the sauce taste too rich.
    • Orange: Another change from authentic teriyaki is using fresh orange juice to add an extra layer of flavor. Fresh squeeze is best as it usually has more of a tart flavor profile, while store-bought is typically a bit more sweet.
    • Ginger: Honey, orange, and ginger work so well that I add a tablespoon of finely grated ginger to this recipe. It makes the dish smell and taste incredible.
    • Mirin: This sweet Japanese rice wine adds flavor and gives the teriyaki sauce a beautiful luster. You can usually find it in the international aisle of larger grocery stores or Asian markets. If you can’t find it, substitutes include dry sherry, sweet marsala wine, dry white wine, or rice vinegar. You may need to add a touch more honey to the sauce when using a substitute.
    • Sesame Oil: I use toasted sesame oil, which adds a lovely, nutty aroma to the sauce.

    Find the full recipe with measurements below.

    How to Make Teriyaki Chicken

    Tip 1: Start by marinating. Whisk the marinade ingredients in a bowl (soy sauce, honey, orange juice, ginger, mirin, and sesame oil). Then, cut the chicken into bite-size pieces and toss them into the marinade. Let the chicken soak up all that flavor for 10 to 15 minutes, then move to the stove to cook it.

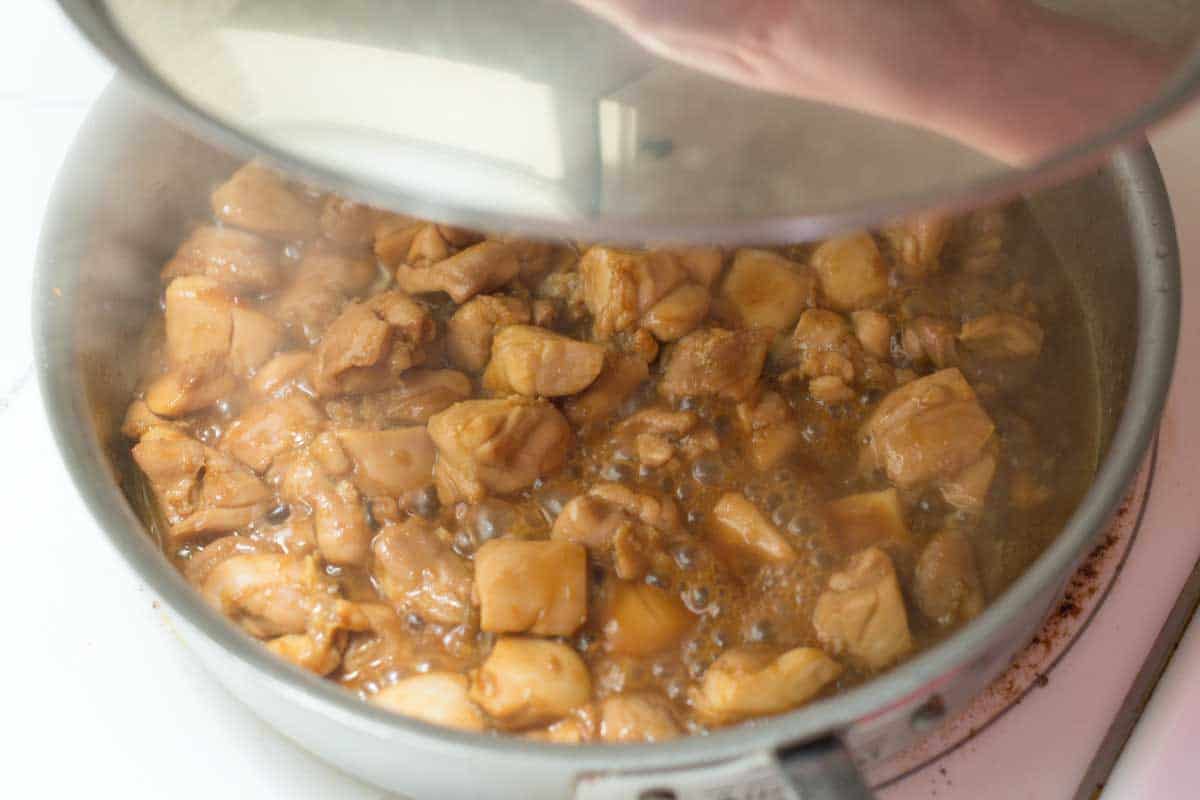
    Tip 2: Our marinade doubles as sauce. Our marinade doubles as our sauce as it cooks down, thickens, and sticks to the chicken. Use a slotted spoon to add the marinated chicken to hot oil in a pan, then cook until browned on all sides. Pour in the marinade and let everything simmer until the chicken is cooked through and the marinade thickens and clings to the chicken. Serve your chicken however you like. I especially love it over rice!

    Cooking the chicken so the honey teriyaki sauce thickens and sticks to the chicken

    More Asian-Inspired Recipes

    Honey Teriyaki Chicken

    Easy Honey Teriyaki Chicken

    • PREP
    • COOK
    • TOTAL

    You will love this quick and easy honey teriyaki chicken! The sauce is so simple and comes together in minutes. Plus, since we cut the chicken into pieces, it cooks quickly, so you can have dinner ready in no time!

    4 Servings

    You Will Need

    1/4 cup (60ml) low-sodium soy sauce

    1/3 cup (80ml) fresh squeezed orange juice, from 2 to 3 oranges

    3 tablespoons pure honey

    1 tablespoon finely grated ginger, 1-inch piece fresh ginger

    2 tablespoons mirin, see tips

    1 teaspoon toasted sesame oil

    1 1/2 pounds (680g) boneless skinless chicken thighs

    1 tablespoon avocado oil or vegetable oil

    2 teaspoons orange zest, optional

    Directions

      1Combine the soy sauce, orange juice, honey, ginger, mirin, and sesame oil in a medium bowl.

      2Cut the chicken thighs into 1-inch pieces, then add them to the marinade. Let marinade for 10 to 15 minutes.

      3Heat the oil in a large skillet or wok with a lid over medium-high heat. When the oil is hot, use a slotted spoon to remove the chicken from the marinade and place it into the pan. Save the marinade for later.

      4Cook the chicken for 2 to 3 minutes per side or until lightly browned.

      5Turn the heat to medium-low, pour in the reserved marinade, and cover the pan with a lid. Cook for 5 minutes. Remove the lid and continue to simmer until the sauce thickens and the chicken is cooked though, about 5 minutes more.

      6Serve over rice sprinkled with orange zest.

    Adam and Joanne’s Tips

    • Ginger: To grate ginger, use a fine microplane. If you don’t have one, mince the ginger very finely.
    • Mirin: This sweet Japanese rice wine adds flavor and gives the teriyaki sauce a beautiful luster. You can usually find it in the international aisle of larger grocery stores or Asian markets. If you can’t find it, substitutes include dry sherry, sweet marsala wine, dry white wine, or rice vinegar. You may need to add a touch more honey to the sauce when using a substitute.
    • The nutrition facts below are estimates.

    Nutrition Per Serving
    Serving Size
    1/4 of the recipe
    /
    Calories
    336
    /
    Total Fat
    11.7g
    /
    Saturated Fat
    2.4g
    /
    Cholesterol
    159.8mg
    /
    Sodium
    626.6mg
    /
    Carbohydrate
    21.1g
    /
    Dietary Fiber
    0.1g
    /
    Total Sugars
    18.8g
    /
    Total Protein
    34.8g


    AUTHOR:

    Adam Gallagher

    Adam and Joanne of Inspired Taste

    We are Adam and Joanne Gallagher, the creators of Inspired Taste. Established in 2009, Inspired Taste grew from a childhood dream into one of the internet’s most trusted recipe sites with hundreds of reliable recipes, step-by-step videos, and expert tips.More About Us
    Source link

  • Easy Creamy Chicken Noodle Soup Recipe

    Easy Creamy Chicken Noodle Soup Recipe

    This easy creamy chicken noodle soup recipe is ready in just 40 minutes, incredibly delicious, and turns out perfectly creamy!

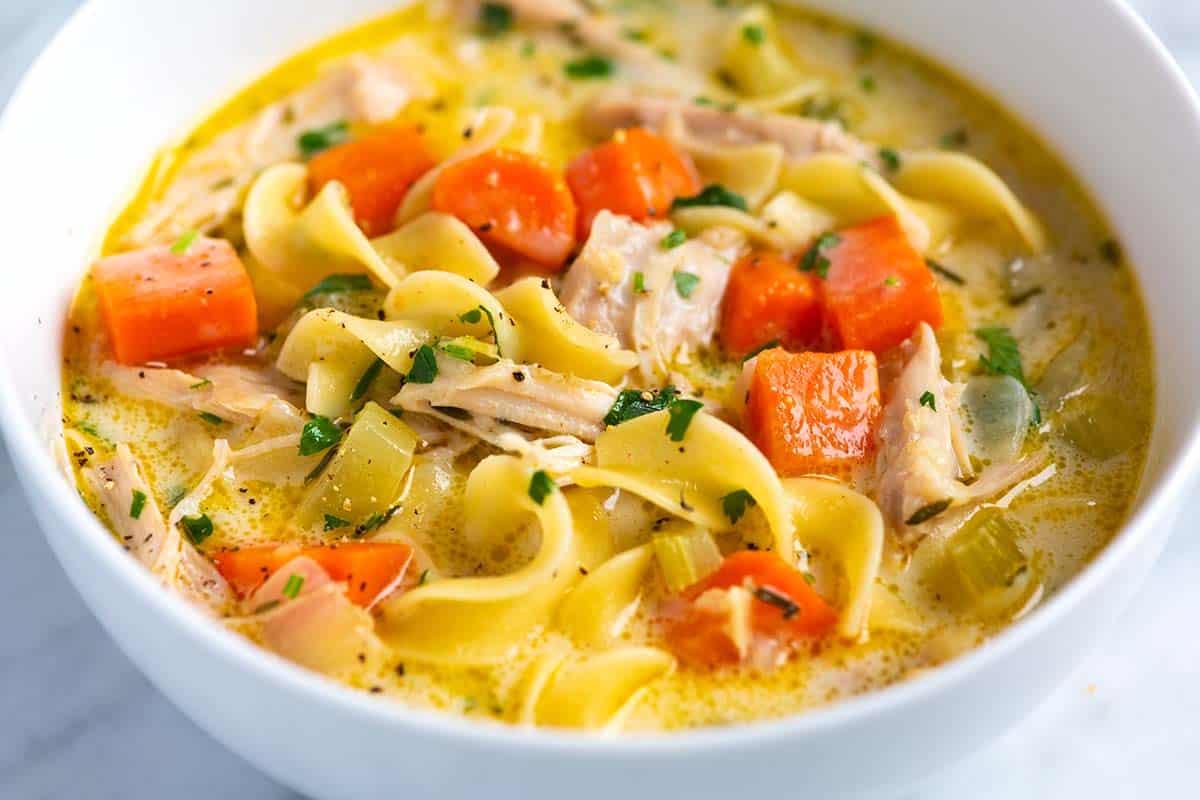
    Homemade Creamy Chicken Noodle Soup

    This is the creamy version of our popular chicken noodle soup, and it walks the line of being super silky without being too thick.

    Just like our classic, the secret to this ridiculously flavorful broth is chicken thighs, which guarantee a delicious result in under 40 minutes, with most of that time being hands-off. I usually make a double batch of this homemade creamy chicken noodle soup because it’s that good!

    Key Ingredients

    • Chicken Thighs: These are my secret for the best creamy chicken noodle soup. They have more fat and flavor than chicken breast and are almost impossible to overcook as they simmer, guaranteeing a tender texture.
    • Chicken Broth: While I recommend homemade chicken stock, store-bought chicken broth works great too. When shopping, look for darker broths or bouillon, as they typically have a richer flavor. Bone broth is a great option as well!
    • Flour and Cream: A bit of flour helps thicken the soup, while a splash of cream adds richness and creaminess. Don’t substitute milk for the cream. I learned the hard way that milk can curdle and won’t give you the same richness. Half-and-half is the next best option if you’re out of cream.
    • Egg Noodles: I love them, but feel free to substitute your favorite pasta.
    • Veggies: I keep it simple and classic with onion, celery, carrots, and garlic. The same combination we use when making chicken pot pie.
    • Herbs: Thyme, bay leaves, and parsley are all classic flavors for chicken soup.

    Find the full recipe with measurements below.

    A Pot of Homemade Creamy Chicken Noodle Soup

    How to Make the Best Creamy Chicken Noodle Soup

    Tip 1: Start your veggies in butter. I always sweat my veggies in butter before adding any broth. I’m not looking to brown them. I want to give them a head start before adding the broth, so they are sweet in the soup.

    Tip 2: Use flour to thicken the soup. I don’t really enjoy thick soup, but I love using a little bit of flour (just 3 tablespoons) to make the broth more silky. It works like a charm!

    Tip 3: Poach the chicken in the broth. Instead of starting with a whole chicken, we use chicken thighs, which flavor our soup and turn out soft and tender when cooked. When you are happy with the broth, add the chicken thighs. Then, gently poach them in the broth. It takes about 20 minutes! This is the same method I use when making shredded chicken.

    Tip 4: Finish with the noodles and cream. To prevent your noodles from overcooking, add them towards the end of the cooking process. Then finish with a generous splash of cream and plenty of fresh parsley.

    More Creamy Soup Recipes

    A Bowl of Creamy Chicken Noodle Soup

    Easy Creamy Chicken Noodle Soup

    • PREP
    • COOK
    • TOTAL

    This creamy chicken noodle soup is easy to make and ready in under 45 minutes. My family loves this soup because it’s so incredibly delicious and perfectly creamy without being too thick. For the original, see our Classic Chicken Noodle Soup.

    4 to 5 Servings

    Watch Us Make the Recipe

    You Will Need

    1 pound skinless, boneless chicken thighs (450g)

    3 tablespoons butter, chicken fat, or olive oil (42g)

    1 large onion, chopped

    2 large carrots, chopped

    2 ribs celery, chopped

    Heaped tablespoon minced garlic, 4 cloves

    3 tablespoons all-purpose flour

    2 bay leaves

    3 sprigs fresh thyme or use 1/2 teaspoon dried thyme

    6 cups chicken stock, try homemade chicken stock

    5 ounces egg noodles

    1/4 cup heavy cream, plus more as needed (60ml)

    1/4 cup fresh parsley, finely chopped

    Salt and pepper, to taste

    Pinch or two crushed red chili peppers, optional for heat

    Directions

      1Cook veggies: Melt butter in a large pot or Dutch oven over medium heat. Add the onions, carrots, celery, and garlic. Cook, stirring every few minutes, until the vegetables begin to soften, 5 to 6 minutes.

      2Make a roux: Stir in the flour and cook, stirring it around the pan, for about 2 minutes.

      3Prepare the broth: Add the thyme and bay leaves, then continue to stir while pouring in the chicken stock. Bring the soup to a low simmer, then taste it and adjust the seasoning with salt and pepper as needed. Depending on the stock used, you may need to add one or more teaspoons of salt.

      4Poach the chicken: Submerge the chicken thighs in the soup so that the broth covers them. Bring the soup back to a low simmer, then partially cover the pot with a lid and cook, stirring occasionally, until the chicken thighs are cooked through and tender, about 20 minutes. Transfer the cooked chicken to a plate to cool for a minute. If the broth seems low, add a bit more stock or use water and reduce the heat a little.

      5Add the noodles: Stir the noodles into the soup and cook until done, 6 to 10 minutes, depending on the type of noodles used.

      6Shred the chicken: While the noodles are cooking, shred the chicken into strips or dice it into cubes.

      7Finish and serve: Slide the chicken back into the pot. Add the cream and parsley, then taste the soup once more. Adjust with more salt and pepper, as needed. We enjoy this soup with a generous amount of pepper or a pinch of crushed red peppers stirred in.

    Adam and Joanne’s Tips

    • Leftovers: Store in an airtight container in the fridge for 3 to 4 days. The noodles soak up the soup broth as it sits. When reheating, add a splash of extra chicken stock or water if you don’t have any.
    • Freezing: Freeze for up to 3 months. The noodles don’t fare too well when frozen. If you plan on freezing the soup, remove the portion you plan to freeze before adding the noodles. Freeze the broth, chicken, and vegetables. When you are ready to reheat the soup, add dried noodles to it and simmer until done.
    • Seasoning: If you feel the soup lacks some zing, add more salt. You can add flavor with a dash of fish sauce (we often use this trick for store-bought stocks and broths) or Worcestershire sauce.
    • Gluten-free option: Skip the flour altogether. At the end of the recipe, just before you stir in the chicken, parsley, and cream, whisk 1 tablespoon cornstarch with 2 tablespoons water and then whisk into the soup. Bring the soup to a simmer, and when it has thickened slightly, continue with the recipe as normal and add the chicken, cream, and parsley.
    • The nutrition facts provided below are estimates.

    Nutrition Per Serving
    Serving Size
    1/5 of the recipe
    /
    Calories
    381
    /
    Total Fat
    18.8g
    /
    Saturated Fat
    5.1g
    /
    Cholesterol
    129.3mg
    /
    Sodium
    719.3mg
    /
    Carbohydrate
    22.2g
    /
    Dietary Fiber
    2.6g
    /
    Total Sugars
    3.8g
    /
    Protein
    32.3g


    AUTHOR:

    Joanne Gallagher

    Adam and Joanne of Inspired Taste

    We are Adam and Joanne Gallagher, the creators of Inspired Taste. Established in 2009, Inspired Taste grew from a childhood dream into one of the internet’s most trusted recipe sites with hundreds of reliable recipes, step-by-step videos, and expert tips.More About Us
    Source link