Tag: Chicken

  • Chicken Asparagus Risotto

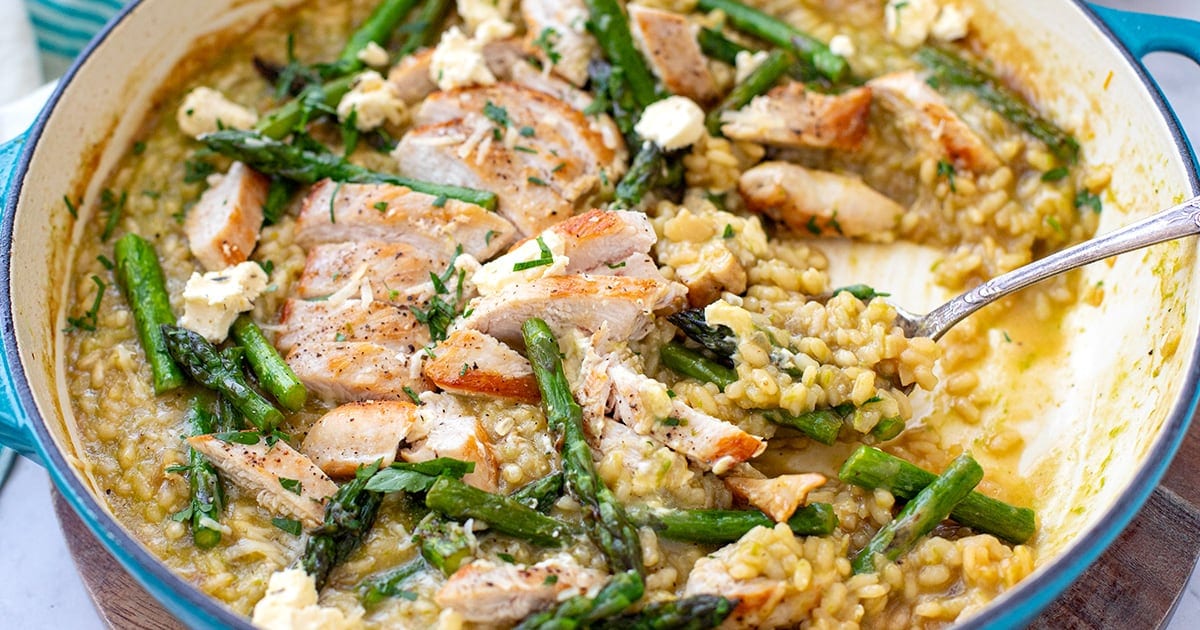
    Chicken Asparagus Risotto

    This creamy chicken risotto with asparagus is a comforting, healthy dinner recipe that’s high in protein and fiber, perfect for weeknights or dinner parties.


    Jump to: ℹ️ Overview | 🛒 Ingredients | 📷 How To Make | 📹 Watch The Video | 👩‍🍳 Recipe Tips | 🥗 Serving Suggestions | 📝 Full Recipe Card | 🍽 More Recipes With Asparagus


    Let me tell you, this chicken and asparagus risotto is something special. Every time I make it, I’m low-key amazed at how flavorful it turns out for something so weeknight doable.

    The rice is creamy without cream (thank you, arborio magic), the chicken is golden and juicy, and the asparagus brings a hit of color and freshness that cuts through the richness just right. The real kicker? I blend the bottom bits of the asparagus into the stock, so every bite is infused with springy green flavor.

    This chicken risotto is high in protein and fiber, and just really satisfying without being too heavy. Perfect for those nights when you want a little comfort and a little veg, all in one bowl.

    👩‍🍳 You might also like these comforting dinner recipes: marry me chicken orzo bake, Tex-mex chicken and rice casserole, creamy chicken pasta with pesto, or my cheesy garlic chicken wraps. Check out these chicken and rice recipes as well.

    What You’ll Need

    Here is what you’ll need for this chicken asparagus risotto. Find the full measurements in the recipe card below.

    • Chicken breasts – lean protein that cooks up juicy and golden with just salt, pepper, and olive oil. Swap chicken for shrimp or leave it out for a veggie version.
    • Fresh asparagus – the real star. I use both ends: the bottoms go into the stock for that gorgeous green flavor, and the tops get pan-seared for texture. I do remove the wooden ends though. No asparagus? Try green beans, broccoli or zucchini.
    • Arborio rice – the starchy rice that makes risotto creamy without needing actual cream.
    • Onion & garlic – for that flavor base you don’t skip.
    • Lemon juice + zest – adds brightness and balances out the richness.
    • Chicken stock – Used both for cooking the rice and infusing asparagus flavor. It’s lighter than broth but still adds that essential savory backbone. Keep it warm to help the risotto cook evenly.
    • Parmesan – adds umami, saltiness, and a bit of body to the risotto.
    • Butter & olive oil – used for sautéing and adding that classic risotto richness.

    Optional garnishes:

    • Fresh herbs like parsley or chives – for color and freshness.
    • A little extra Parmesan or marinated feta if you’re feeling extra.

    How To Make Chicken Risotto With Asparagus

    Find the full recipe and nutritional information below. Here are some handy step-by-step photos for how to make chicken and asparagus risotto.

    • Trim wooden ends and chop asparagus. Separate the spears and the top parts. Blanch bottom bits in hot chicken stock, strain and puree using a blender with a little bit of water.
    • Keep stock warm on low heat.
    • Pan-fry chicken fillets, seasoned with salt and pepper, until golden, 4-5 minutes each side. Char asparagus tops in same pan. Set both aside. Once pre-cooked, slice the chicken and set asparagus tops to rest.
    • Sauté onion in butter and oil until golden. Add garlic and lemon zest.
    • Add and toast the rice for 1 minute.
    • Add warm stock gradually, stirring often until rice is creamy and al dente. This will take about 15 minutes.
    • Stir in Parmesan and asparagus purée at the end.
    • Top with sliced chicken, asparagus tips, herbs, and extra cheese or feta.

    Watch The Video

    Recipe Tips

    • No blender? Just chop the asparagus finely and stir it in.
    • Make-ahead: You can prep the chicken and asparagus earlier in the day and reheat them gently before serving.
    • Storage: Store leftovers in an airtight container for up to 3 days. Reheat gently on the stove with a splash of stock or water.
    • Dairy-free option: Skip butter and cheese — it’ll still be creamy due to rice starch and will be bright and fresh thanks to the lemon and asparagus.
    • Extra flavor: Pan-fry the chicken in garlic-infused oil or throw in a sprig of thyme while it’s cooking.

    Serving Suggestions

    Serve this risotto as a complete meal, or add a crisp side salad with a lemon vinaigrette if you’re feeding a crowd. A glass of white wine wouldn’t hurt either (just saying). For fancier vibes, scatter some marinated feta or toasted pine nuts on top.

    💬 If you’ve tried this chicken asparagus risotto or any other recipe on the blog then don’t forget to rate the recipe and let me know how you got on in the comments below, I love hearing from you! You can also FOLLOW ME on Instagram, Facebook, Pinterest, YouTube, and or sign up to my Newsletter to see more of my delicious food.

    Want to Save This Recipe?

    Enter your email & I’ll send it to your inbox. Plus, get great new recipes from me every week!

    By submitting this form, you consent to receive emails from Cooked & Loved

    This creamy chicken risotto with asparagus is a comforting, healthy dinner recipe that’s high in protein and fiber—perfect for weeknights or dinner parties. Find step-by-step photos and more recipe tips above.

    • Prepare asparagus: Trim woody ends. Slice the bottom halves into small pieces and the tops into 1-inch segments. Keep them separate.

    • Blanch and blend: Bring 4 cups of chicken stock to a boil. Add the bottom asparagus pieces and blanch for 1 minute. Remove and puree with ¼–⅓ cup water or chicken stock until smooth. Set aside. Keep the stock warm.

    • Cook chicken: Slice chicken breasts in half horizontally. Season with salt and pepper. Heat olive oil in a large skillet over high heat and pan-fry for 4 minutes per side. In the last 3 minutes, add asparagus tips and cook until slightly charred. Remove both and set aside.

    • Start risotto: In the same pan, reduce the heat to medium. Add butter and olive oil, then onion. Cook 3 minutes. Add garlic and lemon zest. Cook another 30 seconds.

    • Toast rice: Stir in arborio rice and cook for 1 minute until slightly translucent.

    • Add stock gradually: Add warm stock, 1–2 ladles at a time, stirring often. Wait until most is absorbed before adding more. This will take about 15 minutes.

    • Finish: When rice is nearly done, stir in Parmesan, then the asparagus purée. Taste and adjust lemon juice, salt, and pepper as needed. Turn off heat.

    • Top and serve: Arrange sliced chicken and asparagus tips over the risotto. Garnish with extra Parmesan and herbs if using.

    • Can I use frozen asparagus? Yes! Just thaw and pat dry before cooking. You may need to skip the purée step if it’s too watery.
    • What if I don’t have Arborio rice? You really do need a starchy short-grain rice for that creamy risotto texture. Carnaroli or Vialone Nano work too.
    • Is this gluten-free? Yes, if your stock and Parmesan are GF-certified.
    • What’s the best wine to serve with this? A chilled Sauvignon Blanc or Pinot Grigio pairs beautifully with the lemon and asparagus.
    • No blender? Just chop the asparagus finely and stir it in.
    • Make-ahead: You can prep the chicken and asparagus earlier in the day and reheat them gently before serving.
    • Storage: Store leftovers in an airtight container for up to 3 days. Reheat gently on the stove with a splash of stock or water.
    • Dairy-free option: Skip butter and cheese — it’ll still be creamy due to rice starch and will be bright and fresh thanks to the lemon and asparagus.
    • Extra flavor: Pan-fry the chicken in garlic-infused oil or throw in a sprig of thyme while it’s cooking.

    Calories: 568kcal | Carbohydrates: 71g | Protein: 29g | Fat: 19g | Saturated Fat: 7g | Polyunsaturated Fat: 2g | Monounsaturated Fat: 8g | Trans Fat: 0.2g | Cholesterol: 61mg | Sodium: 1045mg | Potassium: 698mg | Fiber: 4g | Sugar: 3g | Vitamin A: 818IU | Vitamin C: 9mg | Calcium: 191mg | Iron: 6mg
    Keywords: Asparagus Risotto With Chicken, Chicken And Asparagus Risotto, Chicken Asparagus Risotto, Chicken Risotto With Asparagus

    More Recipes With Asparagus


    Source link

  • Chicken & Brussels Sprouts Skillet

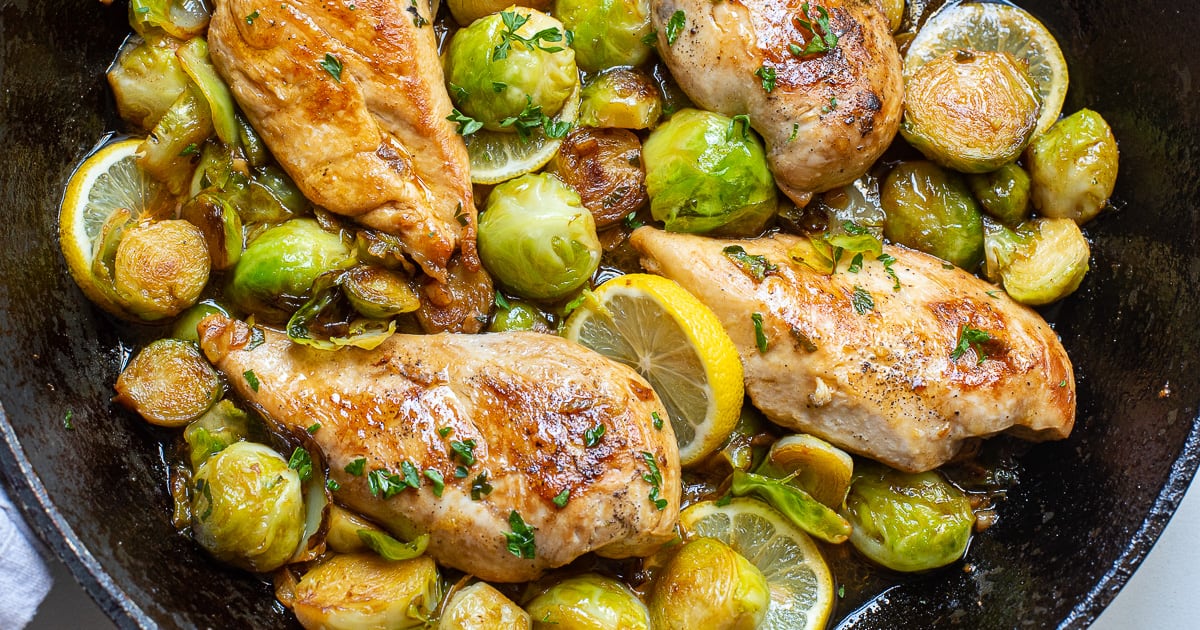
    Chicken & Brussels Sprouts Skillet

    Quick, cozy, and full of lemon-garlic goodness, this 30-minute chicken and Brussels sprouts skillet is my weeknight go-to when I want something hearty but still healthy.


    Jump to: ℹ️ Overview | 🛒 Ingredients | 📷 How To Make | 👩‍🍳 Recipe Tips | 🥗 Serving Suggestions | 📝 Full Recipe Card | 🍽 More Recipes With Brussels Sprouts


    This chicken and Brussels sprouts skillet is the kind of healthy comfort food I could make on repeat. The chicken comes out juicy and golden, while the sprouts soak up all the lemony, buttery, garlicky goodness from the pan.

    The chicken is seared to get that savory crust, and the Brussels sprouts go all golden and caramelized before being finished in a quick, zesty sauce. It’s high in protein and high in fiber, low-carb (if you skip the mash), and naturally gluten-free — basically weeknight gold. I’ve made this a few times, especially when Brussels sprouts are in season, and each time it hits that sweet spot of easy + flavor-packed + filling.

    👩‍🍳 You might also like these high-protein, high-fiber recipes: pan-fried salmon with pea salad, popcorn chicken bowls (with quinoa), coconut chicken and cauliflower rice, or beef rice and bean burritos.

    What You’ll Need

    Here is what you’ll need for this chicken amd Brussels sprouts recipe. Find the full measurements in the recipe card below.

    For the chicken:

    • Chicken breasts: sliced thin for even cooking. Boneless thighs also work for extra juiciness.
    • Sea salt & black pepper: simple seasoning, but essential. I also like a warm, slightly smoky kick from paprika. You can also add a little chili powder to this.
    • Olive oil: for searing the chicken and Brussels sprouts getting those crispy edges.
    • Fresh Brussels sprouts: halved for maximum surface caramelization. You can swap for broccoli if you’re not a sprout fan (but really, try it with the sprouts first!).
    • Garlic: lots of it. Don’t skimp—it adds real depth.
    • Lemon juice: adds brightness and cuts through the richness.
    • Butter: makes it all silky and indulgent.
    • Chicken broth (or stock): brings moisture and umami to the dish.
    • Parsley: fresh and herby for garnish.

    How To Make Chicken & Brussels Sprouts Skillet

    Find the full recipe and nutritional information below. Here are some handy step-by-step photos for chicken & Brussels sprouts skillet.

    • Season the chicken with salt and pepper.
    • Sear in olive oil for 3 minutes each side. Push aside in the pan.
    • In the same skillet, add more oil and cook Brussels sprouts for about 5 minutes until golden.
    • Stir in garlic, lemon juice, butter, broth, and paprika.
    • Stir and cook everything together for 2–3 more minutes. Flipping chicken again.
    • Sprinkle with parsley and serve.

    Recipe Tips

    • Use a large skillet so the Brussels sprouts get nicely browned instead of steaming.
    • Chicken swaps: Chicken thighs work beautifully and stay juicy but need a few minutes longer.
    • Make it spicy: Add red pepper flakes with the garlic if you like heat.
    • Storage: Keeps well in the fridge for 3 days. Reheat in a skillet or microwave until warm.
    • Make-ahead tip: Slice the chicken and prep the Brussels the day before to save time.

    Serving Suggestions

    Serve this over creamy mashed potatoes or fluffy rice to soak up the buttery lemon sauce. Or go low-carb with cauliflower rice. It’s also great on its own for a lighter meal, maybe with a dollop of sour cream or Greek yogurt on the side.

    💬 If you’ve tried this chicken & Brussels sprouts skillet or any other recipe on the blog then don’t forget to rate the recipe and let me know how you got on in the comments below, I love hearing from you! You can also FOLLOW ME on Instagram, Facebook, Pinterest, YouTube, and or sign up to my Newsletter to see more of my delicious food.

    Want to Save This Recipe?

    Enter your email & I’ll send it to your inbox. Plus, get great new recipes from me every week!

    By submitting this form, you consent to receive emails from Cooked & Loved

    Quick, cozy, and full of lemon-garlic goodness—this 30-minute chicken and Brussels sprouts skillet is my weeknight go-to when I want something hearty but still healthy. Find step-by-step photos and more recipe tips above.

    • Season chicken breasts with salt and pepper on both sides.

    • Heat 1 tablespoon olive oil in a large skillet over medium-high heat. Sear chicken for 3 minutes on each side until golden.

    • Push the chicken to one side of the skillet. Add the remaining tablespoon of oil and toss in the Brussels sprouts. Cook for about 5 minutes, flipping halfway, until they start to brown.

    • Stir in the garlic, lemon juice, butter, chicken broth, and paprika. Let everything simmer together for 2–3 minutes, uncovered.

    • Sprinkle with parsley, serve hot, and enjoy!

    • Can I use frozen Brussels sprouts? I don’t recommend it for this one—fresh gives the best browning and texture.
    • Is this dish spicy? Not at all! But feel free to add a pinch of chili flakes if you like a kick.
    • What can I use instead of butter? You can use ghee or even olive oil for a lighter version, though the butter adds richness.
    • Use a large skillet so the Brussels sprouts get nicely browned instead of steaming.
    • Chicken swaps: Chicken thighs work beautifully and stay juicy but need a few minutes longer.
    • Storage: Keeps well in the fridge for 3 days. Reheat in a skillet or microwave until warm.
    • Make-ahead tip: Slice the chicken and prep the Brussels the day before to save time.

    Calories: 331kcal | Carbohydrates: 8g | Protein: 27g | Fat: 22g | Saturated Fat: 9g | Polyunsaturated Fat: 2g | Monounsaturated Fat: 9g | Trans Fat: 0.5g | Cholesterol: 103mg | Sodium: 786mg | Potassium: 720mg | Fiber: 3g | Sugar: 2g | Vitamin A: 1137IU | Vitamin C: 63mg | Calcium: 46mg | Iron: 2mg
    Keywords: Chicken & Brussels Sprouts Skillet, Chicken With Brussels Sprouts, Lemon Garlic Chicken & Brussels Sprouts

    More Recipes With Brussels Sprouts


    Source link

  • Easy Chicken Burrito Bowls

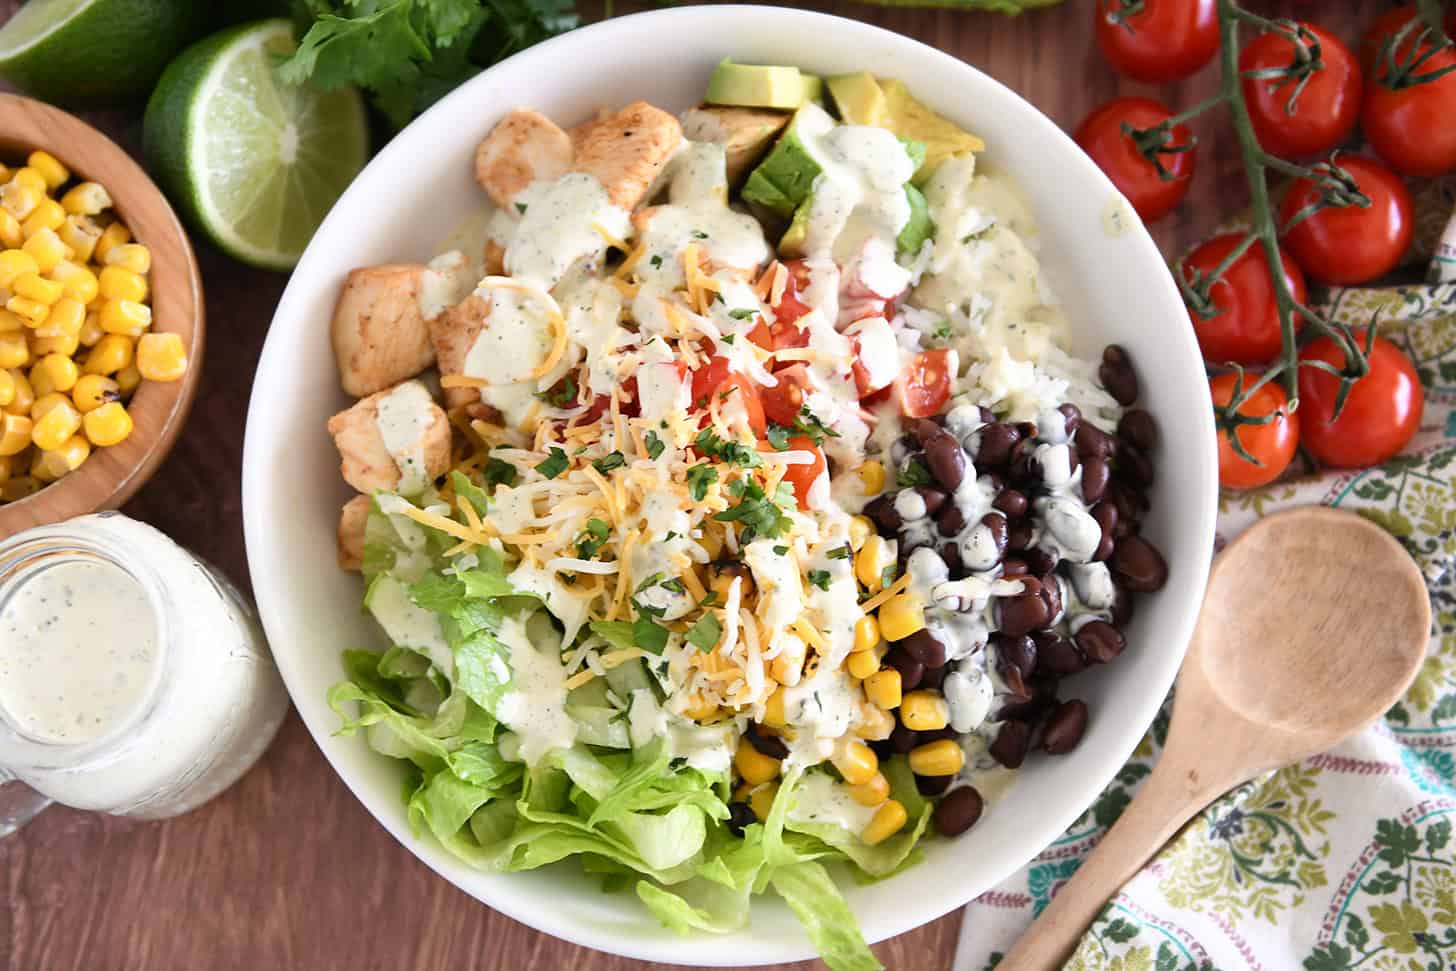
    Easy Chicken Burrito Bowls

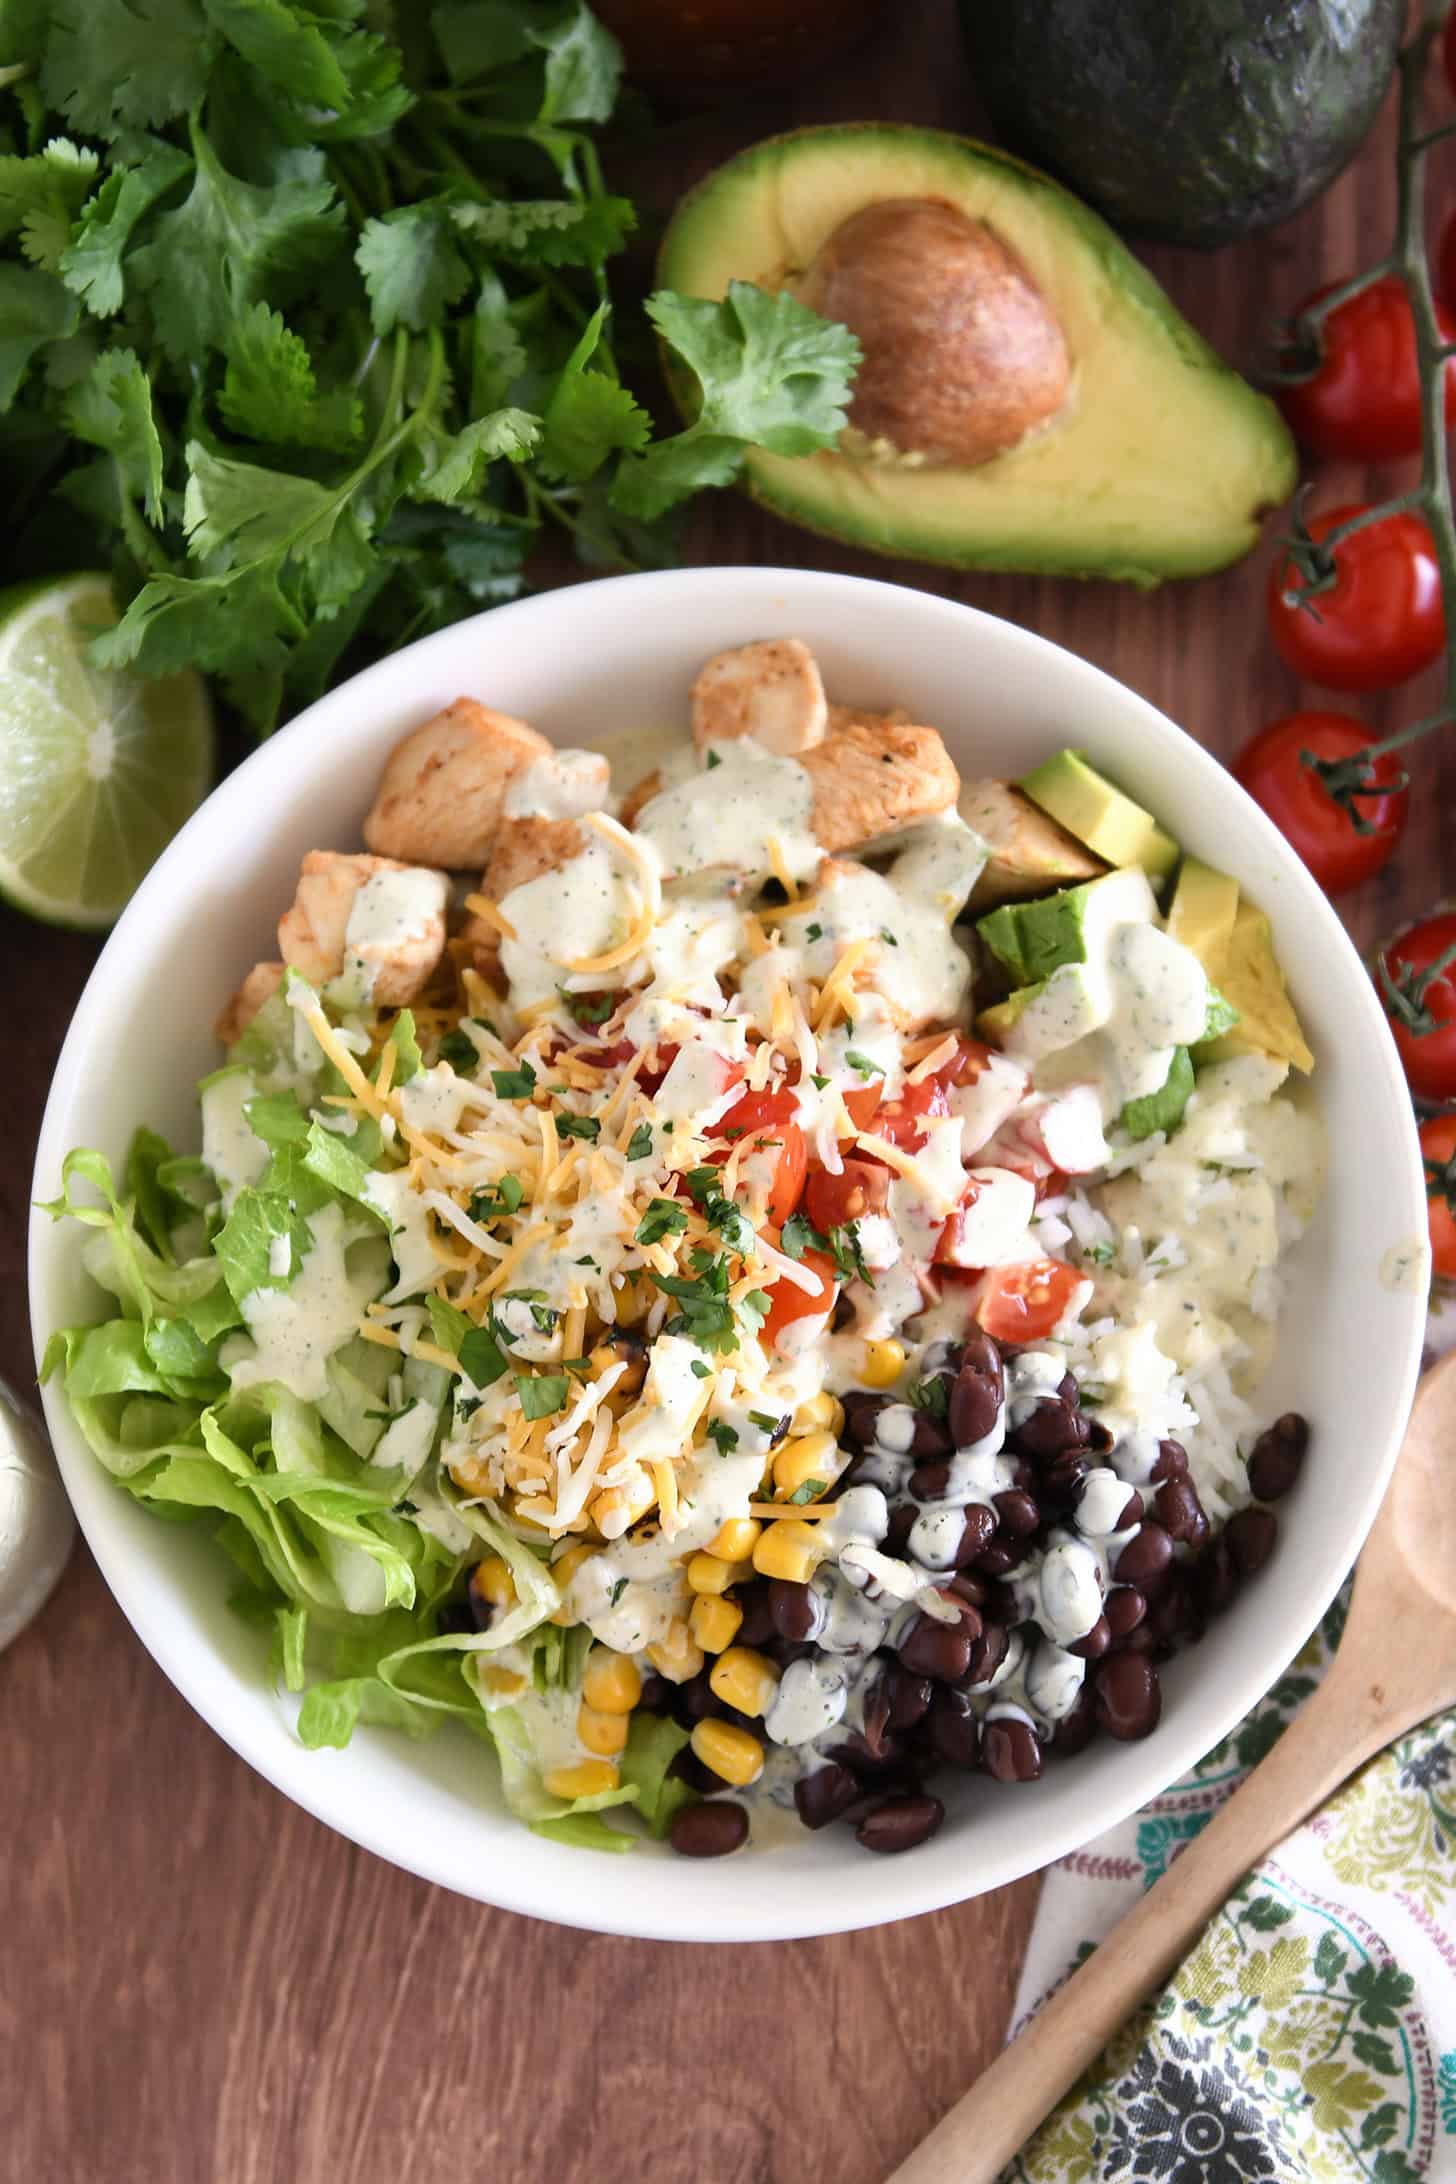
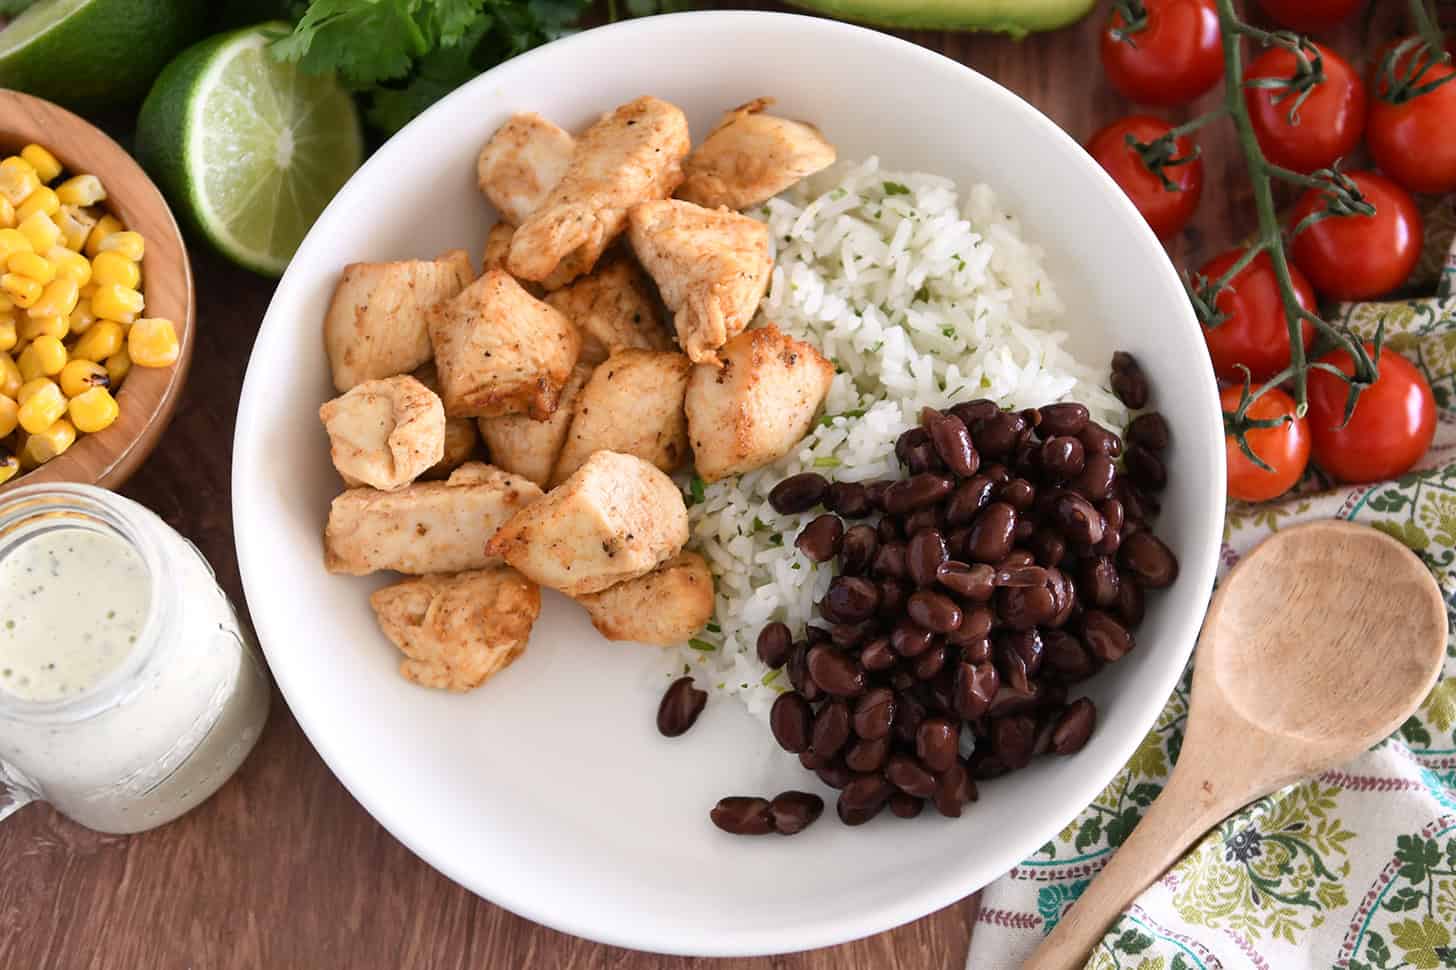
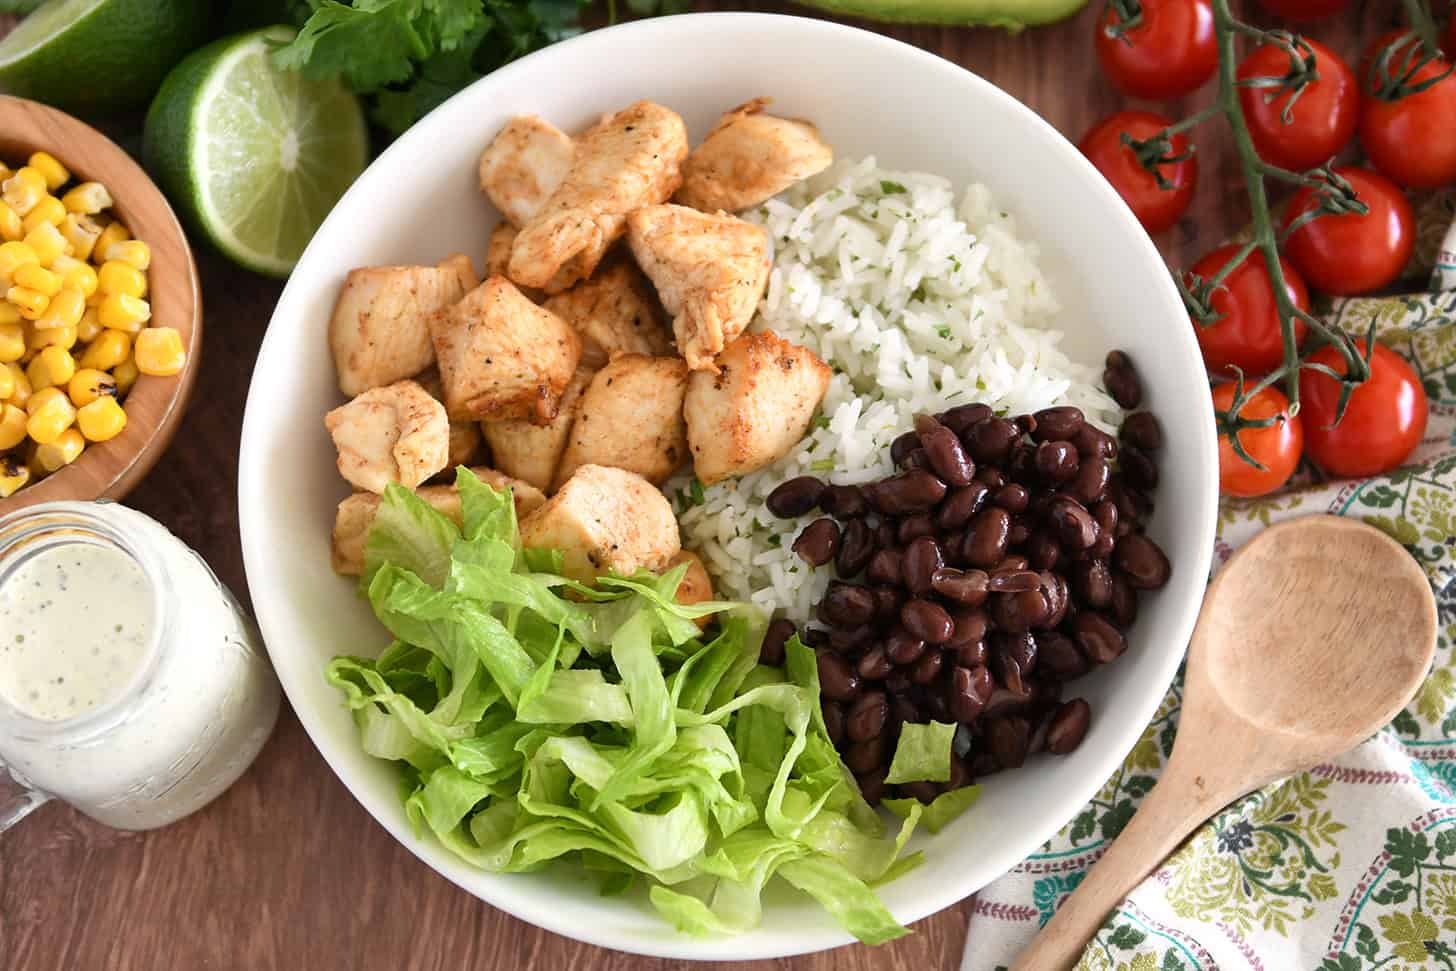
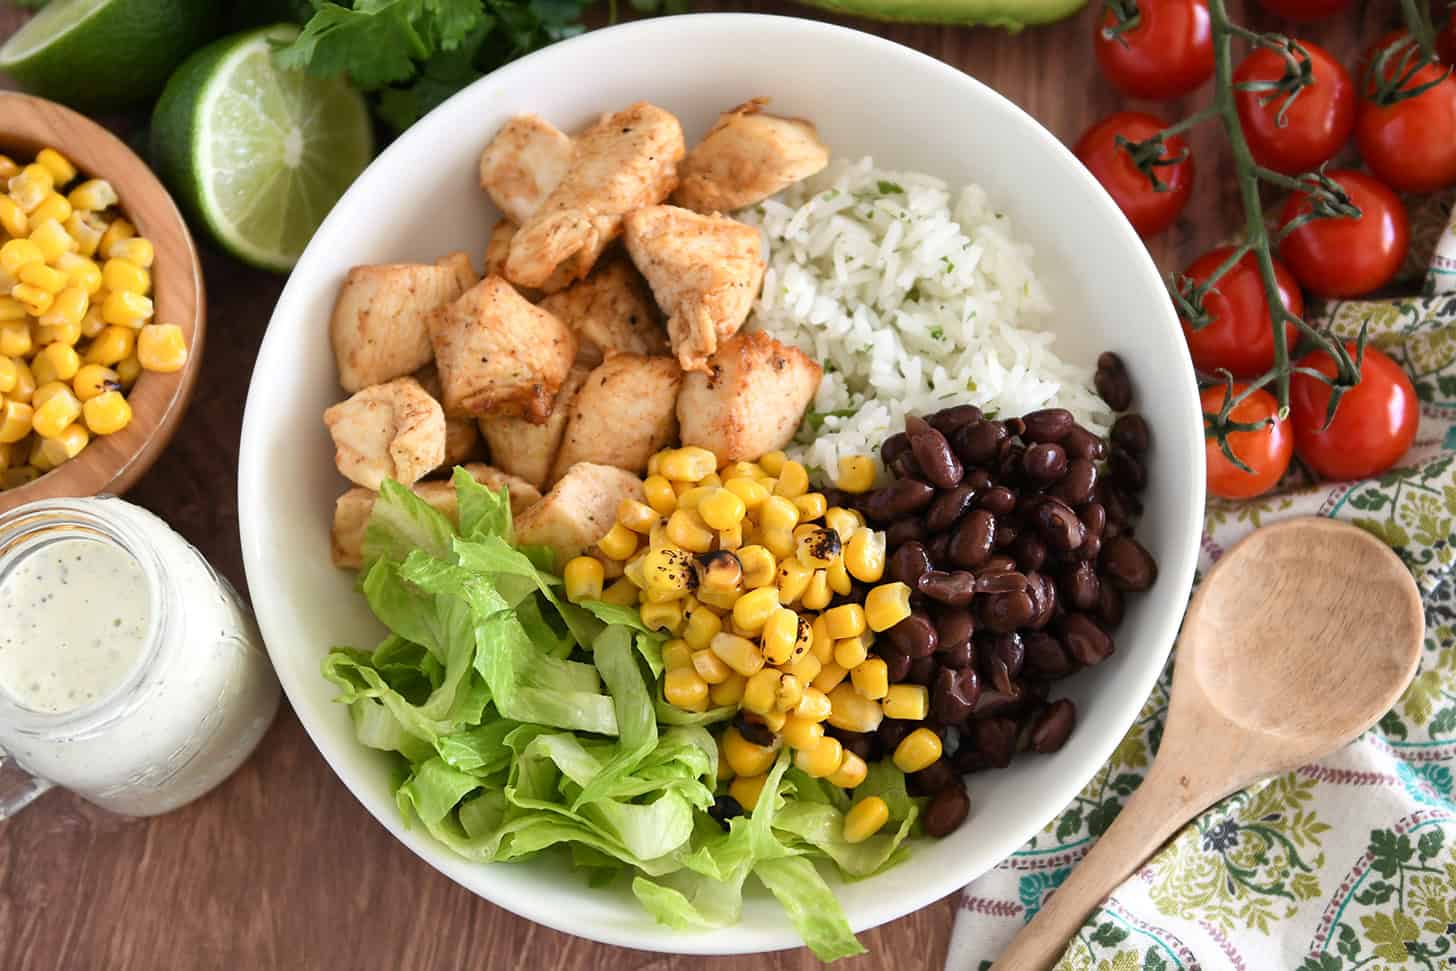
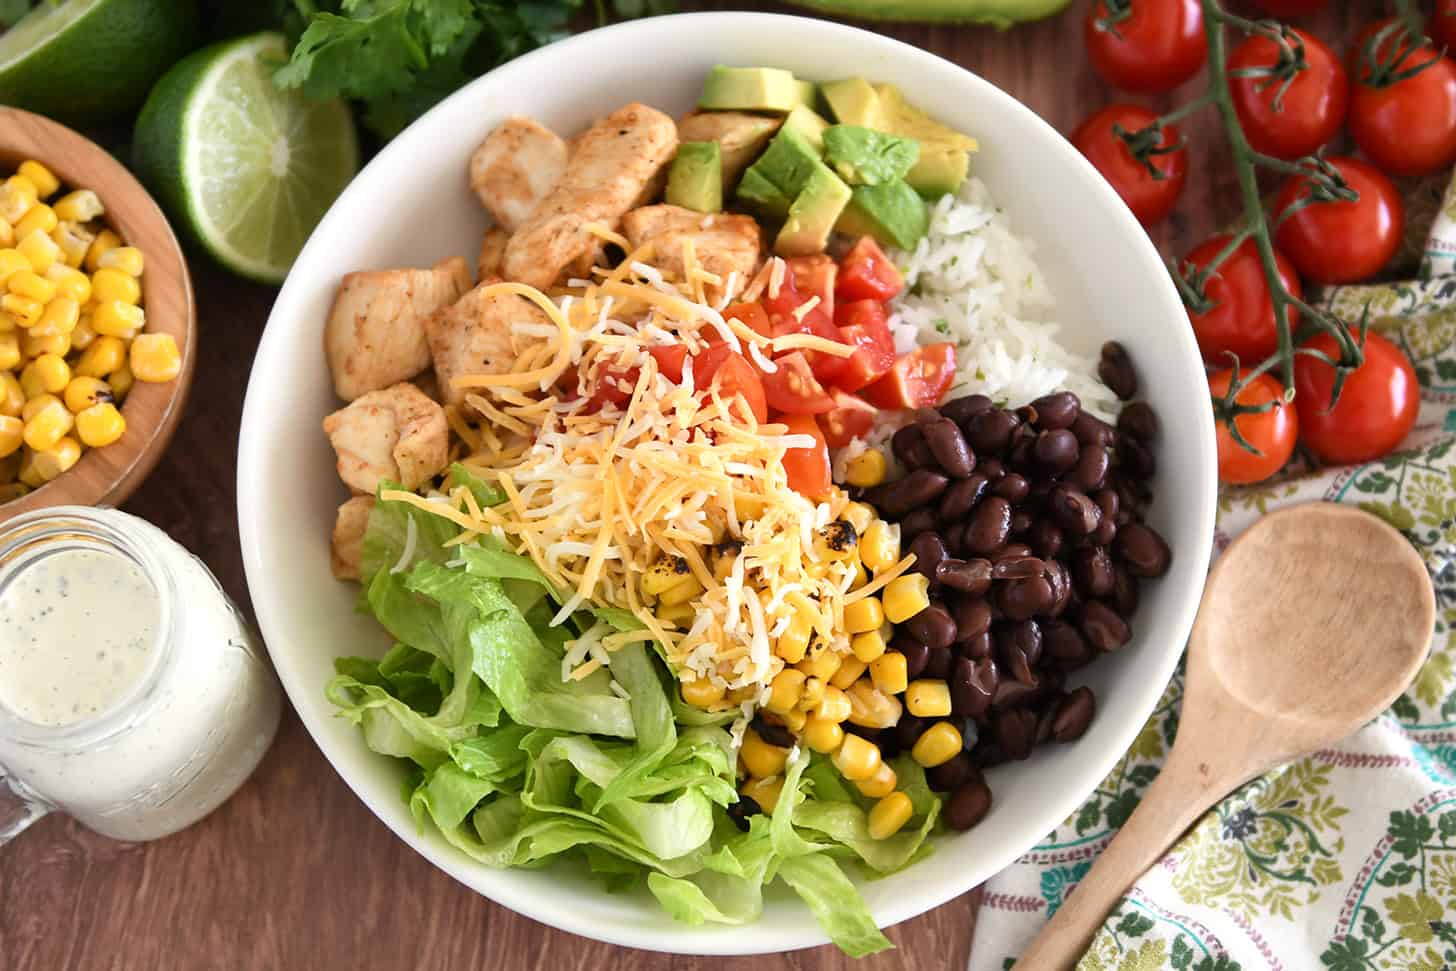
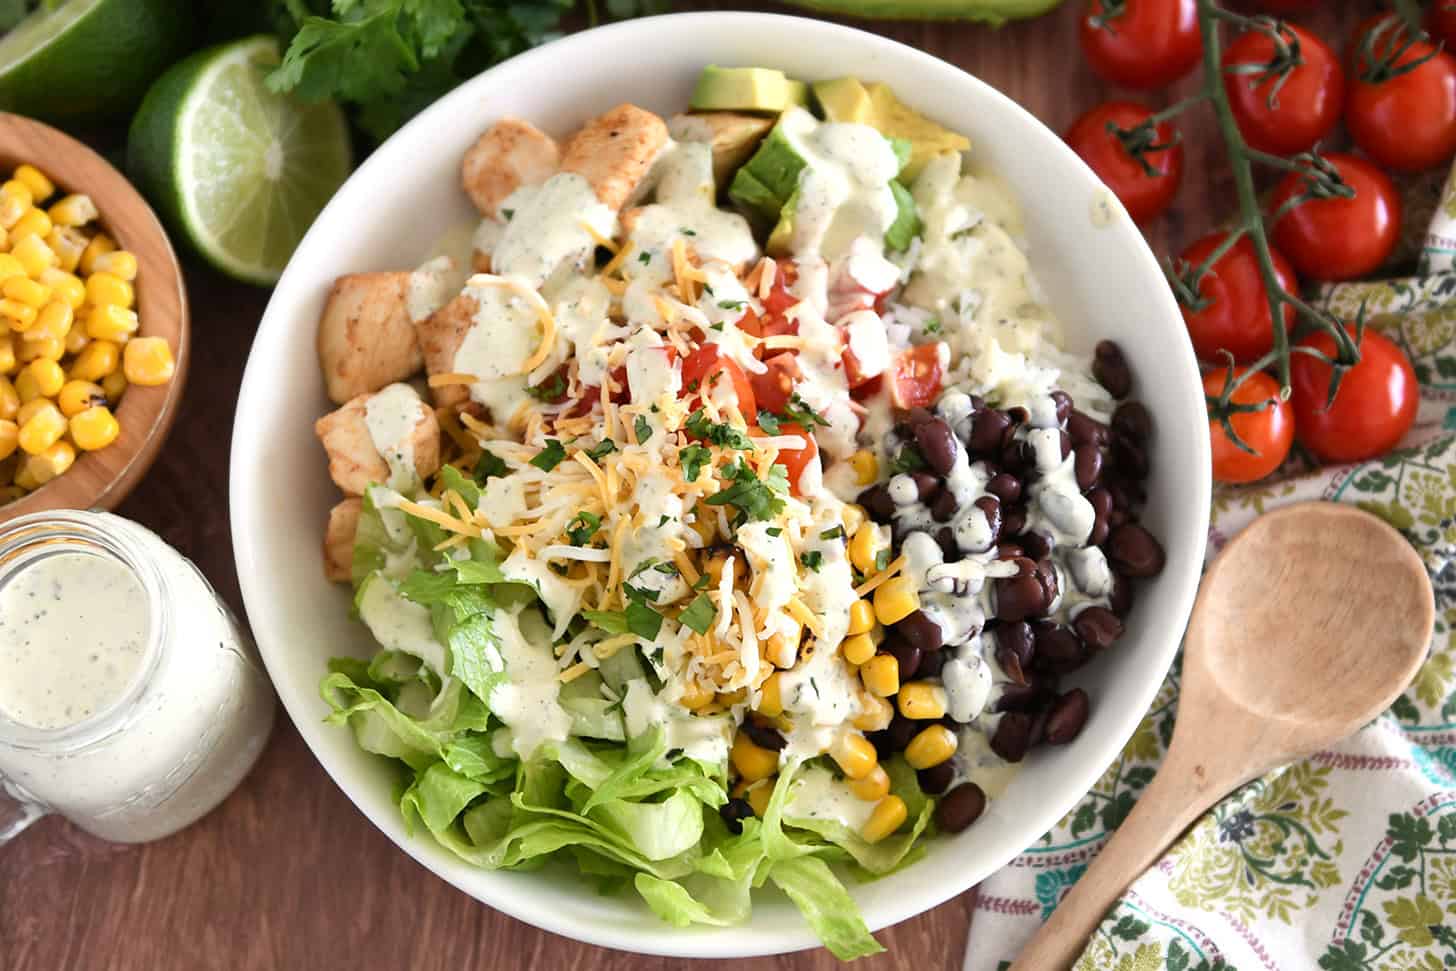
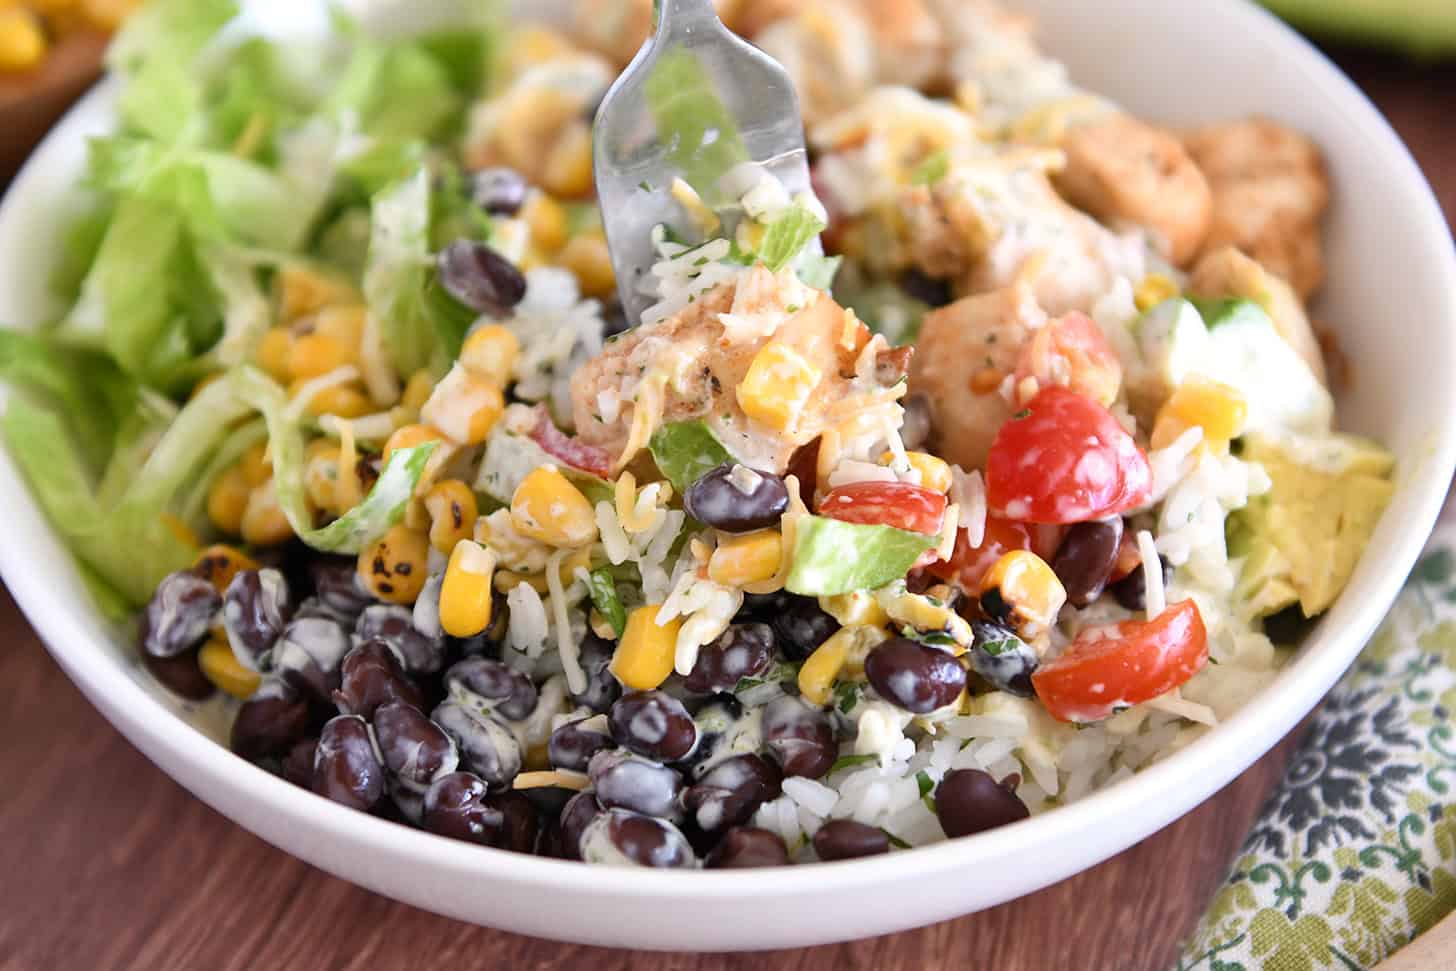
    These easy chicken burrito bowls are piled high with cilantro lime rice, roasted corn, flavorful chicken, black beans and all the toppings your heart desires.

    This quick and simple meal has become one of our go-to weeknight dinners! Best part? Everyone can customize their own plate (which is perfect for picky eaters!).

    Why These Chicken Burrito Bowls are So Easy

    These burrito bowls are a perfect weeknight meal! Many of the components can be prepped ahead of time making it even easier.

    • Chicken + Marinade: Marinate the chicken for as short as one hour or up to eight hours. And if you’re in a time crunch, just give the chicken a couple minutes to bask in the marinade, and then cook it up – the flavor won’t be quite as pronounced, but the chicken will still be delicious.
    • Toppings: Chop and prep all the toppings ahead of time, if needed.
    • Beans: Drain and rinse the beans ahead of time and store in a container in the refrigerator until ready to serve.
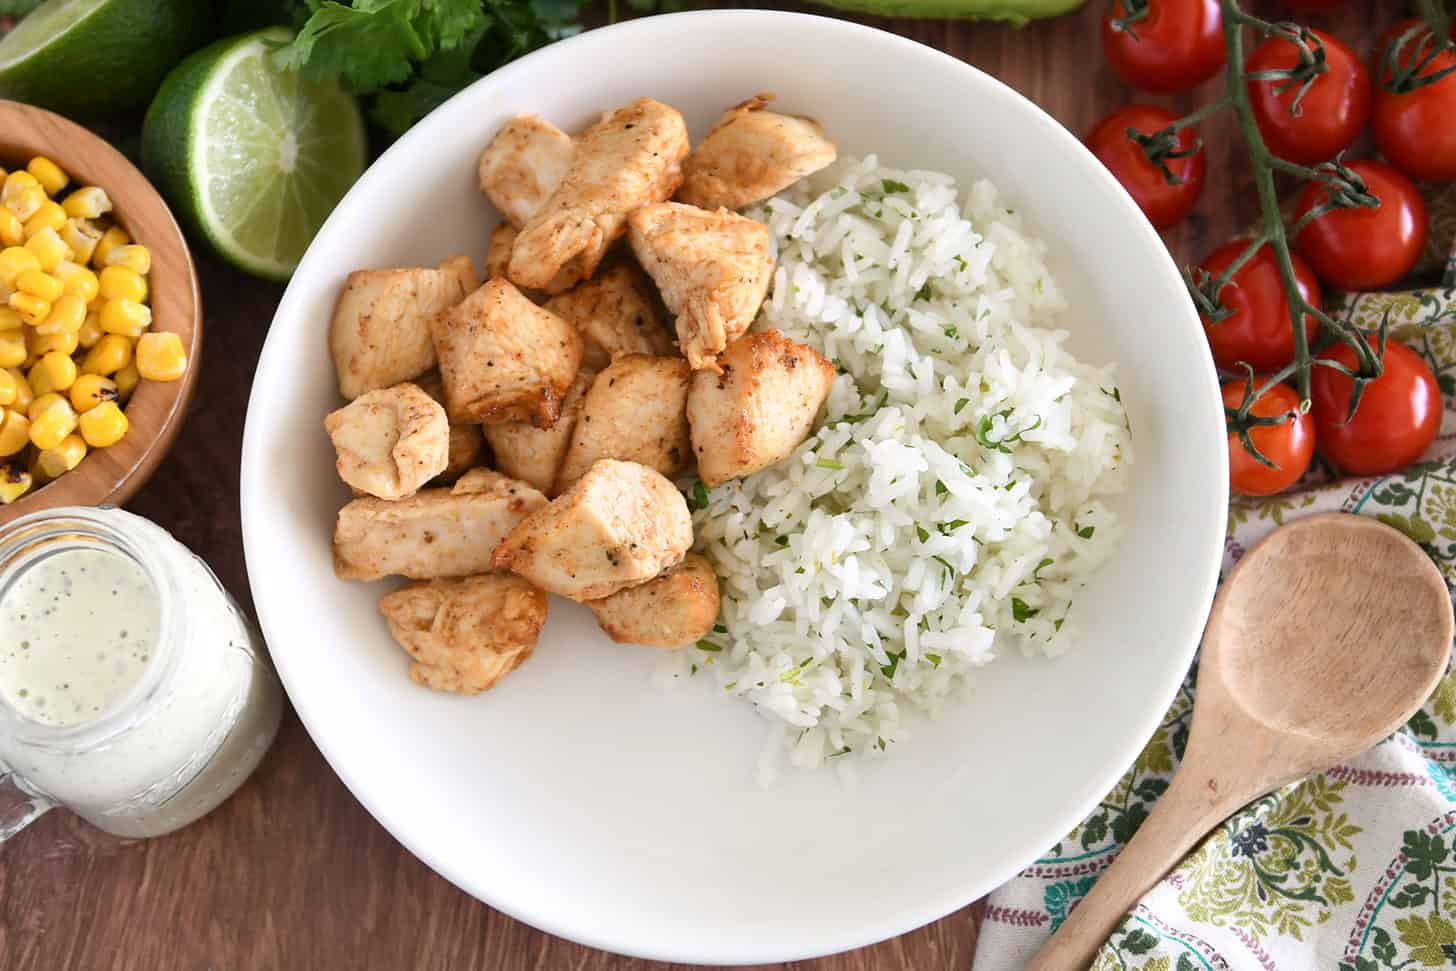
    • Rice: This recipe is a perfect way to use up leftover rice of any sort, like cilantro lime rice, garlic butter rice, cooked white or brown rice, etc. Other types of ingredients can be used in place of rice, like quinoa. I’ve included my favorite way to make cilantro lime rice in the recipe below.

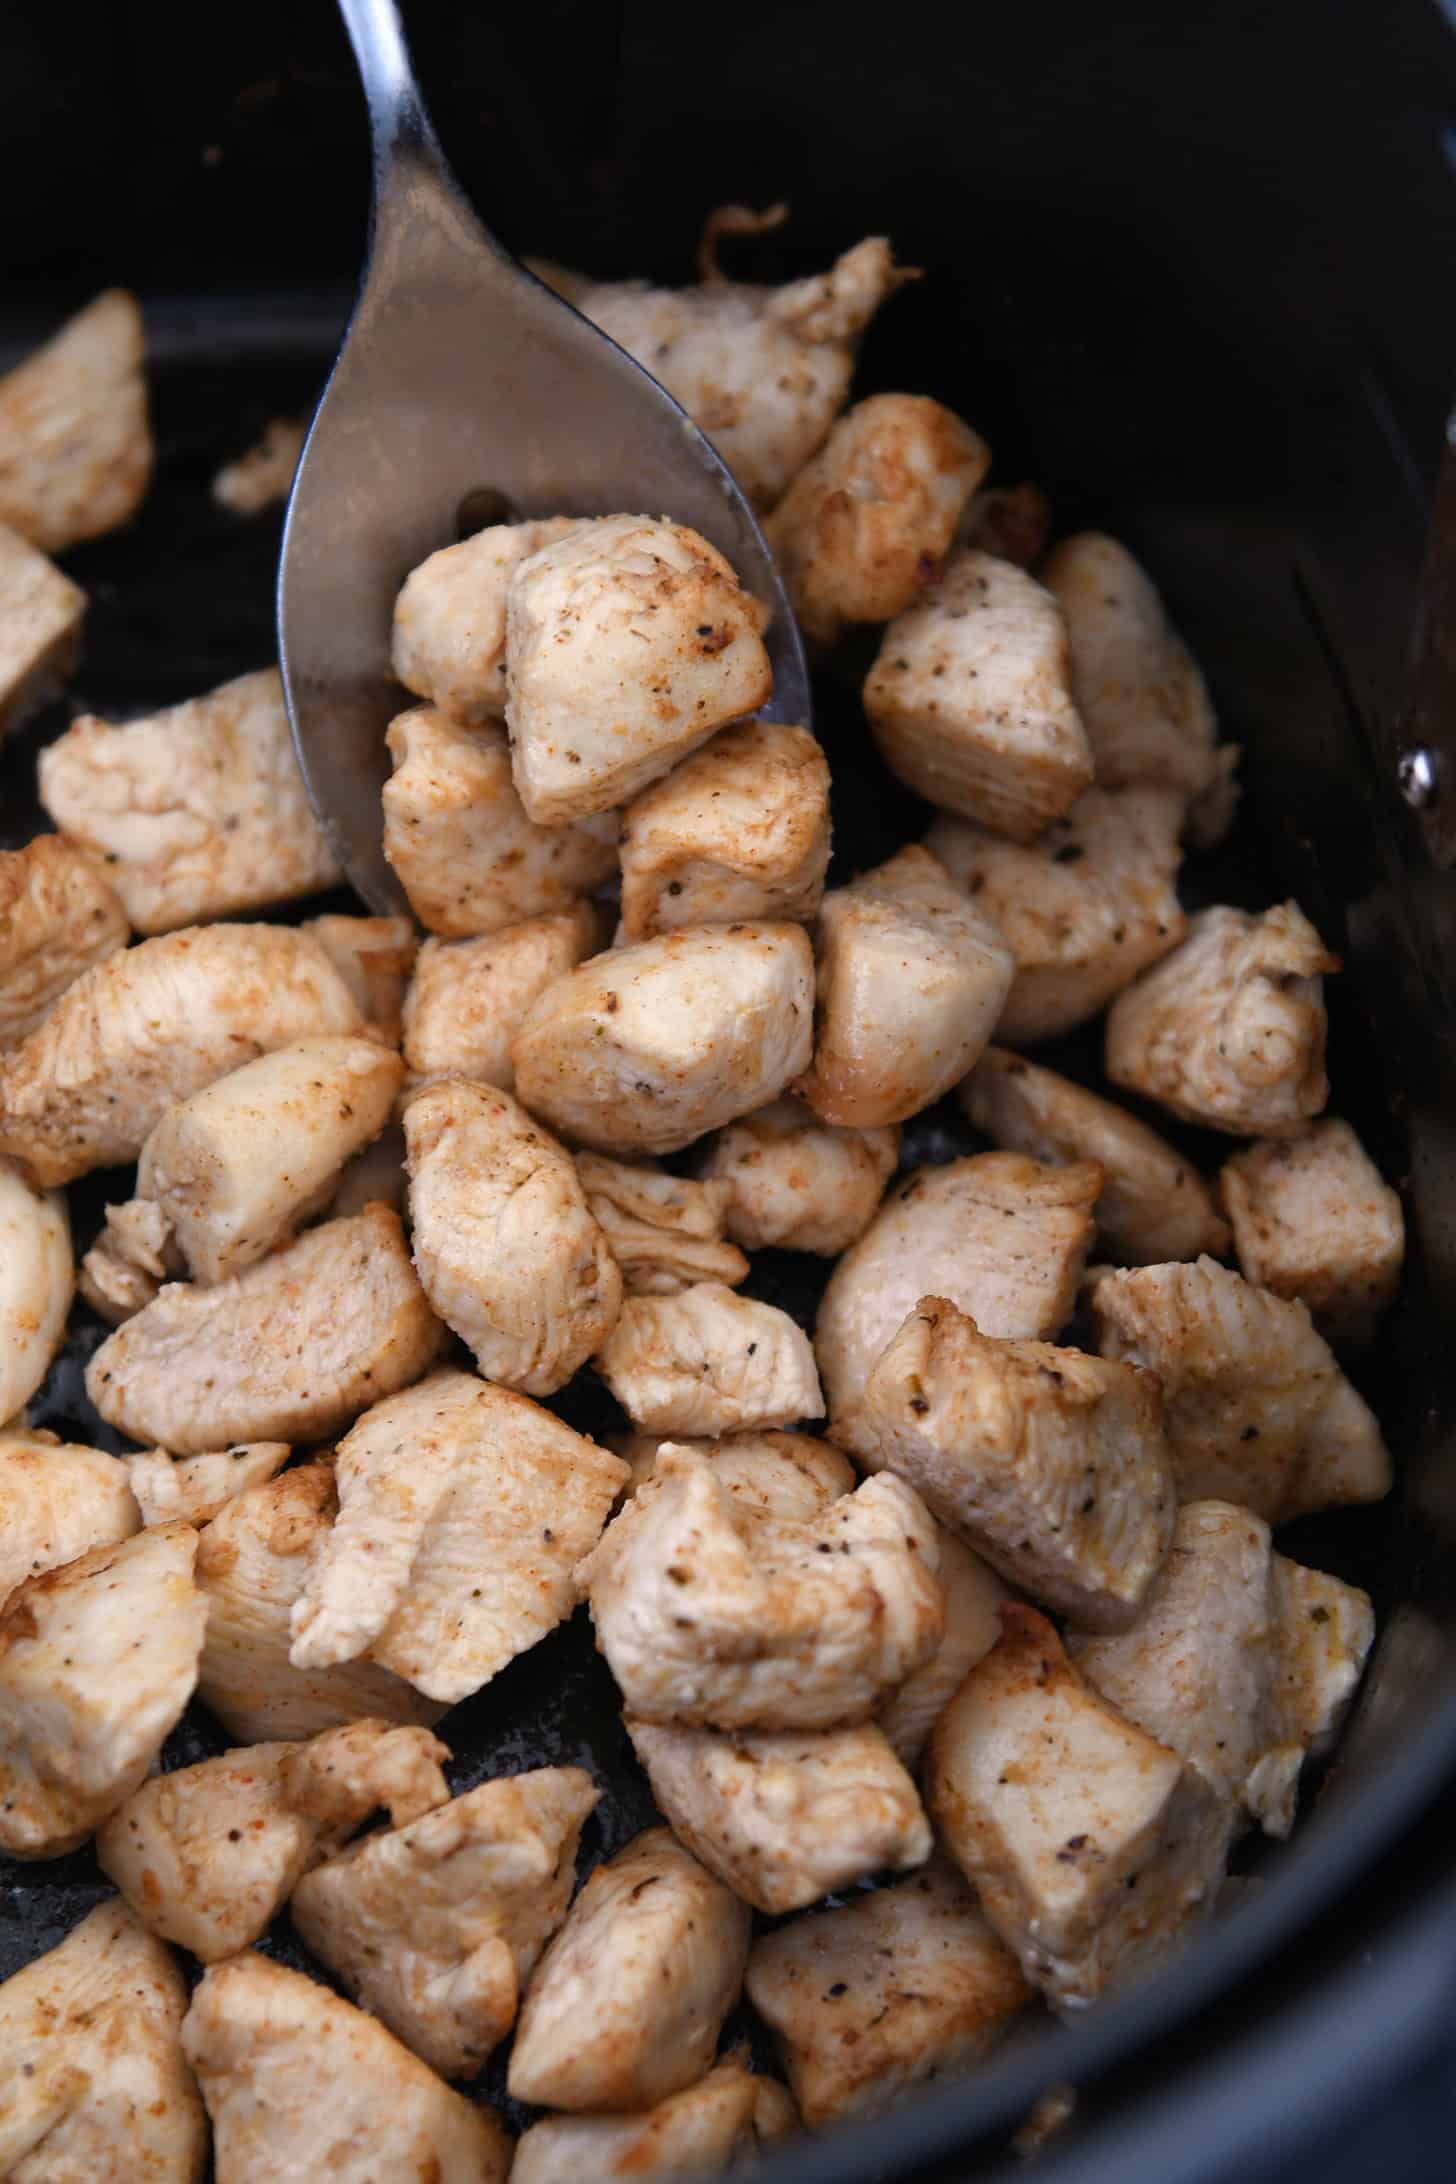
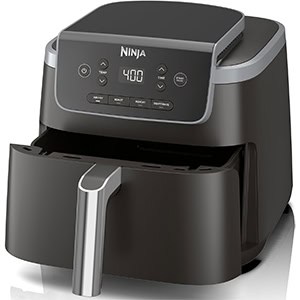
    Cooking Options: Cook the chicken in a skillet on the stovetop or in an air fryer. Instructions are included for both in the recipe. The chicken cooks with the marinade, making it extremely flavorful and delicious.

    Key Ingredients for Chicken Burrito Bowls

    So many of the ingredients for this recipe are easily adaptable if you need to swap in or out based on food allergies, food preferences, or what you have on hand.

    • Chicken: Use boneless, skinless chicken breasts, chicken tenders or chicken thighs.
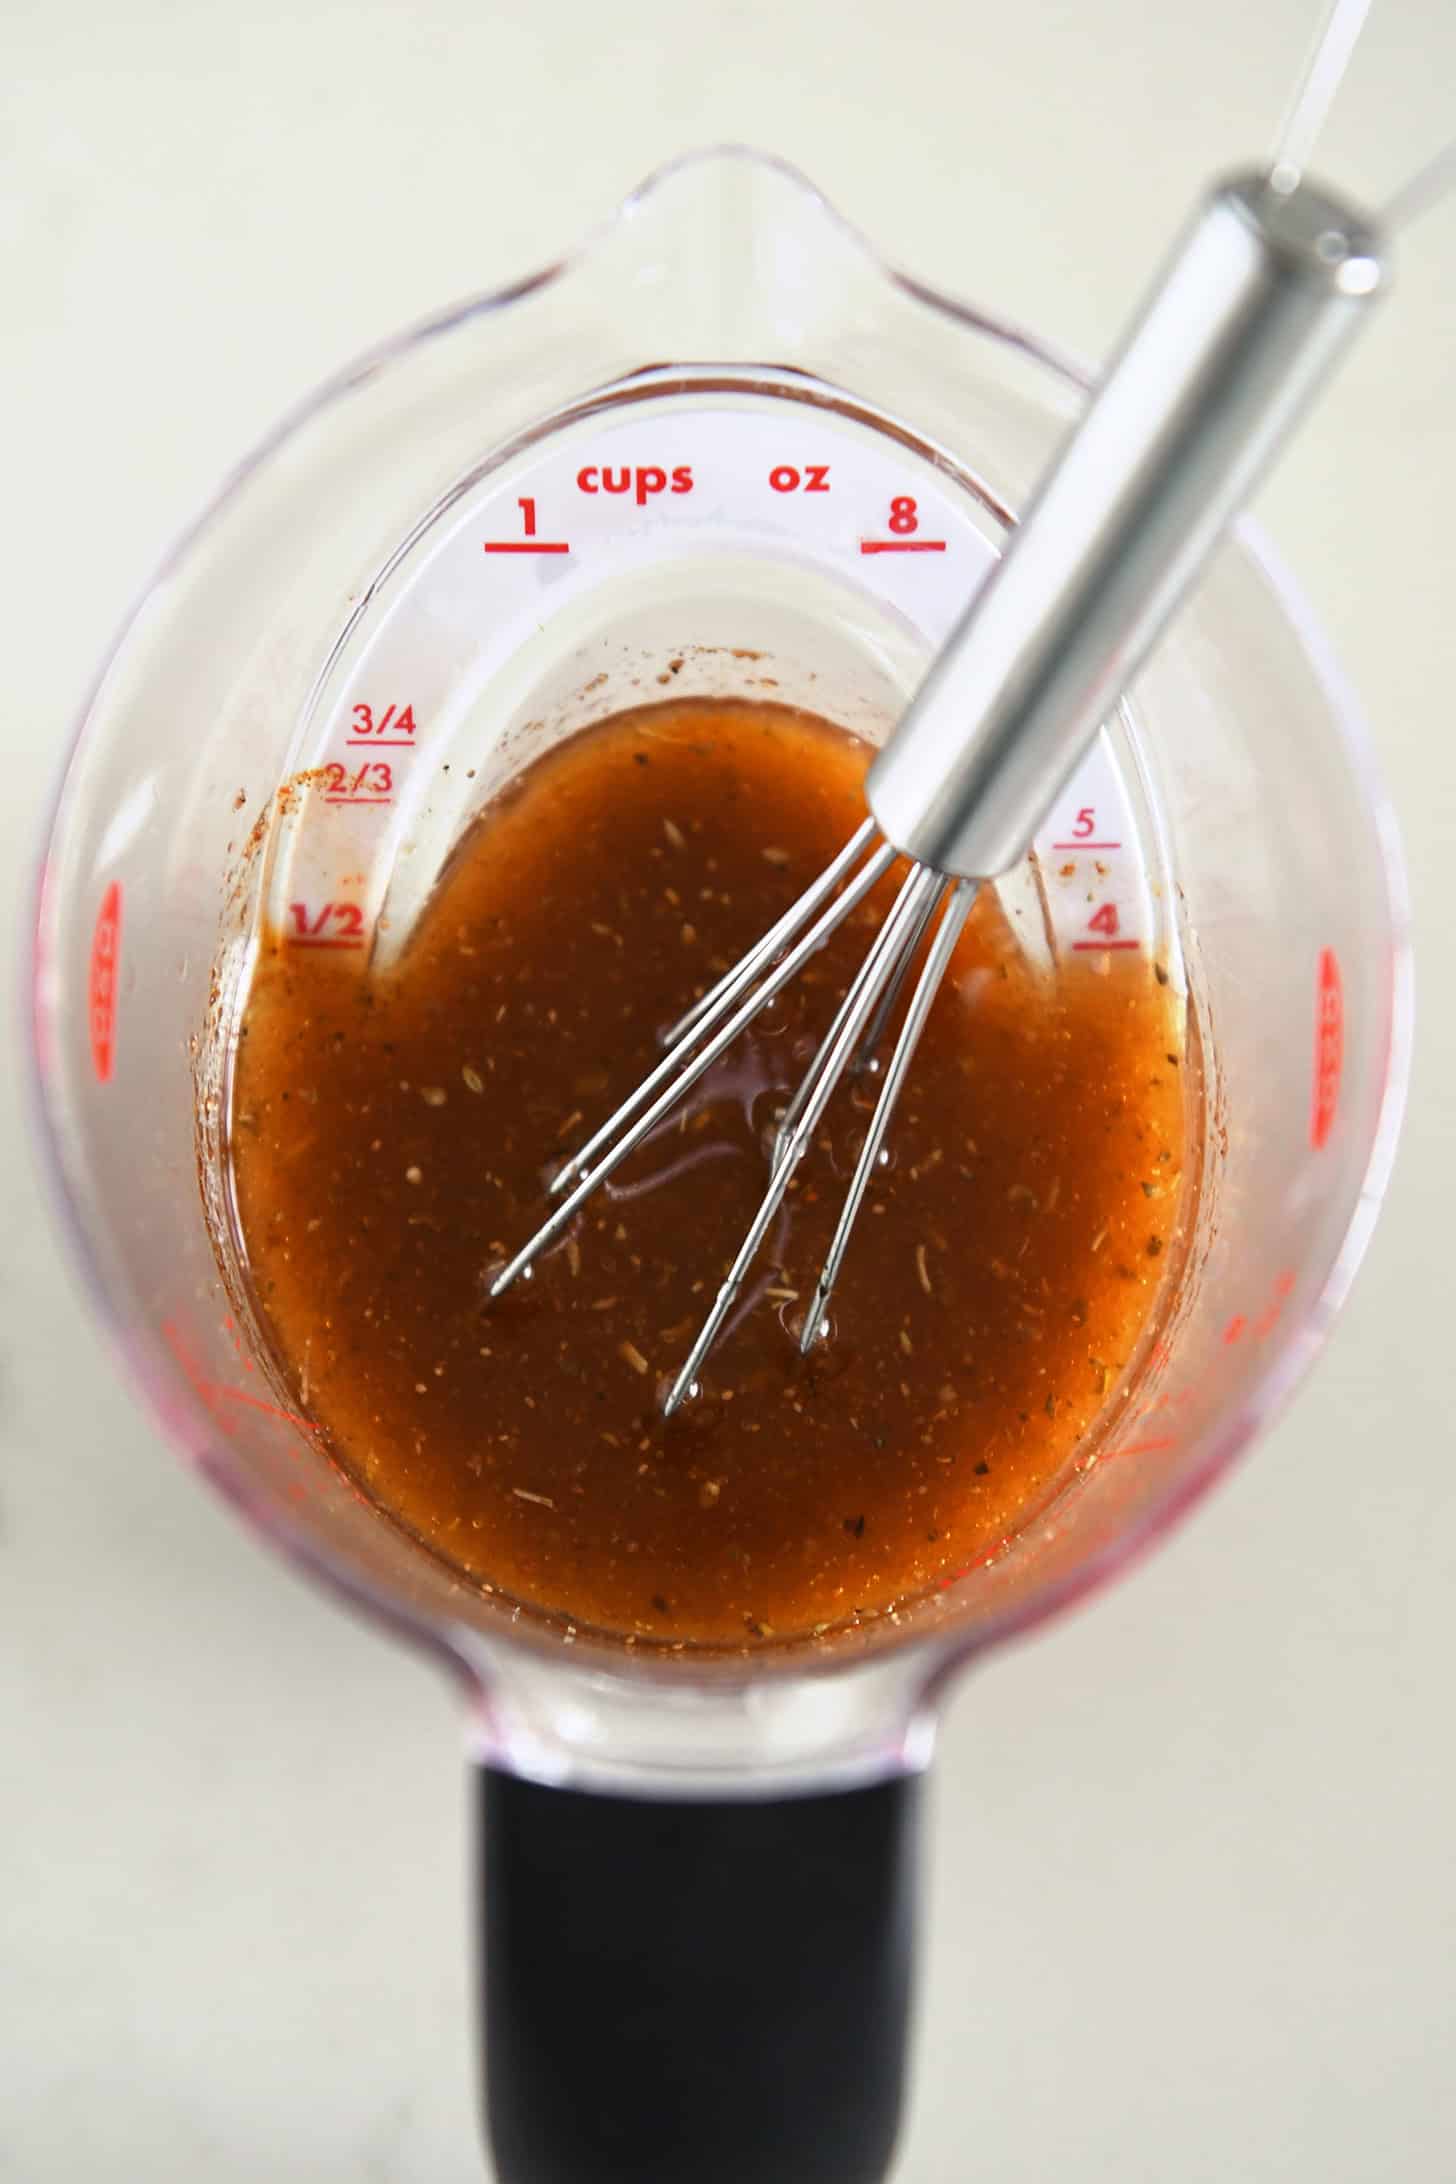
    • Marinade: The simple marinade is a combination of olive oil, lime juice, red wine vinegar, chili powder, cumin, oregano and salt.
    • Black beans: Canned black beans, rinsed and drained, add heartiness, protein and fiber. Other varieties of canned beans can be easily subbed in for the black beans.
    • Corn: Many different types of corn will work in this recipe: canned corn kernels, rinsed and drained. Frozen corn kernels, thawed and patted dry (no need to cook). Fresh corn kernels, cut off the cob (no need to cook). For a tasty variation, I love using the frozen roasted corn from Trader Joe’s. 
    • Rice: Cooked brown rice, white rice, or quinoa works great in this recipe. For different flavor variations, you can use Mexican-style rice, cilantro lime rice, garlic butter rice, coconut rice, etc.
    • Dressing: Homemade or store bought cilantro lime dressing can be used, as well as another type of dressing (like ranch). This is my go-to recipe for cilantro lime dressing.

    And Don’t Forget…Toppings Galore: The beauty of this recipe is that you can use whatever toppings your heart desires! Our favorites are shredded cheese, chopped tomatoes and avocados, shredded lettuce, and crushed tortilla chips.

    Additional Tips and Notes

    This recipe is so easy to level up or keep simple (per the recipe).

    Here are my favorite ways to level up these chicken burrito bowls:

    • Make homemade cilantro lime dressing (this stuff is drinkable, it is so good). It keeps well in the fridge for a week or so.
    • Simmer the beans with 1/2 to 1 cup of green or red salsa for about 5 to 10 minutes before serving. This adds tremendous flavor and a bit of extra sauciness.
    • Use roasted corn – my favorite easy hack is to grab the frozen, roasted corn from Trader Joe’s. So tasty!
    • Make cilantro lime rice (my favorite way to make it is in the notes of the recipe). While other types of rice can be used, these bowls are out-of-this-world delicious with cilantro lime rice.

    Customizable, adaptable, and SUPER CRAZY DELICIOUS, recipes like this are my all-time favorite. I could eat some variation of these chicken burrito bowls every night of the week. I hope you enjoy this recipe as much as we do!

    Easy Chicken Burrito Bowls

    Chicken + Marinade:

    • 2 pounds boneless, skinless chicken breasts
    • 4 tablespoons olive oil
    • 2 tablespoons fresh lime juice
    • 2 tablespoons red wine vinegar (see note)
    • 2 cloves garlic, finely minced, or 1/2 teaspoon garlic powder
    • ½ teaspoon chili powder
    • ½ teaspoon cumin
    • ½ teaspoon dried oregano
    • ½ teaspoon coarse, kosher salt
    • Pinch of black pepper

    Bowls:

    • 1 (15-ounce) can black beans, rinsed and drained
    • 1 ½ to 2 cups corn kernels (see note)
    • 3 cups cooked brown rice, white rice, cilantro lime rice, or quinoa (see note)
    • Cilantro lime dressing or other dressing of choice (see note)

    Toppings:

    • Chopped lettuce, tomatoes, avocados, shredded cheese, sour cream, salsa, crushed tortilla chips, chopped cilantro, olives, etc.

    Prevent your screen from going dark

    • For the chicken, dice the chicken into 1/2 to 1-inch pieces and place in a resealable bag or bowl.

    • Whisk together the olive oil, fresh lime juice, red wine vinegar, garlic, chili powder, cumin, oregano, salt and pepper. Pour over the chicken and toss to coat. Cover (or seal the bag) and refrigerate for one hour or up to 8 hours.

    • Cook the chicken on the stovetop or in an air fryer.

    • Stovetop: Pour the chicken and marinade into a nonstick skillet set over medium heat. Spread the chicken into an even layer and let cook undisturbed for 1 to 2 minutes. Stir or flip and continue cooking until the chicken is cooked through, 3 to 4 minutes longer.

    • Air Fryer: Preheat an air fryer to 375 degrees for 2 to 3 minutes. Pour the chicken and marinade into the basket. Cook for 7 to 8 minutes until cooked through.

    • To assemble, scoop a serving of rice or quinoa into a bowl or plate. Add chicken, black beans, corn, and whatever toppings you like. Drizzle with dressing. Enjoy!

    Red Wine Vinegar: If you don’t have this type of vinegar, you can sub lime juice (bringing the total amount of lime juice to 1/4 cup) or another preferred type of light vinegar.
    Corn: Many different types of corn will work in this recipe. Canned corn kernels, rinsed and drained. Frozen corn kernels, thawed and patted dry (no need to cook). Fresh corn kernels, cut off the cob (no need to cook). For a tasty variation, I love using the frozen roasted corn from Trader Joe’s. 
    Rice: These bowls are super delicious with cilantro lime rice. But you can use whatever rice you have on hand (cooked quinoa works well, too). For the cilantro lime rice pictured in this recipe, in a saucepan, combine 1 1/2 cups white jasmine rice, 2 cups water and 1/2 teaspoon salt. Bring to a vigorous simmer, cover and reduce heat to medium-low. Cook for 16 minutes. Remove from the heat and let stand, covered, for 5 to 10 minutes. Fluff the rice and stir in zest of 1 lime, 4 tablespoons fresh lime juice, and 1/4 cup chopped cilantro. (This recipe is the one in my cookbook using water instead of broth and stirring in the zest and lime juice after cooking.)
    Dressing: This is my go-to recipe for cilantro lime dressing. Store bought cilantro lime dressing can be used, as well as another type of dressing (like ranch). 

    Serving: 1 serving, Calories: 641kcal, Carbohydrates: 82g, Protein: 41g, Fat: 16g, Saturated Fat: 3g, Cholesterol: 97mg, Sodium: 378mg, Fiber: 4g, Sugar: 2g

    Recipe Source: from Mel’s Kitchen Cafe

    Disclaimer: I am a participant in the Amazon Services LLC Associates Program, an affiliate advertising program designed to provide a means for me to earn fees by linking to Amazon.com and affiliated sites. As an Amazon Associate I earn from qualifying purchases.

    Source link

  • Healthy Chicken Taco Soup

    Healthy Chicken Taco Soup

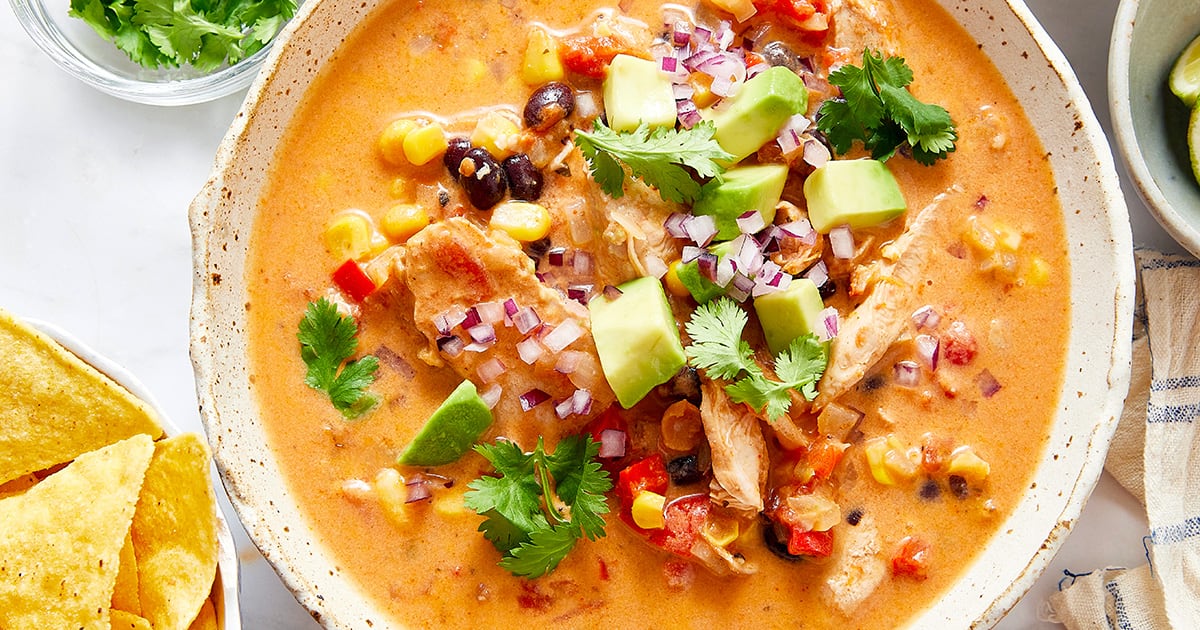
    This creamy chicken taco soup is loaded with protein, fiber, and all the Tex-Mex flavor. It’s easy, filling, and surprisingly light on calories.


    Jump to: ℹ️ Overview | 🛒 Ingredients | 📷 How To Make | 📹 Watch The Video | 👩‍🍳 Recipe Tips | 🥗 Serving Suggestions | 📝 Full Recipe Card | 🍽 More High-Protein Recipes


    This high-protein chicken taco soup is a cozy meal with a healthy twist. It’s hearty like a stew, with chunks of tender chicken, smoky spices, sweet corn, black beans, and a creamy base, without the heavy cream. The real trick? Blending cottage cheese with light cream to get that smooth richness without the calorie bomb.

    If you’re into high-protein and fiber meals, this one checks the boxes. Plus, it makes amazing leftovers with flavors deepening overnight, and it reheats like a dream.

    Nutrition (per serving): ~560 calories, 38 grams protein, 7 grams fiber (estimates based on ingredients used).

    👉 This healthy chicken taco soup is part of my high-protein and fiber meals series. You might also like this baked chia oats recipe, my avocado cottage cheese toast, or my high-protein butternut squash soup.

    Watch The Video

    What You’ll Need

    Here is what you’ll need for this chicken taco soup recipe. Find the full measurements in the recipe card below.

    For the soup base:

    • Chicken breasts – Raw or cooked (rotisserie chicken works!). Great protein source.
    • Chicken stock – Builds the savory soup foundation.
    • Onion, garlic, red bell pepper – Aromatics that bring the base to life.

    Spices & seasoning:

    • Ground cumin, smoked paprika, coriander, oregano – Warm, smoky, earthy spice blend.
    • Chili or chipotle powder – Optional kick, you can also add canned chipotle peppers.
    • Salt & pepper for season in layers.

    Veggies & fillers:

    • Black beans – High in fiber and protein.
    • Corn kernels – Sweet, chewy pops of goodness and high in fiber.
    • Diced tomatoes – Adds a little acidity and tomato depth.

    For the creamy finish:

    • Cottage cheese – Blended for creaminess and protein.
    • Light cream – Keeps it smooth without being too rich.
    • Cheddar cheese – For that melty, cheesy vibe (low-fat optional, I used regular here).

    Toppings (optional but encouraged):

    • Avocado – a few cubes for creamy, healthy fats.
    • Red onion – sharp and crunchy, finely diced is best.
    • Fresh cilantro/coriander – bright and herby, swap for parsley or basil.
    • Corn chips or tortilla chips – adds crunch and fun, don’t go overboard though.
    • Lime wedges – a fresh squeeze makes all the difference in my opinion.

    How To Make Healthy Chicken Taco Soup

    Find the full recipe and nutritional information below. Here are some handy step-by-step photos for healthy chicken taco soup.

    • Season chicken with salt and pepper and pan-fry in a little olive oil until golden on both sides, then set aside. Don’t worry if it’s not completely cooked through as it will go in the soup. If using rotisserie chicken, skip this step.
    • In the same pot, sauté onion until soft, then add red pepper and garlic.
    • Stir in all your spices and cornflour, just for a few seconds to wake them up.
    • Add beans, corn, tomatoes, and stock. Return the chicken to the pot.
    • Simmer until the chicken is cooked through (about 10 minutes). If using rotisserie chicken, you can reduce cooking to 5 minutes.
    • Blend the cottage cheese and cream until smooth, stir into the soup with the cheddar. If you don’t blend, you will have a few cottage cheese curds in the soup, not a biggy.
    • Simmer gently until everything is creamy and thickened.
    • Serve with toppings like avocado, red onion, lime juice, and crushed tortilla chips.

    Recipe Tips

    • Make-ahead: This soup keeps well for 4 days in the fridge. Reheat gently so the dairy doesn’t split.
    • Freezer-friendly: Freeze in portions without toppings. Defrost in the fridge overnight, then reheat on the stove.
    • Use rotisserie chicken: Skip the first step and just shred it in when you add the beans.
    • Spice it up: Add jalapeños or extra chipotle if you like it hot.
    • Smooth or chunky: Blend part of the soup if you want a smoother base.

    Serving Suggestions

    I love this soup as-is in a deep bowl with ALL the toppings: avocado cubes, crunchy tortilla chips, fresh cilantro, and a squeeze of lime. It also pairs nicely with a simple green salad or a slice of cheesy cornbread if you want it more substantial.

    💬 If you’ve tried this healthy chicken taco soup or any other recipe on the blog then don’t forget to rate the recipe and let me know how you got on in the comments below, I love hearing from you! You can also FOLLOW ME on Instagram, Facebook, Pinterest, YouTube, and or sign up to my Newsletter to see more of my delicious food.

    Want to Save This Recipe?

    Enter your email & I’ll send it to your inbox. Plus, get great new recipes from me every week!

    By submitting this form, you consent to receive emails from Cooked & Loved

    Healthy chicken taco soup made creamy with cottage cheese, full of flavor, and loaded with protein and fiber—basically your new go-to cozy dinner. Find step-by-step photos and more recipe tips above.

    • Cut chicken breasts in half and season with salt. Heat oil in a large pot over medium-high heat and cook chicken for 4 minutes per side. Remove and set aside to slice.

    • In the same pot, sauté onion for 4–5 minutes. Add red pepper and garlic; cook another minute.

    • Stir in cumin, paprika, coriander, oregano, chili powder (if using), black pepper, and cornflour.

    • Add beans, corn, tomatoes, chicken stock, and sliced chicken. Simmer for 10 minutes.

    • Blend cottage cheese and cream until smooth. Stir into the soup along with Cheddar. If you don’t blend, you will have a few cottage cheese curds in the soup, not a biggy.

    • Simmer on low until creamy and well combined. Taste and adjust seasoning.

    • Serve with avocado, onion, cilantro, lime, and tortilla chips.

    • Can I use cooked chicken? Yes! Rotisserie chicken works great, just skip the pan-frying step and add it with the beans.
    • What if I don’t have cottage cheese? You could try Greek yogurt or light cream cheese, but it won’t be quite as high in protein or as creamy.
    • Is it spicy? Not very unless you add the chili or chipotle powder. You’re in full control of the heat. Add jalapeños or extra chipotle if you like it hot.
    • How thick should it be? Think creamy stew rather than a brothy soup. It should coat your spoon.
    • Make-ahead: This soup keeps well for 4 days in the fridge. Reheat gently so the dairy doesn’t split.
    • Freezer-friendly: Freeze in portions without toppings. Defrost in the fridge overnight, then reheat on the stove.
    • Smooth or chunky: Blend part of the soup if you want a smoother base.

    Calories: 564kcal | Carbohydrates: 40g | Protein: 38g | Fat: 29g | Saturated Fat: 9g | Polyunsaturated Fat: 5g | Monounsaturated Fat: 13g | Trans Fat: 0.03g | Cholesterol: 103mg | Sodium: 1072mg | Potassium: 1211mg | Fiber: 7g | Sugar: 10g | Vitamin A: 1534IU | Vitamin C: 41mg | Calcium: 188mg | Iron: 3mg

    Keywords: Healthy Chicken Taco Soup, taco soup with chicken, creamy chicken soup

    More High-Protein Recipes


    Source link

  • Easy Chicken Stir Fry Recipe

    Easy Chicken Stir Fry Recipe

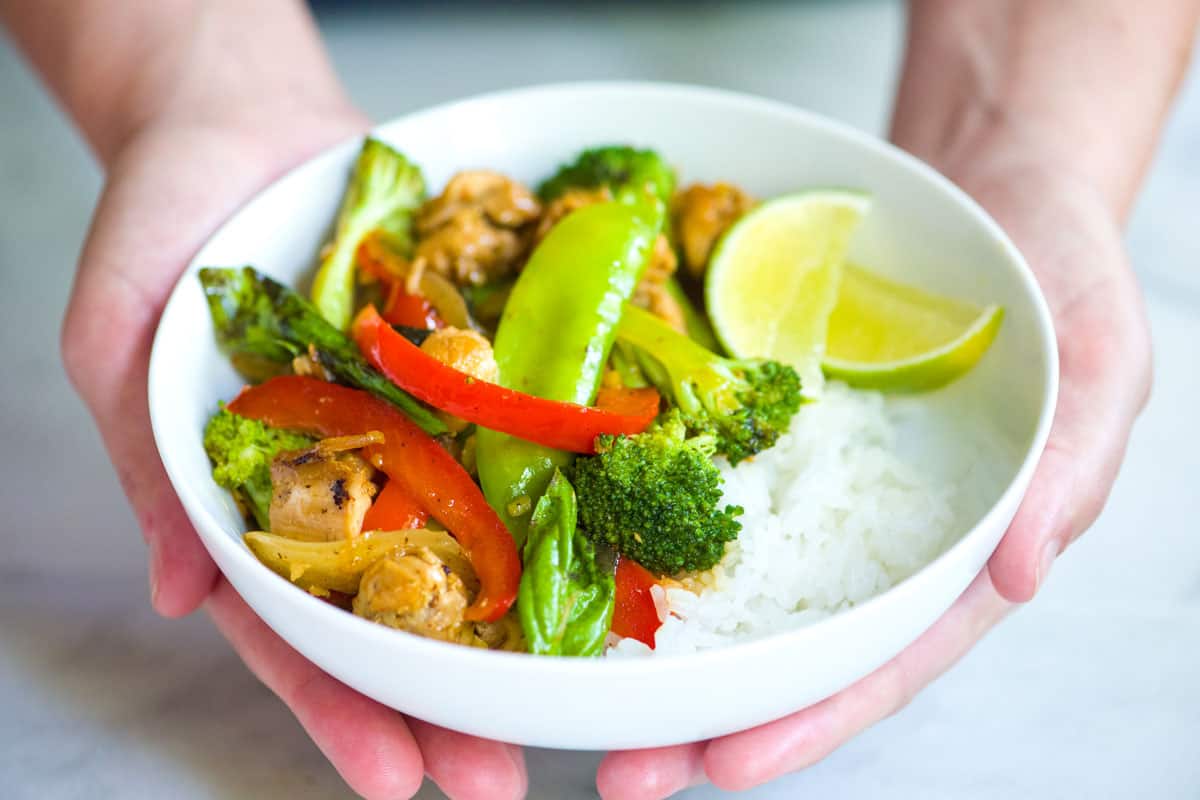
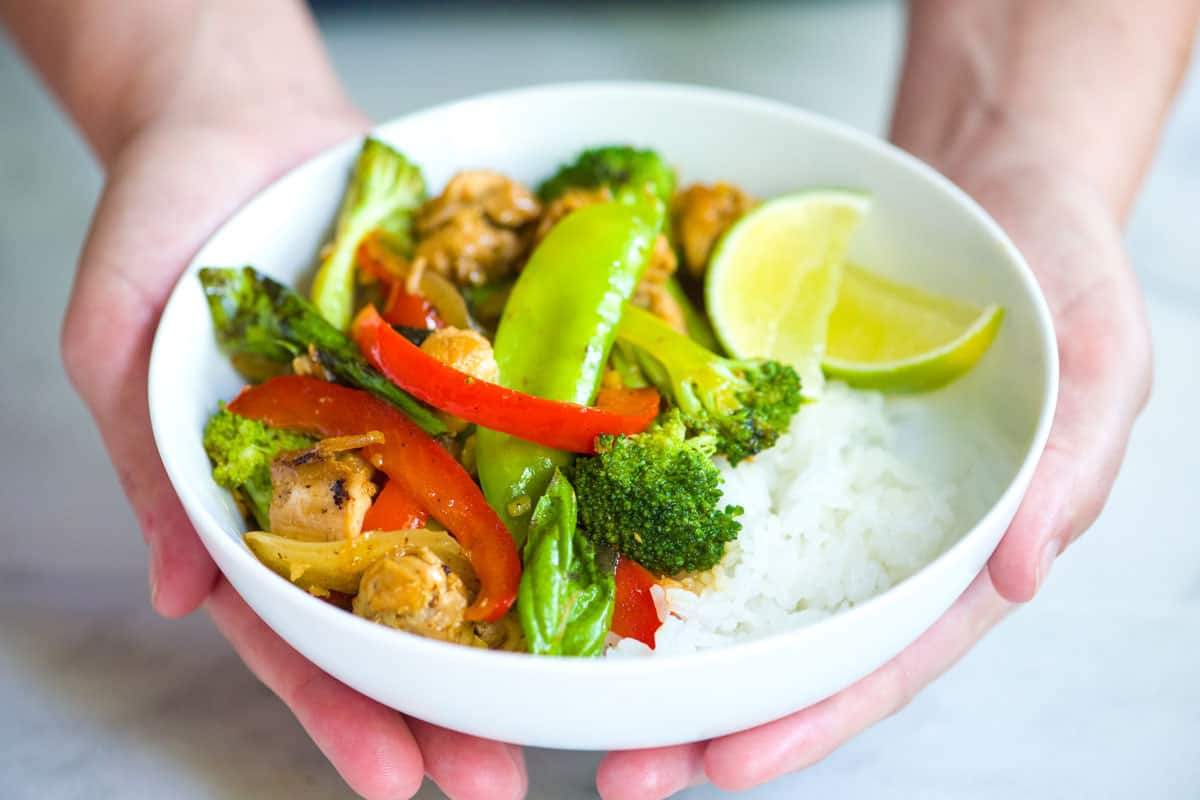
    This chicken stir fry recipe is packed with fresh vegetables and coated with our irresistible homemade sauce.

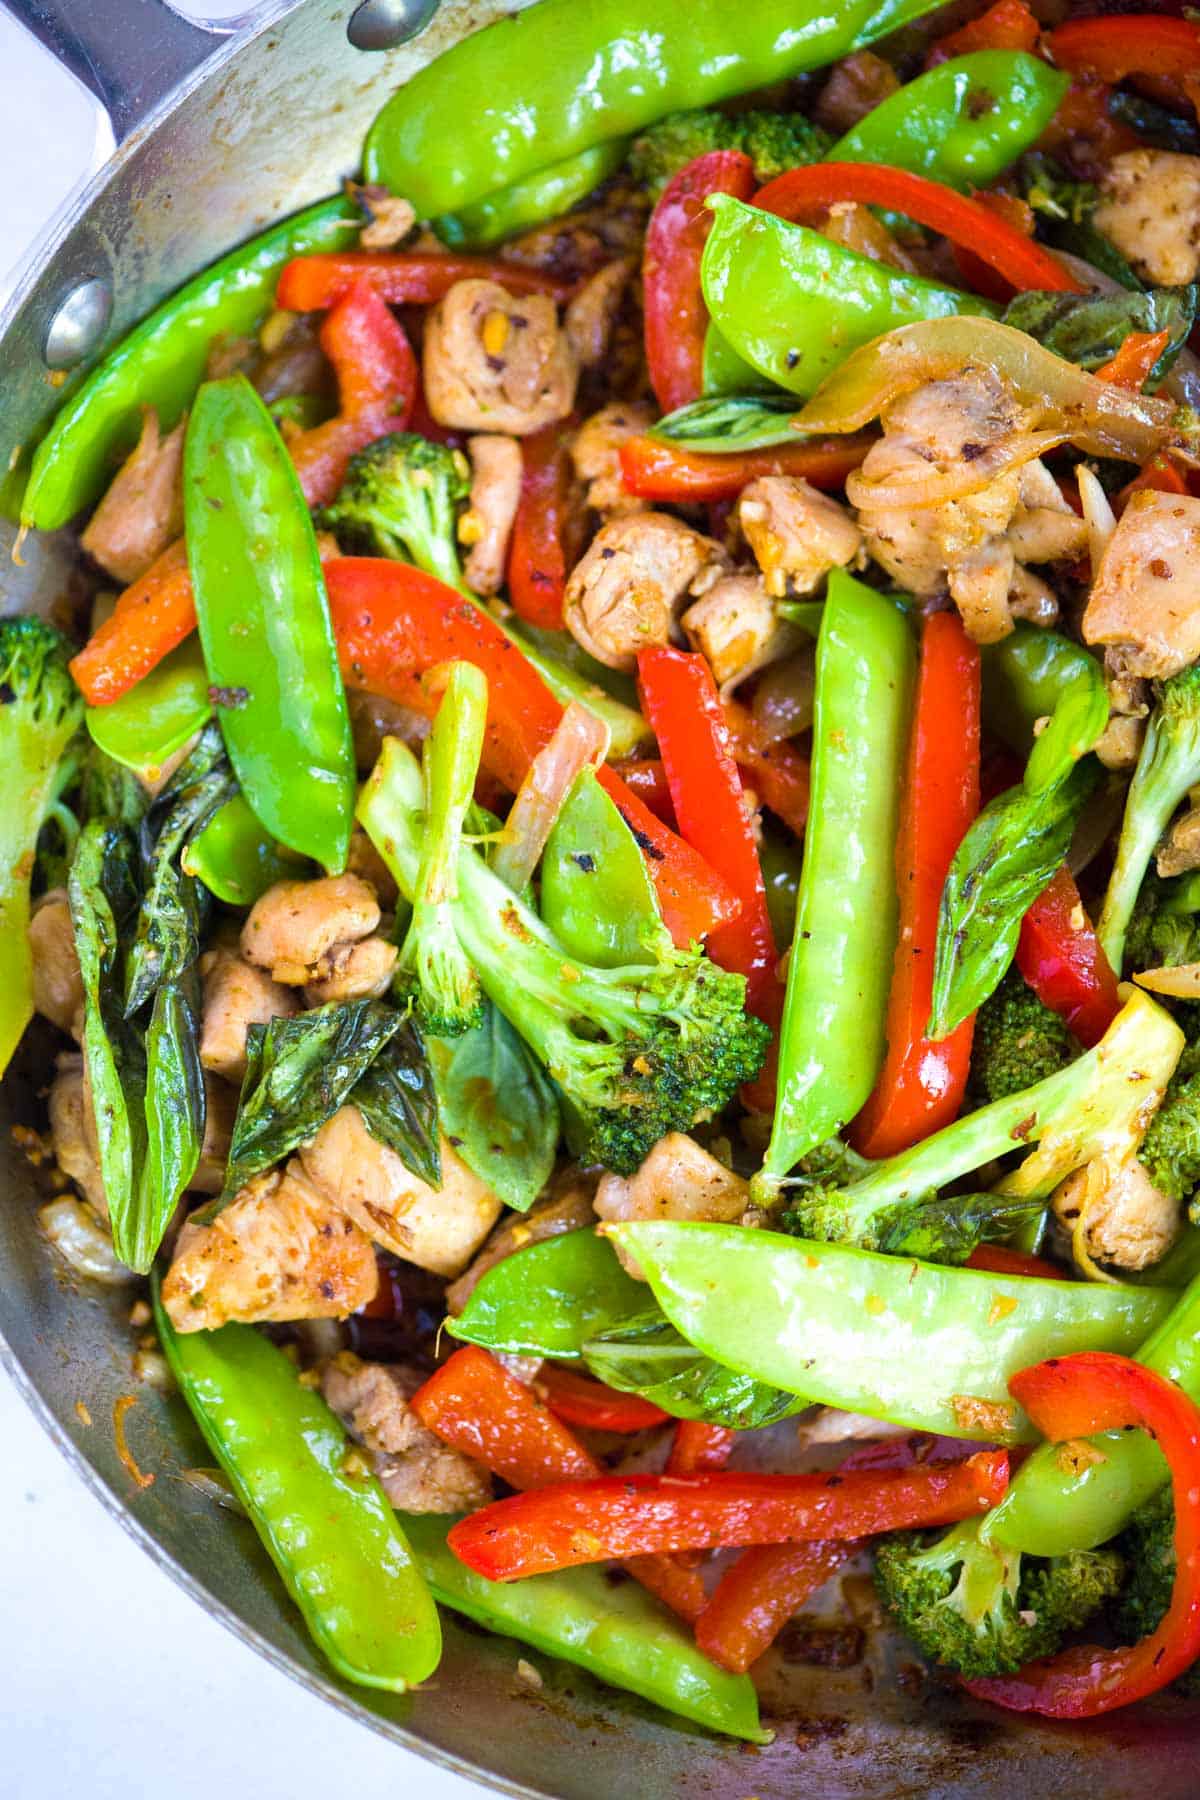
    Chicken stir fry with vegetables

    I love stir fries, especially when I’m short on time. We’ve found ourselves returning to this recipe lately. The sauce is easy and made from scratch with honey, fish sauce, and soy sauce.

    This stir fry can be on the table in about 30 minutes, and if you want to, you can make the stir fry sauce well in advance (it lasts in the fridge for a week).

    Key Ingredients

    • Chicken: I use boneless, skinless chicken thighs in this stir fry recipe, but boneless, skinless chicken breasts work well. Cut the chicken thighs into bite-sized pieces, or if you have chicken breasts, slice them against the grain into 1/4-inch slices.
    • Veggies: Use what you love, but when I make this recipe, I reach for broccoli, onion, bell pepper, and snow peas. The combination is hearty, flavorful, and colorful. Take note of the recipe directions, where I give the heartier veggies (like broccoli) a head start before adding the other vegetables to the skillet/wok.
    • Ginger and Garlic: I love fresh ginger and garlic, and use a tablespoon of each in this stir fry. If you don’t want to buy fresh ginger, look for the fresh ginger paste (sold in squeeze bottles).
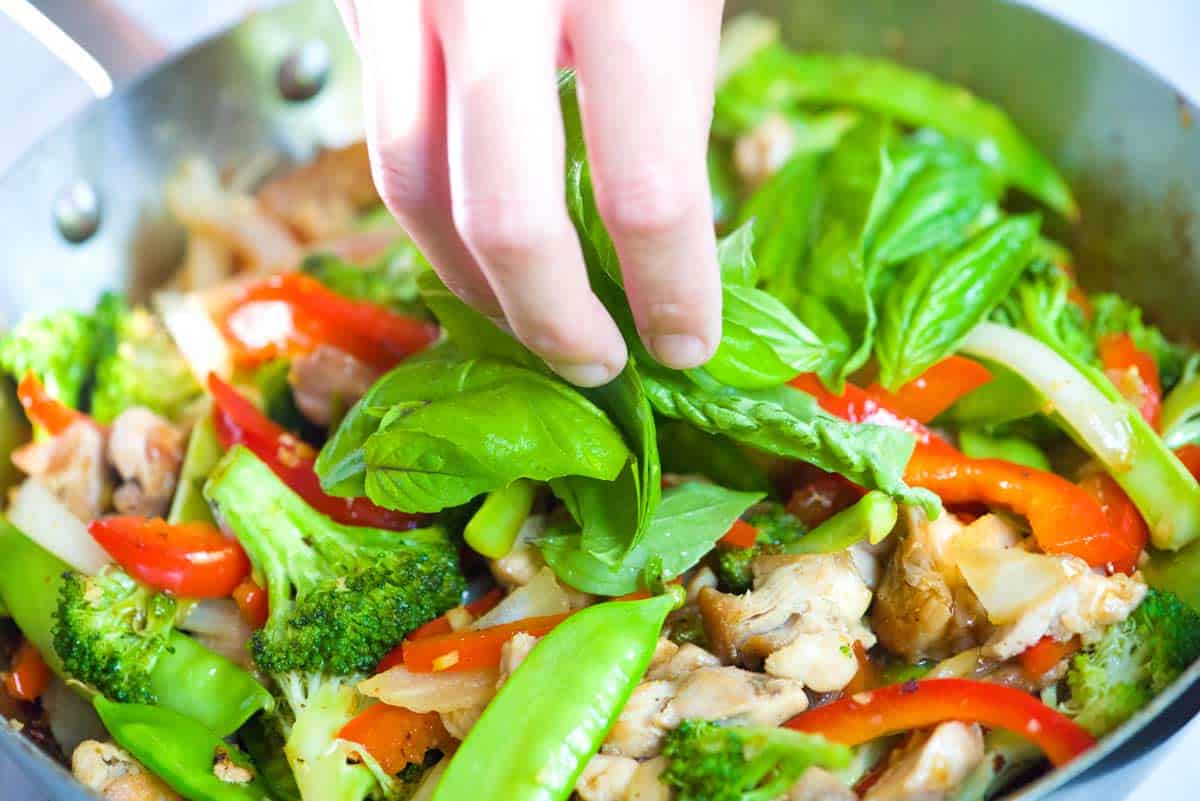
    • Basil: One of my favorite Thai restaurants sells a stir-fried dish with lots of fresh basil and I love it, so I add fresh basil here. Use Italian basil or Thai basil. Mint is also an option.
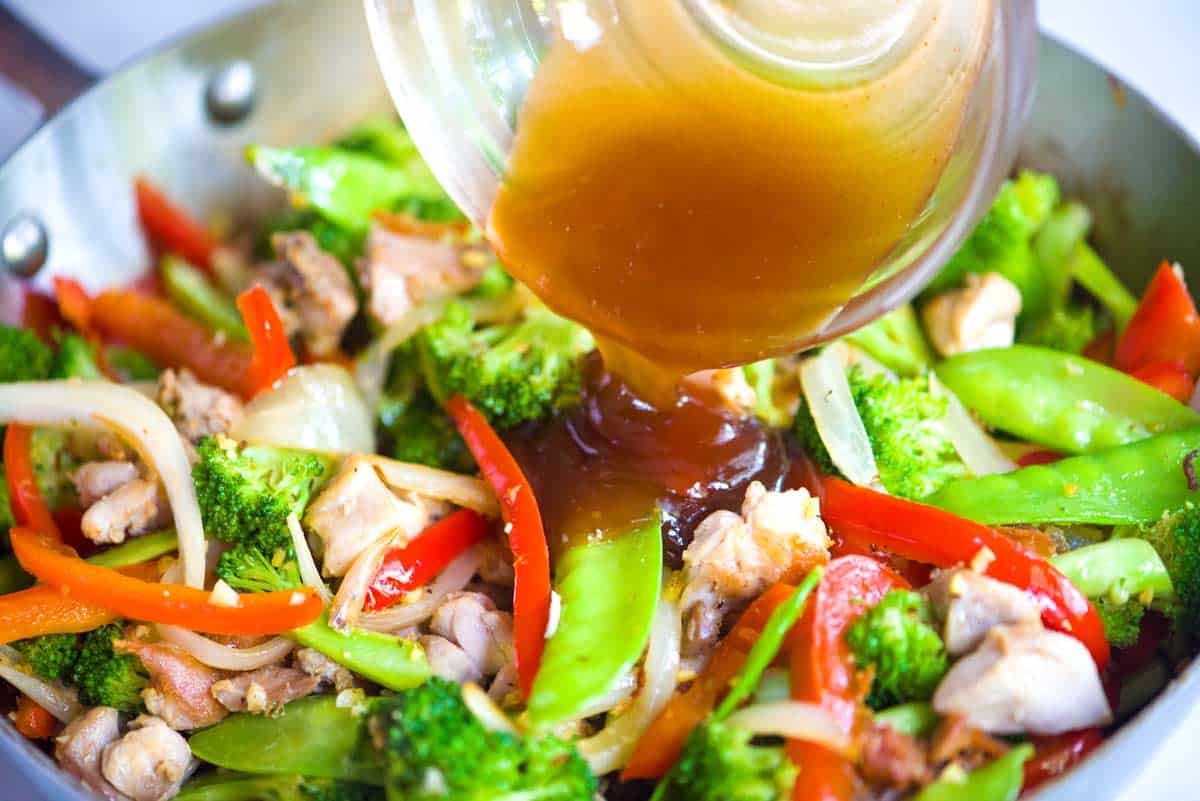
    • Stir Fry Sauce: This homemade sauce is really easy and so flavorful. I combine honey, fish sauce, soy sauce, water (or broth), and cornstarch. The cornstarch thickens the sauce a bit, so it sticks to the chicken and vegetables in the stir fry. I also love this more traditional brown stir fry sauce.

    Find the full recipe with measurements below.

    How to Make the Best Chicken Stir Fry

    Tip 1: A quick guide for making our chicken stir fry. This dish comes together really quickly. For the best results, you’ll want to cook your protein first, then follow up with the veggies. This way the chicken stays perfectly tender and the veggies don’t overcook. Here’s a quick rundown of what you’ll need to do:

    1. Cook the chicken first, then transfer it to a plate.
    2. Toss your broccoli into the pan. Since broccoli is heartier than the other veggies, I like giving it a head start so that by the time everything else is ready, it’s bright green and crisp-tender.
    3. After tossing the remaining veggies, I stir the garlic and ginger. Adding these later guarantees that they stay super fragrant and don’t burn.
    4. Add the chicken and sauce, then reheat everything.
    5. If you have some on hand, toss in some fresh herbs and lime juice. I love basil, but mint is great, too.
    Adding the homemade stir fry sauce to the skillet
    Adding fresh basil to the stir fry

    Tip 2: Serving suggestions. Thanks to all of the hearty veggies, this stir fry is lovely by itself. It’s also great with plain rice, coconut rice, fried rice, noodles or this cilantro lime rice.

    More Asian Inspired Recipes

    Chicken Stir Fry

    Easy Chicken Stir Fry

    • PREP
    • COOK
    • TOTAL

    My family loves this easy chicken and vegetable stir fry. I use chicken thighs, but chicken breast, tofu, pork, or simply replacing the chicken with more vegetables are all options. The key to the best stir fry is to cook the heartiest ingredients first—like the chicken or broccoli, then add less hearty and more delicate ingredients towards the end of cooking. This way, none of the vegetables overcook. Use a nice wide skillet or wok for this recipe. The bigger, the better.

    Makes 4 servings

    You Will Need

    Chicken Stir Fry

    1 ½ pounds boneless, skinless chicken thighs, cut into bite-size pieces

    1 tablespoon avocado oil, peanut oil, or canola oil

    2 cups broccoli florets (1 medium bunch)

    1 small onion, thinly sliced

    1 bell pepper, core removed and thinly sliced

    1 ½ cups snow peas (3 ounces)

    1 tablespoon minced fresh ginger (1-inch piece)

    1 tablespoon minced garlic (3 cloves)

    1/4 cup fresh basil leaves

    Juice of 1 lime, plus extra lime wedges for serving


    Stir Fry Sauce

    1 tablespoon honey

    2 tablespoons fish sauce

    1 teaspoon low sodium soy sauce

    1/3 cup water or chicken broth

    1 ½ teaspoons cornstarch

    1/2 to 1 teaspoon Sriracha hot sauce

    Directions

      1You can make the stir fry sauce up to one week in advance and keep it in an airtight container in the fridge. Whisk honey, fish sauce, soy sauce, water, and cornstarch in a small saucepan over medium-low heat. Continue to whisk as it heats up and thickens, 2 to 3 minutes. When thick and shiny, remove from the heat and stir in Sriracha hot sauce.

      2Heat a large, wide skillet or wok over medium-high heat. Add the oil and swirl it in the pan until the bottom is well coated. Scatter the chicken pieces in one layer. Cook, without moving, until starting to brown on the bottom, about 5 minutes. Stir the chicken and continue to cook until cooked through about 3 minutes. Transfer the chicken to a clean plate.

      3Reduce the heat to medium, then place the skillet back on the burner. Add the broccoli and cook, stirring frequently, until it turns bright green, about 2 minutes.

      4Throw in the onion and bell pepper, and cook, stirring frequently, until the onions begin to sweat, about 2 minutes.

      5Add the snow peas, ginger, and garlic, then cook, tossing frequently until the ginger and garlic are fragrant and the snow peas turn a brighter green, about 2 minutes.

      6Stir in the cooked chicken. When all of the vegetables are crisp-tender and the chicken is reheated, take the skillet off the heat and stir in the stir-fry sauce. As you stir, use tongs or a spoon to scrape the bottom of the pan to lift any bits stuck to the pan and mix them into the sauce.

      7Finish by tossing with fresh basil leaves and the juice of one lime. Serve with extra lime wedges.

    Adam and Joanne’s Tips

    • Chicken breasts: If you substitute chicken breasts in this recipe, slice them against the grain into 1/4-inch slices before cooking them so that they are super tender.
    • Buying fish sauce: We always keep a bottle of fish sauce in our kitchen. It’s truly a magical ingredient. You can use it here and in other Asian-inspired dishes, and it is also excellent for adding to soups, stews, and pasta sauces. We have Red Boat in our kitchen. It has a clean flavor and no water or sugar added. If you cannot find it, go for a mid to high-priced fish sauce sold in a glass bottle instead of in plastic, and look for a light amber or reddish color rather than a very dark color.
    • The nutrition facts provided below are estimates.

    Nutrition Per Serving
    Serving Size
    1 1/4 cups
    /
    Calories
    308
    /
    Protein
    37 g
    /
    Carbohydrate
    16 g
    /
    Dietary Fiber
    3 g
    /
    Total Sugars
    9 g
    /
    Total Fat
    10 g
    /
    Saturated Fat
    2 g
    /
    Cholesterol
    142 mg


    AUTHOR:

    Adam Gallagher

    Adam and Joanne of Inspired Taste

    We are Adam and Joanne Gallagher, the creators of Inspired Taste. Established in 2009, Inspired Taste grew from a childhood dream into one of the internet’s most trusted recipe sites with hundreds of reliable recipes, step-by-step videos, and expert tips.More About Us

    Previous Post: Seriously Good Baked Spaghetti
    Next Post: Easy Cranberry Orange Scones

    Source link

  • Baked Buffalo Chicken Dip Recipe

    Baked Buffalo Chicken Dip Recipe

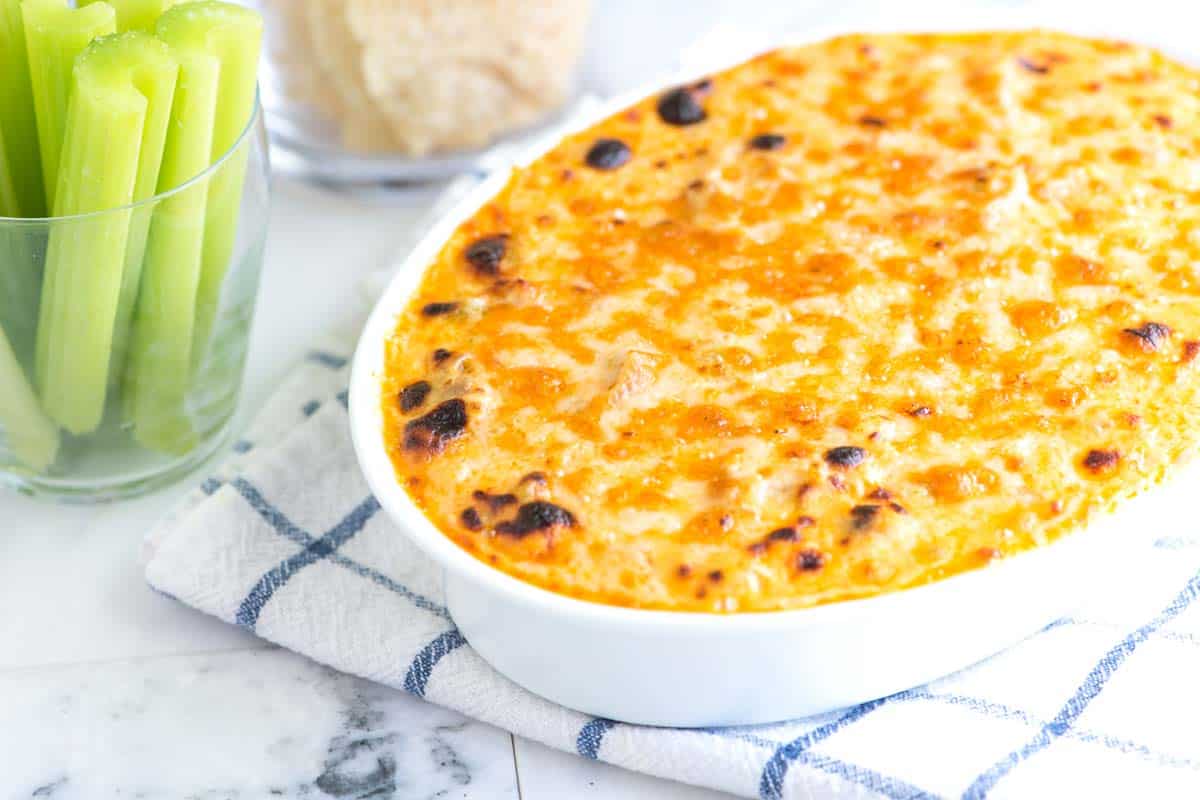
    This Buffalo chicken dip recipe is the perfect appetizer for game day or a crowd. Creamy, cheesy, and loaded with shredded chicken and tangy Buffalo sauce.

    Buffalo Chicken Dip

    It bakes up hot and bubbly with a fondue-like cheese sauce and just the right amount of heat, thanks to Frank’s hot sauce. Everyone I’ve served it to loves it!

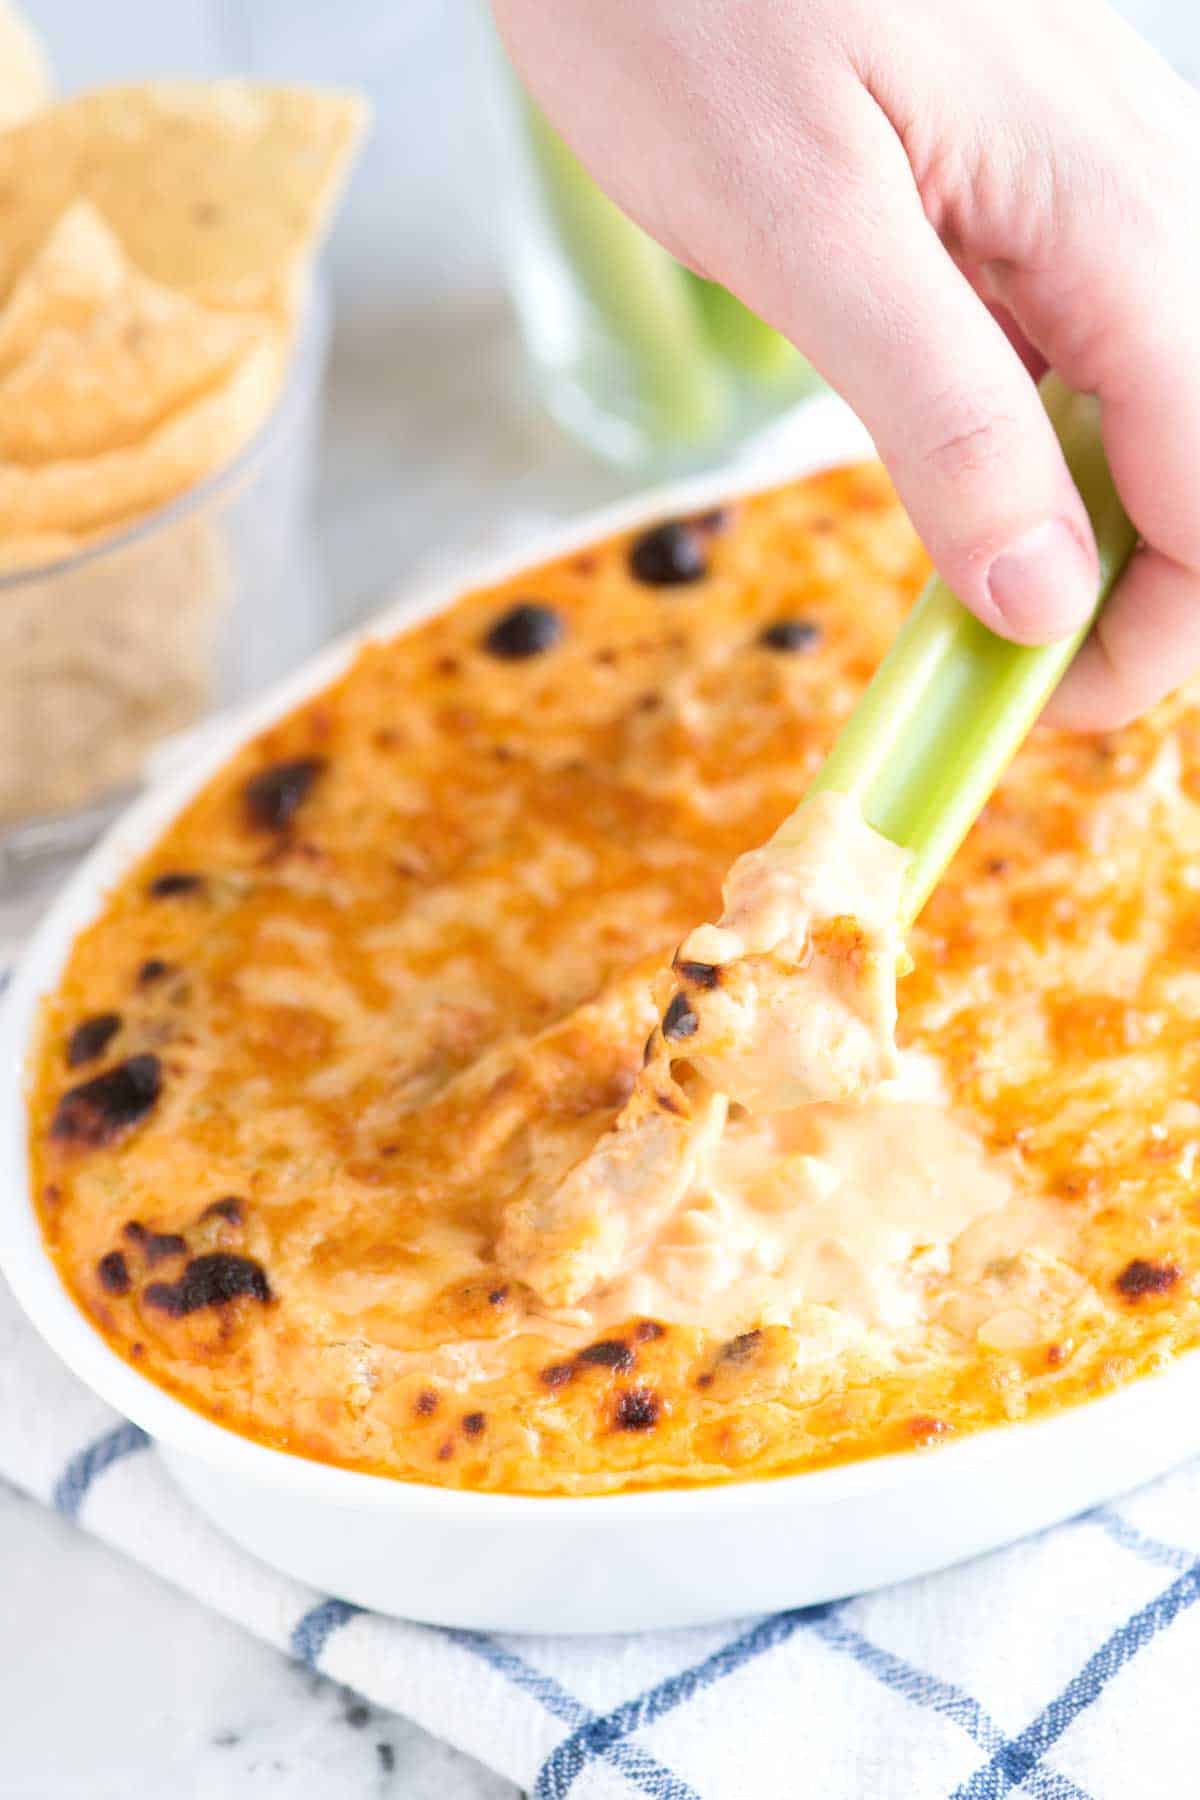
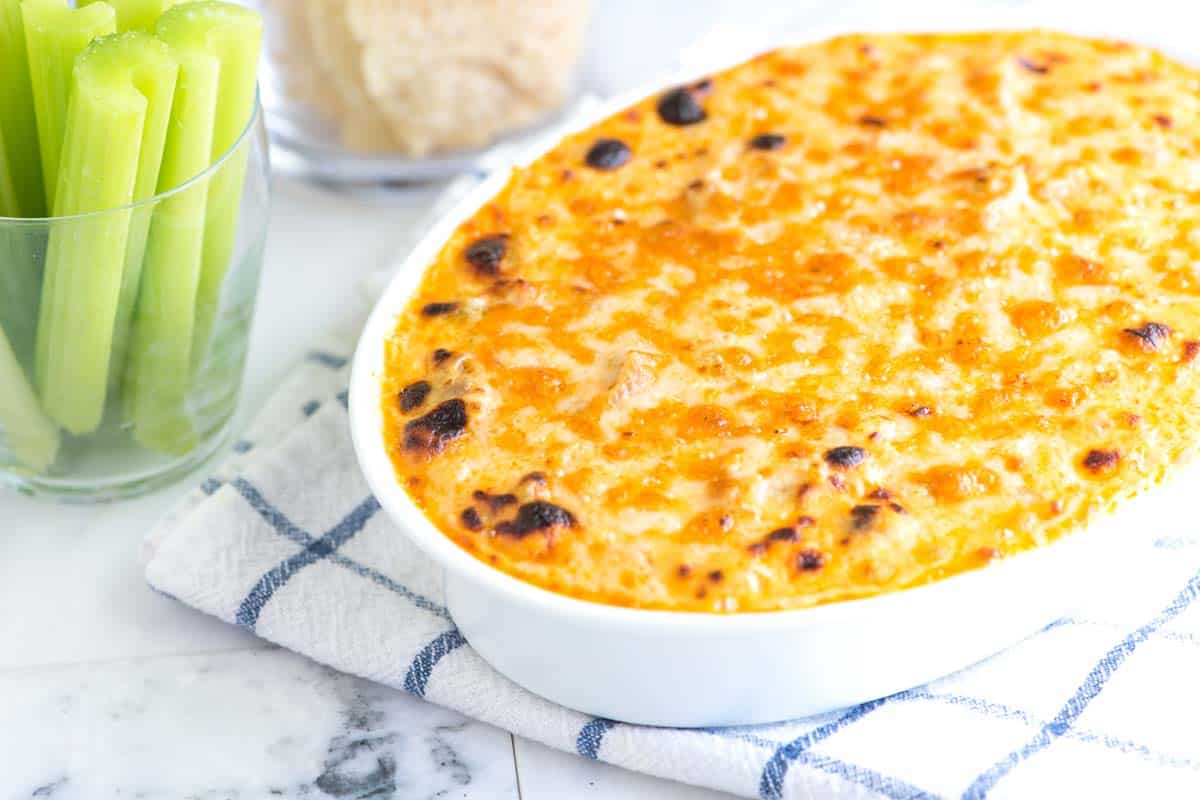
    If you love Buffalo hot wings, this buffalo chicken dip is for you. It’s especially good served with crusty bread, sturdy crackers, or crisp veggies like carrots and celery.

    Key Ingredients

    • Chicken: I usually start with leftover roasted chicken or a store-bought rotisserie chicken. You can also use our stovetop shredded chicken, slow cooker shredded chicken, or poached chicken recipes.
    • Hot Sauce: Use your favorite brand. We love Frank’s RedHot or Crystal Hot Sauce for their flavor and mild heat. These are also what I use when making homemade Buffalo sauce.
    • Butter and Flour: These form the base of our creamy dip. They turn into a roux that thickens the milk (similar to making creamy mac and cheese).
    • Milk: I like the richness of whole milk, but 2% is fine.
    • Veggies: To add flavor to the dip, cook finely diced onion, carrot, and celery in butter with minced garlic.
    • Cheese: For a smooth, creamy dip, use a mix of cream cheese and a melty cheese such as white cheddar, Monterey Jack, or Pepper Jack for a little extra heat.

    Find the full recipe with measurements below.

    How to Make the Best Buffalo Chicken Dip

    Tip 1: Make the creamy base. The base of this dip starts like a classic macaroni and cheese. Cook onion and celery in butter until soft, then stir in garlic and flour. Cook until the flour turns lightly golden, then whisk in the milk until it thickens into a smooth béchamel sauce.

    Making the creamy base of buffalo dip

    Tip 2: Make it cheesy. For the creamiest texture, stir in a bit of cream cheese. The stabilizers help the dip stay silky and smooth (just like in our queso recipe). Then add shredded cheese for flavor. I love white cheddar, but pepper jack adds a nice kick.

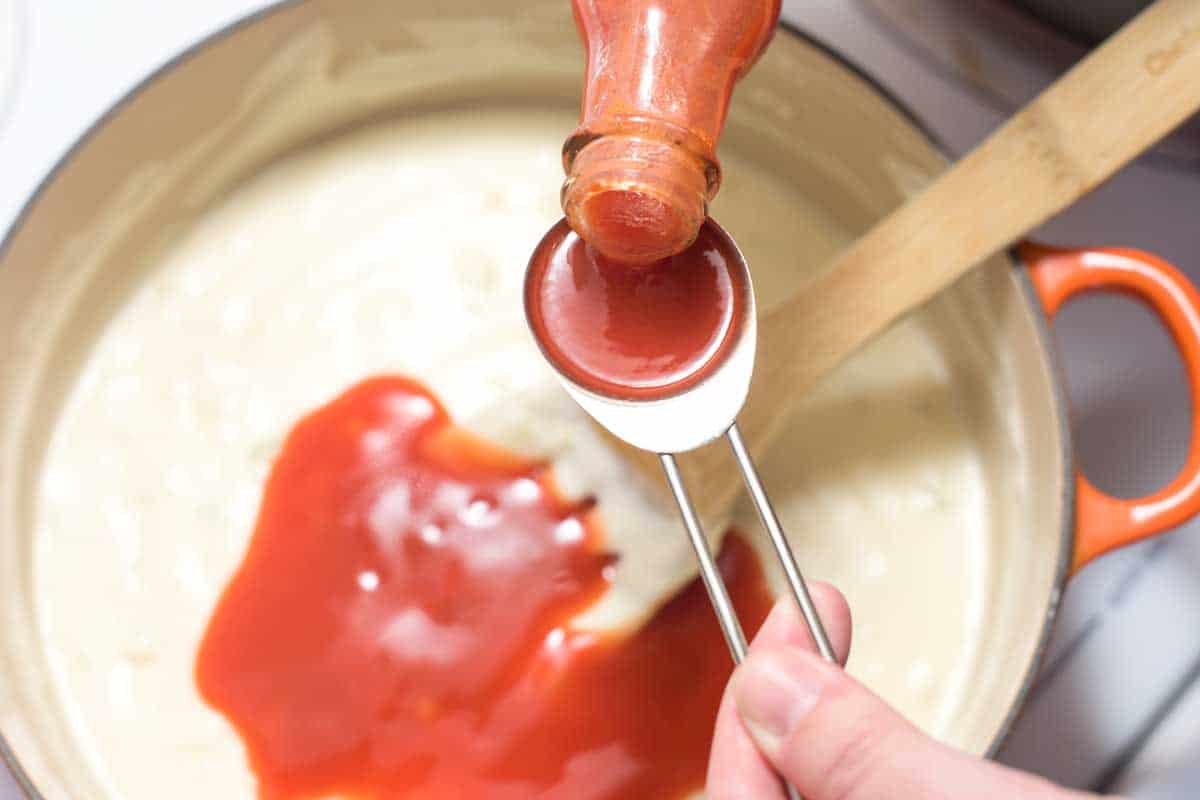
    Tip 3: Make it Buffalo-style. To transform this from a creamy sauce to a Buffalo dip, stir in a generous amount of hot sauce. You can add to taste on this one, so you can make it as spicy as you want. When you are happy with the flavor, stir in your chicken.

    Adding Frank's Redhot to homemade buffalo chicken dip

    Tip 4: Bake it! Transfer the dip to a baking dish, sprinkle extra cheese on top, and broil until hot and bubbly. It only takes a few minutes, and that gooey, golden topping makes all the difference.

    Adding cheese to the top of buffalo chicken dip

    More Buffalo Chicken Recipes

    Buffalo Chicken Dip

    Baked Buffalo Chicken Dip

    • PREP
    • COOK
    • TOTAL

    This Buffalo chicken dip recipe is easy to make and perfect served with crisp celery sticks and crusty bread. We love using Frank’s RedHot Original since it’s full of flavor without being too spicy, but feel free to use your favorite hot sauce. Just taste as you go, since some brands pack a bit more heat.

    This dip is just as good with or without chicken. We’ve made it both ways, and it’s always a hit.

    8 Servings

    You Will Need

    2 cups cooked, shredded chicken, see tips

    2 cups whole milk

    4 tablespoons unsalted butter

    1 cup finely chopped onion (1 medium)

    ½ cup finely chopped celery (1 stalk)

    2 garlic cloves, minced

    4 tablespoons all-purpose flour

    3 ounces cream cheese, block-style

    8 ounces sharp white cheddar, coarsely grated, about 2 cups

    Dash Worcestershire sauce

    5 tablespoons Frank’s RedHot Original, or more to taste

    Celery sticks and/or crusty bread, for serving

    Directions

      1Warm the milk: Heat the milk in a medium saucepan over medium heat until it just begins to simmer. Turn off the heat and set aside. You can also warm it in the microwave.

      2Cook the vegetables: Melt the butter in a large, heavy-bottomed saucepan over medium heat. Add the onion, celery, and ¼ teaspoon salt. Cook, stirring occasionally, until softened, about 5 minutes.

      3Make the roux: Stir in the garlic and flour. Cook, whisking constantly, until the flour turns lightly golden, about 2 to 3 minutes. Remove from the heat.

      4Add the milk: Slowly whisk in the warm milk a little at a time, whisking until smooth. Return the pan to medium heat and cook, whisking constantly, until the sauce thickens enough to coat the back of a spoon, about 2 minutes.

      5Add cheese: Remove from the heat. Stir in the cream cheese and all but a small handful of the cheddar until melted and smooth.

      6Add hot sauce and chicken: Add the Worcestershire sauce and 5 tablespoons of hot sauce. Taste and adjust the spice and salt as needed. Stir in the shredded chicken.

      7Broil and serve: Position a rack 6 inches from the broiler and preheat the broiler to high. Transfer the dip to a 2-quart baking dish and sprinkle the remaining cheese on top. Place the dish on a foil-lined baking sheet and broil until bubbling and lightly browned, about 2 to 3 minutes. Serve hot with celery sticks, or slices of crusty bread.

    Adam and Joanne’s Tips

    • Make ahead: You can prepare this up to 3 days in advance. Follow our recipe directions, but do not broil. Store the dip covered in the refrigerator until ready to serve. Gently reheat the dip in a saucepan over medium-low heat until thoroughly heated through. Pour the dip into the baking dish, add extra cheese on top, and broil until the top is bubbling and cheese begins to brown.
    • The nutrition facts provided below are estimates.

    Nutrition Per Serving
    Calories
    291
    /
    Protein
    16 g
    /
    Carbohydrate
    8 g
    /
    Dietary Fiber
    1 g
    /
    Total Sugars
    4 g
    /
    Total Fat
    21 g
    /
    Saturated Fat
    12 g
    /
    Cholesterol
    89 mg
    /
    Sodium
    315 mg


    AUTHOR:

    Adam Gallagher

    Adam and Joanne of Inspired Taste

    We are Adam and Joanne Gallagher, the creators of Inspired Taste. Established in 2009, Inspired Taste grew from a childhood dream into one of the internet’s most trusted recipe sites with hundreds of reliable recipes, step-by-step videos, and expert tips.More About Us

    Source link

  • Summer Chipotle Chicken Cobb Salad with Cilantro Vinaigrette Recipe

    Summer Chipotle Chicken Cobb Salad with Cilantro Vinaigrette Recipe

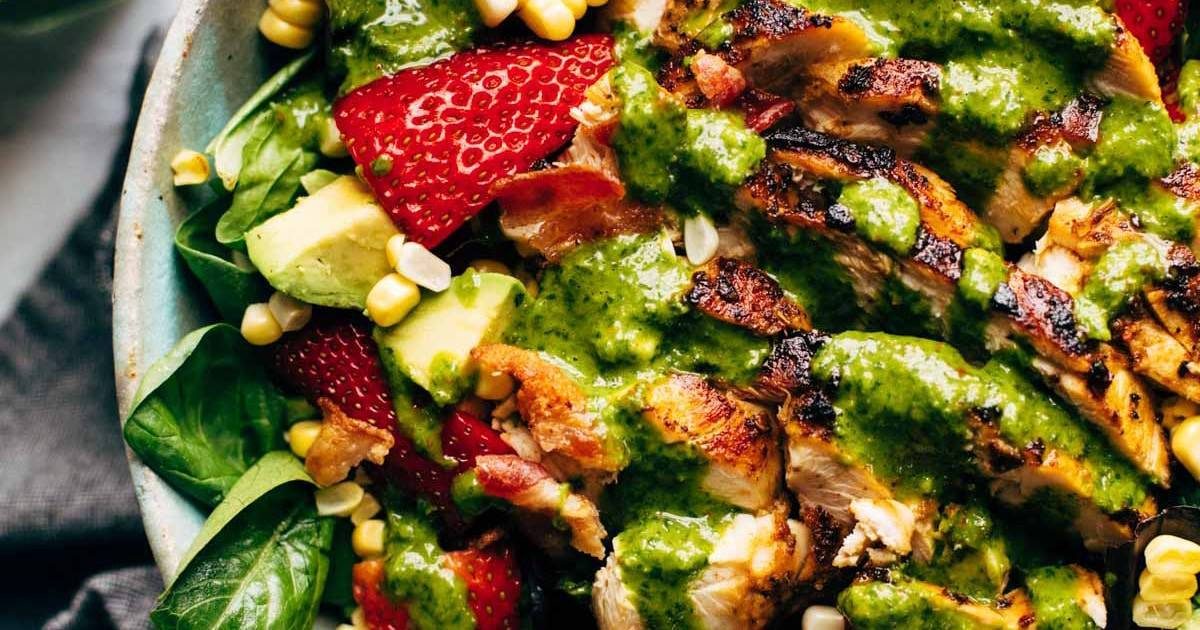
    This juicy salad tastes like summer! With chipotle chicken, sweet corn, avocado, cilantro vinaigrette, bacon crumbles, and fresh strawberries for a pop of sweetness.

    Summah summah summahhhhhhtime!

    I kinda can’t believe it since here in Minnesota we were all “April Blizzard” a minute ago, but you guys, it’s totally here. And I totally had it for dinner last night.

    Here’s what it tasted like:

    • juicy strawberries
    • crisp salty bacon
    • sweet green lettuce
    • bursts of sweet corn
    • creamy avocado chunks
    • and smoky chipotle grilled chicken! REPEAT: GRILLED!

    How To Make Our Chipotle Cobb Salad:

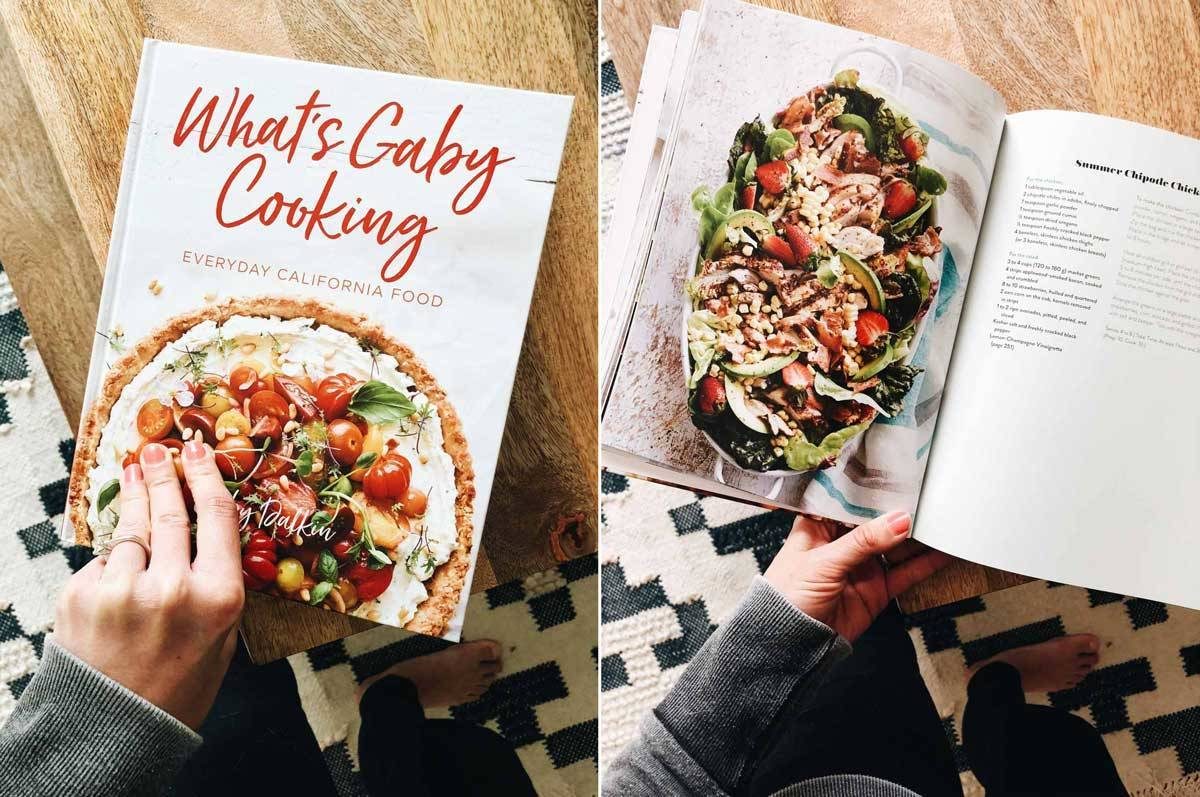
    What's Gaby Cooking Everyday California Food cookbook.

    This dream team of ingredients better known as a Summer Chipotle Chicken Cobb Salad is coming to our hearts today from the What’s Gaby Cooking Cookbook.

    Remember when I published those BEST EVER chicken tinga tacos and told you about my friend Melissa’s amazing book and then talked about how I hardly ever promote books? But then I turned around and told you how great THIS one was, too? LOL to me. It’s just dumb luck that both of these came out when they did.

    We’re not paid for any cookbook promotions – I just like to show you the ones that we like and give you a sneak at their best recipes.

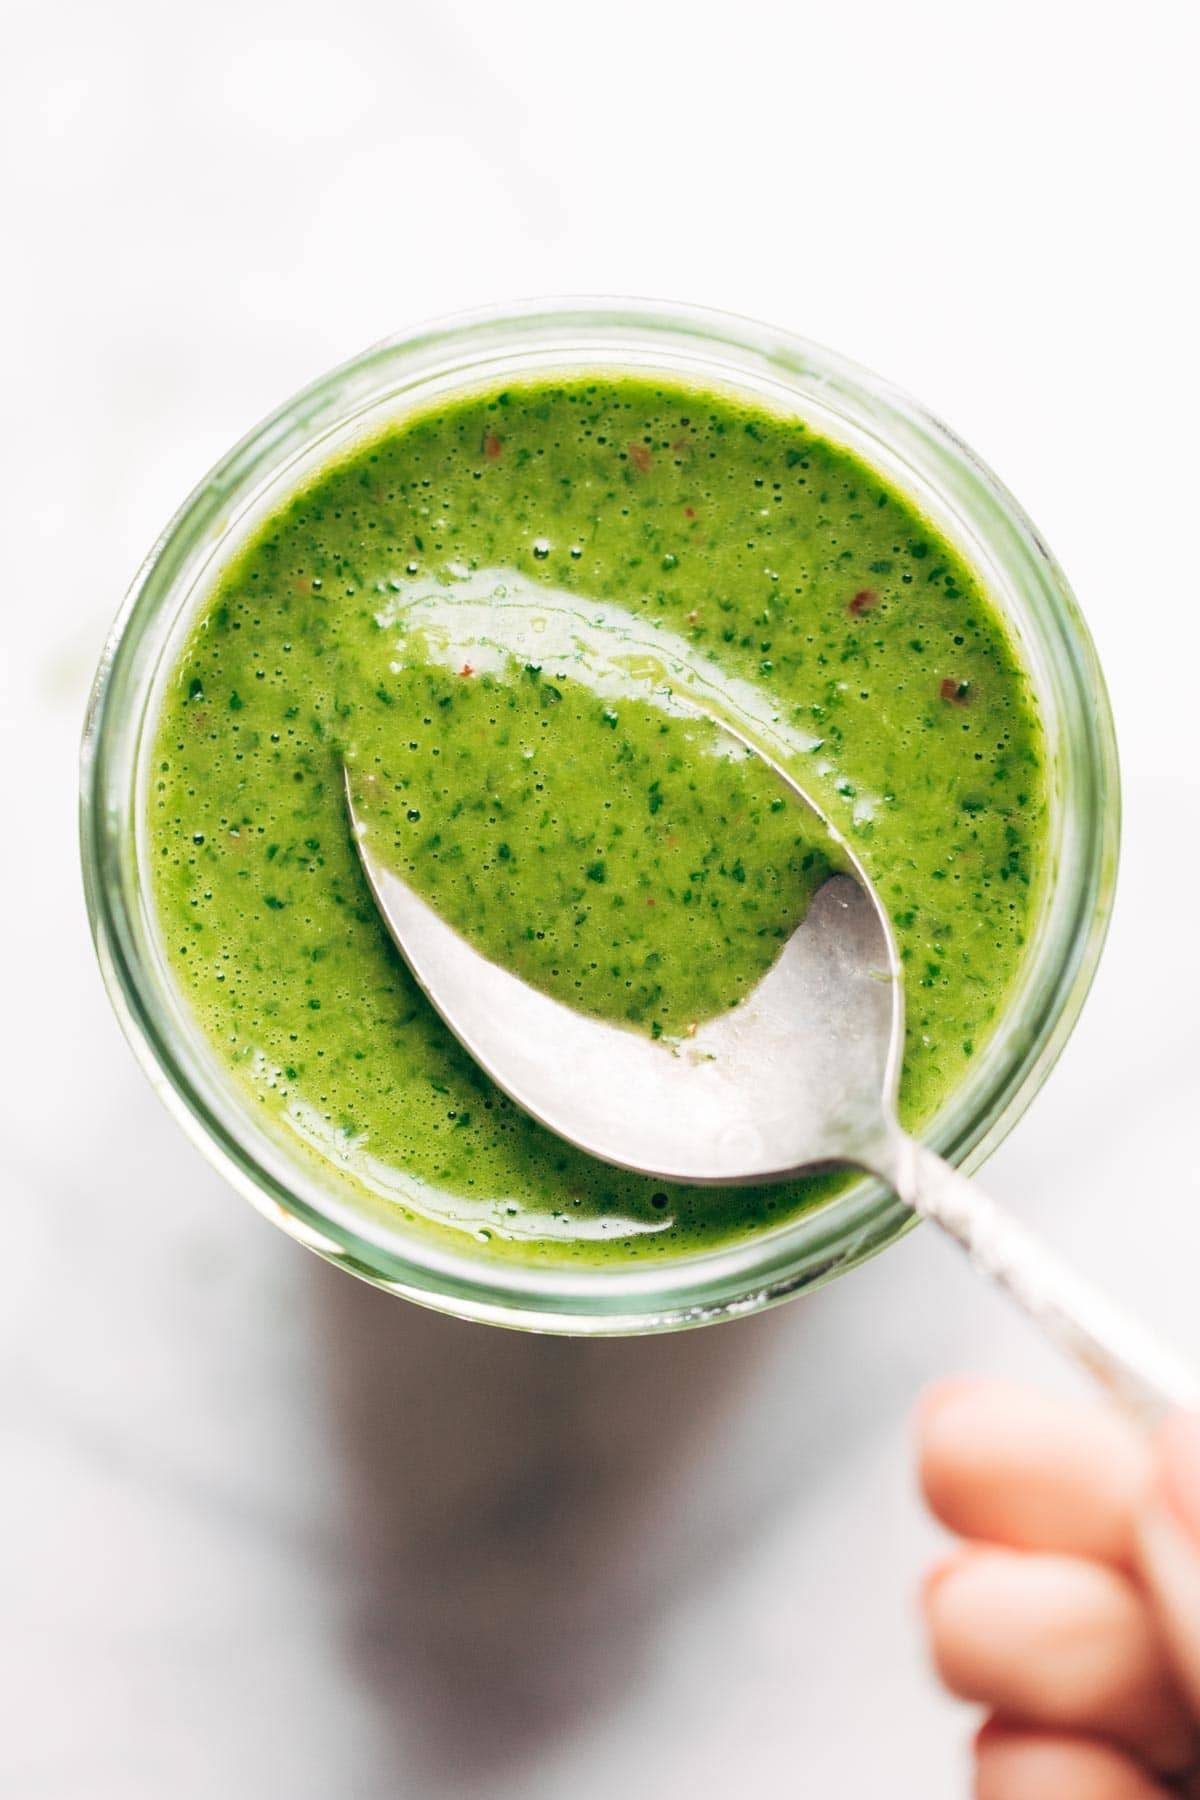
    And this one is one that I like. And this might be one of its best recipes. Tied with the cilantro vinaigrette, which I couldn’t not use again for this salad. I know Gaby says to use the champagne vinaigrette with this salad, but GABY COME ON YOU CAN’T TEASE US LIKE THAT. One good lick of that cilantro dressing and you’re done. Goodbye. This is your life now.

    Cilantro Vinaigrette in jar with spoon.

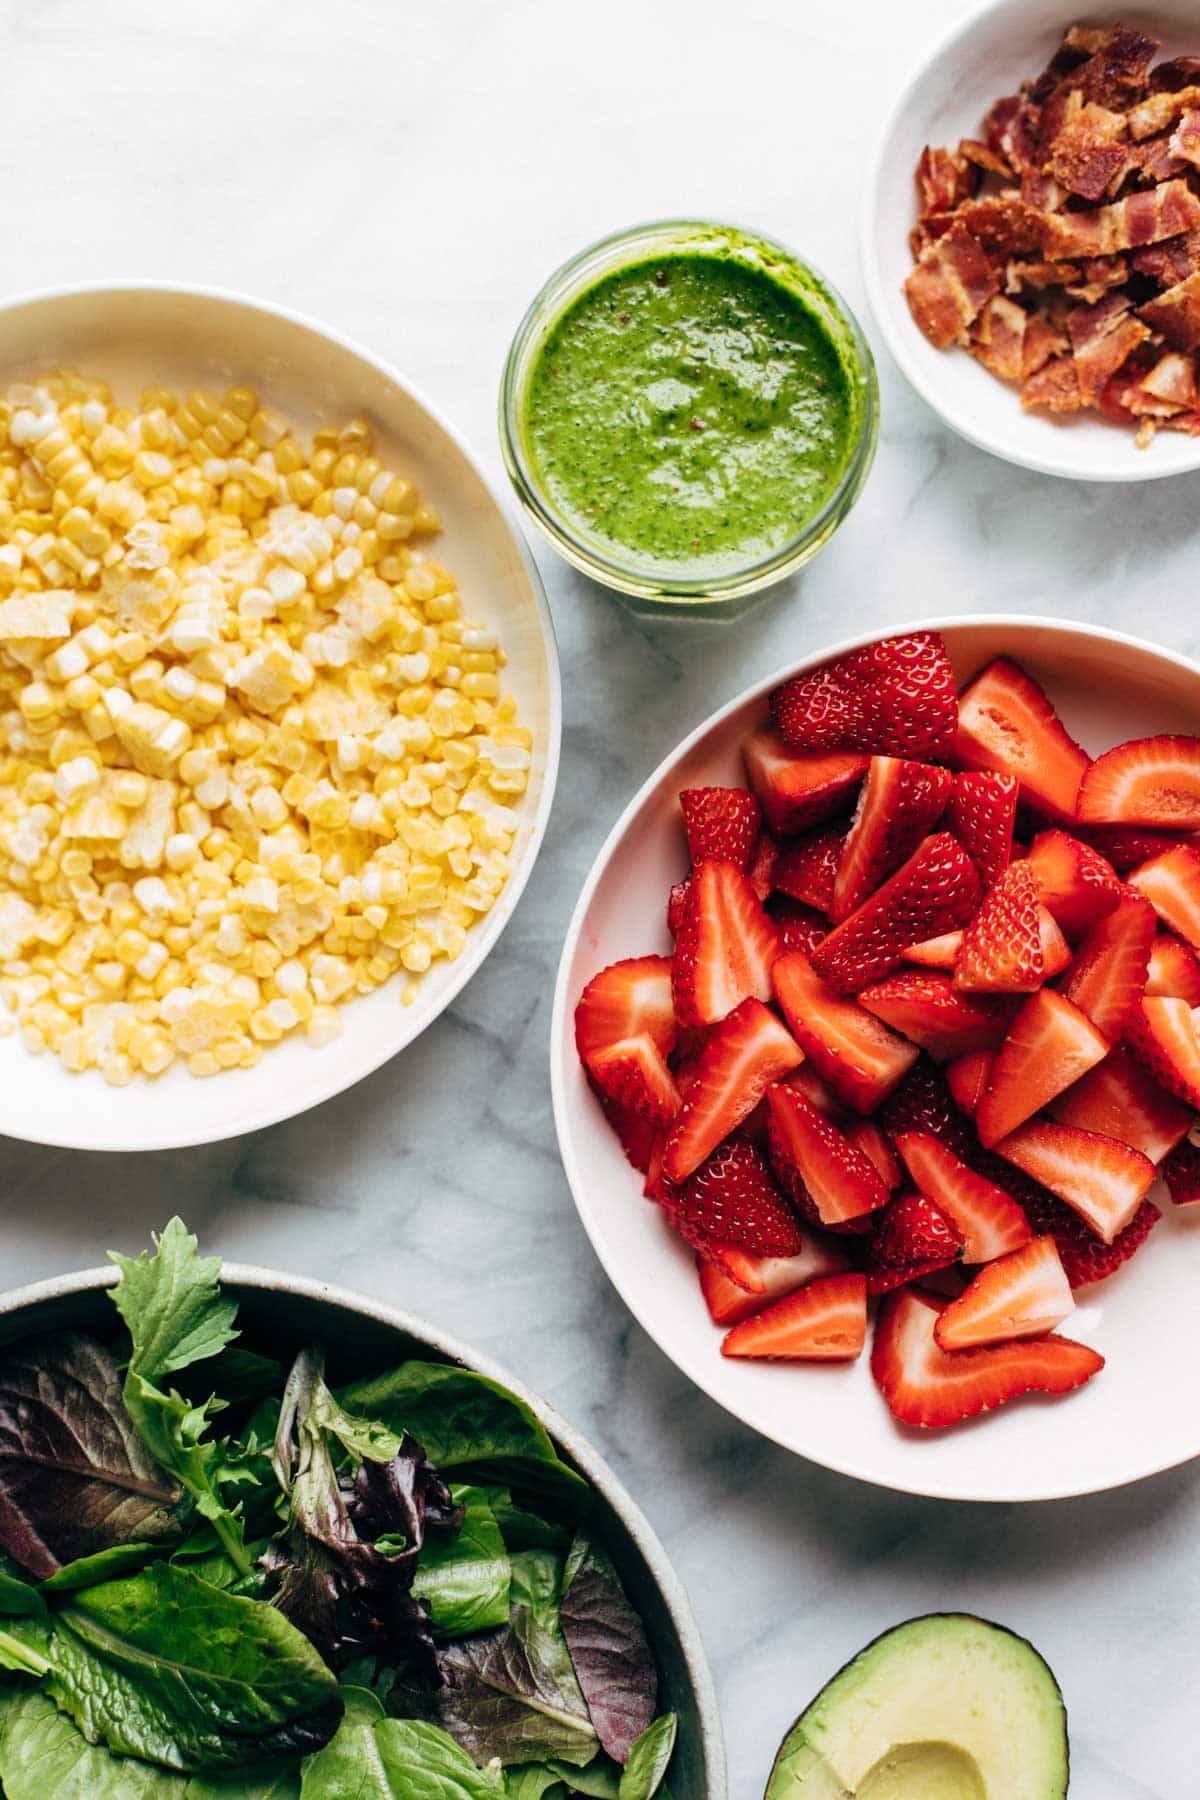
    Okay, salad ingredients. As mentioned, there is a lot of fresh summery goodness going on here, and it looks like so:

    Ingredients in bowls for Summer Chipotle Chicken Cobb Salad.

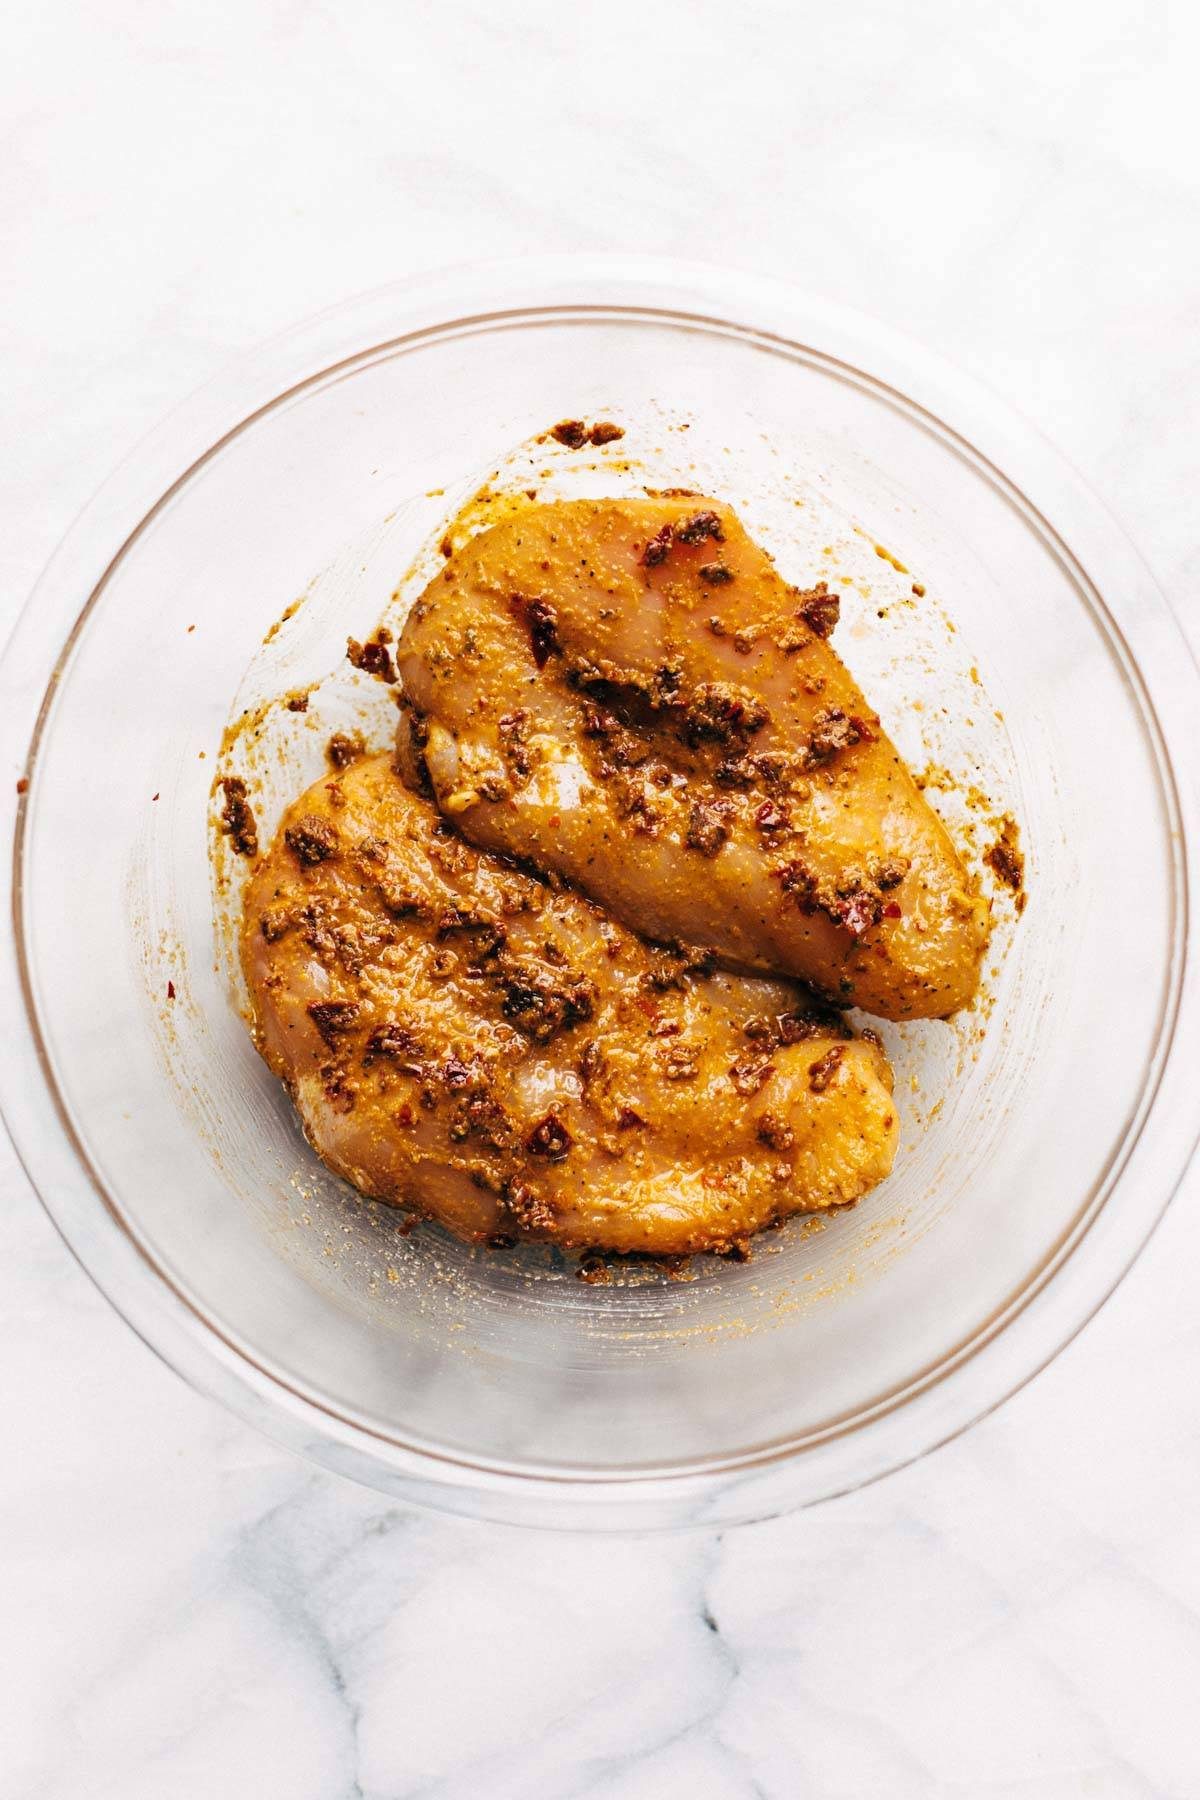
    The more “involved” part of the recipe (if you can even call it that) is just plopping your chicken in some spices and a few chipotle peppers and letting it marinate for a while before grilled.

    WORTH IT, you guys! So worth it.

    Also probably more normal to take a picture of the grilled chicken rather than the raw marinated stuff, but who said anything about normal.

    Raw chicken in a bowl with seasonings.

    Bjork and I ate this salad on the deck on a random Tuesday night and we both mega-loved every lip-lickin juicy bite.

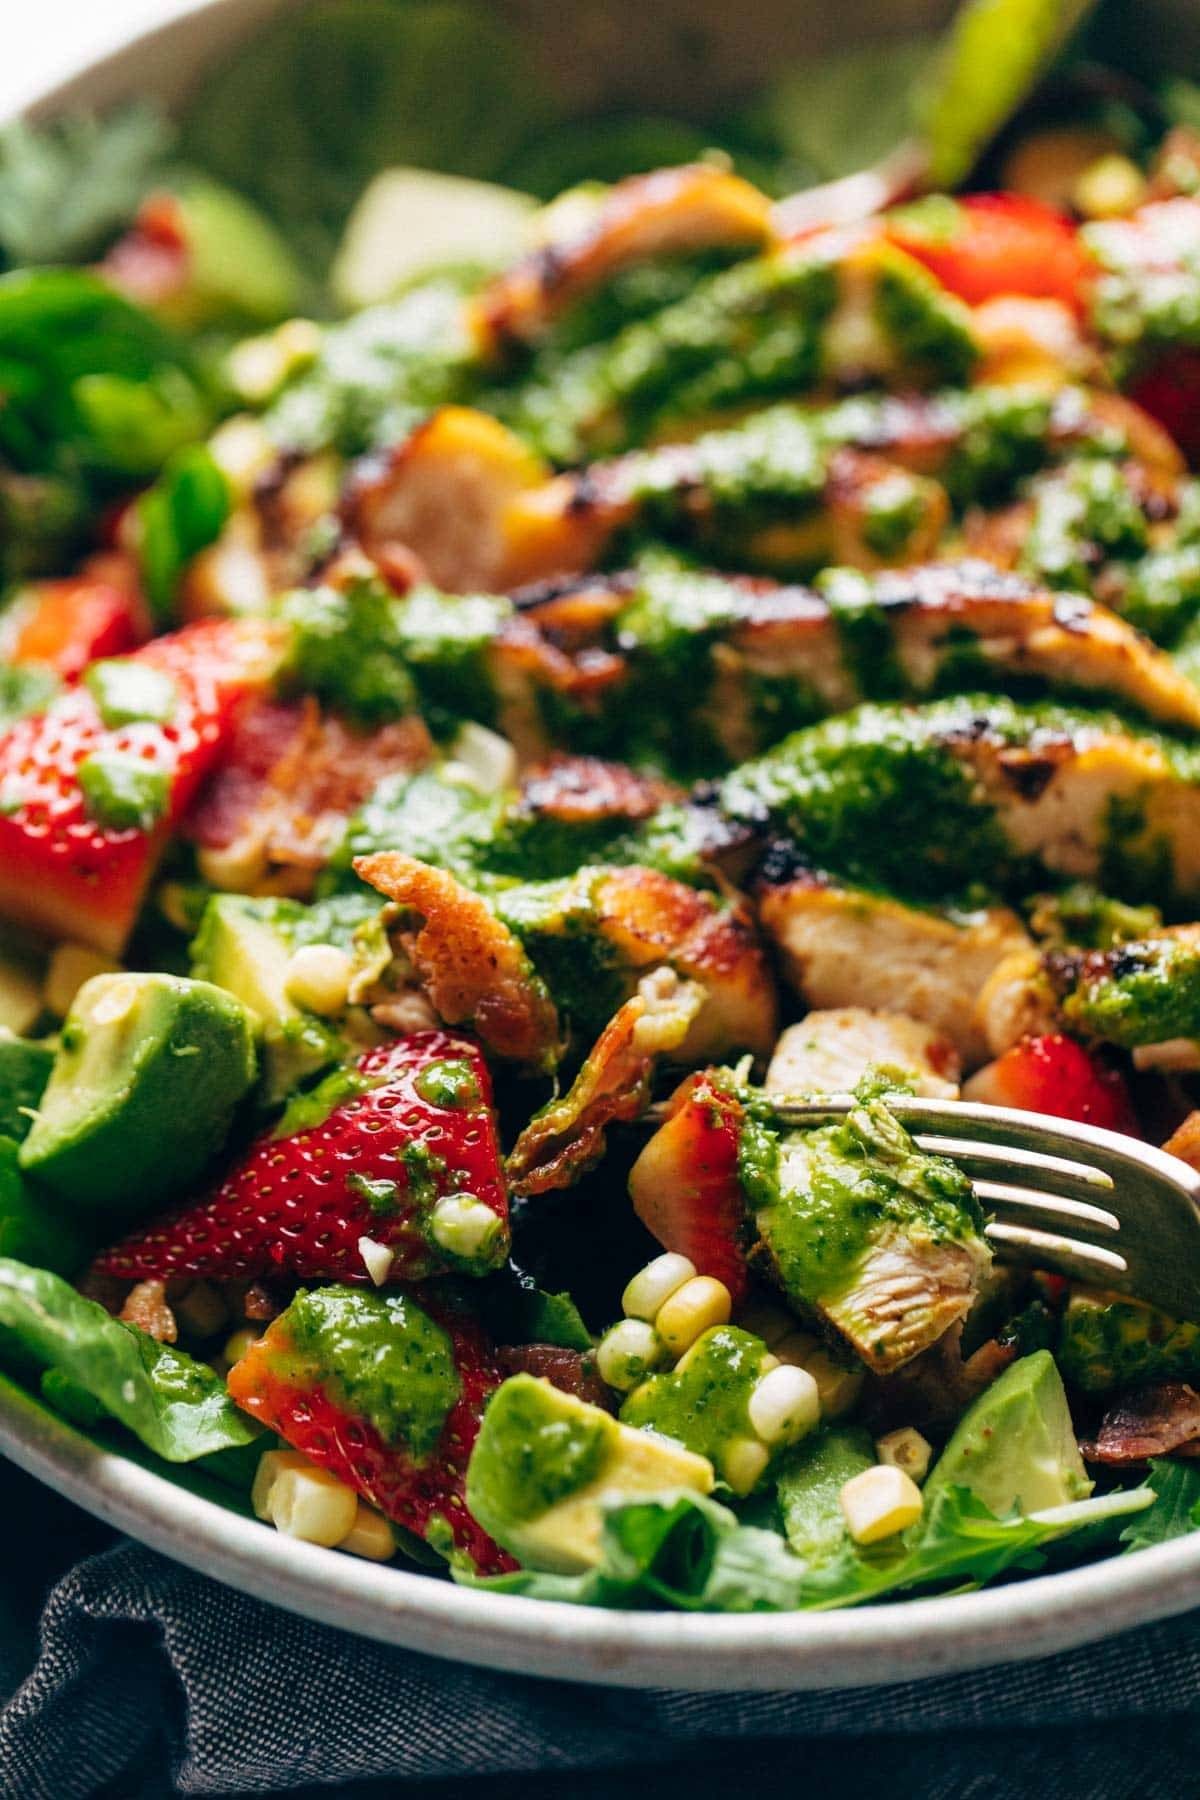
    It’s a little spicy, a lot crunchy, and those bites of sweetness in between are so super rewarding.

    Closeup of Summer Chipotle Chicken Cobb Salad.

    Thank you, Summer Chipotle Chicken Cobb Salad, for making all our dreams come true.


    Print

    clock clock iconcutlery cutlery iconflag flag iconfolder folder iconinstagram instagram iconpinterest pinterest iconfacebook facebook iconprint print iconsquares squares iconheart heart iconheart solid heart solid icon

    Description

    This juicy salad tastes like summer! With chipotle chicken, sweet corn, avocado, cilantro vinaigrette, bacon crumbles, and fresh strawberries for a pop of sweetness. Recipe republished from the What’s Gaby Cookin’ cookbook!


    For the Chipotle Chicken:

    For the Summer Cobb Salad:


    1. Prep the chicken: Combine the oil, chipotles, garlic powder, cumin, oregano, black pepper, and salt in a bowl. Place the chicken in the bowl and toss to coat the chicken in the marinade. Place in the fridge and let it marinate while you prep your other ingredients.
    2. Prep salad: Prep all your salad ingredients (cook the bacon, slice the strawberries, cut the corn off the cob, etc.).
    3. Grill the chicken: Heat an outdoor grill (or grill pan) to about 400 degrees. Place chicken on the grill and grill for 5-6 minutes per side, until cooked through. Remove the chicken from the grill and let rest for ten minutes. Slice against the grain.
    4. Salad: Arrange the greens on a large platter and top with the bacon, strawberries, corn, avocado, and grilled chicken. Season with salt and pepper. Toss with the cilantro vinaigrette and serve!

    Notes

    Greens: We used spring greens in the pictures on this post, but we love this with just spinach too depending on what you have on hand!

    • Prep Time: 1 hour
    • Cook Time: 10 mins
    • Category: Dinner
    • Cuisine: American

    Keywords: chipote chicken, chipotle chicken cobb salad, cobb salad

    Nutrition label does not include the Cilantro Vinaigrette – head to the recipe to find its nutritional information!


    One More Thing!

    This recipe is part of our best sugar free recipe page. Check it out!

    Source link

  • Easy French Onion Chicken Casserole Recipe

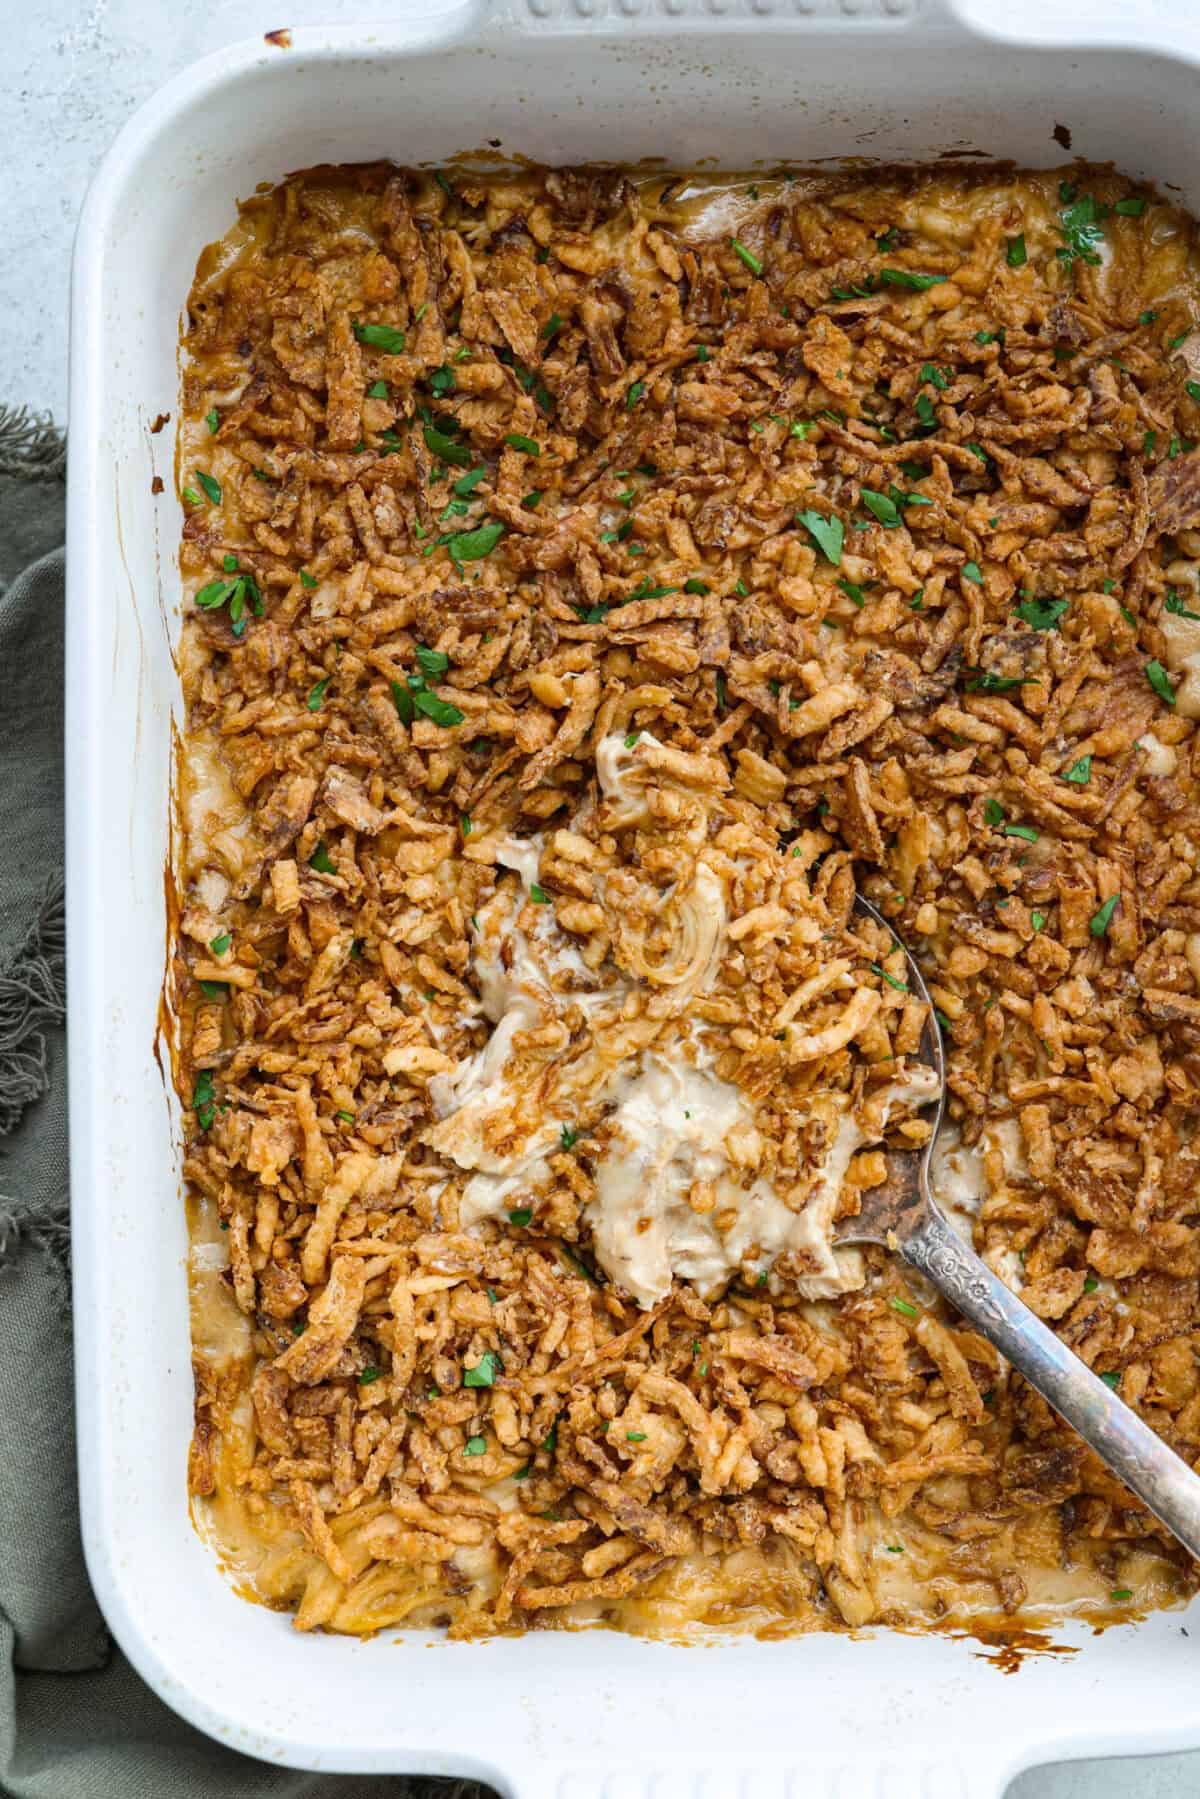
    Easy French Onion Chicken Casserole Recipe

    This website may contain affiliate links and advertising so that we can provide recipes to you. Read my disclosure policy.

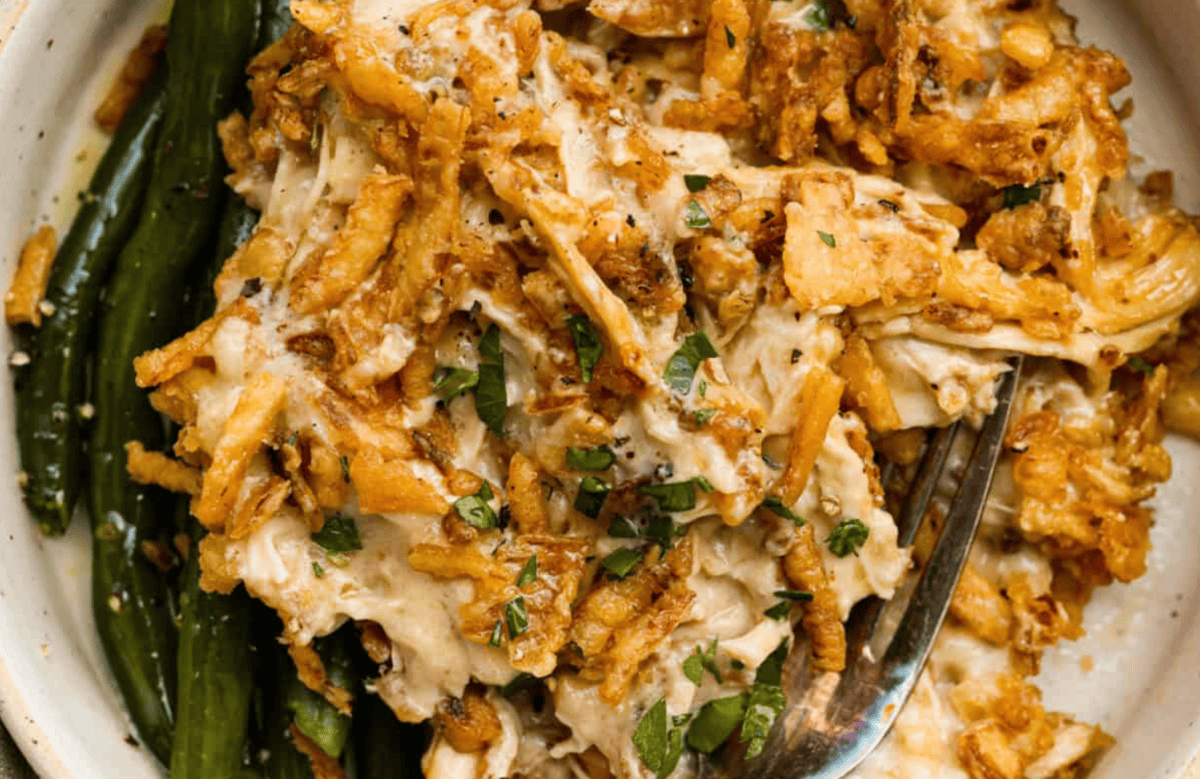
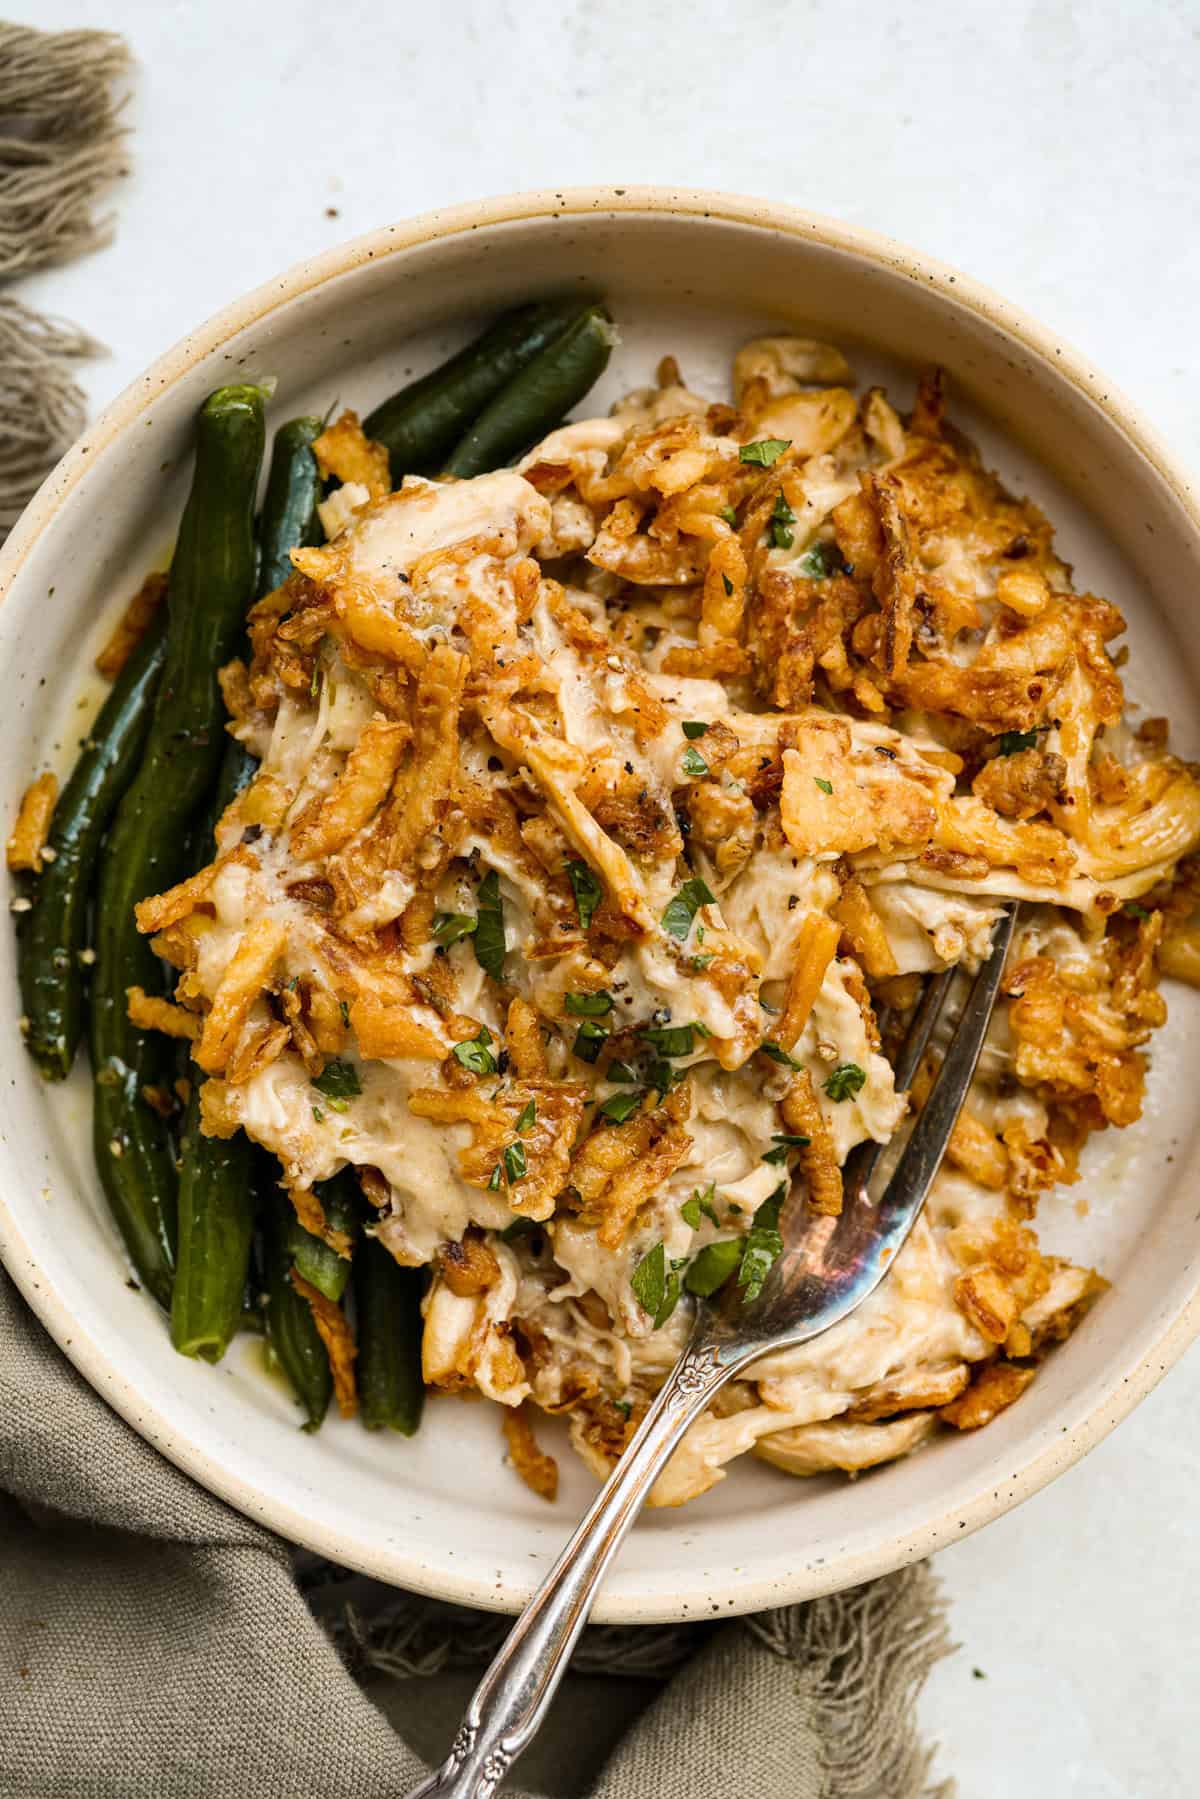
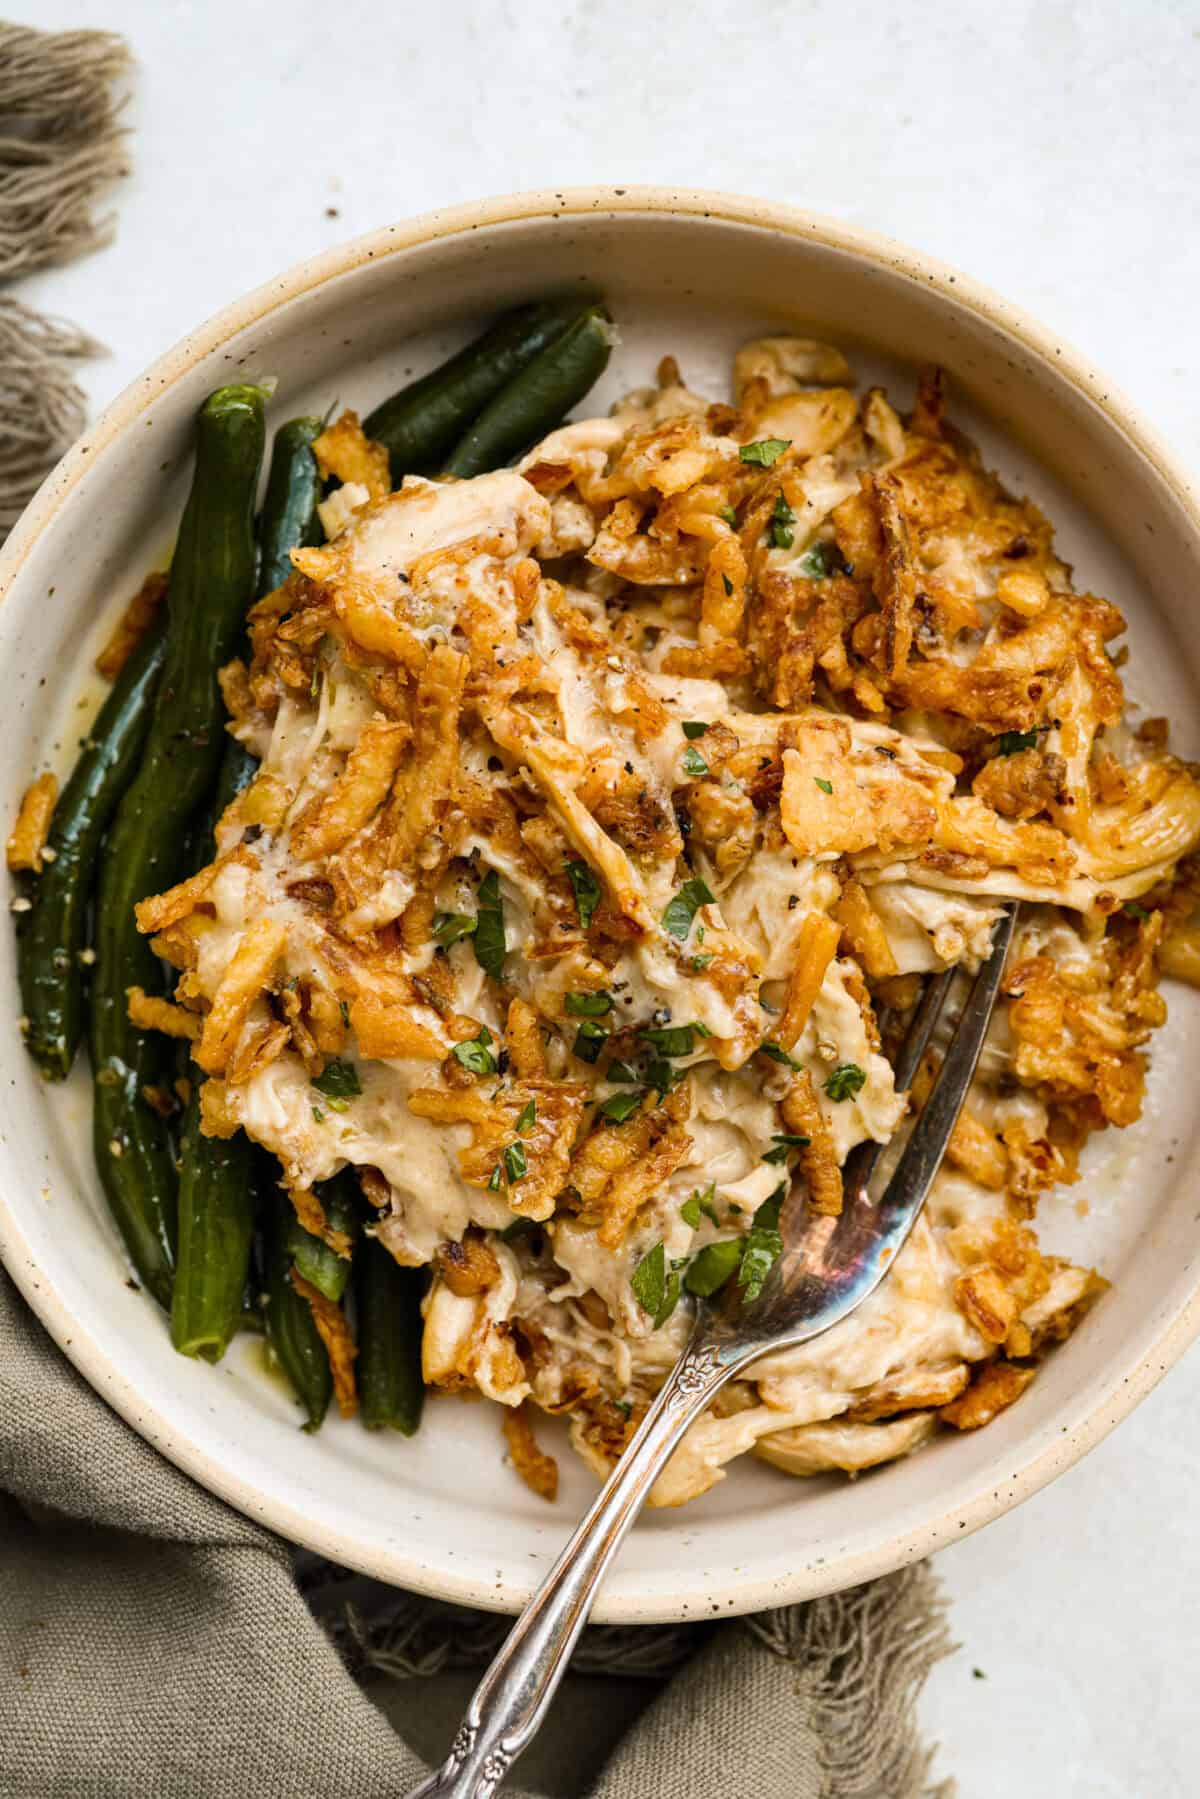
    Creamy, cheesy, and packed with shredded chicken, this French onion chicken casserole is comfort food at its best! Inspired by French onion soup and dip, it’s topped with crispy fried onions for a crunchy finish.

    Overhead shot of baked French onion chicken casserole in a baking dish.

    Why This is a Comfort Food Upgrade

    • Cheesy Comfort, Made Easy: Creamy shredded chicken and melty cheese come together in one simple, cozy casserole.
    • Hassle-Free Dinner: Uses just 7 simple ingredients and comes together in less than 10 minutes, perfect for busy nights.
    • One-Dish Wonder: Little cleanup, big comfort! Everything gets mixed together in one bowl, then baked in one pan.

    French Onion Chicken Casserole Ingredients

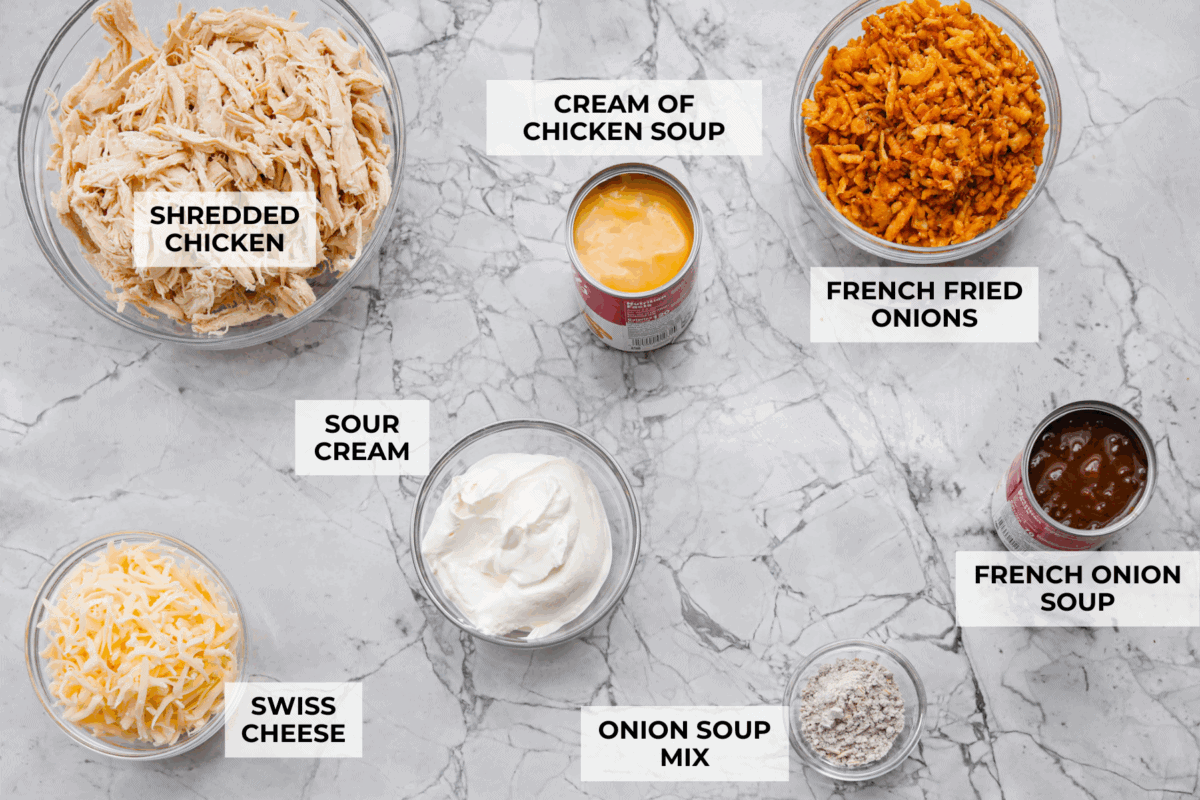
    Overhead shot of labeled ingredients.
    • French Onion Dip: You can use pre-mixed French onion dip. If you do, omit the sour cream and onion soup mix.
    • Condensed Soup & Mix: Use low-sodium or no-salt versions, or make your own onion soup mix to control salt.
    • Homemade Soup: Swap canned cream of chicken for a homemade version to cut sodium.
    • Chicken: Rotisserie chicken works great (Costco’s is perfect), or cook frozen breasts in the Instant Pot.
    • Add Veggies: Stir in 1–2 cups of veggies like green beans, peas, broccoli, or sautéed mushrooms for extra flavor and nutrition.

    French Onion Chicken Casserole Recipe

    This dish comes together in just three easy steps! Quick prep, minimal cleanup, and major flavor make it an epic weeknight or make ahead meal.

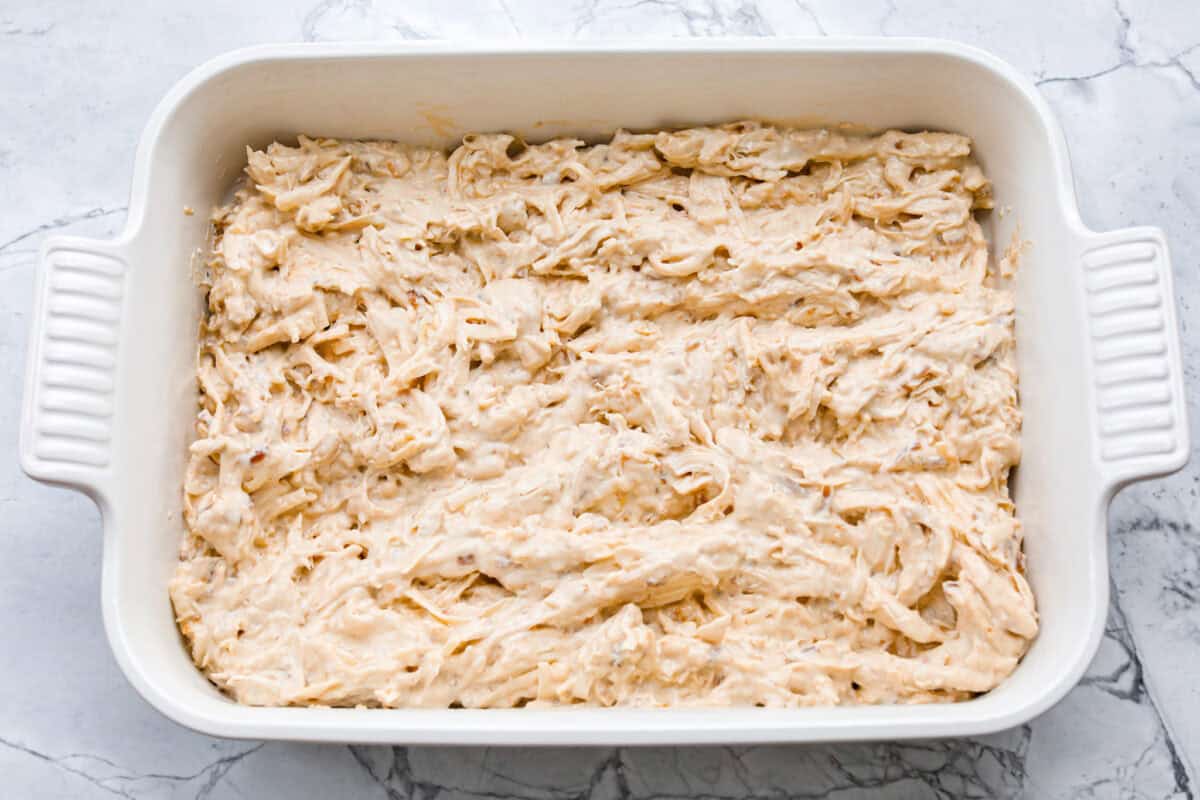
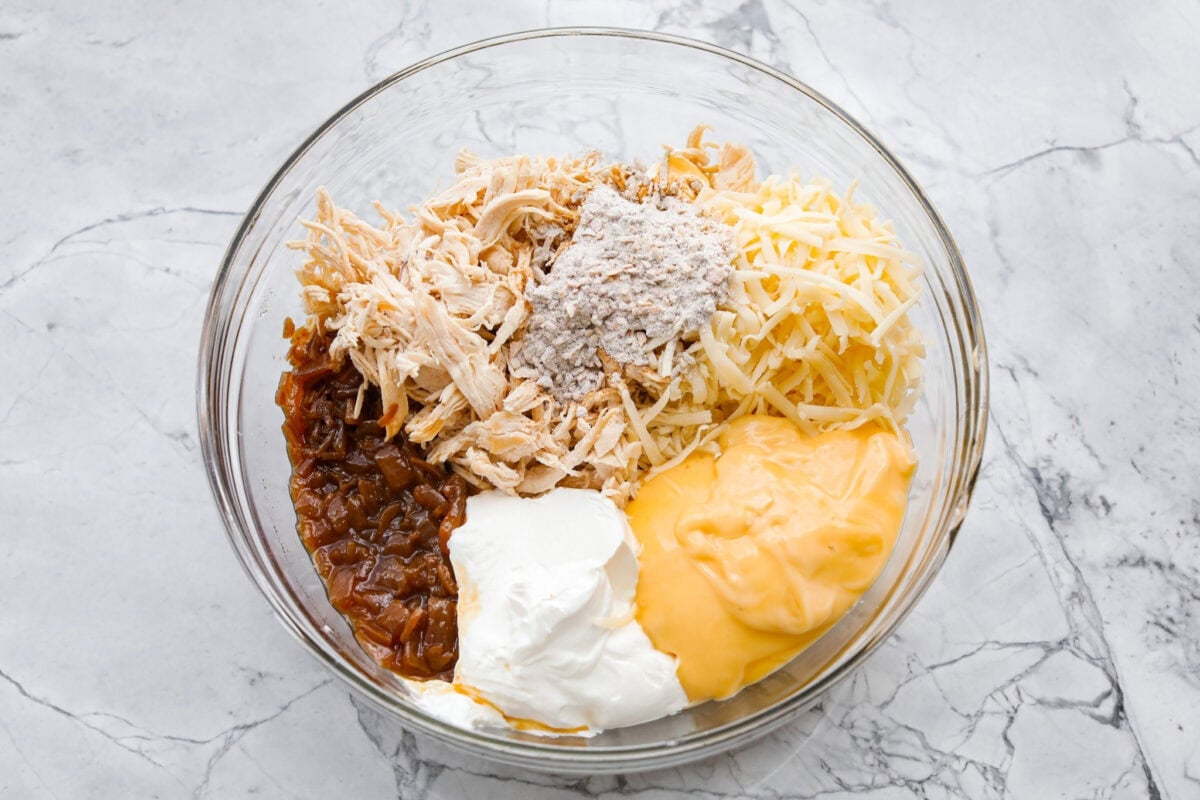
    1. Mix Ingredients: Preheat the oven to 350ºF, then spray a 9 x 13-inch baking dish with nonstick cooking spray and set aside. Add the shredded chicken, sour cream, cream of chicken soup, French onion soup, Swiss cheese, and onion soup mix to a large bowl. Mix to combine.
    2. Bake: Spread the chicken mixture evenly in the baking dish. Bake uncovered for 25-30 minutes, until heated through and bubbling around the edges.
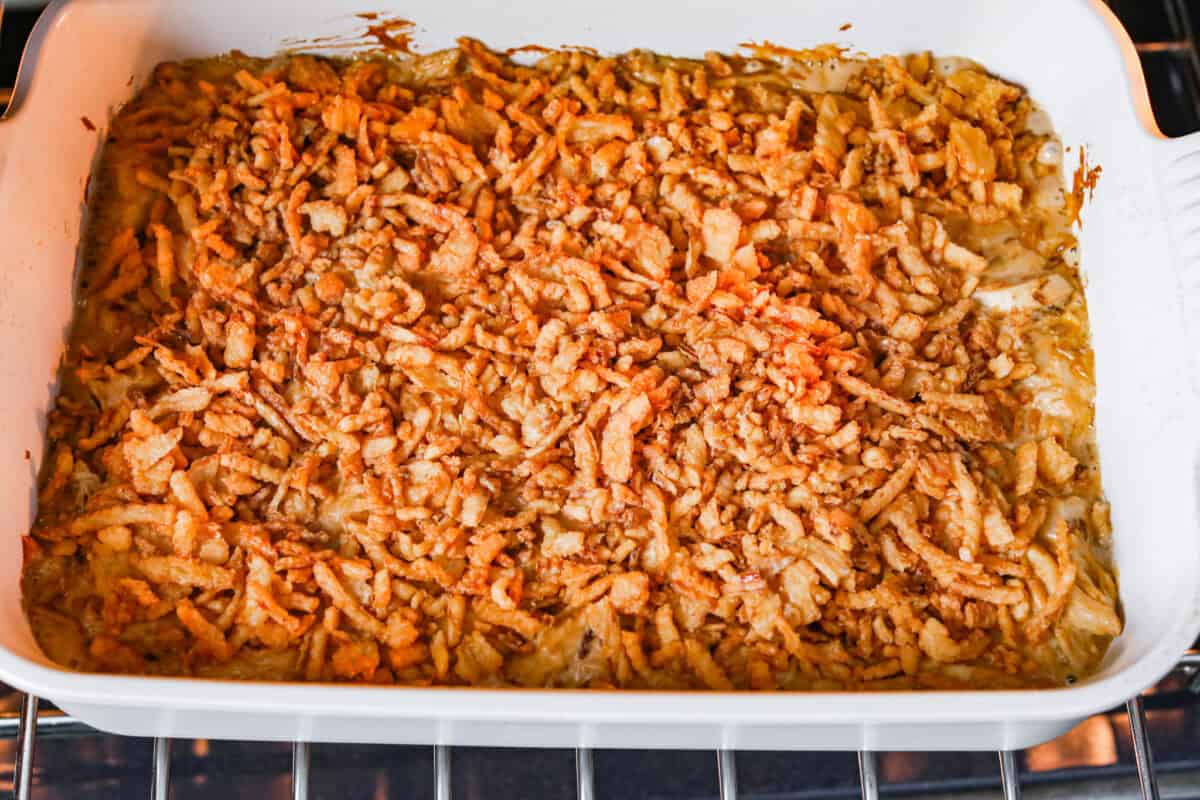
    3. Top, Bake, and Serve: Add the French-fried onions evenly to the top, then bake for 5-10 more minutes. Let it stand for 5-10 minutes before serving.

    Alyssa’s Pro Tip

    Crispy Onions: To prevent burning, add the fried onions during the last 5–10 minutes of baking. If making ahead or freezing, keep the onions off until ready to bake.

    Pin this now to find it later

    Pin It

    Plated French onion chicken casserole with a side of green beans.

    More Easy Casserole Recipes

    Love this dish? Try these next! They’re easy and packed with flavor. They’re perfect for busy nights when you want something everyone will enjoy.

    Taco Rice Casserole

    35 minutes


    Source link

  • Chicken Shawarma With Baked Rice

    Chicken Shawarma With Baked Rice

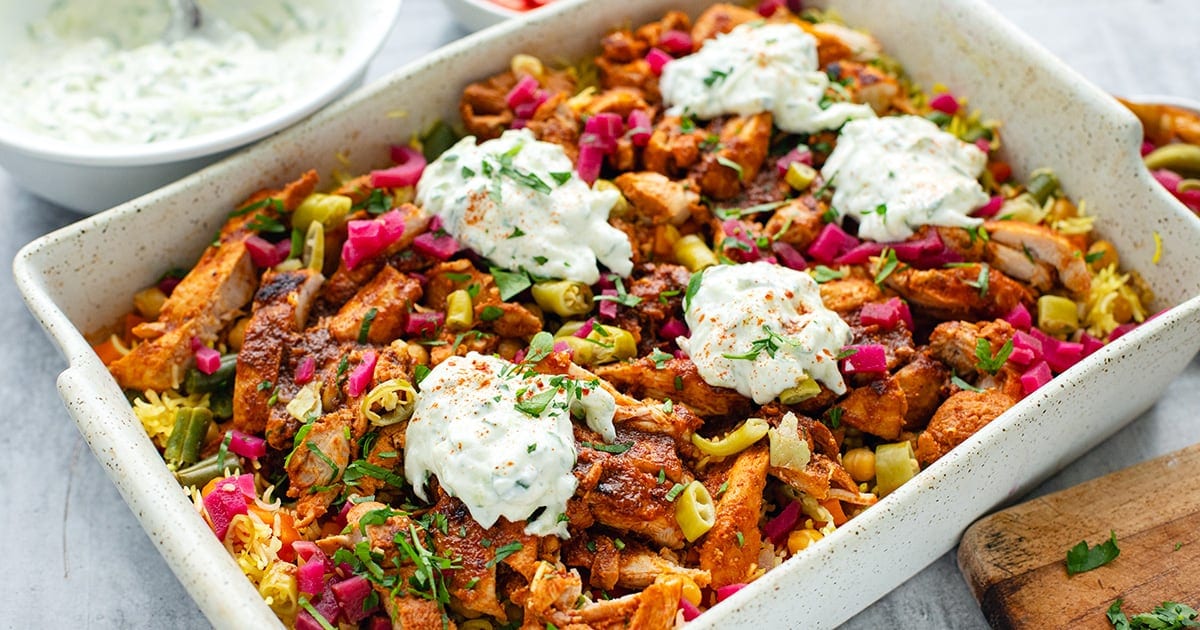
    Chicken shawarma with baked rice and vegetables — a flavorful meal the whole family will love. This is part of my high-protein and fiber meals series.


    Jump to: ℹ️ Overview | 🛒 Ingredients | 📷 How To Make | 📹 Watch The Video | 👩‍🍳 Recipe Tips | 🥗 Serving Suggestions | 📝 Full Recipe Card | 🍽 More


    In this chicken shawarma recipe, tender, spiced chicken sits on a bed of rice that’s baked with chickpeas and colorful vegetables, giving you a balanced, comforting meal. The rice is soft and fluffy with a hint of yellow color from turmeric, the chickpeas add great fiber, and the quick pan‑fried chicken stays juicy with browned edges.

    I also make the shawarma sauce in the same pan as the chicken — it turns into this slightly tangy, savory drizzle that ties everything together. A fresh, creamy tzatziki on the side cuts through the spices beautifully. When served, you get a delicious chicken shawarma bowl that’s high in protein and fiber. This wholesome comfort food has become a weeknight staple in our house.

    Macros highlight (per serving): ~450 cal, ~37 grams protein, ~6-8 grams fiber — so you’re getting good macros and plenty of volume and flavor. See the full nutrition label in the recipe card.

    Get my High-Protein & Fibre Cheat Sheets

    👉 You might also like these recipes from the series: baked chia oats recipe, Asian carrot salad (with chicken and edamame), healthy chicken taco soup, or my high-protein butternut squash soup.

    What You’ll Need

    Here is what you’ll need for this chicken shawarma with baked rice and veggies recipe. Find the full measurements in the recipe card below.

    Chicken Shawarma Marinade

    • Chicken thighs — juicy, flavorful base protein, use skinless and boneless thighs. Swap chicken thighs for breasts if you want leaner meat (just don’t overcook)
    • Garlic, lemon juice, paprika, cumin, coriander seed and tomato paste — shawarma seasoning that builds bold flavor.

    Baked Rice & Veggies

    • Uncooked rice — use medium or long-grain rice here for the hearty carb base.
    • Chickpeas — extra protein + fiber; canned chickpeas are fine.
    • Green beans, bell peppers, carrot, red onion — color, crunch, fiber and nutrients.
    • Chicken stock — infuses the rice with savory flavor.
    • Garlic powder, paprika, lemon, salt and turmeric (optional for color).

    Tzatziki

    • Lebanese cucumber — cool, crisp freshness. No Lebanese cucumber? Regular cucumber works — just squeeze extra moisture out.
    • Greek yogurt (high-protein, low-fat) — creamy and tangy with extra protein.
    • Lemon + garlic — classic tzatziki zing.

    To Serve

    • Pickled turnip + pepperoncini — optional punchy toppings.
    • Parsley + lemon wedges — bright finishing touches.

    How To Make Chicken Shawarma With Baked Rice & Veggies

    Find the full recipe and nutritional information below. Here are some handy step-by-step photos for chicken shawarma with baked rice and veggies. You can bake the rice first or do the chicken first, or in parallel.

    • Marinate the chicken: Cut chicken thighs in half. Toss chicken pieces with shawarma spices, garlic, lemon and tomato paste. Let rest.
    • Cook chicken: Heat oil in a pan over medium‑high heat. Cook chicken 7–8 minutes on one side, flip and cook 2 minutes. Pour chicken stock around chicken and cook 5 more minutes to form a sauce. Remove chicken and slice.
    • Tzatziki: Grate cucumber, squeeze dry and mix with yogurt, garlic, lemon and salt.
    • Dice or slice pickled turnip and pepperoncini or hot pickled peppers (if using).
    • Bake rice & veg: Rinse rice well; combine with chickpeas, vegetables, seasonings and stock in a deep tray. Cover with foil and bake ~35–40 minutes mixing half way through.
    • Assemble: Fluff rice; top with sliced chicken, pour over pan sauce, dollop tzatziki, add pickles + parsley.

    Watch The Video

    Recipe Tips

    • Make‑ahead: Marinate the chicken up to 12 hours ahead — it only gets more flavorful. Tzatziki holds well in the fridge for 24–48 hours; great for meal prep.
    • Storage: Refrigerate leftovers up to 3–4 days. Freeze portions (without tzatziki) up to 2 months. Thaw overnight and reheat covered.
    • Variations: Add cauliflower florets or zucchini for more veg. Swap chickpeas for white beans or lentils. Sprinkle feta on top before serving for extra tang.
    • Timing help: Rice done when liquid’s absorbed and grains are tender. Chicken is best juicy — don’t overcook, and let the pan sauce do its thing.

    Serving Suggestions

    Serve this chicken shawarma rice bake with a squeeze of fresh lemon, a generous dollop of tzatziki and plenty of parsley for brightness. A side salad or warm pita bread makes it feel luxe, or simply enjoy it straight from the tray — it’s one of those meals that’s beautiful either way.

    💬 If you’ve tried this chicken shawarma with baked rice and veggies or any other recipe on the blog then don’t forget to rate the recipe and let me know how you got on in the comments below, I love hearing from you! You can also FOLLOW ME on Instagram, Facebook, Pinterest, YouTube, and or sign up to my Newsletter to see more of my delicious food.

    Want to Save This Recipe?

    Enter your email & I’ll send it to your inbox. Plus, get great new recipes from me every week!

    By submitting this form, you consent to receive emails from Cooked & Loved

    Chicken shawarma with baked rice and vegetables — a flavorful, high-protein and high-fiber meal the whole family will love. This healthy chicken taco soup is part of my high-protein and fiber meals series. Find step-by-step photos and more recipe tips above.

    Chicken Shawarma Marinade

    • Marinate the chicken: Cut chicken thighs in halves and trim excess fat. Combine with garlic, spices, lemon juice and tomato paste. Set aside (or refrigerate if prepping ahead).

    • Prepare rice bake: Rinse rice and add to a deep baking tray. Add drained chickpeas, green beans, peppers, carrots and onion. Stir through salt, garlic powder and paprika. Pour in stock, a bit of lemon juice and turmeric for color. Cover with foil.

    • Bake: Bake at 200°C / 400°F for 35–40 minutes, stirring halfway. Rest 5 minutes once done.

    • Make tzatziki: Grate cucumber and squeeze out excess moisture. Mix with Greek yogurt, lemon juice, garlic and salt. Set aside.

    • Cook chicken: Heat oil in a pan over medium‑high heat. Cook chicken 7–8 minutes on one side, flip and cook 2 minutes. Pour chicken stock around chicken and cook 5 more minutes to form a sauce.

    • Finish sauce & slice: Remove chicken; let sauce reduce a bit. Slice chicken.

    • Assemble: Fluff rice; top with chicken and pour pan sauce over. Add pickled turnip, pepperoncini, parsley and lemon wedges. Serve with tzatziki.

  • Is this gluten‑free? Yes — all ingredients here are naturally gluten‑free as long as your stock and seasonings don’t have additives.
  • What kind of rice works best? Long‑grain or medium-grain white rice bakes more reliably in this one‑pan style. Brown rice is doable — just boost liquid and bake time, veggies will get very soft.
  • Can I skip chickpeas? Sure! Swap for lentils or add extra veg like cauliflower or zucchini.
  • Is this spicy? Not overly — the chili powder is optional. Pickled peppers give heat if you want it.
  • Make‑ahead: Marinate the chicken up to 12 hours ahead — it only gets more flavorful. Tzatziki holds well in the fridge for 24–48 hours; great for meal prep.
  • Storage: Refrigerate leftovers up to 3–4 days. Freeze portions (without tzatziki) up to 2 months. Thaw overnight and reheat covered.
  • Variations: Add cauliflower florets or zucchini for more veg. Swap chickpeas for white beans or lentils. Sprinkle feta on top before serving for extra tang.
  • Timing help: Rice done when liquid’s absorbed and grains are tender. Chicken is best juicy — don’t overcook, and let the pan sauce do its thing.

Calories: 449kcal | Carbohydrates: 50g | Protein: 37g | Fat: 11g | Saturated Fat: 3g | Polyunsaturated Fat: 2g | Monounsaturated Fat: 4g | Trans Fat: 0.02g | Cholesterol: 113mg | Sodium: 1489mg | Potassium: 876mg | Fiber: 6g | Sugar: 9g | Vitamin A: 2645IU | Vitamin C: 87mg | Calcium: 152mg | Iron: 4mg

Keywords: chicken and rice meals, chicken shawarma recipes, Chicken Shawarma With Baked Rice & Veggies

More High-Protein Dinner Recipes


Source link

  • Marry Me Chicken (Crock-Pot Recipe)

    Marry Me Chicken (Crock-Pot Recipe)

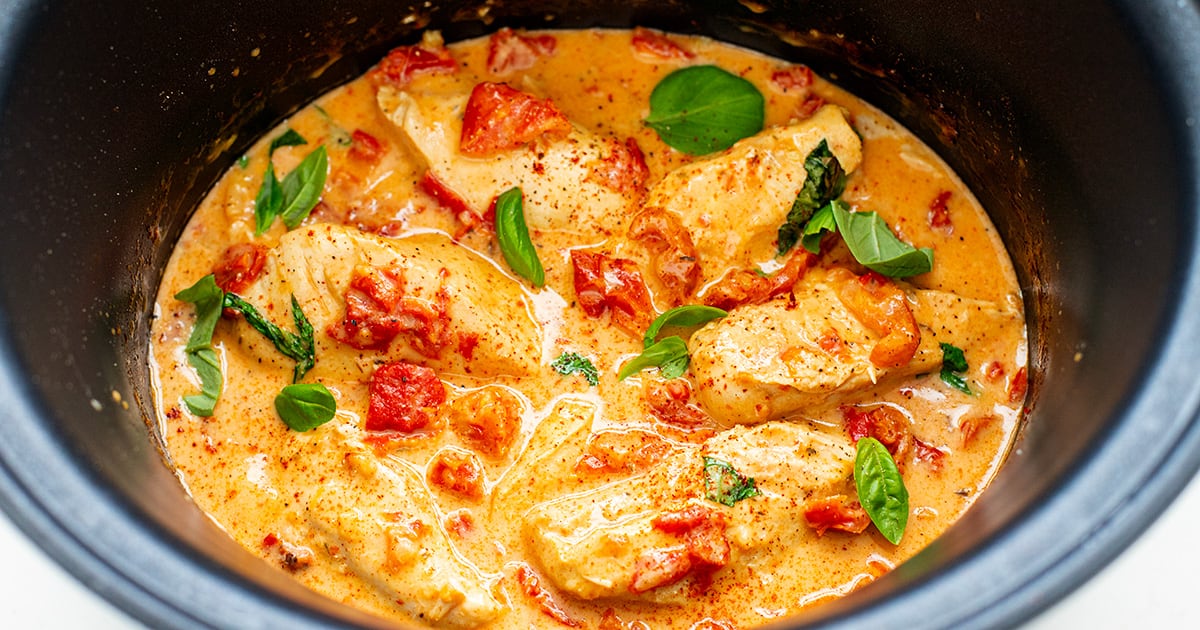
    This crock pot Marry Me chicken is creamy, cozy, and so easy, healthier than the classic but still wildly delicious. Just dump, slow cook, and wait for everyone to fall in love.


    Jump to: ℹ️ Overview | 🛒 Ingredients | 📷 How To Make | 📹 Watch The Video | 👩‍🍳 Recipe Tips | 🥗 Serving Suggestions | 📝 Full Recipe Card | 🍽 More Chicken Dinner Recipes


    This slow cooker Marry Me chicken is my healthier, easier take on the very popular dish that everyone seems to obsess over — and honestly, I get why. The chicken turns out ridiculously tender in the slow cooker, soaked in a creamy sun-dried tomato garlic‑Parmesan sauce.

    I skip pan‑searing to keep things lighter and fuss‑free, and I rinse the sun‑dried tomatoes to reduce excess oil without losing that sweet-savory punch and use lighter cream. A little tomato paste adds a lovely touch of acidity, umami, and the prettiest color — something I started doing during testing and now can’t make this recipe without.

    It’s simple comfort food with better macros: higher protein, lower calories, and still unbelievably satisfying. Serve it over pasta, rice, or veggies and watch how fast it disappears.

    👩‍🍳 ℹ️ What Is Marry Me Chicken? It’s a creamy, garlicky chicken dish (usually pan‑seared) that supposedly tastes so good it could spark a marriage proposal. It’s known for its sun‑dried tomatoes, Parmesan, and luxurious sauce. I have no idea who the original creator is, but this dish is similar to Tuscan creamy chicken or creamy sun-dried tomato chicken, so there are many similar recipes.

    👩‍🍳 You might also like: Marry Me chicken orzo bake, creamy chicken pasta with pesto, creamy chicken mushroom salad, slow cooker chicken Tikka Masala, or these healthy slow-cooker chicken recipes.

    What You’ll Need

    Here is what you’ll need for this slow cooker marry me chicken recipe. Find the full measurements in the recipe card below.

    • Chicken breasts: lean, tender, and perfect for slow cooking. You can swap for boneless thighs for extra juiciness.
    • Sauce Base: chicken stock, tomato paste (my personal touch), cornstarch (to thicken the sauce while it cooks). Tomato paste isn’t always in classic marry me chicken, but here it adds acidity and color.
    • For the flavor: chopped sun‑dried tomatoes add sweetness, chew, and those big Mediterranean notes. Rinsing removes excess oil to keep the recipe lighter. Fresh garlic (a must), but you can use onion powder, plus dried herbs (I used Italian mixed but you can use oregano, basil, or thyme), sweet and smoked paprika, salt, and pepper. These build the backbone of the sauce: savory, garlicky, a little smoky, and full of cozy Italian vibes.
    • Finishing ingredients: light thickened cream or heavy cream, fresh Parmesan (look, you can use pantry Parmesan, but it’s not as good in my opinion), and fresh basil (if available). These create that glossy, creamy finish. The light cream keeps it healthier; Parmesan adds saltiness and umami; basil brightens everything.

    How To Make Crock-Pot Marry Me Chicken

    Find the full recipe and nutritional information below. Here are some handy step-by-step photos for how to make marry me chicken in a crock-pot (slow-cooker)

    • Cut chicken breasts in half lengthwise.
    • Whisk chicken stock, tomato paste, and cornstarch until smooth.
    • Place chicken in the crock pot and pour the tomato mixture over the top.
    • Add garlic, sun‑dried tomatoes, paprika, herbs, salt, and pepper.
    • Stir gently, cover, and cook: 2.5 hours on HIGH or 3.5–4 hours on LOW.
    • Add cream, Parmesan, and basil.
    • Stir and cook for another 20–30 minutes on HIGH (or while you prep your sides).
    • Serve and enjoy!

    Watch The Video

    Recipe Tips

    • Don’t skip rinsing the sun‑dried tomatoes: It helps keep the sauce from being overly oily.
    • Use freshly grated Parmesan: Pre‑grated won’t melt the same, and the flavor is way better.
    • Thickness control: If you like a thicker sauce, stir in an extra teaspoon of cornstarch mixed with a splash of cold stock at the end, or cook without the lid in the last 20 minutes.
    • Chicken option: Boneless thighs work beautifully and stay ultra‑tender.
    • Make-ahead: Assemble all ingredients except cream/Parmesan/basil in the slow cooker insert and refrigerate overnight. In the morning, place it in the crock pot and cook.
    • Storage: Keeps 3–4 days in an airtight container. Reheats well on the stove with a splash of stock or cream.
    • Freezer-friendly: Freeze before adding cream/Parmesan (dairy doesn’t freeze well). Add them when reheating.

    Serving Suggestions

    I love this spooned over pasta — the sauce hugs every noodle beautifully. It’s also great with rice, mashed potatoes, quinoa, roasted veggies, or even zucchini noodles if you want to keep things lighter. A simple green salad or garlic broccoli on the side balances the richness perfectly.

    💬 If you’ve tried this marry me chicken (crock-pot) or any other recipe on the blog then don’t forget to rate the recipe and let me know how you got on in the comments below, I love hearing from you! You can also FOLLOW ME on Instagram, Facebook, Pinterest, YouTube, and or sign up to my Newsletter to see more of my delicious food.

    Want to Save This Recipe?

    Enter your email & I’ll send it to your inbox. Plus, get great new recipes from me every week!

    By submitting this form, you consent to receive emails from Cooked & Loved

    This crock pot marry me chicken is creamy, cozy, and so easy — healthier than the classic but still wildly delicious. Just dump, slow cook, and wait for everyone to fall in love. Find step-by-step photos and more recipe tips above.

    • Cut the chicken breasts in half at the thickest point so you have evenly sized pieces.

    • In a bowl, whisk the chicken stock, tomato paste, and cornstarch until smooth.

    • Place the chicken into the crock pot and pour the tomato mixture over the top.

    • Add garlic, sun‑dried tomatoes, onion powder, Italian herbs, sweet paprika, smoked paprika, salt, and pepper. Stir gently to combine.

    • Cover and cook on HIGH for 2.5 hours or LOW for 3.5–4 hours.

    • Open the lid, add the cream, Parmesan, and basil. Stir to combine.

    • Cook for an additional 20–30 minutes on HIGH, or until the sauce is creamy and slightly thickened.

    • Serve over pasta, rice, or your favorite sides.

    • Can I use chicken thighs? Yes — boneless thighs work beautifully and stay extra juicy and ultra-tender.
    • Can I make this dairy-free? You can use coconut cream and nutritional yeast, but the flavor will be different (still tasty!).
    • Can I cook it longer? Try not to exceed 4.5 hours on LOW for chicken breast — it can dry out.
    • Can I double the recipe? Yes, as long as your crock pot is large enough. Add 20–30 extra minutes if needed.
    • Can I add spinach or veggies? Absolutely — stir in spinach during the last 5 minutes. Mushrooms or chopped zucchini can be added at the start.
    • Don’t skip rinsing the sun‑dried tomatoes: It helps keep the sauce from being overly oily.
    • Use freshly grated Parmesan: Pre‑grated won’t melt the same and the flavor is way better.
    • Thickness control: If you like a thicker sauce, stir in an extra teaspoon of cornstarch mixed with a splash of cold stock at the end or cook without the lid in the last 20 minutes.
    • Make-ahead: Assemble all ingredients except cream/Parmesan/basil in the slow cooker insert and refrigerate overnight. In the morning, place it in the crock pot and cook.
    • Storage: Keeps 3–4 days in an airtight container. Reheats well on the stove with a splash of stock or cream.
    • Freezer-friendly: Freeze before adding cream/Parmesan (dairy doesn’t freeze well). Add them when reheating.

    Calories: 388kcal | Carbohydrates: 15g | Protein: 39g | Fat: 20g | Saturated Fat: 10g | Polyunsaturated Fat: 1g | Monounsaturated Fat: 6g | Trans Fat: 0.02g | Cholesterol: 149mg | Sodium: 817mg | Potassium: 1195mg | Fiber: 2g | Sugar: 6g | Vitamin A: 879IU | Vitamin C: 9mg | Calcium: 139mg | Iron: 2mg

    Keywords: Crock-Pot Marry Me Chicken, Marry Me Chicken (Crock-Pot Recipe), Slow Cooker Marry Me Chicken

    More Chicken Dinner Recipes


    Source link