Tag: Baked

  • Chicken Bites (Baked or Air-Fried)

    Chicken Bites (Baked or Air-Fried)

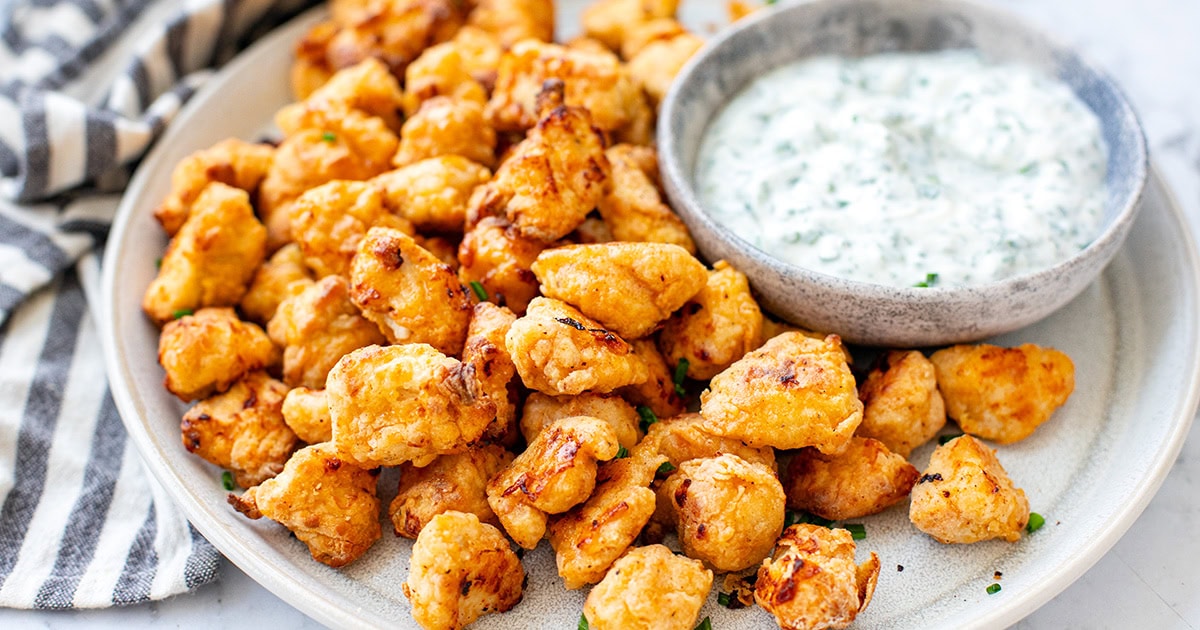
    These healthy chicken bites are like the snacky, protein-packed cousin of popcorn chicken—crispy, juicy, and baked or air-fried to golden perfection. Serve them as the main protein for dinner or use as a protein-rich snack or lunchbox addition.


    Jump to: ℹ️ Overview | 🛒 Ingredients | 📷 How To Make | 📹 Watch The Video | 👩‍🍳 Recipe Tips | 🥗 Serving Suggestions | 📝 Full Recipe Card | 🍽 More Healthy Chicken Recipes


    These tasty chicken bites remind me of popcorn chicken, but without the greasy aftermath. The chicken is marinated in spiced yogurt, which tenderises and adds big flavor, then coated in a seasoned flour blend for that addictive outer crunch. I tested this recipe both in the oven and the air fryer and they both come out golden and crispy, which tender chicken inside.

    Each serving is high in protein, lower in fat, and great for both grown-ups and kids. They double up as a healthy weeknight dinner recipe and a protein-snack you can grab out of the fridge or add to your breakfast. Whether you’re meal prepping or snacking straight off the tray (guilty!), this one’s a reliable go-to. I often make these for my popcorn chicken bowls.

    👩‍🍳 You might also like: Sriracha chicken bites, chicken karaage, air fryer bbq chicken wings, honey soy chicken meatballs, air fryer kielbasa, or my healthy chicken patties.

    What You’ll Need

    Here is what you’ll need for this chicken bites recipe. Find the full measurements in the recipe card below.

    For the chicken marinade

    • Chicken breast – lean and tender. Thighs work too if you prefer something juicier.
    • Plain yogurt – tenderises and keeps the chicken moist. Greek yogurt also works.
    • Garlic powder, onion powder, paprika – brings a deep, savory base.
    • Salt – don’t skip this; it’s key to flavor!

    For the coating

    • All-purpose flour + cornflour – the combo makes them crispy and light. Cornflour is the real crunch MVP.
    • Spices: paprika, garlic powder, onion powder, black pepper – flavor all the way through.
    • Olive oil spray – helps everything get golden without actual frying.

    How To Make Chicken Bites (Baked or Air-Fried)

    Find the full recipe and nutritional information below. Here are some handy step-by-step photos for how to marinate and cook these chicken bites in the oven and in the air fryer.

    • Cut chicken into bite-sized pieces.
    • Mix yogurt and marinade spices in a bowl. Toss in the chicken and marinate for at least 30 minutes (overnight is even better).
    • Combine coating ingredients in a separate bowl.
    • Coat chicken using the “sandwich” method: spread some coating on a plate, add chicken, top with more coating, and toss gently.
    • Place on a lined tray or in air fryer basket. Spray with olive oil generously.
    • Baking: Preheat oven to 210°C / 410°F. Bake for 15 minutes, flip, spray again, then bake for 10 more minutes.
    • Air Frying: Preheat to 200°C / 400°F. Lightly oil the basket, place chicken in a single layer, spray with oil, and cook for 12 minutes, flipping halfway. Let rest for 5 minutes to crisp up fully.

    Watch The Video

    Recipe Tips

    • Make-ahead: Marinate the chicken the night before, or coat it and refrigerate until ready to cook.
    • Storage: Keep leftovers in an airtight container in the fridge for up to 3 days. Reheat in the air fryer or oven for best texture.
    • Freezer-friendly: Freeze after cooking. Reheat straight from frozen.
    • Extra crispy tip: Don’t overcrowd the pan or basket—that hot air needs room to work!
    • Add heat: A little cayenne or chili powder goes a long way if you like a kick.
    • Gluten-free? Use GF flour and potato starch instead.

    Serving Suggestions

    These are super versatile. Serve them with your favorite dip—healthy yogurt ranch dressing, aioli (sun-dried tomato or rosemary chili), bang bang sauce—or pile into a wrap, salad bowl, or lunchbox. I often serve them with air-fried chips or roasted sweet potatoes for a fun, high-protein dinner that doesn’t feel like “healthy food.” And of course, you must try my popcorn chicken bowls.

    💬 If you’ve tried this chicken bites or any other recipe on the blog then don’t forget to rate the recipe and let me know how you got on in the comments below, I love hearing from you! You can also FOLLOW ME on Instagram, Facebook, Pinterest, YouTube, and or sign up to my Newsletter to see more of my delicious food.

    Want to Save This Recipe?

    Enter your email & I’ll send it to your inbox. Plus, get great new recipes from me every week!

    By submitting this form, you consent to receive emails from Cooked & Loved

    These healthy chicken bites are like the snacky, protein-packed cousin of popcorn chicken—crispy, juicy, and baked or air-fried to golden perfection. Find step-by-step photos and more recipe tips above.

    • Marinate: Mix yogurt, spices, and salt in a bowl. Add chicken and coat well. Cover and refrigerate for at least 30 minutes (or overnight).

    • Coating: Mix all coating ingredients in a bowl.

    • Coat: Spread half the coating on a plate, lay chicken on top, sprinkle remaining coating, and toss gently to coat.

    • Bake: Preheat to 210°C / 410°F. Line a tray, place chicken on it, and spray with oil. Bake for 15 minutes, flip, spray again, bake another 10 minutes.

    • Air Fryer: Preheat to 200°C / 400°F. Lightly oil the basket and spread chicken in a single layer. Spray with oil and air fry for 12 minutes, flipping halfway.

    • Let rest for a few minutes to finish crisping before serving.

    • Can I use chicken thighs? Yes! They’re juicier and just as delicious.
    • Can I prep this in advance? Definitely. Marinate overnight or coat in advance and store in the fridge.
    • Can I freeze it? Yes—cook first, then freeze. Reheat in the oven or air fryer until crisp.
    • Any sauce pairings? These go with everything: ranch, garlic aioli, spicy mayo, Romesco, you name it.
    • Can I double the recipe? Go for it! Just cook in batches if using an air fryer so everything crisps up properly.
    • Make-ahead: Marinate the chicken the night before, or coat it and refrigerate until ready to cook.
    • Storage: Keep leftovers in an airtight container in the fridge for up to 3 days. Reheat in the air fryer or oven for best texture.
    • Freezer-friendly: Freeze after cooking. Reheat straight from frozen.
    • Extra crispy tip: Don’t overcrowd the pan or basket—that hot air needs room to work!
    • Add heat: A little cayenne or chili powder goes a long way if you like a kick.
    • Gluten-free? Use GF flour and potato starch instead.

    Calories: 291kcal | Carbohydrates: 32g | Protein: 29g | Fat: 5g | Saturated Fat: 1g | Polyunsaturated Fat: 1g | Monounsaturated Fat: 1g | Trans Fat: 0.01g | Cholesterol: 76mg | Sodium: 1603mg | Potassium: 593mg | Fiber: 2g | Sugar: 2g | Vitamin A: 682IU | Vitamin C: 2mg | Calcium: 77mg | Iron: 2mg

    Keywords: healthy chicken bites, Chicken Bites, baked chicken bites, air fryer chicken bites

    More Healthy Chicken Recipes


    Source link

  • Orange Teriyaki Baked Salmon

    Orange Teriyaki Baked Salmon

    This orange teriyaki baked salmon with red onions is a delicious, healthy dinner meal. This salmon recipe is Paleo, Whole30, and gluten-free friendly and can be served with a side of vegetables, salad or with rice if desired. This post has recently been updated!


    Jump to: ℹ️ Overview | 🛒 Ingredients | 📷 How To Make | 🥗Serving Suggestions | 📝 Go To Full Recipe | 🐟 More Salmon & Fish Recipes


    Orange Teriyaki Baked Salmon

    One of my favourite quick and easy dinners is a tray of baked salmon served alongside a large salad or some stir-fried vegetables. For this delicious meal, I made orange teriyaki sauce, which works beautifully with the fatty salmon.

    I love adding red onions rings both for the flavour and because they make this dish look so pretty when it comes out of the oven. I think it’s the purple against the bright orange colour, and the juxtaposition of the geometrical shapes.

    This teriyaki baked salmon is super easy to make and I know you will love it!\

    You may also like my Mediterranean fish with white bean purée.

    Making Orange Teriyaki Salmon

    You can use salmon fillets or steaks in this recipe, with or without the skin. In fact, any other type of fish will work well with the orange teriyaki sauce (as would shrimp or chicken). In this recipe, I only cooked two fillets but you can easily fit 4-6 on a baking tray, simply double up the sauce ingredients.

    The sauce is super versatile and you can use it on chicken wings or pork skewers. You can also check out my go-to paleo stir-fry sauce, which is similar to this. 

    For other lovely salmon recipes, check out this baked Salmon Loaf with cucumber and dill salad, or my Japanese baked salmon balls.

    What To Serve With Teriyaki Salmon

    I served this baked salmon with a simple stir-fry of Chinese cabbage and carrots with some garlic, lemon juice and sesame oil. I also like to serve some pickled radish or ginger.

    You can also make a batch of my coconut cauliflower rice, or white rice if you desire, or make a simple side salad. If you like the salmon and salad combo, check out my pan-fried salmon with pea radish salad.

    My orange ginger asparagus would be a nice complementary dish as well and if you want something more starchy, try miso sweet potatoes, which you could start baking a little earlier, then finish both at the same time.


    Want to Save This Recipe?

    Enter your email & I’ll send it to your inbox. Plus, get great new recipes from me every week!

    By submitting this form, you consent to receive emails from Cooked & Loved

    A delicious and healthy meal of orange teriyaki salmon baked in the oven with red onions. This baked salmon recipe is gluten-free, Paleo and Whole30 friendly. The recipe below also includes a simple vegetable stir-fry to serve on the side.

    For the stir-fried vegetables

    • Preheat the oven to 200 C / 400 F. Leave the salmon out of the fridge for at least 10 minutes before cooking, to come to room temperature.

    • Place the salmon fillets, skin side down, on a flat baking tray lined with parchment/baking paper. Surround with onion rings, sprinkle with orange zest, sea salt and then drizzle evenly with olive oil.

    • Place the tray in the oven, middle shelf, and cook for 8 minutes. In the meantime, combine the sauce ingredients in a small bowl and whisk together.

    • Remove the salmon from the oven and pour the sauce over the top making sure to cover the salmon and the onions. Fold the edges of the paper inwards, as to prevent the sauce from spilling out. Sprinkle with sesame seeds. Place back in the oven for 7-8 more minutes.

    • While the salmon is finishing cooking, stir-fry the vegetables in a little coconut oil over medium-high heat for 4-5 minutes, stirring frequently. Add garlic, salt, pepper and lemon juice towards the end and stir through. Finally, drizzle and stir through the sesame oil.

    • Serve salmon alongside the veggies for a tasty, healthy dinner.

    Tamari is a gluten-free soy sauce. You can also use coconut aminos.
    Nutrition label below is for salmon with onions and sauce with a veggie side. Actual macros may vary.

    Calories: 694kcal | Carbohydrates: 38g | Protein: 47g | Fat: 40g | Saturated Fat: 11g | Polyunsaturated Fat: 10g | Monounsaturated Fat: 17g | Cholesterol: 110mg | Sodium: 2108mg | Potassium: 1895mg | Fiber: 6g | Sugar: 18g | Vitamin A: 7350IU | Vitamin C: 101mg | Calcium: 264mg | Iron: 4mg

    Keywords: baked salmon, salmon dinner, Salmon Recipes, Teriyaki salmon, orange teriyaki

    More Salmon & Fish Recipes

    Source link

  • Perfectly Baked Fish Recipe with Scallions and Orange

    Perfectly Baked Fish Recipe with Scallions and Orange

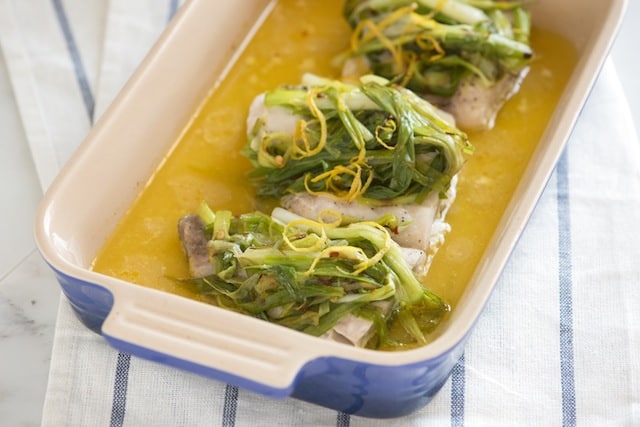
    How to make perfectly baked fish with scallions and orange. Jump to the Baked Fish Recipe with Scallions or read on to see our tips for making it.

    Perfectly Baked Fish Recipe with Scallions and Orange

    We love this easy fish recipe. It doesn’t call for lots of ingredients and is very quick to make. Scallions (or spring onions) are a big part of the recipe. So often we see scallions used as a finishing touch, but they can be used for so much more — they’re mild, not pungent and when you cook them, they turn sweet, gently wilted and tender.

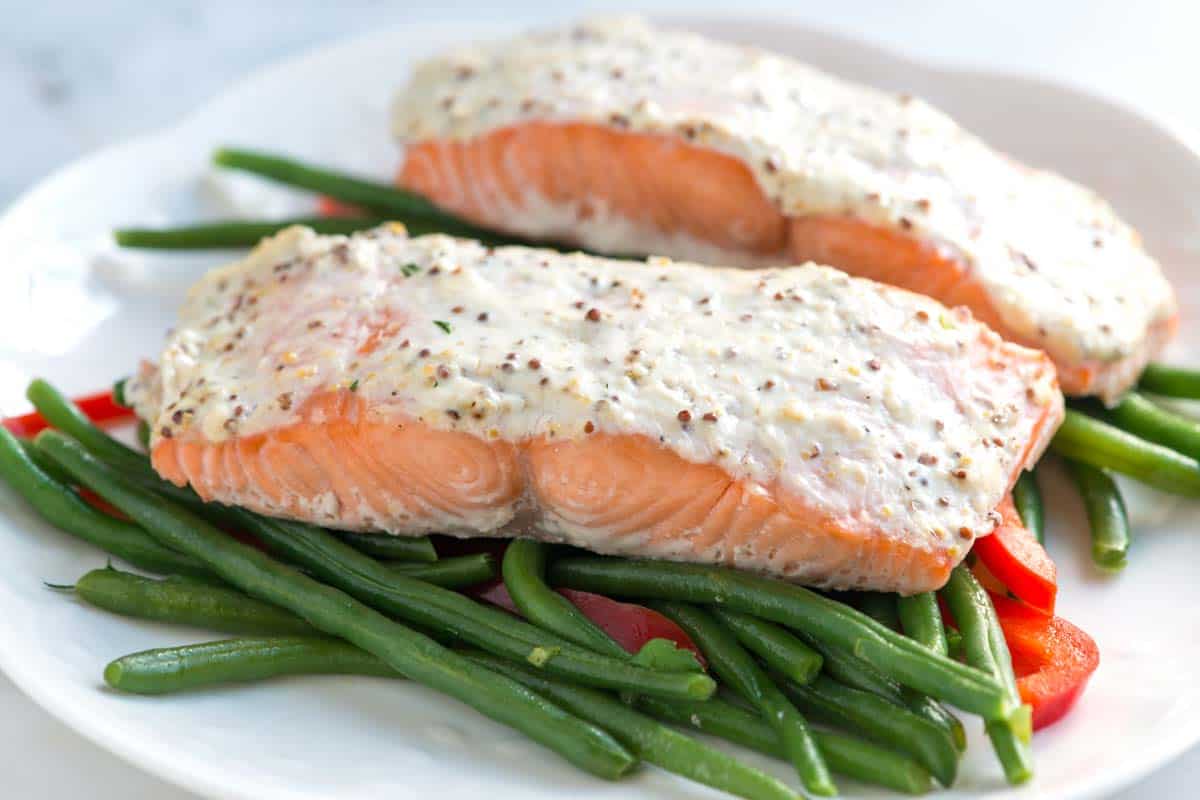
    Sour Cream Baked Salmon RecipeYOU MAY ALSO LIKE: How to make moist and tender baked salmon in less than 30 minutes. Jump to the Sour Cream Baked Salmon Recipe.
    How to Bake Fish with Scallions and Orange

    Look for a firm white fish for this — rockfish, striped bass or halibut are all excellent.

    How to Bake Fish with Scallions and Orange

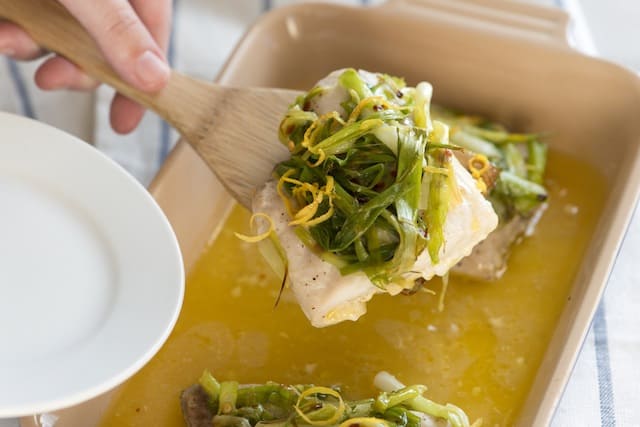
    You will also need scallions, fresh orange juice, red pepper flakes, lemon zest and butter. To make make it, start by cooking thinly sliced scallions until wilted and starting to brown.

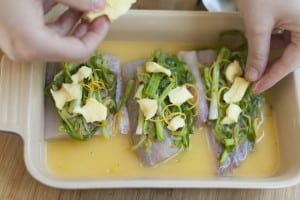
    Season the fish, add to a baking dish, and then top with the cooked scallions. Scatter lemon zest, and a few dabs of butter on top then pour fresh orange juice into the pan. Cover the dish with foil and bake. After about 15 minutes the fish will be perfectly cooked and the butter will have melted down into the orange juice, creating a silky broth.

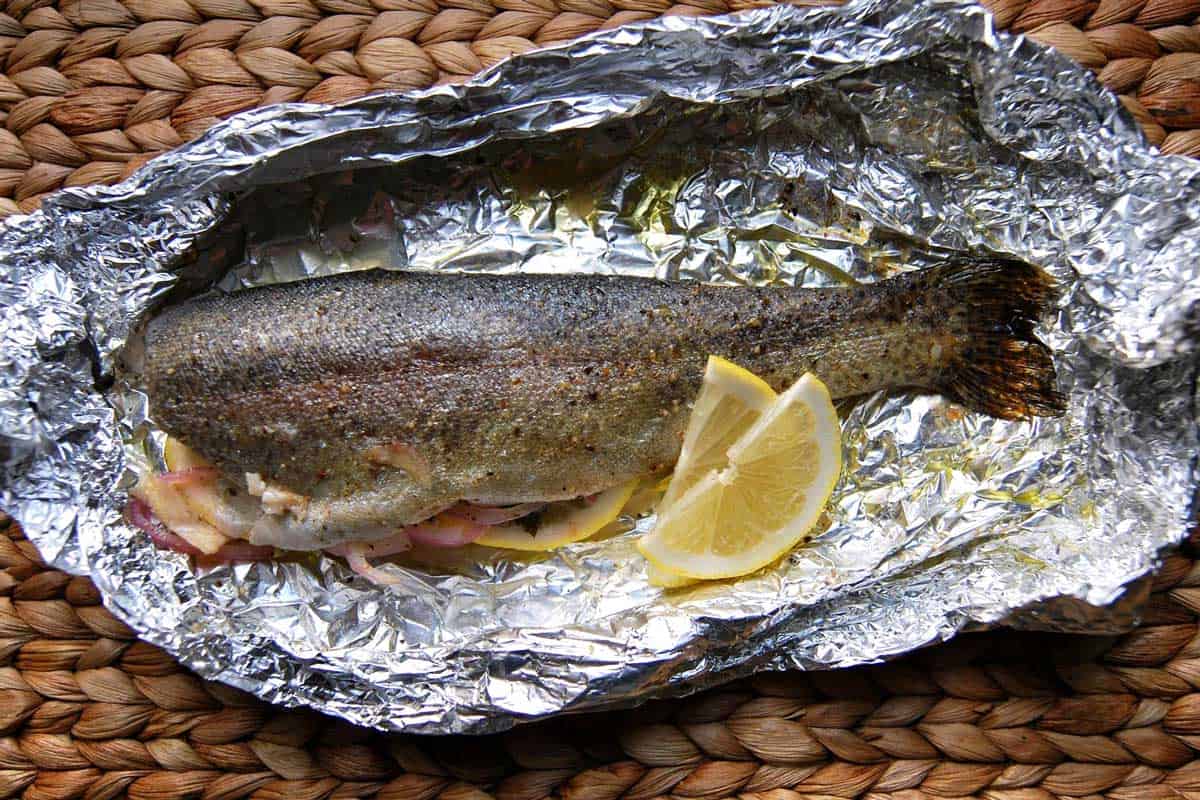
    Oven Baked Trout RecipeYOU MAY ALSO LIKE: How to make oven baked trout in foil packets. Jump to the Easy Oven Baked Trout Recipe.

    Recipe updated, originally posted August 2012. Since posting this in 2012, we have tweaked the recipe to be more clear. – Adam and Joanne

    Perfectly Baked Fish Recipe with Scallions and Orange

    • PREP
    • COOK
    • TOTAL

    If you can, use fresh squeezed orange juice for this. One large orange should do it. For the fish, choose a firm white fish — we particularly like halibut, striped bass and rockfish.

    Makes 4 servings

    You Will Need

    12 scallions

    1 tablespoon extra-virgin olive oil

    1/4 teaspoon crushed red pepper flakes

    4 (6-ounce portions) firm white fish, such as rockfish, striped bass or halibut

    1 tablespoon lemon zest

    1 tablespoon butter

    1/4 cup orange juice

    Salt and fresh ground black pepper

    Directions

      1Heat the oven to 425 degrees F.

      2Discard the first 2 inches from the top of each scallion. Cut scallions in half crosswise and thinly slice them lengthwise into strips.

      3Heat the olive oil in a skillet over medium heat. Add the spring onions, red pepper flakes and a pinch of salt. Cook, stirring occasionally, until the scallions are wilted and begin to brown.

      4Season fish on both sides with salt and fresh ground pepper then place, in one layer, into a baking dish. Divide the cooked scallions between the tops of each piece of fish. Scatter lemon zest over scallions then cut the butter into small squares and place on top.Step 1

      5Pour the orange juice around the fish then cover the pan with aluminum foil. Bake until the fish is opaque throughout, 15 to 18 minutes, depending on thickness of the fish.

    Adam and Joanne’s Tips

    If you make this recipe, snap a photo and hashtag it #inspiredtaste — We love to see your creations on Instagram and Facebook! Find us: @inspiredtaste


    AUTHOR:

    Joanne Gallagher

    Adam and Joanne of Inspired Taste

    We are Adam and Joanne Gallagher, the creators of Inspired Taste. Established in 2009, Inspired Taste grew from a childhood dream into one of the internet’s most trusted recipe sites with hundreds of reliable recipes, step-by-step videos, and expert tips.More About Us


    Source link

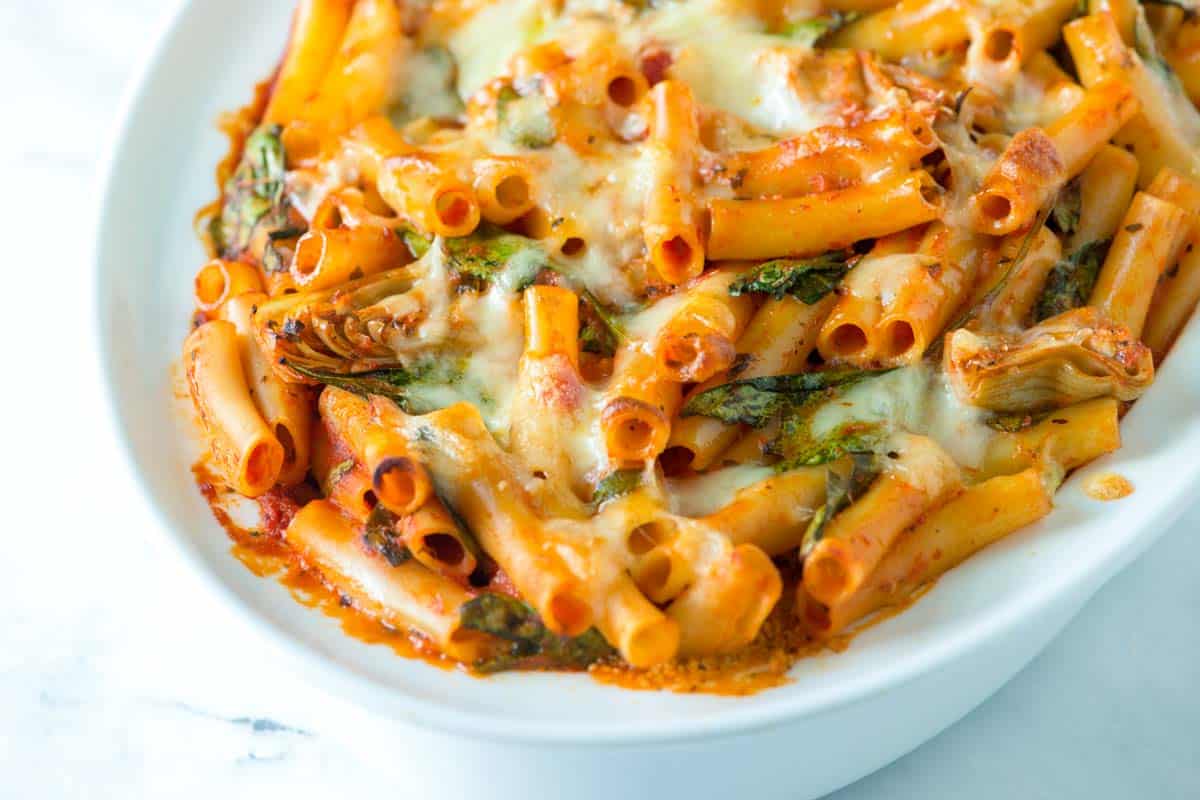
  • Baked Ziti Recipe with Shrimp and Spinach

    Baked Ziti Recipe with Shrimp and Spinach

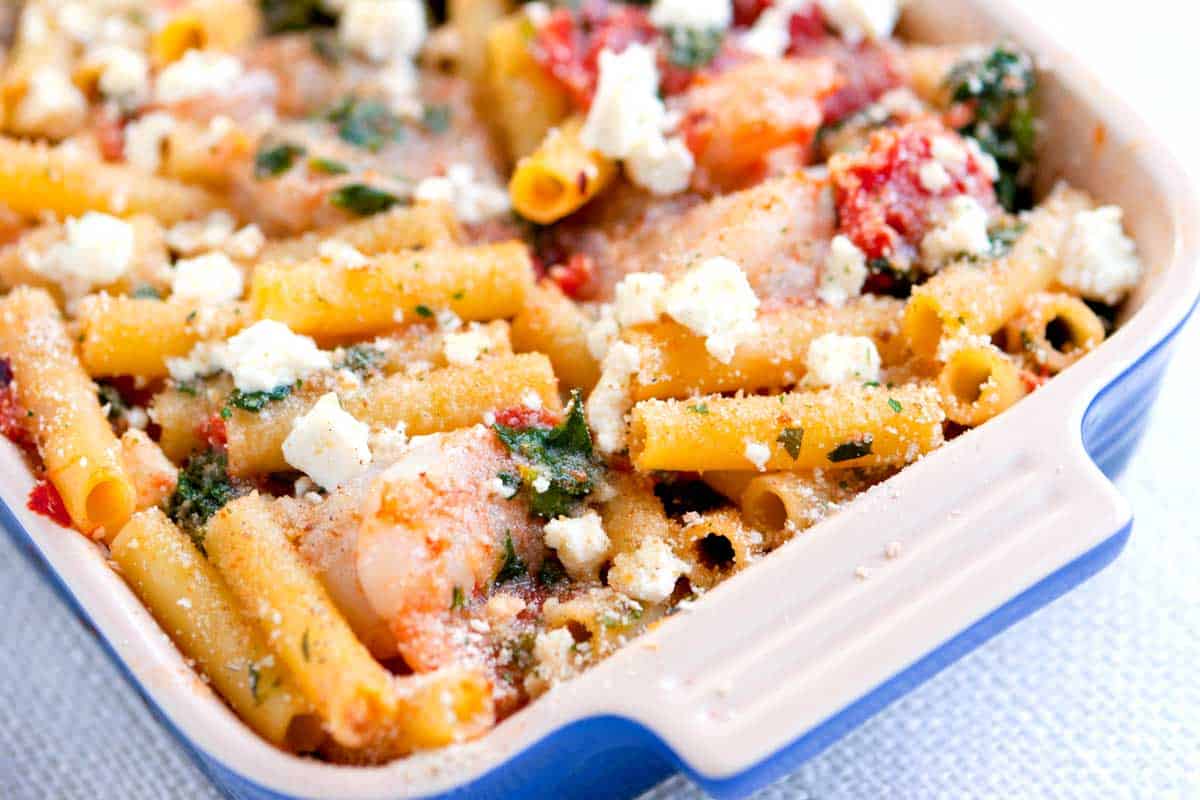
    How to make baked ziti with shrimp, spinach, and feta cheese. Jump to the Baked Ziti Recipe with Shrimp or read on to see our tips for making it.

    Baked Ziti Recipe with Shrimp and Spinach

    There are very few things that can beat pasta for me — I absolutely love it. I love that pasta can be hearty like our Pumpkin Mac and Cheese or light, like this shrimp ziti. I love that you can combine it with almost anything, from brown butter and walnuts to sausage and ricotta. Most of all, I love that it’s fast. With about 15 minutes of hands-on time this easy baked ziti is perfect for busy nights.

    Easy Baked Ziti with SpinachYOU MAY ALSO LIKE: This Easy Baked Ziti Recipe with Spinach has lots of spinach, artichokes, and a creamy pesto layer in the middle. Easy and delicious.
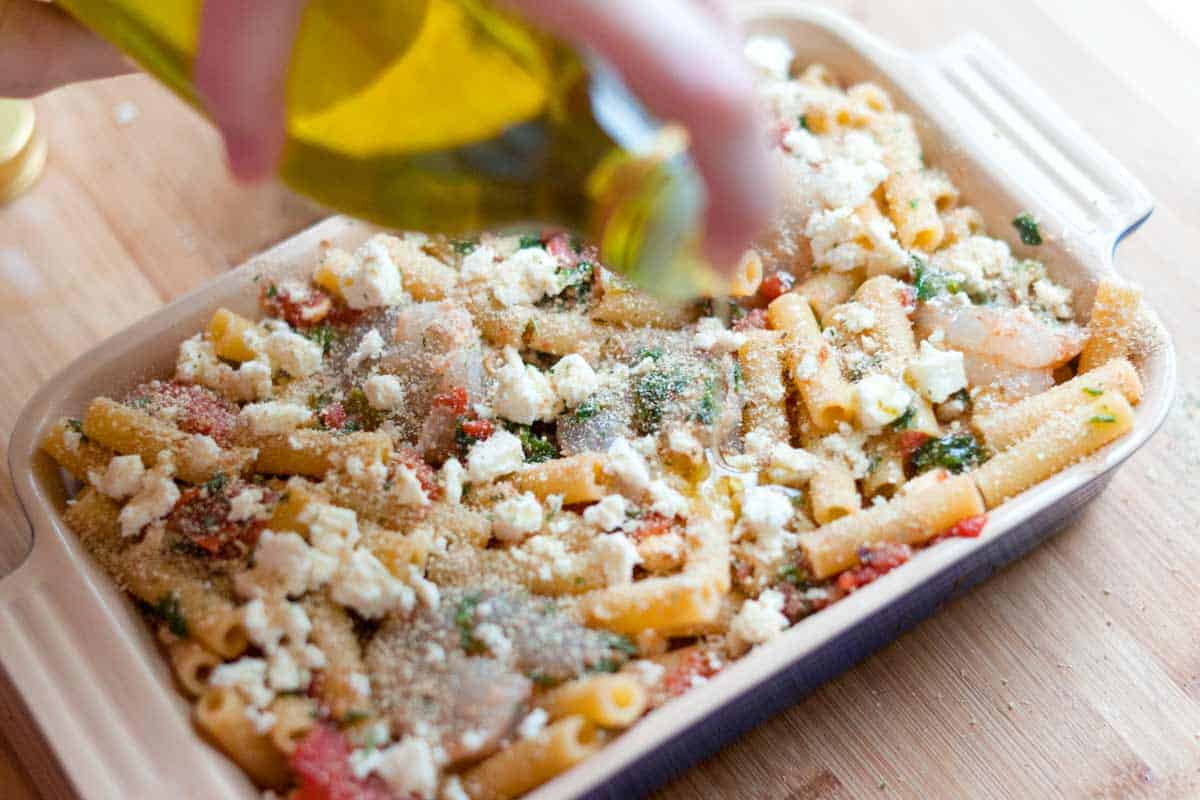
    How to Make Baked Ziti with Shrimp and Spinach

    Start by cooking your pasta, but undercook it by 1 to 2 minutes. This way, when we toss it with the other ingredients and bake the pasta won’t become mushy.
    One of my favorite parts to this recipe is the lemony tomato sauce. It’s light and plays so nicely with the shrimp and feta cheese. It’s extremely simple to make — just olive oil, canned tomatoes, garlic, red pepper flakes, and lemon zest.

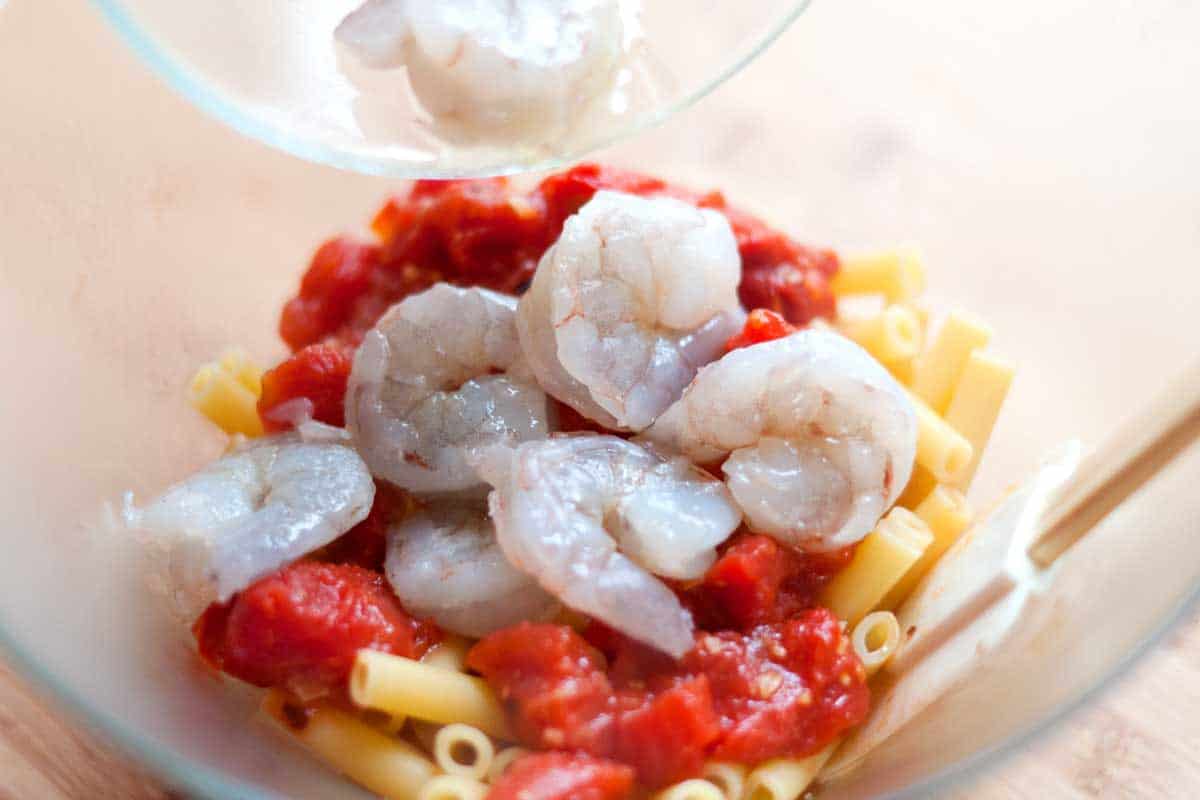
    For the shrimp, season them lightly with a little olive oil, salt, and pepper. Then, when the pasta is cooked, toss it with the shrimp, our homemade sauce, spinach, and feta cheese.

    How to Make Baked Ziti with Shrimp and Spinach

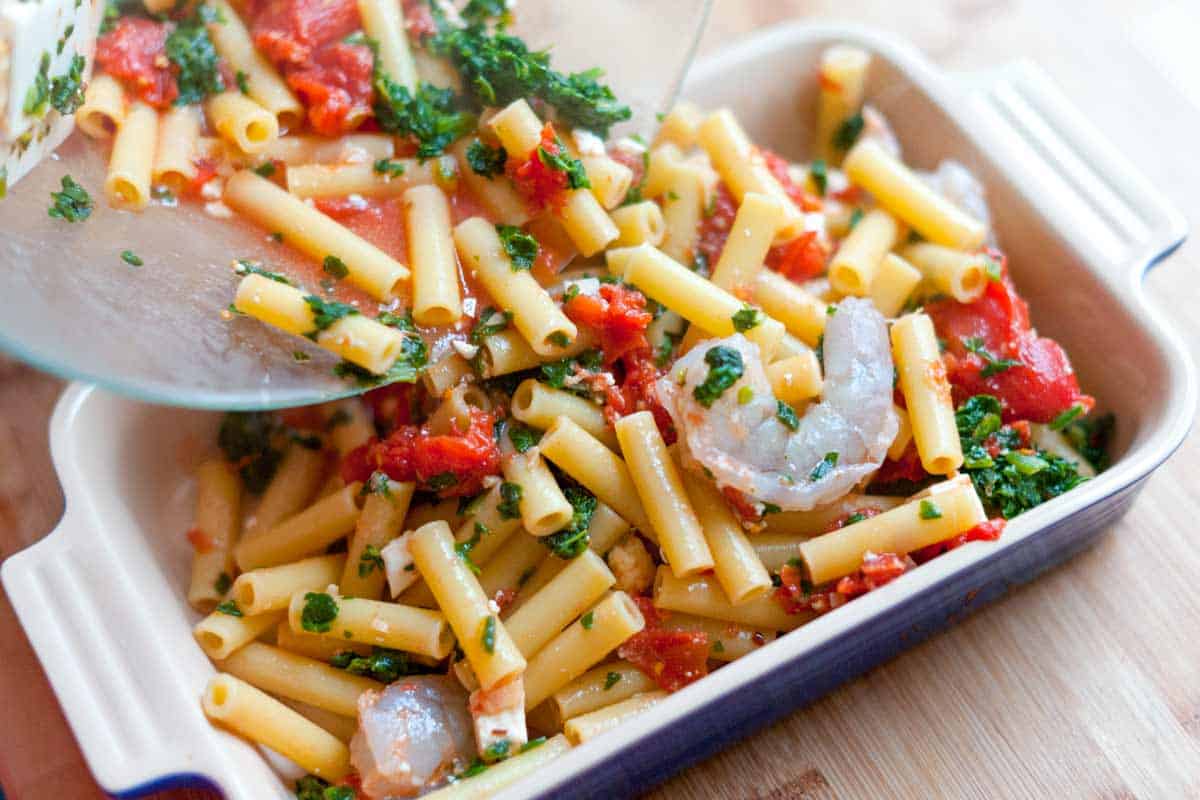
    Toss everything together and slide into a baking dish. See how fresh and light it looks. I love that.

    How to Make Ziti with Shrimp and Spinach

    Just before baking, we scatter breadcrumbs, feta cheese, and a drizzle of olive oil on top. Then the ziti is baked until the shrimp are cooked through and the top of the ziti begins to brown.

    How to Make Baked Pasta with Shrimp and Spinach

    Recipe updated, originally posted February 2012. Since posting this in 2012, we have tweaked the recipe to be more clear. – Adam and Joanne

    Easy Baked Ziti Recipe with Shrimp and Spinach

    • PREP
    • COOK
    • TOTAL

    With about 15 minutes of hands-on time this easy baked ziti is perfect for busy nights. When cooking the pasta, undercook it by 1 to 2 minutes. This way, when it is tossed with the other ingredients and baked the pasta won’t become mushy.

    Makes approximately 4 servings

    You Will Need

    8 ounces dried pasta, such as ziti, penne, or rigatoni

    2 tablespoons extra-virgin olive oil

    2 medium garlic cloves, finely chopped

    1/4 teaspoon crushed red pepper flakes

    1 (14.5-ounce) can diced tomatoes

    1 teaspoon grated lemon zest

    8 ounces medium shrimp, peeled and deveined

    1 (10-ounce) package frozen spinach, thawed and squeezed dry (about 1 1/4 cups)

    2 ounces feta cheese, crumbled

    2 tablespoons dried breadcrumbs

    Salt and fresh ground black pepper

    Directions

      1Heat oven to 350 degrees F. Butter a 2-quart baking dish or spray with non-stick cooking spray.

      2Bring a large pot of salted water to the boil, add the pasta then follow package directions, but cook 1 to 2 minutes less than the package calls for. Drain.

      3Meanwhile, make the sauce. Heat 1 tablespoon of the olive oil, garlic, and red pepper flakes over medium heat until the garlic turns light brown; about 1 minute. Add the tomatoes with juices, lemon zest, a 1/4 teaspoon of salt, and a pinch of pepper. Cook until heated through, about 5 minutes. Taste the sauce for seasoning, and adjust with additional salt and pepper if necessary.

      4Toss the shrimp with 1 teaspoon of olive oil, a 1/4 teaspoon of salt, and a few grinds of black pepper.

      5In a large bowl, toss the drained pasta, tomato sauce, shrimp, ringed out spinach, and half of the feta cheese. Add to the baking dish then top with remaining feta cheese, breadcrumbs, and a drizzle of olive oil.

      6Bake the ziti, covered, until the shrimp are thoroughly cooked (they will become firm and opaque); about 15 minutes. Uncover, and then bake until the cheese and breadcrumbs begin to brown, about 10 minutes.

    Adam and Joanne’s Tips

    • Cooked fresh spinach can be substituted for frozen. Cook about 1 pound of fresh spinach until wilted, squeeze out excess moisture and add to the filling.

    If you make this recipe, snap a photo and hashtag it #inspiredtaste — We love to see your creations on Instagram and Facebook! Find us: @inspiredtaste


    AUTHOR:

    Joanne Gallagher

    Adam and Joanne of Inspired Taste

    We are Adam and Joanne Gallagher, the creators of Inspired Taste. Established in 2009, Inspired Taste grew from a childhood dream into one of the internet’s most trusted recipe sites with hundreds of reliable recipes, step-by-step videos, and expert tips.More About Us


    Source link

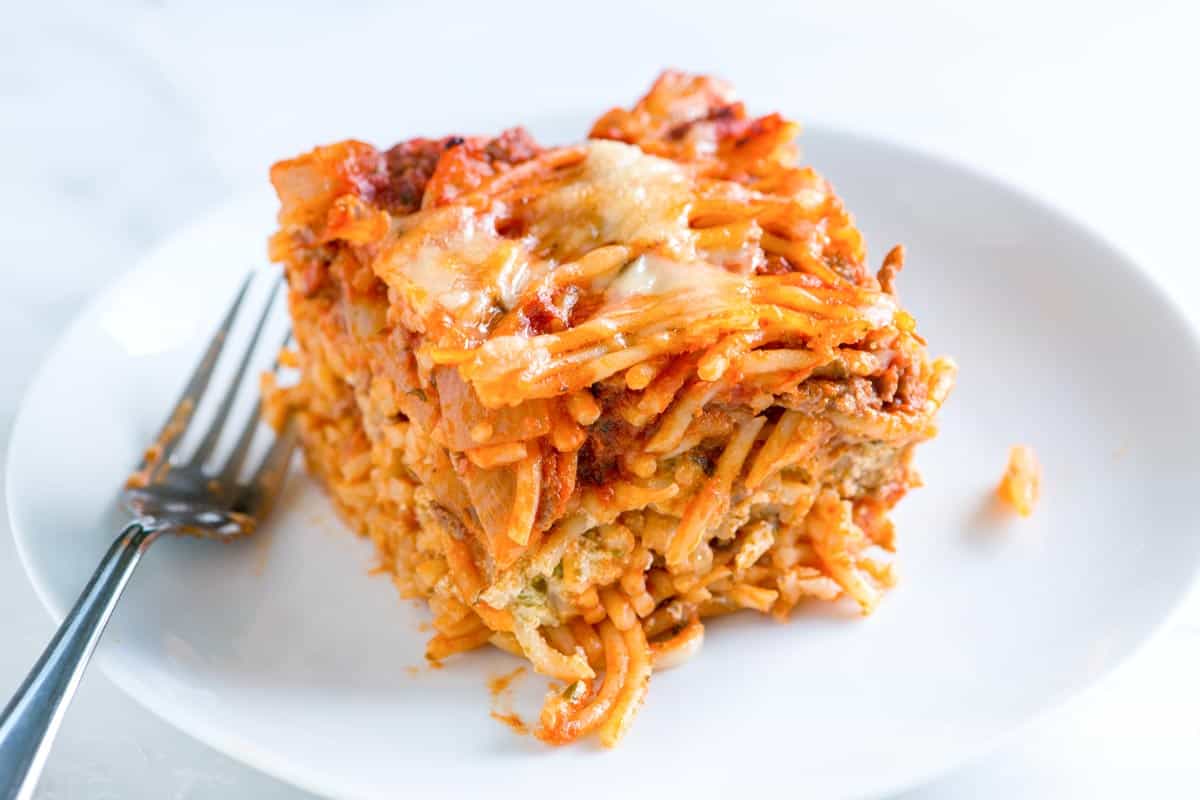
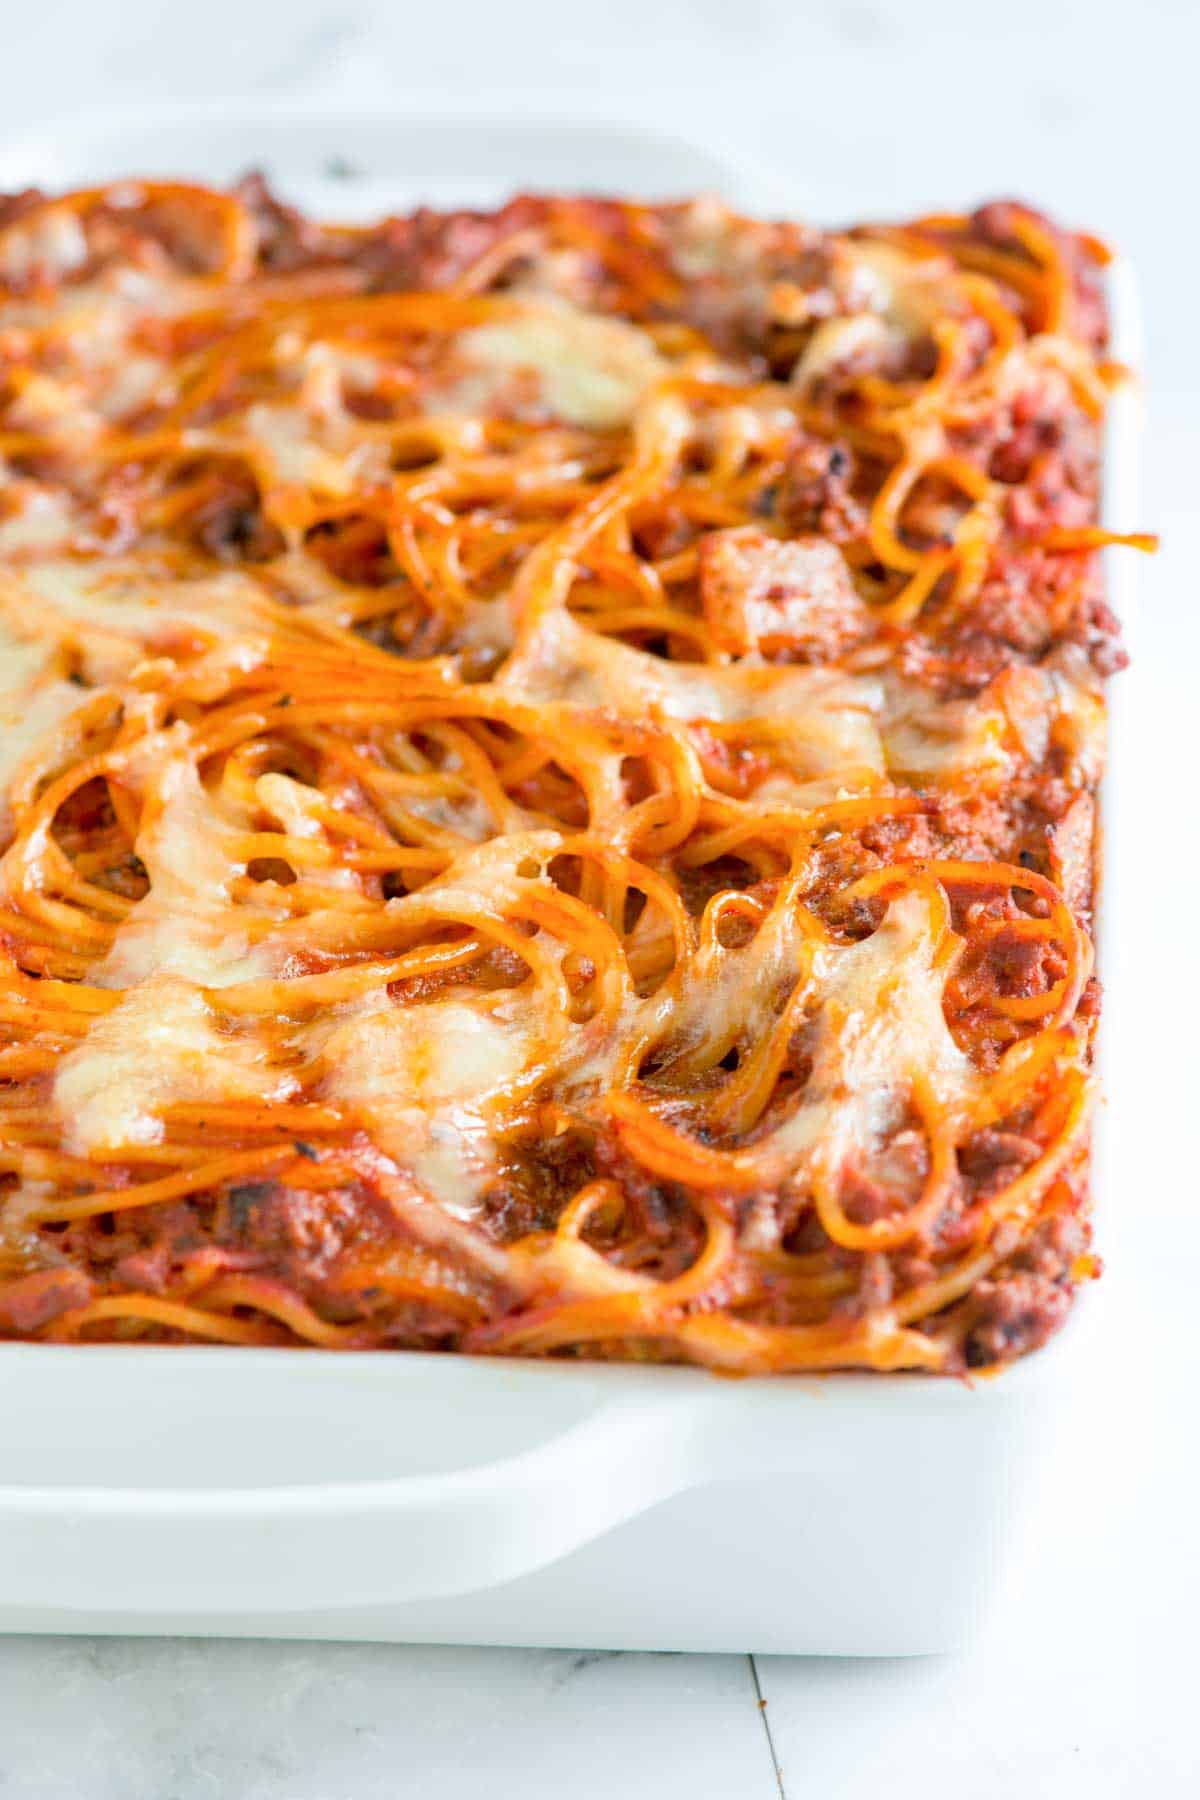
  • Seriously Good Baked Spaghetti Recipe

    Seriously Good Baked Spaghetti Recipe

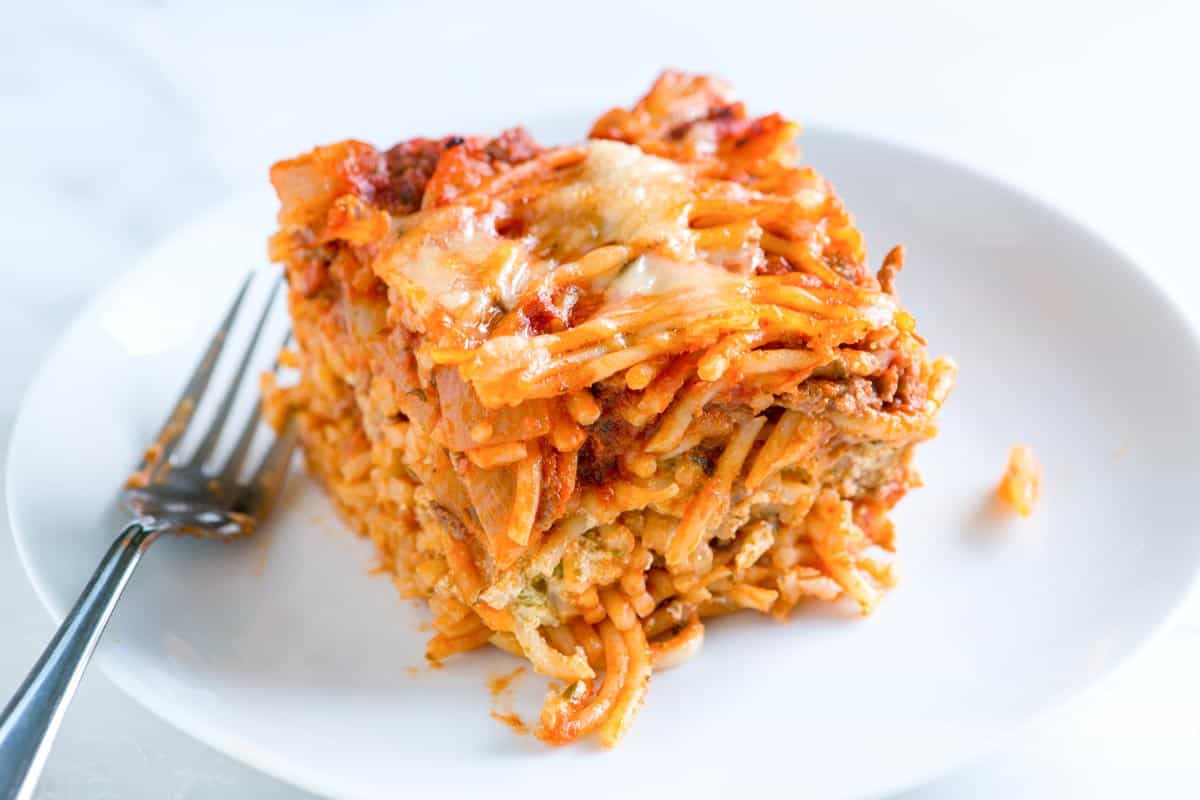
    My baked spaghetti recipe is easy and made with ground beef, marinara sauce, mozzarella cheese, and a hidden layer of creamy pesto sauce. Pure comfort!

    Baked Spaghetti

    This easy baked spaghetti has everything we love about baked pasta. It has noodles, a hearty meat sauce, and lots of cheese. For more spaghetti recipes I love, see our weeknight spaghetti recipe or this veggie spaghetti!

    My favorite part of this baked spaghetti is the creamy pesto layer in the middle. It’s ridiculously simple to make and makes this pasta dish so incredibly delicious!

    Key Ingredients

    • Spaghetti: I use plain spaghetti for this recipe, but other pasta shapes work great. Use what you have! I cook the pasta briefly before tossing it with the sauce and baking. Use the boxed directions as a guide, but cook the pasta for 2 to 3 minutes less. It will continue to cook in the oven.
    • Ground Beef: I usually use ground beef here, but ground sausage, chicken, and turkey are excellent. You can even leave the meat out and add a few extra veggies (see this vegetable spaghetti for suggestions).
    • Marinara Sauce: I use homemade marinara when I have it, but store-bought sauce works nicely in this recipe.
    • Sour Cream and Pesto: This is my favorite part of this baked spaghetti. I stir pesto into sour cream to create a creamy pesto sauce. Then, I add it as a creamy layer into the middle of the baked spaghetti. So good! Store-bought pesto is fine, but if you can, make homemade pesto (I love it!).
    • Cheese: Mozzarella is perfect, but any melty, mild cheese works.

    How to Make Baked Spaghetti

    When I’m not in the mood to assemble a lasagna, I make this baked spaghetti. The flavors are similar, but it’s much easier.

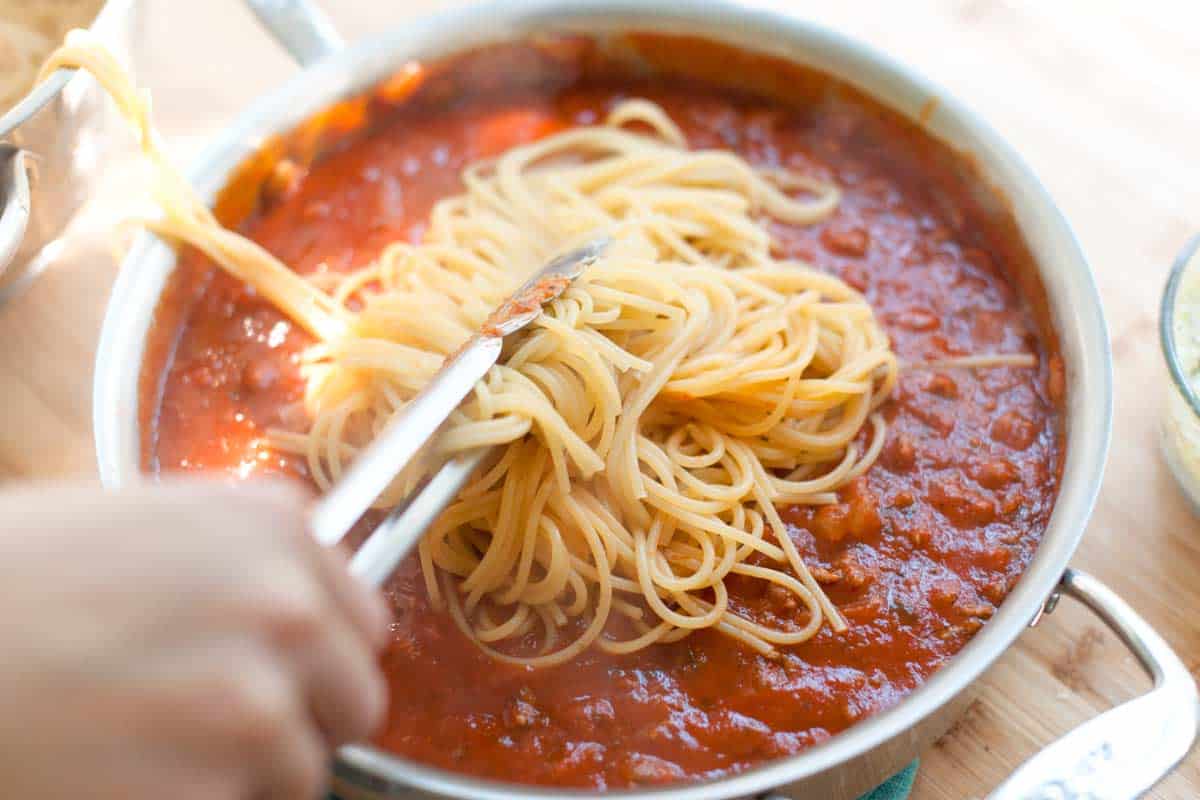
    For the sauce, I cook onions and ground beef, add the marinara sauce, and then toss with partially cooked spaghetti (by undercooking the pasta, it won’t become mushy after baking in the oven).

    How to Make Baked Spaghetti: Toss spaghetti with marinara sauce

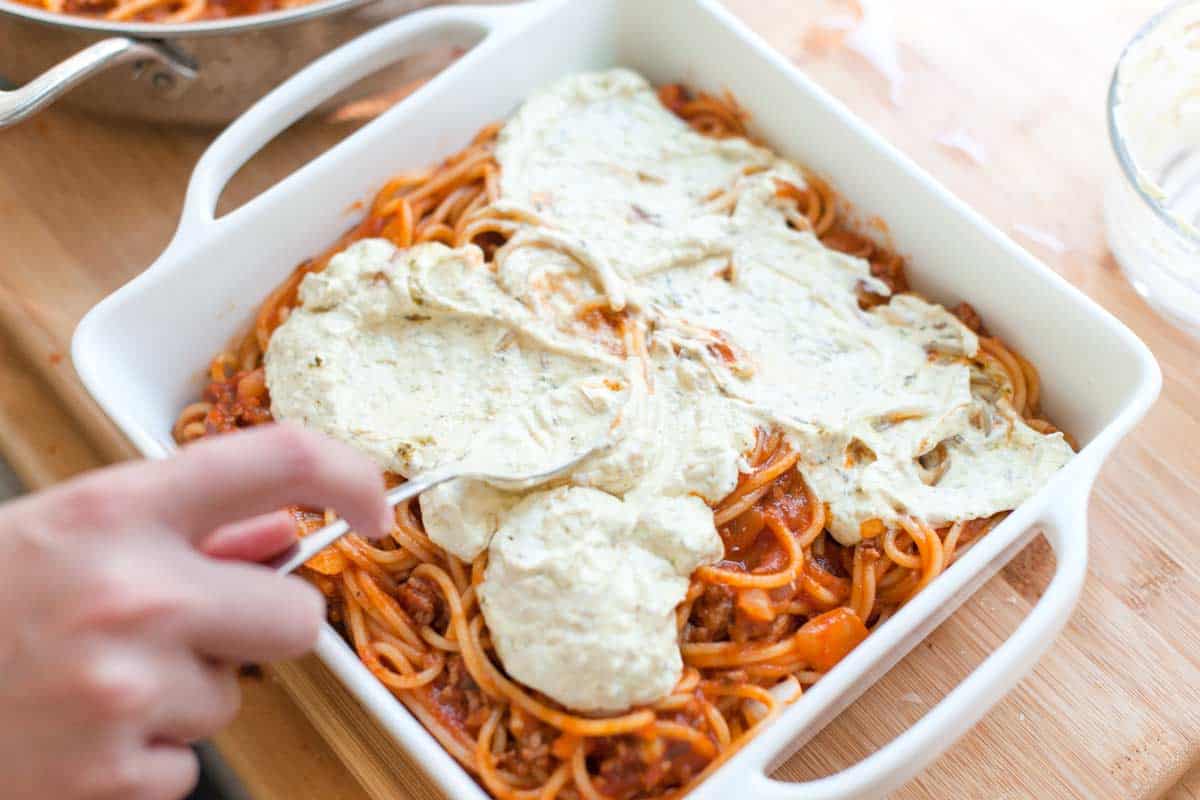
    You can add the spaghetti and meat sauce to a baking dish and top it with cheese, but to make it taste even better, add a creamy pesto layer to the middle.

    How to Make Baked Spaghetti: Add a creamy pesto layer to the middle

    It’s super simple. I mix sour cream with basil pesto. Then, I add about half of my spaghetti to the baking dish, spread a layer of creamy pesto, and layer the remaining spaghetti on top. I do the same when making our baked ziti with spinach, and I love it!

    Baked Spaghetti

    Seriously Good Baked Spaghetti

    • PREP
    • COOK
    • TOTAL

    Our baked spaghetti recipe involves baking spaghetti with a simple meat sauce of ground beef and marinara sauce. We also sneak in a layer of creamy pesto. If you are like us, this will become your new favorite meal! Feel free to swap the ground beef for bulk sausage, ground chicken, or ground turkey. To make this meatless, remove the meat (the spaghetti will still be delicious).

    8 servings

    You Will Need

    1 pound (450g) dry spaghetti

    1 pound (450g) lean ground beef

    1 tablespoon olive oil

    1 medium onion, chopped

    6 cups (1.4L) marinara sauce from 2 (26oz) jars, or see homemade marinara sauce

    3/4 cup (170g) sour cream

    1/4 cup (56g) basil pesto, see homemade basil pesto

    1 cup (113g) grated mozzarella cheese, 4 ounces

    Salt and fresh ground black pepper

    Directions

      1Preheat the oven to 350°F (177°C). Butter a 3-quart baking dish or spray with non-stick cooking spray.

      2Bring a large pot of salted water to the boil. Add the pasta and follow the package directions, but cook for 1 to 2 minutes less than the package calls for. Drain.

      3Meanwhile, make the sauce. Heat the olive oil in a large skillet with sides. Add onions and cook until translucent, about 5 minutes.

      4Add the ground beef and cook until browned, about 10 minutes. As the beef cooks, use a wooden spoon to break it up into small pieces in the pan. Season with 1/4 teaspoon of salt and a few grinds of black pepper. Drain excess fat from the meat.

      5Pour in the marinara sauce and cook until heated through. Take the pan off of the heat and add the cooked and drained pasta. Toss well, taste for seasoning, and adjust with salt and black pepper.

      6In a small bowl, stir sour cream and basil pesto until well blended.

      7Spoon half of the spaghetti into the baking dish. Spread the sour cream and pesto mixture over the pasta and scatter with half of the mozzarella cheese. Top with the remaining pasta, lightly press everything into the baking dish and then scatter the remaining mozzarella cheese.

      8Place the baking dish onto an aluminum-lined baking dish (just in case any sauce drips over the sides of the baking dish). Bake until the cheese has melted and the sauce bubbles, about 30 minutes. Let stand for 10 minutes before serving.

    Adam and Joanne’s Tips

    • Storing: Leftover baked spaghetti can be stored in an airtight container in the fridge for up to 3 days or frozen for up to 3 months. Thaw overnight in the fridge before reheating.
    • Make ahead tips: Assemble, cover with a sheet of parchment paper, and then cover the baking dish with foil. Refrigerate for up to 2 days before baking.
    • The nutrition facts provided below are estimates.

    Nutrition Per Serving
    Serving Size
    1/8 of the dish
    /
    Calories
    540
    /
    Total Fat
    17.8g
    /
    Saturated Fat
    6.4g
    /
    Cholesterol
    60.6mg
    /
    Sodium
    1194.8mg
    /
    Carbohydrate
    61.1g
    /
    Dietary Fiber
    6g
    /
    Total Sugars
    12.3g
    /
    Protein
    32.3g


    AUTHOR:

    Joanne Gallagher

    Adam and Joanne of Inspired Taste

    We are Adam and Joanne Gallagher, the creators of Inspired Taste. Established in 2009, Inspired Taste grew from a childhood dream into one of the internet’s most trusted recipe sites with hundreds of reliable recipes, step-by-step videos, and expert tips.More About Us

    Source link

  • Baked Mayo Parmesan Chicken

    Baked Mayo Parmesan Chicken

    This Baked Mayo Parmesan Chicken is my version of a low-carb chicken dish that’s been popular all over the internet! And if you like the idea of chicken topped with creamy mayo and delicious Parmesan cheese, I bet this is a chicken dinner you’ll make over and over.

    PIN the Baked Mayo Parmesan Chicken to try it later!

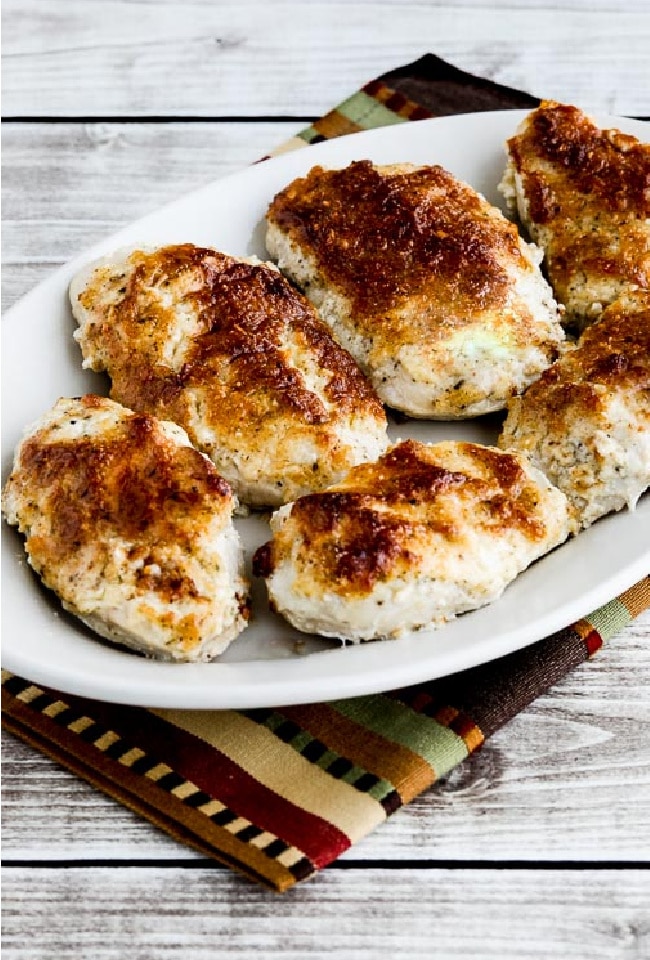
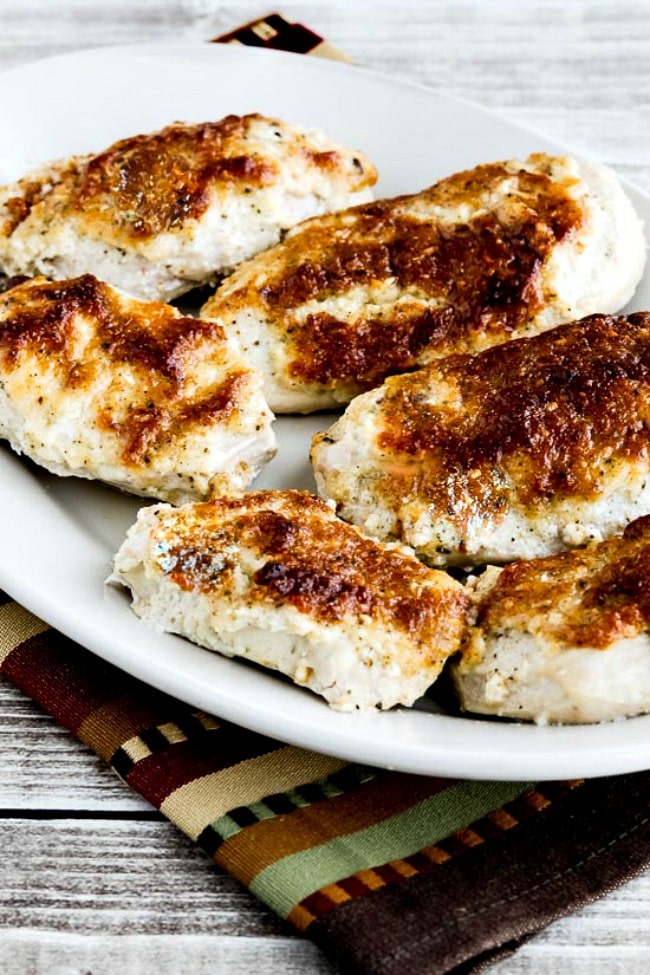
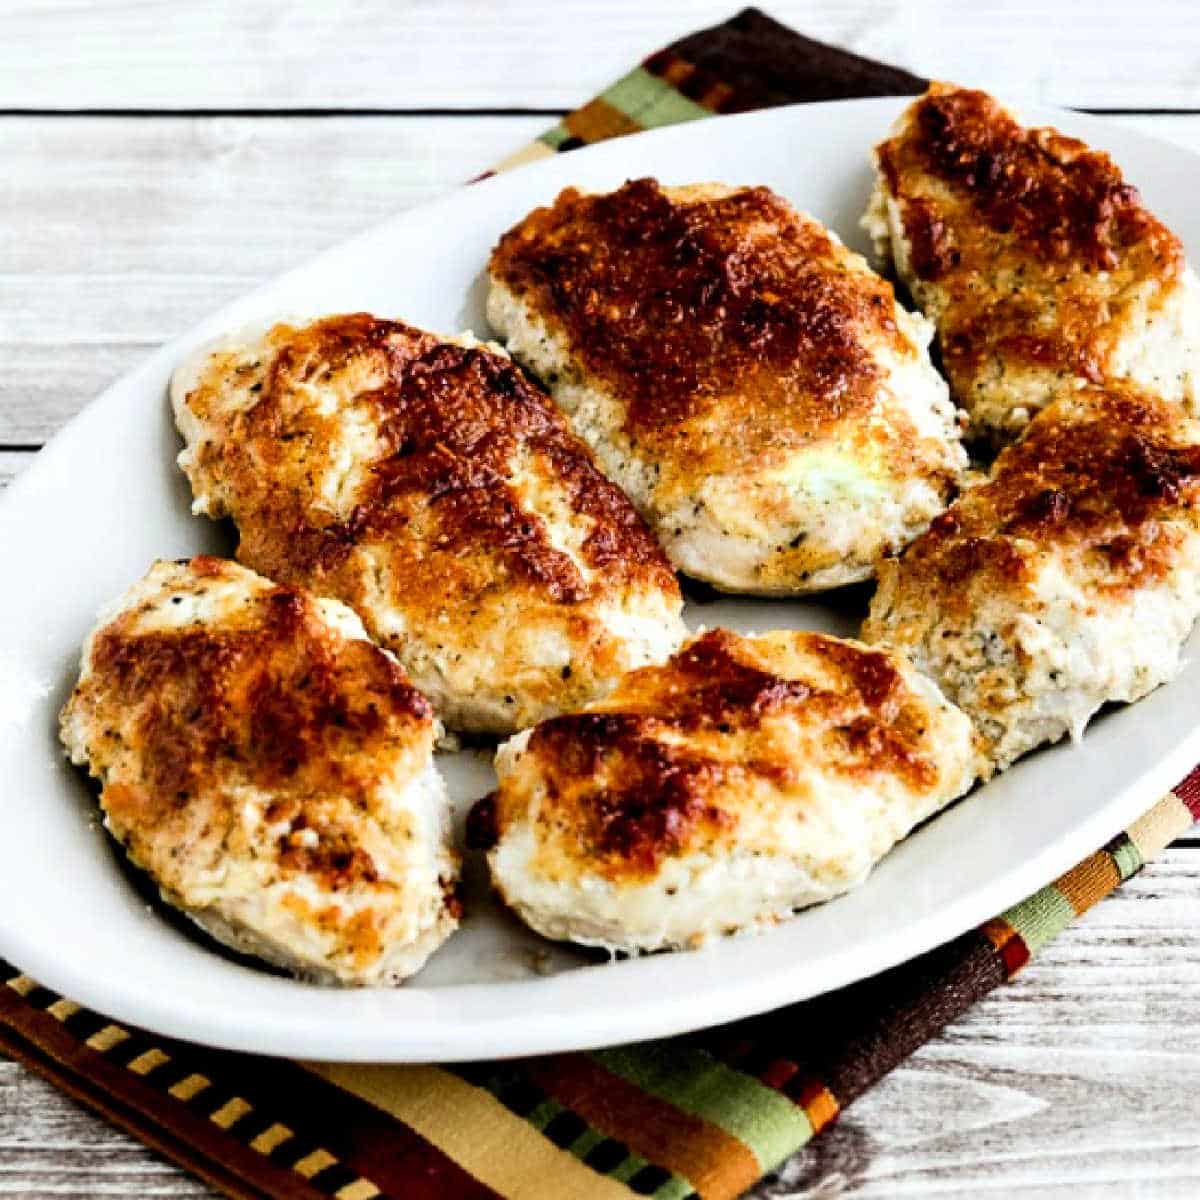
    Internet's Best Baked Mayo-Parmesan Chicken finished chicken on serving plate

    When I discovered the inspiring recipe for this Baked Mayo Parmesan Chicken in a Facebook group, this recipe really caught my eye. I loved the idea of using mayonnaise as an ingredient to keep chicken moist in the oven. So I printed the recipe, and then I tried to find the original source.

    What I did end up finding was variations of Mayo Parmesan Chicken with rave reviews all over the internet! Some of them had no attribution at all, but many attributed the recipe to another website or blog in an endless loop of internet recipe posting! (If anyone sees a site that claims to be the original source, I would love to credit them!)

    When I worked on adapting the recipe with Kara, we loved the version we came up with. We did tweak it to use slightly less mayo and Parmesan and added a little poultry seasoning and garlic powder. Now I’ve made this baked chicken crusted with mayo and Parmesan over and over and I understand why the recipe has been shared far and wide on the internet! I hope this reminder will encourage you make it for an easy dinner some time soon!

    What ingredients do you need?

    (This is only a list of ingredients; please scroll down for complete printable recipe. Or if you use the JUMP TO RECIPE link at the top of the page, it will take you directly to the complete recipe.)

    • boneless, skinless chicken breasts
    • mayo
    • Parmesan cheese (For best results, use coarsely-shredded Parmesan or grate your own.)
    • Poultry Seasoning (affiliate link)
    • Garlic Powder (affiliate link)
    • fresh-ground black pepper to taste

    What makes my Baked Mayo Parmesan Chicken recipe extra tasty?

    As I mentioned, there are versions of this recipe all over the web. But my version pounds the chicken breasts for more even cooking, and I use poultry seasoning and garlic powder in the topping for some added flavors! That’s why I think my recipe is the internet’s best version of this classic dish!

    One way we made sure this is a low-carb dish:

    Some versions of this recipe use breadcrumbs in the topping, but trust me when I say no breadcrumbs are needed for this tasty chicken recipe!

    How low in carbs is the Baked Mayo Parmesan Chicken?

    This tasty internet-famous baked chicken has only 2 net carbs and 27 grams of protein!

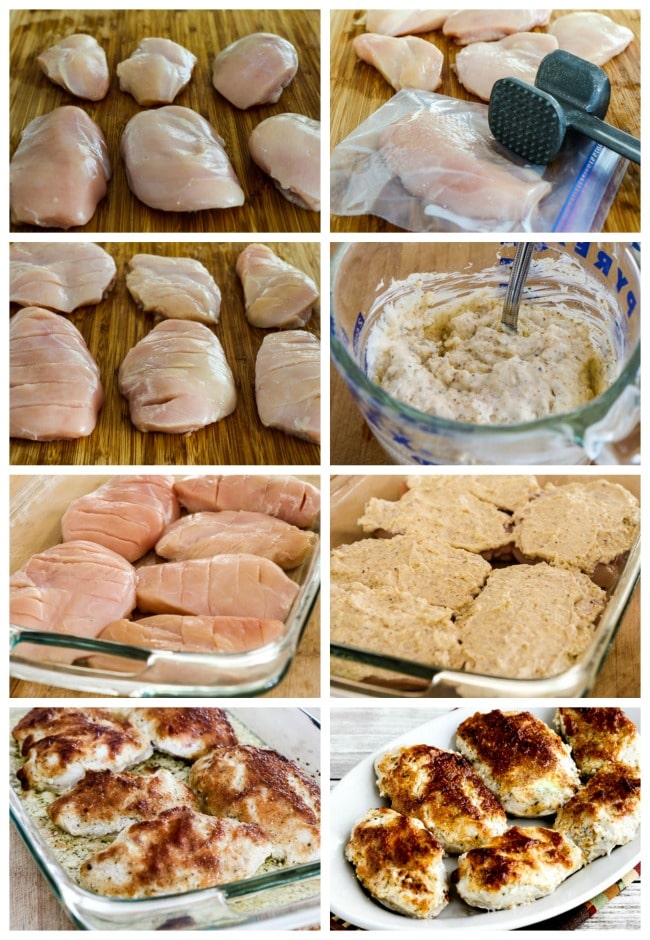
    Internet's Best Low-Carb Baked Mayo-Parmesan Chicken process shots collage

    Steps for making Baked Mayo Parmesan Chicken:

    (This is only a summary of the steps for the recipe; please scroll down for complete printable recipe. Or if you use the JUMP TO RECIPE link at the top of the page, it will take you directly to the complete recipe.)

    1. Trim the chicken, removing pieces of fat or ragged edges. I had two breasts that were extra-large, so I cut them in half and made 6 pieces.
    2. Pound chicken just enough to make each piece an even thickness (or use chicken cutlets and skip this step).
    3. I used my trick from Juicy Grilled Chicken Breasts and cut small slits crosswise in the chicken. This helps the chicken cook evenly and keeps more of the coating on.
    4. Then mix the mayo, poultry seasoning, garlic powder, and pepper and stir in the Parmesan.
    5. Spray a baking dish with non-stick spray and arrange the chicken pieces in a single layer. (Choose the smallest dish that fits all the chicken.)
    6. Use a rubber scraper (affiliate link) to spread a layer of the mayo mixture over each piece of chicken.
    7. Bake in a preheated 375F/190C oven for 35-40 minutes, or until the chicken is firm and cooked through and the mayo-parmesan topping is nicely browned.
    8. Serve, and wait for compliments!

    Make it a Low-Carb Meal:

    The Baked Mayo Parmesan Chicken would be great served with with one of these low-carb side dishes:

    Internet's Best Low-Carb Baked Mayo-Parmesan Chicken close-up photo

    Want another idea for the Mayo Parmesan topping?

    After I shared this recipe, it didn’t take long before people started telling me how much they loved the Mayo Parmesan topping on fish! And I eventually decided that needed to be a separate recipe, and now Baked Mayo Parmesan Fish is also hugely popular on the site too!

    Weekend Food Prep:

    This Baked Mayo Parmesan Chicken recipe is great when it’s re-heated so the recipe has been added to a category called Weekend Food Prep where you’ll find recipes you can prep or cook on the weekend and eat during the week!

    Ingredients

    • 4 large boneless, skinless chicken breasts
    • 3/4 cup mayo
    • 6 T coarsely-grated Parmesan (For best results, use coarsely-shredded Parmesan or grate your own.)
    • 3/4 tsp. poultry seasoning
    • 3/4 tsp. garlic powder
    • fresh-ground black pepper to taste

    Instructions

    1. Preheat oven to 375F/190C. Spray a baking dish with non-stick spray, choosing a dish just large enough to hold the chicken.
    2. Trim chicken breasts well, cutting larger ones in half if desired.
    3. Put each piece of trimmed chicken inside a small Ziploc bag and pound with a meat mallet (affiliate link) (or something heavy), just until the chicken is an even thickness, about 1/2 inch thick. (Don’t pound too hard or too long or the chicken breasts will start to shred apart.) Then cut small shallow crosswise slits going down each chicken breast, being careful not to cut through.
    4. Mix the mayo, poultry seasoning (affiliate link), garlic powder (affiliate link), and black pepper, then stir in the coarsely grated Parmesan.
    5. Put chicken breasts into the baking dish and use a rubber scraper (affiliate link) to spread the mayo-parmesan coating over the top of each chicken breast, covering the entire surface.
    6. Bake chicken 35-40 minutes, or until the chicken is firm and the top is nicely browned. (There will probably be some liquid and congealed cheese in the bottom of the baking dish, but just move the chicken breasts to a serving platter. Several other places where I spotted similar recipes mentioned this, so I’m not sure there’s a way to avoid that.)
    7. Serve Baked Mayo Parmesan Chicken hot, and wait for compliments!

    Notes

    I saw variations on this Baked Mayo-Parmesan Chicken all over the internet and experimented with Kara to come up with the version you see in this recipe. If anyone knows the original source of the recipe, I would love to credit them!

    Nutrition Information

    Yield

    6

    Serving Size

    1

    Amount Per Serving

    Calories 343Total Fat 25gSaturated Fat 5gUnsaturated Fat 19gCholesterol 84mgSodium 324mgCarbohydrates 2gFiber 0gSugar 0gProtein 27g

    Nutrition information is automatically calculated by the Recipe Plug-In I am using. I am not a nutritionist and cannot guarantee 100% accuracy, since many variables affect those calculations.

    Did you make this recipe?

    Did you make this recipe? Please leave a star rating (under the PRINT button in the recipe) or share a photo of your results on Instagram! THANKS!

    Square image of Baked Mayo Parmesan Chicken shown on serving plate.

    Low-Carb Diet / Low-Glycemic Diet / South Beach Diet Suggestions:
    This tasty Mayo Parmesan Chicken is great for low-carb diet plans, including Keto. For the original South Beach Diet, light mayo would definitely be recommended and the amount of Parmesan would probably make this an occasional treat for South Beach Dieters.

    Find More Recipes Like This One:
    Use Oven Dinners to find more recipes like this one. Use the Diet Type Index to find more recipes suitable for a specific eating plan. You might also like to follow Kalyn’s Kitchen on Pinterest, on Facebook, on Instagram, on TikTok, or on YouTube to see all the good recipes I’m sharing there.

    Historical Notes for this Recipe:
    This recipe for chicken coated with mayo and Parmesan and then baked was posted in 2017, and it’s been hugely popular on the site. It was last updated with more information in 2026.

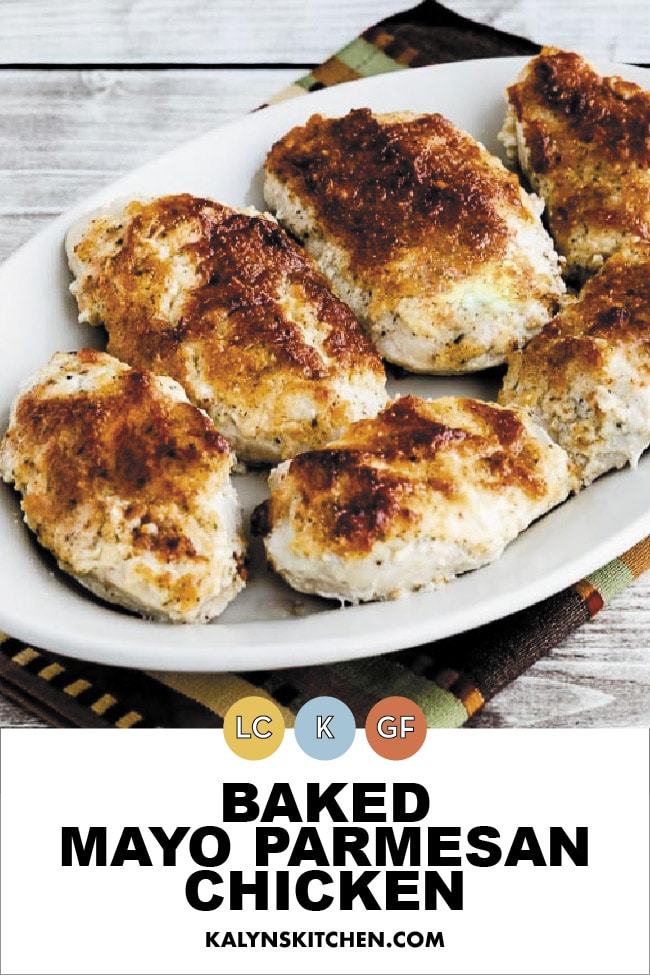
    Pinterest image of Baked Mayo Parmesan Chicken

    We are a participant in the Amazon Services LLC Associates Program, an affiliate advertising program designed to provide a means for us to earn fees by linking to Amazon.com and affiliated sites. As an Amazon Associate, I earn from qualifying purchases.


    Source link

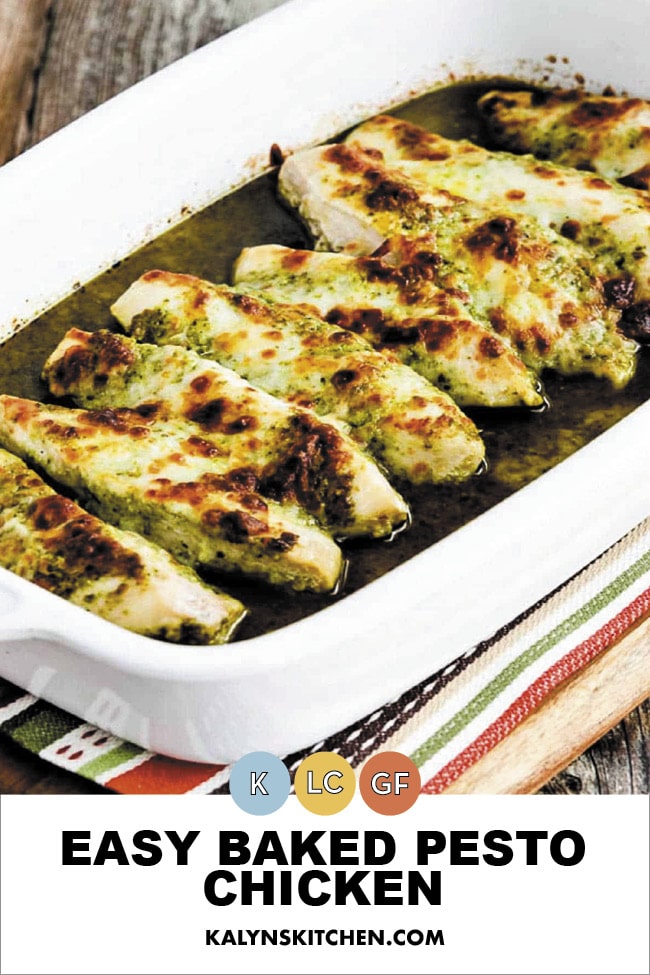
  • Easy Baked Pesto Chicken

    Easy Baked Pesto Chicken

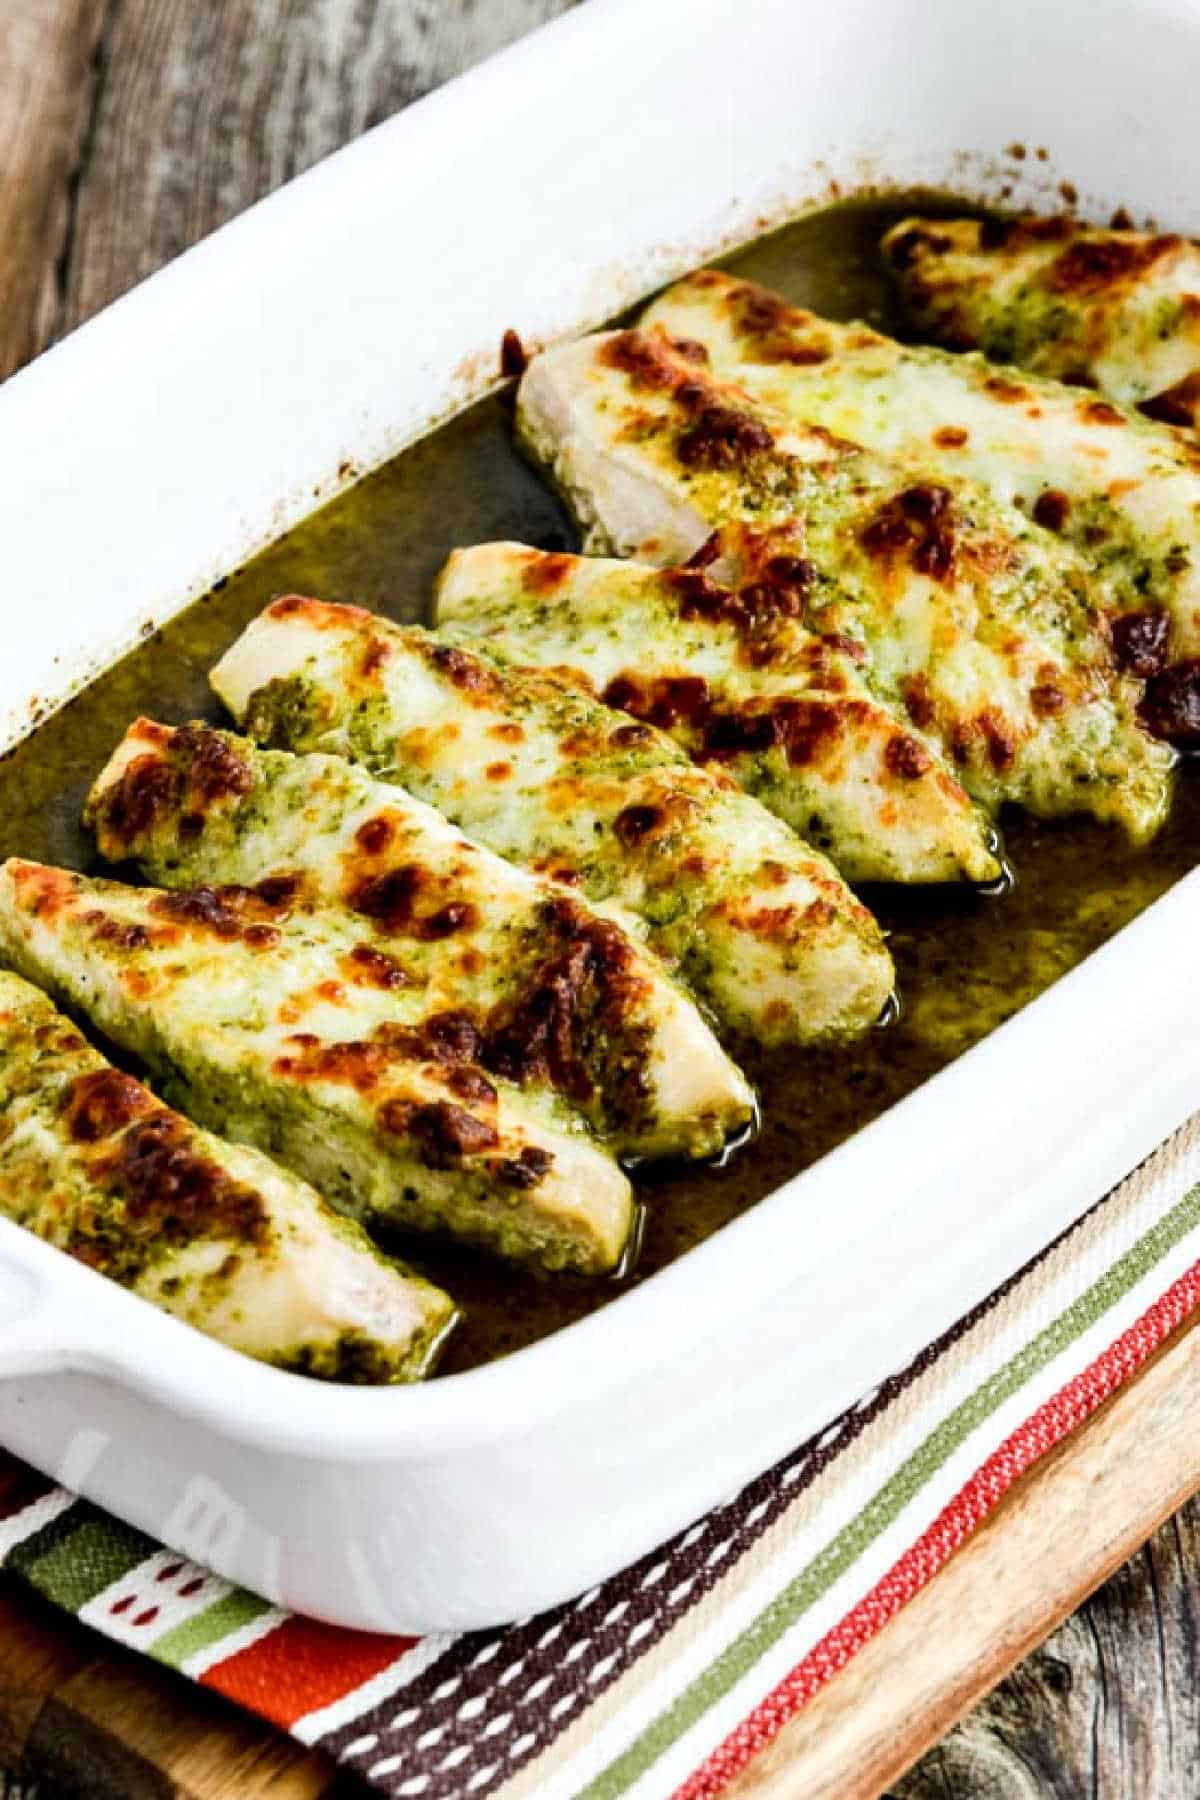
    Easy Baked Pesto Chicken is a tasty dinner to make with purchased pesto, or use homemade pesto if you have some! And this easy five-ingredient low-carb baked chicken recipe is probably something the whole family will enjoy!

    Pin Easy Baked Pesto Chicken to try it later!

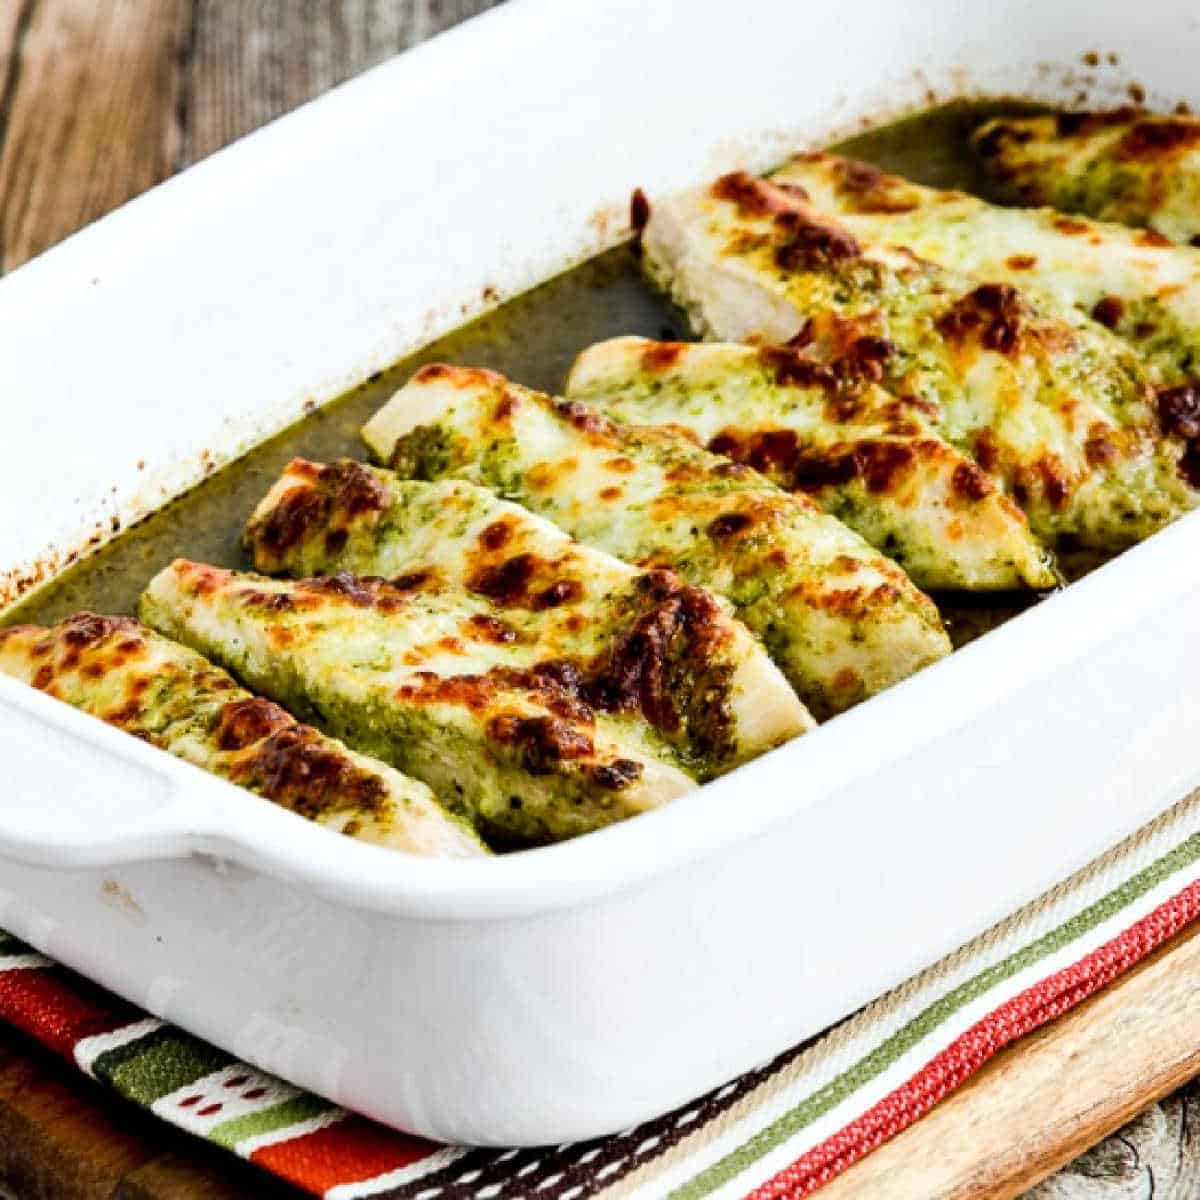
    Easy Baked Pesto Chicken shown in baking dish with melted cheese

    When I first made Easy Baked Pesto Chicken, I loved what a flavorful dinner it was. But I didn’t realize it would become one of the most popular recipes on the blog. Now it’s been pinned millions of times and visited over and over on my website! And I’ve made this many times myself.

    I got the inspiration for a Baked Pesto Chicken recipe years ago when I was browsing in The South Beach Diet Quick and Easy Cookbook. That was in the summer, and when it’s summer at my house there’s fresh basil on the counter, I’m freezing basil for winter, and I’m making Basil Pesto with Lemon. So it’s not surprising that a recipe using pesto would catch my eye.

    But this recipe is also great with purchased pesto. I’m a fan of Kirkland Basil Pesto, so that’s what I’d use if I don’t have homemade pesto in the freezer. I hope you try the recipe if you’re also a pesto fan!

    What ingredients do you need for this recipe?

    (This is only a list of ingredients; please scroll down for complete printable recipe. Or if you use the JUMP TO RECIPE link at the top of the page, it will take you directly to the complete recipe.

    • boneless, skinless chicken breasts
    • salt and fresh ground black pepper for seasoning chicken
    • Basil Pesto (affiliate link), or Basil Pesto with Lemon
    • grated Mozzarella cheese

    Is this baked chicken with pesto a kid-friendly dish?

    A few years after I posted this recipe I started working out with a trainer named Wendy. Then one day she told me she had searched the recipe for her kids’ favorite chicken dish, and it was this recipe from my blog! So if you’re wondering if this can be kid-friendly, Wendy says her kids love this Baked Pesto Chicken. Wendy serves it with pasta for the kids, but I’d serve with one of the options below for a tasty low-carb meal.

    Can you make Baked Pesto Chicken with pesto from the store?

    You can certainly make this ultra-easy main dish with purchased basil pesto, which is what the inspiring recipe called for. But when I have some on hand, I’d always make it with my homemade pesto from the freezer.

    How low in carbs is the Easy Baked Pesto Chicken?

    This flavorful chicken dish only has 3 net carbs per serving, with 48 grams of protein! And this tasty chicken dish is also gluten-free.

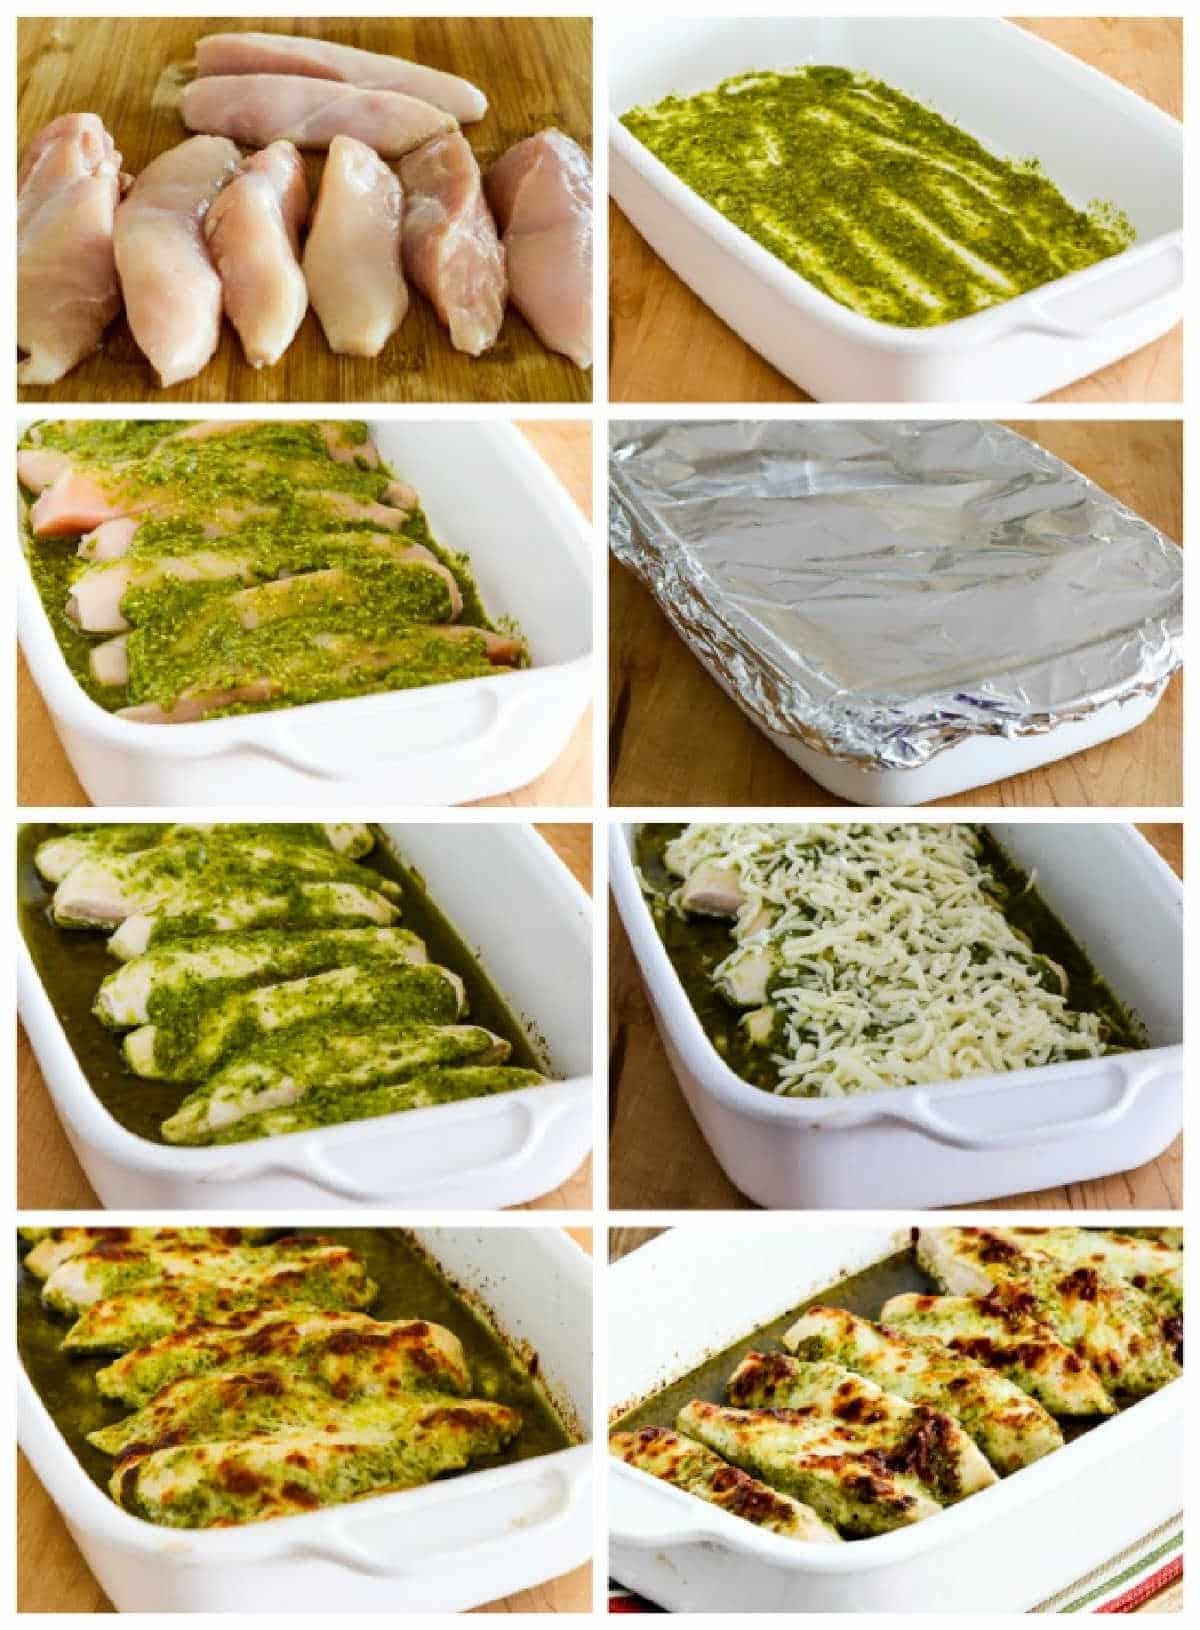
    recipe steps collage for Easy Baked Pesto Chicken

    How to Make Easy Baked Pesto Chicken:

    (This is only a summary of the steps for the recipe; please scroll down for complete printable recipe. Or if you use the JUMP TO RECIPE link at the top of the page, it will take you directly to the complete recipe.)

    1. Trim chicken breasts and cut into lengthwise strips. (I save scraps in the freezer and use them to make homemade chicken stock.)
    2. Spray casserole dish with non-stick spray, then spread 1/4 cup basil pesto over the bottom of the dish.
    3. Lay chicken strips over the pesto and season with salt and fresh ground black pepper.
    4. Spread another 1/4 cup of basil pesto over chicken strips.
    5. Cover dish with foil and bake at 375F/190C for 25-30 minutes, or until the chicken is barely cooked through. (Don’t cook too long at this stage, or the chicken will be overcooked when the cheese is melted.)
    6. Then sprinkle 1/2 cup grated mozzarella cheese (or a little more) over the top and bake about 5 minutes more, or until cheese is melted. (If your broiler is separate from the oven, start preheating it.)
    7. I wanted the cheese to be lightly browned, so after 5 minutes I switched to broil for just long enough to get some color on the cheese.
    8. That’s all there is to making this easy and delicious low-carb chicken dinner!
    9. Serve Easy Baked Pesto Chicken hot, and I hope this will become a favorite in your household!

    Make it a Low-Carb Meal:

    Baked Pesto Chicken would be delicious with either Pureed Cauliflower with Garlic, Parmesan, and Goat Cheese or Easy Cauliflower Rice to smother with the flavorful sauce that will be left in the dish. (It would also be amazing with Greek Lemon Rice if you don’t mind having more carbs!)

    Or serve with one of these low-carb side dishes:

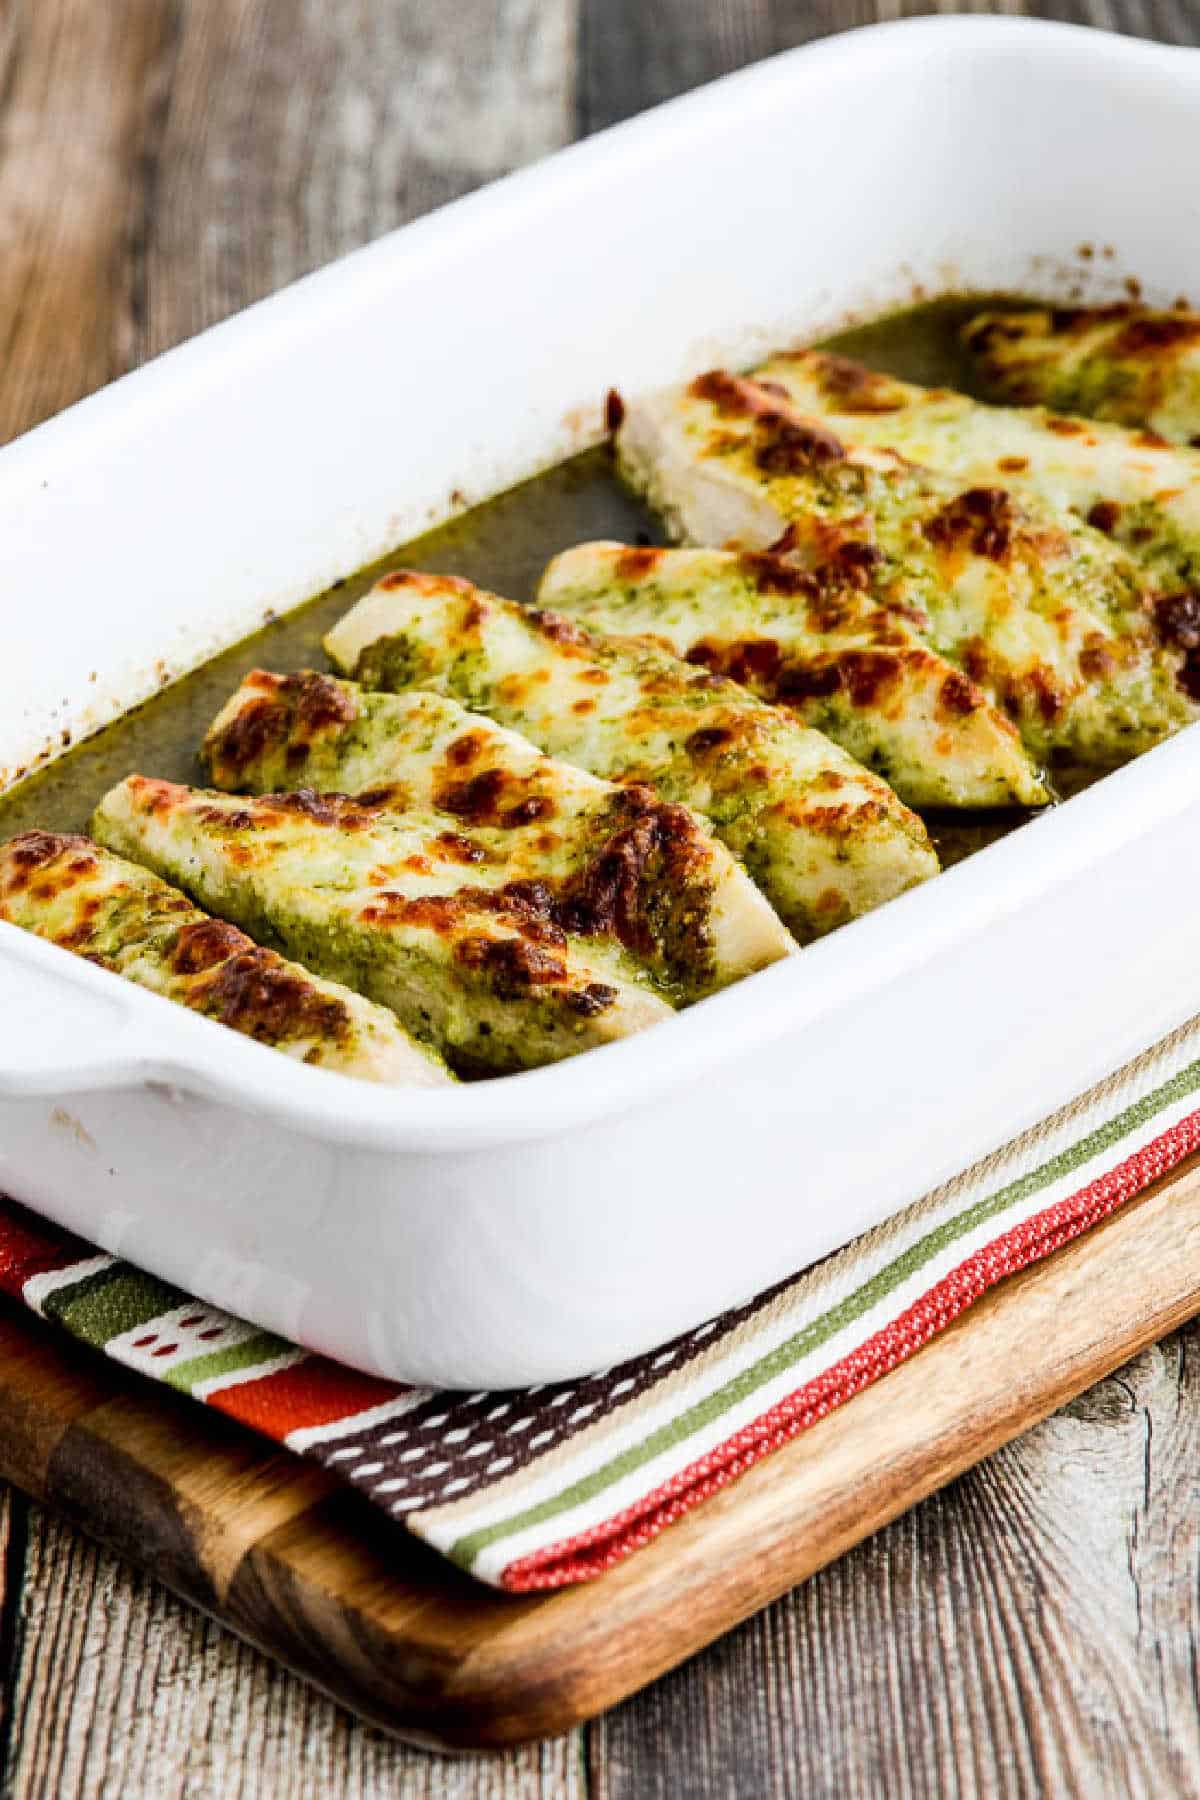
    Easy Baked Pesto Chicken in baking dish on striped napkin and cutting board

    Want more low-carb dinners with pesto?

    If you still have more basil pesto after you make this, check out my other Amazing Recipes with Pesto!

    Weekend Food Prep:

    This recipe has been added to a category called Weekend Food Prep where you’ll find recipes you can prep or cook on the weekend and eat during the week! This recipe can easily be doubled if you want leftovers to reheat later.

    Ingredients

    • 4 boneless, skinless chicken breasts
    • salt and fresh ground black pepper for seasoning chicken
    • 1/2 cup basil pesto (see notes)
    • 1/2 cup grated mozzarella cheese (or more if you like it cheesy!)

    Instructions

    1. Preheat oven to 375F/190C. Trim all visible fat and tendons from chicken pieces, then cut each chicken breast lengthwise into 2 or 3 pieces. (I cut the larger ones into 3 strips and the smaller ones into 2 strips.)
    2. Spray a 9″ x 12″ (or 8.5″ X 12.5″) baking dish with non-stick spray, then spread 1/4 cup basil pesto over the bottom of the dish.
    3. Lay chicken strips over the pesto, then spread 1/4 cup more basil pesto over the chicken.
    4. Cover the baking dish with aluminum foil (or use a baking dish with a tight-fitting lid) and bake the chicken for 25-30 minutes, just until chicken is barely firm and cooked through. (Don’t cook too much at this point, or the chicken will be overcooked by the time the cheese is melted.)
    5. When chicken is barely cooked through, remove foil and sprinkle chicken with 1/2 cup grated mozzarella cheese (or more.)
    6. Put dish back into the oven without foil and cook 5 minutes more, just until cheese is melted. (If your broiler is separate from the oven, start preheating it when you take the chicken out.)
    7. After I melted the cheese for 5 minutes I switched my oven to broil and broiled a few minutes more, just long enough to get the cheese lightly browned.
    8. Serve the Baked Pesto Chicken hot.
    9. There will be some flavorful juice in the bottom of the dish when this is done, so you may want to serve with rice, Cauliflower Rice, or quinoa to soak up the juice.

    Nutrition Information

    Yield

    4

    Serving Size

    1

    Amount Per Serving

    Calories 472Total Fat 28gSaturated Fat 9gUnsaturated Fat 20gCholesterol 134mgSodium 457mgCarbohydrates 3gFiber 0gSugar 1gProtein 48g

    Nutrition information is automatically calculated by the Recipe Plug-In I am using. I am not a nutritionist and cannot guarantee 100% accuracy, since many variables affect those calculations.

    Did you make this recipe?

    Did you make this recipe? Please leave a star rating (under the PRINT button in the recipe) or share a photo of your results on Instagram! THANKS!

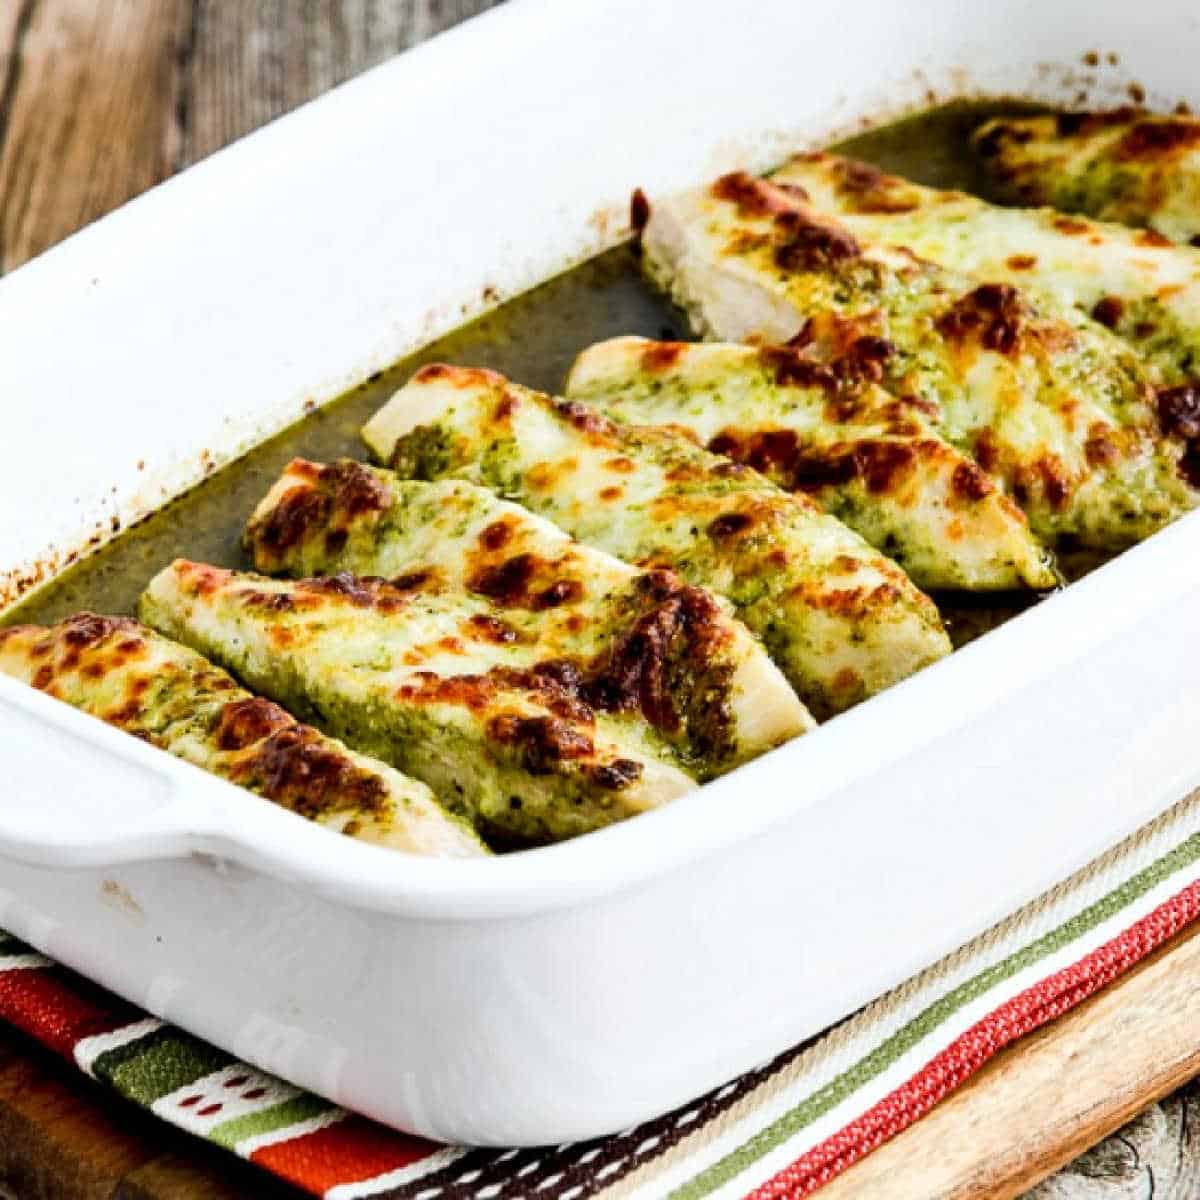
    square image of Easy Baked Pesto Chicken in baking dish on striped napkin

    Low-Carb Diet / Low-Glycemic Diet / South Beach Diet Suggestions:
    This Baked Pesto Chicken would be great for low-carb and Keto diets. If you use low-fat Mozzarella, it could work for any phase of the original South Beach Diet. For low-carb eating plans, full-fat Mozzarella would be preferred.

    Find More Recipes Like This One:
    Use Casserole Recipes to find more recipes like this one. Use the Diet Type Index to find recipes suitable for a specific eating plan. You might also like to follow Kalyn’s Kitchen on Pinterest, on Facebook, on Instagram, on TikTok, or on YouTube to see all the good recipes I’m sharing there.

    Historical Notes for this Recipe:
    This popular recipe was first posted in 2010 (probably with a photo that would make me shudder if I saw it now.) The recipe was updated in 2022 and last updated with more information in 2026.

    Pinterest image of Easy Baked Pesto Chicken

    We are a participant in the Amazon Services LLC Associates Program, an affiliate advertising program designed to provide a means for us to earn fees by linking to Amazon.com and affiliated sites. As an Amazon Associate, I earn from qualifying purchases.


    Source link

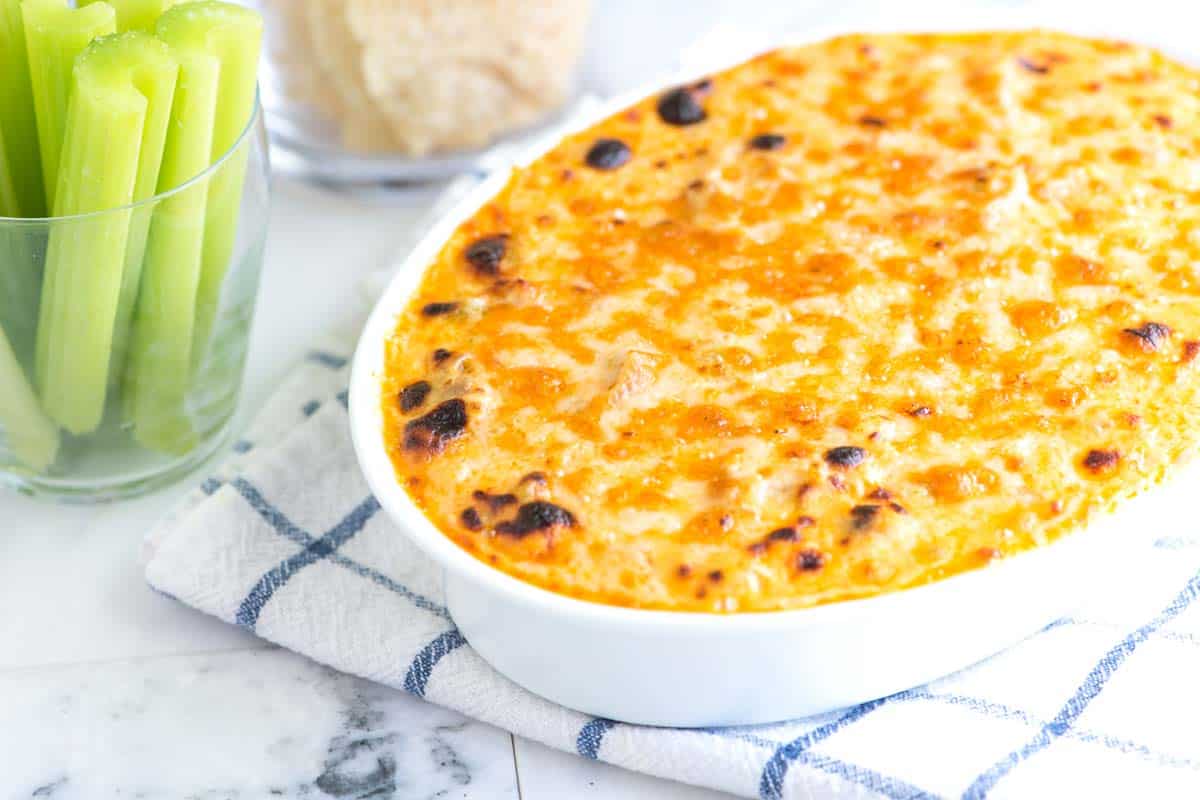
  • Baked Buffalo Chicken Dip Recipe

    Baked Buffalo Chicken Dip Recipe

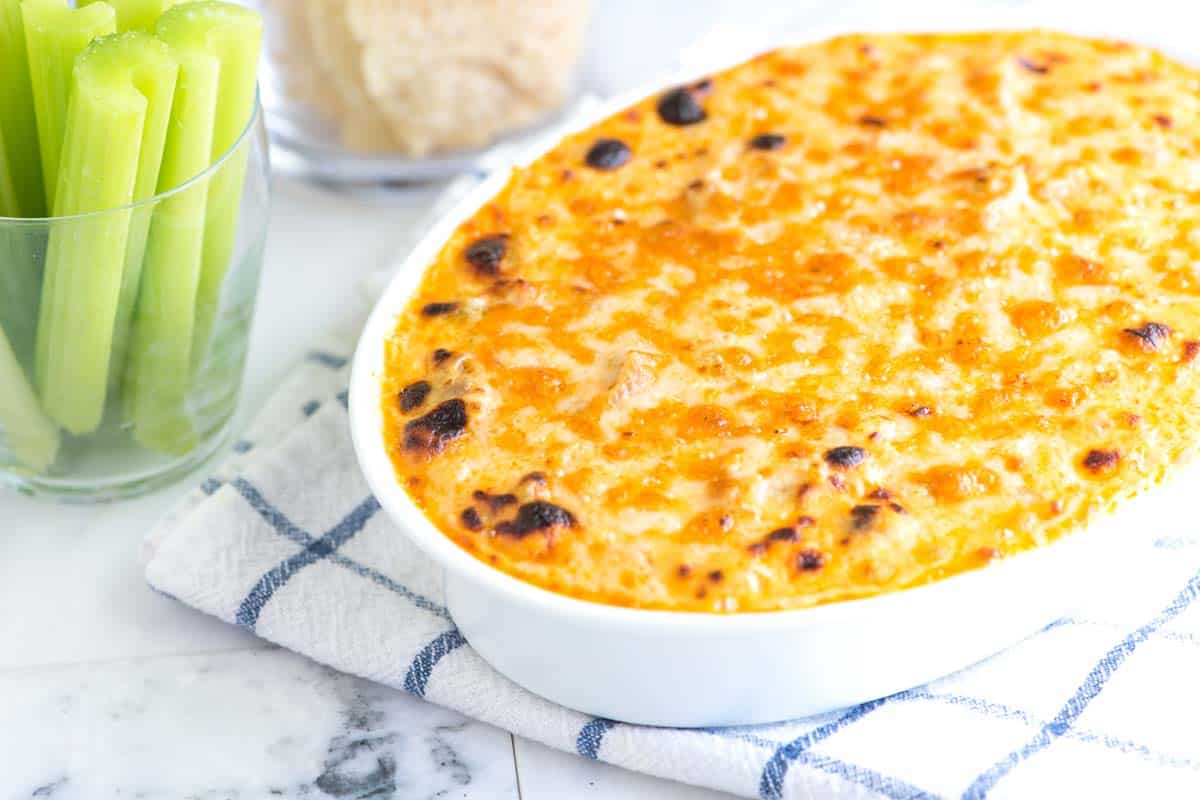
    This Buffalo chicken dip recipe is the perfect appetizer for game day or a crowd. Creamy, cheesy, and loaded with shredded chicken and tangy Buffalo sauce.

    Buffalo Chicken Dip

    It bakes up hot and bubbly with a fondue-like cheese sauce and just the right amount of heat, thanks to Frank’s hot sauce. Everyone I’ve served it to loves it!

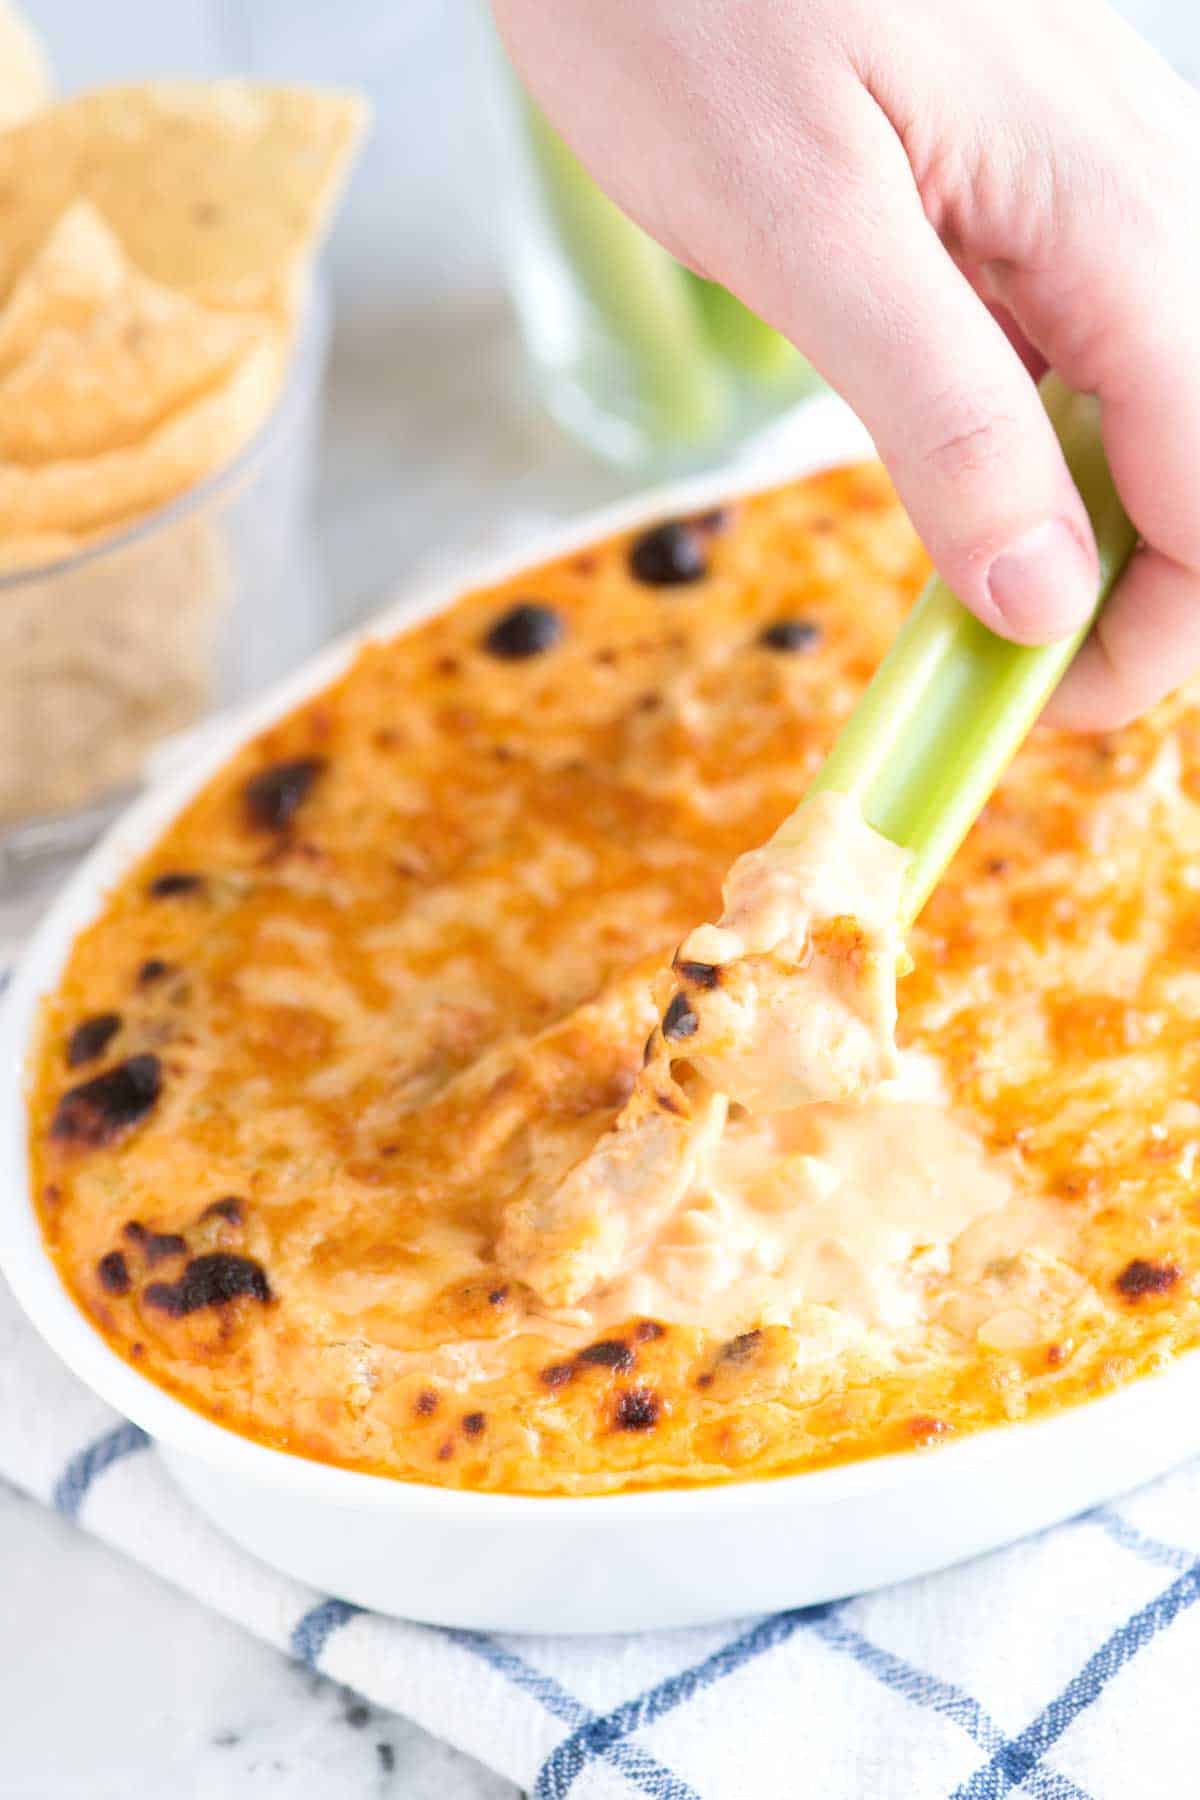
    If you love Buffalo hot wings, this buffalo chicken dip is for you. It’s especially good served with crusty bread, sturdy crackers, or crisp veggies like carrots and celery.

    Key Ingredients

    • Chicken: I usually start with leftover roasted chicken or a store-bought rotisserie chicken. You can also use our stovetop shredded chicken, slow cooker shredded chicken, or poached chicken recipes.
    • Hot Sauce: Use your favorite brand. We love Frank’s RedHot or Crystal Hot Sauce for their flavor and mild heat. These are also what I use when making homemade Buffalo sauce.
    • Butter and Flour: These form the base of our creamy dip. They turn into a roux that thickens the milk (similar to making creamy mac and cheese).
    • Milk: I like the richness of whole milk, but 2% is fine.
    • Veggies: To add flavor to the dip, cook finely diced onion, carrot, and celery in butter with minced garlic.
    • Cheese: For a smooth, creamy dip, use a mix of cream cheese and a melty cheese such as white cheddar, Monterey Jack, or Pepper Jack for a little extra heat.

    Find the full recipe with measurements below.

    How to Make the Best Buffalo Chicken Dip

    Tip 1: Make the creamy base. The base of this dip starts like a classic macaroni and cheese. Cook onion and celery in butter until soft, then stir in garlic and flour. Cook until the flour turns lightly golden, then whisk in the milk until it thickens into a smooth béchamel sauce.

    Making the creamy base of buffalo dip

    Tip 2: Make it cheesy. For the creamiest texture, stir in a bit of cream cheese. The stabilizers help the dip stay silky and smooth (just like in our queso recipe). Then add shredded cheese for flavor. I love white cheddar, but pepper jack adds a nice kick.

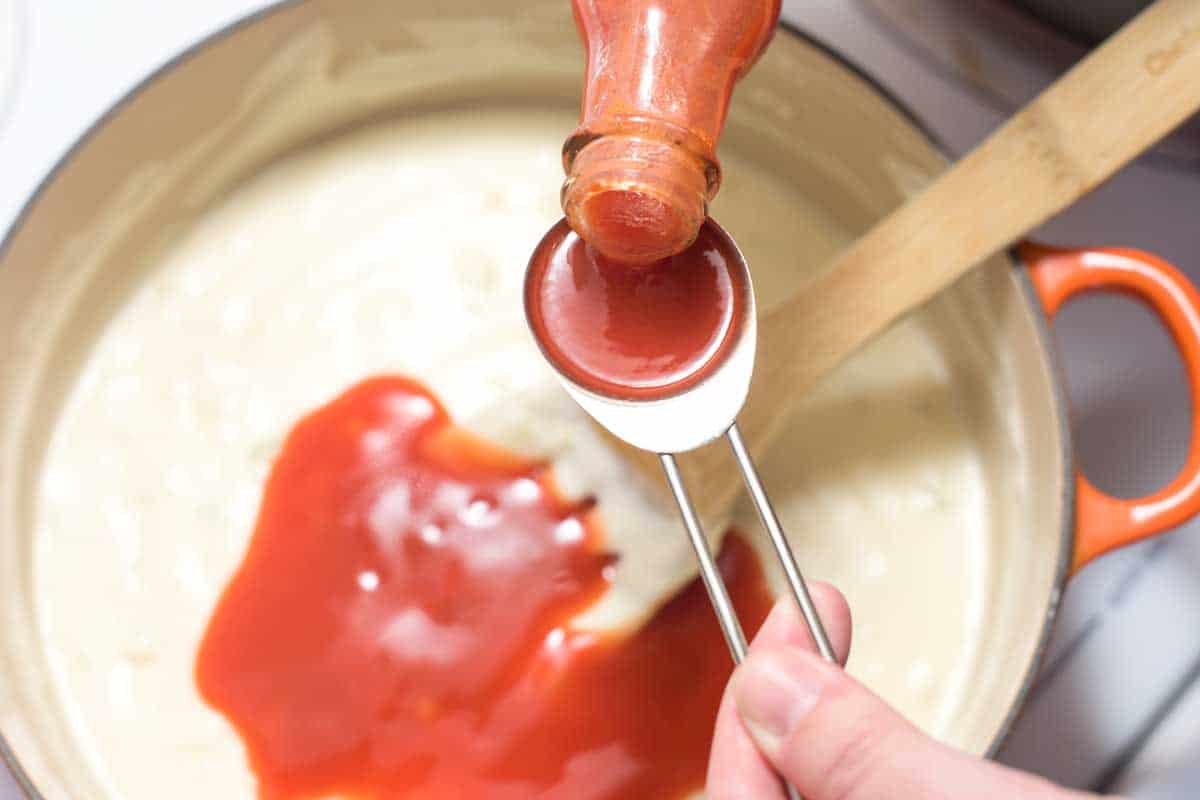
    Tip 3: Make it Buffalo-style. To transform this from a creamy sauce to a Buffalo dip, stir in a generous amount of hot sauce. You can add to taste on this one, so you can make it as spicy as you want. When you are happy with the flavor, stir in your chicken.

    Adding Frank's Redhot to homemade buffalo chicken dip

    Tip 4: Bake it! Transfer the dip to a baking dish, sprinkle extra cheese on top, and broil until hot and bubbly. It only takes a few minutes, and that gooey, golden topping makes all the difference.

    Adding cheese to the top of buffalo chicken dip

    More Buffalo Chicken Recipes

    Buffalo Chicken Dip

    Baked Buffalo Chicken Dip

    • PREP
    • COOK
    • TOTAL

    This Buffalo chicken dip recipe is easy to make and perfect served with crisp celery sticks and crusty bread. We love using Frank’s RedHot Original since it’s full of flavor without being too spicy, but feel free to use your favorite hot sauce. Just taste as you go, since some brands pack a bit more heat.

    This dip is just as good with or without chicken. We’ve made it both ways, and it’s always a hit.

    8 Servings

    You Will Need

    2 cups cooked, shredded chicken, see tips

    2 cups whole milk

    4 tablespoons unsalted butter

    1 cup finely chopped onion (1 medium)

    ½ cup finely chopped celery (1 stalk)

    2 garlic cloves, minced

    4 tablespoons all-purpose flour

    3 ounces cream cheese, block-style

    8 ounces sharp white cheddar, coarsely grated, about 2 cups

    Dash Worcestershire sauce

    5 tablespoons Frank’s RedHot Original, or more to taste

    Celery sticks and/or crusty bread, for serving

    Directions

      1Warm the milk: Heat the milk in a medium saucepan over medium heat until it just begins to simmer. Turn off the heat and set aside. You can also warm it in the microwave.

      2Cook the vegetables: Melt the butter in a large, heavy-bottomed saucepan over medium heat. Add the onion, celery, and ¼ teaspoon salt. Cook, stirring occasionally, until softened, about 5 minutes.

      3Make the roux: Stir in the garlic and flour. Cook, whisking constantly, until the flour turns lightly golden, about 2 to 3 minutes. Remove from the heat.

      4Add the milk: Slowly whisk in the warm milk a little at a time, whisking until smooth. Return the pan to medium heat and cook, whisking constantly, until the sauce thickens enough to coat the back of a spoon, about 2 minutes.

      5Add cheese: Remove from the heat. Stir in the cream cheese and all but a small handful of the cheddar until melted and smooth.

      6Add hot sauce and chicken: Add the Worcestershire sauce and 5 tablespoons of hot sauce. Taste and adjust the spice and salt as needed. Stir in the shredded chicken.

      7Broil and serve: Position a rack 6 inches from the broiler and preheat the broiler to high. Transfer the dip to a 2-quart baking dish and sprinkle the remaining cheese on top. Place the dish on a foil-lined baking sheet and broil until bubbling and lightly browned, about 2 to 3 minutes. Serve hot with celery sticks, or slices of crusty bread.

    Adam and Joanne’s Tips

    • Make ahead: You can prepare this up to 3 days in advance. Follow our recipe directions, but do not broil. Store the dip covered in the refrigerator until ready to serve. Gently reheat the dip in a saucepan over medium-low heat until thoroughly heated through. Pour the dip into the baking dish, add extra cheese on top, and broil until the top is bubbling and cheese begins to brown.
    • The nutrition facts provided below are estimates.

    Nutrition Per Serving
    Calories
    291
    /
    Protein
    16 g
    /
    Carbohydrate
    8 g
    /
    Dietary Fiber
    1 g
    /
    Total Sugars
    4 g
    /
    Total Fat
    21 g
    /
    Saturated Fat
    12 g
    /
    Cholesterol
    89 mg
    /
    Sodium
    315 mg


    AUTHOR:

    Adam Gallagher

    Adam and Joanne of Inspired Taste

    We are Adam and Joanne Gallagher, the creators of Inspired Taste. Established in 2009, Inspired Taste grew from a childhood dream into one of the internet’s most trusted recipe sites with hundreds of reliable recipes, step-by-step videos, and expert tips.More About Us

    Source link

  • Chicken Shawarma With Baked Rice

    Chicken Shawarma With Baked Rice

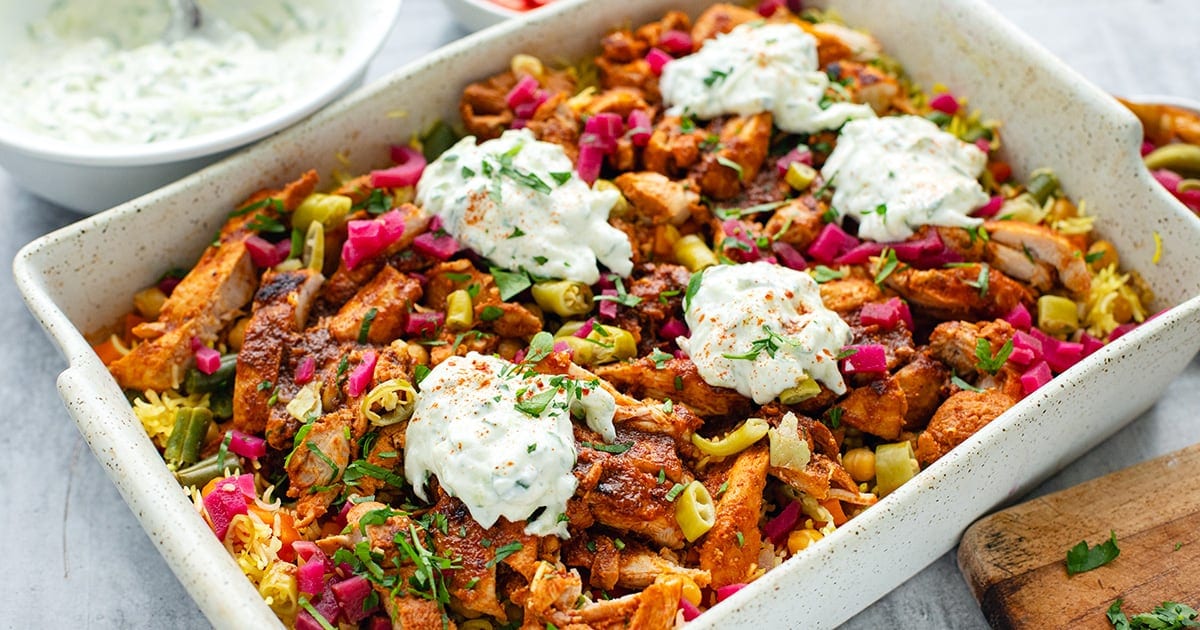
    Chicken shawarma with baked rice and vegetables — a flavorful meal the whole family will love. This is part of my high-protein and fiber meals series.


    Jump to: ℹ️ Overview | 🛒 Ingredients | 📷 How To Make | 📹 Watch The Video | 👩‍🍳 Recipe Tips | 🥗 Serving Suggestions | 📝 Full Recipe Card | 🍽 More


    In this chicken shawarma recipe, tender, spiced chicken sits on a bed of rice that’s baked with chickpeas and colorful vegetables, giving you a balanced, comforting meal. The rice is soft and fluffy with a hint of yellow color from turmeric, the chickpeas add great fiber, and the quick pan‑fried chicken stays juicy with browned edges.

    I also make the shawarma sauce in the same pan as the chicken — it turns into this slightly tangy, savory drizzle that ties everything together. A fresh, creamy tzatziki on the side cuts through the spices beautifully. When served, you get a delicious chicken shawarma bowl that’s high in protein and fiber. This wholesome comfort food has become a weeknight staple in our house.

    Macros highlight (per serving): ~450 cal, ~37 grams protein, ~6-8 grams fiber — so you’re getting good macros and plenty of volume and flavor. See the full nutrition label in the recipe card.

    Get my High-Protein & Fibre Cheat Sheets

    👉 You might also like these recipes from the series: baked chia oats recipe, Asian carrot salad (with chicken and edamame), healthy chicken taco soup, or my high-protein butternut squash soup.

    What You’ll Need

    Here is what you’ll need for this chicken shawarma with baked rice and veggies recipe. Find the full measurements in the recipe card below.

    Chicken Shawarma Marinade

    • Chicken thighs — juicy, flavorful base protein, use skinless and boneless thighs. Swap chicken thighs for breasts if you want leaner meat (just don’t overcook)
    • Garlic, lemon juice, paprika, cumin, coriander seed and tomato paste — shawarma seasoning that builds bold flavor.

    Baked Rice & Veggies

    • Uncooked rice — use medium or long-grain rice here for the hearty carb base.
    • Chickpeas — extra protein + fiber; canned chickpeas are fine.
    • Green beans, bell peppers, carrot, red onion — color, crunch, fiber and nutrients.
    • Chicken stock — infuses the rice with savory flavor.
    • Garlic powder, paprika, lemon, salt and turmeric (optional for color).

    Tzatziki

    • Lebanese cucumber — cool, crisp freshness. No Lebanese cucumber? Regular cucumber works — just squeeze extra moisture out.
    • Greek yogurt (high-protein, low-fat) — creamy and tangy with extra protein.
    • Lemon + garlic — classic tzatziki zing.

    To Serve

    • Pickled turnip + pepperoncini — optional punchy toppings.
    • Parsley + lemon wedges — bright finishing touches.

    How To Make Chicken Shawarma With Baked Rice & Veggies

    Find the full recipe and nutritional information below. Here are some handy step-by-step photos for chicken shawarma with baked rice and veggies. You can bake the rice first or do the chicken first, or in parallel.

    • Marinate the chicken: Cut chicken thighs in half. Toss chicken pieces with shawarma spices, garlic, lemon and tomato paste. Let rest.
    • Cook chicken: Heat oil in a pan over medium‑high heat. Cook chicken 7–8 minutes on one side, flip and cook 2 minutes. Pour chicken stock around chicken and cook 5 more minutes to form a sauce. Remove chicken and slice.
    • Tzatziki: Grate cucumber, squeeze dry and mix with yogurt, garlic, lemon and salt.
    • Dice or slice pickled turnip and pepperoncini or hot pickled peppers (if using).
    • Bake rice & veg: Rinse rice well; combine with chickpeas, vegetables, seasonings and stock in a deep tray. Cover with foil and bake ~35–40 minutes mixing half way through.
    • Assemble: Fluff rice; top with sliced chicken, pour over pan sauce, dollop tzatziki, add pickles + parsley.

    Watch The Video

    Recipe Tips

    • Make‑ahead: Marinate the chicken up to 12 hours ahead — it only gets more flavorful. Tzatziki holds well in the fridge for 24–48 hours; great for meal prep.
    • Storage: Refrigerate leftovers up to 3–4 days. Freeze portions (without tzatziki) up to 2 months. Thaw overnight and reheat covered.
    • Variations: Add cauliflower florets or zucchini for more veg. Swap chickpeas for white beans or lentils. Sprinkle feta on top before serving for extra tang.
    • Timing help: Rice done when liquid’s absorbed and grains are tender. Chicken is best juicy — don’t overcook, and let the pan sauce do its thing.

    Serving Suggestions

    Serve this chicken shawarma rice bake with a squeeze of fresh lemon, a generous dollop of tzatziki and plenty of parsley for brightness. A side salad or warm pita bread makes it feel luxe, or simply enjoy it straight from the tray — it’s one of those meals that’s beautiful either way.

    💬 If you’ve tried this chicken shawarma with baked rice and veggies or any other recipe on the blog then don’t forget to rate the recipe and let me know how you got on in the comments below, I love hearing from you! You can also FOLLOW ME on Instagram, Facebook, Pinterest, YouTube, and or sign up to my Newsletter to see more of my delicious food.

    Want to Save This Recipe?

    Enter your email & I’ll send it to your inbox. Plus, get great new recipes from me every week!

    By submitting this form, you consent to receive emails from Cooked & Loved

    Chicken shawarma with baked rice and vegetables — a flavorful, high-protein and high-fiber meal the whole family will love. This healthy chicken taco soup is part of my high-protein and fiber meals series. Find step-by-step photos and more recipe tips above.

    Chicken Shawarma Marinade

    • Marinate the chicken: Cut chicken thighs in halves and trim excess fat. Combine with garlic, spices, lemon juice and tomato paste. Set aside (or refrigerate if prepping ahead).

    • Prepare rice bake: Rinse rice and add to a deep baking tray. Add drained chickpeas, green beans, peppers, carrots and onion. Stir through salt, garlic powder and paprika. Pour in stock, a bit of lemon juice and turmeric for color. Cover with foil.

    • Bake: Bake at 200°C / 400°F for 35–40 minutes, stirring halfway. Rest 5 minutes once done.

    • Make tzatziki: Grate cucumber and squeeze out excess moisture. Mix with Greek yogurt, lemon juice, garlic and salt. Set aside.

    • Cook chicken: Heat oil in a pan over medium‑high heat. Cook chicken 7–8 minutes on one side, flip and cook 2 minutes. Pour chicken stock around chicken and cook 5 more minutes to form a sauce.

    • Finish sauce & slice: Remove chicken; let sauce reduce a bit. Slice chicken.

    • Assemble: Fluff rice; top with chicken and pour pan sauce over. Add pickled turnip, pepperoncini, parsley and lemon wedges. Serve with tzatziki.

  • Is this gluten‑free? Yes — all ingredients here are naturally gluten‑free as long as your stock and seasonings don’t have additives.
  • What kind of rice works best? Long‑grain or medium-grain white rice bakes more reliably in this one‑pan style. Brown rice is doable — just boost liquid and bake time, veggies will get very soft.
  • Can I skip chickpeas? Sure! Swap for lentils or add extra veg like cauliflower or zucchini.
  • Is this spicy? Not overly — the chili powder is optional. Pickled peppers give heat if you want it.
  • Make‑ahead: Marinate the chicken up to 12 hours ahead — it only gets more flavorful. Tzatziki holds well in the fridge for 24–48 hours; great for meal prep.
  • Storage: Refrigerate leftovers up to 3–4 days. Freeze portions (without tzatziki) up to 2 months. Thaw overnight and reheat covered.
  • Variations: Add cauliflower florets or zucchini for more veg. Swap chickpeas for white beans or lentils. Sprinkle feta on top before serving for extra tang.
  • Timing help: Rice done when liquid’s absorbed and grains are tender. Chicken is best juicy — don’t overcook, and let the pan sauce do its thing.

Calories: 449kcal | Carbohydrates: 50g | Protein: 37g | Fat: 11g | Saturated Fat: 3g | Polyunsaturated Fat: 2g | Monounsaturated Fat: 4g | Trans Fat: 0.02g | Cholesterol: 113mg | Sodium: 1489mg | Potassium: 876mg | Fiber: 6g | Sugar: 9g | Vitamin A: 2645IU | Vitamin C: 87mg | Calcium: 152mg | Iron: 4mg

Keywords: chicken and rice meals, chicken shawarma recipes, Chicken Shawarma With Baked Rice & Veggies

More High-Protein Dinner Recipes


Source link

  • Baked General Tso’s Chicken | Easy, Crispy & Healthy

    Baked General Tso’s Chicken | Easy, Crispy & Healthy

    This website may contain affiliate links and advertising so that we can provide recipes to you. Read my disclosure policy.

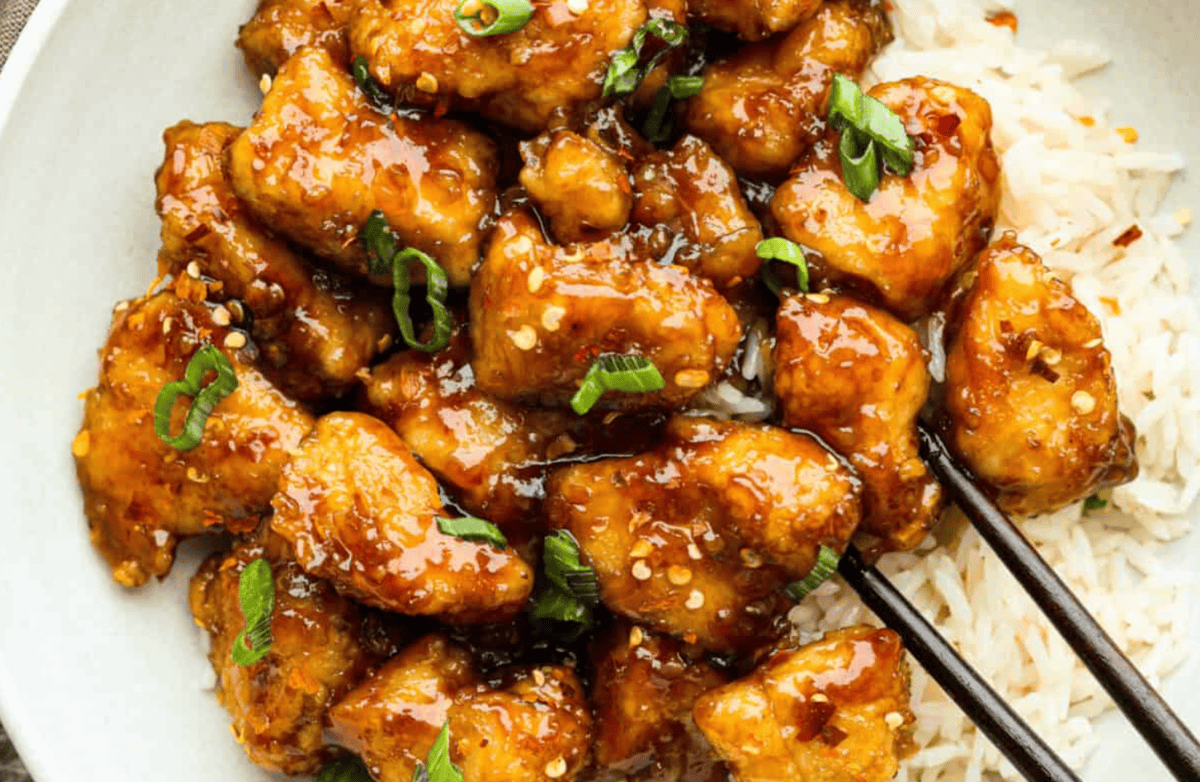
    Skip the takeout and make this easy baked General Tso’s chicken at home! It’s crispy, saucy, and perfectly sweet with just the right amount of heat, no deep fryer required.

    Bowl of General Tso's chicken on a bed of rice.

    Why This Recipe’s a Weeknight Win

    • All the Flavor You Crave: You’ll get the best crispy chicken coated in a glossy, sweet-and-spicy sauce, without frying! Baking keeps it lighter but still totally satisfying.
    • Meal-Prep Friendly: Make a big batch and enjoy leftovers all week. This chicken reheats beautifully, so lunch or dinner is always ready to go.
    • Perfect Pairings: Serve it with fried rice, stir-fried veggies, or crispy egg rolls for a full restaurant-style dinner right at home.

    Baked General Tso’s Chicken Ingredients

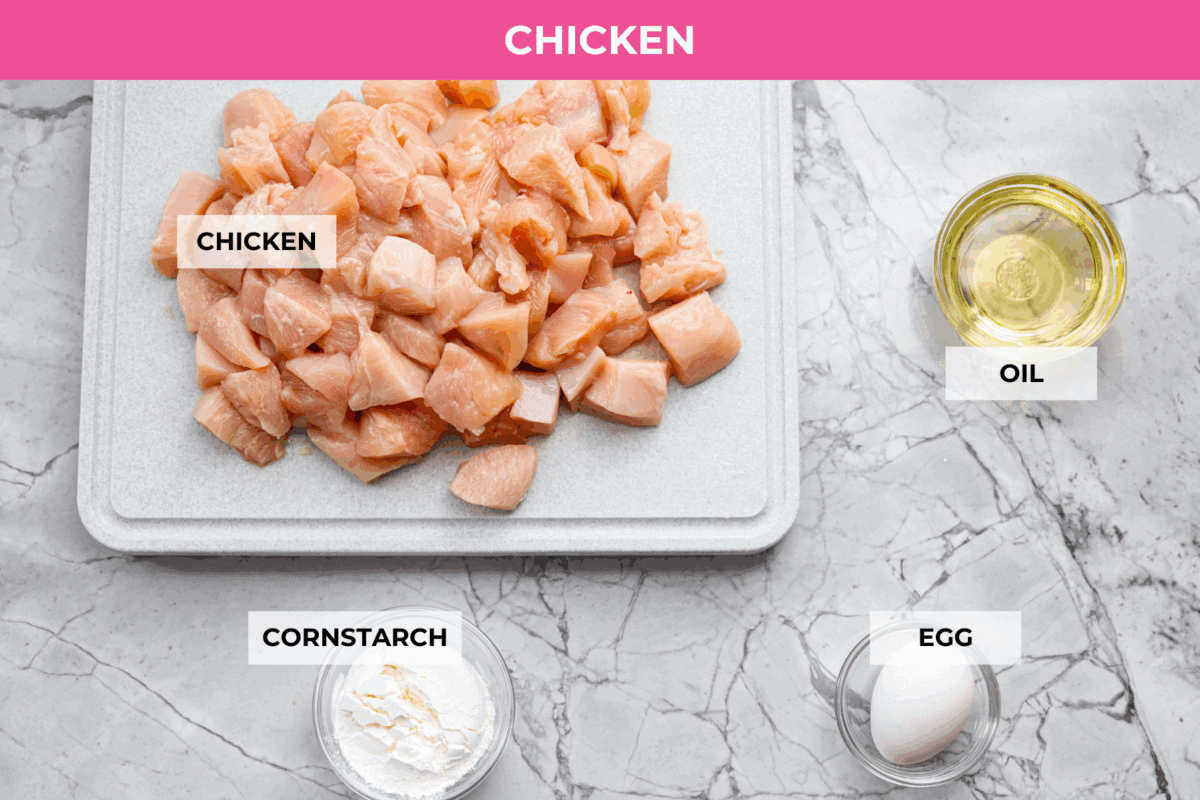
    Overhead shot of labeled ingredients.
    • Chicken: We love boneless, skinless chicken breast for this recipe, but boneless, skinless chicken thighs would also be delicious!
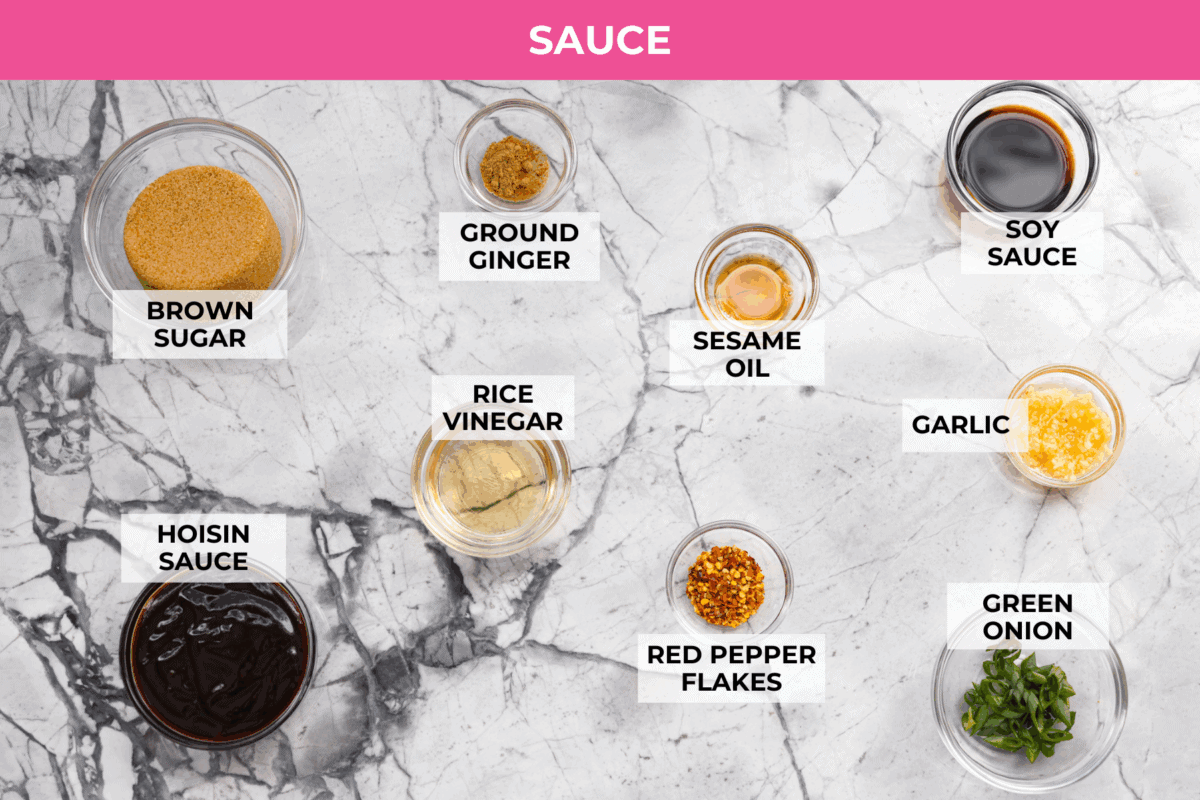
    Overhead shot of labeled sauce ingredients.

    How to Make Baked General Tso’s Chicken

    The magic of this General Tso Chicken recipe is in how simple it is. Taking a few extra minutes to brown the chicken first makes it golden, crispy, and even more irresistible. Want to skip the oven? Make my One-Pan General Tso’s Chicken. It’s similar to my sweet chili chicken. They are all seriously better than takeout!

    1. Cut Chicken and Coat in Egg: Preheat the oven to 350ºF, then spray a 9×13-inch baking dish with non-stick cooking spray. Cut the chicken into bite sized pieces and place in a large bowl. Crack the egg on top of the chicken and massage it in with your hand to coat the chicken.
    2. Toss in Cornstarch: Transfer the chicken to a ziplock bag. Add the cornstarch, seal the bag, and toss to coat well.
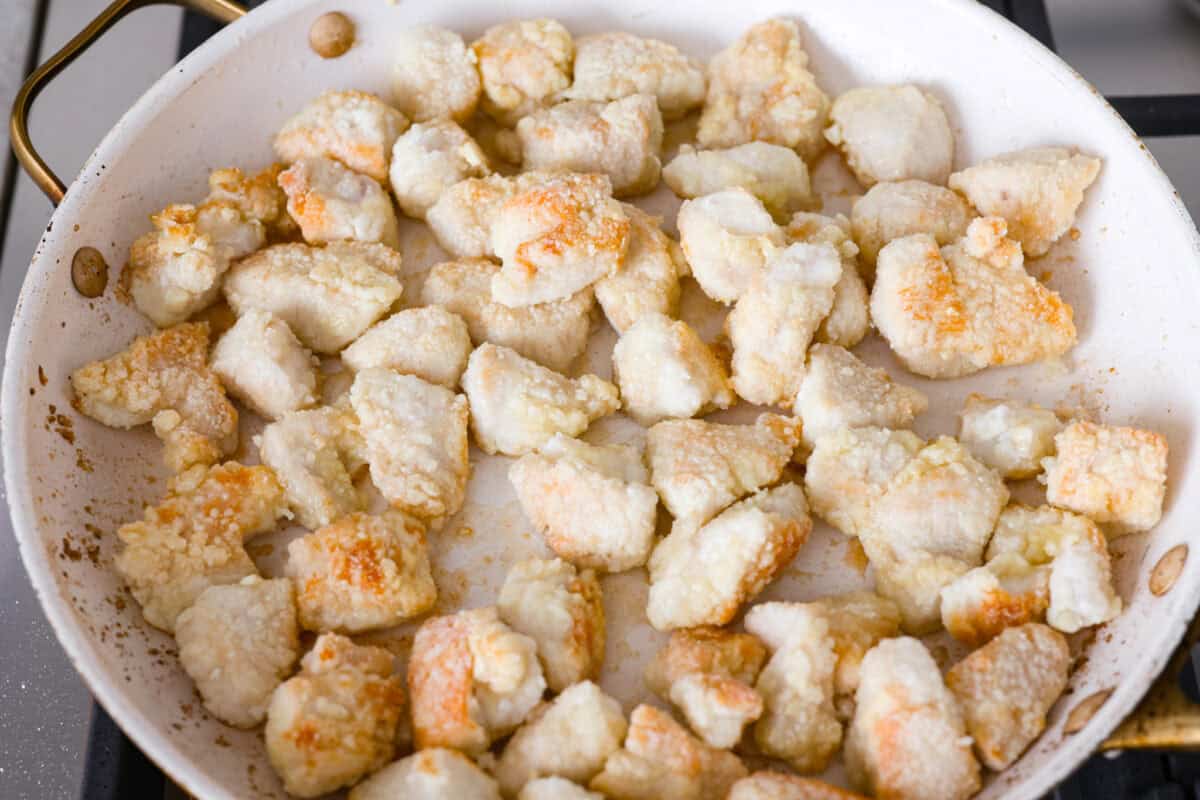
    3. Sear Chicken: In a large skillet over medium-high heat, add oil. Working in batches, add the coated chicken and cook until browned. Brown the chicken on the outside only; you’ll finish cooking it later.
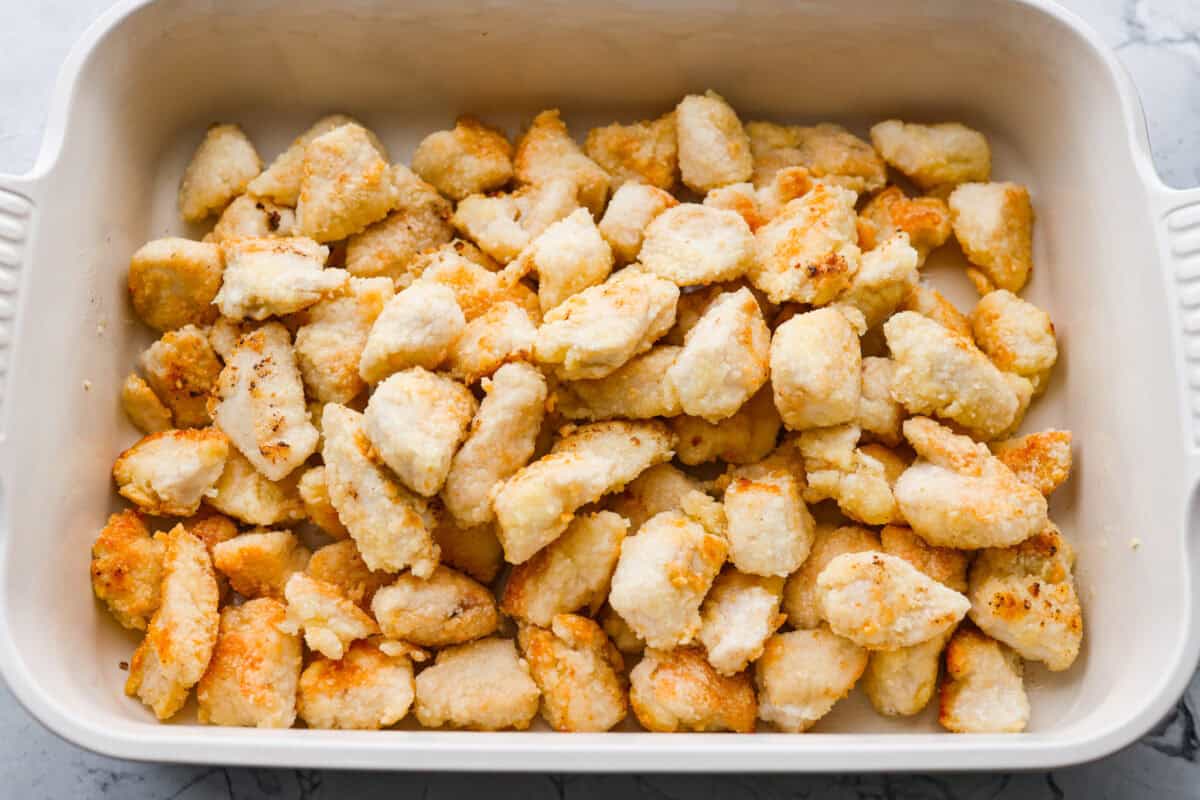
    4. Transfer to Baking Dish: Place the chicken in the prepared baking dish.
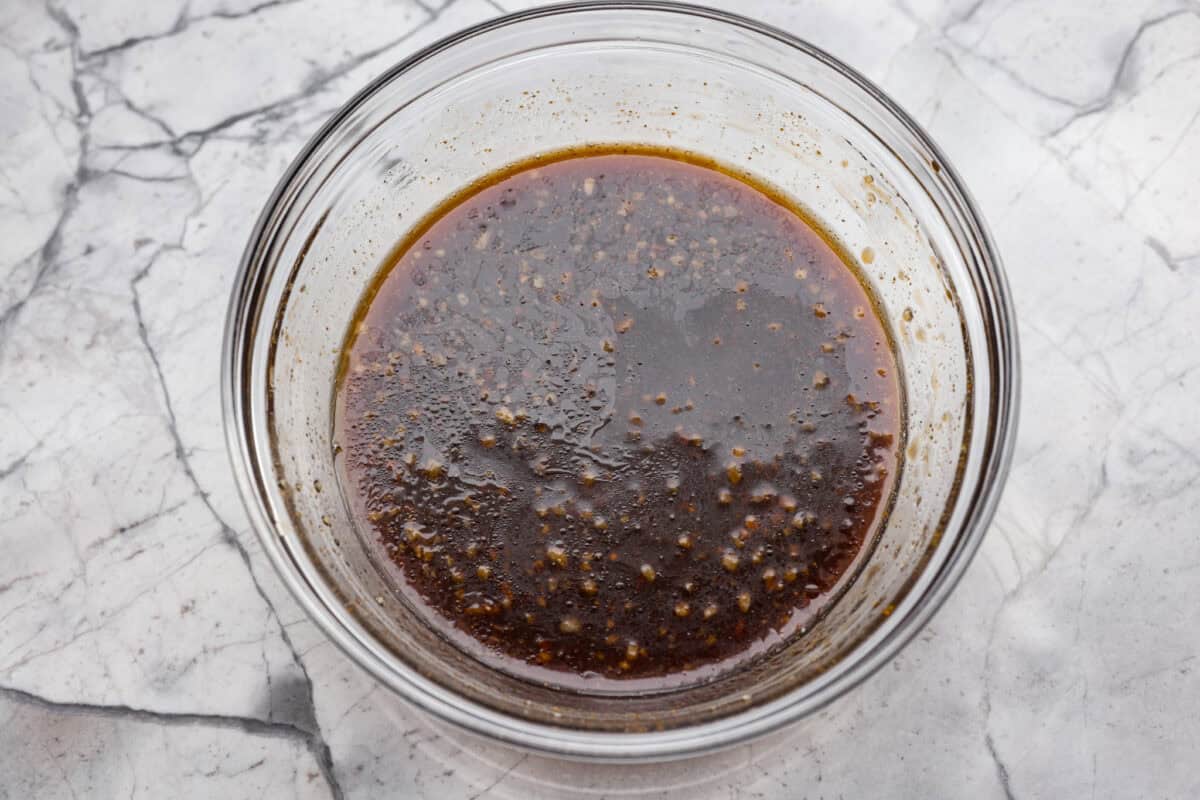
    5. Make the Sauce: In a medium bowl, whisk together hoisin sauce, soy sauce, brown sugar, fresh garlic, rice vinegar, sesame oil, ground ginger, and red pepper flakes. 
    6. Bake: Pour the sauce over the chicken, then bake for 45 minutes. Stir every 15 minutes so that it is coated in the sauce. Garnish with green onions, then serve with rice or noodles and enjoy!

    Pin this now to find it later

    Pin It

    Overhead shot of baked General Tso's chicken in a baking dish.

    More Easy Asian-Inspired Recipes

    Slow Cooker Beef and Broccoli

    3 hours 20 minutes


    Source link