Tag: Baked

  • Easy Oven Baked Trout Recipe

    Easy Oven Baked Trout Recipe

    Learn how to cook moist, flaky trout in the oven. This incredible baked trout recipe is easy and works for rainbow trout but can easily be adapted for larger varieties like steelhead.
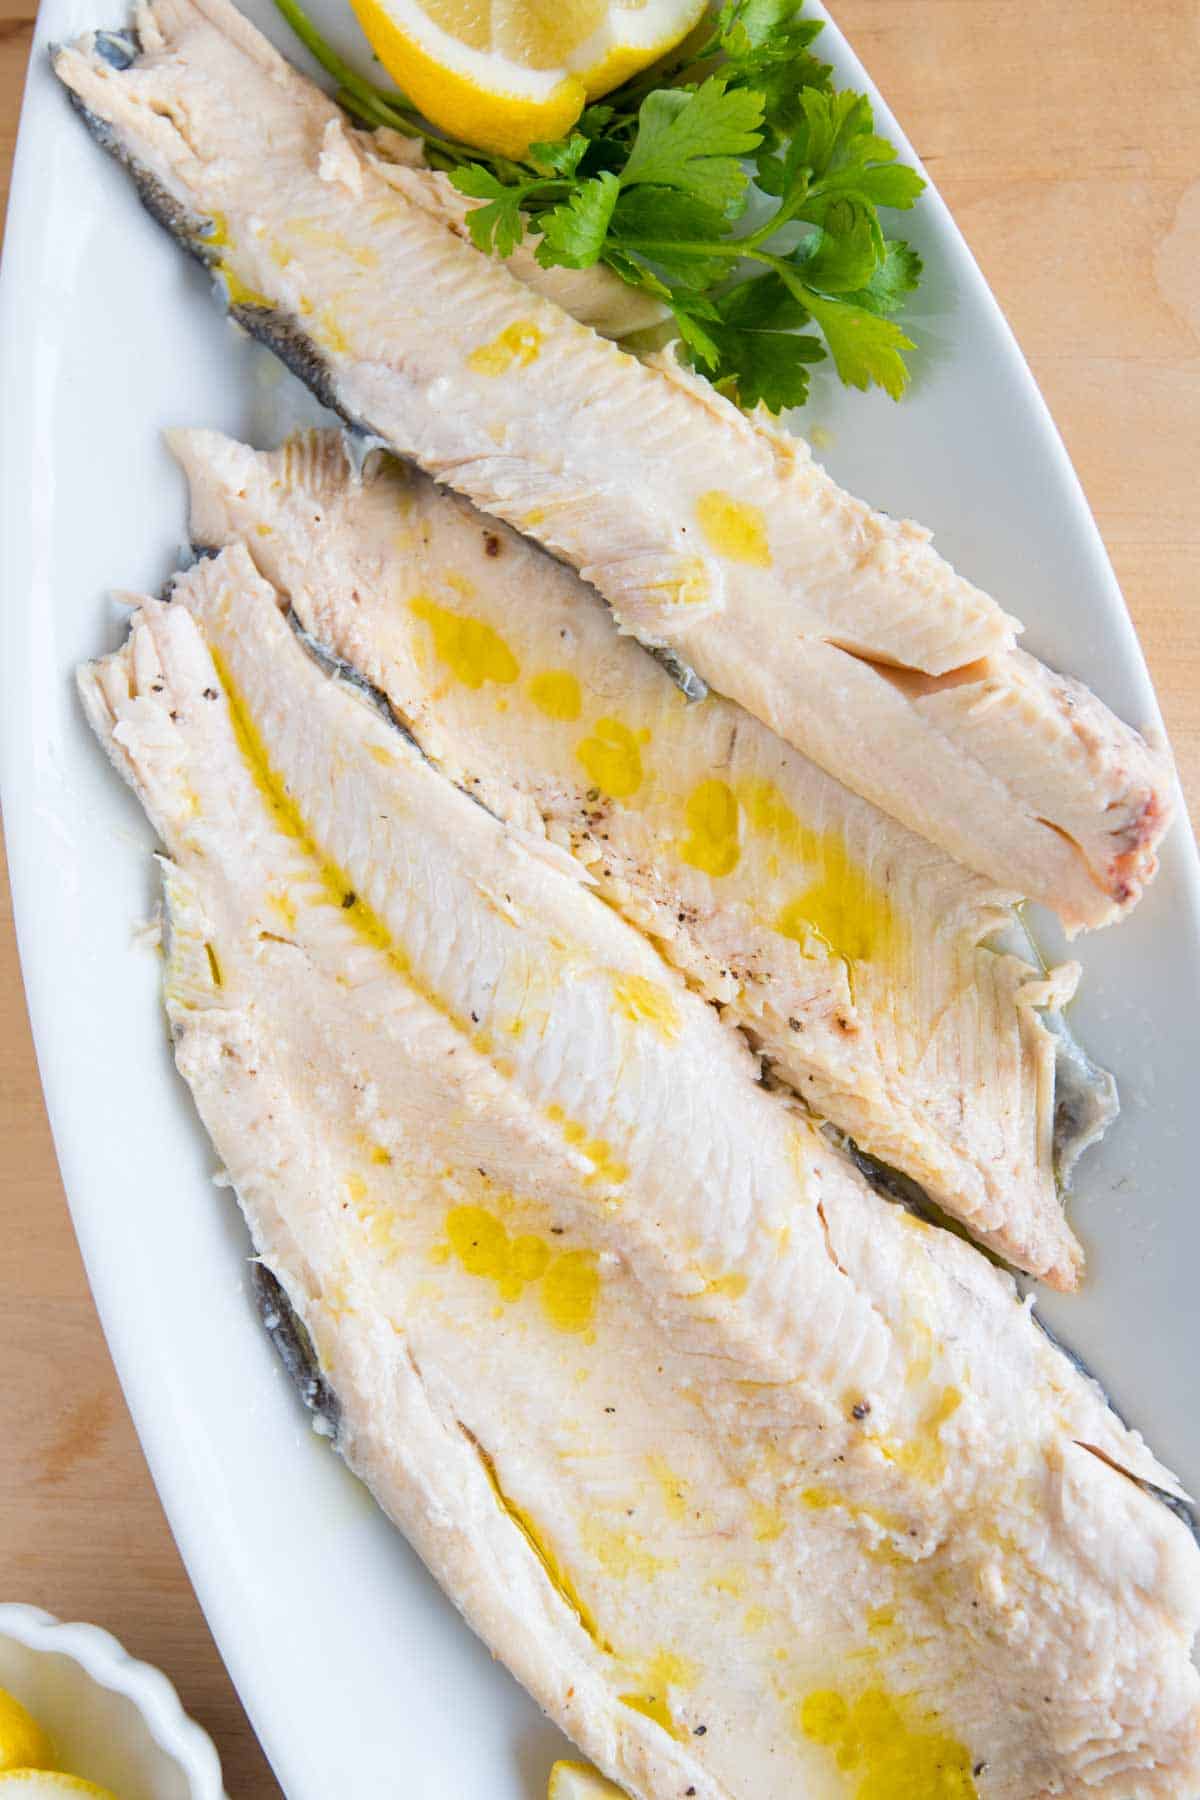
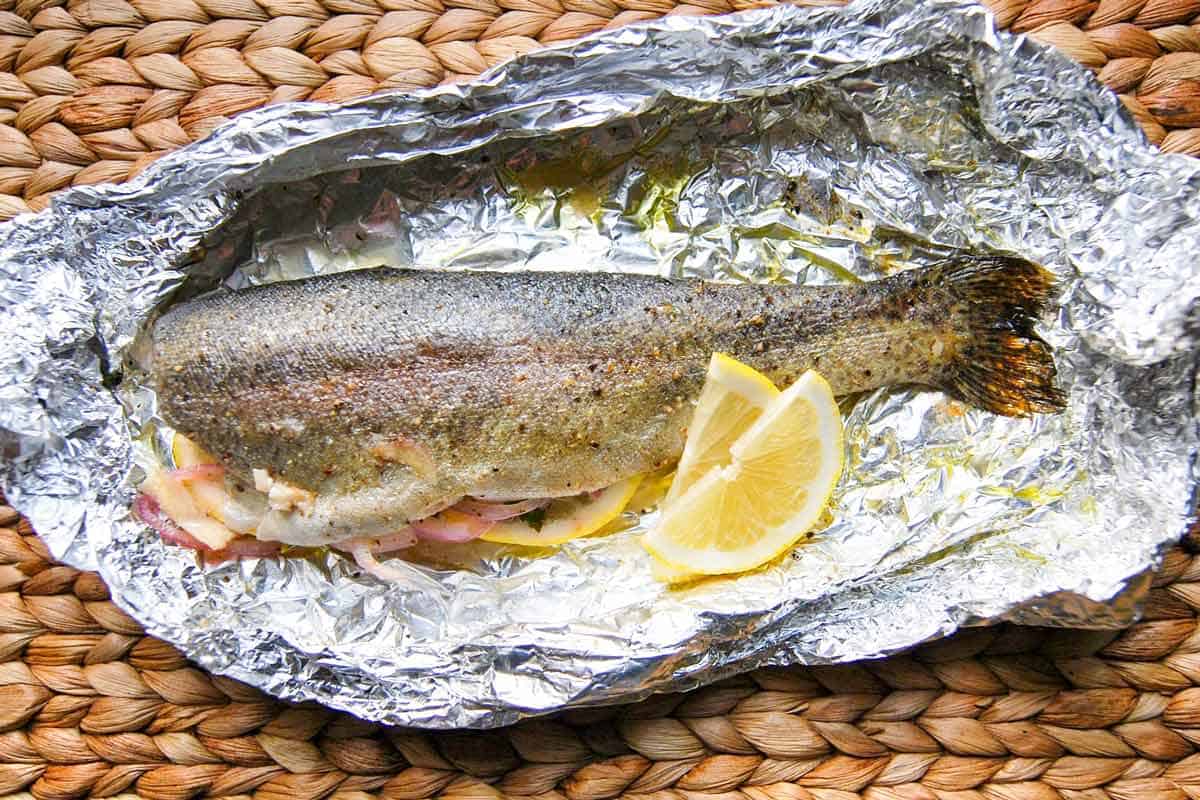
    Baked Trout on serving plate

    Baking whole trout in the oven is genius, especially when you do it in foil or parchment paper packets (called fish cooked en papillote or “paper”). With our easy recipe, your trout stays super moist and dinner will be on the table in about 20 minutes. This truly is one of my favorite trout recipes!

    After sharing this easy baked trout recipe with friends, some were nervous about cooking the whole fish (with the skin, tail, and head still attached). So, if your on the same wavelength, I promise it’s easy and delicious!

    Key Ingredients

    • Trout: You can buy trout as whole fish that has been gutted and cleaned (like in our photos) or as fillets. For this recipe, we’re using whole trout. Look for cleaned and butterflied whole trout. By butterflied, I mean that the fish is slit down the middle but still has the halves attached. I’ve used rainbow trout in our photos, but this recipe works well for larger, saltwater varieties like arctic char, steelhead trout, and even salmon. Check my tips in the recipe for adjusting cooking time.
    • Lemon and Fresh Herbs: Since we use butterflied trout, we can sneak a few aromatics into the middle to infuse the fish while it bakes. I love lemon slices and a handful of fresh herbs like parsley, cilantro, or dill. Thinly sliced garlic or onion are also lovely.
    • Seasoning: I use olive oil, salt, and pepper to season my trout, but you can always use your favorite seafood seasonings instead. I’ve also made a Cajun spiced trout before and loved it. Try my Cajun seasoning if that sounds like something you’d enjoy.

    Find the full recipe with measurements below.

    How to Cook Whole Trout

    Tip 1: Bake your fish in packets. We love baking our trout in packets. We used foil in the photos, but parchment paper is a also great option. Place your trout down onto the foil, lightly drizzle with oil, and season the fish inside and out with salt and pepper (note, you can use your favorite seafood seasoning instead).

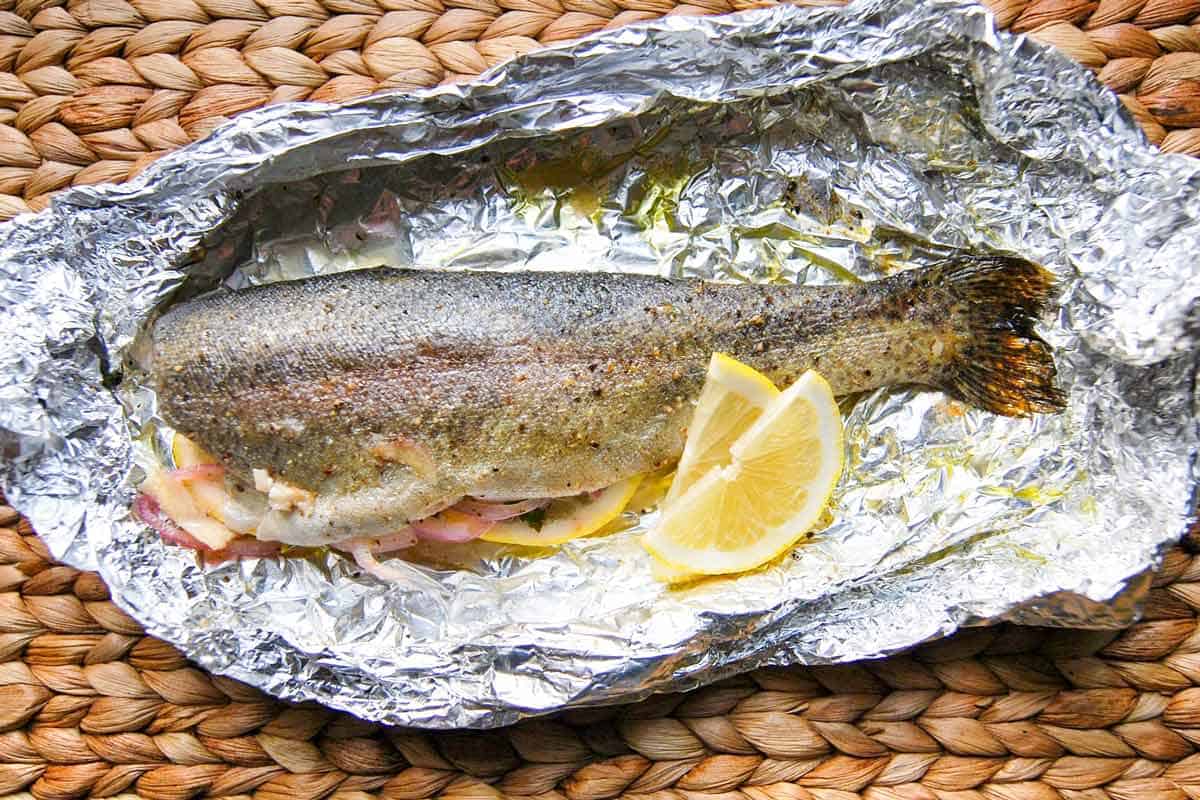
    Tip 2: Stuff your fish with lemon and herbs. We love stuffing the trout with lemon slices and fresh herbs. Sliced onions are tasty, too! Fold the sides of the packet to secure it and bake the trout in the oven until the flesh flakes easily with a fork.

    Stuffing trout with lemon and herbs

    Tip 3: Bake at the right temperature. The cooking time for your trout will vary depending on how large the fish is and the variety of fish you are baking. A small trout, like the one pictured in our photos, takes about 15 minutes in a 400°F oven. You can serve the fish as-is in the packets or remove them and remove the fillets from the bones.

    How to Debone Trout

    Watch our video to see me debone our baked trout. I’ve also shared my tips below for filleting cooked trout, which I find much easier than when the fish is raw. It’s a simple process. I use a spoon and butter knife to do it. Here are the basic steps I follow. I highly recommend watching the video:

    1. Pull away all the fins. Since the fish is cooked, they come away easily.
    2. Press the knife into the soft flesh just before the head and cut up to the bone. Repeat this with the soft flesh just before the tail.
    3. Use the knife to follow the line down the middle of the trout (this follows the spine). Just cut up to the bone.
    4. Following the line you just made down the spine, use a spoon to carefully pull/push the top and bottom fillet away from the bones.
    5. Pull the tail up and away the fish. By doing this the spine and bones will come away with it.
    6. Clean all the fillets of small bones and transfer to a plate for serving.

    Serving Suggestions

    I love serving this with a Caprese salad or a simple green salad tossed in my favorite balsamic vinaigrette or honey mustard dressing. It’s also excellent alongside red potato salad, corn salad, or creamy mashed potatoes.

    For finishing touches, a drizzle of olive oil is lovely over the trout, or try it with homemade tartar sauce or our garlic aioli.

    More Simple Fish Recipes
    Oven Baked Trout

    Easy Oven Baked Trout

    • PREP
    • COOK
    • TOTAL

    This is the best way to cook trout! I love baking whole trout in packets in the oven (see tips for doing this on the grill). The baked trout turns out succulent and flavorful. While your fish bakes, juices form at the bottom of the packet, which are delicious when spooned over the cooked trout. Other ingredients to consider adding to the middle of the fish are thinly sliced garlic, onion, or greens (like spinach). If you have larger varieties of fish like steelhead trout or even salmon, you can still use our method, but the bake time will be longer.

    2 Servings

    Watch Us Make the Recipe

    You Will Need

    2 small rainbow trout, cleaned and butterflied (opened up with the halves still attached), about 1 pound

    Olive oil

    1 lemon, sliced

    Fresh herbs, such as parsley, dill, tarragon, and thyme

    Salt

    Fresh ground black pepper

    Directions

      1Preheat the oven to 400°F (204°C). Cut two sheets of heavy-duty aluminum foil larger than your fish, or use parchment paper.

      2Place the trout, skin side down, on each piece of foil. Drizzle both sides with olive oil, then season both sides, inside and out, with salt and pepper.

      3Place two parsley (or dill) sprigs and two lemon slices down the middle of each fish.

      4Fold the foil by grabbing at the edges and crimping it together to make a packet.

      5Place the packets of fish onto the baking sheet.

      6Bake, checking one packet after 10 minutes. Depending on the size of your fish, it will take 15 to 25 minutes. When ready to come out of the oven, the flesh will be opaque and flake easily with a fork.

      7Place each packet on a plate. Carefully open the foil packets, taking care not to let the steam burn you.

      8Slide the fish away from the packet and onto the plate, pouring the juices over it. Serve with more fresh herbs and lemon slices.

    Adam and Joanne’s Tips

    • Parchment paper: If you do not have heavy-duty foil, use two sheets of regular foil to make each packet.
    • How to make grilled trout: Follow the directions in the recipe above to make each packet. Heat the grill to medium-high heat. Place the packets over indirect heat. Grill for 10 minutes, check one packet for doneness, and then continue to cook until it is cooked through.
    • The nutrition facts provided below are estimates.

    Nutrition Per Serving
    Calories
    285
    /
    Protein
    32 g
    /
    Carbohydrate
    1 g
    /
    Dietary Fiber
    0 g
    /
    Total Sugars
    0 g
    /
    Total Fat
    16 g
    /
    Saturated Fat
    4 g
    /
    Cholesterol
    87 g


    AUTHOR:

    Adam Gallagher

    Adam and Joanne of Inspired Taste

    We are Adam and Joanne Gallagher, the creators of Inspired Taste. Established in 2009, Inspired Taste grew from a childhood dream into one of the internet’s most trusted recipe sites with hundreds of reliable recipes, step-by-step videos, and expert tips.More About Us
    Source link

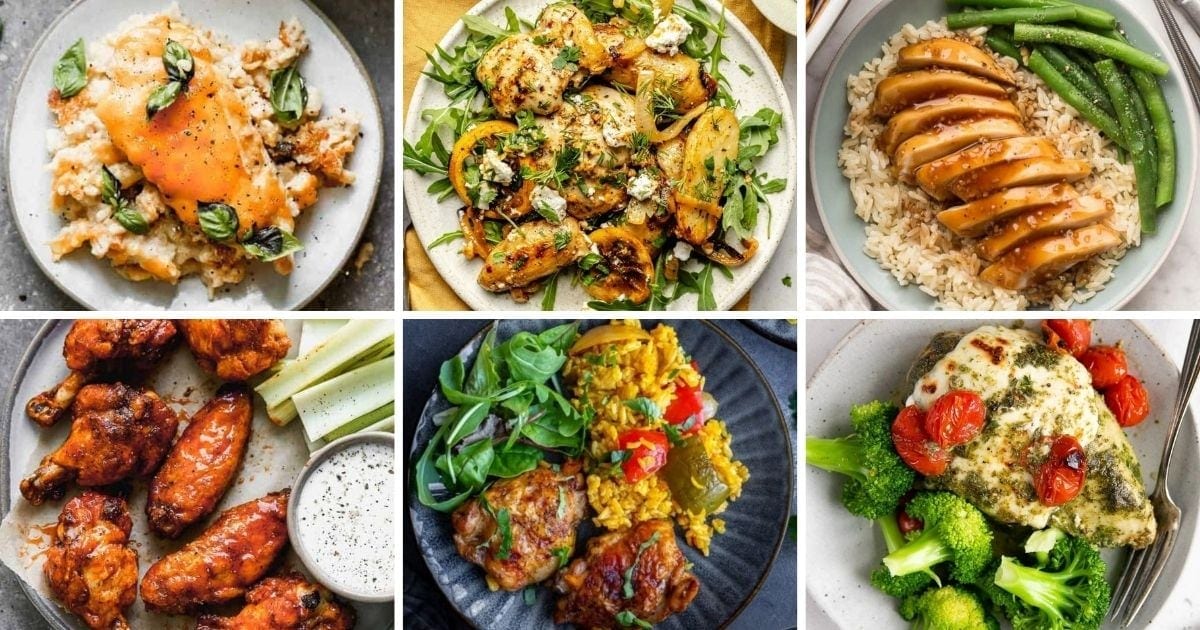
  • 35+ Baked Chicken Recipes

    35+ Baked Chicken Recipes

    If you’re looking for reliable baked chicken recipes, you’re in the right place. From juicy chicken breasts and crispy drumsticks to easy one-pan dinners, these recipes are simple, flavorful, and perfect for busy weeknights.


    Jump to: â„č Overview | đŸœïž Chicken Breast | 🍚 Chicken and Rice | đŸČ Saucy & Comfort | đŸ„˜ One-Pan & Sheet Pan Dinners | đŸ„— Healthy & Light Options | 🍗 Wings & Drumsticks


    I’ll be honest, when someone mentions baked chicken, the first thing I think of is dry, overcooked chicken breast. But, baking chicken goes beyond the breast meat, and with the right recipe, it can be one of those dependable, healthy, low-effort meals that still feels like you tried (even when you didn’t 😅).

    What makes baked chicken recipes so popular is how flexible they are. You can go classic with garlic and herbs, lean into something saucy and comforting, or throw everything onto one pan and call it dinner. Minimal mess, maximum payoff.

    In this roundup, you’ll find a mix of:

    • Quick weeknight chicken dinners
    • Juicy baked chicken breast recipes with sauce
    • Crispy wings and drumsticks
    • Hearty baked chicken and rice meals
    • Easy sheet pan dinners with veggies built right in

    Whether you’re cooking for family, meal prepping for the week, or just trying not to overthink dinner (been there), there’s something here you’ll actually want to make.


    Baked Chicken Breast Recipes (Juicy & Flavorful)

    Chicken breasts don’t have to be boring or dry—I promise. These recipes focus on keeping things juicy, with plenty of sauces, marinades, and simple tricks that make a big difference.


    Baked Chicken and Rice Recipes (Comfort in One Dish)

    If you want a full meal with minimal effort, this is your section. Chicken and rice baked together means flavor soaks into every bite, and fewer dishes to wash.


    Saucy & Comfort Baked Chicken Recipes

    Creamy, cheesy, rich, and cozy, these are the dinners you make when you want something a little extra comforting (or when it’s been a long day).

    Baked Saucy Chicken

    If you love extra sauce for spooning over rice or veggies, this one definitely delivers on that cozy, saucy goodness. Recipe from Fig Jar.


    One-Pan & Sheet Pan Baked Chicken Dinners

    This is where convenience really shines. Toss everything onto a tray, pop it in the oven, and let it do its thing. Easy cleanup is the real hero here.


    Healthy & Light Baked Chicken Recipes

    Lighter meals that still feel satisfying. Think lean protein, fresh herbs, bright flavors, and plenty of veggie-packed options.

    Chicken Bites

    Cooked & Loved recipe: These chicken bites are simple, versatile, and great when you want something lighter but still satisfying.


    Baked Chicken Wings & Drumsticks (Crispy & Crowd-Pleasing)

    Perfect for game nights, casual dinners, or when you just want something fun. These baked versions give you that crispy finish without needing a deep fryer.


    Save These Baked Chicken Recipes To Pinterest

    Source link

  • Easy Baked Wonton Cups Recipe

    Easy Baked Wonton Cups Recipe

    Our easy baked wonton cups are the perfect blank canvas for your favorite fillings! We show you how to transform wonton wrappers into crispy cups, plus delicious filling ideas for them.

    Easy Baked Wonton Cups

    Wonton wrappers are not just for dumplings! We love creating these fun and easy party appetizers using baked wonton cups as the shell. They’re perfect for a swanky cocktail party but easy enough for a casual get-together.

    We’ve been making baked wonton cups for years and have found many ways to fill them. I’ve listed our favorites below. You might also enjoy these chili lime shrimp wonton cups and our mini fish tacos which swap tortillas for baked wonton cups. I also use similar wrappers (just a bit larger) to make our crispy chicken spring rolls!

    Key Ingredients

    • Wonton Wrappers: I use square wonton wrappers to make little cups. Wonton wrappers generally come in a few different thicknesses. If you have the choice, go with thin or medium.
    • Oil: I brush my wonton wrappers with a little oil so they crisp and brown nicely in the oven. Avocado oil or olive oil is great.
    • Salt: This is optional, but I like lightly seasoning one side of the wrappers with a bit of salt.
    • Fillings: There are many options for what to serve inside wonton cups. I have shared a handful of fun and delicious ideas below.

    How to Make Wonton Cups

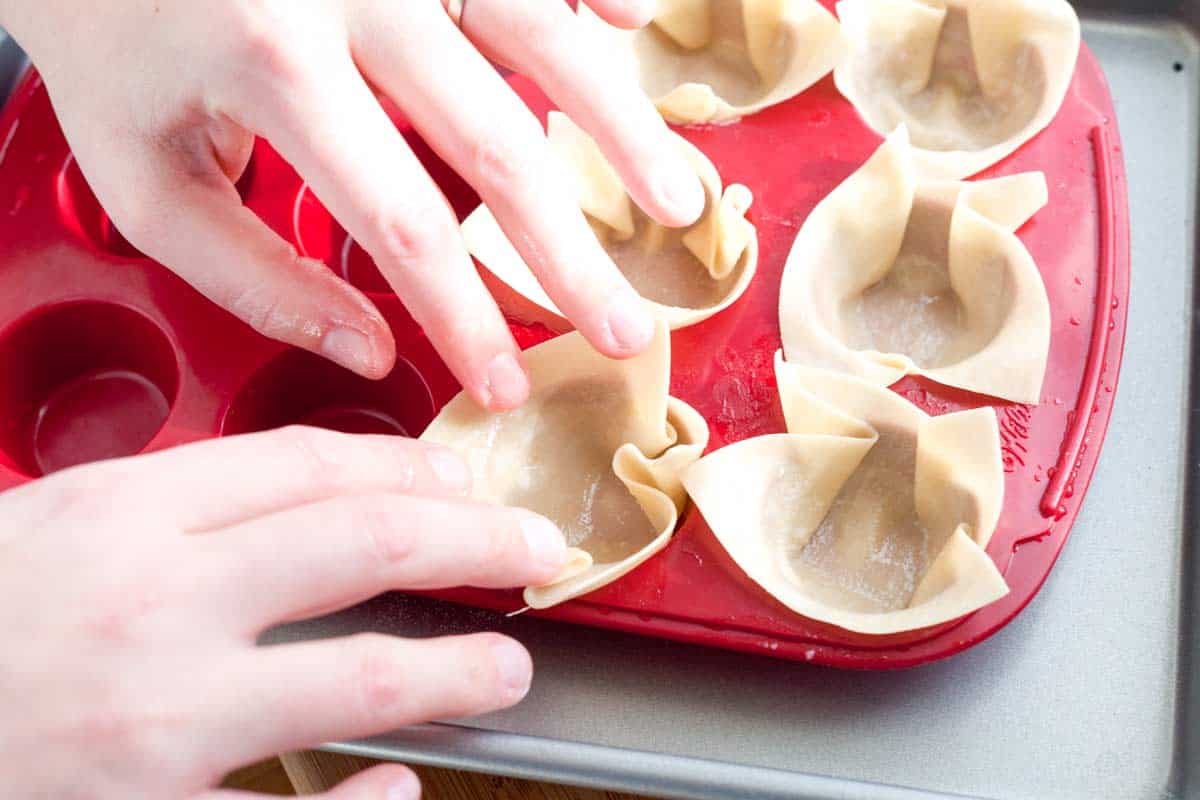
    It’s really easy to transform store-bought wonton wrappers into mini cups. To make the cups, brush wonton wrappers with oil, lightly season with salt, and then press into mini muffin cups. Bake them until golden brown and crisp. They take 8 to 10 minutes in a 350°F oven, but watch them closely as they will burn quickly.

    How to Make Wonton Cups: Pushing wontons into a mini cupcake pan.

    While the wontons bake, you can get the fillings ready. In addition to our mini fish tacos and these easy shrimp wonton cups, I have a few more suggestions for what to add to wonton cups:

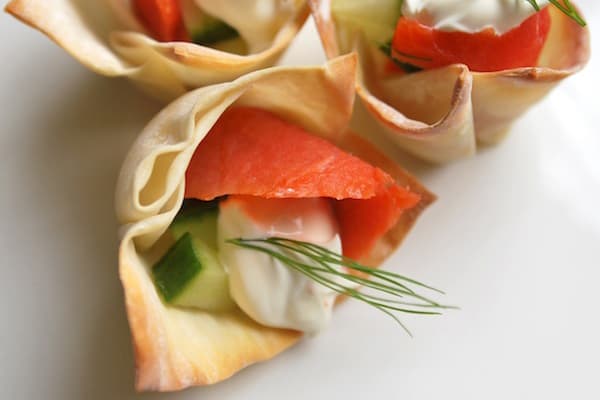
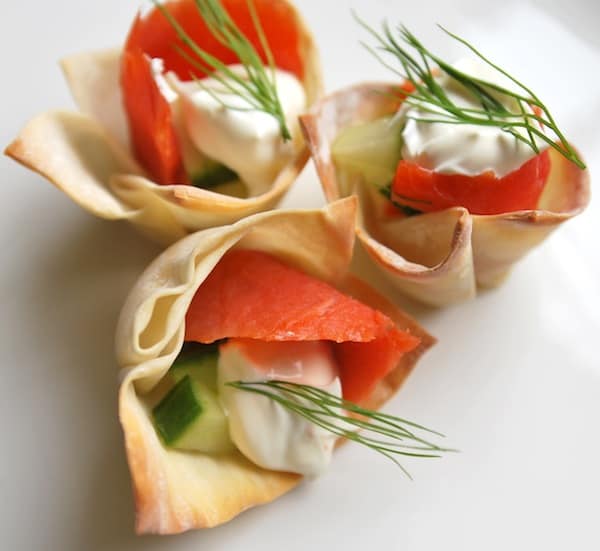
    • Smoked Salmon Wonton Cups: Fill your baked wonton cups with diced cucumber, a little fresh dill, a small spoonful of crĂšme fraĂźche or sour cream, and smoked salmon.
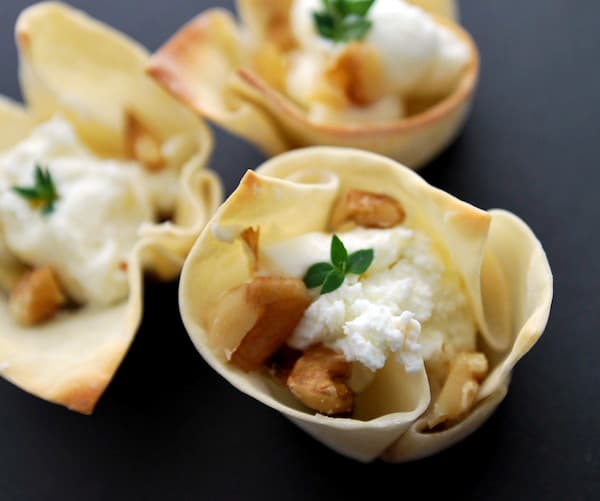
    • Goat Cheese Wonton Cups: Fill your baked wonton cups with whipped goat cheese, a little fig jam, toasted walnuts, and a leaf or two of fresh thyme.
    • Crab Rangoon Cups: Add a spoonful of the creamy filling from our crab Rangoon recipe made with cream cheese and crab meat.
    • Pulled Pork: Add some of our slow cooker pulled pork and then top it with my favorite coleslaw. Add one spinach leaf to the bottom of each cup to prevent the bottom from becoming soggy.
    • Carnitas: Fill them with these crispy carnitas and garnish with diced white onion and lime juice.
    • Spinach and Artichoke Dip: Add a spoonful of our easy spinach and artichoke dip. Since this has a lot of moisture, add one leaf of baby spinach to the bottom of the cup to prevent the bottom from becoming soggy.
    • Buffalo Chicken Dip: Add a spoonful of our hot buffalo chicken dip. Since this has a lot of moisture, add one leaf of baby spinach to the bottom of the cup to prevent the bottom from becoming soggy. You can do the same with our smoked salmon dip or this hot crab dip!
    • Guacamole and Shrimp: Add a spoonful of homemade guacamole to each cup, then top with a roasted shrimp.
    Easy Baked Wonton Cups

    Easy Baked Wonton Cups

    • PREP
    • COOK
    • TOTAL

    These baked wonton cups are the perfect blank canvas for your favorite flavors! To ensure you have enough cups for all your delicious fillings, bake a few extra wonton wrappers. Some may close up during baking, so it’s always good to have a few spares.

    Makes 20 wonton cups

    You Will Need

    24 wonton wrappers

    1 œ tablespoons avocado oil or olive oil

    Salt

    Directions

      1Preheat oven to 350°F (177°C). Set aside a mini muffin pan.

      2Lightly brush wonton wrappers on both sides with oil. Lightly season one side with salt.

      3Press the wonton wrappers into the cups, spreading back the corners and pressing the bottoms to make a defined cup.

      4Bake until lightly browned, 8 to 10 minutes. Keep a close eye on them as they bake to make sure they are not over-browning.

      5Transfer to a rack and let cool.

    Adam and Joanne’s Tips

    • Storing: Baked wonton cups will keep, unfilled, in an airtight container for up to a week. For the best results, fill them right before serving.
    • Filling tips: If you have a wet filling, consider placing one baby spinach leaf on the bottom to act as a layer between the filling and the wonton cup. This prevents the moisture from making the bottom of the wonton cup soggy.
    • Nutrition facts are estimates.

    Nutrition Per Serving
    Serving Size
    1 wonton cup
    /
    Calories
    31
    /
    Total Fat
    1g
    /
    Saturated Fat
    0.1g
    /
    Cholesterol
    0.7mg
    /
    Sodium
    70mg
    /
    Carbohydrate
    4.6g
    /
    Dietary Fiber
    0.1g
    /
    Total Sugars
    0g
    /
    Protein
    0.8g


    AUTHOR:

    Joanne Gallagher

    Previous Post: Curried Chickpea Bowls
    Next Post: Chili Lime Cauliflower Tacos

    Source link

  • Keto Baked Chicken Recipes

    Keto Baked Chicken Recipes

    I’m updating this collection of Keto Baked Chicken Recipes because I think baked chicken is perfect for dinner when the weather starts getting colder! And this round-up has 28 low-carb chicken recipes, which should give you lots of options for your dinner rotation!

    PIN the Keto Baked Chicken Recipes to try some later.

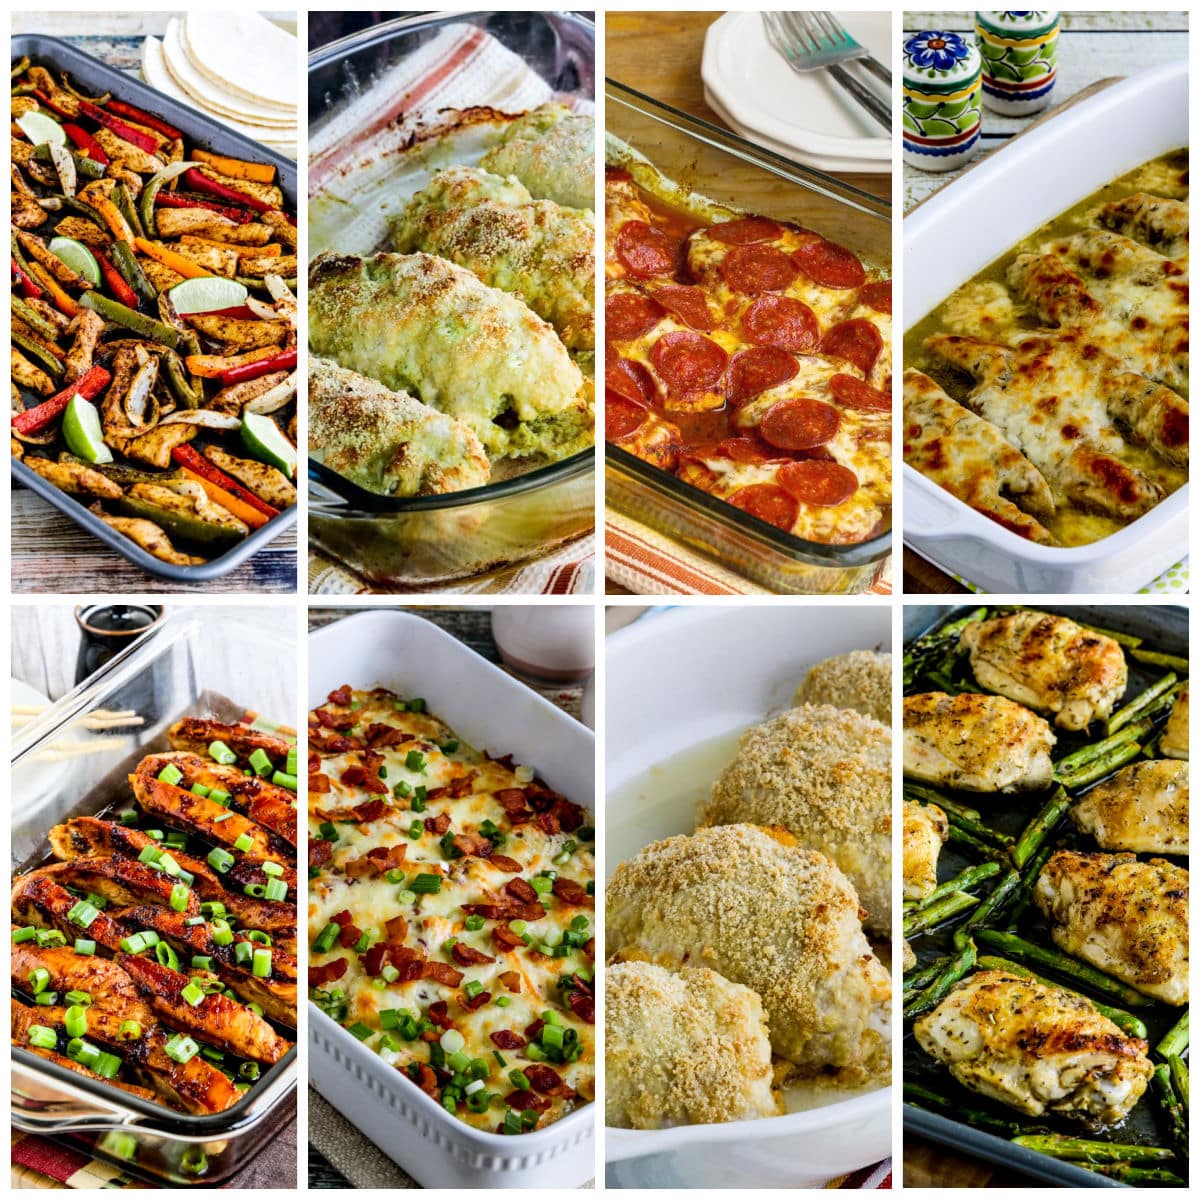
    Keto Baked Chicken Recipes collage showing featured recipes.

    These Keto Baked Chicken Recipes are perfect to make for dinner as soon as the weather starts getting colder. And many of the recipes use chicken breasts, which is something many people keep in the freezer.

    These recipes are the favorite low-carb chicken dishes I’d even make for guests, and I hope some of them might become your favorite chicken dinners too! There are 28 amazing ideas here for a low-carb chicken dinner.

    And I know you don’t want to scroll through that many photos! But please check the recipe links after the photos to see all the tasty Keto chicken dinners that are featured here. I hope you find some new recipes that become favorites for your family!

    What kind of baked chicken recipes are here?

    In this post you’ll find sheet pan meals with chicken, stuffed chicken breasts, chicken nuggets, and roasted chicken. And there are lots of ideas here for the kind of baked chicken recipe that I call a “Chicken Bake,” where chicken breasts browned in a frying pan, cut into strips, and then finished in the oven with a sauce or topping.

    How low in carbs are the Keto Baked Chicken Recipes?

    I’m called this collection of baked chicken recipes Keto, but some recipe may be slightly high in carbs for a strict Keto diet. But every recipe here is definitely low in carbs. Just click the recipe title here, then use the JUMP TO RECIPE link in every recipe to go quickly to the complete recipe, and the nutritional information will be right after the recipe instructions.

    How do you get the complete recipe?

    Just click or tap any recipe title in this post to find the complete recipe on my website. And check out the category for Keto Recipes for even more tasty dinner ideas!

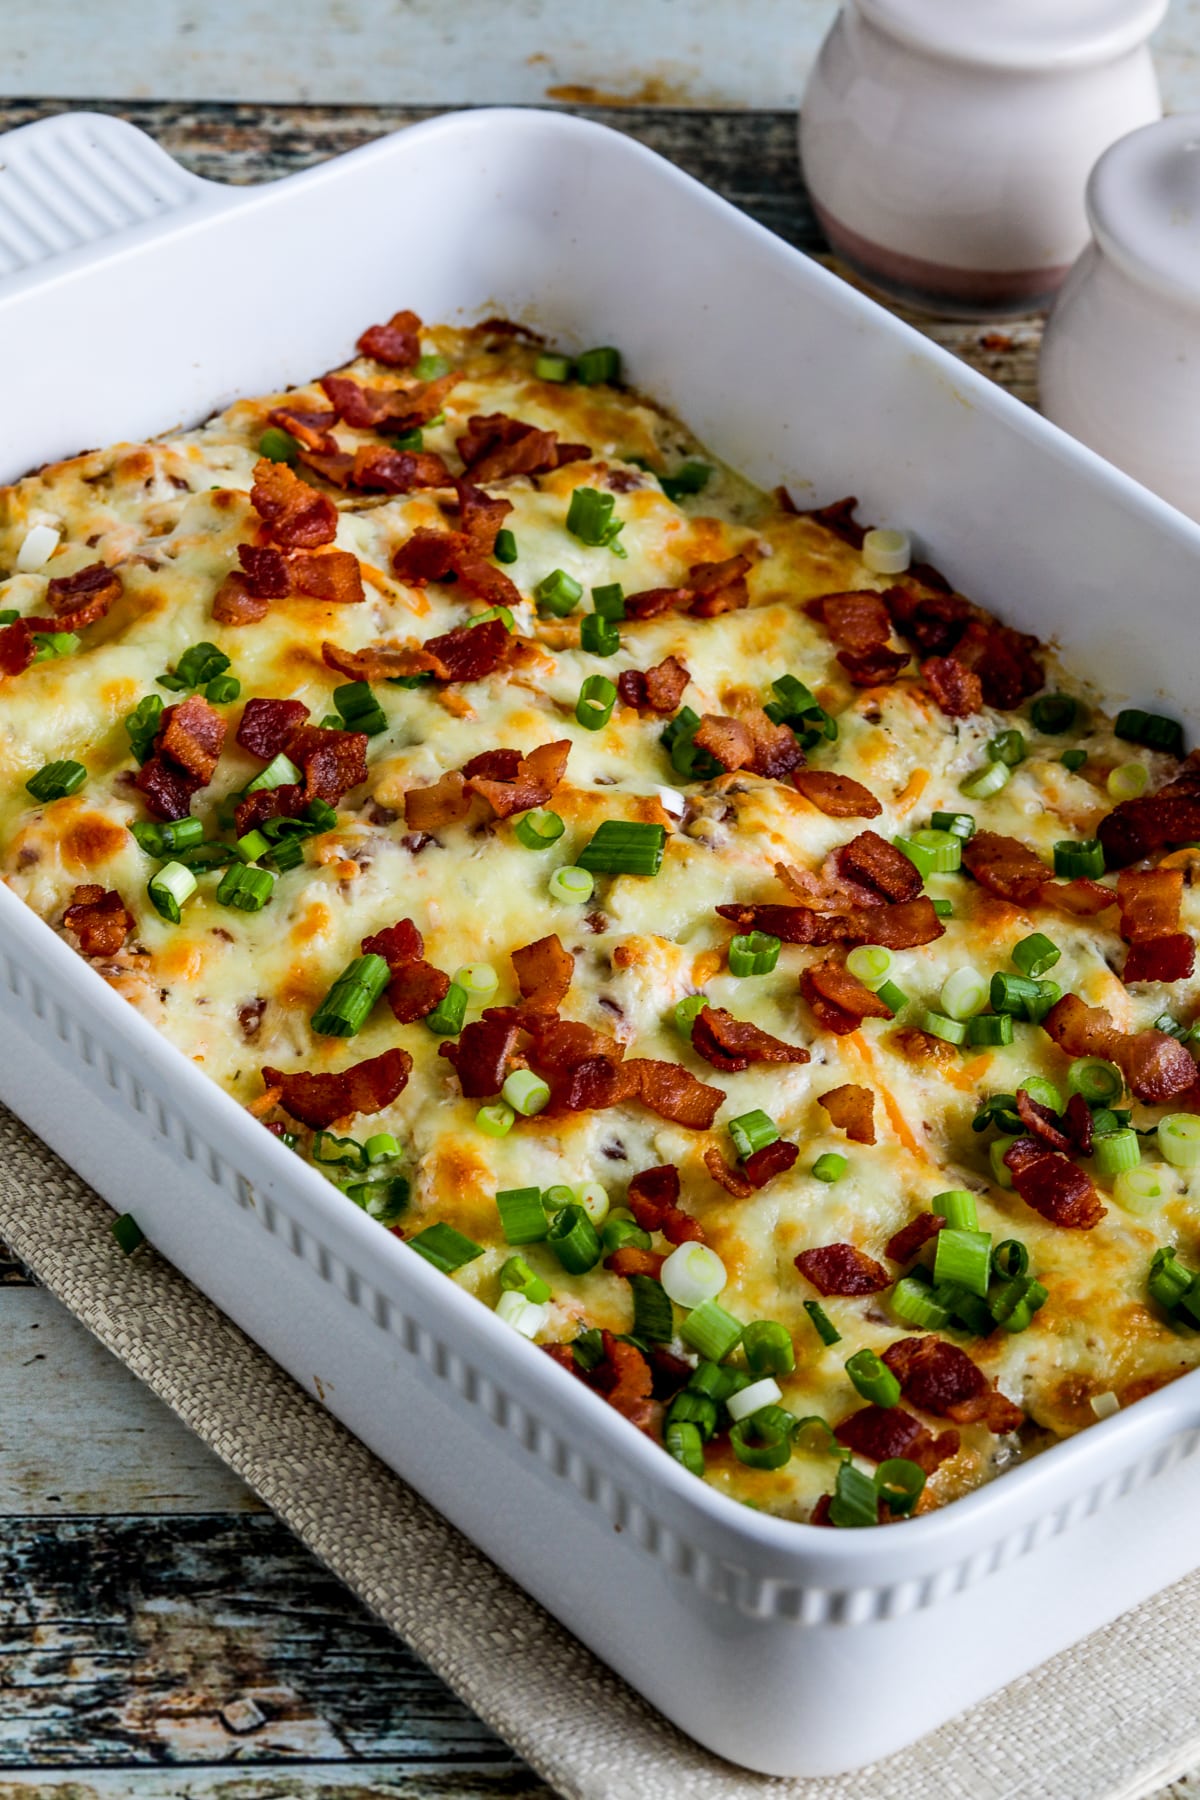
    Keto Crack Chicken Bake shown in baking dish with bacon and green onion sprinkled on

    This Keto Crack Chicken Bake is a recipe that’s been hugely popular on the site, and the whole family will love this for dinner!

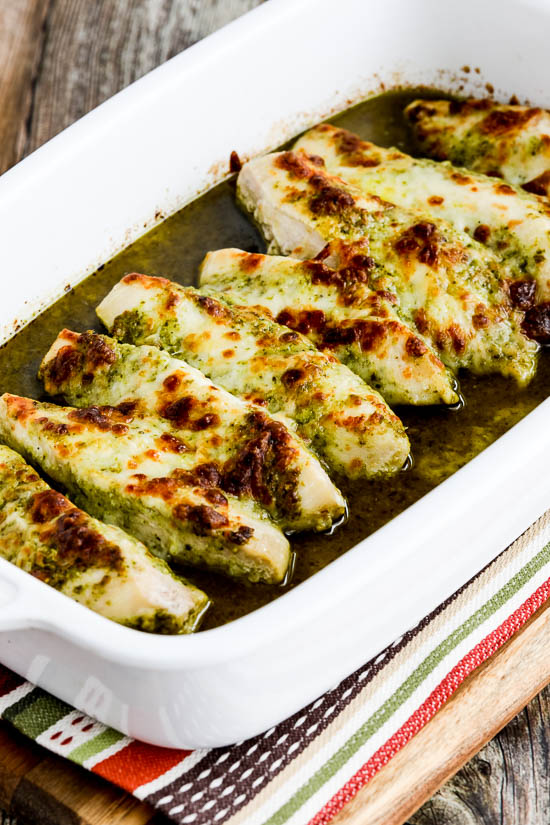
    Easy Baked Pesto Chicken is the most popular baked chicken recipe on my site, and this has been so popular that it took me a long time to work up the courage to take new photos!

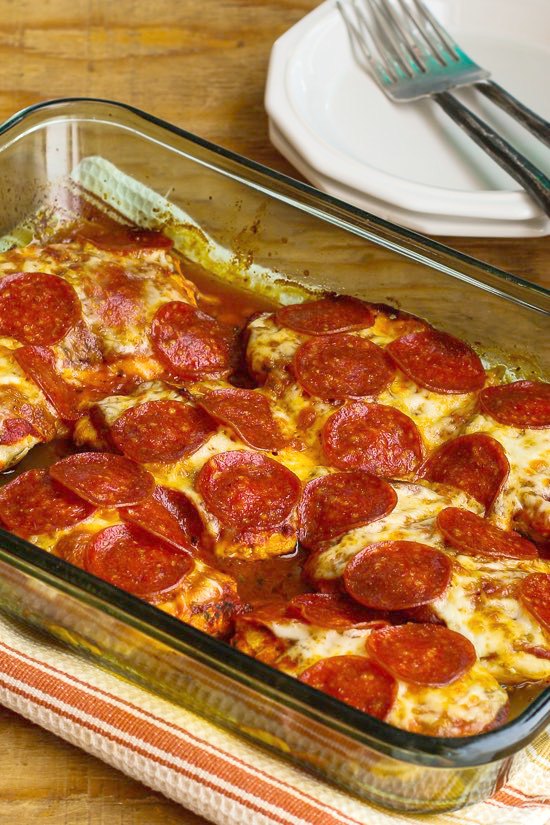
     Low-Carb Pepperoni Pizza Chicken Bake finished casserole

    Pepperoni Pizza Chicken Bake has been wildly popular for years, and this can help when you’re craving pizza.

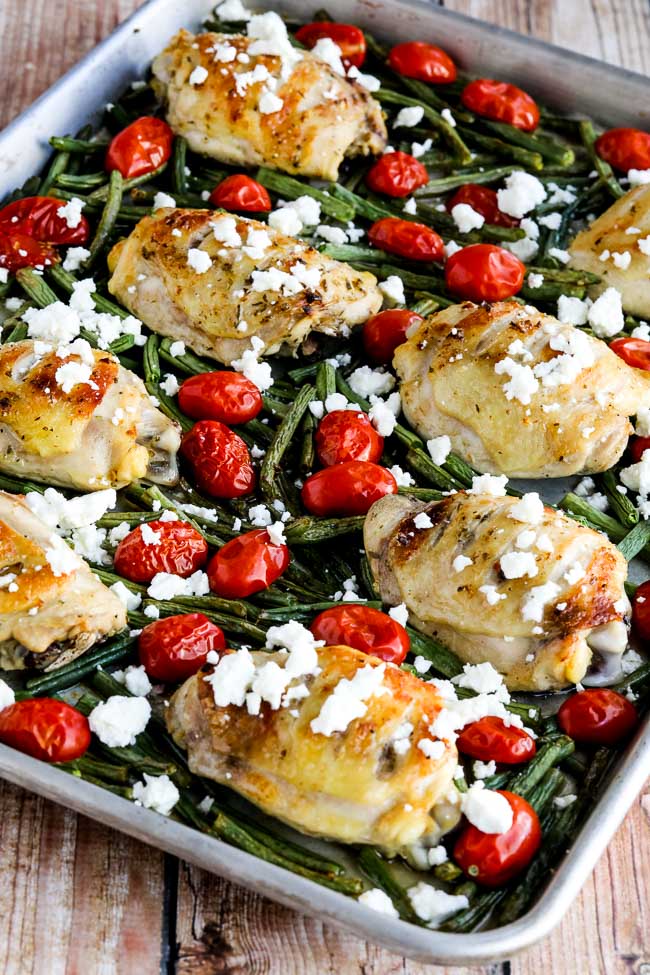
    Greek Chicken, Green Beans, and Tomatoes Sheet Pan Meal found on KalynsKitchen.com

    Greek Sheet Pan Chicken Meal is a prefect Greek Chicken dinner that’s all cooked on a sheet pan. As you can see, I like it with a generous amount of Feta!

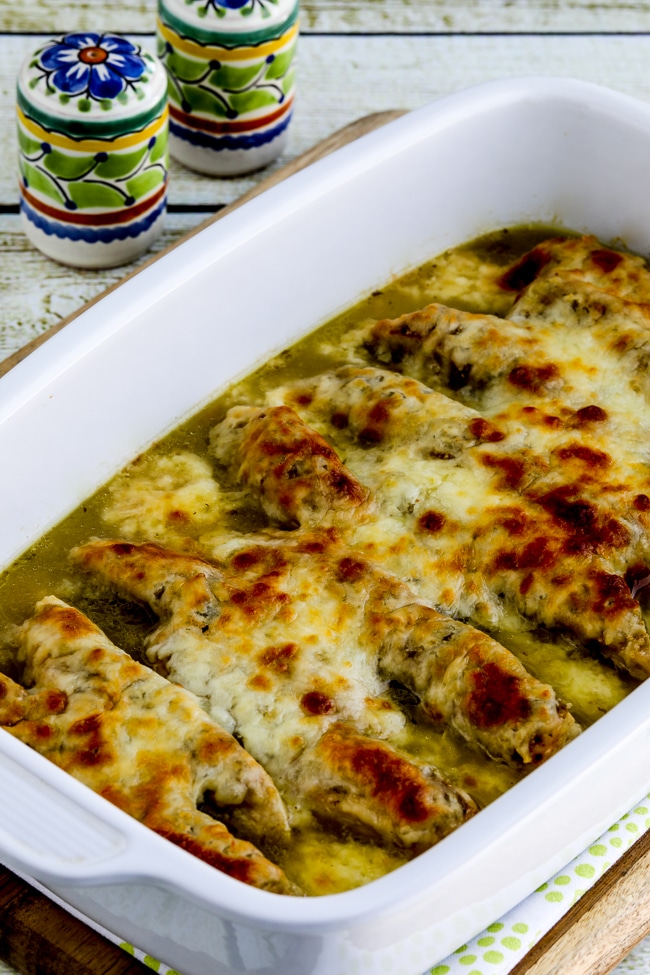
    Salsa Verde Chicken Bake close-up photo

    This Salsa Verde Chicken Bake only has a few ingredients and it’s tasty and amazingly easy to make!

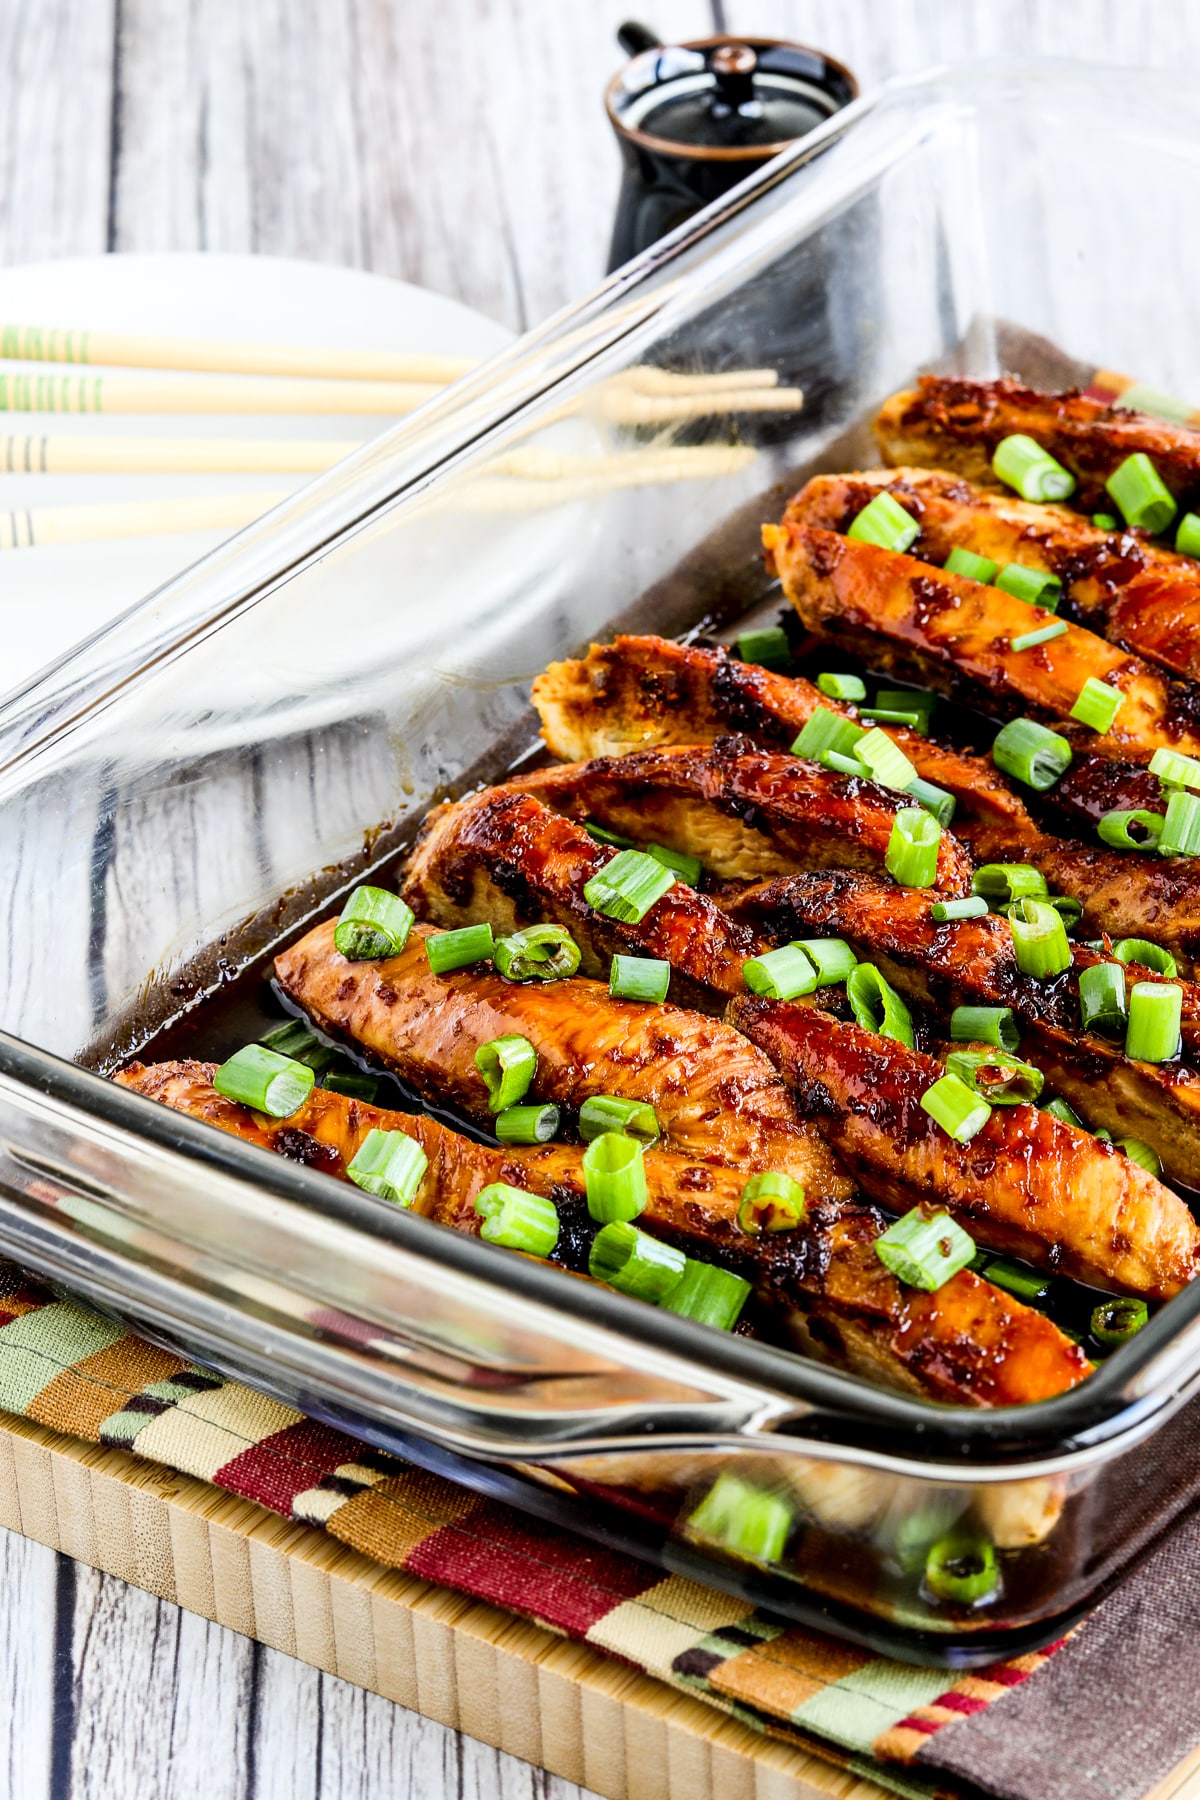
    Baked Teriyaki Chicken (Sugar-Free) shown in baking dish on napkin

    This Baked Teriyaki Chicken has an easy and sugar-free Teriyaki Sauce that makes this recipe so delicious!

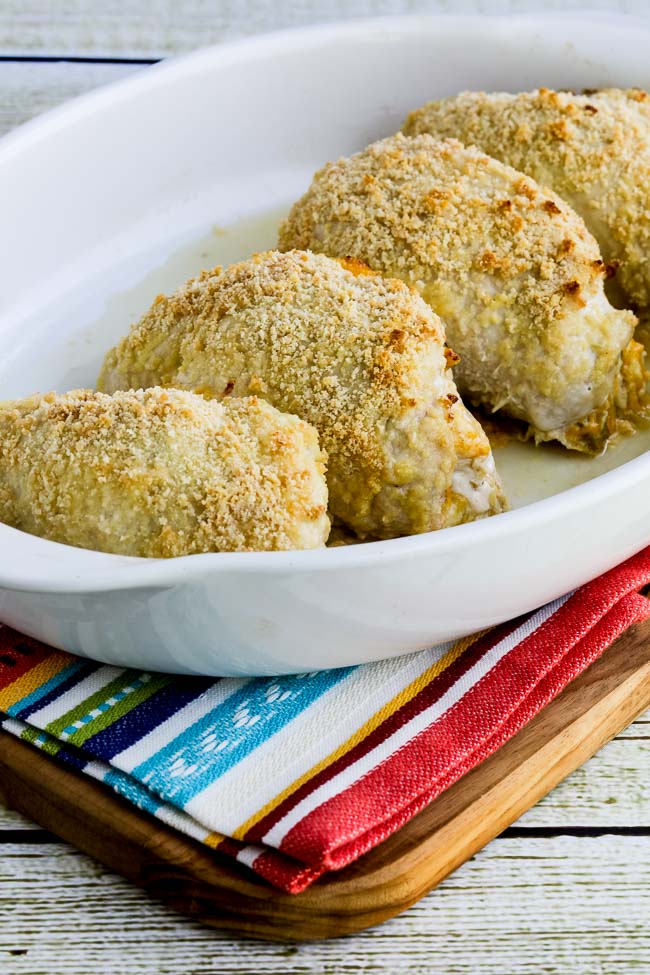
    Baked Stuffed Chicken Breast with Green Chiles and Cheese shown in baking dish on striped napkin

    Baked Stuffed Chicken Breast with Green Chiles and Cheese is really not that hard to make once you master the technique of pounding the chicken so it’s thin enough to roll up. And this is delicious!

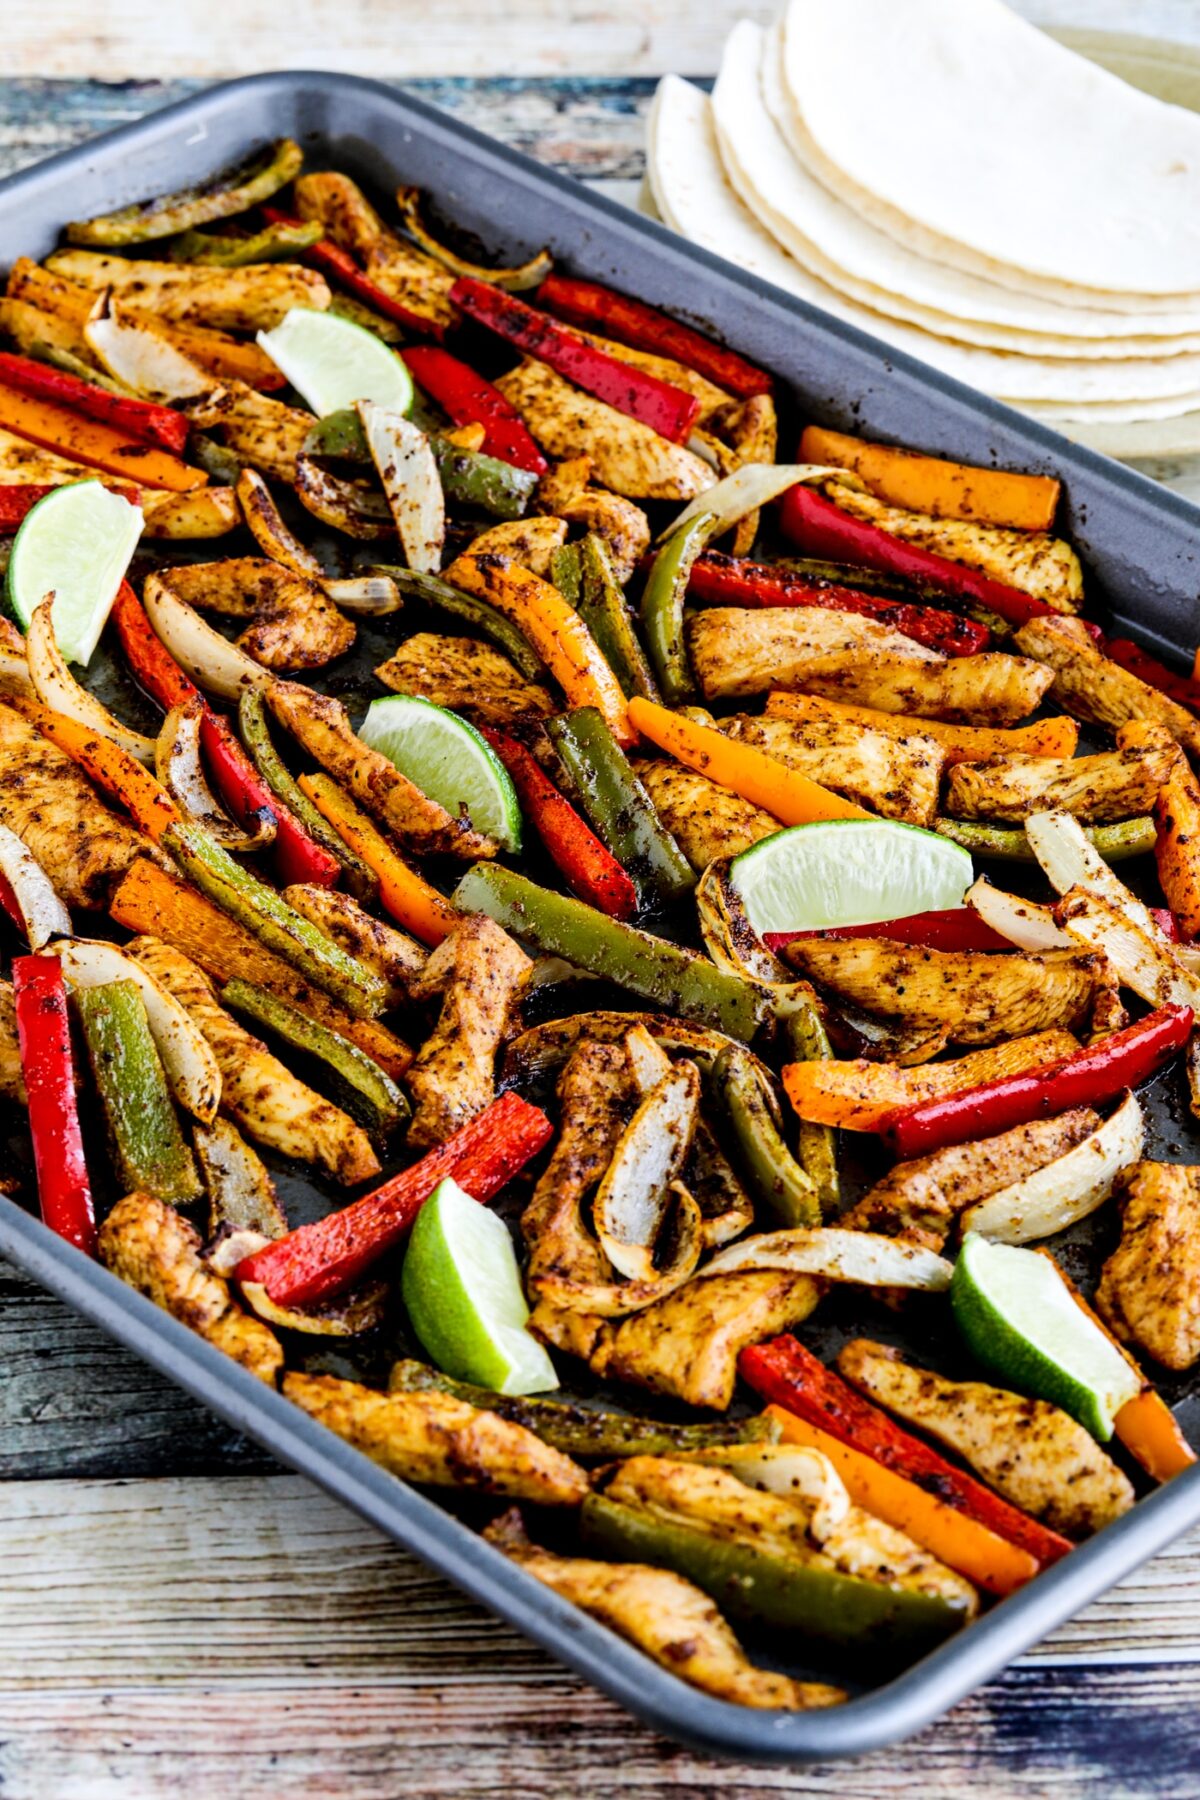
    Chicken Fajitas shown on sheet pan with tortillas and limes

    Sheet Pan Chicken Fajitas are tasty and easy to make, and this is extra low in carbs too!

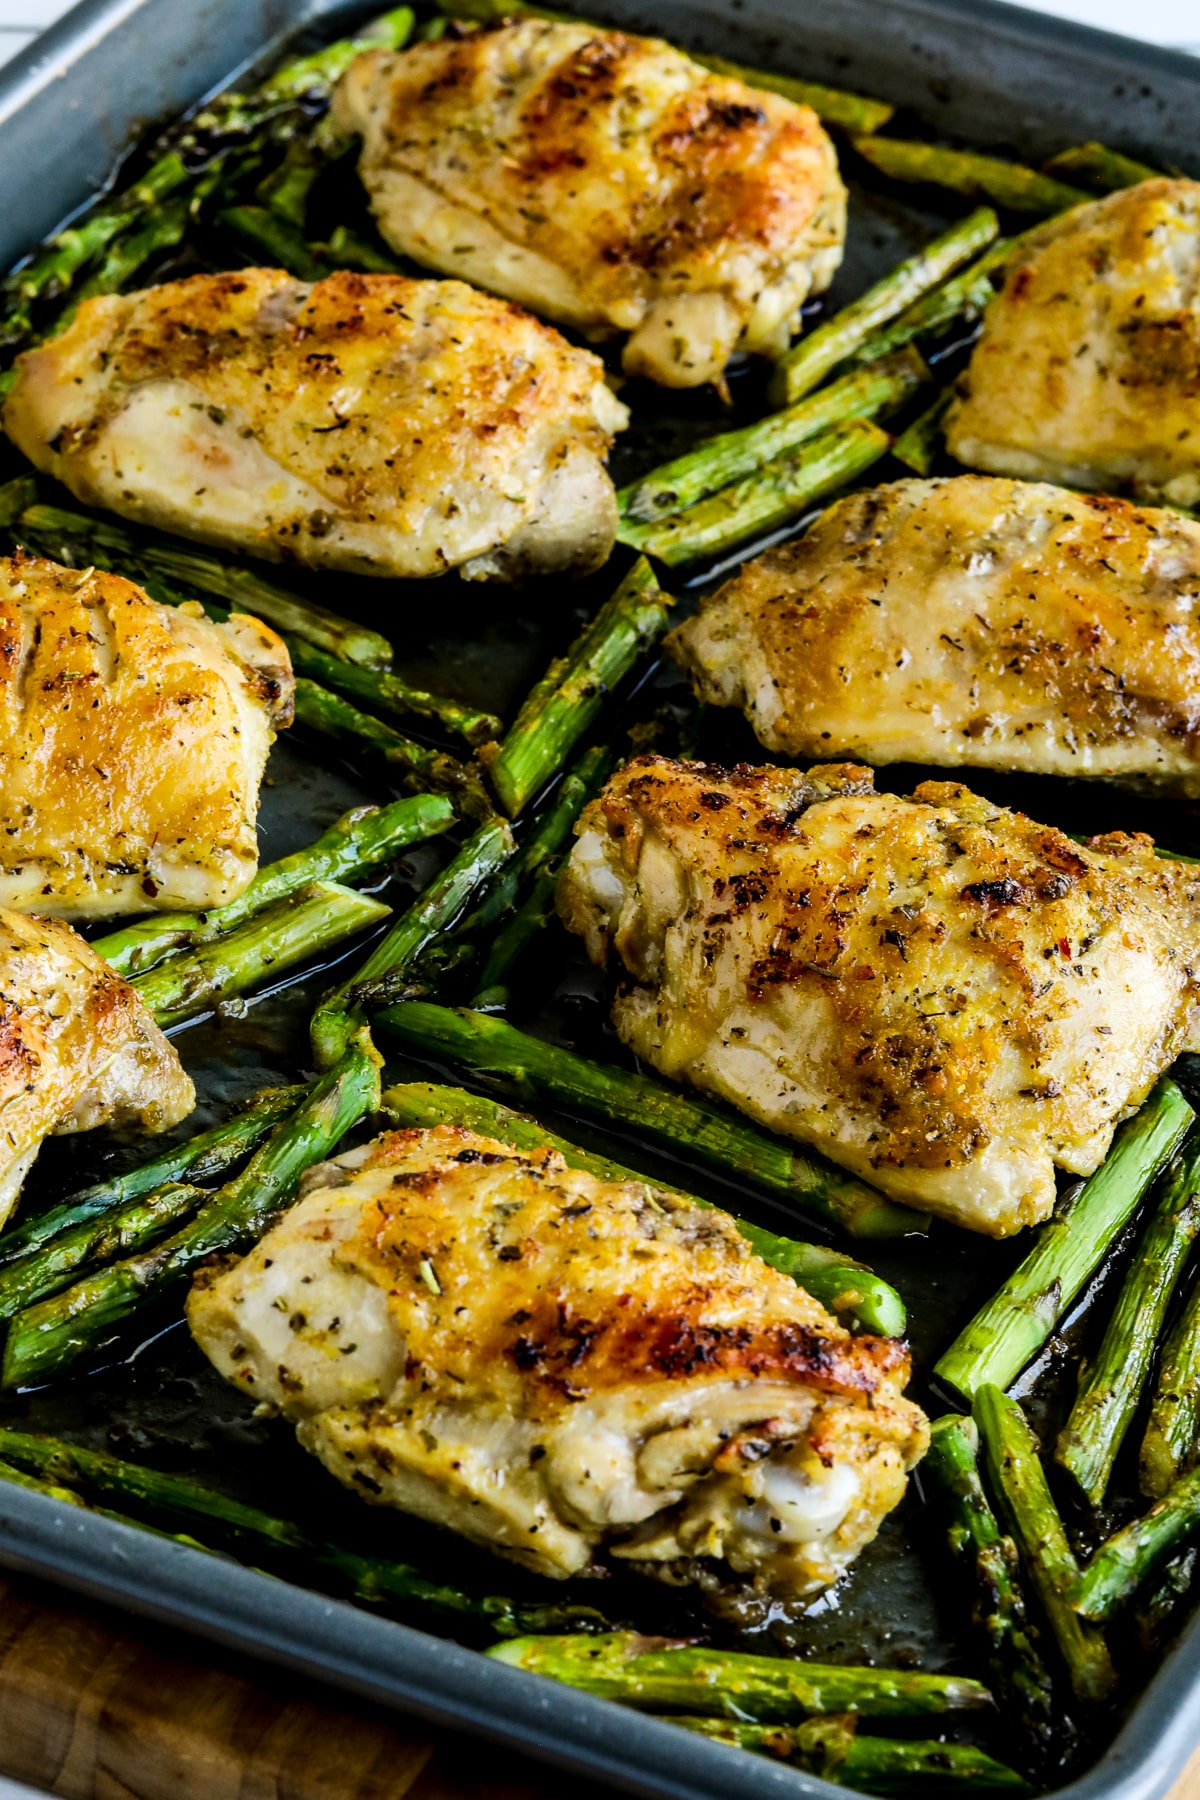
    Finished Sheet Pan Chicken Thighs and Asparagus shown on sheet pan.

    Sheet Pan Chicken Thighs and Asparagus is a perfect easy dinner that’s special enough to make for guests!

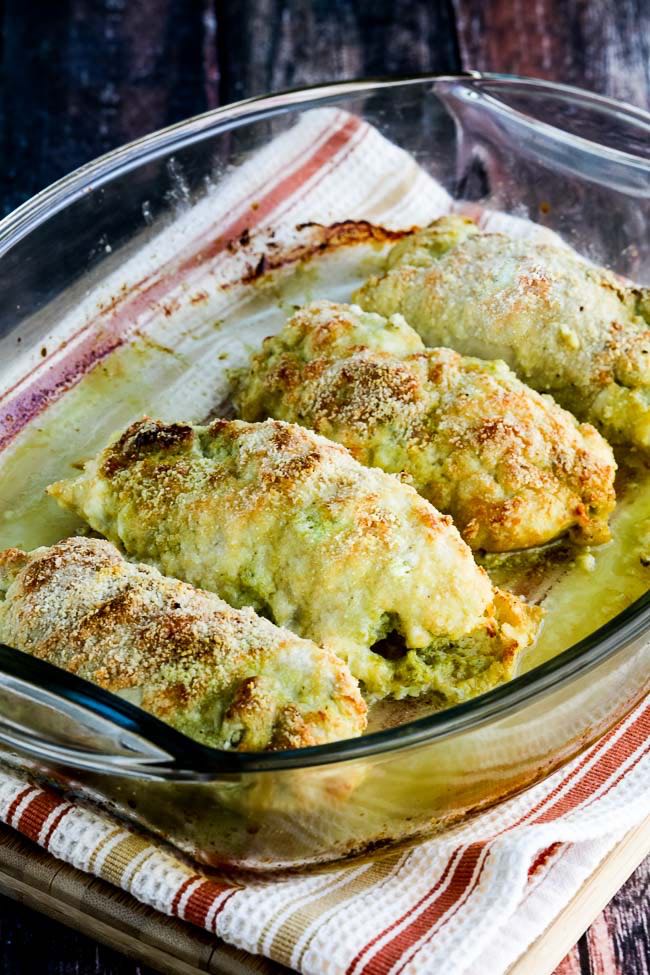
    Low-Carb Baked Chicken Stuffed with Pesto and Cheese found on KalynsKitchen.com

    I had to include this Baked Chicken Stuffed with Pesto and Cheese because  it’s been hugely popular for years and years. You can make this for guests and they won’t even realize they’re eating low-carb!

    More Amazing Keto Baked Chicken Recipes:

    Want more Ideas for Keto Baked Chicken?

    You can use Low-Carb and Keto Casseroles to find lots of Keto casseroles with chicken.

    Pinterest image of Keto Baked Chicken Recipes

    We are a participant in the Amazon Services LLC Associates Program, an affiliate advertising program designed to provide a means for us to earn fees by linking to Amazon.com and affiliated sites. As an Amazon Associate, I earn from qualifying purchases.

    Source link

  • Baked Brie Crescent Rolls Recipe

    Baked Brie Crescent Rolls Recipe

    These mini baked brie crescent rolls are super simple and so delicious! They are perfect for the holidays and gatherings. Everyone I’ve served them to loves them!

    Baked Brie Crescent Rolls

    I serve these brie stuffed crescent rolls as appetizers and in my bread basket as a side for holiday meals. They are quick to make and versatile, so if you don’t have brie cheese, substitute it with whatever you love!

    Store-bought crescent dough (like from Pillsbury) makes these easy, but any brand or homemade pizza dough works well! If you love brie, I highly recommend our brie stuffed bread rolls or this brie with hot honey!

    How to Make Baked Brie Roll Ups

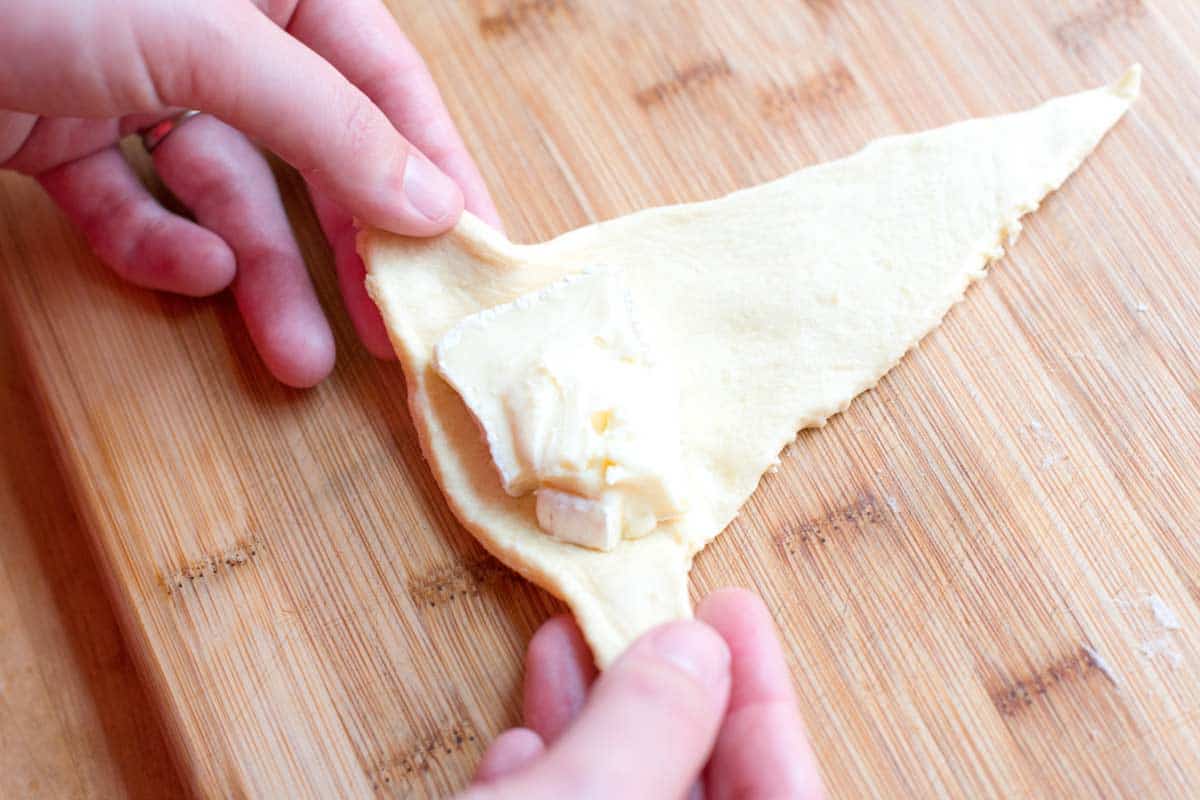
    These crescent rolls really could not get any easier. Place a big piece of brie onto the long end of a crescent dough triangle, tuck in the sides, and roll up. Then brush the tops with egg wash so they turn shiny and golden brown after baking. I also add a pecan half and some sea salt to the top before baking. I love the way it looks.

    How to Make Baked Brie Crescent Rolls: Rolling up the cheese

    The rolls take about 15 minutes to bake and are perfect for parties or as a side dish. A little brie might escape during baking, but the rolls will still taste amazing. See our holiday recipes or appetizer recipes for more recipes like this one.

    Baked Brie Crescent Rolls

    Baked Brie Crescent Rolls

    • PREP
    • COOK
    • TOTAL

    We use store-bought crescent dough for these easy mini baked brie rolls. Brie is excellent, but most cheeses will work as a substitute. Adding more fillings, such as diced olives, ham, or jam, is also great.

    Makes 8 Rolls

    You Will Need

    1 (8oz) can refrigerated crescent dinner rolls

    6 ounces brie cheese

    1 large egg

    1 tablespoon water

    8 pecan halves

    Coarse sea salt for sprinkling on top

    Directions

      1Preheat the oven to 375°F (190°C). Line a baking sheet with parchment paper.

      2Separate the crescent dough into 8 triangles and then slice the brie into 8 pieces.

      3Place one piece of brie onto the wider end of a dough triangle. Fold in the sides, then roll the dough into a tight packet, making sure the ends are closed so the cheese won’t come out during baking. Repeat with remaining dough triangles and place the rolls onto the baking sheet.

      4Whisk the egg and water in a small bowl, then use a pastry brush to lightly brush the tops with egg wash. Press one pecan half onto the top and sprinkle with salt.

      5Bake until golden brown, 12 to 15 minutes. Cool on the baking sheet for 10 to 15 minutes before serving.

    Nutrition Per Serving
    Serving Size
    1 roll
    /
    Calories
    192
    /
    Total Fat
    12.3g
    /
    Saturated Fat
    6g
    /
    Cholesterol
    44.6mg
    /
    Sodium
    411.6mg
    /
    Carbohydrate
    12.4g
    /
    Total Sugars
    3.2g
    /
    Dietary Fiber
    0.2g
    /
    Protein
    7.4g


    AUTHOR:

    Adam Gallagher

    Previous Post: Perfect Roasted Broccoli
    Next Post: Weeknight Homemade Spaghetti Sauce

    Source link

  • Baked Garlic Basil Chicken Recipe

    Baked Garlic Basil Chicken Recipe

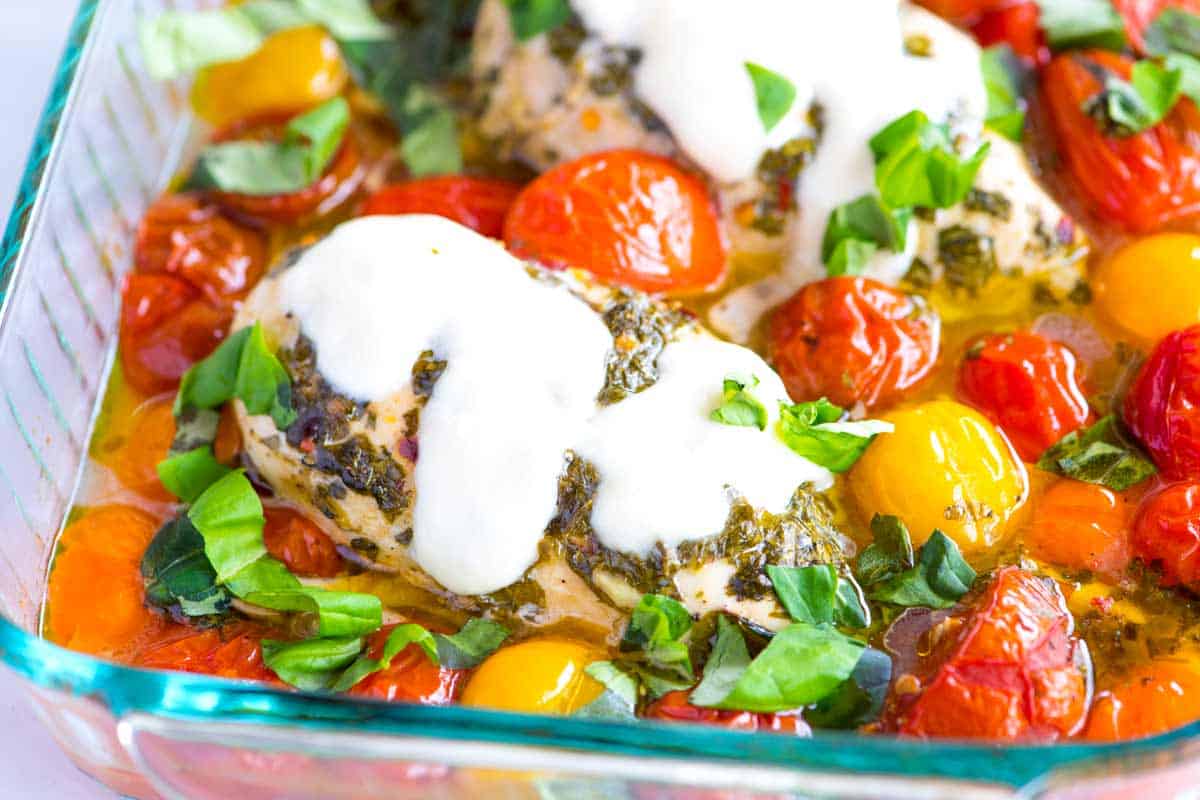
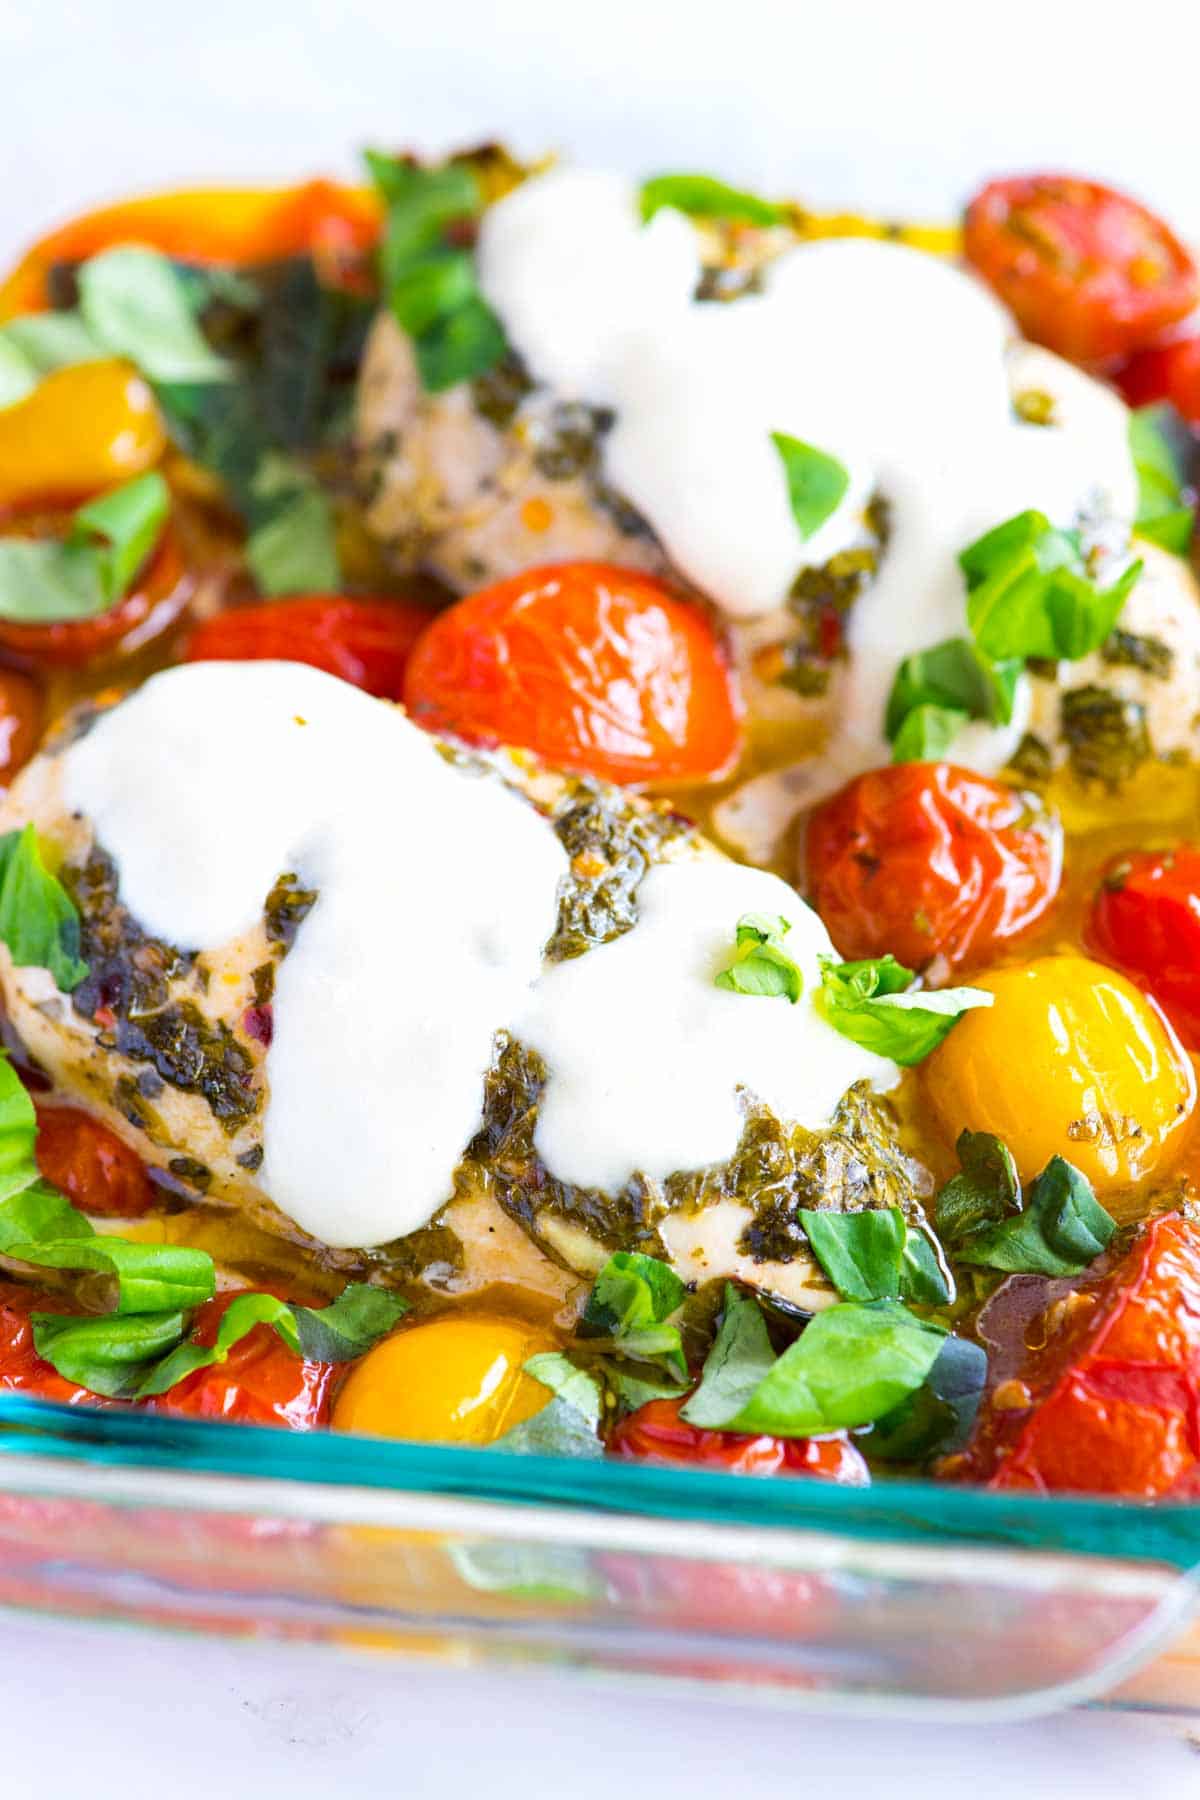
    This garlic basil chicken breast recipe is incredibly juicy and flavorful, thanks to a simple marinade and baking the chicken on a bed of juicy tomatoes.

    Baked Garlic Chicken Breasts

    Our family loves this juicy, tender baked chicken breast recipe with the most delicious garlic basil marinade. I love baking the chicken breasts surrounded with tomatoes, which turn into a lovely fresh sauce.

    If you ever struggle with dry chicken breasts, this recipe is for you! For more chicken breast recipes like this one, see our recipe for baked lemon chicken breast or these lemon dill chicken breasts made in a skillet.

    Key Ingredients

    • Chicken Breasts: While this recipe features chicken breasts, you can easily adapt it to use chicken thighs. Thighs may require a slightly longer cooking time.
    • Garlic and Basil: I am generous with the fresh garlic and basil and use them to make the marinade. I also use the basil stalks underneath the chicken breasts to infuse even more flavor. You can substitute the basil for dill, parsley, cilantro, or mint.
    • Olive Oil and Vinegar: Olive oil and vinegar create the base of the marinade, ensuring it coats the chicken beautifully. I love red wine vinegar adds a lovely tang, but champagne vinegar or even lemon juice work well too.
    • Tomatoes: I love tossing lots of tomatoes around the chicken to bake at the same time. As they bake in the oven, they burst and release their juices, making the most delicious sauce at the bottom of the baking dish.
    • Mozzarella Cheese: I add cheese towards the end of the baking time and allow it to melt down over the chicken.

    Find the full recipe with measurements below.

    How to Make Baked Garlic Chicken

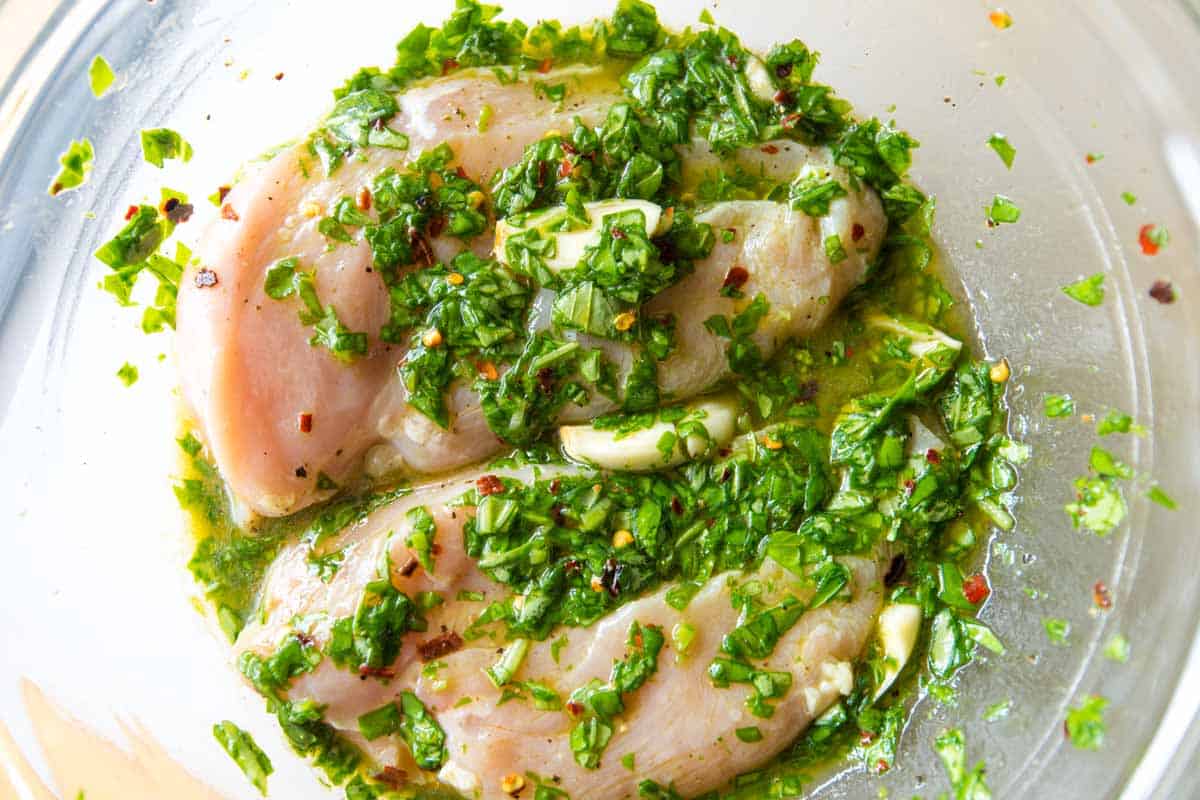
    Tip 1: Use our marinade. It’s a simple combination of red wine vinegar, olive oil, garlic, and basil. We only marinate chicken breasts 1 to 2 hours — you really don’t need to go longer than that. After the chicken has marinated, move on to the tomatoes.

    Marinating the chicken in basil vinaigrette

    Tip 2: Use lots of tomatoes. Use a variety of cut tomatoes and whole small tomatoes. The cut tomatoes give up their juices quickly and the cherry tomatoes stay intact. Add them to a baking dish with basil stalks (we used the leaves to make the marinade). You won’t end up eating the stalks, but they are really fragrant. We also add basil stalks to these slow cooker chicken meatballs.

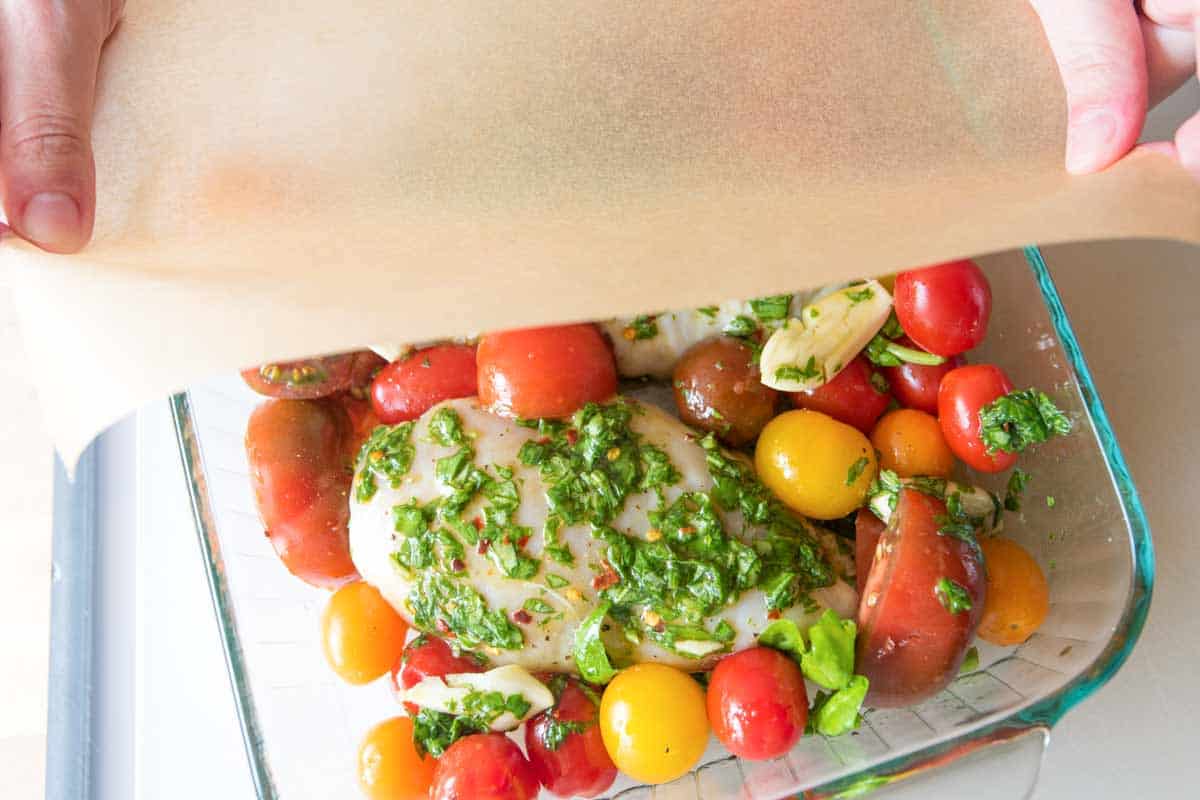
    Tip 3: Cook your chicken covered. Time for the chicken. Just nestle it in to the dish. Then we bake loosely covered with some parchment paper. By loosely covering the chicken, the chicken bakes and braises simultaneously, meaning the chicken bakes in its juices. This method of baking chicken breasts keeps the chicken juicy and so tender.

    Cover with parchment paper before baking.

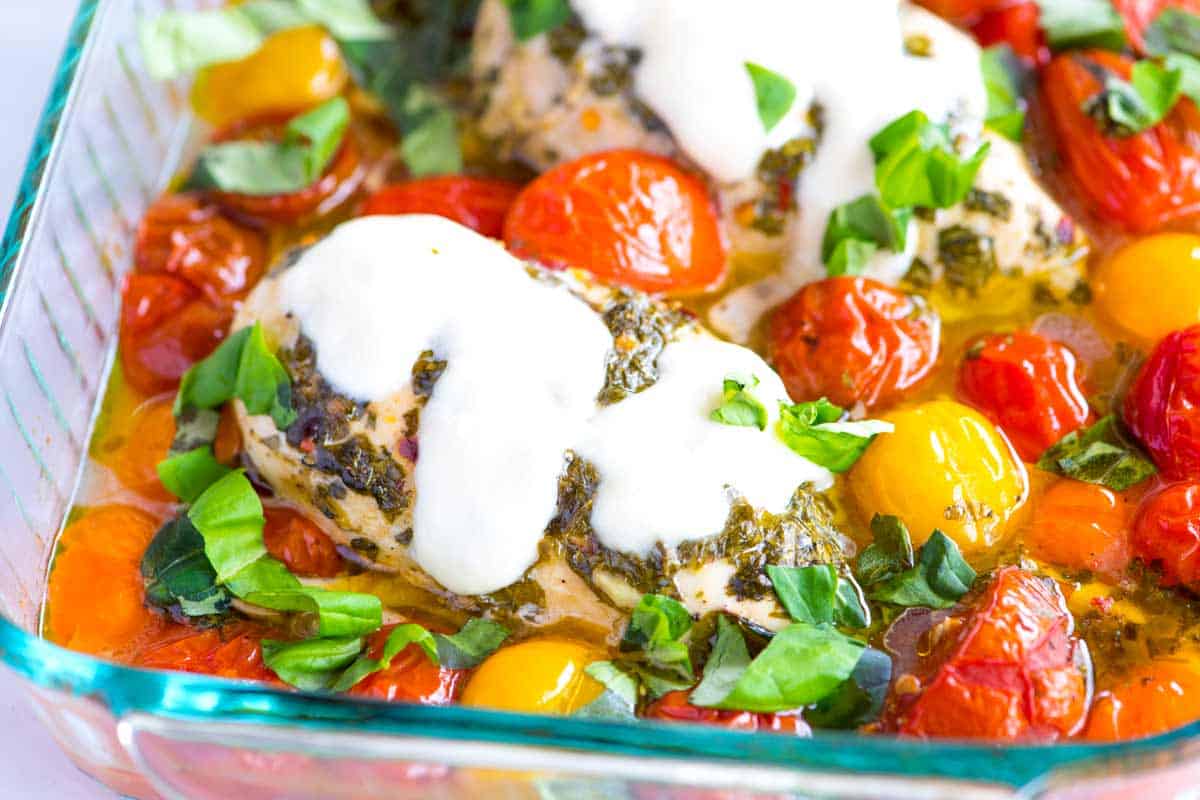
    Tip 4: Top with cheese and save the liquid. After 35 to 40 minutes the chicken should be done and it’s time to add a little mozzarella on top. Oh, and that liquid at the bottom of the baking dish? It’s pure gold! A big piece of focaccia bread to sop it all up is a great idea!

    Baked Garlic Basil Chicken

    Baked Garlic Basil Chicken

    • PREP
    • COOK
    • TOTAL

    For juicy, tender baked chicken breasts remember these three things: marinate, bake loosely covered, and use a meat thermometer. In our photos, we show baking 2 chicken breasts, but the marinade shared below is enough for 4 chicken breasts. The chicken does not need to be completely immersed in the marinade, just coated by it. If you plan to double the recipe, simply double the amount of chicken, tomatoes, and the mozzarella.

    4 Servings

    You Will Need

    4 boneless, skinless chicken breasts (6 to 8 ounces each)

    1 bunch fresh basil

    Extra-virgin olive oil

    2 tablespoons red wine vinegar

    1/4 teaspoon to 1/2 teaspoon red pepper flakes, depending on how spicy you like things

    3 cloves garlic, crushed with the side of a large knife or minced

    2 cups tomatoes, cut to rough 1-inch chunks and leaving cherry tomatoes whole

    1/4 cup torn fresh mozzarella cheese

    Salt and freshly ground black pepper

    Directions

    • Marinate Chicken
    • 1Remove basil leaves from the stalks and set them aside. Roughly chop the basil leaves so that you have about 1/4 cup. Whisk 2 tablespoons of olive oil, red wine vinegar, red pepper flakes, 1/2 teaspoon salt, and 1/2 teaspoon black pepper together until the salt has dissolved. Stir in the garlic and basil. Refrigerate and use within 1 to 2 hours.

      2Add chicken breasts to the marinade and marinate for at least 1 hour and up to 2 hours in the refrigerator.

    • Bake the Chicken
    • 1Position the oven rack in the middle of the oven and preheat it to 400°F (204°C). Lightly oil one side of a sheet of parchment paper large enough to cover the baking dish. (Aluminum foil can also be used.)

      2Add the basil stalks set aside from earlier to a baking dish large enough to fit the chicken breasts arranged in one layer. Add the tomatoes, then toss with 1/2 a tablespoon of olive oil and a pinch of salt and pepper.

      3Nestle the chicken breasts into the tomatoes, allowing the tomatoes to gather up the sides of each breast. Throw the garlic cloves from the marinade into the baking dish, then cover the dish with parchment paper. Loosely tuck the parchment paper around the chicken.

      4Bake until the chicken is opaque all the way through, and an internal thermometer reads 165°F when inserted into the thickest part of the breast. Check for doneness in around 25 minutes, and then go from there. Most chicken breasts will take 35 to 40 minutes.

      5Scatter mozzarella on top of each breast, then broil on high for about a minute or until the cheese melts. Serve the chicken with the baked tomatoes, juices from the bottom of the baking dish, and more torn basil leaves.

    Adam and Joanne’s Tips

    • The nutrition facts provided below are estimates.

    Nutrition Per Serving
    Serving Size
    1/4 of the recipe
    /
    Calories
    240
    /
    Protein
    28 g
    /
    Carbohydrate
    4 g
    /
    Dietary Fiber
    1 g
    /
    Total Sugars
    2 g
    /
    Total Fat
    12 g
    /
    Saturated Fat
    3 g
    /
    Cholesterol
    89 mg


    AUTHOR:

    Adam Gallagher

    Adam and Joanne of Inspired Taste

    We are Adam and Joanne Gallagher, the creators of Inspired Taste. Established in 2009, Inspired Taste grew from a childhood dream into one of the internet’s most trusted recipe sites with hundreds of reliable recipes, step-by-step videos, and expert tips.More About Us

    Source link

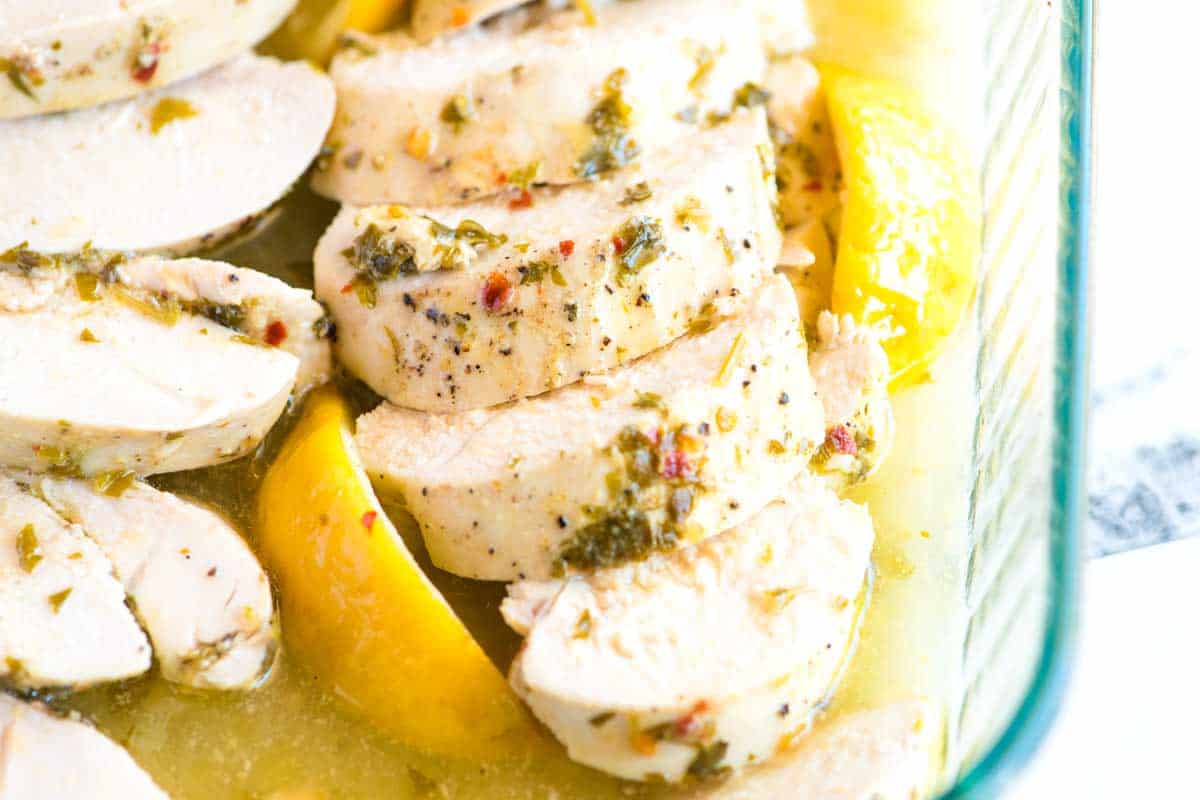
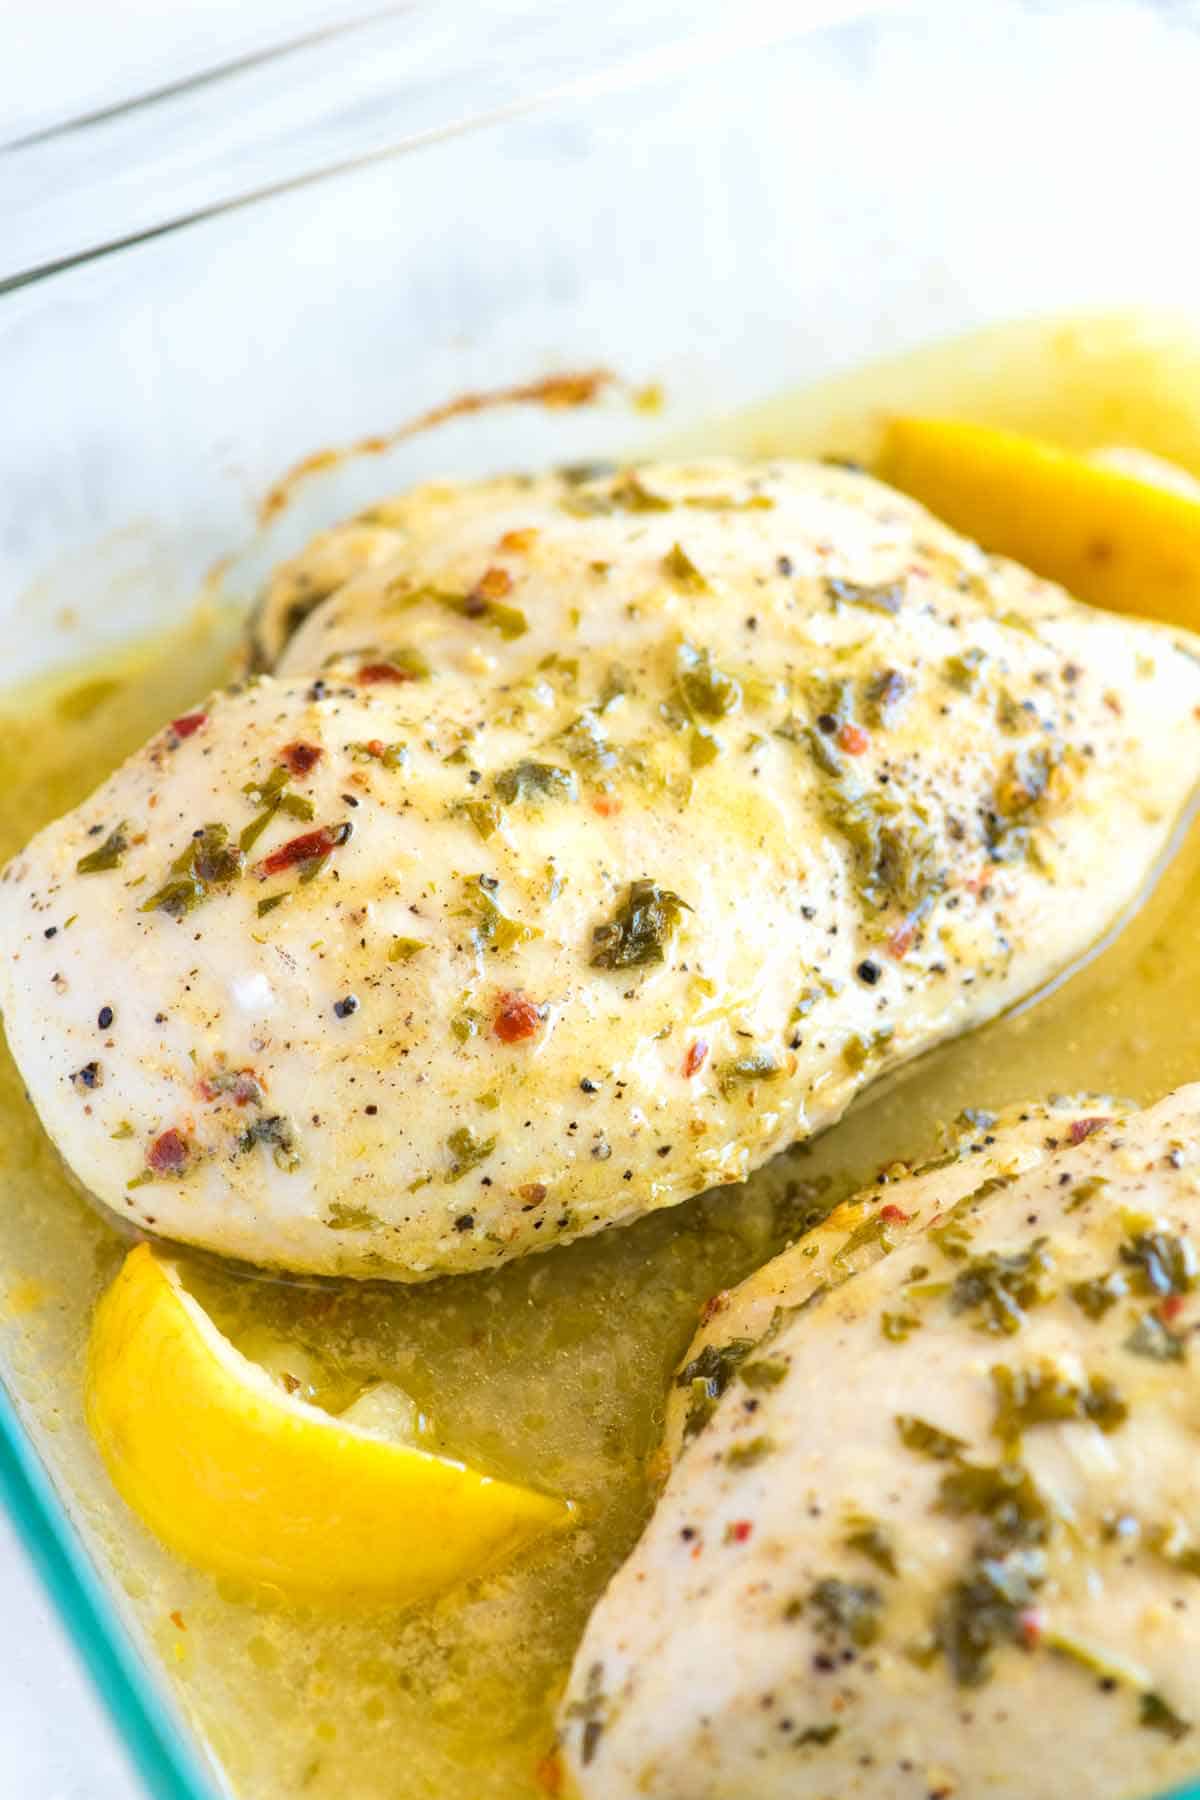
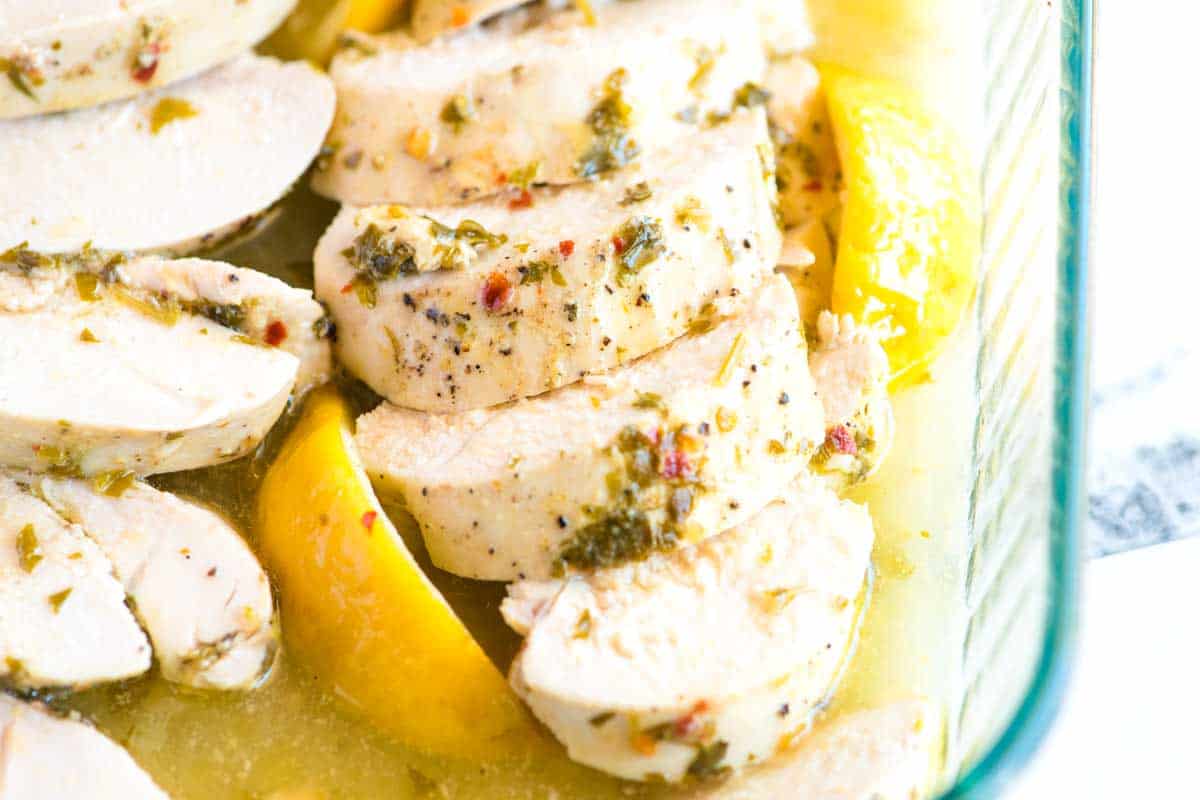
  • Baked Lemon Chicken Breast Recipe

    Baked Lemon Chicken Breast Recipe

    Say goodbye to dry, flavorless chicken! This easy lemon baked chicken breast recipe has a simple marinade that guarantees incredibly juicy, flavorful chicken.

    Baked Lemon Chicken

    We have a lot of chicken recipes on Inspired Taste, and honestly, I love them all! These lemon baked chicken breasts fit right in. Thanks to our lemon chicken marinade, they are super flavorful, extra juicy, and tender, thanks to our easy baking method.

    Skinless, boneless chicken breasts are easy to overcook. With our method, you’ll be guaranteed juicy, flavorful chicken! Try our lemon dill chicken breasts for a stovetop method, or for another take on this baked recipe, see these tomato basil baked chicken breasts.

    Key Ingredients

    • Chicken Breasts: While this recipe features chicken breasts, you can easily adapt it to use chicken thighs. Thighs may require a slightly longer cooking time. In fact, we also a recipe for lemon chicken thighs if you are interested.
    • Lemon: I use fresh lemon juice and zest for this. Lemon juice makes the base of the marinade, while the zest gives it an extra lemony punch. I like using a vegetable peeler to make strips of the zest.
    • Olive Oil: I love the flavor of olive oil in this marinade. It makes the chicken more delicious. If you plan to cook your chicken over high heat, consider substituting it with avocado oil.
    • Dijon Mustard: Mustard and lemon work beautifully together, so I always add a little Dijon to this marinade.
    • Garlic: Smashed whole garlic cloves add the right amount of fresh garlic flavor and balance the acidity of the lemon. Keeping them whole also prevents any garlic from burning later on.
    • Fresh Herbs: These are optional, but I love adding fresh herbs to this chicken marinade. I use fresh parsley in the photos, but dill, cilantro, and basil are excellent choices.

    Find the full recipe with measurements below.

    How to Make the Best Baked Lemon Chicken Breast

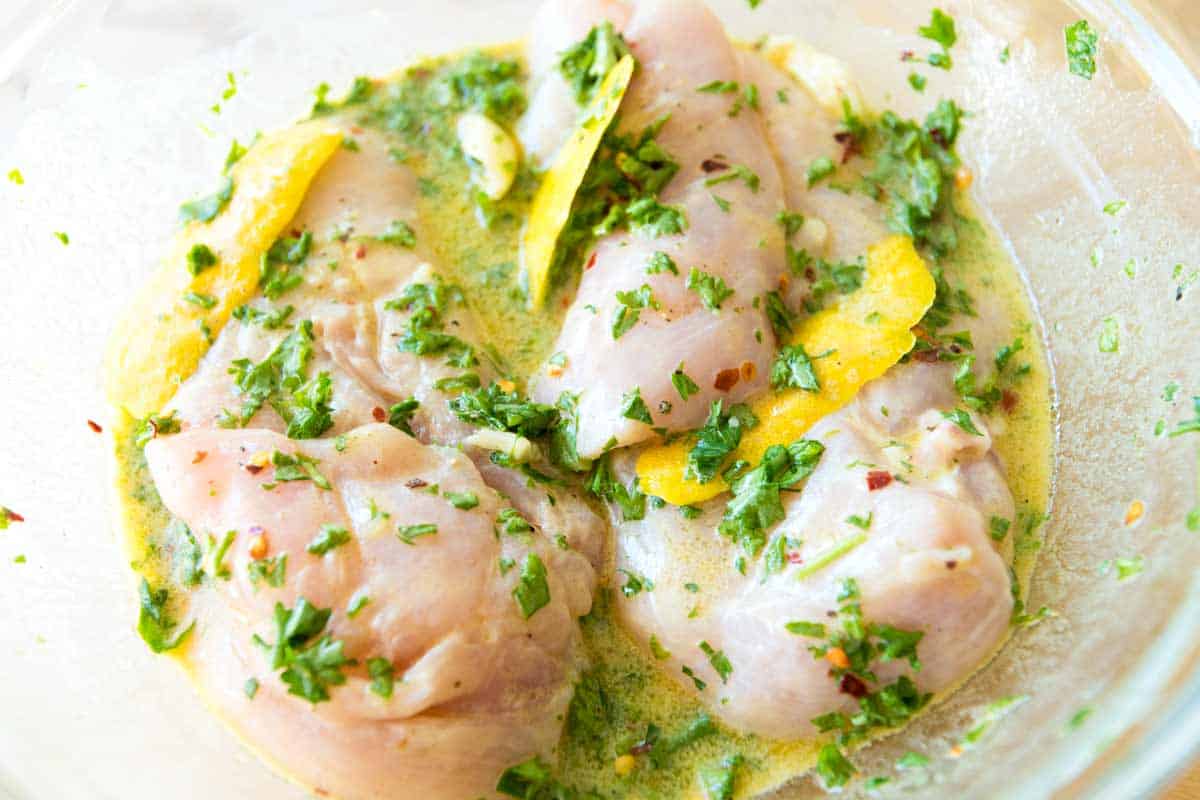
    Tip 1: Use our marinade. In our recipe below, we share a marinade made of fresh lemon, garlic, and Dijon mustard. It’s best to marinate chicken breasts 1 to 2 hours before baking. There isn’t a need to go longer than that.

    Marinating the chicken breasts in a lemon marinade

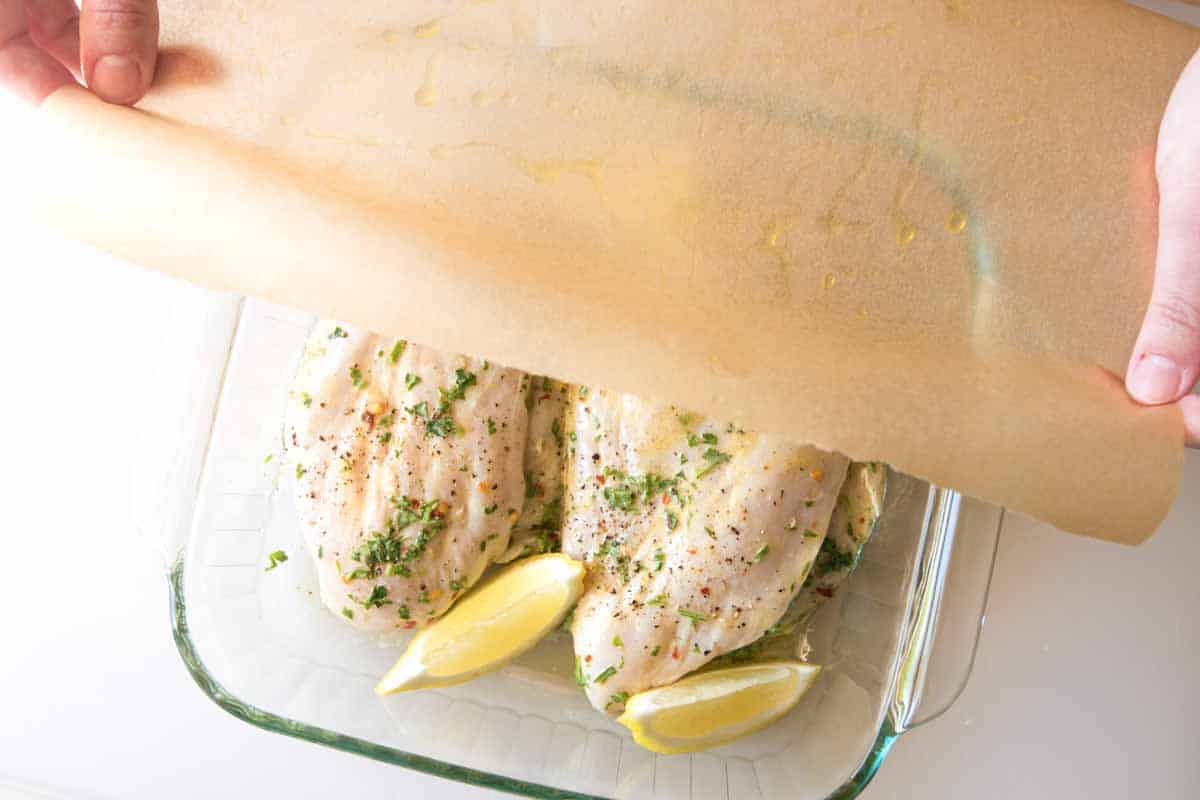
    Tip 2: Bake your chicken covered. After marinating, we add the chicken to a baking dish and loosely cover it with parchment paper (aluminum foil is a good alternative). By loosely covering the chicken, the chicken breasts bake and braise simultaneously, meaning the chicken bakes in its juices. This method of baking chicken breasts keeps the chicken breasts juicy and so tender.

    Loosely covering the chicken before baking.

    Tip 3: Knowing when the chicken is done. The bake time depends on how large your chicken breasts are. I check for doneness around 25 minutes and then proceed from there. Most chicken breasts take 35 to 40 minutes to bake in the oven (I use 400°F). An internal thermometer is one foolproof way to check if your chicken is done. Insert it into the thickest part of the breast and take the chicken out once you see 165°F. Then, let the chicken rest before serving.

    Baked Lemon Chicken Breasts

    Baked Lemon Chicken Breast

    • PREP
    • COOK
    • TOTAL

    For the best, juicy, and tender lemon baked chicken breast remember these three things: marinate first, bake loosely covered, and use a meat thermometer. Before baking in the oven, we marinate the chicken breasts in a magical mixture of fresh lemon, garlic, Dijon mustard, and parsley. If you’re short on time, marinate as close to an hour as you can. If you’re flexible, go for a whole two hours. And since we want to keep things safe, it’s best to marinate the chicken in the refrigerator (no matter how long you do it for).

    4 Servings

    Watch Us Make the Recipe

    You Will Need

    4 boneless, skinless chicken breasts (6 to 8 ounces each)

    2 large lemons

    2 tablespoons olive oil

    1 tablespoon Dijon mustard

    1/2 teaspoon fine sea salt

    1/4 teaspoon red pepper flakes, or more to taste

    1/2 teaspoon fresh ground black pepper

    3 cloves garlic, crushed with the side of a large knife or minced

    1/2 cup loosely packed fresh parsley, roughly chopped

    Directions

    • Marinate Chicken
    • 1Peel or zest the thin, yellow skin (zest) from one lemon, and then juice the lemon so that you have 1/4 cup of fresh lemon juice. (If the first lemon was not enough, Use half of the second lemon to make up the 1/4 cup of juice.)

      2Whisk lemon juice, olive oil, mustard, salt, red pepper flakes, and black pepper until the salt has dissolved. Stir in the garlic, lemon zest, and parsley (if using). Refrigerate and use within 1 to 2 hours.

      3Add the chicken breasts to the marinade and marinate for 1 hour or up to 2 hours in the refrigerator.

    • Bake Chicken Breasts
    • 1Position the oven rack in the middle of the oven and preheat it to 400°F (204°C). Lightly oil one side of a sheet of parchment paper large enough to cover the baking dish. (Aluminum foil can also be used.)

      2Transfer the chicken breasts to the prepared baking dish, removing any large pieces of garlic that might be stuck to them. Season the chicken with salt and pepper.

      3Quarter the second lemon. Scatter lemon wedges around the chicken, then cover with parchment paper, oiled side down, towards the chicken. Loosely tuck the parchment paper around the chicken.

      4Bake until the chicken is opaque all the way through and an internal thermometer reads 165°F when inserted into the thickest part of the breast. Check for doneness in around 25 minutes, and then go from there. Most chicken breasts will take 35 to 40 minutes.

      5Let the chicken rest for about 10 minutes, then serve drizzled with some of the liquid left in the baking dish. You can also slice the chicken and place it back into the baking dish with all the leftover cooking liquid (our favorite).

    Adam and Joanne’s Tips

    • The nutrition facts provided below are estimates.

    Nutrition Per Serving
    Calories
    212
    /
    Protein
    27 g
    /
    Carbohydrate
    4 g
    /
    Dietary Fiber
    1 g
    /
    Total Sugars
    1 g
    /
    Total Fat
    10 g
    /
    Saturated Fat
    2 g
    /
    Cholesterol
    83 mg


    AUTHOR:

    Joanne Gallagher

    Adam and Joanne of Inspired Taste

    We are Adam and Joanne Gallagher, the creators of Inspired Taste. Established in 2009, Inspired Taste grew from a childhood dream into one of the internet’s most trusted recipe sites with hundreds of reliable recipes, step-by-step videos, and expert tips.More About Us

    Source link

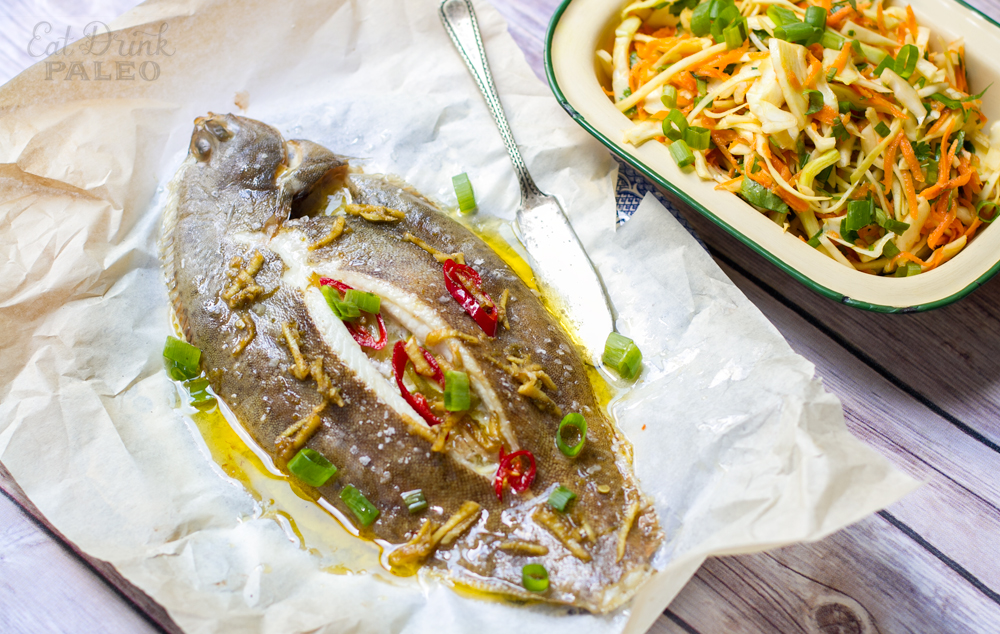
  • Baked Lemon Sole With Ginger & Chilli Butter

    Baked Lemon Sole With Ginger & Chilli Butter

    Baked lemon sole with ginger chilli butter sauce is a savoury, succulent fish packed with complex flavours and just the right amount of kick. Served with a simple Asian slaw salad, this healthy lemon sole recipe is quick and easy to prepare for a midweek meal or your next dinner party.


    Jump to: â„č Overview | 🛒 Ingredients | đŸ“· How To Make | đŸ„—Serving Suggestions | 📝 Go To Full Recipe |🐟 More Healthy Fish Recipes


    Baked Lemon Sole Recipe

    Infused with zesty lime and topped with fiery ginger and chili butter sauce, this baked lemon sole dish is sure to awaken your taste buds and leave you feeling satisfied and nourished. 

    And to balance things out, I served this fish dish with a refreshing slaw salad loaded with crisp veggies and tangy dressing. A side of rice or quinoa will make it even more satiating and energy-dense.

    This baked lemon sole recipe is healthy, gluten-free, low-carb, paleo and Whole30 friendly (use ghee instead of butter). 

    What Is Sole Fish?

    Let me tell you about the marvelous fish known as the sole! These fish are typically flat and oval-shaped, with both eyes on one side of their head. They are usually brown or gray in color, with a smooth, slightly slimy skin. 

    They are found in oceans all around the world and highly sought after by chefs and foodies alike for its delicate and sweet taste, and tender texture. 

    There are many different types of sole out there, each with their own unique qualities. You’ve got your Dover sole, lemon sole, petrale sole, and more! These fish are like ninja warriors, sneaking around the ocean floor with their eyes all on one side of their head.

    Sole is a popular ingredient in many different types of cuisine, including French, Italian, and Asian. You can grill it up, bake it, fry it, or poach it to perfection. And when it comes to seasoning, a little bit of butter, lemon, herbs, or white wine can really bring out the best in this tasty fish. 

    Cooking Lemon Sole

    You can buy sole as fillets or a whole fish. I really like cooking the sole fish whole, either pan fried or baked, with some delicious sauce on the side. I am using lemon sole for this recipe.

    I asked my fishmonger to make a deep slit in the middle of the sole so I could stuff it with some ginger and lime. I then used a small sharp knife to cut the flesh on each side of the slit away from the bone, so you have two little pockets. Make sure to ask you fishmonger to clean the scales, unless you know how to do it.

    This recipe is for cooking one large whole lemon sole or 2 small ones or 2 fillets. This is enough for two servings when served with a side dish like salad or/and rice or some qunoa and vegetables. 

    The flesh of the fish is delicate and mild and goes well with some strong flavours like lemon and capers. For this recipe, I am using bold flavours of ginger, chilii and lime to compliment the delicate sole flesh.

    You can use butter or ghee as the base for the sauce, which mellows out those strong ingredients and gives you that gorgeous, rich flavour.

    What To Serve With Lemon Sole

    This lemon sole recipe is inspired by Asian cuisine and uses ingredients like ginger and fish sauce, so it works well with side dishes like rice, noodles, stir-fried vegetables or fresh, herby salad. 

    It would also work well with cooked quinoa, cauliflower rice or sweet potatoes. I’ve included ingredients and instructions for an Asian-inspired slaw salad I served with this fish.


    Want to Save This Recipe?

    Enter your email & I’ll send it to your inbox. Plus, get great new recipes from me every week!

    By submitting this form, you consent to receive emails from Cooked & Loved

    Looking for a simple and delicious lemon sole recipe? Look no further than this baked sole with ginger, chilli and lime-infused butter sauce. With just a few simple ingredients, you can transform this flaky white fish into a flavourful and satisfying meal that’s perfect for any occasion.

    • Preheat the oven to 200ÂșC / 400ÂșF.

    • Make a long slit in the middle of the fish and cut inside the flesh, peeling it away from the bone to create a little pocket on each side. See Cooking With Lemon Sole notes above.

    • Grate about half a teaspoon worthh of lemon zest, and cut 2-3 thin slices to insert inside the fish. 

    • Sprinkle the sole with a little sea salt on each side. Stuff the ginger and lime slices inside the flesh pockets on one side of the fish and place it on an oven tray lined with lightly grease baking paper (you can use a little butter/ghee or olive oil).

    • Place fish in the oven and cook for 13-15 minutes, depending on the size of the fish. I think I did mine for 13 minutes at 200ÂșC

    • In the meantime, add butter to a medium frying pan and bring to medium-high heat. Add ginger and chilli and cook until golden brown and slightly crispy, a couple of minutes. Add lime zest, juice of half a lime, and fish sauce. Stir through and take off the heat.

    • Prepare the Asian slaw by combining all dressing ingredients together and tossing them through the salad.

    • Remove sole from the oven and pour over the butter sauce with ginger and chillies. Sprinkle with diced ghreen onions and a little extra sea salt. You can also drizzle more lime juice or serve a wedge of lime on the side. Serve with the Asian slaw or a side of favourite vegetables.

    Calories: 398kcal | Carbohydrates: 16g | Protein: 18g | Fat: 30g | Saturated Fat: 10g | Polyunsaturated Fat: 3g | Monounsaturated Fat: 15g | Trans Fat: 0.5g | Cholesterol: 88mg | Sodium: 1167mg | Potassium: 472mg | Fiber: 3g | Sugar: 13g | Vitamin A: 4728IU | Vitamin C: 29mg | Calcium: 79mg | Iron: 1mg

    Keywords: Baked Sole, Sole Fish, Butter Sauce, Fish Recipes, Dinner Recipes, Sole Recipe, Lemon Sole

    More Healthy Fish Recipes

    [mv_playlist id=”224″ jsonLd=”false” ratio=”16:9″ thumbnail=”https://mediavine-res.cloudinary.com/v1599716598/plqh05ivvby851y7acqo.jpg” title=”WATCH MY TOP 10 HEALTHY VIDEO RECIPES”]

    Source link

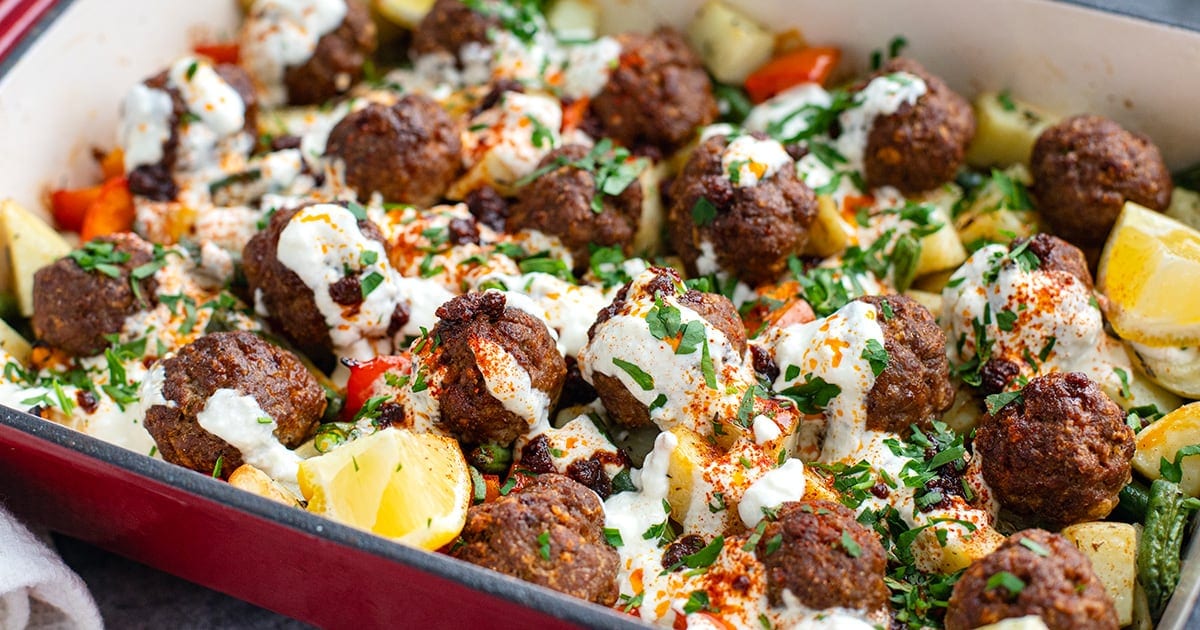
  • Turkish Baked Meatballs & Potatoes With Garlic Yogurt

    Turkish Baked Meatballs & Potatoes With Garlic Yogurt

    Spiced baked meatballs with potatoes, finished with garlic yogurt and paprika butter sauce. This one-pan meal is inspired by a viral Turkish pasta recipe, and is hearty, high in protein, and packed with flavor.


    Jump to: â„č Overview | 🛒 Ingredients | đŸ“· How To Make | đŸ“č Watch The Video | đŸ‘©â€đŸł Recipe Tips | đŸ„—Â Serving Suggestions | 📝 Full Recipe Card | đŸœ More Meatball Recipes And More Recipes With Potatoes


    You might be familiar with Turkish köfte (meatballs) AND you might have seen a viral Turkish pasta with garlic yogurt sauce and paprika chili oil, and if you like the sound of either of those, you will love this dinner meal.

    I wanted to create something more protein-rich and veggie-forward, so I swapped the pasta for crispy potatoes, sweet red peppers, and tender green beans, all baked together with seasoned beef meatballs.

    The whole tray soaks up the savory goodness as it bakes. But the real magic is in the toppings — a creamy, garlicky yogurt sauce and that golden, earthy, slightly sweet paprika butter drizzle. Both are non-negotiable, trust me.

    It’s easy enough for a weeknight dinner and impressive enough to serve guests. It’s not spicy, but the flavors are complex, which some kids might not be used to, in which case you serve the meatballs and potatoes without the sauces.

    Nutrition per serving: 550 calories, 40 grams protein, 8 grams fiber.

    đŸ‘©â€đŸł This meatballs and potatoes recipe is part of my high-protein and fiber meals series, try some of the dishes: smashed chicken tacos, steak and potatoes with chimichurri salsa, chicken shawarma with baked rice, grilled salmon salad with kale, corn & Parmesan, or honey soy chicken & rice bowls.

    What You’ll Need

    Here is what you’ll need for this Turkish meatballs and potato bake. Find the full measurements in the recipe card below.

    For the meatballs:

    • Lean ground beef – the main protein star, rich and juicy. You can swap for lamb or chicken if needed. I used 5% fat ground beef mince.
    • Breadcrumbs – use GF breadcrumbs to keep it gluten-free.
    • Spices – paprika (both sweet and smoked), cumin, cinnamon, coriander seed, and onion powder. These give it that unmistakable Turkish-inspired depth. If you happen to have some pul biber or Aleppo pepper (Turkish chili), add a bit of that as well.
    • Olive oil & water – for moisture and binding without eggs.

    For the veggies:

    • Potatoes – classic, comforting, and fiber-rich. Use sweet potatoes for extra nutrients or swap for cauliflower if low-carb.
    • Red bell pepper & green beans – for color, texture, and crunch (and fiber). Zucchini or carrots also work.
    • Dried thyme & olive oil – herby and fragrant, bringing it all together.

    Garlic yogurt sauce:

    • Greek yogurt – low-fat, high-protein yogurt is best.
    • Garlic, lemon juice, salt, water – tangy and punchy, this sauce ties everything together. Coconut yogurt can be used for dairy-free.

    Paprika butter sauce:

    • Salted butter – rich and golden. You can use olive oil for a dairy-free version.
    • Paprika (sweet + smoked), chili, honey, lemon juice – buttery, smoky, and slightly tangy-sweet.

    How To Make Turkish Baked Meatballs & Potatoes With Garlic Yogurt

    Find the full recipe and nutritional information below. Here are some handy step-by-step photos for Turkish baked meatballs & potatoes with garlic yogurt.

    • Mix all meatball ingredients and roll into 1 oz (30 grams) balls. Set aside.
    • Bake diced potatoes first with thyme and salt for 15 minutes at 200°C (400°F).
    • Add peppers and green beans, toss with oil and salt.
    • Nestle meatballs on top and bake for another 20 minutes.
    • Meanwhile, mix garlic yogurt sauce.
    • Melt butter and spices for paprika sauce; finish with lemon juice and honey.
    • Once everything is cooked, serve with dollops of garlic yogurt and drizzle with paprika butter sauce.

    Watch The Video

    Recipe Tips

    • Don’t skip the sauces! Seriously. The yogurt and paprika butter are what make this whole thing sing.
    • Batch it – Make double the meatballs and freeze half for later.
    • Low-carb? Use cauliflower or rutabaga instead of potatoes.
    • Meal prep friendly – Store in airtight containers for up to 3 days (keep sauces separately, or I would even make the paprika butter fresh). Reheat gently to keep meatballs juicy.
    • Make-ahead tip – Prep meatballs and chop veggies the night before.

    Serving Suggestions

    Serve this cozy tray bake straight from the oven with a side of fresh greens or a simple cucumber-tomato salad. I also love a bit of crusty bread to scoop up that garlic yogurt + paprika oil situation (but hey, that’s optional if you’re keeping it gluten-free). A glass of chilled ayran or sparkling water with lemon? Chef-style finish.

    💬 If you’ve tried these Turkish baked meatballs & potatoes with garlic yogurt or any other recipe on the blog then don’t forget to rate the recipe and let me know how you got on in the comments below, I love hearing from you! You can also FOLLOW ME on Instagram, Facebook, Pinterest, YouTube, and or sign up to my Newsletter to see more of my delicious food.

    Want to Save This Recipe?

    Enter your email & I’ll send it to your inbox. Plus, get great new recipes from me every week!

    By submitting this form, you consent to receive emails from Cooked & Loved

    Viral Turkish pasta inspired meal of spiced baked meatballs with potatoes, finished with garlic yogurt and paprika butter sauce. This one-pan wonder is hearty, high in protein, and packed with flavor. Find step-by-step photos and more recipe tips above.

    • Preheat the oven to 200°C / 400°F.

    • Make the meatballs: Mix all ingredients in a bowl until just combined. Roll into 1 oz (25–30 grams) balls. You should get about 20.

    • Roast the potatoes: Add diced potatoes to a large baking tray. Toss with œ tablepsoon olive oil, thyme, and œ teaspoon salt. Bake for 15 minutes.

    • Add veggies: Toss in bell peppers and green beans with the remaining oil and ÂŒ teaspoon salt. Nestle the meatballs on top.

    • Bake for another 20 minutes, until meatballs are golden and potatoes tender.

    • Garlic yogurt: Mix yogurt, garlic, lemon juice, salt, and water. Set aside.

    • Paprika butter: Melt butter with paprika, chili, and salt. Let bubble briefly, then add lemon juice and honey. Stir and remove from heat.

    • Serve: Drizzle yogurt sauce and paprika butter over the meatballs and veggies. Enjoy!

    • Can I use a different protein? Yes! Ground chicken, pork (or mix of pork and beef) or lamb would both work beautifully here. Just adjust cooking time slightly if using leaner meat.
    • What if I don’t like yogurt? Try labneh or a dairy-free yogurt. Hummus might work, too, for a totally different spin.
    • Is it spicy? Not really! The paprika butter sauce has flavor but very mild heat — still very family-friendly.
    • Can I make it vegetarian? You could swap in plant-based meatballs or falafel, but you’ll lose the richness from the beef. Still tasty though!
    • Don’t skip the sauces! Seriously. The yogurt and paprika butter are what make this whole thing sing.
    • Batch it – Make double the meatballs and freeze half for later.
    • Low-carb? Use cauliflower or rutabaga instead of potatoes.
    • Meal prep friendly – Store in airtight containers for up to 3 days (keep sauces separately, or I would even make the paprika butter fresh). Reheat gently to keep meatballs juicy.
    • Make-ahead tip – Prep meatballs and chop veggies the night before.

    Calories: 558kcal | Carbohydrates: 57g | Protein: 40g | Fat: 19g | Saturated Fat: 8g | Polyunsaturated Fat: 2g | Monounsaturated Fat: 8g | Trans Fat: 1g | Cholesterol: 96mg | Sodium: 1678mg | Potassium: 1563mg | Fiber: 8g | Sugar: 9g | Vitamin A: 2540IU | Vitamin C: 87mg | Calcium: 185mg | Iron: 8mg

    Keywords: Dinner Recipes, One-Pan recipes, Meatballs, Homemade Meatballs, meatballs and potatoes, Turkish meatballs, garlic yogurt sauce

    More Meatball Recipes

    More Recipes With Potatoes


    Source link

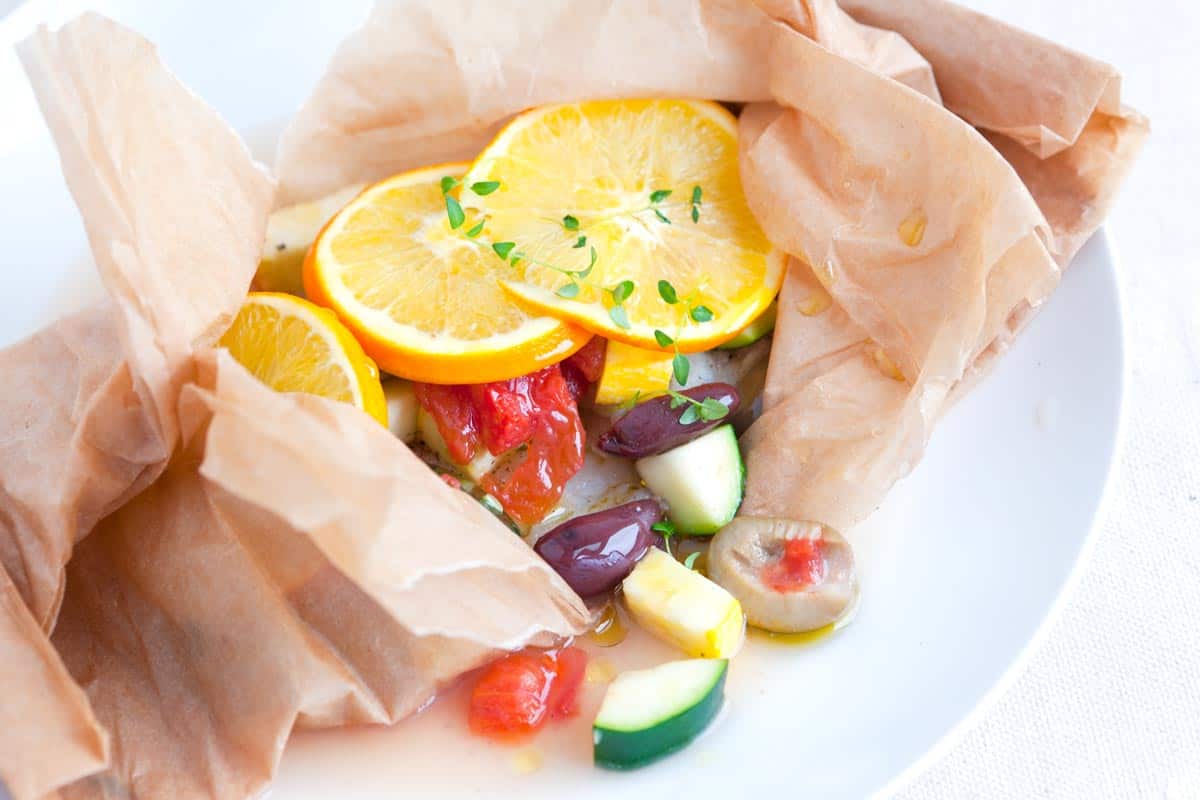
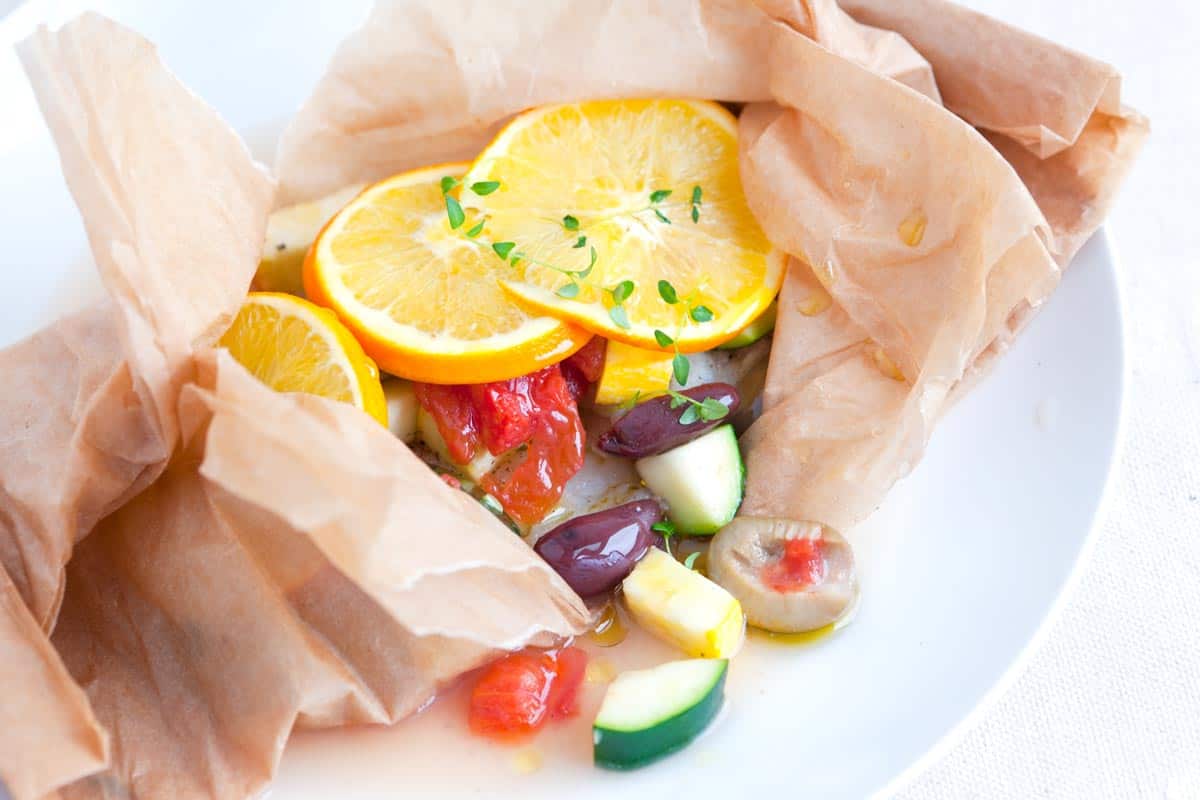
  • Easy Baked Fish in Parchment with Orange and Olives

    Easy Baked Fish in Parchment with Orange and Olives

    Light and healthy baked fish packets with tomatoes, olives and orange. Jump to the Baked Fish with Orange and Olives Recipe or read on to see our tips for making it.

    Easy Baked Fish in Parchment with Orange and Olives

    I love how easy this recipe is, plus it has everything you need in one adorable little packet.

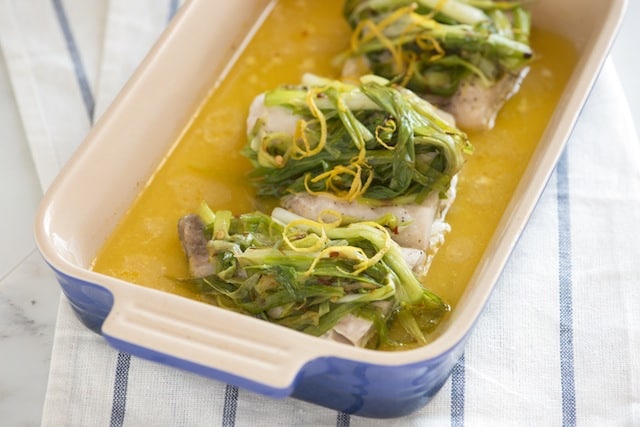
    Baked Fish with ScallionsYOU MAY ALSO LIKE: How to make perfectly baked fish with scallions and orange. Jump to the Baked Fish Recipe with Scallions.

    How to Bake Fish in Parchment Packets

    This recipe comes together very quickly. You will need a sheet of parchment paper. We pile everything into it then fold it up and bake in the oven until the fish is perfectly cooked and the vegetables are tender.

    How to Bake Fish in Parchment Packets

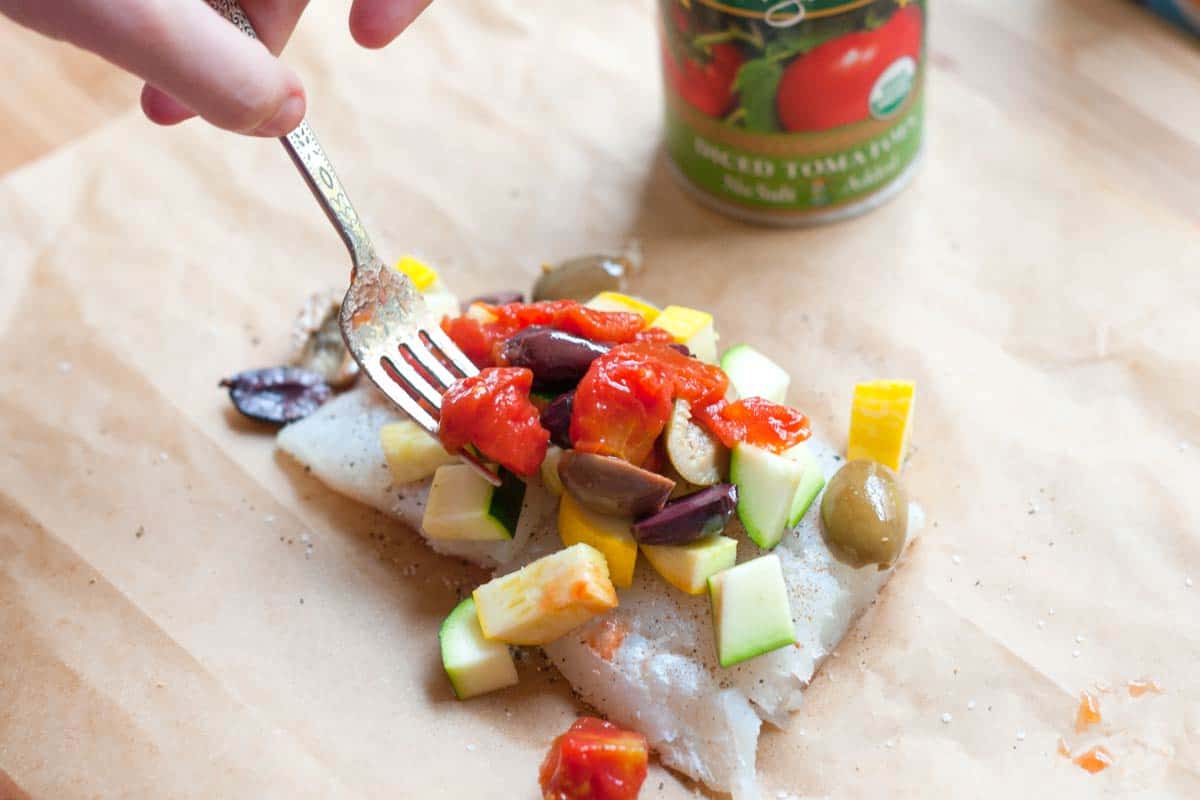
    Season the fish with salt, pepper and a little cinnamon. I know cinnamon sounds a bit odd, but the orange-cinnamon combination is really delicious. Mound olives, squash and tomatoes on top. We used canned tomatoes, but fresh will work nicely.

    Adding the vegetables

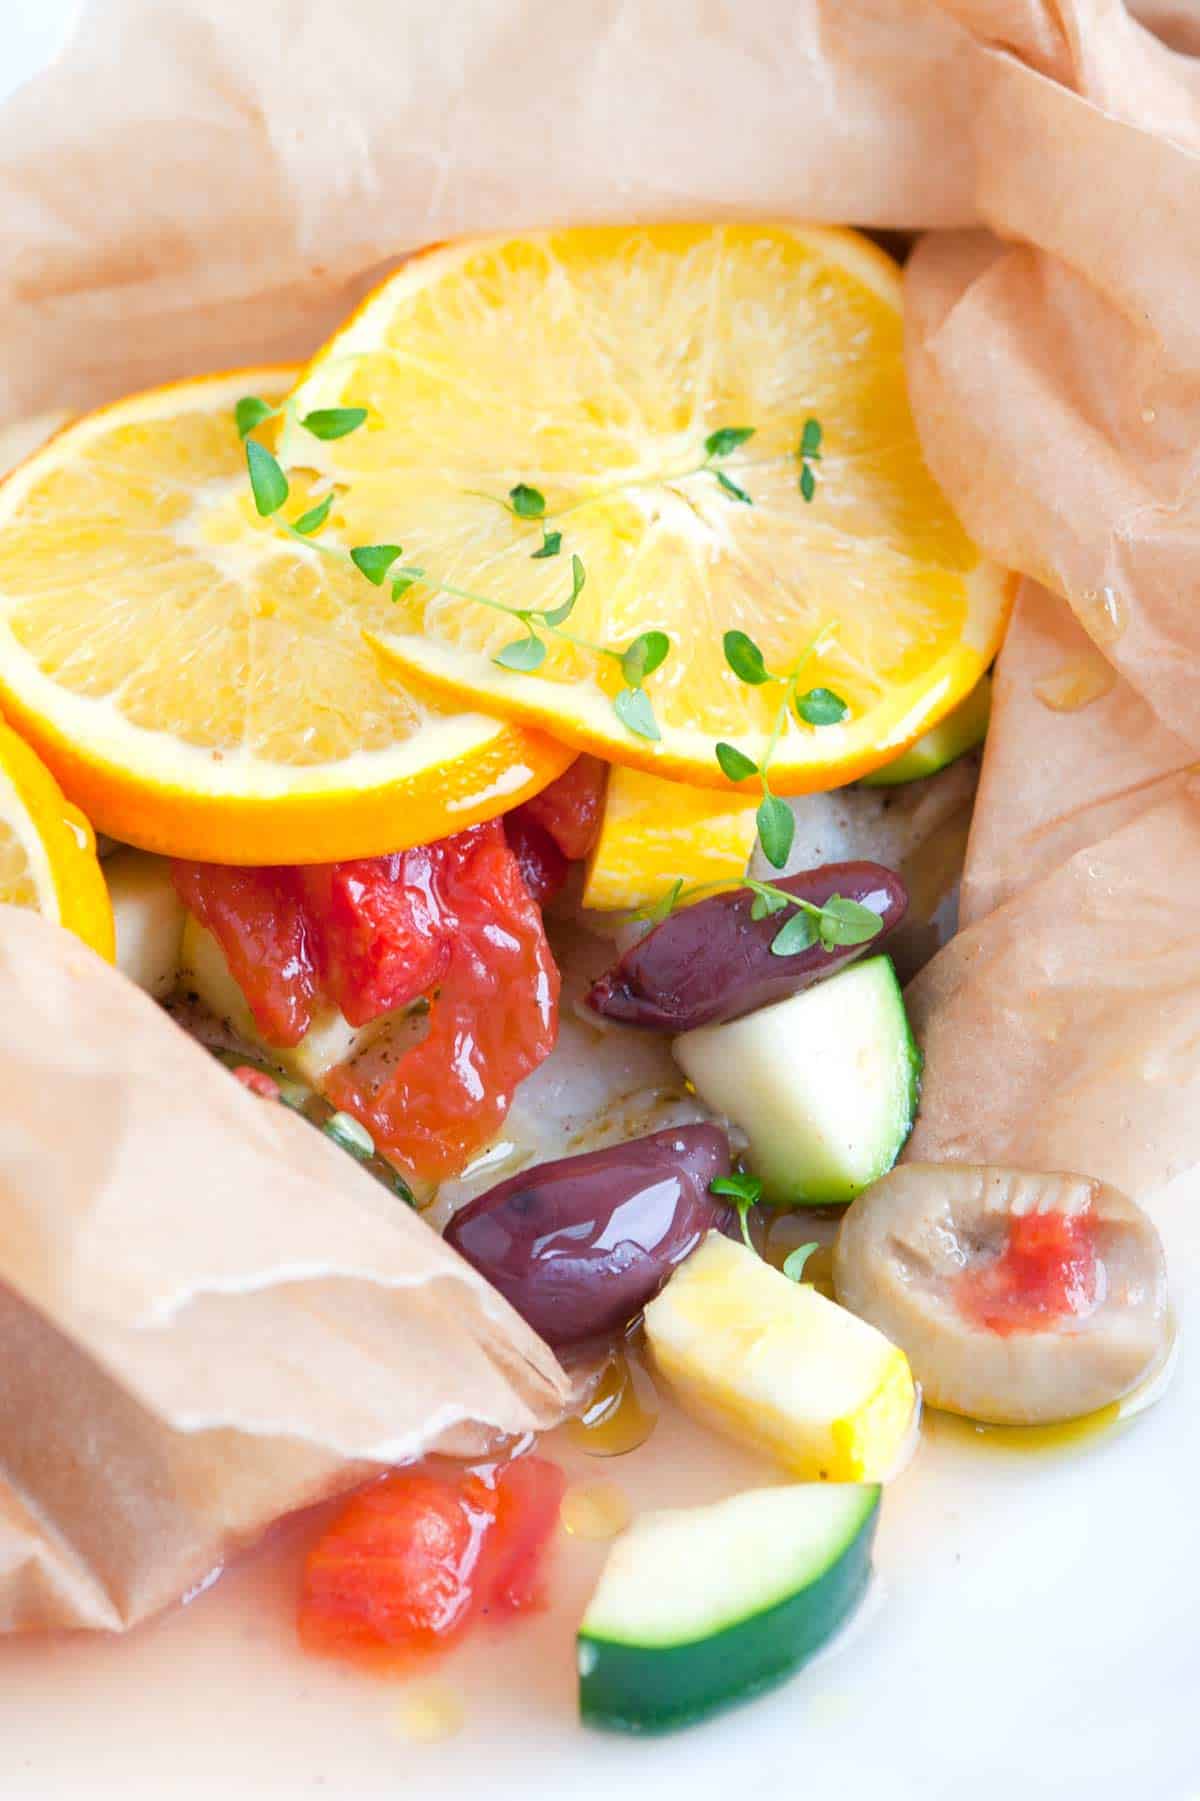
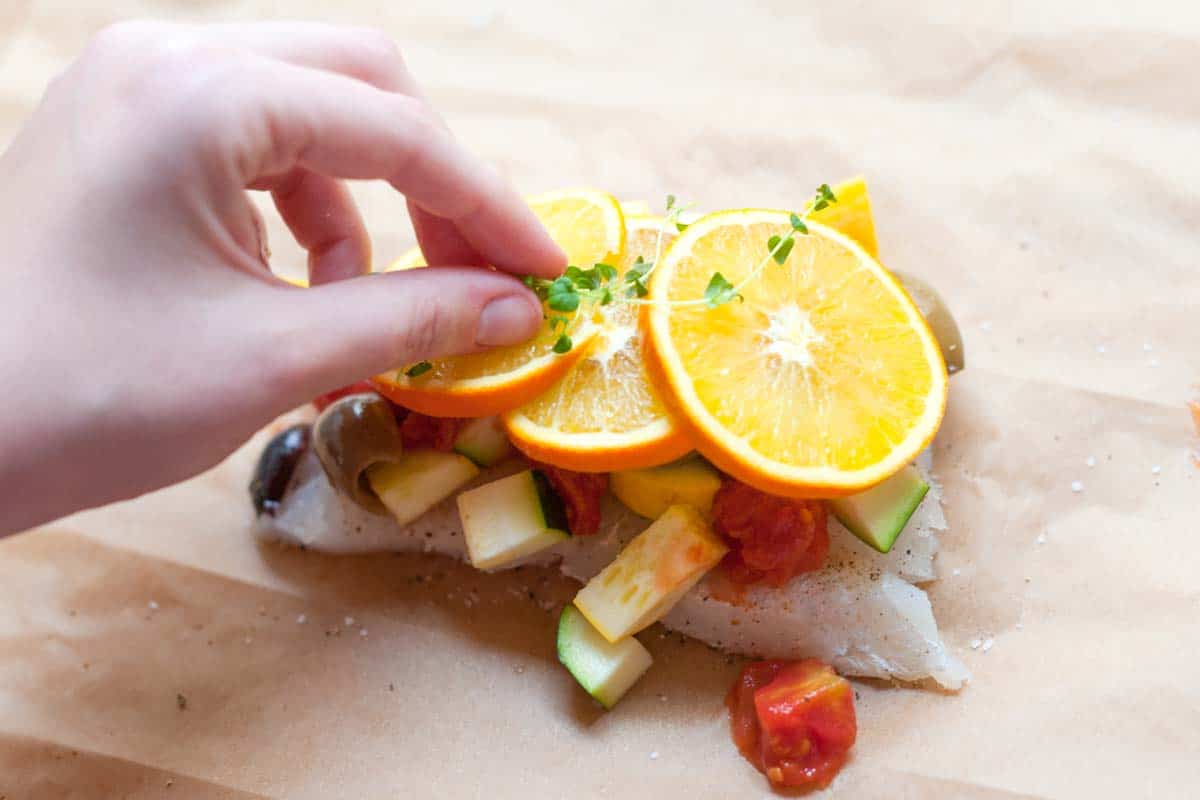
    Add a tiny drizzle of olive oil, a few orange slices and some fresh thyme. Just before folding up the parchment, pour a couple tablespoons of liquid over the fish and vegetables. Chicken stock, fish stock or a dry white wine are all excellent options. This little bit of liquid helps the fish to steam inside the packet, keeping the fish from drying out.

    Adding orange and thyme

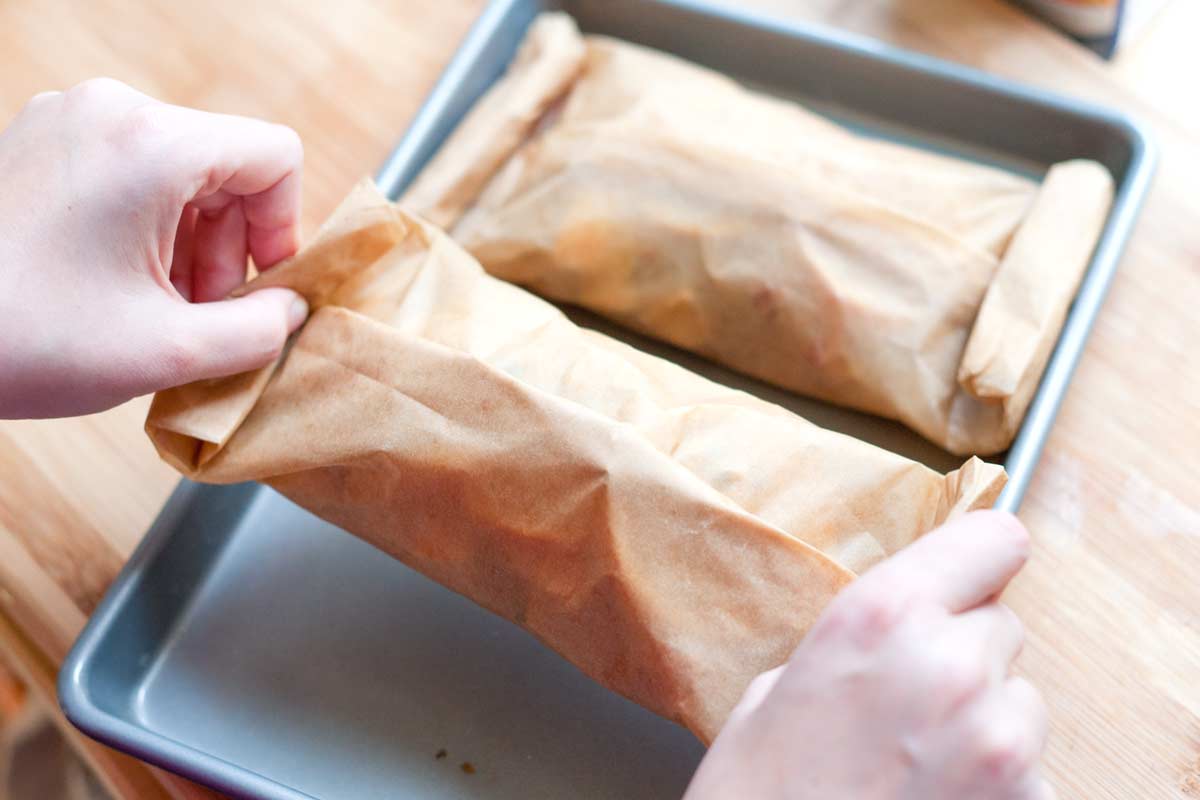
    Alright, now it’s time to fold up the parchment paper to make little packets. Bring two sides of the paper together and then roll and crimp the edges so that the top of the packet is completely sealed. Do the same with the ends and transfer to a baking sheet. After 12 to 15 minutes, the fish will be cooked and the veggies tender.

    Folding up the packets

    Back in the day we were contributors for Betty Crocker. We shared this recipe with them. We loved it so much we had to share an adapted version with you.

    Recipe updated, originally posted January 2012. Since posting this in 2012, we have tweaked the recipe to be more clear. – Adam and Joanne

    Easy Baked Fish in Parchment with Orange and Olives

    • PREP
    • COOK
    • TOTAL

    We use fresh thyme for this, if you would prefer to use dried, use 1/4 teaspoon of dried thyme. Other fresh herbs will work, too. Basil, dill or parsley are excellent. When you serve, add the parchment packet to each plate and allow each person to slit through the parchment, releasing the aromas of cinnamon, orange and herbs.

    Makes 2 servings

    You Will Need

    2 (6-ounce) firm white fish fillets such as Pacific halibut, Pacific rockfish or Pacific cod

    1/4 teaspoon ground cinnamon

    Salt and freshly ground pepper

    1 cup diced zucchini and yellow summer squash, 1/4-inch cubes

    1/4 cup pitted olives, halved

    1 tablespoon extra-virgin olive oil

    1/4 cup drained canned diced tomatoes

    4 tablespoons chicken stock, fish stock or dry white wine

    4 thin orange slices

    2 sprigs fresh thyme

    Directions

      1Heat oven to 400 degrees F. Cut two 16-inch squares of cooking parchment paper or use foil.

      2Lay both squares of parchment out onto your workbench. Season both sides of the fish with cinnamon, salt and pepper, and then place one fillet onto the middle of each parchment square.

      3Divide the olives, zucchini and yellow squash, tomatoes and olive oil between fillets, mounding them on top of the fish. Season with another pinch of salt and a few grinds of black pepper then pour two tablespoons of liquid (stock or wine) over each fillet. Top with orange slices and thyme.

      4To make packets, roll and crimp opposite sides of parchment paper together over fish and vegetables, then roll and crimp ends to prevent steam from escaping.

      5Place packets onto a rimmed baking sheet. Bake until the fish flakes easily with a fork, 12 to 15 minutes depending on thickness of fillets. To check for doneness, carefully open one end of a packet. Transfer packets to plates for serving.

    Adam and Joanne’s Tips

    If you make this recipe, snap a photo and hashtag it #inspiredtaste — We love to see your creations on Instagram and Facebook! Find us: @inspiredtaste


    AUTHOR:

    Joanne Gallagher

    Adam and Joanne of Inspired Taste

    We are Adam and Joanne Gallagher, the creators of Inspired Taste. Established in 2009, Inspired Taste grew from a childhood dream into one of the internet’s most trusted recipe sites with hundreds of reliable recipes, step-by-step videos, and expert tips.More About Us


    Source link