Tag: Shrimp

  • Easy Shrimp Cocktail Recipe

    Easy Shrimp Cocktail Recipe

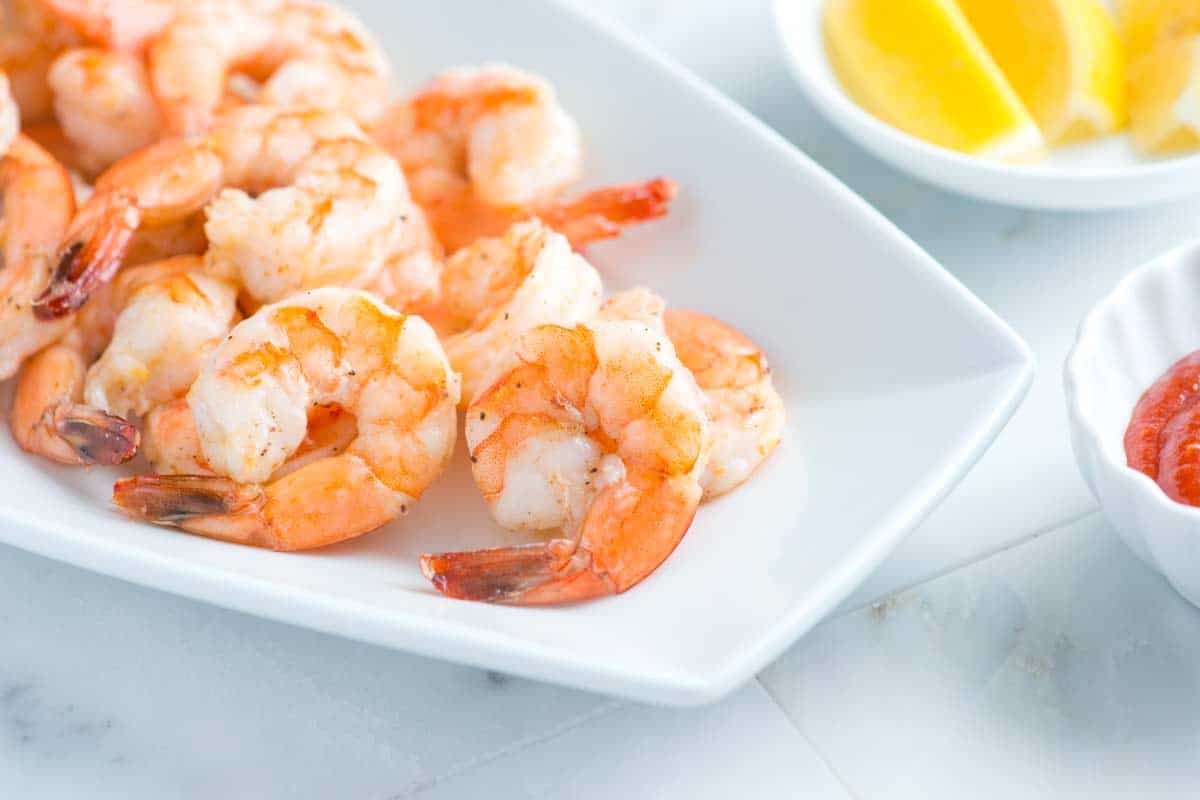
    Our favorite shrimp cocktail recipe skips poaching or boiling and roasts the shrimp instead. It’s easy to make and guarantees juicy, tender shrimp every time.
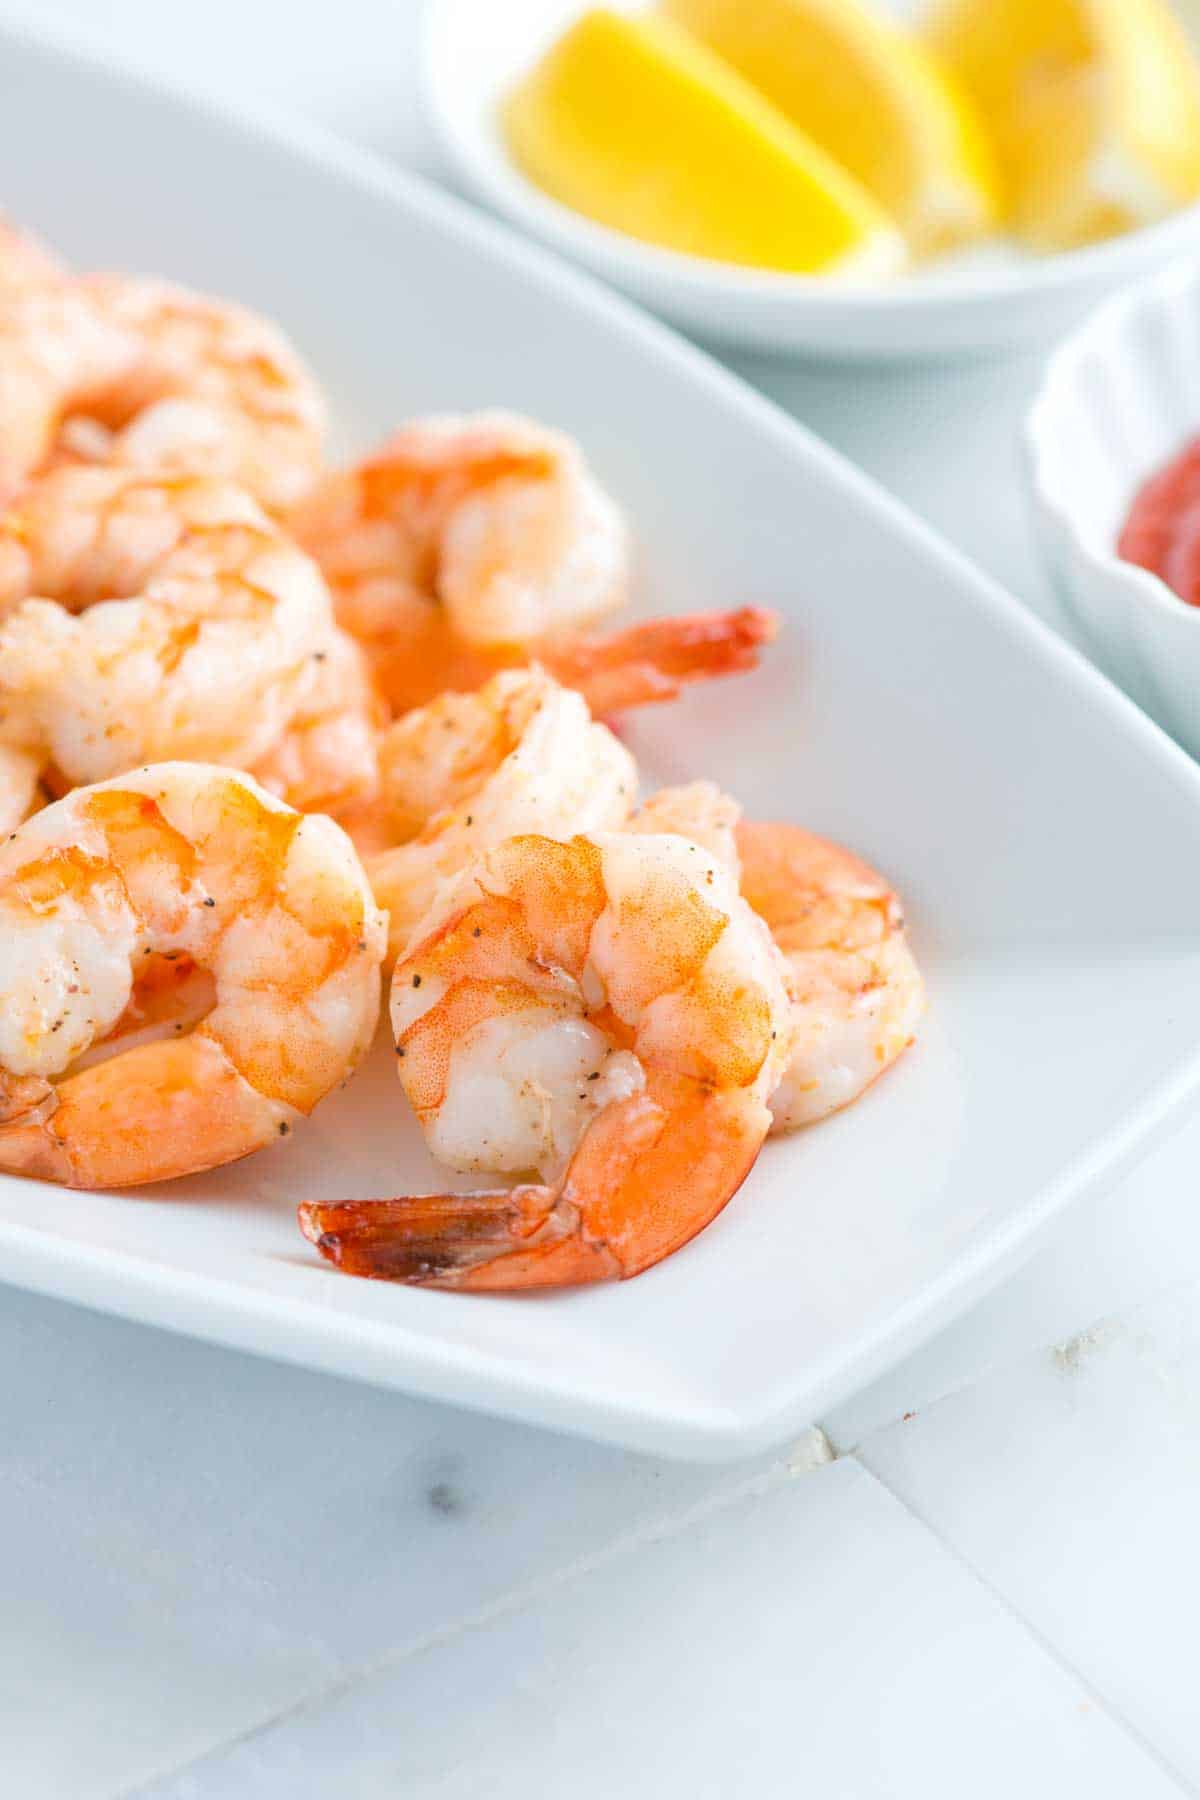
    Shrimp Cocktail

    We both love shrimp cocktail and can never resist ordering it at restaurants. It’s such a simple but impressive appetizer, and I know it will always be a hit with my friends and family. Whenever we make this recipe, it’s one of the first dishes to disappear.

    The secret to the best shrimp cocktail is roasting the shrimp. It’s quick, hard to overcook, and adds extra flavor from the olive oil and lemon. Once you try our method, you’ll never go back to boiling again. That said, if you prefer the classic approach, we also have a great poached shrimp you can try!

    Key Ingredients

    • Shrimp: Use fresh, high-quality jumbo or large shrimp for this. I like to leave the tails on since it makes dipping into the cocktail sauce easier and looks nice for serving. If using frozen shrimp, thaw them overnight in the refrigerator, then pat dry with paper towels before roasting.
    • Olive Oil: I prefer roasting the shrimp with olive oil or avocado oil for their flavor. I save my extra-virgin olive oil for other dishes since it has a lower smoke point.
    • Lemon: For an extra layer of flavor, grate some lemon zest with a microplane and toss it with the shrimp before roasting. You can then use the rest of the lemon for serving!
    • Salt and Pepper: I season generously with salt and pepper, but feel free to add more flavor with your favorite spice blends. Our Cajun seasoning is a particular favorite in my household, but Old Bay, or other seafood blends would be lovely.
    • Cocktail Sauce: You can use a high-quality store-bought cocktail sauce or make our homemade version below with ketchup, horseradish, lemon juice, Worcestershire sauce, and a touch of hot sauce. Tartar sauce is really delicious, too.

    Find the full recipe with measurements below.

    How to Make the Best Shrimp Cocktail

    Tip 1: Pat the shrimp dry. Damp food won’t roast properly, it steams, instead. Before roasting, pat the shrimp really dry with paper towels. Then toss them with olive oil, lemon zest, salt, and pepper.
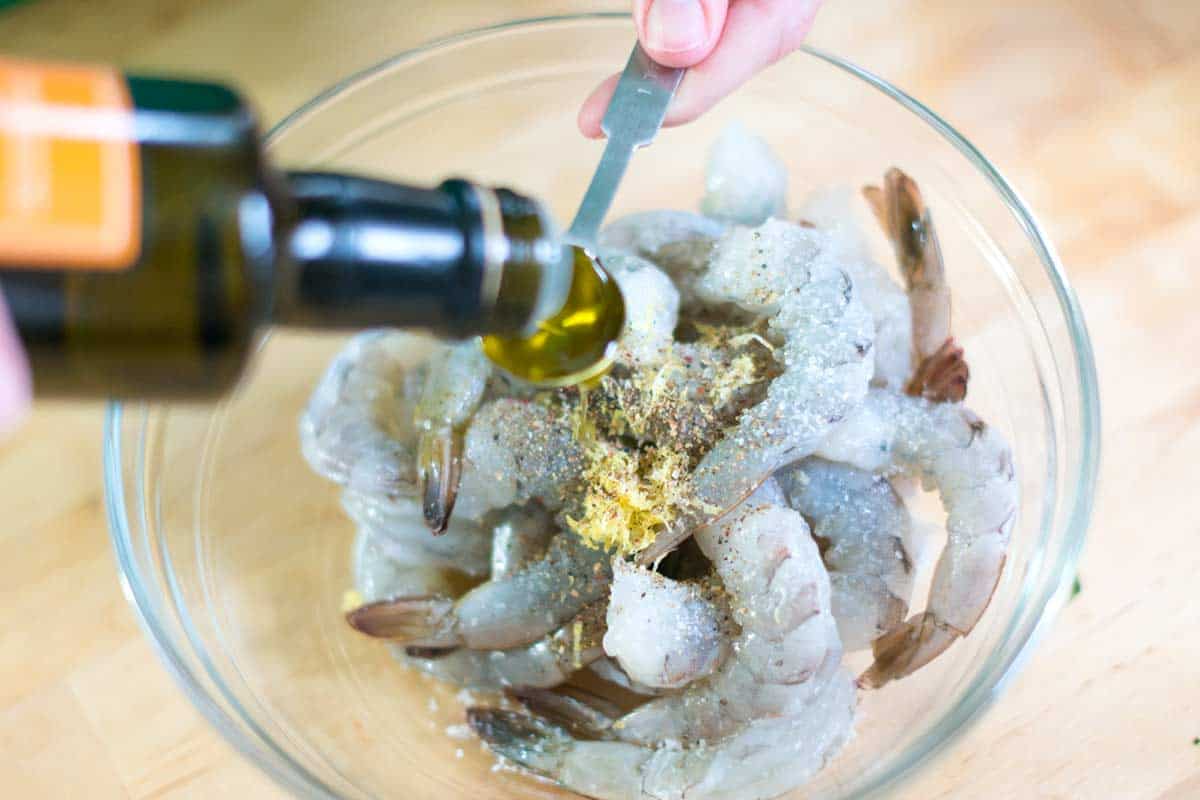
    Tossing shrimp with salt, pepper, lemon zest, and olive oil.

    Tip 2: Roast the shrimp. Spread the seasoned shrimp into a single layer on a baking sheet. Roasting them too close together will cause them to steam and become soggy. Then, roast them until the shrimp are pink, firm, and cooked through (5 to 10 minutes, depending on their size).

    Shrimp on baking sheet to make shrimp cocktail

    Tip 3: Serve warm or cold. While they are usually served chilled, these roasted shrimp are delicious warm, too. To serve cold, transfer the roasted shrimp to a plate and refrigerate for about 30 minutes before serving.

    Serving Suggestions

    I love serving these shrimp alongside lemon wedges and cocktail sauce (recipe below), but they are fantastic served other ways, too. I especially love using these shrimp to make shrimp salad or adding them to my favorite salads. I love them on top of this Greek salad, Caesar salad, our orzo pasta salad, or this hearty quinoa black bean salad!

    More Shrimp Recipes
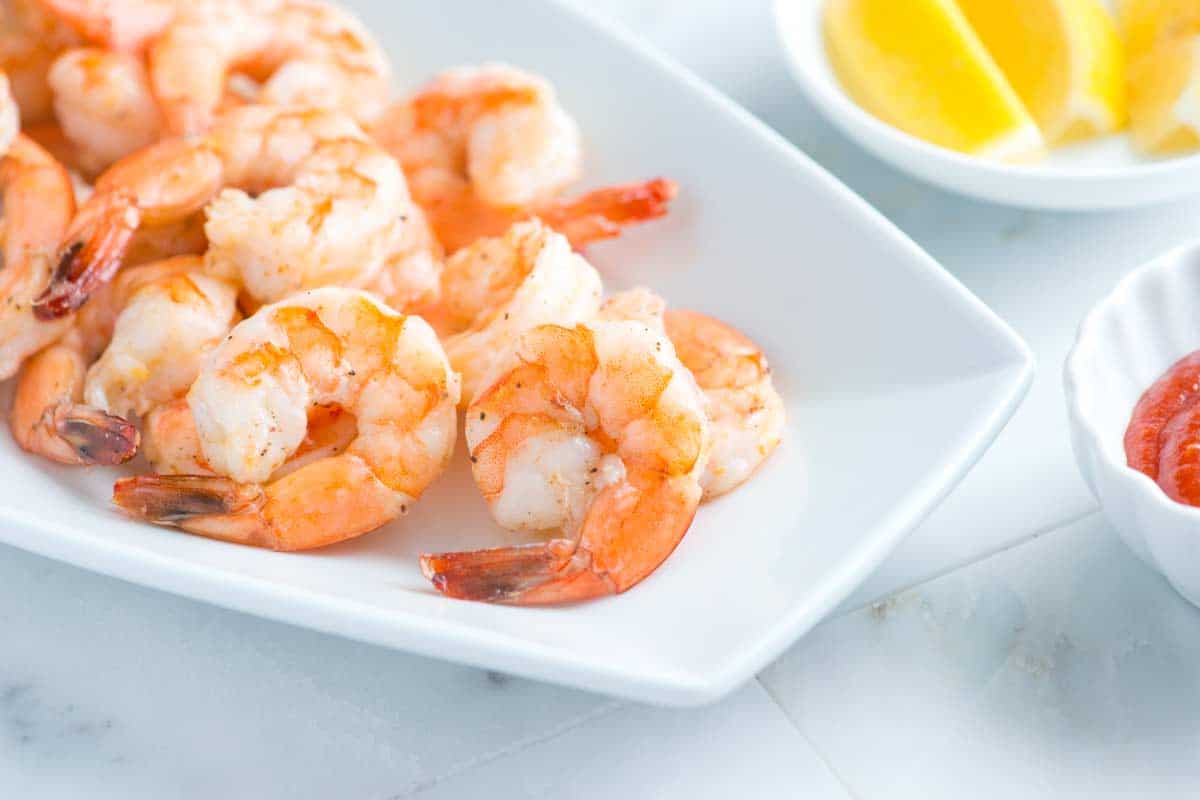
    Shrimp Cocktail

    Easy Shrimp Cocktail

    • PREP
    • COOK
    • TOTAL

    These shrimp are simple and delicious. We’ve used lots of lemon and pepper here, but you can customize it in several ways. Try using Old Bay, Cajun seasoning, garam masala, or another spice blend in place of or in addition to the lemon.

    4 Servings

    You Will Need

    For the Shrimp

    1 pound extra-large shrimp, shelled with tails left on

    1 tablespoon olive oil or avocado oil

    ½ teaspoon fine sea salt

    ½ teaspoon fresh ground black pepper

    1 teaspoon grated lemon zest

    1 lemon, cut into wedges, for serving

    Cocktail sauce, recipe below


    For Homemade Cocktail Sauce

    1 cup ketchup, try homemade ketchup

    2 to 3 tablespoons prepared horseradish, to taste

    1 tablespoon fresh squeeze lemon juice

    ½ teaspoon Worcestershire sauce

    1 to 2 dashes hot sauce, like Tabasco or Crystal

    Directions

      1Prep: Preheat the oven to 400°F (204°C). Line a baking sheet with aluminum foil or parchment paper.

      2Prepare shrimp: Pat the shrimp dry, then toss with oil, salt, pepper, and lemon zest in a bowl.

      3Roast: Place the shrimp on the baking sheet in one layer. Try to leave some space between each shrimp. Roast the shrimp for 5 to 10 minutes until pink, firm, and cooked through. If you are doubling this recipe, you may need two baking sheets.

      4Make cocktail sauce: In a small bowl, whisk the ketchup, horseradish, lemon juice, Worcestershire, and hot sauce together. Taste, and then adjust with more horseradish or lemon. Store in an airtight container for up to 1 week.

      5Serve: Serve the shrimp warm or chilled with lemon wedges, cocktail sauce on the side.

    Adam and Joanne’s Tips

    • Storing: Keep the shrimp in an airtight container in the refrigerator for up to 4 days. The sauce lasts for a week in the fridge.
    • Alternate sauce: Try homemade tartar sauce!
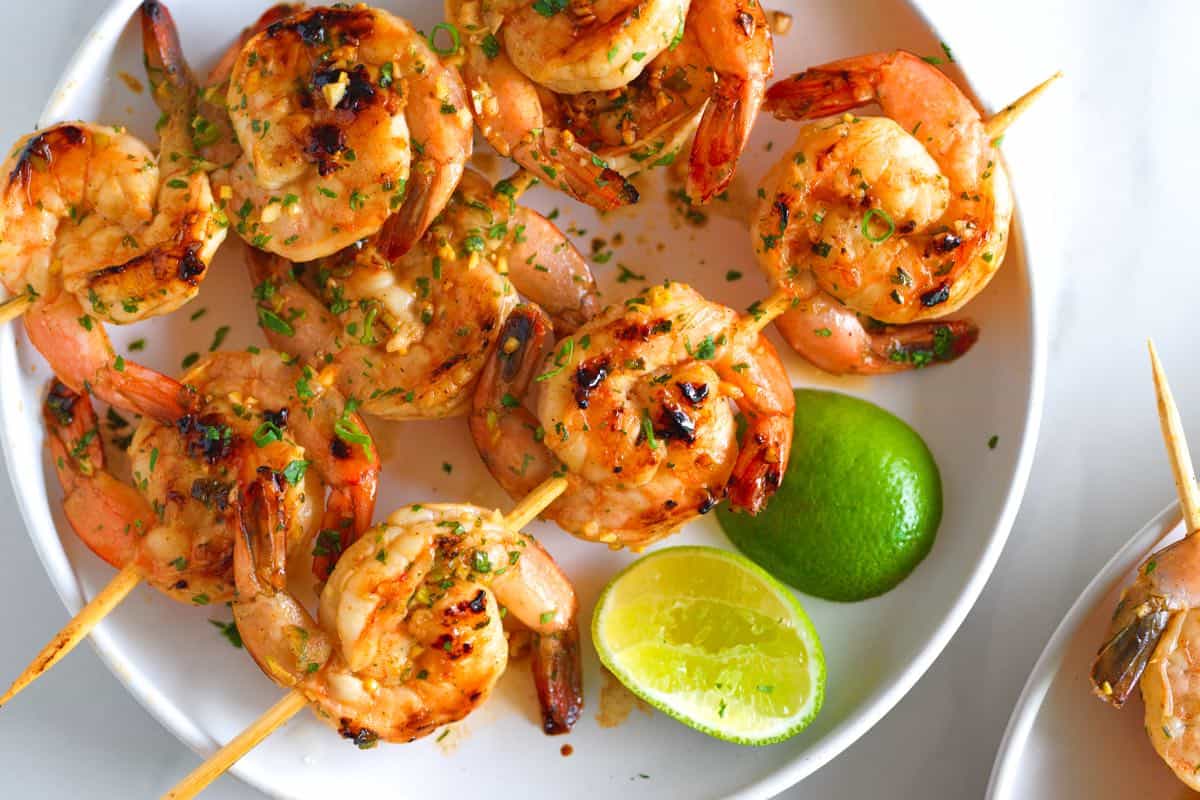
    • Grilled shrimp cocktail: Soak wooden or bamboo skewers in water for 30 minutes, then thread the shrimp onto them. Grill the shrimp skewers over medium heat until pink, firm, and cooked through, for 4 to 5 minutes on each side.
    • The nutrition facts provided below are estimates. We did not include any sauce.

    Nutrition Per Serving
    Serving Size
    1/4 of the recipe
    /
    Calories
    128
    /
    Total Fat
    4.1g
    /
    Saturated Fat
    0.6g
    /
    Cholesterol
    182.5mg
    /
    Sodium
    425.7mg
    /
    Carbohydrate
    0.4g
    /
    Dietary Fiber
    0.1g
    /
    Total Sugars
    0.1g
    /
    Protein
    22.8g


    AUTHOR:

    Adam Gallagher

    Adam and Joanne of Inspired Taste

    We are Adam and Joanne Gallagher, the creators of Inspired Taste. Established in 2009, Inspired Taste grew from a childhood dream into one of the internet’s most trusted recipe sites with hundreds of reliable recipes, step-by-step videos, and expert tips.More About Us
    Source link

  • Seriously Good Pickled Shrimp Recipe

    Seriously Good Pickled Shrimp Recipe

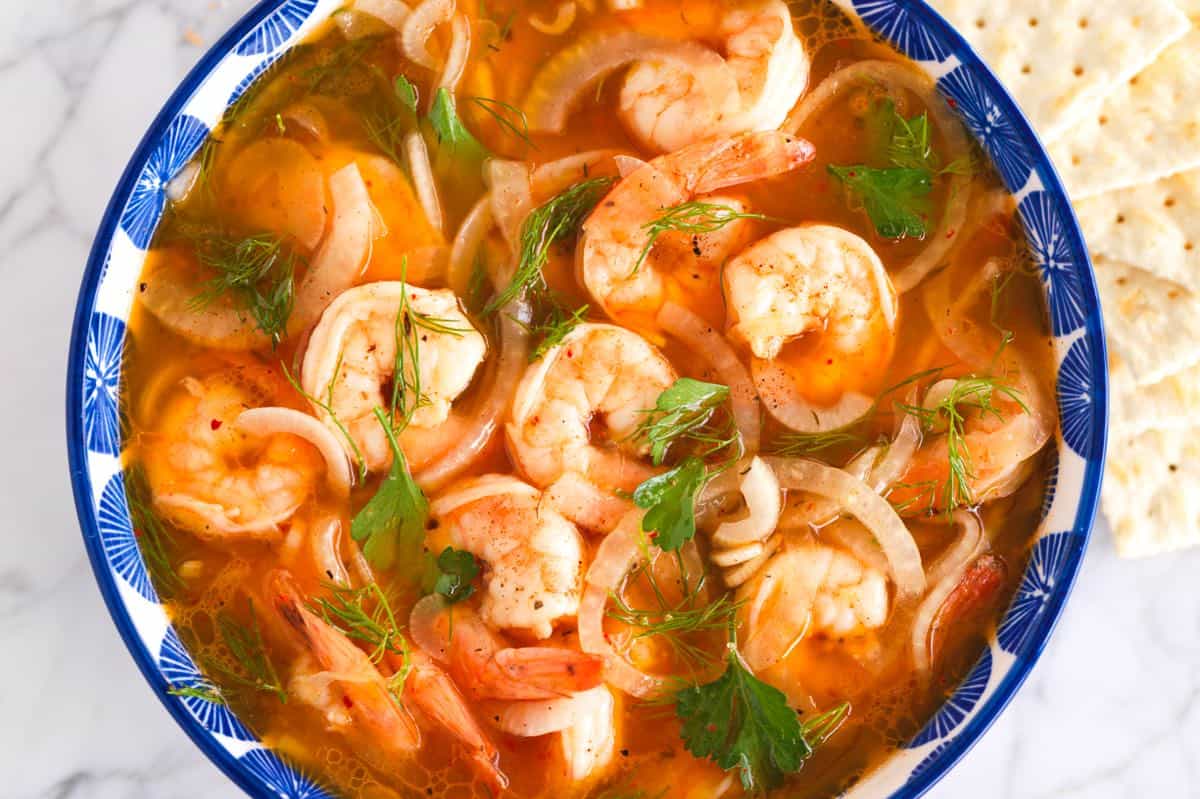
    This tangy, herby, lemony pickled shrimp recipe is so good you’ll want to make a double batch!

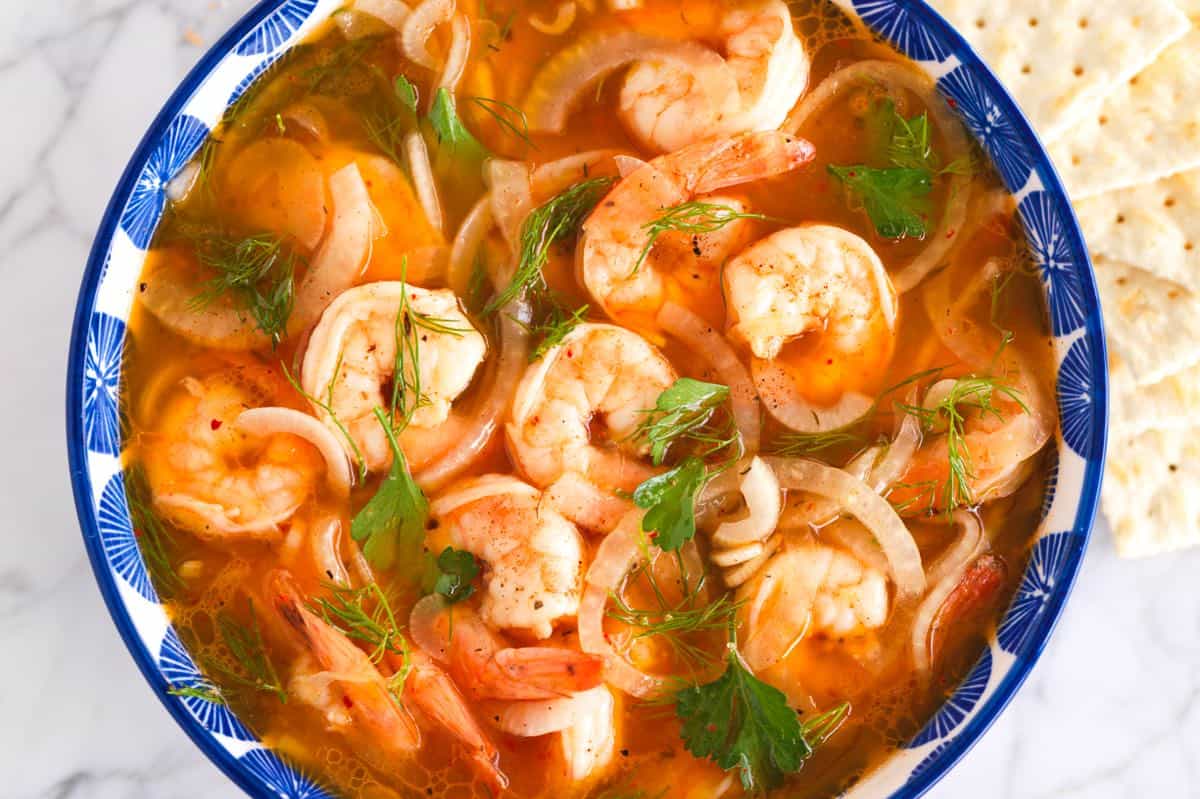
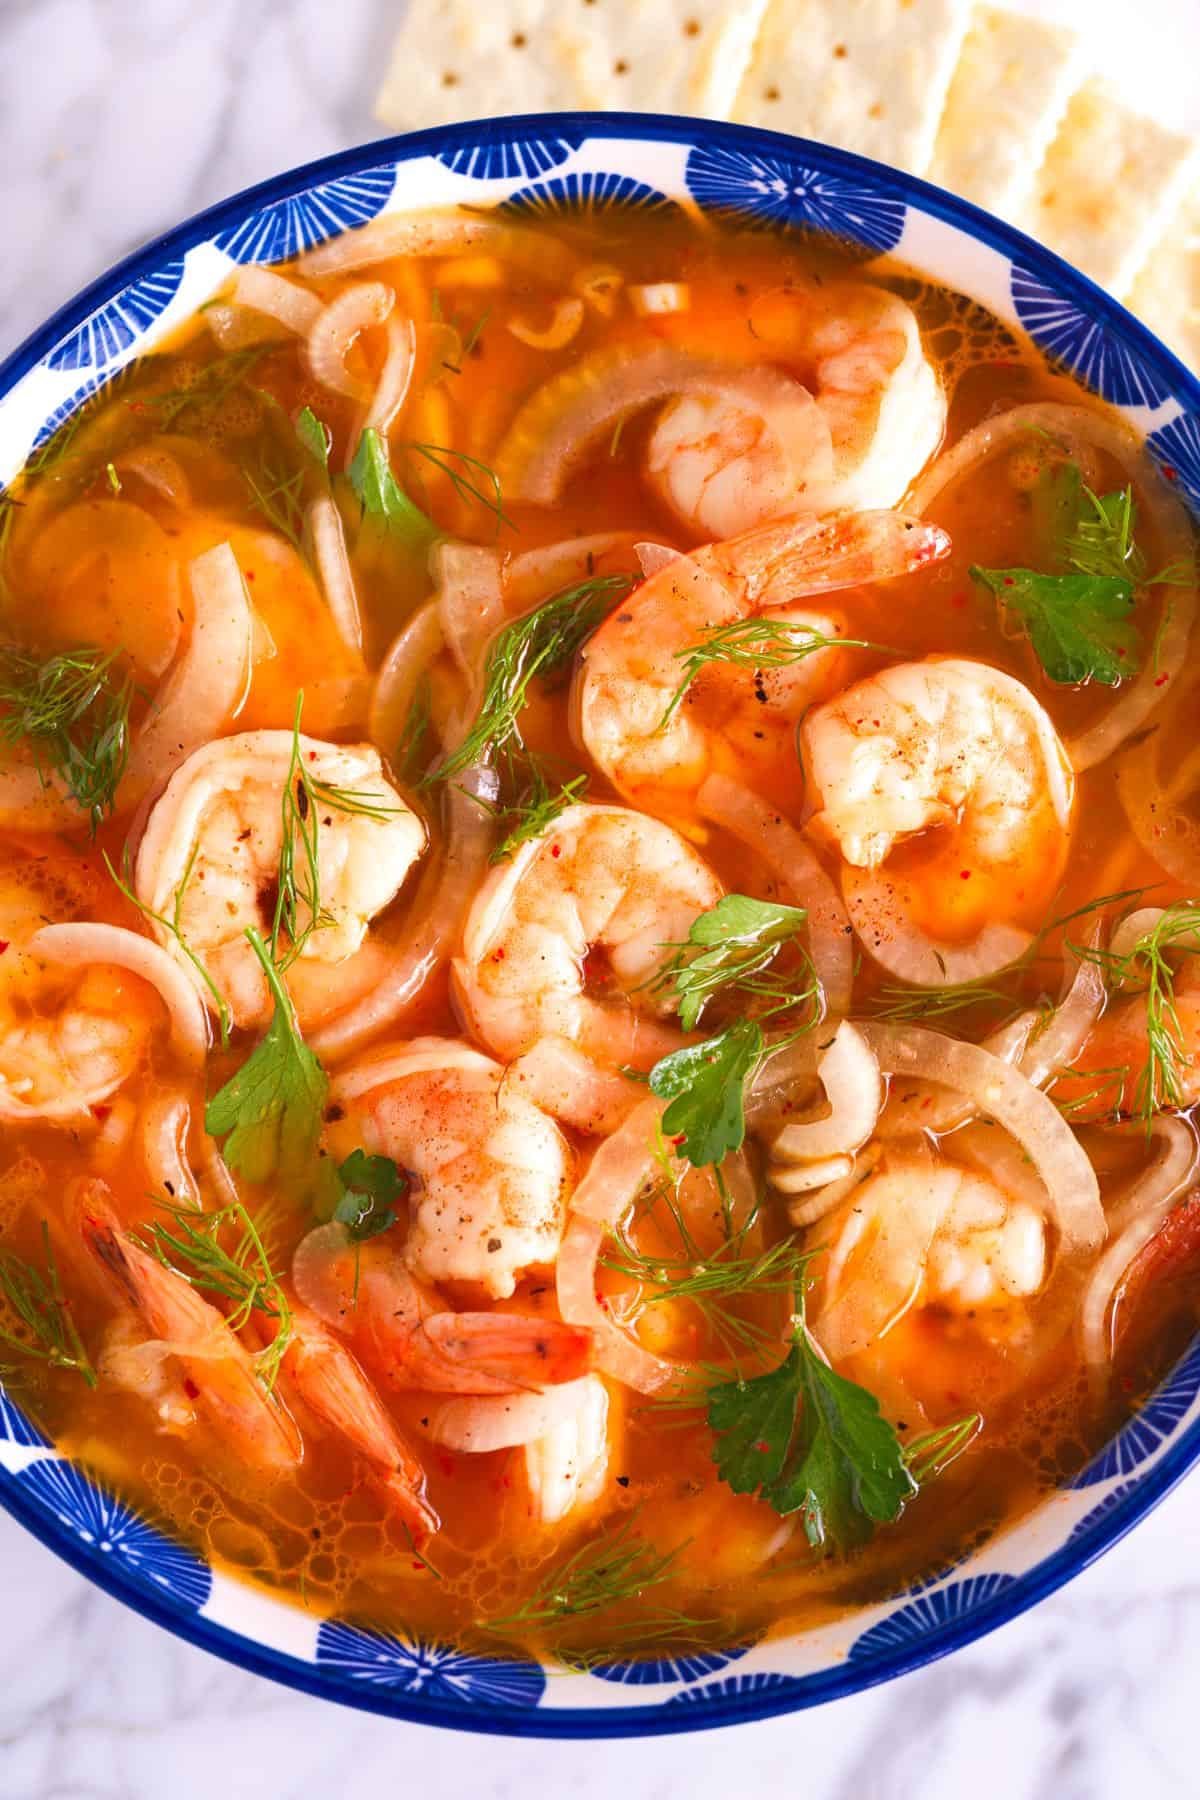
    Pickled Shrimp

    I love these pickled shrimp as a light dinner and for entertaining (they always go quickly). Serve them with crackers, crusty bread and butter, or make a sandwich. They’re even great added to salads and light pasta dishes (like this orzo pasta salad).

    I didn’t know how much I loved Southern-style pickled shrimp until our friend Richard introduced us to them. Now, I can’t get enough. Once you try this easy recipe, you’ll be hooked, too. They are seriously good! For another Southern-inspired shrimp recipe, see our easy shrimp and grits!

    Key Ingredients

    • Shrimp: For the best results, I recommend large or jumbo shrimp. They’re less likely to overcook and dry out. Look for fresh shrimp that feels firm and has a slightly sweet smell. If you’re using frozen shrimp, thaw and drain them before cooking them.
    • Lemon: I use lemon juice for the pickling liquid and a whole lemon for the shrimp cooking liquid.
    • Cajun or Creole Seasoning: This adds a ton of flavor to both the cooking liquid and the pickling liquid. I love my homemade Cajun seasoning, but feel free to use what you have. I also like to add a bay leaf to the cooking liquid.
    • Onion: This might be my favorite part! I love pickled onions, and since we add lots of sliced onion to the pickling brine, you end up with perfect shrimp and pickled onions. I usually use sweet onions, but yellow or red onions work too.
    • Apple Cider Vinegar and Oil: These are the base of your pickling liquid. Apple cider vinegar keeps things tangy, and the oil adds richness and helps the pickling liquid turn into more of a dressing.
    • Herbs: I love stirring fresh parsley and dill into the shrimp before serving for a bright, fresh flavor.

    Find the full recipe with measurements below.

    How to Make the Best Pickled Shrimp

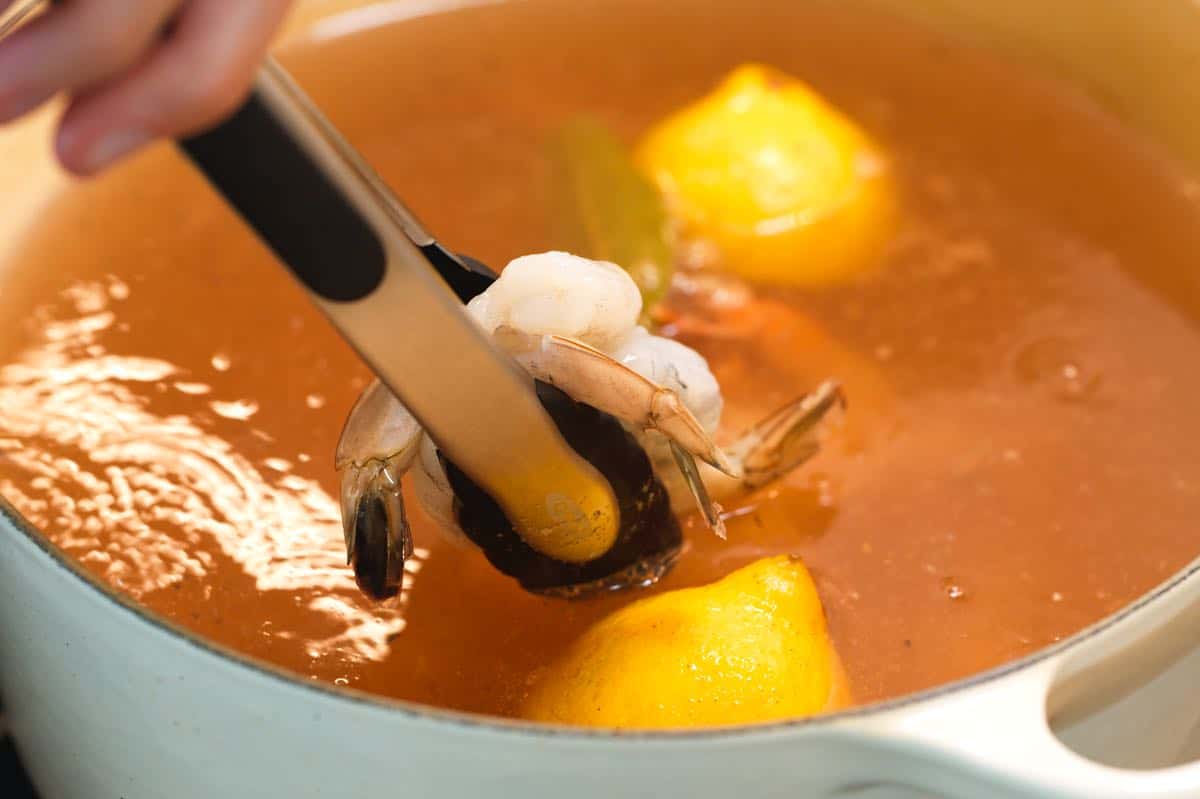
    Tip 1: Cook your shrimp first. Just like when making shrimp ceviche, I quickly cook my shrimp before they go into the pickling liquid. This way, we can season them perfectly before they soak up all that tangy brine. A quick poach is all you need for the shrimp.

    Three minutes in the seasoned water is the sweet spot for plump, juicy shrimp. Once the shrimp are cooked, they go straight into the chilled pickling liquid! Let them hang out in the fridge for at least 20 minutes (or longer if you want).

    Shrimp Boil for pickled shrimp

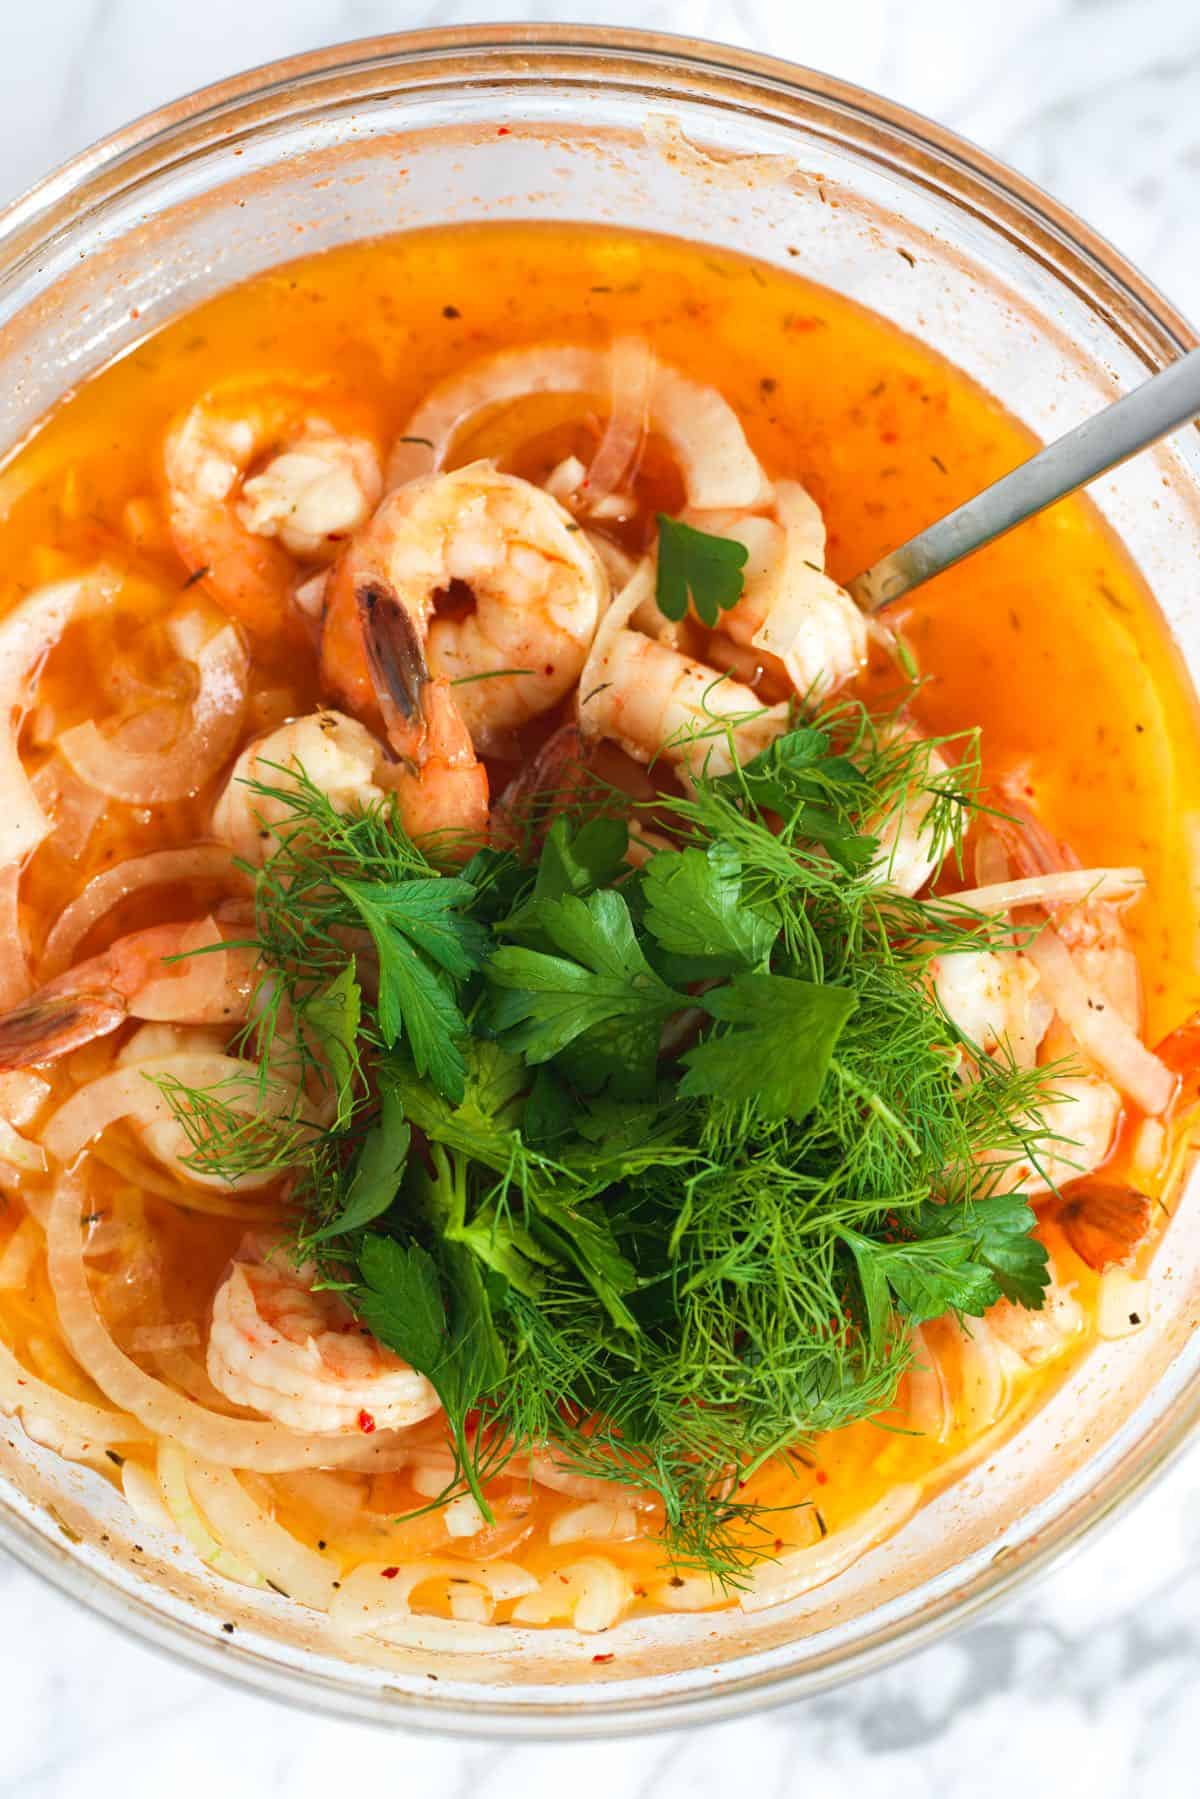
    Tip 2: Use our pickling liquid. The pickling liquid itself is extraordinarily flavorful, made with lemon juice, spices, onion, and herbs. You’ll combine everything in a bowl with ice water to get it nice and cold, then pop it in the fridge while your shrimp cook.

    Tossing shrimp in pickled shrimp brine

    Tip 3: Serving suggestions. When you’re ready to serve, the options are endless! I love them with crackers, buttered toast, or tossed into a salad. And don’t forget about those onions from the brine. They pickle, too, and are seriously delicious!

    Homemade Pickled Shrimp

    Seriously Good Pickled Shrimp

    • PREP
    • COOK
    • TOTAL

    We cannot get enough of these pickled shrimp. The shrimp turn out tangy, herby, and so delicious! You will quickly cook the shrimp before adding them to the brine. It’s easy and guarantees the perfect texture!

    4 Servings

    You Will Need

    For Cooking the Shrimp

    1 pound (450g) large shrimp, peeled and deveined

    1 lemon

    1 tablespoon fine sea salt

    1 teaspoon Cajun seasoning or Creole seasoning

    1 bay leaf

    1/4 teaspoon fresh ground black pepper


    For the Pickling Liquid

    2 tablespoons fresh lemon juice from half a large lemon

    1 ½ teaspoons fine sea salt

    3/4 teaspoon Cajun seasoning or Creole seasoning

    1 small sweet onion, thinly sliced

    6 tablespoons (88ml) apple cider vinegar

    1/4 cup (60ml) avocado oil or vegetable oil

    1/2 cup (120ml) ice water

    1/8 teaspoon gochugaru Korean red chili flakes or use crushed red pepper flakes

    1/4 teaspoon fresh ground black pepper

    1/4 cup (15g) fresh parsley leaves, chopped

    2 tablespoons fresh dill, chopped

    Directions

      1Make the pickling liquid. Add the lemon juice, salt, Cajun seasoning, sliced onion, cider vinegar, oil, ice water, chili flakes, and black pepper to a bowl large enough to hold the shrimp once it has cooked.

      2Stir until well blended, then chill in the refrigerator while you cook the shrimp.

      3Bring 8 cups (1.8L) of water to a boil in a large pot. Cut the lemon in half, squeeze the juice into the boiling water, and add the lemon halves.

      4Add the tablespoon of salt, Cajun or Creole seasoning, bay leaf, and black pepper.

      5Add the shrimp and cook for 3 minutes, then transfer them to the chilled pickling liquid using a slotted spoon, stirring them around the pickling liquid a few times.

      6Refrigerate for 20 minutes.

      7Stir in the fresh herbs before serving.

    Adam and Joanne’s Tips

    • Storing: Keep the shrimp in the brine in the refrigerator for up to 3 days. The shrimp do firm up as they sit, but are still delicious!
    • The nutrition facts provided below are estimates. The brine is included in the calculations, so fat and sodium are higher than what you will likely consume.

    Nutrition Per Serving
    Serving Size
    1/4 of the recipe
    /
    Calories
    236
    /
    Total Fat
    14.4g
    /
    Saturated Fat
    1.7g
    /
    Cholesterol
    182.5mg
    /
    Sodium
    1015.3mg
    /
    Carbohydrate
    3.6g
    /
    Dietary Fiber
    0.8g
    /
    Total Sugars
    0.9g
    /
    Protein
    23.5g


    AUTHOR:

    Joanne Gallagher

    Adam and Joanne of Inspired Taste

    We are Adam and Joanne Gallagher, the creators of Inspired Taste. Established in 2009, Inspired Taste grew from a childhood dream into one of the internet’s most trusted recipe sites with hundreds of reliable recipes, step-by-step videos, and expert tips.More About Us
    Source link

  • Chili Garlic Shrimp – All Day I Dream About Food

    Chili Garlic Shrimp – All Day I Dream About Food

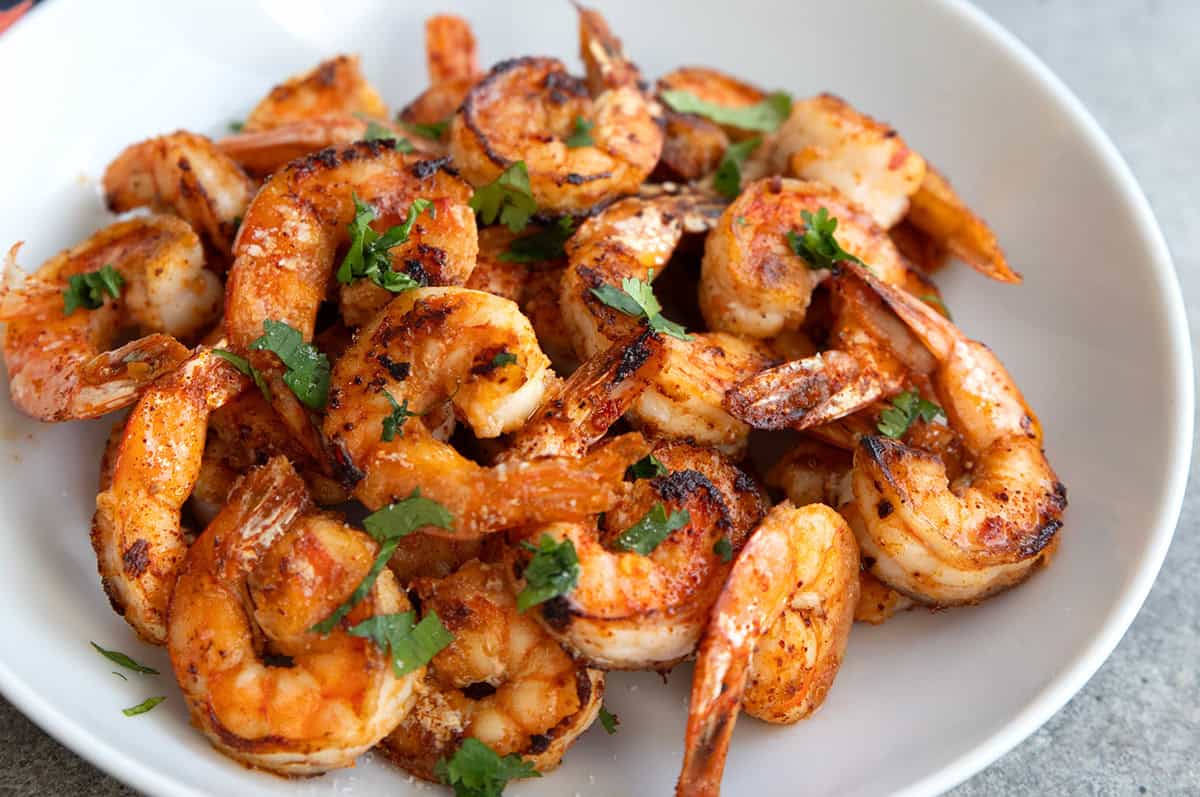
    This Chili Garlic Shrimp recipe is a savory delight! It takes four simple ingredients and 10 minutes to make, and packs some serious flavor. Serve as an appetizer or turn it into a full meal, and watch it disappear.

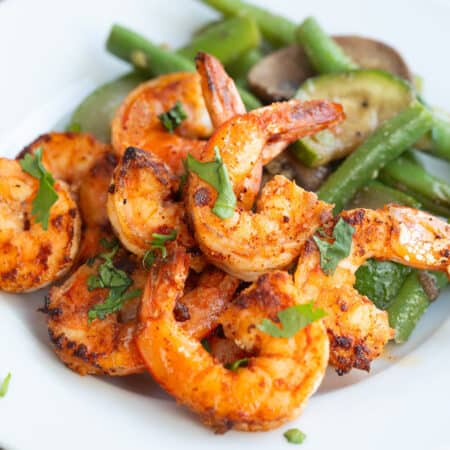
    Chili Garlic Shrimp on a white plate with sautéed vegetables, with chopped parsley on top.

    When you need a quick but super tasty meal, look no further than this easy Chili Garlic Shrimp. It takes so little effort and time, but it’s an absolute flavor explosion. And it’s one of my all-time favorite low carb-high protein recipes.

    I have been making this recipe for decades, and I love pairing it with other easy recipes like keto coleslaw or Keto Sesame Noodles. I finally decided I needed to share it here, so that you too can enjoy the mouthwatering flavors.

    Chili Garlic Shrimp on a white plate with sautéed vegetables, with chopped parsley on top.

    Shrimp is a fabulous keto ingredient to have on hand and I almost always have some in my freezer. It’s a wonderful source of protein, and it pairs delightfully with a wide variety of flavors. It can be light and fresh, like Shrimp and Cucumber Salad. Or it can used in hearty comfort food like Keto Shrimp Chowder.

    But Chili Garlic Shrimp is perhaps my favorite way to serve it. It’s quick, easy, and always delicious.

    Close up shot of Chili Garlic Shrimp piled up in a white bowl.

    Why You Will Love This Recipe

    • Bold flavor: The combination of chili garlic sauce and cumin is astonishingly good!
    • Ridiculously easy: You simply toss the shrimp with the seasonings and sauté for less than 5 minutes.
    • Surprisingly light: Shrimp has very little in the way of fat, so it can serve as a lighter meal when you need one. I love using this shrimp over a fresh green salad.
    • Low carb: Each serving has less than 1 gram of carbs. So you can pair it with your favorite low carb sides for a keto-approved meal.
    • High protein: With over 30 grams per serving, this is a great way to max out your protein goals.
    • Serving options: These tasty shrimp can be served as an appetizer, with a nice dipping sauce, or as part of a main meal.

    Ingredient Notes

    Ingredients for chili garlic shrimp.
    • Shrimp: I recommend using large peeled shrimp. It doesn’t matter whether the tail is on or off, it cooks the same way.
    • Chili Garlic Sauce: This is not the same as chili crunch or sweet chili sauce, as both of those have sugar. It is a concentrated paste from Huy Fong (the makers of Sriracha) that has no added sugar. A little goes a long way, trust me!
    • Cumin: I have been making this shrimp recipe for so long, I don’t even remember when I started adding cumin. But it’s a fabulous combo!
    • Olive oil: Extra virgin olive oil is the best choice for cooking the shrimp, but you can also use avocado oil.

    How to Make Chili Garlic Shrimp

    A collage of 4 images showing the steps for making Chili Garlic Shrimp.
    1. Add the seasonings: In a large bowl, toss the shrimp with the chili garlic sauce and cumin until well coated.
    2. Heat the oil: Get the pan nice and hot before adding the shrimp.
    3. Cook the shrimp: Spread them out in a single layer in the hot pan and allow to cook for 2 minutes, then flip them over and cook another minute or two.
    4. Serve: Sprinkle with a little chopped cilantro or parsley. Serve as an appetizer or main dish.
    Chili Garlic Shrimp piled up in a white bowl on a gray concrete table, with a colorful napkin in the background.

    Tips for Success

    Patting the shrimp dry prior to cooking helps them crisp up and brown better. Add moisture can make them rubbery. If using frozen shrimp, let them thaw completely in a sieve over the sink, then pat dry.

    Chili garlic sauce can be quite spicy so start with 1 teaspoon the first time you try this, unless you know you like it. You can always add more spice, but you can’t take it away once the shrimp are cooked.

    Get that pan and oil nice and hot before adding the shrimp. You want to sear them quickly to lock in the moisture. And be sure to use a large enough pan to hold all the shrimp in one layer, so each one is against the hot pan.

    A white plate filled with Chili Garlic Shrimp served over sautéed green beans and zucchini.

    More Shrimp Recipes To Love

    Chili Garlic Shrimp on a white plate with sautéed vegetables, with chopped parsley on top.

    Chili Garlic Shrimp

    Servings: 4 servings

    Prep Time 5 minutes

    Cook Time 5 minutes

    Total Time 10 minutes

    This Chili Garlic Shrimp recipe is a savory delight! It takes four simple ingredients and 10 minutes to make, and packs some serious flavor. Serve as an appetizer or turn it into a full meal, and watch it disappear.

    • 1 1/3 lb (604.79 g) large shrimp, tails on or off
    • 1 to 2 tsp chili garlic sauce
    • 2 tsp cumin
    • 2 tbsp olive oil
    • Salt and pepper

    Prevent your screen from going dark

    • Pat the shrimp dry with a kitchen rag or paper towels.

    • In a medium bowl, toss the shrimp with the chili garlic sauce and the cumin. Mix well to coat.

    • In a large skillet over medium high heat, heat the oil until shimmering. Add the shrimp and spread out into a single layer. Cook 2 minutes.

    • Using tongs, flip each shrimp over and cook the other side, 1 to 2 minutes more. The shrimp will become bright pink when cooked through.

    • Remove immediately and sprinkle with salt and chopped parsley or cilantro.

    Storage Information: Store the shrimp in a covered container in the fridge for up to 3 days. Reheat gently in the microwave or eat cold (great over salad!). 

    Serving: 0.25of recipe | Calories: 193kcal | Carbohydrates: 0.9g | Protein: 30.7g | Fat: 7.3g | Saturated Fat: 1.1g | Fiber: 0.2g

    Nutritional Disclaimer

    Please note that I am not a medical or nutritional professional. I am simply recounting and sharing my own experiences on this blog. Nothing I express here should be taken as medical advice and you should consult with your doctor before starting any diet or exercise program. I provide nutritional information for my recipes simply as a courtesy to my readers. It is calculated using MacGourmet software and I remove erythritol from the final carb count and net carb count, as it does not affect my own blood glucose levels. I do my best to be as accurate as possible but you should independently calculate nutritional information on your own before relying on them. I expressly disclaim any and all liability of any kind with respect to any act or omission wholly or in part in reliance on anything contained in this website.

    Free Bonus: Secrets to Keto Baking!

    Sign up for your favorite recipes delivered straight to your inbox plus get our FREE bonus: Secrets to Keto Baking!


    Source link

  • Shrimp Caesar Salad

    Shrimp Caesar Salad

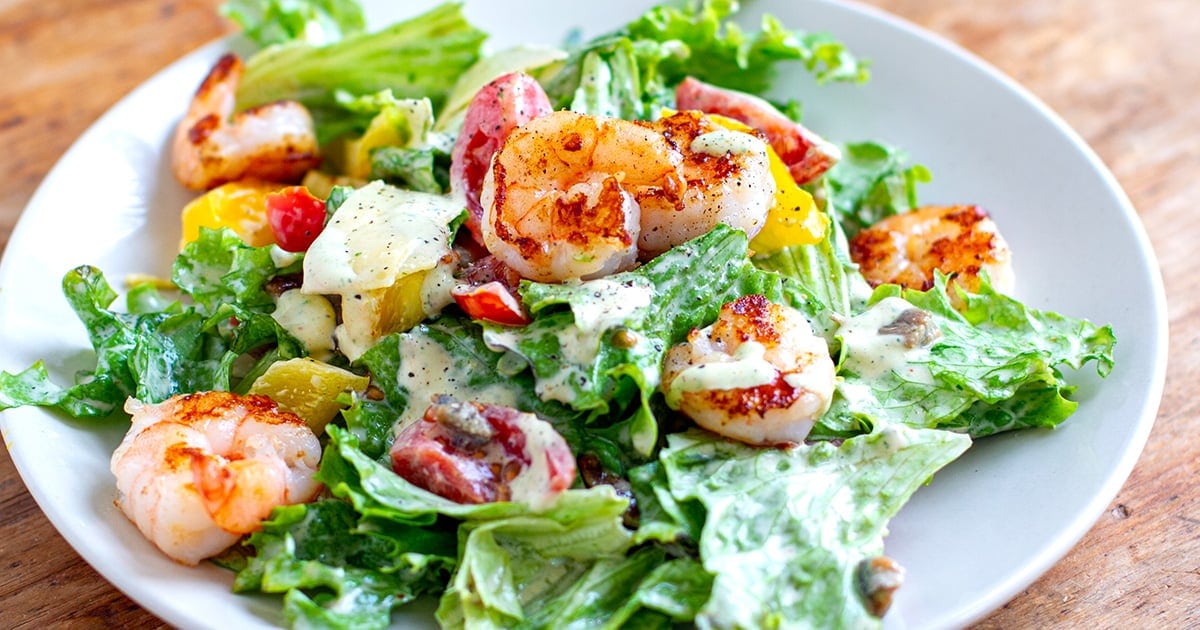
    This nutritious and tasty shrimp Caesar salad recipe nutritious, tasty, quick and easy to make – perfect for a weeknight dinner or lunch. Featuring juicy, sweet prawns/shrimp (chicken could also be used), crispy bacon, fresh lettuce, peppers and cherry tomatoes, this gluten-free and keto-friendly salad is smothered in the most delicious, creamy Caesar dressing. It’s high in protein and nutrients. Paleo & dairy-free modifications provided.


    Shrimp Caesar Salad Notes

    I’ve always loved a good Caesar salad and my favourite thing about it is probably the dressing. If the dressing is done well, then it doesn’t matter what veggies or protein you toss in it.

    I wanted to do a variation of a Caesar salad with grilled shrimp instead of chicken and add some extra colourful veggies like cherry tomatoes and sweet peppers.

    This recipe is for two servings and you simply increase the ingredients for a larger batch. You can use grilled chicken instead of shrimp/prawns or throw in some grilled tofu/tempeh or chickpeas for a vegetarian version.

    Feel free to use any other salad vegetables such as cucumber, radish, fennel or steamed asparagus. As I said, it’s more about the dressing than anything else.

    Recipe Tips

    I often make this shrimp Caesar salad for a quick, high-protein lunch. I make the dressing ahead of time as it keeps for up to 7 days in the refrigerator. I have a couple of bags or containers of pre-washed, pat-dried lettuce ready to go so that saves quite a bit of time.

    I keep a bag of frozen de-shelled shrimp in the freezer, so I take a handful of those out and place in a bowl of hot water 10 minutes before I want to grill or pan-fry them. If I work from home, I will cook the shrimp, cut the vegetables and shave Parmesan at lunchtime.

    If I have to take it somewhere, I will usually do these steps the night before and pack the salad ready to go (mind you, shrimp could be pan-fried in the morning as it only takes a few minutes). I take the dressing in a separate container.

    More Quick & Easy Salad Meals

    Full Recipe 

    Find the full list of ingredients, instructions, and nutritional breakdown below. If you have questions or cook this recipe, please let me know in the comments, and make sure to rate this shrimp Caesar salad recipe so it’s easy for others to find.

    Want to Save This Recipe?

    Enter your email & I’ll send it to your inbox. Plus, get great new recipes from me every week!

    By submitting this form, you consent to receive emails from Cooked & Loved

    Nutritious and tasty, this grilled shrimp Caesar salad is super quick and easy to make. It features crispy lettuce, bacon, grilled prawns, sweet peppers and cherry tomatoes. The best part is the delicious, creamy Caesar dressing! This recipe is gluten-free and low-carb and I provided dairy-free/paleo modifications below.

    • Heat the oil in a large skillet and add the bacon. Cook on both sides until crispy, then remove to a plate and add the prawns. Season with a little pepper and garlic powder and cook for 2 minutes on each side. Set aside.

    • Roughly slice the bacon and prepare other salad ingredients.

    • Whisk the dressing ingredients and toss through the salad in a large bowl. Stir through the bacon and shaved Parmesan if using. Top with the grilled shrimp. 

    Paleo or dairy-free Caesar dressing:

    • 3 tablespoons mayo
    • 1.5 tablespoons almond milk
    • 1 teaspoon Worcestershire sauce
    • 1 garlic clove
    • 2 anchovies
    • 1 tablespoon lemon juice
    • 1 tablespoon nutritional yeast flakes
    • Pinch of pepper

    In the salad, replace parmesan cheese with a sprinkle of nutritional yeast or try this paleo Parmesan cheese option. 

    • Keto modifications: The salad is gluten-free and low-carb but if you want to reduce the carbohydrates intake even further, replace peppers and cherry tomatoes with lower-carb veggies like cucumber, radish, celery, fennel or lightly grilled/blanched asparagus or snow peas.

    Calories: 541kcal | Carbohydrates: 19g | Protein: 25g | Fat: 41g | Saturated Fat: 12g | Polyunsaturated Fat: 10g | Monounsaturated Fat: 16g | Trans Fat: 0.1g | Cholesterol: 128mg | Sodium: 1108mg | Potassium: 796mg | Fiber: 4g | Sugar: 10g | Vitamin A: 3767IU | Vitamin C: 123mg | Calcium: 277mg | Iron: 2mg

    Keywords: Shrimp Recipes, Shrimp salad, Prawn Salad, prawn recipes, Prawn Caesar Salad

    [mv_playlist id=”224″ jsonLd=”false” ratio=”16:9″ thumbnail=”https://mediavine-res.cloudinary.com/v1599716598/plqh05ivvby851y7acqo.jpg” title=”WATCH MY TOP 10 HEALTHY VIDEO RECIPES”]

    Save This Shrimp Caesar Salad Recipe To Pinterest

    Source link

  • Marry Me Shrimp Pasta | The Recipe Critic

    Marry Me Shrimp Pasta | The Recipe Critic

    This website may contain affiliate links and advertising so that we can provide recipes to you. Read my disclosure policy.

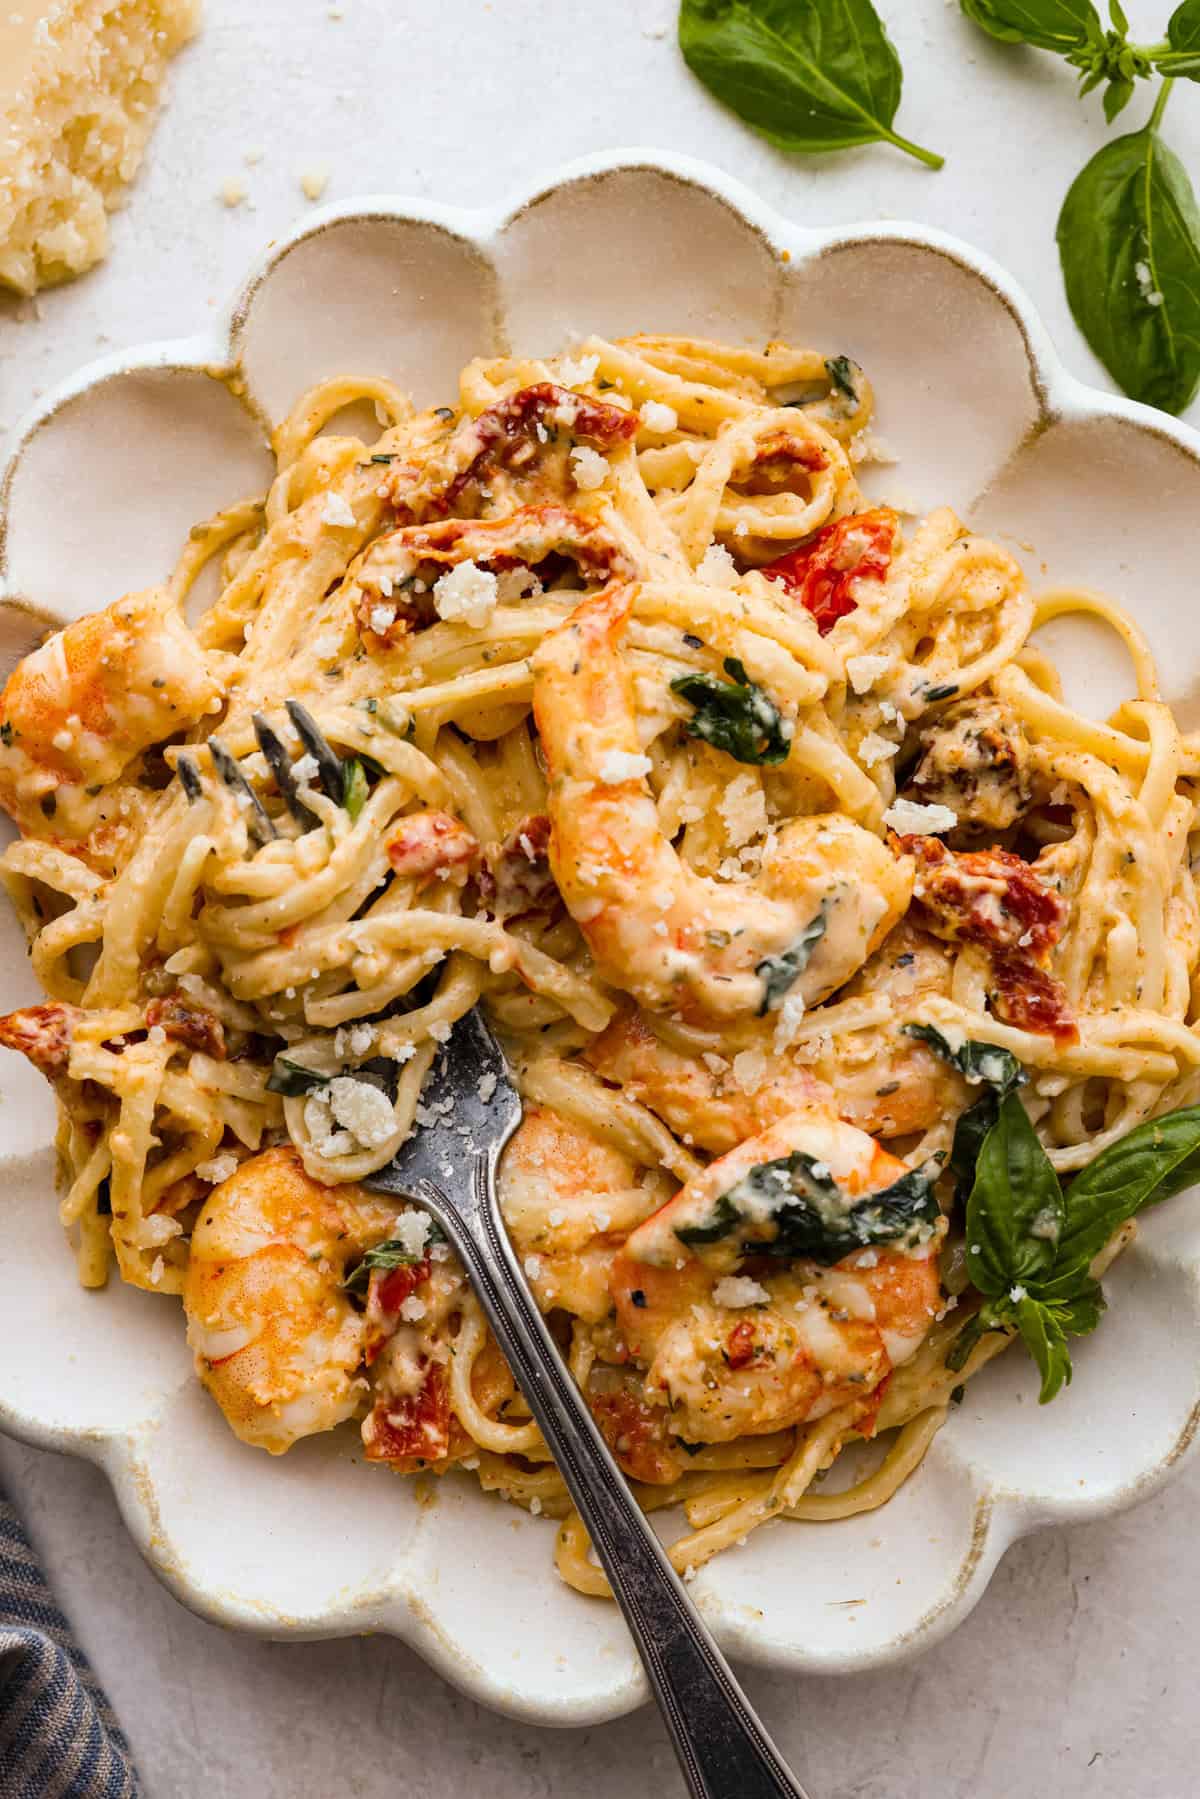
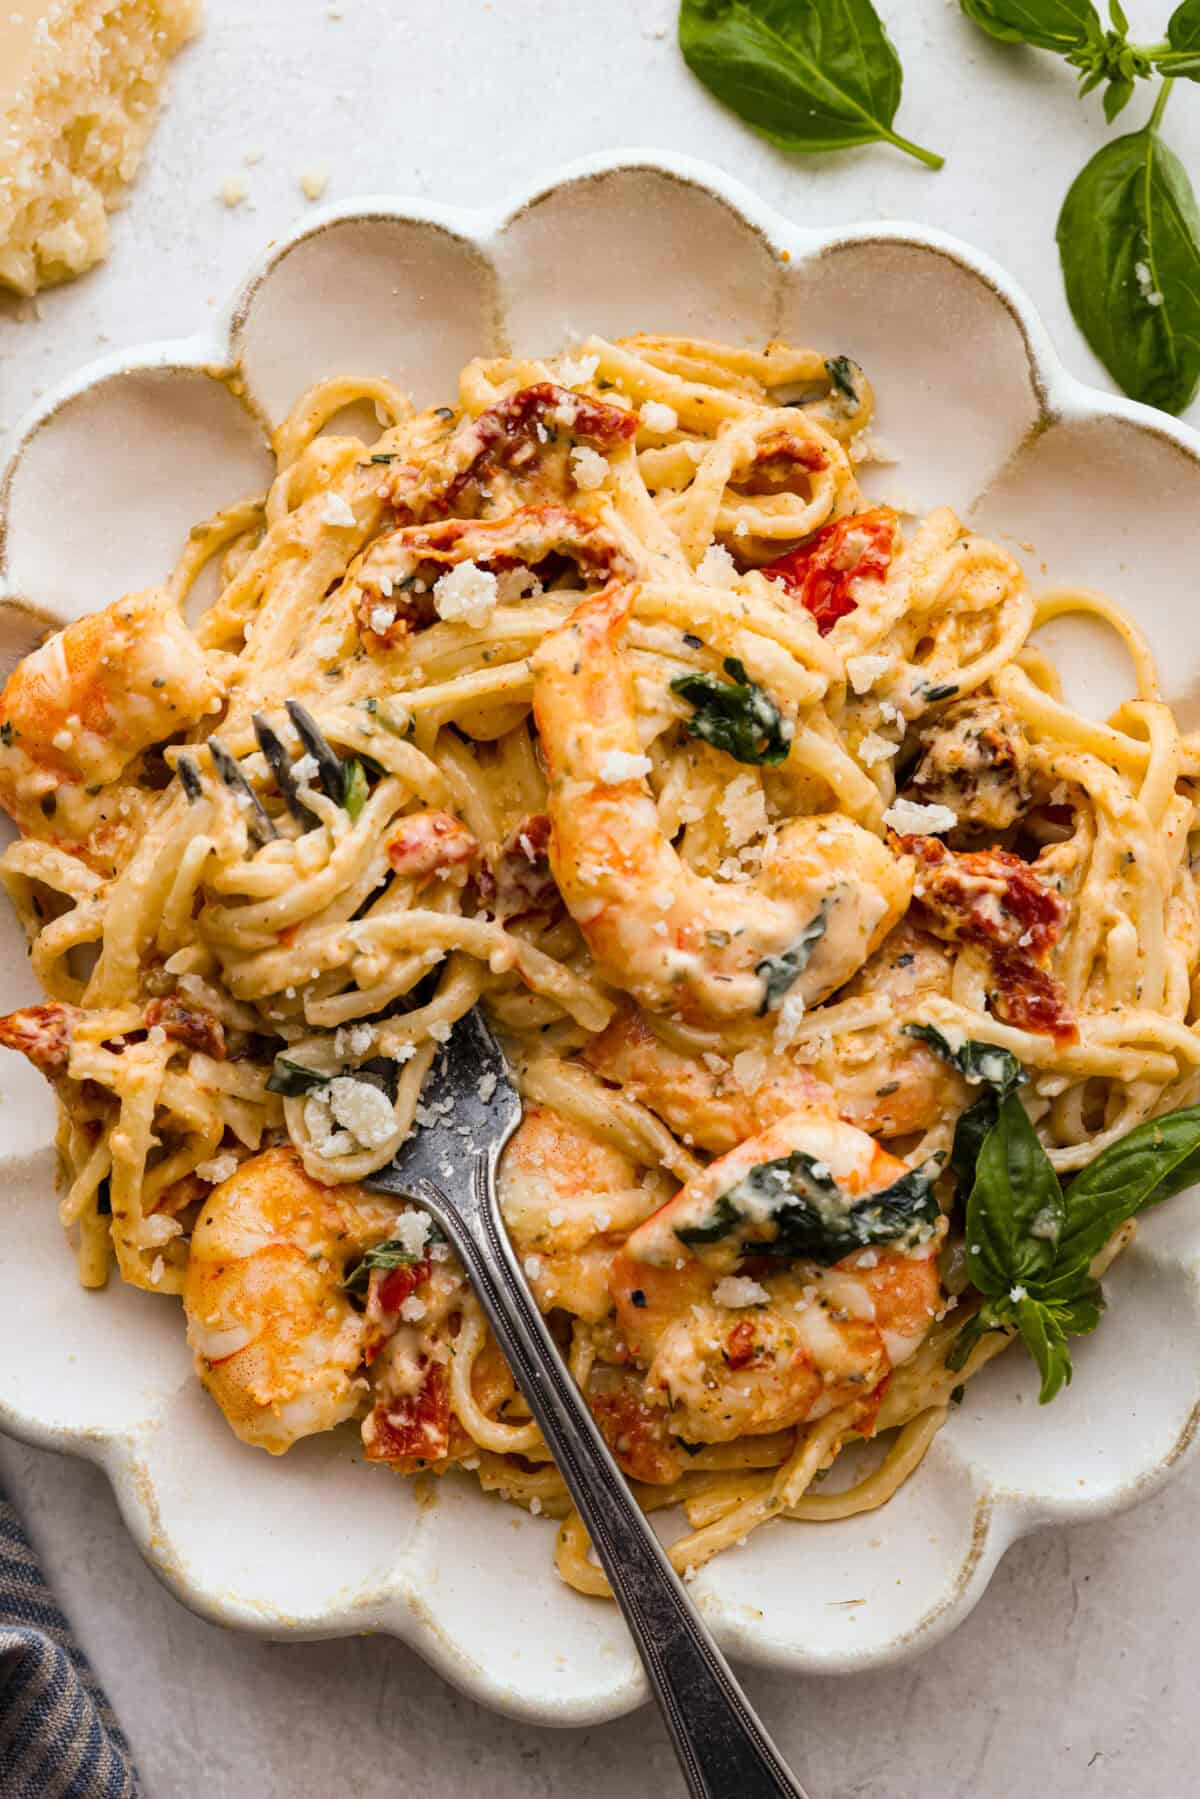
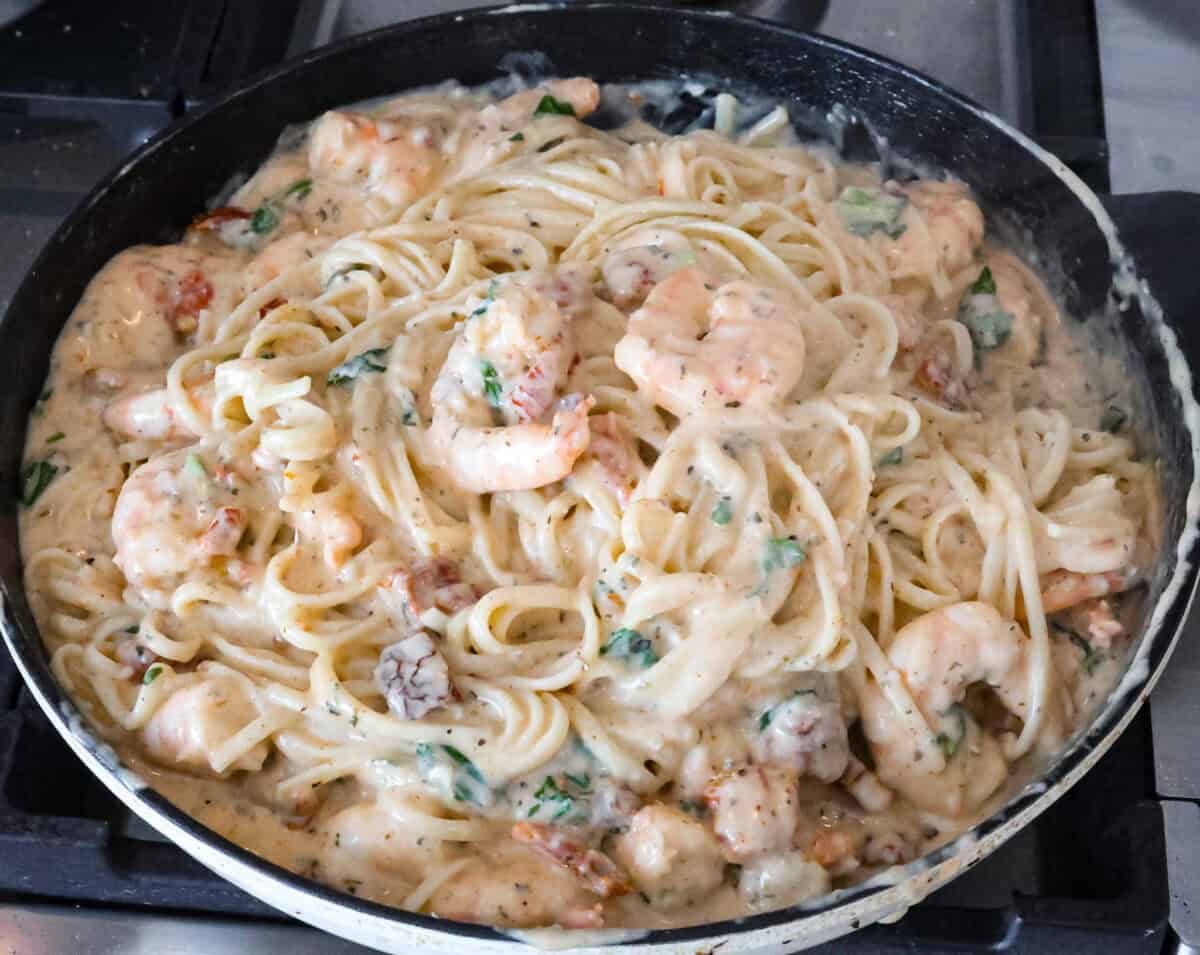
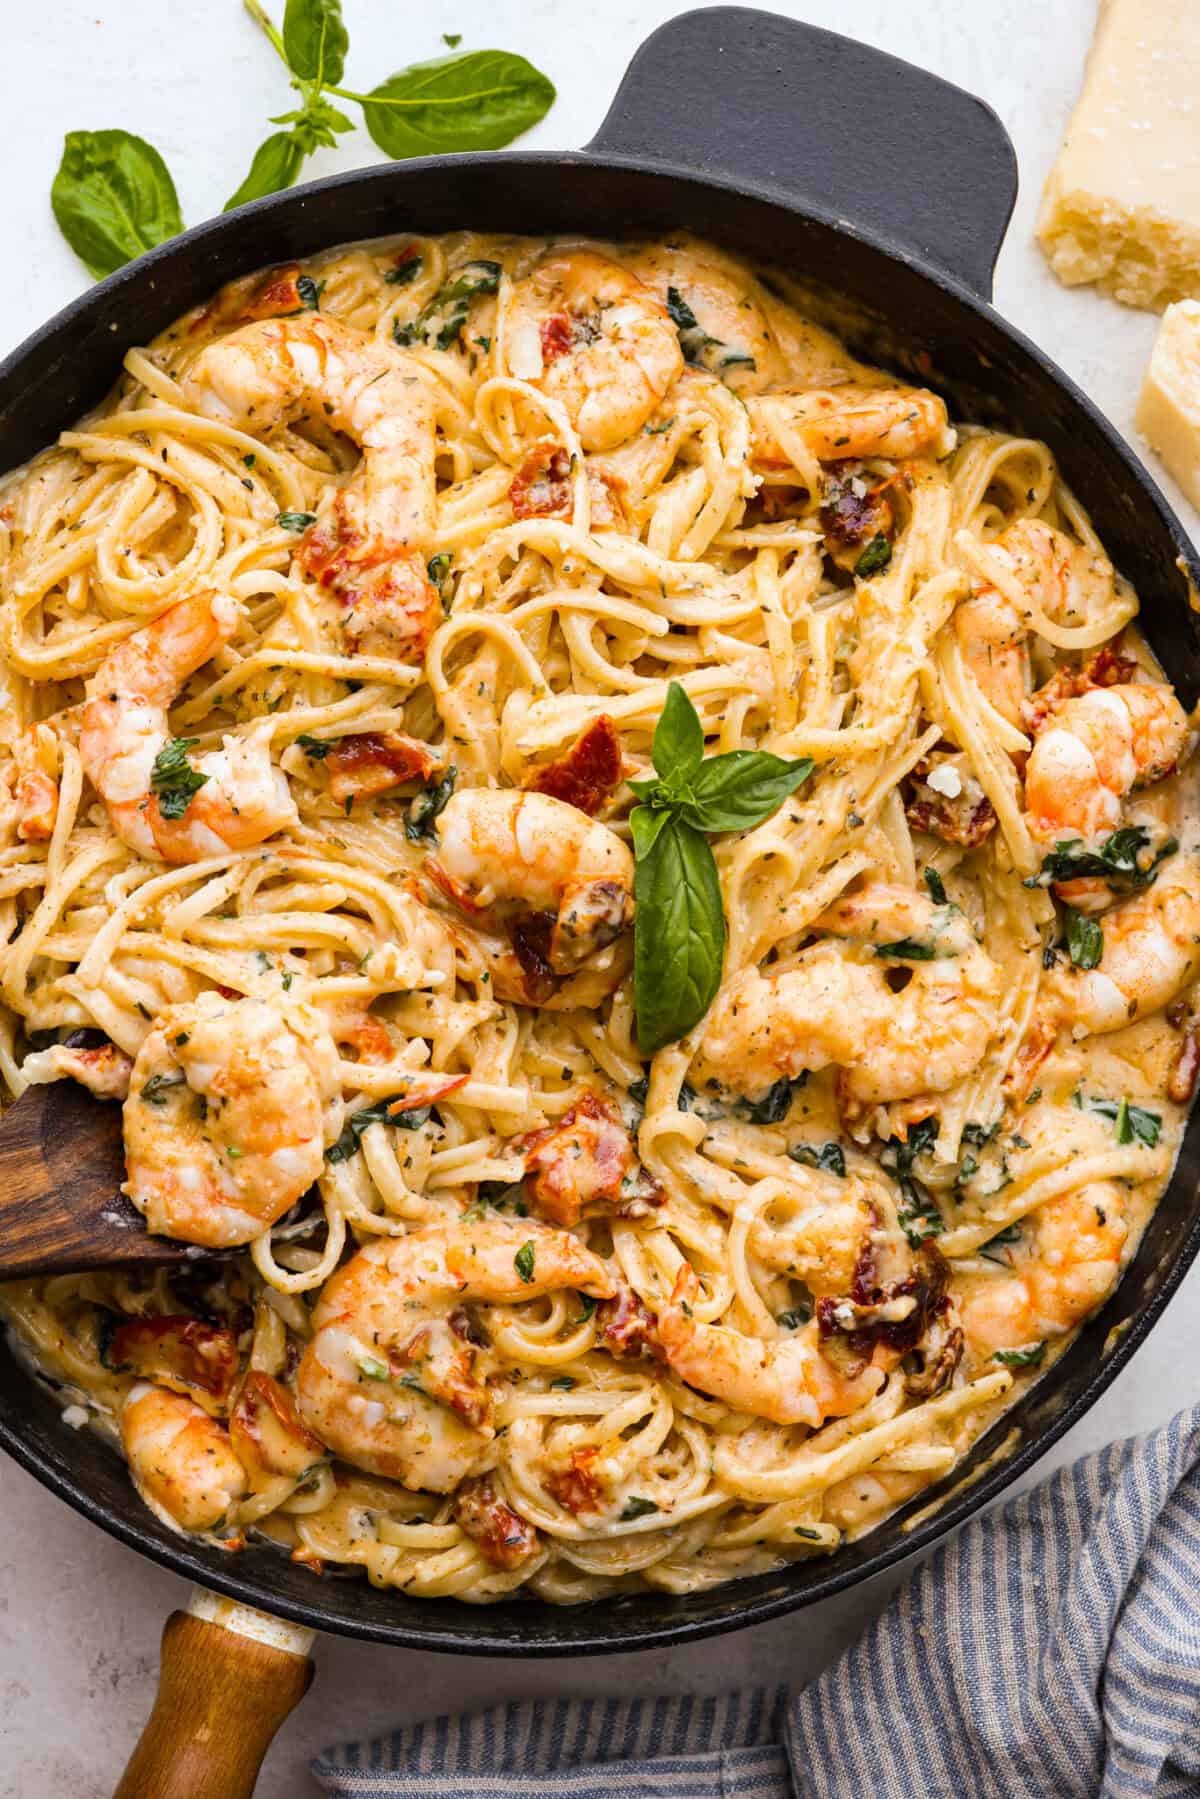
    Marry Me Shrimp Pasta dazzles with robust Italian flavors. It’s ready in just 30 minutes, and the creamy sauce, brimming with fresh herbs and spices, could very well lead to a marriage proposal after your first bite!

    This dish will knock anyone’s socks off. To complete the meal, you should start out with my easy bruschetta recipe as a delightful appetizer. Then serve the pasta with this copycat olive garden salad and the best homemade garlic bread. Dinner is served!

    Overhead shot of plated marry me shrimp with pasta. Overhead shot of plated marry me shrimp with pasta.

    Why You’ll Love This Recipe

    • Ease of Preparation: Even though this tastes like a gourmet meal, it comes together so quickly and easily.
    • Flavor: The flavor profiles of this dish are simply extraordinary! Not only that, but the combination of garlic, grated Parmesan cheese, fresh basil leaves, and rich sun-dried tomatoes will undoubtedly have your taste buds singing with delight!
    • Versatility: You can change up the ingredients to suit your tastes. For example, add some spice with red pepper flakes, or incorporate vegetables such as baby spinach, mushrooms, or peppers.
    • Crowd-pleaser: This recipe will become one of your family’s go-tos. It appeals to both young and old. If your kids don’t like shrimp, you can make this a chicken recipe.

    What is Marry Me Shrimp With Pasta?

    Marry Me Shrimp Pasta puts a delicious spin on the classic Marry Me Chicken recipe. Picture juicy shrimp and tender linguine coming together to transport you to a cozy evening on a Venetian restaurant patio.

    If you’re interested in more Marry Me recipes, I’ve got you covered. Check out my Marry Me salmon, Marry Me chicken pasta, and my Marry Me Chicken. Delicious Marry Me recipes, with their mouthwatering flavors and romantic charm, are perfect for creating memorable and impressive meals.

    Ingredients Needed to Make Marry Me Shrimp with Pasta

    There really aren’t that many ingredients in this pasta. Most items you probably already have in your fridge or pantry. I like to use fresh seafood when making this. Scroll down to the recipe card for exact measurements.

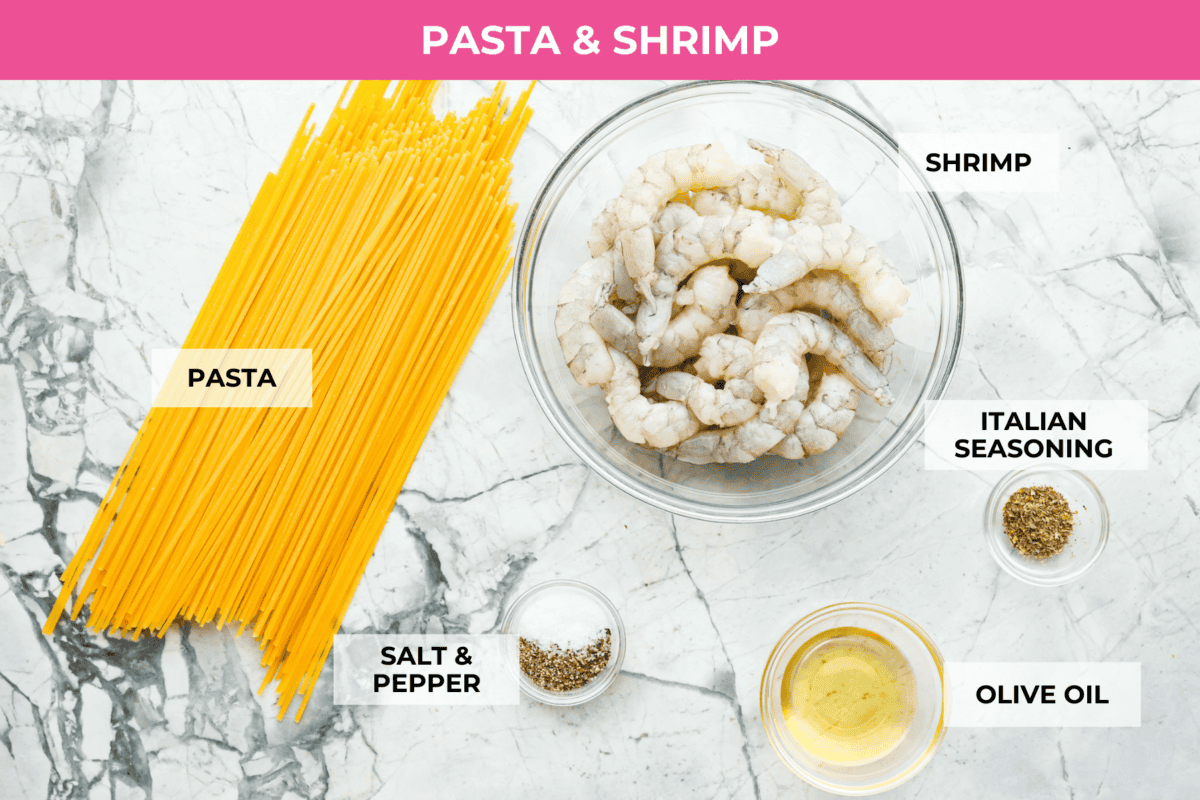
    • Linguine pasta: Provides a hearty base and a chewy texture that compliments the shrimp.
    • Peeled and deveined shrimp: Provides a sweet seafood flavor and is a great source of lean protein.
    • Italian seasoning: Adds depth to the Italian flavor and enhances the overall flavor.
    • Salt: Enhances each individual flavor in the dish.
    • Black Pepper: Gives a peppery bite and enhances flavor.
    • Olive oil: Helps create smoothness in the sauce.
    Overhead shot of labeled pasta and shrimp ingredients. Overhead shot of labeled pasta and shrimp ingredients.

    Sauce

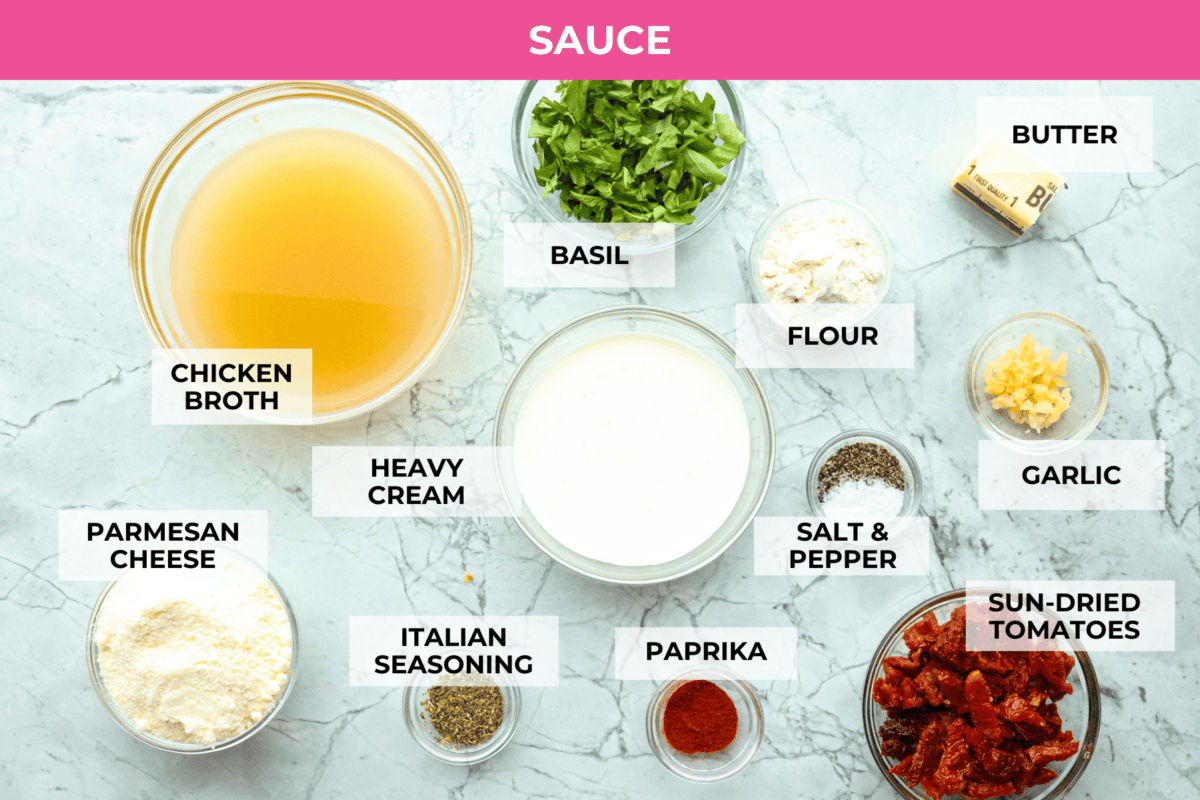
    • Butter: Provides a rich cream base for the sauce.
    • Minced garlic: Infuses the sauce with a robust flavor that compliments the shrimp.
    • Flour: Helps thicken the sauce to get the right consistency.
    • Chicken broth: Adds a depth of flavor and helps to smooth out the sauce.
    • Heavy Cream: Provides a luxuriously creamy texture and flavor.
    • Parmesan Cheese: Helps thicken the sauce and adds a savory, nutty warmth.
    • Drained and chopped sun-dried tomatoes: Add a tangy sweetness and beautiful color to the dish.
    • Fresh Basil: Provides a fresh herbal note and bright green color.
    • Paprika: Adds a slight smokey flavor and makes the sauce a more edible color.
    • Italian Seasoning: Provides a variety of herbs and spices that complement the other ingredients. You can use store-bought or make your own homemade Italian seasoning.
    • Salt & Pepper: To taste
    Overhead shot of labeled sauce ingredients. Overhead shot of labeled sauce ingredients.

    Marry Me Shrimp Pasta Recipe

    This Marry Me Shrimp with pasta recipe comes together quickly. First, cook the pasta, then simmer the ingredients in a pan, and before you know it, dinner is ready! Just remember not to overcook your shrimp. Follow the steps below to create this amazing dish.

    1. Pasta: Cook the linguine according to the package directions, then drain, and set aside.
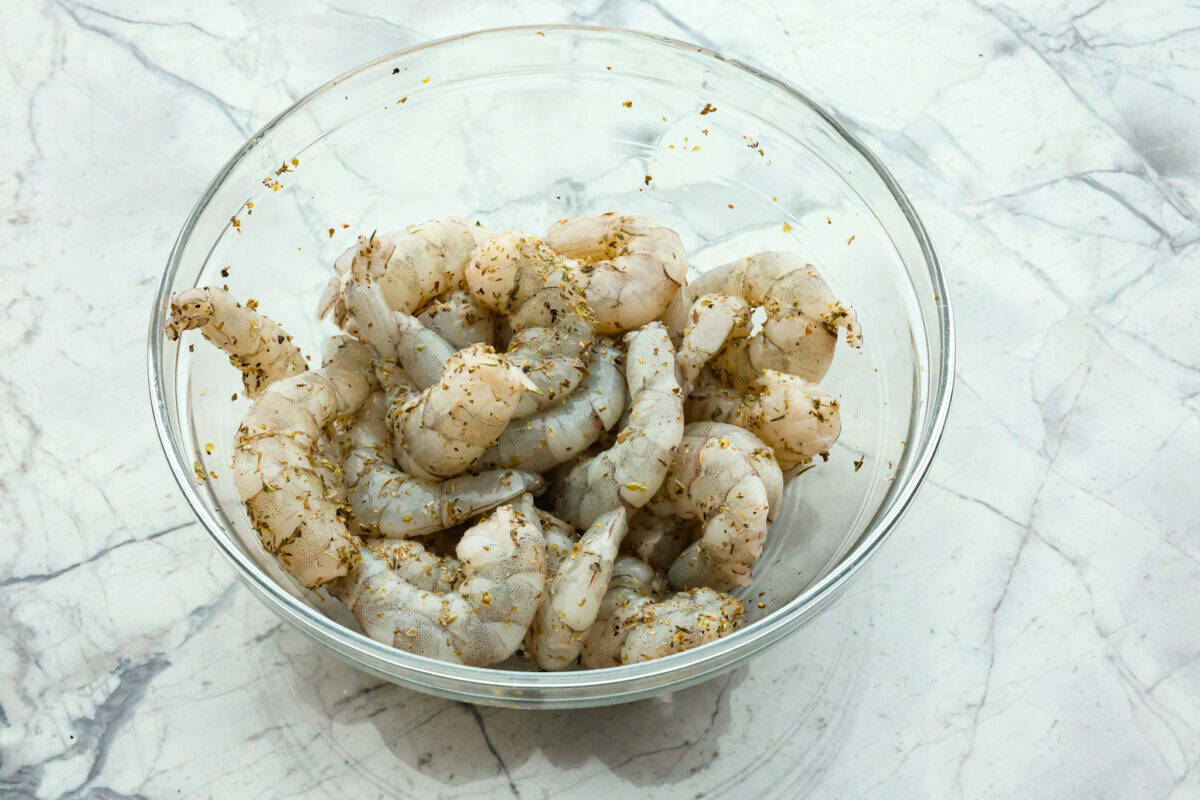
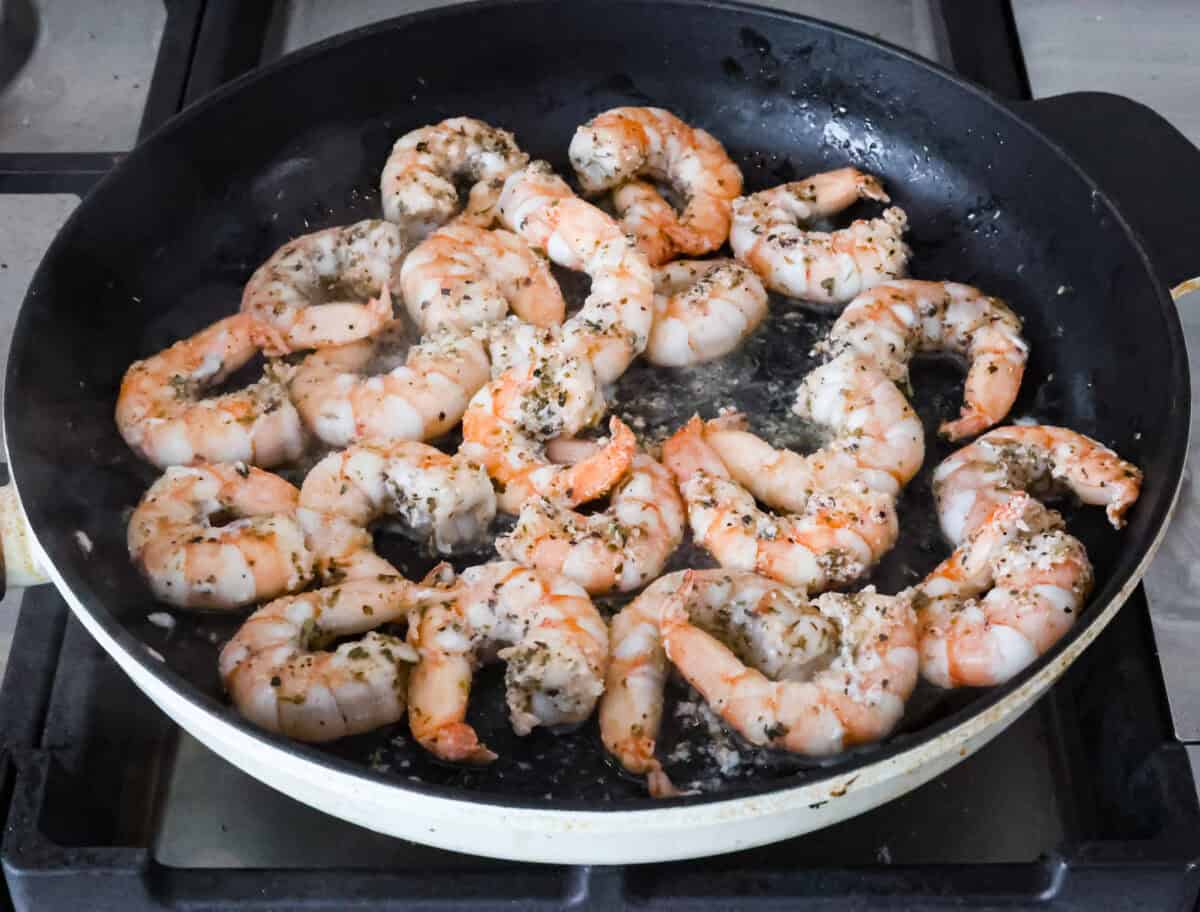
    2. Coat shrimp: Toss the shrimp in the Italian seasoning, salt, and pepper in a bowl. Then, heat the olive oil in a large skillet over medium-high heat.
    3. Cook shrimp: Add the shrimp to the pan and cook until it turns pink, about 6-8 minutes. Don’t overcook the shrimp, or it will be chewy. Remove the shrimp from the pan and set aside.

    Sauce

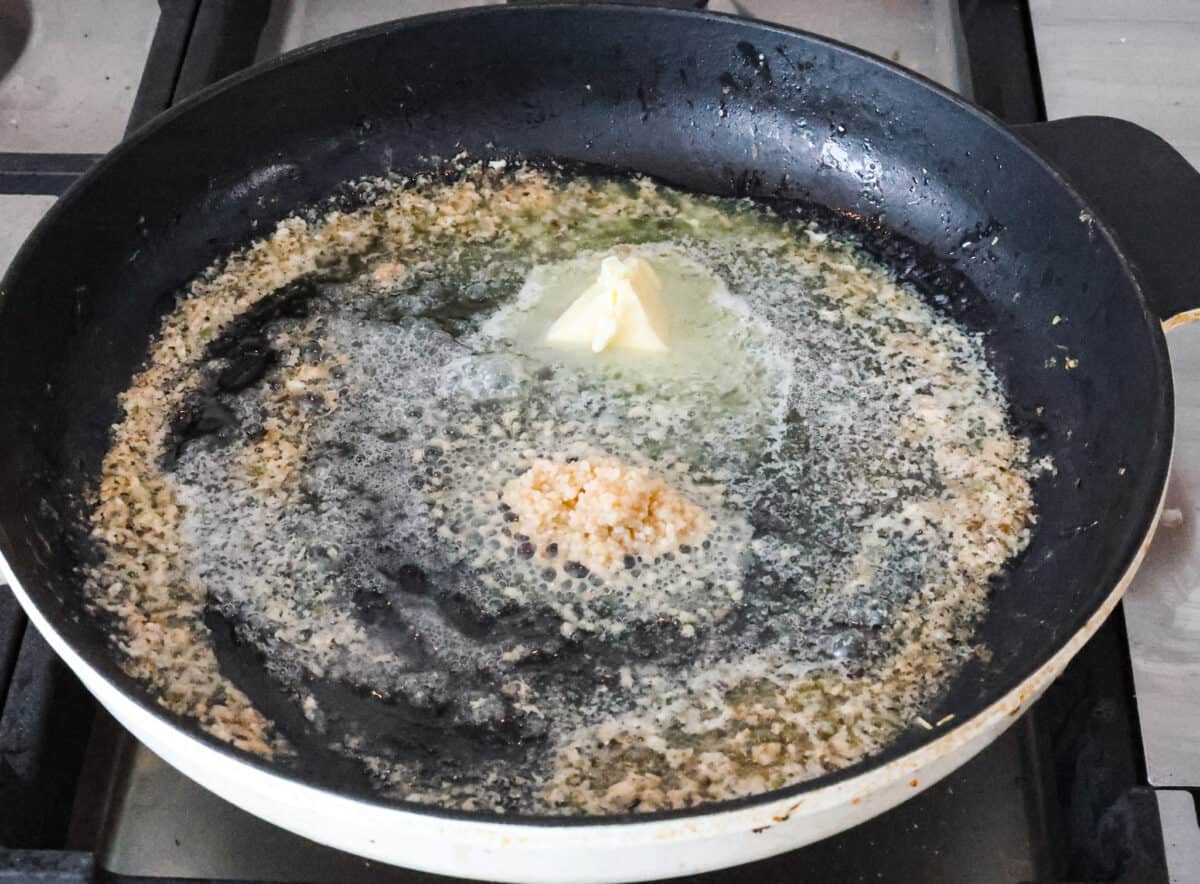
    1. Saute: Melt the butter in the same pan. Saute the garlic for 30 seconds, then whisk in the flour to make a paste.
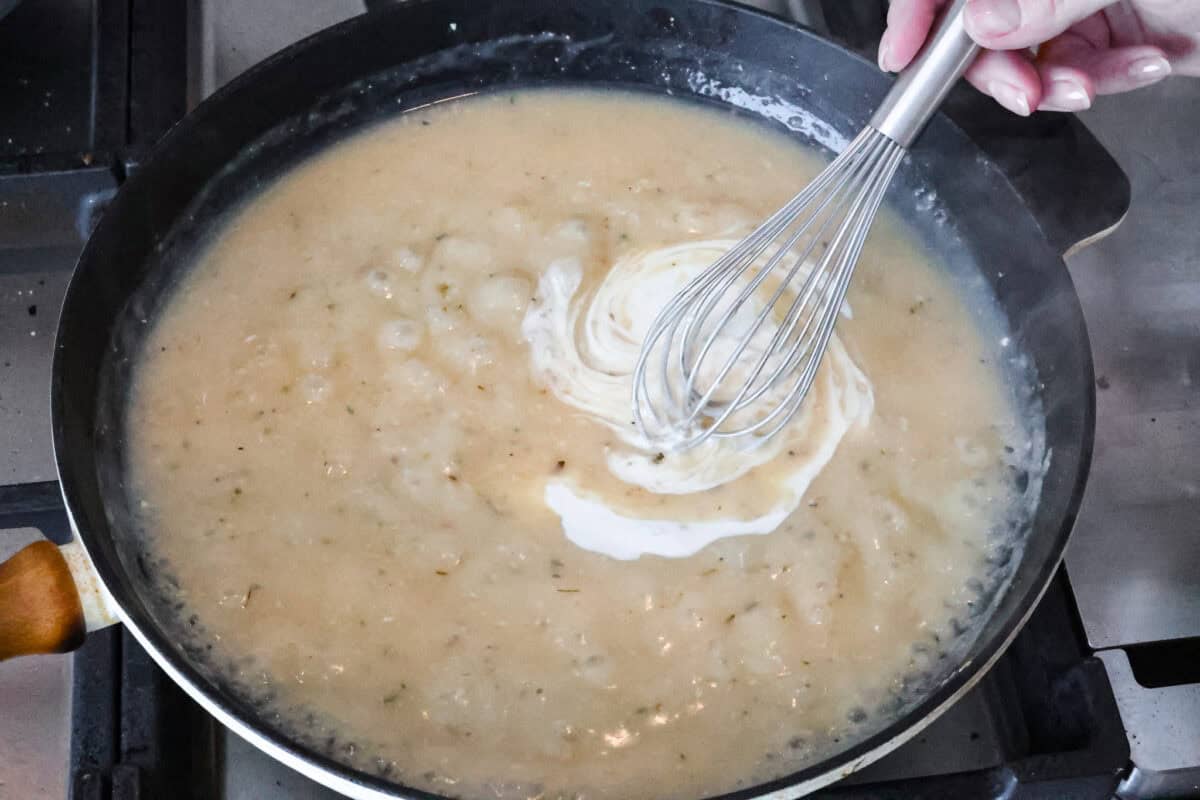
    2. Whisk: Slowly whisk in the chicken broth and heavy cream. Whisk together and heat until the sauce starts to thicken.
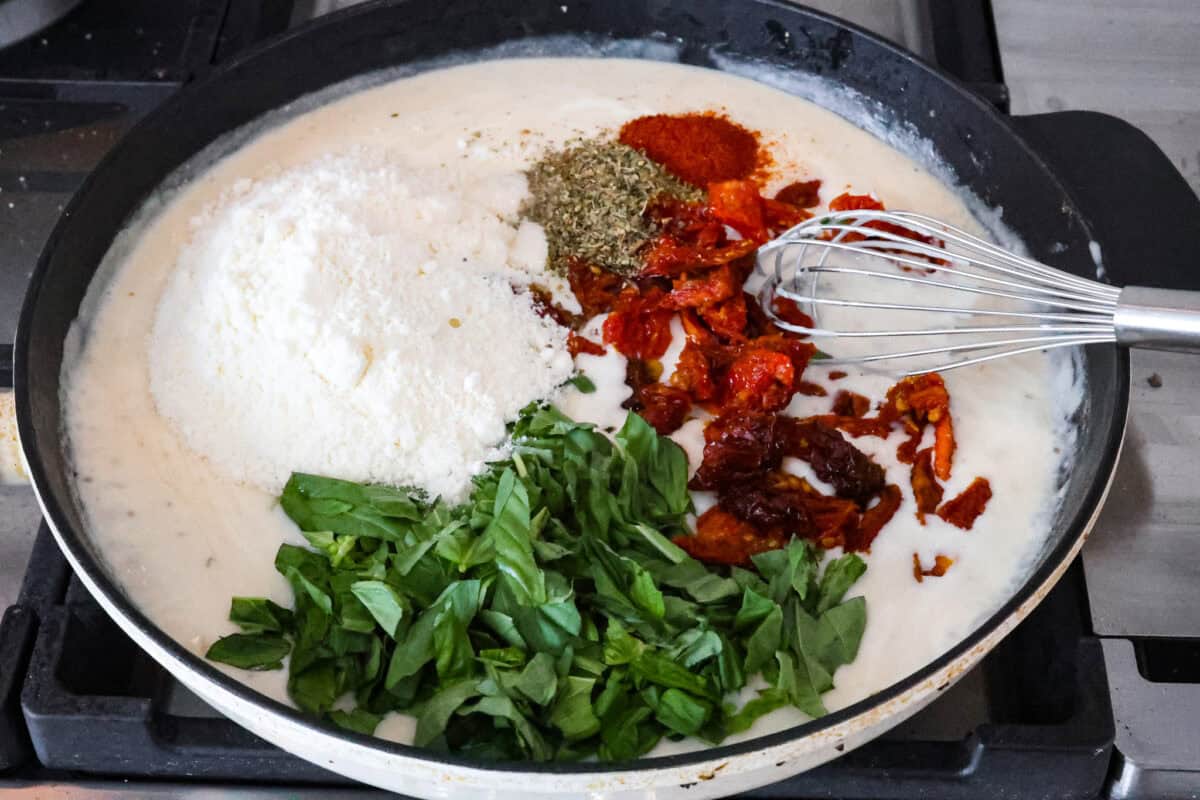
    3. Seasonings: Add the parmesan cheese, sun-dried tomatoes, basil, paprika, Italian seasoning, and salt and pepper. Whisk and heat through until you have a smooth, creamy sauce.
    4. Heat everything: Add the shrimp and pasta to the sauce and toss to coat. Saute everything together for another 3-4 minutes.
    5. Garnish: Top Marry Me shrimp pasta with additional basil, and enjoy fresh!

    Tips to Make Your Marry Me Shrimp Pasta Perfectly

    This Marry Me shrimp with pasta dish is hard to get wrong, but here are some tips and ideas to make it the best it can be!

    • DON’T overcook shrimp: Cook the shrimp until the shrimp just turns pink, not much longer than that; it will finish cooking later in the sauce
    • Pasta trick: I like to toss my cooked pasta in a little olive oil to keep it from sticking together while it waits for the rest of the recipe to come together.
    • Fresh shrimp is superior: I like to use fresh shrimp from the deli if it’s available, but frozen shrimp works just as well. Make sure to thaw it completely before using it.

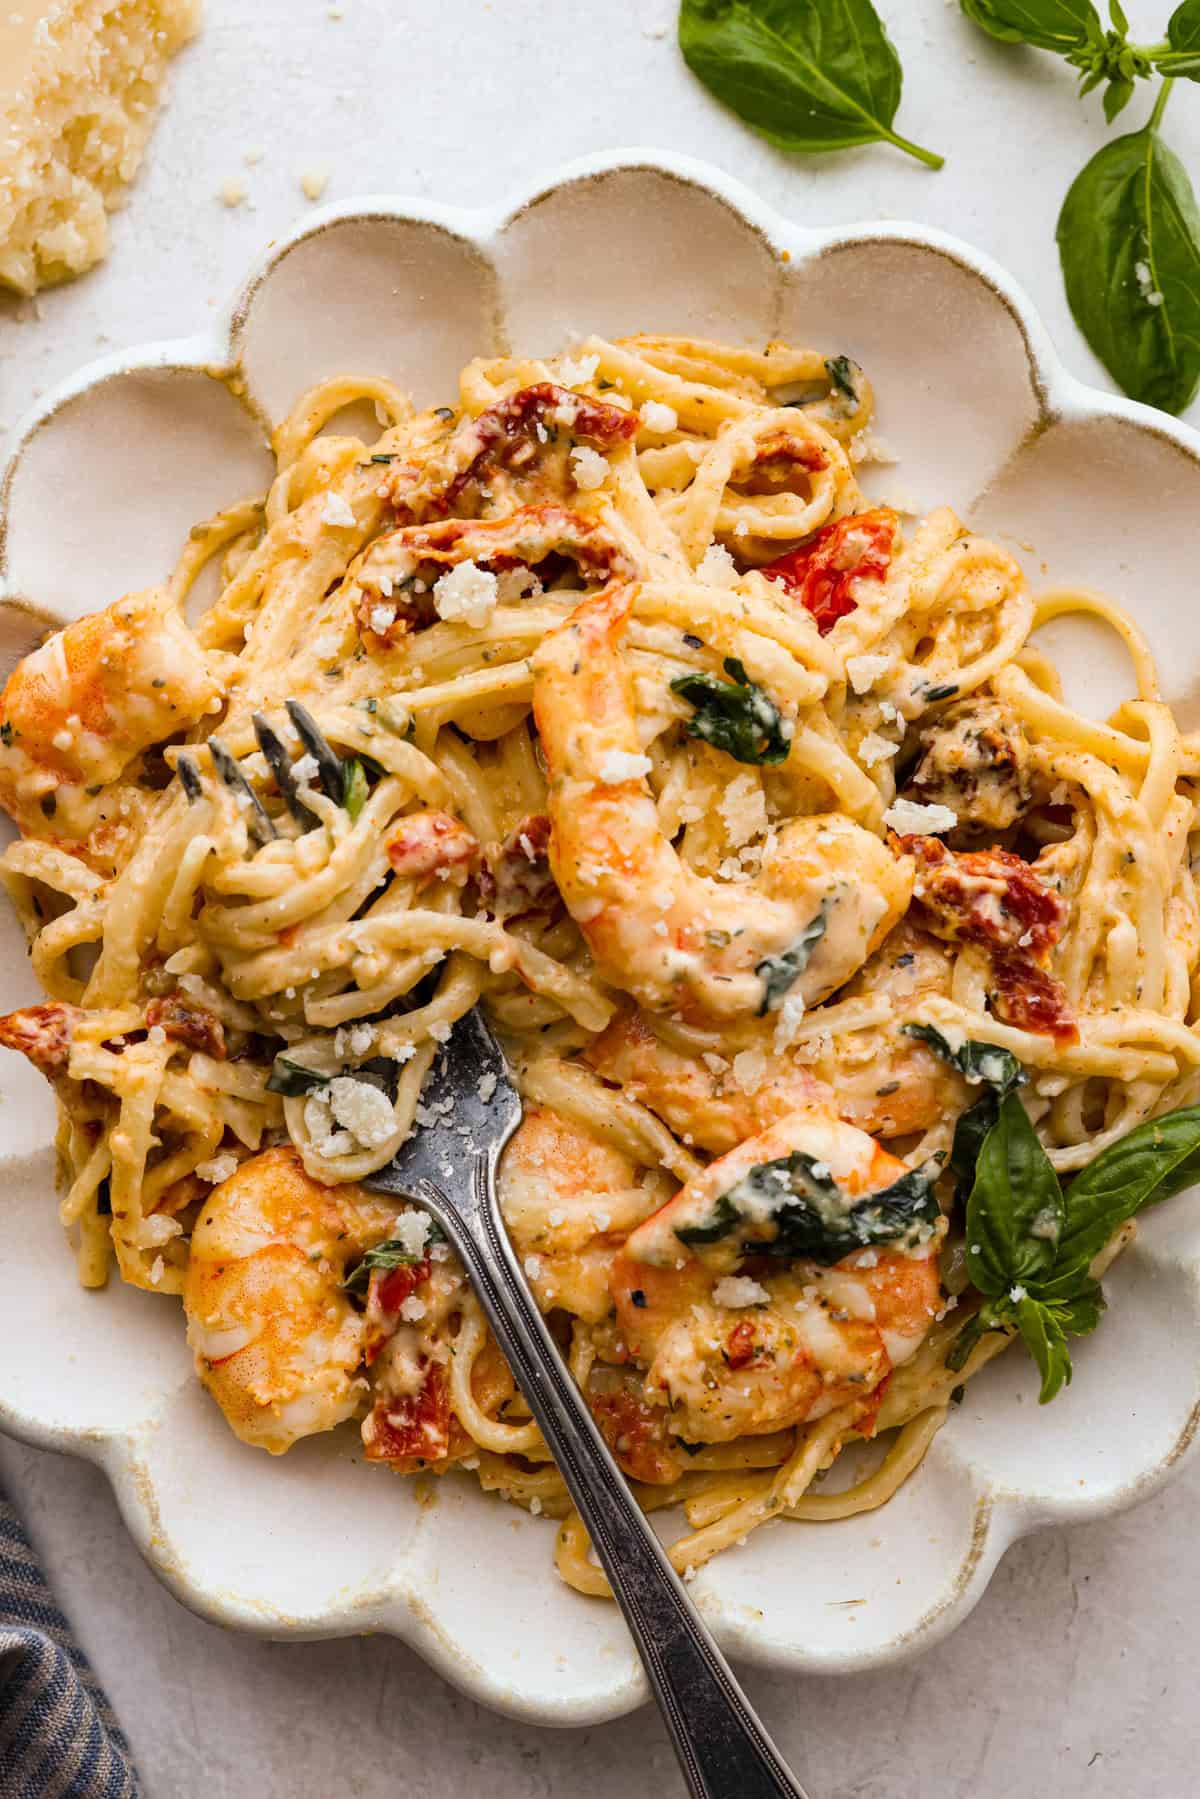
    Overhead close up shot of garnished marry me shrimp with pasta dish. Overhead close up shot of garnished marry me shrimp with pasta dish.

    Storing Leftover Marry Me Shrimp Pasta

    Luckily you can store any leftovers. Follow the instructions below to store and reheat pasta below.

    • Cool: Make sure the dish has cooled completely before putting it in an airtight container.
    • Refrigerate: Put the container in the fridge; it will last up to 3 days.
    • Reheat: To reheat Marry Me Shrimp Pasta, transfer it to a microwave-safe dish or saucepan. Add a splash of water, broth, or cream to maintain its creamy texture. Microwave covered for 30-second increments, stirring in between, or reheat gently on the stovetop over low heat, stirring occasionally.
    • DO NOT freeze: We do not recommend freezing this dish. It will affect the texture of the shrimp and the creaminess of the sauce.

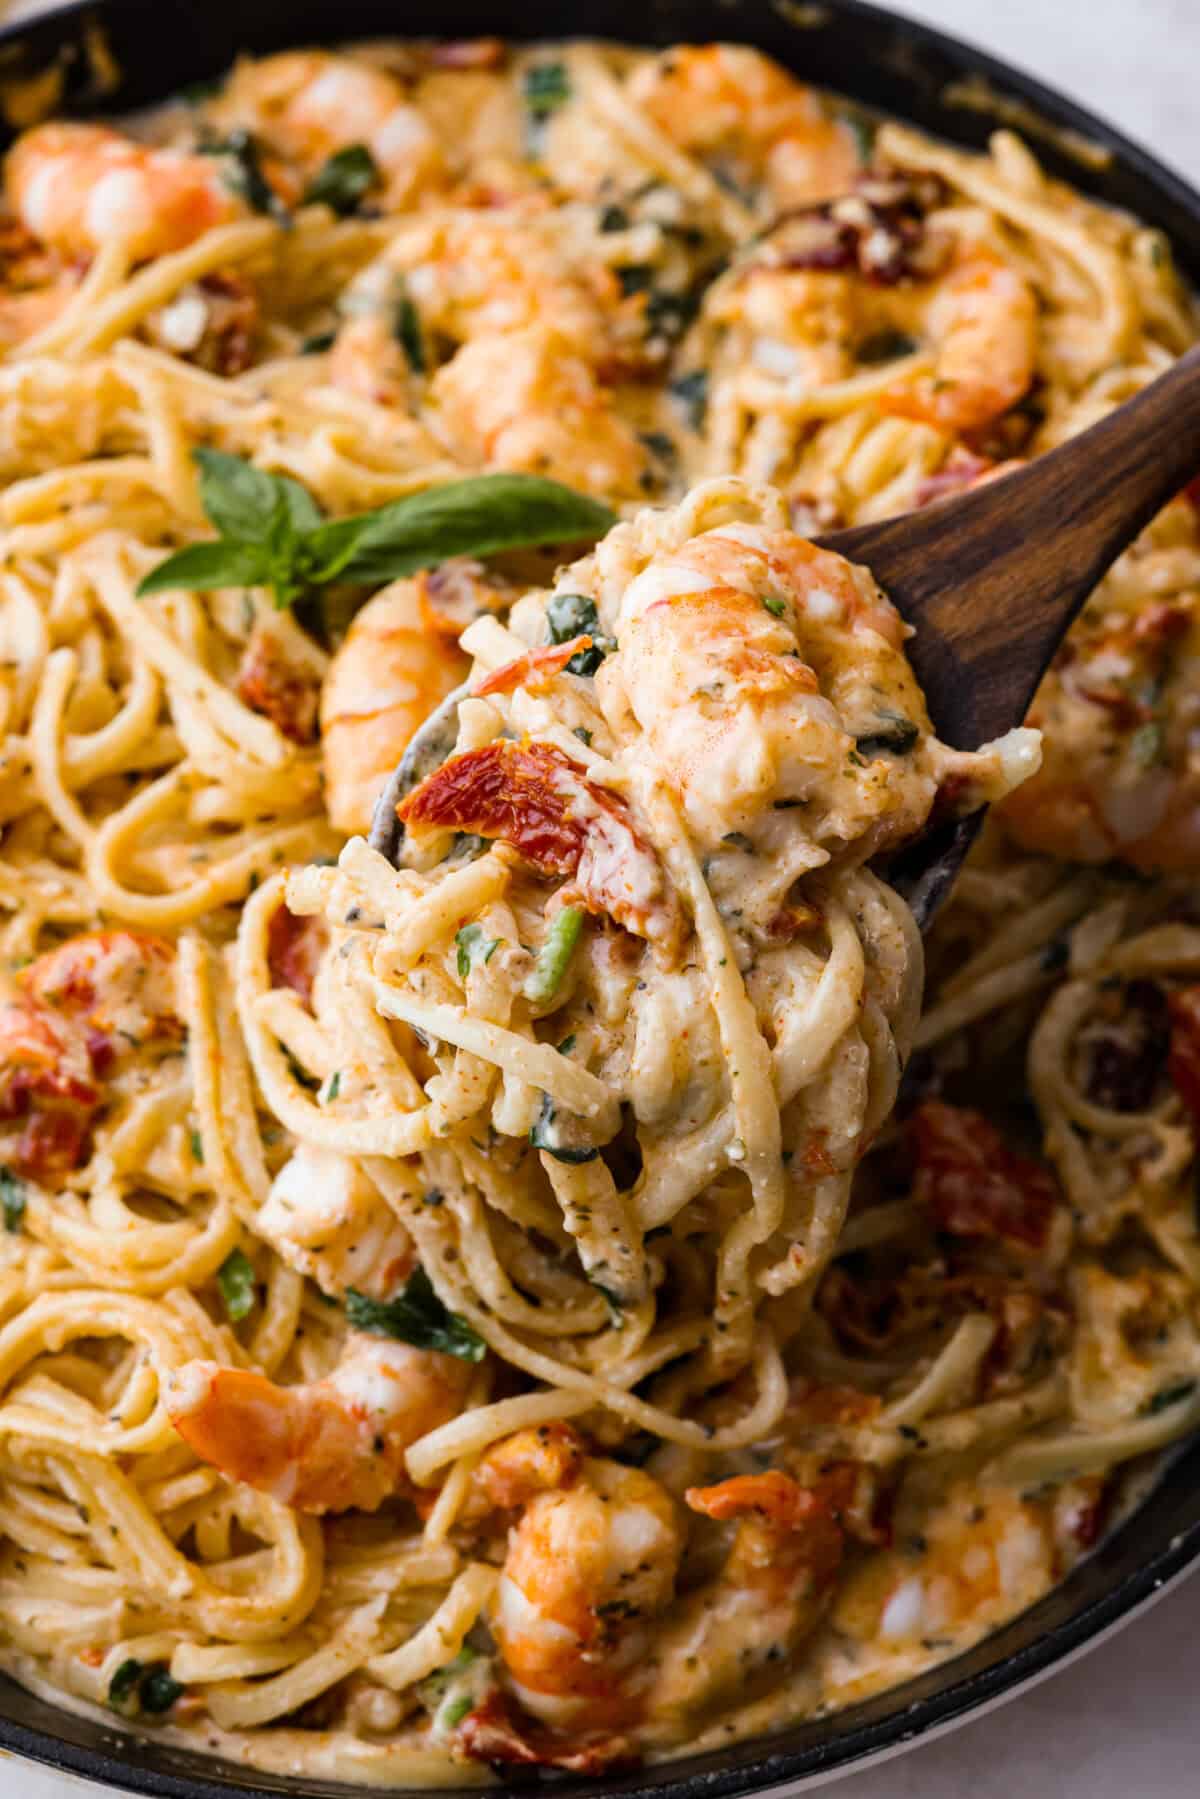
    Angle shot of close up pasta with scoop being taken out of it.Angle shot of close up pasta with scoop being taken out of it.

    More Scrumptious Shrimp Recipes

    I love shrimp! Not only is it good both cold and hot, but it is also a great source of lean protein. If you’re looking for more recipes with shrimp, try my creamy lemon garlic seafood pasta and the recipes below!

    Pin this now to find it later

    Pin It


    Source link

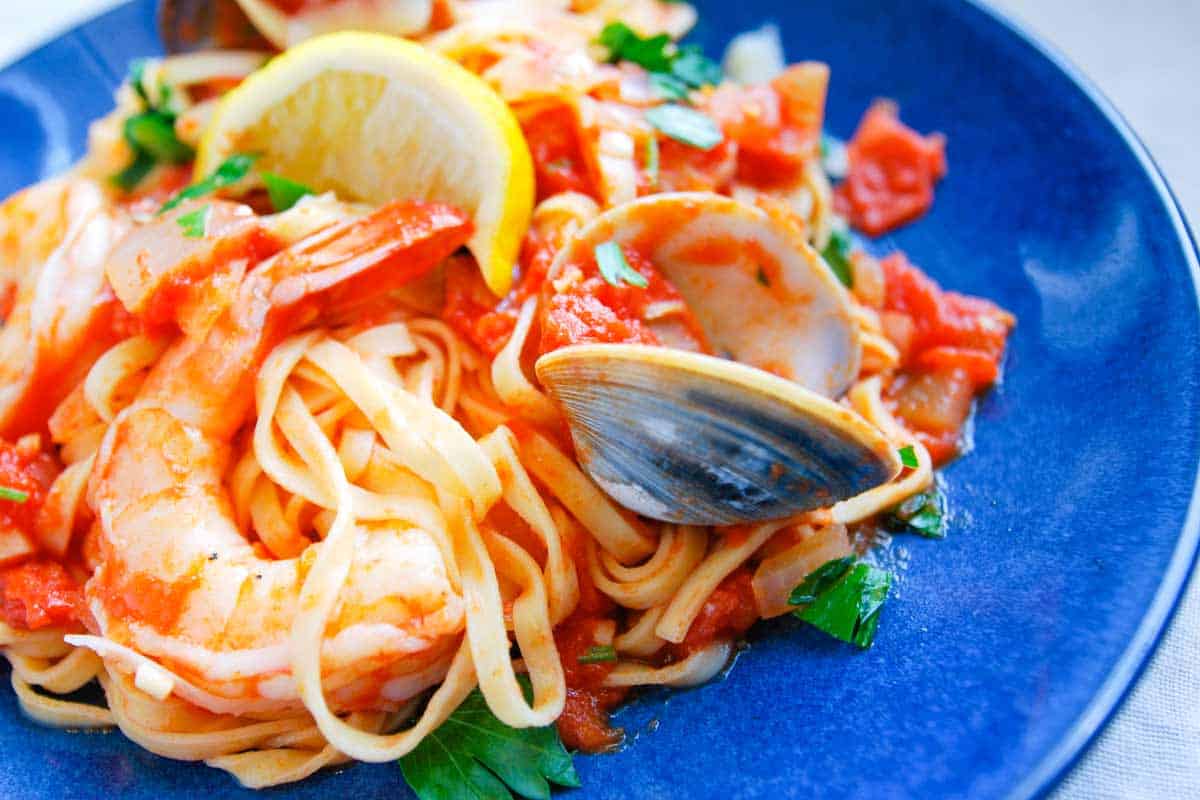
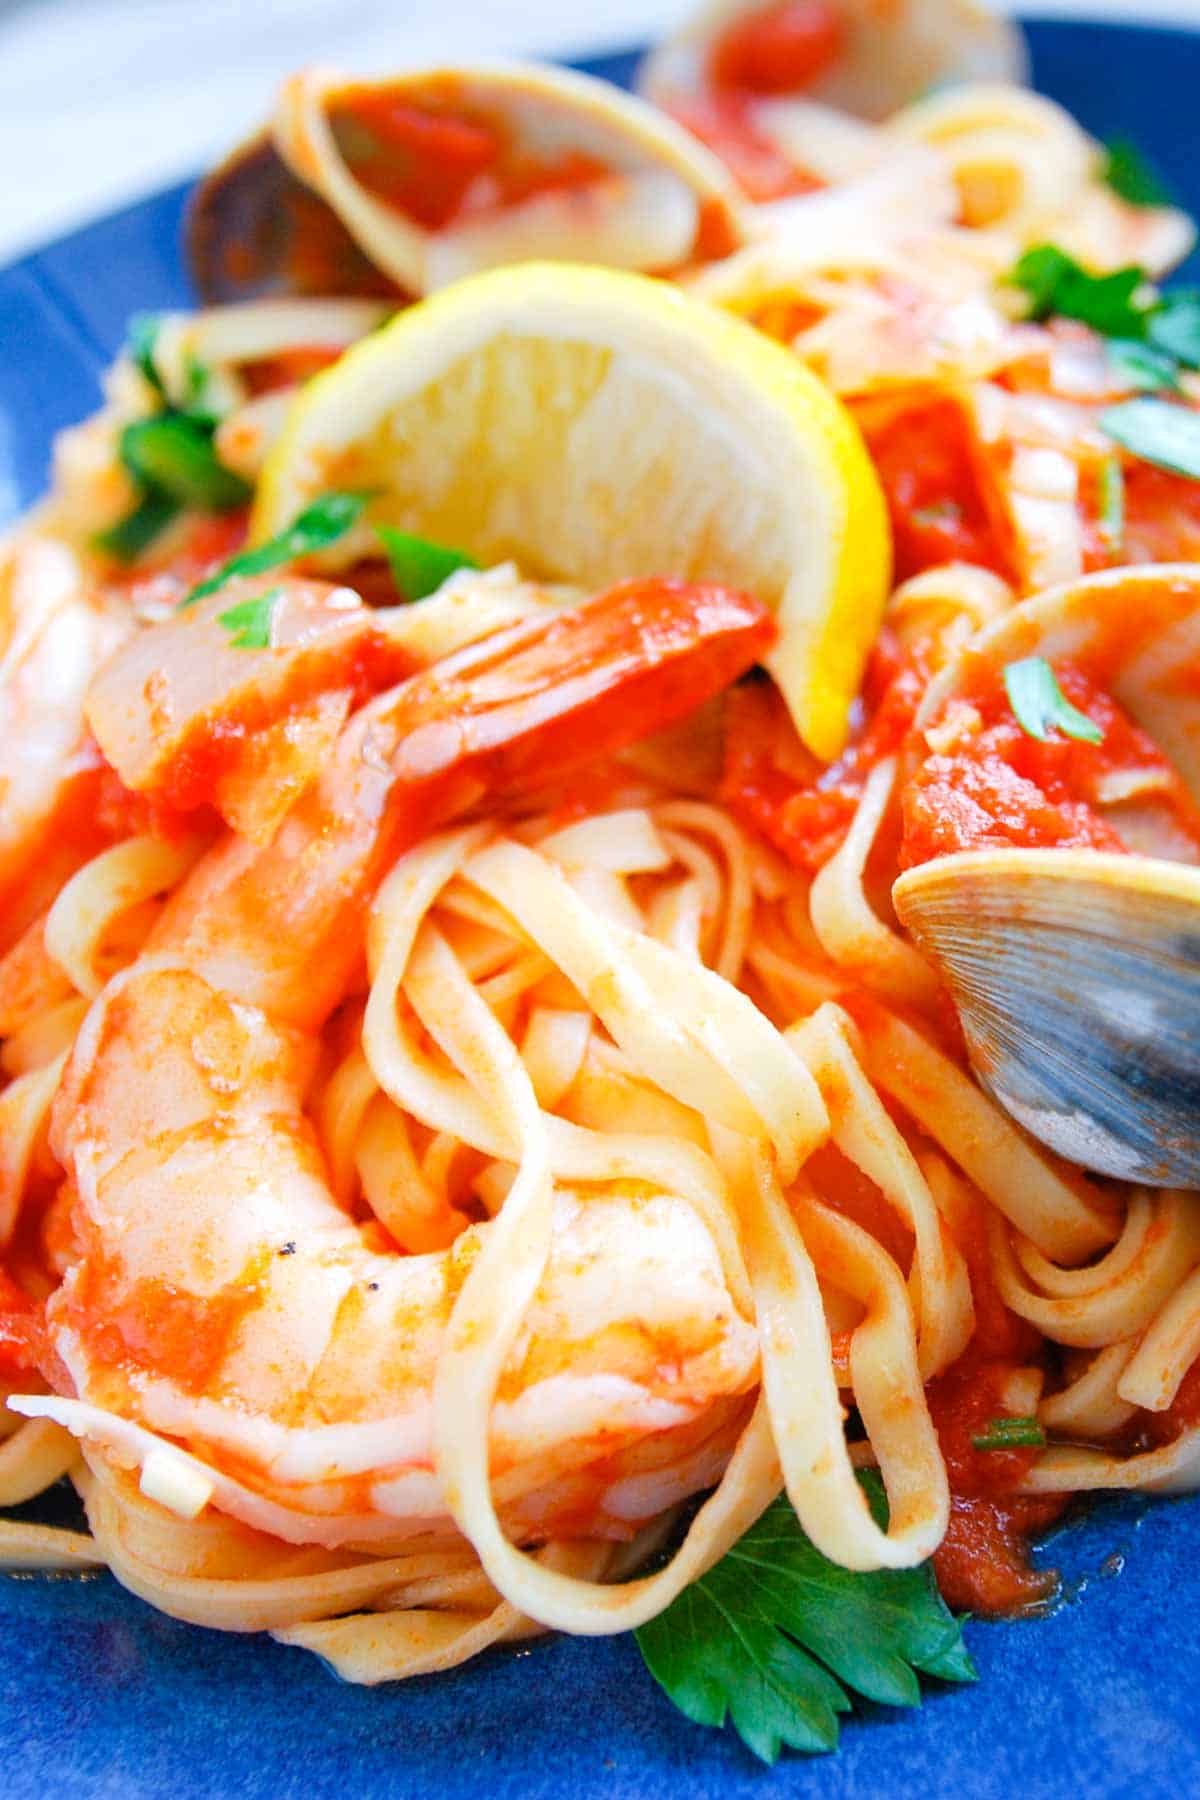
  • Spicy Shrimp and Clam Pasta

    Spicy Shrimp and Clam Pasta

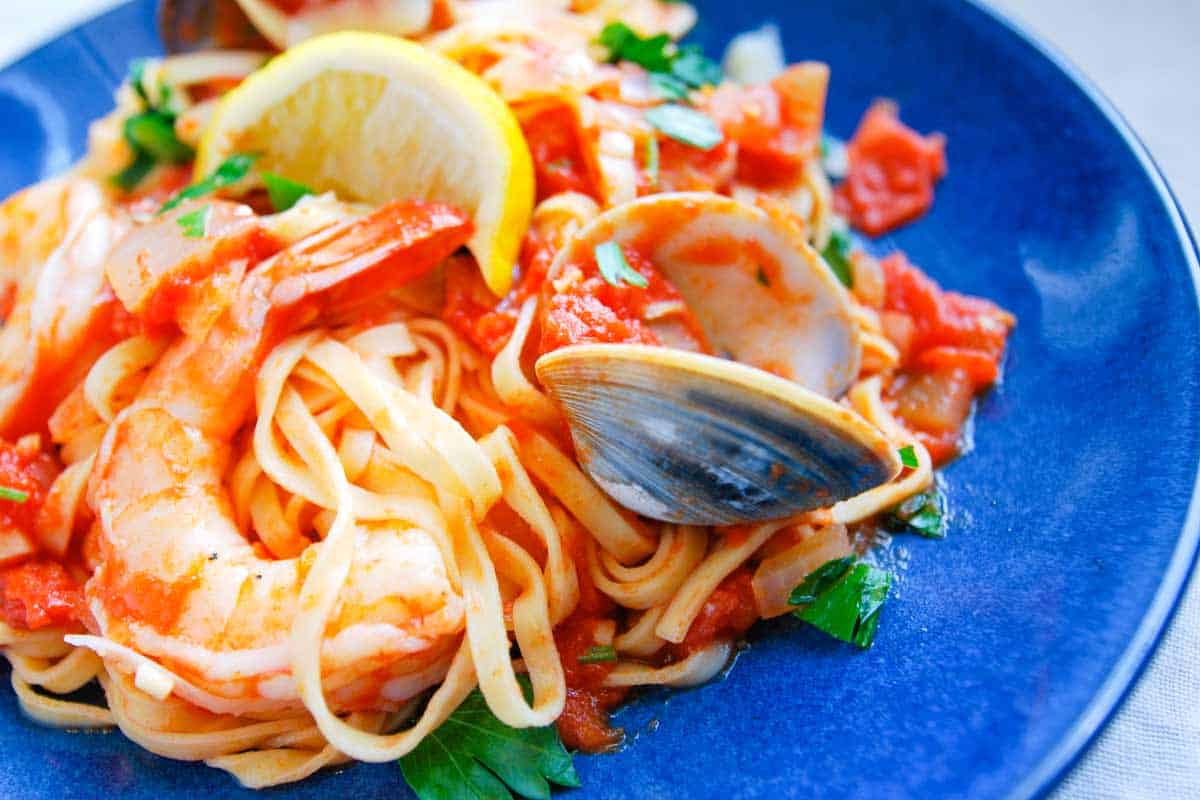
    With this spicy pasta you can have dinner on the table in under 45 minutes. 

    Spicy Shrimp and Clam Pasta Recipe

    Hi there. It’s me, Joanne. This is an updated post from September 2009, which was only our third month sharing recipes with you. A lot has changed since then. Here’s the little blurb we wrote way back then. If you’re only interested in the recipe, scroll down to the recipe below.

    From 2009: We are only into our second month here at Inspired Taste and I must say Adam and I are pretty excited with our progress.  It may not seem like too much, but yesterday we had a record breaking 64 unique visitors look at our site.  When we compare that with last month it has more than tripled.  We have also started to receive comments on various posts, which is quite possibly the coolest thing ever!  I knew we would be excited, but once we started hearing from people out there who liked something we did, it truly was an awesome feeling.  Sometimes I sit at my computer wondering if anyone will actually care about what I am saying, am I actually that interesting? … like right now, is someone really wanting to read about how many unique visitors we had yesterday?  It is incredibly humbling to know that people do take the time to view our work and possibly even try our recipes and then take the additional time to write to us either through email or by commenting on our site.

    How to Make the Best Spicy Pasta with Shrimp and Clams

    This spicy pasta recipe comes from a coworker who was kind enough to let us in on one of his favorite recipes. The sauce comes together pretty quickly and is packed with flavor thanks to cooked onions, dry vermouth, red pepper flakes, fresh parsley and lemon juice. This sauce is perfect with shrimp and clams, but you can also skip the shellfish and simply toss the sauce with pasta.

    How to Make Spicy Pasta with Shrimp and Clams

    The shrimp are peeled then deveined and roasted in the oven while the sauce comes together and then added at the very end. The clams are washed and put into the sauce a few minutes before serving so they have a chance to open.

    Spicy Shrimp and Clam Pasta

    • PREP
    • COOK
    • TOTAL

    This spicy pasta recipe comes from a coworker who was kind enough to let us in on one of his favorite recipes. The sauce comes together pretty quickly and is packed with flavor thanks to cooked onions, dry vermouth, red pepper flakes, fresh parsley and lemon juice.

    Makes 4 to 6 servings

    You Will Need

    1 pound dry pasta such as spaghetti or fettuccini

    Salt and fresh ground black pepper

    1 tablespoon extra-virgin olive oil, plus more for cooking shrimp

    1 tablespoon butter

    1 medium onion, chopped

    4 garlic cloves, minced

    1/3 cup dry vermouth or substitute dry white wine

    1 (28 ounce) can whole tomatoes

    1 teaspoon red pepper flakes, or more to taste

    1 teaspoon brown sugar

    1/4 cup chopped fresh parsley

    1 lemon, cut into wedges

    1 1/4 pounds littleneck clams (about 15 clams), scrubbed

    1  pound cleaned large shrimp

    Directions

      1Heat the oven to 400 degrees F.

      2Add the olive oil and butter to a wide skillet (with lid) over medium heat. Once the butter has melted, add the onions and cook until softened, about 5 minutes. Add the garlic and cook for another 2 minutes.

      3Pour in the vermouth and use a wooden spoon to scrape any bits stuck to the bottom of the pan. Add the tomatoes, red pepper flakes and brown sugar. Bring to a low simmer and cook until reduced slightly, about 8 minutes. While cooking, use a wooden spoon to break the whole tomatoes apart into bite-size chunks.

      4Meanwhile, cook the pasta in boiling salted water until it is tender but not mushy. Drain, but reserve about 1/4 cup of the pasta water.

      5While the pasta is cooking, cook the shrimp. Toss shrimp with a tablespoon of olive oil, salt and pepper. Add to a baking dish and roast the shrimp for 5 to 10 minutes until pink, firm, and cooked through.

      6When the sauce is done, add the clams and cover with a lid. Allow them to steam for 4 to 5 minutes. After 4 to 5 minutes, the clams should have opened, if one or two have not, remove from the pan and discard.

      7Add the shrimp, cooked pasta, and about 1/4 cup of the pasta water. Toss well then cook one more minute until the sauce coats the pasta. Top with parsley and serve with lemon wedges on the side.

    Adam and Joanne’s Tips

    • The sauce can be made (without shellfish) up to 3 days in advance or frozen up to 1 month.

    If you make this recipe, snap a photo and hashtag it #inspiredtaste — We love to see your creations on Instagram and Facebook! Find us: @inspiredtaste


    AUTHOR:

    Adam Gallagher

    Previous Post: Easy Butter Cookies
    Next Post: White Chocolate Cranberry Oatmeal Cookies


    Source link

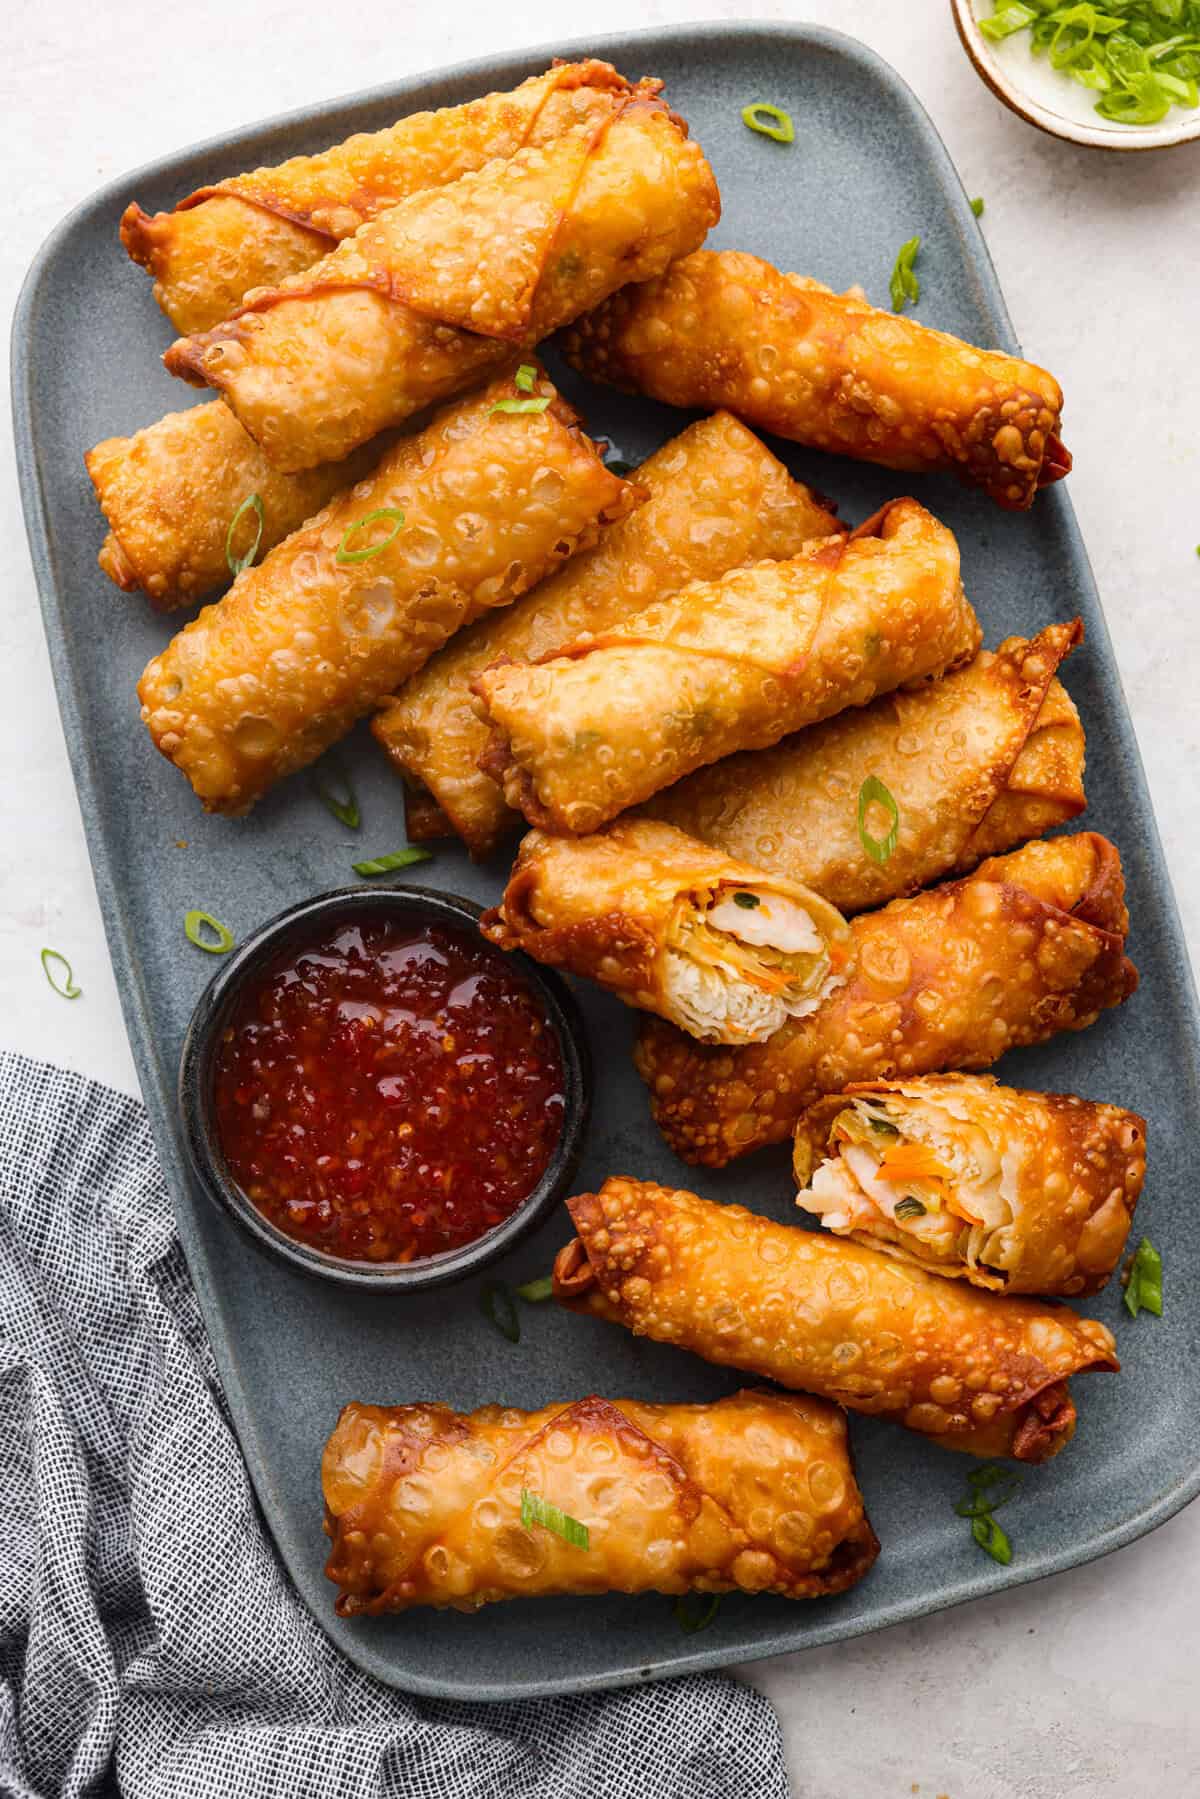
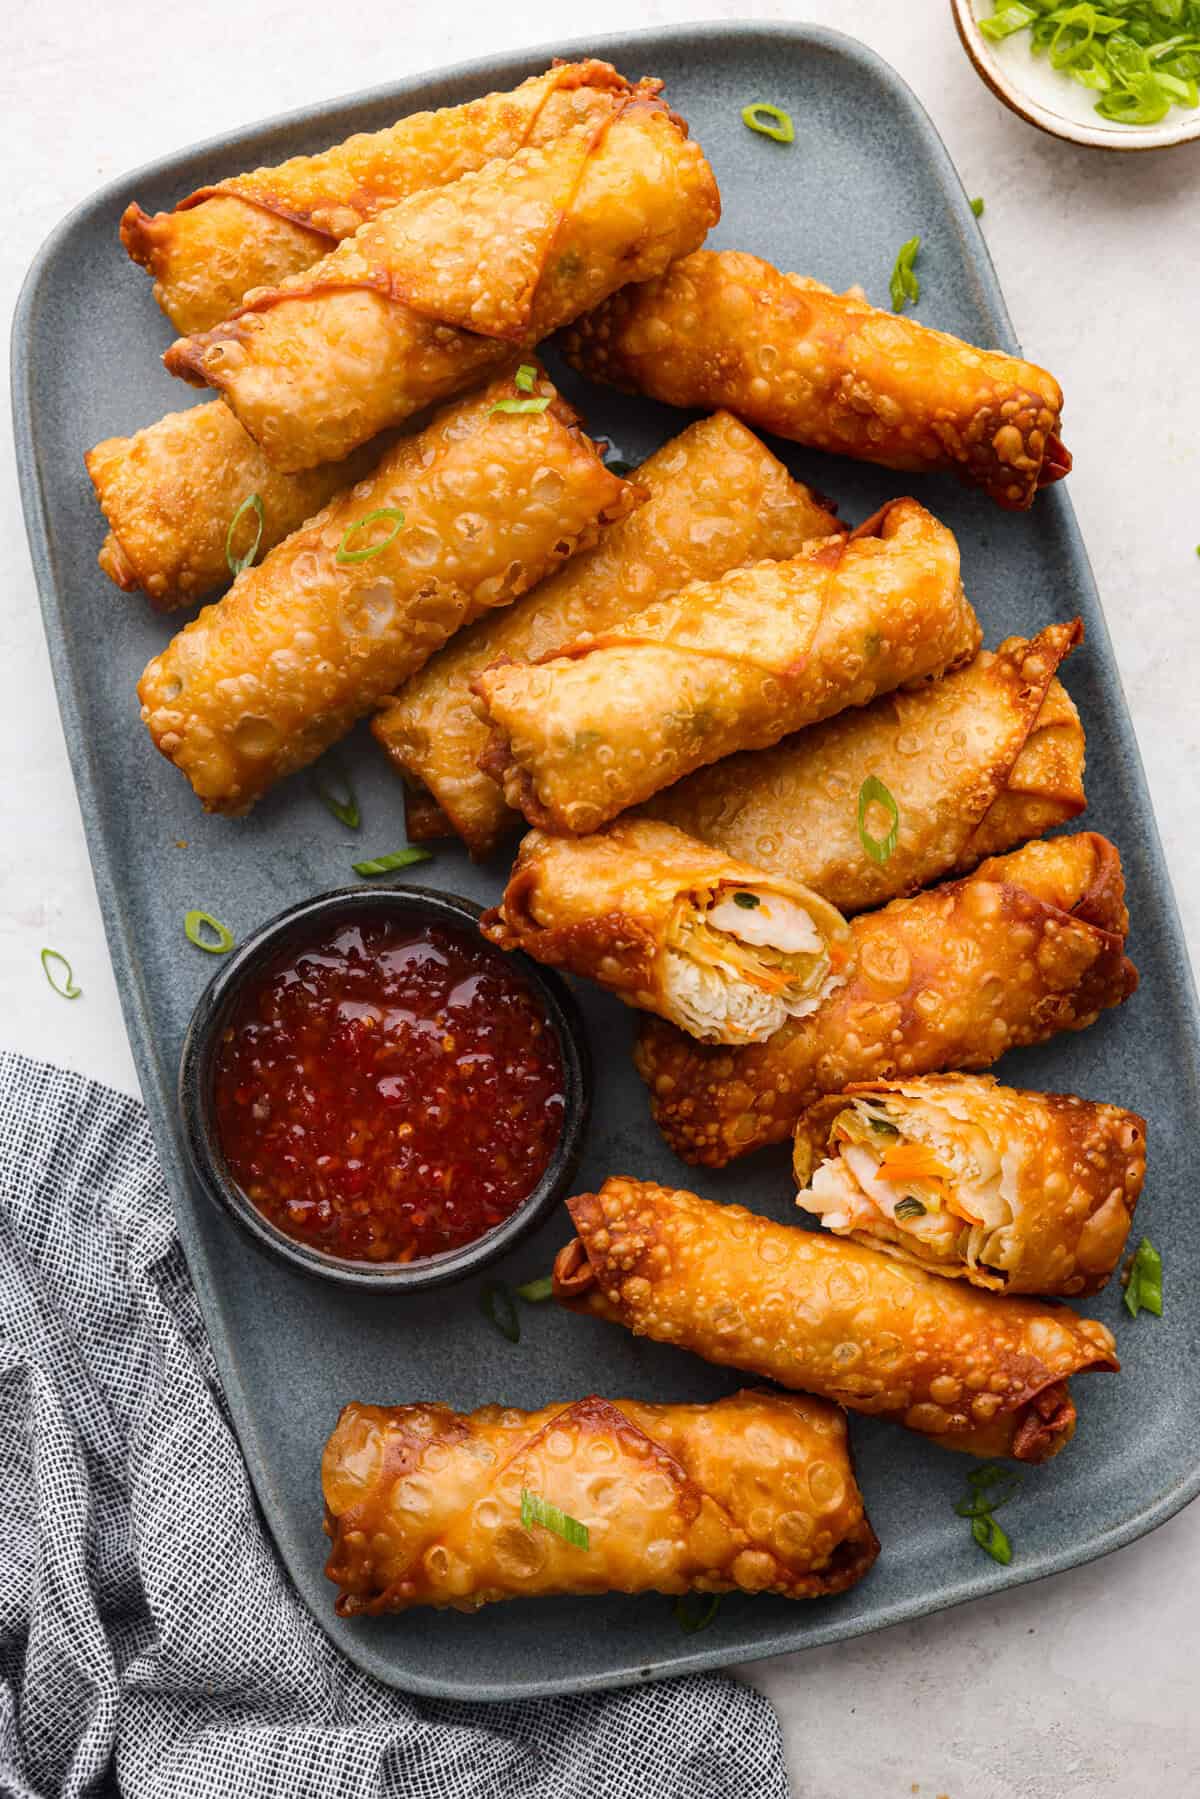
  • Shrimp Egg Rolls Recipe | The Recipe Critic

    Shrimp Egg Rolls Recipe | The Recipe Critic

    This website may contain affiliate links and advertising so that we can provide recipes to you. Read my disclosure policy.

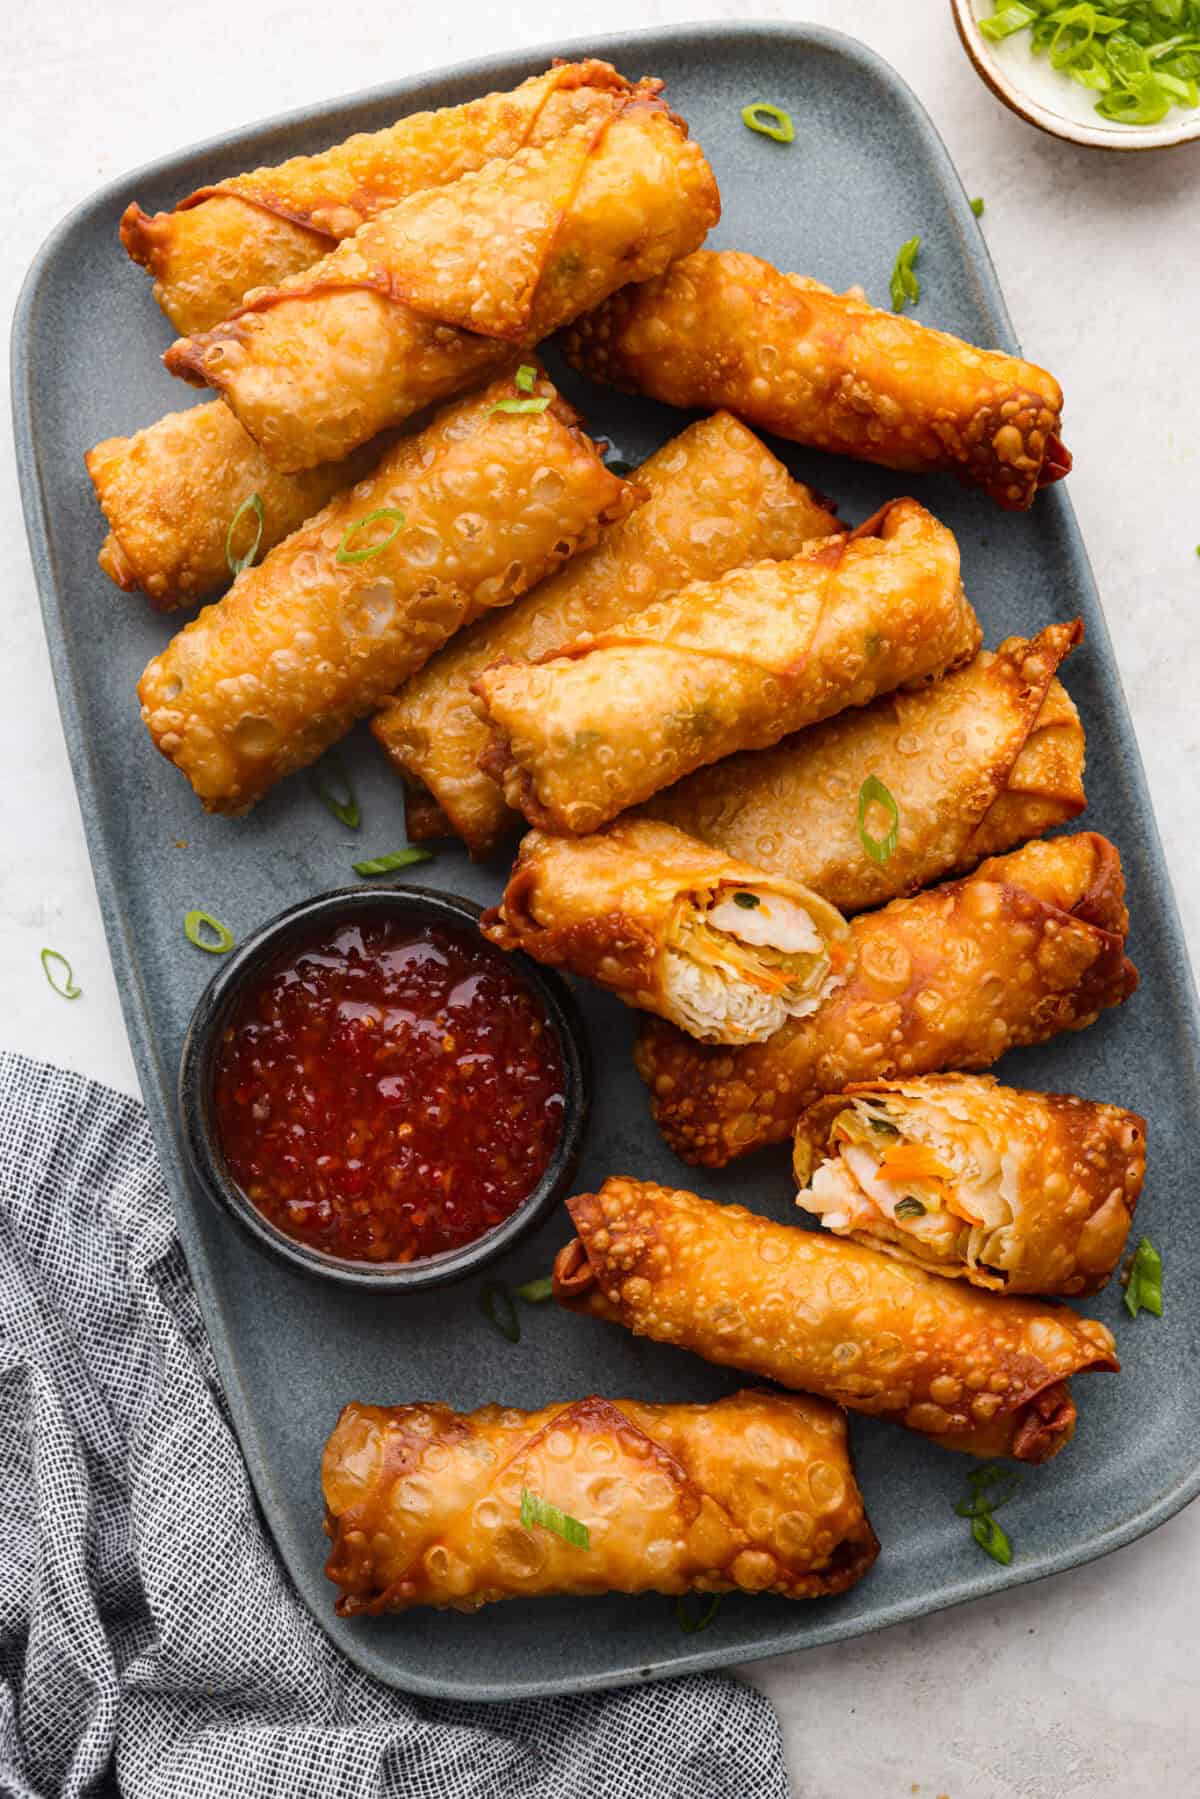
    These Shrimp Egg Rolls are beyond delicious! They’re packed with a mix of vermicelli noodles, sautéed veggies, shrimp, and plenty of seasonings, then fried till crunchy and golden brown. Serve them as an appetizer, a light main, or a party side dish!

    Overhead shot of a plate full of fried shrimp egg rolls.

    Reasons You’ll Love This Recipe

    • So easy to make! Prepare the simple filling, assemble the rolls, then fry to crispy perfection!
    • They keep for days: Leftovers store well for days and reheat wonderfully in an air fryer. They’re even freezer-friendly!
    • Great for any occasion: These are a crowd favorite! Make them for game day or a holiday party, they’ll disappear in a flash.

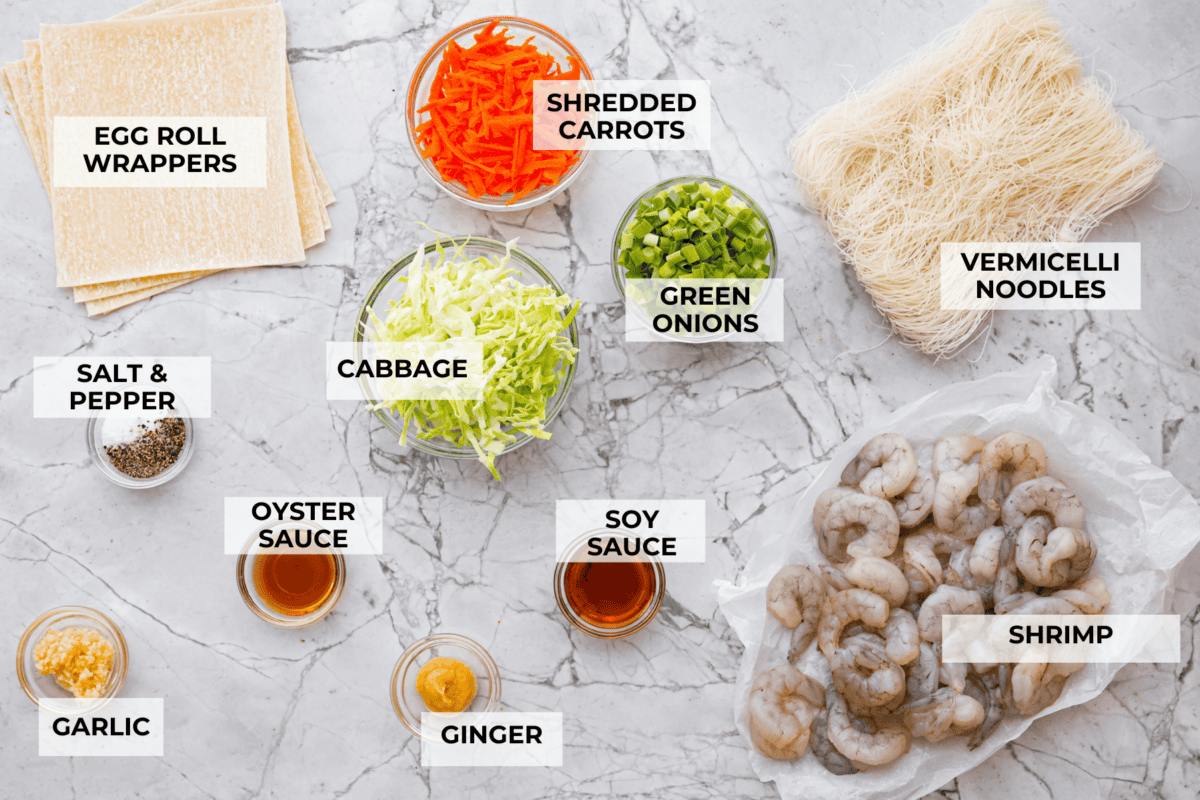
    Ingredients Needed to Make Shrimp Egg Rolls

    This shrimp egg roll recipe is made with fresh ingredients and loaded with authentic Asian flavors. The filling consists of sautéed vegetables, shrimp and plenty of flavorings. Serve them as appetizers or as the main course with fried rice, vegetable stir fry and/or this asian cucumber salad. They’re always a hit! Check out the recipe card at the bottom of the post for exact measurements.

    • Vermicelli Noodles: Soft, thin rice noodles add heartiness to the filling.
    • Sesame Oil: For tossing the noodles, sautéing the vegetables and adding rich flavor.
    • Green Cabbage: Shredded cabbage adds crunch and a nice texture.
    • Carrots: Shredded carrots for additional crunch and hint of sweetness.
    • Green Onions: Chopped green onions add a mild onion flavor.
    • Garlic: Freshly minced garlic for extra flavor.
    • Ginger: Fresh ginger adds a slightly peppery, yet sweet taste.
    • Oyster Sauce: For a complex taste that is earthy, slightly sweet and salty.
    • Soy Sauce: Creates wonderful umami flavor.
    • Shrimp: The star protein of the recipe and what makes them super satisfying.
    • Salt and Pepper: To taste!
    • Egg Roll Wrappers: To hold all of the filling ingredients together and become crispy and golden brown on the outside when fried!
    Overhead shot of labeled ingredients. Overhead shot of labeled ingredients.

    How to Make Shrimp Egg Rolls

    Don’t be intimidated to roll the egg rolls, check out the visual guide below for step-by-step instructions. It’s actually super easy! Here’s how everything comes together:

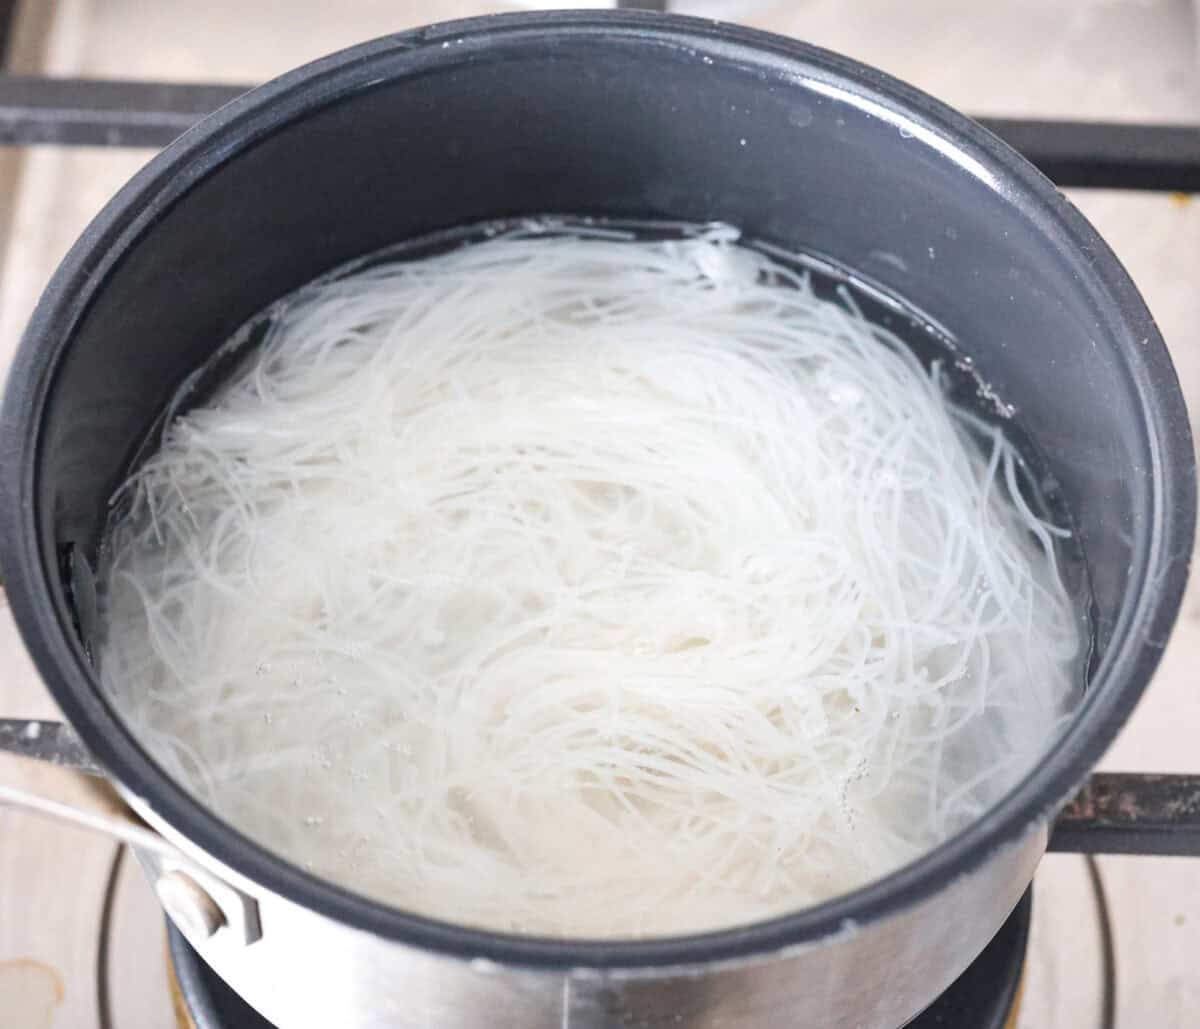
    1. Cook: Cook the vermicelli according to the package directions, rinse under cold water, then lightly toss in a little sesame oil to keep them from sticking together. Set aside.
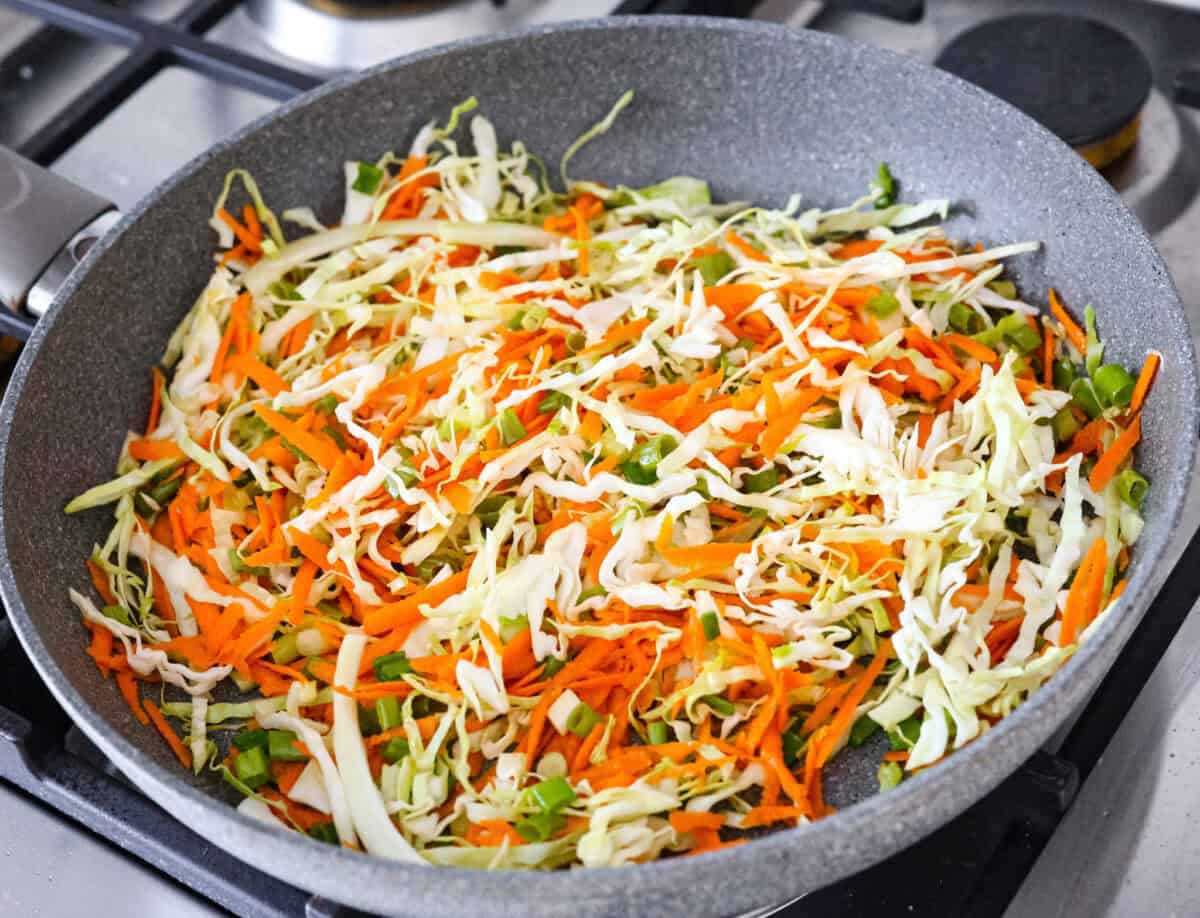
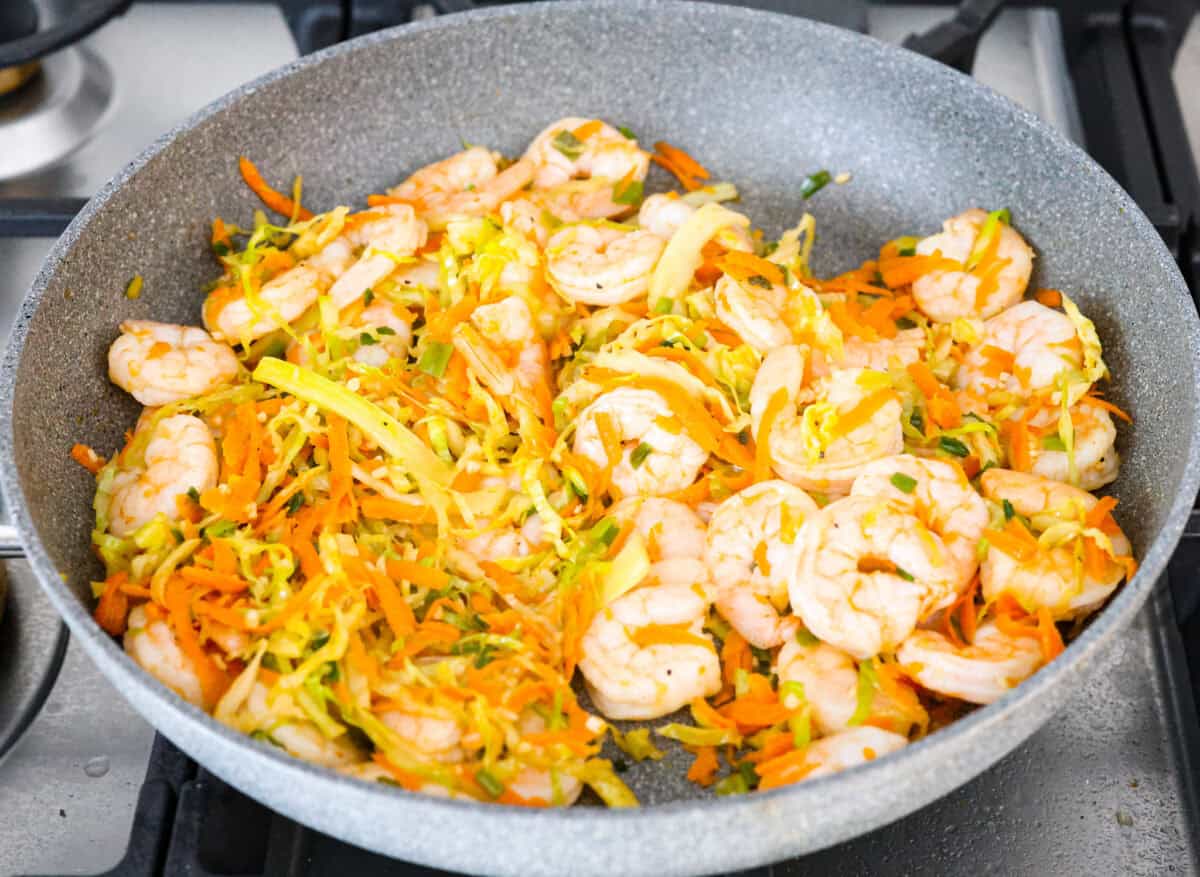
    2. Sauté: In a large skillet, heat the sesame oil over medium-high heat, then add the cabbage, carrots, and green onions to the skillet. Saute the vegetables until they become tender, about 5 minutes.
    3. Add: Add garlic, ginger, oyster sauce, soy sauce, shrimp, salt, and pepper. Saute everything together until the shrimp has turned pink and cooked through. Remove the shrimp and vegetable filling from the heat and set aside.
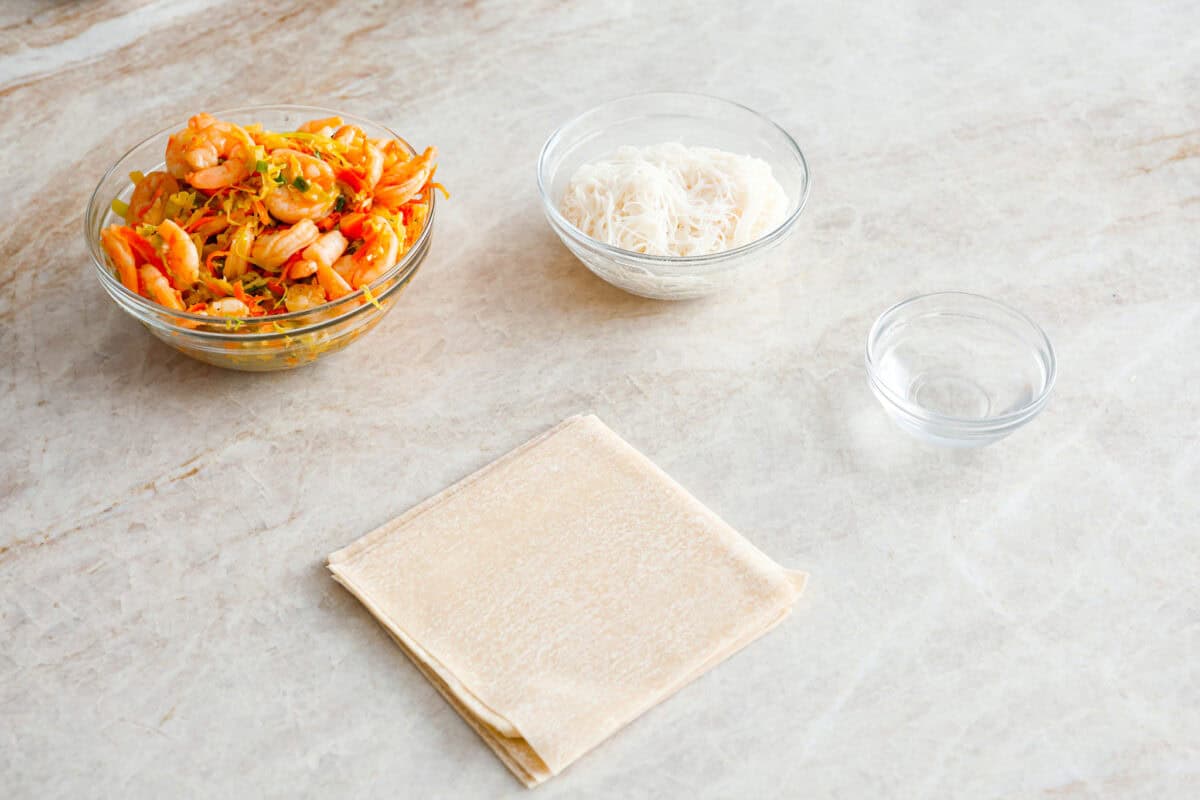
    4. Prep Work Station: Meanwhile, prepare a clean work surface with egg roll wrappers, a small bowl of water, the filling, and the vermicelli noodles.
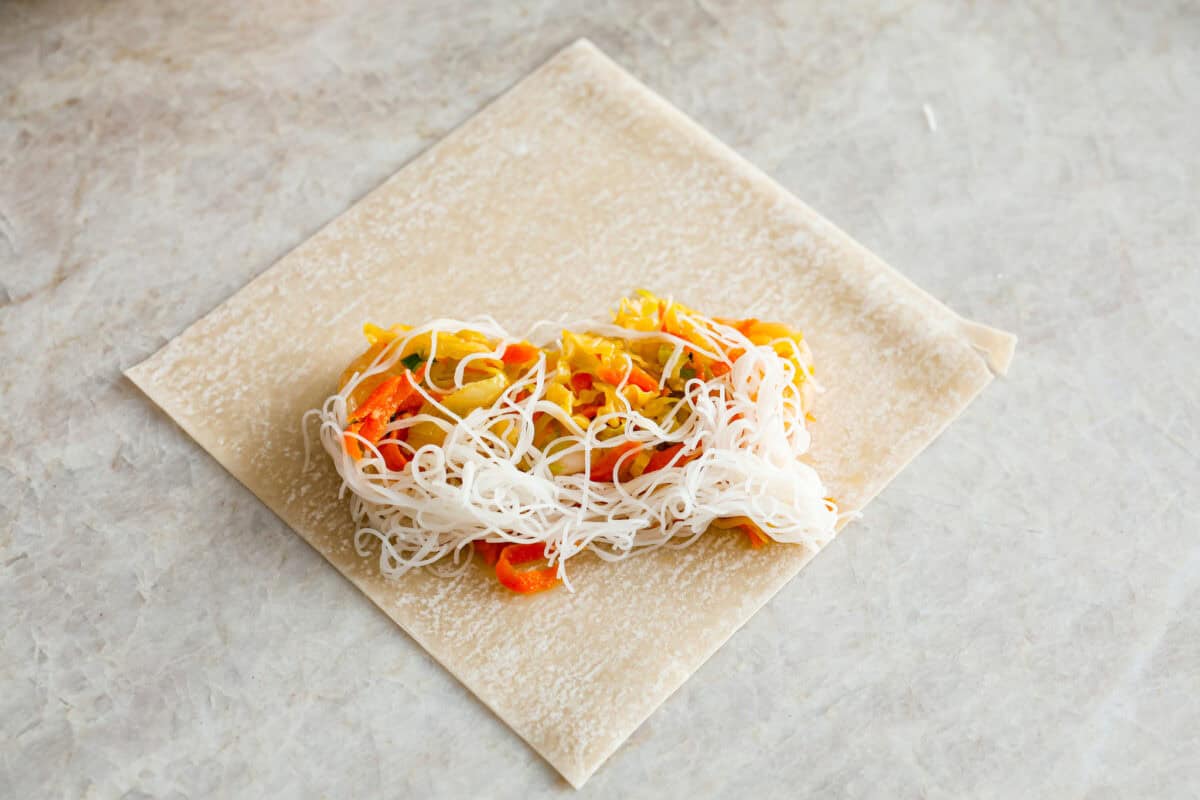
    5. Fill the Paper Wrappers: Working one at a time, place a wrapper with a corner facing you, then add some of the shrimp and vegetable filling along with some vermicelli noodles into the lower ⅓ of the wrapper.
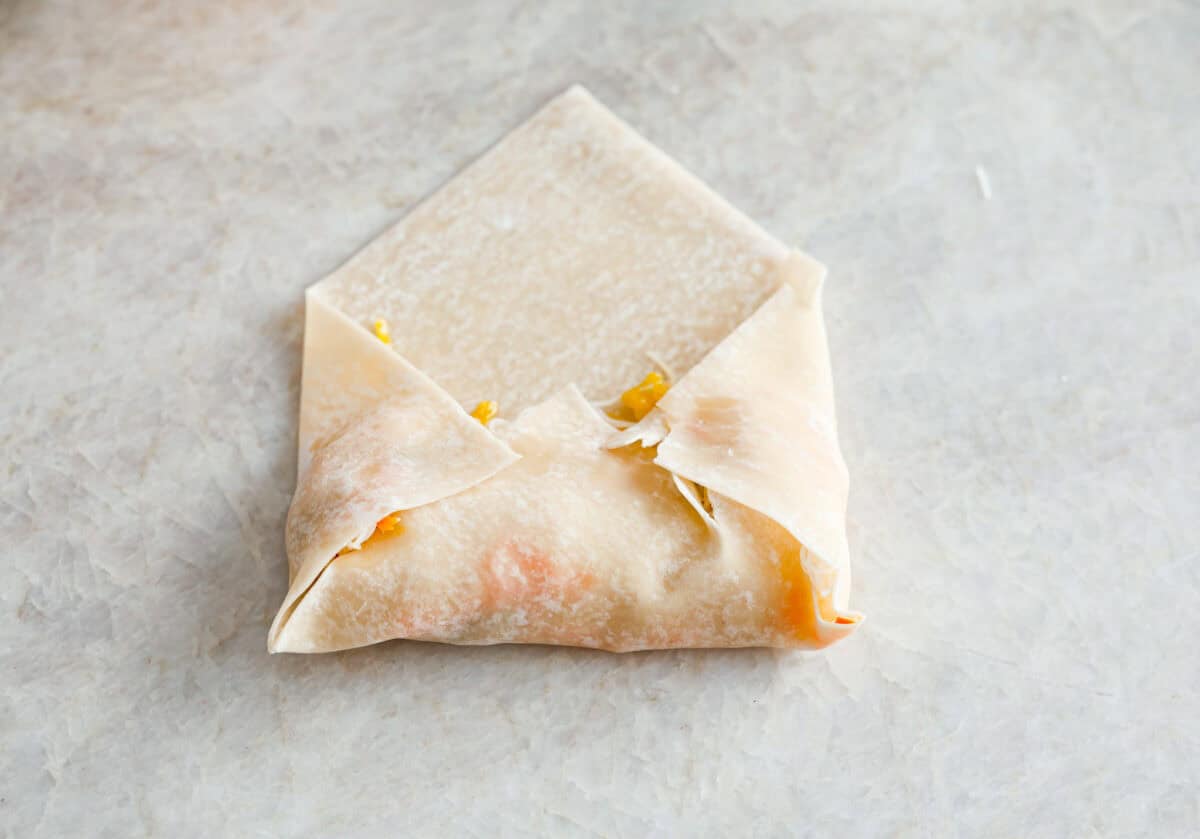
    6. Roll: Roll the corner up over the filling, fold the sides in, and continue rolling using a little water on the edge of the wrapper to seal it closed. While the egg rolls are being filled, heat 2 inches of oil in a large skillet over medium-high heat.
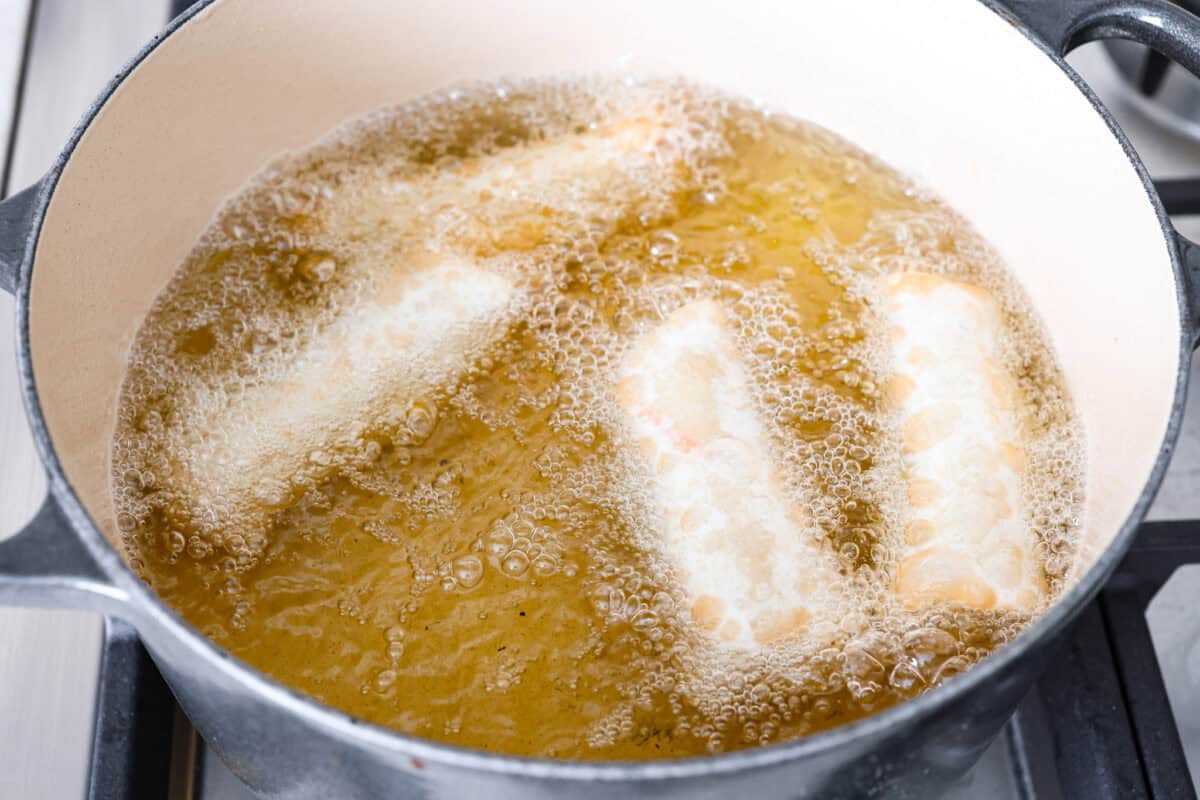
    7. Fry: Once all the egg rolls are filled, start frying them in batches. There should be space between all the egg rolls while they fry. Fry the egg rolls for 3-4 minutes until golden brown.
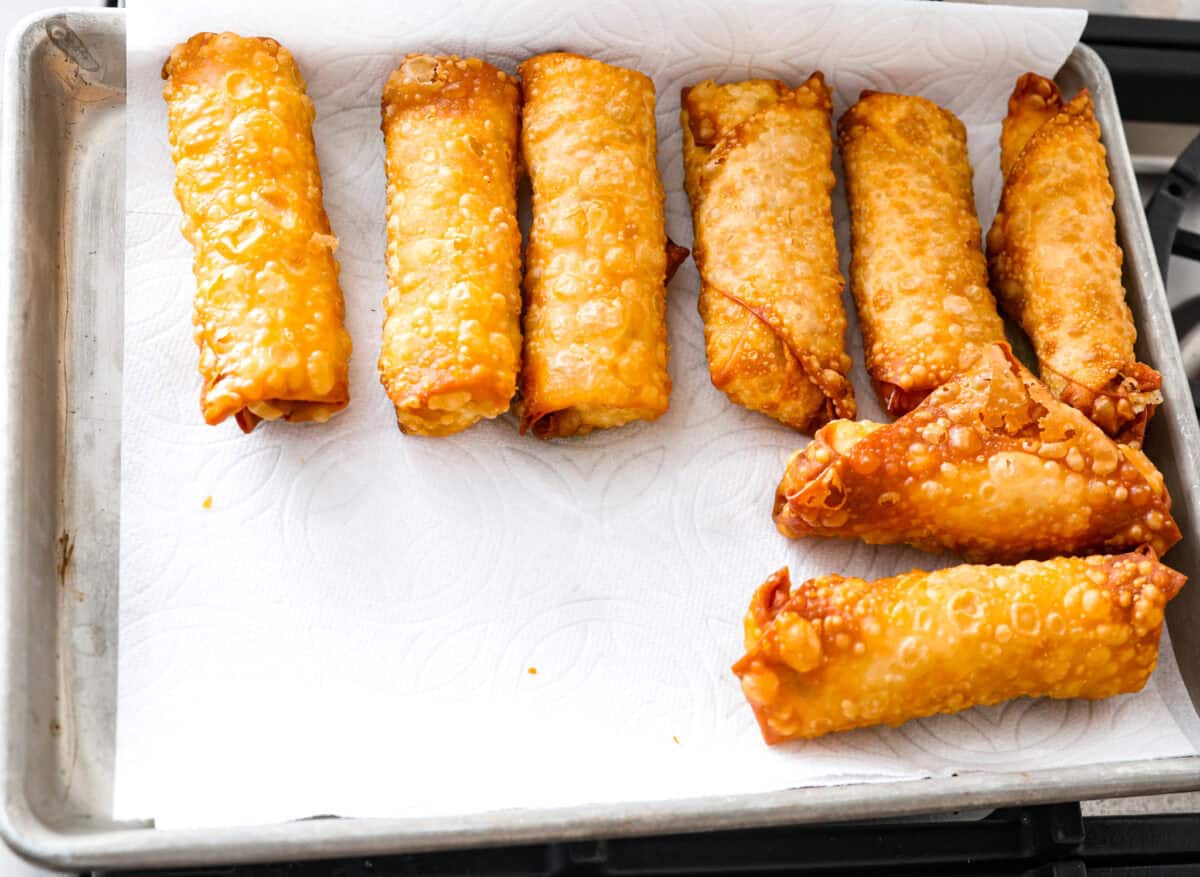
    8. Cool: Remove the fried shrimp egg rolls from the pan and set them aside on a paper towel-lined plate to cool while you fry the rest of the rolls.

    Tips for Making Shrimp Egg Rolls

    Here are my top tips for making shrimp egg rolls. They will turn out absolutely perfect every time you make them!

    • To Air Fry the Egg Rolls: Once all the egg rolls are filled, lightly spray or brush them with oil and place them in an even layer in the air fryer with space between. Set the air fryer to 375 degrees and fry them for 4-5 minutes on each side or until they are golden brown. 
    • Shrimp Size: I like to use shrimp that isn’t too big so I can get at least three pieces in each roll, using jumbo shrimp works if that is your preference, but you might only get 1 or 2 shrimps in each roll. 
    • Use Cooked Shrimp: You can use cooked shrimp in this recipe, just toss it in with the veggies and sauce at the end of cooking to coat it in flavor, don’t overcook the shrimp. 

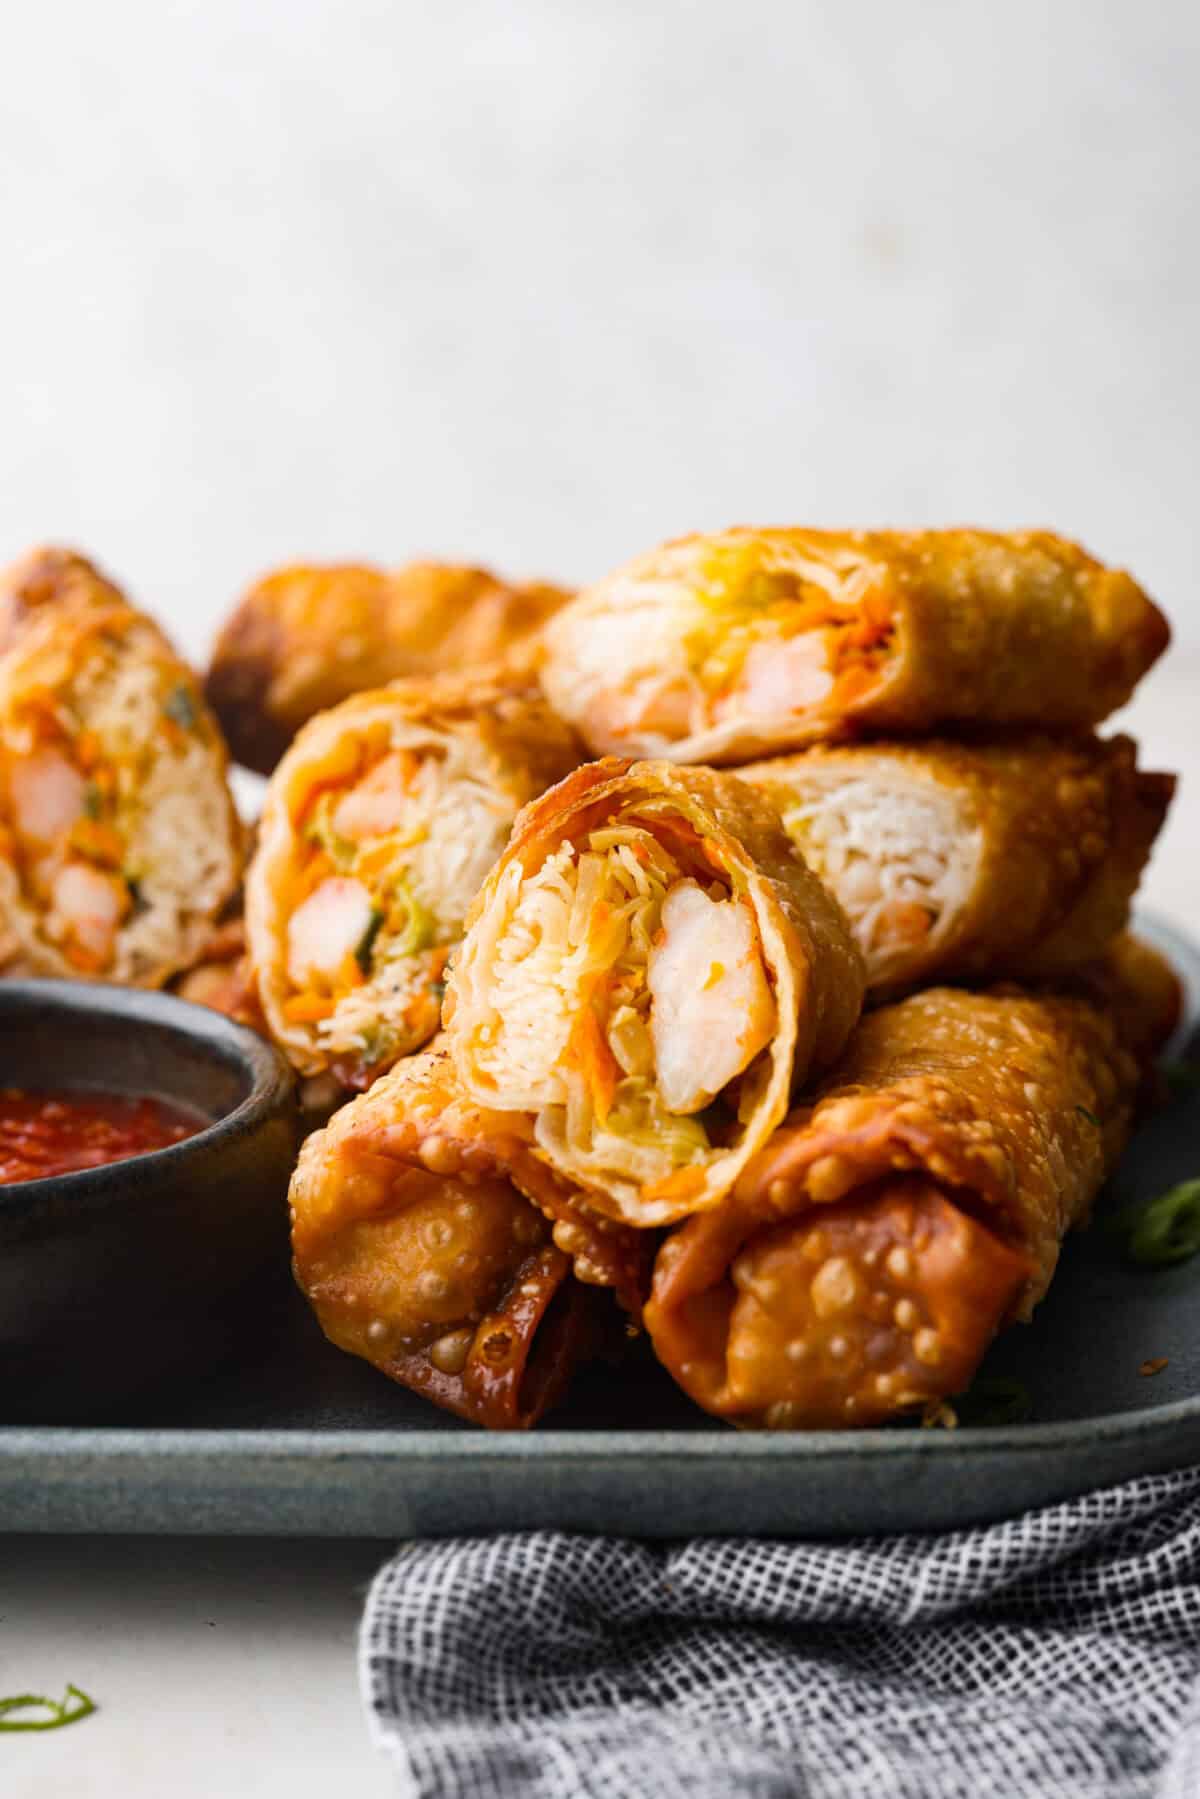
    Side shot of egg rolls stacked on a plate with some of the rolls cut in half. Side shot of egg rolls stacked on a plate with some of the rolls cut in half.

    How to Store Leftovers

    • In the Refrigerator: Store leftovers in an airtight container in the fridge for up to 4 days. 
    • In the Freezer: Place cooled egg rolls into an airtight container and store them in the freezer for up to 2 months.
    • To Reheat: To make sure your leftovers are nice and crispy, cook them in the air fryer at 375 degrees Fahrenheit for approximately five minutes.

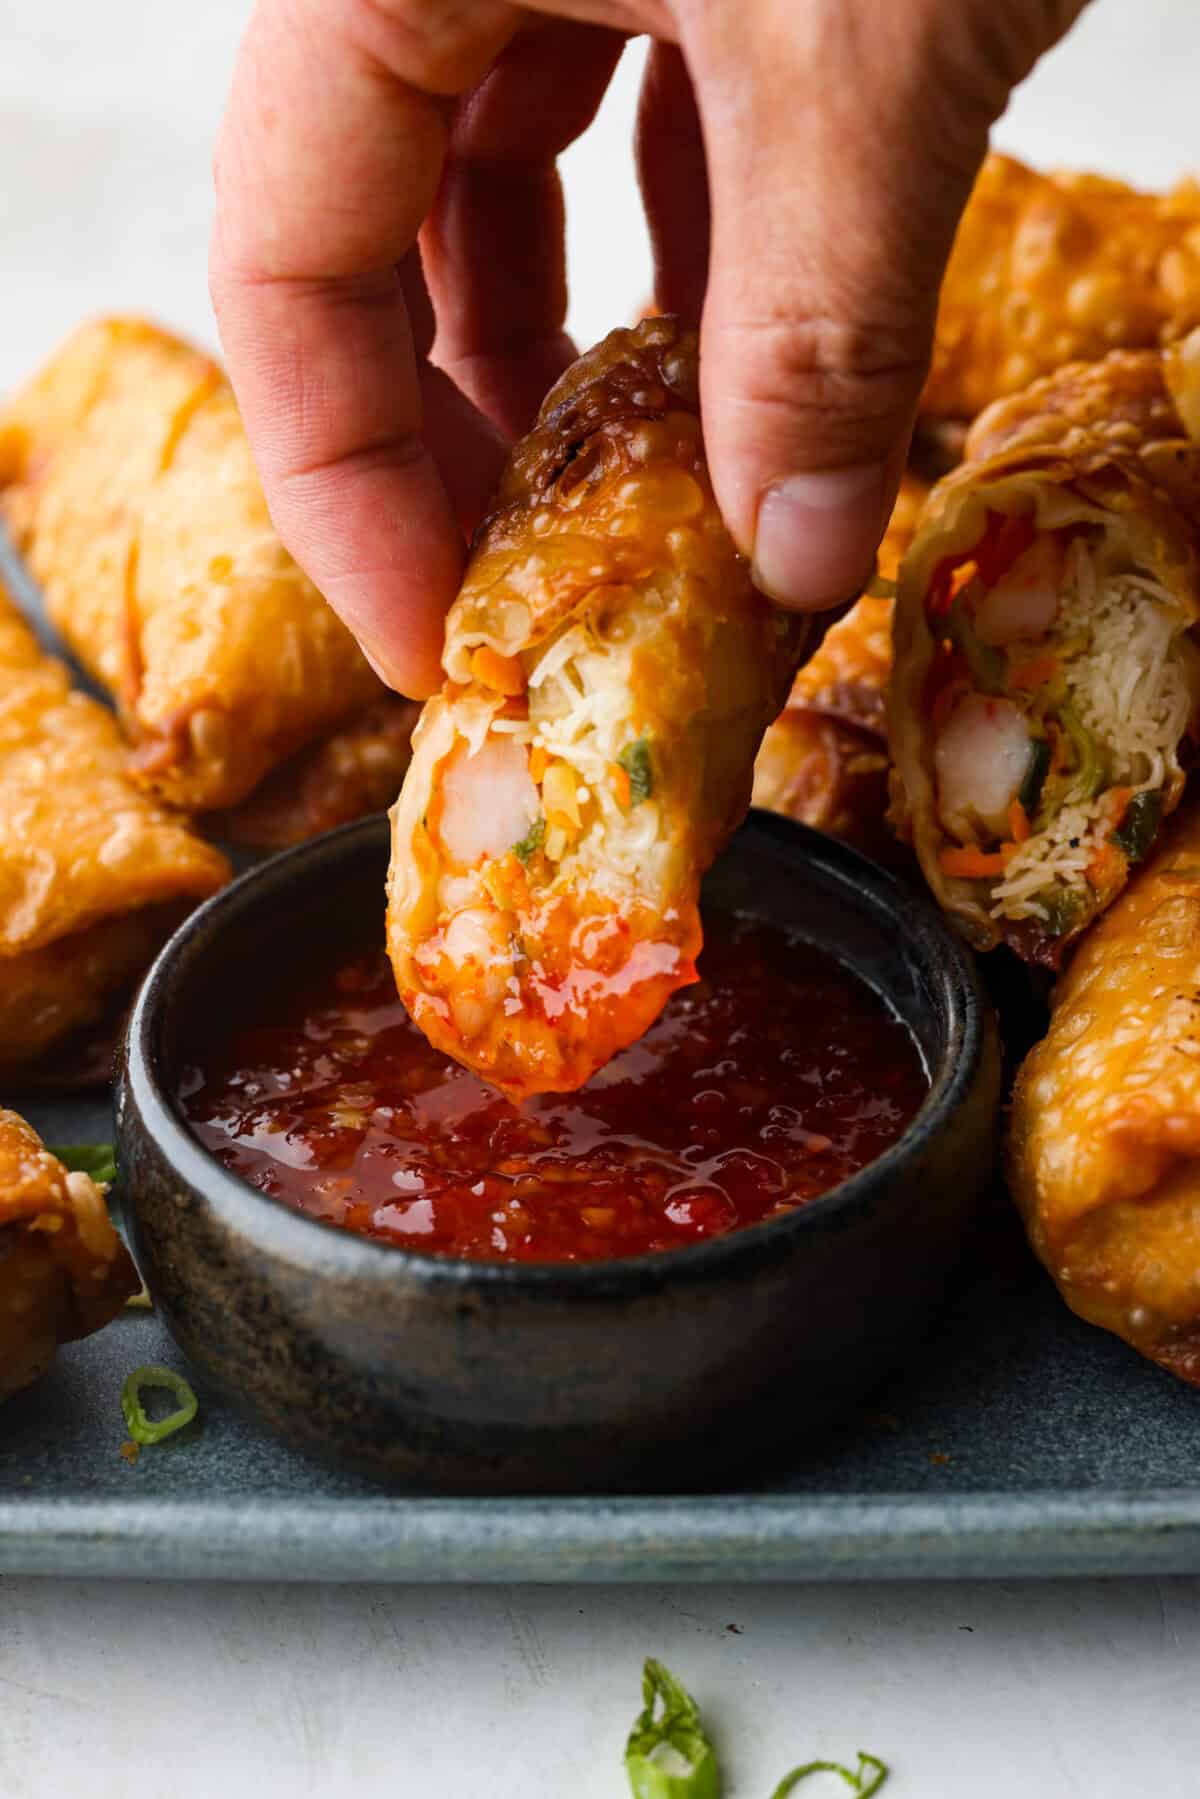
    Close up shot of someone dipping a shrimp egg roll in sauce. Close up shot of someone dipping a shrimp egg roll in sauce.

    More Delicious Egg Rolls to Try

    Homemade egg rolls can seem intimidating, but once you get the hang of using egg roll wrappers, you’ll see how easy they are to make! Plus, there are so many variations! From dessert cheesecake egg rolls to buffalo chicken egg rolls and even breakfast egg rolls, there are endless options! Here are some of our favorite recipes to try!

    Pin this now to find it later

    Pin It


    Source link

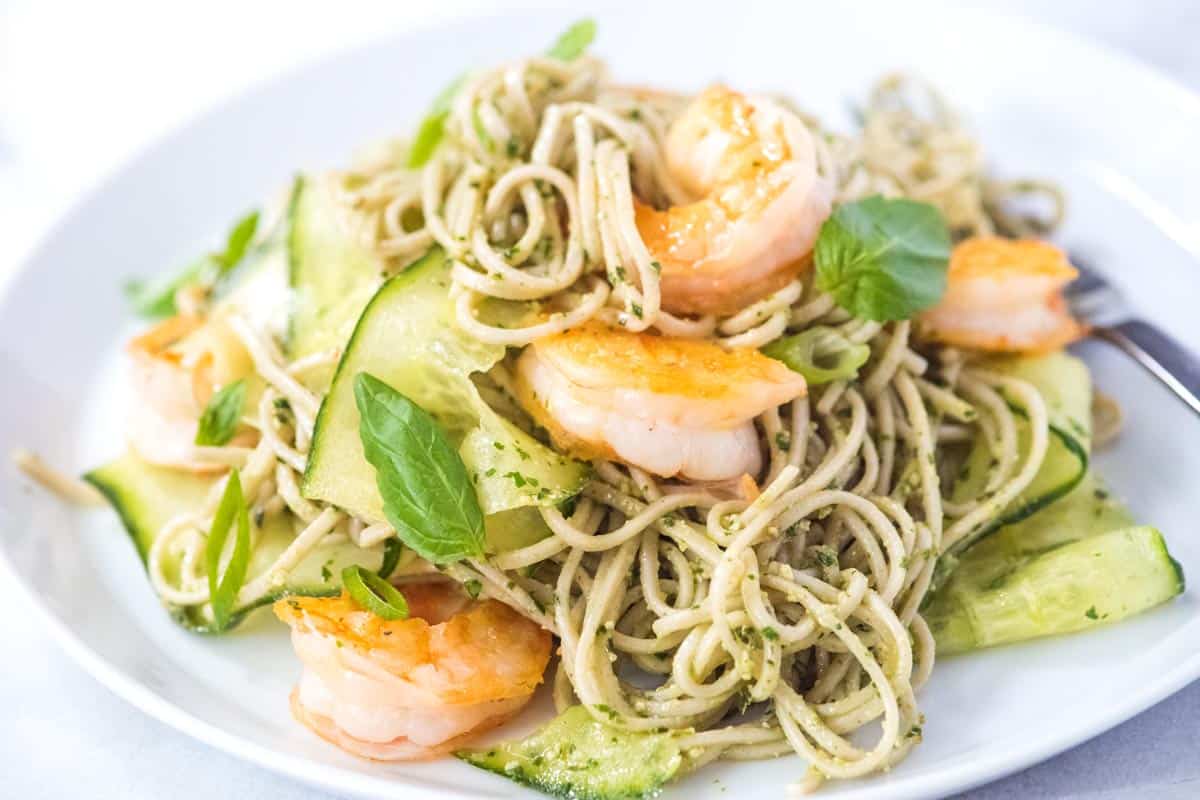
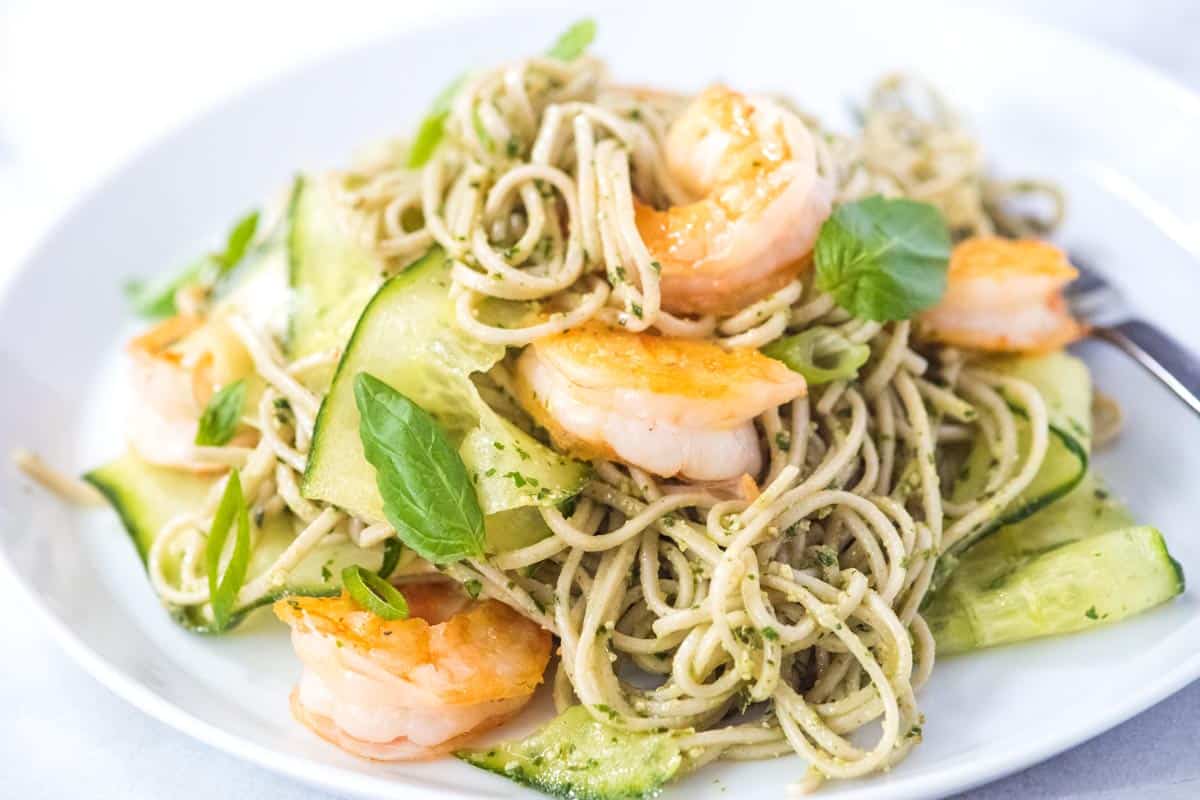
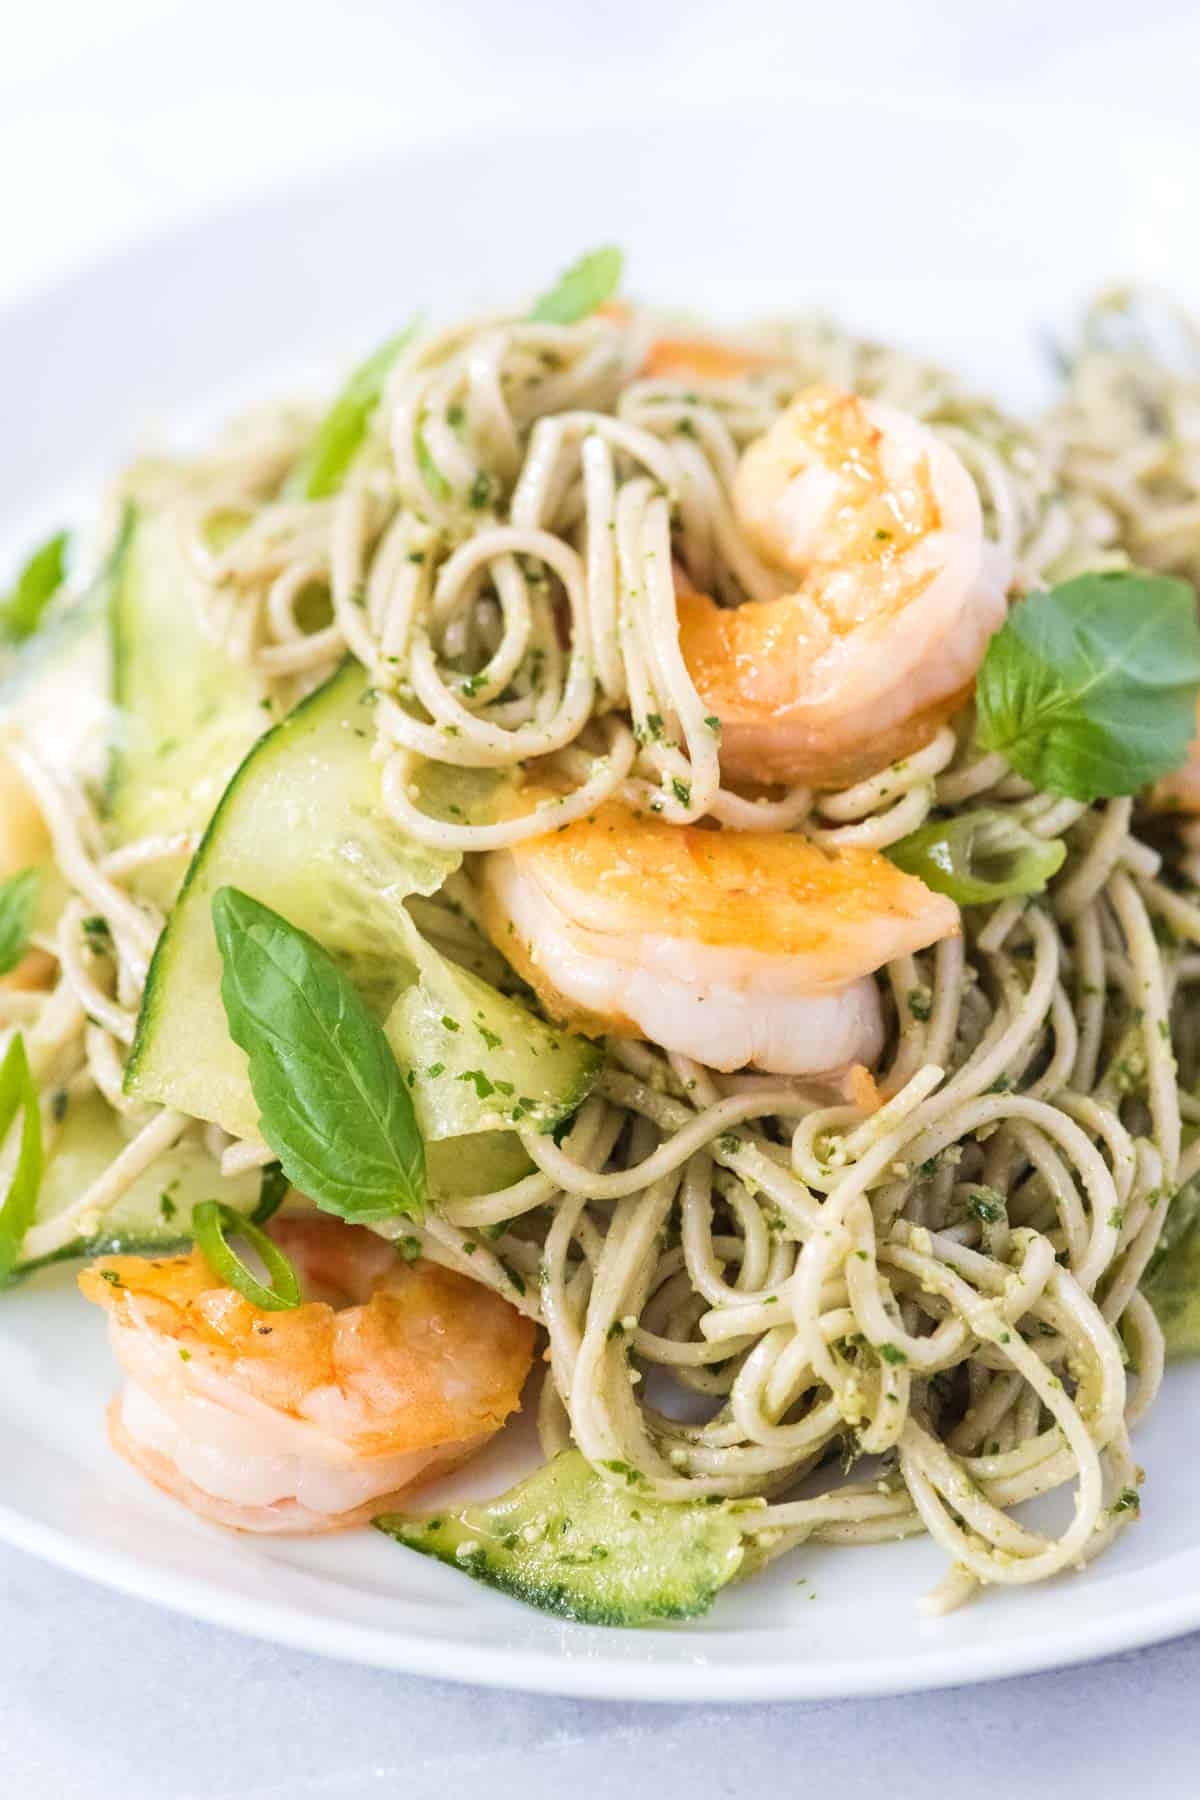
  • Pesto Soba Noodles with Shrimp

    Pesto Soba Noodles with Shrimp

    You will love this quick and fresh soba noodles recipe with basil pesto, shrimp, and cucumber. Made in under 25 minutes! Jump to the Pesto Soba Noodles Recipe or read on to see our tips for making it.

    Ridiculously Good Shrimp Pesto Soba Noodles Recipe

    What are Soba Noodles?

    If you’re not 100% sure about soba noodles, let’s get that out of the way first. We love them! They are made with buckwheat flour, which makes them taste nutty and also contributes to the brownish color. If you are gluten-free, these are a for you! Check the packaging, though. While you can find 100% buckwheat noodles, some brands still sneak in some wheat.

    How to Make Soba Noodles with Pesto and Shrimp

    These noodles can be served cold or hot — we’re partial to cold, but that’s just us. Let me show you how simple they are to make.

    Ridiculously Good Shrimp Pesto Soba Noodles Recipe // You will love this quick and fresh soba noodles recipe with basil pesto, shrimp, and cucumber. Made in under 25 minutes!

    Let’s talk about the pesto first. You can make it yourself — here’s our homemade pesto recipe. Or, you can buy it from the store. Making it yourself requires few ingredients and takes about 15 minutes.

    We stick with basil pesto since we’re feeling the summer vibes lately, but if you are reading this in the fall or winter, why not try swapping out the basil for a winter green — spinach or kale are perfect. Here’s our kale and almond pesto recipe for you to look at, it’s beyond delicious.

    Once you’ve got the pesto figured out, the recipe comes together unbelievably fast. I told you that we love soba noodles — they taste great, we love the texture and better yet, they cook quickly! We’re talking 4 to 5 minutes in boiling water and you are done.

    When the noodles are cooked, throw them into a colander and rinse with cold water. This stops them from cooking and becoming mushy and gets them ready to toss with the pesto. By the way, if you were planning on serving this dish hot, I’d still rinse with cool water to stop the noodles from overcooking. You just don’t need to rinse until cold.

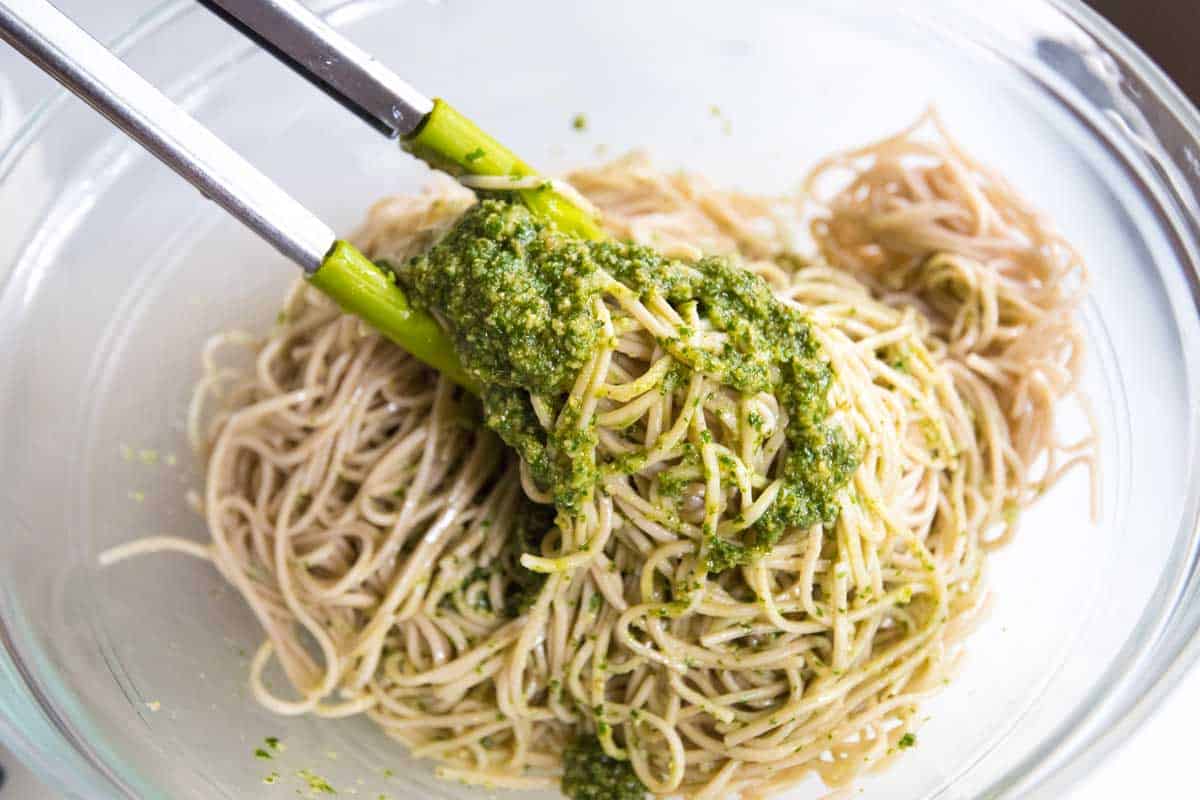
    Toss cooked soba noodles with pesto for an easy, fresh meal.
    Toss cooked soba noodles with pesto for an easy, fresh meal.

    Cooking the Shrimp

    We keep the shrimp really simple — just salt, pepper, olive oil, and fresh lemon. You could toss in some spice with chili flakes or a chili paste, it’s completely up to you. They’ll need about 6 minutes in a hot pan. Or you could roast them — here’s our recipe for easy baked shrimp.

    We keep the shrimp for these soba noodles simple, just olive oil, salt, pepper, and lemon.
    We keep the shrimp simple, just olive oil, salt, pepper, and lemon.

    Putting the Dish Together

    When you are ready to assemble, grab a big bowl and toss the noodles, some pesto, the shrimp, and some cucumber together. You can simply chop the cucumber or do what we do and make cucumber ribbons.

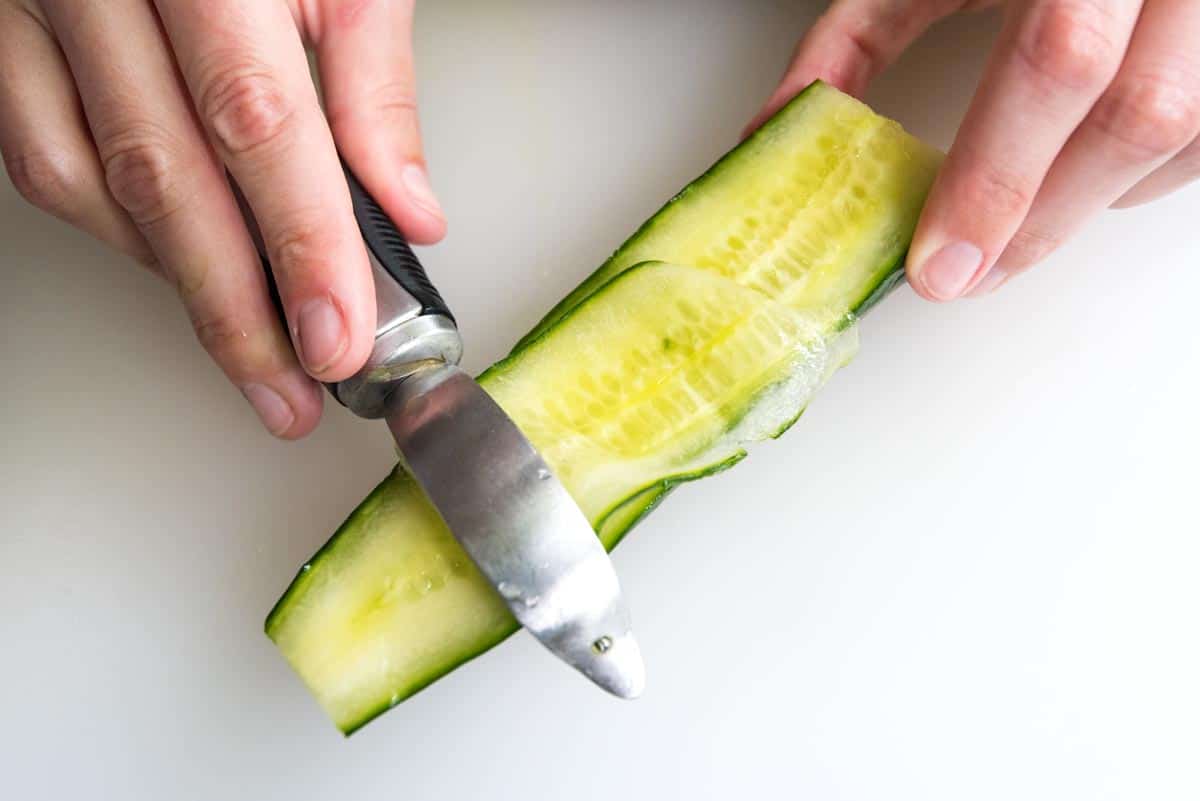
    To make the ribbons, take a vegetable peeler and peel down the cucumber, making a thin ribbon. Some will look perfect, others might tear a bit. Don’t worry, it will still look great when everything is put together. A mandoline slicer works well for this, too.

    How to make cucumber ribbons.

    And that’s it, an easy and fast soba noodles recipe with fresh pesto, shrimp and cucumber ribbons. It’s delicious as-is or you can sneak in a few of your favorite vegetables — zucchini, bell pepper or edamame would be great.

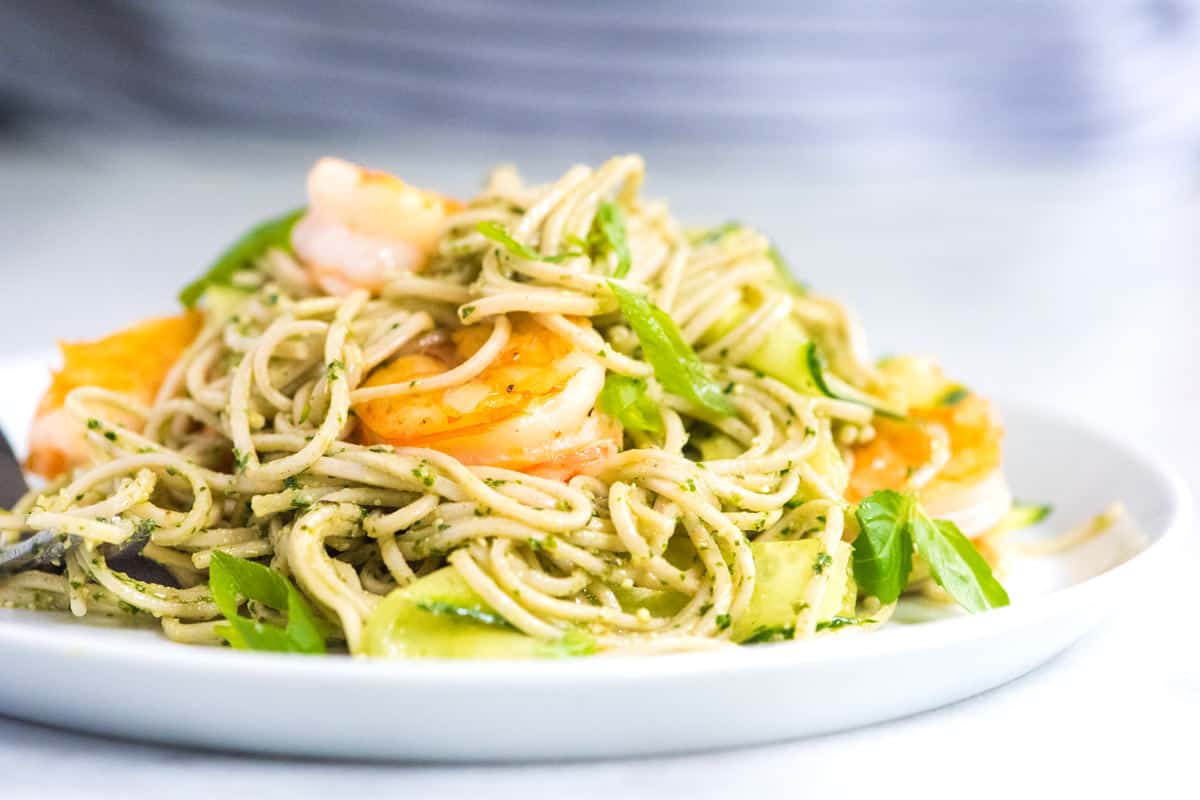
    Pesto Shrimp Soba Noodles with Cucumber Ribbons

    For more easy shrimp recipes, take a look at our Fresh and Easy Shrimp Ceviche with avocado, these Cilantro Lime Butter Shrimp, or our Garlicky Shrimp Scampi (which I love to add to pasta).

    Pesto Soba Noodles with Shrimp

    • PREP
    • COOK
    • TOTAL

    These pesto tossed soba noodles with shrimp come together fast. The noodles and shrimp only take about 5 minutes to cook. The pesto can be made in advance or you can swap the recipe below for a store-bought version. If you do make your own pesto, you will be done in under 15 minutes. Feel free to add your favorite vegetables to this — zucchini, bell pepper or edamame are all excellent. Shrimp is delicious in this, but you can easily swap them for chicken, tofu or more vegetables.

    Makes 4 servings

    You Will Need

    Soba Noodles

    6 ounces soba noodles or noodles of choice

    1 pound shrimp, peeled and deveined

    1 tablespoon extra-virgin olive oil

    Half of a lemon

    4 to 6 tablespoons basil pesto, recipe below

    Half of a seedless (English or hothouse) cucumber

    1 scallion, ends and tops trimmed and thinly sliced

    Salt and fresh ground black pepper

    Handful torn or small basil leaves for serving


    Homemade Pesto

    2 cups fresh basil leaves

    1 clove garlic

    1/4 cup pine nuts or walnuts, lightly toasted

    1/2 cup olive oil, plus more for storing

    1/2 cup finely grated pecorino or parmesan cheese

    Salt and fresh ground black pepper, to taste

    Directions

    • Make Noodles
    • 1Bring a large pot of water to a boil. Add the soba noodles and cook until pasta is cooked, but not mushy. Check the package directions, but this usually takes 4 to 5 minutes. Drain noodles then immediately rinse under cold water until the noodles are no longer hot.

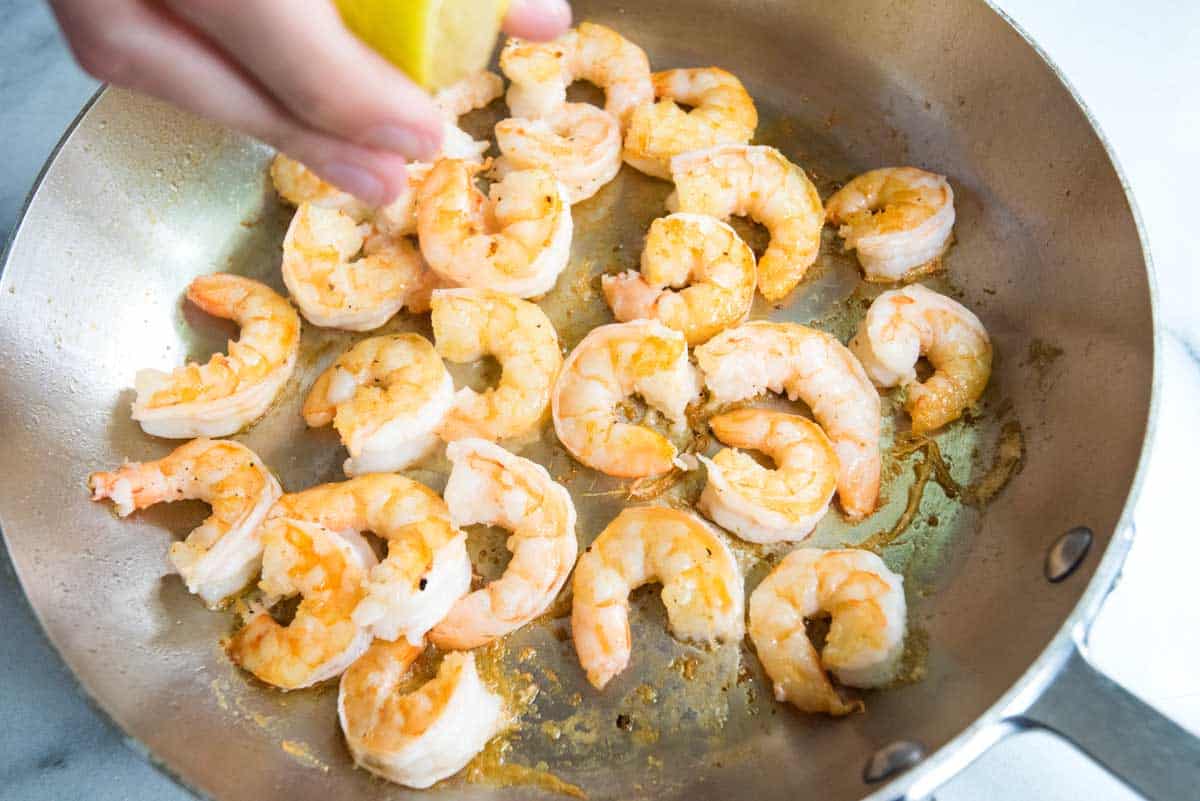
      2Meanwhile, heat the olive oil in a wide skillet over medium-high heat. Add the shrimp in one layer and cook, turning occasionally, until pink, firm, and cooked through; 6 to 8 minutes. Squeeze the juice from half a lemon over the cooked shrimp.

      3Use a vegetable peeler or mandoline slicer to shave the cucumber lengthwise into thin strips. Or simply chop into bite-size pieces.

      4Combine the noodles, shrimp, cucumber, and 4 tablespoons of the pesto. Toss well, adding more pesto as necessary. Serve with scallions and fresh basil scattered on top.

    • How to Make Pesto
    • 1Prepare a small bowl of ice water. Bring a small saucepan, filled halfway with salted water, to a boil. Submerge basil leaves in boiling water for 5 to 10 seconds, or until wilted. Then immediately plunge into ice water to stop cooking. Drain, squeeze to remove excess water then pat dry with a clean dish towel. This step helps to make the greenest pesto possible. By blanching the basil, it makes the leaves bright green. You can skip this step and just add the basil straight into the food processor.

      2Smash and peel the garlic clove then mince. Holding a chef’s knife at an angle, scrape the blade of the knife across the minced garlic. Gather it all together then scrape it against the board again until it becomes a very fine paste.

      3Add the garlic and the pine nuts in the bowl of a food processor. Pulse 2 to 3 times until everything is chopped small. Add basil.

      4With the processor running, slowly pour the olive oil into the bowl. Once all the olive oil has been added, check the consistency of the pesto — we like it to have some texture. If you prefer it smoother, pulse a few more times.

      5Transfer pesto to a bowl then stir in cheese and season to taste with salt and pepper. Use immediately or store for later.

      6Store Pesto in the Refrigerator: Add a thin layer of extra olive oil to the top (to prevent any air from getting to it), cover with a lid or plastic wrap and refrigerate up to 2 weeks.

      7How to Freeze Pesto: If freezing, leave out the cheese. Fill ice cube trays with pesto, freeze until hard. Then store frozen cubes in freezer-safe plastic bags. Freeze up to 1 month.

    Adam and Joanne’s Tips

    • Gluten-free soba noodles: Not all soba noodles sold are 100% gluten-free. To make this gluten-free, double check the package to see if wheat has been added to the noodles.
    • For more tips about making homemade pesto, here’s our article about making the greenest pesto with lots of photos to help you out.
    • Nutrition facts: The nutrition facts provided below are estimates. We have used the USDA database to calculate approximate values.

    If you make this recipe, snap a photo and hashtag it #inspiredtaste — We love to see your creations on Instagram and Facebook! Find us: @inspiredtaste

    Nutrition Per Serving
    Calories
    431
    /
    Protein
    25 g
    /
    Carbohydrate
    44 g
    /
    Dietary Fiber
    3 g
    /
    Total Sugars
    2 g
    /
    Total Fat
    17 g
    /
    Saturated Fat
    3 g
    /
    Cholesterol
    145 mg


    AUTHOR:

    Joanne Gallagher


    Source link

  • Grilled Shrimp Salad

    Grilled Shrimp Salad

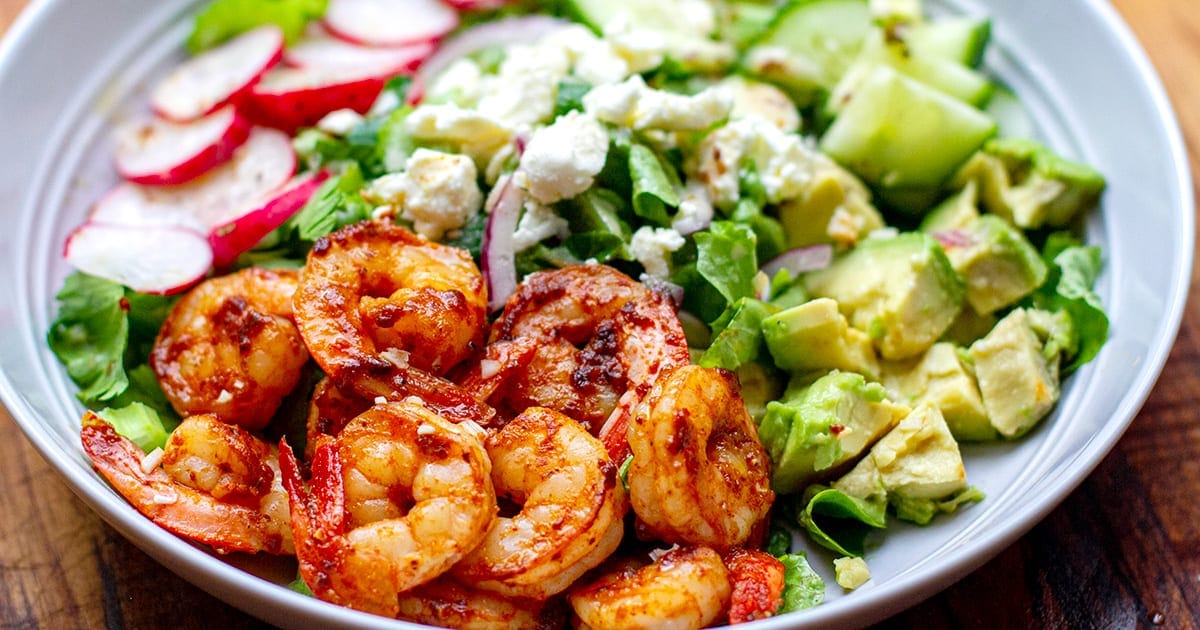
    My spice-rubbed, grilled shrimp salad recipe is paired with avocado, crunchy vegetables like radish, cucumbers and celery, and topped with feta cheese for extra flavour. The shrimp is seasoned with a delicious smokey rub and can be grilled in a skillet, on a barbecue or under a broil. This recipe is gluten-free, low-carb and keto-friendly.


    This is a grilled shrimp salad I often make for lunch or a light dinner. When I say light, I mean healthy, as this dish is actually quite satiating. Shrimp, or prawns for my Aussies, is high in protein and with plenty of fibre from all the vegetables and healthy fats in avocado and feta, this salad is a hearty one.

    What I love about it is that you can use it as a template and swap out vegetables based on what you have on hand. It also goes with a variety of dressings. I have enjoyed it with lemon honey and mustard vinaigrette (in the recipe), my yogurt ranch dressing, a Mexican-inspired lime and coriander based sauce, or with a few drizzles of Balsamic and olive oil.

    This shrimp salad is low-carb and keto-friendly and can be served without feta for a Whole30 and Paleo version. 

    Grilled Shrimp Salad Tips

    • I recommend getting large shrimp, without the shell, to save you on prep time. 
    • You can use frozen shrimp to cut on costs. To defrost quickly, add a handful or as many pieces as you need to a bowl of warm water and leave for 5 minutes. Once the water is cold, replace it with more warm water. The shrimp will defrost in no time! Alternatively, you can thaw it out overnight in the fridge.
    • The spice rub is the key to deliciosu grilled shrimp and the smoked paprika is a must here. It gives the shrimp lovely smokey flavour. 
    • Make sure the skillet or BBQ are hot! If it’s still heating up when you add the shrimp, it will start to stew rather than sizzle and brown. 
    • Don’t overcook the shrimp or the meat will get tough and rubbery. 

    More Shrimp Salad Recipes


    Full Recipe 

    Find the full list of ingredients, instructions, and a nutritional breakdown below. If you have questions or cook this recipe, please let me know in the comments, and make sure to rate this recipe so it’s easy for others to find.

    Want to Save This Recipe?

    Enter your email & I’ll send it to your inbox. Plus, get great new recipes from me every week!

    By submitting this form, you consent to receive emails from Cooked & Loved

    Learn how to make a delicious and healthy grilled shrimp salad with avocado, crunchy vegetables, and feta. Top with your favourite dressing like the lemon honey and mustard vinaigrette in this recipe, and enjoy a protein-rich meal that’s great for you. The recipe is for 2 satiating servings so double up or divide down if you need to adjust.

    • Prepare the shrimp.Remove the shell if needed but can leave the tail. Pat dry the shrimp.
    • Season the shrimp.Add the rub ingredients to a large bowl and mix in the shrimp. Rub the spices and oil all over using your hands. Set aside. You can do this ahead of time and store the shrimp in an airtight container in the fridge for up to 24 hours.
    • Grill the shrimp.Preheat a large skillet or the barbecue over high heat (e.g. 8 on the Induction stove). Add about 2 tablespoons of oil to a skillet and spray or brush the barbecue griddle with a little oil. Once hot, add the prawns and cook for 2-3 minutes on each side depending on size, or until just cooked through. Once both sides are done, toss them in a pan a few times and remove them from heat. I like to let them sit in a bowl for a few minutes to finish cooking.
    • Make the salad.Prepare the salad ingredients and whisk the dressing. You can do this before you cook the prawns or during the time. Assemble the salad bowls by dividing all ingredients evenly. Dress the salad with the dressing, then top it with the shrimp and some feta.

    Calories: 537kcal | Carbohydrates: 19g | Protein: 26g | Fat: 42g | Saturated Fat: 8g | Polyunsaturated Fat: 4g | Monounsaturated Fat: 27g | Trans Fat: 0.01g | Cholesterol: 183mg | Sodium: 1310mg | Potassium: 805mg | Fiber: 6g | Sugar: 9g | Vitamin A: 607IU | Vitamin C: 12mg | Calcium: 234mg | Iron: 2mg

    Keywords: shrimp avocado salad, shrimp salad with lettuce, prawn recipes, Low-Carb, Gluten-Free, Keto, Shrimp Recipes, Shrimp salad, Prawn Salad, Grilled shrimp recipes, spiced shrimp, shrimp rub

    More Shrimp Recipes You Might Like

    [mv_video doNotAutoplayNorOptimizePlacement=”false” doNotOptimizePlacement=”true” jsonLd=”true” key=”bmwep0qptjsellvvhxwh” ratio=”16:9″ thumbnail=”https://mediavine-res.cloudinary.com/v1576707923/b0rgnnmdabk1fxknxgu0.jpg” title=”Grilled Shrimp With Three Sauces” volume=”70″]

    Source link

  • Sesame Ginger Shrimp Marinade Recipe

    Sesame Ginger Shrimp Marinade Recipe

    This shrimp marinade recipe is perfect for grilling or roasting! Ginger, garlic, fish sauce, sesame oil, and honey combine for a delicious, sweet, sticky glaze.

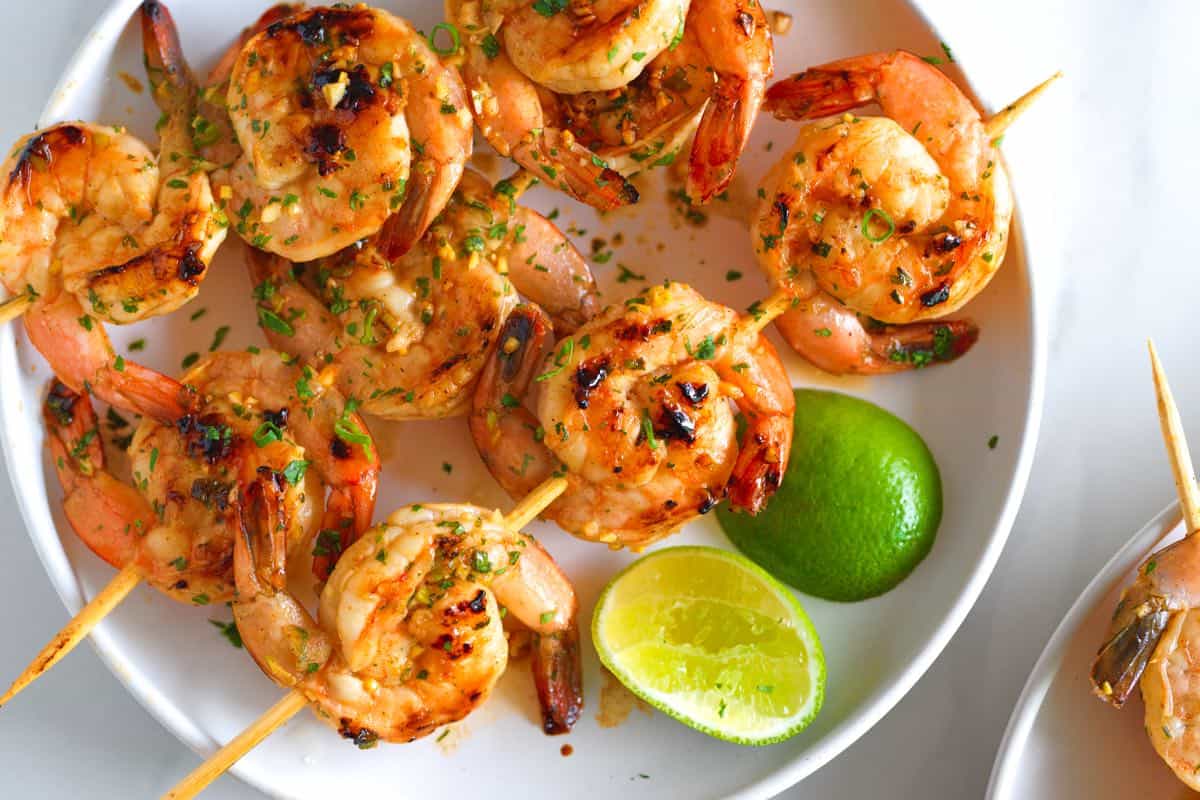
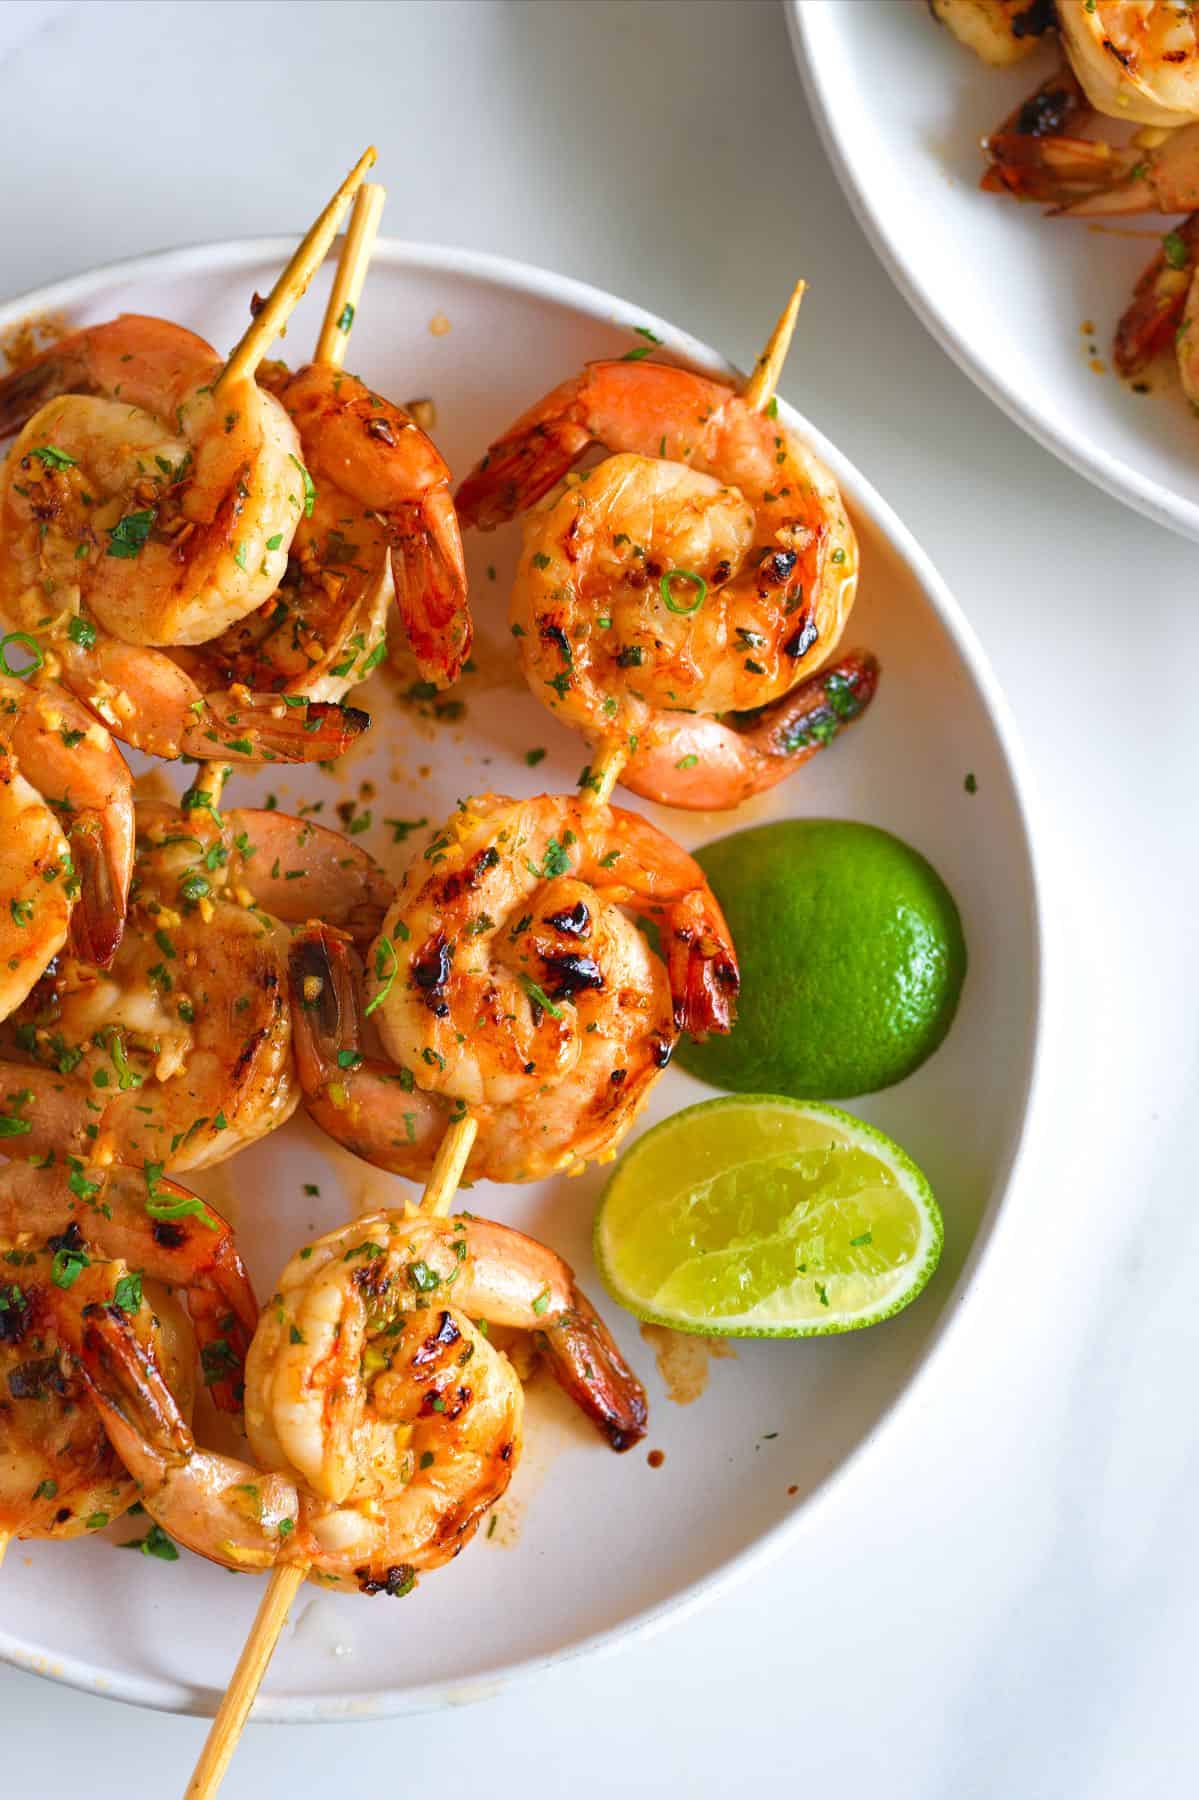
    Marinated Shrimp made with our Asian Shrimp Marinade

    Chef Richard created this easy shrimp marinade recipe. We wanted something bright, zesty, and a bit spicy, and he delivered! It features some of my favorite ingredients: ginger, fresh lime, fish sauce, and toasty sesame oil.

    We let the shrimp marinate for 30 to 60 minutes. No longer, or the acidity will start “cooking” them. This marinade is great for shrimp, chicken, tofu, or beef. It’s quick, easy, and always makes me happy. I love serving this marinated shrimp with coconut rice or cilantro lime rice.

    Key Ingredients

    • Shrimp: For the best results, I prefer large or jumbo shrimp. They are less likely to overcook and dry out. Look for fresh shrimp that is firm and has a slightly sweet smell. If you have frozen shrimp, thaw and drain them before marinating.
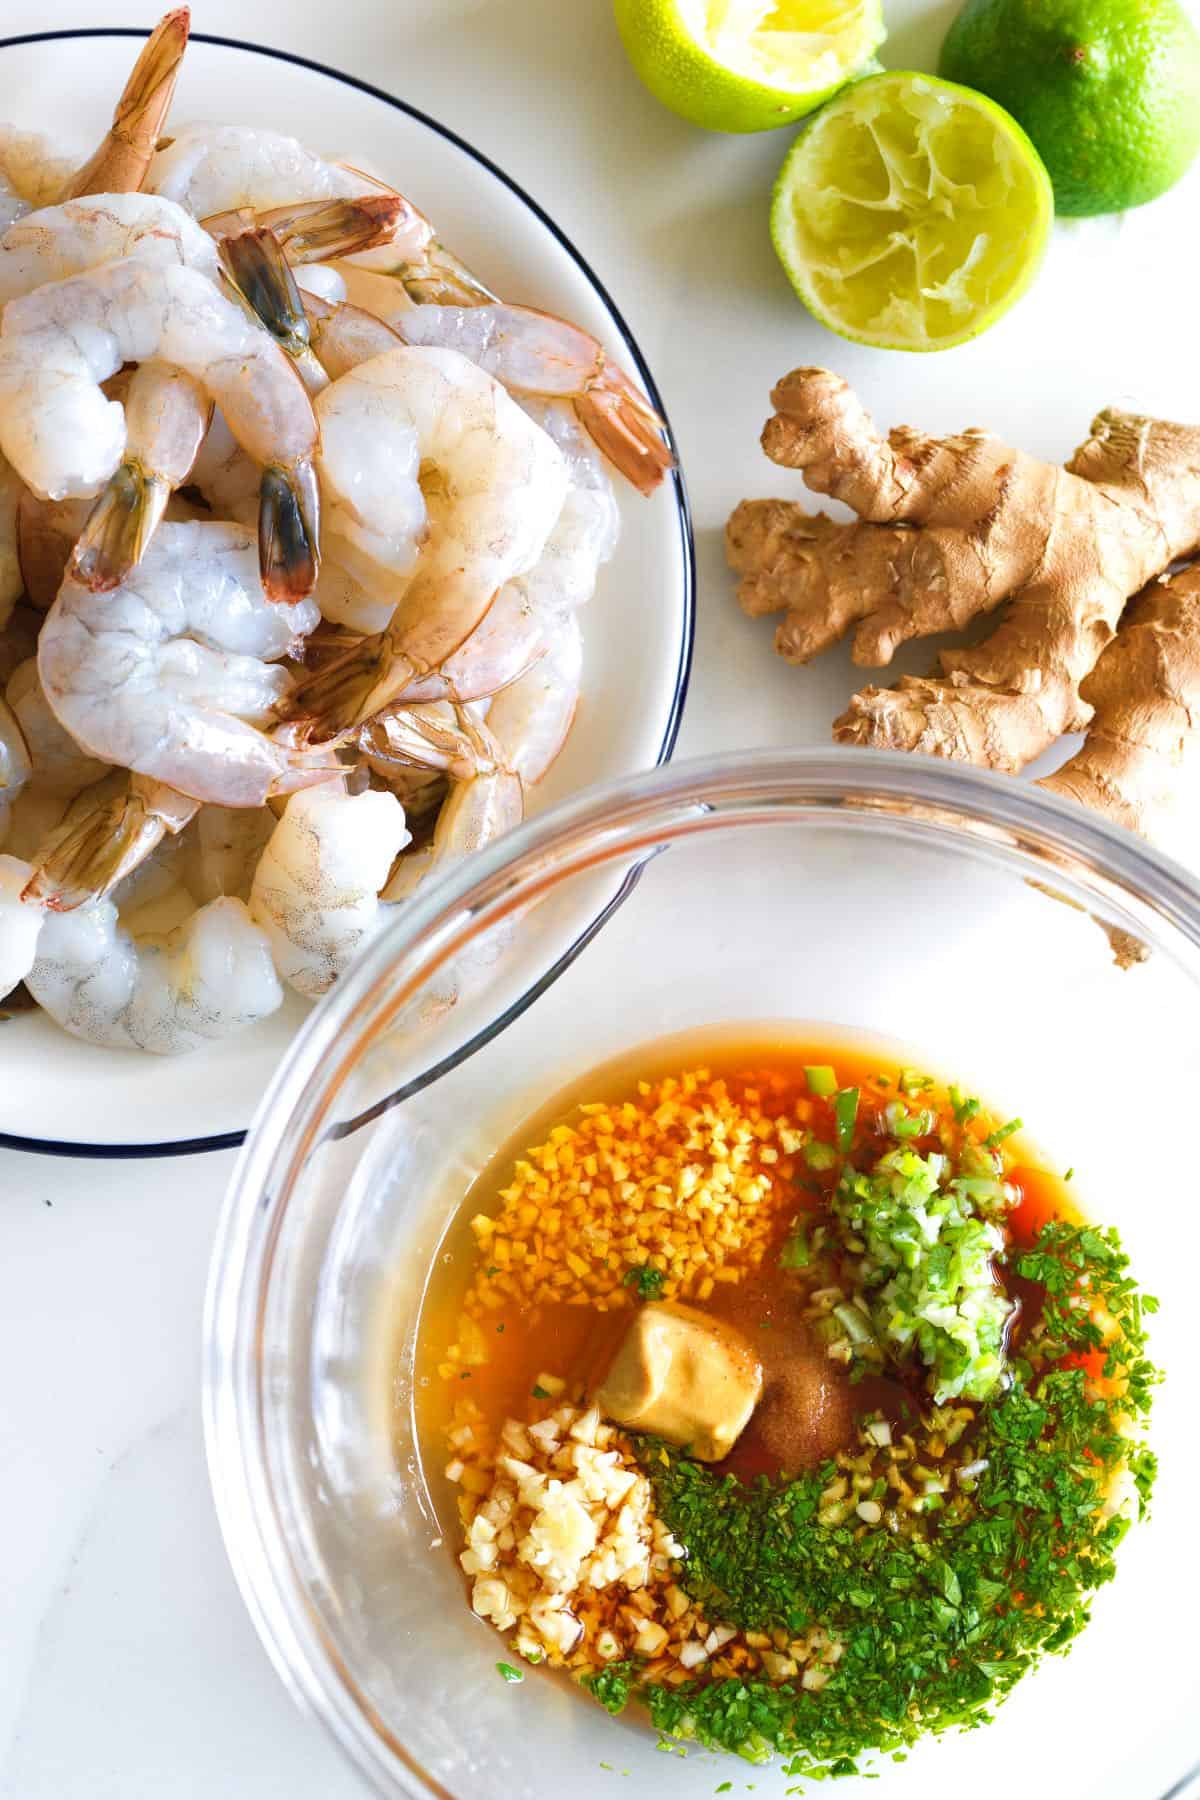
    • Fresh Ginger and Garlic: The ginger adds warmth and a subtle spiciness, and the garlic complements all the other Asian-inspired flavors. Fresh is best for these.
    • Cilantro and Green Onion: These will give you a pop of color and freshness. I like using the white and lighter green parts of the green onion for the marinade and saving the darker green tops for slicing and scattering over the cooked shrimp when serving.
    • Soy Sauce or Tamari: Use what you prefer. If gluten-free is a concern, I recommend using gluten-free certified tamari.
    • Lime: This will brighten everything up and add acidity, making everything taste better. I usually buy an extra lime and use it for serving.
    • Honey: After cooking, the honey turns the marinade into a slightly sticky glaze. You can substitute maple syrup.
    • Fish Sauce: This magical ingredient adds a savory, umami flavor to the marinade. I recommend Red Boat Fish Sauce. If it’s unavailable, look for fish sauce in glass jars, which tend to be higher quality.
    • Sesame Oil: The toasted sesame oil will provide a nutty richness and a wonderful aroma.
    • Gochujang: This Korean fermented chili paste adds mild to moderate heat. You can adjust the amount to your liking or substitute it with Sriracha. I also use it to make our homemade hoisin sauce.
    • Dijon Mustard: This adds a subtle tang and makes the marinade more interesting. I love Dijon mustard for marinades and also use it when making this chicken marinade and honey mustard chicken.

    Find the full recipe with measurements below.

    Shrimp Marinade Ingredients -- Ginger, Lime, Garlic

    How to Make the Best Shrimp Marinade

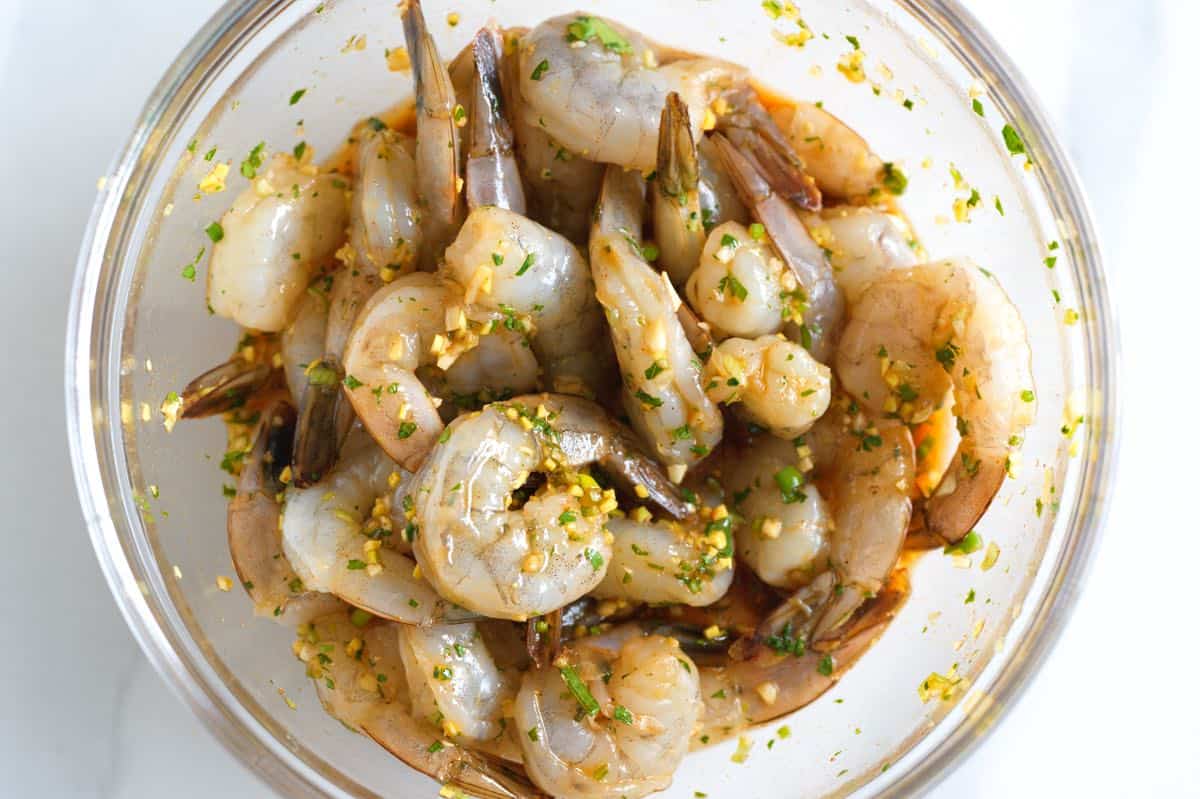
    Tip 1: Perfect for weeknights. This marinade comes together in minutes. Combine all ingredients in a bowl or zip-top bag. Then, add shrimp and let it marinate for 30 minutes to an hour. This timeframe allows the shrimp to absorb the marinade flavors without becoming tough. This is especially important if the marinade has acidic ingredients, like the lime juice in this Asian marinade.

    Marinating the shrimp longer than 60 minutes will begin to “cook” the shrimp which you don’t want in this recipe.

    Marinating Shrimp

    Tip 2: Cook with high heat. We love this marinade for grilled shrimp, which we cook on an outdoor grill or on the stove using a grill pan. You can also roast the marinated shrimp at high heat in the oven, which caramelizes the honey.

    More Shrimp Recipes

    Grilled Shrimp made with shrimp Marinade

    Sesame Ginger Shrimp Marinade

    • PREP
    • COOK
    • TOTAL

    We love this Asian-inspired shrimp marinade recipe. Quickly marinate your shrimp, 30 to 60 minutes is perfect. Any longer, and the shrimp will begin to “cook” in the lime juice. This marinade is perfect for grilled shrimp, but you can roast them in the oven or cook them in a skillet. Below, we provide tips for all three cooking methods.

    Serves 4

    You Will Need

    1 pound (450g) large or jumbo shrimp, peeled and deveined

    1 tablespoon minced fresh ginger, ½-inch piece

    1 tablespoon minced garlic, 3 cloves

    1 tablespoon finely chopped fresh cilantro

    1 tablespoon finely chopped green onion

    1 tablespoon fresh lime juice

    1 tablespoon toasted sesame oil

    1 tablespoon honey

    1 tablespoon soy sauce or tamari

    1 tablespoon fish sauce

    1 teaspoon Gochujang, see notes

    1 teaspoon Dijon mustard

    1/4 teaspoon fine sea salt

    Directions

    • Marinate Shrimp
    • 1Combine the shrimp marinade ingredients in a bowl or zip-top freezer bag. Let the shrimp marinate for 30 minutes to 1 hour.

      2If using skewers, soak wooden skewers in water while the shrimp marinate so they do not burn on the grill or in the oven.

    • Cook Shrimp
    • 1Grill (Recommended): Preheat your grill or a grill pan to medium-high heat. Thread shrimp onto skewers in opposing directions (heads touching, tails outward) for flat skewers. See our photos for reference. Push the skewer through the head and tail of each shrimp. They will look like an interlocking circle, keeping the shrimp skewers flat.

      2Grill for 2 to 3 minutes per side until opaque and cooked through.

      3Roast: Preheat your oven to 400°F (200°C). Spread shrimp in a single layer on a baking sheet and roast for 5 to 7 minutes or until opaque and cooked through.

      4Skillet: Heat skillet over medium heat. Cook shrimp for 5 to 7 minutes until opaque and cooked. Watch for the honey burning in the pan (keep the heat between medium and medium-high).

    Adam and Joanne’s Tips

    • Frozen Shrimp: Thaw and drain frozen shrimp before marinating.
    • Gochujang: A Korean chili paste, we find Mother-in-law’s Gochujang in stores around us. It can also be found sold in Asian or Korean markets. While it does not taste the same, Sriracha is a good substitute in this marinade recipe. Or leave it out.
    • Best Cooking Method: This marinade works exceptionally well on an outdoor grill or in a grill pan. Roasting in the oven is our second-best method.
    • Gluten-free: Use GF Tamari and ensure all other ingredients (specifically the fish sauce and gochujang) are marked gluten-free.
    • Nutrition facts: The nutrition facts provided below are estimates. We have used the USDA database to calculate approximate values.

    Nutrition Per Serving
    Serving Size
    1/4 of the recipe
    /
    Calories
    156
    /
    Total Fat
    4g
    /
    Saturated Fat
    0.6g
    /
    Cholesterol
    182.5mg
    /
    Sodium
    799.4mg
    /
    Carbohydrate
    6.7g
    /
    Dietary Fiber
    0.2g
    /
    Total Sugars
    5g
    /
    Protein
    23.6g


    AUTHOR:

    Joanne Gallagher

    Adam and Joanne of Inspired Taste

    We are Adam and Joanne Gallagher, the creators of Inspired Taste. Established in 2009, Inspired Taste grew from a childhood dream into one of the internet’s most trusted recipe sites with hundreds of reliable recipes, step-by-step videos, and expert tips.More About Us
    Source link