Tag: Roasted

  • Easy Roasted Butternut Squash Soup Recipe

    Easy Roasted Butternut Squash Soup Recipe

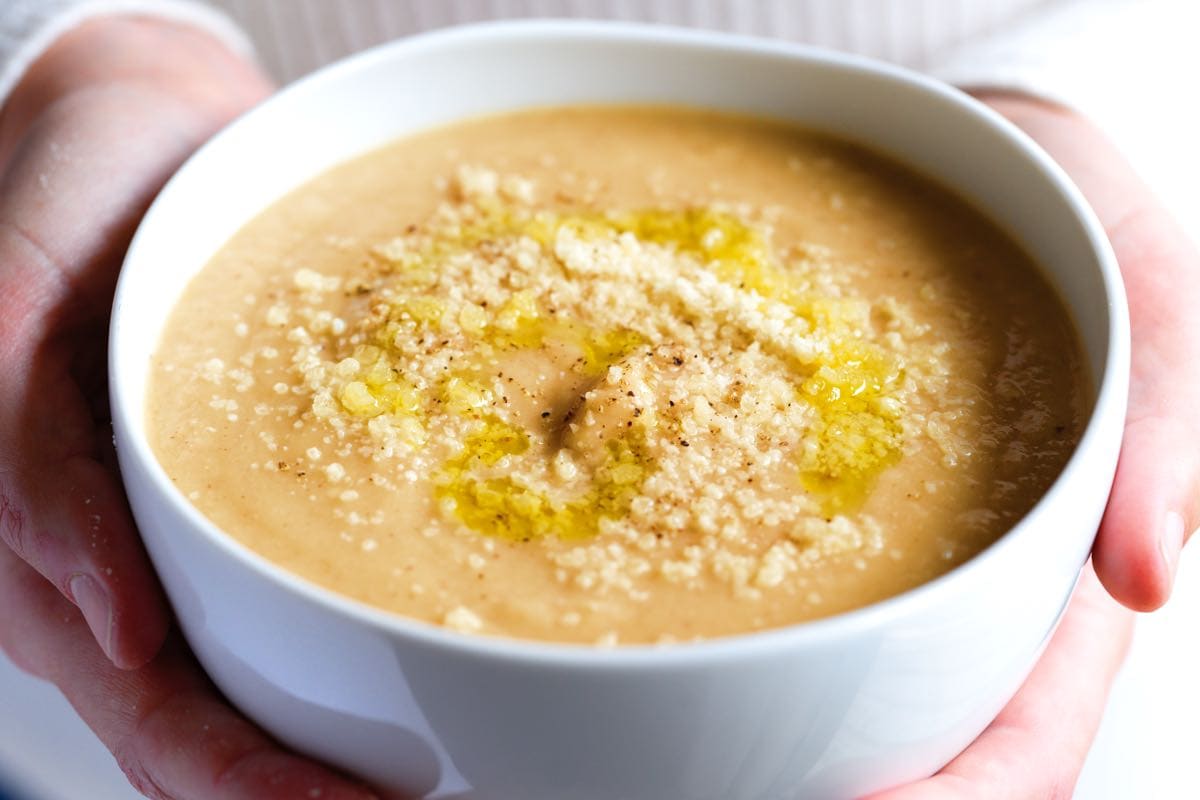
    This roasted butternut squash soup recipe with a short list of simple ingredients turns out silky, smooth, and incredibly delicious.

    Roasted butternut squash soup

    In this recipe, you’ll roast butternut squash on top of fresh garlic and thyme, then blend it with broth for one of the easiest soups we’ve shared!

    There’s no sautéing, very little simmering, and you don’t need to chop lots of veggies. I love it for an easy fall dinner, but since it turns out so well, it’s actually perfect for the holidays (like Thanksgiving dinner). For a similar soup with even more seasonal vegetables like leeks and carrots, see this Butternut Squash Soup topped with crispy chickpeas.

    Key Ingredients

    • Butternut Squash: I use medium butternut squash, but feel free to swap in winter squash varieties often found during autumn at the farmers market, like honey nut, kabocha, or red kuri squash, or swap it for a small sugar pumpkin like I use when making homemade pumpkin puree.
    • Herbs:When roasting the squash, we tuck fresh herbs underneath for extra flavor. I use fresh thyme and rosemary most often, but this is also incredible with fresh sage. You can use one of these or all three.
    • Garlic: In addition to the herbs, we also tuck whole garlic cloves (still in their skins) under the squash. This way, they flavor the squash, and the garlic becomes soft and sweet at the same time. You can then blend the roasted garlic into the soup later on.
    • Broth: You can use your favorite broth or stock. I love the richness of homemade chicken stock, chicken broth, or bone broth, but this soup is also excellent when you use a flavorful vegetable broth.
    • Cream: This is optional, but I almost always add a splash of heavy cream to my soup for a silky, velvety texture. To keep it vegetarian or vegan, try coconut milk or coconut cream.

    Find the full recipe with measurements below.

    My Tips for Making the Easiest Butternut Squash Soup

    Tip 1: Cutting butternut squash. My favorite method for cutting butternut squash is the same as I use for spaghetti squash:

    1. To prevent the squash from rolling around, place one half of a kitchen towel under the squash to keep it stable on the counter. Then, use the other half of the towel to hold the squash in place while you cut.
    2. Using a heavy chef’s knife, pierce into the middle of the squash and cut it from end to end. Don’t try to cut through the stem. It is too tough.
    3. Wiggle the knife out and separate the two halves by removing the knife and pulling them apart.

    Tip 2: Roast the squash with garlic and herbs. Sneak some herbs and garlic underneath the butternut squash halves before roasting them in the oven until fork-tender and golden on the bottom. The squash becomes fragrant and so flavorful this way.

    Tip 3: Blending your soup. When the squash is tender and caramelized, it’s time to blend. Use an immersion blender in a pot or use a stand blender to blend the roasted squash with broth and the soft roasted garlic. (You can squeeze the roasted garlic flesh into the blender and discard the skins.) Season with salt and pepper to taste, then, as a last (optional) step, I love blending in some cream.

    Tip 4: Serving this soup. I love this roasted squash soup with a slice of homemade focaccia bread, but it’s also really good with some homemade croutons on top. If you’re feeling fancy, it is also amazing with a grilled cheese made with sourdough and Gruyère cheese!

    More Easy Soups

    Roasted Butternut Squash Soup

    Easy Roasted Butternut Squash Soup

    • PREP
    • COOK
    • TOTAL

    This easy butternut squash soup requires a short list of ingredients and minimal effort from you. Since it is so simple, you have some wiggle room with variations. Feel free to substitute other varieties of squash or pumpkin in place of the butternut squash. Or add some roasted apples, onions, or carrots. You can roast them alongside the squash on the same baking sheet. More variations are below the recipe.

    6 Servings

    You Will Need

    1 medium butternut squash, 2 ½ to 3 pounds

    1 tablespoon extra-virgin olive oil or melted butter

    3 sprigs fresh thyme, rosemary, or fresh sage

    4 garlic cloves, with skins left on

    4 to 5 cups low-sodium vegetable or chicken stock, try homemade chicken stock (950ml to 1180ml)

    ¼ cup heavy cream, optional (60ml)

    Salt and fresh ground black pepper

    Directions

      1Prepare oven and pan: Preheat the oven to 400°F (204°C). Line a rimmed baking sheet, roasting pan, or baking dish with foil or parchment paper.

      2Prepare the squash: Cut the squash in half, lengthwise, using a heavy chef’s knife. Scoop out and discard the seeds. Brush each half, inside and out, with 1 tablespoon olive oil (or melted butter). Season the squash with ½ teaspoon salt and ¼ teaspoon black pepper.

      3Roast the squash: Make a bed of fresh herbs and garlic cloves in the middle of the baking sheet. Place the squash, cut side down, on top. Roast until the squash is completely tender, about 1 hour.

      4Blend until creamy: Remove the squash from the oven and let it cool until you can handle it. Scoop out the roasted butternut squash flesh and add it to a large pot. Squeeze the roasted garlic from the skins into the saucepan and throw away the skins. Throw away the herbs.

      5Pour 4 cups of stock into the saucepan and bring to a simmer. Using a blender or immersion blender, blend the soup until completely smooth. Add more stock to thin the soup to your desired consistency. Season to taste with salt and pepper. Stir in cream (optional).

    Adam and Joanne’s Tips

    • Storing: Store homemade butternut squash soup in an airtight container in the fridge for up to 3 days or in the freezer for up to 3 months.
    • Variations: Consider adding some warm spices to this soup, like 1/4 teaspoon ground ginger or finely grated ginger, a pinch of nutmeg, or a pinch of cayenne pepper for some heat.
    • Serving ideas: I love an extra drizzle of cream, but this soup is also lovely with some toasted pepitas (or roasted pumpkin seeds), crumbled bacon, or crispy fried shallots on top.
    • Blending hot liquids: When using a regular blender, work in smaller batches, and don’t fill it too high – hot soup expands! For safety, remove the lid’s center insert and cover the opening with a kitchen towel while blending. This releases steam and prevents messy splatters.
    • The nutrition facts provided below are estimates.

    Nutrition Per Serving
    Serving Size
    1 of 6 servings
    /
    Calories
    287
    /
    Total Fat
    11g
    /
    Saturated Fat
    5g
    /
    Cholesterol
    20mg
    /
    Sodium
    546mg
    /
    Carbohydrate
    45g
    /
    Dietary Fiber
    7g
    /
    Total Sugars
    8g
    /
    Protein
    10g


    AUTHOR:

    Adam Gallagher

    Adam and Joanne of Inspired Taste

    We are Adam and Joanne Gallagher, the creators of Inspired Taste. Established in 2009, Inspired Taste grew from a childhood dream into one of the internet’s most trusted recipe sites with hundreds of reliable recipes, step-by-step videos, and expert tips.More About Us
    Source link

  • House Favorite Roasted Brussels Sprouts Recipe

    House Favorite Roasted Brussels Sprouts Recipe

    These House Favorite Brussels Sprouts are the best side veg and are speckled with bright bursts of cranberries and nutty walnuts. The perfect addition to any meal!

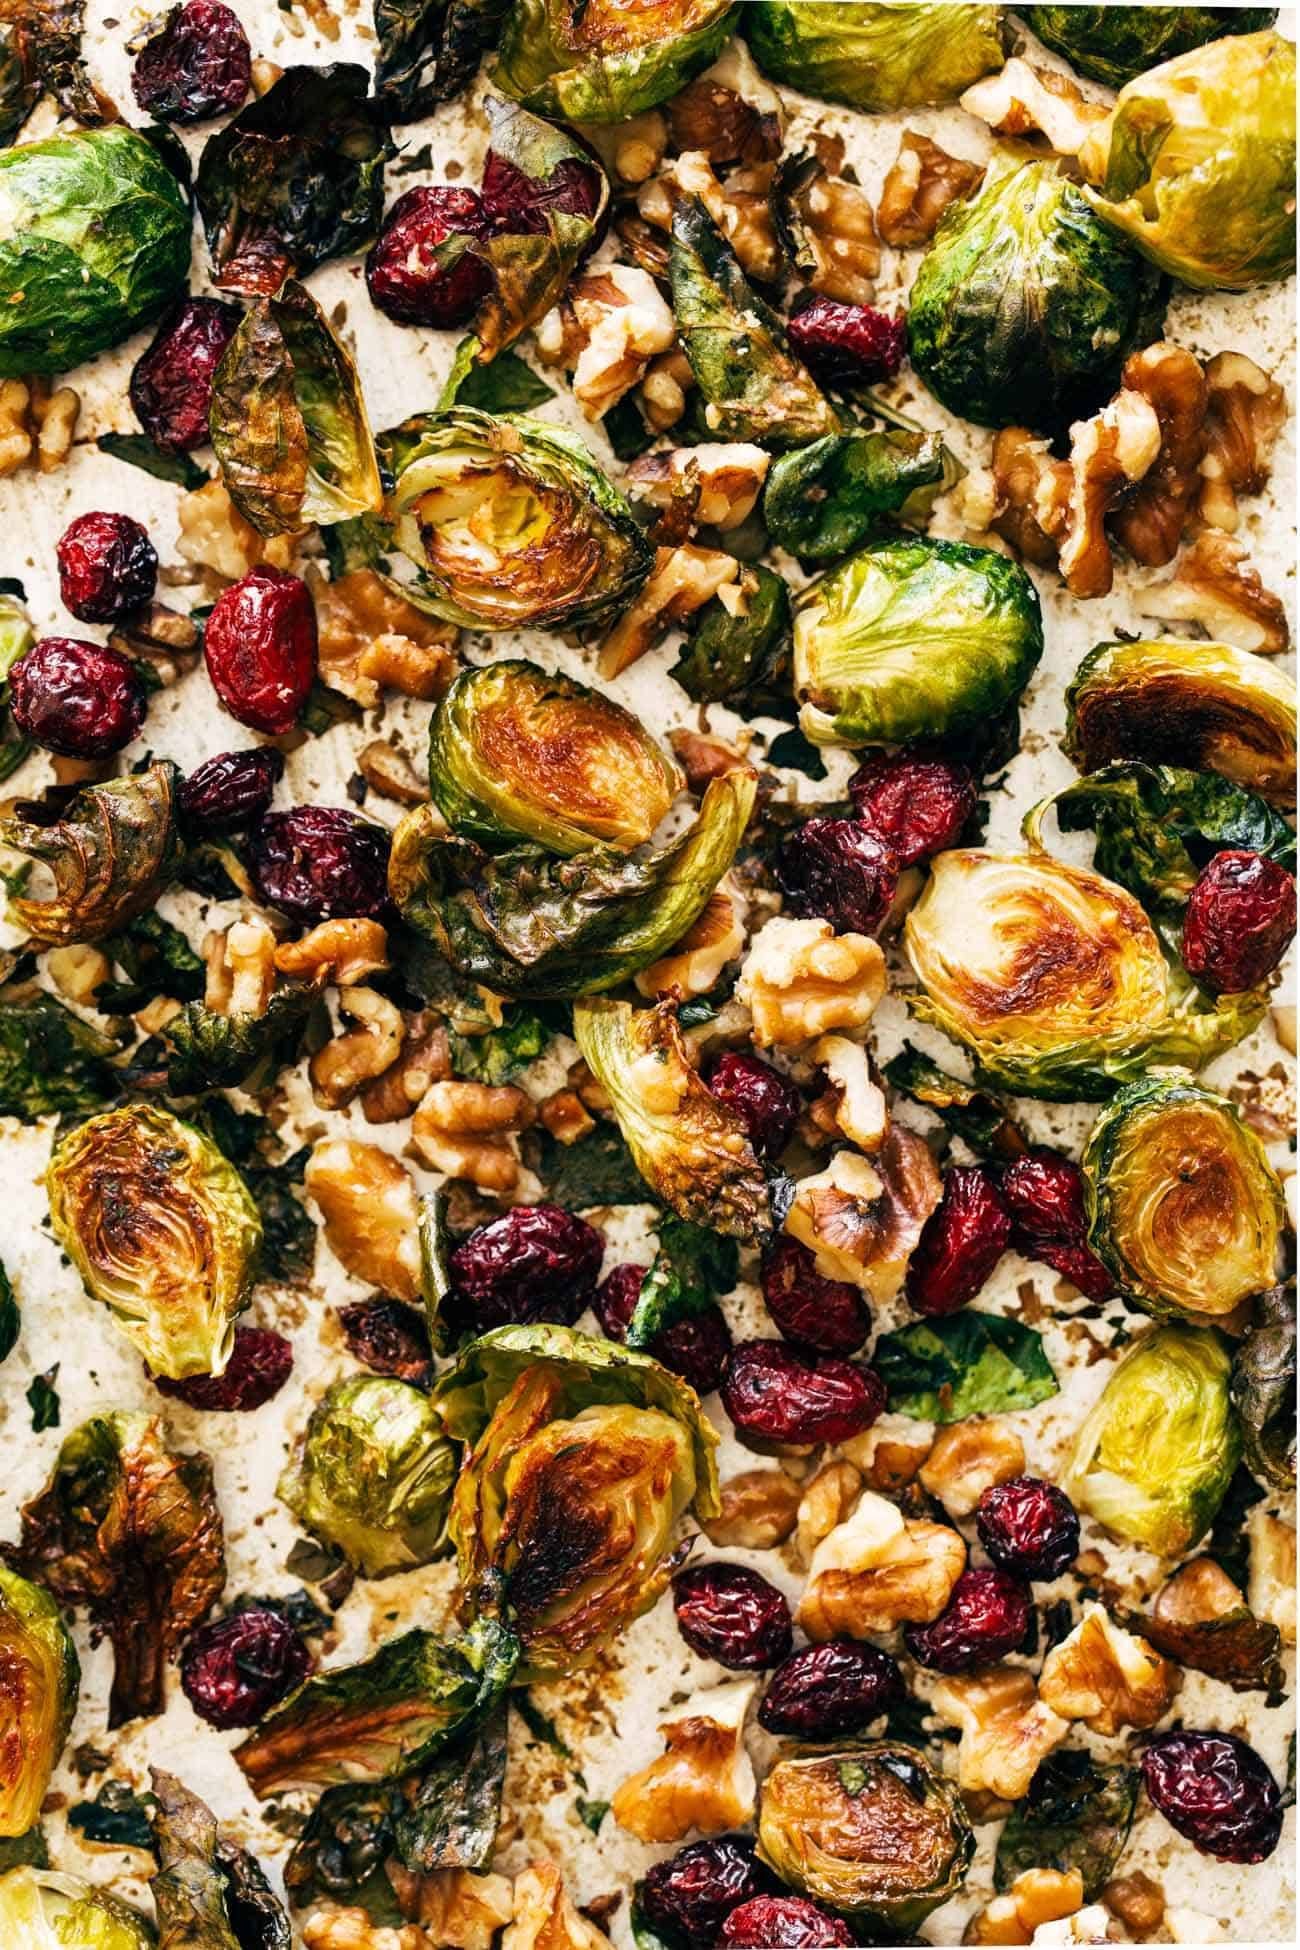
    Let’s talk about these roasty, sweet, nutty brussels sprouts that combine those tender-crisp, whole-brussel bites with the ultra thin and crispy leaves, all coated with a lil’ mustard-maple drench and speckled with juicy bites of dried cranberry. Oh my gosh. WHY ARE THEY SO GOOD.

    To be honest, I have very few “house favorites” in our house because I always change it up. Always trying new recipes, always moving on to the next thing. We hardly stay on any one recipe for more than just a few repeats because new! exciting! rah rah rah. But this recipe has been made WEEKLY for… um, the last five months? It has solidly earned its House Favorite status. We make these brussels sprouts all. the. time. We’ve even added a spicy variation to our repertoire and I cannot be stopped.

    Dad loves them, toddler loves them, Mom loves them AND loves that everyone loves them. Also: guests love them, although usually if it’s more than just us, we’re going to need to double the recipe because, yes, in our house, we will for sure finish one pan between the three of us.


    In This Post: Everything You Need For These Brussels Sprouts


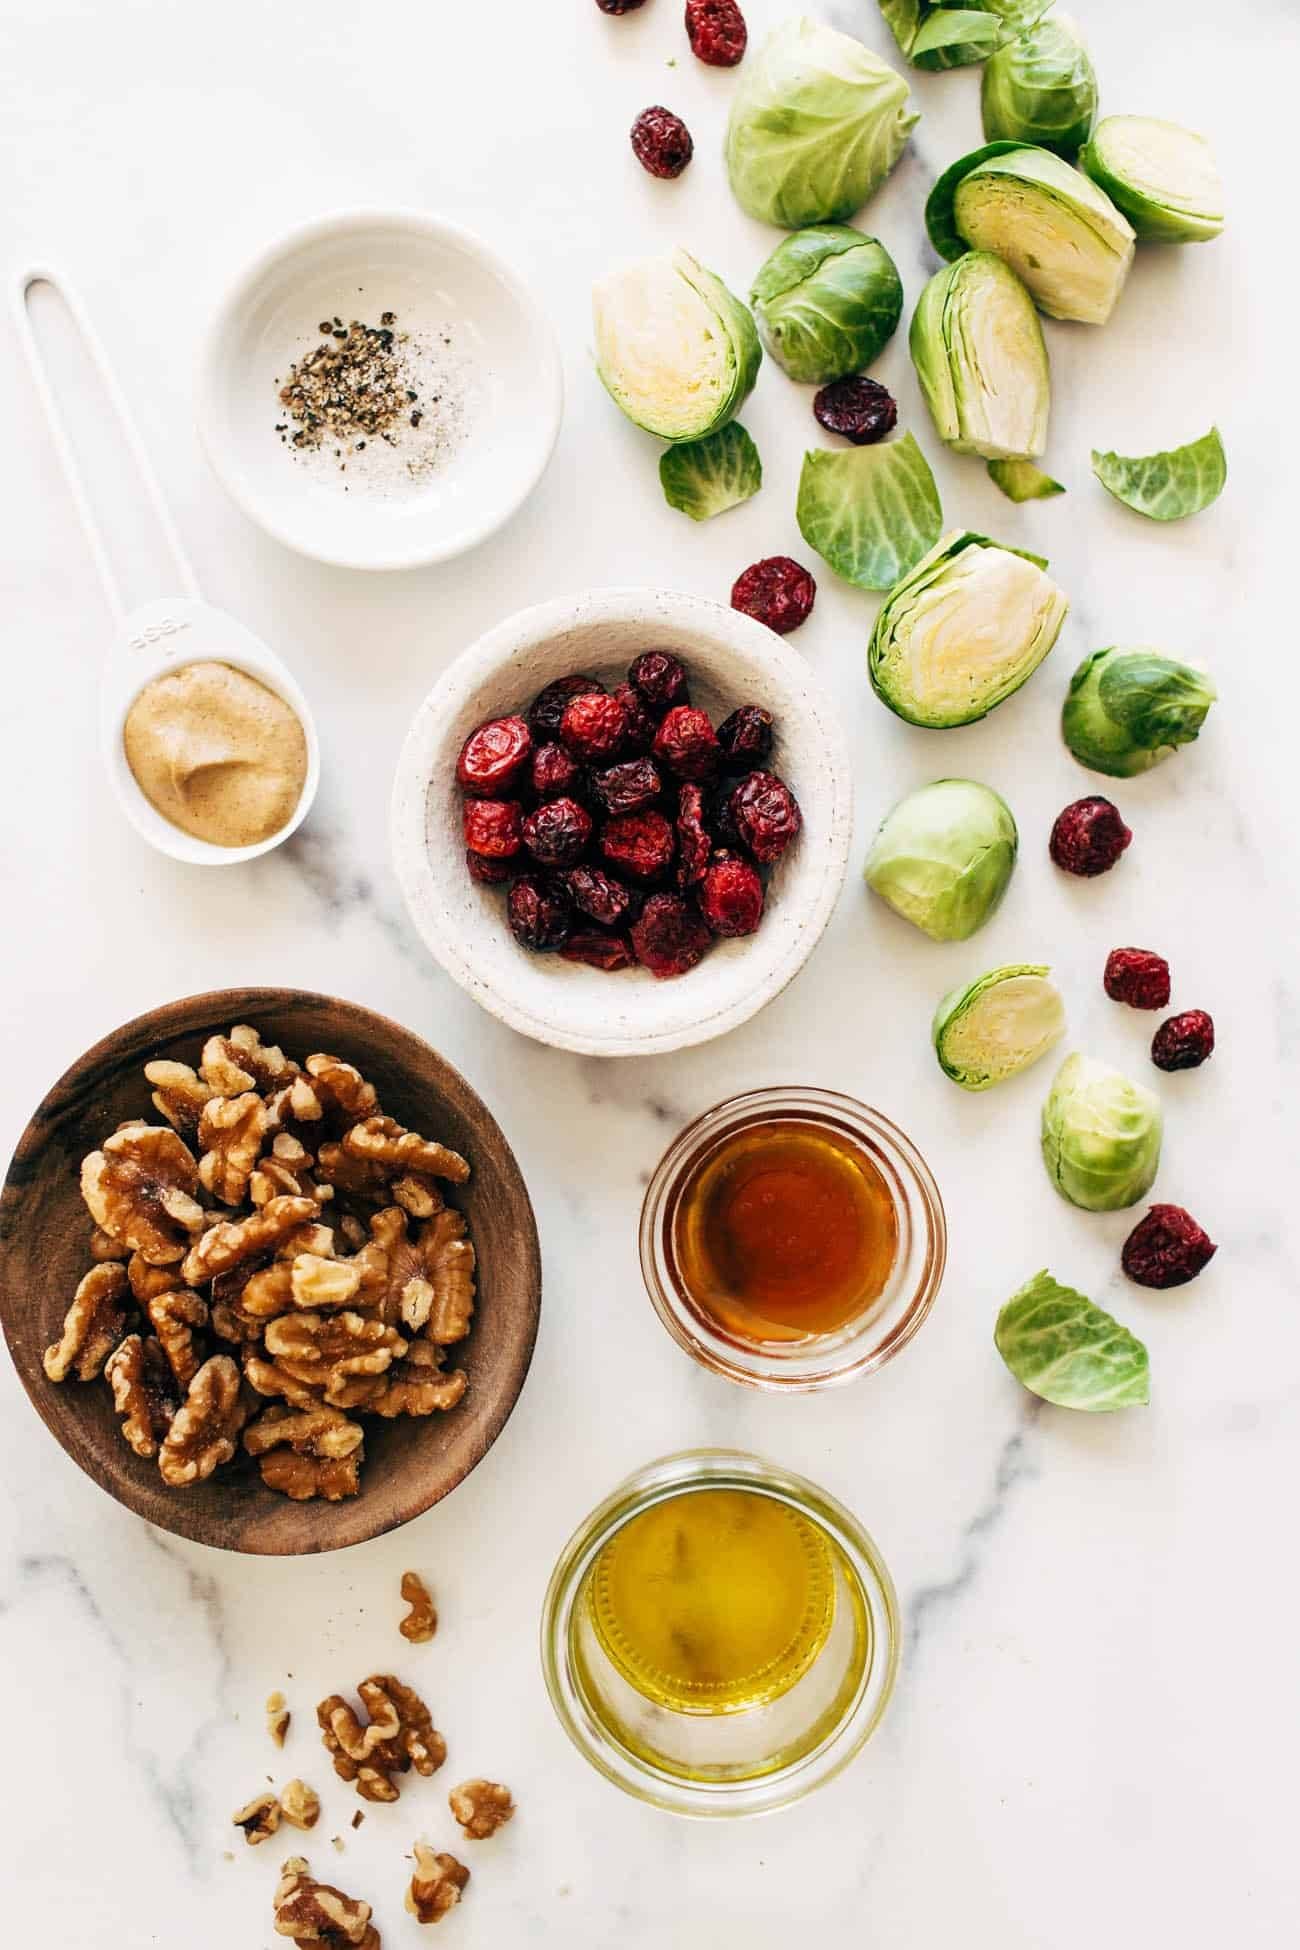
    Ingredients For These Roasted Brussels Sprouts

    This is an SOS series recipe – as in, an excellent back pocket choice for when you just need to get something on the table quickly – so here’s our super short and sweet ingredient list:

    • brussels sprouts
    • walnuts
    • dried cranberries
    • maple syrup
    • Dijon mustard

    And, of course, your standards: olive oil, salt, and pepper.

    Prefer To Watch Instead Of Read?

    Ingredients for House Favorite Brussels Sprouts

    How To Make Brussels Sprouts That Actually Taste Good

    Here we go!

    1. Prep your brussels sprouts. Cut off the base of the brussel sprout, remove the outer leaves, and cut it in half vertically. Turn on some music or a good show and go to town.
    2. Then, the brussels get tossed in olive oil and roast in the oven, cut side down, until they are nice and crispy.
    3. The walnuts get added for the last minute for a little toasting.
    4. The cranberries join the cool-down party.
    5. And finally, the sauce gets added directly to the pan. And by sauce, I mean an eyeballed little squirt of Dijon mustard and a solid drizzle of maple syrup (if you like things tangy, maybe a little balsamic vinegar too?). Get a little more olive oil, salt, and pepper up in there, maybe some red pepper flakes if you like things spicy, and ohhhkay yes.

    That was easy. We are in business.

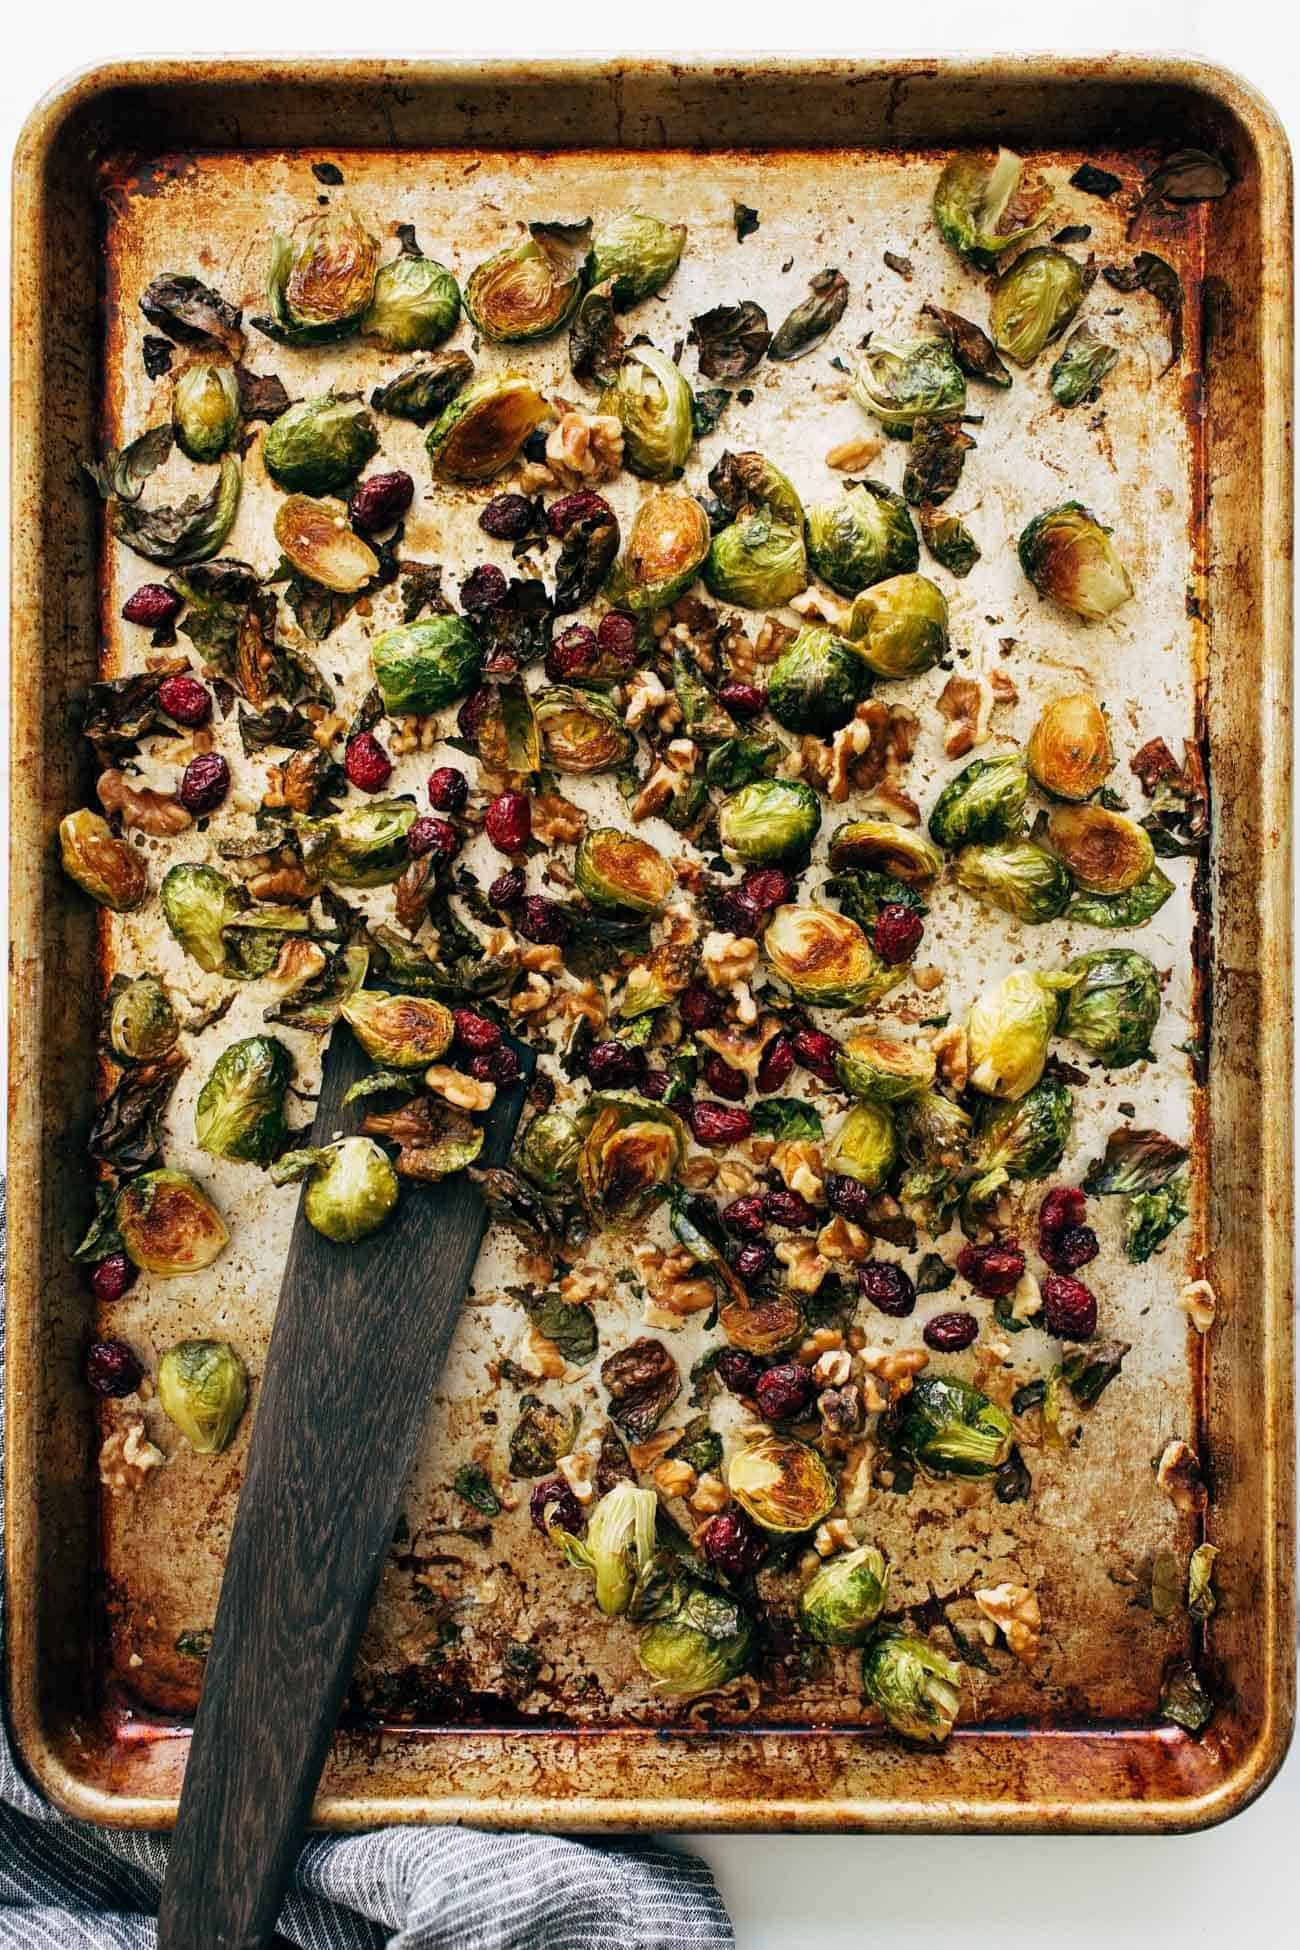
    Roasted Brussels sprouts on a pan with a spatula

    What To Serve with Brussels Sprouts

    The brussels in and of themselves aren’t a meal (although, with the cranberries and walnuts in there…maybe they are?), but here are some ideas for what to serve them with – SOS STYLE.

    The flavors of this recipe can go so many directions with whatever it is you’re eating. And I’m sure you can think of 100 or more fancier ideas to round out the table if you’re going for a more impressive-dinner-party situation, so don’t let me hold you back.

    But for basic nights at home, when you want to really, truly, actually look forward to eating your vegetables, these basic, versatile, saucy, crispy sprouts are where it’s at.

    I’m telling you – HOUSE FAVORITE.

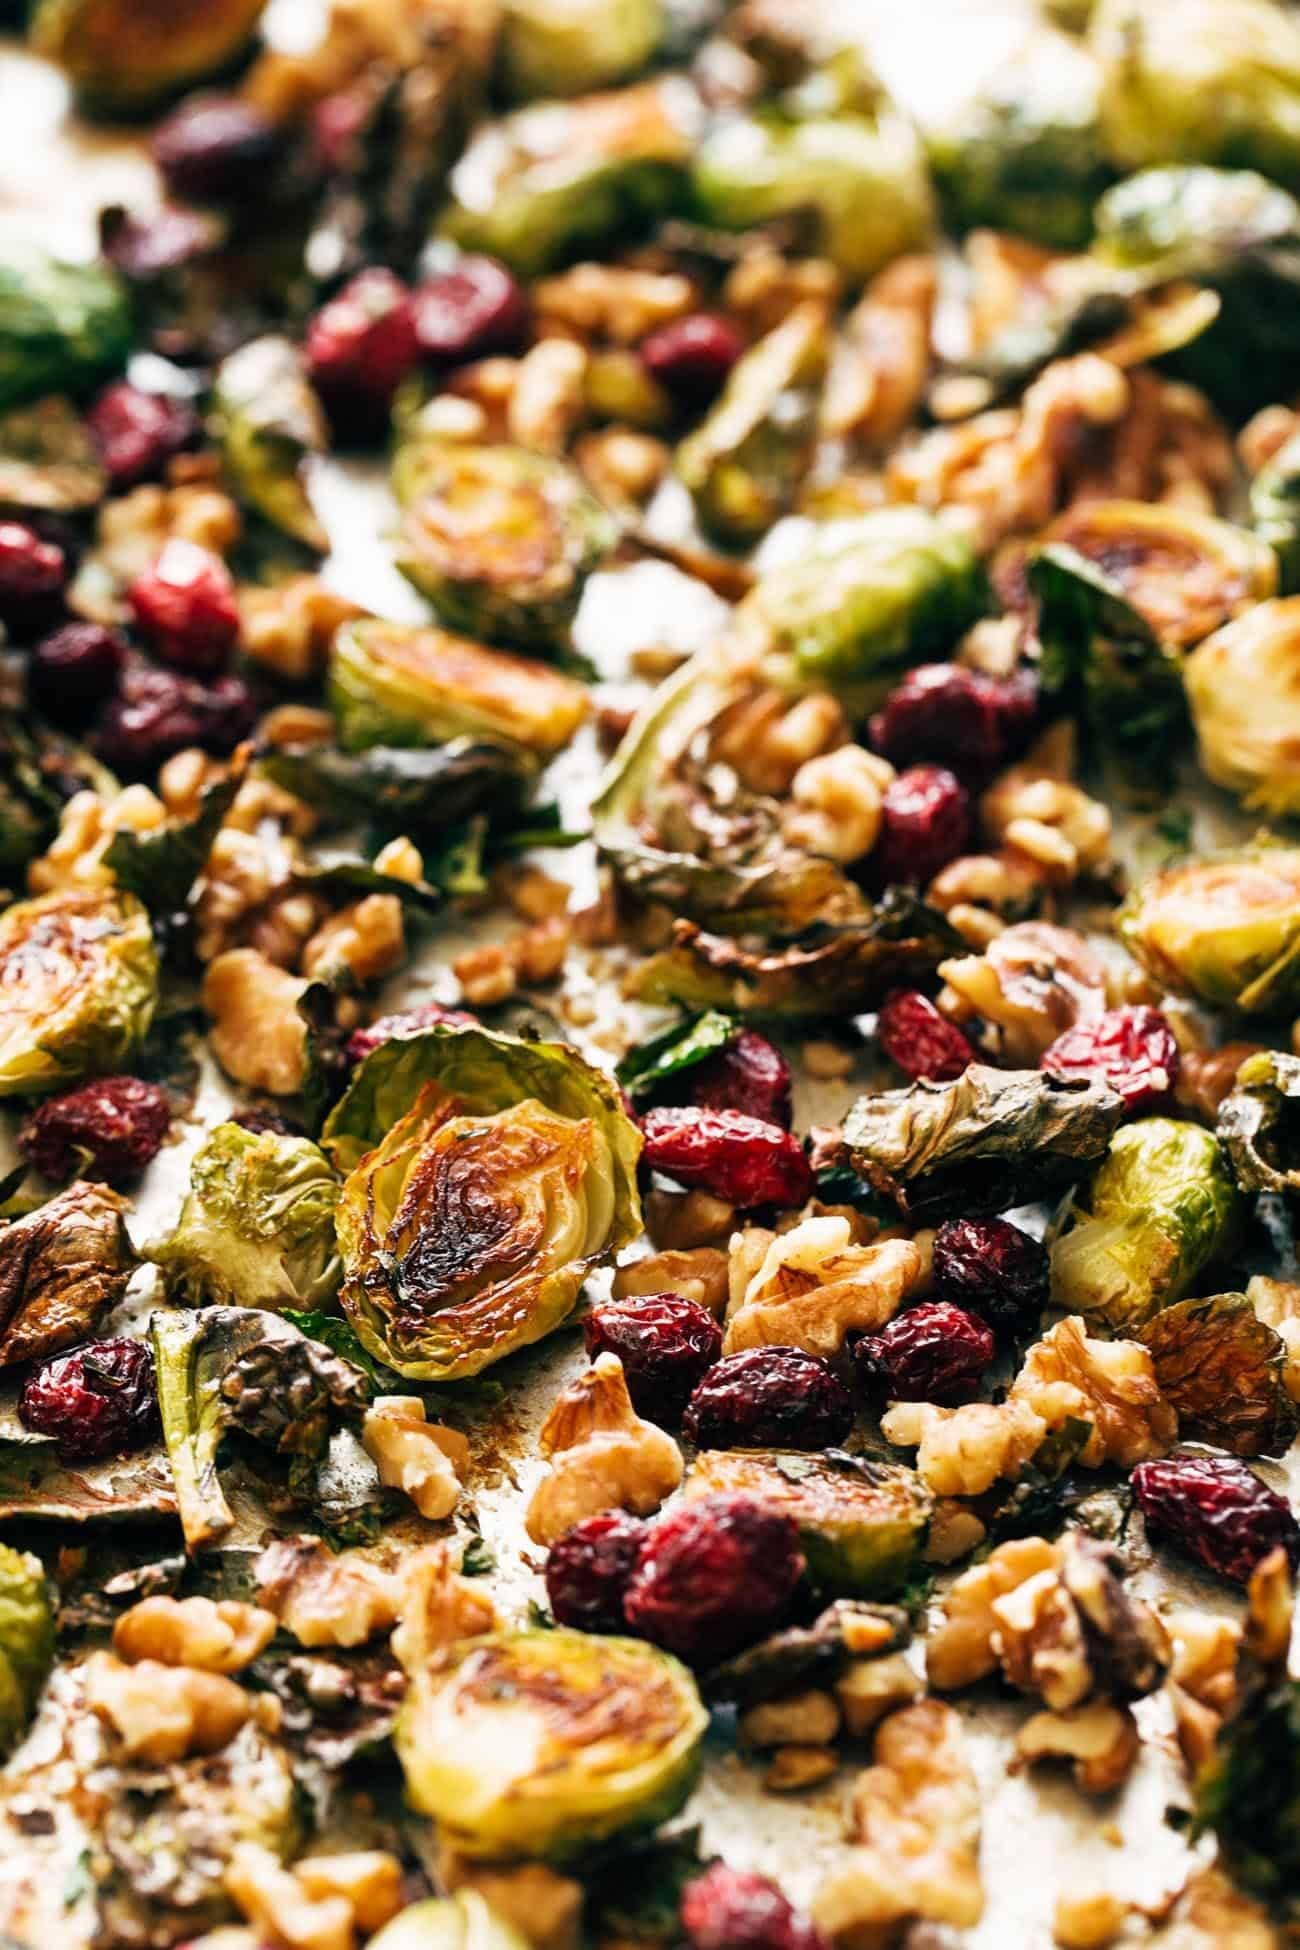
    Close-up of roasted Brussels sprouts on a pan with walnuts and cranberries.

    House Favorite Brussels Sprouts: Frequently Asked Questions

    I’m allergic to nuts. What can I substitute?

    You could leave the nuts out completely or, if you can have seeds, you could add pumpkin seeds here. Once you add the pumpkin seeds, just keep a close eye on things so they don’t burn.

    How could I prep brussels sprouts in advance?

    Brussels sprouts are really best fresh and crispy out of the oven, so for prepping ahead of time, I would recommend just cutting the brussels sprouts so they’re ready to get roasted, and whisk the mustard and maple syrup together so that’s ready to go too!

    Can I add meat to these brussels sprouts?

    Sure! Some diced pancetta or bacon would be great! You could also cook up some salmon to go with this very nicely.

    Are there any herbs I could add to this?

    Absolutely! Thyme and/or rosemary would be lovely additions to this.

    Can I add cheese to this?

    That sounds delicious! Yes. Crumbled goat cheese or feta cheese would be delicious.


    Print

    clock clock iconcutlery cutlery iconflag flag iconfolder folder iconinstagram instagram iconpinterest pinterest iconfacebook facebook iconprint print iconsquares squares iconheart heart iconheart solid heart solid icon

    Description

    These House Favorite Brussels Sprouts are the best side veg and are speckled with bright bursts of cranberries and nutty walnuts. The perfect addition to any meal! 


    1. Preheat the oven to 425 degrees. Place brussels sprouts cut-side down directly on a baking sheet. Drizzle with oil and sprinkle with salt and pepper.

    2. Roast brussels sprouts for 15-20 minutes, until cut sides are very brown and some of the leaves are crispy. Add walnuts, mustard, and maple; return to oven for 5-10 minutes to get the walnuts toasted. (You can choose to either add the sauce now, or when the pan comes out of the oven in step 3. If you add it now, it gets kind of baked into the brussels, but if you add it when they’re done baking, it’ll be a little more saucy. I like it both ways. Your choice!)

    3. Remove from oven. Toss with cranberries directly on the baking sheet. Season and serve immediately. Yumo!

    • Prep Time: 5 minutes
    • Cook Time: 20 minutes
    • Category: Side Dish
    • Method: Roast
    • Cuisine: American

    Keywords: brussels sprouts, walnuts, cranberries

    More Delicious Brussels Sprouts Recipes

    Source link

  • Roasted Cherry Tomato Soup With Creamy Mascarpone

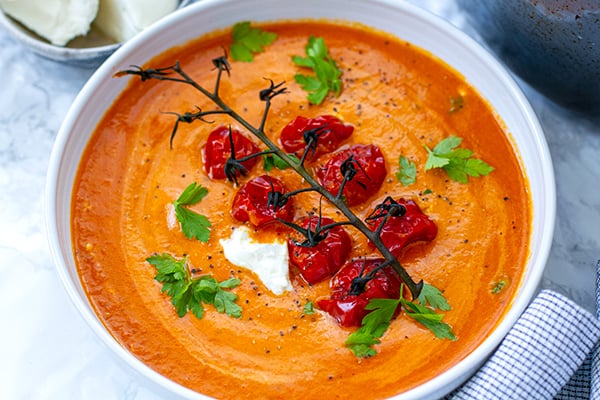
    Roasted Cherry Tomato Soup With Creamy Mascarpone

    Guys, this is one of the tastiest soups I’ve made and I am super excited to share this recipe! It’s a roasted tomato soup that is Bisque-like, tangy and sweet with silky, decadent mascarpone cream cheese folded in at the last minute. It’s a vitamin and antioxidant-rich recipe that is gluten-free, grain-free and vegetarian. You can also make a dairy-free version, although I do think mascarpone adds a bit of magic to it. Make sure to rate this recipe and comment at the bottom for others to discover this yummy dish.


    Roasted Cherry Tomato Soup

    The idea for this soup wasn’t mine, to begin with. A couple of months ago, I was walking down a supermarket in London and I saw a few ready-made soups on offer. There was the roast chicken, the classic butternut squash and then I spotted a pot of roasted cherry tomato soup with mascarpone. I’ve never had that soup, neither did I buy it that time.

    But, the idea has stuck in my mind because just that morning I roasted a whole bunch of cherry tomatoes and I was commenting to my partner how extra sweet and flavourful they become when caramelised during roasting.

    I thought ‘Wow, imaging that punchy, tangy and sweet roasted cherry tomato flavour mellowed out by the milky mascarpone. Creamy, silky, plenty of umami.” It was working in my head, so without ever trying the supermarket version, I decided to make my own creamy roasted tomato bisque soup. Not sure if it’s anything like that other soup but it was bloody fantastic and I am definitely making it again.

    What Is Mascarpone?

    Mascarpone is an Italian cream cheese that is most known for its use in tiramisu. It’s subtly sweet and silky cow’s milk cheese that has a rich texture that is somewhere between Philadelphia cream cheese and double cream. It tastes somewhere in between two, so it’s has a very faint hint of cheese and all the creaminess of the milky fat.

    Alternatives to mascarpone: you can fold in regular or light cream cheese, heavy or double cream, sour cream, creme fraiche, thick Greek yoghurt. If you’re using just the cream or yoghurt, you could also add a tiny sprinkle of grated cheese or Parmesan. For a dairy-free version, try thick coconut cream or a dairy-free cream.

    What Goes With Tomato Soup?

    The soup is rich and satiating on its own but you could serve it with some shredded chicken, cooked prawns, quinoa or chickpeas for extra protein. Grilled salty halloumi would also work well here.

    Serve it with a side of grilled cheese sandwiches or for something healthier make a loaf of this spinach feta bread, my low-carb bread or this fluffy gluten-free bread. I’ve also served it with this gluten-free focaccia, which was a fabulous combo. Some sourdough croutons might be nice or you can top the soup with some fried shallots or pumpkin seeds for an extra crunchy texture.

    How To Make Roasted Tomato Soup

    There are three simple parts to making this creamy tomato soup. I will guide you with some step-by-step pics and you can find the full list of ingredients, instructions and nutritional breakdown in the recipe card below.

    Part 1. Roast cherry tomatoes until caramelised and slightly charred. This will take about 30 minutes, during which time you can do Part 2.

    Part 2. Cook the base soup with sauteed mirepoix (onion, celery and carrots), garlic, tinned tomatoes and a few sun-dried tomatoes for extra oomph. This should take about 15-20 minutes.

    Part 3. Add the roasted cherry tomatoes to the cooked soup and puree into smooth bisque consistency. Finally, fold in the mascarpone cream cheese or alternatives.

    Want to Save This Recipe?

    Enter your email & I’ll send it to your inbox. Plus, get great new recipes from me every week!

    By submitting this form, you consent to receive emails from Cooked & Loved

    Learn how to make the most delicious roasted cherry tomato soup with creamy mascarpone. It’s a Bisque-like, tangy and sweet soup that is grain-free and gluten-free (if served as is). You can make a dairy-free version with coconut cream or plant-based cream.

    Calories: 253kcal | Carbohydrates: 15g | Protein: 5g | Fat: 20g | Saturated Fat: 9g | Polyunsaturated Fat: 1g | Monounsaturated Fat: 5g | Cholesterol: 28mg | Sodium: 282mg | Potassium: 546mg | Fiber: 3g | Sugar: 8g | Vitamin A: 3820IU | Vitamin C: 27mg | Calcium: 78mg | Iron: 2mg

    Keywords: Appetizer, Vegetarian, Soups

    MORE HEALTHY SOUPS TO TRY

    SAVE THIS CREAMY TOMATO SOUP TO PINTEREST

    Source link

  • Roasted Cabbage With Parmesan Sauce & Pangrattato

    Roasted Cabbage With Parmesan Sauce & Pangrattato

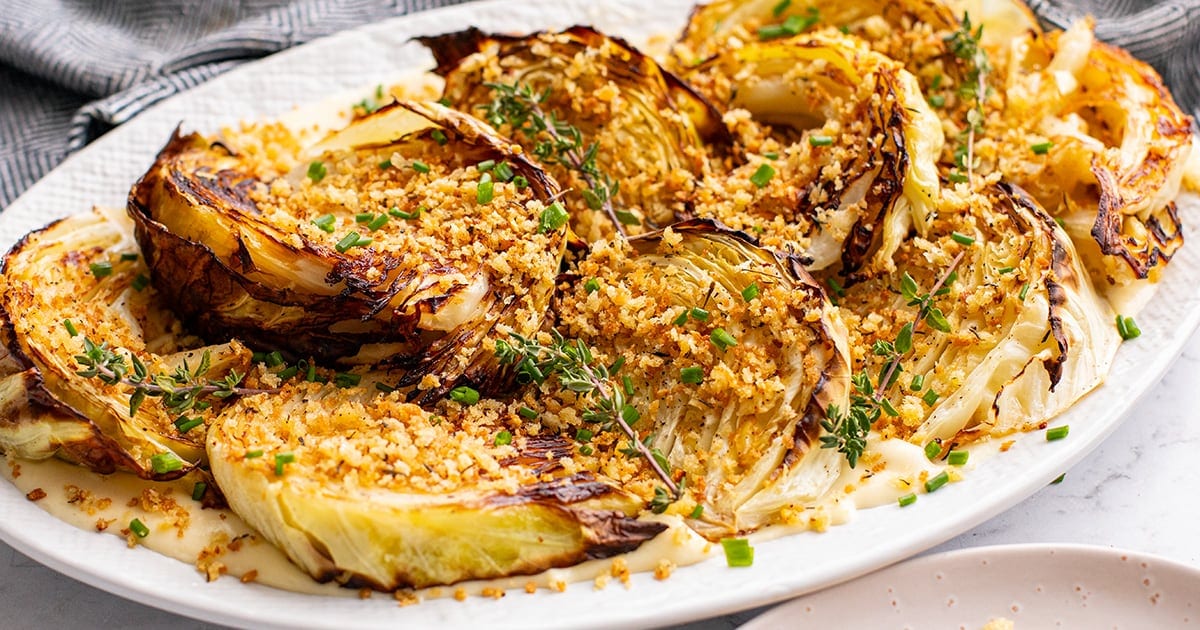
    Roasted cabbage with parmesan sauce and pangrattato (Italian breadcrumbs) – a flavor-packed, crunchy, creamy side dish perfect for holidays or cozy Sunday dinners.


    Jump to: ℹ️ Overview | 🛒 Ingredients | 📷 How To Make | 📹 Watch The Video | 👩‍🍳 Recipe Tips | 🥗 Serving Suggestions | 📝 Full Recipe Card | 🍽 More Vegetable Side Dishes


    This roasted cabbage is cheesy, crunchy and straight-up delicious. It’s the kind of dish that makes people ask for the recipe.

    You’ve got wedges of cabbage roasted until golden and just-tender, with charred edges that add a smoky sweetness. Then there’s the Parmesan sauce: creamy, garlicky, and packed with umami. And to top it off? Pangrattato. Italian breadcrumbs that are garlicky, crispy, herby, and salty in the best way. It’s giving gourmet but without the fuss.

    I’ve made this for Sunday roasts and dinner parties—people always go back for seconds. Bonus: it’s vegetarian-friendly and surprisingly filling, so you can serve it as a centrepiece dish.

    Tip: You can repurpose this recipe to make roasted Brussels sprouts or roasted cauliflower with parmesan sauce.

    👩‍🍳 You might also like these cabbage recipes: cabbage pie, tuna and cabbage patties with spicy garlicky mayonnaise, sautéed cabbage with garlic, lemon, and butter, Indian cabbage, Japanese cabbage, or these other cabbage recipes. Check out my parmesan crusted Brussels sprouts sides as well.

    What You’ll Need

    Here is what you’ll need for this roasted cabbage with parmesan sauce and pangrattato recipe. Find the full measurements in the recipe card below.

    For the roasted cabbage:

    • White cabbage – like Drumhead; it softens beautifully and holds shape. Can sub with Savoy or even red, but not Napa. I have this lovely Napa cabbage recipe for you to try.
    • Olive oil – helps get those crispy edges.
    • Salt & pepper – don’t skimp; they bring everything to life.

    For the pangrattato:

    • Olive oil & butter – for rich flavor and golden crumbs.
    • Garlic – adds that punch.
    • Dried thyme – earthy and herby.
    • Panko breadcrumbs – extra crunchy; regular crumbs work too, just not as light.

    For the parmesan sauce:

    • Butter & flour – classic roux base for creamy sauces.
    • Garlic – just a touch, but adds that lovely aroma.
    • Chicken stock – adds depth (use veg stock for full veg version).
    • Light cream – for a silky finish.
    • Parmesan – salty, nutty, umami magic.

    How To Make Roasted Cabbage With Parmesan Sauce & Pangrattato

    Find the full recipe and nutritional information below. Here are some handy step-by-step photos for roasted cabbage with parmesan sauce and pangrattato.

    • Preheat oven to 395°F / 200°C.
    • Cut cabbage into 1-inch wedges or steaks.
    • Brush with olive oil, season both sides, roast 25 minutes middle rack.
    • Move to top rack for another 5 minutes to get crispy edges.
    • Meanwhile, make the pangrattato: sauté garlic in olive oil and butter, then add breadcrumbs, thyme, salt, and pepper. Cook until golden and crispy.
    • For the parmesan sauce: melt butter, whisk in flour, then garlic. Slowly whisk in chicken stock, followed by cream and parmesan. Stir until smooth and melty.
    • To assemble: spread sauce on a platter, top with cabbage wedges, and sprinkle generously with pangrattato. Or layer it however you like.

    Watch The Video

    Recipe Tips/Variations

    • Cabbage cuts: Steaks work just as well as wedges, just watch for thickness—about 1 inch is ideal.
    • Make-ahead: Roast the cabbage and prep the pangrattato in advance. Reheat cabbage in the oven and crisp pangrattato in a dry skillet.
    • Storage: Keep leftovers in the fridge for up to 3 days. Reheat in the oven to maintain crispness.
    • Add-ins: A pinch of nutmeg in the sauce or a squeeze of lemon before serving adds extra zing. Crispy bacon or pancetta would add a little extra saltiness.
    • Make it vegetarian: Use veggie stock in the sauce, and you’re good to go.

    Serving Suggestions

    This dish shines as a holiday side (hello Thanksgiving or Christmas!), but I also love it as a meatless main with roast potatoes and a big leafy salad. It’s also a dream alongside grilled chicken or a juicy steak. Basically? It plays well with so many things.

    💬 If you’ve tried this roasted cabbage with parmesan sauce and pangrattato or any other recipe on the blog then don’t forget to rate the recipe and let me know how you got on in the comments below, I love hearing from you! You can also FOLLOW ME on Instagram, Facebook, Pinterest, YouTube, and or sign up to my Newsletter to see more of my delicious food.

    Want to Save This Recipe?

    Enter your email & I’ll send it to your inbox. Plus, get great new recipes from me every week!

    By submitting this form, you consent to receive emails from Cooked & Loved

    Roasted cabbage with parmesan sauce and pangrattato (Italian breadcrumbs) – a flavor-packed, crunchy, creamy side dish perfect for holidays or cozy Sunday dinners. Find step-by-step photos and more recipe tips above.

    • Preheat oven to 395°F / 200°C.

    • Line a flat baking tray with parchment or lightly grease it. Arrange cabbage wedges cut-side down.

    • Brush both sides with olive oil, sprinkle with salt and pepper.

    • Roast on the middle rack for 25 minutes, then move to a higher rack for 5 more minutes to crisp up.

    • For the pangrattato, heat olive oil and butter in a skillet. Add garlic, cook 10 seconds. Stir in breadcrumbs, thyme, salt, and pepper. Cook 2–3 minutes until golden. Set aside.

    • For the sauce, melt butter in a saucepan. Add flour and stir into a roux. Add garlic, then slowly whisk in stock until smooth. Stir in cream and parmesan. Let it melt, taste and season as needed.

    • To serve, spread sauce on a serving dish, top with roasted cabbage, and sprinkle over pangrattato. Garnish with fresh thyme if you like.

    • Can I cut the cabbage in steaks instead of wedges Absolutely. Just keep them about 1 inch thick so they hold together well and cook evenly.
    • Can I make this dairy-free? Yes – use plant-based butter and cream, and a vegan parmesan or nutritional yeast.
    • Make-ahead: Roast the cabbage and prep the pangrattato in advance. Reheat cabbage in the oven and crisp pangrattato in a dry skillet.
    • Storage: Keep leftovers in the fridge for up to 3 days. Reheat in the oven to maintain crispness.
    • Add-ins: A pinch of nutmeg in the sauce or a squeeze of lemon before serving adds extra zing. Crispy bacon or pancetta would add a little extra saltiness.
    • Make it vegetarian: Use veggie stock in the sauce, and you’re good to go.

    Calories: 260kcal | Carbohydrates: 16g | Protein: 7g | Fat: 20g | Saturated Fat: 9g | Polyunsaturated Fat: 1g | Monounsaturated Fat: 8g | Trans Fat: 0.2g | Cholesterol: 43mg | Sodium: 862mg | Potassium: 315mg | Fiber: 4g | Sugar: 5g | Vitamin A: 581IU | Vitamin C: 52mg | Calcium: 195mg | Iron: 1mg

    Keywords: Roasted cabbage with parmesan sauce and pangrattato, Roasted cabbage with parmesan sauce, oven-roasted cabbage

    More Vegetable Side Dishes


    Source link

  • Buttery Roasted Carrots Recipe

    Buttery Roasted Carrots Recipe

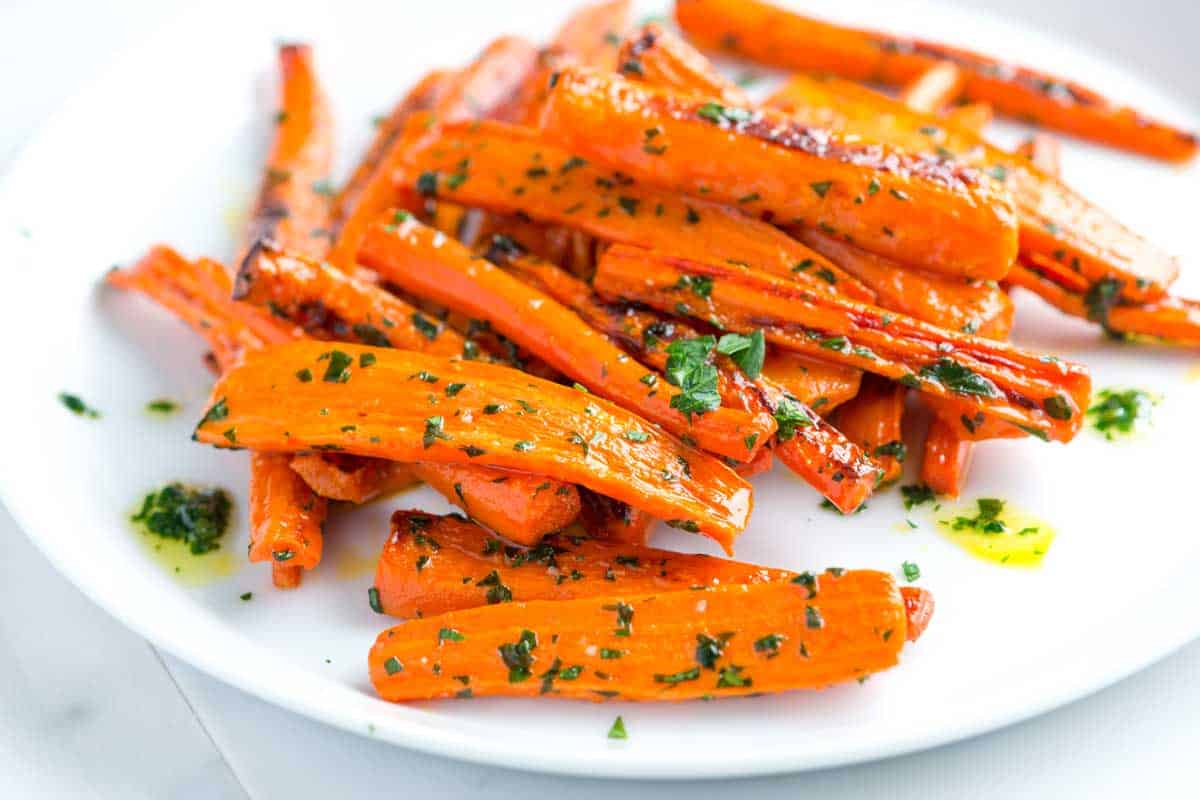
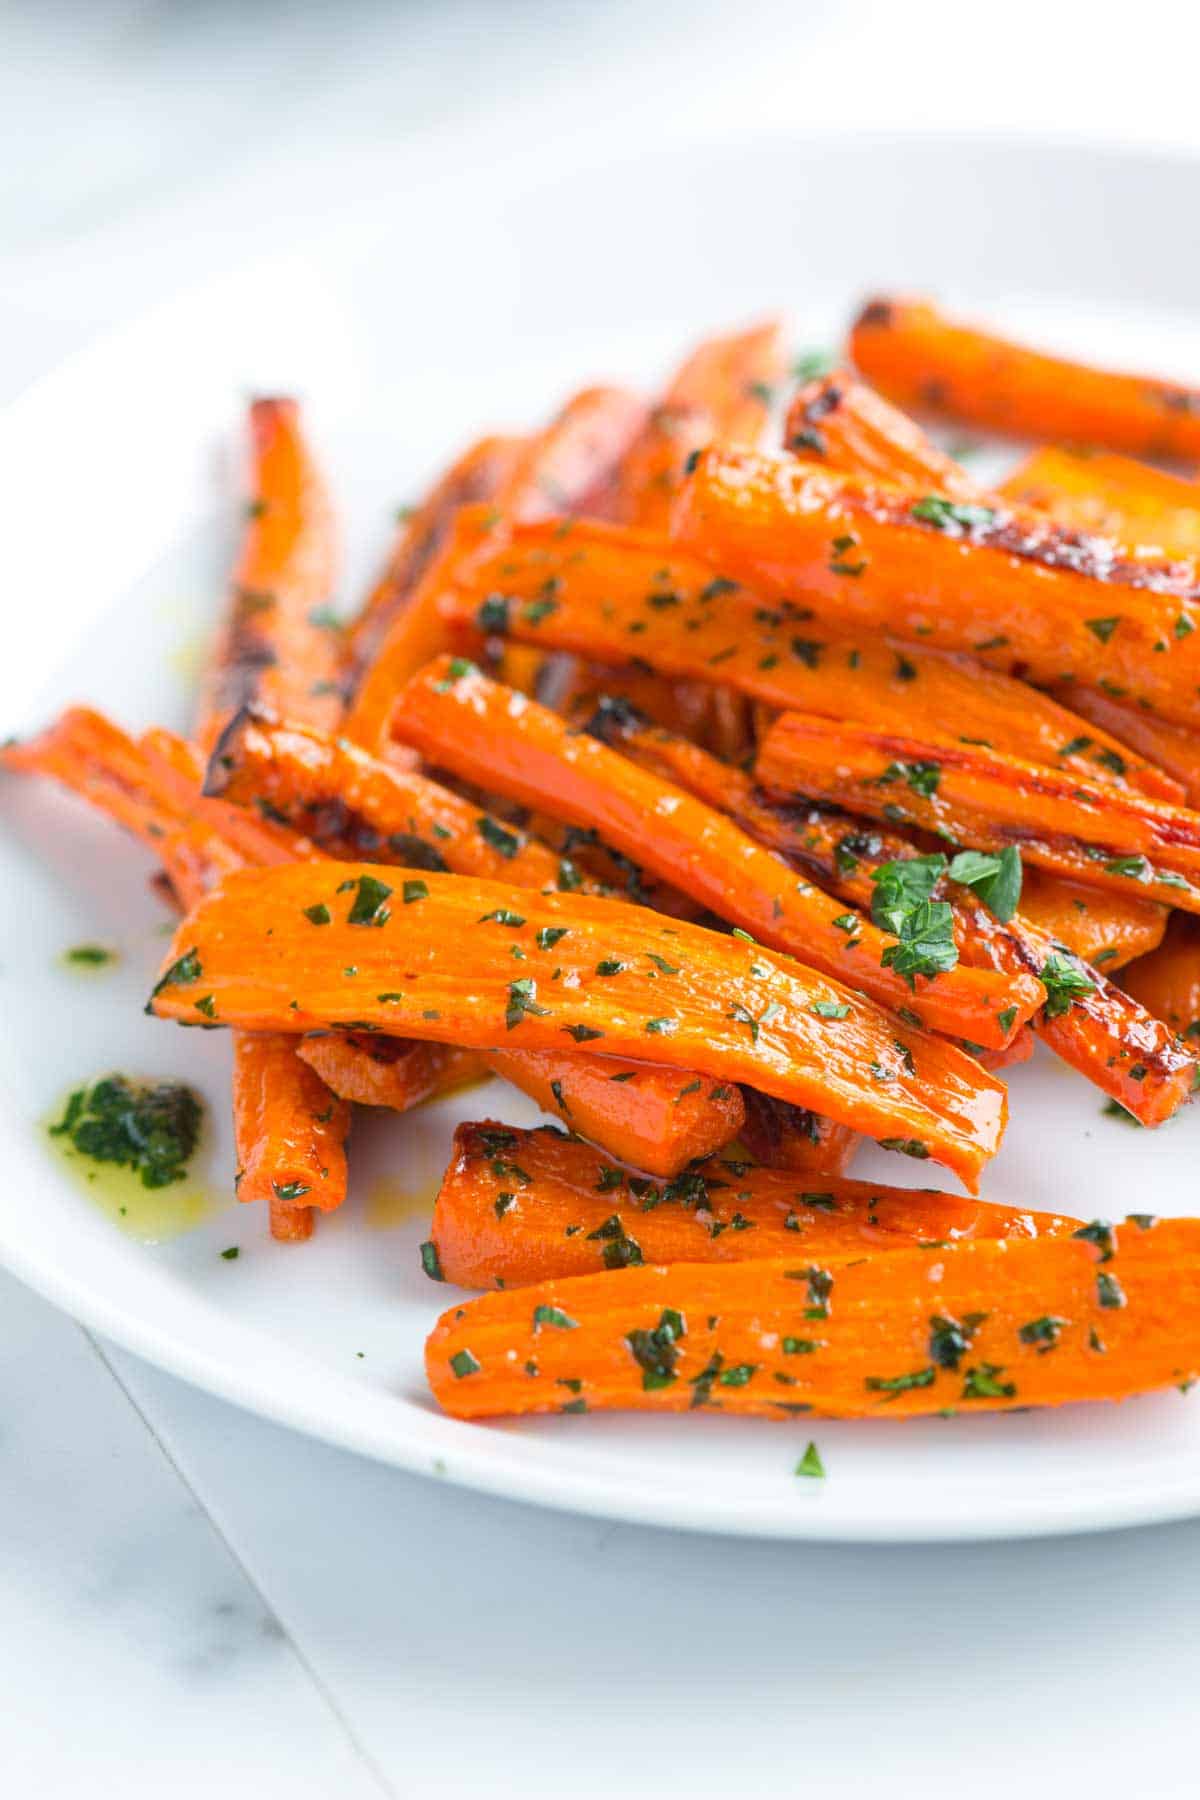
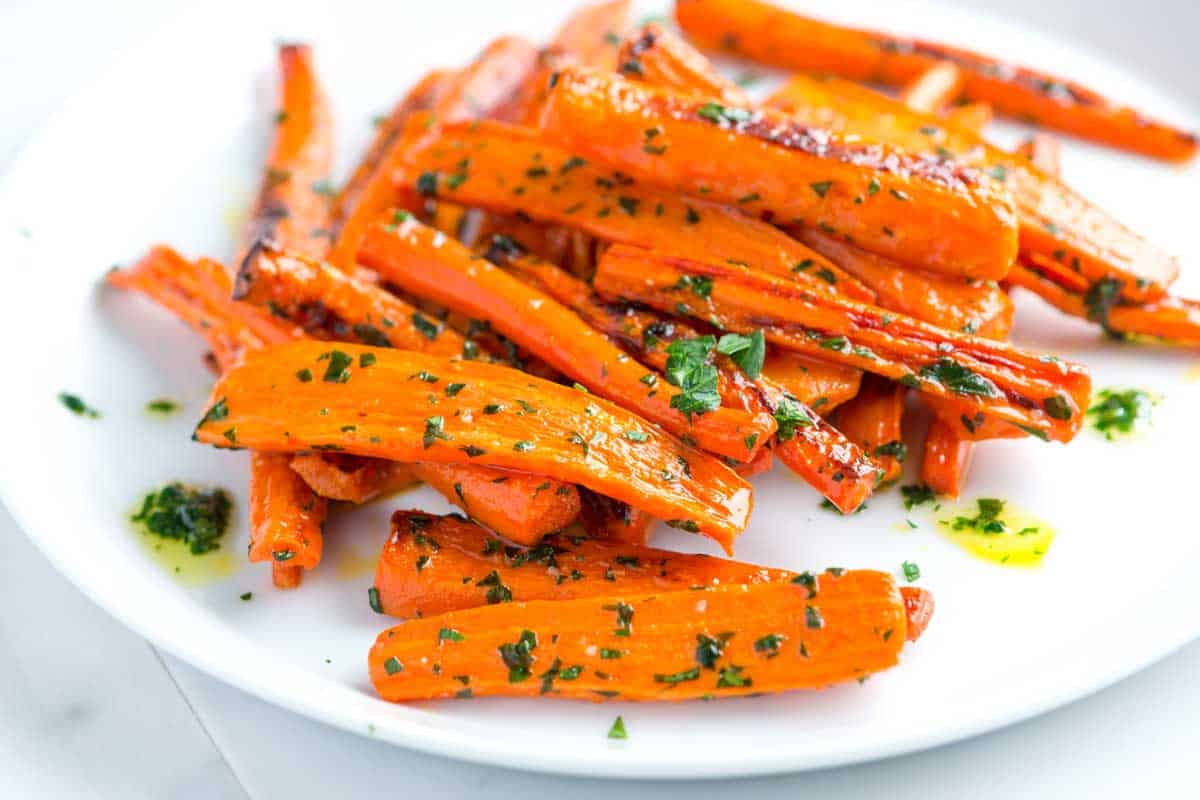
    This roasted carrots recipe has perfectly tender carrots tossed in the most delicious garlic parsley butter.

    Roasted Carrots with Garlic Parsley Butter

    Of all the carrot recipes on Inspired Taste, these garlic butter roasted carrots are my absolute favorite!

    I make them for weeknights, special occasions, and even for Thanksgiving! For more carrot recipes, see our honey roasted carrots, and my favorite carrot ginger dressing!

    Key Ingredients

    • Carrots: You can use any kind of carrot for this recipe. I typically buy medium to large ones and give them a good scrub before cutting. Feel free to peel them if you prefer. Baby carrots work, but you might need to adjust the roasting time.
    • Butter: I roast the carrots with olive oil and salt, then toss them with homemade garlic parsley butter once they’re tender and caramelized. You can use salted or unsalted butter or even a plant-based alternative.
    • Garlic and Parsley: You’ll need one small garlic clove and a generous handful of parsley for this recipe. Feel free to experiment with other herbs, such as cilantro, mint, rosemary, or sage. Just remember to use a bit less of the stronger herbs, such as rosemary and sage.

    Find the full recipe with measurements below.

    How to Make Buttery Roasted Carrots

    Tip 1: Roasting carrots. The trick to perfectly roasted carrots is to give them enough room on the baking sheet. You want the sugars to caramelize and brown, not steam. Giving them some room helps a lot. The butter in this recipe comes later, so I roast roast these with olive oil, salt, and pepper. They only take 25-30 minutes.

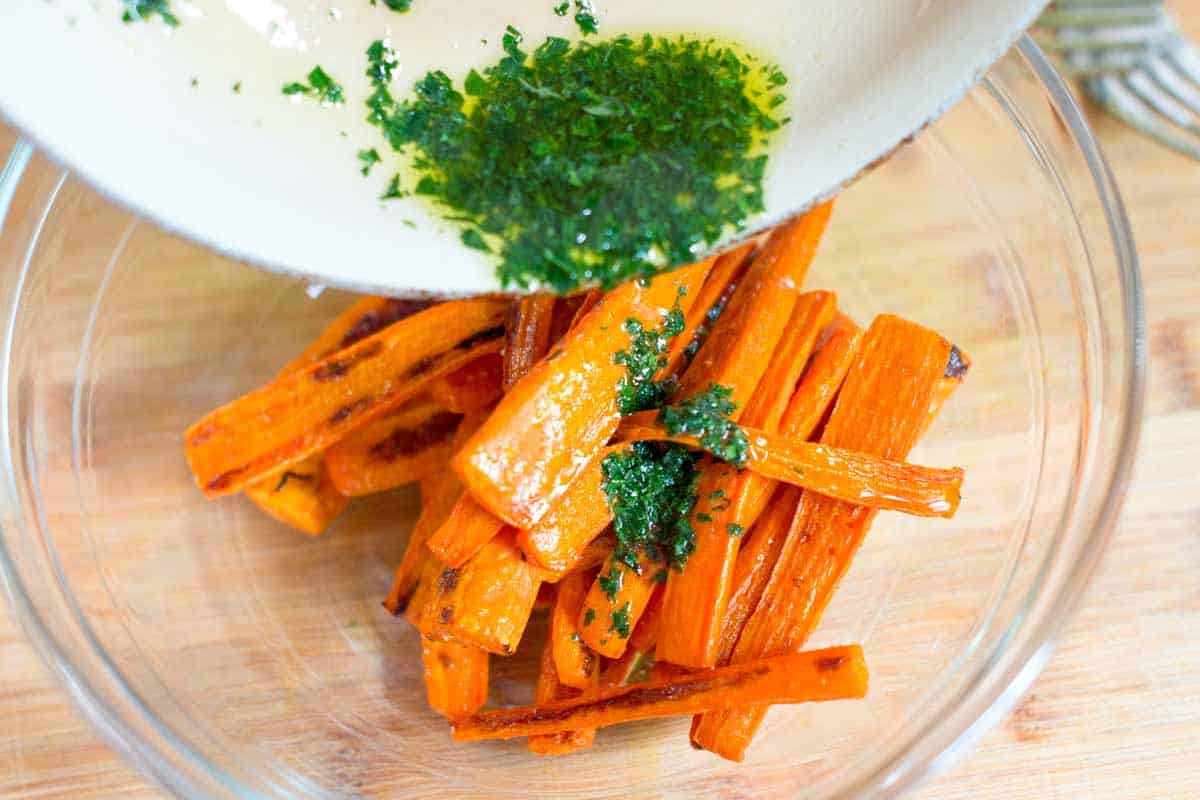
    Tip 2: Make our parsley butter. You can make the flavored butter while the carrots are roasting. Melt butter in a small pan over low heat, then add a smashed garlic clove and some chopped fresh parsley. The butter will gently bubble around the garlic and parsley, infusing itself with their amazing flavors. Once the carrots are done, I remove the garlic clove and pour the garlicky butter over them.

    By the way, this garlic parsley butter isn’t just for carrots! It’s amazing poured over other roasted vegetables, like roasted potatoes, or even drizzled over baked salmon.

    Tossing cooked carrots with garlic butter

    Serving Suggestions

    We love to serve them next to pan roasted chicken, my mother’s baked salmon with lemon and dill, and our roasted pork tenderloin with apples. They are also perfect for topping grain or rice bowls. I love these tahini lemon quinoa bowls.

    Garlic Butter Roasted Carrots

    Buttery Roasted Carrots

    • PREP
    • COOK
    • TOTAL

    You’ll love this easy roasted carrots recipe with our garlic herb butter. I use parsley in our photos, but other herbs work well. Substitute the parsley for cilantro, dill, or mint. Or, use a little less and try sage or rosemary.

    Makes 4 servings

    You Will Need

    1 ½ pounds carrots, peeled with ends trimmed (8 to 9 carrots)

    1 tablespoon extra-virgin olive oil

    1/4 teaspoon kosher salt

    1 tablespoon butter

    1 garlic clove

    1/3 cup loosely packed fresh parsley leaves, chopped

    Directions

      1Heat your oven to 425°F (218°C) and line a baking sheet with aluminum foil or parchment paper for easy cleanup.

      2Chop your carrots into sticks 2 to 3 inches long. If the thicker ends are wide, cut them in half lengthwise for even cooking.

      3Toss the carrot sticks with olive oil and salt and spread them on the prepared baking sheet in a single layer.

      4Roast for 25 to 30 minutes, stirring twice, until tender and lightly browned on the edges.

      5While the carrots roast, melt butter in a small pan over low heat. Gently crush a garlic clove with the back of a knife, remove the skin, and add it to the melted butter and the parsley.

      6Let the butter bubble gently for about 1 minute. Then, slide the pan off the heat and let it sit for 10 to 15 minutes to infuse the flavors. Discard the garlic clove.

      7Transfer the roasted carrots into a bowl with the garlic parsley butter. Toss, then season to taste with additional salt as needed.

    Adam and Joanne’s Tips

    • To make this vegan, swap the butter for vegan butter, coconut oil or olive oil.

    Nutrition Per Serving
    Calories
    118
    /
    Protein
    1 g
    /
    Carbohydrate
    15 g
    /
    Dietary Fiber
    4 g
    /
    Total Sugars
    7 g
    /
    Total Fat
    7 g
    /
    Saturated Fat
    2 g
    /
    Cholesterol
    8 mg


    AUTHOR:

    Adam Gallagher

    Adam and Joanne of Inspired Taste

    We are Adam and Joanne Gallagher, the creators of Inspired Taste. Established in 2009, Inspired Taste grew from a childhood dream into one of the internet’s most trusted recipe sites with hundreds of reliable recipes, step-by-step videos, and expert tips.More About Us

    Source link

  • Roasted Tomato Soup with Lemon and Thyme

    Roasted Tomato Soup with Lemon and Thyme

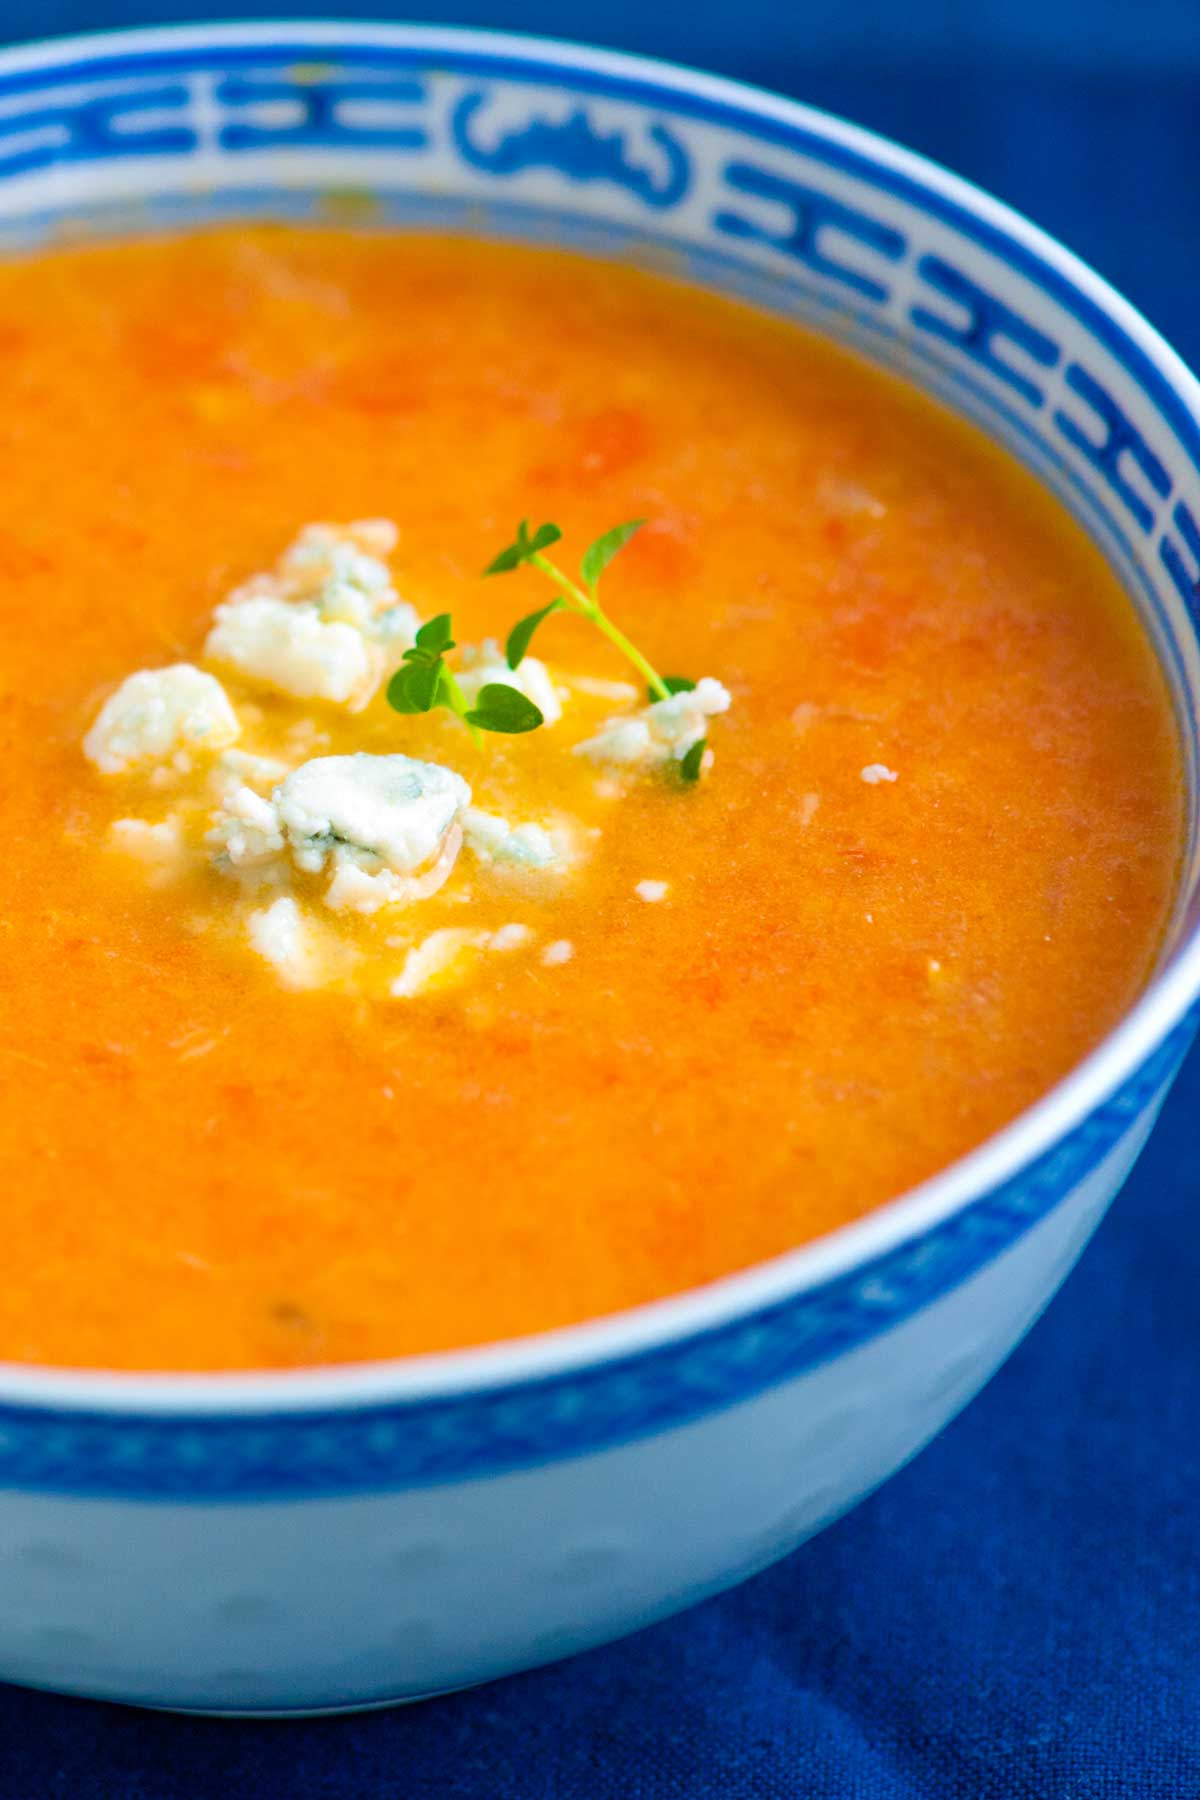
    How to make roasted tomato soup with fresh lemon, garlic and thyme. Jump to the Roasted Tomato Soup with Lemon and Thyme or read on to see our tips for making it.

    Roasted Tomato Soup with Lemon and Thyme

    After sharing this Cardamom Roasted Tomato Pasta we wanted to try another recipe combining roasted tomatoes and citrus. Instead of cardamom and lemon (like in the pasta), we went with lemon and fresh thyme for this easy roasted tomato soup. We thought about calling this “adult soup” since it is a bit different from a more traditional creamy tomato soup. This soup is much lighter and tastes fresh thanks to the lemon.

    How to Make Roasted Tomato Soup with Lemon

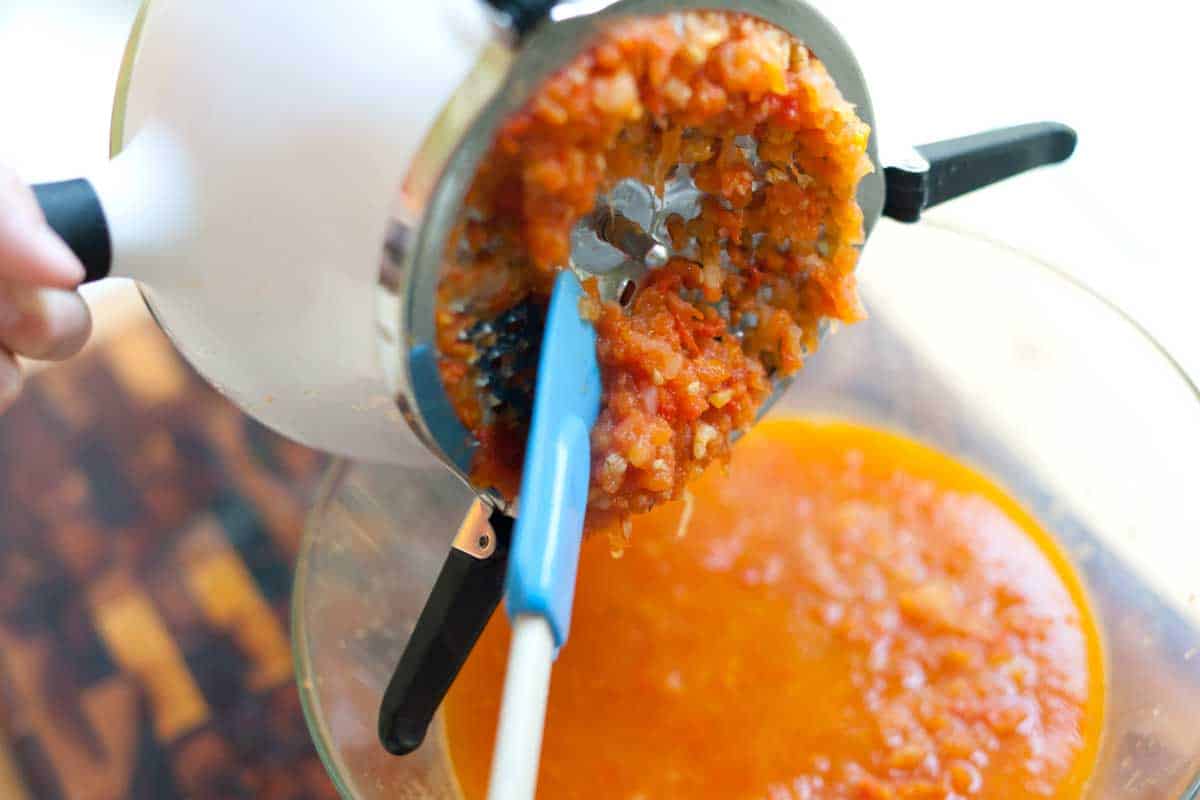
    To make the soup, we used our new favorite kitchen gadget, the OXO Food Mill on the coarsest setting. You can use a blender, but we prefer the texture you get from using the food mill.

    How to Make Roasted Tomato Soup with Lemon and Thyme

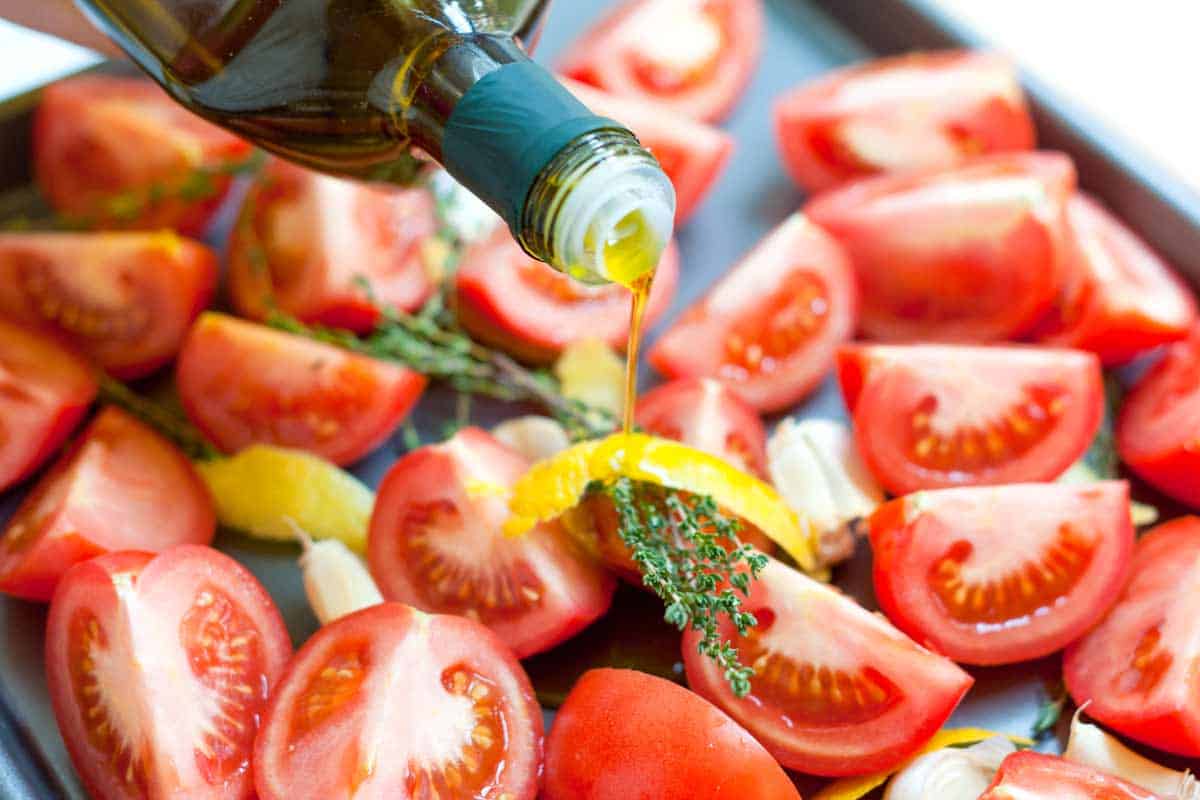
    To make the soup, we start roast lots of tomatoes with thyme, garlic and a few strips of lemon zest. Since we’re using the food mill, you don’t need to remove the skin from the garlic cloves. It will catch the skin when we blend the soup. If you are using a blender, you might want to remove the skins now.

    Roasting the tomatoes

    Add olive oil, salt and pepper then roast until the tomatoes begin to caramelize around the edges. While they roast, cook some onions in a large pot then add the roasted tomatoes and garlic. Here’s another roasted tomato soup recipe, made with onion, garlic, and basil.

    Pour in some chicken stock and a large can of tomatoes. Simmer then pass the soup through a food mill. By the way, if you do use a food mill, don’t forget to scrape underneath the mill when you are done. You don’t want to miss all that good stuff.

    Using a food mill to make soup

    Add the soup back to the pot and pour in some half and half for a little creaminess — coconut or almond milk would work as well.

    Recipe updated, originally posted December 2011. Since posting this in 2011, we have tweaked the recipe to be more clear. – Adam and Joanne

    Roasted Tomato Soup with Lemon and Thyme

    • PREP
    • COOK
    • TOTAL

    This tomato soup with lemon and thyme taste fresh and bright. When zesting the lemon, use a vegetable peeler for 1/4-inch wide strips of zest. If you have one on hand, a food mill, using the coarsest blade, creates nice thick texture. You can also use an immersion blender or blender as a substitute.

    Makes approximately 6 servings

    You Will Need

    3 pounds ripe tomatoes, quartered

    4 sprigs fresh thyme or 2 teaspoons dried

    4 whole garlic cloves, skins removed

    4 strips lemon zest, each 1/4-inch wide and 2 inches long

    4 tablespoons extra-virgin olive oil

    2 medium onions, chopped

    1 (28-ounce) can whole tomatoes with juice

    4 cups low sodium chicken stock or vegetable stock, see our easy chicken stock recipe

    1/4 cup half and half or non-dairy milk such as almond and coconut

    Salt and fresh ground pepper

    1/4 cup feta or blue cheese crumbles for serving, optional

    Directions

    • Roast Tomatoes
    • 1Heat the oven to 400 degrees F.

      2On a baking sheet, toss tomatoes, garlic, thyme sprigs, lemon zest, 2 tablespoons of olive oil and about 2 teaspoons of salt together. Spread into one layer and roast until the edges of the tomatoes begin to caramelize, about 45 minutes.

      3Meanwhile, cook onions with 2 tablespoons of olive oil in a large pot until softened and starting to brown, about 10 minutes.

    • To Finish
    • 1Add the oven-roasted tomatoes and garlic, including the liquid on the baking sheet, canned tomatoes and chicken stock to the onions. Bring to a simmer and simmer, uncovered, for 30 minutes.

      2Pass the soup through a food mill fitted with the coarsest blade or blend using an immersion blender or blender. Add back to the pot then stir in half and half (or non-dairy milk). Taste the adjust with salt and/or pepper. Serve with cheese crumbles on top — optional.

    Adam and Joanne’s Tips

    If you make this recipe, snap a photo and hashtag it #inspiredtaste — We love to see your creations on Instagram and Facebook! Find us: @inspiredtaste


    AUTHOR:

    Joanne Gallagher

    Adam and Joanne of Inspired Taste

    We are Adam and Joanne Gallagher, the creators of Inspired Taste. Established in 2009, Inspired Taste grew from a childhood dream into one of the internet’s most trusted recipe sites with hundreds of reliable recipes, step-by-step videos, and expert tips.More About Us


    Source link

  • Easy Roasted Cauliflower Soup Recipe

    Easy Roasted Cauliflower Soup Recipe

    This roasted cauliflower soup recipe is close to my heart. It’s rich and creamy, super easy to make, and tastes amazing!

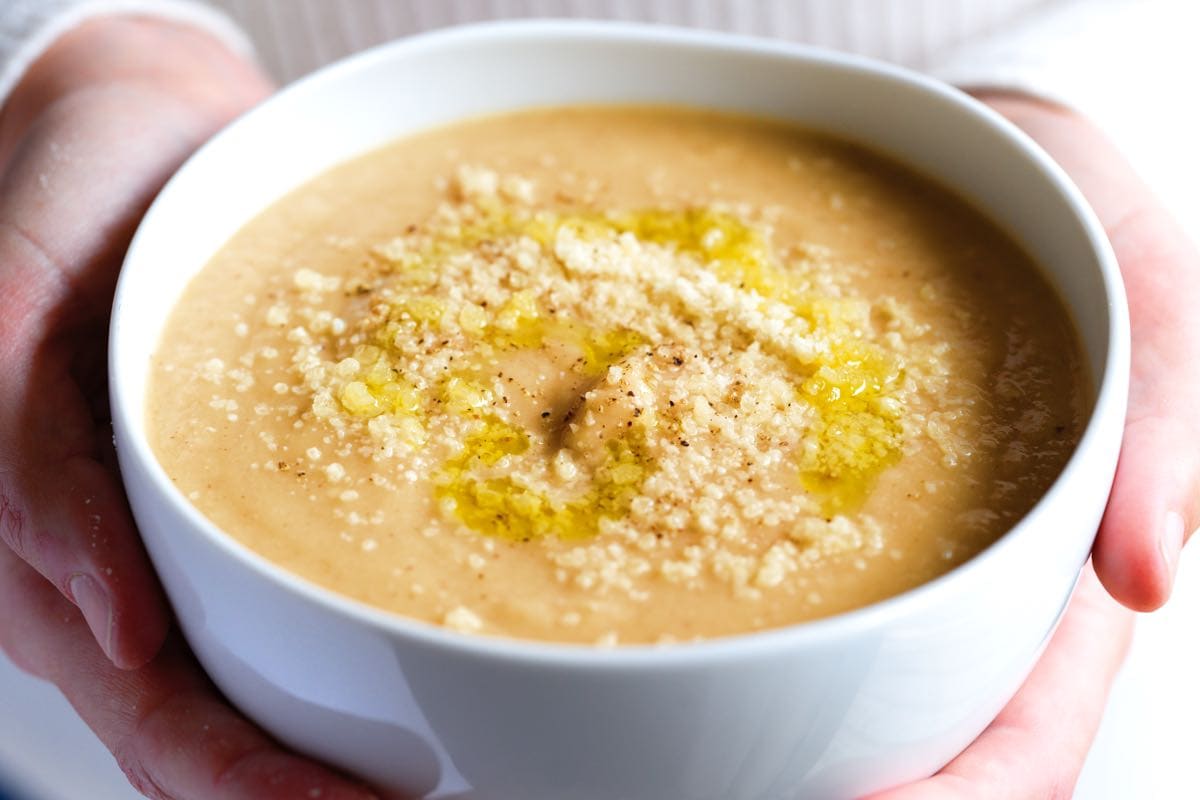
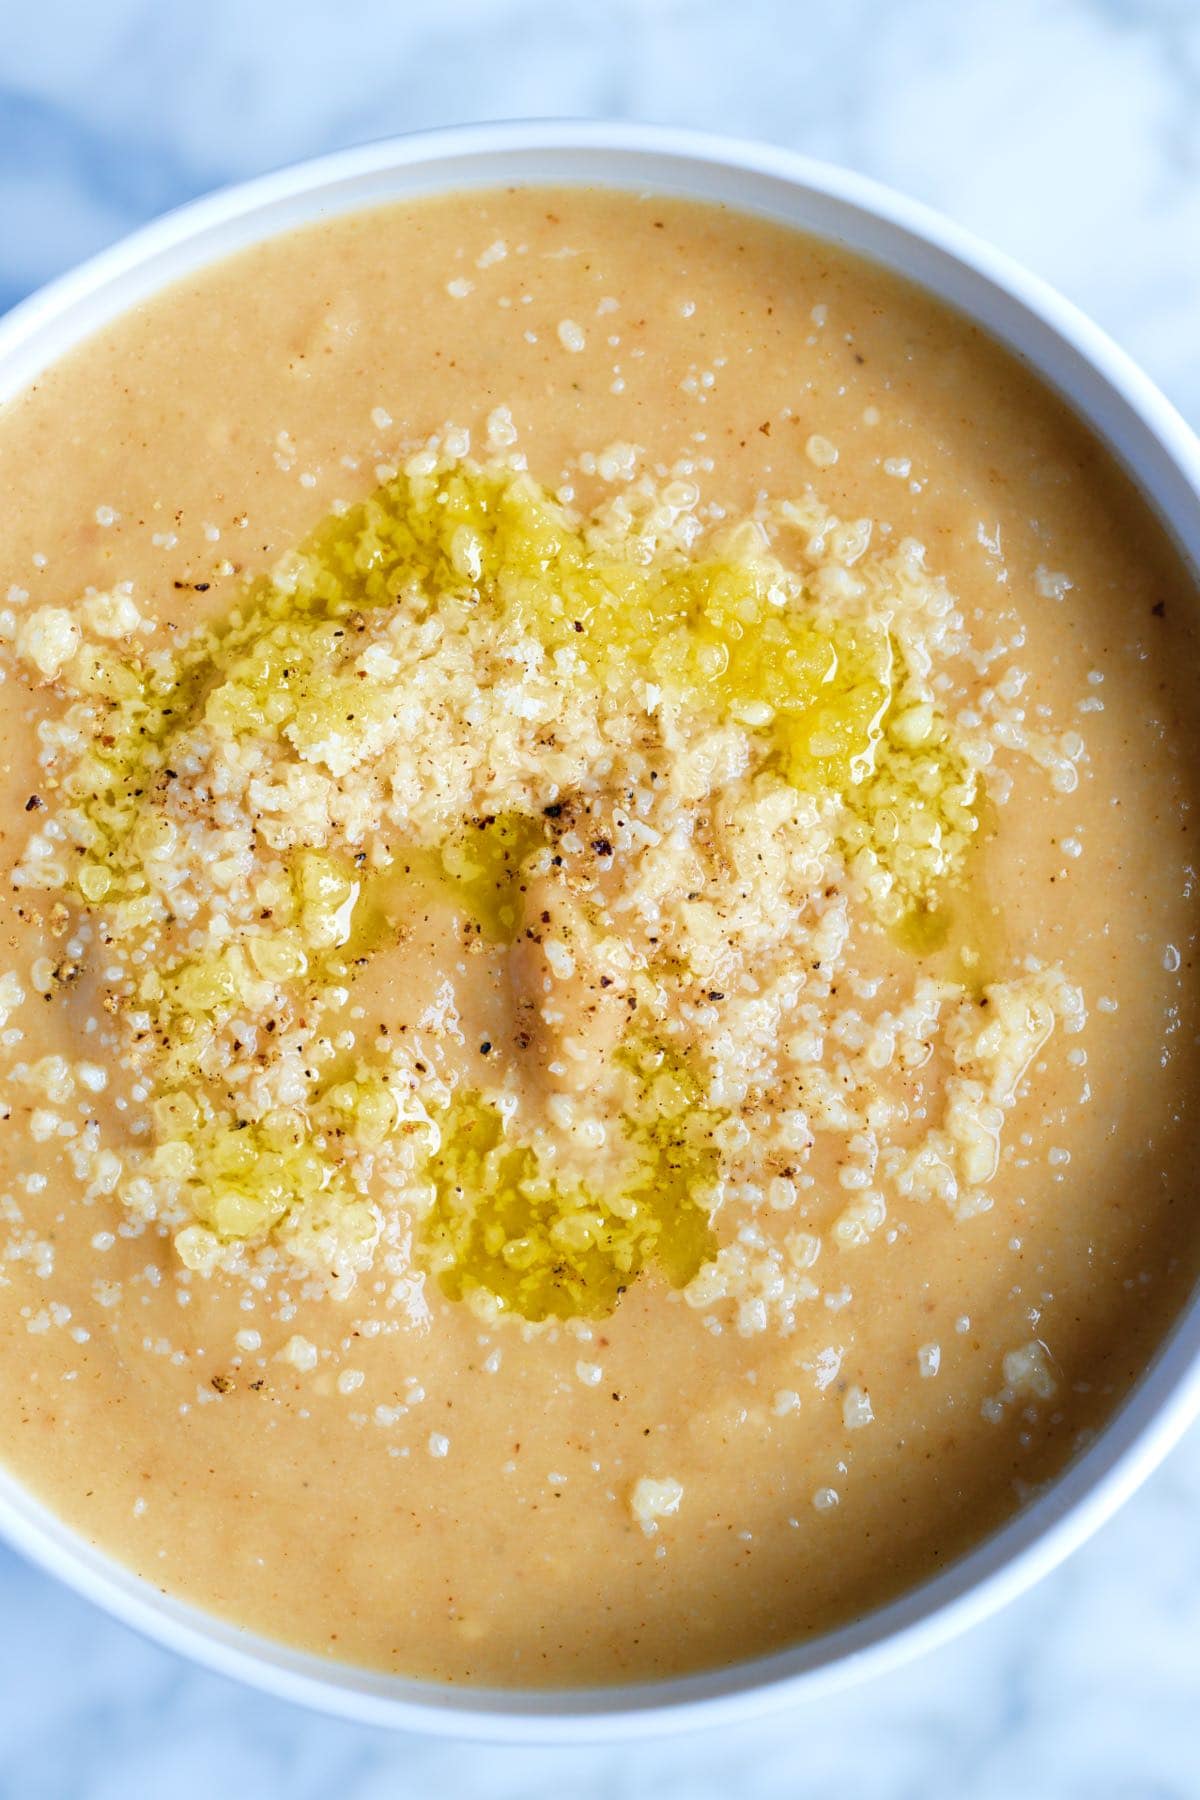
    Roasted Cauliflower Soup with parmesan on top

    For this easy cauliflower soup, we roast a whole head of cauliflower until golden brown and blend with onion, parmesan cheese, and broth until silky smooth.

    We have so many cauliflower recipes on Inspired Taste, and honestly, I love them all, but this soup is the one I go to when I need a little comfort. A big bowl of this soup makes the day melt away.

    Key Ingredients

    • Cauliflower: I use one large head of cauliflower for this soup, which means you’ll get 4 generous servings.
    • Garlic and Thyme: Since I roast the cauliflower for this soup, I take the opportunity to toss a few garlic cloves and fresh thyme onto the baking sheet. They add so much flavor!
    • Onion and Celery: Once the cauliflower has finished roasting in the oven, we cook onion and celery with a pinch of red pepper flakes and salt, adding more nutritious vegetables to the soup and flavor.
    • Broth: I love using a light broth so that the cauliflower shines. I especially love this easy chicken broth and this delicious veggie broth.
    • Butter: I don’t add cream to this cauliflower soup, but I do add butter. Use a good-quality European-style butter or your favorite plant-based butter.
    • Lemon Juice: A squeeze of fresh lemon juice brings this soup together. We highly recommend it.
    • Cheese: I love adding parmesan cheese, but you can substitute it for another kind of cheese or leave it out altogether.

    Find the full recipe with measurements below.

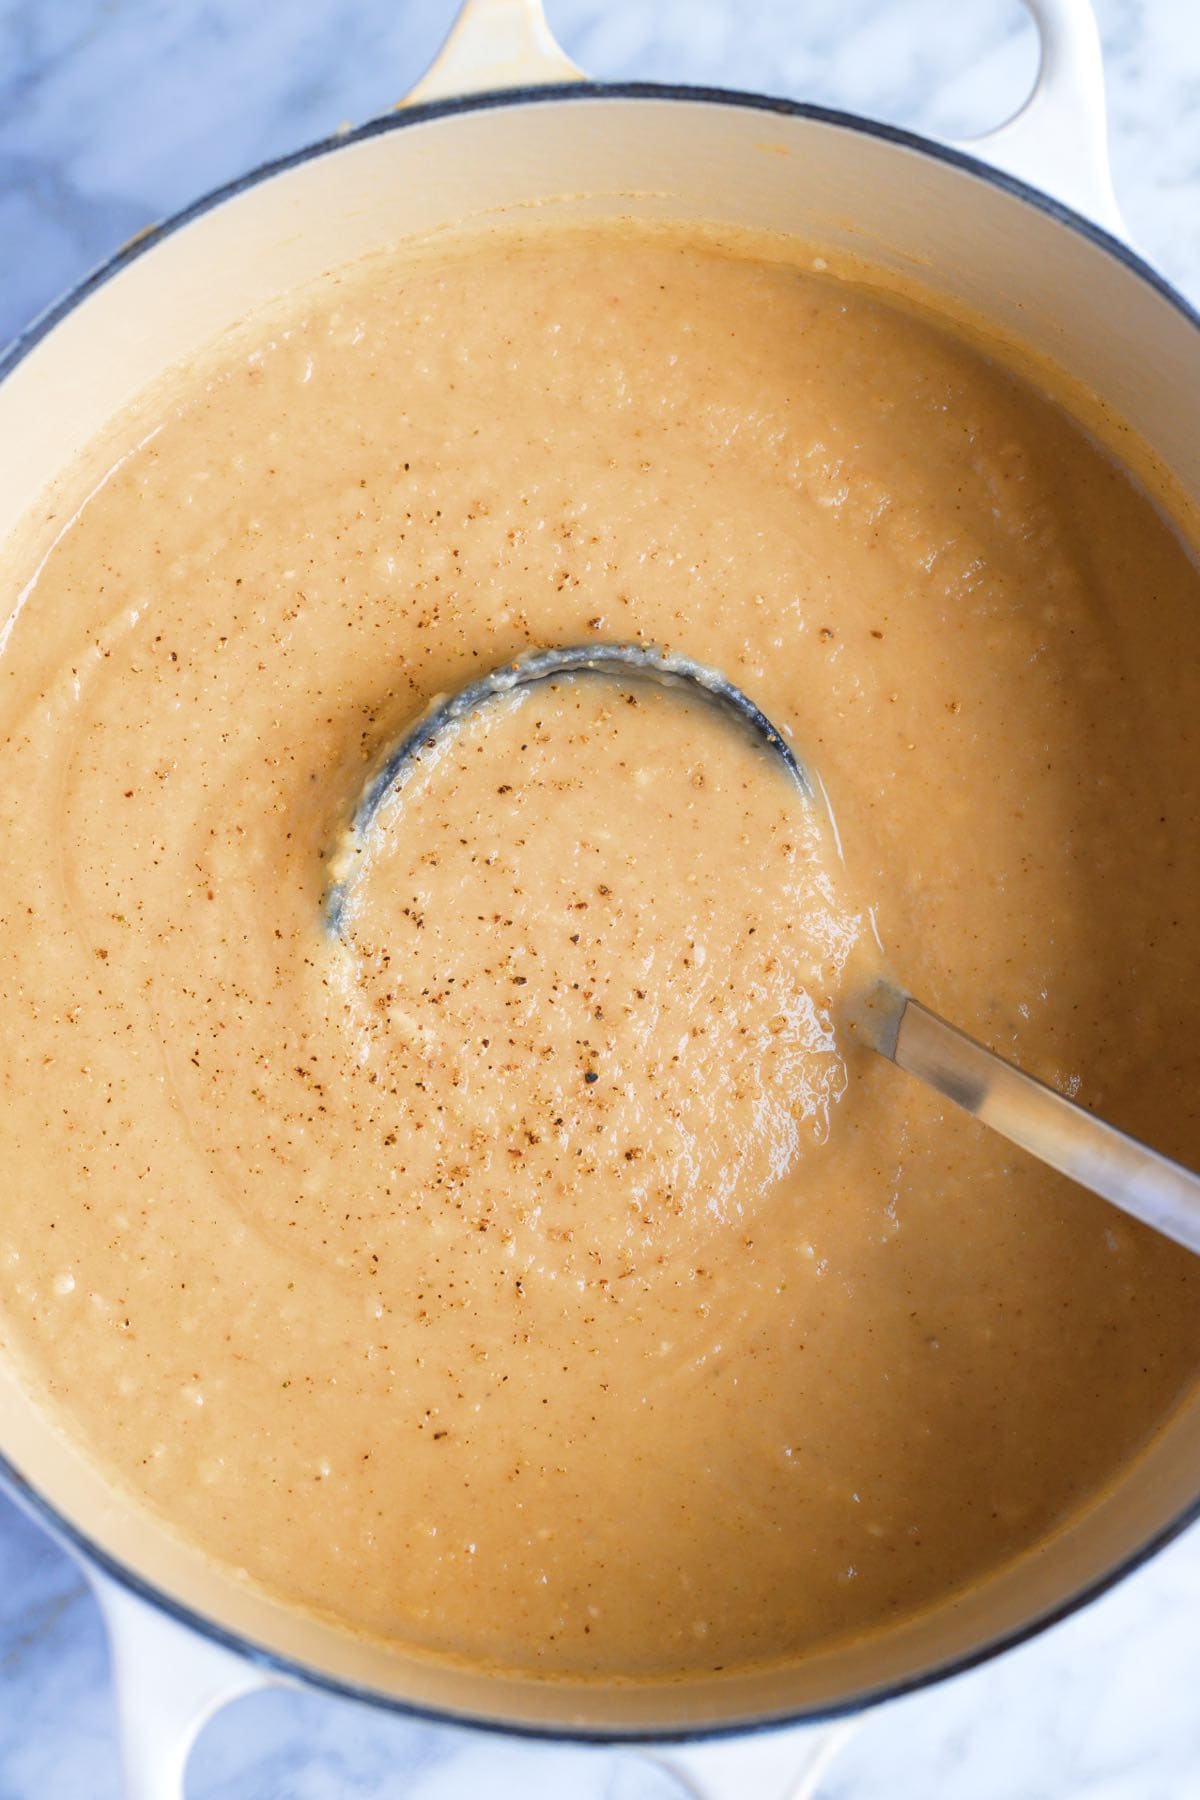
    A Pot of Creamy Cauliflower Soup

    How to Make the Best Roasted Cauliflower Soup

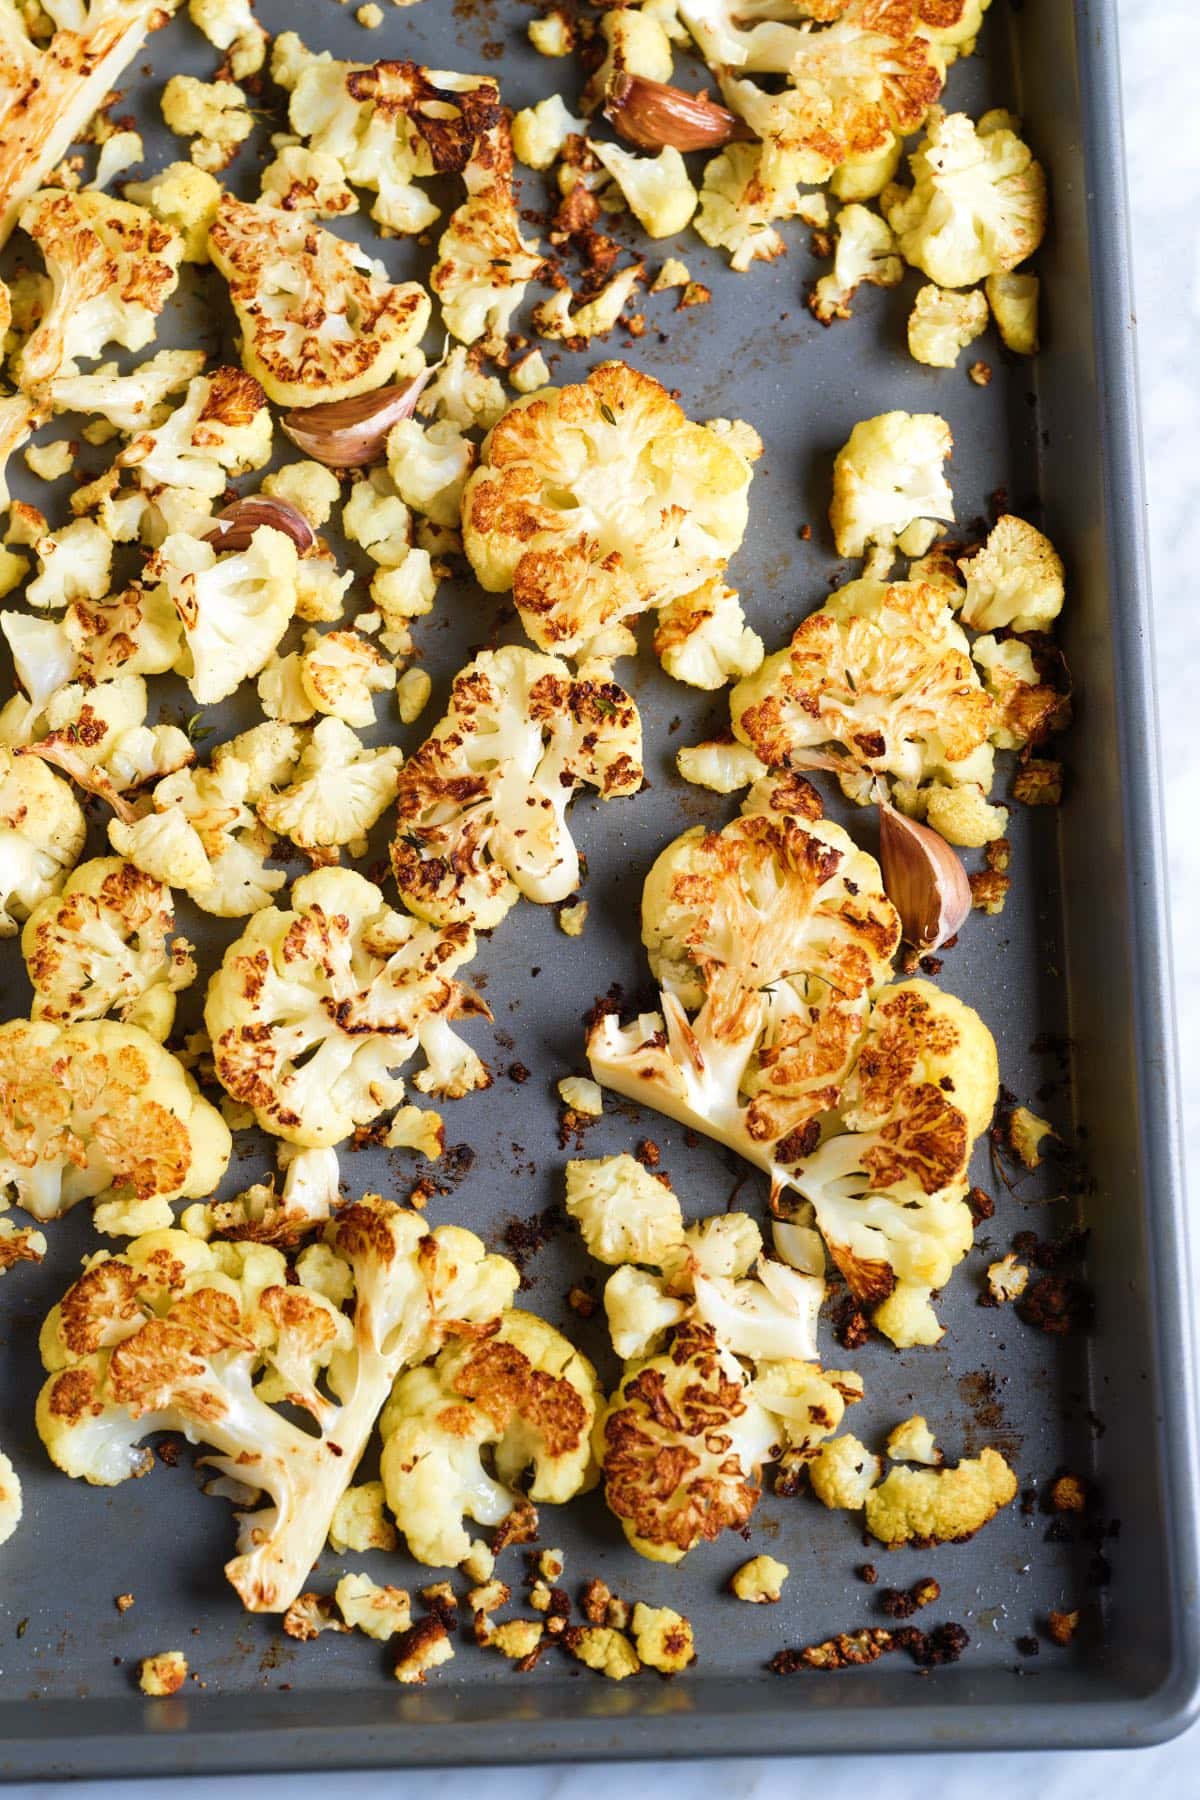
    Tip 1: Roast garlic and cauliflower. This cauliflower soup starts with roasting a whole head of cauliflower. I don’t pay too much attention to how well I chop the cauliflower. Slicing it into cauliflower steaks or slabs is the quickest way. Then we toss them with olive oil, salt, thyme, and whole garlic cloves (you can leave the peel on for now). As the garlic roasts in the oven, it softens and becomes sweet (like in our whole roasted garlic recipe)

    The cauliflower and garlic roast in a hot oven for 20 to 25 minutes, so it’s pretty quick. When it is nearly finished roasting, you can prepare the remaining ingredients.

    Roasted Cauliflower Ready for Cauliflower Soup

    Tip 2: Build flavors. Just as the cauliflower and garlic is finishing in the oven, in a soup pot, cook roughly chopped onion and celery in butter (or olive oil) until soft. The roasted garlic will have softened a lot, so you can easily squeeze the soft garlic cloves to the pot. Then, pour in broth and add the roasted cauliflower. I have two favorite homemade broths for this: veggie broth or chicken broth.

    Tip 3: Blend until creamy. Let the soup simmer for 10 minutes, then blend it into a smooth, decadent soup. I love adding some fresh lemon juice and parmesan cheese, but you can adjust the seasoning with fresh herbs, another kind of cheese, or leave it plain. You can see from the photos that the cauliflower soup is super creamy without having to add any cream!

    More Vegetable Soup Recipes

    More Cauliflower Recipes

    Roasted Cauliflower Soup

    Easy Roasted Cauliflower Soup

    • PREP
    • COOK
    • TOTAL

    For this easy cauliflower soup recipe, we roast a whole head of cauliflower until golden brown and then blend it with onion, parmesan cheese, and broth until silky smooth. This healthy soup is creamy, decadent, and delicious! For more crunch, try serving this soup topped with our homemade garlic croutons.

    4 Servings (makes 6 to 7 cups)

    Watch Us Make the Recipe

    You Will Need

    1 large head cauliflower, about 2 pounds

    4 tablespoons olive oil

    1 teaspoon fresh thyme leaves or 1/4 teaspoon dried thyme

    4 garlic cloves, left unpeeled

    1/2 large onion, chopped, about 1 ¼ cups

    1 celery stalk, chopped, about 1/2 cup

    Pinch crushed red pepper flakes, optional for heat

    4 cups (946ml) vegetable broth or chicken broth

    2 tablespoons butter

    1 tablespoon fresh lemon juice, or more if needed

    1/4 cup grated parmesan cheese, plus more for serving, optional (1/2 ounce)

    Directions

      1Preheat the oven to 425°F (220°C) and prepare a baking sheet. We roast the cauliflower directly on the baking sheet, but for easy cleanup, line it with parchment paper or a silicone baking mat.

      2Remove the larger leaves from the cauliflower and leave the core intact. (You can save the leaves to blend into the soup later.)

      3Slice the cauliflower in half and cut it into 3/4-inch thick slices.
      Drizzle two tablespoons of olive oil onto the baking sheet, then arrange the cauliflower on top of the oil.

      4Add the unpeeled garlic cloves (they will roast in their peels) and the thyme, then drizzle over two more tablespoons of olive oil. Move the cauliflower slices around so they each have a chance to touch some oil.

      5Roast for 20 minutes or until the bottom of each slice looks well browned. Flip each piece, and then roast for 5 minutes more.

      6Melt two tablespoons of butter in a deep soup pot over medium heat. Then, stir in the onions, celery, pinch of red pepper flakes, and 1/4 teaspoon salt. Cook until softened, about 5 minutes.

      7When they are cool enough to handle, squeeze the garlic from inside each clove and place it in the soup pot. Discard the garlic peel.

      8Transfer the roasted cauliflower to the pot and pour in the broth. If you saved any cauliflower leaves from earlier, add them to the pot. Bring to a simmer and cook for 10 minutes.

      9Turn off the heat, and add the cheese and two tablespoons of lemon juice.

      10Blend the soup until smooth. An immersion blender is the easiest, or you can use a blender. If you use a regular blender, it is best to blend in batches and fill the blender less than you usually would since the soup is so hot. We like to remove the lid’s center insert and cover it with a kitchen towel while blending. This helps to release some of the steam and prevents the blender lid from popping off (which can be a big, hot mess).

      11Taste the soup and add more lemon juice, salt, and pepper until the flavor pops (it should make you smile). Serve with more cheese, a few grinds of black pepper, and a drizzle of olive oil on top.

    Adam and Joanne’s Tips

    • Storing: This cauliflower soup lasts in your refrigerator for up to 5 days. It can also be frozen for up to one month, probably longer.
    • Soup is too thick: Add 1/4 cup to 1 cup of water. Add enough water to achieve your preferred thickness. The water will not water down the flavor of your soup, but if you are concerned or have more on hand, you can use stock or broth.
    • Vegetarian adaptations: Use vegetable broth, a vegetarian-friendly cheese or leave it out altogether.
    • Vegan adaptations: Use vegan broth, vegan butter and vegan cheese or a couple tablespoons of nutritional yeast instead (my preference).
    • The nutrition facts provided below are estimates.

    Nutrition Per Serving
    Serving Size
    1/4 of the recipe (1 of 4 servings)
    /
    Calories
    288
    /
    Total Fat
    23.2g
    /
    Saturated Fat
    7.5g
    /
    Cholesterol
    23.4mg
    /
    Sodium
    686.7mg
    /
    Carbohydrate
    18.1g
    /
    Dietary Fiber
    5.2g
    /
    Total Sugars
    7.5g
    /
    Protein
    6.8g


    AUTHOR:

    Joanne Gallagher

    Adam and Joanne of Inspired Taste

    We are Adam and Joanne Gallagher, the creators of Inspired Taste. Established in 2009, Inspired Taste grew from a childhood dream into one of the internet’s most trusted recipe sites with hundreds of reliable recipes, step-by-step videos, and expert tips.More About Us
    Source link

  • Roasted Veggie Grain Bowl with Balsamic Dressing Recipe

    Roasted Veggie Grain Bowl with Balsamic Dressing Recipe

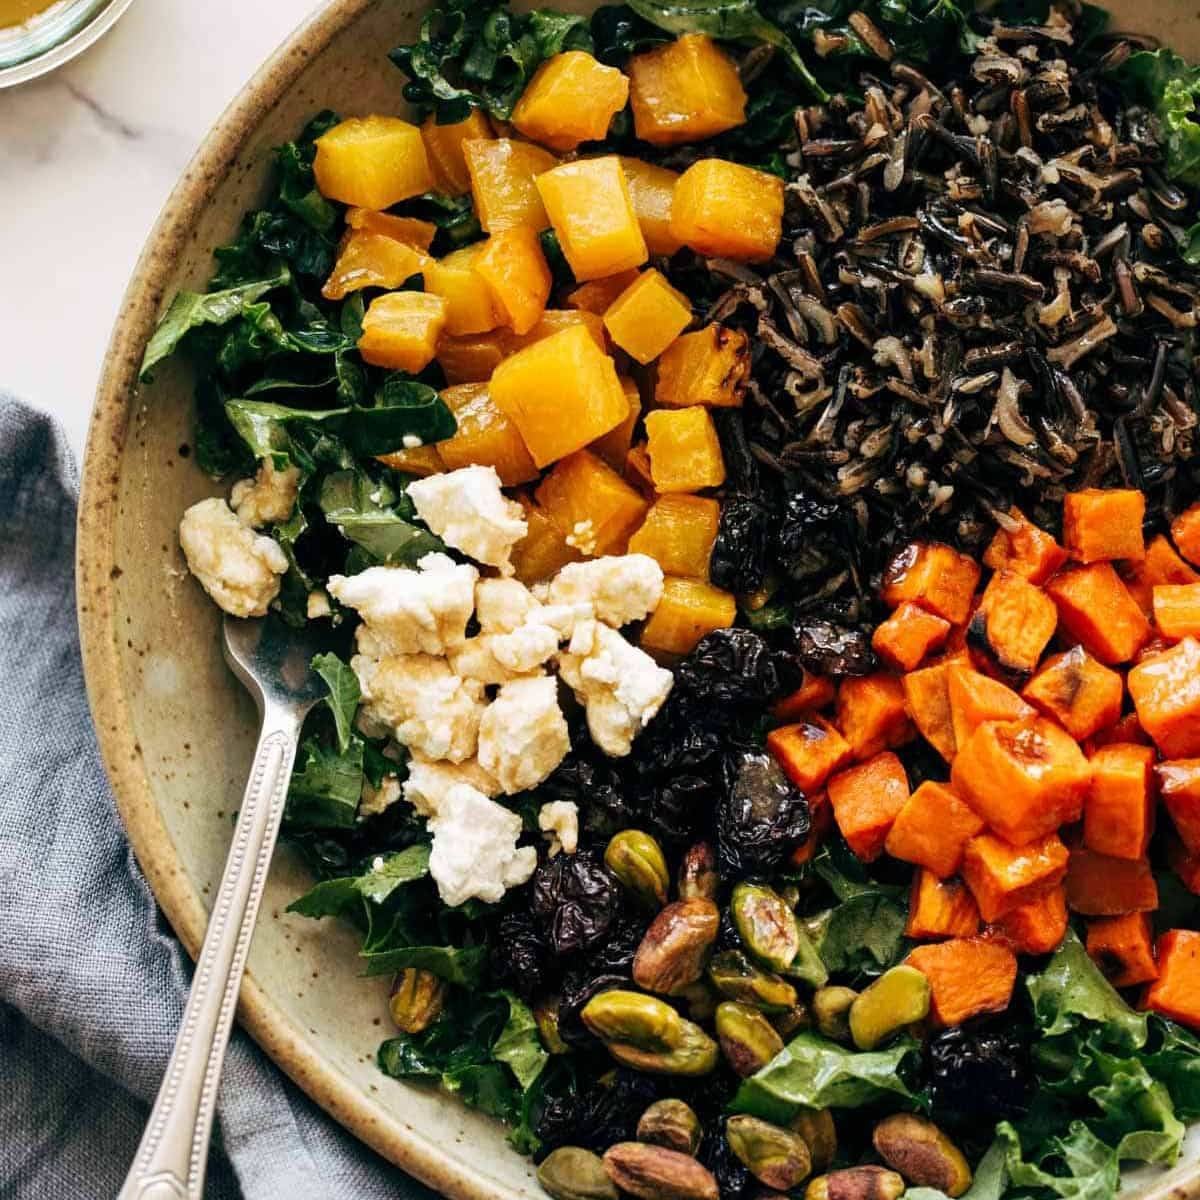
    The BEST Grain Bowl! Roasted root vegetables, earthy grains, dried fruit, dark leafy greens, buttery goat cheese, and lusciously creamy balsamic dressing.

    Watch How To Make These Grain Bowls

    I Love a Good Grain Bowl.

    Lindsay Ostrom headshot.

    What’s colorful and nutritious and playful and makes your tastebuds feel very alive? This bowl.

    Roasted root vegetables, earthy grains, and dried fruit. Dark leafy greens, buttery goat cheese, and lusciously creamy balsamic dressing.

    This grain bowl is:

    • really delicious
    • colorful
    • packed with nutrition
    • calorie-dense (in a good way)
    • super satisfying
    • adaptable (pick and choose your favorite roasted vegetables)
    • really good with or without protein
    • playful

    A) Yes, it’s a slice of healthy eating heaven, and B) this is the salad / bowl situation you want gracing the shelves of your fridge this winter.

    Like, for days. Because you can meal-prep it! THANK YOU GRAIN BOWLS for knowing what we need.

    Lindsay signature.
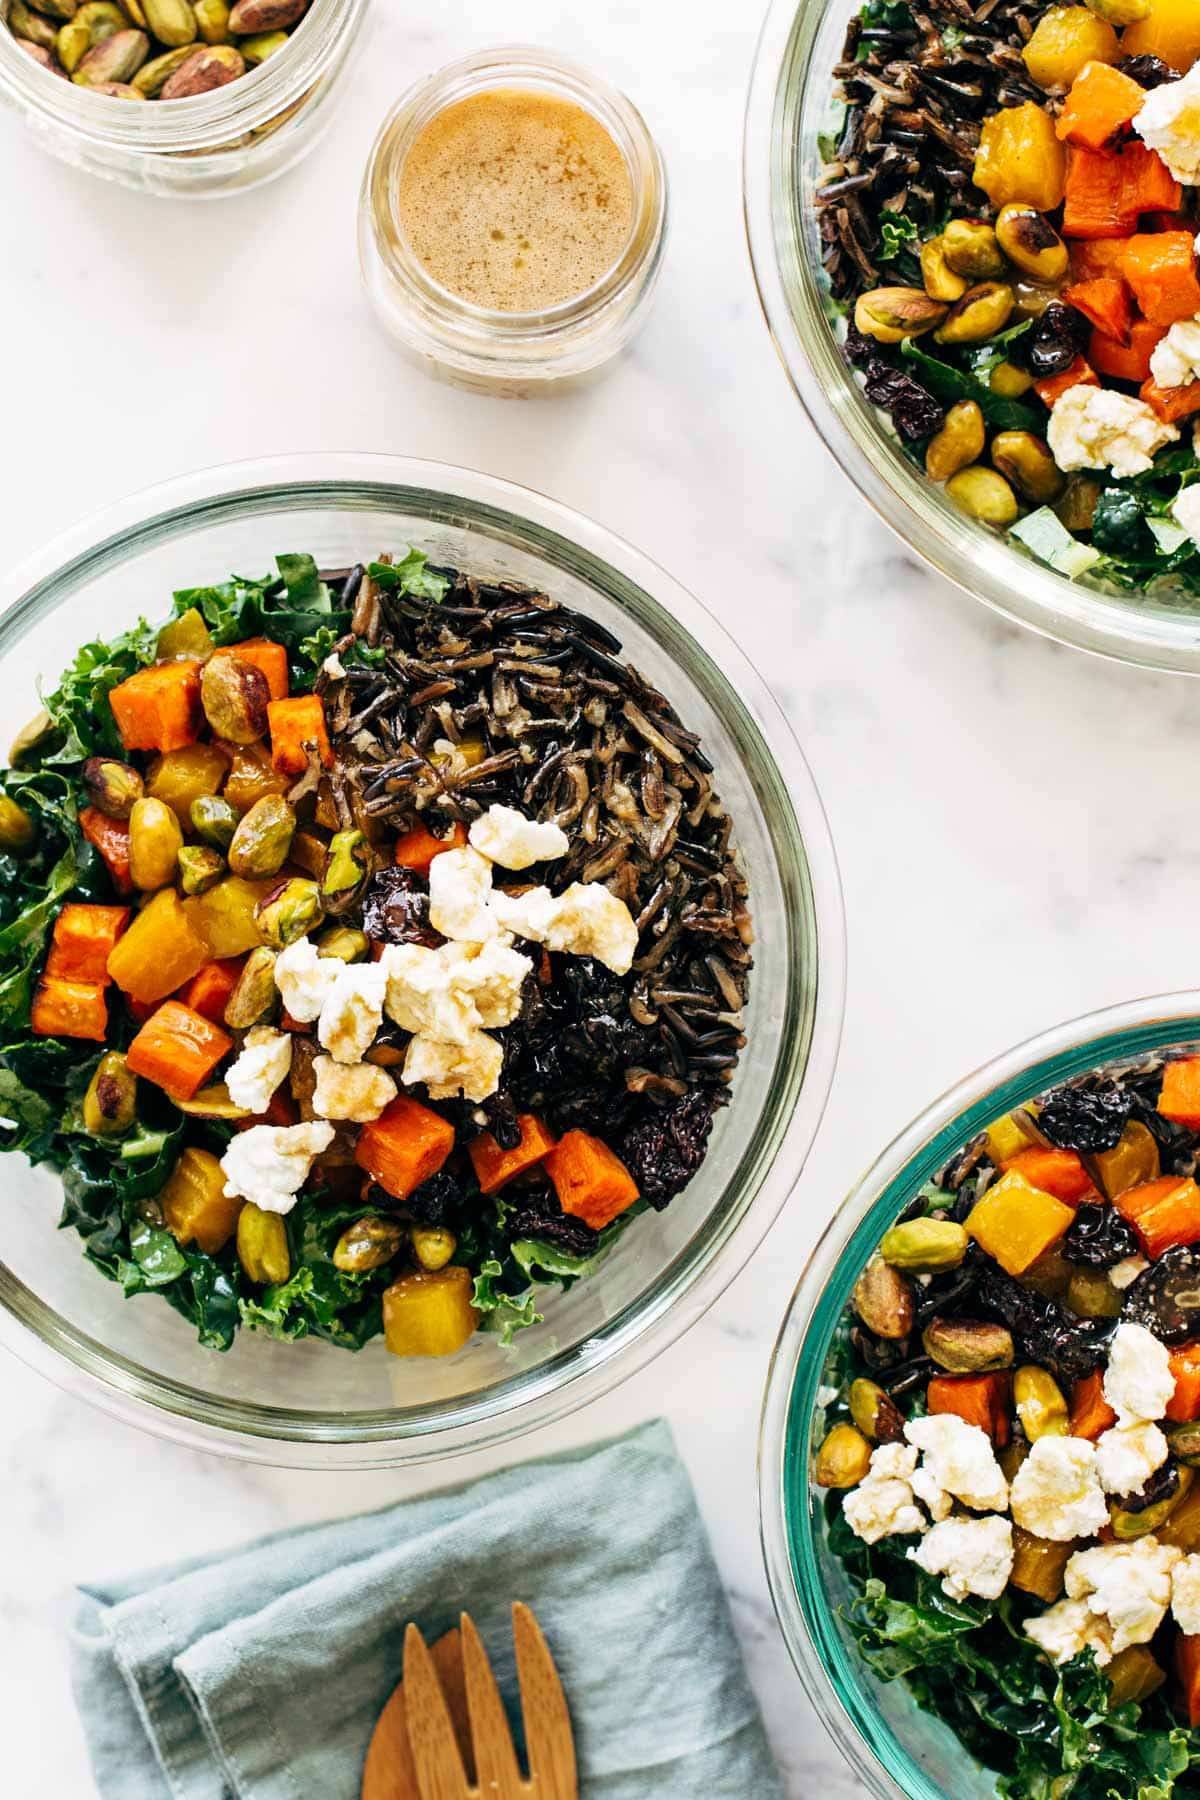
    Grain bowl in meal prep containers.

    How To Make These Grain Bowls

    We’re working with just three steps here. THREE STEPS.

    1. Roast The Vegetables: Sweet potatoes and beets in the oven for 30 minutes. Done!
    2. Cook the Rice: I’d start this right away since wild rice can take some time.
    3. Make The Dressing: I like to blend this dressing so that it gets super smooth and almost creamy. Delicious!

    Once you have all your elements ready to go, all you need to do is assemble in bowls.

    How To Meal Prep This

    One of the best things about these grain bowls is that they can stand up to some fridge time. Here’s how I like to store this for meal prep:

    • Keep the kale, goat cheese, and pistachios separate to maintain their freshness.
    • The roasted vegetables, wild rice, and dried cherries can sit tight in a little bit of balsamic dressing while it’s in the fridge and kinda just keeps getting better and better.

    When you’re ready to eat, combine it all together and add a little more dressing to coat the greens. Meal prep superstar!

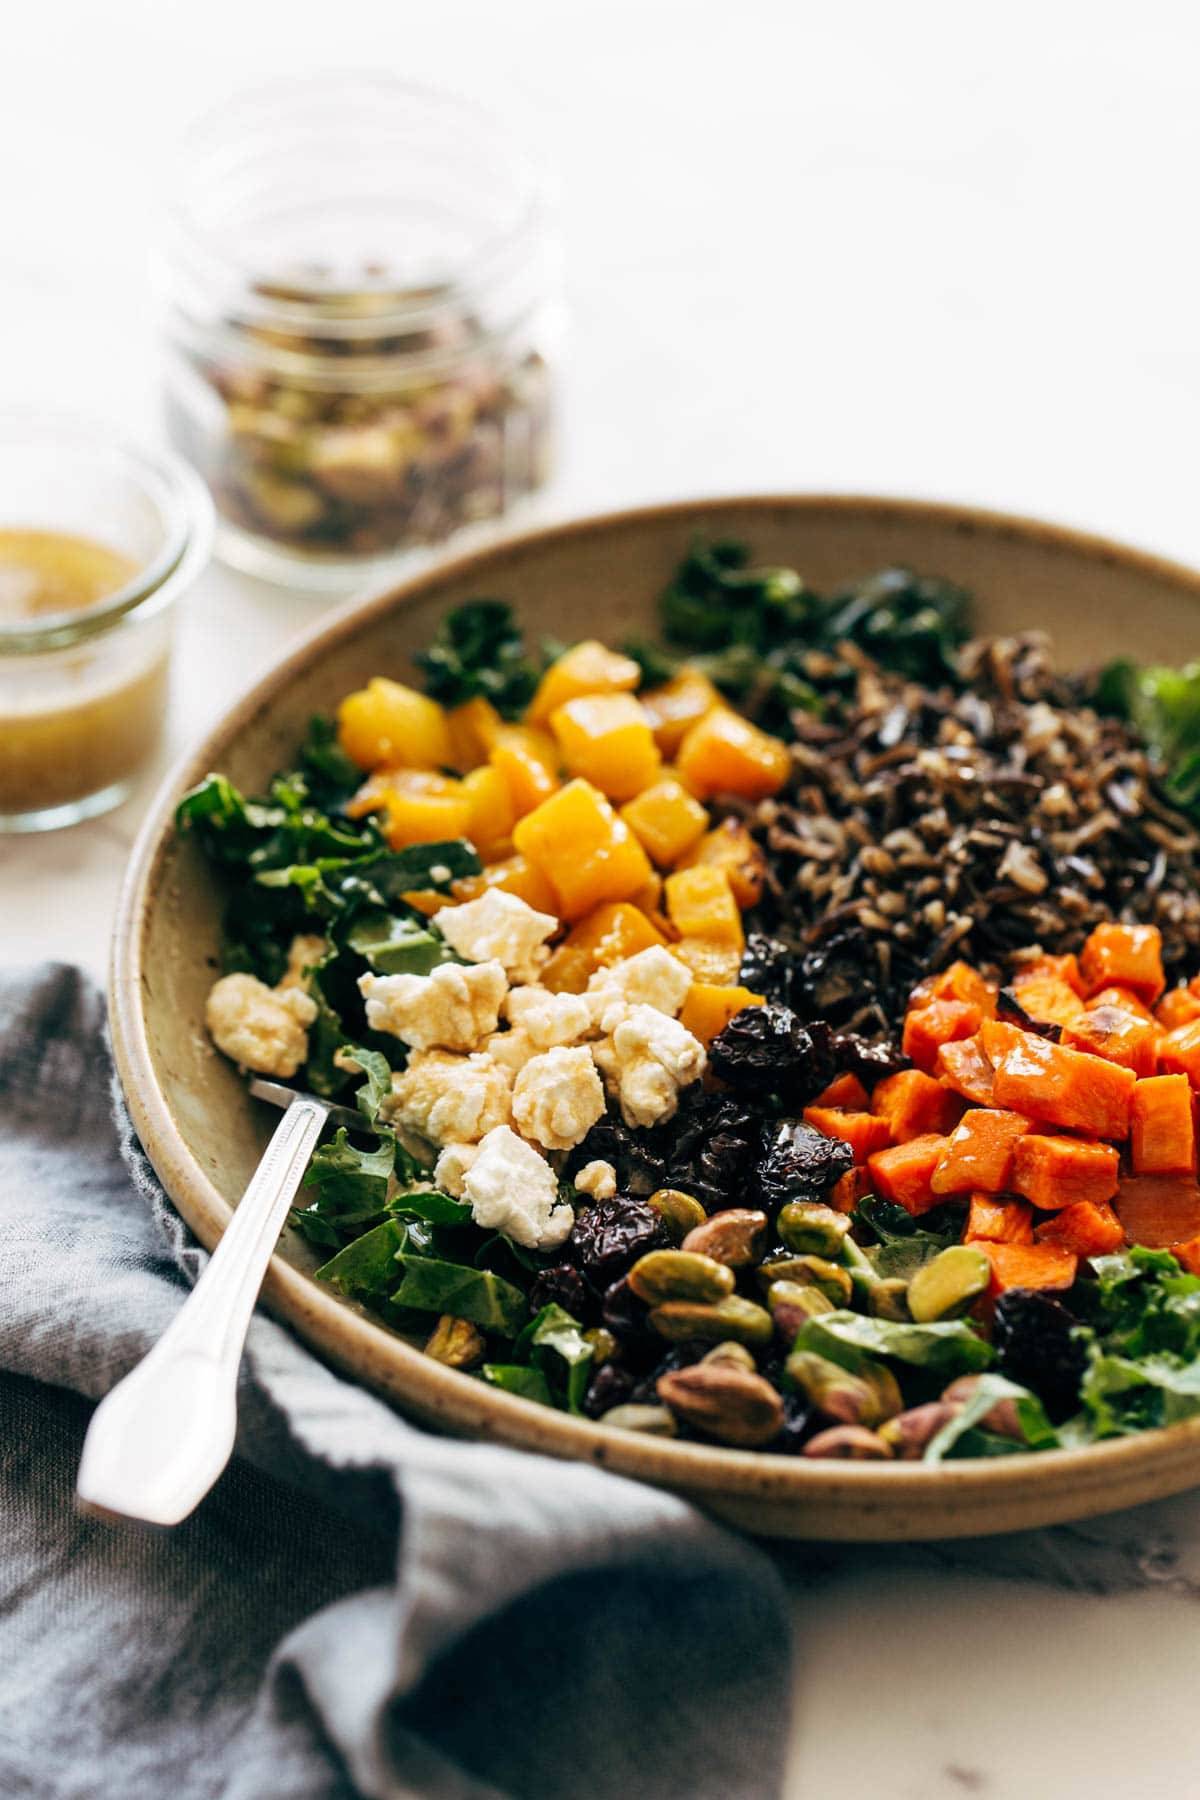
    Side view of grain bowl with fork.

    More Ideas For This Grain Bowl

    This grain bowl is as versatile as it gets.

    Eat it warm or cold. Eat it on its own for lunch, or add a fried egg for a breakfast hash situation (gah!), or top it with some grilled chicken or pan-fried halloumi (omg yum) for dinner. Use a different dressing, or make the balsamic dressing and put it all over everything.

    Don’t have wild rice? Swap in quinoa, farro, or your favorite grain.

    Don’t have the patience to roast beets? Get pre-cooked ones at the store.

    Don’t LIKE beets? Sub in another favorite roasted vegetable.

    Hate pistachios and/or goat cheese? Any nut/seed or crumbly cheese will work.

    However you do it, this rainbowy grain bowl has totally got your back.

    Frequently Asked Questions About This Recipe

    Can I use a different grain?

    Yep! Swap in quinoa, farro, or your favorite grain.

    What other vegetables could I use?

    Roasted carrots, cauliflower, and/or brussels sprouts would work great here.

    What other cheese could I use?

    Parmesa, feta, blue cheese, or some pan-fried halloumi would be delicious.

    How can I add protein to this?

    This would be perfect with some chicken (grilled, roasted, air-fried) or some chickpeas for a vegetarian-friendly option.

    Can I make this vegan?

    Yes! Skip the cheese and skip the mayonnaise.


    Print

    clock clock iconcutlery cutlery iconflag flag iconfolder folder iconinstagram instagram iconpinterest pinterest iconfacebook facebook iconprint print iconsquares squares iconheart heart iconheart solid heart solid icon

    Description

    The BEST Grain Bowl! Roasted root vegetables, earthy grains, dried fruit, dark leafy greens, buttery goat cheese, and lusciously creamy balsamic dressing.


    Notes

    For meal prepping: store sweet potatoes, beets, and wild rice together. Combine with kale, goat cheese, and pistachios, and dressing before eating. 

    • Prep Time: 30 mins
    • Cook Time: 1 hour
    • Category: Lunch
    • Method: Bake
    • Cuisine: American

    Keywords: grain bowl, grain salad, wild rice salad, sweet potato salad, roasted beets, goat cheese


    One More Thing!

    This recipe is part of our best healthy meal prep recipes page. Check it out!

    Source link

  • Roasted Red Pepper Feta Dip

    Roasted Red Pepper Feta Dip

    This easy Roasted Red Pepper Feta Dip is creamy and zesty with a hint of smoky spice. And it’s ready in about 5 minutes, for your dipping pleasure!

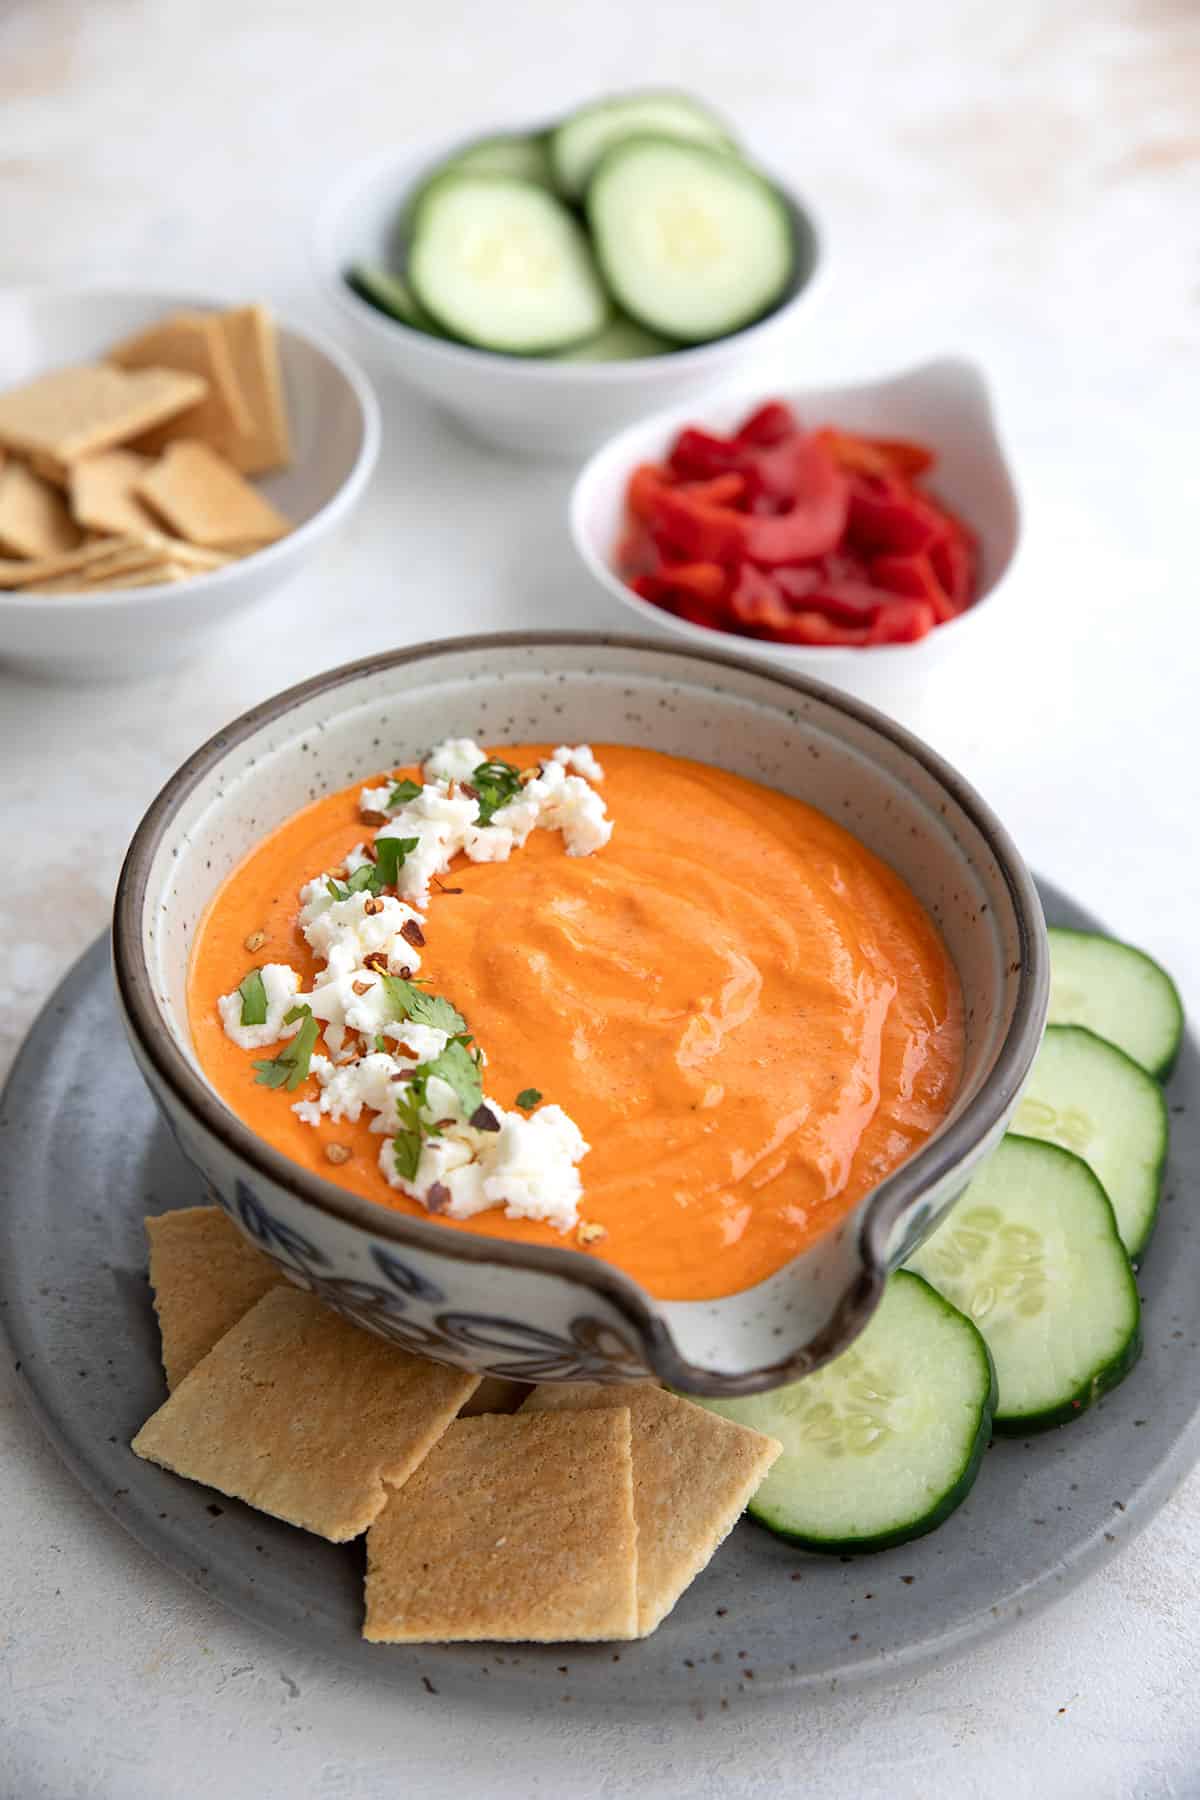
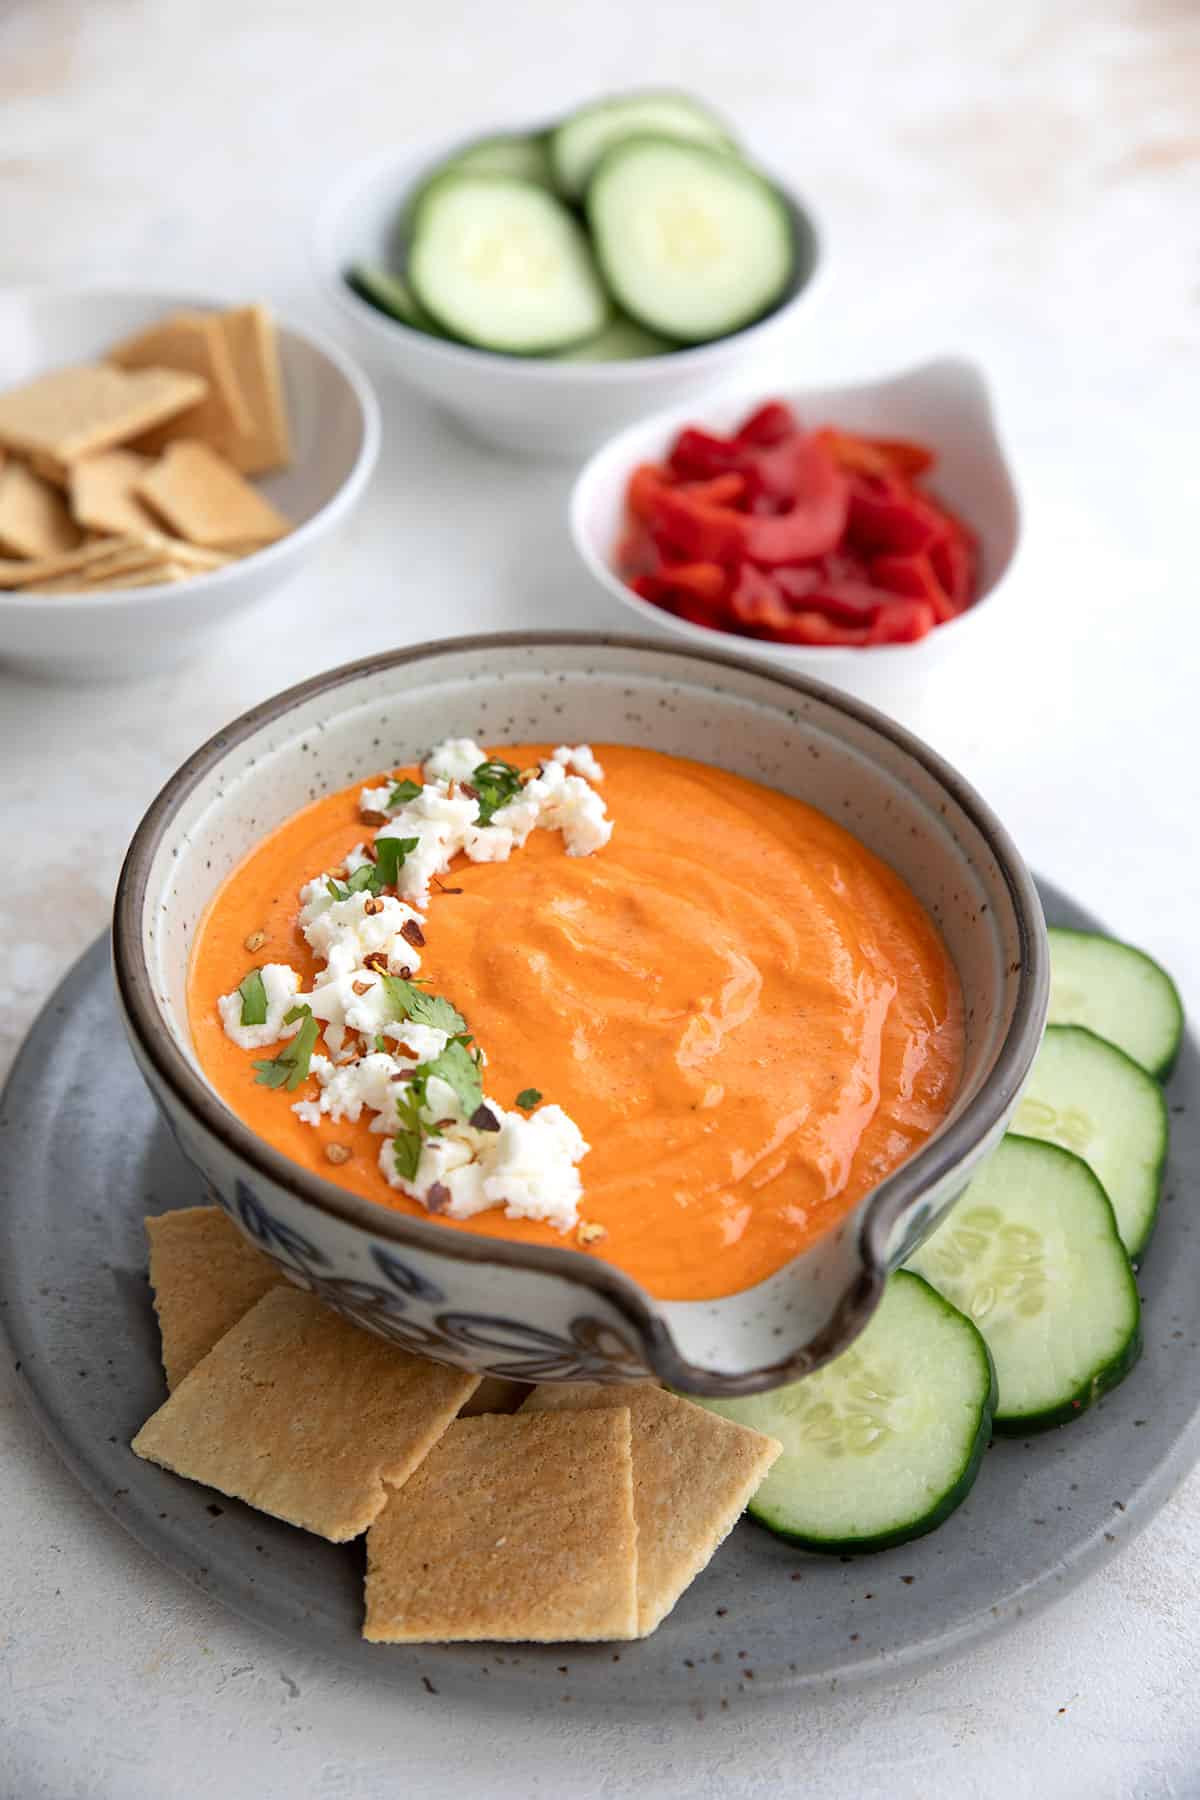
    A patterned gray bowl filled with Roasted Red Pepper Feta Dip.

    This easy Roasted Red Pepper Feta Dip is creamy and zesty with a hint of smoky spice. And it’s ready in about 5 minutes, for your dipping pleasure!

    A bowl of Red Pepper Feta Dip on a gray plate with keto crackers and cucumber slices.

    Craving something a little different for your keto appetizers? Perhaps you’re hosting a football watch party and need a last minute addition to the lineup. Well, look no further than this easy Red Pepper Feta Dip.

    Don’t get me wrong, I love the game-day classics like Sausage Cheese Dip or Caramelized Onion Dip. But this festive feta dip recipe is zesty and creamy, and fabulous with fresh veggies or keto crackers.

    It’s also delicious as a sauce for grilled chicken or baked shrimp!

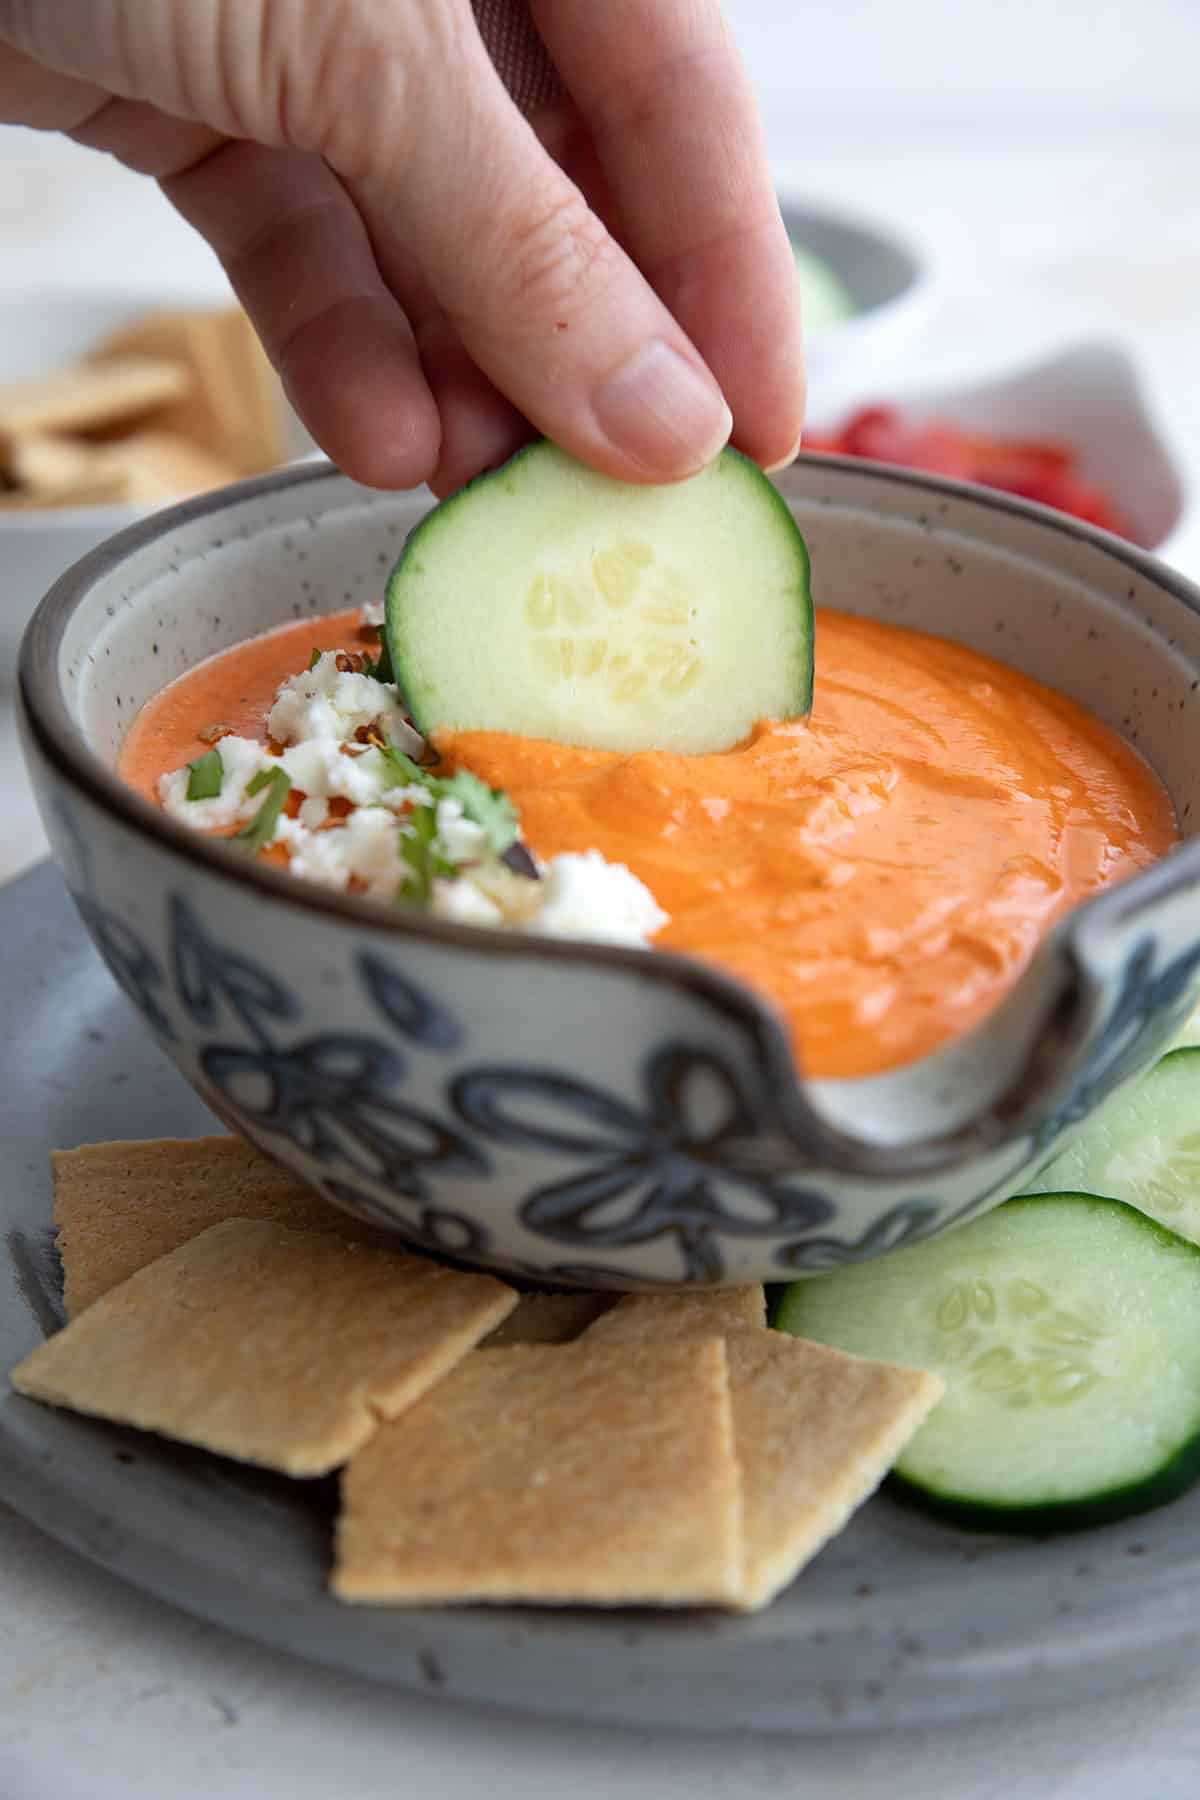
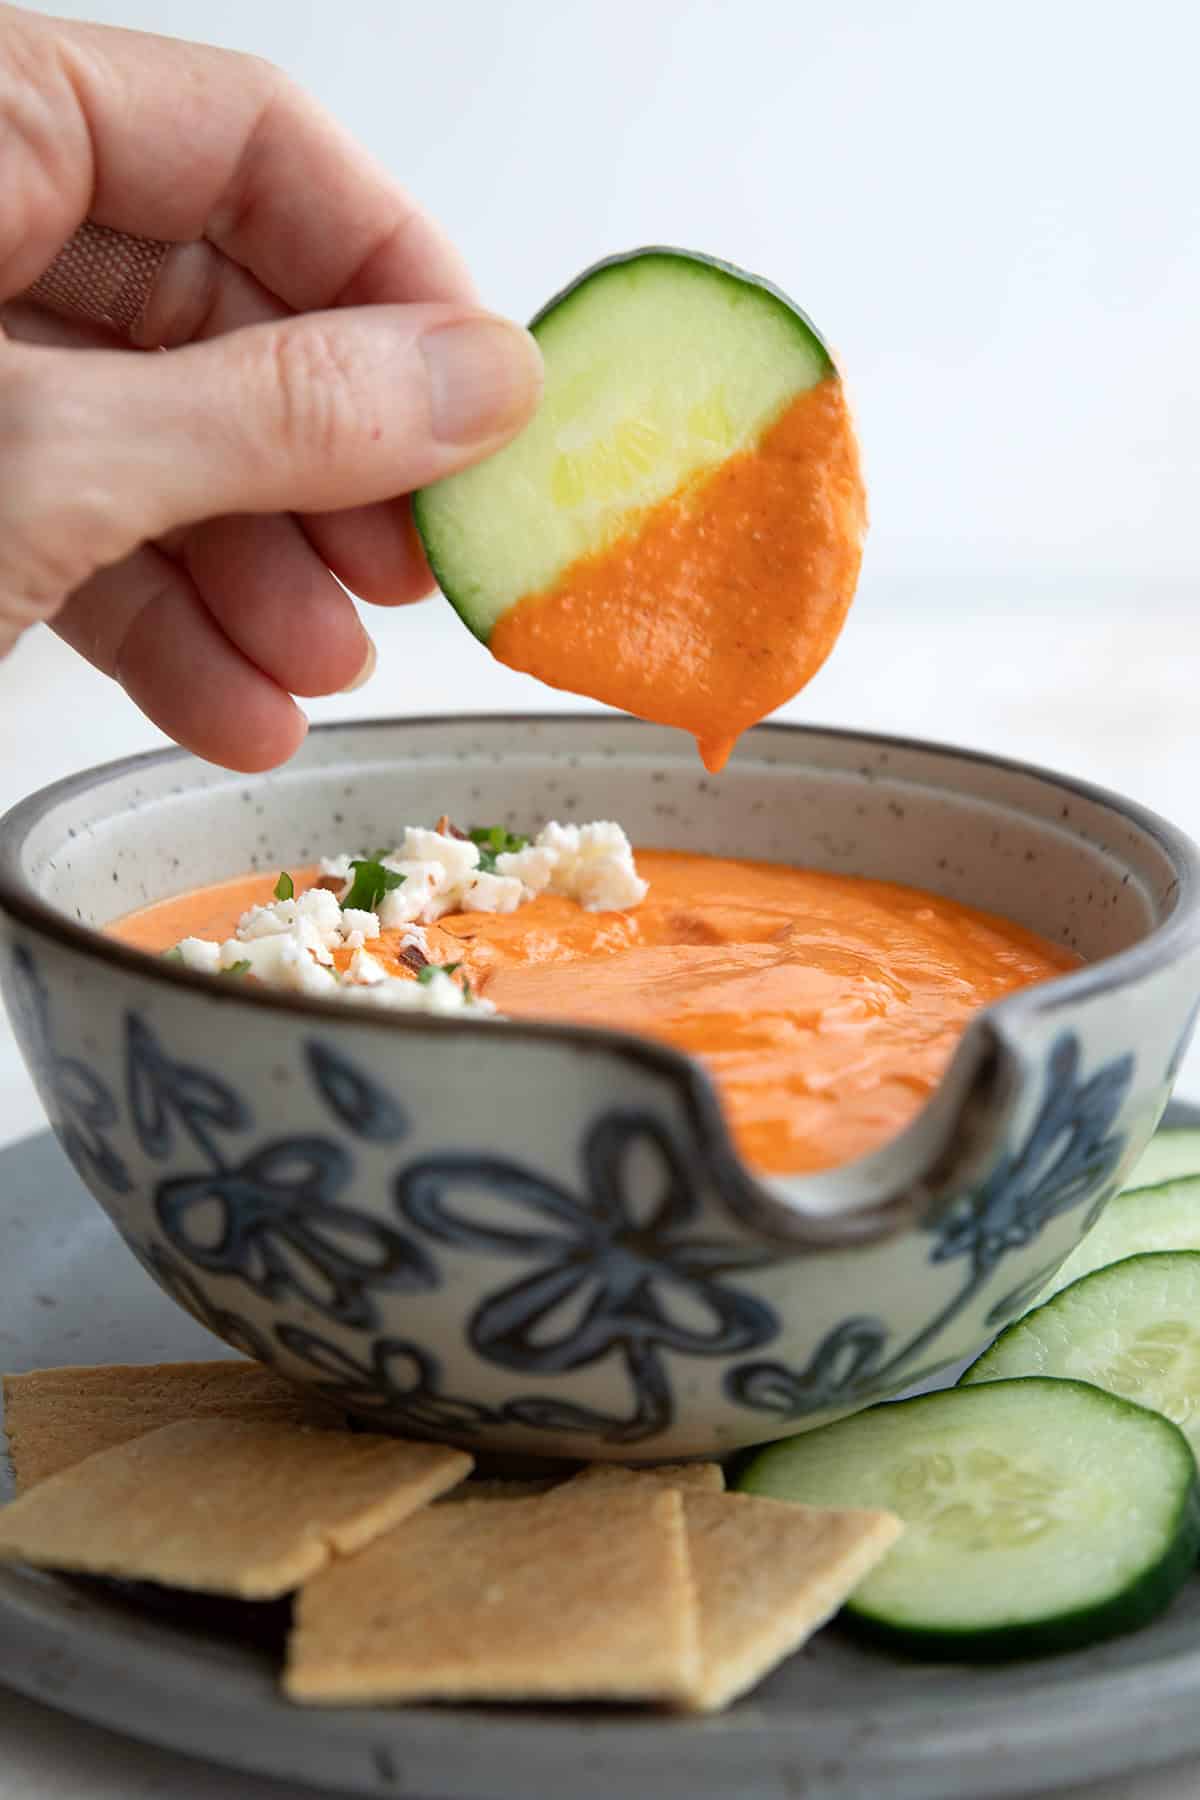
    A cucumber slice being dipped into a bowl of Red Pepper Feta Dip

    Why we love it

    My husband is a feta fiend. He loves the stuff and adds it to any number of dishes. He’s the one who convinced me to add feta to our keto zucchini fritters. Yep, he’s a feta pusher!

    So when I spotted some recipes for a Greek-style feta dip made with roasted peppers, I knew it would be a sure-fire win in our house. I checked out a few recipes and then struck out on my own. I found I had to adjust the flavor balance a bit before I was satisfied with the results.

    But it was so ridiculously easy to make, and so ridiculously flavorful. We couldn’t stop dipping sliced cucumber into it as we walked through the kitchen.

    And when I had leftovers, I added it as a sauce to some grilled chicken. That was delicious too!

    Ingredient notes

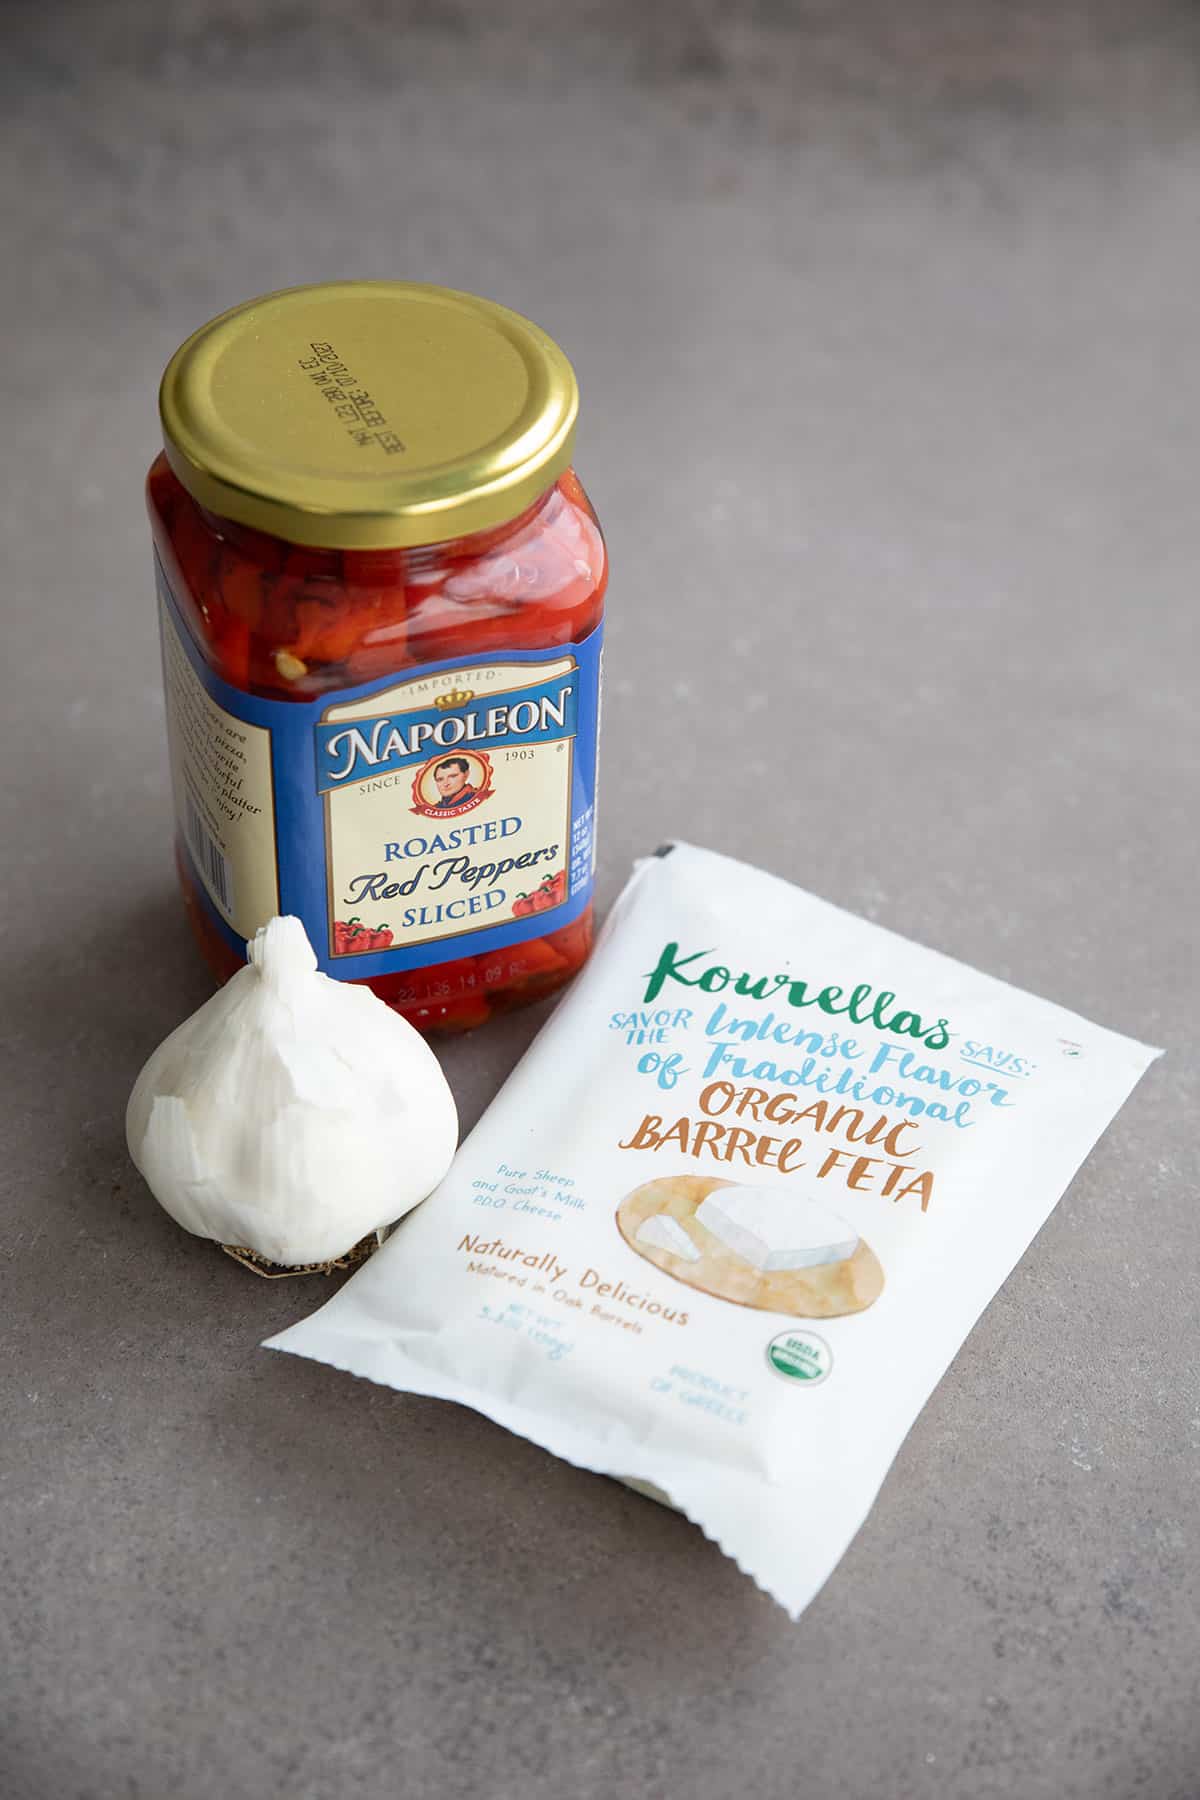
    Ingredients needed for Roasted Red Pepper Feta Dip.
    • Feta cheese: Any brand or style of feta will work for this dip.
    • Cottage cheese:  This helps create more volume without using copious amounts of expensive feta. You can also use ricotta cheese.
    • Roasted red peppers: Make it easy on yourself and use bottled roasted red pepper. Drain them before adding to the dip.
    • Lemon juice: Use fresh squeezed lemon juice..
    • Smoked paprika: This adds a wonderful smoky flavor to the dip but you can use regular paprika as well.
    • Pepper: For a little kick, I recommend adding some red chili pepper or jalapeño.
    • Pantry staples: Garlic and salt.

    Step by step directions

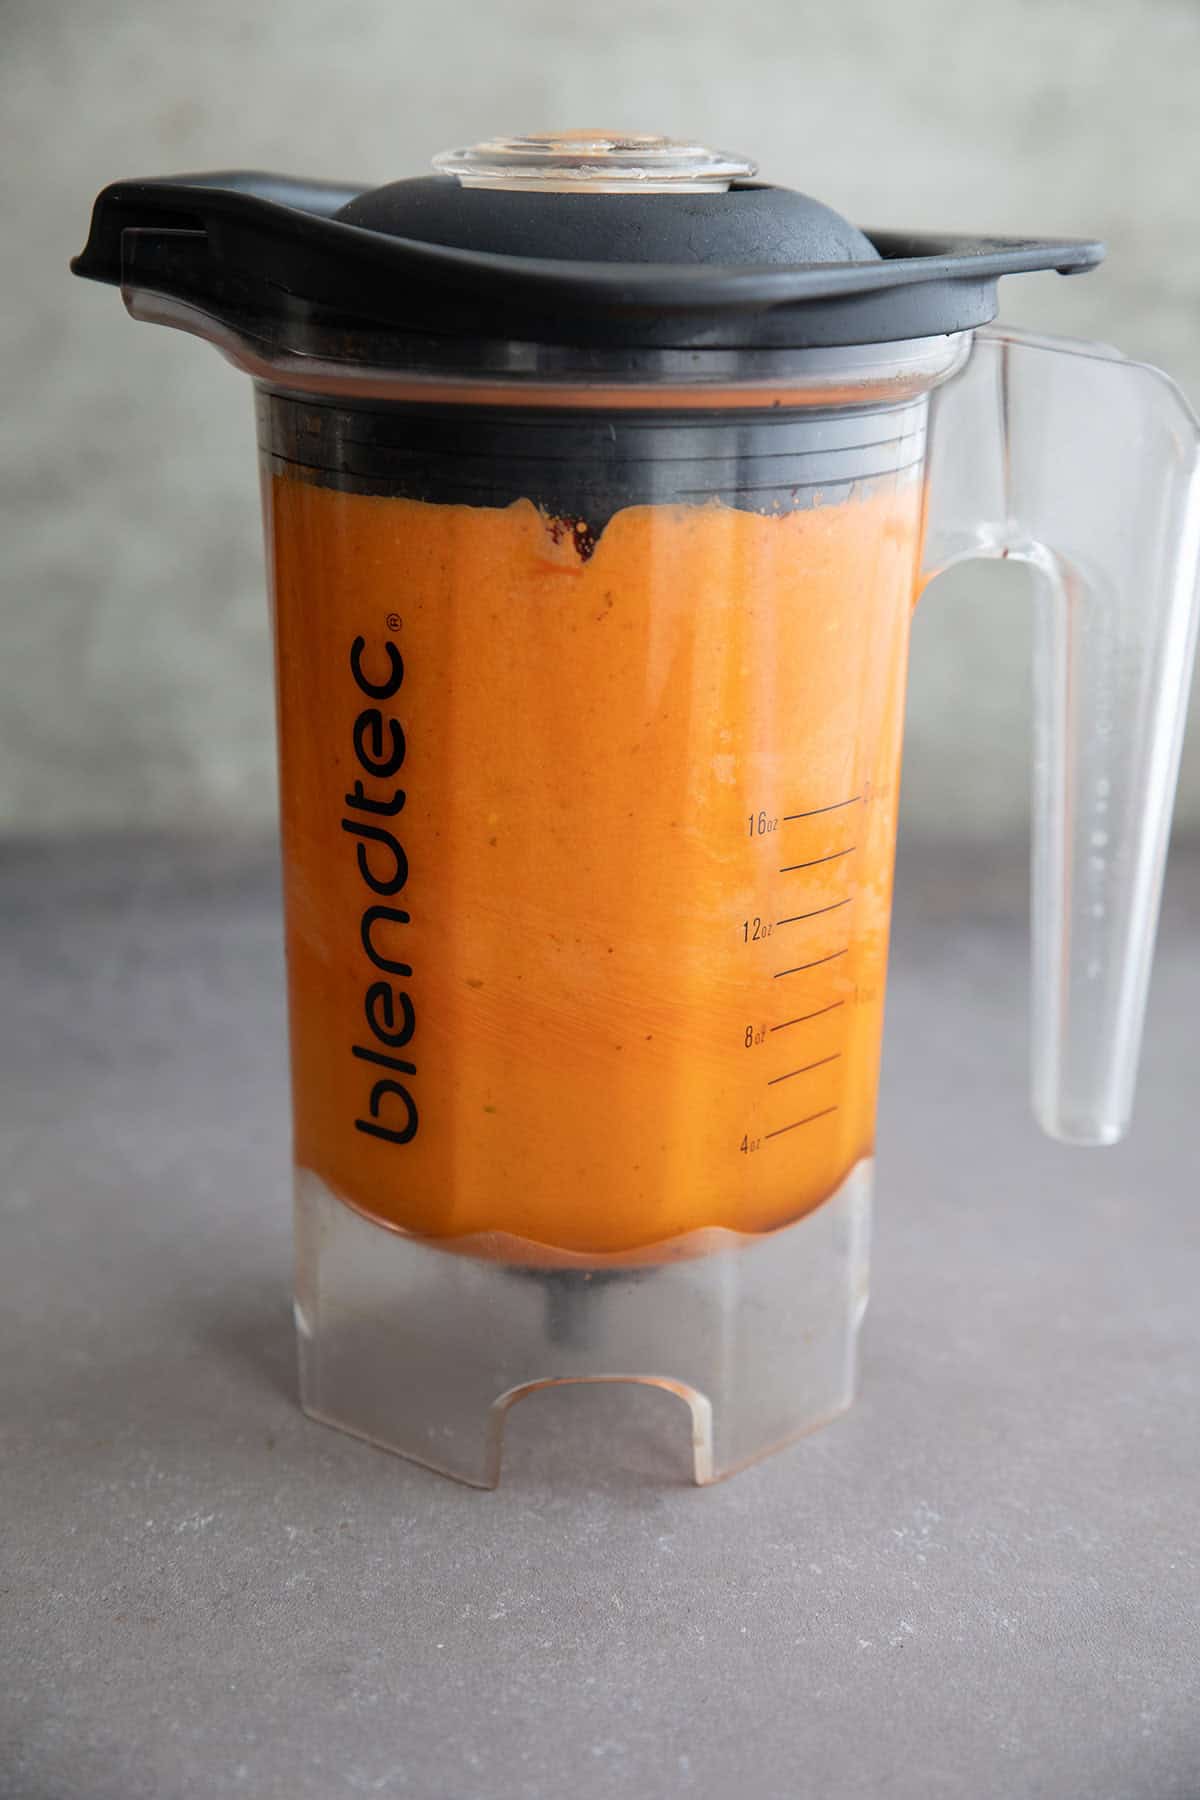
    A blender jar filled with Roasted Red Pepper Feta Dip.

    1. Blend it up: Place all of the ingredients in a blender or food processor and blend until smooth. Taste and adjust seasonings as desired.

    2. Serve it up: Transfer to a bowl, top with a little more crumbled feta, and serve with sliced cucumber and keto crackers. It’s also delicious as a sauce for chicken, fish, or roasted veggies.

    Tips for Success

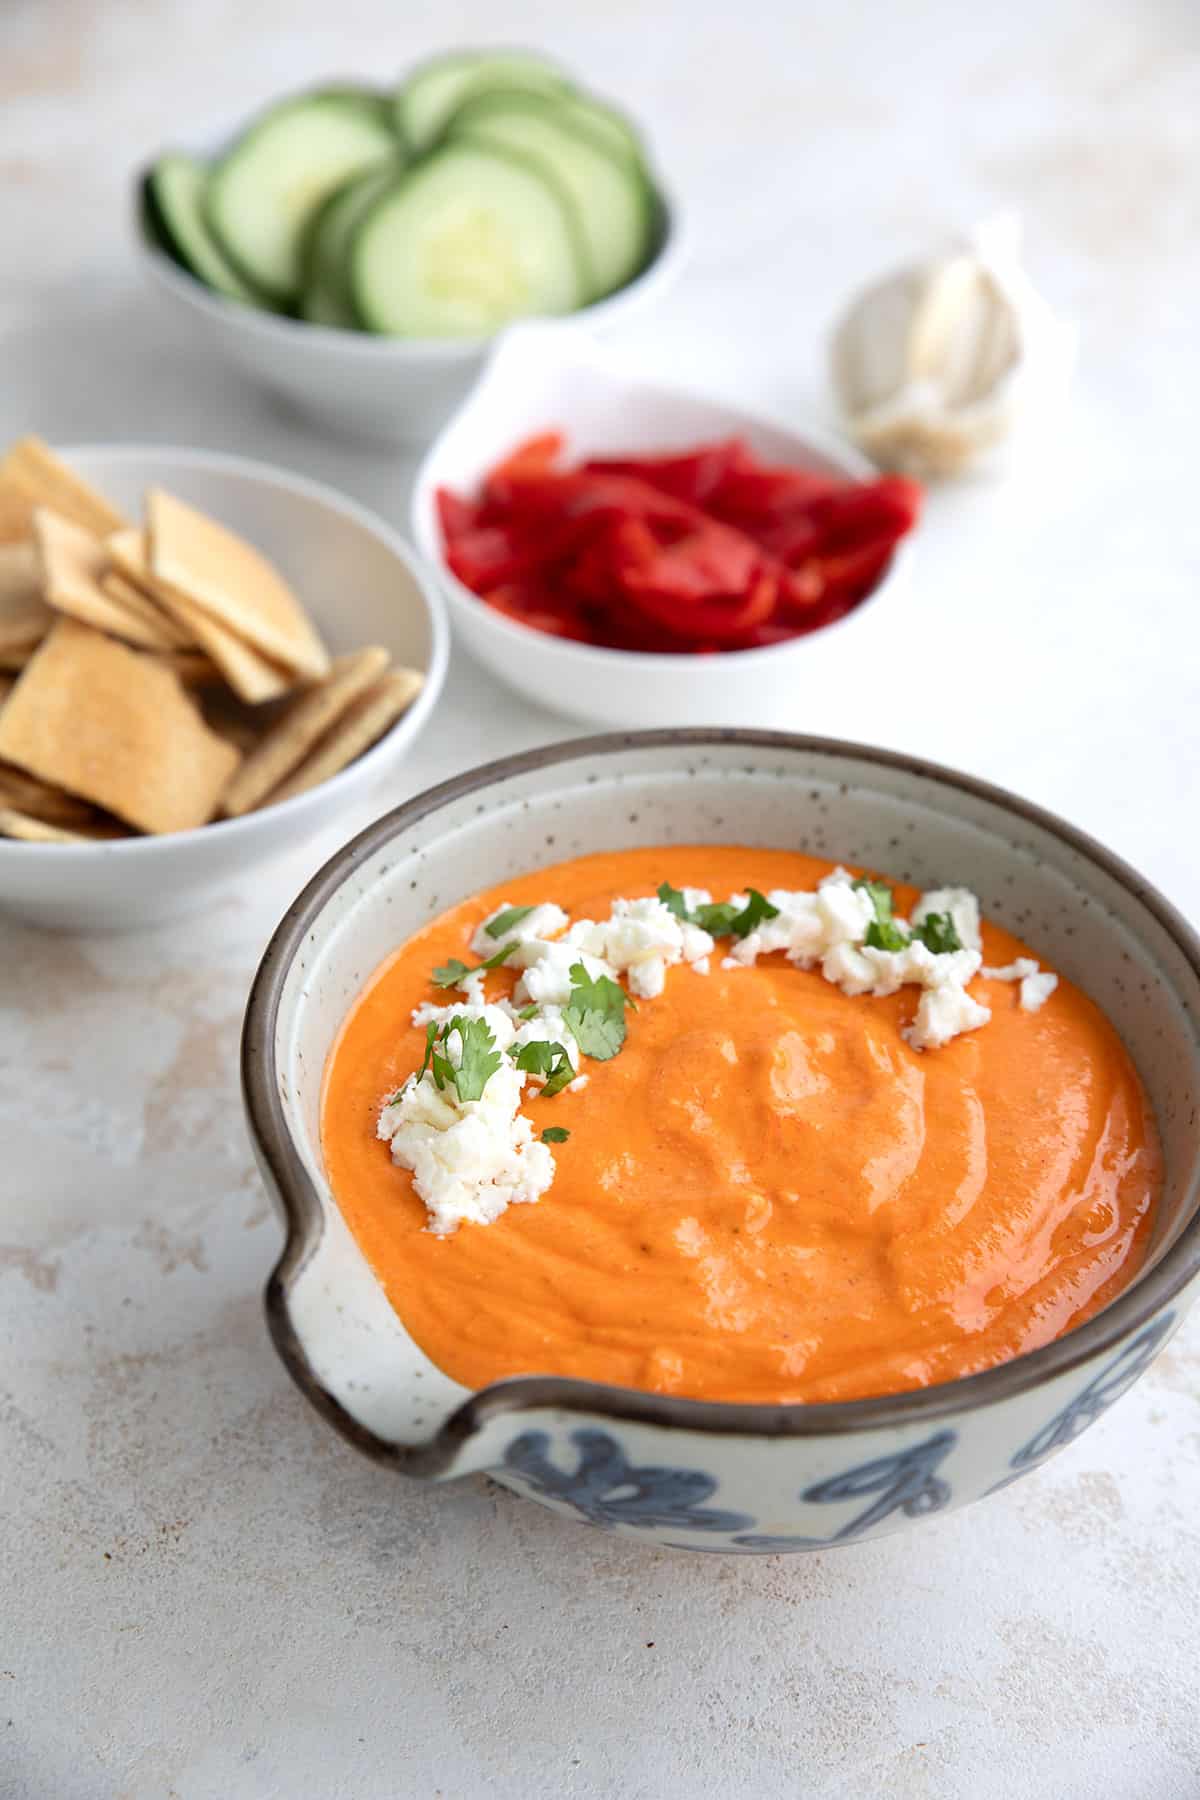
    A bowl of Roasted Red Pepper Feta Dip on a white table with veggies in the background.

    Use a rubber spatula to scrape down the sides of the blender a few times while blending. This helps ensure it all gets blended and creamy!

    You can hold back on the hot peppers if you are unsure of how much you should add, and add it in at the end after you taste it. It doesn’t make it overly spicy as is, but gives it a nice piquant kick.

    Frequently Asked Questions

    Can I make this feta dip in advance?

    Yes, you can make the dip a day before you serve it. Just store it in an air tight container or cover the bowl with plastic wrap and refrigerate until ready to use. Do the same with any leftovers you have. If all of your ingredients are fresh, it can last up to one week in the refrigerator.

    What do you serve with red pepper feta dip?

    To stay low carb or keto, I recommend serving this with sliced cucumber, celery sticks, and keto crackers. You can also use this dip as a sauce on baked chicken, fish, or even keto meatballs!

    How many carbs are in Roasted Red Pepper Feta Dip?

    This easy keto appetizer recipe has 2.5g of carbs and 0.3g of fiber per serving. That comes to 2.2g net carbs per serving.

    A hand dipping a cucumber slice into Roasted Red Pepper Feta Dip.

    More delicious feta recipes

    A patterned gray bowl filled with Roasted Red Pepper Feta Dip.

    Roasted Red Pepper Feta Dip Recipe

    Servings: 6 servings

    Prep Time 5 minutes

    Total Time 5 minutes

    This easy Roasted Red Pepper Feta Dip is creamy and zesty with a hint of smoky spice. And it’s ready in about 5 minutes, for your dipping pleasure!

    • 5 ounces (141.75 g) feta cheese
    • 1/3 cup (70 g) cottage cheese
    • 1/3 cup (46.67 g) roasted red peppers, drained of excess liquid
    • 1 tbsp lemon juice
    • 2 cloves garlic
    • 1 tsp smoked paprika
    • 1/2 small red chili pepper, or jalapeno
    • 1/4 to 1/2 tsp kosher salt

    Prevent your screen from going dark

    • Place all of the ingredients in a blender or food processor and blend until smooth. Taste and adjust seasonings as desired.

    • Transfer to a bowl, top with a little more crumbled feta, and serve with sliced cucumber and keto crackers.

    • It’s also delicious as a sauce for chicken, fish, or roasted veggies.

    Storage Information: Store it in an air tight container or cover the bowl with plastic wrap and refrigerate until ready to use. If all of your ingredients are fresh, it can last up to one week in the refrigerator.

    Serving: 4tablespoons (approx) | Calories: 75kcal | Carbohydrates: 2.5g | Protein: 5.1g | Fat: 5.1g | Fiber: 0.3g

    Categories:

    Appetizers & Snacks,
    Low Carb,

    Nutritional Disclaimer

    Please note that I am not a medical or nutritional professional. I am simply recounting and sharing my own experiences on this blog. Nothing I express here should be taken as medical advice and you should consult with your doctor before starting any diet or exercise program. I provide nutritional information for my recipes simply as a courtesy to my readers. It is calculated using MacGourmet software and I remove erythritol from the final carb count and net carb count, as it does not affect my own blood glucose levels. I do my best to be as accurate as possible but you should independently calculate nutritional information on your own before relying on them. I expressly disclaim any and all liability of any kind with respect to any act or omission wholly or in part in reliance on anything contained in this website.

    Free Bonus: Secrets to Keto Baking!

    Sign up for your favorite recipes delivered straight to your inbox plus get our FREE bonus: Secrets to Keto Baking!


    Source link