Tag: Creamy

  • Creamy Italian Sausage Pasta

    Creamy Italian Sausage Pasta

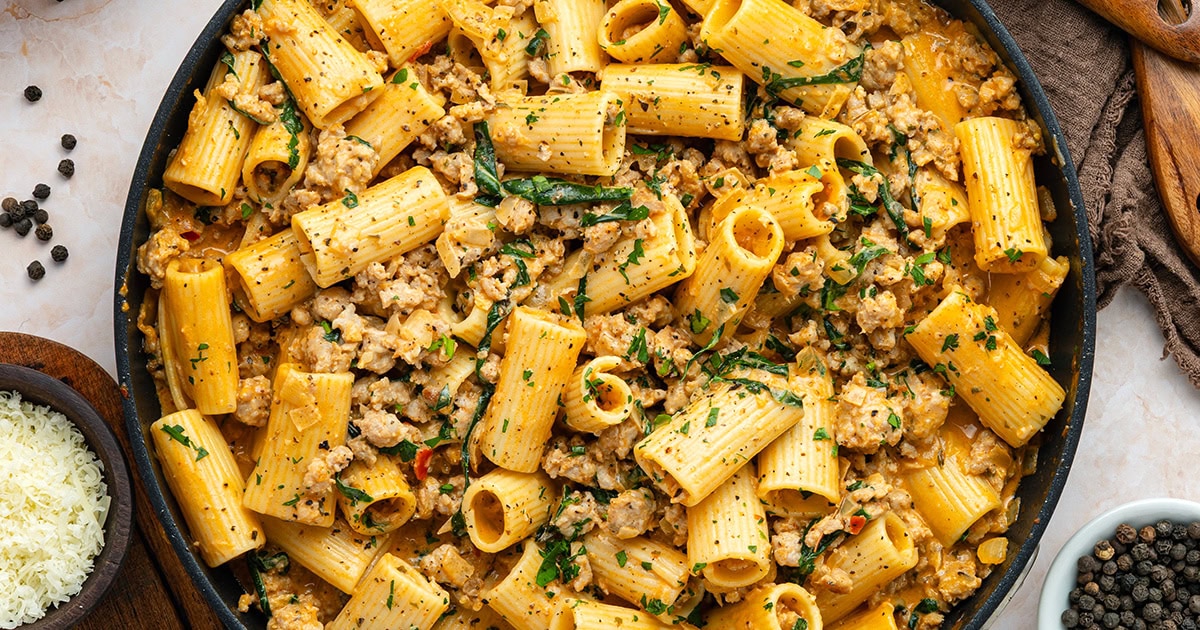
    This creamy Italian sausage pasta is weeknight comfort food done right. It’s rich, cozy, and bursting with flavor from sausage, garlic, and parmesan.


    Jump to: ℹ️ Overview | 🛒 Ingredients | 📷 How To Make | 👩‍🍳 Recipe Tips | 🥗 Serving Suggestions | 📝 Full Recipe Card | 🍽 More Pasta Recipes To Try


    This creamy Italian sausage pasta is the kind of dish I pull out when I want dinner to feel a little special but I’ve got zero energy for anything fussy. It’s easy enough for a weeknight, but flavorful enough to serve when friends pop over. The combo of garlicky sausage, a splash of cream, a touch of tomato paste (cooked until it smells amazing), and a generous handful of Parmesan just works.

    It’s rich and cozy, but not heavy in a “food coma” way. The spinach adds a little freshness and color (and let’s be honest, makes me feel like I’ve made a responsible life choice).

    Whether you’re craving something hearty after a long day or just want a one-pan wonder that delivers serious flavor, this one’s a keeper.

    A quick note on the Italian sausage: you can usually find it sold as ground sausage meat—already seasoned and ready to go. It also comes in sausage links (mild, sweet, or fennel), and if that’s what you’ve got, just slice open the casing and use the meat inside. It’s fatty, flavorful, and really the star of this dish.

    👩‍🍳 You might also like these comforting one-pan meals: creamy pesto chicken pasta, Cajun shrimp pasta, marry me chicken orzo bake, chicken risotto with asparagus, or Spanish one pot chicken rice.

    What You’ll Need

    Here is what you’ll need for this creamy Italian sausage pasta recipe. Find the full measurements in the recipe card below.

    • Short pasta like rigatoni or penne – they catch the sauce so well!
    • Olive oil – helps brown the sausage and adds flavor.
    • Tomato paste – adds umami and that concentrated tomato goodness.
    • Chicken broth – lightens the sauce a bit and brings savory depth.
    • Cream – the base of that creamy lusciousness. You can use heavy creamy for extra luxurious feel or regular thinner cooking cream, or lighter cream to cut down on calories.
    • Parmesan cheese – salty, nutty, and rich. Use fresh and grate yourself for best flavor.
    • Red pepper flakes & Italian seasoning – warmth and herby vibes.
    • Yellow onion and garlic – the classic flavor duo.
    • Fresh spinach – for a hit of green and earthy flavor; you can also throw in kale, chard, broccolini or asparagus.
    • Fresh herbs like basil or parsley – totally optional but adds brightness.
    • Italian sausage – Mild, sweet, or fennel-spiced. You can buy it ground by the pound at most butcher counters or grocery stores. Or grab sausage links and remove the casing. Most Italian sausage is pork-based, but beef versions exist too. No Italian sausage? You can mix ground pork or beef with fennel seeds, garlic, paprika, oregano, and chili flakes to make your own. It’s not exact, but it’s close enough for a delicious meal.

    How To Make Creamy Italian Sausage Pasta

    Find the full recipe and nutritional information below. Here are some handy step-by-step photos for creamy Italian sausage pasta.

    • Cook pasta until al dente. Reserve some pasta water before draining. You can do this in parallel with below steps.
    • Brown the Italian sausage in olive oil, breaking it up into crumbles. Set aside.
    • In the same pan, sauté onion until soft. Add garlic, red pepper flakes, and Italian seasoning.
    • Stir in tomato paste and cook until it darkens a little.
    • Pour in chicken broth to deglaze the pan. Add cream and the sausage back in.
    • Simmer until slightly thickened. Stir in Parmesan until smooth.
    • Toss in the pasta and spinach. Add reserved pasta water if needed.
    • Finish with fresh herbs and extra cheese. Serve hot!

    Recipe Tips/Variations

    • Don’t skip cooking the tomato paste for a minute or two—this deepens the flavor and makes it richer.
    • Make it ahead: The sauce keeps well in the fridge for a day or two. Reheat gently and toss with freshly cooked pasta.
    • Storage: Leftovers keep in the fridge for 3 days. Reheat on the stove or in the microwave with a splash of broth or water.
    • Add-ins: Mushrooms, sun-dried tomatoes, or roasted red peppers would all work beautifully.
    • Make it spicy: Use hot Italian sausage or add extra chili flakes.
    • Want to lighten it up? Swap the heavy cream for light cream, half-and-half, or even a mix of milk and Greek yogurt (just stir the yogurt in off the heat to prevent curdling). Use less Parmesan or go for a hard cheese like Grana Padano, which is still flavorful but a bit leaner. For the sausage, look for leaner Italian-style turkey or chicken sausage — tons of flavor, less fat. And if you’re watching carbs, try a high-fiber pasta or a chickpea-based one to bump up the protein and keep things balanced.

    Serving Suggestions

    This dish is pretty rich, so a crisp green salad with a tangy vinaigrette is a perfect match. You could also serve it with some crusty bread to soak up every last drop of that sauce. Try these side dishes:

    💬 If you’ve tried this creamy Italian sausage pasta or any other recipe on the blog then don’t forget to rate the recipe and let me know how you got on in the comments below, I love hearing from you! You can also FOLLOW ME on Instagram, Facebook, Pinterest, YouTube, and or sign up to my Newsletter to see more of my delicious food.

    Want to Save This Recipe?

    Enter your email & I’ll send it to your inbox. Plus, get great new recipes from me every week!

    By submitting this form, you consent to receive emails from Cooked & Loved

    This creamy Italian sausage pasta is weeknight comfort food done right. It’s rich, cozy, and bursting with flavor from sausage, garlic, and parmesan. Find step-by-step photos and more recipe tips above.

    • Bring a large pot of salted water to a boil. Cook pasta until al dente. Reserve ½ cup of pasta water, then drain.

    • Heat olive oil in a large skillet over medium heat. Add sausage, breaking it up with a spoon. Cook until browned and cooked through, 6–8 minutes. Transfer to a plate, leaving a little fat in the pan.

    • In the same pan, sauté the onion until soft, about 3 minutes. Add garlic, red pepper flakes, and Italian seasoning. Cook for 1 minute.

    • Stir in tomato paste and cook for 1–2 minutes until slightly darkened.

    • Deglaze the pan with chicken broth, scraping up any bits. Add the cream and bring to a simmer.

    • Return sausage to the pan. Simmer for 3–4 minutes until the sauce slightly thickens.

    • Stir in Parmesan until melted and smooth. Add the drained pasta and spinach. Toss to coat. Add pasta water a splash at a time if needed to loosen the sauce.

    • Season to taste with salt and pepper.

    • Serve hot with extra Parmesan and fresh herbs on top.

    • What kind of sausage should I use? Go for mild, sweet, or fennel Italian sausage. If you can’t find ground sausage, just remove the casing from regular sausages.
    • Can I make this without cream? Yes! Try half-and-half or even evaporated milk, though the sauce won’t be quite as rich.
    • How do I make it vegetarian? Swap the sausage for plant-based sausage or sautéed mushrooms for a meaty texture.
    • Can I freeze it? Creamy sauces don’t always freeze well—they can split—but it’s okay in a pinch. Just reheat slowly and stir well.
    • Don’t skip cooking the tomato paste for a minute or two—this deepens the flavor and makes it richer.
    • Make it ahead: The sauce keeps well in the fridge for a day or two. Reheat gently and toss with freshly cooked pasta.
    • Storage: Leftovers keep in the fridge for 3 days. Reheat on the stove or in the microwave with a splash of broth or water.
    • Add-ins: Mushrooms, sun-dried tomatoes, or roasted red peppers would all work beautifully.
    • Make it spicy: Use hot Italian sausage or add extra chili flakes.
    • Want to lighten it up? Use a mix of milk and Greek yogurt (just stir the yogurt in off the heat to prevent curdling) intsead of cream. Use less Parmesan or go for a hard cheese like Grana Padano, which is still flavorful but a bit leaner. For the sausage, look for leaner Italian-style sausage or choose turkey or chicken sausage — tons of flavor, less fat. And if you’re watching carbs, try a high-fiber pasta or a chickpea-based one to bump up the protein and keep things balanced.

    Calories: 661kcal | Carbohydrates: 49g | Protein: 22g | Fat: 42g | Saturated Fat: 18g | Polyunsaturated Fat: 4g | Monounsaturated Fat: 17g | Cholesterol: 109mg | Sodium: 838mg | Potassium: 524mg | Fiber: 3g | Sugar: 3g | Vitamin A: 1551IU | Vitamin C: 8mg | Calcium: 152mg | Iron: 2mg

    Keywords: Creamy Italian Sausage Pasta, italian dinner recipes, pasta dinner ideas, pasta and sausage recipes

    More Pasta Recipes To Try


    Source link

  • Curried Coconut Red Lentil Soup (Vegan & Creamy)

    Curried Coconut Red Lentil Soup (Vegan & Creamy)

    This curried coconut red lentil soup is creamy, cozy, and packed with plant-based protein. It’s an easy lentil soup that’s vegan, hearty, and perfect for weeknights.


    Jump to: ℹ️ Overview | 🛒 Ingredients | 📷 How To Make | 📹 Watch The Video | 👩‍🍳 Recipe Tips | 🥗 Serving Suggestions | 📝Full Recipe Card | 🍽 More Vegetarian Recipes


    At A Glance

    • Ready In: 45 minutes
    • 🍽 Serves: 4
    • 🌱 Diet: Vegan, dairy-free, gluten-free
    • 💪 Nutrition Highlights: High in plant-based protein and fiber
    • 🥕 Main Ingredients: Red lentils, coconut cream, curry paste, mild curry powder, spinach
    • 🔥 Flavor Profile: Creamy, gently spiced, slightly sweet, fresh lime finish
    • 🧊 Meal-Prep Friendly: Keeps 4 days in the fridge and freezes beautifully
    • 🍞 Best Served With: Crusty bread or warm naan for dipping

    This curried coconut red lentil soup is one of those dinners I turn to when I want something nourishing but low effort. The red lentils break down beautifully, giving you that naturally creamy texture without needing any dairy or blending. The Thai red curry paste and curry powder work together to create warmth and depth, while the coconut cream makes it rich and silky.

    You’ve got sweetness from the carrots and onion, gentle heat from the spices, and a fresh pop at the end from lime juice. The baby spinach wilts right in, adding color and a boost of fiber and nutrients.

    It’s high in plant-based protein and fiber thanks to the lentils, completely vegan, and naturally gluten-free. It’s also great for meal prep — the flavors deepen as it sits, and it freezes like a dream. If you’re looking for an easy lentil soup that feels a little special but uses everyday ingredients, this is it.

    Per serving: 370 calories, 15 grams protein, and 17grams fiber. Serve with a high-protein toast for extra 10 grams of protein.

    👩‍🍳 You might also like these high-protein vegetarian dinner recipes: tofu rice bowls, lentil mushroom Bolognese, black bean tacos, or high-protein butternut squash soup. For a non-vegetarian version, check out this lentil soup with chicken. Check out more meals high in protein and fiber here.

    What You’ll Need

    Here is what you’ll need for this coconut red lentil soup recipe. Find the full measurements in the recipe card below.

    • For aromatic base (flavor foundation) – onion, celery, carrots, salt, and oil for cooking; I use olive oil most of the time, but you can use avocado, coconut, or canola oil here
    • Flavor Boosters: garlic for warmth and punch, fresh ginger for a gentle zing that lifts the soup, Thai red curry paste for that bold curry flavor, and mild curry powder for extra warmth and color, tomato paste for richness, color, and umami, sugar or honey to balance the acidity and spice
    • Red lentils – high in protein and fiber; they cook quickly and turn creamy
    • Vegetable stock – builds savory depth (have extra to thin if needed)
    • Coconut cream – makes it luxuriously creamy (you can swap for full-fat coconut milk for a lighter option)
    • Baby spinach – adds nutrients and color
    • Lime juice – brightens and balances the richness (don’t skip!)
    • Fresh cilantro (coriander) – fresh, herby finish
    • Chili crisp (optional) – for extra heat and texture
    • To Serve: Toast or crusty bread – perfect for dunking

    How To Make Coconut Red Lentil Soup

    Find the full recipe and nutritional information below. Here are some handy step-by-step photos for coconut red lentil soup.

    • Sauté onion, celery, carrot, and salt in olive oil until soft and fragrant.
    • Add garlic and ginger; cook briefly.
    • Stir in curry paste, curry powder, tomato paste, and sugar; cook to deepen flavor.
    • Add rinsed red lentils and vegetable stock. Bring to a boil, then simmer about 20 minutes until lentils are soft.
    • Stir in coconut cream and simmer 5–10 more minutes.
    • Add spinach and let it wilt.
    • Finish with lime juice, adjust salt, and serve with coriander and optional chili crisp.

    Watch The Video

    Recipe Tips

    • Too thick? Add a splash of water or extra stock to loosen it. Red lentils thicken as they sit.
    • Layer your salt. A small pinch during sautéing makes a big difference later.
    • Want it smoother? Blend half the soup with a stick blender for extra creaminess.
    • More heat? Add chili flakes or extra curry paste.
    • Make-ahead: Tastes even better the next day. Store in the fridge for up to 4 days.
    • Freezer-friendly: Cool completely and freeze in portions for up to 3 months. Thaw overnight and reheat gently.

    Serving Suggestions

    I love serving this curry lentil soup with thick slices of toasted sourdough or warm naan for dipping. It also pairs beautifully with a simple cucumber salad dressed with lemon and olive oil to balance the richness. If you want to make it extra hearty, serve it over steamed rice for a cozy bowl situation.

    💬 If you’ve tried this coconut red lentil soup or any other recipe on the blog then don’t forget to rate the recipe and let me know how you got on in the comments below, I love hearing from you! You can also FOLLOW ME on Instagram, Facebook, Pinterest, YouTube, and or sign up to my Newsletter to see more of my delicious food.

    Want to Save This Recipe?

    Enter your email & I’ll send it to your inbox. Plus, get great new recipes from me every week!

    By submitting this form, you consent to receive emails from Cooked & Loved

    If you love a creamy red lentil soup with curry and coconut flavors, this one’s for you. It’s a simple vegan lentil soup that’s filling, freezer-friendly, and so satisfying. Find step-by-step photos and more recipe tips above.

    • Sauté the base: Heat olive oil in a large pot over medium heat. Add onion, celery, carrot, and salt. Cook for 5–7 minutes, until softened and fragrant.

    • Add the flavor boosters: Stir in garlic and ginger and cook for 1 minute. Add red curry paste, curry powder, tomato paste, and sugar. Stir and cook for another 1–2 minutes to deepen the flavors.

    • Simmer the soup: Add red lentils and vegetable stock. Bring to a boil, then reduce heat and simmer gently for about 20 minutes, or until lentils are soft and starting to break down.

    • Stir in coconut cream: Add coconut cream and simmer for another 5–10 minutes until thick and creamy. Stir in baby spinach and cook just until wilted.

    • Finish & serve: Add lime juice. Taste and adjust salt as needed. Serve hot, topped with coriander and a swirl of reserved coconut cream if desired.

    • Can I use brown or green lentils instead? Red lentils are best here because they break down and create that creamy texture. Brown or green lentils will stay firmer and change the consistency.
    • Can I use canned lentils? Yes. Use 2 cans (14–15 oz each), drained and rinsed. Reduce the stock to 2½–3 cups and simmer to develop flavor. Blend part of the soup if you’d like it creamier.
    • Is this lentil soup spicy? It has mild warmth. Adjust the curry paste to your spice preference.
    • Can I use coconut milk instead of coconut cream? Yes. Full-fat coconut milk works well and makes it slightly lighter.
    • How do I make it extra creamy? Blend part of the soup or add an extra spoonful of coconut cream on top.
    • Is this vegan and gluten-free? Yes, this vegan lentil soup is naturally dairy-free and gluten-free — just double-check your curry paste label to be sure.
    • Too thick? Add a splash of water or extra stock to loosen it. Red lentils thicken as they sit.
    • Layer your salt. A small pinch during sautéing makes a big difference later.
    • Want it smoother? Blend half the soup with a stick blender for extra creaminess.
    • More heat? Add chili flakes or extra curry paste.
    • Make-ahead: Tastes even better the next day. Store in the fridge for up to 4 days.
    • Freezer-friendly: Cool completely and freeze in portions for up to 3 months. Thaw overnight and reheat gently.

    Calories: 369kcal | Carbohydrates: 43g | Protein: 15g | Fat: 17g | Saturated Fat: 11g | Polyunsaturated Fat: 1g | Monounsaturated Fat: 3g | Sodium: 1299mg | Potassium: 844mg | Fiber: 17g | Sugar: 7g | Vitamin A: 5142IU | Vitamin C: 13mg | Calcium: 79mg | Iron: 7mg

    Keywords: Coconut Red Lentil Soup, vegan soup, curried soup, curry lentil soup, high-protein soup

    More Vegetarian Recipes You Might Like


    Source link

  • Creamy Potato Salad with Dill Pickles (Lightened Up Recipe)

    Creamy Potato Salad with Dill Pickles (Lightened Up Recipe)

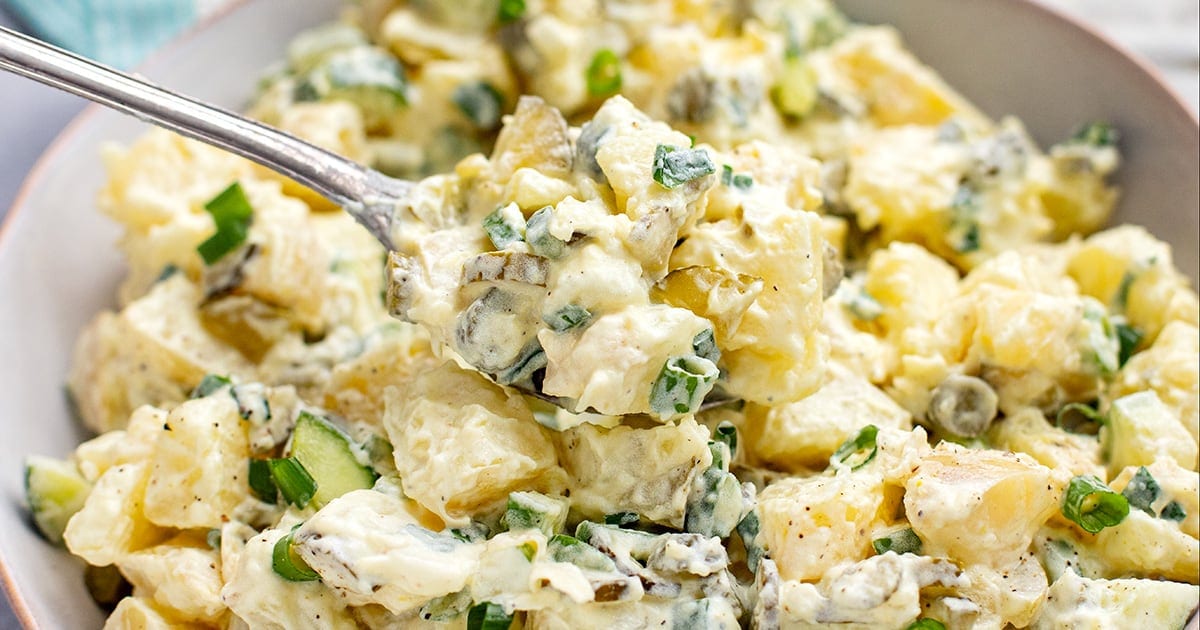
    This creamy potato salad with dill pickles is my go-to easy potato salad for BBQs and weekend dinners—tangy, crunchy and tossed in a lighter creamy dressing.


    Jump to: ℹ️ Overview | 🛒 Ingredients | 📷 How To Make | 📹 Watch The Video | 👩‍🍳 Recipe Tips | 🥗 Serving Suggestions | 📝Full Recipe Card | 🍽 More Salad Recipes


    • ⏱ Ready In: 35 minutes
    • 🍽 Serves: 8
    • 🌱 Diet: Vegetarian, gluten-free
    • 💪 Nutrition Highlights: Lighter dressing using light mayo and sour cream or Greek yogurt
    • 🥕 Main Ingredients: Potatoes, dill pickles, sweet pickles, cucumber, green onions
    • 🔥 Flavor Profile: Creamy, tangy, slightly sweet, crunchy, and fresh
    • 🧊 Meal-Prep Friendly: Keeps well for up to 4 days in the fridge
    • Best Served With: BBQ meats, grilled chicken, burgers, sausages, or roasted vegetables

    This creamy potato salad with dill pickles is the one I end up making the most. It’s simple, quick, and made with just a handful of ingredients, but the flavor is spot on.

    You get little pops of tangy dill pickles, a touch of sweetness from the sweet pickles, and fresh crunch from cucumber and green onions. Everything is coated in a lighter creamy dressing made with light mayo and light sour cream (or Greek yogurt if that’s what you have in the fridge).

    The potatoes stay nice and tender but not mushy, which is key for a good potato salad. The dressing is creamy without feeling heavy, and the pickle juice adds a little tang that really wakes the whole dish up.

    It’s one of those potato salads that people always ask about when I bring it to BBQs or family dinners. It’s also surprisingly great for meal prep — I’ll often serve it with grilled chicken or a couple of boiled eggs for a quick lunch.

    And yes… my 5-year-old happily eats this one too, which is always a good sign.

    🥔🥗 You might also like my other potato salads, such as this crispy smashed potato salad, this Spanish-inspired no-mayo potato salad with Romesco dressing, or this unique potato salad with capers, apple, and crispy bacon. These are all great summer salads, but I make them throughout the year, too.

    What You’ll Need

    Here is what you’ll need for this creamy potato salad. Find the full measurements in the recipe card below.

    Potatoes & Crunchy Bits

    • White potatoes – creamy and hold their shape well for potato salad; I have made this with larger potatoes and baby potatoes; red potatoes will also work and give you a fun color. PS. Leave the skin on if they’re clean for extra texture and fibre.
    • Fresh cucumber – adds freshness and crunch.
    • Dill pickles / gherkins – bring tangy acidity and savory flavor.
    • Sweet pickles – add a little sweetness that balances the tang.
    • Green onions – mild onion flavor and freshness.

    Note: Pickles are a classic flavor booster in creamy salads because they add tang, sweetness, and crunch that balance rich dressings. I love a combination of more savory dill and also sweet (like butter pickles), but you can use one type, just make sure it’s the total amount of both.

    Creamy Dressing

    • Light mayonnaise – the creamy base.
    • Light sour cream or Greek yogurt – adds tang and lightens the dressing.
    • Yellow mustard – a little zing.
    • Pickle juice – subtle acidity and extra pickle flavor.
    • Salt and pepper – to bring everything together.

    How To Make Creamy Potato Salad With Dill Pickles

    Find the full recipe and nutritional information below. Here are some handy step-by-step photos for how to make potato salad with dill pickles and creamy but light dressing.

    • Add potatoes to a pot with cold water and salt. Bring to a boil and simmer until just fork-tender, about 12–15 minutes.
    • Drain and let the potatoes cool slightly, then cut into bite-sized cubes.
    • Dice cucumber, dill pickles, sweet pickles, and green onions.
    • Whisk together mayonnaise, sour cream (or yogurt), mustard, pickle juice, salt, and pepper in a large bowl.
    • Add pickles, cucumber, and green onions to the bowl and follow with potatoes, and gently toss until coated.
    • Taste; add more salt or pepper if needed. Top with extra green onions or chives and a little black pepper.

    Watch The Video

    Recipe Tips

    • Start potatoes in cold water. This helps them cook evenly instead of being mushy outside and undercooked inside.
    • Don’t overcook the potatoes. They should be tender but still hold their shape. Overcooked potatoes will make the salad mushy.
    • Let the potatoes cool slightly before mixing. If they’re too hot, the dressing can separate.
    • Chop everything evenly. Small, uniform pieces make every bite balanced.
    • For extra flavor. Add a little chopped fresh dill or chives.
    • Storage: Store in an airtight container in the fridge for up to 4 days. Stir before serving, as the dressing may settle.
    • Make-ahead tip: This salad actually tastes better after a few hours in the fridge, which makes it perfect for BBQs or meal prep.

    Variations

    • Add hard-boiled eggs for a classic deli-style potato salad.
    • Add crispy bacon for a smoky twist.
    • Swap cucumber for celery if you prefer.

    Serving Suggestions

    This potato salad is basically made for summer meals and BBQs.

    Serve it alongside BBQs kabobs or skewers, grilled chicken tenders, burgers, sausages, or steak. It’s also great with grilled vegetables or baked salmon.

    For a quick lunch, I often pair it with air fryer chicken wings, shrimp skewers, or steak bites. For a quick lunch, you can pair it with canned tuna, boiled eggs, chickpeas, or grilled halloumi. It turns a simple side dish into a pretty satisfying meal.

    💬 If you’ve tried this creamy potato salad with dill pickles or any other recipe on the blog then don’t forget to rate the recipe and let me know how you got on in the comments below, I love hearing from you! You can also FOLLOW ME on Instagram, Facebook, Pinterest, YouTube, and or sign up to my Newsletter to see more of my delicious food.

    Want to Save This Recipe?

    Enter your email & I’ll send it to your inbox. Plus, get great new recipes from me every week!

    By submitting this form, you consent to receive emails from Cooked & Loved

    This creamy potato salad with dill pickles is my go-to easy potato salad for BBQs and weekend dinners—tangy, crunchy and tossed in a lighter creamy dressing. Find step-by-step photos and more recipe tips above.

    • If the potatoes are clean, leave the skin on and trim any blemishes or green spots. Cut into large wedges.

    • Add potatoes to a medium pot and cover with cold water. Stir in 1 teaspoon salt.

    • Bring to a boil, then reduce to a simmer and cook until potatoes are just tender when pierced with a knife, about 12–15 minutes.

    • Drain and allow potatoes to cool slightly, then cut into cubes.

    • While the potatoes cool, dice the cucumber, pickles and green onions.

    • In a large bowl, whisk together mustard, salt, pepper, pickle juice, mayonnaise and sour cream until smooth.

    • Add the diced pickles, cucumber, green onions and potatoes to the bowl.

    • Gently mix until everything is evenly coated in the dressing.

    • Taste and adjust seasoning if needed.

    • Serve topped with extra green onions or chives and a little cracked pepper.

    • Can I make potato salad ahead of time? Yes. It actually tastes better after chilling for a few hours as the flavours meld together, which makes it perfect for BBQs or meal prep.
    • What potatoes work best? Waxy potatoes like white or Yukon Gold hold their shape well.
    • Can I make this healthier? Yes — swap the sour cream for Greek yogurt and use light mayonnaise.
    • Can I skip the sweet pickles? You can, but they balance the tangy dill pickles nicely.
    • Can I add herbs? Fresh dill or chives are fantastic here.
    • Start potatoes in cold water. This helps them cook evenly instead of being mushy outside and undercooked inside.
    • Don’t overcook the potatoes. They should be tender but still hold their shape. Overcooked potatoes will make the salad mushy.
    • Let the potatoes cool slightly before mixing. If they’re too hot, the dressing can separate.
    • Chop everything evenly. Small, uniform pieces make every bite balanced.
    • For extra flavor. Add a little chopped fresh dill or chives.
    • Storage: Store in an airtight container in the fridge for up to 4 days. Stir before serving as the dressing may settle.
    • Add hard-boiled eggs for a classic deli-style potato salad.
    • Add crispy bacon for a smoky twist.
    • Swap cucumber for celery if you prefer.

    Calories: 175kcal | Carbohydrates: 28g | Protein: 3g | Fat: 6g | Saturated Fat: 2g | Polyunsaturated Fat: 3g | Monounsaturated Fat: 1g | Trans Fat: 0.01g | Cholesterol: 8mg | Sodium: 762mg | Potassium: 623mg | Fiber: 3g | Sugar: 4g | Vitamin A: 227IU | Vitamin C: 27mg | Calcium: 55mg | Iron: 1mg

    Keywords: potato salad, Creamy Potato Salad with Dill Pickles, Dill Pickle Potato Salad

    Check Out These Salad Recipes


    Source link

  • Creamy Cheesy Bean Dip

    Creamy Cheesy Bean Dip

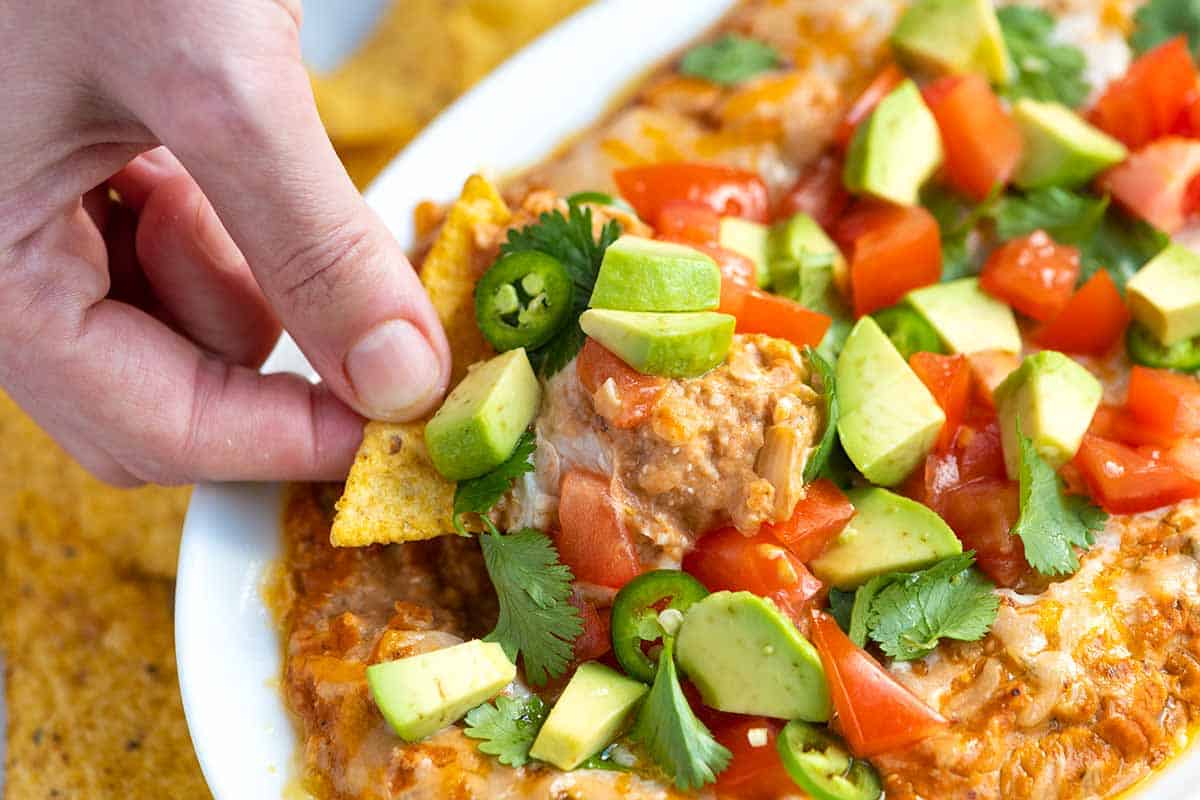
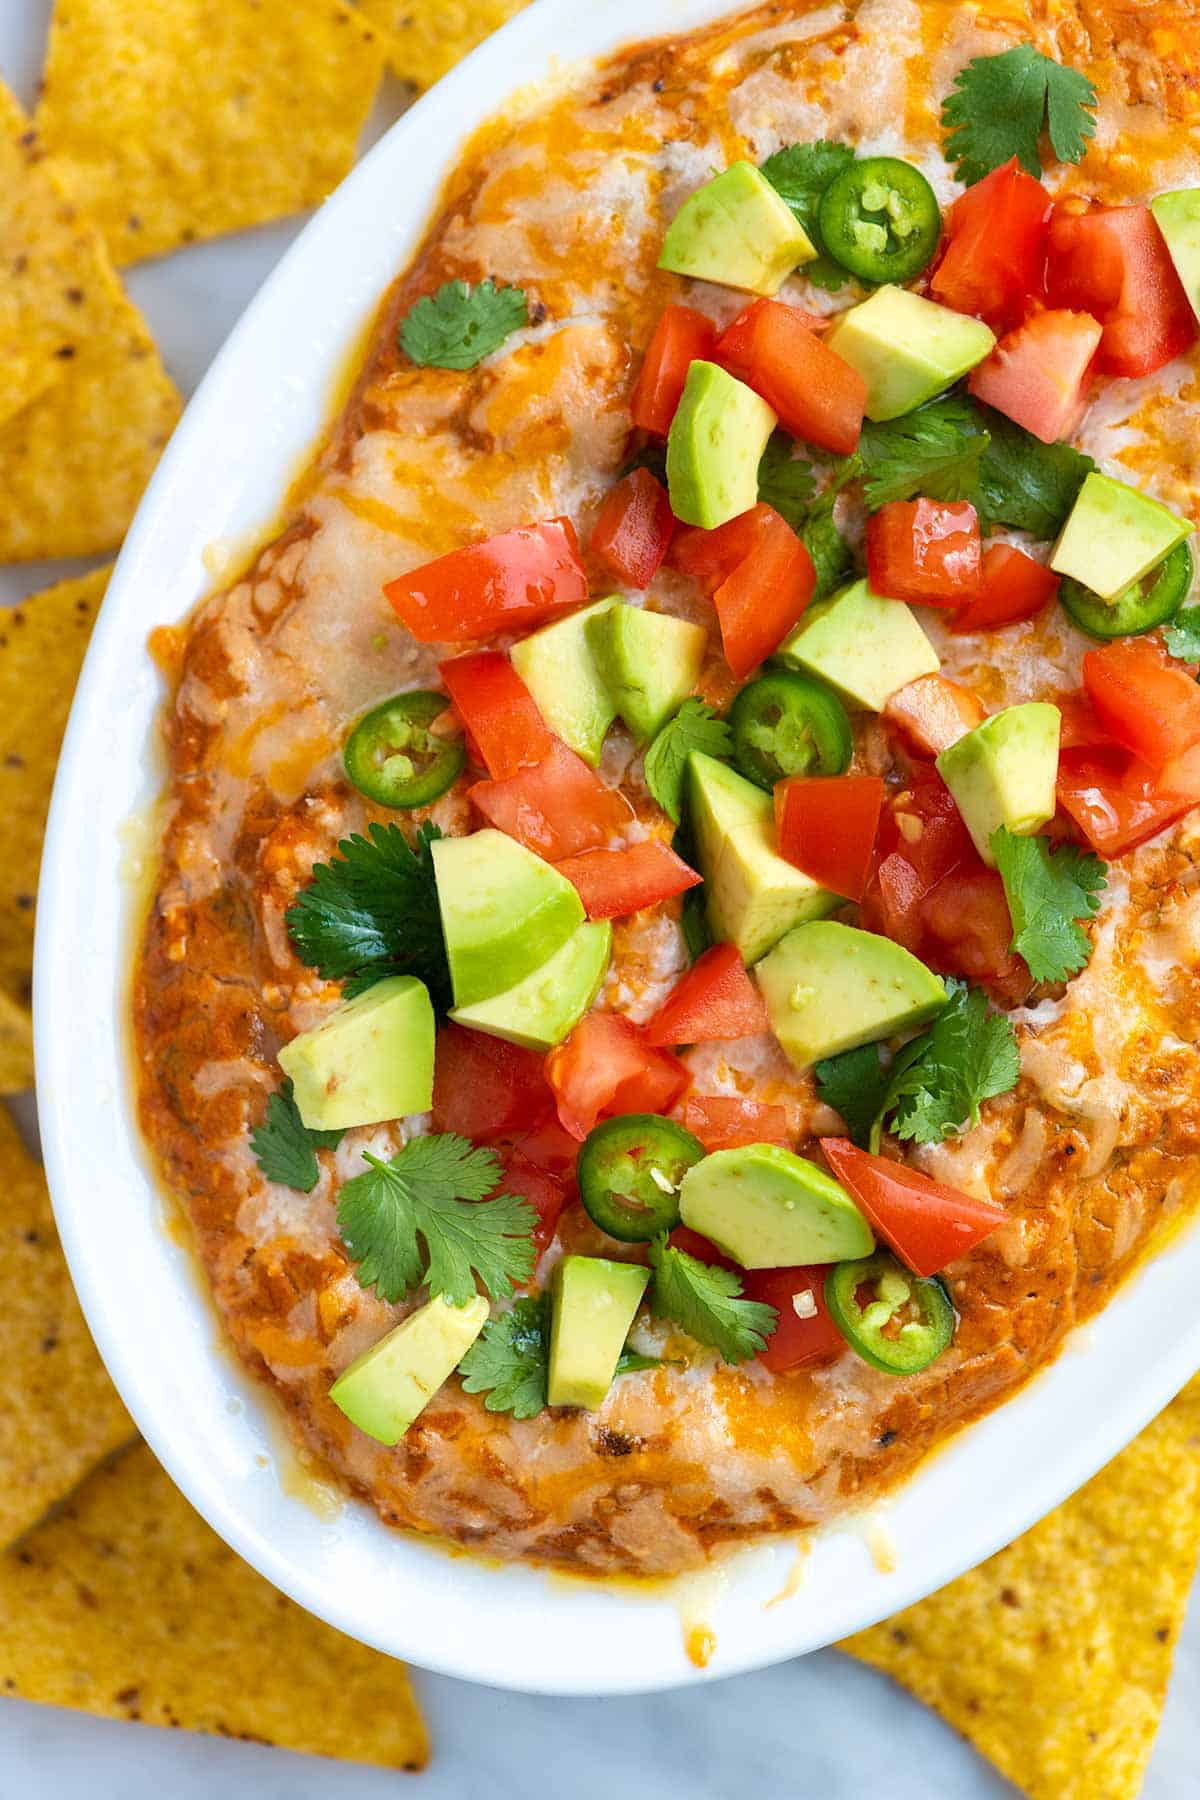
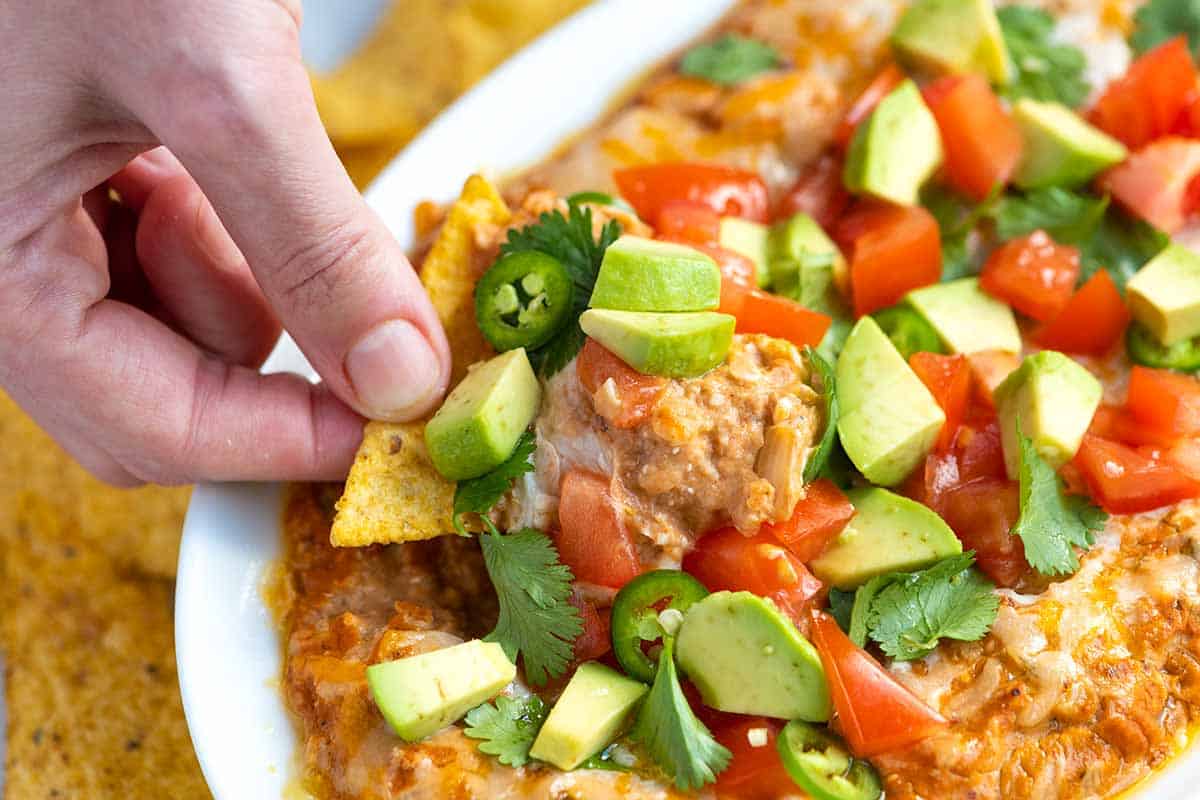
    Our bean dip recipe combines refried beans, sour cream, the perfect blend of spices, and melty shredded cheese. It’s hot, bubbly, cheesy, and really delicious!

    Cheesy Bean Dip

    Serve this easy bean dip with tortilla chips, toasted bread, or veggies! It’s basically my new go-to party appetizer (well, this and our infamous onion dip). It’s excellent with homemade refried beans, but you can absolutely use canned for ease.

    This is perfect with chips, especially homemade tortilla chips. It never lasts long.

    Key Ingredients

    • Refried Beans: Canned works perfectly fine, but I love making our refried beans from scratch when I have the time.
    • Onion, Garlic, and Spices: You’ll cook these in a bit of oil before adding our spices. We combine chili powder (I love ancho chili powder or homemade chili powder), cumin, smoked paprika, and coriander.
    • Salsa: Use your favorite store-bought salsa or make your own. I love this roasted tomato salsa or this quicker restaurant-style salsa.
    • Green Chiles: I use canned green chiles in quite a few of our recipes and love them! They are sold in small (4-ounce) cans near salsas and hot sauce. When buying them, look for either “mild” or “hot” on the can and choose whichever you prefer based on how spicy you want the dip. Other recipes where I use them include homemade queso, this white chicken chili, and our weeknight taco soup.
    • Cream Cheese and Sour Cream: These make our dip extra creamy. I love full-fat versions of each for the best flavor. To make this dip vegan, you can substitute your favorite dairy-free versions.
    • Melty Cheese: This dip has two layers of melted cheese (on top and in the middle), so when you dig in with a tortilla chip, you are guaranteed to get some cheese. Use something that melts well, like cheddar, Monterey Jack, or my favorite, Oaxaca melting cheese, which I buy in a local Mexican grocery store.

    Find the full recipe with measurements below.

    How to Make Our Cheesy Bean Dip

    Tip 1: Cook the onions with spices. You want your onions to turn soft and sweet, so cook them in a bit of oil wth the garlic. When they smell sweet, stir in the dried spices and let them toast in the pan to really bring out their flavor.

    Tip 2: Bring everything together. Once your onions are ready, you’ll stir them with the other dip ingredients (refried beans, salsa, chilies, cream cheese, and sour cream). It doesn’t look like much, but wow, does it turn out delicious.

    Stirring all the bean dip ingredients together in a bowl

    Tip 3: Add two layers of cheese. Instead of adding all the shredded cheese to the top of your dip. Spread about half of the bean dip mixture into a baking dish, then cover with cheese, add the remaining dip mixture, and top with more cheese. Layering the cheese like this guarantees a cheesy dip every time you go in for more.

    Adding two layers of cheese to the bean dip before baking in the oven

    Tip 4: Bake until hot. You are looking at about 25 minutes in the oven. Then you want to serve it hot. If you aren’t quite ready to bake, cover the dip and refrigerate until you are. It can sit in the fridge up to 3 days, and then be baked for serving.

    Tip 5: Add some toppings. The dip is lovely as is, but you can make it even better by adding a sprinkle of your favorite fresh toppings like diced avocado, chopped tomatoes, onions, or cilantro.

    More Favorite Party Appetizers

    Cheesy Bean Dip

    Cheesy Bean Dip

    • PREP
    • COOK
    • TOTAL

    Perfect for parties, watching the game, and family gatherings, this easy bean dip comes together in no time. Start with canned refried beans, or use homemade refried beans to make it. I love serving this with homemade tortilla chips!

    12 Servings (4 cups)

    Watch Us Make the Recipe

    You Will Need

    1 (15-ounce) can of refried beans or 1 ¾ cups homemade refried beans

    1 tablespoon avocado oil or olive oil

    ¾ cup finely chopped onion, half a medium onion

    1 tablespoon minced garlic, 3 cloves

    ¾ teaspoon ancho chili powder or homemade chili powder

    ¾ teaspoon ground cumin

    ½ teaspoon smoked paprika

    ½ teaspoon ground coriander

    ½ cup mild or medium salsa, like homemade roasted tomato salsa

    1 (4-ounce) can of diced green chilies

    ½ cup cream cheese (113g or 4oz)

    ½ cup sour cream (113g or 4oz)

    ¾ cup shredded cheese like cheddar, Monterey Jack, or Oaxaca cheese (85g or 3oz)

    Salt and fresh ground black pepper

    Pinch cayenne or hot sauce, optional for spicy dip

    Optional toppings: lime juice, diced avocado, guacamole, chopped tomatoes, sliced jalapeño, fresh cilantro, extra hot sauce

    Directions

      1Prep: Preheat the oven to 350°F (180°C). Set aside a small (1 to 1 ½ quart) baking dish or 8-inch cast iron skillet.

      2Cook the onions and garlic: Heat 1 tablespoon of oil in a small skillet over medium heat. Add the onions and garlic, then cook, stirring occasionally, until the onions are soft, translucent, and smell sweet, about 5 minutes. Stir in 3/4 teaspoon chili powder, 3/4 teaspoon cumin, 1/2 teaspoon smoked paprika, and 1/2 teaspoon coriander.

      3Prepare the bean dip: In a medium bowl, stir the refried beans, salsa, diced chilies, cream cheese, and sour cream. When they are ready, stir in the cooked spiced onions and garlic.

      4Taste the dip, and then adjust with salt and pepper as needed. To make it spicy, add a pinch of cayenne pepper or a few dashes of hot sauce.

      5Bake the bean dip: Transfer half of the dip to a small baking dish. Top with half of the shredded cheese. Then, spread the remaining bean dip over the cheese and finish with the rest of the shredded cheese.

      6Bake until hot throughout, and the cheese melted, for 20 to 25 minutes. Serve warm with a spritz of fresh lime juice and any optional toppings.

    Adam and Joanne’s Tips

    • Make-ahead: Make the dip as directed in our recipe below, and then add the dip and cheese to a baking dish. Cover the dish, then refrigerate for up to 3 days until you are ready to bake.
    • Diced green chilies: Small 4 ounce cans are sold at the supermarket. We love the Hatch brand and usually purchase mild.
    • Vegan adaptations: Use vegan refried beans, vegan sour cream, and vegan cream cheese (a combination of or use just one), as well as vegan shredded cheese or substitute with 4 to 5 tablespoons of nutritional yeast for sprinkling in the middle and on top.
    • Slow cooker version: Cook the onions, garlic, and spices as directed in the recipe below, and then add them along with the remaining ingredients to your slow cooker. Stir until well combined, then cook on LOW for 2 to 3 hours or until the cheese melts and the dip is heated throughout.
    • The nutrition facts provided below are estimates.

    Nutrition Per Serving
    Serving Size
    1/3 cup
    /
    Calories
    127
    /
    Total Fat
    8.8g
    /
    Saturated Fat
    4.4g
    /
    Cholesterol
    22.4g
    /
    Sodium
    296.8mg
    /
    Carbohydrate
    7.9g
    /
    Dietary Fiber
    2.1g
    /
    Total Sugars
    1.7g
    /
    Protein
    4.6g


    AUTHOR:

    Joanne Gallagher

    Adam and Joanne of Inspired Taste

    We are Adam and Joanne Gallagher, the creators of Inspired Taste. Established in 2009, Inspired Taste grew from a childhood dream into one of the internet’s most trusted recipe sites with hundreds of reliable recipes, step-by-step videos, and expert tips.More About Us

    Source link

  • Creamy Vegan Queso Recipe

    Creamy Vegan Queso Recipe

    Our vegan queso recipe truly is a game-changer. It’s outrageously creamy texture is all thanks to the magic of cashews. Both vegans and non-vegans consistently rave about this dairy-free dip.

    Creamy Vegan Queso

    I’ve served this countless times to those who typically eat dairy, and they’re always blown away by how incredibly creamy and flavorful it is. With just about a minute in a blender, cashews transform into a velvety smooth cashew cream, forming the perfect base for this easy dip. It honestly rivals any traditional queso made with dairy cheese!

    It’s fantastic spooned generously onto tacos or tucked inside burritos for an extra layer of creamy goodness. Beyond that, I adore serving it simply with a big bowl of homemade tortilla chips for dipping. It also makes an amazing cheese replacement for our veggie quesadillas, a perfect addition to our spiced cauliflower burritos, and my absolute favorite topping for these veggie tacos.

    Key Ingredients

    • Cashews: These make the base of our queso. We add them along with some water to a blender and blend until smooth, creating what we call cashew cream. I use raw cashews and don’t find it necessary to soak them before blending, especially with my high-powered blender. If you prefer to soak your cashews, you can (I’ve shared how in the tips below our recipe).
    • Taco Seasoning: I use my favorite homemade taco seasoning here, and I just love it! However, if you prefer a store-bought blend, please feel free to use it. It’s all about getting that perfect flavor you love.
    • Nutritional Yeast: If you’re familiar with vegan recipes, I bet you already have nutritional yeast on hand. I’m a major fan and find myself sprinkling it over everything from popcorn to avocado toast! For our queso, it’s key for adding that distinct cheesy flavor as well as a hint of yellow color.
    • Canned Green Chilies: I absolutely love canned green chilies (Hatch is my favorite brand!). In the U.S., they are typically sold in 4-ounce cans and are available in both mild and hot varieties. I usually go for the mild, but if you love a super spicy queso, the hot might be more your style.
    • Pickled Jalapeños (optional): We almost always have a jar of pickled jalapeños in our fridge (thanks, Adam!). Our vegan queso tastes amazing with just a splash of the brine from the pickled jalapeños. I also love scattering a small handful of chopped jalapeños right over the top for extra flavor and a bit of a kick.

    Find the full recipe with measurements below.

    How to Make Vegan Queso

    Tip 1: Make the creamy base. Cashews are the base for this vegan queso. If you’ve not made it before, it’s incredibly straightforward. Toss cashews and hot water into your blender, hit blend, and watch as the nuts turn into a smooth, creamy consistency.

    Since you’ll be blending hot water, remember to remove the blender lid insert and cover the hole with a dishtowel. This will allow steam to escape and prevent too much pressure from building inside the blender. (I learned this the hard way in culinary school when I blended a hot soup without removing the lid insert. The blender pretty much exploded, and soup was everywhere!)

    Cashews and hot water inside a blender
    Blended cashews for the base of vegan queso

    Tip 2: Make it “cheesy.” Now that you have the creamy base, you can add lots of flavor with nutritional yeast, taco seasoning, chopped green chiles, and pickled jalapeño brine (if using them). Blend until smooth, then check the consistency. If it’s too thick (mine often is), add a tablespoon or two of water to thin.

    You can serve it however you like, but for a pop of heat, I love to add some chopped pickled jalapeños on top.

    Make Ahead Tips

    This lasts in the fridge for up to 5 days, but you’ll probably notice it thickens over time. I like to slowly reheat on the stove or microwave with a little splash of water or unsweetened dairy-free milk to get it back to its proper consistency. If it just doesn’t seem as blended or creamy as when you first made it, consider blending it again to bring it back to its super creamy, luxurious texture.

    More Vegan Recipes

    Dipping a chip into Vegan Queso

    Creamy Vegan Queso

    • PREP
    • TOTAL

    Our favorite vegan queso recipe turns out incredibly creamy and flavorful, thanks to a base of cashews, nutritional yeast, and canned green chiles. If you have a high-powered blender, there is no need to soak your cashews before making the dip. However, if your blender is not very powerful, consider soaking the cashews for a smoother consistency (tips for this are below).

    I love this with homemade tortilla chips, used as a substitute for cheese in our veggie quesadillas, and added to these veggie burritos.

    Makes 1 ½ cups

    Watch Us Make the Recipe

    You Will Need

    1 cup raw cashews (140g or 5oz)

    ¾ to 1 cup hot water

    1 to 2 teaspoons taco seasoning, see our taco seasoning recipe

    3 tablespoons nutritional yeast

    1 (4-ounce) can chopped green chilies, mild or hot depending on preference

    1 tablespoon juice from jar of pickled jalapeños, optional

    1 tablespoon chopped pickled jalapeño, optional

    Salt to taste

    Chips for serving, try homemade tortilla chips

    Directions

      1Make cashew cream: Place the cashews and ¾ cup of hot water into your blender. Blend until it’s very smooth – we’re looking for a smooth, creamy consistency. For safety and to allow steam to escape, leave the top insert out and cover the opening with a clean dishtowel, holding it firmly in place with your hand.

      2Make vegan queso: To the cashew cream in your blender, add 1 teaspoon of taco seasoning, the nutritional yeast, chopped green chilies, and a tablespoon of jalapeño pickle juice. Blend again until everything is perfectly smooth and combined. If you find the queso is a bit too thick for your liking, blend in a little more water, a tablespoon at a time, until it reaches your desired consistency.

      3Serve: Taste it, and then season with salt or a bit more taco seasoning as needed. Spoon into a bowl. For an extra pop of flavor and a touch of heat, top it generously with chopped pickled jalapeños.

    Adam and Joanne’s Tips

    • Soaking cashews: This step can help soften them, making them easier to blend into a smooth cream. However, if you’re like me and have a high-powered blender, soaking isn’t even necessary. However, if you do want to soak them, I have a couple of quick methods: bring water to a boil, turn off the heat, add the cashews, and let them soak for about 30 minutes before draining. Alternatively, for a more hands-off approach, you can soak them in room-temperature water for 3 to 4 hours.
    • Storing: Store vegan queso in an airtight container in the fridge for up to 5 days or freeze for 1 to 2 months. Thaw overnight in the refrigerator (you may find it needs a good stir or quick blend to get back to the right texture).
    • The nutrition facts provided below are estimates.

    Nutrition Per Serving
    Serving Size
    About 1/2 cup
    /
    Calories
    145
    /
    Total Fat
    10.6g
    /
    Saturated Fat
    2.1g
    /
    Cholesterol
    0mg
    /
    Sodium
    105.1mg
    /
    Carbohydrate
    9.6g
    /
    Dietary Fiber
    1.8g
    /
    Total Sugars
    1.9g
    /
    Protein
    4.5g


    AUTHOR:

    Joanne Gallagher

    Adam and Joanne of Inspired Taste

    We are Adam and Joanne Gallagher, the creators of Inspired Taste. Established in 2009, Inspired Taste grew from a childhood dream into one of the internet’s most trusted recipe sites with hundreds of reliable recipes, step-by-step videos, and expert tips.More About Us

    Source link

  • Roasted Cherry Tomato Soup With Creamy Mascarpone

    Roasted Cherry Tomato Soup With Creamy Mascarpone

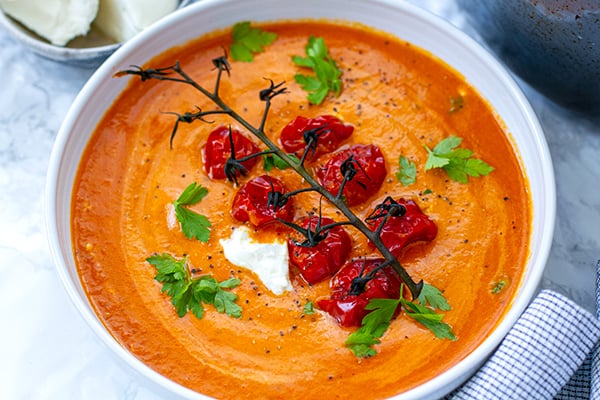
    Guys, this is one of the tastiest soups I’ve made and I am super excited to share this recipe! It’s a roasted tomato soup that is Bisque-like, tangy and sweet with silky, decadent mascarpone cream cheese folded in at the last minute. It’s a vitamin and antioxidant-rich recipe that is gluten-free, grain-free and vegetarian. You can also make a dairy-free version, although I do think mascarpone adds a bit of magic to it. Make sure to rate this recipe and comment at the bottom for others to discover this yummy dish.


    Roasted Cherry Tomato Soup

    The idea for this soup wasn’t mine, to begin with. A couple of months ago, I was walking down a supermarket in London and I saw a few ready-made soups on offer. There was the roast chicken, the classic butternut squash and then I spotted a pot of roasted cherry tomato soup with mascarpone. I’ve never had that soup, neither did I buy it that time.

    But, the idea has stuck in my mind because just that morning I roasted a whole bunch of cherry tomatoes and I was commenting to my partner how extra sweet and flavourful they become when caramelised during roasting.

    I thought ‘Wow, imaging that punchy, tangy and sweet roasted cherry tomato flavour mellowed out by the milky mascarpone. Creamy, silky, plenty of umami.” It was working in my head, so without ever trying the supermarket version, I decided to make my own creamy roasted tomato bisque soup. Not sure if it’s anything like that other soup but it was bloody fantastic and I am definitely making it again.

    What Is Mascarpone?

    Mascarpone is an Italian cream cheese that is most known for its use in tiramisu. It’s subtly sweet and silky cow’s milk cheese that has a rich texture that is somewhere between Philadelphia cream cheese and double cream. It tastes somewhere in between two, so it’s has a very faint hint of cheese and all the creaminess of the milky fat.

    Alternatives to mascarpone: you can fold in regular or light cream cheese, heavy or double cream, sour cream, creme fraiche, thick Greek yoghurt. If you’re using just the cream or yoghurt, you could also add a tiny sprinkle of grated cheese or Parmesan. For a dairy-free version, try thick coconut cream or a dairy-free cream.

    What Goes With Tomato Soup?

    The soup is rich and satiating on its own but you could serve it with some shredded chicken, cooked prawns, quinoa or chickpeas for extra protein. Grilled salty halloumi would also work well here.

    Serve it with a side of grilled cheese sandwiches or for something healthier make a loaf of this spinach feta bread, my low-carb bread or this fluffy gluten-free bread. I’ve also served it with this gluten-free focaccia, which was a fabulous combo. Some sourdough croutons might be nice or you can top the soup with some fried shallots or pumpkin seeds for an extra crunchy texture.

    How To Make Roasted Tomato Soup

    There are three simple parts to making this creamy tomato soup. I will guide you with some step-by-step pics and you can find the full list of ingredients, instructions and nutritional breakdown in the recipe card below.

    Part 1. Roast cherry tomatoes until caramelised and slightly charred. This will take about 30 minutes, during which time you can do Part 2.

    Part 2. Cook the base soup with sauteed mirepoix (onion, celery and carrots), garlic, tinned tomatoes and a few sun-dried tomatoes for extra oomph. This should take about 15-20 minutes.

    Part 3. Add the roasted cherry tomatoes to the cooked soup and puree into smooth bisque consistency. Finally, fold in the mascarpone cream cheese or alternatives.

    Want to Save This Recipe?

    Enter your email & I’ll send it to your inbox. Plus, get great new recipes from me every week!

    By submitting this form, you consent to receive emails from Cooked & Loved

    Learn how to make the most delicious roasted cherry tomato soup with creamy mascarpone. It’s a Bisque-like, tangy and sweet soup that is grain-free and gluten-free (if served as is). You can make a dairy-free version with coconut cream or plant-based cream.

    Calories: 253kcal | Carbohydrates: 15g | Protein: 5g | Fat: 20g | Saturated Fat: 9g | Polyunsaturated Fat: 1g | Monounsaturated Fat: 5g | Cholesterol: 28mg | Sodium: 282mg | Potassium: 546mg | Fiber: 3g | Sugar: 8g | Vitamin A: 3820IU | Vitamin C: 27mg | Calcium: 78mg | Iron: 2mg
    Keywords: Appetizer, Vegetarian, Soups

    MORE HEALTHY SOUPS TO TRY

    SAVE THIS CREAMY TOMATO SOUP TO PINTEREST

    Source link

  • Creamy Chicken Alfredo Soup in One Pot

    Creamy Chicken Alfredo Soup in One Pot

    This website may contain affiliate links and advertising so that we can provide recipes to you. Read my disclosure policy.

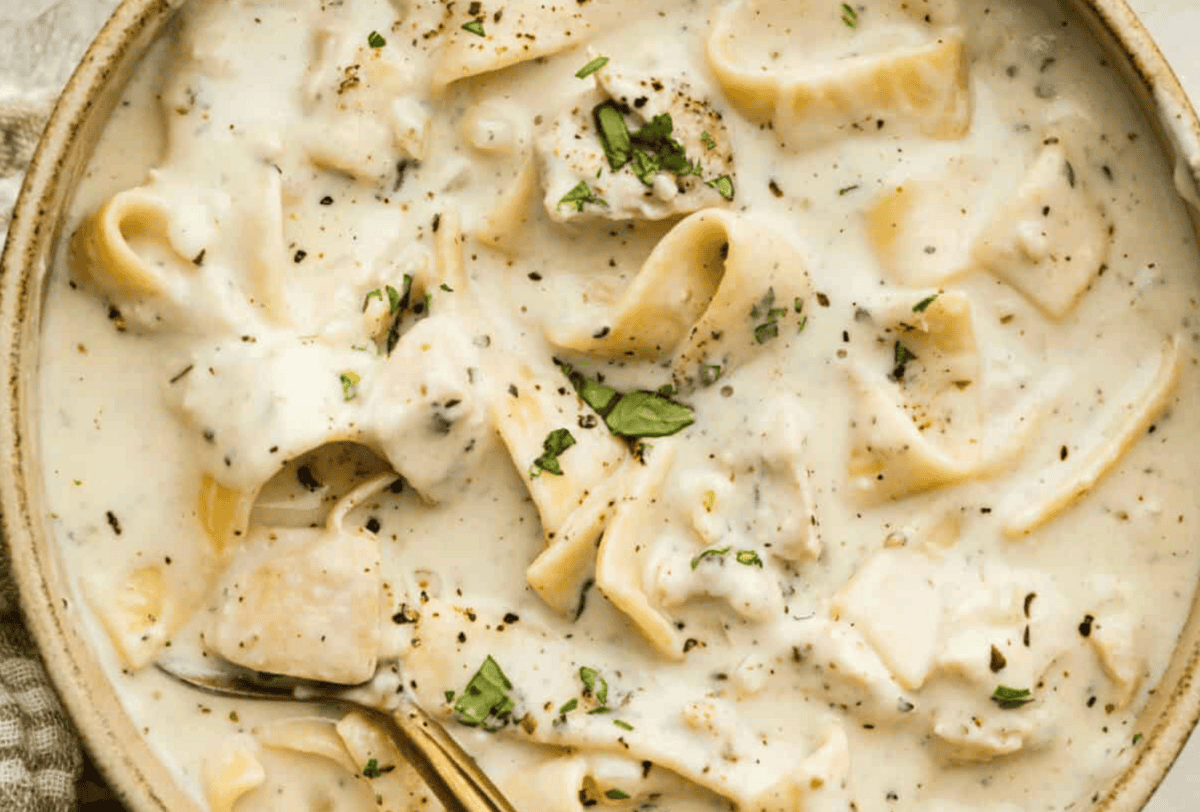
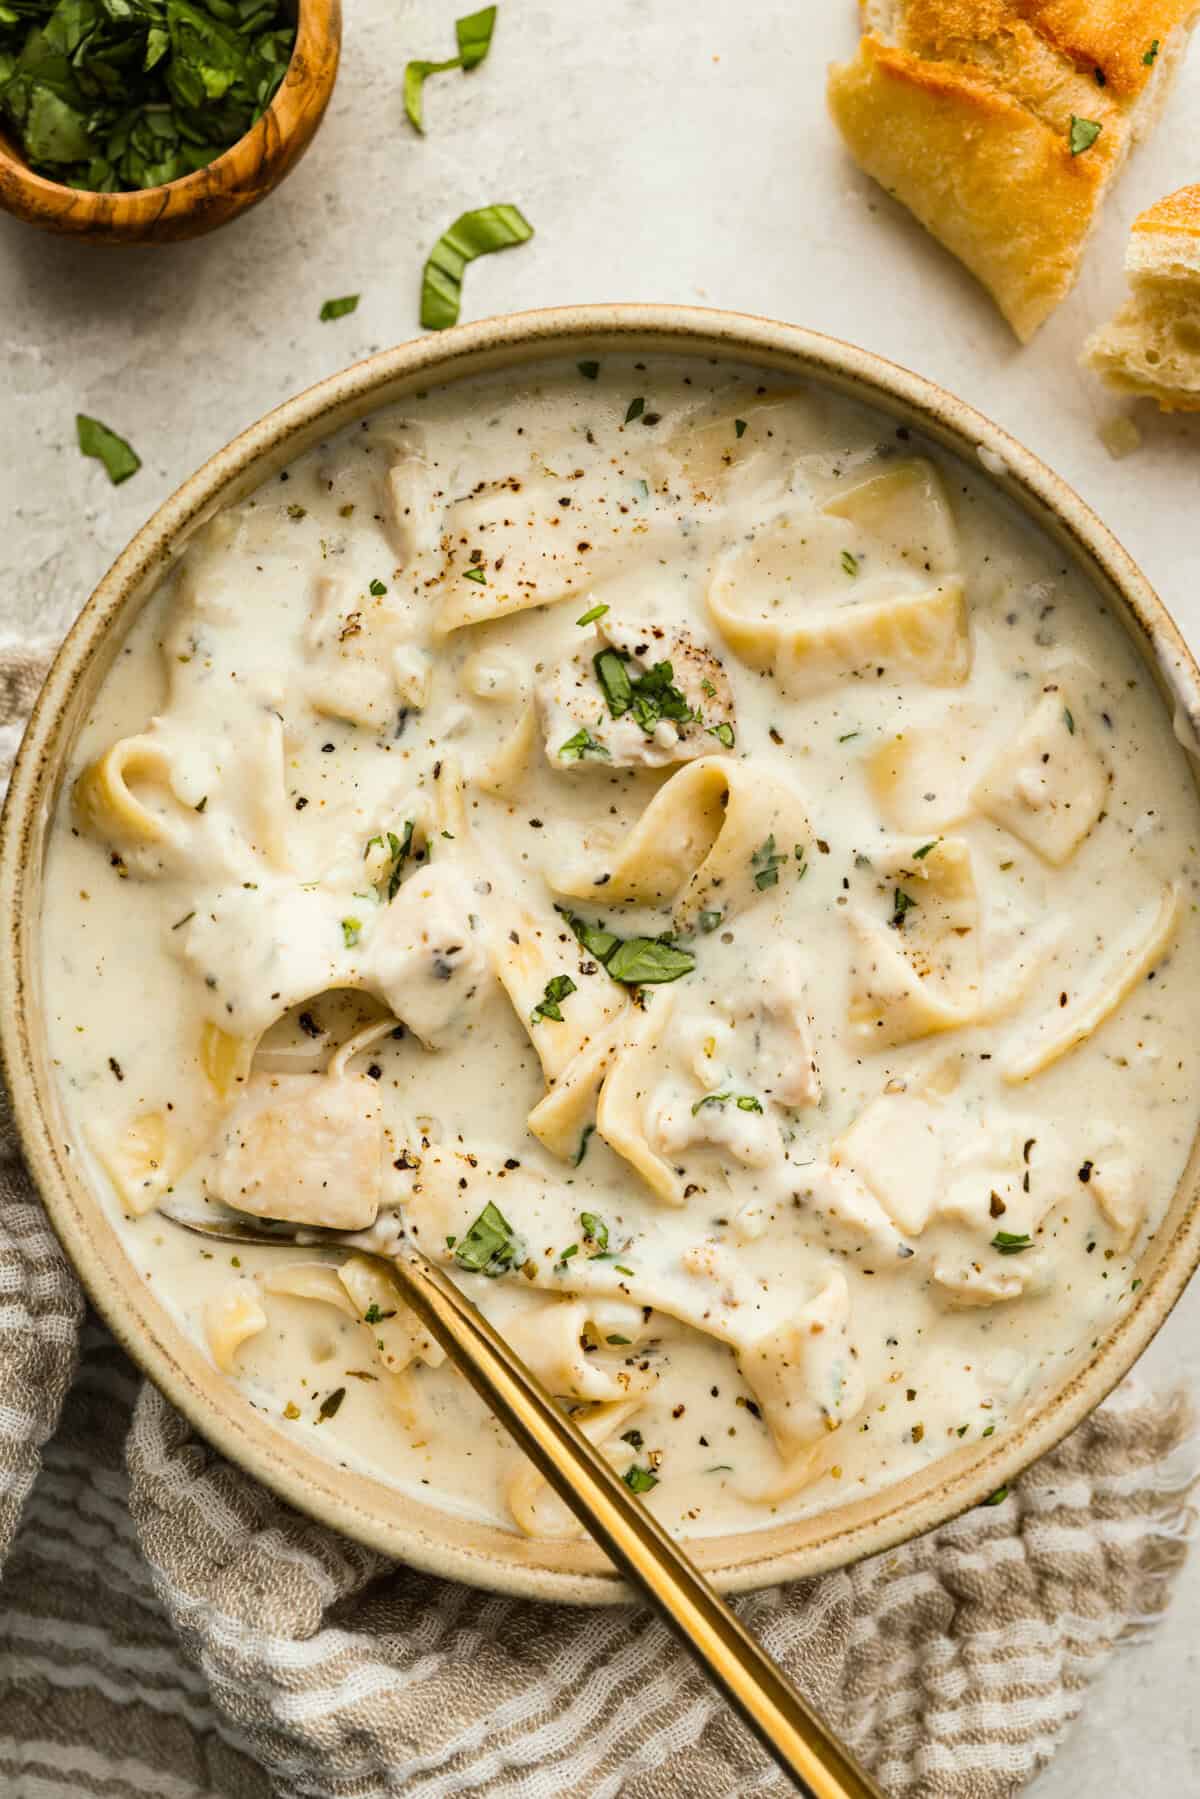
    You guys are obsessed with my homemade alfredo sauce. So I had to make this creamy, cheesy chicken Alfredo soup! Tender chicken, rich broth, and pasta all come together in just 30 minutes!

    Serving of chicken Alfredo soup in a bowl.

    Why This Soup is a Weeknight Wonder

    • All-in-One Pot: Everything cooks together in a single pot, making cleanup a breeze while delivering layers of creamy, cheesy flavor.
    • Perfect Family Dinner: Hearty and satisfying, it’s a simple meal everyone will love. Pair it with easy no-knead bread, my Grandma’s homemade bread, or these rolls.
    • Make it Your Own: Add extra veggies, swap in your favorite pasta, or spice it up!

    Ingredients for Chicken Alfredo Soup

    Overhead shot of labeled ingredients.
    • Half and Half: Half and half makes this soup creamy but not overly rich. You can make your own half and half if you don’t have any.
    • Pasta: Use any pasta shape for this. I love using wide egg noodles. Other great options are bowtie, rotini, or even cheese tortellini.
    • Chicken: This is a great recipe to use up leftover rotisserie chicken or make a quick batch of my air fryer chicken.

    How to Make Chicken Alfredo Soup

    One pot, simple ingredients, and big flavor! This creamy chicken Alfredo soup is a quick way to everyone’s heart! It’s so good and feels like a warm hug!

    1. Sauté the Onions: In a large pot over medium heat, melt the butter. Once melted, add diced onion and garlic. Cook until the onions begin to soften, about 2-3 minutes. Sprinkle all-purpose flour over the onions. Stir and cook the flour for 1-2 minutes.
    2. Add Seasonings: Add Italian seasoning, garlic powder, salt, and pepper to taste. Then slowly whisk in chicken broth and half and half.
    3. Cook: Bring to a boil and then add uncooked pasta. Reduce to a simmer and cook until the pasta is al dente.
    4. Finish with Chicken and Cheese: Add cooked chicken, grated parmesan cheese, and shredded mozzarella cheese, then cook until the cheese is melted. Add fresh basil and parsley and serve.

    Pin this now to find it later

    Pin It

    Pot of chicken Alfredo soup.

    More Cozy Soup Recipes

    best_chicken_noodle_soup_recipes

    Slow Cooker Chicken Fajita Soup

    4 hours 10 minutes


    Source link

  • Creamy Chicken Pasta With Pesto

    Creamy Chicken Pasta With Pesto

    This creamy chicken pasta with pesto is fresh, vibrant, and perfectly comforting. It’s family-friendly, high in protein, satisfying, and everyone at my table gobbled it up (including my 4-year-old).


    Jump to: ℹ️ Overview | 🛒 Ingredients | 📷 How To Make | 📹 Watch The Video | 👩‍🍳 Recipe Tips | 🥗 Serving Suggestions | 📝 Full Recipe Card | 🍽 More Chicken Recipes


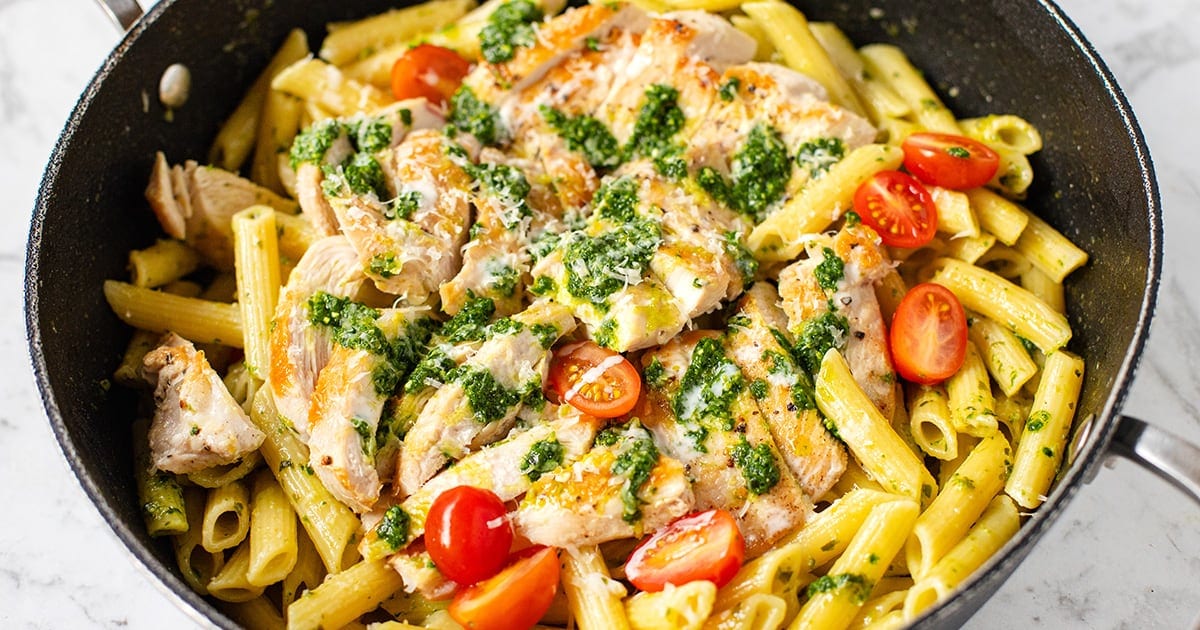
    This creamy chicken pasta with pesto is something I make often, and it never fails me. It’s got that gorgeous fresh basil flavor from pesto, balanced with a light cream sauce that clings to every bite of tender chicken and penne.

    Unlike heavier Alfredo-style pastas, this one feels just right — creamy but not overwhelming. A bit of lemon keeps it bright, and a sprinkle of Parmesan ties it all together.

    My kid always asks for seconds, and I secretly love that it packs in protein without feeling too rich. Each serving hits that sweet spot of about 30 grams of protein and enough carbs to keep you full. Honestly, it’s one of those recipes you’ll tuck away and keep coming back to.

    👩‍🍳 You might also like these pasta dishes: creamy Italian sausage pasta, Marry Me chicken orzo bake, chicken pasta Alfredo with broccoli, garlic Parmesan chicken and pasta, lemon chicken orzo pasta, butternut squash pasta, and veggie pasta bake. You may also want to check out these chicken pasta recipes and crock pot Marry Me chicken.

    What You’ll Need

    Here is what you’ll need for this creamy chicken pasta with pesto recipe. Find the full measurements in the recipe card below.

    • Pasta – I like penne pasta, but you could use fusilli or rigatoni — anything that holds sauce nicely.
    • Chicken – Boneless chicken breast (you could use boneless thighs if you prefer juicier meat), and you will need salt and pepper for seasoning and a little olive oil for cooking. PS. For a speedy version, slice up some store-bought rotisserie chicken and skip the chicken cooking step altogether!
    • Basil pesto – Store-bought basil pesto is fine, but homemade makes it special. If buying store-bought, I highly recommend fresh pesto you would get in the refrigerated section, it’s more pungent and vibrant green.
    • Also for creamy pesto sauce – garlic (for that savory backbone), lemon zest and juice (brightens up the cream), chicken stock (adds depth and volume), light cream (or use half-and-half), and Parmesan cheese (for salty, nutty richness).
    • To Serve – Cherry tomatoes (I love the pop of color) and extra Parmesan (never too much cheese).

    How To Make Creamy Chicken Pasta With Pesto

    Find the full recipe and nutritional information below. Here are some handy step-by-step photos for how to make creamy chicken pasta with pesto.

    • Cut chicken breasts horizontally for even cooking, season with salt and pepper.
    • Sear chicken in olive oil until golden and cooked through, about 5 minutes each side; set aside.
    • In parallel, cook pasta until just al dente; set aside.
    • In the same pan, add a little extra oil and sauté garlic and lemon zest gently.
    • Pour in chicken stock, half the pesto, light cream, lemon juice, and Parmesan.
    • Simmer 4–5 minutes until the sauce is slightly thickened.
    • Slice chicken, return to pan with juices (you can also pop the chicken on top of the pasta later).
    • Stir in cooked pasta and remaining pesto.
    • Top with extra pesto, Parmesan, and cherry tomatoes.

    Watch The Video

    Recipe Tips

    • Make it extra creamy: Swap light cream for heavy cream if you want indulgence.
    • Protein swap: Try shrimp or rotisserie chicken (this will make things even easier as you won’t need to cook the chicken). If using shrimp/prawns, pan-fry for 2 minutes each side.
    • Veg it up: Stir in baby spinach or peas at the end. Try adding some sun-dried tomatoes.
    • Pasta water: If your sauce feels too thick, add a splash of pasta cooking water to loosen it.
    • Leftover pesto: Freeze in an ice cube tray for quick flavor boosts.
    • Storage tips: Leftovers keep well in the fridge up to 3 days. Reheat gently on the stovetop with a splash of stock or cream. I don’t recommend freezing—cream sauces can separate.
    • Make-ahead tips: You can cook the chicken and make the sauce a day ahead—just reheat gently before tossing with pasta. Even the pasta can be cooked in advance and lightly oiled to prevent sticking.

    Serving Suggestions

    I like serving this with a simple side salad or a green salad and maybe a hunk of crusty bread to mop up the sauce. A glass of chilled white wine doesn’t hurt either.

    💬 If you’ve tried this creamy chicken pasta with pesto or any other recipe on the blog then don’t forget to rate the recipe and let me know how you got on in the comments below, I love hearing from you! You can also FOLLOW ME on Instagram, Facebook, Pinterest, YouTube, and or sign up to my Newsletter to see more of my delicious food.

    Want to Save This Recipe?

    Enter your email & I’ll send it to your inbox. Plus, get great new recipes from me every week!

    By submitting this form, you consent to receive emails from Cooked & Loved

    This creamy chicken pasta with pesto is fresh, vibrant, and perfectly comforting. It’s family-friendly, high in protein, satisfying, and everyone at my table gobbled it up (including my 4-year-old). Find step-by-step photos and more recipe tips above.

    • Cook Pasta: Cook the penne according to package directions until al dente. Drain and set aside.

    • Prepare Chicken: Cut the chicken breasts horizontally so they cook evenly. Season both sides with salt and pepper.

    • Sear Chicken: Heat 1 tablespoon olive oil in a large sauté pan over high heat. Add chicken, reduce heat to medium-high, and cook about 5 minutes per side. Remove thinner pieces early if needed. Transfer all chicken to a plate and rest.

    • Make Sauce: Lower heat to medium. Add 1 teaspoon olive oil, garlic, and lemon zest. Sauté until fragrant.

    • Build Sauce: Pour in chicken stock, half the pesto, cream, lemon juice, and Parmesan. Simmer for 4–5 minutes until slightly reduced.

    • Finish Chicken: Slice cooked chicken. Return to pan along with any juices. You can also return the juices to the sauce and reserve the chicken to serve on top like I did (for nicer presentation).

    • Combine Pasta: Add pasta and remaining pesto. Toss to coat.

    • Serve: Top with extra Parmesan, cherry tomatoes, and another drizzle of pesto.

    • Can I use jarred pantry pesto rather than fresh? Absolutely! Just look for one with good olive oil and real Parmesan.
    • What’s the best pasta shape? I like penne or rigatoni because they hold the sauce nicely.
    • Does this reheat well? Yes! We always enjoy the leftovers — just warm it gently on the stove with a splash of stock or cream.
    • Make it extra creamy: Swap light cream for heavy cream if you want indulgence.
    • Protein swap: Try shrimp or rotisserie chicken (this will make things even easier as you won’t need to cook the chicken). If using shrimp/prawns, pan-fry for 2 minutes each side.
    • Veg it up: Stir in baby spinach or peas at the end. Try adding some sun-dried tomatoes.
    • Pasta water: If your sauce feels too thick, add a splash of pasta cooking water to loosen it.
    • Leftover pesto: Freeze in an ice cube tray for quick flavor boosts.
    • Storage tips: Leftovers keep well in the fridge up to 3 days. I don’t recommend freezing—cream sauces can separate.
    • Make-ahead tips: You can cook the chicken and make the sauce a day ahead—just reheat gently before tossing with pasta. Even the pasta can be cooked in advance and lightly oiled to prevent sticking.

    Calories: 519kcal | Carbohydrates: 47g | Protein: 31g | Fat: 22g | Saturated Fat: 8g | Polyunsaturated Fat: 1g | Monounsaturated Fat: 6g | Trans Fat: 0.01g | Cholesterol: 92mg | Sodium: 896mg | Potassium: 534mg | Fiber: 2g | Sugar: 3g | Vitamin A: 663IU | Vitamin C: 3mg | Calcium: 123mg | Iron: 1mg

    Keywords: creamy chicken pasta with pesto, chicken pesto pasta, creamy pesto chicken pasta, chicken pesto, creamy chicken pasta

    More Chicken Recipes


    Source link

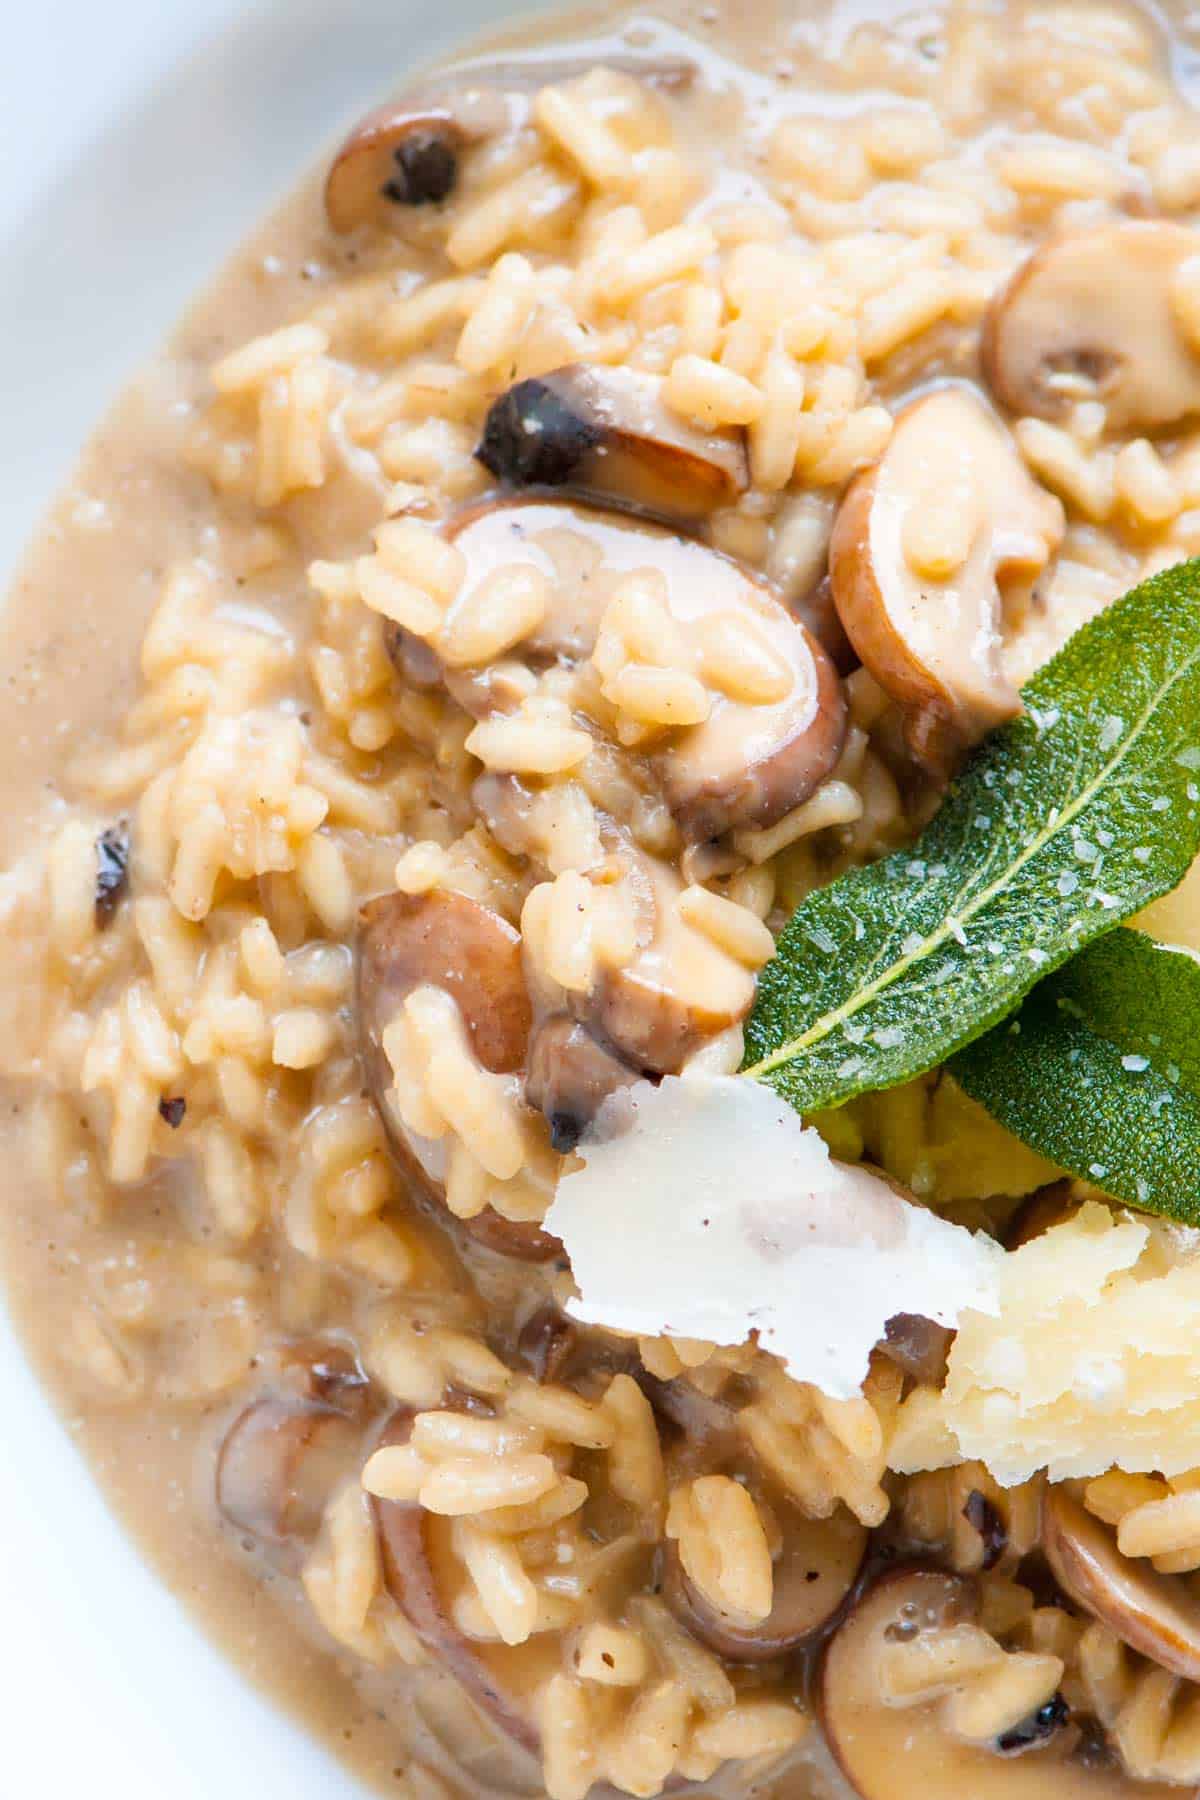
  • Creamy Mushroom Risotto Recipe

    Creamy Mushroom Risotto Recipe

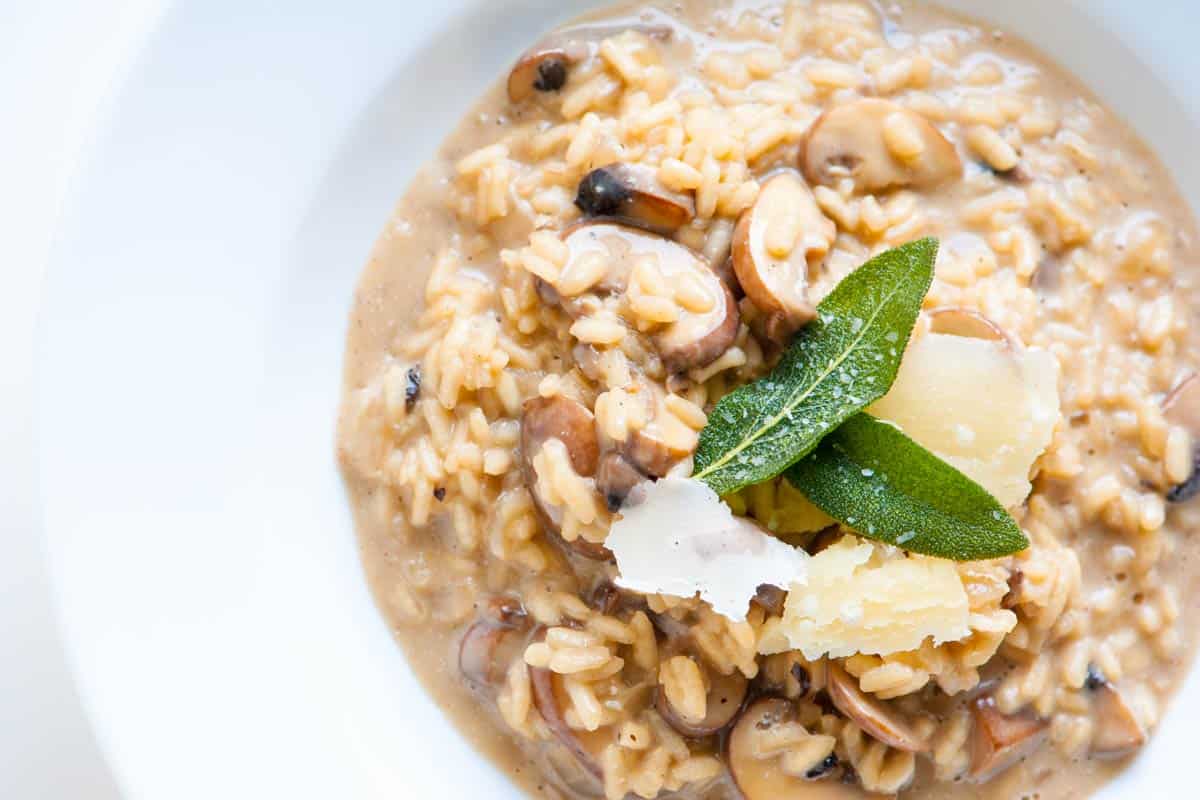
    I love this easy mushroom risotto recipe so much! It’s unbelievably creamy and tastes incredible, thanks to perfectly cooked mushrooms and an easy, umami-packed broth!

    Creamy Mushroom Risotto

    Mushroom risotto is a labor of love, but this mushroom risotto is totally doable with our easy recipe! It’s not a “throw everything into a pan and walk away” deal, but the steps are simple, and you’ll be rewarded with creamy mushroom risotto rivaling your favorite restaurants.

    For more incredible risotto recipes, I highly recommend our vegetable risotto made with tomato broth and lots of fresh veggies! For a quicker mushroom dish that still wows, try our mushroom pasta!

    Key Ingredients

    • Mushrooms: You can use your favorite mushrooms for this recipe, but I love cremini or wild mushrooms. I remove the stems and then use them to infuse my broth with mushroom flavor. Then, I slice the mushroom caps for the risotto.
    • Rice: The best rice for risotto are Arborio, Carnaroli, and Vialone Nano, all short-grain rice varieties with a high starch content. We use Carnaroli in our kitchen because it makes creamy risotto and is more forgiving of overcooking.
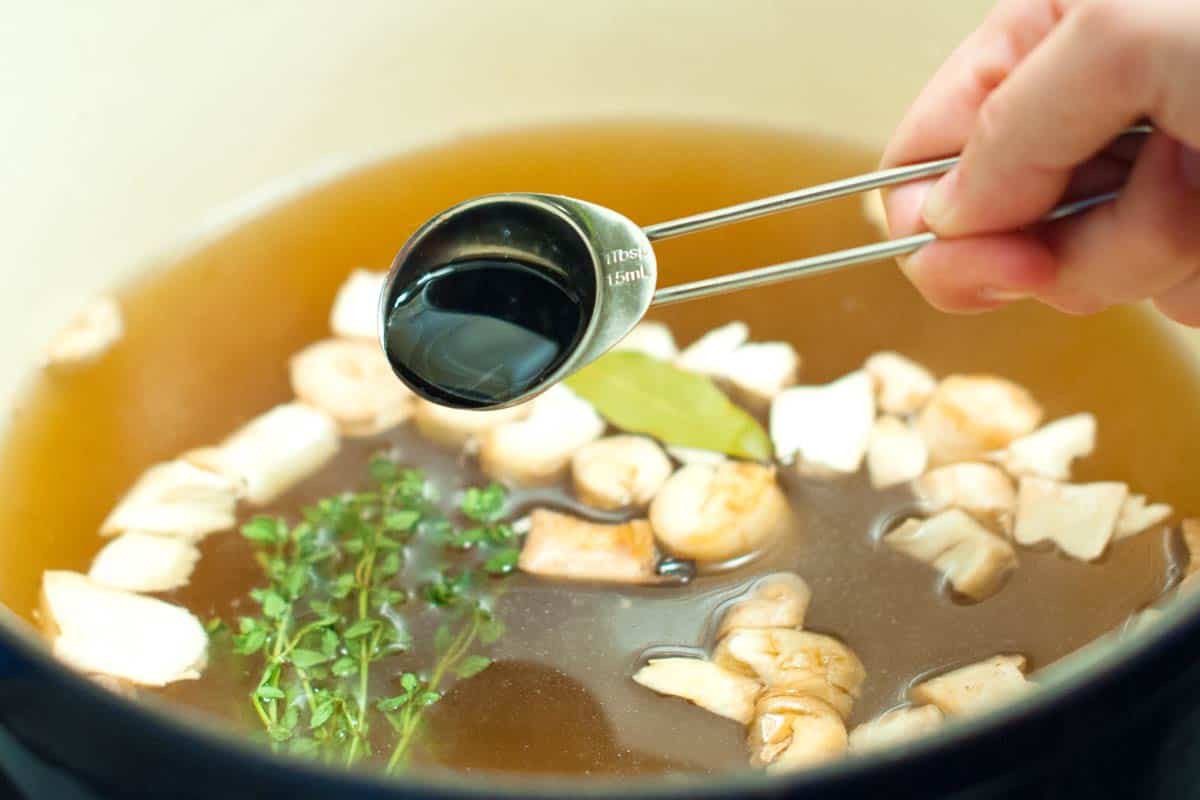
    • Broth: A good vegetable broth or chicken broth works well in this recipe. I love doctoring it up a bit and simmering my broth with the discarded mushroom stems, thyme, a bay leaf, and a bit of soy sauce. These add extra flavor and nicely complement the mushrooms in our risotto.
    • White Wine: Whenever you cook with wine, the most important thing to remember is to use something you enjoy. I use a light, dry white wine like Pino Gris, Albariño, Grüner Veltliner, or Sauvignon Blanc for this mushroom risotto. Wine adds flavor and some acidity. If you prefer to leave it out, replace it with more broth and sprinkle a little fresh lemon juice over the risotto before serving.
    • Cheese: To make this risotto creamy, I stir in mascarpone cheese (or cream cheese) and lots of Parmigiano-Reggiano cheese at the end.

    How to Make Mushroom Risotto

    This mushroom risotto starts with a flavorful base. I enhance store-bought or homemade stock by simmering it with mushroom stalks (saved from prepping the mushrooms!), thyme, a bay leaf, and a bit of soy sauce for richness.

    Making mushroom risotto broth: Seasoning the risotto stock with soy sauce

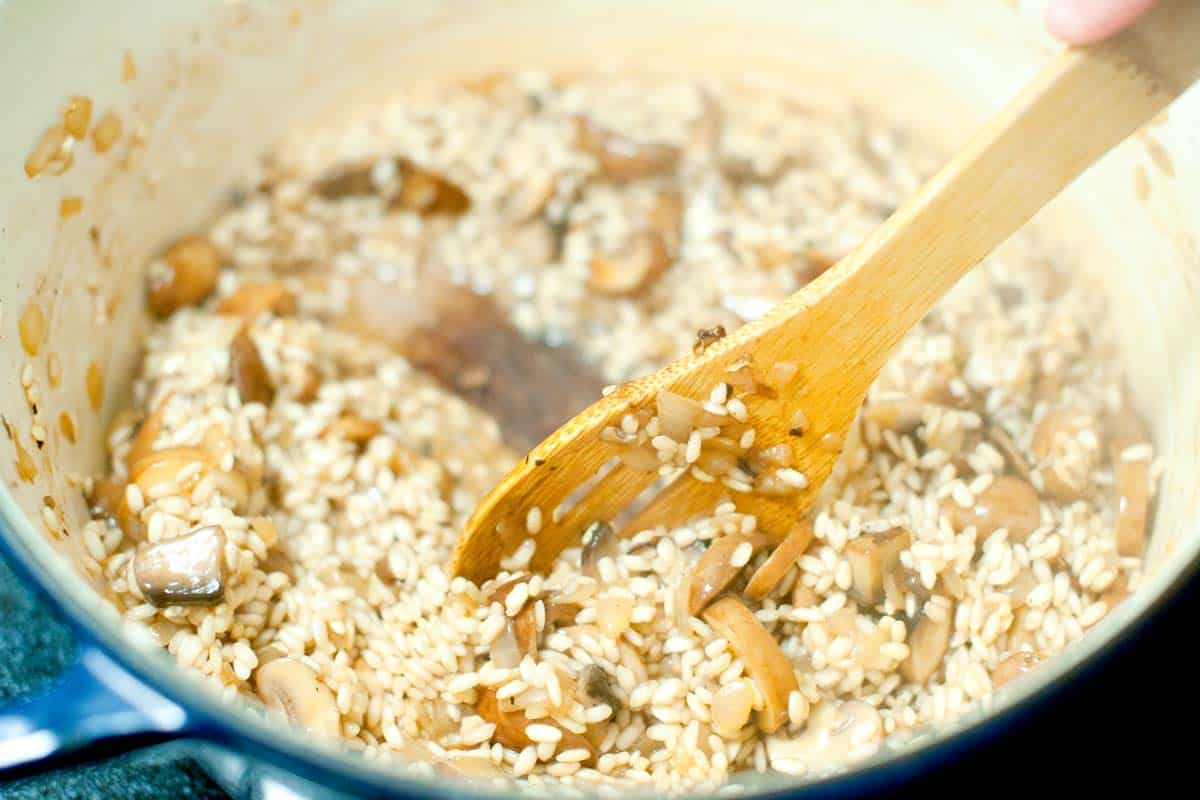
    Next, I cook sliced mushrooms and onions in butter until they’re soft and golden brown. Then, I add the arborio rice to the pan, stirring to toast it in the butter (yum!).

    How to Make Mushroom Risotto: Stirring risotto to make it creamy

    In goes some white wine. I let it reduce, then slowly incorporate the warm mushroom broth. You want to add the broth a little at a time, allowing it to be fully absorbed by the rice before adding more. As you add the broth, remember to stir frequently. Stirring is the key to achieving that luxuriously creamy texture risotto is known for.

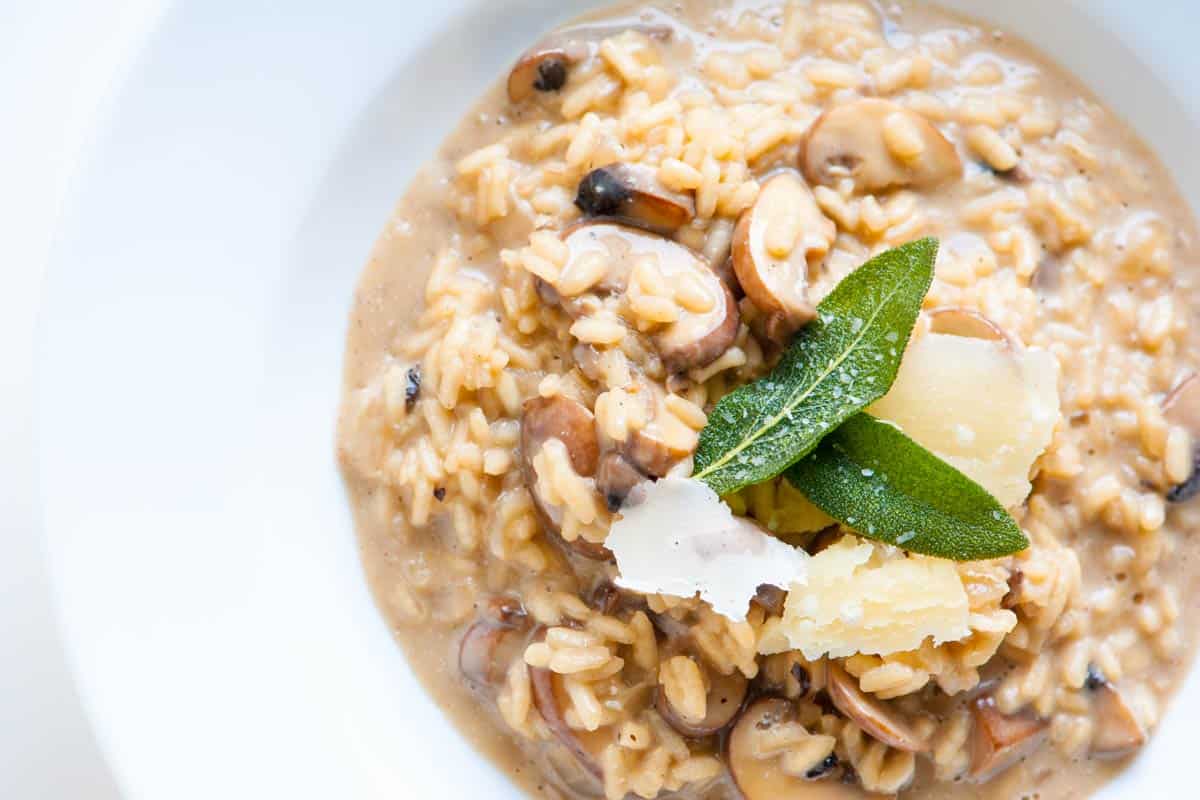
    After 20 to 25 minutes of adding stock and stirring, the rice is nearly cooked. So, you can stir in mascarpone cheese and parmesan and season to taste with salt and pepper. Of course, you could stop there, but if you are up to it, fry a few sage leaves in oil to place on top of the risotto. It takes less than a minute (I shared how to make them in the recipe below).

    Creamy Mushroom Risotto

    Creamy Mushroom Risotto

    • PREP
    • COOK
    • TOTAL

    This incredibly creamy mushroom risotto is the perfect dinner for two or to make for your next dinner party. It’s easy to make and can be customized to your liking with different types of mushrooms and stock (try vegetable stock to make this vegetarian).

    For wild mushrooms, clean them (if necessary) and tear or slice thicker mushrooms into smaller pieces. Smaller wild mushrooms can be left whole.

    4 Servings

    You Will Need

    Mushroom Risotto

    4 tablespoons butter

    2 cups mushrooms such as button, cremini, or wild mushrooms

    8 cups chicken broth or vegetable broth

    2 sprigs fresh thyme

    1 bay leaf

    1 tablespoon soy sauce

    1 medium onion, finely chopped

    1 ¾ cups arborio risotto rice

    3/4 cup dry white wine

    1/3 cup mascarpone cheese or cream cheese

    1/3 cup fresh grated Parmigiano-Reggiano cheese, plus more for serving

    Salt and fresh ground black pepper

    Homemade mushroom powder, optional


    Fried Sage Leaves

    1 tablespoon olive oil

    12 sage leaves for garnish

    Directions

      1Clean mushrooms by wiping them with a dry paper towel. Remove mushroom stems, roughly chop them, and set aside. Cut mushroom caps into 1/4-inch thick slices. (If large, cut into bite-sized pieces.)

      2Make the mushroom broth. Pour broth into a 3-quart saucepan. Add chopped mushroom stems, thyme, bay leaf, and soy sauce. Bring to a boil, then reduce to a simmer. Cook at a low simmer, uncovered, for 30 minutes. Strain stock and discard the stems, thyme, and bay leaf. You should have about 6 cups of broth; if not, add water or more broth.

      3In a 3-quart deep heavy saucepan, melt butter over medium-high heat. Add mushroom slices and onion, then cook for 5 minutes. Stir in the rice and cook for 1 minute. Pour in the wine, then cook until reduced by half.

      4Add 1/2 cup of the mushroom-infused stock and cook over medium-high heat, constantly stirring, until the rice has absorbed the liquid. Repeat this until 5 to 5 ½ cups of broth have been added and the rice is cooked but slightly chewy.

      5Stir in the mascarpone cheese and grated Parmesan cheese. Season to taste with salt, pepper, and 1/2 to 1 teaspoon of mushroom powder (optional).

      6Make fried sage leaves. Heat the olive oil over medium-high heat in an 8-inch skillet. Add sage leaves, a few at a time, in a single layer. Fry for 15 seconds, but do not brown. Transfer the leaves from the skillet to paper towels and sprinkle with a pinch of salt.

      7Serve risotto in individual shallow bowls. Top each with a few sage leaves and parmesan cheese shavings.

    Adam and Joanne’s Tips

    • Make-ahead: The mushroom infused stock can be made up to 2 days in advance. Keep it in an airtight container in the refrigerator. Warm before adding to the risotto.
    • Wine to use: Choose a lighter dry white wine like Pino Gris, Albariño, Grüner Veltliner, or Sauvignon Blanc
    • Wine substitution: If you prefer to leave the wine out, replace it with more broth and sprinkle a little fresh lemon juice over the risotto before serving.
    • The nutrition facts provided below are estimates. Sodium will vary based on the which brand of stock you choose.

    Nutrition Per Serving
    Serving Size
    1/4 of the recipe
    /
    Calories
    461
    /
    Total Fat
    25.7g
    /
    Saturated Fat
    14.1g
    /
    Cholesterol
    61.7mg
    /
    Sodium
    592.1mg
    /
    Carbohydrate
    35.9g
    /
    Dietary Fiber
    0.9g
    /
    Total Sugars
    2.7g
    /
    Protein
    17.1g


    AUTHOR:

    Joanne Gallagher

    Adam and Joanne of Inspired Taste

    We are Adam and Joanne Gallagher, the creators of Inspired Taste. Established in 2009, Inspired Taste grew from a childhood dream into one of the internet’s most trusted recipe sites with hundreds of reliable recipes, step-by-step videos, and expert tips.More About Us

    Source link

  • Chicken Pillows Recipe (Creamy Chicken Crescent Rolls)

    Chicken Pillows Recipe (Creamy Chicken Crescent Rolls)

    This website may contain affiliate links and advertising so that we can provide recipes to you. Read my disclosure policy.

    If you grew up in Utah, chicken pillows were practically a weeknight tradition. Creamy chicken wrapped in warm crescent dough is the kind of cozy comfort kids love and adults secretly crave.

    Plated chicken pillows.

    Why This Utah Classic Still Hits

    • Nostalgic comfort: Buttery crescent roll dough and creamy chicken filling give you that classic Utah-style coziness in every bite.
    • Kid-Friendly: Simple flavors and the fun “pillow” shape make this an easy weeknight dinner win picky eaters.
    • Weeknight Easy: Minimal ingredients, quick prep, and everything bakes in the oven for a simple dinner.

    Chicken Pillow Ingredients

    Overhead shot of labeled chicken pillow ingredients.
    • Crescent Rolls: Refrigerated dough makes this recipe easy! I also like to use crescent dough sheets. Simply cut the sheet of dough into 8 even squares before putting them together.
    • Chicken: Canned or rotisserie chicken is a great alternative!
    • Bread Crumbs: Plain or panko bread crumbs can be used. Add flavor with 1 teaspoon of Italian seasoning if you use either of these options!
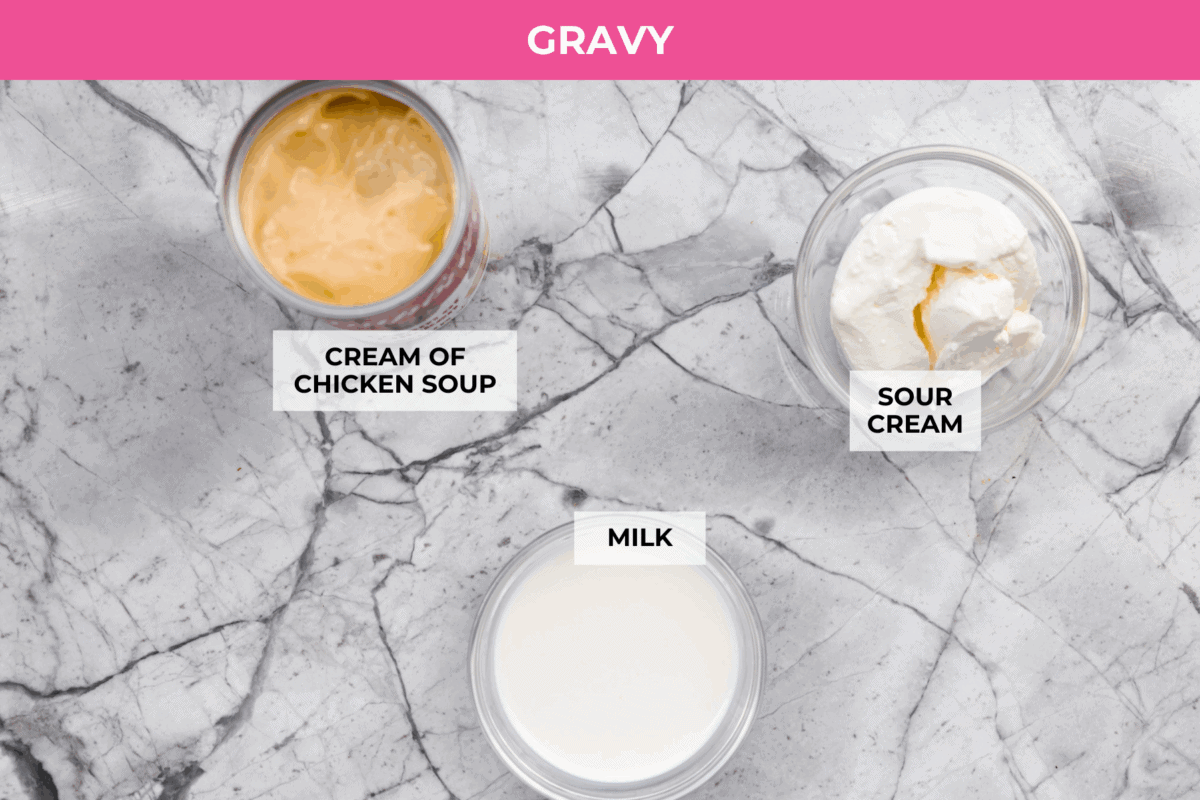
    Overhead shot of gravy ingredients.
    • Milk: Add a splash of milk for a thinner gravy, if preferred.

    How to Make Chicken Pillows

    This chicken pillows recipe is my go to when I haven’t planned dinner. I keep crescent rolls on hand because this is my girls’ favorite recipe. And, there’s almost always some cooked chicken in the fridge or freezer.

    Chicken Pillows

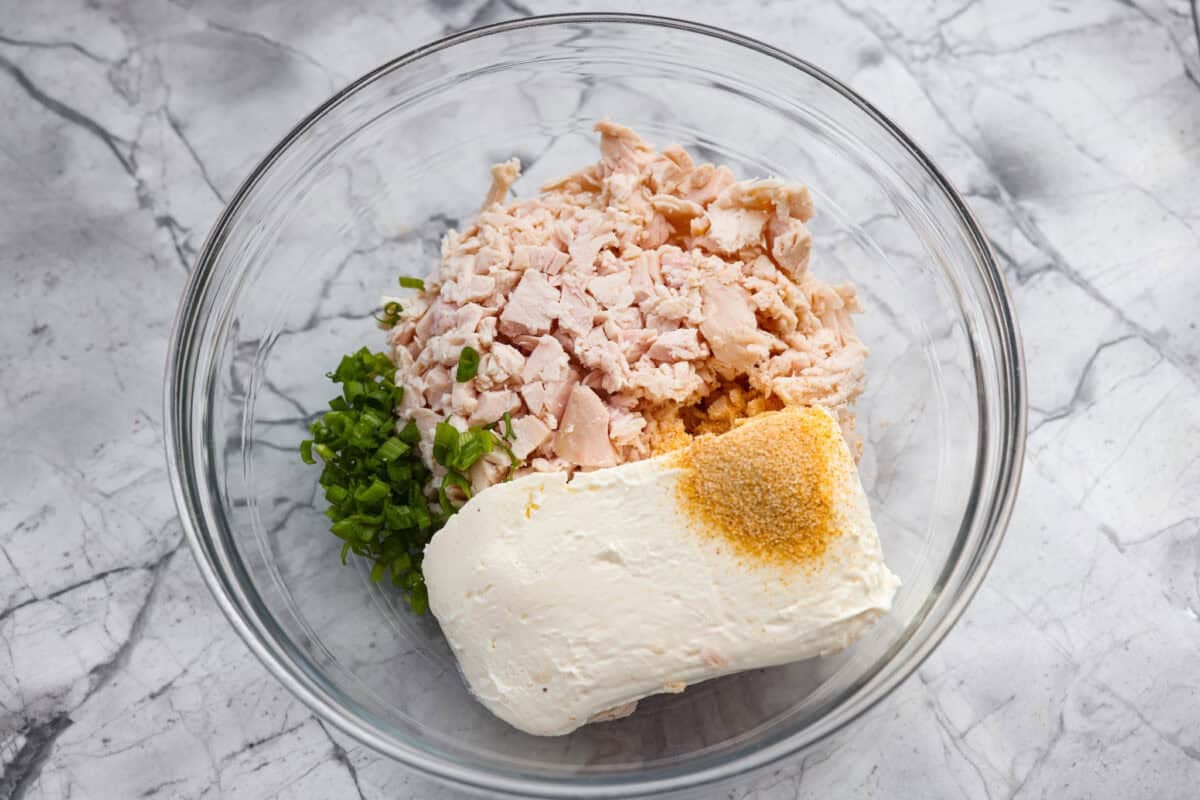
    1. Prep and Chicken Filling: Preheat the oven to 375°F. Spray 2 sheet pans with non stick cooking spray and set aside. In a medium sized bowl, add shredded chicken, cream cheese, green onion, and garlic powder.
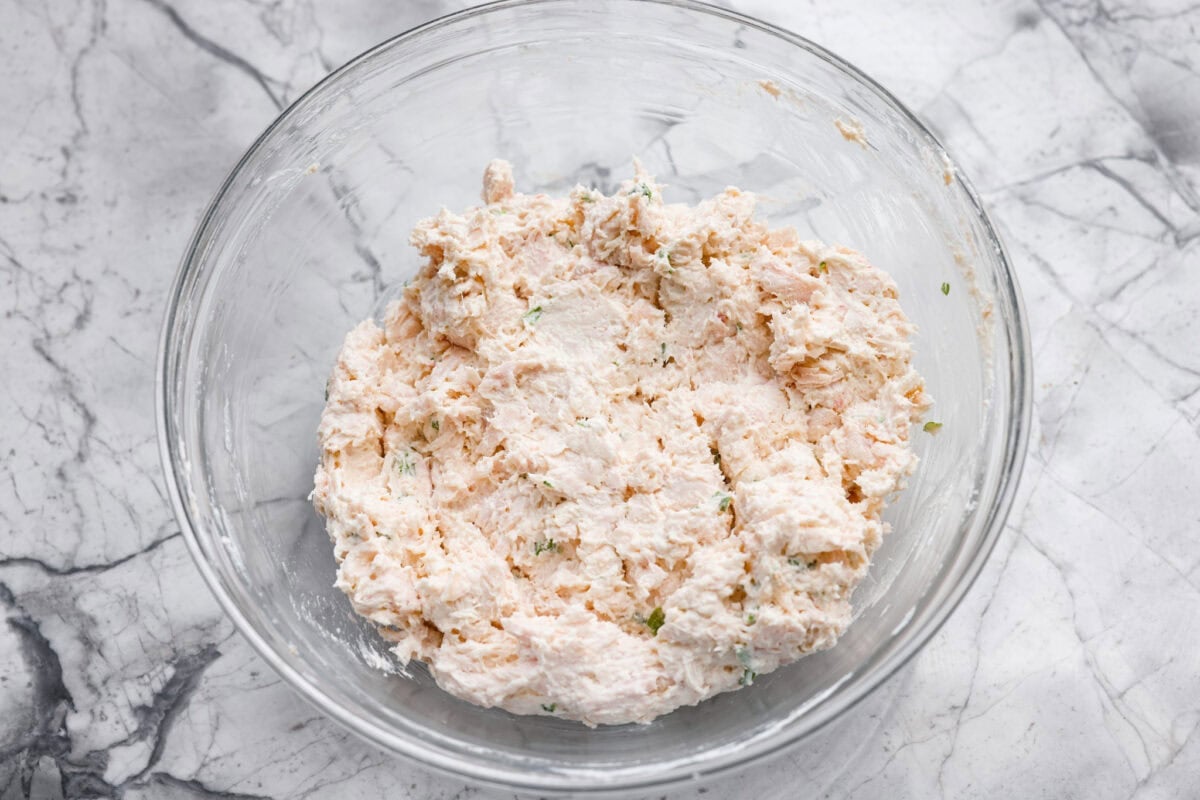
    2. Combine & Open: Stir chicken mixture well until well combined. Next, open crescent rolls and separate the triangles.
    3. Fill Pillows: Place about 2 tablespoons of the chicken mixture onto the wider end of the crescent roll.
    4. Seal Pillows: Fold the sides of the dough over the chicken mixture, then roll the crescent roll. Pinch the dough around the chicken mixture to fully seal it. Repeat the method until done.
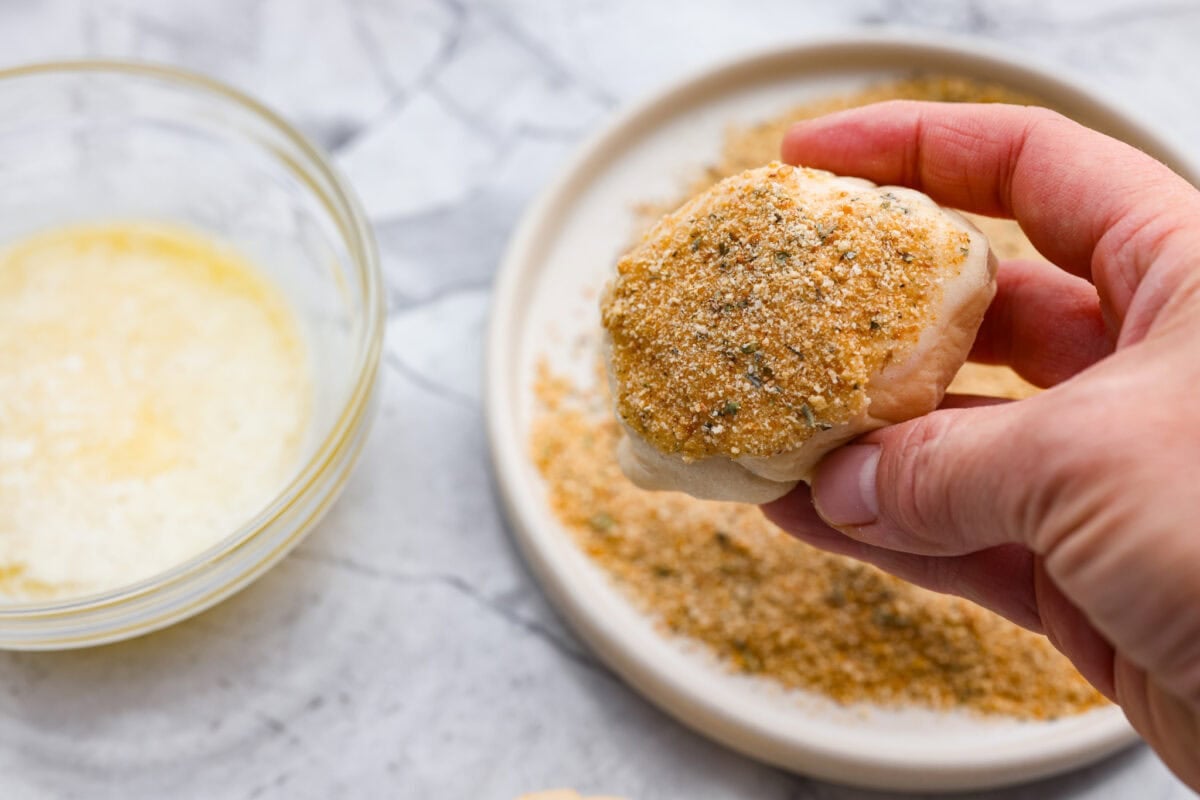
    5. Coat Pillows: Melt butter in a microwaveable bowl for about 40 seconds. Pour Italian bread crumbs on a plate for easy dipping! Dip the top of each chicken pillow in the bowl of melted butter, followed by the Italian bread crumbs.
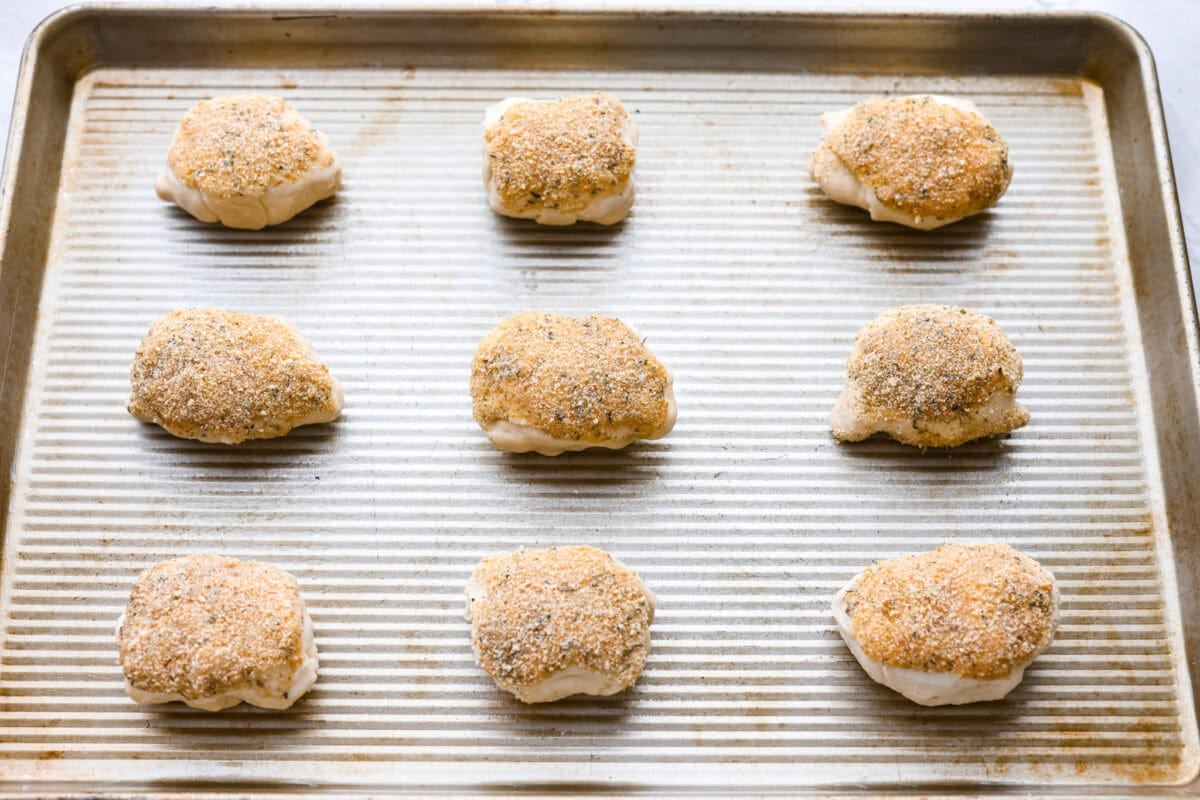
    6. Bake: Place the coated chicken pillows on the prepared pan. Bake for 10-15 minutes or until the chicken pillows are golden brown.

    Chicken Gravy

    1. In a small pan, add cream of chicken soupmilk, and sour cream. Heat and stir over medium heat until warmed through, about 5 minutes. Add more milk if needed to reach the desired thickness. Serve the gravy on the side or pour it over the warm chicken pillows and enjoy!
    Gravy ingredients added to a sauce pan being whisked together.

    Alyssa’s Pro Tip

    Gravy: These pillows are delicious with or without gravy! Make my easy gravy recipe, or use store bought if you’re short on time!

    Pin this now to find it later

    Pin It

    Chicken pillows on the baking sheet all baked and out of the oven.

    More Simple Chicken Recipes

    A spoon taking a scoop of chicken divan out of a white casserole dish.

    The Very Best Poppy Seed Chicken Casserole

    35 minutes


    Source link