Tag: Butter

  • Peanut Butter Protein Balls – All Day I Dream About Food

    Peanut Butter Protein Balls – All Day I Dream About Food

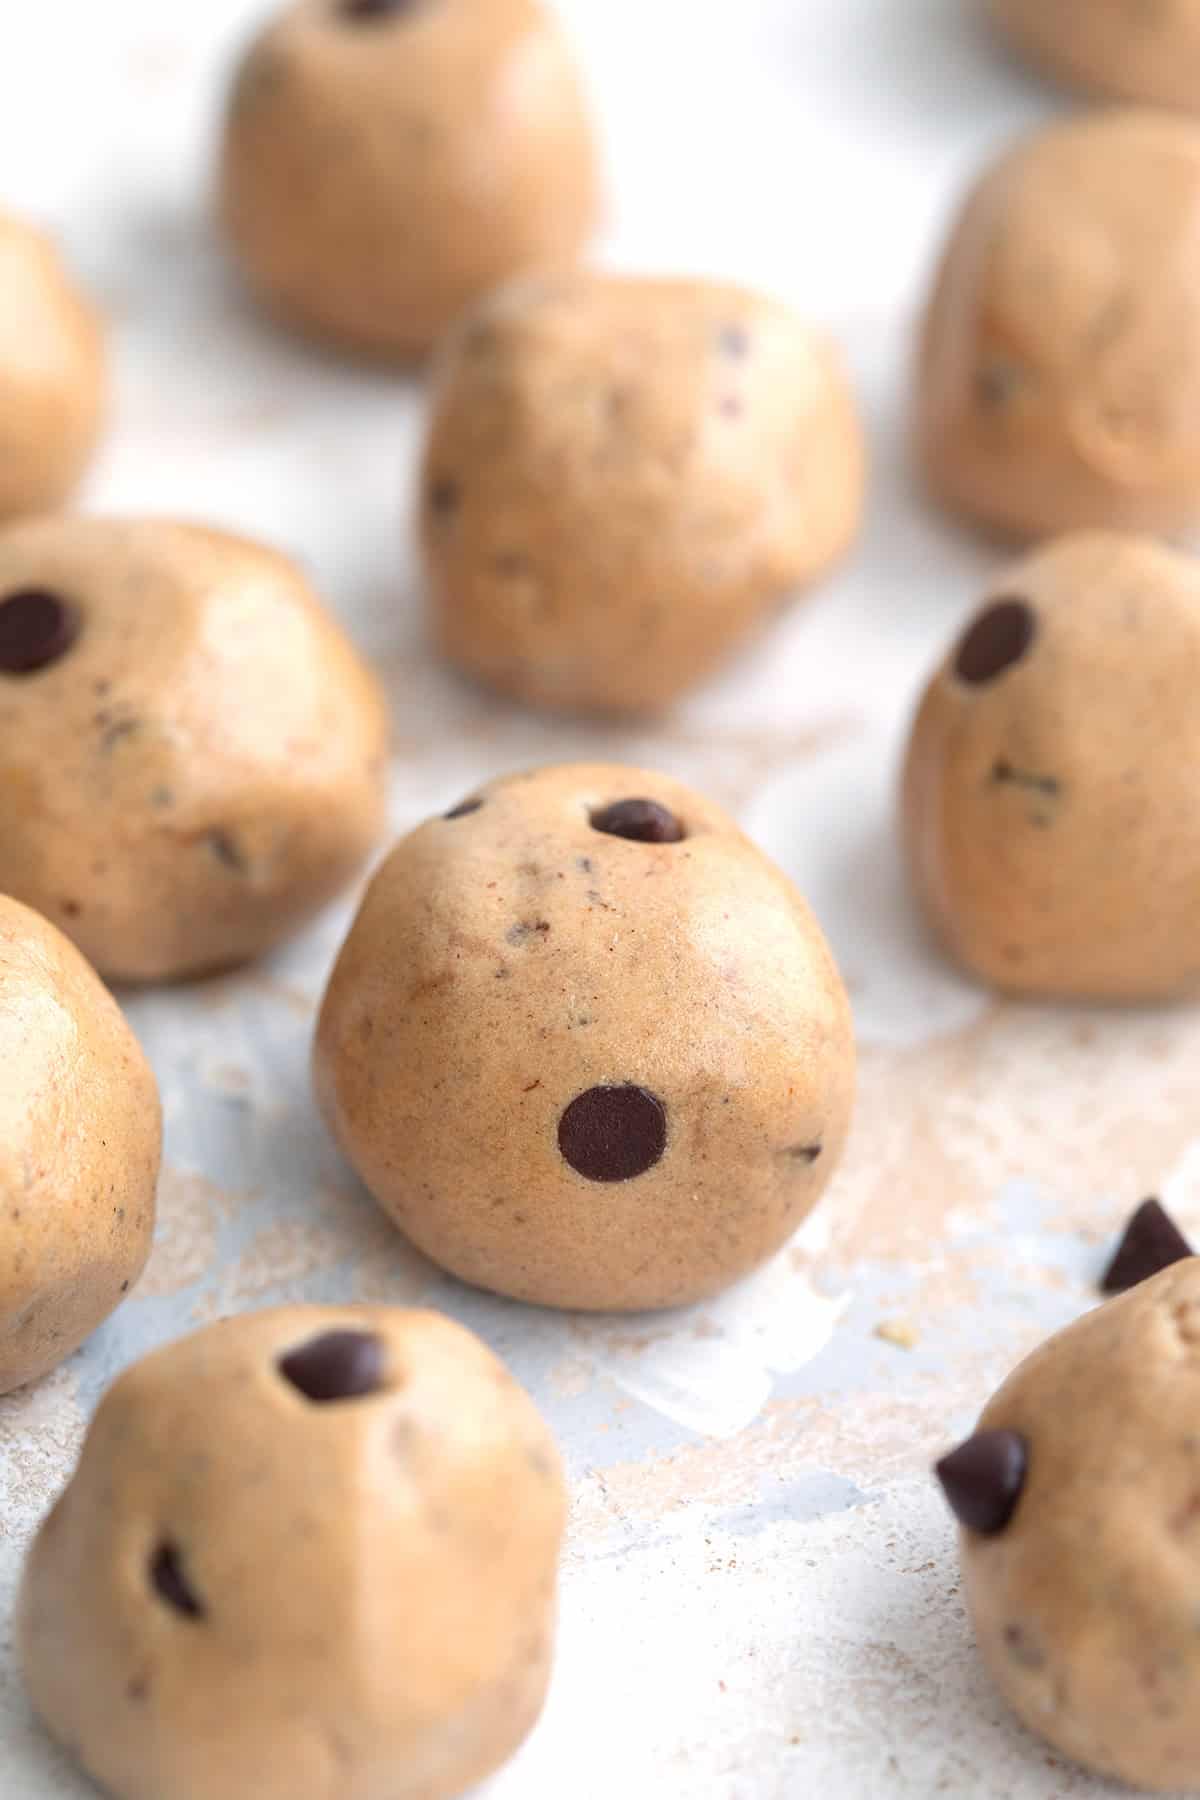
    These no-bake Peanut Butter Protein Balls give you a quick energy boost any time you need it. With 12g of protein and only 3.8g carbs per serving, this keto friendly snack helps you stay focused on your day.

    Top down image of a pile of keto peanut butter protein balls with a bite taken out of one.

    When you’re trying to increase your protein intake, having a few easy keto snack ideas is paramount to success. And these no-bake Peanut Butter Protein Balls are one of my favorites. Made with creamy peanut butter, almond flour, and protein powder, they’re perfect for curbing hunger without the added carbs.

    I created this recipe a few years ago when I needed more low-carb high-protein recipes I could make quickly. I am often on the go, headed to a workout or to a child’s performance, and I need quick bites I can grab as I head out the door. I do not like to be caught out hungry and with no good keto options!

    Peanut Butter Protein Balls piled up in a brown bowl in front of a jar of peanut butter and a small bowl of chocolate chips.

    These keto protein balls became an instant hit for me, and for my readers too! They require no special equipment and no baking. Just you, your ingredients, and a good silicone spatula. And they pack a significant protein punch, with plenty of healthy fats too.

    Reader’s Thoughts

    “Peanut Butter protein balls popped on my screen today and I realized I had all the ingredients so these quick, no-bake treats became a lunchtime effort for me. Wowowow! My only challenge now is not eating them all! Thank you for this recipe – delicious, satisfying and EASY.” — Jeannine

    Close up shot of Peanut Butter Protein Balls with chocolate chips on a white table.

    Why we love this recipe

    • Easy to make: These no bake protein balls take all of 15 minutes to make!
    • No special equipment: It’s easy to just mix your ingredients by hand, so you don’t need to dirty a food processor.
    • Make ahead: This is a great recipe for storing in the fridge. They last up to two weeks so you can grab a bite whenever you need it.
    • Adaptable: You can adapt this recipe easily for your preferred nut butter, protein powder, flours, etc.
    • Great flavor: They taste like peanut butter cookie dough!
    • Great macros: With 12 grams of protein and less than 7 grams of carbs, these are a great snack for keto and low carb diets.

    Ingredient Notes

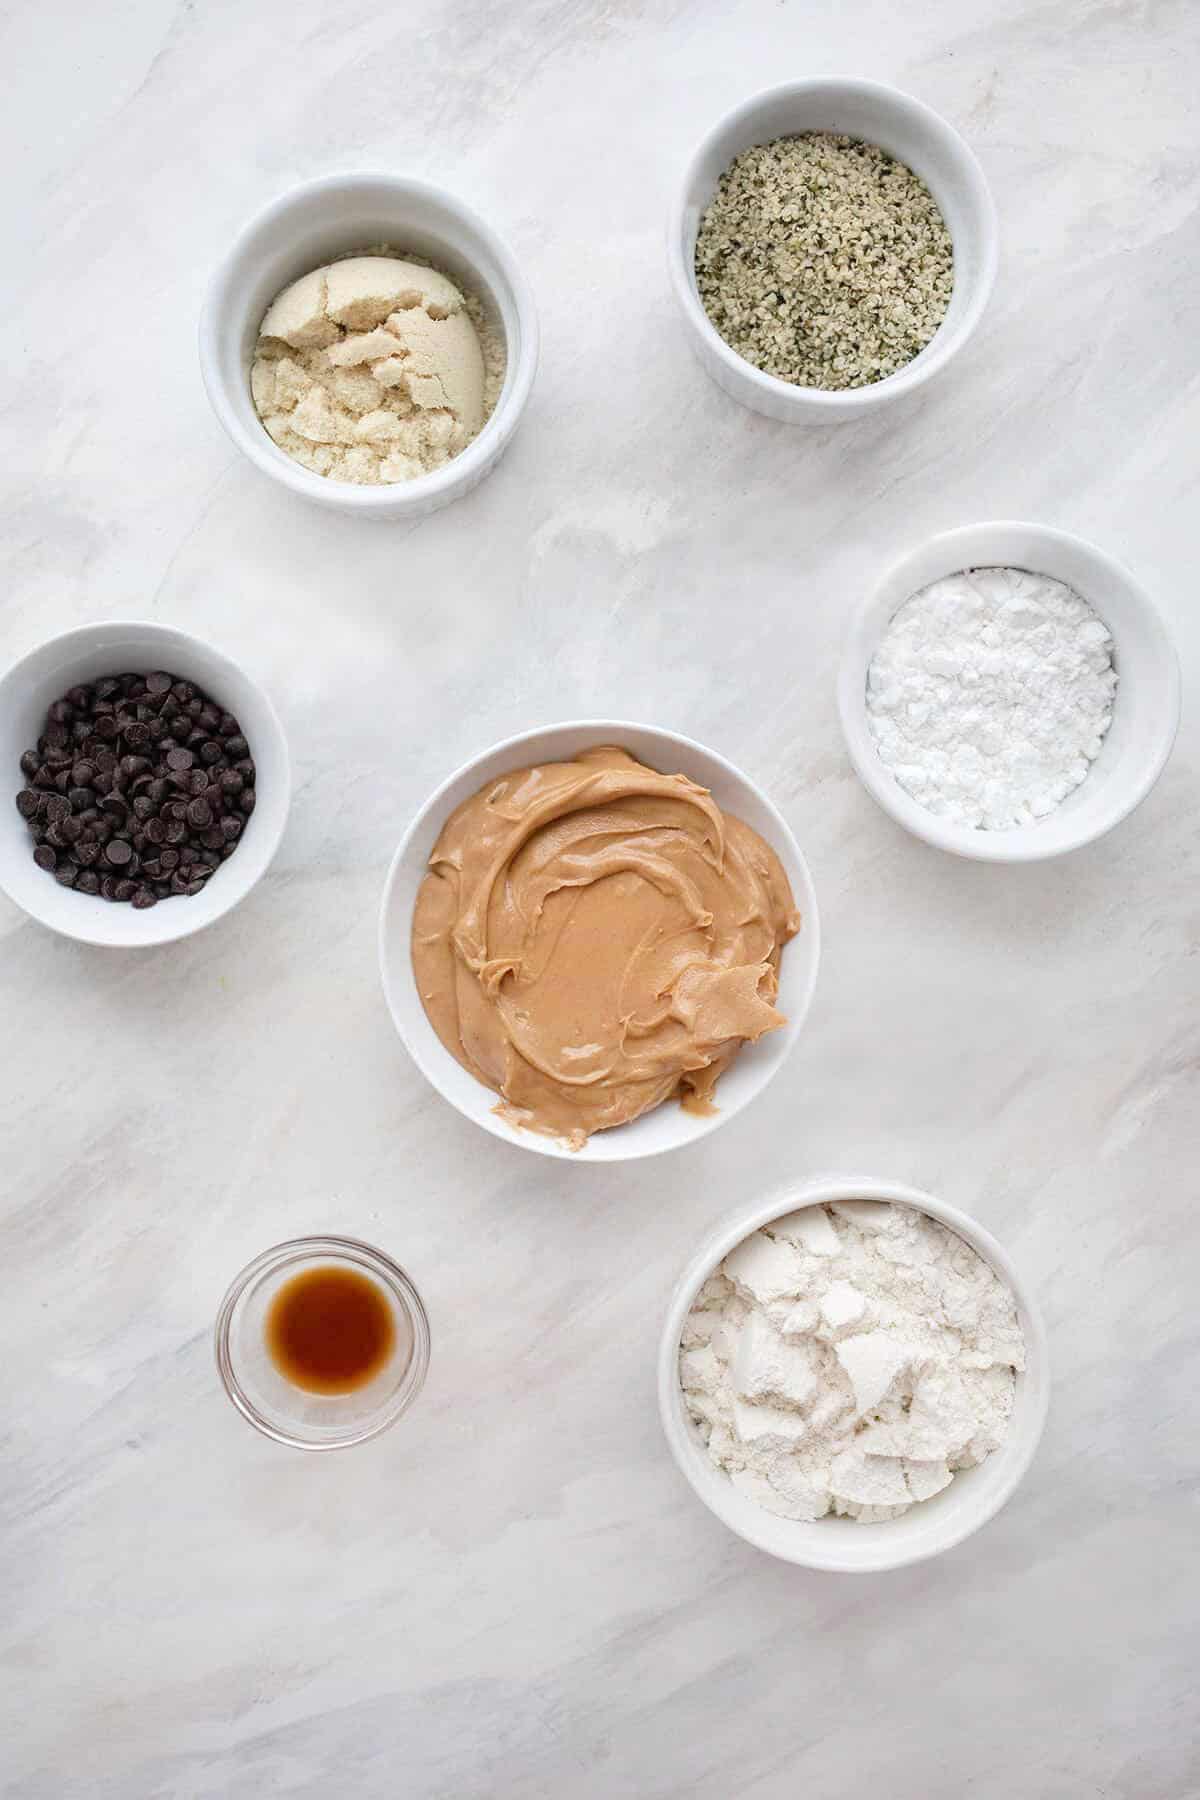
    Top down image of the ingredients needed for peanut butter protein balls.
    • Peanut butter: Use a natural creamy peanut butter. If it’s the kind that separates and has a lot of oil at the top, mix it in well. Other nut butters, like almond butter, will also work.
    • Protein powder: I recommend a protein isolate as it will give you a higher protein count. See expert tips for more protein options.
    • Sweetener: Powdered sweeteners like Swerve Confectioners work best, so they don’t get gritty. Check out the expert tips for more sweetener options.
    • Almond flour: You do need some flour to add bulk and create a dough. But it doesn’t have to be almond flour. You can use a few tablespoons of peanut flour or coconut flour too.
    • Hemp seeds: Hemp seeds have a surprising amount of protein and add a nutty crunch to the protein balls. This is entirely optional.
    • Chocolate chips: Mini chocolate chips work best in these, as it’s easier to roll them into balls.
    • Pantry staples: Butter or oil, vanilla extract, salt.

    Quick Overview: How to make Keto Protein Balls

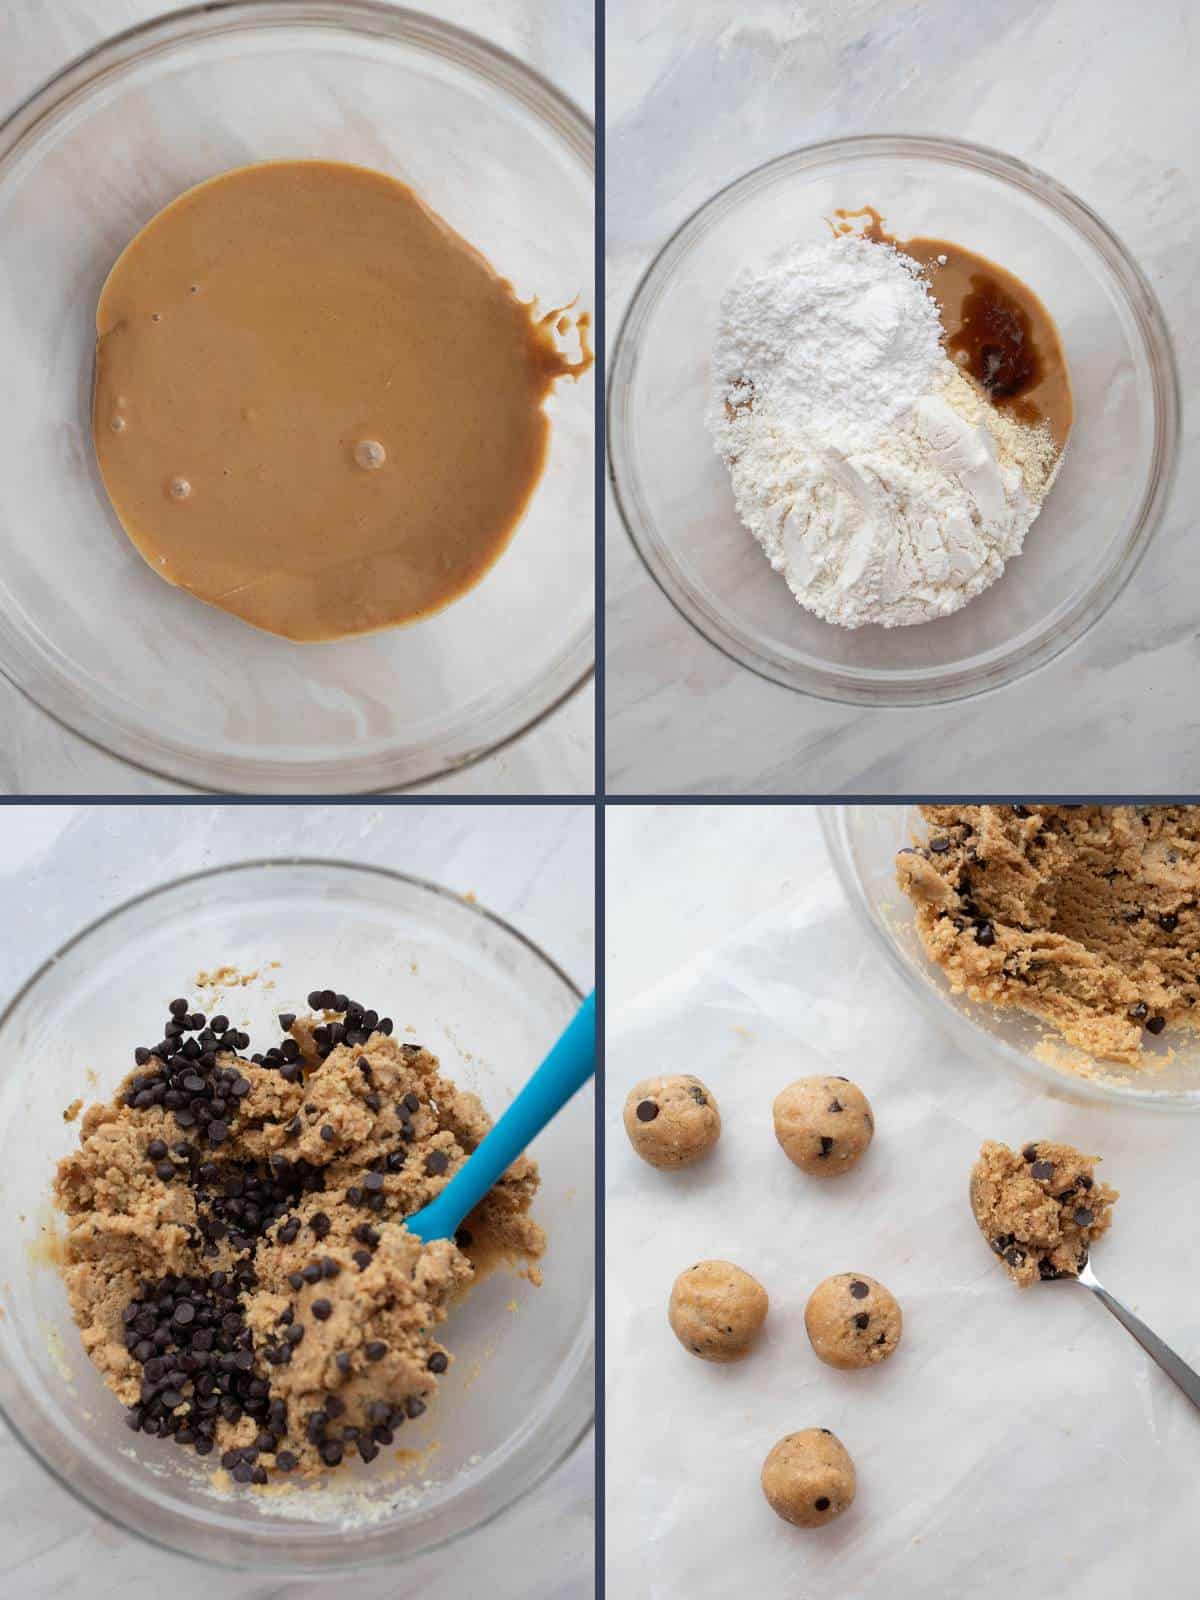
    A collage of four images showing how to make Peanut Butter Protein Balls.
    1. Melt the peanut butter: It’s a lot easier to mix in the sweetener, protein powder, and other ingredients if you melt the peanut butter first. I do this in the microwave but you can also do it in a pan on the stovetop over low heat.
    2. Add the other ingredients: Using a flexible silicone spatula, work the dry ingredients into the peanut butter until it become like a dough.
    3. Add the chocolate chips, if using: Stir in the chocolate chips until well distributed.
    4. Roll into balls: Use your hands to roll into 1 inch balls. You should get about 20 of them.
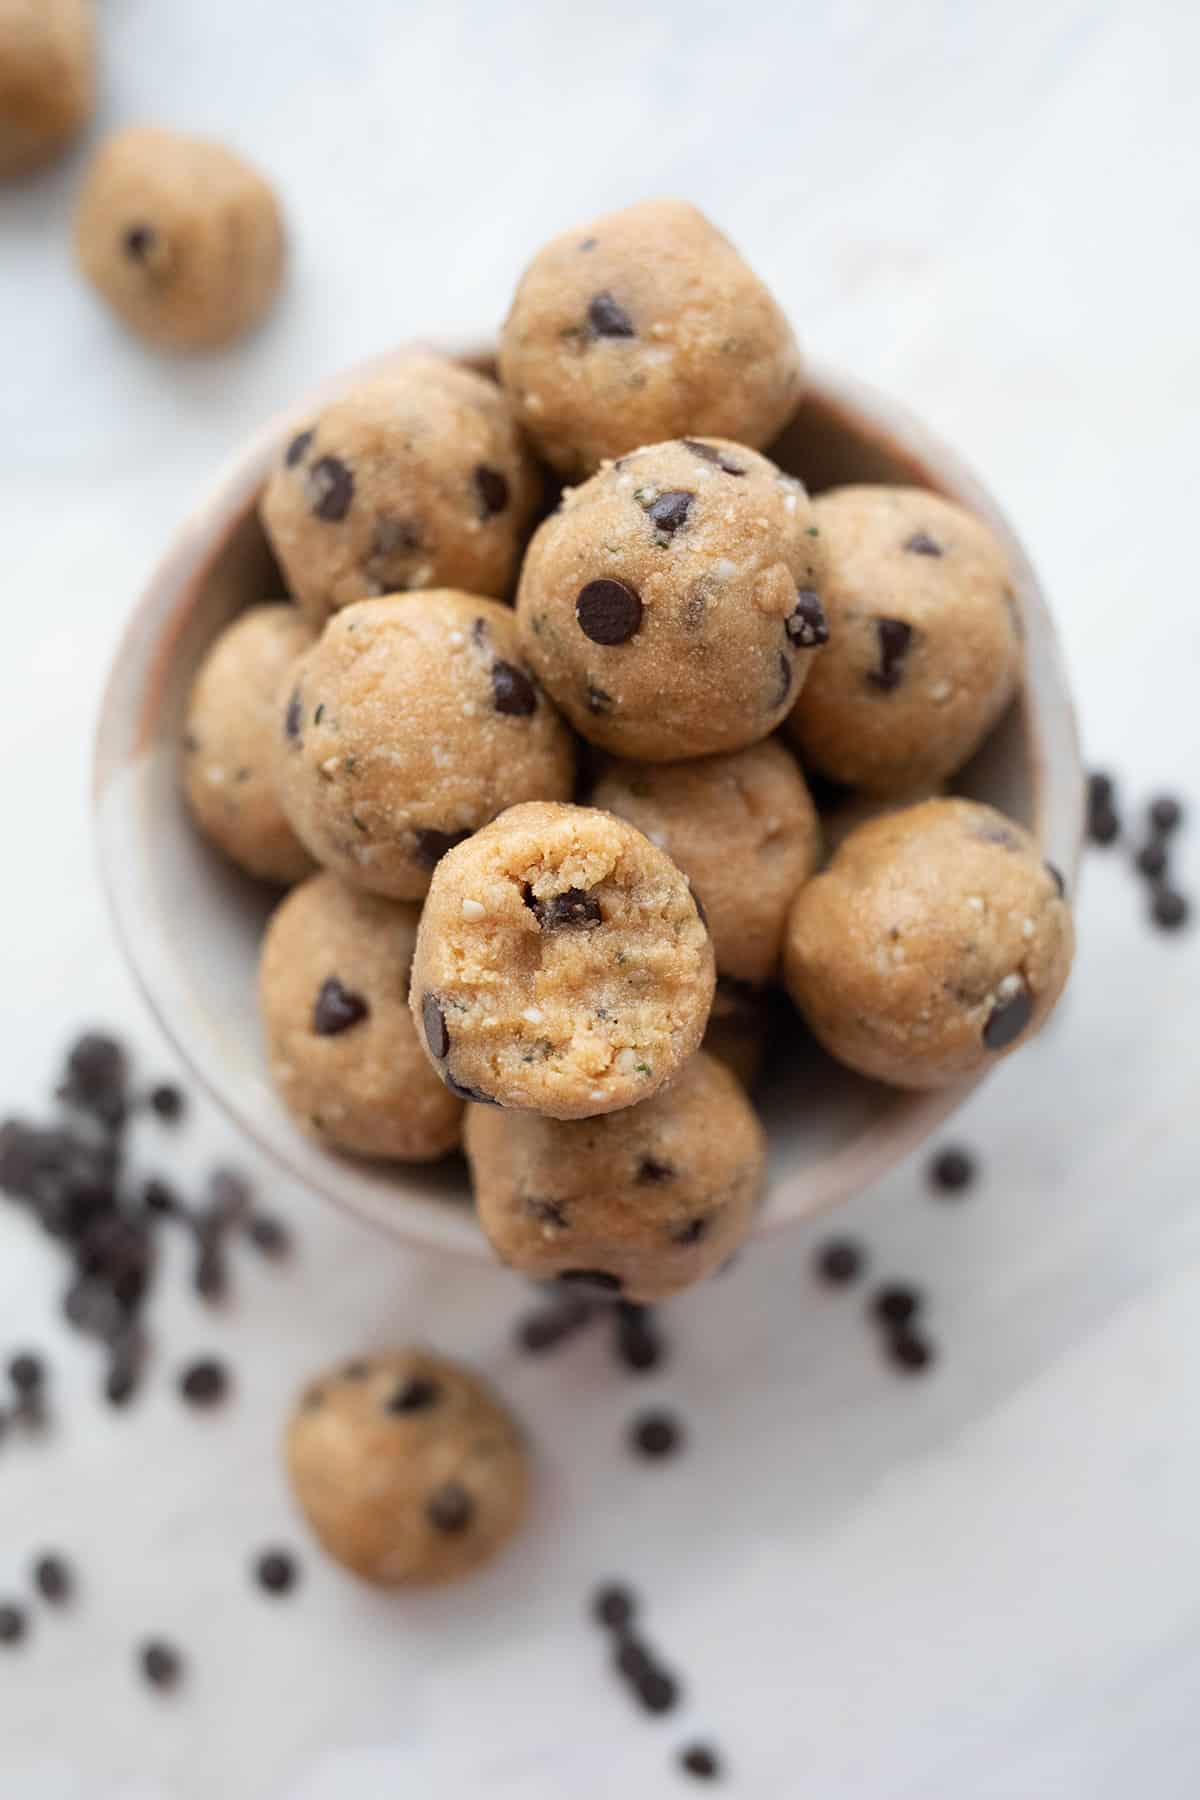
    Top down image of a pile of keto peanut butter protein balls with a bite taken out of one.

    Expert Tips

    You have a lot of choices for these keto protein balls, so you can customize and adjust as you see fit. You can use other nut or seed butters and different kinds of protein. And you can sweeten them more or less, according to your tastes.

    If your dough is too stiff and won’t hold together, add a bit more oil. If the dough is too goopy and you can’t roll it into balls, work in a bit more flour.

    Protein Options

    • Whey protein: I like a whey protein isolate as it has a higher protein content and a lower carb count. You can use vanilla or unflavored. If using vanilla, you may want to reduce the sweetener and the added vanilla extract.
    • Egg white protein powder: I find that plain egg white protein gives these protein balls a funny flavor. So if you want to use it, go for the vanilla variety and reduce sweetener and vanilla accordingly.
    • Plant protein: Pea protein, hemp protein, and other plant based protein powders should also work well here. Make sure they don’t have a greenish tinge as some do.
    • Collagen protein: You can also use collagen protein (aka collagen peptides) but it has a different consistency in recipes like this. So you will likely have to add additional flour to firm up the dough.

    Sweetener Options

    You can use your preferred sweetener for these Peanut Butter Protein Balls, but you may need to make some adjustments to get the correct consistency.

    Confectioner’s style powdered sweeteners add bulk without grittiness, so they are my preference. But it can be erythritol, allulose, or BochaSweet. I don’t recommend granular sweeteners as they just won’t mix in well enough.

    Concentrated extracts like stevia and monk fruit also work, but they don’t add any bulk and you may need to add some additional flour. Liquid allulose will throw off the liquid/dry balance, so you would need to add more flour there as well.

    Two peanut butter protein balls, a spoonful of peanut butter, and some chocolate chips sit in front of a brown bowl with more protein balls.

    Frequently Asked Questions

    What are the benefits of Peanut Butter Protein Balls?

    Protein balls have a number of advantages. They are easy to make and extremely portable for on-the-go snacks. And they are an excellent source of energy, with the ideal combination of protein, healthy fats, and fiber. They keep you full and satisfied for whatever the day throws your way!

    How do you store Keto Protein Balls

    Store the balls in a covered container on the counter for up to 5 days, or in the fridge for up to 2 weeks. They can also be frozen for several months.

    How many carbs are in protein balls?

    This recipe for peanut butter protein balls has 6.8g of carbs and 3g of fiber. The net carb count comes to 3.8g for 2 balls.

    More high protein recipes

    Top down image of a pile of keto peanut butter protein balls with a bite taken out of one.

    Peanut Butter Protein Balls Recipe

    Servings: 10 servings

    Prep Time 15 minutes

    Total Time 15 minutes

    These no-bake Peanut Butter Protein Balls give you a quick energy boost any time you need it. With 12g of protein and only 3.8g carbs per serving, this keto friendly snack helps you stay focused on your day.

    Prevent your screen from going dark

    • In a large microwave safe bowl, melt the peanut butter with the butter until it can be stirred together.

    • Add the protein powder, sweetener, almond flour, hemp seeds, and vanilla extract. Mix until a cohesive dough forms and you can roll into firm balls (see notes for any adjustments).

    • Stir in the chocolate chips until well distributed.

    • Roll into balls about 1 inch in diameter. You should get 20 balls. Refrigerate until firm.

    Depending on the choice of nut butter and protein powder, the consistency of the dough may differ. But it’s easy to adjust it as needed. If your dough is too stiff and won’t hold together, add a bit more oil. If the dough is too goopy and you can’t roll it into balls, work in a bit more flour.
    Storage Information: Store the balls in a covered container on the counter for up to 5 days, or in the fridge for up to 2 weeks. They can also be frozen for several months.

    Serving: 2balls | Calories: 192kcal | Carbohydrates: 6.8g | Protein: 12.1g | Fat: 14.6g | Fiber: 3g

    Nutritional Disclaimer

    Please note that I am not a medical or nutritional professional. I am simply recounting and sharing my own experiences on this blog. Nothing I express here should be taken as medical advice and you should consult with your doctor before starting any diet or exercise program. I provide nutritional information for my recipes simply as a courtesy to my readers. It is calculated using MacGourmet software and I remove erythritol from the final carb count and net carb count, as it does not affect my own blood glucose levels. I do my best to be as accurate as possible but you should independently calculate nutritional information on your own before relying on them. I expressly disclaim any and all liability of any kind with respect to any act or omission wholly or in part in reliance on anything contained in this website.

    Free Bonus: Secrets to Keto Baking!

    Sign up for your favorite recipes delivered straight to your inbox plus get our FREE bonus: Secrets to Keto Baking!

    Source link

  • Greek Butter Beans

    Greek Butter Beans


    This butter beans recipe is inspired by shrimp saganaki, a Greek dish that features shrimp (or prawns) cooked in a rich tomato sauce with garlic, onions, and plenty of feta cheese. The word “saganaki” actually refers to the type of pan used to cook the dish. A saganaki is a two-handled frying pan traditionally made of heavy materials like cast iron or copper. In Greek cuisine, “saganaki” can refer to any dish cooked in this type of pan, but it’s most famously associated with fried cheese (like in cheese saganaki) or seafood dishes like shrimp or mussels saganaki.

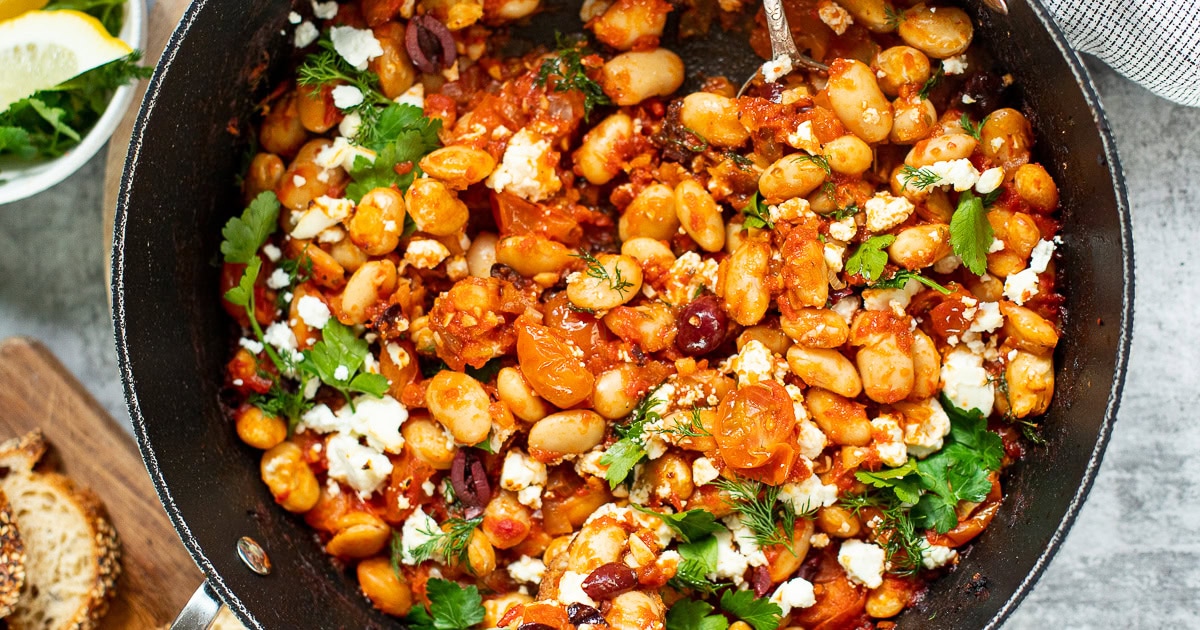
    In this version, I used tender canned butter beans, which I cooked in a rich tomato sauce, garlic, and onion, then topped with briny Kalamata olives and creamy feta cheese. Fresh dill and parsley add a burst of vibrant herby flavor, making this dish not only hearty but also incredibly refreshing. Seriously, for something so simple, this dish is sooooo tasty and was a hit even with my non-bean-loving partner!

    Oh, and I used my oven-proof sauté pan, which happens to be two-handled so this dish is as close to saganaki as I am going to get!

    Greek butter beans is a perfect cosy dinner, easy enough for a weeknight meal. Serve it with crusty bread to soak up every last bit of the flavorful tomato sauce. It’s equally good the next day so you can enjoy it for breakfast with some fried or poached eggs or simply spread over toasted sourdough. And don’t forget to pop some in your lunchbox for a satiating, nutritious protein kick.

    👩‍🍳 You might also enjoy these Mediterranean recipes: eggplant & chickpea salad, Greek roasted potatoes, herby and lemony chickpea soup, Persian salad, Greek quinoa breakfast bowl, or this couscous salad. You will also find some fun ideas in this healthy chickpea recipes roundup.

    What You’ll Need

    Here is what you’ll need for this Greek butter beans recipe. Find the full measurements in the recipe card below.

    • The foundation of flavor: olive oil (use good quality here), onion and garlic.
    • Spices and seasonings: salt, crushed red pepper flakes (or chili flakes), dried oregano and sweet paprika.
    • Tomatoes: Cherry tomatoes and canned diced tomatoes, I love a combination of both.
    • Sweetener: Honey (maple syrup works as a vegan alternative), don’t skip it if you can!
    • Main ingredients: Butter beans (cannellini beans, white beans or even chickpeas can work too), feta cheese (swap with goat cheese or omit for a vegan version) and Kalamata olives (green olives work too).
    • Fresh herbs: fresh dill and fresh parsley, lemon wedges. I highly recommend dill but the dish will still work without.

    How To Make Greek Butter Beans

    Find the full recipe and nutritional information below. Here are some handy step-by-step photos.

    • Prep: Chop and dice all the ingredients.
    • Sauté the veggies: Heat oil in an oven-safe skillet, it needs to be fairly deep. Cook onion with salt until softened, then add garlic and cook until fragrant.
    • Make the sauce: Add spices, honey, cherry tomatoes, and cook briefly. Stir in canned tomatoes and simmer until the sauce thickens.
    • Combine and grill: Mix in beans and olives, add dill, top with feta, and broil/grill in the oven until the cheese browns slightly. The grilling part is optional!
    • Garnish and serve: Sprinkle with more dill and parsley and serve with lemon wedges and crusty bread.

    Watch The Video

    Recipe Tips

    • You can substitute the butter beans with other white beans like cannellini or great northern beans for a slightly different texture. Chickpeas also work in this recipe.
    • For a vegan version, use a plant-based feta cheese or skip the cheese altogether and sprinkle with nutritional yeast.
    • Add a pinch of smoked paprika or cumin for an extra layer of flavor.
    • Feel free to add more vegetables like spinach or zucchini for added nutrition and variety.
    • This dish pairs wonderfully with a side salad, quinoa, or rice for a more filling meal.
    • Chili flakes and honey – both are optional but in my opinion, they are needed to experience the full flavor potential of this recipe. Feel free to adjust the chili flakes or add them when serving.

    Serving Suggestions

    Serve this butter bean saganaki with crusty bread or pita bread to soak up the sauce. It also pairs well with grilled fish, rice, or a fresh side salad. For breakfast, I love the leftovers with some fried or poached eggs and I will often spread some of these butter beans on toasted sourdough as a quick protein snack. Don’t forget to add these to your lunchbox, too!

    💬 If you’ve tried this butter beans recipe or any other recipe on the blog then don’t forget to rate the recipe and let me know how you got on in the comments below, I love hearing from you! You can also FOLLOW ME on Instagram, Facebook, Pinterest, YouTube and or sign up to my Newsletter to see more of my delicious food.

    Want to Save This Recipe?

    Enter your email & I’ll send it to your inbox. Plus, get great new recipes from me every week!

    By submitting this form, you consent to receive emails from Cooked & Loved

    This Greek butter beans recipe is inspired by the traditional Greek shrimp saganaki. The beans are cooked in a rich and flavourful tomato sauce with refreshing notes of dill and parsley and the salty finish of feta cheese. Enjoy as a vegetarian main or as a side dish, spread it on toast or serve with eggs for a Mediterranean breakfast.

    • Sauté Vegetables: Heat olive oil in an oven-safe skillet over medium heat. Add diced onion and season with ½ teaspoon of salt. Cook until soft (about 7 minutes), then add sliced garlic and cook for another 1 minute until fragrant.

    • Make the Sauce: Add crushed red pepper flakes, paprika, dried oregano, honey and cherry tomatoes. Cook for 30 seconds to a minute, stirring through. Add diced canned tomatoes and season with another ½ teaspoon of salt. Stir and simmer (uncovered) for 8-10 minutes until some liquid evaporates and the tomato sauce thickens a bit.

    • Combine and grill: Fold in the butter beans and olives, then add a few sprigs of dill. Top with crumbled feta and place the skillet under the hot broiler (grill in the oven) for about 5 minutes until the cheese melts and browns slightly. This step is optional as the beans are technically ready to eat and you can serve with feta without grilling the top.

    • Garnish and serve: Remove from oven, sprinkle with more fresh dill and parsley. Serve with lemon wedges and crusty bread.Enjoy this flavourful and hearty butter bean saganaki with some crusty bread or a side dish to fish, rice or potatoes.
    • Storage tips: Store leftovers in an airtight container in the refrigerator for up to 3 days. Reheat on the stove over medium heat until warmed through. You may need to add a splash of water or broth to loosen the sauce. Avoid microwaving as it may alter the texture of the beans and cheese.
    • You can freeze the dish without the feta cheese for up to 2 months. Freeze it in airtight containers or freezer bags. To serve, thaw overnight in the refrigerator, reheat on the stove, and add fresh feta and herbs before serving.
    • Make-ahead tips: You can make the sauce and beans ahead of time and store them in the refrigerator for up to 3 days. When ready to serve, reheat gently on the stove and add fresh herbs and feta before serving. Broil just before serving to refresh the dish.

    • You can substitute the butter beans with other white beans like cannellini or great northern beans for a slightly different texture. Chickpeas also work in this recipe.
    • For a vegan version, use a plant-based feta cheese or skip the cheese altogether and sprinkle with nutritional yeast.
    • Add a pinch of smoked paprika or cumin for an extra layer of flavor.
    • Feel free to add more vegetables like spinach or zucchini for added nutrition and variety.
    • This dish pairs wonderfully with a side salad, quinoa, or rice for a more filling meal.
    • Chili flakes and honey – both are optional but in my opinion, they are needed to experience the full flavor potential of this recipe. Feel free to adjust the chili flakes or add them when serving.


    Serving: 6servings | Calories: 150kcal | Carbohydrates: 13g | Protein: 4g | Fat: 10g | Saturated Fat: 3g | Polyunsaturated Fat: 1g | Monounsaturated Fat: 5g | Cholesterol: 17mg | Sodium: 799mg | Potassium: 329mg | Fiber: 3g | Sugar: 7g | Vitamin A: 936IU | Vitamin C: 31mg | Calcium: 155mg | Iron: 2mg

    Keywords: Greek recipes, Green beans, Butter beans recipe, butter beans, saganaki, bean recipes, tomato beans

    Butter Beans FAQs

    What are butter beans? Can I use a substitute?

    Butter beans are large, creamy beans also known as lima beans. They have a smooth, buttery texture that’s perfect for soaking up flavors. If you can’t find butter beans, you can substitute them with cannellini beans, great northern beans, or even chickpeas for a slightly different texture and taste.

    Is this butter beans recipe vegan?

    The traditional recipe is vegetarian since it includes feta cheese. To make it vegan, simply omit the feta or replace it with a vegan cheese alternative. Also, substitute honey with maple syrup or agave nectar if used in the recipe.

    What does ‘saganaki’ mean?

    ‘Saganaki’ refers to a variety of Greek dishes that are prepared in a small, two-handled frying pan of the same name. The most famous saganaki dish is the fried cheese appetizer, but the term is also used for other dishes like shrimp saganaki and this butter beans version, all typically featuring a rich tomato-based sauce.

    Can I add other vegetables to the dish?

    Absolutely! Spinach, bell peppers, zucchini, or eggplant make great additions and can enhance the nutritional value and flavor complexity of the dish. Add them during the sautéing stage to ensure they’re cooked properly.

    Can I use fresh tomatoes instead of canned ones?

    Yes, you can use fresh tomatoes. You’ll need about 4-5 medium-sized ripe tomatoes, chopped. Keep in mind that fresh tomatoes may make the sauce lighter and may require a longer cooking time to break down and thicken properly.

    More Vegetarian Dinner Recipes


    Source link

  • One Pan Honey Butter Chicken Recipe

    One Pan Honey Butter Chicken Recipe

    This website may contain affiliate links and advertising so that we can provide recipes to you. Read my disclosure policy.

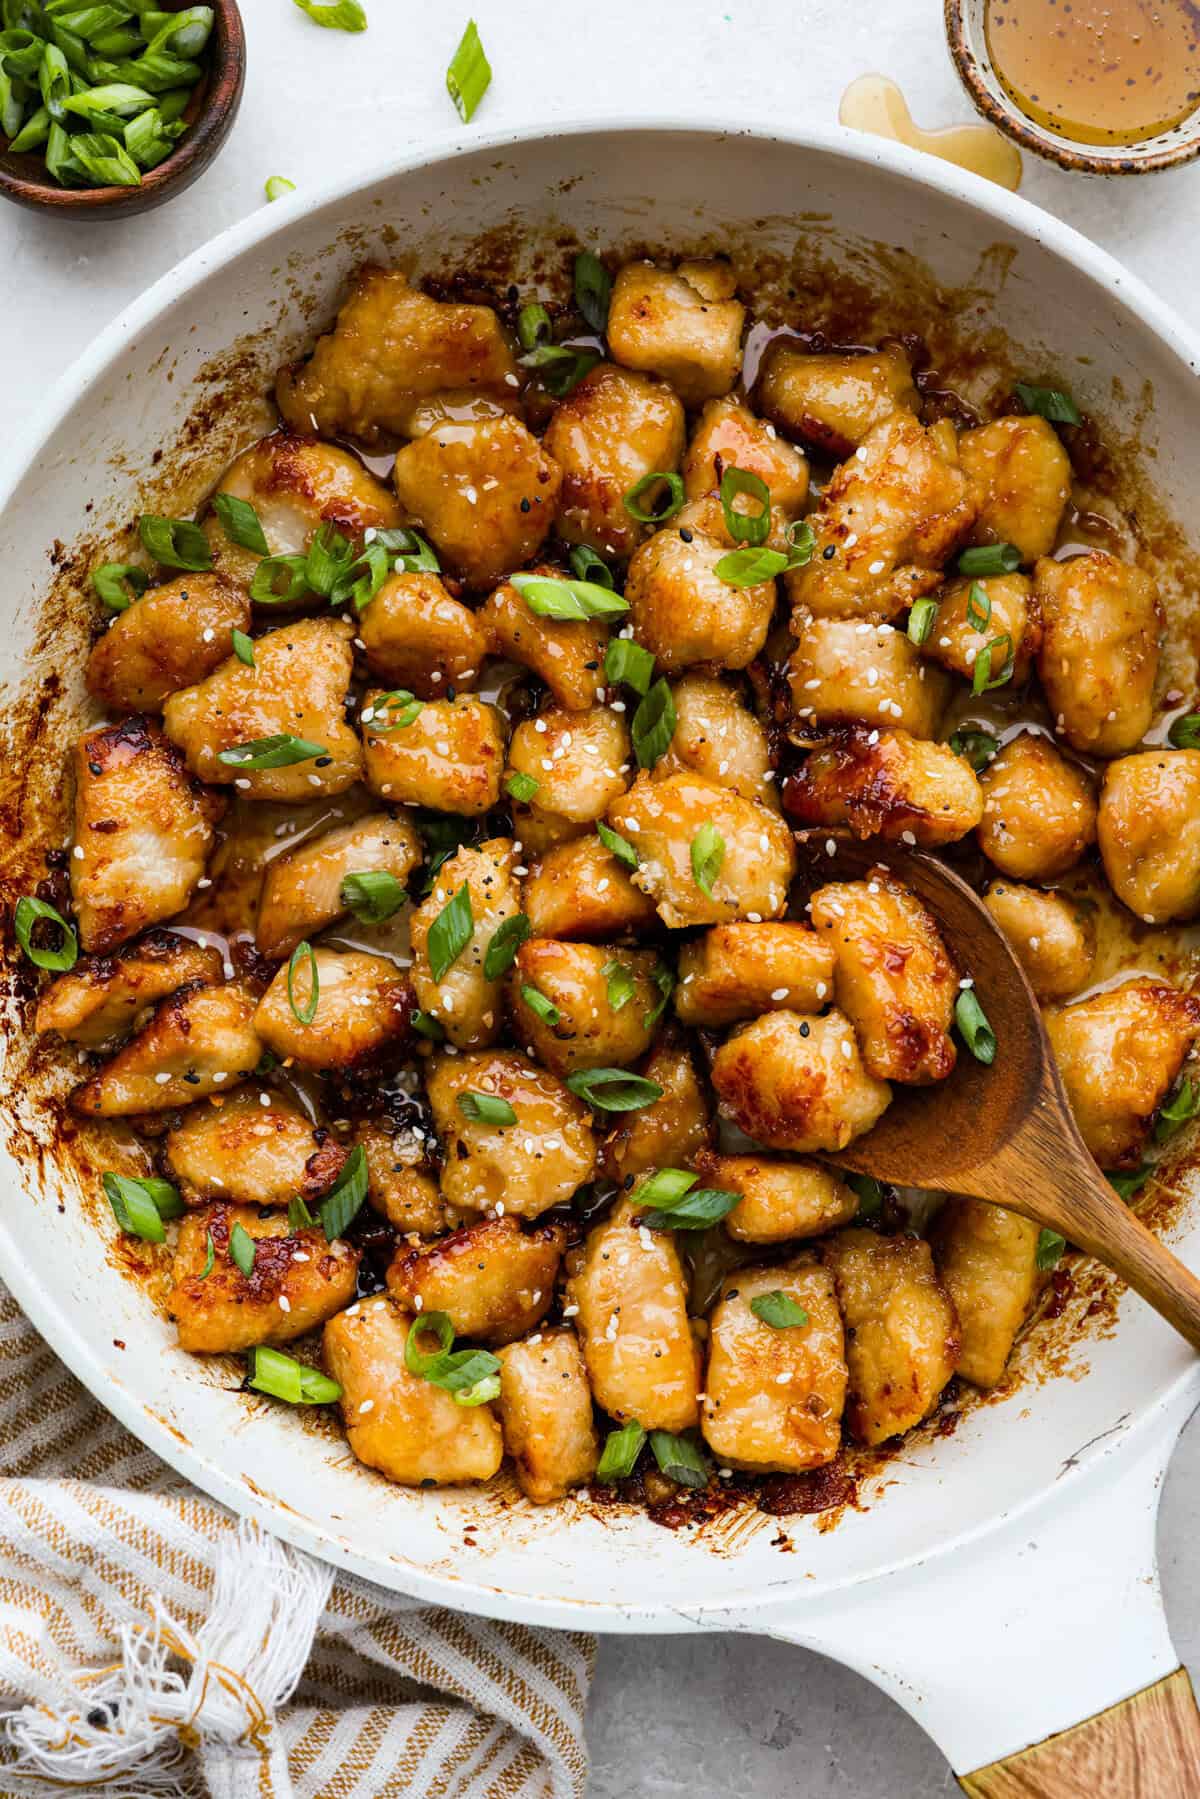
    Sticky, sweet, and totally irresistible, this honey butter chicken brings golden brown perfection to your dinner table. One pan, picky-eater approved, and guaranteed to have everyone begging for seconds.

    Overhead shot of honey butter chicken in a skillet garnished with sesame seeds and green onions.

    Why This Recipe Steals the Show

    • A True Weeknight Win: With simple steps and only 30 minutes, this is one of those rare meals that feels special without extra effort.
    • Crispy Without Deep Frying: A quick cornstarch coating gives the chicken that satisfying crunch using just a little oil, no messy frying required.
    • Kid-Friendly Meets Adult-Approved: Picky eaters love the sticky glaze, and adults appreciate the balance of sweet, savory, and tangy!

    Honey Butter Chicken Ingredients

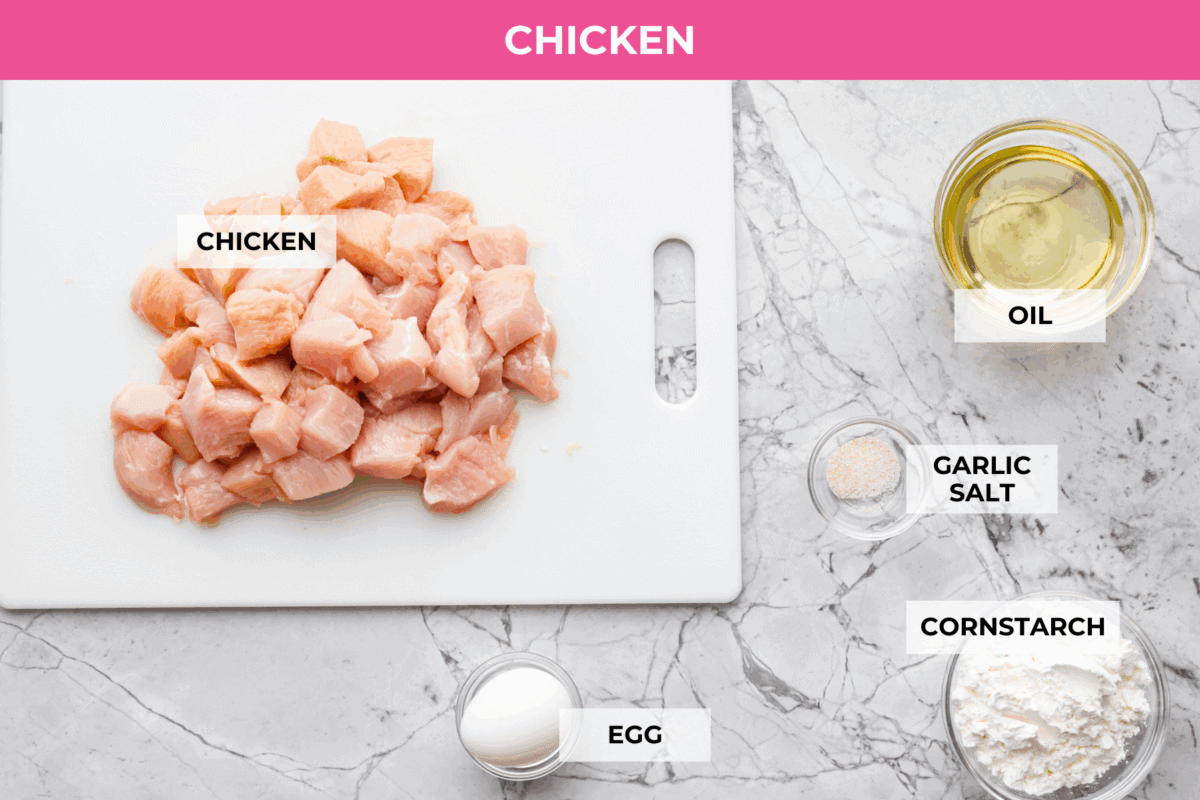
    Overhead shot of labeled honey butter chicken ingredients.
    • Chicken: You can use chicken tenders or boneless, skinless chicken thighs in this recipe!
    • Cornstarch: Some recipes call for flour, but I have found that cornstarch works best. It doesn’t clump, creates the perfect crisp texture, and keeps this recipe gluten-free!
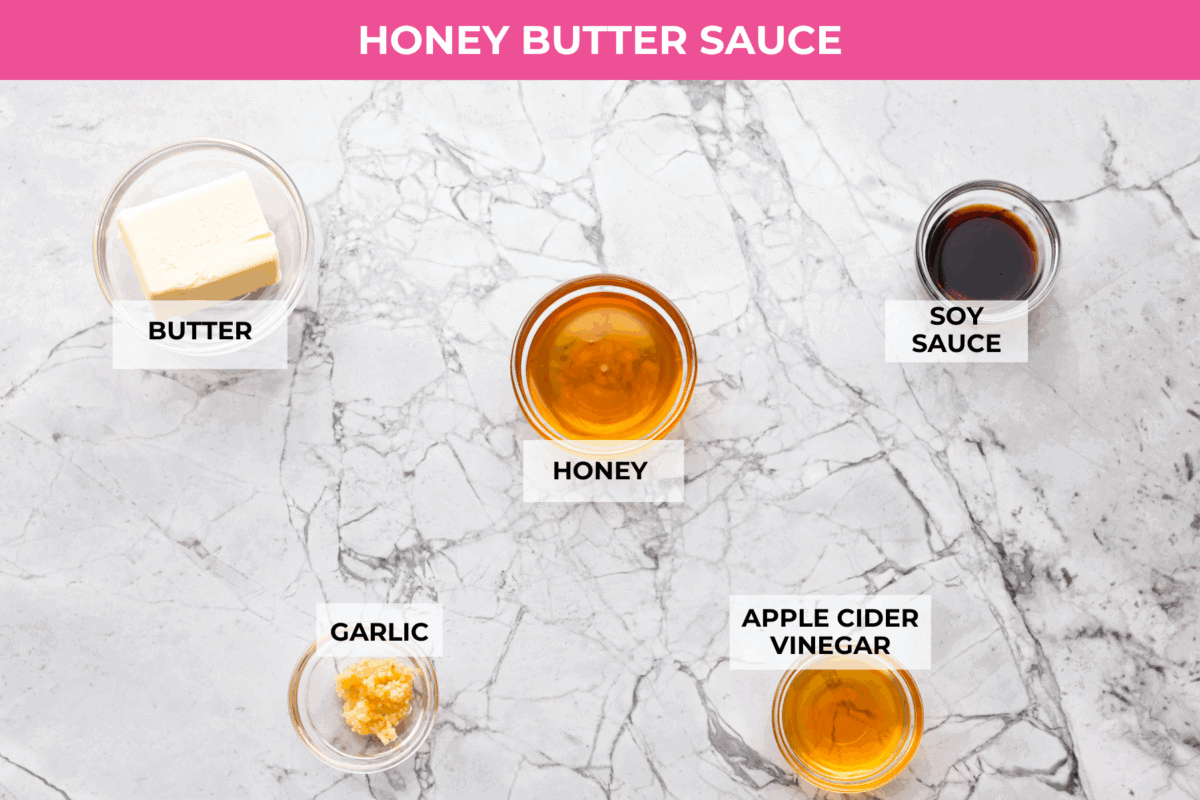
    Overhead shot of labeled honey butter chicken sauce ingredients.

    How to Make Honey Butter Chicken

    This honey butter chicken recipe is quick, easy, and packed with sticky, sweet goodness that clings to every crispy bite. Add a side of mashed potatoes or green beans for extra comfort food vibes.

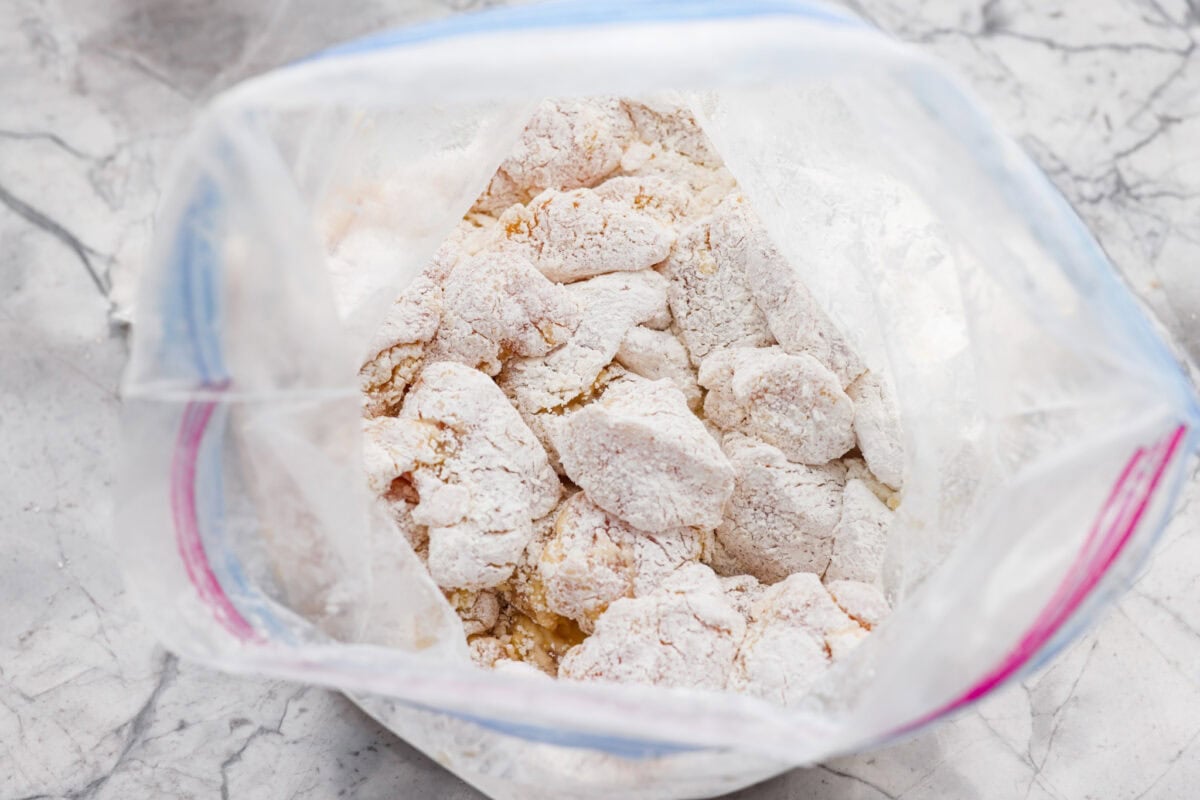
    1. Coat the Chicken: Cut the chicken into bite sized pieces and place them into a large ziplock bag. Sprinkle the chicken with garlic salt, then crack an egg over the chicken, and massage it in with your hand. Add the cornstarch, then seal the bag and shake to coat the chicken well.
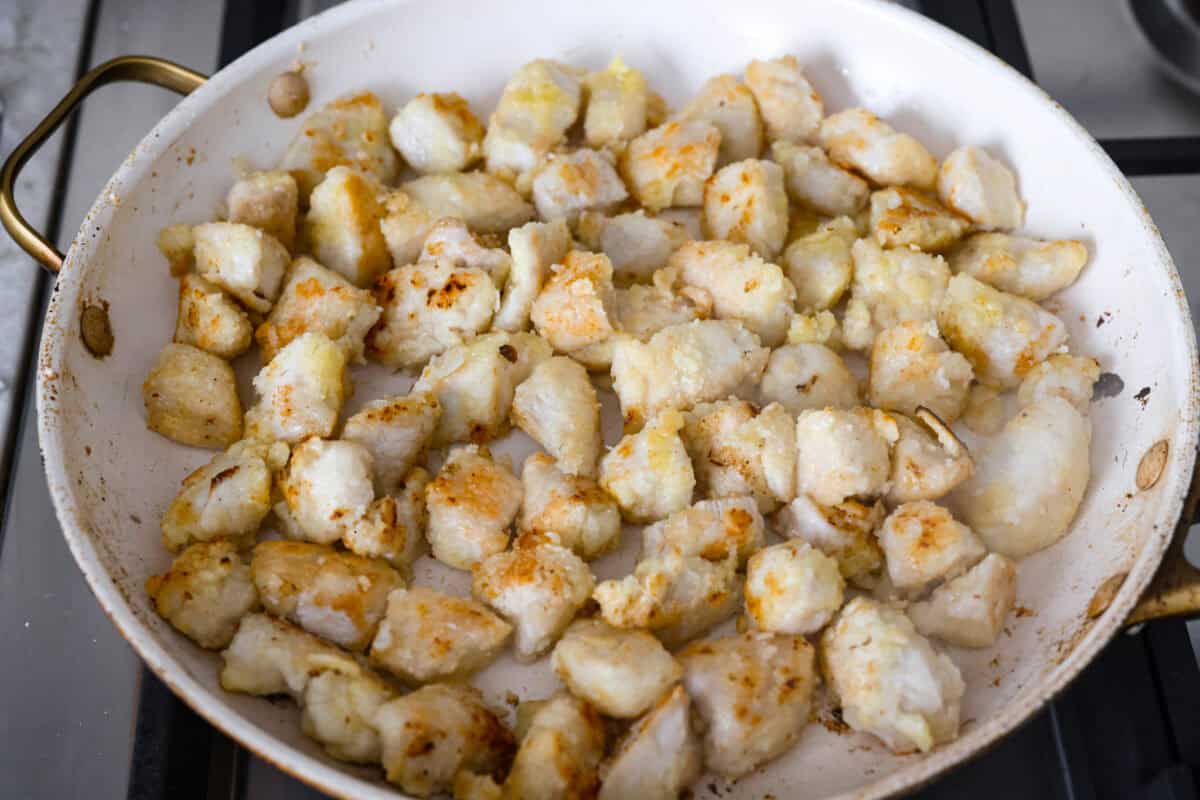
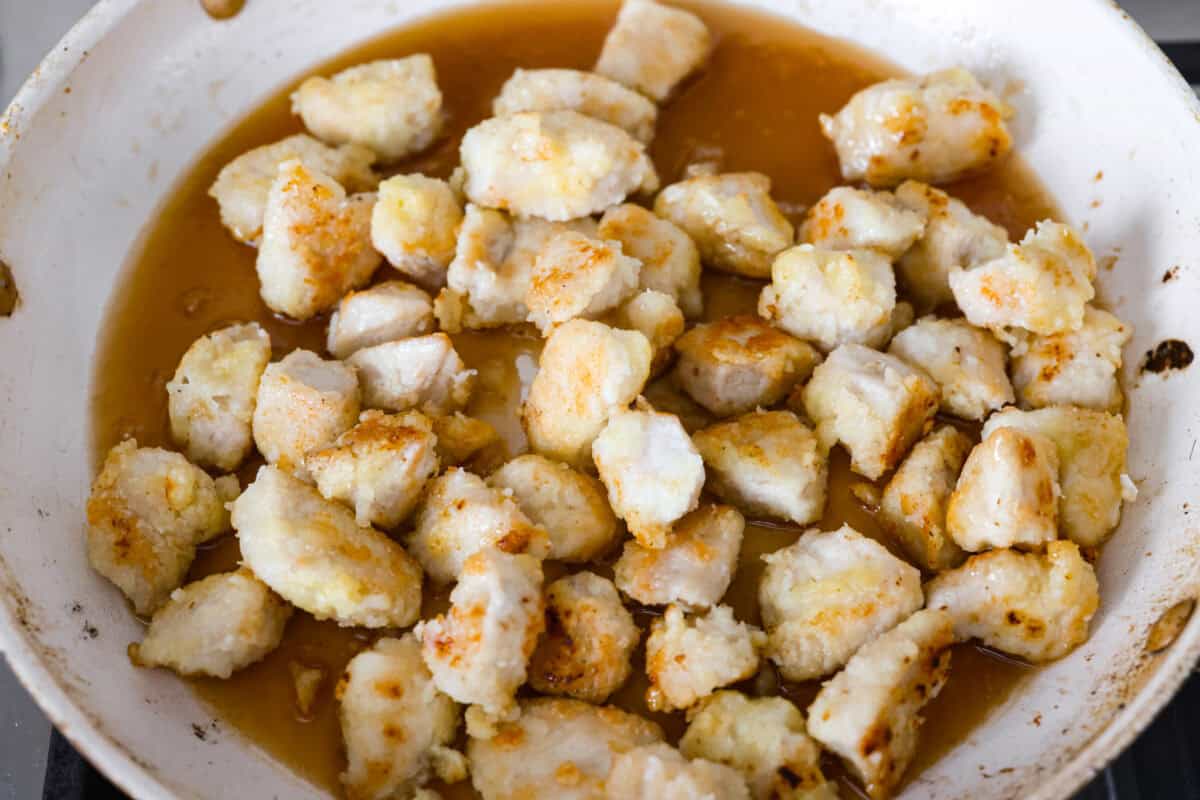
    2. Cook the Chicken: In a medium sized skillet over medium high heat, add vegetable oil. Add the coated chicken and cook 7-8 minutes, or until cooked through and browned. Remove the chicken from the skillet, then set aside.
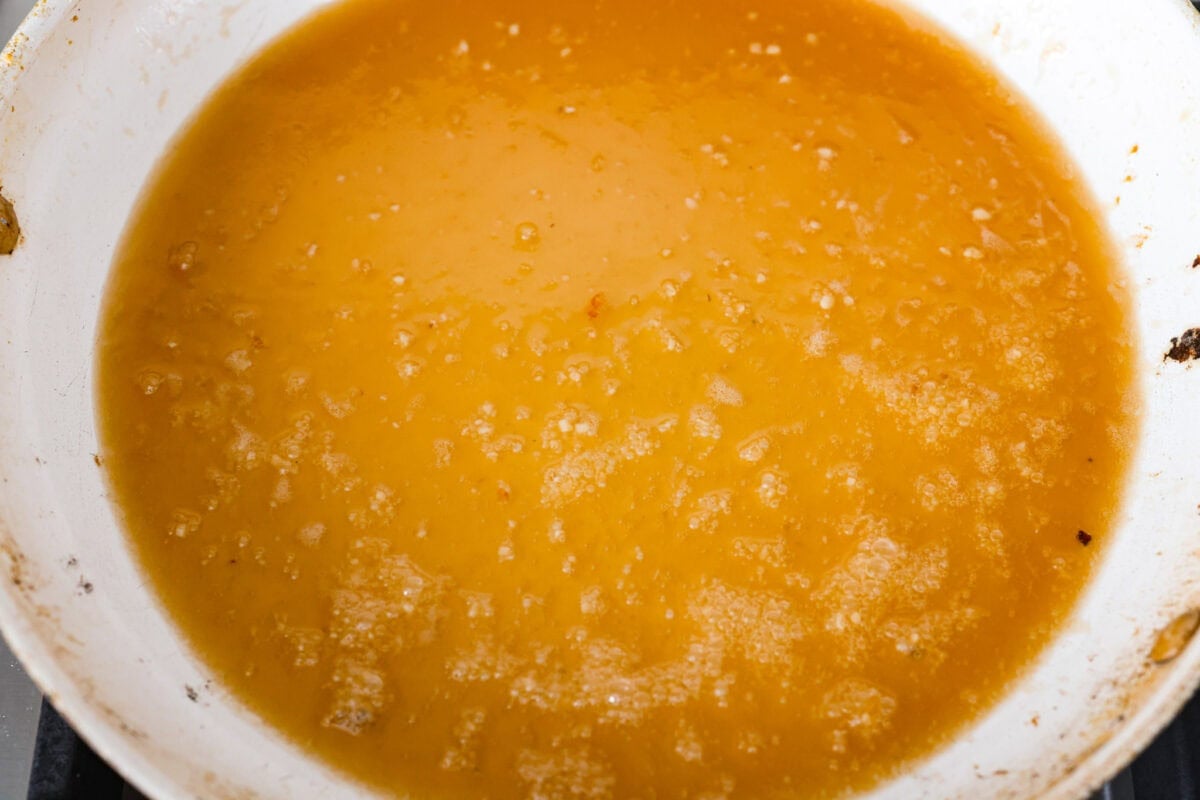
    3. Make the Honey Butter Sauce: Add unsalted butter to the skillet and melt over medium heat. Then add honey, minced garlic, soy sauce, and apple cider vinegar. Whisk together and cook for a couple of minutes until the sauce is bubbly and starts to thicken.
    4. Toss Chicken in Sauce: Add the cooked chicken back to the skillet, then toss to coat with the sauce. Garnish honey butter chicken with sesame seeds and diced green onion, if desired. Serve over rice and enjoy!

    Alyssa’s Pro Tip

    Ziplock Bag Tip: Trust me on this! The BEST and easiest way to coat the chicken with cornstarch is with a ziplock bag. Shake well to separate and coat each piece of chicken.

    Pin this now to find it later

    Pin It

    Plated honey butter chicken over rice next to green beans.

    More 30-Minute Chicken Recipes

    For a similar recipe with a little kick, try my sweet chili chicken next. Here are some more 30-minute chicken recipes!

    Creamy Cajun Chicken

    30 minutes


    Source link

  • Cilantro Lime Butter Shrimp Recipe

    Cilantro Lime Butter Shrimp Recipe

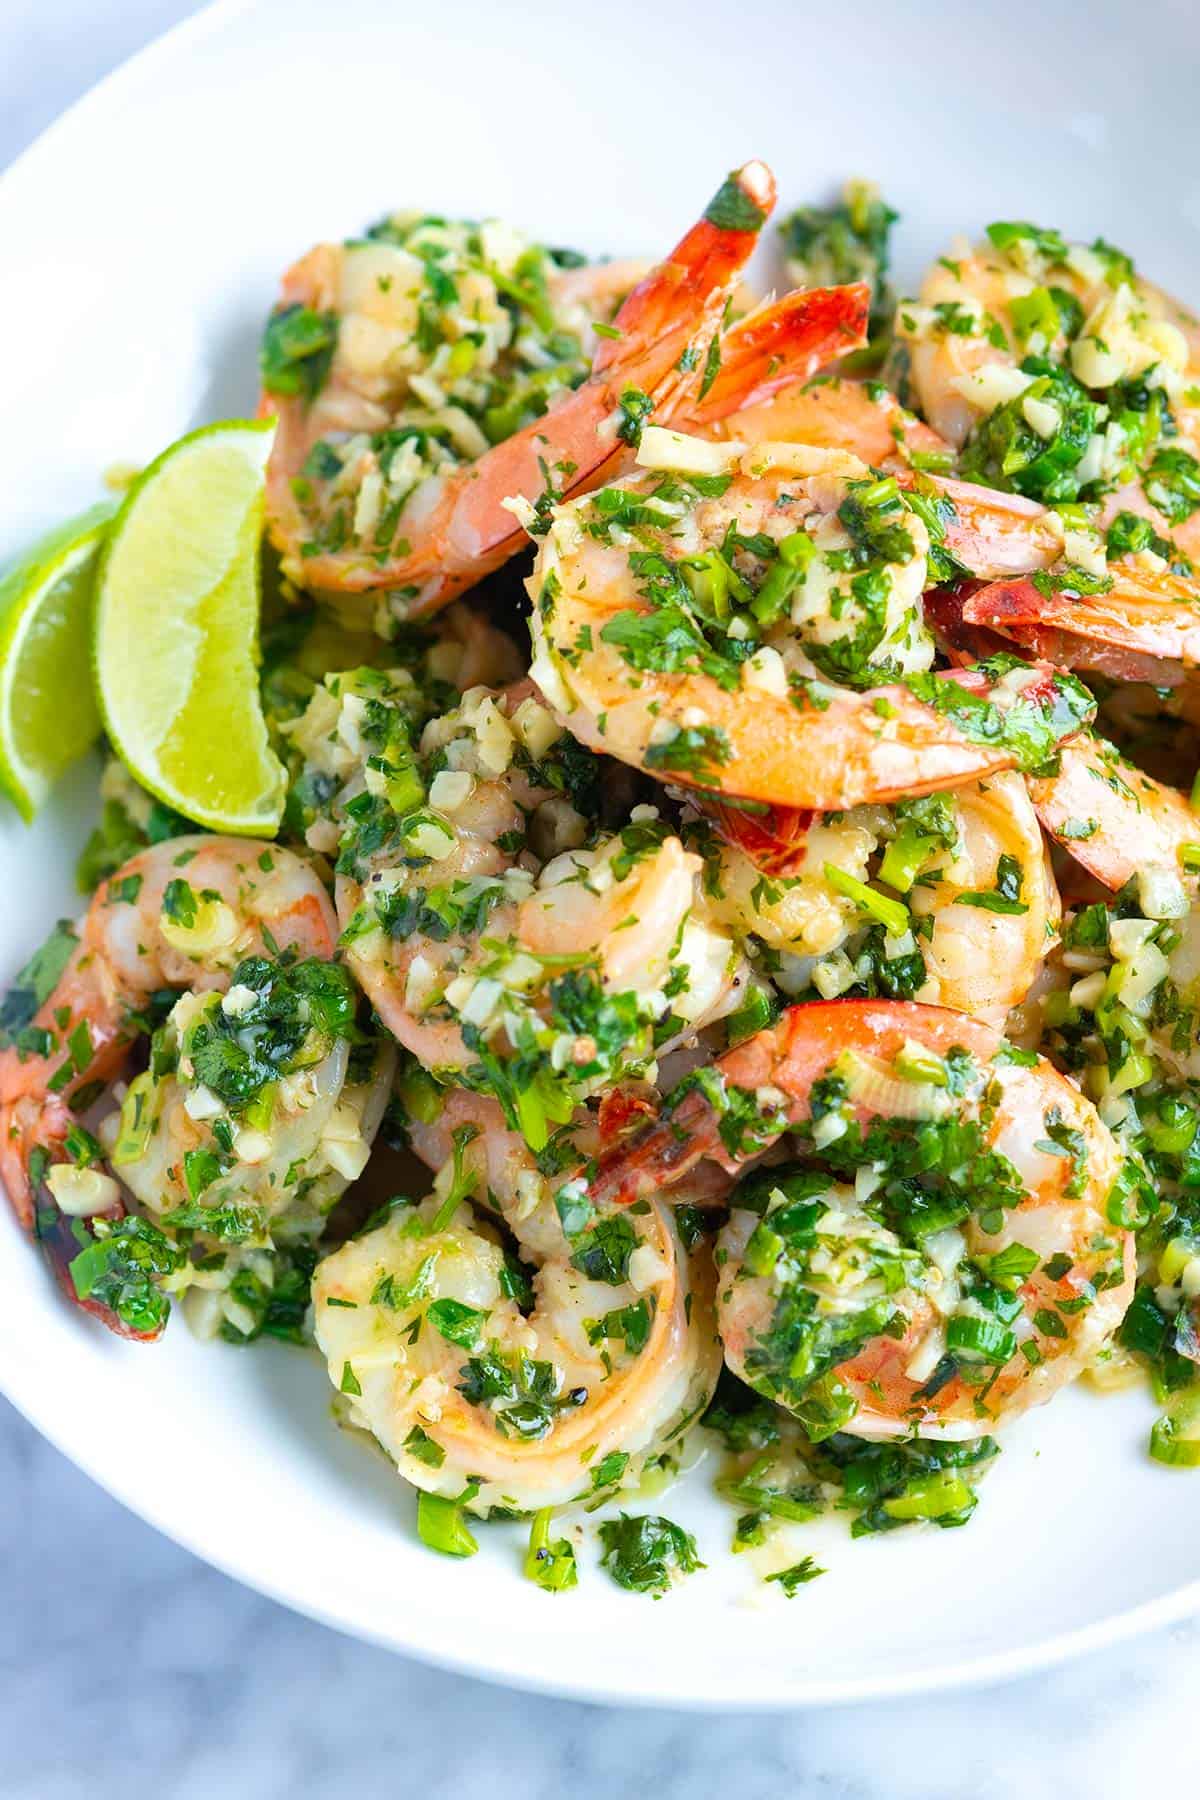
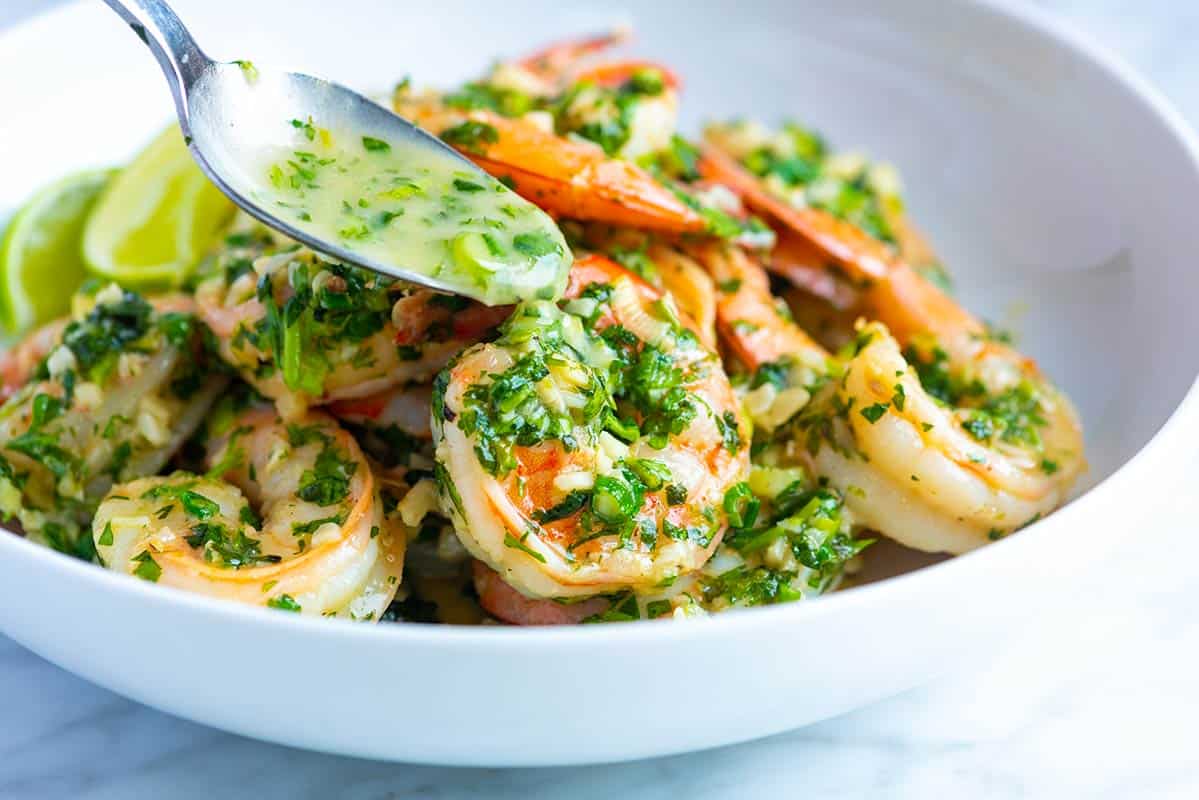
    This delicious cilantro lime shrimp recipe is ready in less than 20 minutes and has easily become one of my family’s favorite shrimp recipes!

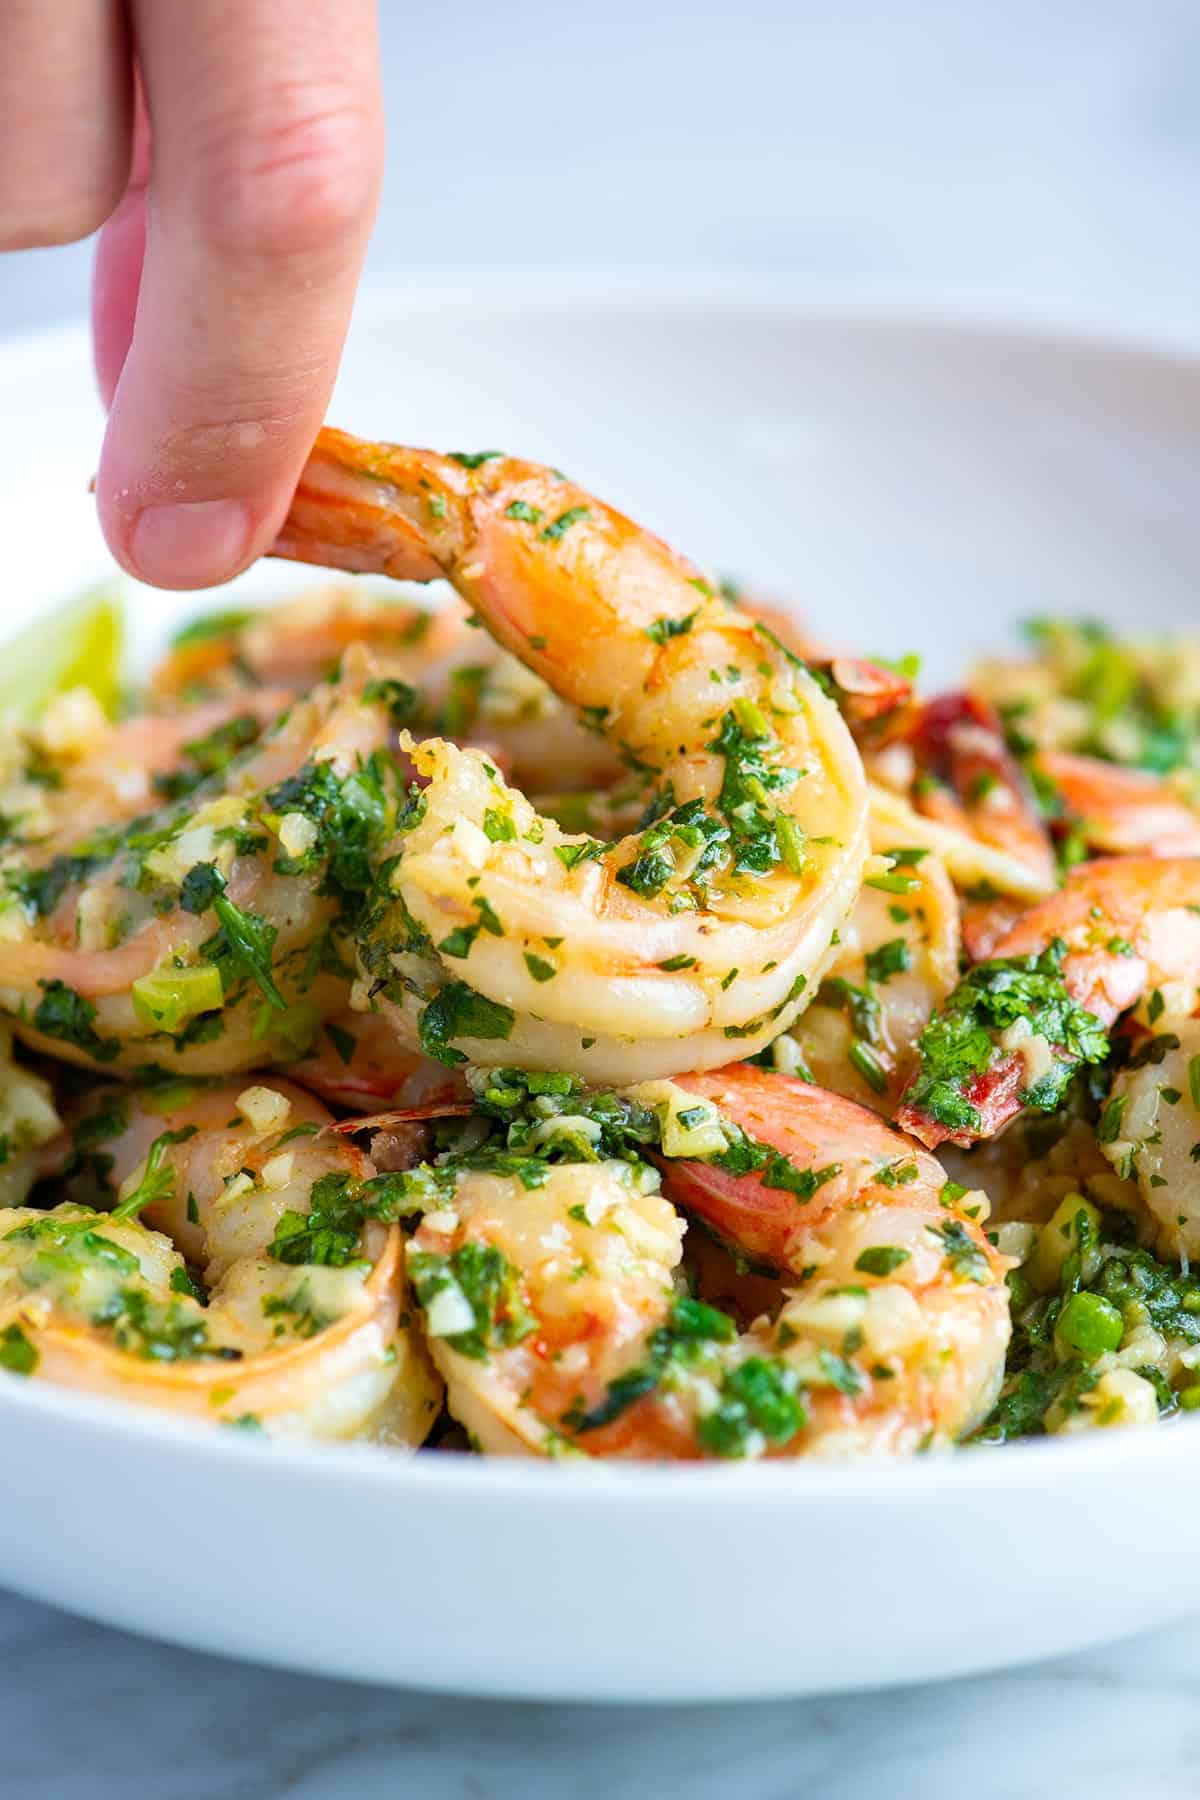
    Cilantro Lime shrimp with lots of garlic piled up on a plate.

    This cilantro lime shrimp is one of my favorite shrimp recipes. I love classic shrimp scampi with lemon, garlic, and butter, but lately, I’ve fallen for this shrimp with a butter sauce made with fresh cilantro and lime.

    This recipe is quick and simple, so you can absolutely make it tonight. It takes less than 20 minutes and requires only a handful of ingredients.

    Key Ingredients

    • Shrimp: Use fresh, high-quality jumbo or large shrimp. You can keep the tails on or remove them, whichever you prefer.
    • Butter: I use butter in two ways in this cilantro lime shrimp recipe. First, I cook the shrimp in it, and then, as it finishes cooking, I swirl in more for a creamy sauce. I do the same when making these seared scallops.
    • Garlic: I use 6 garlic cloves for this recipe and love it!Lime: I use the juice and zest of 1 lime for this recipe.
    • Cilantro: I use a lot of cilantro! I know not everyone loves it, and if that’s you, don’t worry. You can swap the cilantro for any tender fresh herb like parsley or basil.
    • Coriander: It’s optional, but it adds a delicious citrusy flavor to the shrimp. Coriander seeds are the seeds of cilantro.
    • Green Onion: It’s also optional, but I love the extra green and flavor it adds.

    Find the full recipe with measurements below.

    Cilantro lime garlic butter shrimp

    How to Make the Best Cilantro Lime Shrimp

    Tip 1: Use lots of garlic. When we crave garlicky shrimp, we go all in. That means we don’t hold back on the amount of garlic in this recipe. We use 6 garlic cloves (sometimes more) for one pound of shrimp.

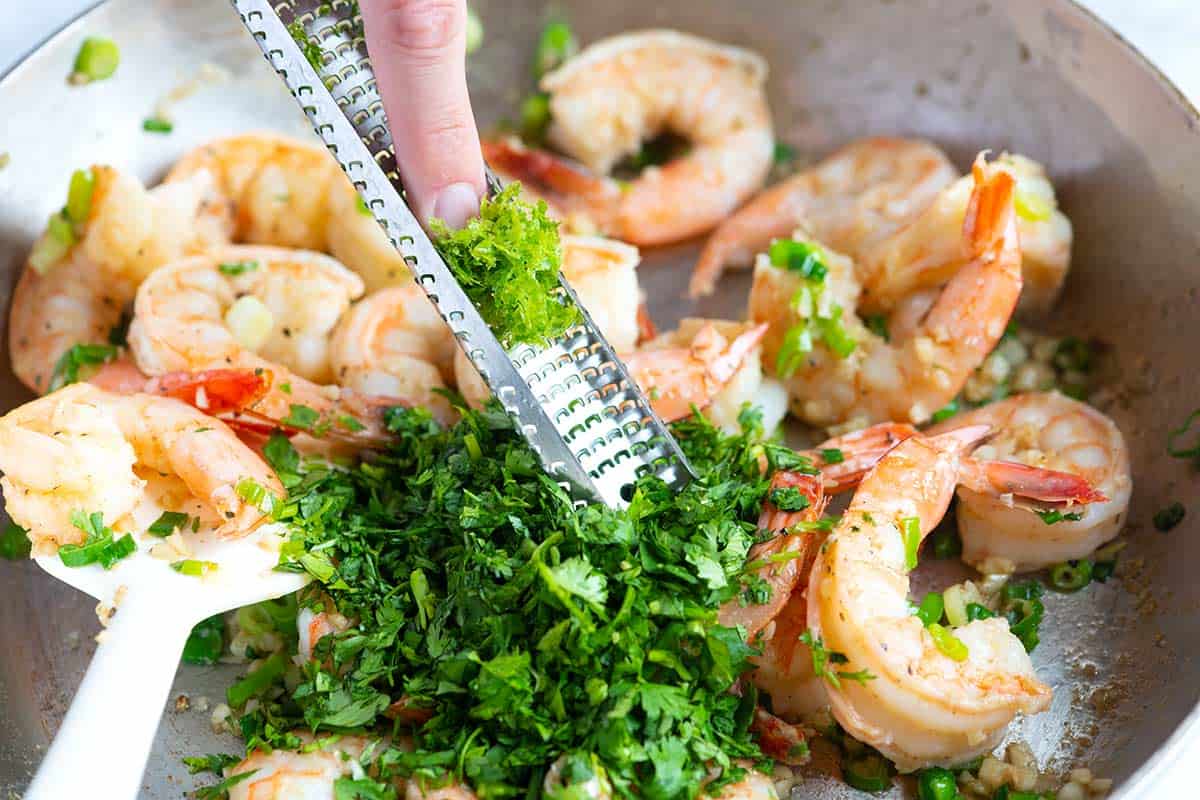
    Tip 2: Use lots of lime. We use the juice and zest of a whole lime. To remove the zest, we use our Microplane (a fine hand grater). It’s quick and easy, plus the tool isn’t expensive.

    Adding cilantro and the zest and juice of a lime to the shrimp

    Tip 3: Make a butter sauce. For the best flavor, cook the shrimp in a little butter, and then as the shrimp finishes cooking, slide the skillet off the heat and swirl in more butter. Since the pan isn’t too hot, the butter melts into a creamy sauce.

    Serving Suggestions

    These cilantro lime shrimp are perfect served family-style. The shrimp are a bit messy, but that’s a good thing in this case. Serve these by themselves, with pasta (hello garlic cilantro shrimp pasta), over cilantro lime rice, coconut rice, Mexican rice, on top of homemade grits, or wrapped in homemade tortillas. I also love them next to this avocado and cucumber salad.

    Recipe Variations

    Our recipe is flexible. Although we use garlic, cilantro, and lime in our photos to make the sauce, you don’t need to. You can always take our method and swap the flavors around a bit. Swap lime for lemon and cilantro for parsley. This lemon parsley version is similar to more traditional shrimp scampi. Or try fresh basil, dill, and tarragon. I also highly recommend our cajun butter shrimp!

    Cilantro Lime Shrimp

    Cilantro Lime Butter Shrimp

    • PREP
    • COOK
    • TOTAL

    I love this garlic shrimp cooked in a creamy cilantro lime butter sauce. Serve this as an appetizer, with pasta, over rice, or in tortillas for tacos. The recipe is easy to adapt. Swap lime for lemon and try other tender herbs like parsley, dill, basil, or tarragon instead of cilantro.

    Makes 4 servings

    You Will Need

    1 pound (450g) extra large shrimp, peeled with tails left on and deveined

    1 lime plus a few extra wedges for serving

    3 tablespoons unsalted butter, divided

    2 tablespoons minced garlic, about 6 cloves

    1/2 teaspoon ground coriander, optional

    2 scallions, chopped

    1/2 cup fresh cilantro leaves and tender stems, chopped

    Salt and fresh ground black pepper

    Directions

    • Cook Shrimp
    • 1Pat the shrimp dry, then season it with 1/4 teaspoon of salt and fresh ground black pepper.

      2Zest the lime using a microplane and set aside. Cut the zested lime in half, ready for the sauce later in the recipe.

      3Add one tablespoon of the butter to a wide skillet. Save the remaining two tablespoons for later.

      4Place the skillet with butter over medium heat, then add the garlic and coriander. Stir the garlic around the pan until the butter melts and bubbles for about 1 minute.

      5Add the shrimp, nestling them into the pan so they are in one layer. A few shrimp stacked on top of each other is okay. Cook until the shrimp starts turning opaque, about 1 minute.

      6Stir in the scallions and lime zest. Continue to cook, stirring, until the shrimp are firm and opaque, another 1 to 2 minutes. Slide the skillet off the heat.

      7Add the cilantro, lime juice, and the remaining two tablespoons of butter. Stir the butter around the pan to melt into the lime juice, making the creamy butter sauce.

      8Taste, then season as needed with salt and pepper. Serve with extra lime wedges on the side.

    Adam and Joanne’s Tips

    • Lemon garlic butter shrimp: Swap lime for lemon and cilantro for parsley, then follow the recipe as written above. Add a splash of dry white wine at the end for extra flavor.
    • How to make spicy cilantro lime shrimp: Add 1/2 to 3/4 teaspoons of crushed red pepper flakes to the pan while adding the garlic.
    • Olive oil instead of butter: While the sauce is not creamy, you can substitute olive oil for the butter. You will need one tablespoon to cook the Shrimp and only a light drizzle at the end (about half a tablespoon).
    • The nutrition facts provided below are estimates.

    Nutrition Per Serving
    Serving Size
    1/4 pound
    /
    Calories
    193
    /
    Protein
    23.6 g
    /
    Carbohydrate
    5.2 g
    /
    Dietary Fiber
    1.2 g
    /
    Total Sugars
    1.4 g
    /
    Total Fat
    9.4 g
    /
    Saturated Fat
    5.5 g
    /
    Cholesterol
    205.4mg
    /
    Sodium
    284.9 mg


    AUTHOR:

    Adam Gallagher

    Adam and Joanne of Inspired Taste

    We are Adam and Joanne Gallagher, the creators of Inspired Taste. Established in 2009, Inspired Taste grew from a childhood dream into one of the internet’s most trusted recipe sites with hundreds of reliable recipes, step-by-step videos, and expert tips.More About Us

    Source link

  • Easy Brown Butter Recipe

    Easy Brown Butter Recipe

    Here’s my method for how to brown butter perfectly every time. It takes 5 minutes, and you can use this brown butter in your favorite baking and savory recipes.

    How to Brown Butter - Skillet with butter that has been browned to perfection. Brown butter looks light brown.

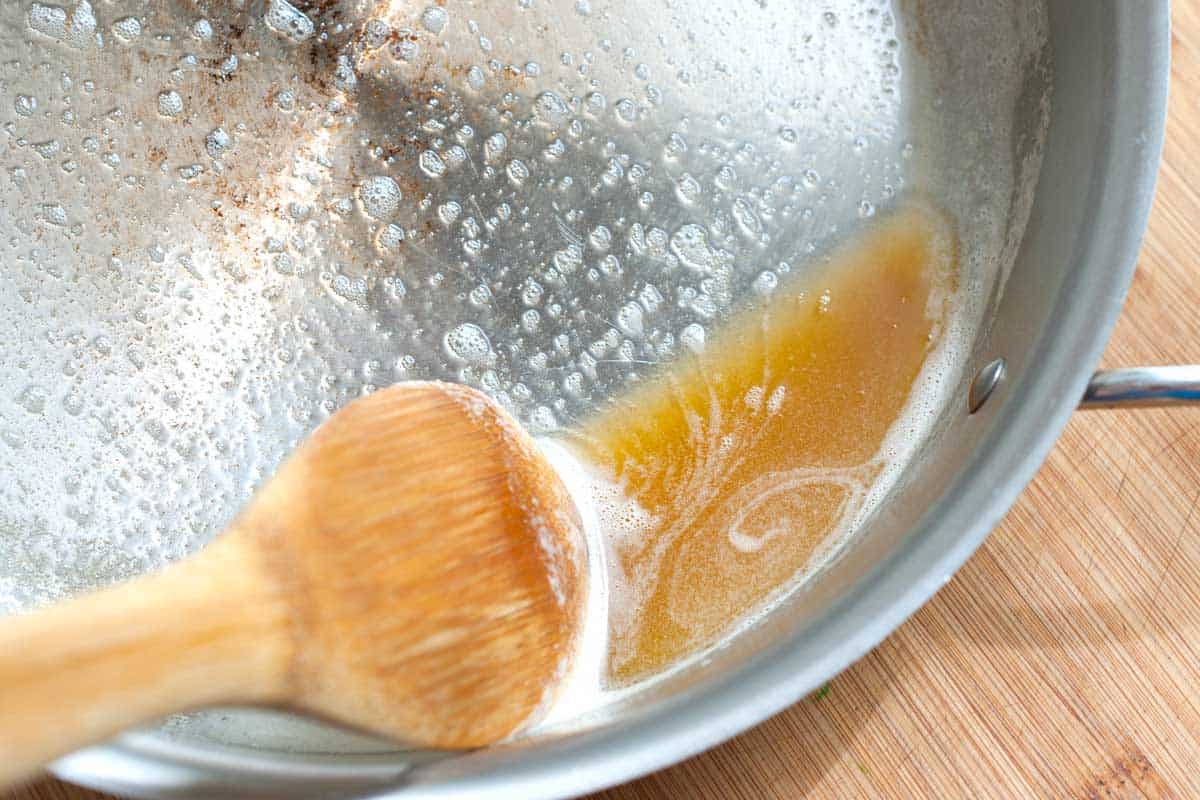
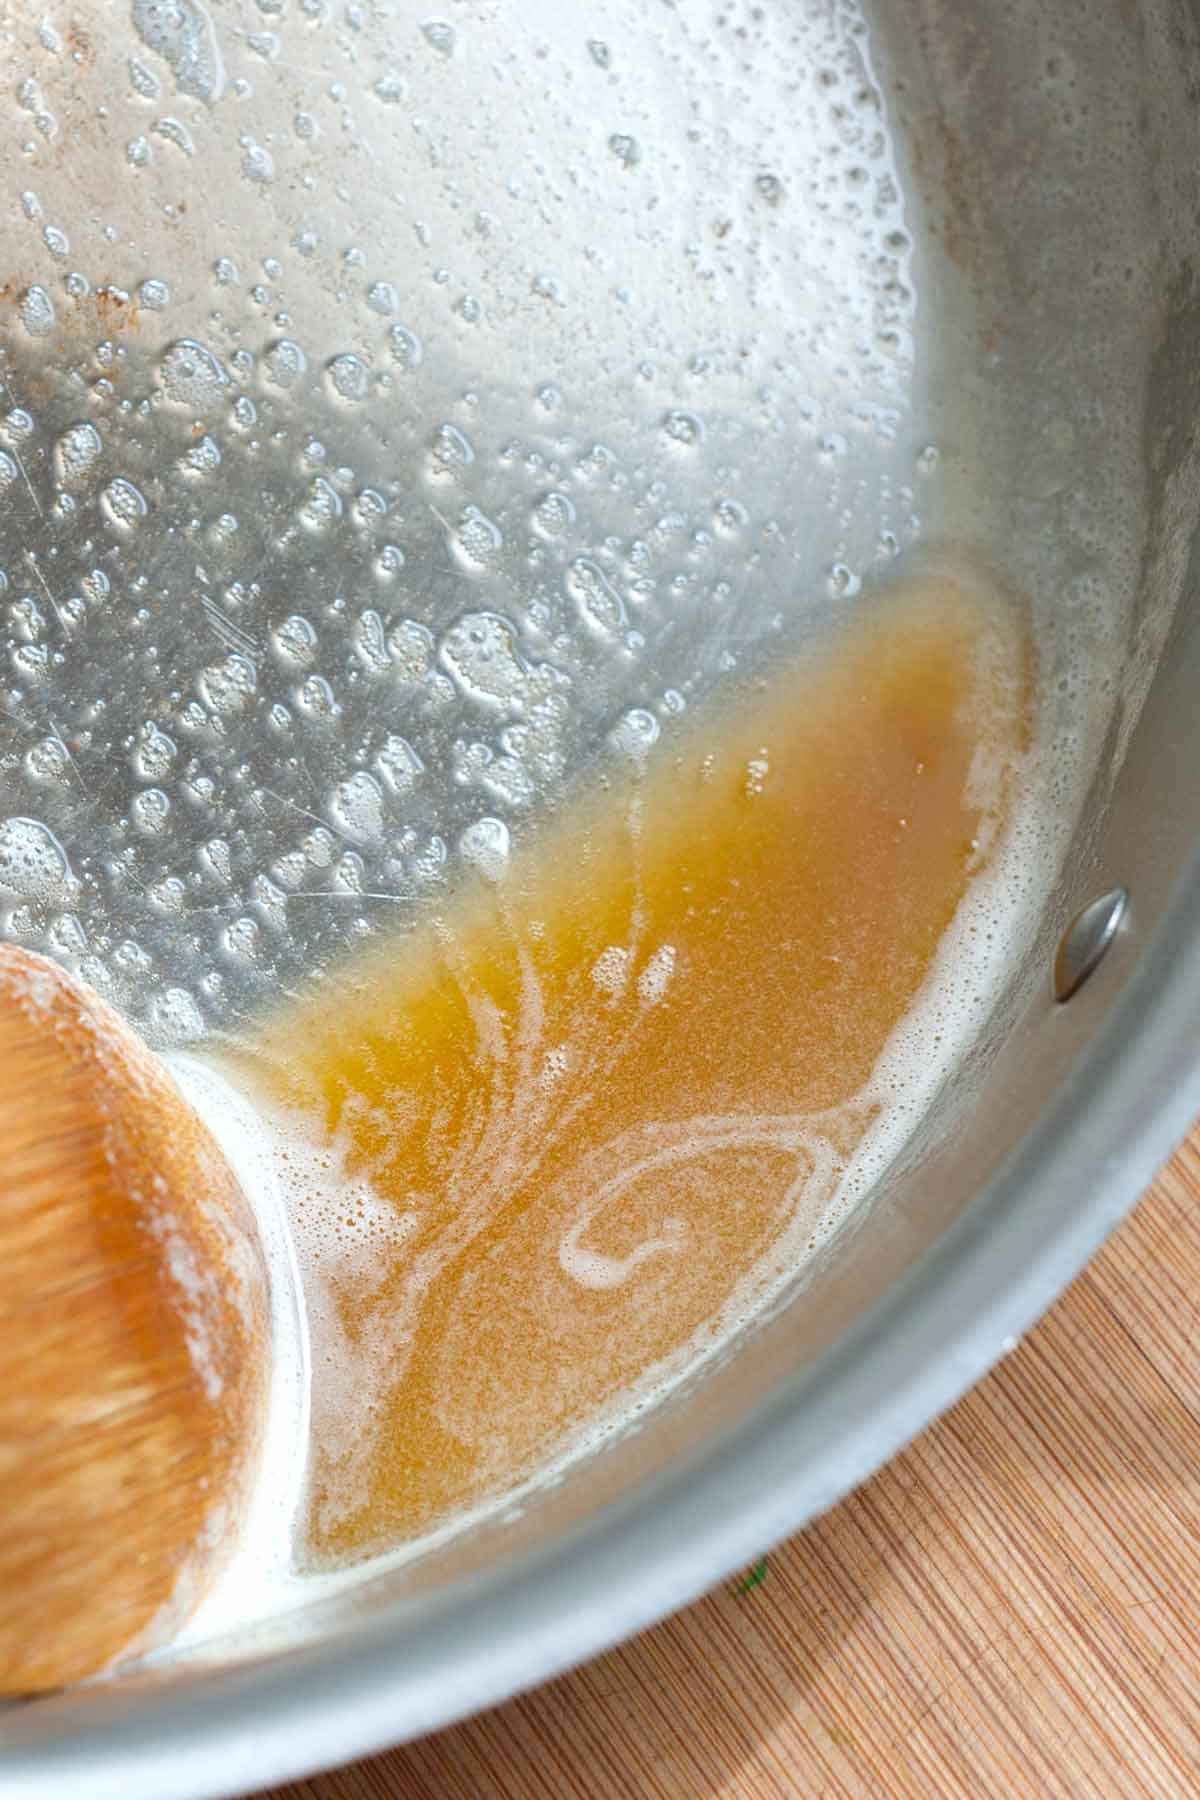
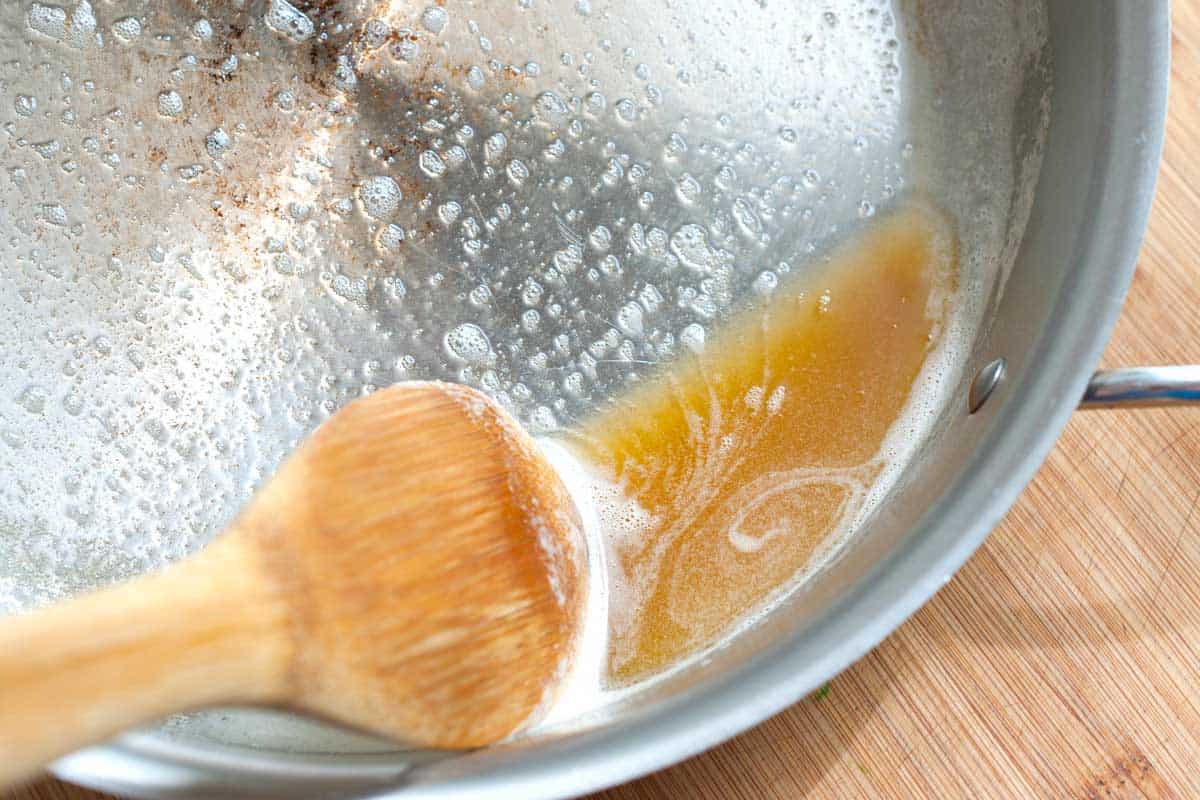
    Brown butter is regular butter cooked a bit longer than usual until the milk solids toast and turn brown. You’ll cook the butter just past the melting point.

    Browning butter creates a magical toasty flavor you don’t get with regular melted butter. Brown butter (or beurre noisette in France) tastes nutty, toasted, and like toasted hazelnuts.

    How to Use Brown Butter

    Use brown butter in almost any recipe that calls for melted butter. Toss cooked pasta or noodles with browned butter, as we do for our brown butter pasta with egg and this kale pasta. I also love drizzling vegetables with brown butter before (or after) roasting them. It’s absolutely amazing when used to make mashed potatoes, and it makes the best popcorn!

    For sweeter recipes, swap plain melted butter for brown butter in cookies, bars, and even buttercream (yes, you can chill the butter and whip it!). I love using brown butter to make chocolate chip cookies, oatmeal cookies, and blondies. It also makes these easy sautéed apples extra delicious, and I love drizzling it over oatmeal.

    Perfect Brown Butter

    Easy Brown Butter

    It takes five minutes to make brown butter. You can use it almost anytime a recipe calls for melted butter (hello, brown butter chocolate chip cookies). For herb brown butter, add a handful of fresh sage leaves, rosemary sprigs, or fresh thyme to the pan while you make the brown butter.

    3/4 cup

    You Will Need

    1 cup (227g) butter, salted or unsalted

    Directions

      1Add butter to a heavy-bottomed pan over medium-low heat. As the butter melts, continuously swirl it around the pan. The butter will quickly go from brown to burnt, so stay close to the pan when you do this.

      2Continue swirling the butter over the heat. It will melt, get a little foamy, and finally start turning golden brown. Remove it from the heat when the butter is light brown and smells nutty.

      3Store brown butter in the fridge for up to two weeks or freeze for up to three months.

    Adam and Joanne’s Tips

    • Storing: Homemade brown butter lasts in an airtight container in the fridge for up to 2 weeks or frozen for up to 3 months. The butter will solidify again, but you can warm it over low heat when needed. To freeze brown butter, pour it into a clean ice cube tray, freeze, and then transfer the frozen cubes to a freezer-safe container or bag.
    • How to freeze brown butter: Pour it into a clean ice cube tray, freeze, and then transfer the frozen cubes to a freezer-safe container or bag. Freeze for up to 3 months. Gently reheat in a pan over low heat.
    • Nutrition facts are estimates. We assumed unsalted butter.

    Nutrition Per Serving
    Serving Size
    About 1 tablespoon
    /
    Calories
    136
    /
    Total Fat
    15.3g
    /
    Saturated Fat
    9.6g
    /
    Cholesterol
    40.7mg
    /
    Sodium
    2.1mg
    /
    Carbohydrate
    0g
    /
    Dietary Fiber
    0g
    /
    Total Sugars
    0g
    /
    Protein
    0.2g


    AUTHOR:

    Adam Gallagher

    Previous Post: Easy Smoked Salmon Dip
    Next Post: Sausage Stuffed Shells

    Source link