Category: Soup & Stew

  • How to Make the Best Chicken Stock

    How to Make the Best Chicken Stock

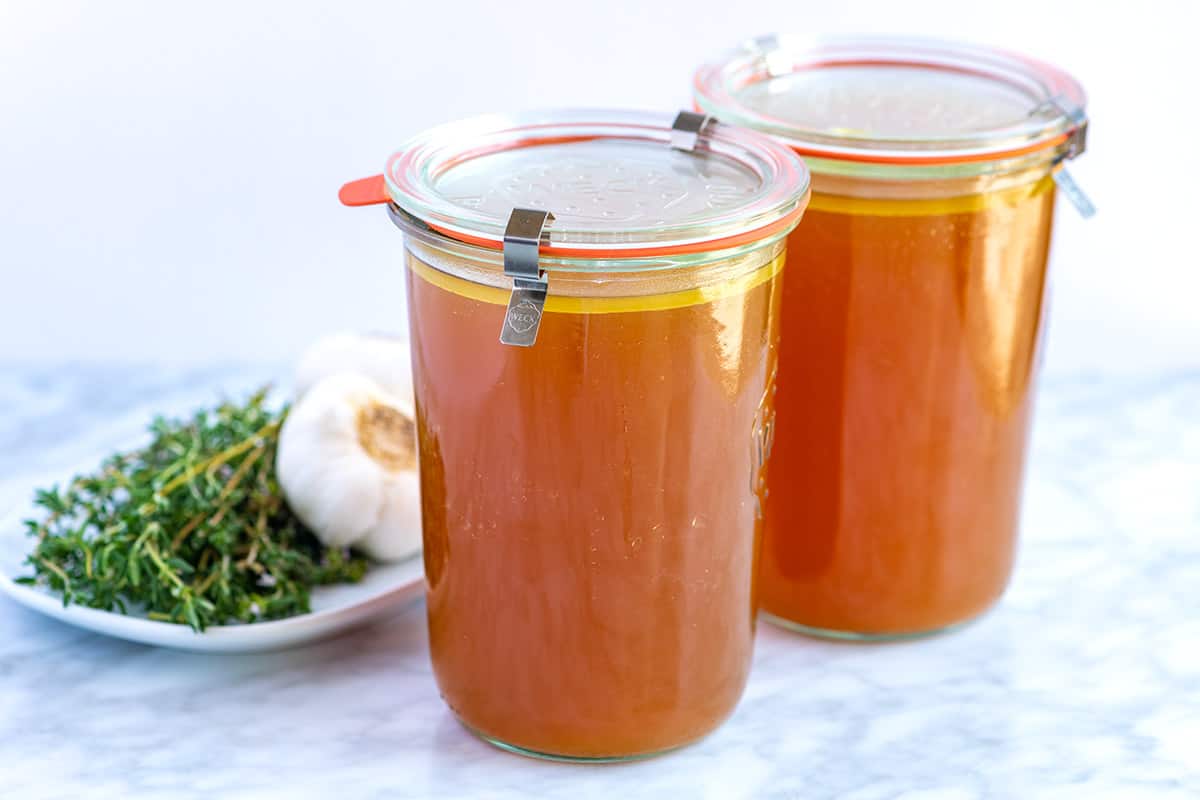
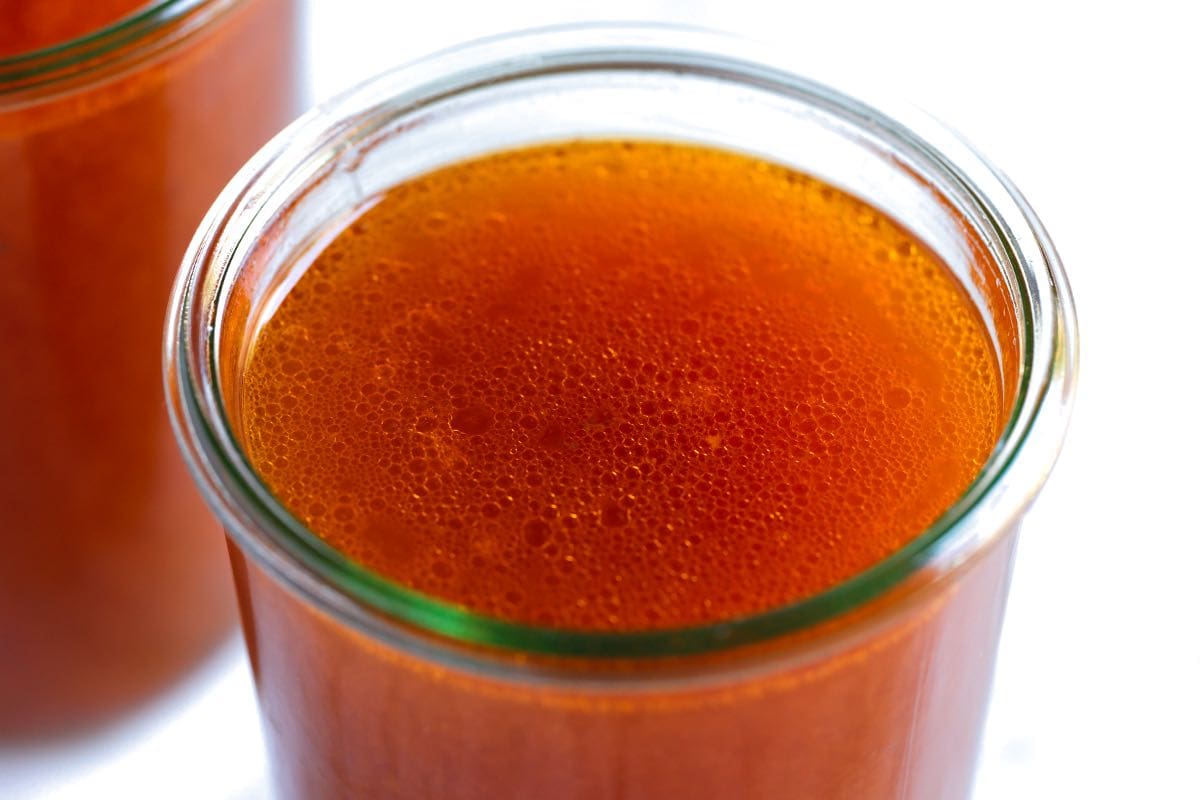
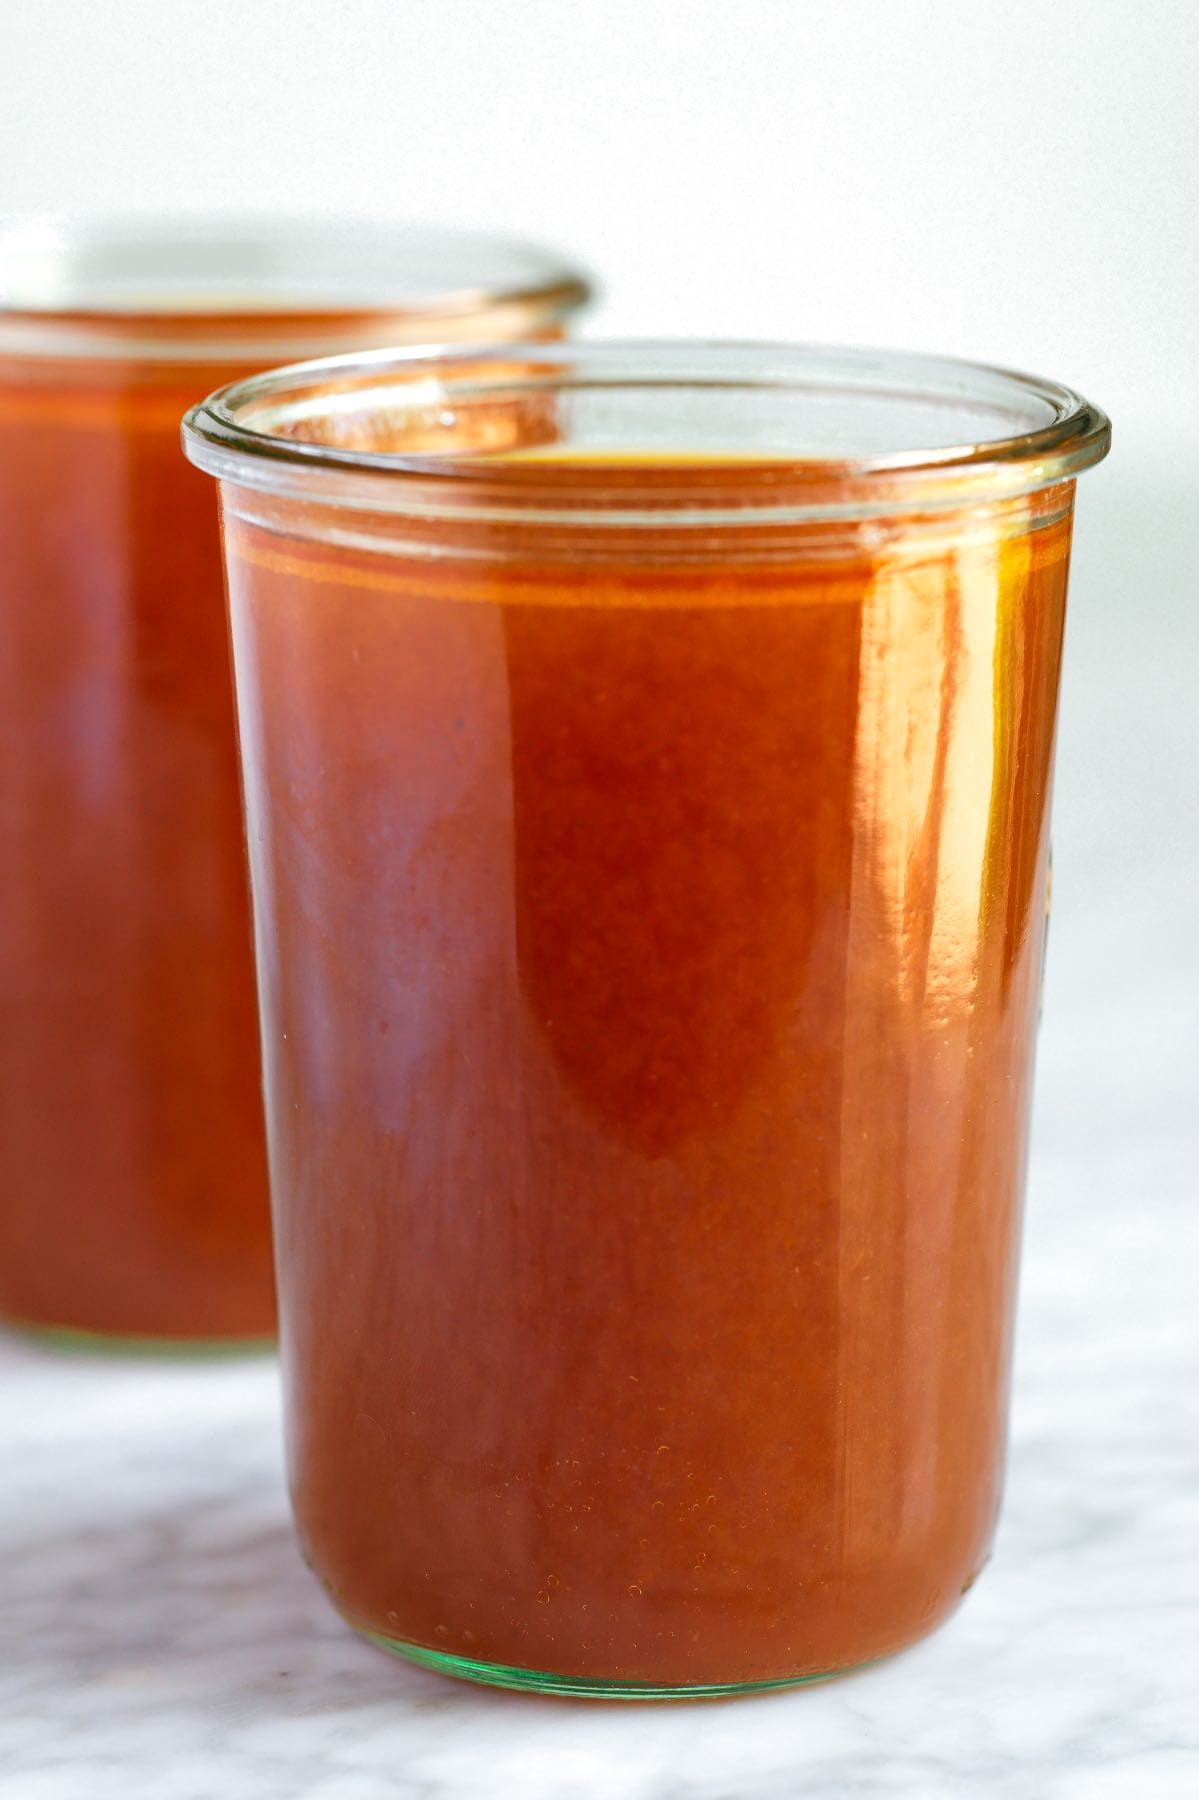
    My favorite homemade chicken stock recipe will knock the socks off of anything you buy at the store. You can use chicken bones or chicken parts for this easy recipe.
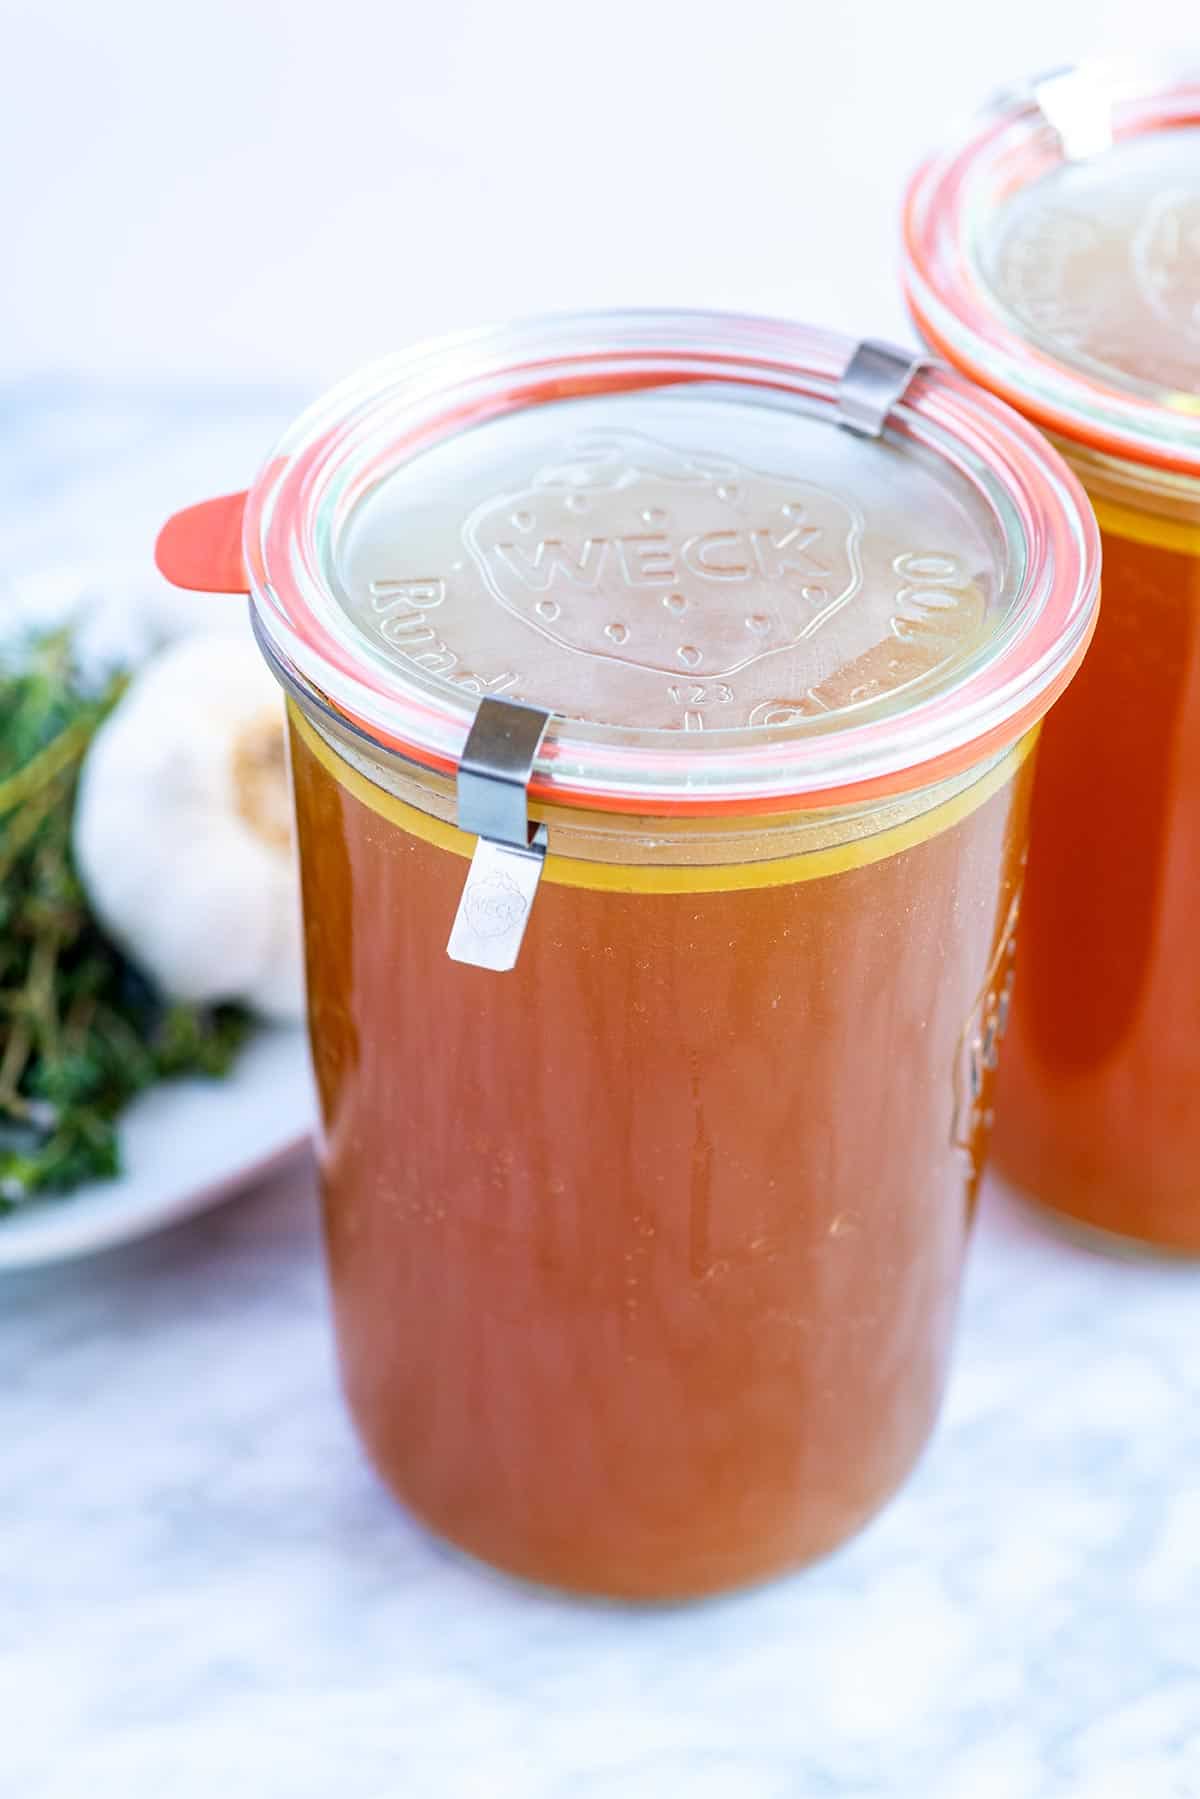
    Homemade chicken stock

    Not only does this chicken stock taste better than the box, but it is also easy to make and lasts in the freezer for up to 3 months. I especially love making chicken stock after making our roasted chicken.

    I use this chicken stock to make many of the soup recipes on Inspired Taste, including our highly-rated chicken noodle soup! For a more delicately flavored broth, see my easy chicken broth, or for richer flavor, try our homemade bone broth.

    Key Ingredients

    • Chicken parts: Make this recipe using chicken parts or leftover bones (say from roasted chicken or a rotisserie chicken). My favorite way to make chicken stock is using chicken wings. They are inexpensive and have lots of cartilage and connective tissue, which are rich in collagen. As they simmer in the stock, the collagen breaks down into gelatin, giving our chicken stock a rich flavor and silky texture.
    • Aromatics: For classic chicken stock, use onion, carrots, celery, and garlic.
    • Herbs: Using a variety of herbs makes the best stock, tasting better than store-bought. I love bay leaves, thyme, parsley, dill, and peppercorns.
    • Salt: I season my homemade chicken stock with salt early on, adding more to taste as it simmers.

    Find the full recipe with measurements below.

    Tips for Making the Best Chicken Stock

    Tip 1: Use any part of the chicken. I love chicken wings, but whole chickens, leftover bones, and legs are all excellent options. Add more or less chicken, depending on how rich and flavorful you want the stock. Our recipe calls for 12 cups of water. Use 4 pounds of chicken parts for a light but flavorful chicken stock. For a rich ultra-flavorful broth, use 8 pounds of chicken.

    Tip 2: Add plenty of aromatics. Add chopped onion, carrots, celery, garlic, bay leaves, peppercorns, and fresh herbs for the most flavorful stock. Other vegetables like fennel and leek are also excellent.
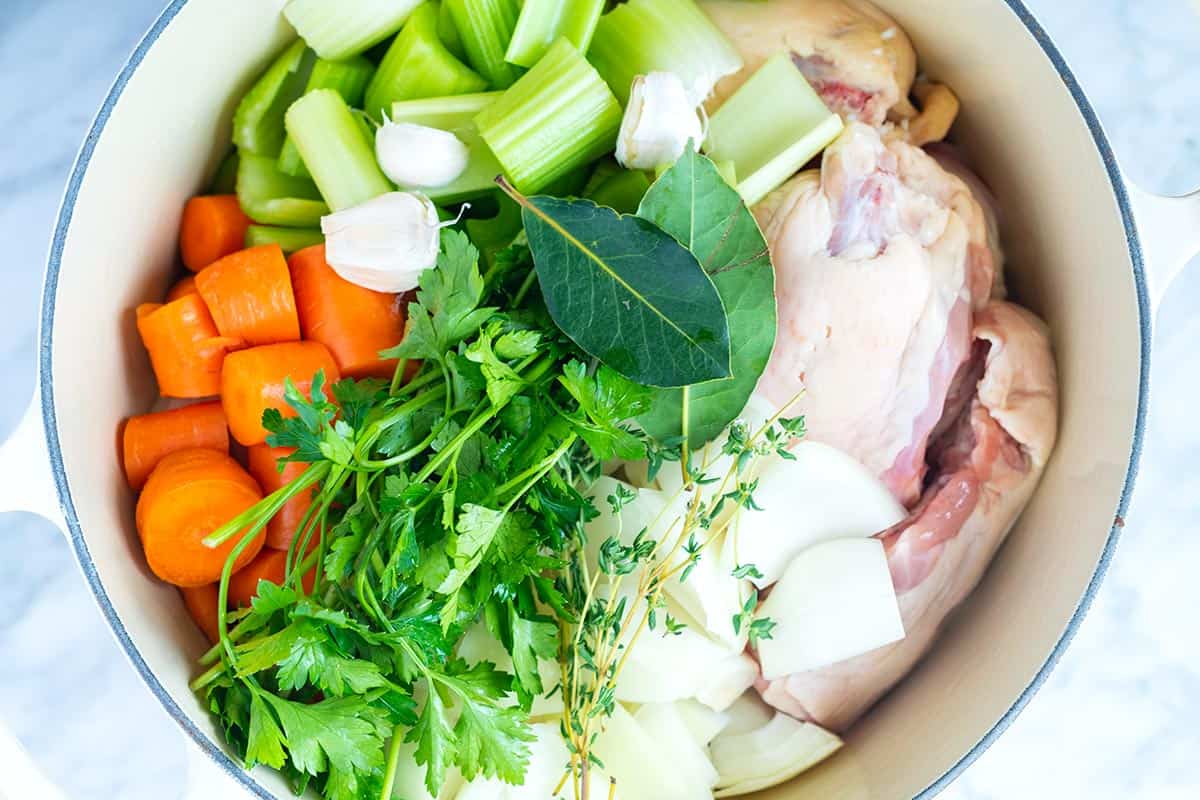
    Chicken Stock ingredients in a stock pot.

    Tip 3: Skim the foamy layer. Making chicken stock is super simple! Add everything to a large pot, cover with cold water, and bring to a boil. As it heats up, you’ll notice some foam, sometimes called scum, rise to the surface. I scrape that away and discard it. Removing the foam keeps the chicken stock clear with more of a clean flavor.

    Tip 4: Simmer on low. Keep the stock at a gentle simmer. Staying at a low simmer helps keep the stock as clear as possible. Reduce the heat so that the water is gently simmering, and then cook for about 4 hours before straining and storing in the fridge or freezer.

    My Favorite Ways to Use Chicken Stock

    You can use homemade chicken stock in so many delicious recipes. I love it for creamy chicken noodle soup and my favorite vegetable soup. It’s great for homemade chicken and dumplings, and I also use it as a base for sauces and gravy, like in this gravy recipe.

    You can also use it as a cooking liquid for rice and grains. It makes this cilantro lime rice and Mexican rice extra flavorful, and I love it for this mushroom risotto.
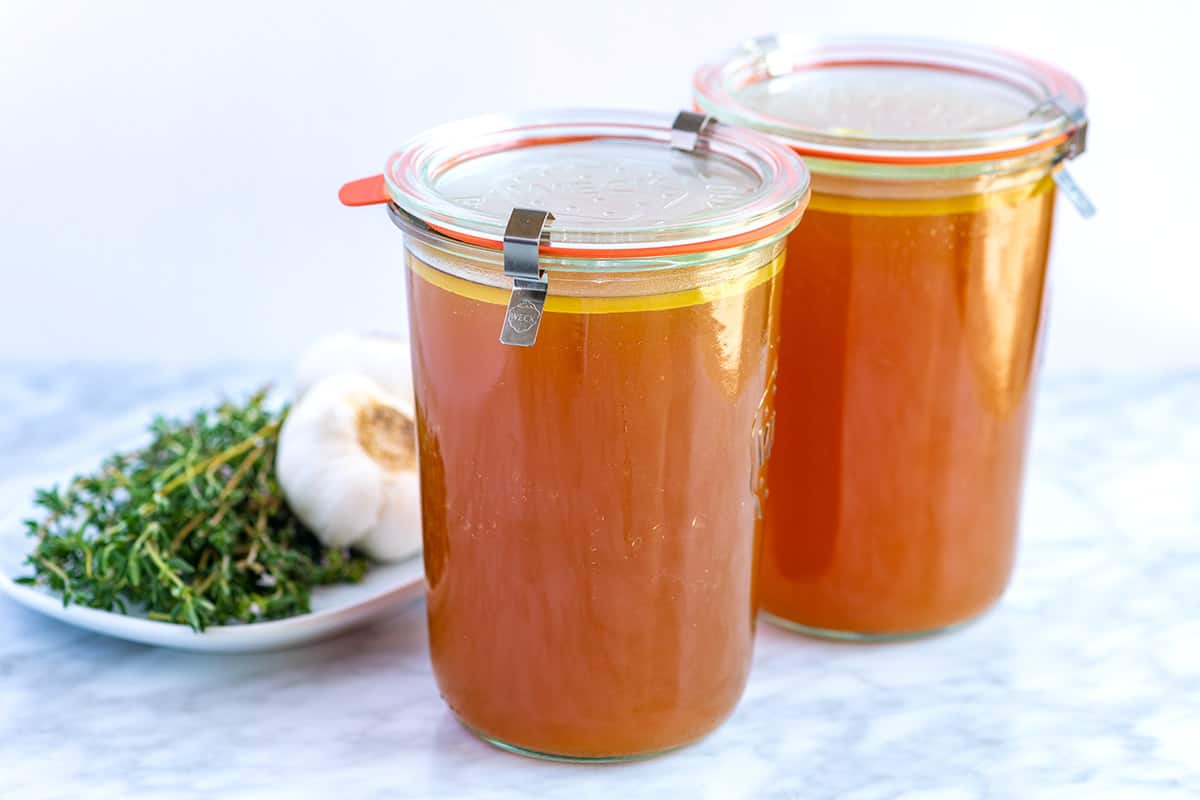
    Homemade Chicken Stock

    How to Make the Best Chicken Stock

    • PREP
    • COOK
    • TOTAL

    Thanks to the aromatics and fresh herbs, our chicken stock has so much flavor. Add more or less chicken, depending on how rich you want the stock. For a light but flavorful chicken stock, use about 4 pounds of chicken parts. For a rich, ultra-flavorful broth, use about 8 pounds of chicken.

    Makes about 10 cups

    Watch Us Make the Recipe

    You Will Need

    4 to 8 pounds chicken parts, such as whole chicken, bones, wings, breast, and legs

    1 pound onion, peeled and chopped (2 large)

    1/2 pound carrots, chopped (4 to 5 medium)

    1/2 pound celery, chopped (3 to 4 celery ribs)

    6 medium cloves garlic, crushed with the back of a knife

    2 bay leaves

    6 sprigs fresh thyme

    Small bunch of fresh parsley, dill, or both

    2 teaspoons whole peppercorns

    2 teaspoons sea salt, or more to taste

    12 cups cold water

    Directions

      1Place the chicken, onions, carrots, celery, garlic, bay leaves, thyme, parsley or dill, peppercorns, and salt in a large stockpot.

      2Add 12 cups of water and bring to a boil. If the water does not cover the contents of the pot, add a cup or two more water.

      3Reduce the heat to low and cook at a gentle simmer, uncovered, for about 4 hours. As it simmers, it is normal for some foam or scum to rise to the top. Use a spoon to remove it.

      4After three hours, taste and adjust the broth with more salt.

      5To strain the stock, use a slotted spoon to remove the larger pieces of bone and vegetables. Then, pour the stock through a fine-mesh strainer to catch all the smaller bits.

      6Transfer to containers and refrigerate for up to five days or freeze for up to 3 months.

      7After the stock has chilled, fat will rise to the surface. We usually leave this, but you can remove the fat for a leaner broth.

    Adam and Joanne’s Tips

    • Storing: Homemade chicken stock will last up to 4 days in the refrigerator. Freeze for up to 6 months. When filling your freezer-friendly containers, leave a little headspace for the stock to expand as it freezes.
    • The nutrition facts provided below are estimates. It was difficult to estimate actual numbers for this recipe, but we have done our best.

    Nutrition Per Serving
    Serving Size
    1 cup
    /
    Calories
    12
    /
    Protein
    1 g
    /
    Carbohydrate
    1 g
    /
    Dietary Fiber
    0 g
    /
    Total Sugars
    0 g
    /
    Total Fat
    0 g
    /
    Saturated Fat
    0 g
    /
    Cholesterol
    0 mg
    /
    Sodium
    343 mg


    AUTHOR:

    Joanne Gallagher

    Adam and Joanne of Inspired Taste

    We are Adam and Joanne Gallagher, the creators of Inspired Taste. Established in 2009, Inspired Taste grew from a childhood dream into one of the internet’s most trusted recipe sites with hundreds of reliable recipes, step-by-step videos, and expert tips.More About Us
    Source link

  • Flavorful Beef Stock Recipe

    Flavorful Beef Stock Recipe

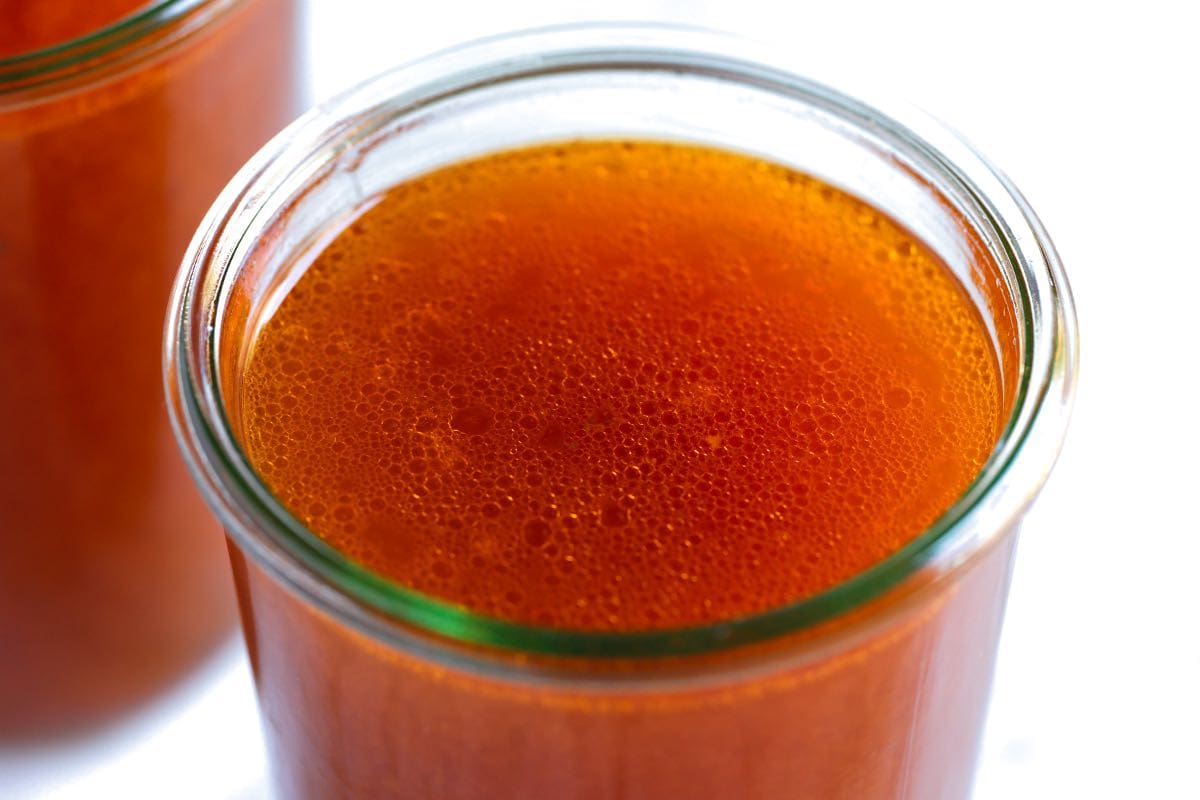
    This flavorful homemade beef stock recipe guarantees rich, beefy broth in just over 4 hours and is way better than store-bought.

    Homemade Beef Stock

    Store-bought beef stock often disappoints us. It lacks flavor and is usually too salty. That’s why I love making my own in the Instant Pot! Traditional stovetop stock takes at least 6 hours, and for a rich beef broth, you’re looking at 8+ hours.

    A pressure cooker dramatically speeds things up, and you get a delicious beef bone broth packed with collagen and minerals. If you’re short on time, try our stovetop chicken stock or this quick 1-hour chicken broth. Or, if you prefer the pressure cooker, check out our bone broth recipe made with chicken bones.

    Key Ingredients

    • Beef Bones: You need good-quality, meaty beef bones for the best homemade stock. I go to my local butcher shop and use whatever they have that day. Beef knuckles, oxtail, neck bones, shanks, and ribs are all great options, especially if they have a bit of meat left on them. Bones with bits of connective tissue help with gelatin production (or the texture of the broth), and bones with meat help with flavor.
    • Tomato Paste: We are all about that rich, beefy flavor. Thanks to the umami in tomatoes, tomato paste helps us achieve it. We roast our beef bones, rubbed in tomato paste, for 30 minutes before making the stock.
    • Onion, Garlic, and Olive Oil: Since we want our broth rich and beefy, we don’t use carrots or celery in this recipe. This keeps our ingredient list down. The olive oil roasts the onions and garlic, sweetening them before making our stock.
    • Thyme, Bay Leaves, Peppercorns, and Salt: We keep our seasonings classic for this homemade stock.
    • Pickapepper or Worcestershire sauce: We use Pickapepper in our homemade BBQ sauce and love it. The two sauces bump up the umami-rich flavor of our stock, so use what you have. Pickapepper is a little thinner and a bit sweeter than the more savory Worcestershire, but in this recipe, they are interchangeable.
    • Water: Since we use a pressure cooker, you do not want to fill past the “Fill Line.” For a 6-quart pressure cooker, you need about 8 cups of water. Since there is less evaporation in a pressure cooker than when simmering on the stove, you will have about 8 cups of stock when it’s done.

    Find the full recipe with measurements below.

    How to Make the Best Beef Stock

    Tip 1: Roast your bones. Roasting makes our bone broth richer and more flavorful. Tumble the bones into a baking dish, then roast for 10 minutes. Remove the bones from the oven, and when they are cool enough to handle, rub them down with tomato paste, adding even more of a rich flavor. Toss in onions and garlic, and drizzle with olive oil. Roast everything for another 30 minutes.

    Roasted beef bones for making stock.

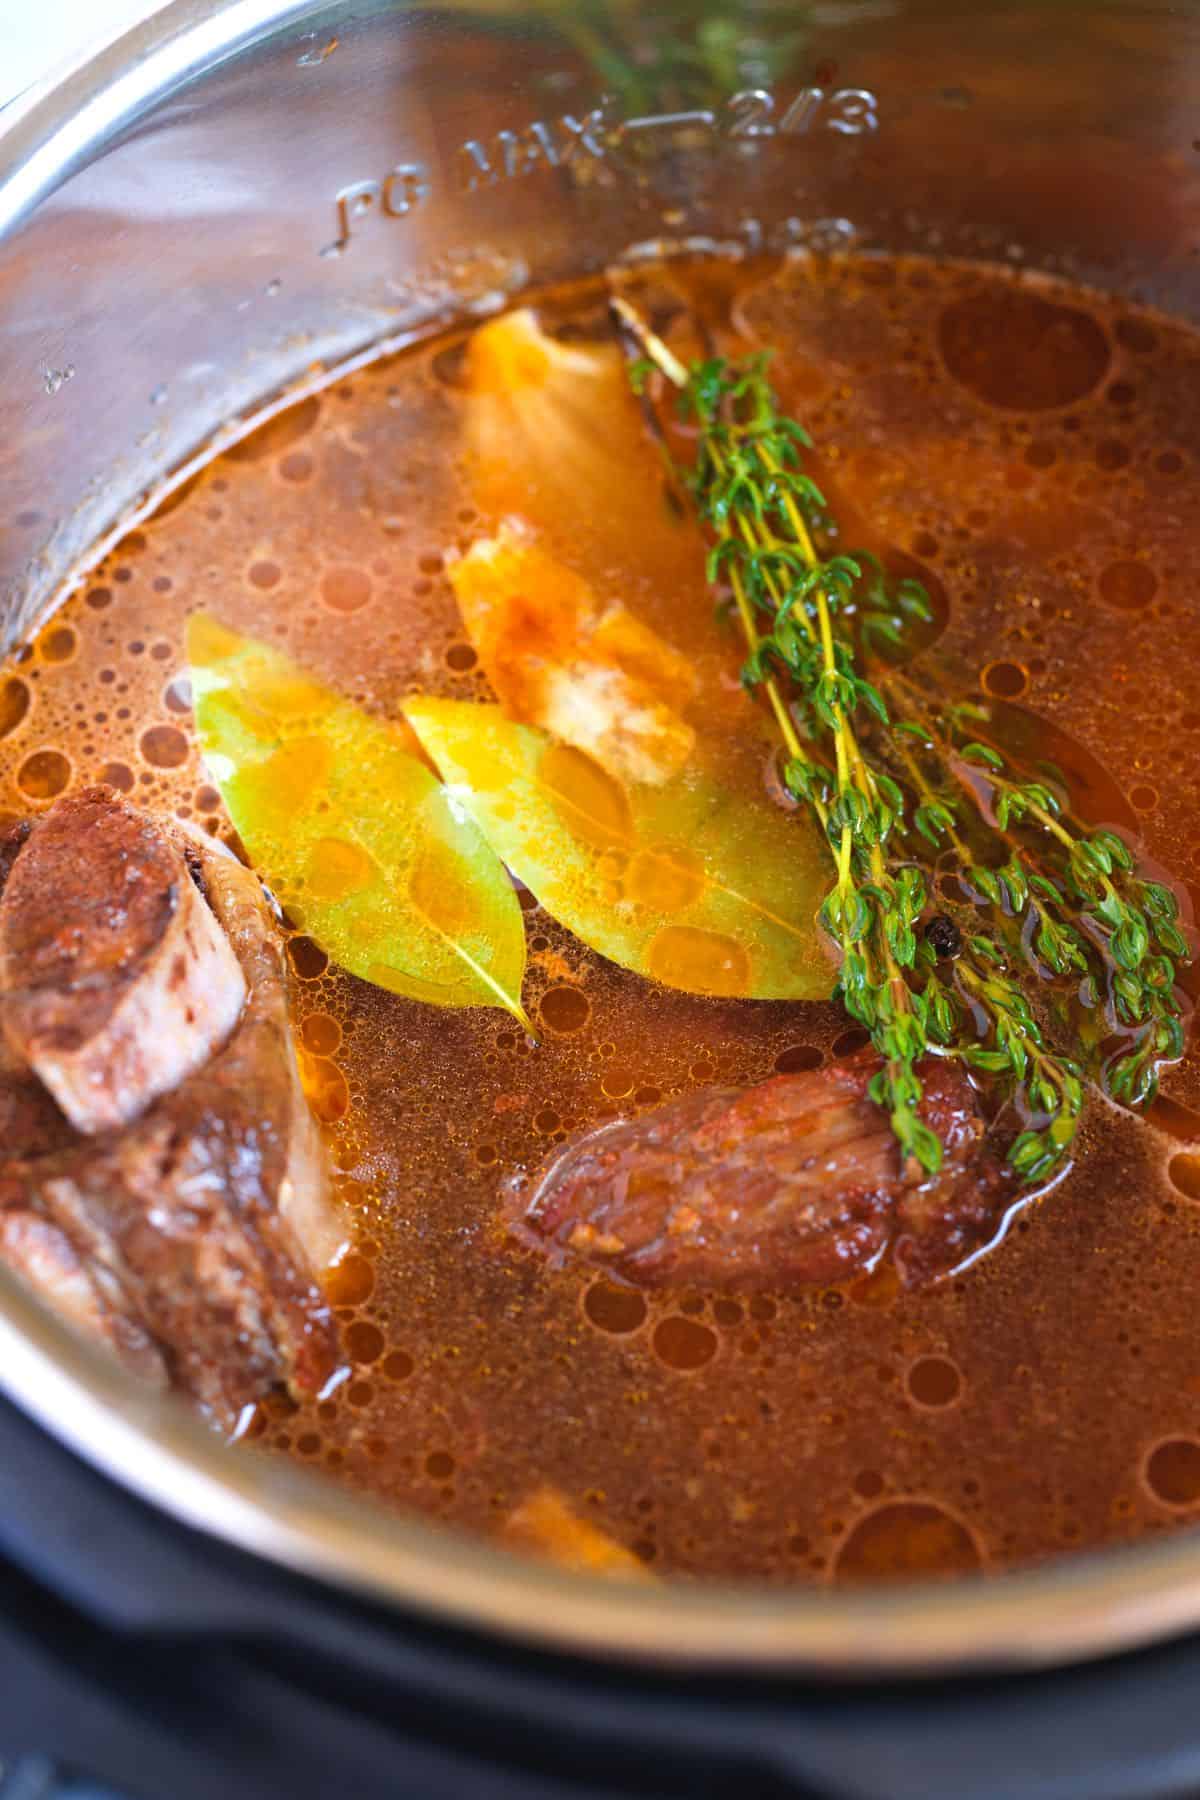
    Tip 2: Build flavors in pressure cooker. Now transfer everything from the roasting pan to your pressure cooker (ours is an Instant Pot). Pour a little of your measured water into the roasting pan and deglaze it by scraping all the stuck bits from the bottom and sides. Pour this liquid into the pressure cooker along with the remaining measured water. Finally, add thyme, peppercorns, bay leaves, salt, and Pickapepper sauce (or use Worcestershire).

    Beef stock before cooking

    Tip 3: Cook on high. Seal the lid and cook on high pressure (or the stock setting) for 4 hours. Allow the pressure cooker to naturally release the pressure, and then strain.

    Ways to Use Your Beef Stock

    Once you have homemade stock, you can use it or save it for another day (storing tips are in the recipe below). It’s delicious enough to sip on, or you can use it in your favorite recipes. Here are some of my favorite recipes:

    Homemade Beef Stock

    Flavorful Beef Stock

    • PREP
    • COOK
    • TOTAL

    Since we use a pressure cooker for this beef stock, the method is straightforward and requires much less time than stock made on the stove. When shopping for beef bones, look for good-quality, meaty beef bones. Beef knuckles, oxtail, neck bones, shanks, and ribs are all great options, especially if they have a bit of meat left on them. Since this broth cooks at high pressure for 4 hours, it is also considered a beef bone broth.

    Equipment: We use a 6-quart Instant Pot for this recipe

    Makes 8 cups

    You Will Need

    1 ¾ to 2 pounds meaty beef bones

    2 ½ tablespoons tomato paste

    1 tablespoon olive oil

    1 onion, sliced into 8 wedges

    5 cloves garlic, smashed

    5 sprigs fresh thyme

    2 bay leaves

    5 whole peppercorns

    1 teaspoon fine sea salt

    2 quarts (1893 ml or 8 cups) water

    1/2 teaspoon Pickapepper sauce or Worcestershire sauce

    Directions

      1Heat the oven to 375°F (190°C). Place beef bones into a large baking dish or pan.

      2Roast the bones for 10 minutes. Remove them from the oven, cool for a few minutes, and then rub them all over with the tomato paste.

      3Scatter the onion wedges and smashed garlic around the bones and drizzle them with olive oil. Roast the bones, onion, and garlic for 30 minutes.

      4Transfer the roasted bones, onion, and garlic to a 6-quart pressure cooker (we use an Instant Pot).

      5Pour a little of the measured water into the baking dish to deglaze. Use a wooden spoon to scrape anything stuck to the bottom and sides of the pan, and then pour it into the pressure cooker.

      6Pour in the remaining water (8 cups total), and then add the thyme, bay leaves, peppercorns, salt, and Pickapepper (or Worcestershire sauce).

      7Cook on high pressure (or use the soup/stock setting) for 4 hours. Allow the cooker to naturally depressurize, which will take around 30 minutes.

      8Use a fine mesh strainer and strain the stock. Allow to cool and refrigerate for up to five days or freeze for up to three months.

    Adam and Joanne’s Tips

    • Storing: After making the stock, let it cool and refrigerate for up to five days or freeze for up to three months. When refrigerating the stock, leave the layer of fat that rises to the top as it cools. This layer of fat helps to keep the stock fresh. When you reheat, keep as much of this fat as you like. You can also cook with it.
    • Freezing stock: To freeze the stock, store it in freezer-safe bags or freezer-safe canning jars. If you use jars, leave space (at least 1 inch) at the top to allow for expansion when the liquid freezes. You can also freeze stock in large ice cube trays. When they are frozen, transfer the stock cubes to a freezer-safe bag.
    • Why do you roast the bones before adding the tomato paste? Roasting the bones for 10 minutes before adding the tomato paste gives the bones a longer roasting time while reducing the roasting time for tomato paste. With all the sugar in the tomato paste, it can burn.
    • Pickapepper and Worcestershire sauce are umami-rich. Pickapepper is a little thinner and a bit sweeter than the more savory Worcestershire, but in this recipe, they are interchangeable.
    • Stovetop stock: You can still make delicious stock on the stovetop. Roast the bones as directed, then simmer them gently with the other ingredients for 6-8 hours or longer if you have the time. Keep the simmer low and slow to prevent too much evaporation. The stovetop method may yield less stock than a pressure cooker, but the flavor will be just as fantastic. For an extra-rich broth, consider increasing the amount of beef bones and water (4-5 pounds bones, 10-12 cups water). No matter how you make it, homemade is always better to store-bought!
    • The nutrition facts provided below are estimates.

    Nutrition Per Serving
    Serving Size
    1 cup
    /
    Calories
    46
    /
    Total Fat
    2g
    /
    Saturated Fat
    0.3g
    /
    Cholesterol
    0mg
    /
    Sodium
    475.2mg
    /
    Carbohydrate
    2.9g
    /
    Dietary Fiber
    0g
    /
    Total Sugars
    1.3g
    /
    Protein
    4.7g


    AUTHOR:

    Joanne Gallagher

    Adam and Joanne of Inspired Taste

    We are Adam and Joanne Gallagher, the creators of Inspired Taste. Established in 2009, Inspired Taste grew from a childhood dream into one of the internet’s most trusted recipe sites with hundreds of reliable recipes, step-by-step videos, and expert tips.More About Us

    Source link

  • Easy Broccoli Cheddar Soup Recipe

    Easy Broccoli Cheddar Soup Recipe

    Our broccoli cheddar soup recipe is extra cheesy, packed with broccoli, and incredibly creamy!

    A bowl of broccoli cheddar soup

    I love broccoli cheddar soup so much, especially this one, which skips the flour and butter base common in many other recipes. Instead of extra butter and flour, we use a potato to thicken our soup and make it creamy.

    Even with these smart changes, our soup is creamy, rich, and incredibly delicious! For a similar soup, take a look at our cauliflower soup made with parmesan cheese.

    Key Ingredients

    • Broccoli: I love using broccoli with the stems for this recipe. The stems (or stalks) taste fantastic and blend well with the potato to make this super creamy broccoli soup.
    • Butter or Olive Oil: I love cooking my onion and garlic in butter, but olive oil is excellent for this soup.
    • Onion and Garlic: I’m pretty generous with the onion and garlic. I love one large sweet or yellow onion with four cloves of garlic. You’ll cook them until soft and sweet so they taste mild in the soup.
    • Potato: One potato makes this soup super creamy without needing the traditional flour and butter roux.
    • Spices: Salt and pepper are a must, but you will also need a pinch of red pepper flakes (or gochugaru), Dijon mustard, and a bay leaf. These round out the flavor of our soup.
    • Broth: I use something light, like our homemade veggie broth or chicken broth. You can even use chicken bone broth to add a bit of extra protein. I have also made this plenty of times with plain water. It works great and allows the broccoli flavor to shine!
    • Cheese: I stir in about 2 cups of sharp cheddar cheese for the perfect cheesy flavor. Other cheeses work, too, but I do love the combo of broccoli and cheddar (see my cheddar roasted broccoli and this broccoli cheddar quiche for proof).

    Find the full recipe with measurements below.

    How to Make the Best Broccoli Cheddar Soup

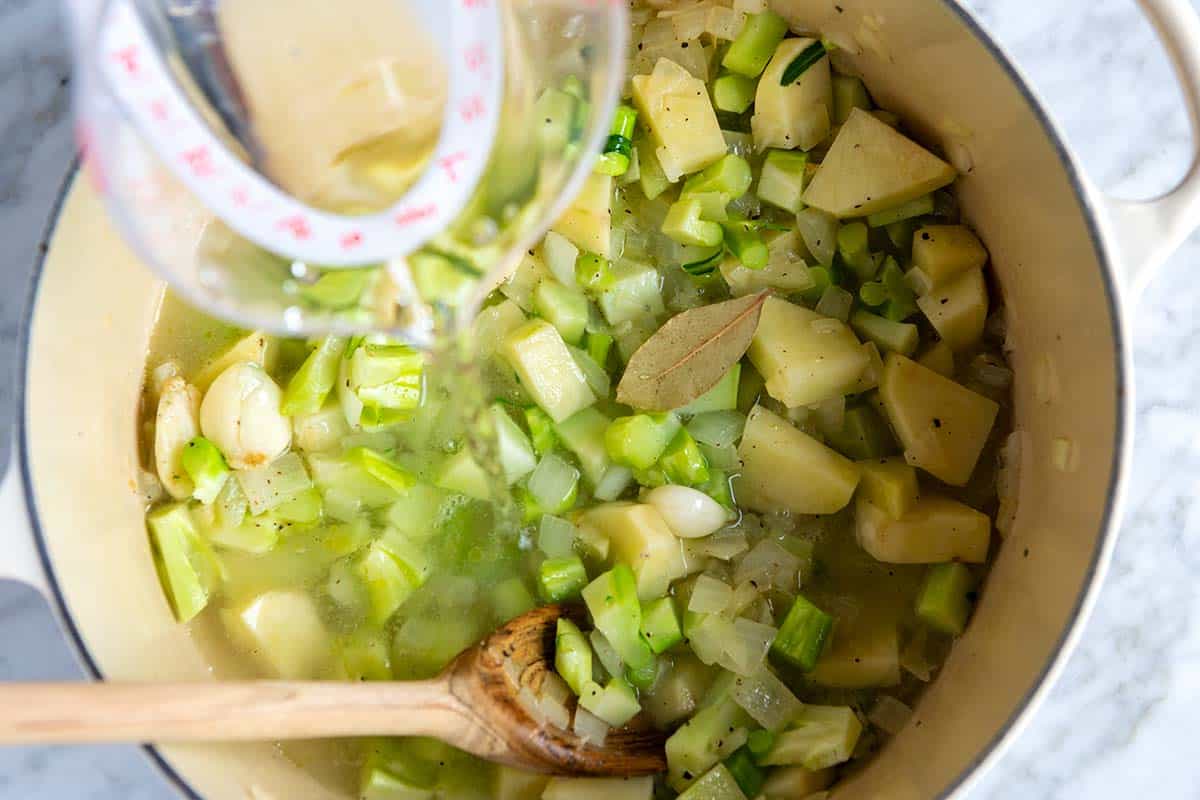
    Tip 1: Use the broccoli stalks. In this broccoli soup, you’ll use both the stalks and the florets of the broccoli. You’ll cook onions and whole garlic cloves in butter or olive oil until soft and sweet. Then, stir in the diced potatoes and broccoli stalks. Add your broth and simmer. The potato and broccoli stalks become the base of this creamy soup.

    Adding broth to the pot with potatoes, broccoli, and onions.

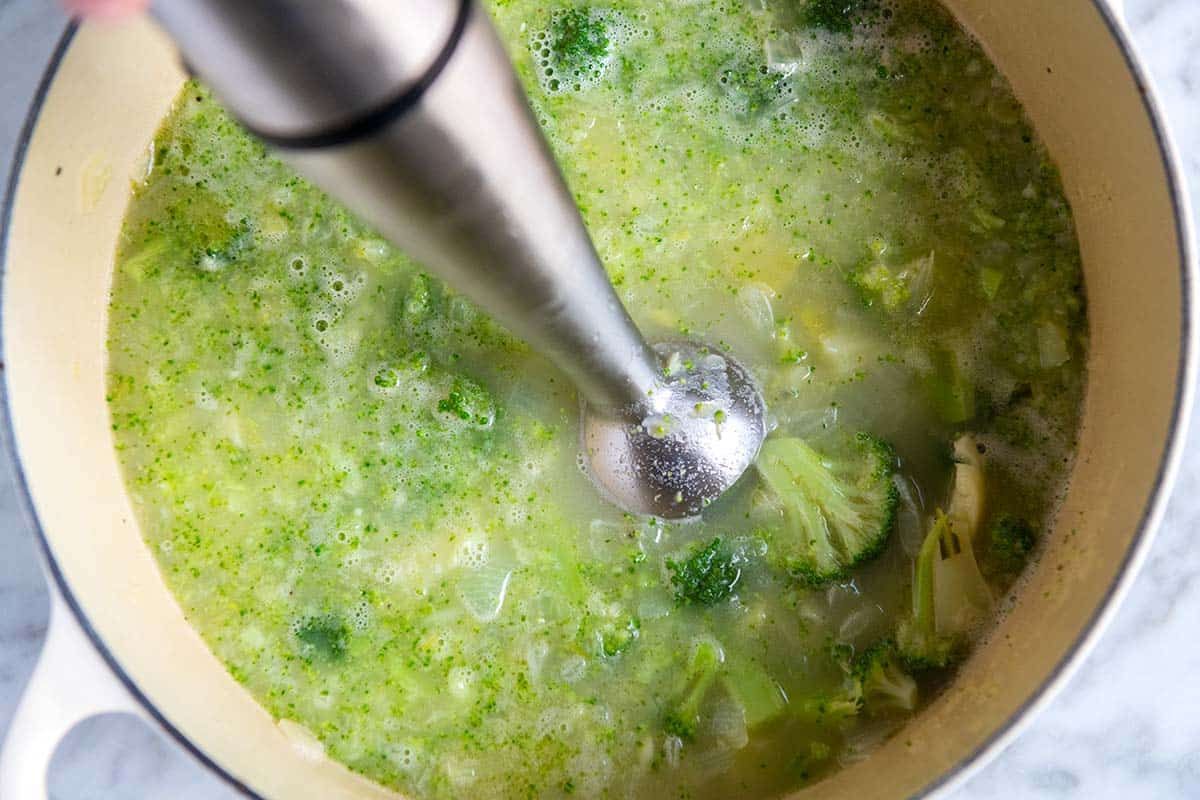
    Tip 2: Save some florets for the end. When the potato and stalks are tender, you’ll add half of the broccoli florets. Then, when they are tender, blend them into the soup so everything is super creamy and thick. As a last step, add the remaining broccoli florets and cook until they are bright green and tender. This way, the base of the soup is green and creamy, and you still get a few small bites of broccoli.

    Blending broccoli cheddar soup ingredients with an immersion blender

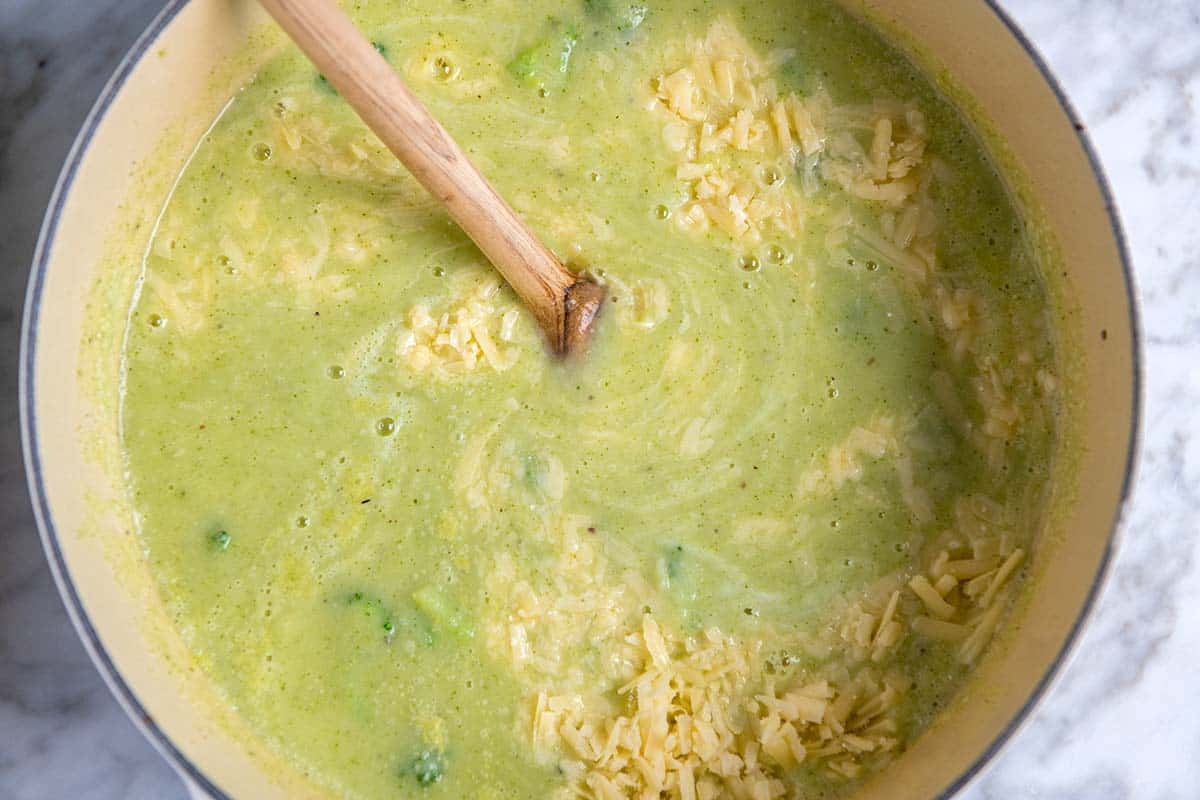
    Tip 3: Add cheese and cream. Stir in lots of grated sharp cheddar cheese and, if you want it extra creamy and luxurious, a bit of cream. This is a good one!

    Stirring cheddar cheese into broccoli soup

    More Creamy Soups

    More Broccoli Recipes

    If you have some broccoli leftover, I highly recommend making our easy sautéed broccoli, broccoli salad with bacon, or this incredible broccoli slaw.

    Broccoli Cheddar Soup

    Easy Broccoli Cheddar Soup

    • PREP
    • COOK
    • TOTAL

    This broccoli cheddar soup recipe is packed with broccoli and is extra cheesy. It is made without flour and butter and gets its thick, creamy base from a potato! When shopping for this soup, look for broccoli sold with long stalks. We chop the stalks up and cook them with the potato. After a quick blend, the stalks and potato turn into a delicious, creamy soup.

    6 Servings

    Watch Us Make the Recipe

    You Will Need

    1 large onion, finely chopped

    4 medium garlic cloves, peeled and smashed

    2 tablespoons unsalted butter or olive oil

    2 pounds broccoli with stalks

    3/4 teaspoon fine sea salt, plus more to taste

    1/2 teaspoon fresh ground black pepper

    1/8 to 1/4 teaspoon crushed red pepper flakes, omit if sensitive to spice

    1 teaspoon Dijon mustard

    1 medium-to-large potato, peeled and chopped

    1 bay leaf

    4 cups chicken broth, veggie broth, or water

    1/2 cup cream, optional

    2 cups grated sharp cheddar cheese, 8 ounces (226g)

    Thinly sliced chives, for serving, optional

    Fish sauce, optional

    Directions

      1Slice the florets from the stalks. Set the broccoli stalks aside and cut the florets into small bite-size pieces (watch our video for reference). Throw the florets into a bowl and set them aside for later.

      2Grab the broccoli stalks, cut about 1 inch from the bottom of each stalk, and discard it. Use a vegetable peeler to peel away the tough outer layer of the stalks, and then slice the stalks into 1/2-inch pieces.

      3Melt the butter in a large pot like a Dutch oven over medium heat. When it has melted, toss in the onion and garlic cloves. Cook, occasionally stirring, until the onions are soft and smell sweet, about 5 minutes.

      4Add the chopped broccoli stalks, potato, 3/4 teaspoon salt, 1/2 teaspoon black pepper, Dijon mustard, and red pepper flakes (if using). Cook for two minutes, then add the bay leaf and four cups of broth or water.

      5Bring the soup to a boil, then reduce to a low simmer. Cook, at a low simmer, until the broccoli and potatoes are tender, about 15 minutes.

      6Stir in half of the broccoli florets to the soup, cover with a lid, and cook until they turn bright green and are tender, 3 to 5 minutes. Adding the florets in this step ensures that our soup stays green.

      7Turn off the heat, remove the bay leaf, and blend the soup until smooth with an immersion blender. You can also use a blender, but be careful to blend the soup in batches, do not fill more than halfway, and hold the lid down firmly as you blend. Hot liquids can cause steam to build up in the blender, and the top can pop off.

      8Place the pot back onto the burner and heat over medium heat. Stir in the remaining broccoli florets, cover the pot again, and cook until they turn bright green and are tender, 3 to 5 minutes.

      9Stir in the cream and cheese. When the cheese melts into the soup, taste it, and then adjust with additional salt and pepper. For a pop of flavor, add a few dashes of fish sauce. Serve with chives scattered on top.

    Adam and Joanne’s Tips

    • Storing: Store leftover broccoli cheddar soup in an airtight container in the refrigerator for up to 4 days. Freezing is an option, but it risks the soup separating. Freeze for up to 1 month. Thaw overnight in the fridge and reheat gently on the stovetop, stirring frequently. If the soup does separate, a quick blend can restore its smoothness.
    • No stalks: If you cannot find broccoli with the stalks/stem still attached, use 2 pounds of broccoli florets.
    • Make the soup more green: For an even more vibrant green color, just before you plan to blend the soup, add a couple of handfuls of baby spinach leaves and allow them to wilt into the soup slightly (30 to 45 seconds).
    • Fish sauce: This is optional but adds a lovely flavor to sauces and soups like this broccoli cheddar soup. Two to three dashes season the soup nicely. Think of fish sauce as salt on steroids. It doesn’t make the soup taste fishy but makes the flavor pop.
    • The nutrition facts provided below are estimates.

    Nutrition Per Serving
    Serving Size
    1/6 of the recipe
    /
    Calories
    295
    /
    Total Fat
    19.2g
    /
    Saturated Fat
    11g
    /
    Cholesterol
    54.7mg
    /
    Sodium
    627.3mg
    /
    Carbohydrate
    19.3g
    /
    Dietary Fiber
    5.1g
    /
    Total Sugars
    5g
    /
    Protein
    14.4g


    AUTHOR:

    Joanne Gallagher

    Adam and Joanne of Inspired Taste

    We are Adam and Joanne Gallagher, the creators of Inspired Taste. Established in 2009, Inspired Taste grew from a childhood dream into one of the internet’s most trusted recipe sites with hundreds of reliable recipes, step-by-step videos, and expert tips.More About Us
    Source link

  • Easy Butternut Squash Soup Recipe

    Easy Butternut Squash Soup Recipe

    My easy butternut squash soup recipe is unbelievably creamy, satisfying, and flavorful. Our recipe is also naturally vegan!

    Best Butternut Squash Soup

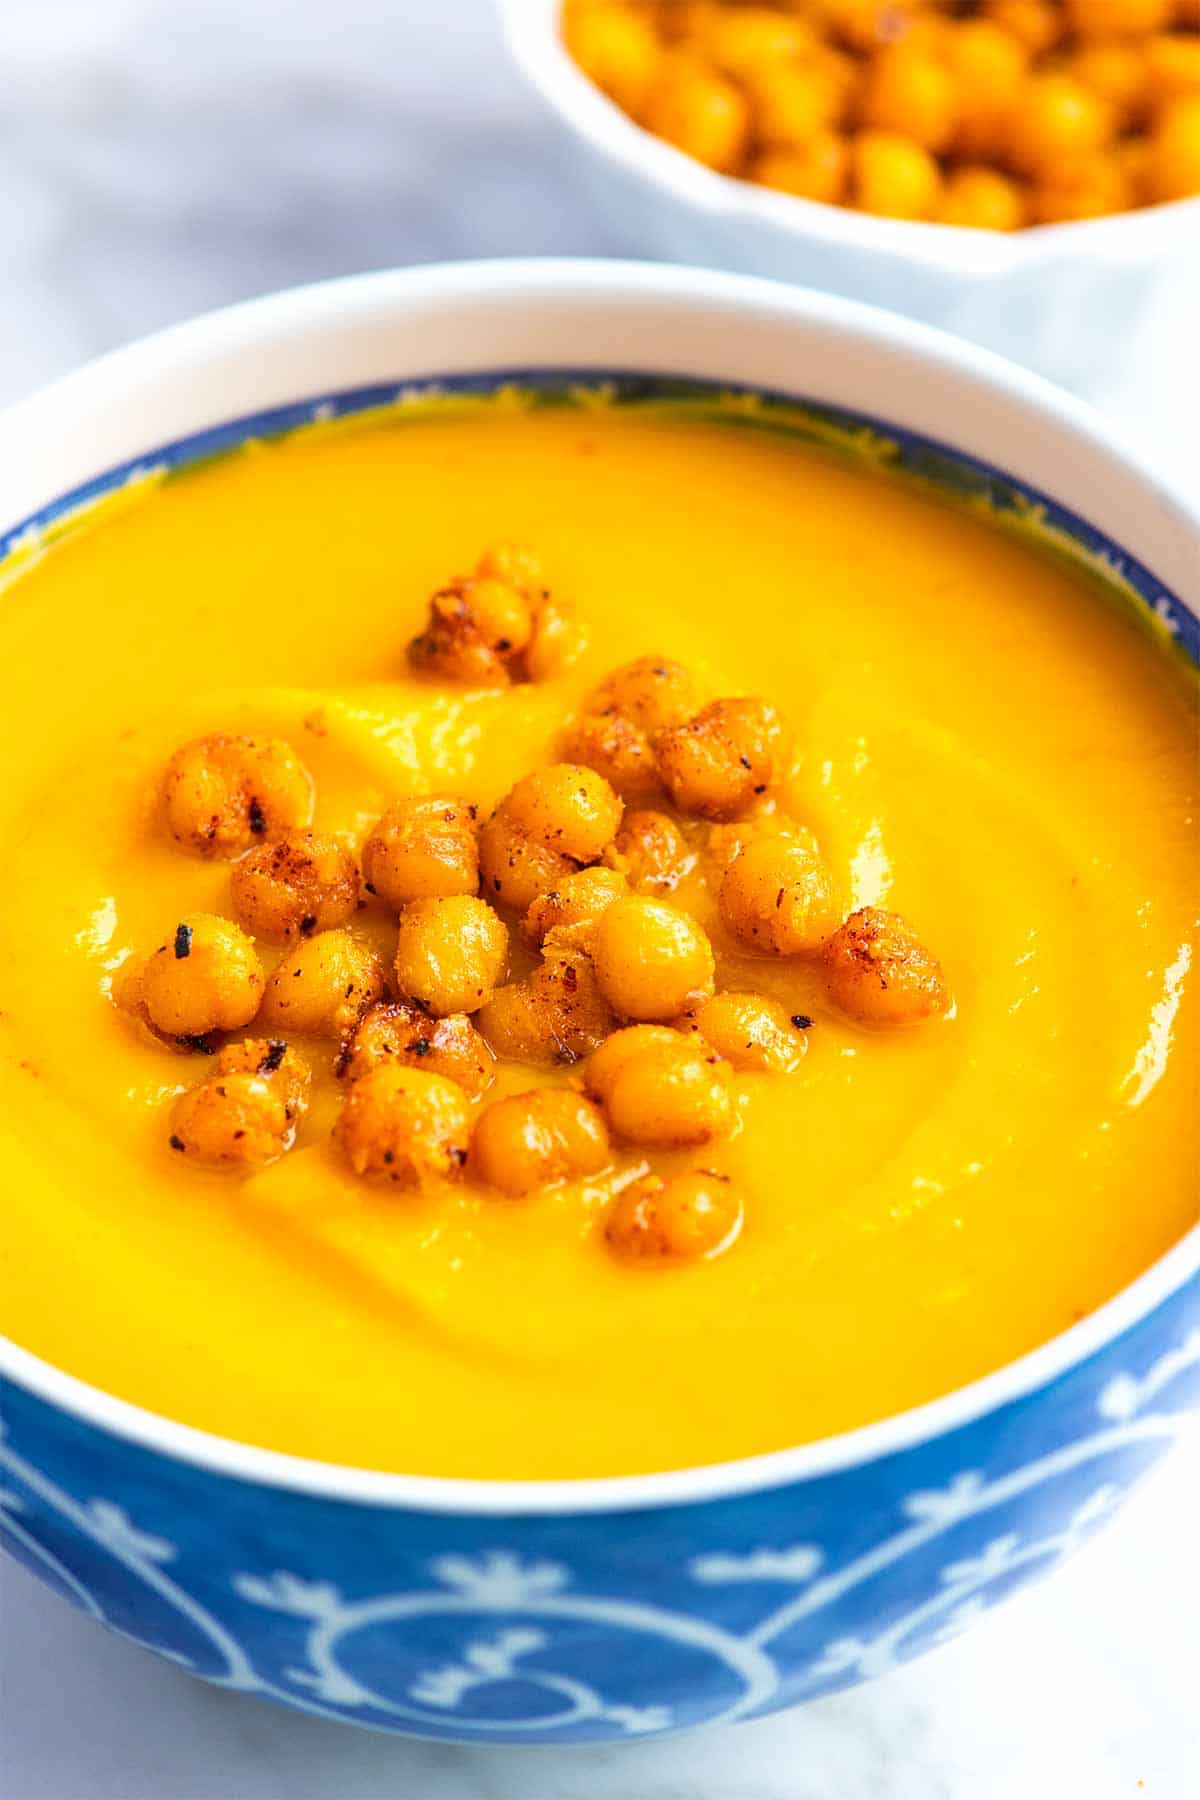
    You do not need any cream or butter to make this creamy butternut squash soup! Everyone, even the meat-eaters at the table, will love it, especially when topped with our delicious crispy spiced chickpeas!

    We’ve already shared our easy roasted butternut squash soup, but this recipe adds even more flavor with extra veggies, coconut oil, and crispy chickpeas (optional, but really tasty). The key to the best flavor is roasting. By roasting our butternut squash, we develop lots of flavor and caramelize the sugars, much like roasting cauliflower for roasted cauliflower soup or roasting tomatoes for my favorite roasted tomato soup!

    Key Ingredients

    • Butternut Squash: I typically use a medium butternut squash, but feel free to swap in other winter squash like honeynut, kabocha, or red kuri squash, or even a small sugar pumpkin like I use when making homemade pumpkin puree.
    • Veggies: Leeks, carrots, and garlic complement the squash beautifully. They cook down and add a touch of sweetness.
    • Spices: Cumin and smoked paprika add a smoky flavor. A pinch of cayenne adds a little kick (optional but delicious!).
    • Broth: I use vegetable broth to keep my butternut squash soup vegetarian, but chicken broth works great if that’s not a concern.
    • Coconut Oil: I love stirring in a small amount at the end to add a subtle coconut flavor. If coconut is not your thing, use butter or olive oil instead.
    • Crispy Spiced Chickpeas: These are optional but add a nice crunch, extra flavor, and a bit of protein. You can buy them ready-made or roast your own (it’s simple!). The recipe below includes instructions for making them.

    Find the full recipe with measurements below.

    How to Make the Best Butternut Squash Soup

    Tip 1: Roast your butternut squash. This soup is one of my favorite fall soup recipes. Start by roasting your butternut squash. I like to cut it in half and tuck a sprig of fresh rosemary underneath each piece before roasting (just like I do when roasting spaghetti squash).

    Roasted butternut squash on a baking sheet.

    Tip 2: Build flavors. While the squash roasts the oven, sauté your veggies (leeks, carrots, and garlic) in a bit of oil until they’re soft and sweet. Add cumin and smoked paprika for warmth and smokiness, along with your broth. Then, when the squash is out of the oven, you can scoop out the flesh and add it to the pot, and finally, blend until smooth. An immersion blender is the easiest way to do this right in the pot, which is what I’ve done in the video.

    Creamy butternut squash soup

    Tip 3: Finish with coconut oil and crunch. Just before serving, stir in a little coconut oil for a light coconut flavor. If you’re not a coconut fan, feel free to omit it or use olive oil or butter instead. I also love topping the soup with a handful of spiced chickpeas for extra crunch and flavor. You can buy them pre-made or roast your own (it’s easy!). Check out the recipe below for instructions.

    More Squash Recipes

    Butternut Squash Soup

    Easy Butternut Squash Soup

    • PREP
    • COOK
    • TOTAL

    This easy roasted butternut squash soup recipe is unbelievably creamy, satisfying, and so flavorful. It’s also straightforward, delicious when made in advance, and naturally vegan. We stir a little coconut oil right at the end before serving, adding a faint, sweet coconut flavor. If you do not enjoy coconut, skip this step or stir in olive oil or butter.

    4 to 6 Servings

    Watch Us Make the Recipe

    You Will Need

    Butternut Squash Soup

    1 medium butternut squash (3 to 3 ½ pounds)

    2 fresh rosemary sprigs

    2 tablespoons olive oil

    2 cups thinly sliced leeks, white and light green parts only (1 large leek)

    3/4 cup thinly sliced carrots (1 large carrot)

    3 medium cloves garlic, peels removed

    1/4 teaspoon ground cumin

    1/4 teaspoon smoked paprika

    Pinch red pepper flakes or cayenne, optional for heat

    5 to 6 cups vegetable broth or chicken broth, use more as needed

    1 bay leaf

    1 tablespoon coconut oil, optional

    Salt and fresh ground black pepper, to taste


    Spiced Chickpeas

    1 (15oz) can chickpeas or 1 ½ cups cooked chickpeas

    3 tablespoons oil like olive oil, safflower oil, or avocado oil

    Pinch salt

    1/2 to 1 teaspoon spice blend like chili powder, Za’atar, or Cajun seasoning

    Directions

    • Roast Butternut Squash
    • 1Preheat the oven to 400°F (204°C). Line a baking sheet with parchment paper or silicone baking mat.

      2Trim the stem end of the squash and slice it in half lengthwise. If the squash is too large to safely cut in half, cut it crosswise in half, just where the thinner end begins to widen. Then, slice each piece in half lengthwise. Scoop out the seeds. (Watch us do this in the recipe video.)

      3Brush or spray the cut side of the squash with 1/2 tablespoon of olive oil and season with a generous pinch of salt.

      4Place each piece of squash, cut side down, onto the prepared baking sheet. Sneak a small sprig of rosemary underneath each piece of squash.

      5Roast the squash until soft inside, 40 to 50 minutes.

    • Make Soup
    • 1While the squash is in the oven, heat 1 ½ tablespoons of olive oil in a large Dutch oven or deep pot over medium heat. Then, add the leeks, carrots, and whole garlic cloves. Cook, stirring occasionally, until the leeks have softened and smell sweet, 5 to 8 minutes.

      2Stir in the cumin, smoked paprika, and red pepper flakes (optional) and cook another 30 seconds.

      3Pour in 5 cups of the broth, add the bay leaf, and bring to a simmer. Taste the broth and adjust with salt and pepper if needed.

      4Cook at a low simmer for 15 minutes, then turn off the heat and wait for the squash to finish roasting.

      5When the squash is roasted and cool enough to handle, use a spoon to scrape out the soft flesh from the peel. Discard the peel and rosemary, then place the squash into the pot with leeks.

      6Remove the bay leaf, and then blend the soup using an immersion blender or transfer it to a high-speed blender, being careful not to overfill. Blend until smooth and creamy. If the soup is too thick, add some or all of the final cup of broth.

      7Stir in the coconut oil, then adjust with more salt or pepper as needed. Serve with spiced chickpeas on top (directions below).

    • Spiced Chickpeas (Optional)
    • 1Open and drain a can of chickpeas, and then pat them very dry.

      2Heat a few tablespoons of olive oil in a wide skillet over medium-high heat, then add the chickpeas.

      3Cook, stirring often, until the chickpeas turn a light brown and look crisp, about 10 minutes. Stir in a generous pinch of salt and your favorite spice blend. Transfer to a bowl lined with paper towels and enjoy.

    Adam and Joanne’s Tips

    • Storing: This soup can be stored in airtight containers in the refrigerator for 5 to 7 days or frozen for up to 1 month. Thaw and reheat in the microwave or on the stove before serving.
    • Other winter squashes: Try swapping the butternut squash for acorn squash, kabocha squash, red kuri squash, sugar or baking pumpkins, or any other winter varieties you’ve found at your local farmer’s markets.
    • Rosemary: I love rosemary and butternut squash together, but other herbs work, as well. Try thyme or sage. If you don’t have access to fresh herbs, scatter a pinch of dried herbs over the cut side of the squash pieces before roasting.
    • The nutrition facts provided below are estimates. Information provided includes the spiced chickpeas.

    Nutrition Per Serving
    Serving Size
    1 cup
    /
    Calories
    236
    /
    Total Fat
    11.5g
    /
    Saturated Fat
    2.8g
    /
    Cholesterol
    0mg
    /
    Sodium
    666.4mg
    /
    Carbohydrate
    33.4g
    /
    Dietary Fiber
    6.2g
    /
    Total Sugars
    7.6g
    /
    Protein
    4.3g


    AUTHOR:

    Joanne Gallagher

    Adam and Joanne of Inspired Taste

    We are Adam and Joanne Gallagher, the creators of Inspired Taste. Established in 2009, Inspired Taste grew from a childhood dream into one of the internet’s most trusted recipe sites with hundreds of reliable recipes, step-by-step videos, and expert tips.More About Us
    Source link

  • Easy Italian Wedding Soup Recipe

    Easy Italian Wedding Soup Recipe

    This Italian wedding soup recipe has homemade meatballs, tender greens, and pasta in the most perfect, comforting, savory broth.

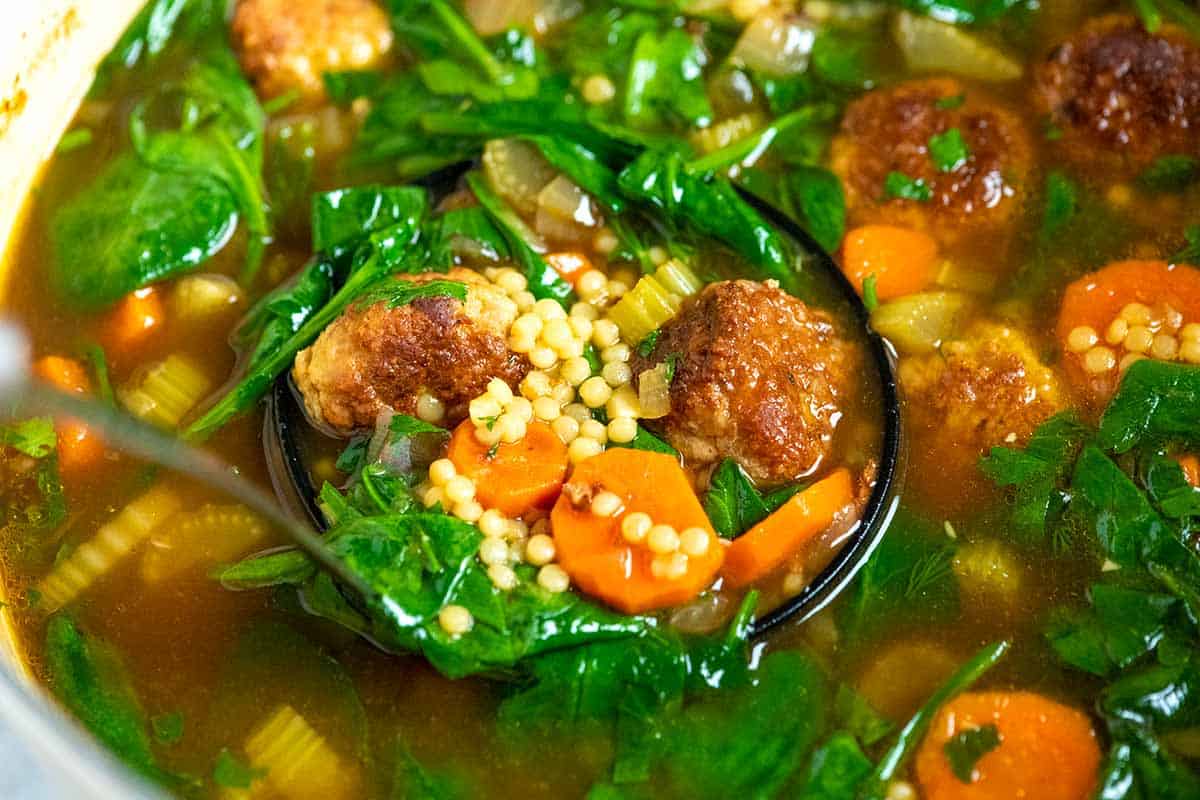
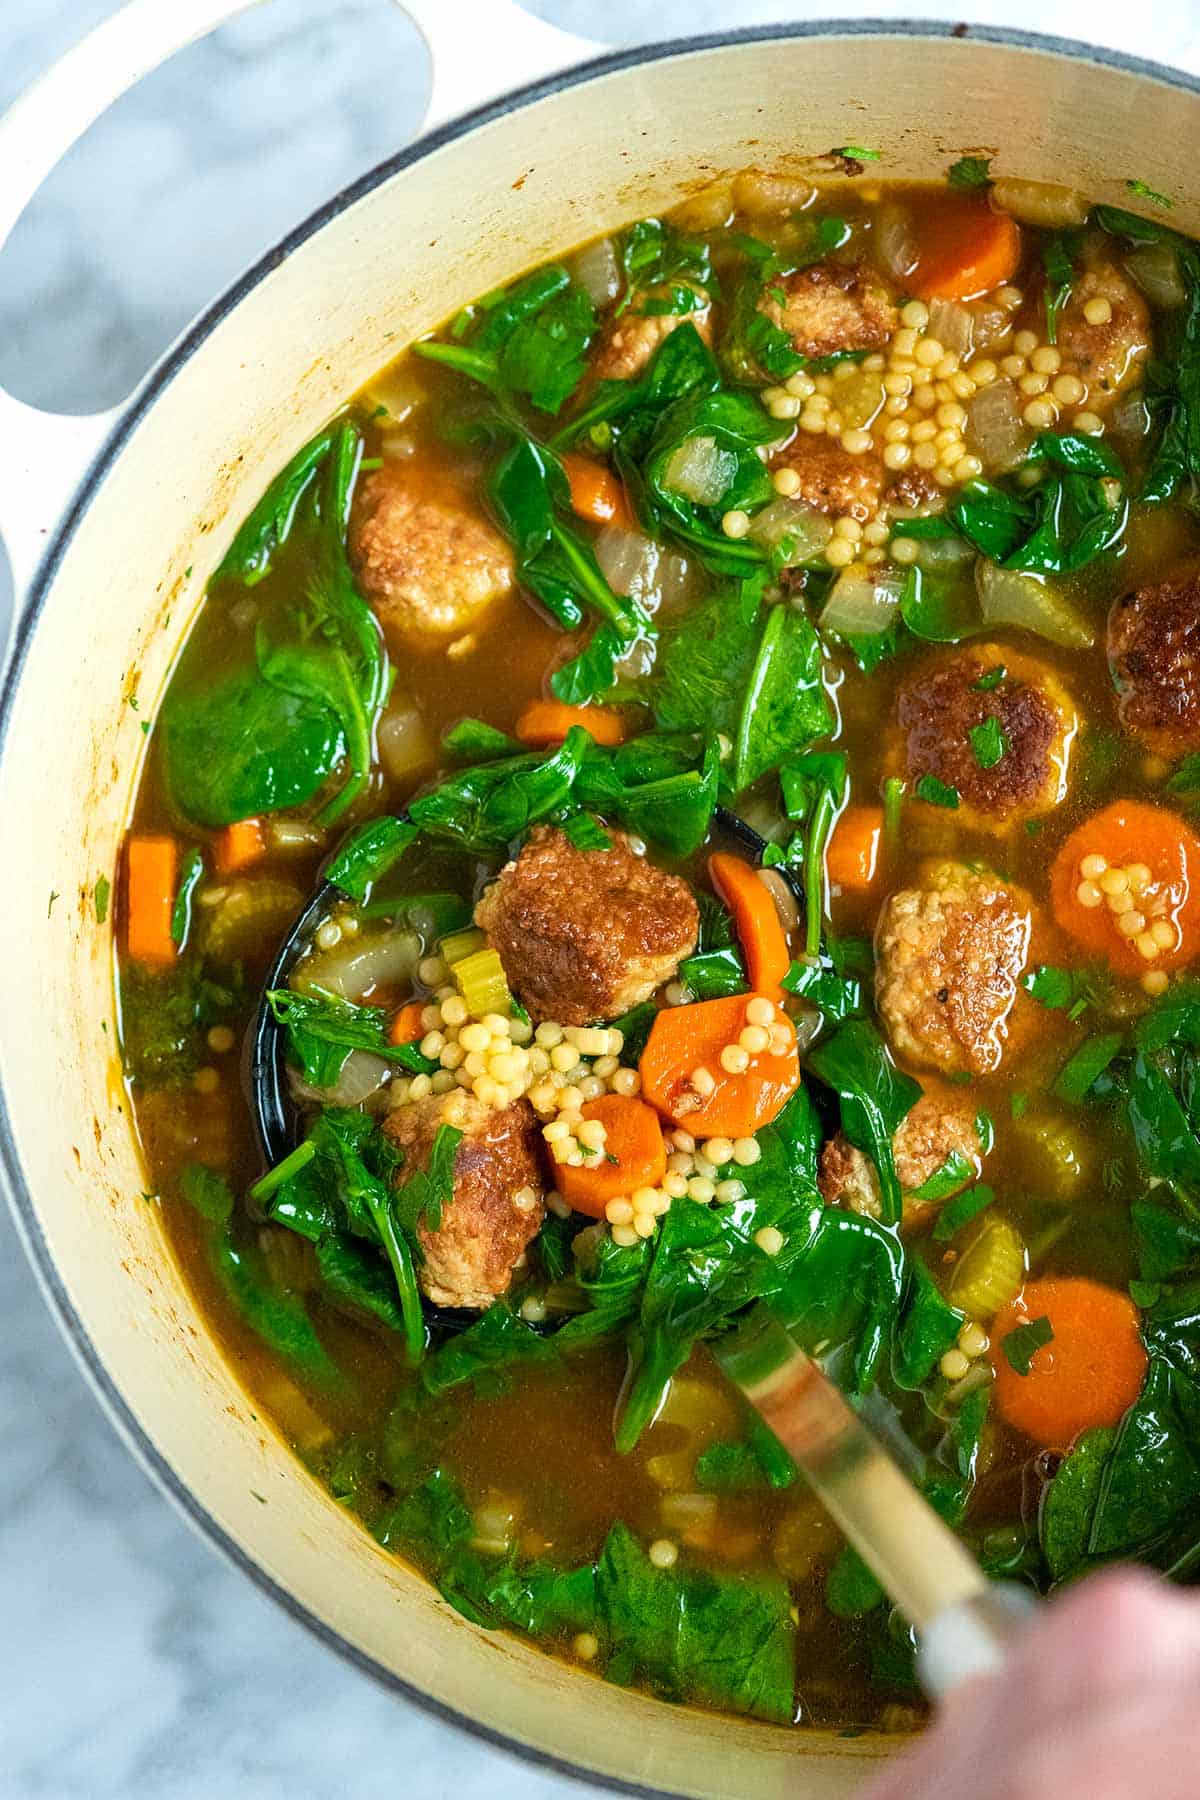
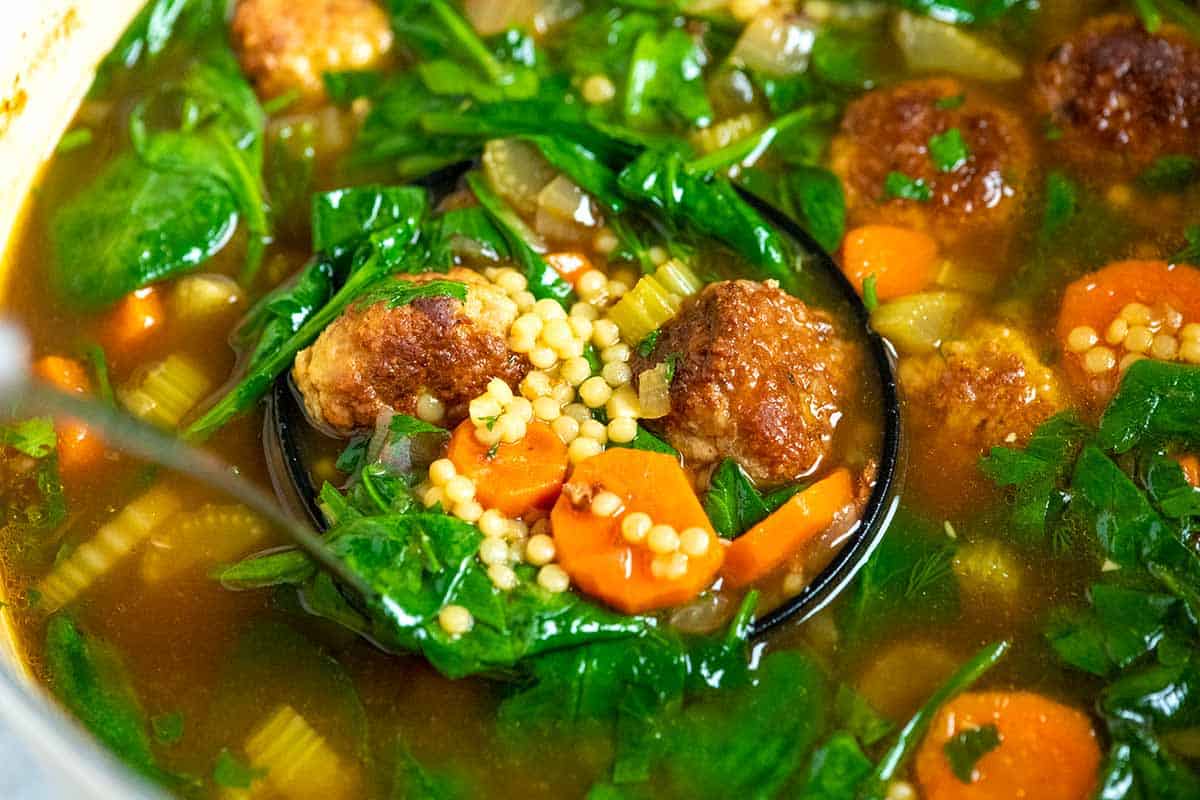
    Homemade Italian wedding soup with meatballs

    Every time I make this Italian wedding soup, I fall in love with it all over again. The meatballs are perfectly tender and juicy on the inside, and the broth is incredibly flavorful.

    Making this soup is simpler than you’d think and absolutely worth the effort for one of the tastiest bowls of soup I’ve had in a while! For more like this, you may enjoy our turkey meatball soup with orzo.

    Key Ingredients

    • Ground Meat: You can use your favorite ground meat, such as beef, turkey, pork, or chicken. I love combining ground pork and turkey for the meatballs. The pork makes them really juicy, and the turkey keeps them light.
    • Meatball Mixture: These Italian wedding soup meatballs require ingredients similar to those used in our Italian Meatballs. You will need breadcrumbs, milk (dairy or non-dairy), and an egg to keep them moist in the middle. Then, you’ll stir in Parmesan cheese, oregano, salt, and pepper to add lots of delicious flavor.
    • Pasta: Any small pasta shape works, although we prefer to use Acini di Pepe if available. Orzo or pearl couscous are great substitutes.
    • Veggies: I love a base of vegetables in this wedding soup, so I add onion, carrot, celery, garlic, and fresh spinach leaves to the broth. As a substitute for spinach, consider kale or escarole.
    • Broth: I use chicken stock for this soup, but a rich vegetable broth would be lovely. I love homemade chicken stock, bone broth, or this vegetable broth.
    • Fresh Herbs: Right before serving, I love stirring fresh green herbs in the soup and especially enjoy fresh parsley and dill.

    Find the full recipe with measurements below.

    How to Make the Best Italian Wedding Soup

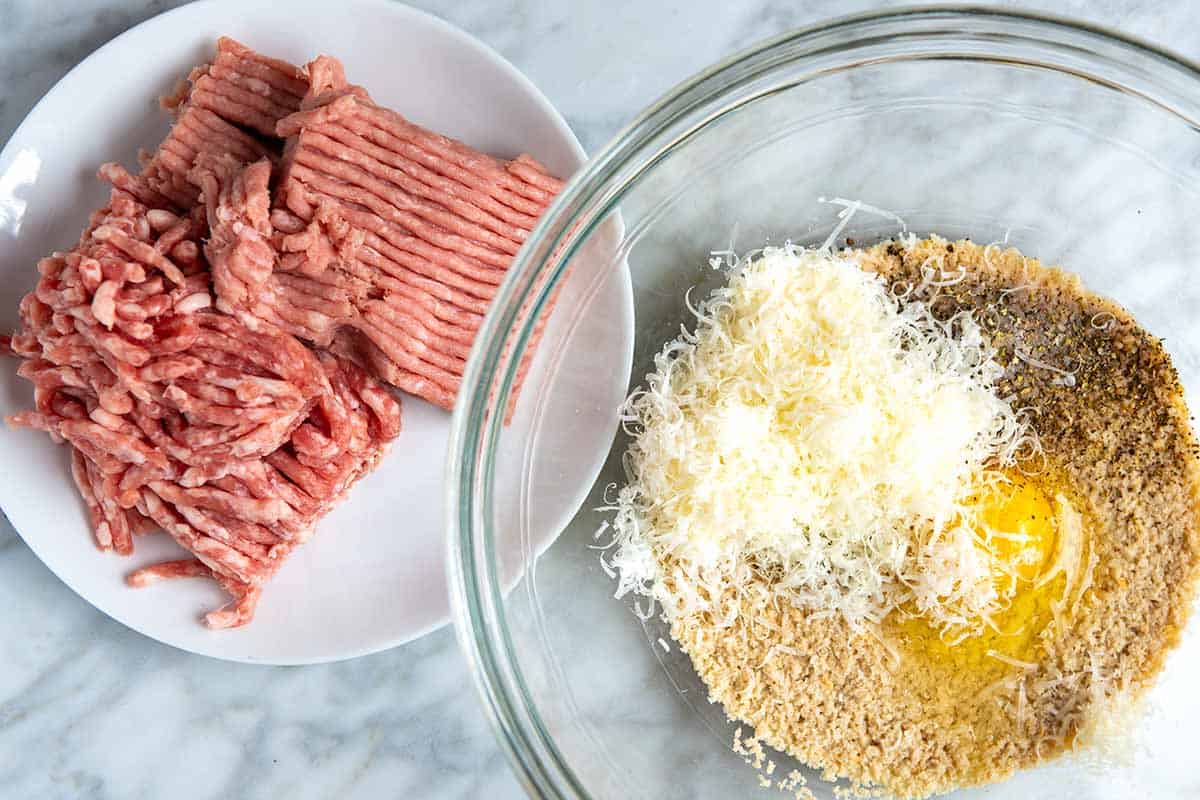
    Tip 1: Making the meatballs. These meatballs are incredibly easy to prepare. Mix everything until blended and then form into small meatballs. I use a small cookie scoop to portion them out, then roll them with damp hands until smooth.

    Italian Wedding Soup Meatball ingredients in a bowl

    Tip 2: Brown the meatballs in the soup pot. To add lots of flavor to your soup’s broth, brown your meatballs in oil directly in the soup pot you plan to use for making your soup. As they brown, they will leave little bits of stuck meat and spices on the bottom of the pot. Scraping up those tasty browned bits from the bottom adds incredible flavor to the broth. Trust me, you don’t want to miss that extra flavor!

    Browning meatballs for Italian wedding soup

    Tip 3: Finishing the soup. When the meatballs are browned on all sides, transfer them to a plate and continue making the soup. You’ll sauté the veggies first, add stock, simmer, and then finish with the pasta, browned meatballs, and spinach. It all goes quickly! Before serving, stir in a handful of fresh herbs, and then enjoy!

    Making Italian wedding soup from scratch

    More Italian-Inspired Soups

    Homemade Italian Wedding Soup

    Easy Italian Wedding Soup

    • PREP
    • COOK
    • TOTAL

    Our Italian wedding soup combines homemade meatballs, spinach, and a rich, savory broth. The type of ground meat you use is up to you. Ground beef, pork, turkey, and chicken all work well. When we make this recipe, we love to combine ground pork and ground turkey. The pork makes the meatballs super juicy and rich, and the turkey keeps them light.

    6 Servings

    Watch Us Make the Recipe

    You Will Need

    For the Meatballs

    1 pound ground beef, pork, chicken, turkey, or a combination; we prefer a 50-50 blend of pork and turkey (450g)

    1/2 cup panko breadcrumbs or homemade breadcrumbs (35g)

    1/2 cup milk, dairy or non-dairy (118ml)

    1 large egg

    1/4 cup (14g) finely grated Parmigiano-Reggiano cheese, 1/2 ounce

    1/2 teaspoon dried oregano

    3/4 teaspoon fine sea salt

    1/2 teaspoon fresh ground black pepper


    For the Soup

    2 tablespoons olive oil or avocado oil

    1/2 medium onion, chopped

    2 medium carrots, thinly sliced

    2 celery ribs, finely diced

    2 garlic cloves, minced, 2 teaspoons

    1 bay leaf

    8 cups chicken stock (1.8L)

    1/2 cup small pasta like Acini di Pepe, orzo, or pearl couscous (113g)

    4 cups baby spinach, substitute kale or escarole (113g)

    1/2 cup fresh parsley, chopped

    Handful of fresh dill, optional

    Directions

    • Prepare the Meatballs
    • 1Stir breadcrumbs and milk in a large bowl and let sit for 5 minutes. Add the egg, parmesan cheese, oregano, salt, and pepper. Stir until well blended.

      2Add the ground meat, and use a fork or your fingers to gently mix everything until combined. Try not to overmix for the most tender meatballs.

      3Wet your hands and form the mixture into ½-inch balls (about 2 teaspoons). You should get about 35 meatballs. A small cookie scoop is useful here (see our video).

      4Heat 2 tablespoons of oil in the bottom of a large soup pot or Dutch oven over medium heat. Place the meatballs into the hot oil and cook until browned on all sides, about 10 minutes. Depending on the shape or size of the pot, you may need to do this in two batches. Transfer the browned meatballs to a plate.

    • Make the Soup
    • 1Check the bottom of the pot used to brown the meatballs. If there is a lot of oil/fat left, remove most of it. Place the pot back over medium heat, and then add the onions, carrots, and celery. Cook, stirring every few minutes, until the vegetables begin to soften, 5 to 6 minutes.

      2Stir in the garlic and bay leaf. Cook, stirring the garlic around the pan, for about 1 minute.

      3Pour in the stock and bring to a low simmer. Use a spoon to scrape up any browned bits stuck to the bottom of the pot. Taste the soup, then adjust the seasoning with salt and pepper. You may need 1/2 or more teaspoons of salt, depending on the stock used.

      4Simmer the soup for 20 minutes, then add the pasta and browned meatballs. Simmer for another 10 to 15 minutes or until the pasta is cooked.

      5Stir in the spinach and cook until wilted, about 2 minutes. Serve.

    Adam and Joanne’s Tips

    • Storing: This soup can be stored in an airtight container for 3 to 4 days or frozen for up to 3 months. If you plan to freeze the soup as a make-ahead meal, leave out the pasta, as it can become mushy when thawed and reheated. When reheating, add dry pasta and cook fresh.
    • Dairy-free meatballs: Substitute the milk for unsweetened dairy-free milk and the cheese for 2 tablespoons of nutritional yeast.
    • Gluten-free meatballs: Substitute the bread crumbs for crushed gluten-free cereal or crackers
    • The nutrition facts provided below are estimates. We included 8 ounces of turkey and 8 ounces of pork for the meatballs.

    Nutrition Per Serving
    Serving Size
    1 of 6 servings
    /
    Calories
    372
    /
    Total Fat
    16g
    /
    Saturated Fat
    5.5g
    /
    Choletserol
    90mg
    /
    Sodium
    625.3mg
    /
    Carbohydrate
    31.2g
    /
    Dietary Fiber
    3g
    /
    Total Sugars
    4.5g
    /
    Protein
    27.3g


    AUTHOR:

    Joanne Gallagher

    Adam and Joanne of Inspired Taste

    We are Adam and Joanne Gallagher, the creators of Inspired Taste. Established in 2009, Inspired Taste grew from a childhood dream into one of the internet’s most trusted recipe sites with hundreds of reliable recipes, step-by-step videos, and expert tips.More About Us

    Source link

  • Easy Split Pea Soup Recipe

    Easy Split Pea Soup Recipe

    This split pea soup recipe is outrageously delicious and comforting. Made with simple ingredients and a rich broth, it turns out thick, creamy, and flavorful!

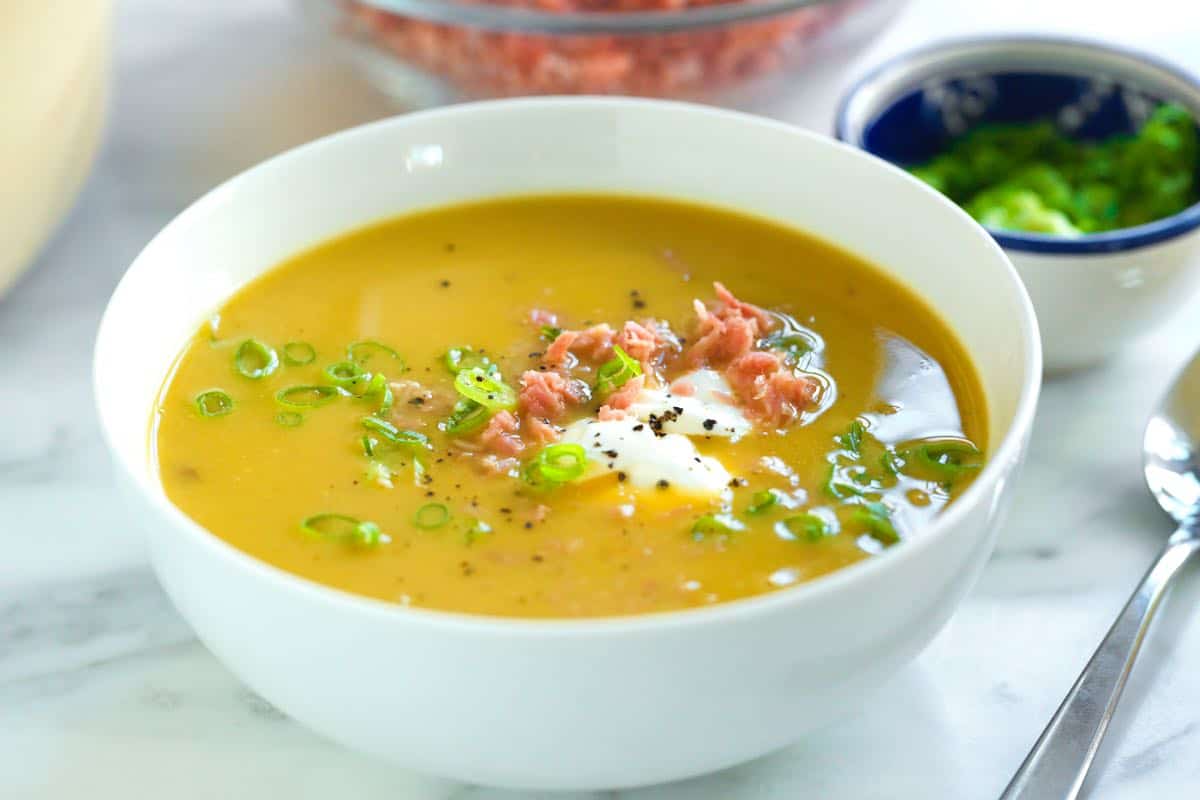
    Homemade Split Pea Soup

    I love hearty soup recipes, and this split pea soup definitely hits the mark! We use dried split peas as the base, and slowly simmer them with aromatic veggies, broth, and thyme until perfectly tender. Then, we blend the soup until smooth for an extra creamy texture. It’s hearty, flavorful, and unbelievably delicious.

    The ham adds a lovely smoky flavor, but if you’d prefer to make this without it, you can (and it will still be delightful).

    Key Ingredients

    • Split Peas: Split peas are dried peas that have been split in half, which helps them cook faster. They have an earthy and slightly sweet flavor. There are two main types: green and yellow. For this soup, we’re using green split peas because they have a slightly sweeter taste and hold their shape better during cooking, resulting in a heartier texture.
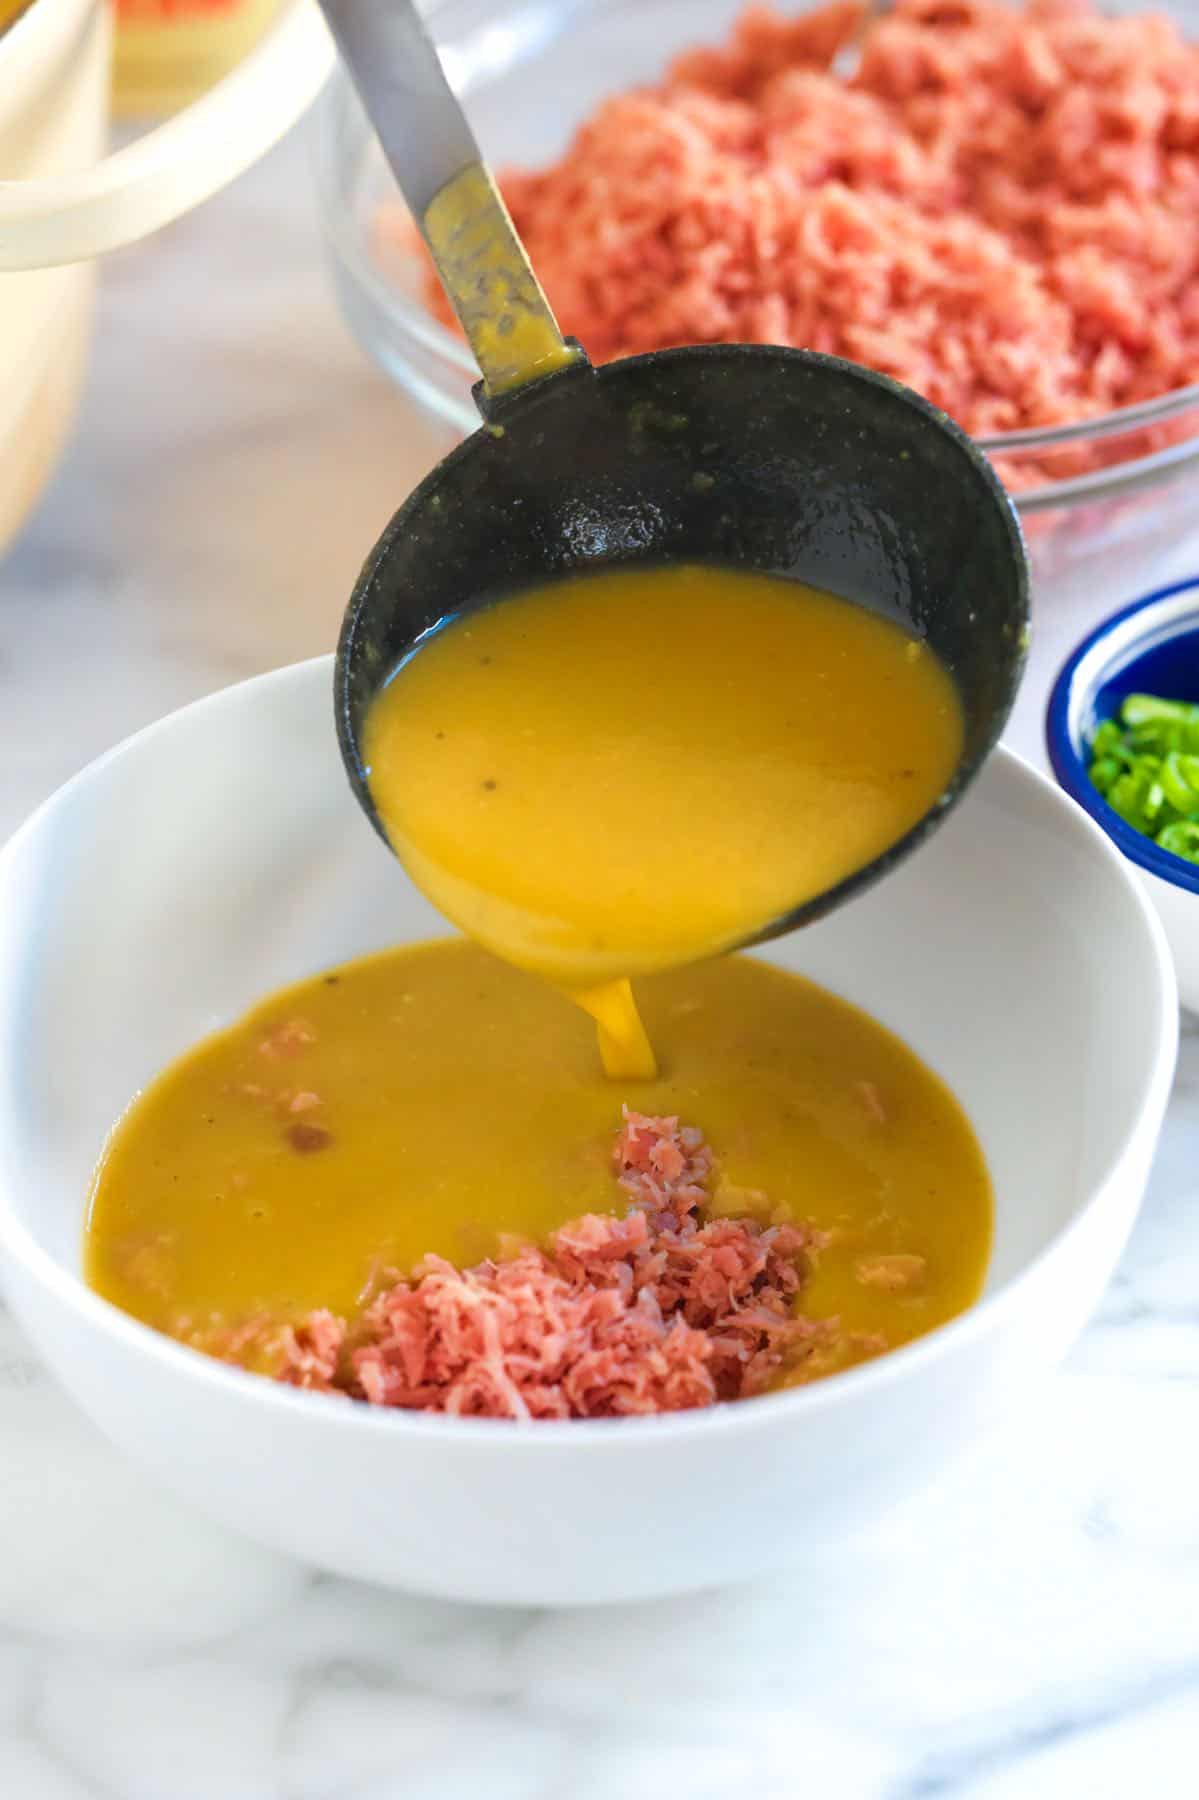
    • Ham: I use boneless ham steak and usually find it sold by the pound (or close) in 1/2-inch slices. Bone-in ham is excellent, too. You can add the ham bone to the soup as it simmers for even more flavor. We’ll briefly cook the ham in the pot, remove it, and pulse it in a blender until it is shredded. This seems unusual, but it creates the perfect texture for the soup! We’ll save the shredded ham for serving.
    • Aromatics: We’re keeping it classic with a mixture of onion, carrot, celery, and garlic to create a flavorful base.
    • Herbs: I love the combination of bay leaves and fresh thyme. I usually take 6 or so thyme stalks and tie them with some twine for easy removal later.
    • Broth: Use what you love! That’s chicken stock for me, but veggie broth works perfectly well, too.
    • Wine: A dry white wine adds a bit of complexity to the soup. Use something you already enjoy drinking. I often go for something simple like Pinot Grigio, Sauvignon Blanc, or unoaked Chardonnay. You can also use a dry sherry.
    • Dijon Mustard and Parsley: This is our secret! To add a lovely pop of flavor and color right at the end, we’ll blend in a couple of teaspoons of Dijon mustard and half of a bunch of fresh parsley. It livens everything up and really makes the soup taste incredible.
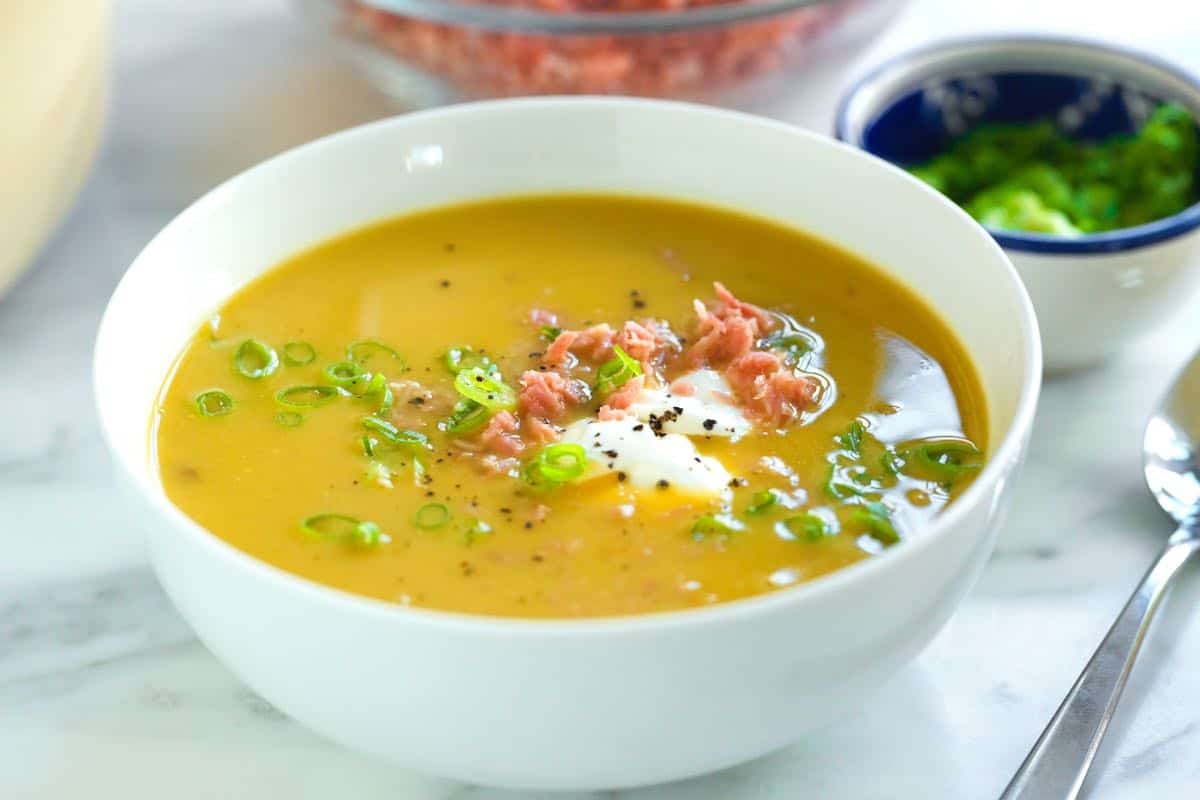
    • Toppings (Optional): When serving this soup, we’ll blend it until smooth and creamy, then top it with the shredded ham, a dollop of sour cream, and some sliced green onion.

    Find the full recipe with measurements below.

    How to Make the Best Split Pea Soup

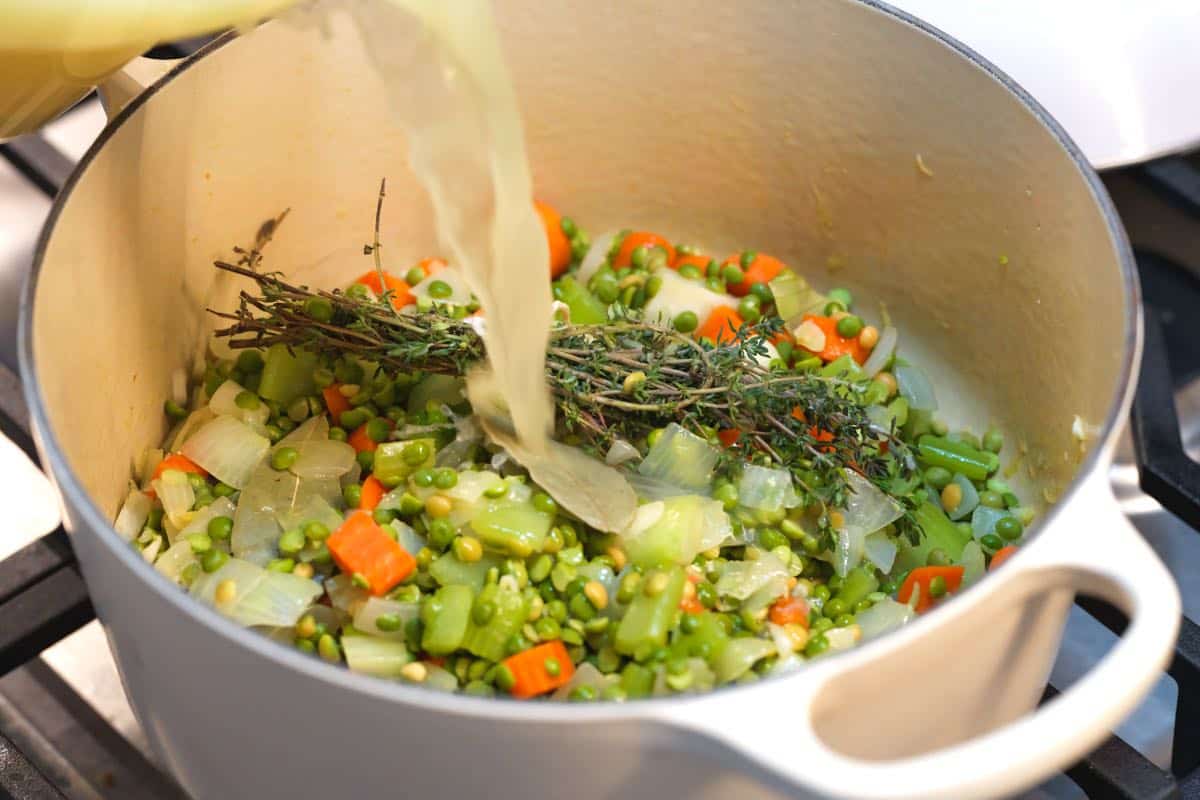
    Tip 1: Build flavors. The trick to this soup is gradually building flavors in your soup pot. So, if you’re adding it, start with the ham and cook it until browned. Remove it, then add your onion, carrot, celery, and garlic. As they cook, they will pick up the flavor from the ham. Finally, finish with the thyme and broth.

    Adding the broth to make split pea soup

    Tip 2: Simmering the split peas. Dried split peas take a bit to become tender, so expect this soup to simmer for about 1 hour.

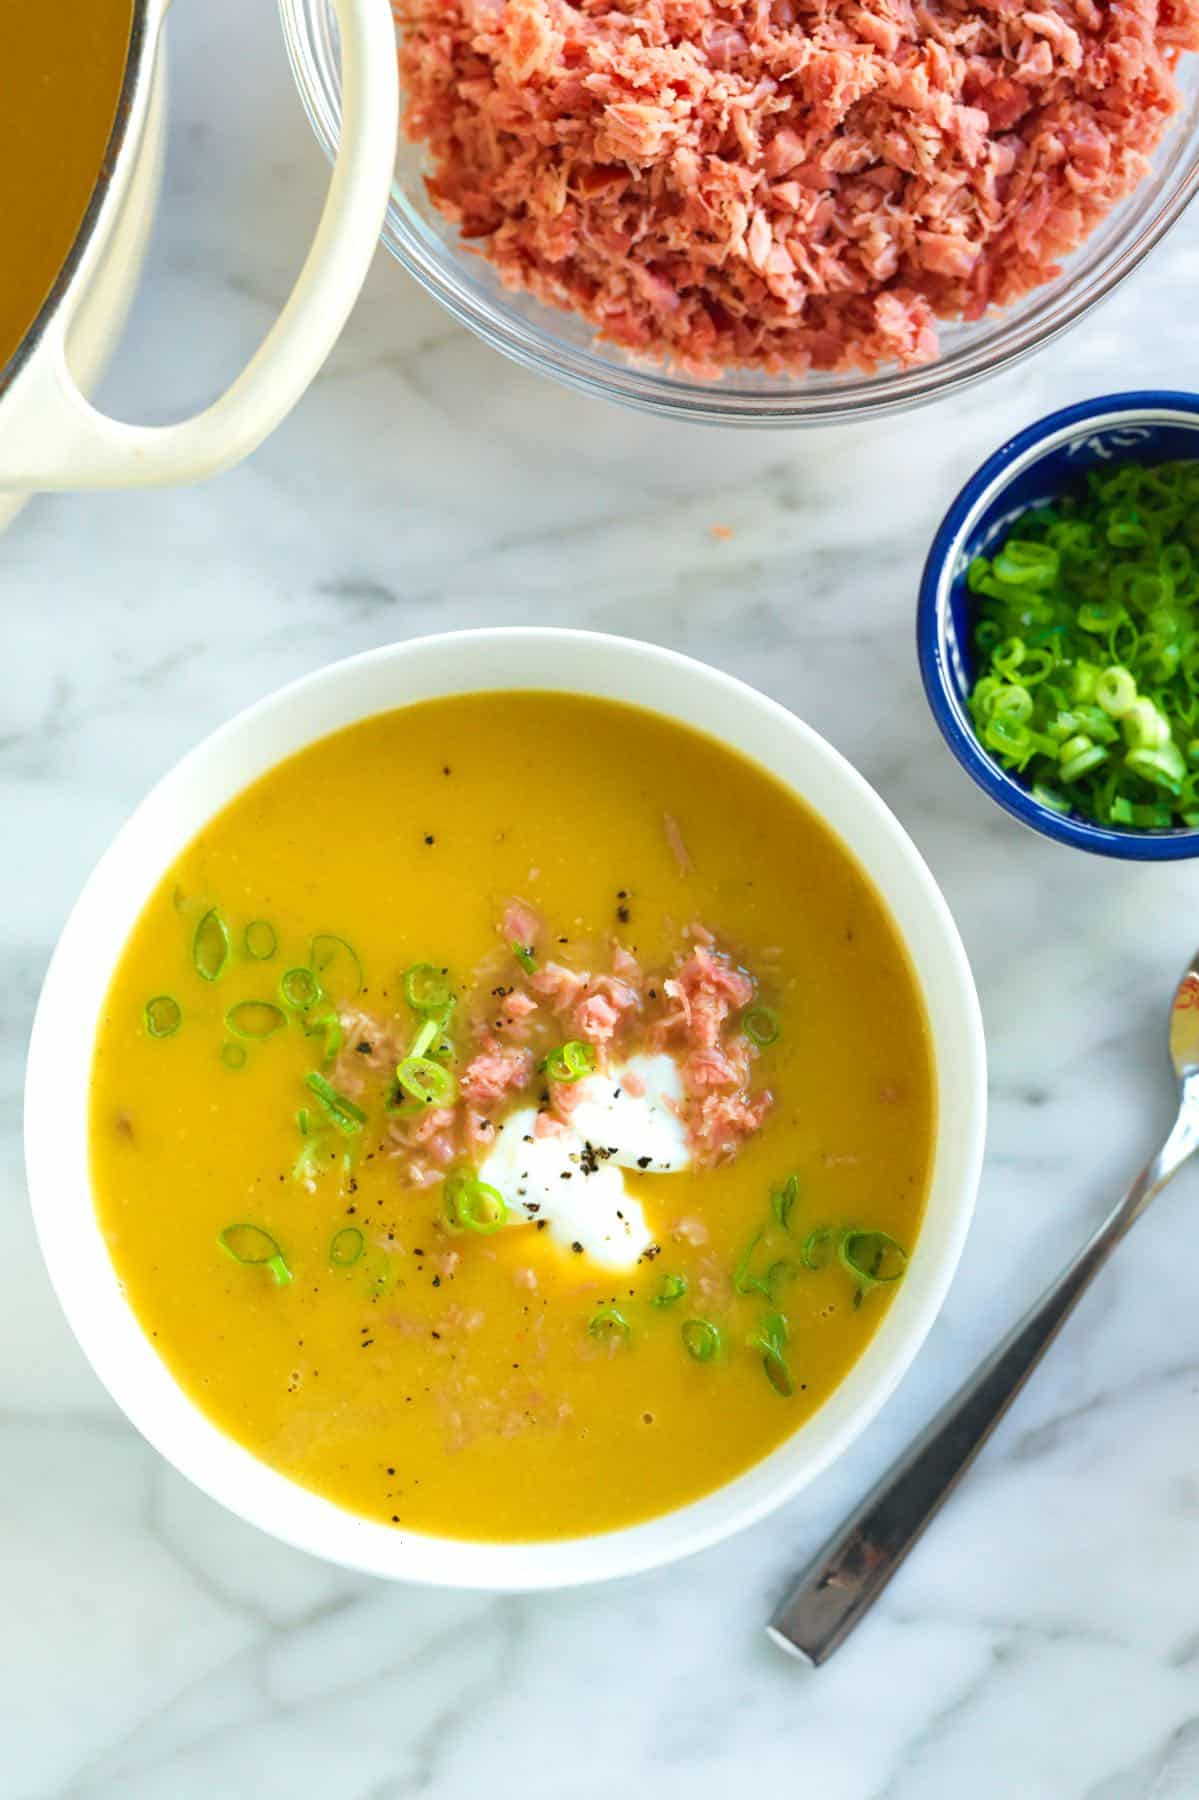
    Tip 3: Blend the ham. Yep, you read that right! It feels odd to blend ham, but trust me. The ham breaks down into the perfect texture for adding to our serving bowls. See what I mean in our photos.

    Tip 4: Serving it. When serving this split pea soup, we place a generous spoonful of ham into the bottom of a bowl and then pour the soup over it. Garnish with more ham, sour cream, and sliced green onions, and enjoy! It would also be amazing with a slice of homemade focaccia or this easy flatbread for dunking!

    Serving Split Pea Soup with Ham

    More Cozy Soup Recipes

    Easy Split Pea Soup

    Easy Split Pea Soup

    • PREP
    • COOK
    • TOTAL

    This split pea soup is absolutely delicious and unbelievably comforting. It’s incredibly easy to make with simple ingredients like dried split peas, carrots, celery, onions, and ham. We love the ham in this soup, but you can easily adapt it to be vegetarian (details for this are in the tips below).

    6 Servings (12 cups)

    Watch Us Make the Recipe

    You Will Need

    2 tablespoons olive oil

    12 ounces ham steak, diced into 1/2-inch cubes (340g)

    2 cups chopped onions, 1 large

    1 cup chopped carrots, 2 medium

    1 cup chopped celery, 3 ribs

    6 cloves garlic, thinly sliced

    1 pound (450g) green split peas (dried)

    2 bay leaves

    1 bundle fresh thyme

    1/3 cup white wine or dry sherry (80ml)

    10 cups low sodium chicken stock or veggie broth (2.4L)

    1/2 bunch fresh parsley

    2 teaspoons Dijon mustard

    Salt and pepper to taste

    6 tablespoons sour cream for serving

    2 green onions, thinly sliced for serving

    Directions

      1Heat a tablespoon of olive oil in a large pot, like a Dutch oven, over medium heat. Add the ham and cook for a few minutes, browning slightly (but don’t dry it out). Remove the ham and set aside.

      2Add another tablespoon of oil, onion, carrots, celery, and garlic to the pot and cook until the onions are translucent, about 5 minutes. Stir in 1/4 teaspoon of salt. Then, add the split peas, bay leaves, and thyme. Cook for 2 minutes.

      3Pour in the wine and stir to lift anything stuck to the bottom of the pot. When the wine evaporates, pour in the chicken stock. Season with some salt (taste to see if you need it – I usually add 1/4 teaspoon or so).

      4Bring to a low simmer, adjusting the heat as needed. Cook covered until the split peas are tender, 50 to 60 minutes. Stir the pot occasionally as it cooks.

      5As the soup simmers, prepare the ham. Place the ham into a blender, working in batches if needed. Pulse until chopped/shredded. Reserve in an airtight container in the fridge until serving.

      6When the split peas are tender, remove the bay leaves and thyme bundle. Add the parsley and mustard, then use an immersion blender to blend the soup until creamy. (You can also use a stand blender, but you will need to work in batches.)

      7When ready to serve, reheat the ham, place a few spoonfuls of the ham at the bottom of the bowl. Pour over the soup and garnish with sour cream, sliced green onions, and a little more ham.

    Adam and Joanne’s Tips

    • Storing: Transfer the soup to an airtight container and store it in the refrigerator for up to 5 days. Or freeze in freezer-safe containers for up to 3 months. Thaw overnight in the fridge before reheating.
    • Reheating the ham: Place the ham on a microwave-safe plate. Cover the plate with a damp paper towel to help retain moisture. Microwave on high for 30 to 60 seconds or until heated through. Or, quickly warm in a skillet with a couple of teaspoons of water.
    • Bone-in ham: If you have a ham bone, add it to the soup as it simmers, and then remove before blending.
    • Vegetarian adaptations: Remove the ham. There are no other necessary changes. For vegan soup, remove the ham and sour cream.
    • Wine: I love the pop of flavor wine adds to this soup, but if you prefer this without wine, feel free to leave it out. Deglaze the pot with a splash of stock and then continue with the remaining recipe steps.
    • The nutrition facts provided below are estimates.

    Nutrition Per Serving
    Serving Size
    1/6 of the recipe
    /
    Calories
    517
    /
    Total Fat
    12.9g
    /
    Saturated Fat
    3.6g
    /
    Sodium
    1030.1mg
    /
    Carbohydrate
    63g
    /
    Dietary Fiber
    21.4g
    /
    Total Sugars
    10.6g
    /
    Protein
    38.7g


    AUTHOR:

    Joanne Gallagher

    Adam and Joanne of Inspired Taste

    We are Adam and Joanne Gallagher, the creators of Inspired Taste. Established in 2009, Inspired Taste grew from a childhood dream into one of the internet’s most trusted recipe sites with hundreds of reliable recipes, step-by-step videos, and expert tips.More About Us

    Source link

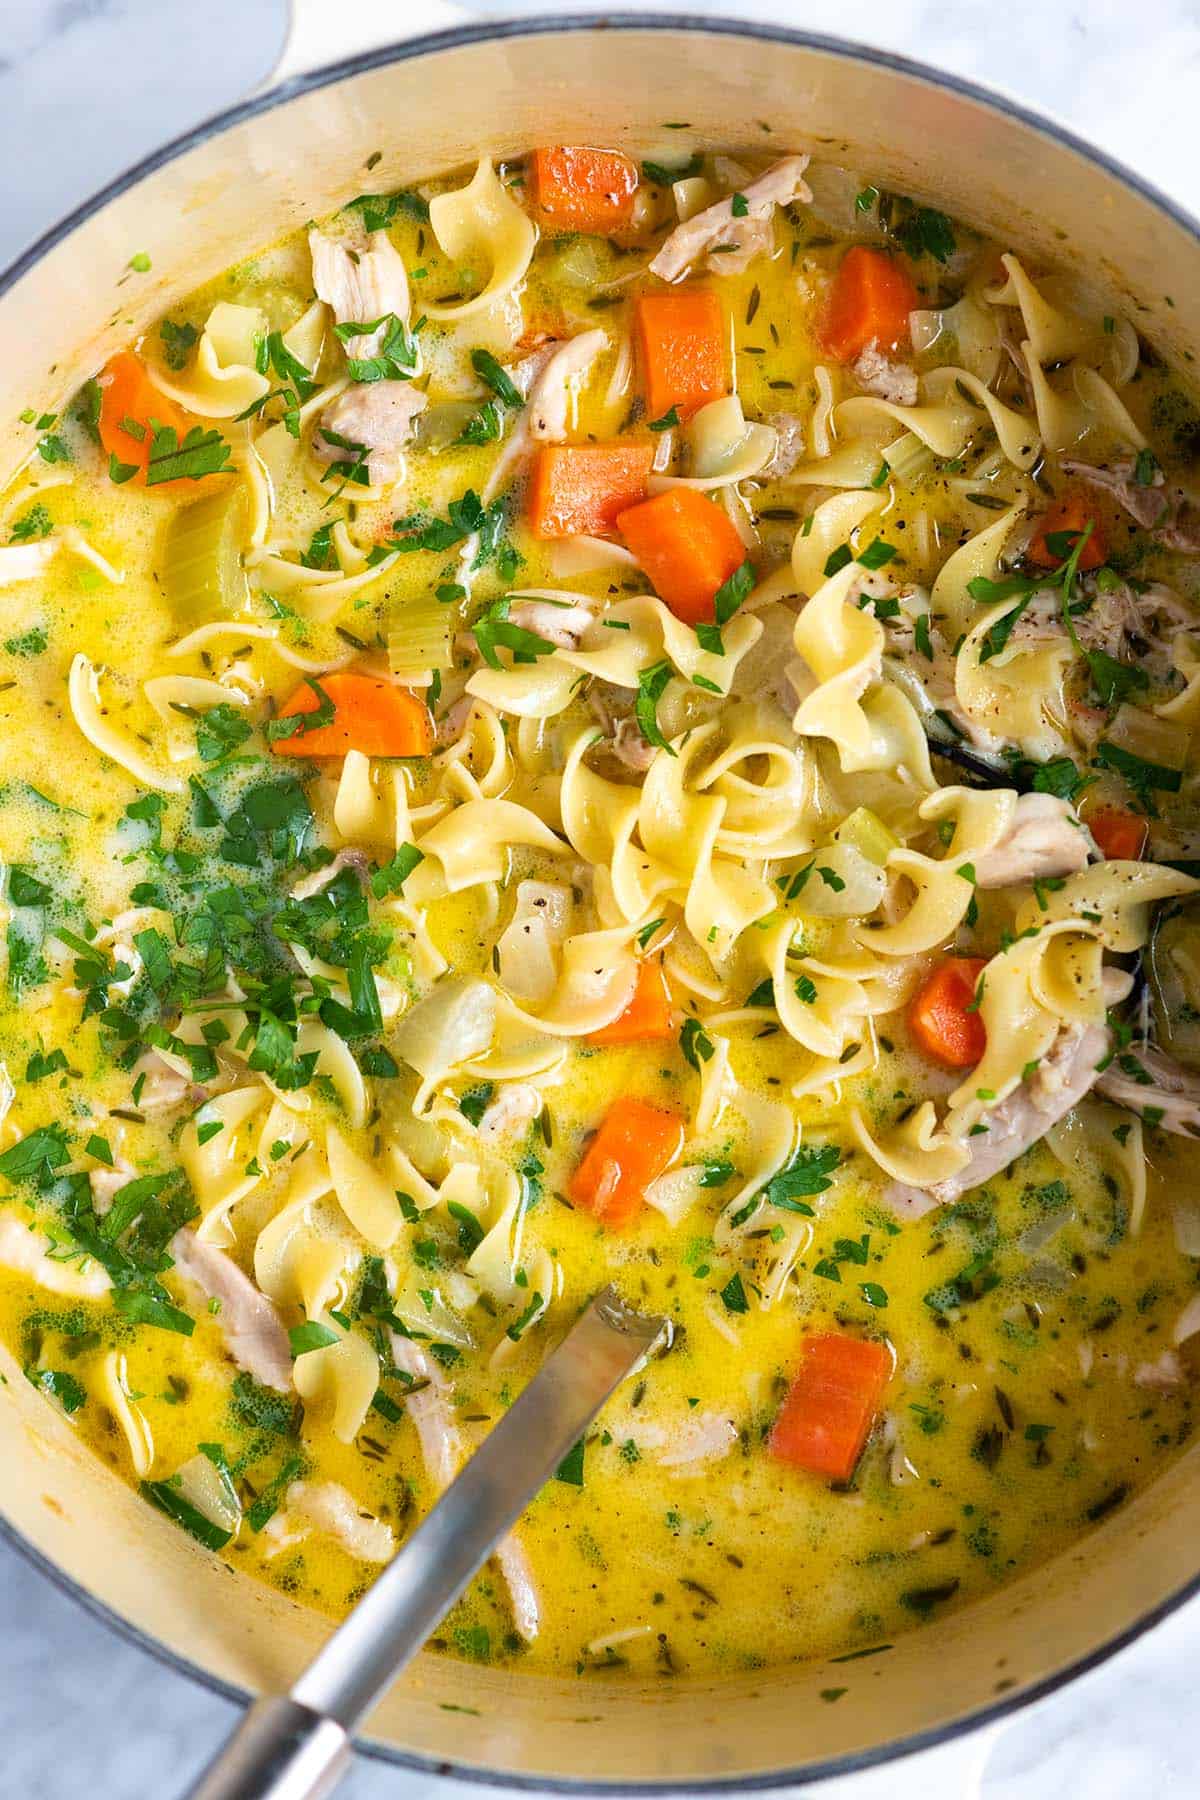
  • Easy Creamy Chicken Noodle Soup Recipe

    Easy Creamy Chicken Noodle Soup Recipe

    This easy creamy chicken noodle soup recipe is ready in just 40 minutes, incredibly delicious, and turns out perfectly creamy!

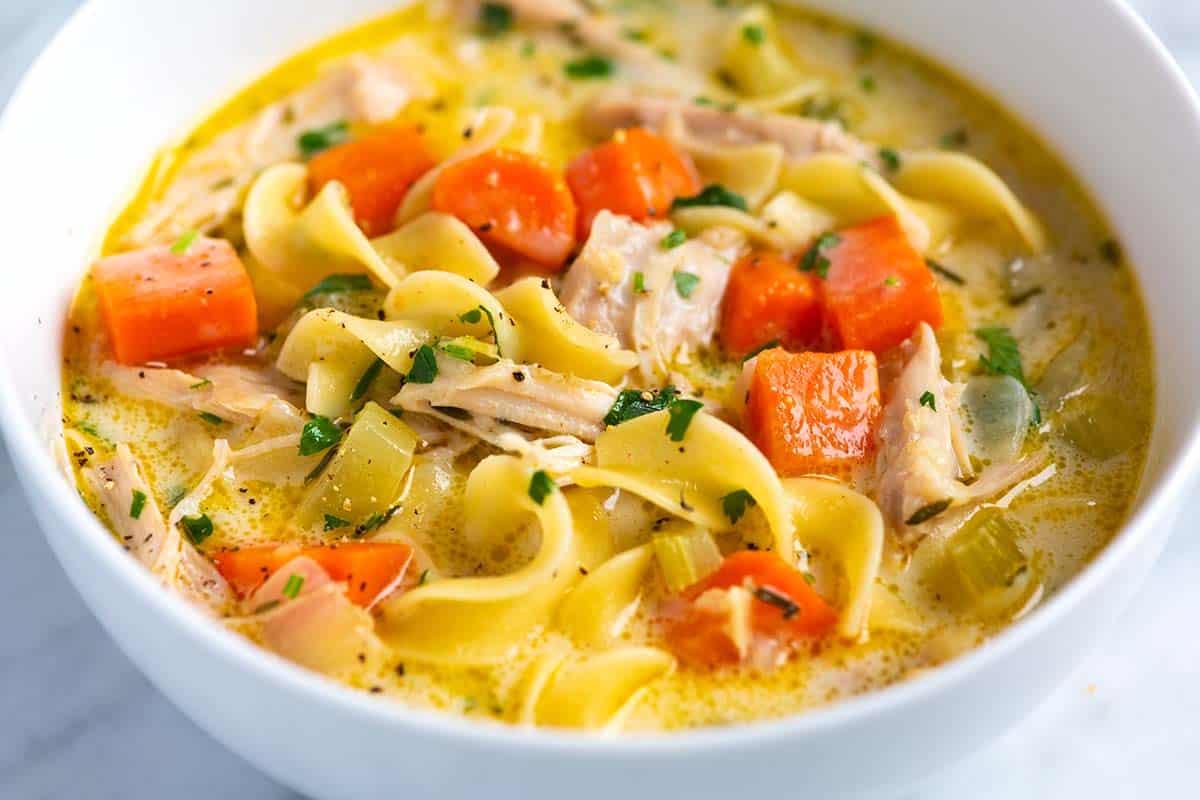
    Homemade Creamy Chicken Noodle Soup

    This is the creamy version of our popular chicken noodle soup, and it walks the line of being super silky without being too thick.

    Just like our classic, the secret to this ridiculously flavorful broth is chicken thighs, which guarantee a delicious result in under 40 minutes, with most of that time being hands-off. I usually make a double batch of this homemade creamy chicken noodle soup because it’s that good!

    Key Ingredients

    • Chicken Thighs: These are my secret for the best creamy chicken noodle soup. They have more fat and flavor than chicken breast and are almost impossible to overcook as they simmer, guaranteeing a tender texture.
    • Chicken Broth: While I recommend homemade chicken stock, store-bought chicken broth works great too. When shopping, look for darker broths or bouillon, as they typically have a richer flavor. Bone broth is a great option as well!
    • Flour and Cream: A bit of flour helps thicken the soup, while a splash of cream adds richness and creaminess. Don’t substitute milk for the cream. I learned the hard way that milk can curdle and won’t give you the same richness. Half-and-half is the next best option if you’re out of cream.
    • Egg Noodles: I love them, but feel free to substitute your favorite pasta.
    • Veggies: I keep it simple and classic with onion, celery, carrots, and garlic. The same combination we use when making chicken pot pie.
    • Herbs: Thyme, bay leaves, and parsley are all classic flavors for chicken soup.

    Find the full recipe with measurements below.

    A Pot of Homemade Creamy Chicken Noodle Soup

    How to Make the Best Creamy Chicken Noodle Soup

    Tip 1: Start your veggies in butter. I always sweat my veggies in butter before adding any broth. I’m not looking to brown them. I want to give them a head start before adding the broth, so they are sweet in the soup.

    Tip 2: Use flour to thicken the soup. I don’t really enjoy thick soup, but I love using a little bit of flour (just 3 tablespoons) to make the broth more silky. It works like a charm!

    Tip 3: Poach the chicken in the broth. Instead of starting with a whole chicken, we use chicken thighs, which flavor our soup and turn out soft and tender when cooked. When you are happy with the broth, add the chicken thighs. Then, gently poach them in the broth. It takes about 20 minutes! This is the same method I use when making shredded chicken.

    Tip 4: Finish with the noodles and cream. To prevent your noodles from overcooking, add them towards the end of the cooking process. Then finish with a generous splash of cream and plenty of fresh parsley.

    More Creamy Soup Recipes

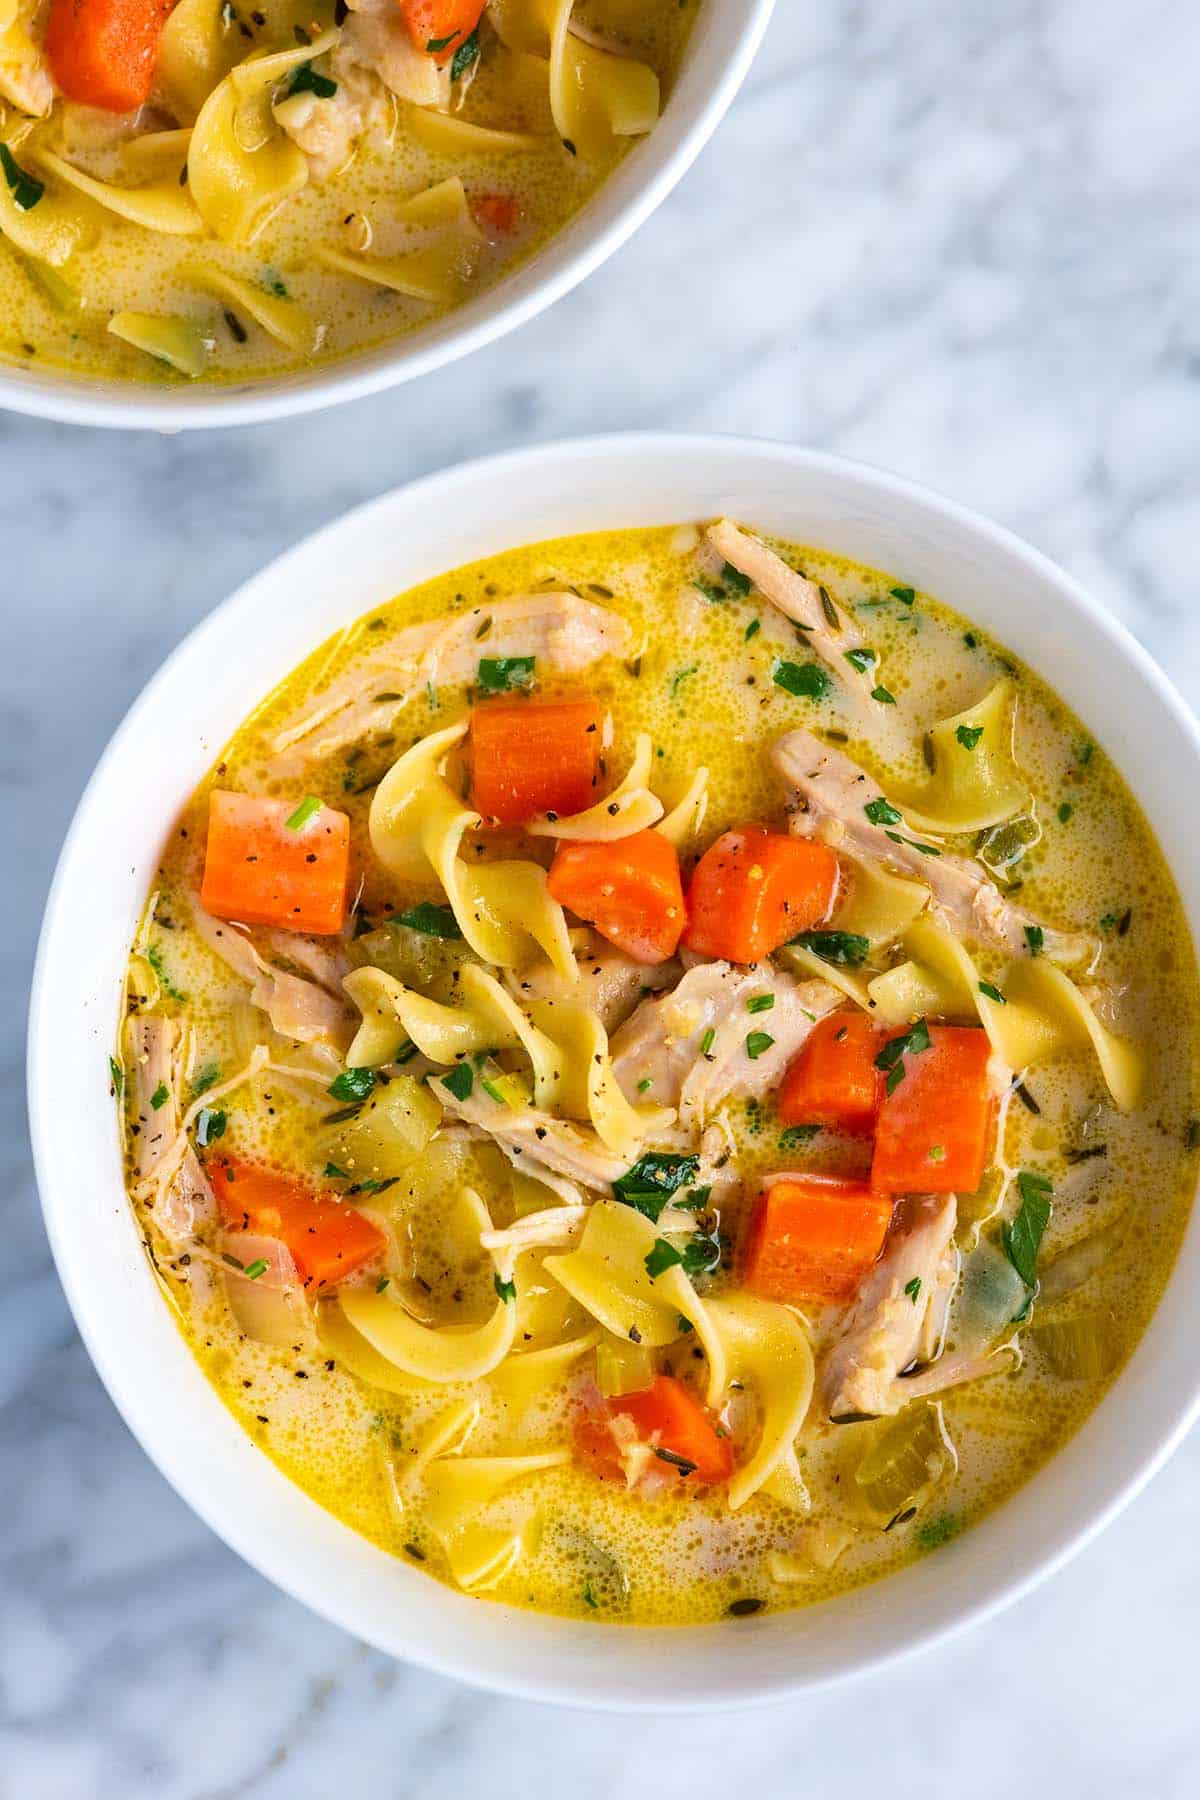
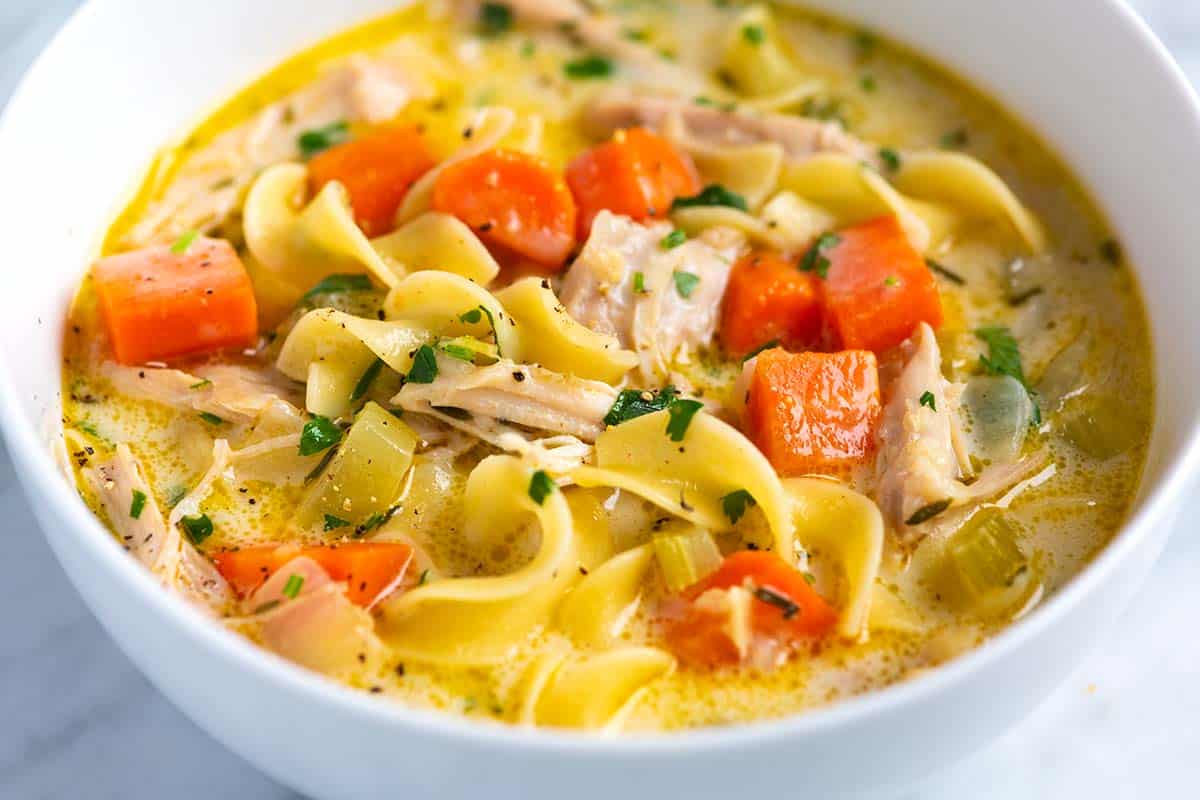
    A Bowl of Creamy Chicken Noodle Soup

    Easy Creamy Chicken Noodle Soup

    • PREP
    • COOK
    • TOTAL

    This creamy chicken noodle soup is easy to make and ready in under 45 minutes. My family loves this soup because it’s so incredibly delicious and perfectly creamy without being too thick. For the original, see our Classic Chicken Noodle Soup.

    4 to 5 Servings

    Watch Us Make the Recipe

    You Will Need

    1 pound skinless, boneless chicken thighs (450g)

    3 tablespoons butter, chicken fat, or olive oil (42g)

    1 large onion, chopped

    2 large carrots, chopped

    2 ribs celery, chopped

    Heaped tablespoon minced garlic, 4 cloves

    3 tablespoons all-purpose flour

    2 bay leaves

    3 sprigs fresh thyme or use 1/2 teaspoon dried thyme

    6 cups chicken stock, try homemade chicken stock

    5 ounces egg noodles

    1/4 cup heavy cream, plus more as needed (60ml)

    1/4 cup fresh parsley, finely chopped

    Salt and pepper, to taste

    Pinch or two crushed red chili peppers, optional for heat

    Directions

      1Cook veggies: Melt butter in a large pot or Dutch oven over medium heat. Add the onions, carrots, celery, and garlic. Cook, stirring every few minutes, until the vegetables begin to soften, 5 to 6 minutes.

      2Make a roux: Stir in the flour and cook, stirring it around the pan, for about 2 minutes.

      3Prepare the broth: Add the thyme and bay leaves, then continue to stir while pouring in the chicken stock. Bring the soup to a low simmer, then taste it and adjust the seasoning with salt and pepper as needed. Depending on the stock used, you may need to add one or more teaspoons of salt.

      4Poach the chicken: Submerge the chicken thighs in the soup so that the broth covers them. Bring the soup back to a low simmer, then partially cover the pot with a lid and cook, stirring occasionally, until the chicken thighs are cooked through and tender, about 20 minutes. Transfer the cooked chicken to a plate to cool for a minute. If the broth seems low, add a bit more stock or use water and reduce the heat a little.

      5Add the noodles: Stir the noodles into the soup and cook until done, 6 to 10 minutes, depending on the type of noodles used.

      6Shred the chicken: While the noodles are cooking, shred the chicken into strips or dice it into cubes.

      7Finish and serve: Slide the chicken back into the pot. Add the cream and parsley, then taste the soup once more. Adjust with more salt and pepper, as needed. We enjoy this soup with a generous amount of pepper or a pinch of crushed red peppers stirred in.

    Adam and Joanne’s Tips

    • Leftovers: Store in an airtight container in the fridge for 3 to 4 days. The noodles soak up the soup broth as it sits. When reheating, add a splash of extra chicken stock or water if you don’t have any.
    • Freezing: Freeze for up to 3 months. The noodles don’t fare too well when frozen. If you plan on freezing the soup, remove the portion you plan to freeze before adding the noodles. Freeze the broth, chicken, and vegetables. When you are ready to reheat the soup, add dried noodles to it and simmer until done.
    • Seasoning: If you feel the soup lacks some zing, add more salt. You can add flavor with a dash of fish sauce (we often use this trick for store-bought stocks and broths) or Worcestershire sauce.
    • Gluten-free option: Skip the flour altogether. At the end of the recipe, just before you stir in the chicken, parsley, and cream, whisk 1 tablespoon cornstarch with 2 tablespoons water and then whisk into the soup. Bring the soup to a simmer, and when it has thickened slightly, continue with the recipe as normal and add the chicken, cream, and parsley.
    • The nutrition facts provided below are estimates.

    Nutrition Per Serving
    Serving Size
    1/5 of the recipe
    /
    Calories
    381
    /
    Total Fat
    18.8g
    /
    Saturated Fat
    5.1g
    /
    Cholesterol
    129.3mg
    /
    Sodium
    719.3mg
    /
    Carbohydrate
    22.2g
    /
    Dietary Fiber
    2.6g
    /
    Total Sugars
    3.8g
    /
    Protein
    32.3g


    AUTHOR:

    Joanne Gallagher

    Adam and Joanne of Inspired Taste

    We are Adam and Joanne Gallagher, the creators of Inspired Taste. Established in 2009, Inspired Taste grew from a childhood dream into one of the internet’s most trusted recipe sites with hundreds of reliable recipes, step-by-step videos, and expert tips.More About Us
    Source link

  • Best French Onion Soup Recipe We’ve Made

    Best French Onion Soup Recipe We’ve Made

    Our French onion soup recipe has the most delicious broth, sweet caramelized onions, and extra cheesy, garlic-rubbed bread.

    Homemade Classic French onion soup

    French onion soup is easier than you might think to make at home. Trust me. All you need are a few tips and a surprisingly short list of ingredients.

    If there’s one thing to take away from this recipe, it’s how we cook the onions. Stirring them often is the key. Watch our video to see how we do it, or see our photos below! To make this a full meal, serve it with your favorite salad. We love serving it with our balsamic strawberry salad with lettuce and cucumber.

    Key Ingredients

    • Onions: Yellow onions are the best onions for French onion soup. We have made this soup with sweet onions and found it a little too sweet for our tastes. A combination of yellow onions and sweet onions would be interesting. Red onions are spicier than yellow onions and will change the color of your soup. White onions are more mild and sweet, making them a good alternative.
    • Broth: You can use chicken broth or beef broth to make French onion soup. We’ve tried all combinations (including using half chicken and half beef broth) and have loved them all. Beef broth is a bit more savory, while chicken is lighter on its feet. Here’s our recipes for chicken broth and beef stock. If you use store-bought broth, we’ve found chicken broth is a bit more forgiving, while store-bought beef broth usually lacks flavor and tastes salty.
    • Wine: For flavorful, classic French onion soup, use wine. We use dry white wine and sweet vermouth, an aromatic fortified wine. We highly recommend using both, although substitutions are provided below. Also, if you want to make French onion soup without wine, see the tips section in the recipe.
    • Bread: I use toasted slices of French baguette rubbed with a bit of fresh garlic to make them extra delicious before adding them to my soup. It’s the best!
    • Cheese: The best cheese for French onion soup is Gruyère. It melts beautifully and tastes earthy and nutty, which works nicely with the savory soup base. If you cannot find Gruyère, substitute it with parmesan cheese, Swiss cheese, fontina, or mozzarella.

    Find the full recipe with measurements below.

    How to Make Our Favorite French Onion Soup

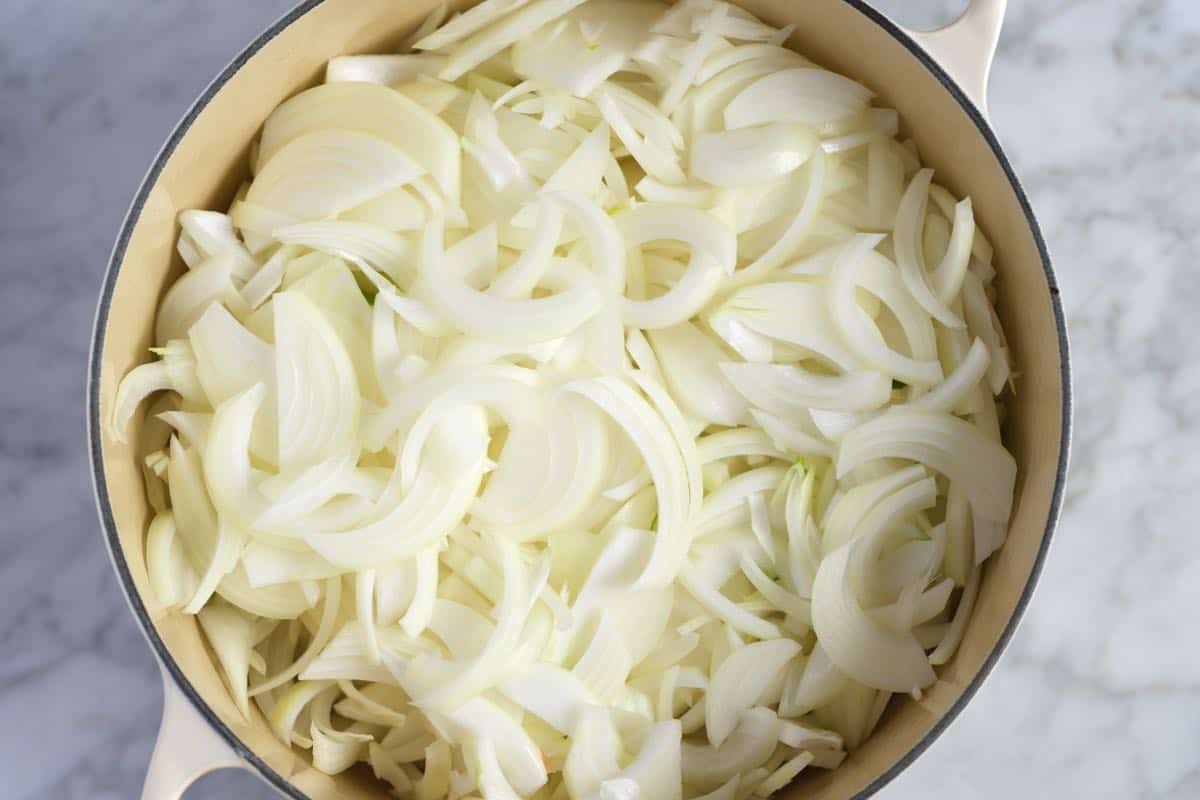
    Tip 1: Use a food processor or mandoline. To cook onions for French onion soup, you will need to slice a lot of them (by a lot, we need 6 to 7 medium onions for a soup that serves four). I do this by hand. I peel them, cut them in half, and thinly slice them into half moons. To speed things up, you can use the slicing disk of a food processor or mandoline slicer.

    Cooking onions to make french onion soup.

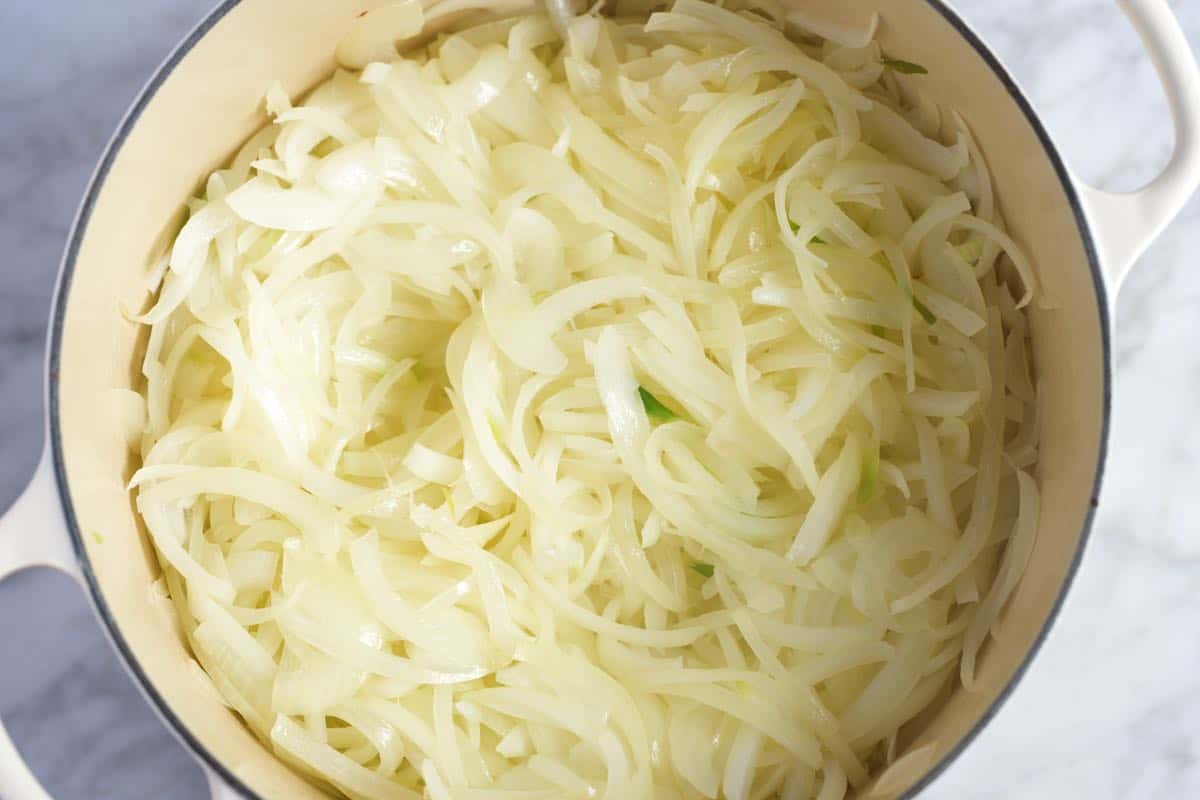
    Tip 2: Soften onions with lid on. Now, you’ll cook the onions in butter (yum) with the lid ON for about 12 minutes. This step softens the onions and helps them to release some liquid.

    Sweating the onions in the pan with butter.

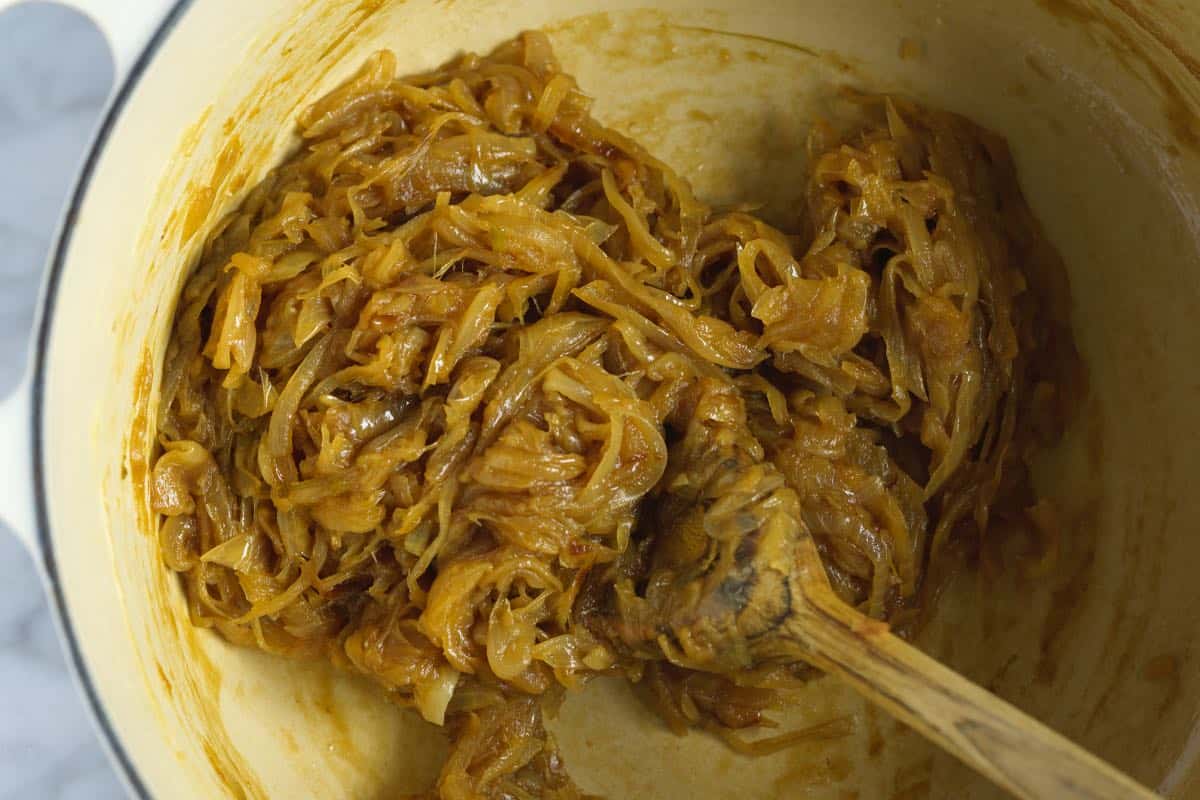
    Tips 3: Caramelizing the onions slowly is key. Cook the onions uncovered over medium heat, stirring often, until they look golden and caramelized. This step takes me somewhere between 40 and 50 minutes. Do you see why we started with so many onions? They cook down a lot!

    Caramelizing onions to make French onion soup.

    Tip 4: Deglaze the pot and add flavor. Get the onions right, and you’re 99% of the way to the best onion soup you’ve ever had. Now we have our onions, it’s time to add the rest of the ingredients. You will deglaze the pot with the wine, and then stir in the broth, fresh thyme, and some salt. You’ll let the soup steep like tea for a few minutes, and it’s ready.

    How to Serve French Onion Soup

    1. Rub toast with fresh garlic: While our soup sits, we can toast bread slices and rub them with fresh garlic. This trick came from Chef Richard, and I honestly don’t know if I could ever enjoy a bowl of French onion soup without garlic-rubbed bread again. It’s so good!
    2. Pre-dunk bread slices: Before filling our soup bowls, briefly dunk the bread slices in the soup. Dunking the bread in the soup before adding it to your bowl allows the bread to absorb some of the soup, so that it doesn’t steal all the broth from your bowl when you eat it. So smart!
    3. Add cheese and broil: Finally, you’ll add the bread and soup to oven-safe bowls and top with cheese. Broil until bubbly, and you are ready to dig in!
    Dunking garlic bread in French onion soup
    Broiling cheese on French onion soup

    More Soup Recipes

    Homemade French Onion Soup

    Best French Onion Soup We’ve Made

    • PREP
    • COOK
    • TOTAL

    This is the best homemade French onion soup we’ve ever made, and to be honest, it knocks the socks off most that we’ve had at restaurants, too. Take care to caramelize your onions, as that’s where the rich onion flavor comes from.

    Serves 4

    Watch Us Make the Recipe

    You Will Need

    3 ½ pounds (1590g) yellow onions, peeled and thinly sliced (6 to 7 medium)

    4 tablespoons (57g) European-style salted butter, like Kerrygold, plus more for bread

    1/4 cup (2 ounces) sweet vermouth, sherry, or brandy

    1/4 cup (2 ounces) dry white wine or Lillet Blanc; see notes

    4 to 5 cups (950ml to 1180ml) chicken broth or beef stock, see tips

    1 teaspoon fresh thyme leaves

    1/4 teaspoon fine sea salt, plus more to taste

    1 French baguette or rustic loaf, sliced into 1/2-inch slices, 12 slices

    2 cloves garlic

    1 cup (114g) grated Gruyere cheese, 4 ounces

    Directions

    • Make Soup
    • 1Melt the butter in a wide pot over medium heat — use a heavy-bottomed or stainless steel pot like a Dutch oven or rondeau.

      2Stir in the onions, and then cover with a lid. Cook, over medium heat, until the onions look translucent, 12 to 15 minutes.

      3Uncover the pot, and continue to cook the onions, stirring occasionally and scraping up any stuck browned bits from the bottom and sides. The onions take 45 to 60 minutes to caramelize. Keep a close eye on them. When you notice they begin to brown, stir them more often to keep them from burning.

      4When the onions are golden and smell caramelized, stir in the vermouth and white wine. Cook, scraping the bottom and sides of the bowl, for about 2 minutes. Continue to the next step when you no longer smell strong alcohol and instead smell sweet onions with the aromas of the vermouth and wine.

      5Stir in the broth, thyme, and 1/4 teaspoon of salt. Cover the pot with its lid and bring the soup to a simmer. Simmer for 5 minutes. Taste and then season with additional salt if needed. While Chef Richard suggests 4 cups of broth, we enjoy a bit more liquid and use 5 cups of broth, instead.

      6Turn off the heat, and allow the soup to steep (covered) while you prepare the bread.

    • To Serve
    • 1Set aside four oven-safe soup bowls (we use cocottes from Le Creuset).

      2Heat the oven to 400°F (204°C). Butter the bread slices, and then line them up on a baking sheet. Bake until golden, 5 to 6 minutes. Allow to cool for a few minutes.

      3Rub the toasted bread with the garlic cloves, and then quickly dunk the bread into the soup. Dunking the bread first helps to prevent the bread from soaking up all the broth in your bowl when serving.

      4Place oven-safe bowls onto a large baking sheet (to help move them in and out of the oven). Place one slice into the bottom of each oven-safe soup bowl and sprinkle a little Gruyere cheese on top. Ladle soup into the bowls and top with two more slices of bread. Top with remaining cheese. Broil until the cheese is bubbly and golden brown.

    Adam and Joanne’s Tips

    • Onions: I use yellow onions, but if you try sweet onions (like Vidalia or Walla Walla), we have noticed that they brown more quickly than yellow onions, so be careful to keep close when the onions are caramelizing so that they do not burn.
    • Broth: Use homemade chicken broth or homemade beef stock, or substitute it with store-bought chicken broth. Unfortunately, we do not recommend store-bought beef broth since we’ve yet to find one we enjoy (I find them more salty than flavorful).
    • Alcohol: We use sweet vermouth (Dolin) and Lillet Blanc. You can substitute sweet vermouth with sherry (not sherry cooking wine) or brandy. Lillet Blanc is similar to dry white wine but more aromatic. Your favorite dry white wine is fine.
    • Can you make French onion soup without wine? Yes, leave the alcohol out altogether and season to taste with a splash of sherry vinegar and possibly a dash of fish sauce (odd, but it adds a lot of flavor). When deglazing the pan, use broth. You will lose some complexity in the flavor, but the soup will still be tasty.
    • French onion soup bowls: Any oven-safe soup bowl (sometimes called crocks) will work for this recipe. Handles do help when transferring them in and out of the oven. We used mini round cocotte’s from Le Creuset (8 ounces).
    • The nutrition facts provided below are estimates.

    Nutrition Per Serving
    Serving Size
    1/4 of the recipe
    /
    Calories
    596
    /
    Total Fat
    24.2g
    /
    Saturated Fat
    13.4g
    /
    Cholesterol
    67.4mg
    /
    Sodium
    907.8mg
    /
    Carbohydrate
    64.2g
    /
    Dietary Fiber
    7.7g
    /
    Total Sugars
    21.8g
    /
    Protein
    22.4g


    AUTHOR:

    Joanne Gallagher

    Adam and Joanne of Inspired Taste

    We are Adam and Joanne Gallagher, the creators of Inspired Taste. Established in 2009, Inspired Taste grew from a childhood dream into one of the internet’s most trusted recipe sites with hundreds of reliable recipes, step-by-step videos, and expert tips.More About Us
    Source link

  • The Best Gazpacho Recipe

    The Best Gazpacho Recipe

    This is hands down my favorite gazpacho recipe! The secret is lightly roasting the tomatoes with onions and garlic, which adds incredible flavor!

    Tomato Gazpacho

    Gazpacho, a chilled soup (sometimes called a salad in Spanish cookbooks) from Andalusia, Spain, is traditionally made with tomatoes, garlic, onion, and cucumber, and often thickened with bread. While authentic gazpacho recipes rely on raw ingredients, our version takes a slightly different approach.

    We developed this with Chef Richard and discovered that lightly roasting the tomatoes, onions, and garlic enhances the tomato flavor and softens the bite of the raw aromatics. The result is a seriously delicious, refreshing gazpacho that still feels true to its roots.

    Key Ingredients

    • Tomatoes: For the best gazpacho, I use ripe, juicy tomatoes. Summertime is ideal for finding them, but if you’re craving gazpacho out of season, don’t worry! While fresh garden-grown tomatoes usually have way more flavor, since this recipe roasts the tomatoes before blending, store-bought tomatoes work fine.
    • Bell Pepper: I add one roasted red bell pepper to the blender. You can buy jarred roasted peppers or roast your own (I’ve included instructions in the recipe).
    • Onion and Garlic: Roasting the tomatoes with olive oil, onion, and garlic mellows their flavors, making the soup extra delicious.
    • Croutons: Authentic Spanish gazpacho often includes bread blended into the soup for creaminess and thickness. Rustic bread works well, but try my garlic croutons for extra flavor! They’re made with garlic, shallot, and herbs and are also amazing on top of the soup for a nice crunch.
    • Sherry Vinegar: This aged vinegar is traditionally used in Spanish gazpacho (called Vinagre de Jerez in Spain). I love it as an all-purpose vinegar for salad dressings, too.
    • Cucumber: Another classic gazpacho ingredient, I peel and use seedless cucumbers. If your cucumber has seeds, remove them before blending.

    Find the full recipe with measurements below.

    How to Make My Favorite Gazpacho

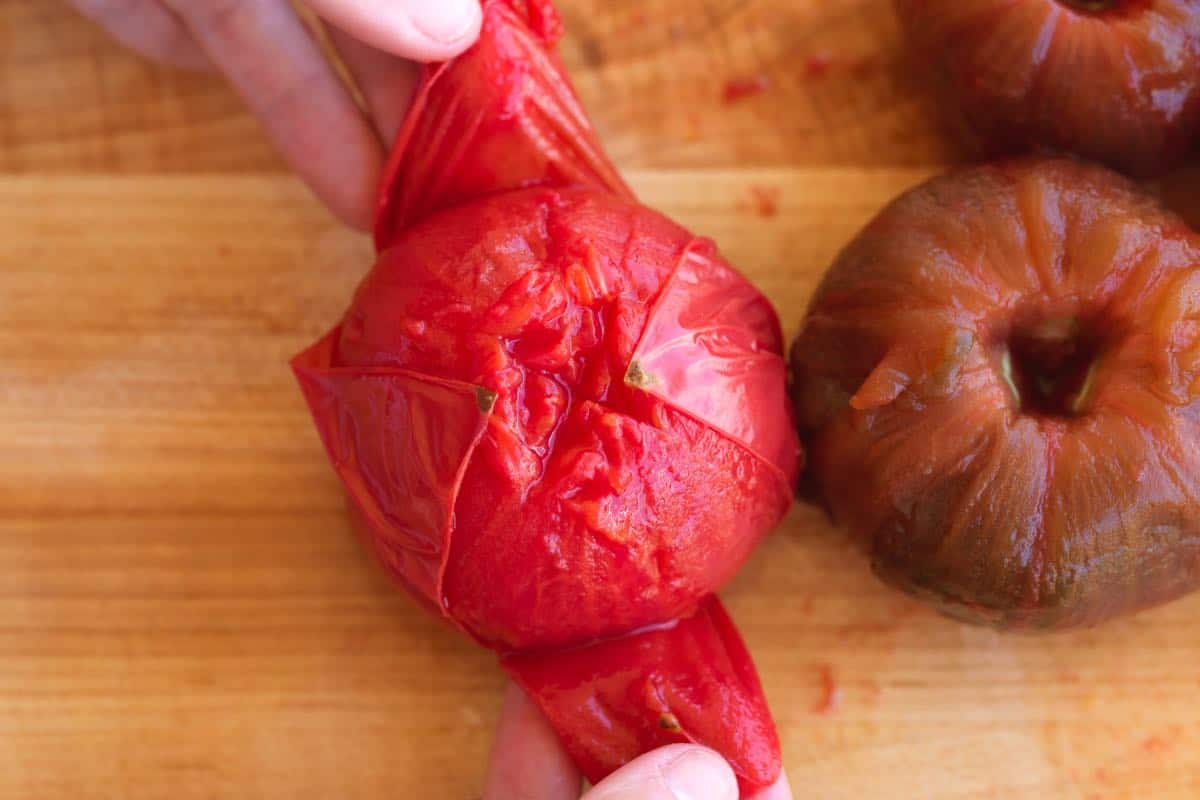
    Tip 1: Prepare the tomatoes. While it’s not 100% necessary, when I make gazpacho, I peel and remove the cores of my tomatoes. After making this recipe a few times, I’ve found that it improves the soup’s texture (especially if you don’t have a high-powered blender).

    To peel them easily, score a shallow “X” on the bottom of each tomato, boil for 30 seconds, then transfer to an ice bath. The skins will slip right off.

    Peeling tomatoes for gazpacho

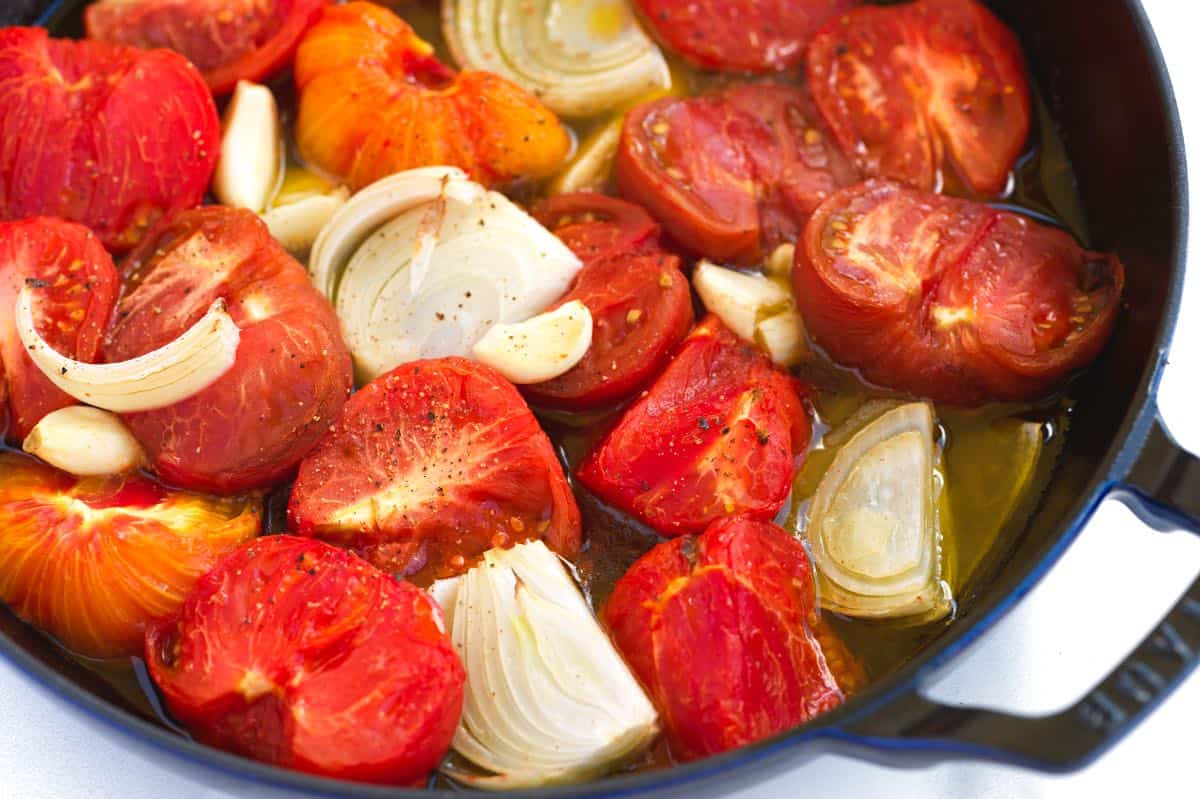
    Tip 2: Lightly roast the vegetables. Roast the tomatoes, garlic, and onion for about 20 minutes to deepen their flavors and mellow any sharp edges. Sometimes, raw gazpacho is slightly overpowering, so roasting tones things down a bit. While the oven’s on, roast a red bell pepper next to the tomatoes, as it softens and peels easily once cooled.

    Lightly roasted tomatoes, onion and garlic

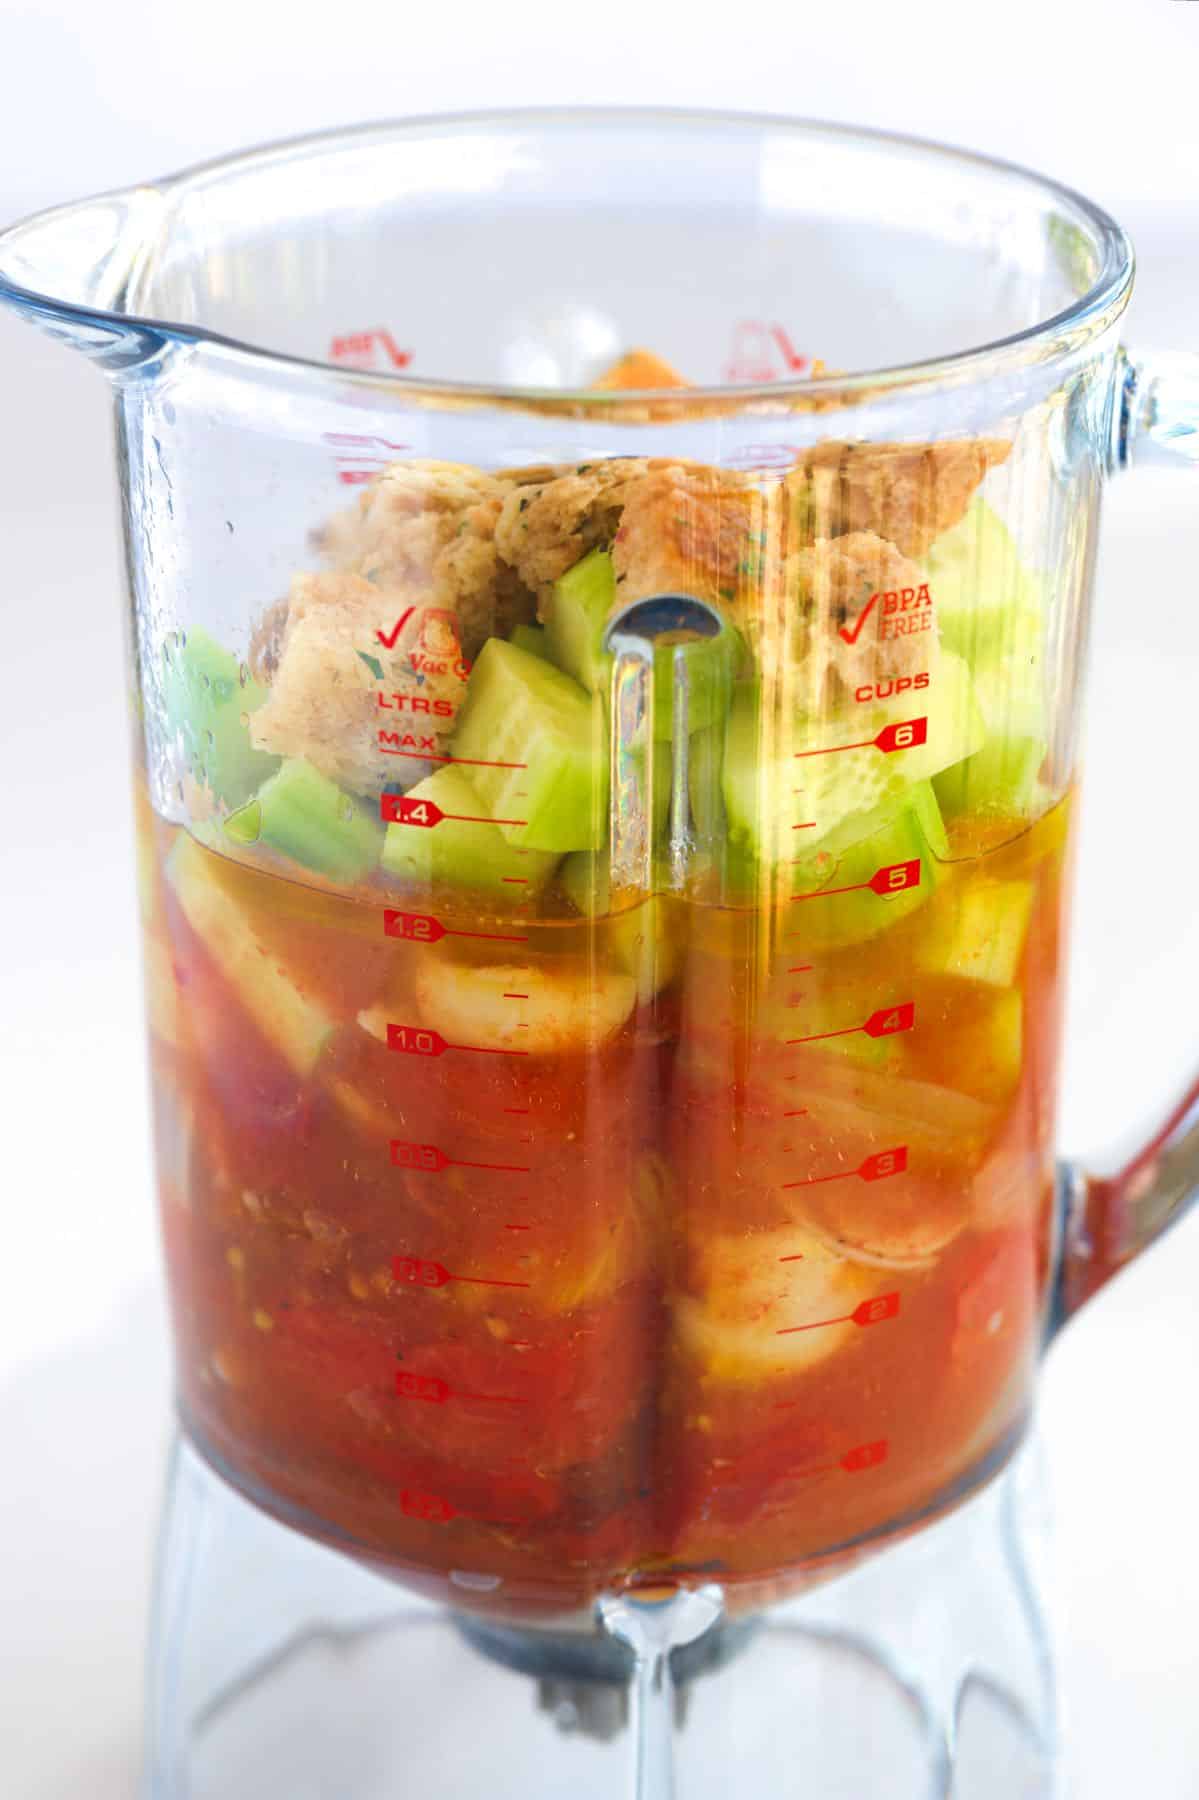
    Tip 3: Blend until smooth (or not!). Add the tomatoes, garlic, onion, and pepper to your blender. Then, toss a peeled cucumber and a few croutons, which have been soaked briefly in water and vinegar to soften. Season with salt and pepper, then blend until smooth, or leave it slightly chunky if you prefer more texture.

    Gazpacho ingredients in a blender

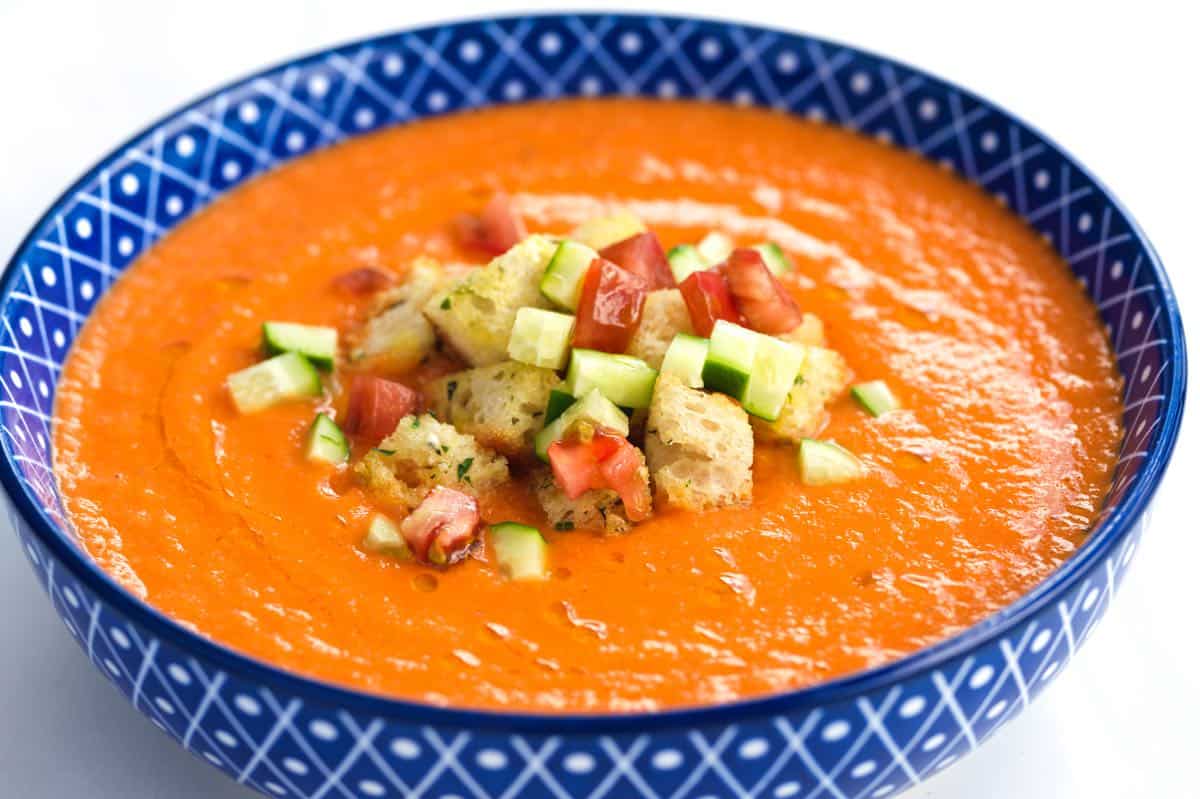
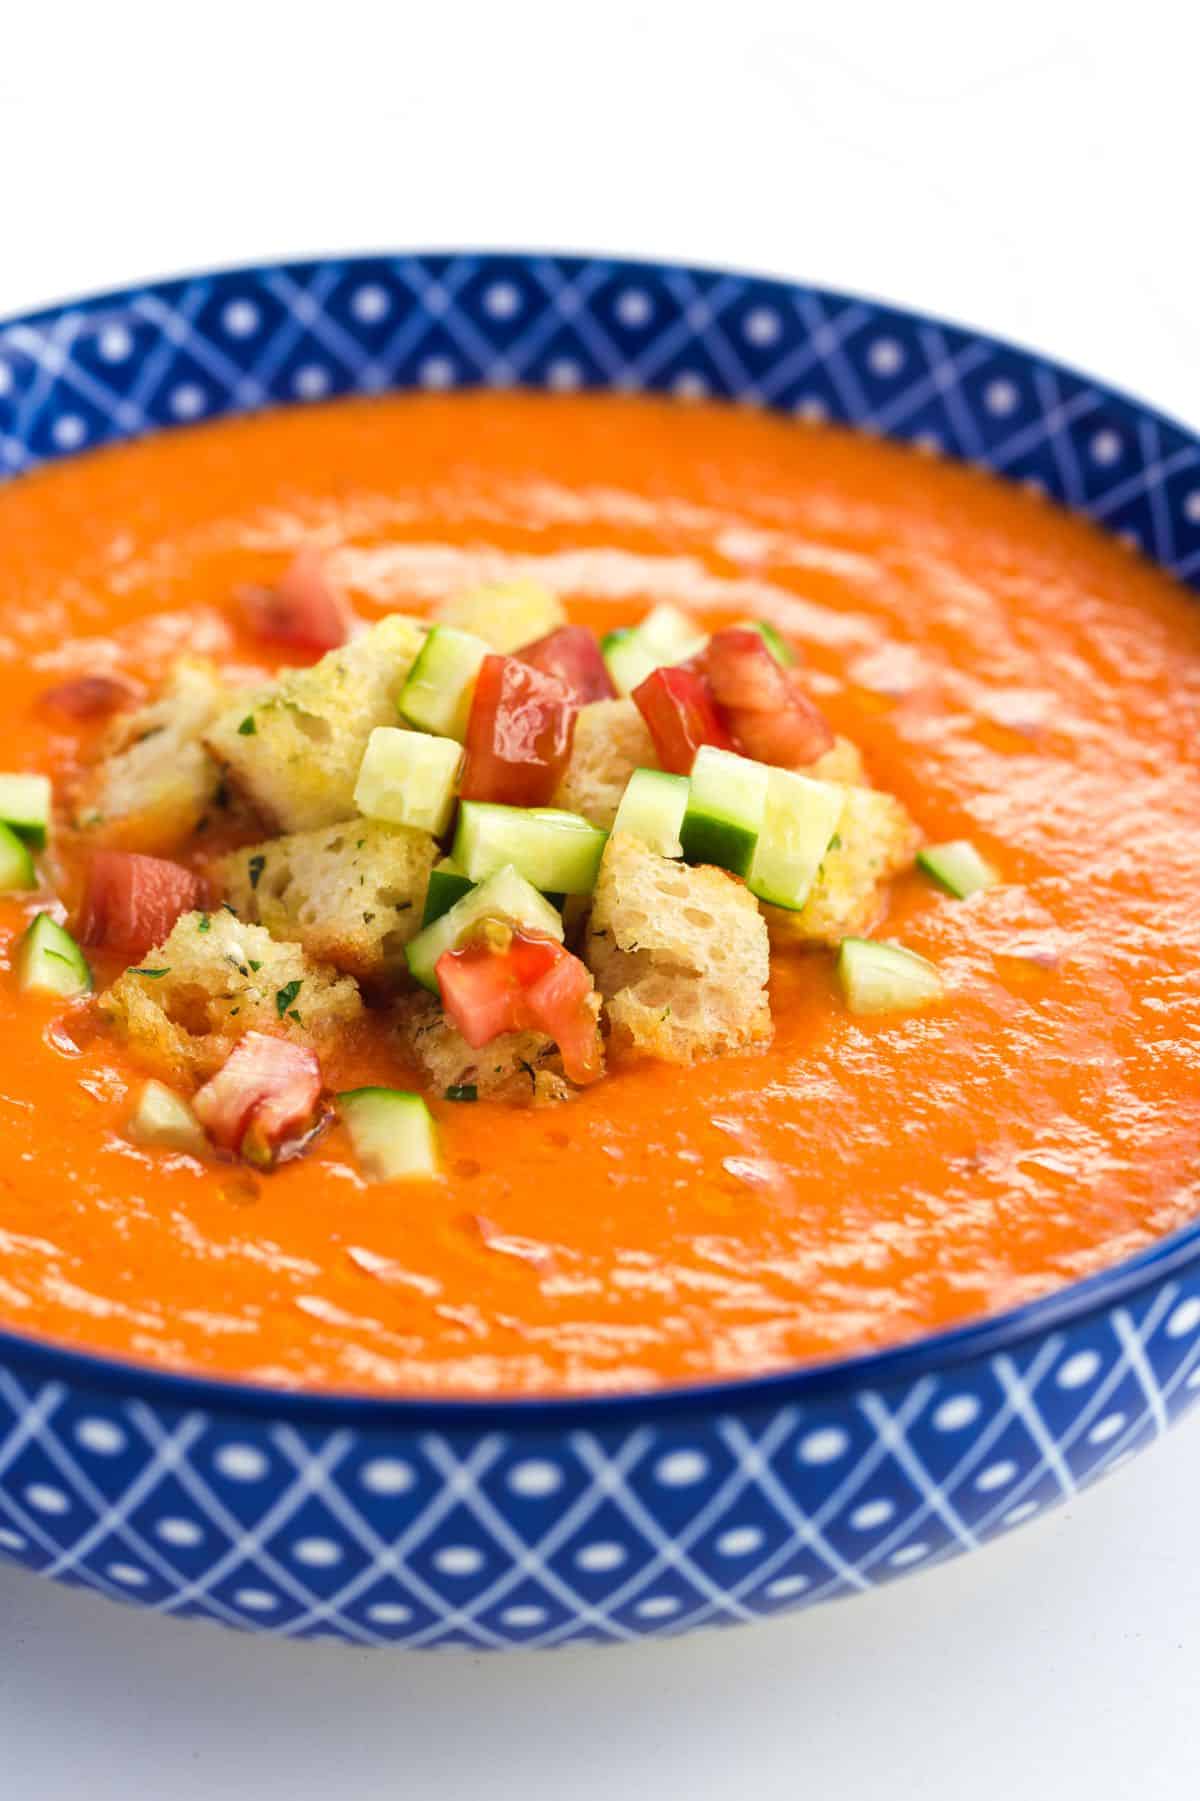
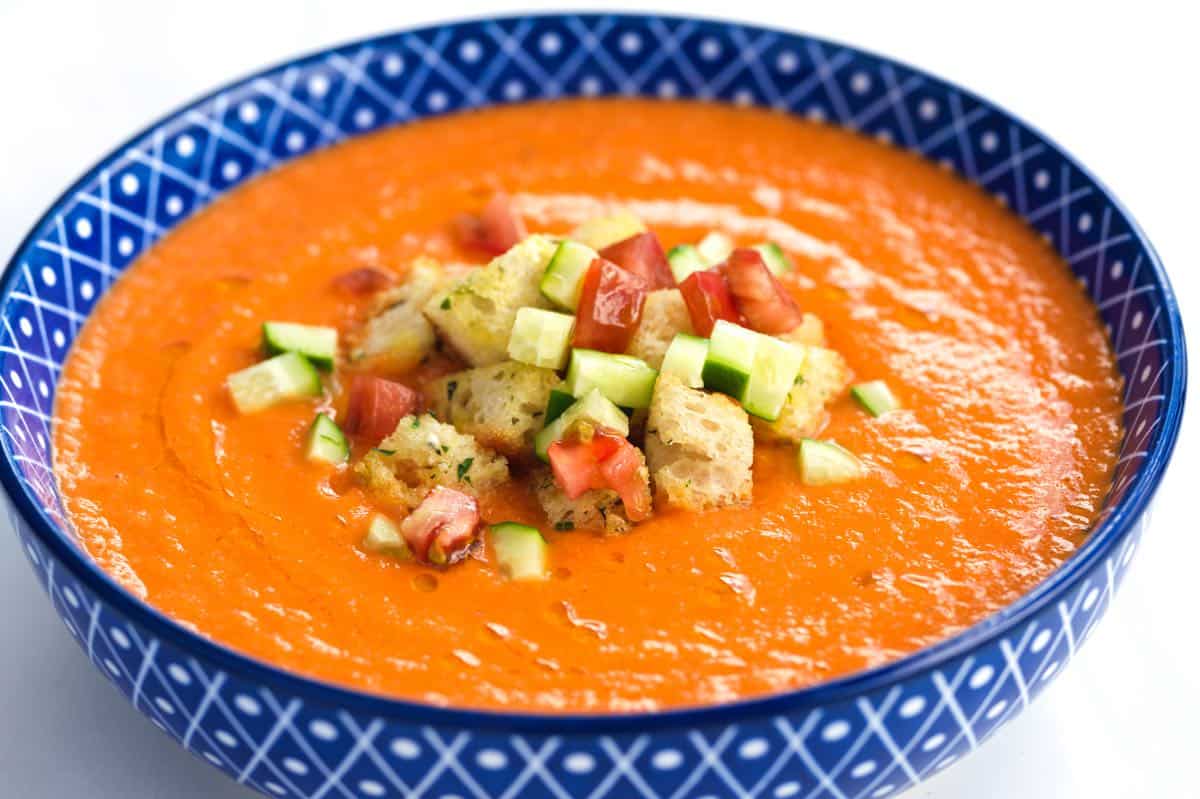
    Tip 4: Chill before serving. Gazpacho tastes best after it chills for a few hours (or overnight) to let the flavors bloom. I make it the day before and leave it in the refrigerator overnight. To serve, add it to a bowl or glass (yep, you can drink it, too). Then, top with some chopped cucumber, tomato, and more croutons.

    More Tomato Soup Recipes

    A bowl of Gazpacho

    The Best Gazpacho

    • PREP
    • COOK
    • TOTAL

    This tomato gazpacho recipe is unbelievably delicious! We peel our tomatoes. It’s easy and develops a much better texture (especially if you don’t have a high-powered blender). It’s not 100% necessary, but after making quite a few batches of this soup, we’ve noticed that those made with peeled tomatoes have a much more pleasant texture.

    We use this recipe for garlic croutons. If you do not want to make your own, you can substitute store-bought croutons or cubed rustic bread.

    Makes 6 cups

    You Will Need

    2 ½ pounds ripe tomatoes, 6 to 7 medium tomatoes (1130g)

    1 red bell pepper

    6 cloves garlic, smashed and peeled

    Quarter of a large onion, sliced

    3 tablespoons olive oil, plus more for serving

    ½ cup garlic croutons, use garlic croutons recipe, or substitute cubed rustic bread

    ¼ cup water (60ml)

    1 teaspoon sherry vinegar or balsamic vinegar

    1 medium cucumber, peeled and cut into 1-inch pieces

    Salt and fresh ground black pepper

    Directions

      1Prep: Heat the oven to 400°F (204°C). Set aside a wide baking dish as well as a small baking sheet.

      2Roast the bell pepper: Rub the pepper with a bit of olive oil, then place it on the small baking sheet. Roast for 20 to 30 minutes, or until the skin looks wrinkly and you see dark spots. Remove from the oven. When cool enough to handle, peel away the skin, remove the stem and seeds, and discard them.

      3Prep the tomatoes (optional, but recommended): While the pepper roasts, fill a large bowl with ice water to make an ice bath. Bring a medium pot of water to a boil. Cut a shallow “X” into the bottom of each tomato, then carefully submerge them in the boiling water for 30 seconds. Transfer to the ice bath to cool. Once cooled, peel away the skins.

      4Core and roast tomatoes: Remove the tomato cores and slice each tomato in half. Place them into the large baking dish (it’s okay if they touch). Scatter the smashed garlic cloves and sliced onion around the tomatoes. Drizzle with 2 to 3 tablespoons of olive oil, sprinkle with ½ teaspoon of salt, and finish with a few twists of black pepper. Roast for 20 minutes.

      5Soak the croutons: In a small bowl, combine the croutons with water and vinegar. Set aside until the croutons absorb all the liquid and look soggy.

      6Blend: Transfer the roasted tomato mixture (including onions, garlic, and juices) to a blender. Add the roasted pepper, soaked croutons, cucumber, ¼ teaspoon salt, and a few twists of black pepper. Blend on high until smooth or to your preferred texture. Taste and adjust with more salt, pepper, or vinegar as needed.

      7Chill before serving: Gazpacho tastes best when chilled. If you can, refrigerate for a few hours, if not overnight, to let the flavors bloom. Serve cold, drizzled with olive oil and topped with chopped cucumber, tomato, and more croutons.

    Adam and Joanne’s Tips

    • Storing: Homemade gazpacho keeps up to 4 days in the refrigerator when stored in an airtight container. You can also freeze it for up to 3 months (the texture may thin a bit, so consider re-blending it briefly before serving).
    • Gluten-free / bread-free: Croutons and bread add a silkiness and thickness to the soup, but you can leave them out and still make excellent gazpacho.
    • The nutrition facts provided below are estimates.

    Nutrition Per Serving
    Serving Size
    1/4 of the recipe (1 1/2 cups)
    /
    Calories
    218
    /
    Total Fat
    11.6g
    /
    Saturated Fat
    1.7g
    /
    Cholesterol
    0mg
    /
    Sodium
    560.6mg
    /
    Carbohydrate
    26.7g
    /
    Dietary Fiber
    5.2g
    /
    Total Sugars
    10.9g
    /
    Protein
    5.5g


    AUTHOR:

    Joanne Gallagher

    Adam and Joanne of Inspired Taste

    We are Adam and Joanne Gallagher, the creators of Inspired Taste. Established in 2009, Inspired Taste grew from a childhood dream into one of the internet’s most trusted recipe sites with hundreds of reliable recipes, step-by-step videos, and expert tips.More About Us
    Source link

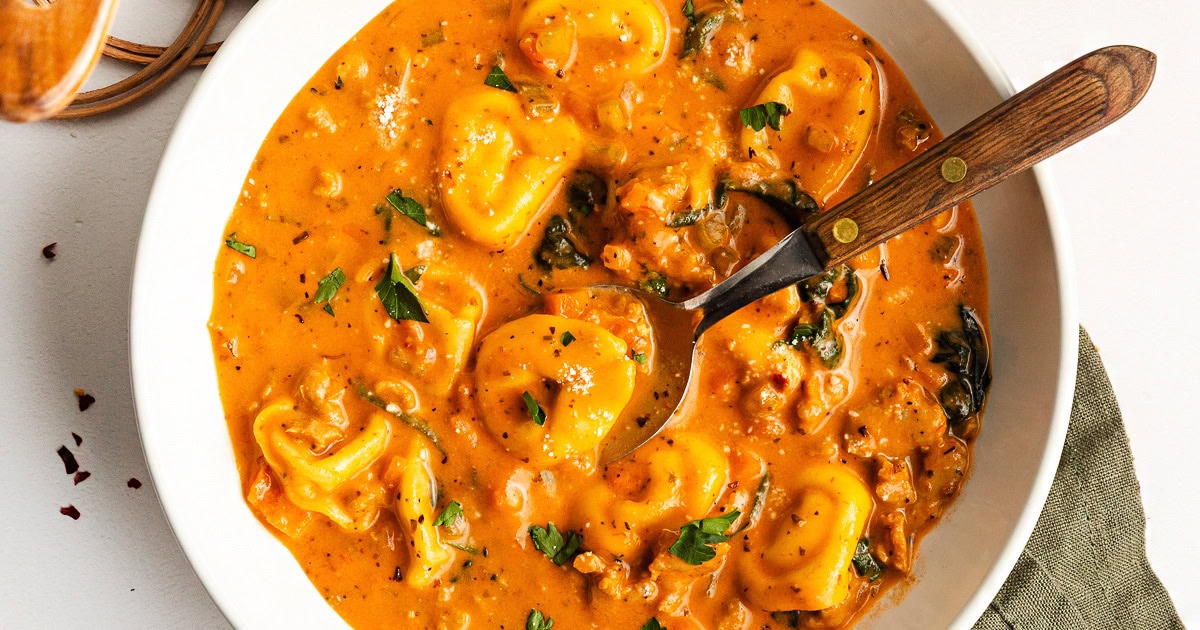
  • Creamy Sausage Tortellini Soup (Easy One-Pot, 30 Minutes)

    Creamy Sausage Tortellini Soup (Easy One-Pot, 30 Minutes)

    This creamy sausage tortellini soup is rich, cozy, and packed with flavor. It’s a meal I like to make on busy nights when I want something hearty but easy.


    Jump to: ℹ️ Overview | 🛒 Ingredients | 📷 How To Make | 👩‍🍳 Recipe Tips | 🥗 Serving Suggestions | 📝Full Recipe Card | 🍽 More Comfort Soup Recipes For Dinner


    At A Glance

    • Ready In: 35 minutes
    • 🍽 Serves: 4–6
    • 💪 Nutrition Highlights: High in protein, good source of fiber from veggies and spinach
    • 🍝 Main Ingredients: Italian chicken or pork sausage, cheese tortellini, spinach, tomato paste, broth, light cream
    • 🔥 Flavor Profile: Creamy, savory, slightly tangy, gently spiced
    • 🧊 Meal-Prep Friendly: Keeps 3 days in the fridge (see notes)
    • Best Served With: Crusty bread or a simple green side salad

    If you need a comforting dinner fast, this creamy sausage tortellini soup delivers big flavor with minimal effort and one pot.

    The base starts with sausage (you could also use shredded chicken) and a classic veggie trio (carrot, celery, onion), which gives it that slow-cooked flavor without the wait. Cooking the tomato paste properly adds depth and a slight richness that balances beautifully with the cream.

    The tortellini cooks right in the broth, soaking up all that flavor, while the spinach adds a fresh finish. It’s hearty, satisfying, and has just the right balance of creamy and savory, basically the kind of soup that disappears fast at the table.

    👩‍🍳 You might also like these recipes: my creamy Italian sausage pasta, this Marry Me chicken orzo recipe, this lightened up ground beef Stroganoff recipe, or this garlic Parmesan chicken pasta.

    What You’ll Need

    Here is what you’ll need for this sausage tortellini soup recipe. Find the full measurements in the recipe card below.

    • Cheese tortellini – hearty, comforting, and quick-cooking; I used refrigerated fresh tortellini but if using pantry stuff, allow for longer cooking time
    • Italian chicken sausage – adds protein and tons of flavor (can swap for pork, turkey, or plant-based), you can use ground meat sausage or sausage links (scoop the meat out of the casings)
    • Onion, carrot, celery – classic soup base that builds sweetness and depth
    • Garlic – essential for that savory backbone
    • Italian seasoning + red pepper flakes – warmth and a little kick
    • Tomato paste – deepens flavor and adds umami (cook it properly for best results!)
    • Flour – helps create that slightly thick, creamy texture
    • Chicken broth – the base that ties everything together; chicken stock is fine too
    • Half and half (or light cream) – makes it silky and rich
    • Spinach – adds freshness and a bit of fiber; baby spinach or chopped English spinach
    • Parmesan cheese – salty, nutty boost of flavor
    • Fresh parsley – bright, fresh contrast

    How To Make Sausage Tortellini Soup

    Find the full recipe and nutritional information below. Here are some handy step-by-step photos for how to make this creamy sausage tortellini soup.

    • Heat olive oil in a large pot and cook sausage until browned, breaking it up as it cooks
    • Add celery, carrot, and onion; cook until softened (about 5–7 minutes)
    • Stir in garlic, seasoning, salt, and pepper; cook until fragrant
    • Add tomato paste and cook for 2–3 minutes to deepen flavor
    • Sprinkle in flour and cook briefly
    • Gradually add chicken broth while stirring to keep it smooth
    • Bring to a gentle simmer and add tortellini; cook until tender
    • Stir in half and half and spinach; simmer until wilted and creamy
    • Taste, adjust seasoning, and serve with Parmesan and parsley

    Recipe Tips

    • Cook the tomato paste properly: Let it darken slightly, this makes a big difference in flavor
    • Don’t overcook the tortellini: Start checking at 3 minutes so it stays tender, not mushy. If using pantry dry tortellini, allow for longer cooking time. Fresh tortellini is best in this soup.
    • Add broth gradually: This keeps the soup smooth and lump-free
    • Season as you go: Layering salt builds better flavor than adding it all at the end
    • Variations: Use spicy sausage for a little heat. Swap spinach for kale or Swiss chard. Add mushrooms for extra depth and texture
    • Storage: Store in the fridge for up to 3 days in an airtight container. The soup will thicken as it sits (totally normal!)
    • Reheating: Add a splash of broth or water to loosen it up. Heat gently on the stove for best texture
    • Make-Ahead Tip: Make the soup base without tortellini. Add tortellini, cream, and spinach fresh when reheating

    Serving Suggestions

    You can serve this with a big chunk of warm, crusty bread to soak up that creamy broth. If you want to keep things a little lighter, a simple green salad with a tangy vinaigrette balances it out nicely. It’s also great with garlic bread if you’re leaning fully into comfort mode (no judgment here).

    💬 If you’ve tried this creamy sausage tortellini soup or any other recipe on the blog then don’t forget to rate the recipe and let me know how you got on in the comments below, I love hearing from you! You can also FOLLOW ME on Instagram, Facebook, Pinterest, YouTube, and or sign up to my Newsletter to see more of my delicious food.

    Want to Save This Recipe?

    Enter your email & I’ll send it to your inbox. Plus, get great new recipes from me every week!

    By submitting this form, you consent to receive emails from Cooked & Loved

    This creamy sausage tortellini soup is rich, cozy, and packed with flavor—perfect for busy nights when you want something hearty but easy. Find step-by-step photos and more recipe tips above.

    • Heat olive oil in a large Dutch oven over medium heat. Add sausage and cook until browned, breaking it up as it cooks. Drain excess grease if needed.

    • Add celery, carrot, and onion. Cook for 5–7 minutes until softened.

    • Stir in garlic, Italian seasoning, red pepper flakes, salt, and pepper. Cook for 30 seconds.

    • Add tomato paste and cook for 2–3 minutes, stirring frequently.

    • Sprinkle in flour and stir well. Cook for 1 minute.

    • Gradually add chicken broth while stirring. Bring to a gentle simmer.

    • Add tortellini and cook for 3–5 minutes until tender.

    • Stir in half and half and spinach. Simmer 2–3 minutes until spinach is wilted.

    • Taste and adjust seasoning. Serve with Parmesan and parsley.

    • Why cook tomato paste first? It removes the raw taste and adds depth
    • Soup too thick? Add warm broth ¼ cup at a time until it loosens
    • Can I freeze this? Not recommended—the cream and tortellini don’t hold up well
    • Salt levels vary: Taste at the end, especially depending on your broth and sausage
    • Variations: Use spicy sausage for a little heat. Swap spinach for kale or Swiss chard. Add mushrooms for extra depth and texture
    • Storage: Store in the fridge for up to 3 days in an airtight container. The soup will thicken as it sits (totally normal!)
    • Reheating: Add a splash of broth or water to loosen it up. Heat gently on the stove for best texture
    • Make-Ahead Tip: Make the soup base without tortellini. Add tortellini, cream, and spinach fresh when reheating

    Calories: 654kcal | Carbohydrates: 58g | Protein: 35g | Fat: 33g | Saturated Fat: 10g | Polyunsaturated Fat: 1g | Monounsaturated Fat: 5g | Cholesterol: 133mg | Sodium: 3330mg | Potassium: 787mg | Fiber: 7g | Sugar: 14g | Vitamin A: 5464IU | Vitamin C: 19mg | Calcium: 246mg | Iron: 6mg

    Keywords: comfort food dinner, creamy sausage and pasta recipe, tortellini, italian sausage, tortellini soup, creamy soup

    More Comfort Soup Recipes For Dinner


    Source link