Category: Chicken

  • Honey Lime Chicken Thighs (Boneless, Skinless)

    Honey Lime Chicken Thighs (Boneless, Skinless)

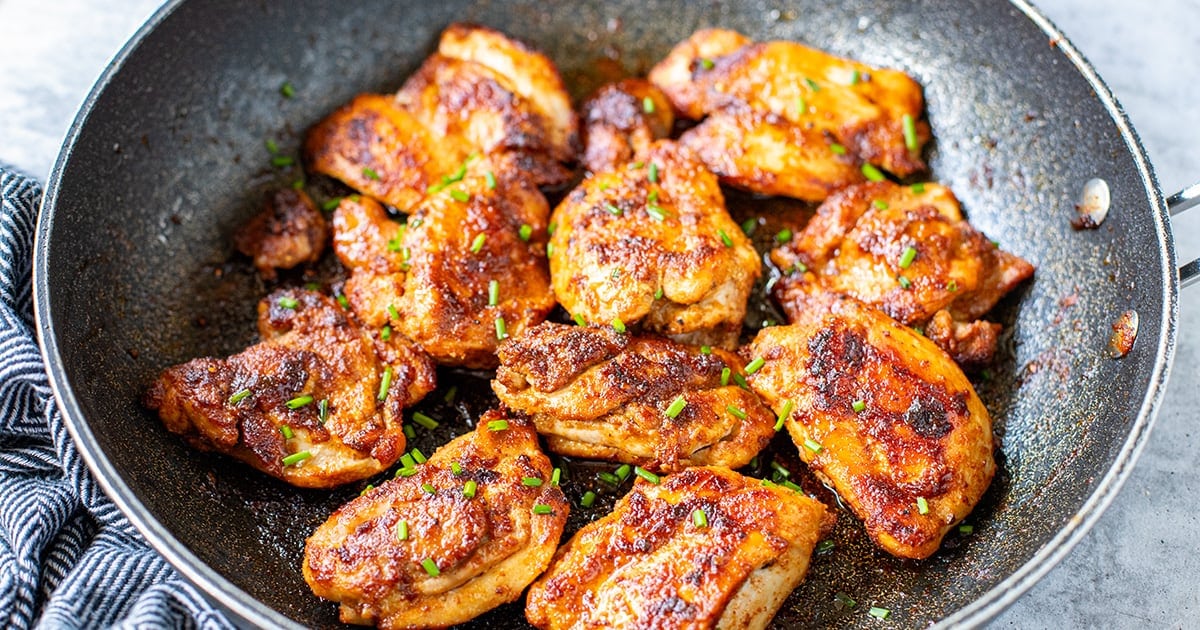
    This recipe is the reason people ask me why my honey lime chicken thighs are so good — bold spices, crispy edges, and that sticky-sweet zingy glaze at the end. Plus, made with boneless, chicken thighs, so this recipe is quick and with a few calories.


    Jump to: ℹ️ Overview | 🛒 Ingredients | 📷 How To Make | 📹 Watch The Video | 👩‍🍳 Recipe Tips | 🥗 Serving Suggestions | 📝 Full Recipe Card | 🍽 More Chicken Recipes To Try


    These honey lime chicken thighs are my weeknight secret weapon. The bold spice rub and pan-frying make the chicken sooo flavorful – tender and juicy on the inside with golden, slightly charred bits on the outside, and then boom — sweet and tangy honey lime glaze at the end to take it all to the next level.

    It’s savory, a bit sweet, a bit spiced, and honestly tastes like something you’d get at a great little bistro. The best part? It’s made with boneless, skinless chicken thighs (so fast and fuss-free), and it’s high-protein, low-carb, gluten-free, and paleo-friendly. I’ve made this chicken thigh recipe more times than I can count and people always ask for the recipe, so I hope you give it a go!

    👩‍🍳 More recipes with chicken thighs: honey lemon garlic pepper chicken thighs, chicken and potato bake, roasted chicken thighs (with oregano garlic marinade), coconut chicken and cauliflower rice, Spanish chicken and rice and baked chicken thighs (with special green sauce).

    What You’ll Need

    Here is what you’ll need for this honey lime chicken thighs recipe. Find the full measurements in the recipe card below.

    • Boneless, skinless chicken thighs – juicy, quick-cooking, and lower in calories than the bone-in kind.
    • Olive oil – for that perfect sear. You can also use avocado oil or ghee. You don’t need a lot!
    • Spices (the flavor bomb rub): Smoked paprika adds a smoky depth, cumin powder is warm and earthy, onion and garlic powder are base flavor magic, and salt and pepper to season.
    • For the glaze: Honey gives that sticky caramelized finish while lime juice is bright and tangy to balance the sweet; you can use lemon if you like.

    How To Make Boneless Skinless Chicken Thighs With Glaze

    Find the full recipe and nutritional information below. Here are some handy step-by-step photos for how to cook the best boneless, skinless chicken thighs with honey lime glaze.

    • Cut chicken thighs in half and trim large bits of fat.
    • Mix all spices with salt and pepper, then rub evenly on both sides of the chicken.
    • Heat a large skillet with olive oil on high, then reduce to medium-high.
    • Cook chicken for 8–10 minutes per side (in batches if needed).
    • Flip, add more oil if needed, and cook through until golden.
    • Drizzle over honey and lime juice, toss to coat, and let the glaze bubble up.
    • Let rest for 1 minute, then serve whole or slice up.

    Watch The Video

    Recipe Tips

    • Don’t overcrowd the pan—space equals better sear.
    • Thin thighs cook faster—watch them so they don’t dry out.
    • If you’re air-frying, they’ll still be great but a little less juicy.
    • Add chili flakes or sriracha to the glaze for a spicy twist.
    • You can double the spice mix and keep some in a jar for next time!
    • Storage Tips: Leftovers will keep in the fridge for 3-4 days. Reheat gently in a skillet or microwave. You can freeze them too—just thaw overnight in the fridge and reheat as above.
    • Make-Ahead Tips: You can season the chicken and store it in the fridge for up to 24 hours before cooking. You can also cook the whole thing and slice it ahead for easy lunch meal prep bowls.

    Serving Suggestions

    Slice it up for chicken rice bowls (my fave!), wrap in tortillas, toss over a salad, or pop it in a sandwich. It also makes a killer protein addition to scrambled eggs (check out my curried scrambled eggs or scrambled eggs with zucchini) or even a breakfast taco (try my chorizo breakfast tacos).

    💬 If you’ve tried these honey lime chicken thighs or any other recipe on the blog then don’t forget to rate the recipe and let me know how you got on in the comments below, I love hearing from you! You can also FOLLOW ME on Instagram, Facebook, Pinterest, YouTube, and or sign up to my Newsletter to see more of my delicious food.

    Want to Save This Recipe?

    Enter your email & I’ll send it to your inbox. Plus, get great new recipes from me every week!

    By submitting this form, you consent to receive emails from Cooked & Loved

    Boneless, juicy chicken thighs pan-fried to crispy perfection and finished with a honey-lime glaze that’s sweet, tangy, and seriously addictive. Find step-by-step photos and more recipe tips above.

    • Cut chicken thighs in half and trim any large fat pieces.

    • Season both sides of chicken evenly with the spices, salt, and pepper. Rub it all in well.

    • Heat 1 tablespoon olive oil in a large skillet over high heat. Lower to medium-high and add chicken without overcrowding.

    • Cook for 8–10 minutes on one side, then flip and add remaining 1 tablespoon oil. Cook for another 8–10 minutes or until nicely browned and cooked through.

    • In the last minute, drizzle over honey and lime juice. Toss the chicken around in the glaze until slightly caramelized.

    • Let it rest a minute, then slice or serve whole.

    • Don’t overcrowd the pan—space equals better sear.
    • Thin thighs cook faster—watch them so they don’t dry out.
    • If you’re air-frying, they’ll still be great but a little less juicy.
    • Add chili flakes or sriracha to the glaze for a spicy twist.
    • You can double the spice mix and keep some in a jar for next time!
    • Storage Tips: Leftovers will keep in the fridge for 3-4 days. Reheat gently in a skillet or microwave. You can freeze them too—just thaw overnight in the fridge and reheat as above.
    • Make-Ahead Tips: You can season the chicken and store it in the fridge for up to 24 hours before cooking. You can also cook the whole thing and slice it ahead for easy lunch meal prep bowls.
    • Can I use chicken breast instead? You can, but thighs stay juicier and have more flavor. If you use breast, be careful not to overcook.
    • Is it spicy? Not really—just a touch of warmth from the paprika and cumin. Add chili flakes if you want heat!
    • Can I cook this in the oven? You can bake at 425°F (220°C) for about 20-25 minutes, then broil for a few minutes to get the caramelization.
    • What oil can I use instead of olive oil? Avocado oil, canola, or even ghee work well.

    Calories: 195kcal | Carbohydrates: 5g | Protein: 22g | Fat: 10g | Saturated Fat: 2g | Polyunsaturated Fat: 2g | Monounsaturated Fat: 5g | Trans Fat: 0.02g | Cholesterol: 107mg | Sodium: 490mg | Potassium: 320mg | Fiber: 0.4g | Sugar: 3g | Vitamin A: 283IU | Vitamin C: 1mg | Calcium: 20mg | Iron: 1mg

    Keywords: honey lime chicken thighs, skinless honey lime chicken thighs, boneless honey lime chicken thighs, honey lime chicken, boneless skinless chicken thighs, pan-fried chicken thighs

    More Chicken Recipes To Try


    Source link

  • Chicken Alfredo Ravioli Casserole (Easy Cheesy Dinner Bake)

    Chicken Alfredo Ravioli Casserole (Easy Cheesy Dinner Bake)

    This website may contain affiliate links and advertising so that we can provide recipes to you. Read my disclosure policy.

    By the end of the day, I’m wiped and still expected to make dinner. This Alfredo ravioli casserole swoops in and saves the night. Just layer everything, bake it, and dinner is done.

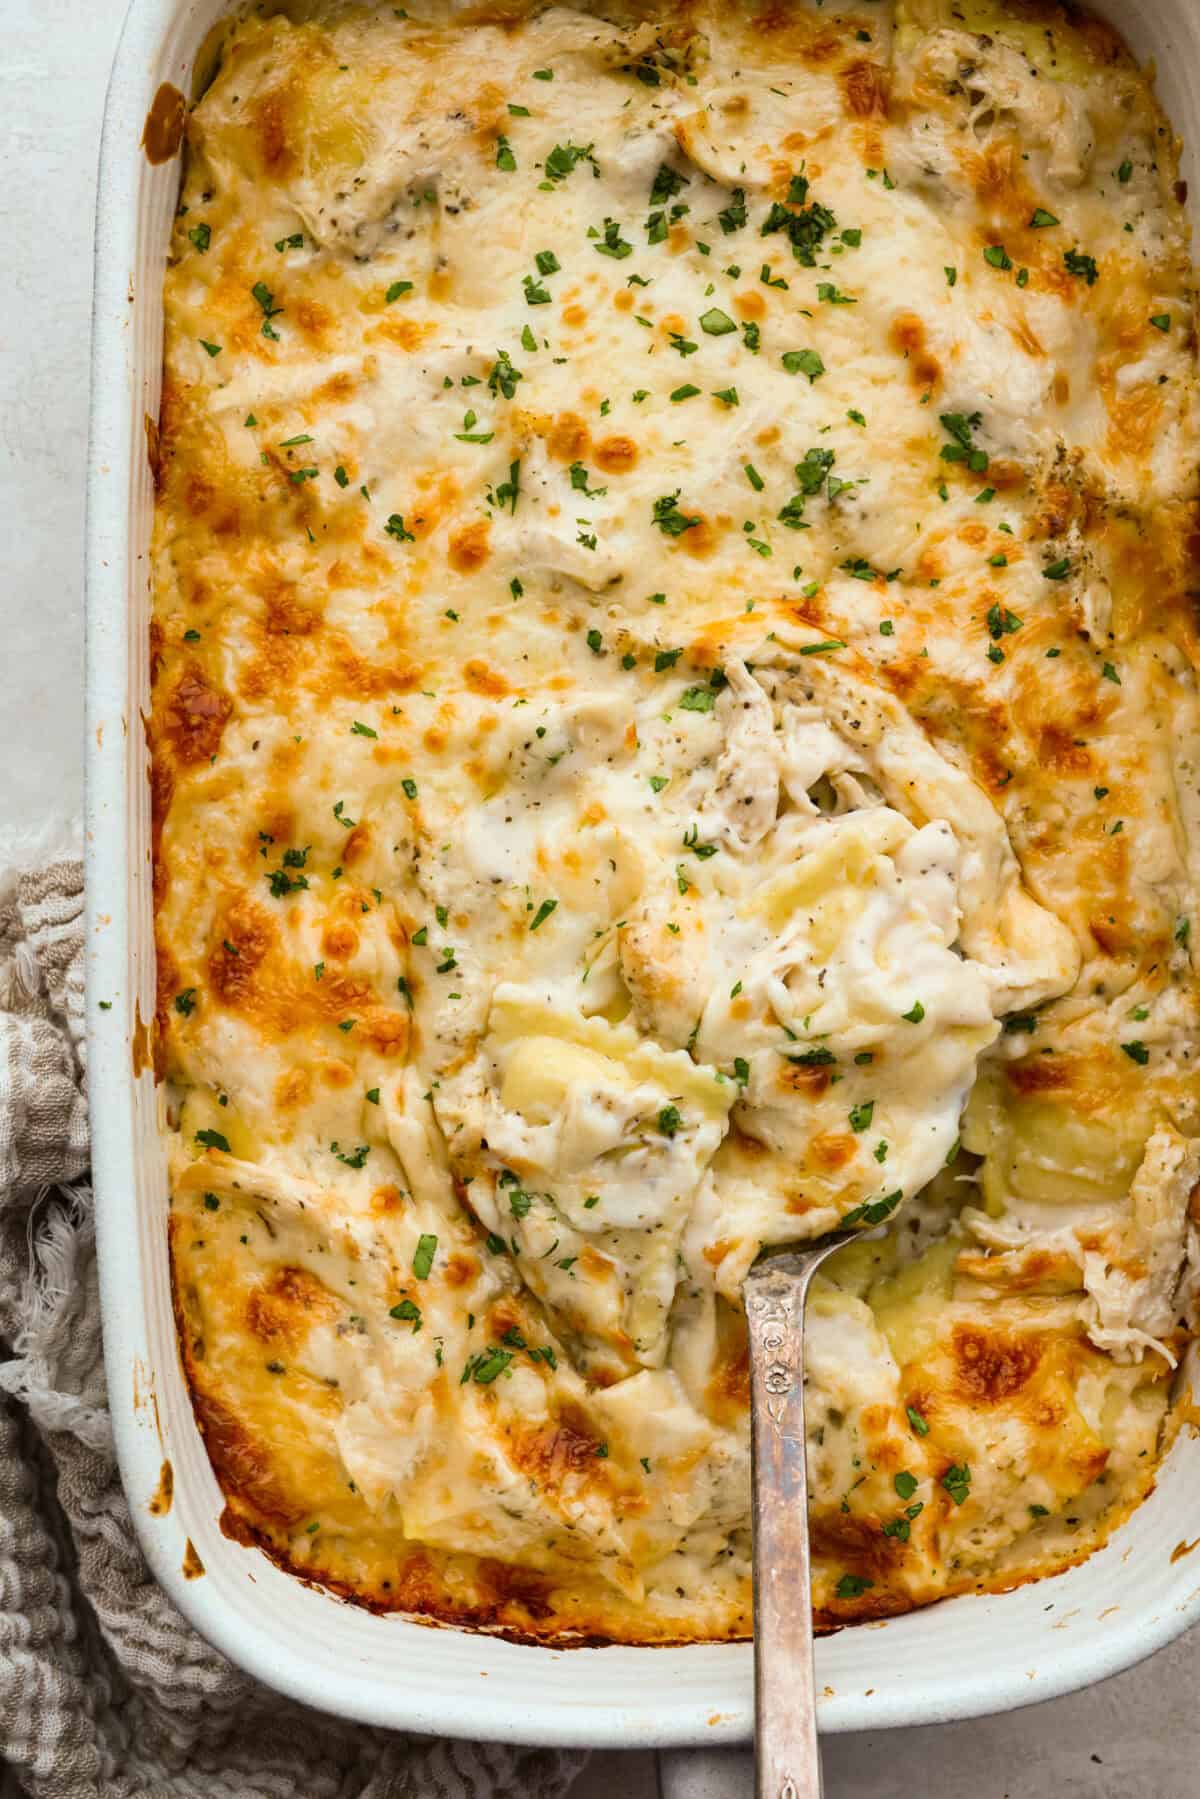
    Top down shot of the baked Alfredo ravioli casserole.

    Why This Recipe Will Save the Day

    • Shortcut Ingredients: Using frozen ravioli, pre cooked chicken, and jarred Alfredo keeps this recipe fast without giving up any flavor.
    • Just Layer and Bake: No boiling pasta, no raw chicken, no homemade sauce. Everything goes straight into the dish, and the oven does the rest.
    • Seasoned for Extra Flavor: The Italian seasoning takes the sauce to a whole new level, so it’s not just straight from the jar like other recipes.

    Alfredo Ravioli Casserole Ingredients

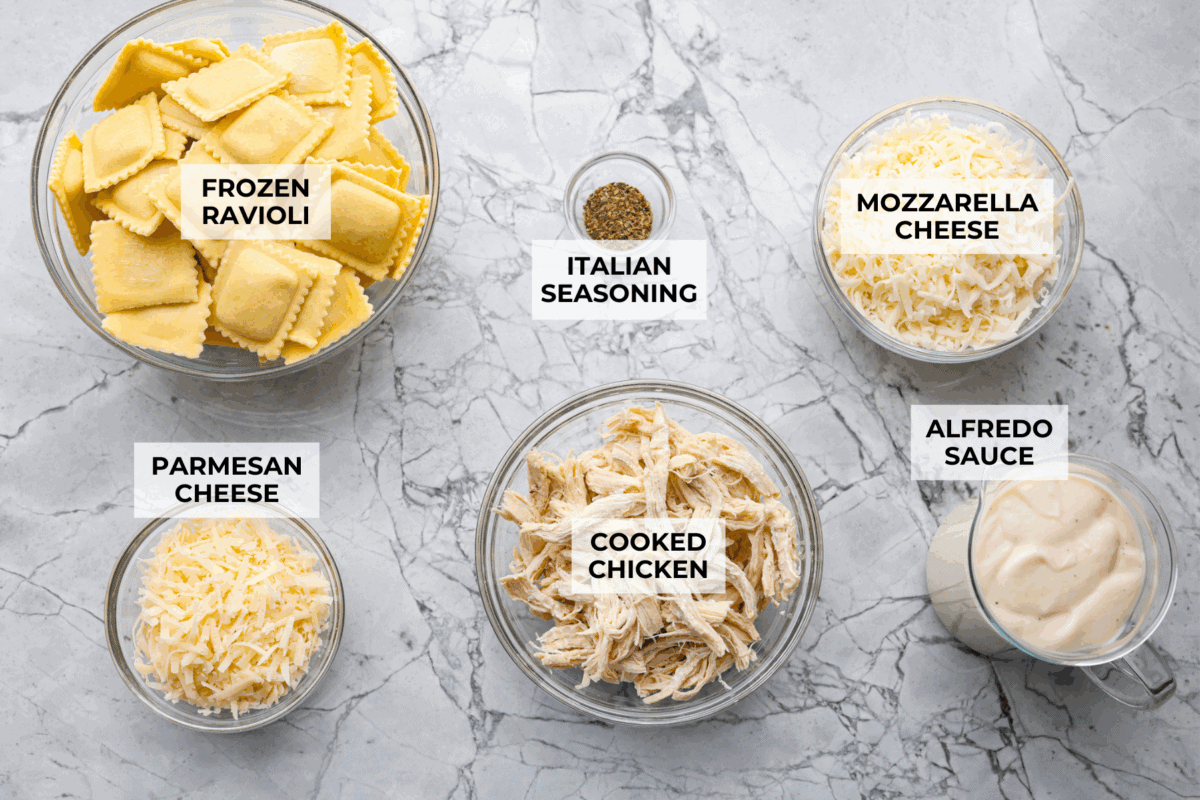
    Overhead shot of labeled ingredients.
    • Alfredo Sauce: Use jarred or homemade.
    • Ravioli: Use one with your favorite filling. I used cheese filled ravioli. Fresh ravioli will work as well.
    • Protein: Rotisserie chicken works, or you can swap it for Italian sausage or leave out the meat and use spinach instead.
    • Seasoning: I love adding Italian seasoning for extra herby flavor. You can also add some fresh herbs or use your favorite blend of dried.

    How to Make Alfredo Ravioli Casserole

    This is one of the easiest recipes to put together when you are short on time. Premade sauce and rotisserie chicken make this come together so easily! While it’s baking, you can make this wedge salad and some garlic bread to go with it!

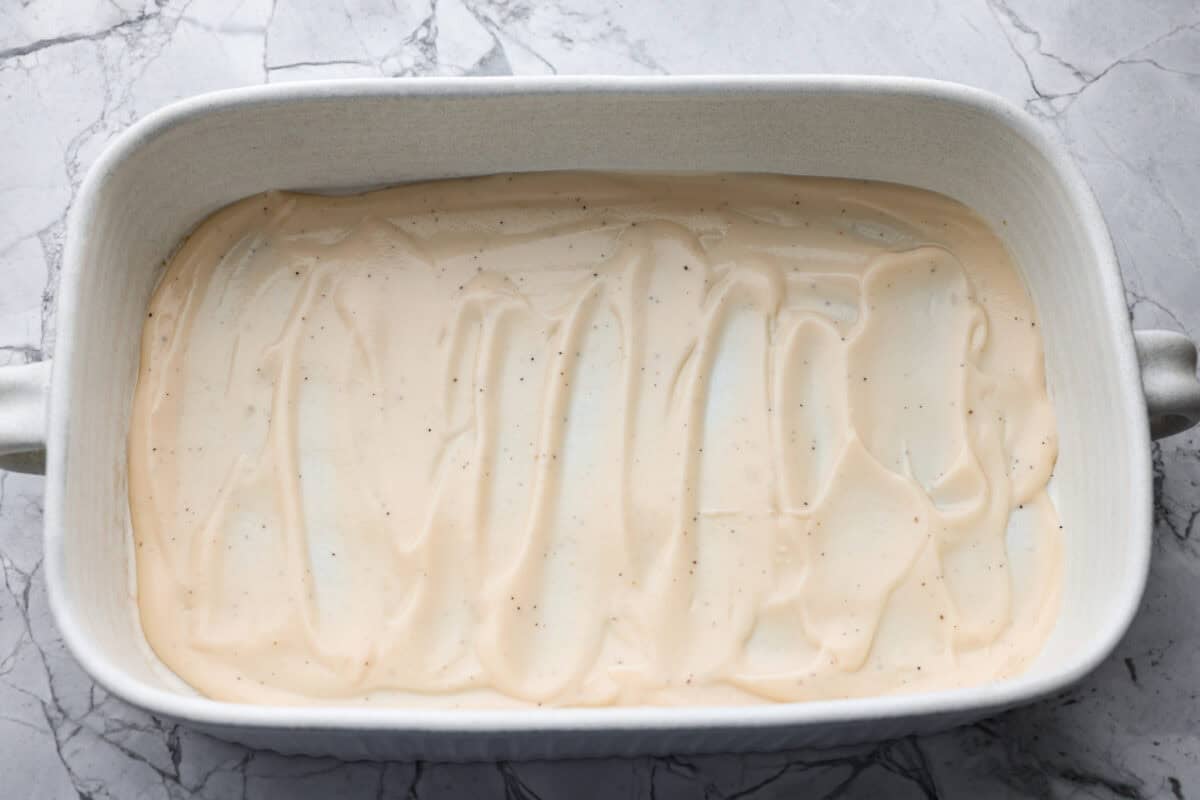
    1. Prep: Preheat the oven to 350°F. Spread ⅓ of the Alfredo sauce on the bottom of a 9 x 13-inch baking dish.
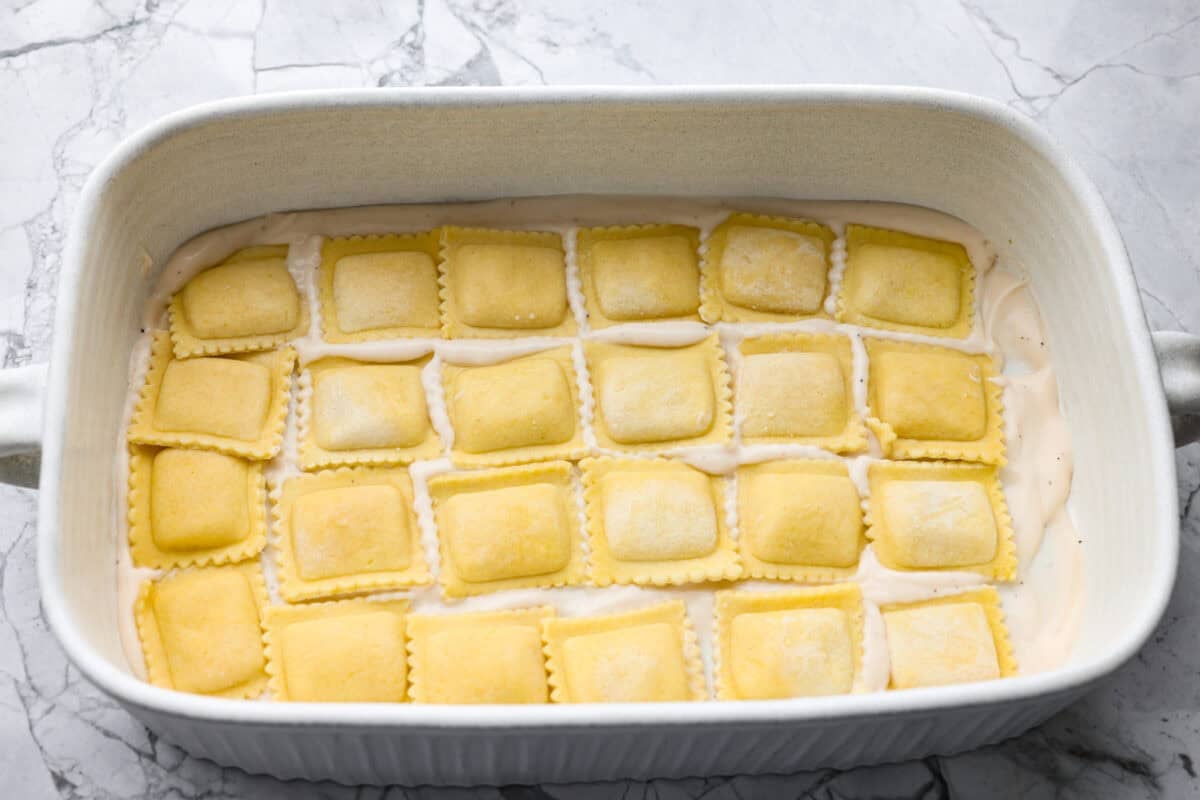
    2. Add: Layer half of the frozen ravioli over the sauce.
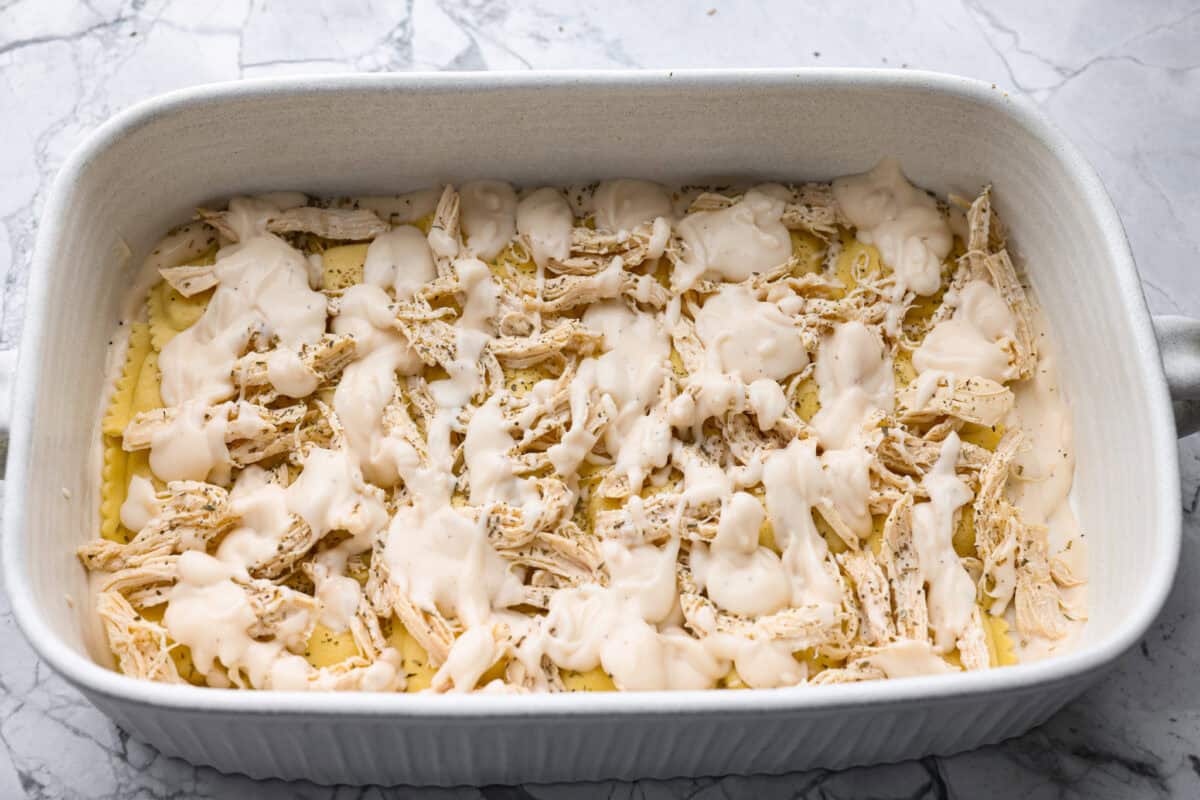
    3. Layer: Add half of the cooked chicken. Sprinkle with half of the Italian seasoning. Drizzle another ⅓ of the Alfredo sauce on top.
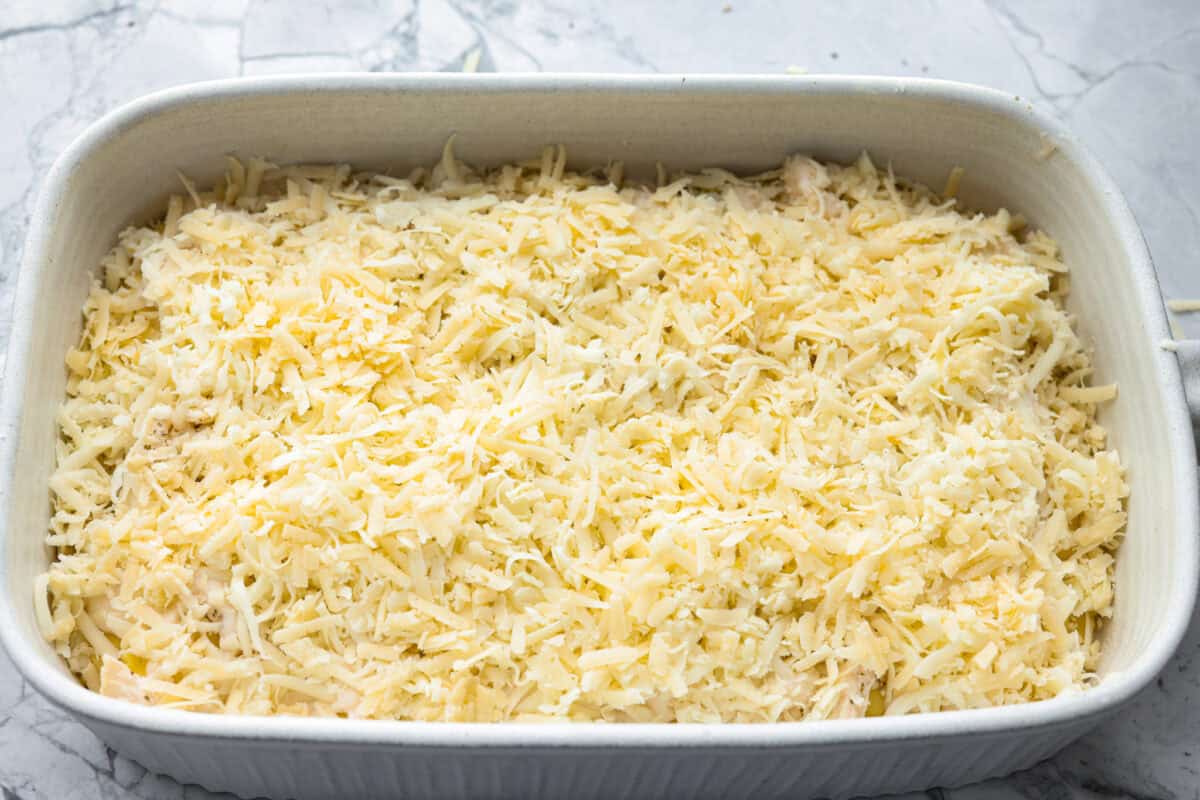
    4. Repeat & Bake: Repeat the layers, starting with the ravioli, then top with mozzarella and Parmesan. Cover with foil and bake for 30 minutes. Uncover and bake for an additional 5-10 minutes, until the top of the alfredo ravioli casserole is golden and bubbly.

    Pin this now to find it later

    Pin It

    Someone scooping a portion of alfredo ravioli casserole from the baking dish.

    More Quick & Easy Casseroles

    I am seriously done by the end of the day. Juggling dance and soccer, homework and my work, I need something simple to make for dinner. The best part about a casserole is that I can prep it ahead of time, throw it in the oven, and dinner is on!

    Baked Pierogi Casserole

    50 minutes


    Source link

  • Lemon Chicken Orzo Soup

    Lemon Chicken Orzo Soup

    This lemon chicken orzo soup is bright, cozy, and always gets thumbs up from my 4-year-old daughter. Everyone who tries it asks for the recipe, and it’s become one of our all-time family favorites.


    Jump to: ℹ️ Overview | 🛒 Ingredients | 📷 How To Make | 📹 Watch The Video | 👩‍🍳 Recipe Tips | 🥗 Serving Suggestions | 📝 Full Recipe Card | 🍽 More Recipes With Orzo


    I make this lemon chicken orzo soup on a regular basis, especially in winter, and every single time, my family practically inhales it. It’s also one of those soups I make for a friend or family member who needs a little care and nurturing.

    It’s a little bit creamy from the Parmesan and the starch in the orzo, with that lovely, bright hit of lemon that keeps it from feeling heavy. The broth is rich and full of umami from chicken stock and sautéed veggies — sweet onions, carrots, celery — and it gets an aromatic lift from fresh herbs if you want to toss them in.

    I often use leftover roast chicken or a rotisserie chicken to keep things simple, but you can cook fresh chicken right in the soup. One batch makes enough to feed my family of four with leftovers. Pro tip: undercook the orzo just a bit, because it keeps soaking up the broth as it sits.

    Nutrition-wise, it’s got good protein, some veggies, and that soul-soothing quality only a big pot of homemade soup can deliver.

    👩‍🍳 You might also like garlic chicken soup, chicken lentil soup, fall-off-the-bone chicken soup, chicken potato soup, paleo chicken tortilla soup, and check out these other soup recipes with chicken or these winter soups. You may also like this high-protein butternut squash soup.

    What You’ll Need

    Here is what you’ll need for this lemon chicken orzo soup recipe. Find the full measurements in the recipe card below.

    • Base veggies: onion (sweetness and depth), carrot (mild sweetness), celery (savory backbone), and garlic (flavor boost).
    • Fats: Olive oil + Butter (richness and aroma).
    • Seasonings: Salt, black pepper, bay leaves, and optional turmeric (gives that gorgeous yellow color).
    • Lemon: Zest and juice for brightness.
    • Broth: Chicken stock or homemade broth (the heart of the soup). I often use stock cubes when low on broth.
    • Protein: Shredded cooked chicken or raw chicken breast.
    • Pasta: Orzo, also known as risoni, or you can sub with other small-shaped pasta. Learn about orzo here. If you have any leftover, you may also want to try this Marry Me chicken orzo bake.
    • Cheese: Parmesan (creaminess and umami).
    • Herbs: Dill, parsley, chives (freshness at the end), feel free to omit or just use one of these.

    How To Make Lemon Chicken Orzo Soup

    Find the full recipe and nutritional information below. Here are some handy step-by-step photos for how to make chicken orzo soup.

    • Dice up vegetables, garlic, and herbs.
    • Heat olive oil and butter in a big pot.
    • Sauté onion, carrot, and celery with salt until golden and soft.
    • Add garlic, lemon zest, bay leaves, turmeric, dry orzo, and all the broth.
    • Bring to a simmer and cook until the orzo is just al dente (about 8 minutes). While cooking, shred the chicken, grate Parmesan, and squeeze lemon juice.
    • Stir in chicken, Parmesan, and lemon juice.
    • Adjust salt, pepper, or extra lemon if you like.
    • Finish with fresh herbs and serve with extra lemon wedges and Parmesan.

    Watch The Video

    Recipe Tips

    • Parmesan rind: Toss it in while simmering—huge flavor payoff.
    • Make it lighter: Use more veggies and less orzo.
    • Make it heartier: Add extra chicken or even chickpeas.
    • Kid-friendly: Serve herbs on the side if your kids are picky.
    • Undercook the orzo just a bit, because it keeps soaking up the broth as it sits and will continue to soften and puff up.
    • Throw in extra veggies: Peas, diced asparagus, broccoli, or cauliflower will work well.
    • Storage Tips: Our leftovers don’t last very long, but you can store this soup in the fridge for up to 3 days. When reheating, add a splash of broth or water since the orzo will thicken the soup. It also freezes well (though the pasta gets softer).
    • Make-ahead tips: Obviously, as with most soups, this is a great make-ahead recipe. But, if you just want to do a few steps early on, you can prep the veggies and shred the chicken ahead. Store separately in the fridge for up to 2 days. You can even cook the broth with veggies and freeze, then reheat and add orzo and chicken when ready.

    Serving Suggestions

    To be honest, you don’t really need a lot more to go with this soup. Personally, I love a drizzle of chili oil or some chili, which I don’t add to the soup as I make it kid-friendly. You can also serve it with a chunk of crusty bread or a side of garlic toast. For a lighter meal, serve it with a crisp green salad. Don’t skip a sprinkle of fresh herbs and extra lemon at the table — it brightens up everything.

    💬 If you’ve tried this lemon chicken orzo soup or any other recipe on the blog then don’t forget to rate the recipe and let me know how you got on in the comments below, I love hearing from you! You can also FOLLOW ME on Instagram, Facebook, Pinterest, YouTube, and or sign up to my Newsletter to see more of my delicious food.

    Want to Save This Recipe?

    Enter your email & I’ll send it to your inbox. Plus, get great new recipes from me every week!

    By submitting this form, you consent to receive emails from Cooked & Loved

    I’ve made this lemon chicken orzo soup more times than I can count — it’s bright, cozy, and always gets two thumbs up from my 4-year-old daughter. Everyone who tries it asks for the recipe, and it’s become one of our all-time family favorites. Find step-by-step photos and more recipe tips above.

    • Heat olive oil and butter in a large pot over medium-high heat. Add onion, carrot, and celery. Season with ⅓ teaspoon salt (or 1 teaspoon if using low-sodium stock). Cook 6–7 minutes until golden and softened.

    • Add garlic, lemon zest, bay leaves, turmeric, orzo, and all the chicken stock. Stir and bring to a simmer.

    • Cook for about 8 minutes until orzo is just al dente. I suggest undercooking orzo by a minute as it will continue to absorb liquid and soften after cooking.

    • While cooking, shred the chicken, grate Parmesan and squeeze lemon juice.

    • Stir in shredded chicken, Parmesan, and lemon juice. Warm through.

    • Taste and adjust seasoning. If you like it thinner, add a splash of hot water or broth. If you like it more tangy, add a bit more lemon juice.

    • Finish with fresh herbs and extra pepper. Serve with lemon wedges and more Parmesan.

    • Lemon: If using a smaller lemon, zest 2/3 to 1 lemon but if using a larger lemon, you only need to zest 1/2 of it. Lemon juice wise, I suggest adding two tablespoons to begin with, then taste and add more to your liking it. I like it quite lemony so I will often add 3-4 tablespoons but it’s better to add gradually. If you add too much and find it too lemony, simply add more stock.
    • Parmesan rind: Toss it in while simmering—huge flavor payoff.
    • Make it lighter: Use more veggies and less orzo.
    • Make it heartier: Add extra chicken or even chickpeas.
    • Kid-friendly: Serve herbs on the side if your kids are picky.
    • Undercook the orzo just a bit, because it keeps soaking up the broth as it sits and will continue to soften and puff up.
    • Throw in extra veggies: Peas, diced asparagus, broccoli or cauliflower will work well.
    • Storage Tips: Our leftovers don’t last very long but you can store this soup in the fridge for up to 3 days. When reheating, add a splash of broth or water since the orzo will thicken the soup. It also freezes well (though the pasta gets softer).
    • Make-ahead tips: Obviously, as with most soups, this is a great make-ahead recipe. But, if you just want to do a few steps early on, you can prep the veggies and shred the chicken ahead. Store separately in the fridge for up to 2 days. You can even cook the broth with veggies and freeze, then reheat and add orzo and chicken when ready.
    • Can I use raw chicken? If you’re starting with raw chicken breasts (1 breast) or thighs (3 thighs), slice them into thin pieces so it cooks quickly. Nestle them into the simmering broth right after you add the stock and orzo. Lift the larger pieces out and shred or dice, then stir the meat back into the soup before with Parmesan and lemon juice.
    • Can I use rice instead of orzo? Sure — just cook the rice longer until tender. It will thicken the soup a lot as it sits.
    • How do I make it dairy-free? Skip the Parmesan or use a dairy-free cheese alternative. Butter is very low in lactose but feel free to use ghee or extra olive oil.

    Calories: 464kcal | Carbohydrates: 40g | Protein: 32g | Fat: 19g | Saturated Fat: 7g | Polyunsaturated Fat: 2g | Monounsaturated Fat: 7g | Trans Fat: 0.1g | Cholesterol: 75mg | Sodium: 1024mg | Potassium: 648mg | Fiber: 2g | Sugar: 7g | Vitamin A: 2322IU | Vitamin C: 4mg | Calcium: 214mg | Iron: 2mg

    Keywords: chicken soup, lemon chicken orzo soup, lemon chicken, orzo soup, lemon chicken soup, chicken soup with orzo

    More Recipes With Orzo


    Source link

  • Crispy Sweet Chili Chicken (Easy, Sticky, Better Than Takeout)

    Crispy Sweet Chili Chicken (Easy, Sticky, Better Than Takeout)

    This website may contain affiliate links and advertising so that we can provide recipes to you. Read my disclosure policy.

    Saucy and packed with flavor, this sweet chili chicken is a weeknight winner! Tender chicken bites get a crunchy coating, then get tossed in a sticky, sweet, and slightly spicy sauce. YUM!

    Pan of sweet chili chicken garnished with green onions.

    3 Reasons This Chicken Beats Takeout

    • Less Oil: A light cornstarch coating creates golden chicken using just a little oil, no deep frying needed.
    • Flavor Explosion: Sweet, tangy, and just the right amount of spice make every bite of this sweet chili chicken dish irresistible.
    • Easy to Customize: Serve over rice, with noodles, or stir fry vegetables, and tweak the heat to your taste for the perfect family friendly meal.

    Ingredients for Sweet Chili Chicken

    Overhead shot of labeled ingredients.
    • Chicken: Boneless skinless chicken thighs can be used in place of the chicken breast if you prefer.
    • Oil: Vegetable or canola oil is best for frying the chicken! Add more oil, if needed, to prevent the chicken from sticking.
    • Sweet Chili Sauce: Store-bought bottled sauce makes this recipe super easy, but if you prefer homemade, use my recipe!

    How to Make Sweet Chili Chicken

    This sweet chili chicken recipe is quick, easy, and packed with sticky, sweet goodness that clings to every crispy bite. Serve it with fried rice and Kung Pao Brussels sprouts for an Asian inspired meal.

    1. Season Chicken: Place chicken pieces into a large bowl, then season with garlic salt and paprika. Crack 1 large egg on top of the chicken and massage it in with your hand to coat the chicken evenly.
    2. Coat in Cornstarch*: Transfer the chicken to a large Ziplock bag. Add 1 cup of cornstarch to the bag, then seal it and shake to coat the chicken well.
    3. Pan Fry Chicken: In a medium sized frying pan over medium high heat, add vegetable oil for frying. Add the coated chicken and cook 7-8 minutes, or until cooked through and browned.
    4. Add Sauce & Serve: Pour Thai sweet chili sauce and toss to coat well. Garnish with diced green onions, if desired. Serve sweet chili chicken over rice and enjoy!

    Alyssa’s Pro Tip

    *Cornstarch Tip: Coating each piece of chicken in cornstarch gets you the “fried” texture. It’s important to shake off any excess cornstarch before cooking the chicken.

    Pin this now to find it later

    Pin It

    Bowl of a serving of sweet chili chicken.

    More Easy Chicken Recipes

    3 Packet Crockpot Chicken

    4 hours 5 minutes


    Source link

  • Hot Honey Chicken Wings

    Hot Honey Chicken Wings

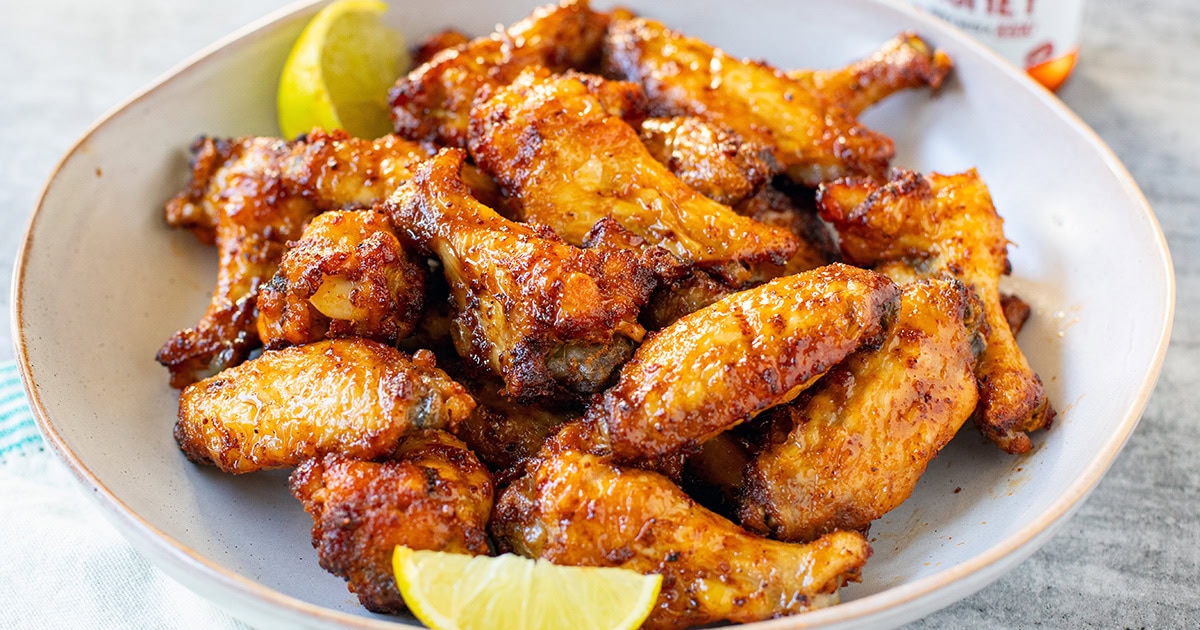
    These hot honey chicken wings are crispy, sticky, sweet, and just the right amount of spicy. They’re baked (not fried!) and basically disappear the second you put them out.


    Jump to: ℹ️ Overview | 🛒 Ingredients | 📷 How To Make | 📹 Watch The Video | 👩‍🍳 Recipe Tips | 🥗 Serving Suggestions | 📝 Full Recipe Card | 🍽 More Chicken Recipes


    These hot honey chicken wings are the kind I make when I want something super tasty with minimal fuss. They’re crispy on the outside (thank you, baking powder trick!), juicy on the inside, and coated in a sticky glaze that’s sweet from the honey, tangy from lime, and has just enough heat to keep things interesting. This flavor combo is also used in my super popular boneless skinless chicken thighs recipe.

    The flavor hits all the right notes — savory, spiced, a little smoky. Plus, no deep-frying required. You can make them in the oven or air fryer, and they’re way lighter than traditional wings. I’ve made these a bunch of times now for dinners and parties, and people always go back for seconds (and thirds).

    Each serving is about 220 calories with 15 grams protein, 4 grams carbs, and 15 grams fat—so it’s a pretty decent macro balance, too.

    👩‍🍳 You might also like: salt and pepper chicken wings, hot honey chicken tenders, air fryer bbq chicken wings, dry rub chicken wings, baked honey soy chicken wings, sticky Portuguese chicken wings, or paleo chicken wings.

    What You’ll Need

    Here is what you’ll need for this hot honey chicken wings recipe. Find the full measurements in the recipe card below.

    • Chicken wings – I usually buy pre-cut chicken wings, but you get whole wings and cut them yourself.
    • Olive oil – Helps the seasoning stick and promotes crispiness.
    • Spice Rub: Salt (essential for flavor), garlic powder and onion powder for that savory backbone, smoked paprika (a little smoky, a little sweet), and baking powder – not a flavor ingredient, but it gives you that bubbly, golden, crispy skin.
    • Glaze: Hot honey – Store-bought or homemade (I’ve got a recipe if you want it) and lime juice for bright, tangy finish that balances the sweetness.

    Swap tips: Don’t have smoked paprika? Regular sweet paprika will work. You can use lemon juice instead of lime in a pinch. No hot honey? Use regular honey and chili powder, or Sriracha hot sauce.

    How To Make Hot Honey Chicken Wings

    Find the full recipe and nutritional information below. Here are some handy step-by-step photos for hot honey chicken wings.

    • Preheat oven to 410°F / 210°C and place a wire rack on a lined baking sheet. You can use foil or baking paper to catch the drippings.
    • Mix salt, garlic powder, onion powder, smoked paprika, and baking powder in a small bowl.
    • Pat wings super dry, then toss with olive oil and spice mix.
    • Arrange on the rack in a single layer, skin side up.
    • Bake 22 minutes, flip, and bake another 20 minutes until crispy and browned.
    • Toss with hot honey and lime juice while hot. Serve!

    Watch The Video

    Recipe Tips

    • Don’t skip the drying step — extra moisture = less crisp.
    • Baking powder is the secret to that crackly skin without frying.
    • For even crispier wings, let them sit uncovered in the fridge for an hour or two after seasoning. Kind of like a dry brine.
    • Want more heat? Use extra hot honey or add a pinch of cayenne or chili powder to the spice rub.
    • Try them in the air fryer: cook in two batches at 400°F (200°C) for about 18–20 minutes, flipping halfway.
    • Storage tips: Store leftover wings in an airtight container in the fridge for up to 3 days. Reheat in the oven or air fryer to bring back the crisp!
    • Make-ahead tips: You can season the wings ahead of time and refrigerate them for up to 24 hours before baking. Even better for crispiness. Just glaze them right before serving.

    Serving Suggestions

    These are so good on their own, but I also love them with:

    💬 If you’ve tried these hot honey chicken wings or any other recipe on the blog then don’t forget to rate the recipe and let me know how you got on in the comments below, I love hearing from you! You can also FOLLOW ME on Instagram, Facebook, Pinterest, YouTube, and or sign up to my Newsletter to see more of my delicious food.

    Want to Save This Recipe?

    Enter your email & I’ll send it to your inbox. Plus, get great new recipes from me every week!

    By submitting this form, you consent to receive emails from Cooked & Loved

    These hot honey chicken wings are crispy, sticky, sweet and just the right amount of spicy. They’re baked (not fried!) and basically disappear the second you put them out. Find step-by-step photos and more recipe tips above.

    • Preheat your oven to 410°F / 210°C. Line a baking tray with foil or parchment and place a wire rack on top. Spray with oil if needed.

    • In a small bowl, mix together the salt, baking powder, garlic powder, onion powder, and smoked paprika.

    • Pat the chicken wings dry really well using paper towels. (This is key!)

    • Toss the wings in a large bowl with olive oil, then add half the spice mix. Flip and add the rest, tossing to coat evenly.

    • Arrange wings skin side up on the rack in a single layer.

    • Bake for 22 minutes, flip, then bake for another 20 minutes until crispy and browned.

    • Remove from oven and place half the wings in a bowl. Drizzle with 2 tablespoons of hot honey and juice of half a lime. Toss to coat. Repeat with the rest.

    • Serve hot and sticky!

    • Can I use drumsticks or boneless chicken? You can! Just adjust the cooking time — drumsticks take longer, boneless less time. Keep an eye on them so they don’t dry out.
    • What if I don’t have hot honey? Mix regular honey with a little hot sauce (like sriracha or Frank’s), red chili flakes, or cayenne. Taste and tweak until you love it.
    • Why use baking powder? It is the secret to that crackly skin without frying. It reacts with the skin and moisture to create tiny bubbles—aka crispy magic. Just make sure it’s aluminum-free to avoid any odd aftertaste. 
    • Can I freeze these? You can freeze the cooked, unglazed wings. Reheat in the oven, then toss with glaze once hot.
    • Don’t skip the drying step — extra moisture = less crisp.
    • For even crispier wings, let them sit uncovered in the fridge for an hour or two after seasoning. Kind of like a dry brine.
    • Want more heat? Use extra hot honey or add a pinch of cayenne or chili powder to the spice rub.
    • Try them in the air fryer: cook in two batches at 400°F (200°C) for about 18–20 minutes, flipping halfway.
    • Storage tips: Store leftover wings in an airtight container in the fridge for up to 3 days. Reheat in the oven or air fryer to bring back the crisp!
    • Make-ahead tips: You can season the wings ahead of time and refrigerate them for up to 24 hours before baking. Even better for crispiness. Just glaze them right before serving.

    Calories: 262kcal | Carbohydrates: 14g | Protein: 15g | Fat: 17g | Saturated Fat: 4g | Polyunsaturated Fat: 3g | Monounsaturated Fat: 8g | Trans Fat: 0.2g | Cholesterol: 63mg | Sodium: 661mg | Potassium: 163mg | Fiber: 0.4g | Sugar: 12g | Vitamin A: 368IU | Vitamin C: 2mg | Calcium: 132mg | Iron: 1mg

    Keywords: hot honey chicken wings, baked chicken wings, crispy hot honey chicken wings, baked hot honey chicken wings

    More Chicken Recipes


    Source link

  • Creamy Chicken Alfredo Soup in One Pot

    Creamy Chicken Alfredo Soup in One Pot

    This website may contain affiliate links and advertising so that we can provide recipes to you. Read my disclosure policy.

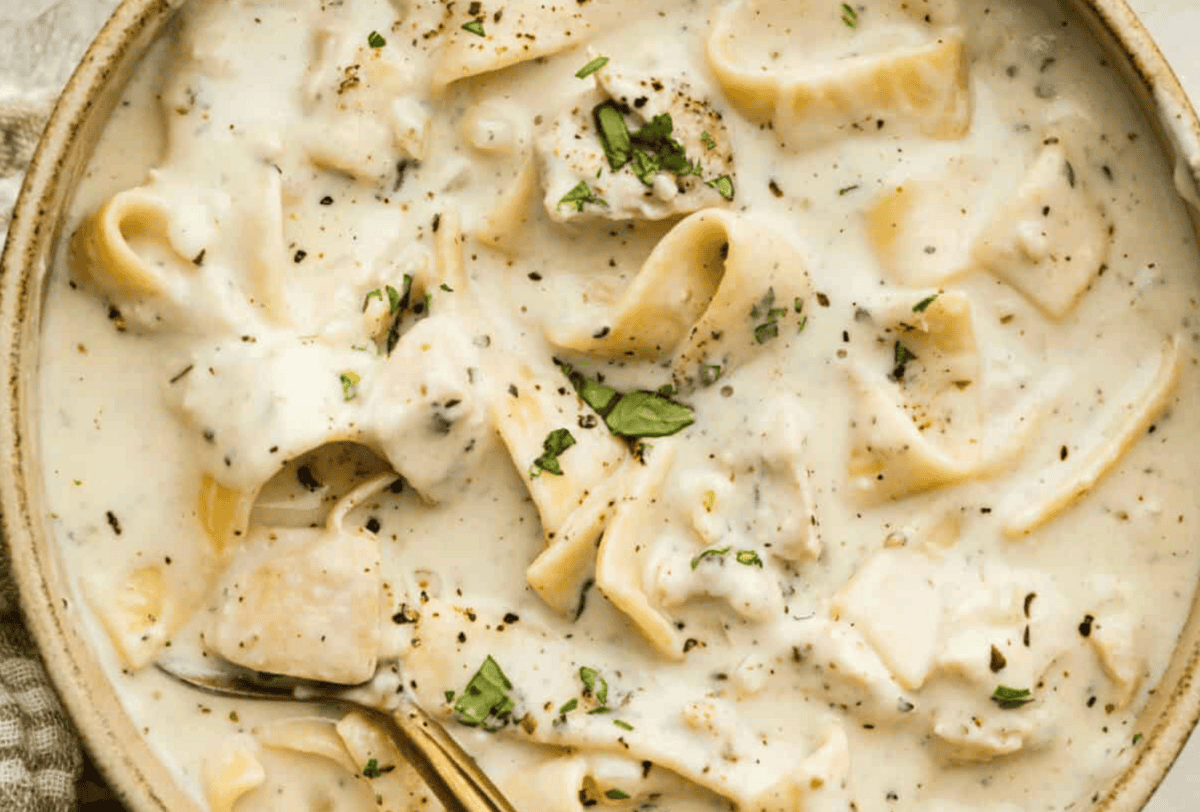
    You guys are obsessed with my homemade alfredo sauce. So I had to make this creamy, cheesy chicken Alfredo soup! Tender chicken, rich broth, and pasta all come together in just 30 minutes!

    Serving of chicken Alfredo soup in a bowl.

    Why This Soup is a Weeknight Wonder

    • All-in-One Pot: Everything cooks together in a single pot, making cleanup a breeze while delivering layers of creamy, cheesy flavor.
    • Perfect Family Dinner: Hearty and satisfying, it’s a simple meal everyone will love. Pair it with easy no-knead bread, my Grandma’s homemade bread, or these rolls.
    • Make it Your Own: Add extra veggies, swap in your favorite pasta, or spice it up!

    Ingredients for Chicken Alfredo Soup

    Overhead shot of labeled ingredients.
    • Half and Half: Half and half makes this soup creamy but not overly rich. You can make your own half and half if you don’t have any.
    • Pasta: Use any pasta shape for this. I love using wide egg noodles. Other great options are bowtie, rotini, or even cheese tortellini.
    • Chicken: This is a great recipe to use up leftover rotisserie chicken or make a quick batch of my air fryer chicken.

    How to Make Chicken Alfredo Soup

    One pot, simple ingredients, and big flavor! This creamy chicken Alfredo soup is a quick way to everyone’s heart! It’s so good and feels like a warm hug!

    1. Sauté the Onions: In a large pot over medium heat, melt the butter. Once melted, add diced onion and garlic. Cook until the onions begin to soften, about 2-3 minutes. Sprinkle all-purpose flour over the onions. Stir and cook the flour for 1-2 minutes.
    2. Add Seasonings: Add Italian seasoning, garlic powder, salt, and pepper to taste. Then slowly whisk in chicken broth and half and half.
    3. Cook: Bring to a boil and then add uncooked pasta. Reduce to a simmer and cook until the pasta is al dente.
    4. Finish with Chicken and Cheese: Add cooked chicken, grated parmesan cheese, and shredded mozzarella cheese, then cook until the cheese is melted. Add fresh basil and parsley and serve.

    Pin this now to find it later

    Pin It

    Pot of chicken Alfredo soup.

    More Cozy Soup Recipes

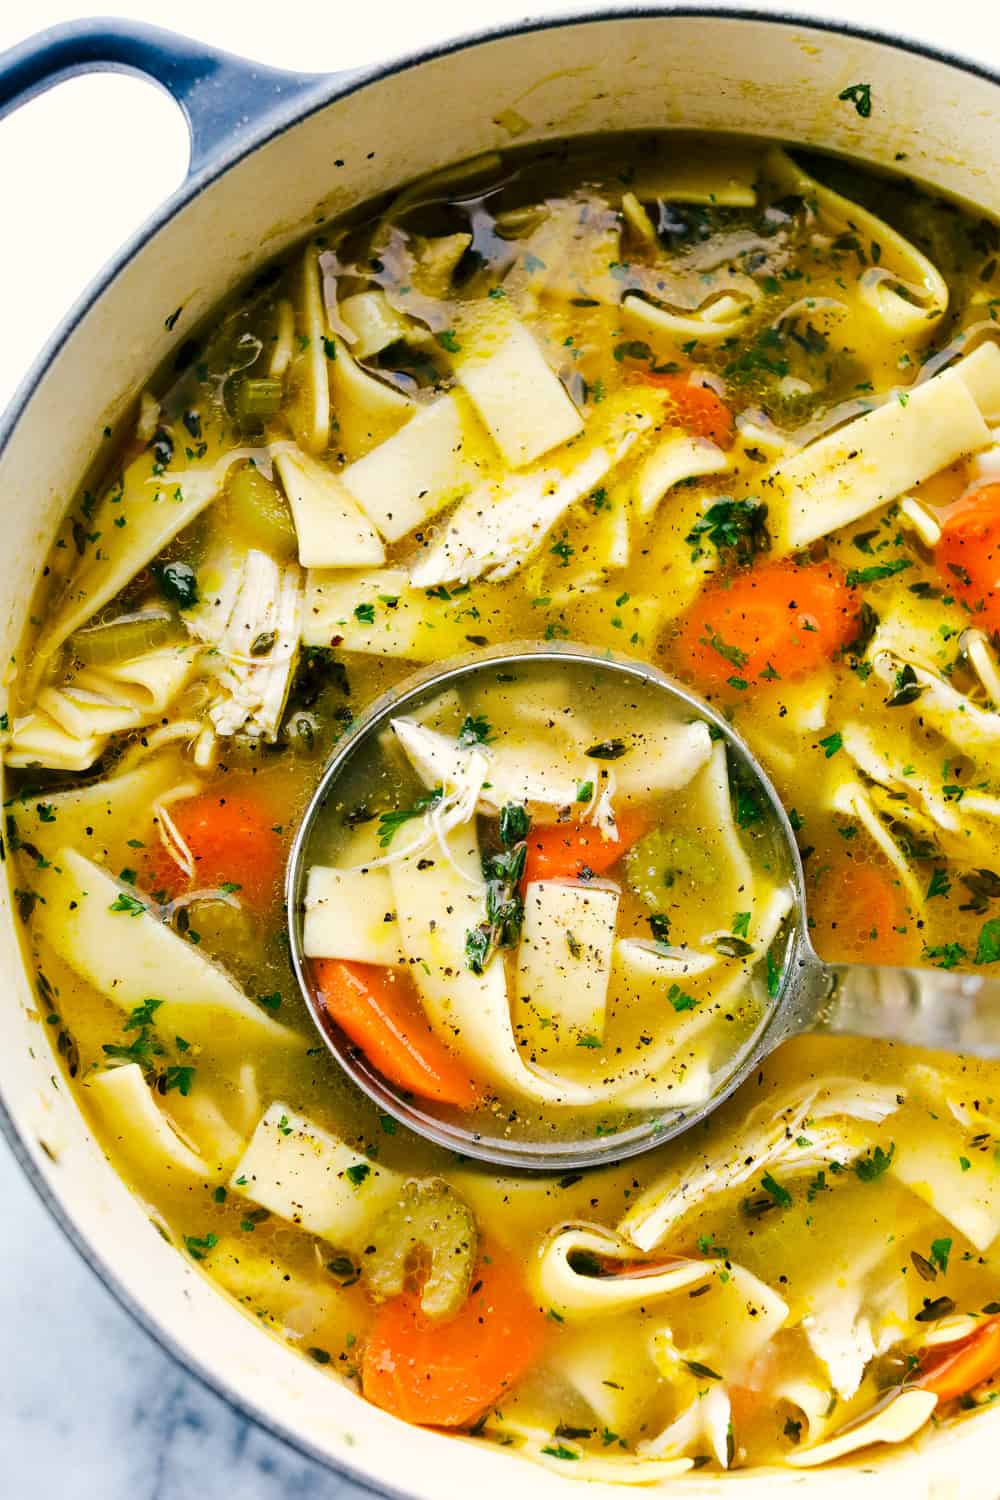
    best_chicken_noodle_soup_recipes

    Slow Cooker Chicken Fajita Soup

    4 hours 10 minutes


    Source link

  • Greek Air Fryer Wings

    Greek Air Fryer Wings

    Greek Air Fryer Wings are amazing for an appetizer or a main dish, and marinating the wings adds amazing flavor. These Greek wings are delicious with Whipped Feta Dip, but the recipe gives other options as well.

    PIN the recipe for Greek Wings to try them later!

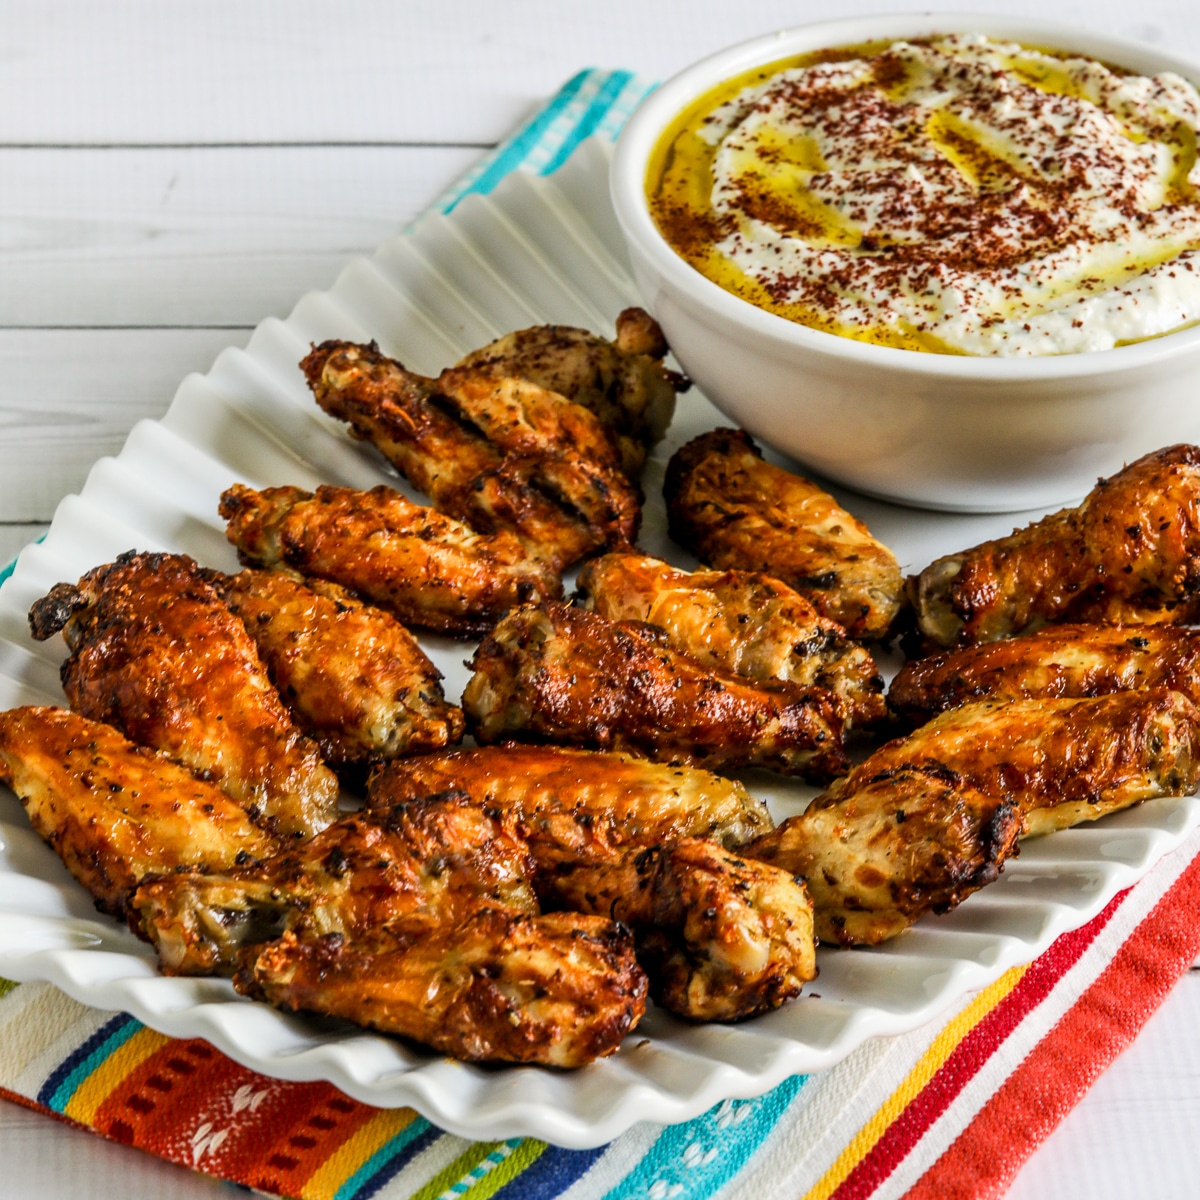
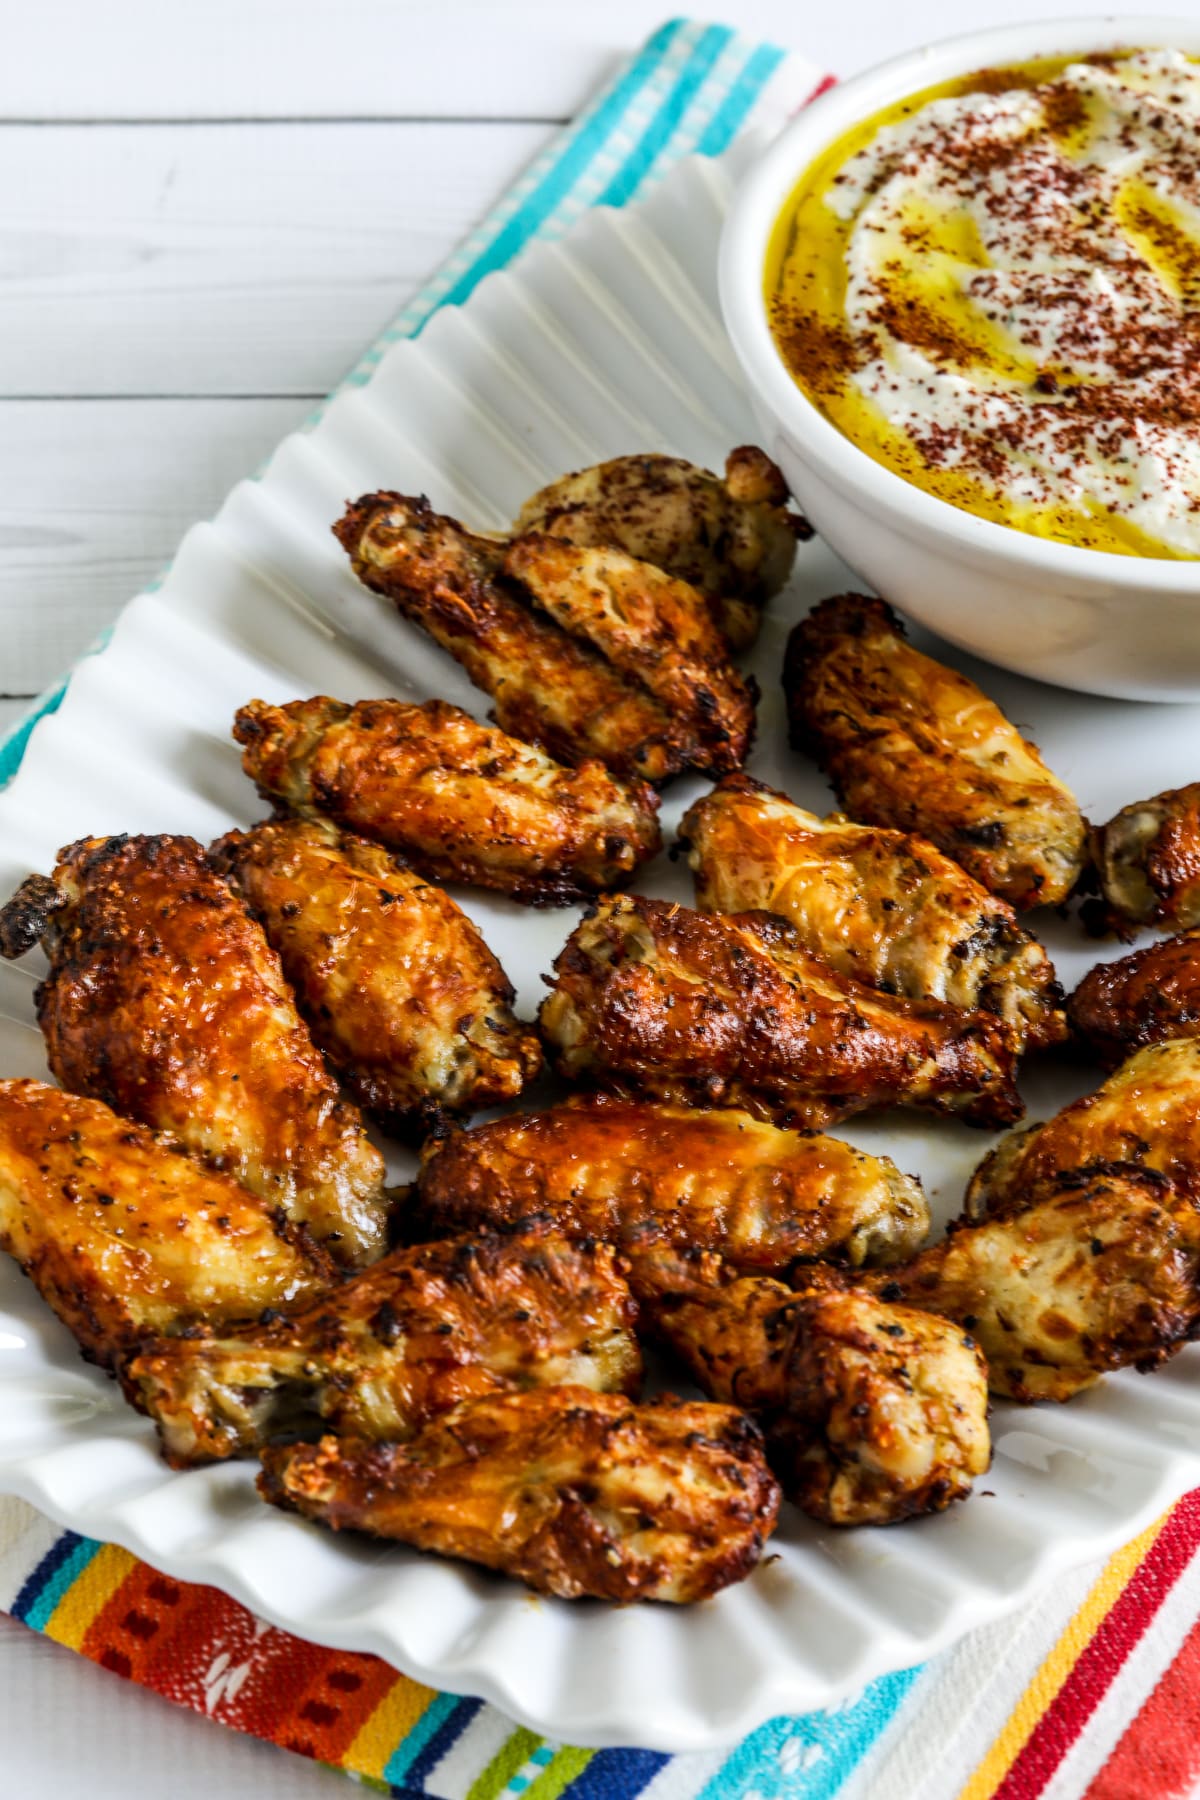
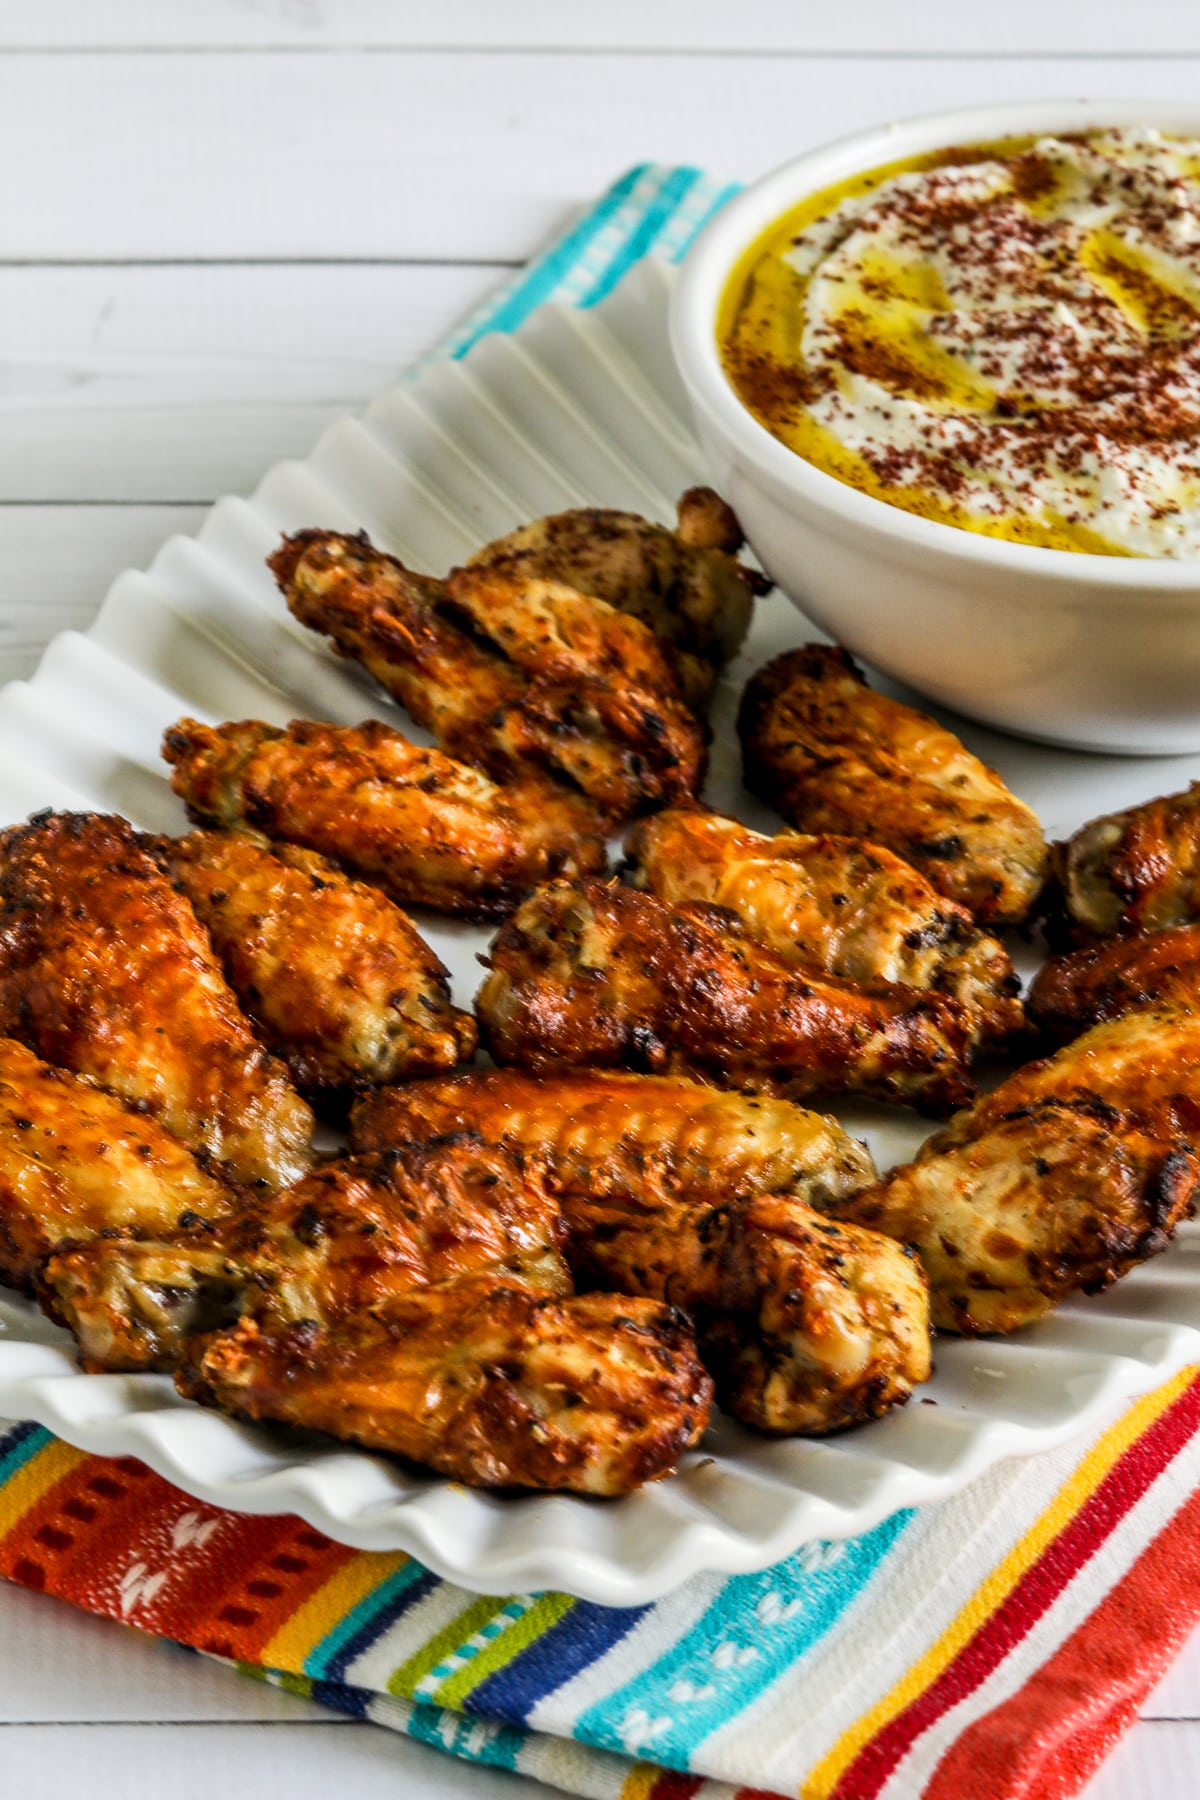
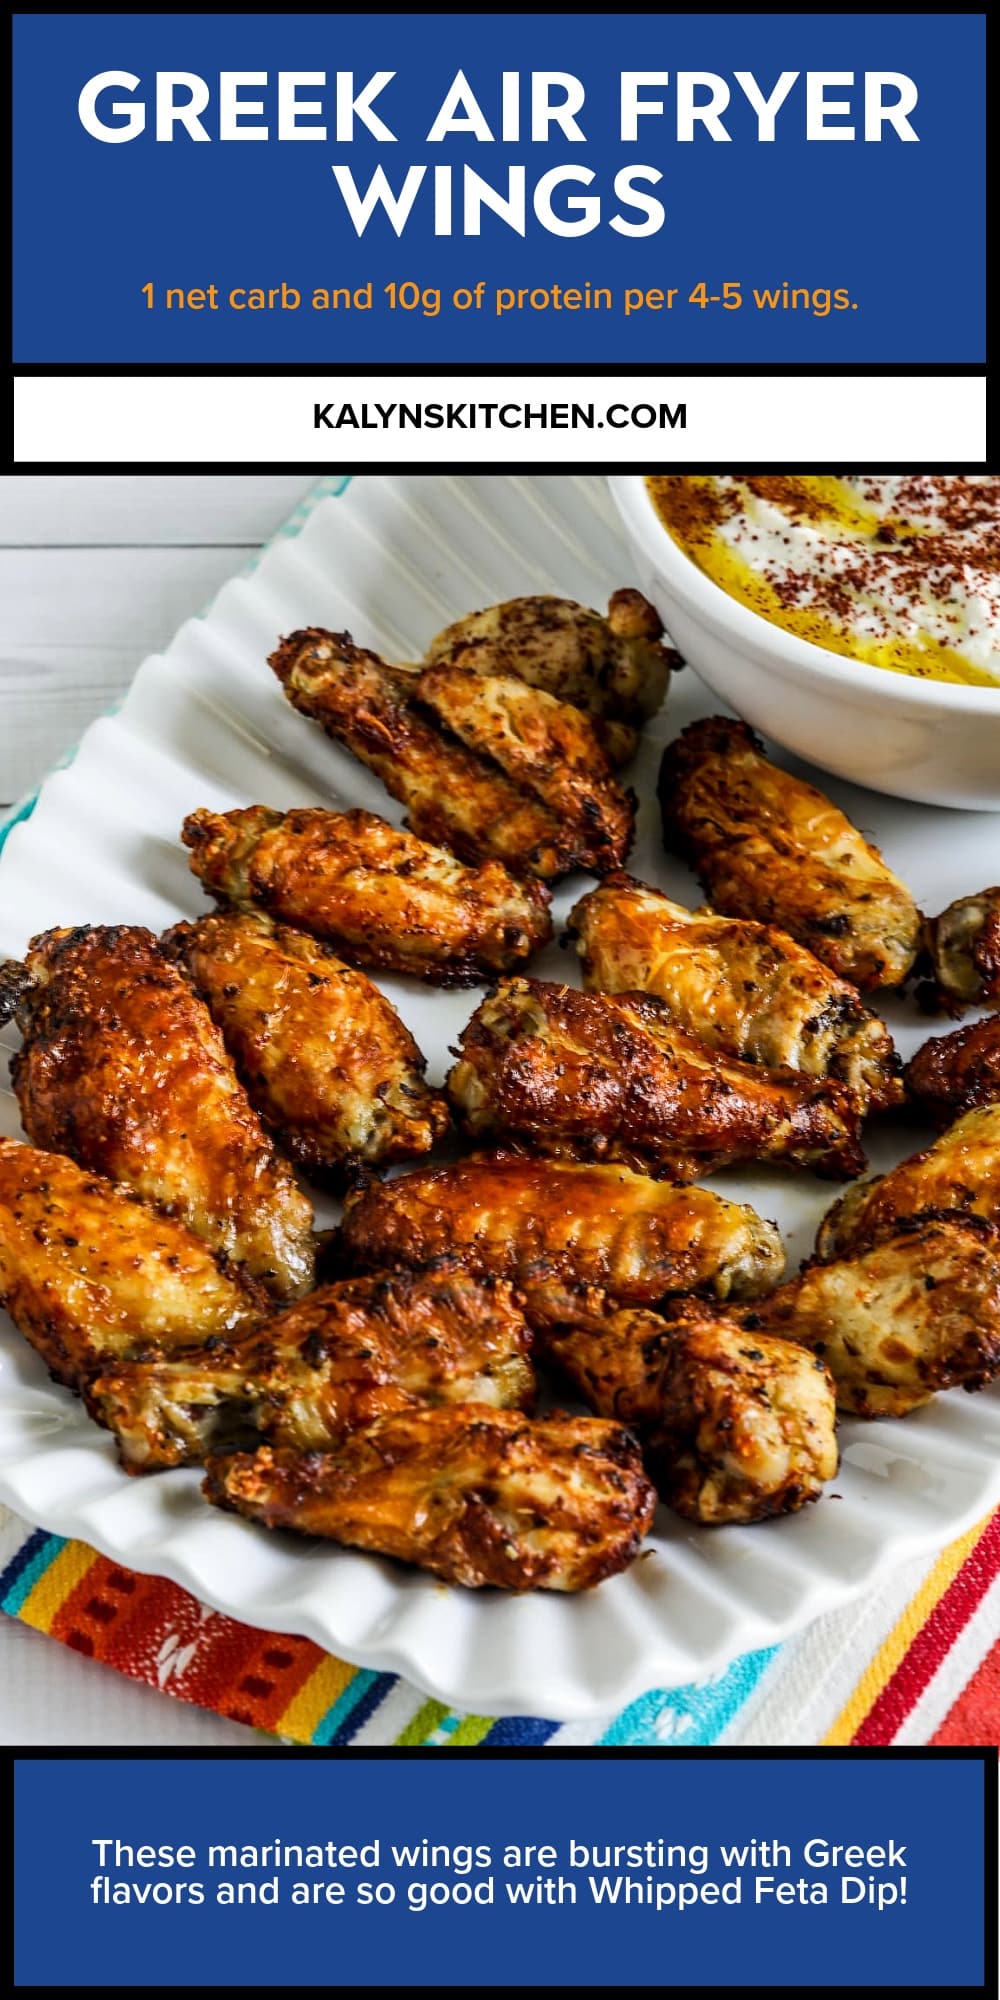
    Greek Air Fryer Chicken Wings shown on serving platter with Feta dip

    These tasty Greek Air Fryer Wings are an amazing appetizer or main dish that has those Greek Flavors so many people like! I’ve always enjoyed chicken wings as a low-carb appetizer in a restaurant. But I’m not sure I would have tried making them at home until my brother Rand raved about Greek Wings he made to enjoy as a main dish. And I realized wings would be perfect to cook in the Air Fryer and serve with my favorite Whipped Feta Dip.

    I cut down and simplified the inspiring recipe to get Greek wings that are flavorful and also easy to make in the Air Fryer. But I want to emphasize, don’t skip the step of marinating the wings to add amazing flavor! We marinated them overnight the first time we tested the recipe and that worked well. But if that isn’t possible, I recommend a minimum of four hours marinating time (and eight hours or more is even better.)

    This recipe uses 1 1/2 pounds of wing pieces which made 16-18 individual wings, but if you’re cooking for a crowd it can definitely be doubled. And whether you serve the wings as an appetizer or a main dish, everyone will love this easy recipe that’s extra low in carbs! See tips below for other dips that would be great with the air fryer wings. And I’m reminding you about this fun recipe for cooking wings for my Friday Favorites this week, and I hope you try the recipe soon!

    What ingredients do you need?

    (This is ONLY a list of ingredients for the recipe; please scroll down for complete printable recipe. Or if you use the JUMP TO RECIPE link at the top of the page, it will take you directly to the complete recipe.)

    • freshly-grated lemon zest (optional, but recommended)
    • fresh-squeezed lemon juice
    • extra-virgin olive oil
    • Minced Garlic (affiliate link) 
    • salt
    • Dried Oregano (affiliate link)
    • trimmed chicken wings
    • Whipped Feta Dip for serving (optional; see other options below)

    Which Air Fryer did I Use?

    I’m crazy about the Cuisinart Convection Air Fryer Toaster Oven (affiliate link) which is what I used for this recipe. This air fryer has a large basket, which let me fit 17 chicken wings, and I find this model easy to use. I also like the convenience of having an air fryer that stays out on the counter. (Use Air Fryer Recipes to see all Air Fryer recipes on this site.)

    What gives these Air Fryer wings the Greek Flavors?

    The Greek flavors in this recipe come from olive oil, lemon, garlic, and oregano, which are traditionally used for marinating Greek Lemon Chicken. And if you serve the wings with the Whipped Feta Dip that adds another Greek flavor.

    Do chicken wings need to be trimmed?

    I bought a six-pack of what Costco called Chicken Party Wings and used two of the packages for this recipe. The Kirkland wings from Costco were pretty well-trimmed, but when I looked at packages of wings at my grocery store it seemed like most of them would need trimming. Personally I enjoy wings the most when they just have a moderate amount of skin, and I always want to trim off some fat.

    Can you cook Greek Wings in the oven?

    I haven’t tried cooking these wings in the oven, but if you want to try it I would set the temperature at 400F/205C. Then cook the wings on a baking sheet until they’re crispy and the thickest part of the wing has reached a temperature of 165F/75C. Cooking time in the oven will be definitely longer than in the Air Fryer.

    How low in carbs are the Greek Air Fryer Wings?

    For an appetizer-sized serving of 4-5 wings, this recipe has only 1 net carb and 10 grams of protein! That doesn’t include the Feta Dip, but that’s also extra low in carbs.

    What other dips would be good with Greek Air Fryer Wings?

    We did LOVE these wings with the Whipped Feta Dip. But here are some other tasty options:

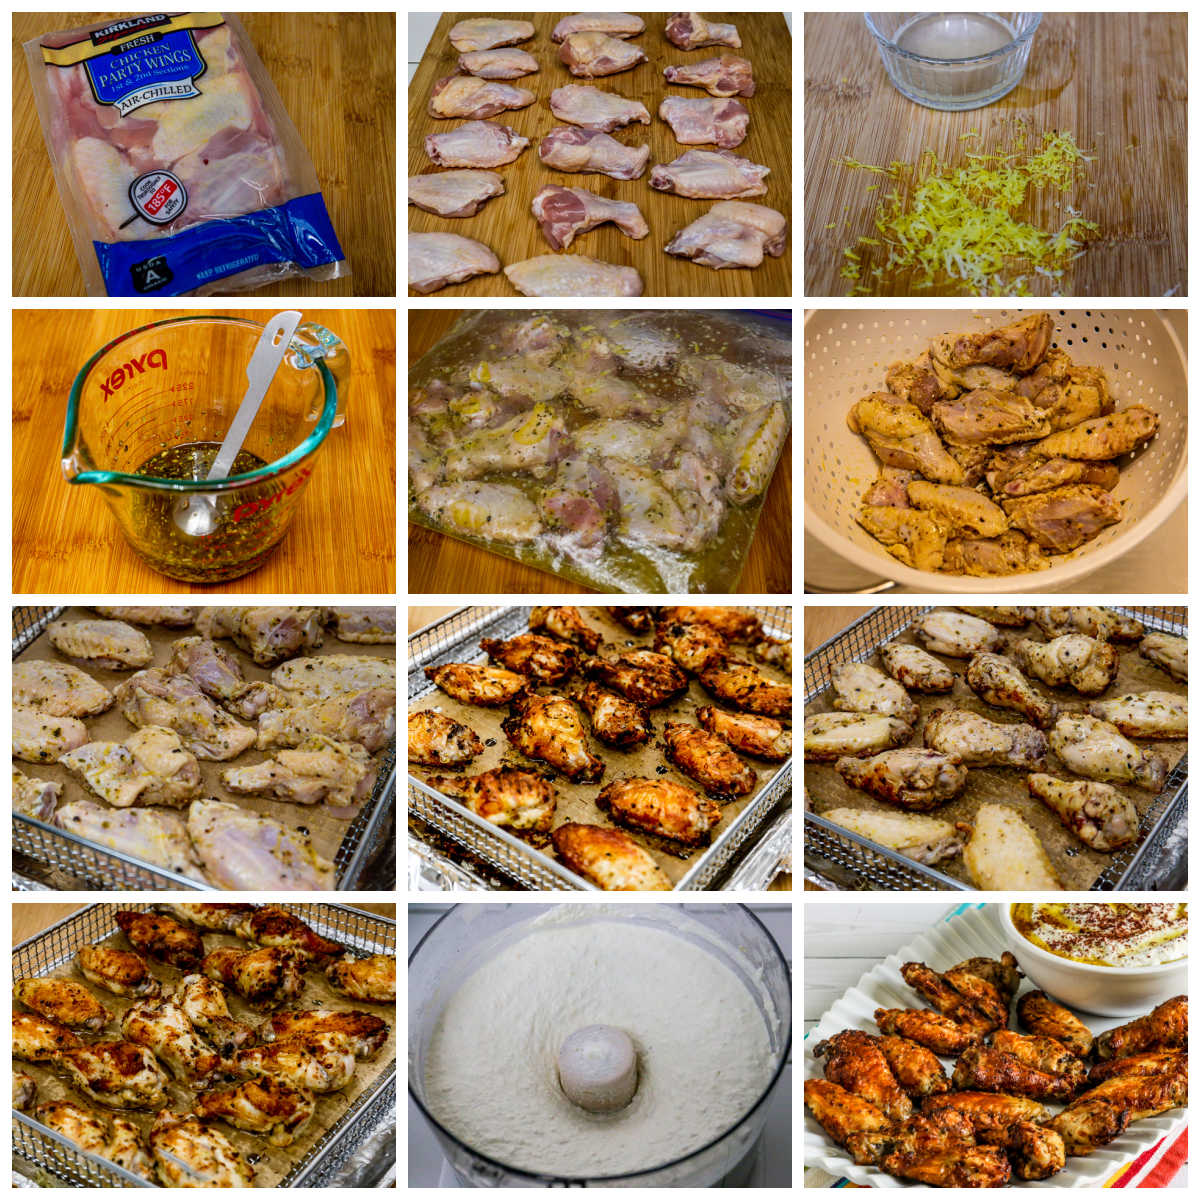
    Greek Air Fryer Chicken Wings collage of recipe steps

    How to Make Greek Air Fryer Wings:

    (This is ONLY a summary of the steps for the recipe; please scroll down for complete printable recipe. Or if you use the JUMP TO RECIPE link at the top of the page, it will take you directly to the complete recipe.)

    1. I used Kirkland Party Wings, and we used two packs from the six-pack for this recipe
    2. Trim the wings if needed.
    3. Zest a lemon and then squeeze the juice
    4. Whisk together lemon zest (if using), lemon juice, olive oil, garlic, oregano, salt, and pepper
    5. Let wings marinate at least four hours in the fridge; marinating overnight or eight hours is even better
    6. When you’re ready to cook, drain wings and discard the marinade
    7. Let wings come to room temperature and preheat Air Fryer to 400F/205C. (Preheat without the rack in the Air Fryer if you are going to use Air Fryer Parchment Paper, which I recommend.
    8. Line rack with Air Fryer Parchment Paper (if using) and arrange wings so they are not touching each other. (If you have a smaller Air Fryer you may need to cook in two batches.)
    9. Cook wings 8 minutes, or until the first side is getting brown
    10. Remove Air Fryer basket and turn wings over with tongs or a fork
    11. Put basket back in the Air Fryer and cook until second side is golden brown and wings are 165F/75C in the thickest part. (For us that was about 6 minutes on the second side, but other Air Fryer models might take more or less time.
    12. While the wings cook, make the Whipped Feta Dip (or other dip or sauce of your choice.)
    13. Serve the Greek Wings hot, with plenty of napkins!

    Make it a Low-Carb Meal:

    This recipe makes four appetizer servings, but probably 3 servings if you serve it as a meal. The Greek Air Fryer Wings would taste amazing with one of these side dishes:

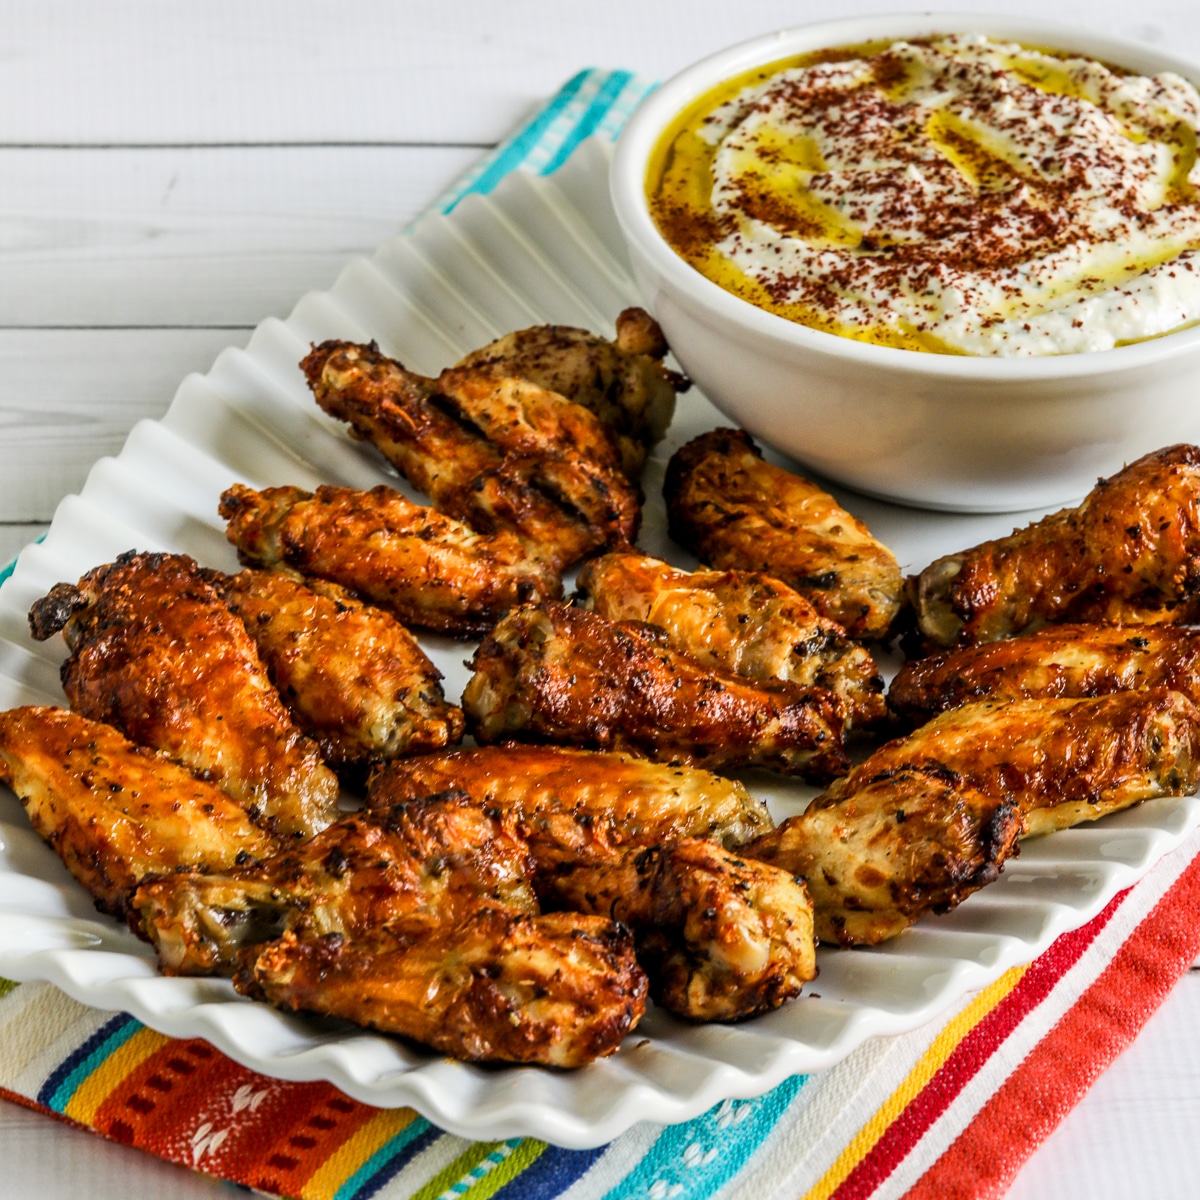
    Greek Air Fryer Chicken Wings on serving platter with Feta dip

    More Chicken with Greek Flavors:

    Ingredients

    • 1 T freshly-grated lemon zest (optional, but recommended)
    • 1 T fresh-squeezed lemon juice (or more if you really like lemon)
    • 1/4 cup extra-virgin olive oil
    • 1 tsp. minced garlic (or more)
    • 1 tsp. salt (more or less to taste)
    • 1 tsp. dried oregano
    • 1.5 pounds trimmed raw chicken wings (see notes)
    • Whipped Feta Dip with Sumac for serving (optional)

    Instructions

    1. Trim the wings if needed. (We didn’t need to do much trimming for the Kirkland Party Wings we used, but some grocery store wings will need to have excess skin and fat trimmed.)
    2. Zest the skin from a lemon and then squeeze the juice. (Or you can use fresh-frozen lemon juice and skip the zest if you don’t want to buy a lemon.)
    3. Whisk together lemon zest (if using), lemon juice, olive oil, garlic, oregano, salt, and pepper to make the marinade
    4. Put the wings and marinade in a large Ziploc bag or plastic container with a snap-tight lid, and let them marinate in the fridge for a minimum of four hours, or marinating them overnight or for eight hours or longer will give more flavor
    5. When you’re ready to cook, drain the wings into a colander place in the sink and discard the marinade. (If you don’t want the oily marinade to go down your sink, catch it in a bowl and discard.)
    6. Let wings come to room temperature while you preheat Air Fryer to 400F/205C. (Preheat without the rack in the Air Fryer if you are going to use Air Fryer Parchment Paper, which I recommend.)
    7. Line Air Fryer rack with Air Fryer Parchment Paper if using. Try to arrange wings in the Air Fryer basket so they are not touching each other. (I was able to fit 18 wing pieces in my Cuisinart Air Fryer, but if you have a smaller Air Fryer you may need to cook in two batches.)
    8. Cook wings 8 minutes, or until they are golden-brown on the first side. (Some Air Fryers cook a bit hotter, so I’d start checking after 6 minutes.)
    9. Remove Air Fryer basket and turn wings over (with tongs or a fork so you don’t burn your fingers.)
    10. Put basket back into the Air Fryer and cook until the second side is golden brown and wings have reached 165F/75C in the thickest part. (For us that was 6 minutes on the second side, but other Air Fryer models might take a bit more or less time.)
    11. While the wings cook, make the Whipped Feta Dip with Sumac (or other dip or sauce of your choice.
    12. Serve the Greek Wings hot, with plenty of napkins!

    Notes

    I used Kirkland Chicken Party Wings from Costco, which included both flats and drumettes. One and one-half pounds of wings will be 16-18 individual wing half pieces.

    I used my Cuisinart Convection Air Fryer Toaster Oven (affiliate link) for this recipe.

    Nutritional information is for the wings and marinade and doesn’t include the optional dip.

    This recipe adapted from Greek Wings with Lemon and Feta on Bon Appetit.

    Nutrition Information

    Yield

    4

    Serving Size

    1

    Amount Per Serving

    Calories 518Total Fat 21gSaturated Fat 4gTrans Fat 0gUnsaturated Fat 16gCholesterol 60mgSodium 624mgCarbohydrates 1gFiber .2gSugar .2gProtein 10g

    Nutrition information is automatically calculated by the Recipe Plug-In I am using. I am not a nutritionist and cannot guarantee 100% accuracy, since many variables affect those calculations.

    Did you make this recipe?

    Did you make this recipe? Please leave a star rating (under the PRINT button in the recipe) or share a photo of your results on Instagram! THANKS!

    square image of Greek Air Fryer Chicken Wings on platter

    Low-Carb Diet / Low-Glycemic Diet / South Beach Diet Suggestions:
    Greek Air Fryer Wings are good recipe for low-carb or Keto diets. Wings are not recommended for the original South Beach Diet, due to the amount of fat.

    Find More Recipes Like This One:
    Use the Diet Type Index to find more recipes suitable for a specific eating plan. You might also like to follow Kalyn’s Kitchen on Pinterest, on Facebook, on Instagram, on TikTok, or on YouTube to see all the good recipes I’m sharing there.

    Historical Notes for this Recipe:
    The Greek Wings with Whipped Feta Dip were first posted in 2023. The recipe was last updated with more information in 2026.

    Pinterest image of Greek Air Fryer Wings

    We are a participant in the Amazon Services LLC Associates Program, an affiliate advertising program designed to provide a means for us to earn fees by linking to Amazon.com and affiliated sites. As an Amazon Associate, I earn from qualifying purchases.


    Source link

  • Marry Me Chicken Orzo Bake

    Marry Me Chicken Orzo Bake

    Marry Me chicken orzo bake is a creamy one-pot pasta dinner made with chicken thighs, sun-dried tomatoes, garlic, and orzo baked in a luscious sauce.


    Jump to: ℹ️ Overview | 🛒 Ingredients | 📷 How To Make | 📹 Watch The Video | 👩‍🍳 Recipe Tips | 🥗 Serving Suggestions | 📝 Full Recipe Card | 🍽 More Pasta Recipes


    This Marry Me chicken orzo bake has all the classic marry me chicken vibes — garlicky, creamy, herby, and just a little fancy thanks to sun-dried tomatoes.

    The twist? Instead of serving it over plain pasta, it gets baked right into a saucy orzo casserole where the pasta soaks up all that flavor. I use skinless, boneless chicken thighs to keep things juicy and a touch lighter, plus a splash of light cream to make it luscious without feeling heavy.

    The chicken gets seared, then everything simmers and bakes in one pan. It’s cozy, high-protein, and crazy satisfying. And yes, I tested this a few times — and every time it turned out like a hug in a bowl.

    👩‍🍳 You might also like these: crock pot Marry Me chicken, chicken pasta recipes, lemon chicken orzo pasta, boursin orzo bake, lemon chicken orzo soup, chicken asparagus risotto, other chicken and rice recipes, and even more orzo recipes here. Check out my creamy Italian sausage pasta as well.

    What You’ll Need

    Here is what you’ll need for this creamy chicken orzo bake recipe. Find the full measurements in the recipe card below.

    For the Chicken:

    • Boneless, skinless chicken thighs — juicy and flavorful, a bit lighter without the skin; chicken breast works too, but I find thighs more forgiving.
    • Olive oil, salt, pepper, smoked paprika — classic flavor trio to season the chicken and add warmth.

    For the Sauce & Pasta:

    • Onion + garlic — your flavor base, don’t skip them!
    • Sun-dried tomatoes (oil-packed) — salty, tangy, and slightly sweet. These are the flavor bombs.
    • Dried Italian herbs + oregano — herby backbone. You can also use dried thyme if you don’t have mixed Italian herbs.
    • Chicken stock — flavorful liquid that orzo soaks up like a sponge.
    • Light cream — gives it that creamy, velvety sauce without the heaviness.
    • Orzo (or risoni) — the tiny pasta that cooks like rice. Soaks up everything.
    • Parmesan — salty, nutty, and so perfect melted into the sauce.
    • Chili flakes (optional) — for a bit of warmth if you like a tiny kick.

    To Finish:

    • Fresh herbs (basil, chives, parsley) — freshness to balance all that creamy richness.
    • Extra Parmesan — always.

    How To Make Marry Me Chicken Orzo Bake

    Find the full recipe and nutritional information below. Here are some handy step-by-step photos for how to make this one-pot baked chicken and orzo recipe.

    • Dice the onions and garlic so these are ready to go. Strain sun-dried tomatoes (if they are packed in oil) and chop them into smaller pieces. Set aside while we move onto the chicken.
    • Preheat oven to 350°F (180°C fan).
    • Season chicken thighs and pan-sear 2–3 minutes per side in a large oven-safe pan. I use cast iron low casserole pan.
    • Remove chicken; sauté onions first and then add garlic in the same pan. Add a little extra oil if needed.
    • Add chopped sun-dried tomatoes, herbs, and a pinch of chili flakes.
    • Pour in chicken stock (reserving a bit), cream, and Parmesan. Simmer briefly.
    • Taste the sauce and adjust seasoning; it should be salty as orzo absorbs a lot of the flavor.
    • Stir in orzo and nestle chicken back in.
    • Cover and bake for 15–20 minutes until orzo is tender and chicken is fully cooked. I think I did mine for 18 minutes.
    • Rest a few minutes, then sprinkle with herbs and more Parmesan. Dig in!

    Watch The Video

    Recipe Tips

    • Use an oven-safe deep pan or French (or Dutch) oven pot if you’ve got one — one less dish!
    • Don’t worry if the sauce looks a bit runny at first — orzo thickens a lot as it sits. If however it looks like it’s soaked up a lot of the stock, add a few splashes at the end to thin it out.
    • Want it spicier? Add more chili flakes or a pinch of cayenne.
    • Chicken breast? Sure, just don’t overcook it. Bone-in thighs also work but will need more time.
    • Want more veg? Stir in chopped spinach or baby kale before baking.
    • Make-ahead tips: You can pre-sear the chicken and make the sauce a day ahead. Store separately or all together (without the orzo) in the fridge, then mix in orzo and bake when ready.
    • Storage tips: Store leftovers in an airtight container in the fridge for up to 3 days. Reheat with a splash or two of broth or cream to loosen the orzo. Freezing is okay, but orzo can get soft. I don’t recommend.

    Serving Suggestions

    I love serving this with a bright, crunchy salad (lemon vinaigrette all the way – check out my asparagus salad) or simple steamed green beans, sauteed asparagus, or broccolini with garlic and lemon. It’s rich, so a little citrus on the side balances it beautifully.

    💬 If you’ve tried this Marry Me chicken orzo bake or any other recipe on the blog then don’t forget to rate the recipe and let me know how you got on in the comments below, I love hearing from you! You can also FOLLOW ME on Instagram, Facebook, Pinterest, YouTube, and or sign up to my Newsletter to see more of my delicious food.

    Want to Save This Recipe?

    Enter your email & I’ll send it to your inbox. Plus, get great new recipes from me every week!

    By submitting this form, you consent to receive emails from Cooked & Loved

    Marry Me Chicken Orzo Bake is a creamy one-pot pasta dinner made with chicken thighs, sun-dried tomatoes, garlic, and orzo baked in a luscious sauce. Find step-by-step photos and more recipe tips above.

    • Preheat oven to 350°F (180°C fan).

    • Season chicken with salt, pepper, and smoked paprika.

    • Heat a tablespoon of olive oil in a large oven-safe sauté pan or Dutch oven over medium-high heat.

    • Sear chicken on both sides until golden (2–3 mins per side). Remove and set aside.

    • Lower heat to medium, add extra oil if needed, and sauté onions until soft (3–4 mins). Add garlic and cook for 30 seconds.

    • Stir in chopped sun-dried tomatoes, Italian herbs, oregano, and chili flakes (if using).

    • Add stock (3 cups), cream, Parmesan, and bring to a gentle simmer. Season to taste — it should be slightly salty.

    • Add orzo and stir to combine. Nestle seared chicken on top.

    • Cover and bake for 15–20 minutes until orzo is tender and chicken is cooked through. I did mine for 18 minutes.

    • Optional step: splash extra stock around the edges if it looks dry near the end. Orzo tends to soak up more liquid around the edges of the pan as it’s hotter.

    • Let rest for 5 minutes. Garnish with herbs, more Parmesan, and a drizzle of cream if you’re feeling extra.

    • Can I use chicken breast instead of thighs? Yes! Just don’t overcook it — thighs are more forgiving and juicier. Bone-in thighs also work but will need more time.
    • What if I don’t have light cream? Use half-and-half or mix milk with a bit of heavy cream. Even evaporated milk works.
    • Why is it still saucy out of the oven? That’s perfect! Orzo keeps absorbing liquid after baking. The extra sauce keeps things creamy.
    • Can I make this dairy-free? You can try using coconut cream and skip the Parmesan, but the flavor will change quite a bit.
    • Can I double the recipe? Yes, just use a larger baking dish or split between two. Add a few extra minutes to the bake time.
    • Use an oven-safe deep pan or Dutch oven if you’ve got one — one less dish!
    • Don’t worry if the sauce looks a bit runny at first — orzo thickens a lot as it sits. If however it looks like it’s soaked up a lot of the stock, add a few splashes at the end to thin it out.
    • Want it spicier? Add more chili flakes or a pinch of cayenne.
    • Want more veg? Stir in chopped spinach or baby kale before baking.
    • Make-ahead tips: You can pre-sear the chicken and make the sauce a day ahead. Store separately or all together (without the orzo) in the fridge, then mix in orzo and bake when ready.
    • Storage tips: Store leftovers in an airtight container in the fridge for up to 3 days. Reheat with a splash or two of broth or cream to loosen the orzo. Freezing is okay, but orzo can get soft. I don’t recommend.

    Calories: 528kcal | Carbohydrates: 48g | Protein: 36g | Fat: 21g | Saturated Fat: 9g | Polyunsaturated Fat: 2g | Monounsaturated Fat: 8g | Trans Fat: 0.02g | Cholesterol: 152mg | Sodium: 868mg | Potassium: 1234mg | Fiber: 4g | Sugar: 11g | Vitamin A: 743IU | Vitamin C: 10mg | Calcium: 157mg | Iron: 4mg

    Keywords: chicken orzo, Marry Me Chicken Orzo Bake, chicken orzo bake, baked chicken orzo, chicken with orzo pasta

    More Pasta Recipes


    Source link

  • Copycat Raising Cane’s Chicken (Crispy and Easy)

    Copycat Raising Cane’s Chicken (Crispy and Easy)

    This website may contain affiliate links and advertising so that we can provide recipes to you. Read my disclosure policy.

    Make this copycat Raising Cane’s chicken tenders at home, no drive-thru required. An easy marinade, simple ingredients, and a quick fry give you crisp, light chicken and that unmistakable Cane’s sauce for a fraction of the cost.

    Crispy Raising Cane's chicken tenders on a plate next to crinkle cut fries, Texas toast, and a small bowl of Cane's dipping sauce.

    The Magic Behind the Crunch and the Sauce

    • Double Crunch: My version uses a double coat of breading for that extra-loud crunch you expect from the real thing.
    • Air Fryer Friendly: Not into deep frying? No problem. I include air fryer directions that still give you a crisp finish.
    • Built-In Flavor: Spices go into both the marinade and the breading, so every bite hits with the same bold flavor you get at Cane’s.

    Raising Cane’s Chicken Tenders Ingredients

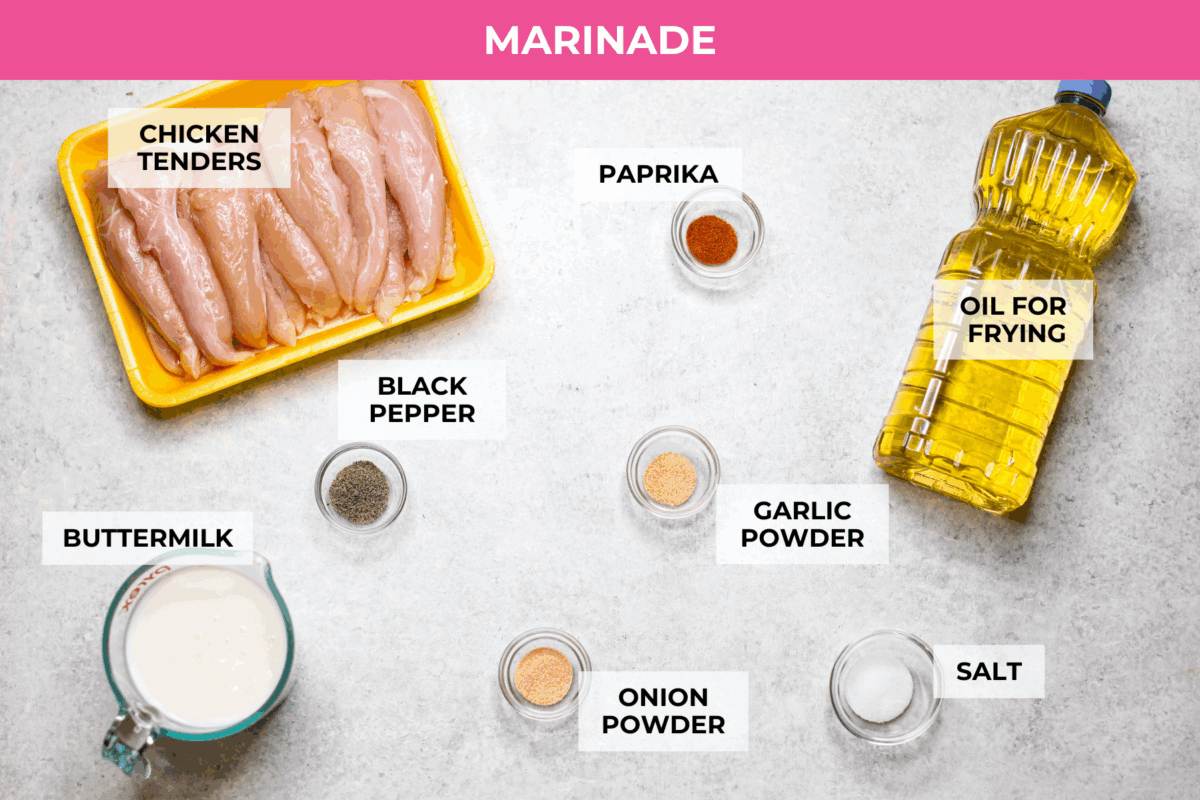
    Overhead shot of labeled raising canes chicken marinade ingredients.
    • Bring the Heat! Add 1-2 teaspoons of hot sauce to the marinade and a pinch or two of cayenne pepper to the breading for added heat.
    • Buttermilk: Don’t have buttermilk, make your own. It won’t be as thick, so the breading may not stick as well, but in a pinch, it can work.
    • Chicken: Remove the tendons from the chicken tenders before marinating, or use chicken breasts, sliced into even vertical pieces.
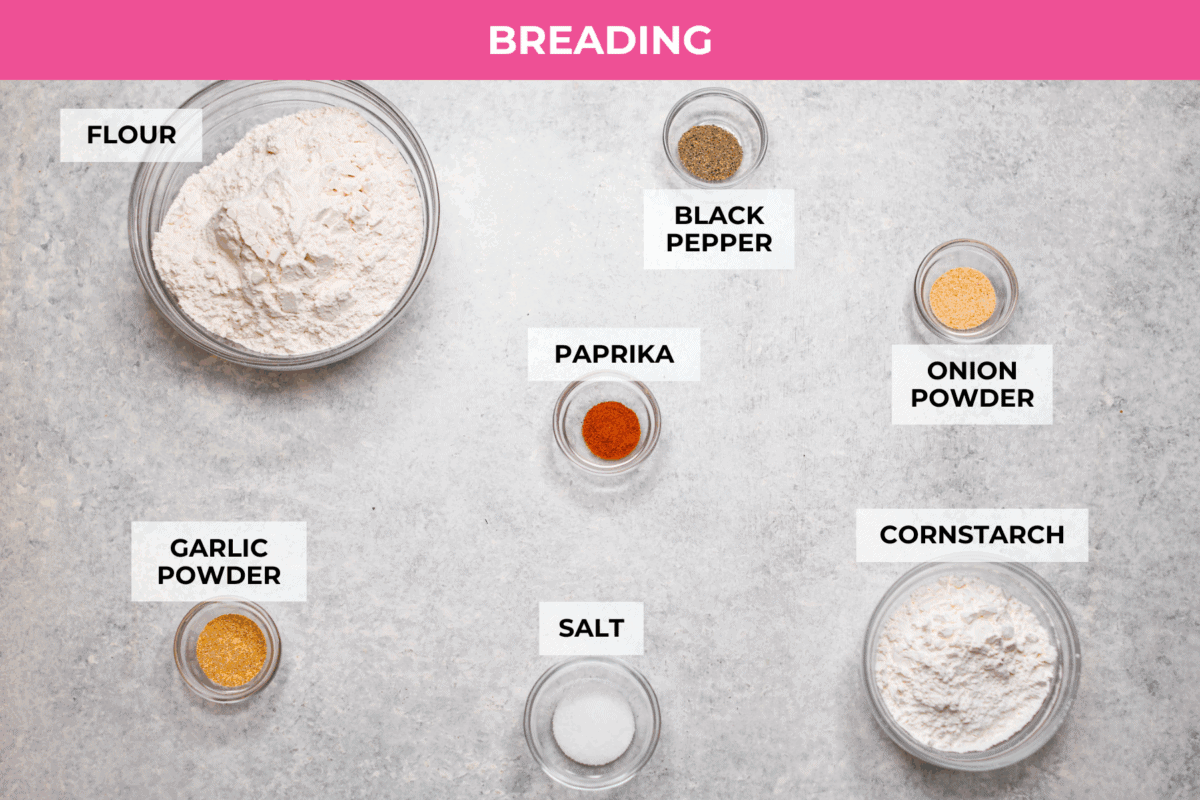
    Overhead shot of labeled breading ingredients.

    How to Make Raising Cane’s Chicken

    If you’re craving Cane’s but don’t want to leave the house or pay the higher restaurant prices. You can make them at home, and it’s easier than you’d think!

    1. Trim & Season Chicken: Trim the chicken by removing the tendons. Add the chicken to a large bowl. Add the buttermilk, salt, pepper, onion powder, garlic powder, and paprika to the bowl with the chicken. 
    2. Marinate: Toss everything together until well combined and the chicken is fully coated. Let it marinate for at least 4 hours, or up to 24 hours.
    3. Heat Oil & Make Breading: When ready to fry, add 5-6 cups of vegetable oil to a large, deep pot until it is about 2 inches deep. Heat over high heat until it reaches 350°F. Meanwhile, combine the flour, cornstarch, salt, pepper, onion powder, garlic powder, and paprika in a large bowl.
    4. Dip Chicken In Breading: Remove the chicken strips from the marinade, one at a time, letting the excess marinade drip off before adding them to the breading mixture.
    5. Double Dip: Coat each piece of chicken fully with the breading mixture. Press it onto the chicken with your hands, then dip it back into the marinade, then back into the flour mixture. This double-breading will give you an extra-flaky coating.
    6. Fry & Drain: Fry the breaded chicken in batches for 5-7 minutes, flipping them halfway through, until the thickest part of the tenders reaches 165°F. Transfer them to a baking pan lined with paper towels or a wire rack to drain. Serve Raising Cane’s Chicken Tenders with crinkle-cut fries, coleslaw, and  Cane’s Sauce

    Air Fryer Option

    Don’t want to Deep Fry? Air fry the breaded chicken tenders by spraying them with oil, then air fry at 400°F for 12 minutes, flipping halfway through and spraying them lightly with oil again. 

    Pin this now to find it later

    Pin It

    Someone dipping a Raising Cane's chicken into a small bowl of Cane's sauce.

    More Copycat Recipes To Try

    If you loved this Copycat Raising Cane’s Chicken Tender recipe, you’ll love all of my other copycat recipes. What copycat recipe would you like me to try next?

    Copycat Crumbl Cookies

    40 minutes


    Source link

  • Chicken Bites (Baked or Air-Fried)

    Chicken Bites (Baked or Air-Fried)

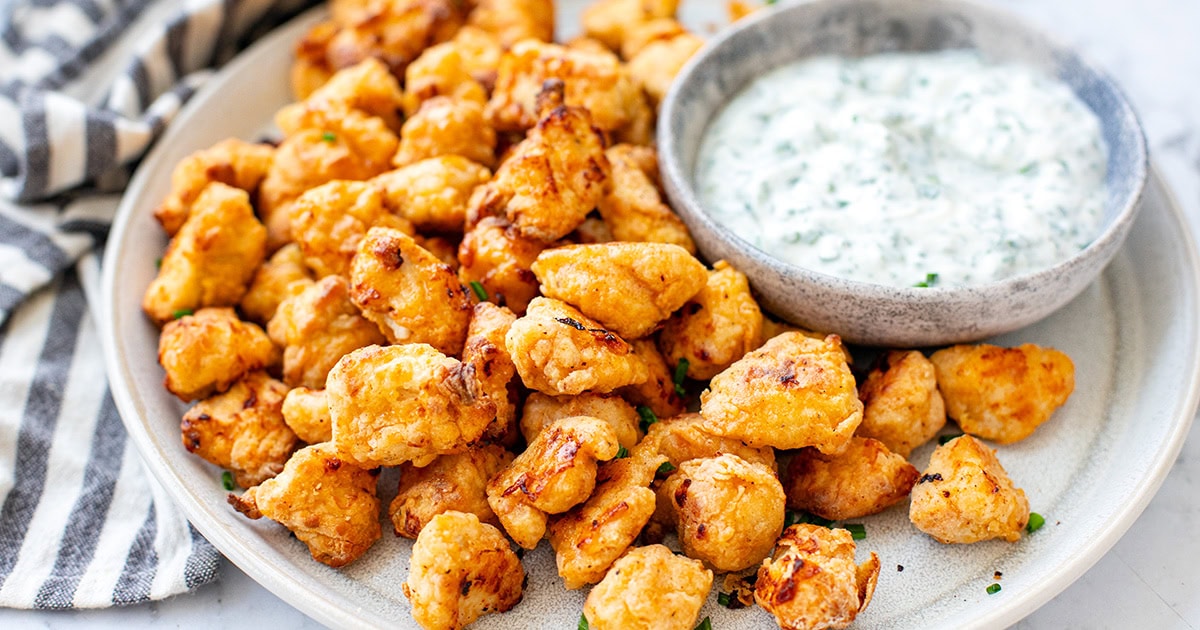
    These healthy chicken bites are like the snacky, protein-packed cousin of popcorn chicken—crispy, juicy, and baked or air-fried to golden perfection. Serve them as the main protein for dinner or use as a protein-rich snack or lunchbox addition.


    Jump to: ℹ️ Overview | 🛒 Ingredients | 📷 How To Make | 📹 Watch The Video | 👩‍🍳 Recipe Tips | 🥗 Serving Suggestions | 📝 Full Recipe Card | 🍽 More Healthy Chicken Recipes


    These tasty chicken bites remind me of popcorn chicken, but without the greasy aftermath. The chicken is marinated in spiced yogurt, which tenderises and adds big flavor, then coated in a seasoned flour blend for that addictive outer crunch. I tested this recipe both in the oven and the air fryer and they both come out golden and crispy, which tender chicken inside.

    Each serving is high in protein, lower in fat, and great for both grown-ups and kids. They double up as a healthy weeknight dinner recipe and a protein-snack you can grab out of the fridge or add to your breakfast. Whether you’re meal prepping or snacking straight off the tray (guilty!), this one’s a reliable go-to. I often make these for my popcorn chicken bowls.

    👩‍🍳 You might also like: Sriracha chicken bites, chicken karaage, air fryer bbq chicken wings, honey soy chicken meatballs, air fryer kielbasa, or my healthy chicken patties.

    What You’ll Need

    Here is what you’ll need for this chicken bites recipe. Find the full measurements in the recipe card below.

    For the chicken marinade

    • Chicken breast – lean and tender. Thighs work too if you prefer something juicier.
    • Plain yogurt – tenderises and keeps the chicken moist. Greek yogurt also works.
    • Garlic powder, onion powder, paprika – brings a deep, savory base.
    • Salt – don’t skip this; it’s key to flavor!

    For the coating

    • All-purpose flour + cornflour – the combo makes them crispy and light. Cornflour is the real crunch MVP.
    • Spices: paprika, garlic powder, onion powder, black pepper – flavor all the way through.
    • Olive oil spray – helps everything get golden without actual frying.

    How To Make Chicken Bites (Baked or Air-Fried)

    Find the full recipe and nutritional information below. Here are some handy step-by-step photos for how to marinate and cook these chicken bites in the oven and in the air fryer.

    • Cut chicken into bite-sized pieces.
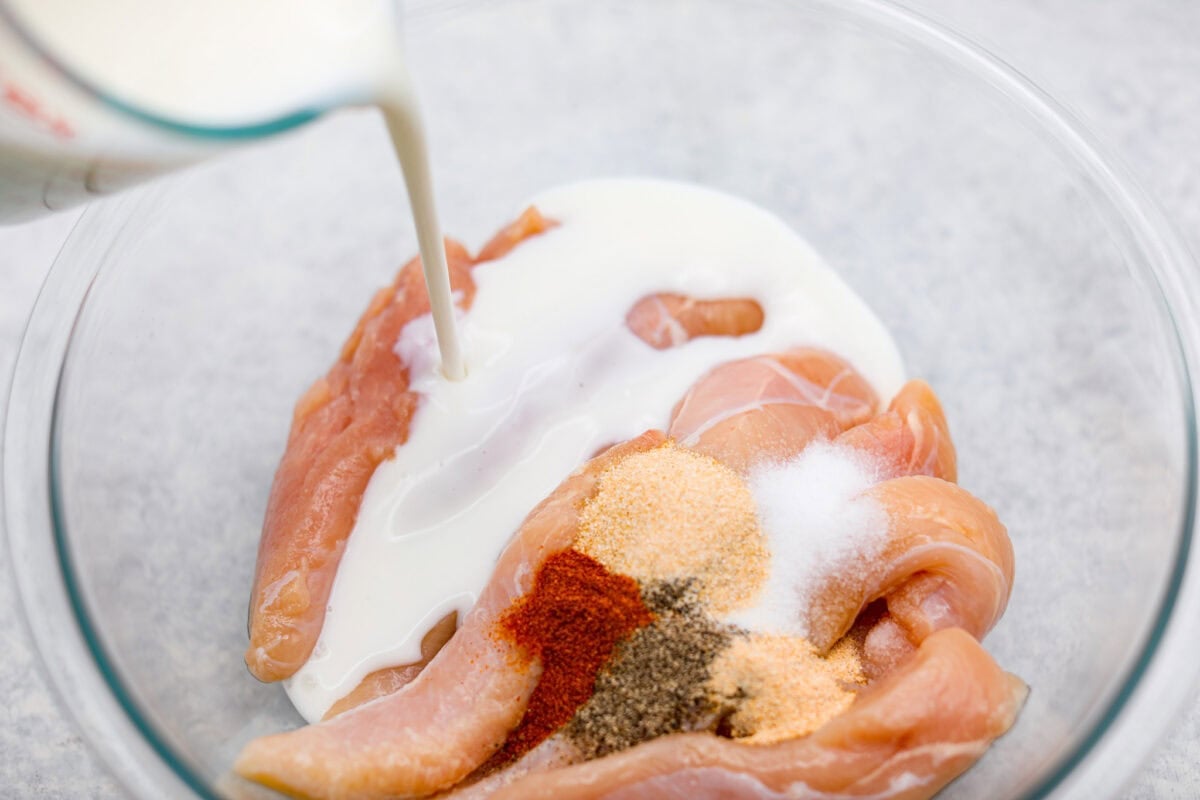
    • Mix yogurt and marinade spices in a bowl. Toss in the chicken and marinate for at least 30 minutes (overnight is even better).
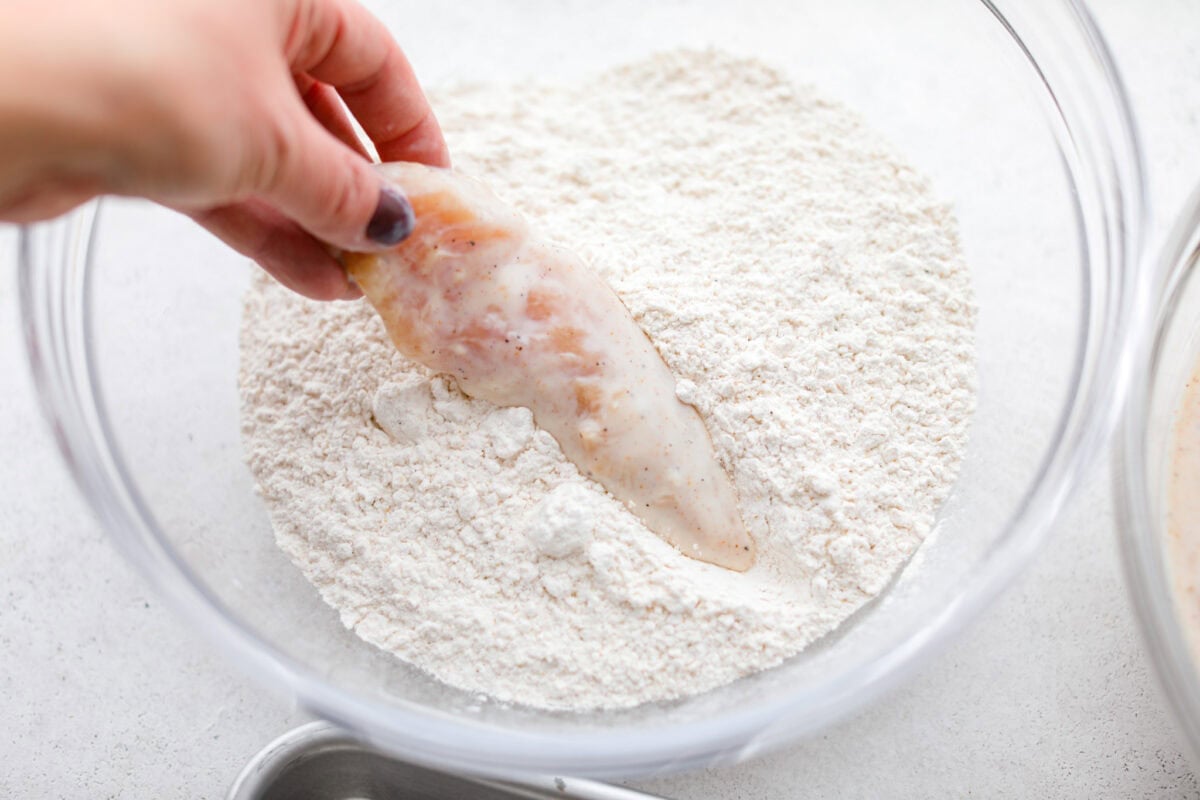
    • Combine coating ingredients in a separate bowl.
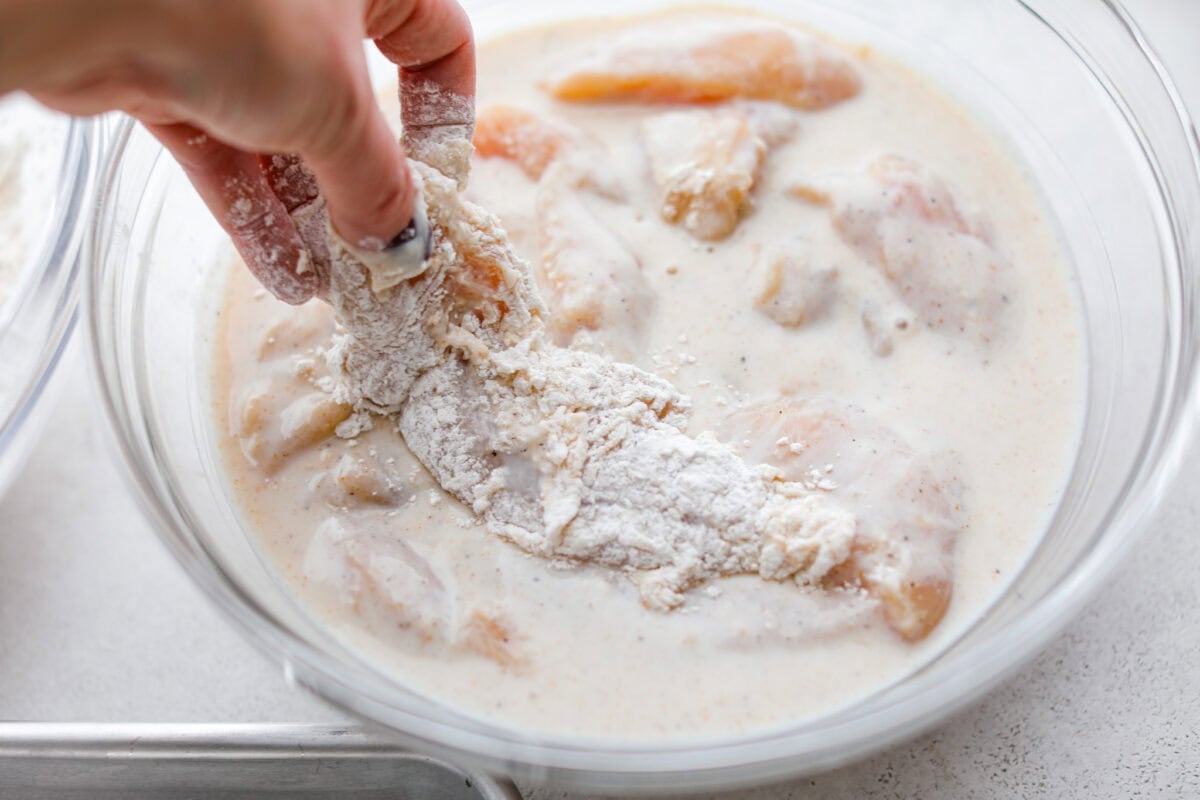
    • Coat chicken using the “sandwich” method: spread some coating on a plate, add chicken, top with more coating, and toss gently.
    • Place on a lined tray or in air fryer basket. Spray with olive oil generously.
    • Baking: Preheat oven to 210°C / 410°F. Bake for 15 minutes, flip, spray again, then bake for 10 more minutes.
    • Air Frying: Preheat to 200°C / 400°F. Lightly oil the basket, place chicken in a single layer, spray with oil, and cook for 12 minutes, flipping halfway. Let rest for 5 minutes to crisp up fully.

    Watch The Video

    Recipe Tips

    • Make-ahead: Marinate the chicken the night before, or coat it and refrigerate until ready to cook.
    • Storage: Keep leftovers in an airtight container in the fridge for up to 3 days. Reheat in the air fryer or oven for best texture.
    • Freezer-friendly: Freeze after cooking. Reheat straight from frozen.
    • Extra crispy tip: Don’t overcrowd the pan or basket—that hot air needs room to work!
    • Add heat: A little cayenne or chili powder goes a long way if you like a kick.
    • Gluten-free? Use GF flour and potato starch instead.

    Serving Suggestions

    These are super versatile. Serve them with your favorite dip—healthy yogurt ranch dressing, aioli (sun-dried tomato or rosemary chili), bang bang sauce—or pile into a wrap, salad bowl, or lunchbox. I often serve them with air-fried chips or roasted sweet potatoes for a fun, high-protein dinner that doesn’t feel like “healthy food.” And of course, you must try my popcorn chicken bowls.

    💬 If you’ve tried this chicken bites or any other recipe on the blog then don’t forget to rate the recipe and let me know how you got on in the comments below, I love hearing from you! You can also FOLLOW ME on Instagram, Facebook, Pinterest, YouTube, and or sign up to my Newsletter to see more of my delicious food.

    Want to Save This Recipe?

    Enter your email & I’ll send it to your inbox. Plus, get great new recipes from me every week!

    By submitting this form, you consent to receive emails from Cooked & Loved

    These healthy chicken bites are like the snacky, protein-packed cousin of popcorn chicken—crispy, juicy, and baked or air-fried to golden perfection. Find step-by-step photos and more recipe tips above.

    • Marinate: Mix yogurt, spices, and salt in a bowl. Add chicken and coat well. Cover and refrigerate for at least 30 minutes (or overnight).

    • Coating: Mix all coating ingredients in a bowl.

    • Coat: Spread half the coating on a plate, lay chicken on top, sprinkle remaining coating, and toss gently to coat.

    • Bake: Preheat to 210°C / 410°F. Line a tray, place chicken on it, and spray with oil. Bake for 15 minutes, flip, spray again, bake another 10 minutes.

    • Air Fryer: Preheat to 200°C / 400°F. Lightly oil the basket and spread chicken in a single layer. Spray with oil and air fry for 12 minutes, flipping halfway.

    • Let rest for a few minutes to finish crisping before serving.

    • Can I use chicken thighs? Yes! They’re juicier and just as delicious.
    • Can I prep this in advance? Definitely. Marinate overnight or coat in advance and store in the fridge.
    • Can I freeze it? Yes—cook first, then freeze. Reheat in the oven or air fryer until crisp.
    • Any sauce pairings? These go with everything: ranch, garlic aioli, spicy mayo, Romesco, you name it.
    • Can I double the recipe? Go for it! Just cook in batches if using an air fryer so everything crisps up properly.
    • Make-ahead: Marinate the chicken the night before, or coat it and refrigerate until ready to cook.
    • Storage: Keep leftovers in an airtight container in the fridge for up to 3 days. Reheat in the air fryer or oven for best texture.
    • Freezer-friendly: Freeze after cooking. Reheat straight from frozen.
    • Extra crispy tip: Don’t overcrowd the pan or basket—that hot air needs room to work!
    • Add heat: A little cayenne or chili powder goes a long way if you like a kick.
    • Gluten-free? Use GF flour and potato starch instead.

    Calories: 291kcal | Carbohydrates: 32g | Protein: 29g | Fat: 5g | Saturated Fat: 1g | Polyunsaturated Fat: 1g | Monounsaturated Fat: 1g | Trans Fat: 0.01g | Cholesterol: 76mg | Sodium: 1603mg | Potassium: 593mg | Fiber: 2g | Sugar: 2g | Vitamin A: 682IU | Vitamin C: 2mg | Calcium: 77mg | Iron: 2mg

    Keywords: healthy chicken bites, Chicken Bites, baked chicken bites, air fryer chicken bites

    More Healthy Chicken Recipes


    Source link