Author: admin

  • Bang Bang Shrimp (Copycat Recipe)

    Bang Bang Shrimp (Copycat Recipe)

    This website may contain affiliate links and advertising so that we can provide recipes to you. Read my disclosure policy.
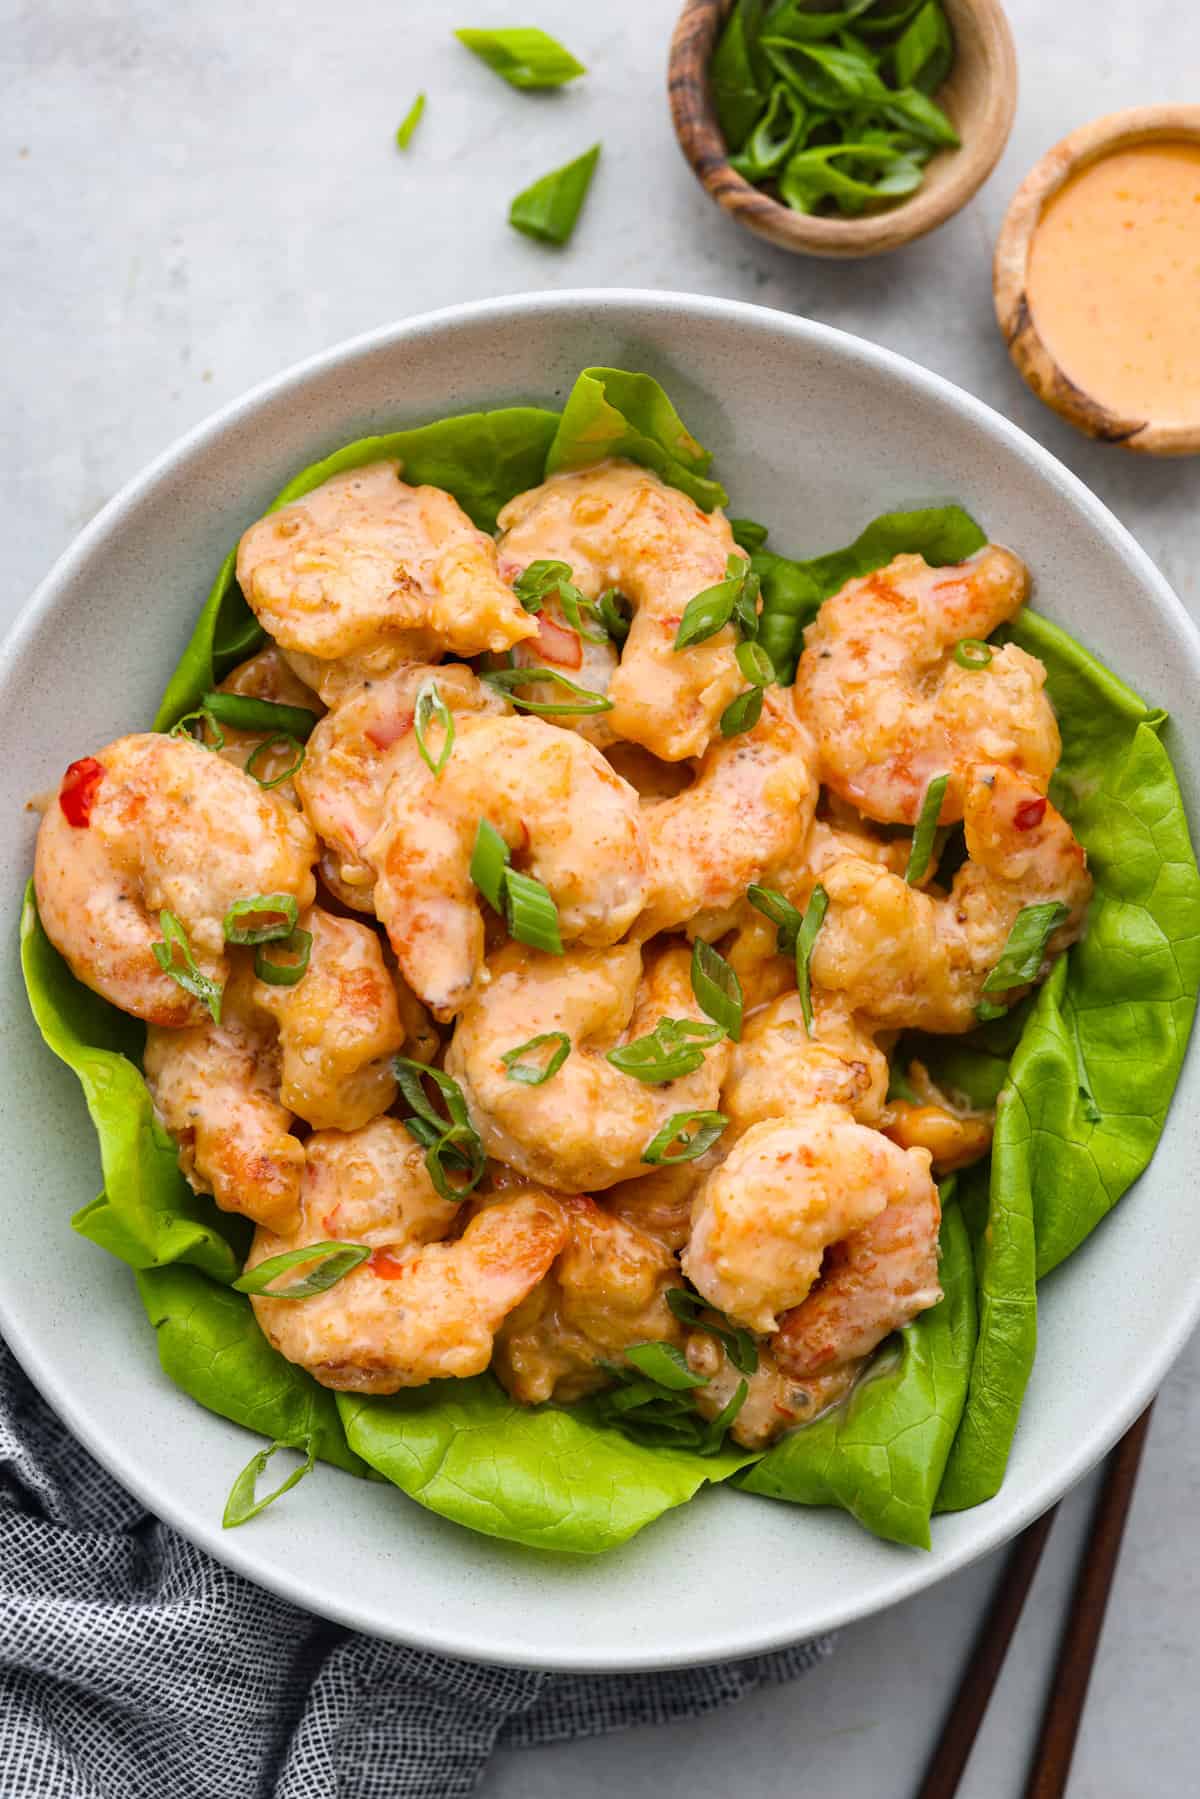
    This Copycat Bonefish Grill Bang Bang Shrimp is a replica of everyone’s favorite shrimp appetizer! Sweet shrimp are fried until crispy, then tossed in a spicy, creamy mayo, and topped with chives. Perfect for sharing!

    We love bite-sized apps, so be sure to check out these Crispy Cauliflower Fritters, Slow Cooker Honey Garlic Sriracha Wings, or this Sweet and Savory Bacon Wrapped Shrimp.
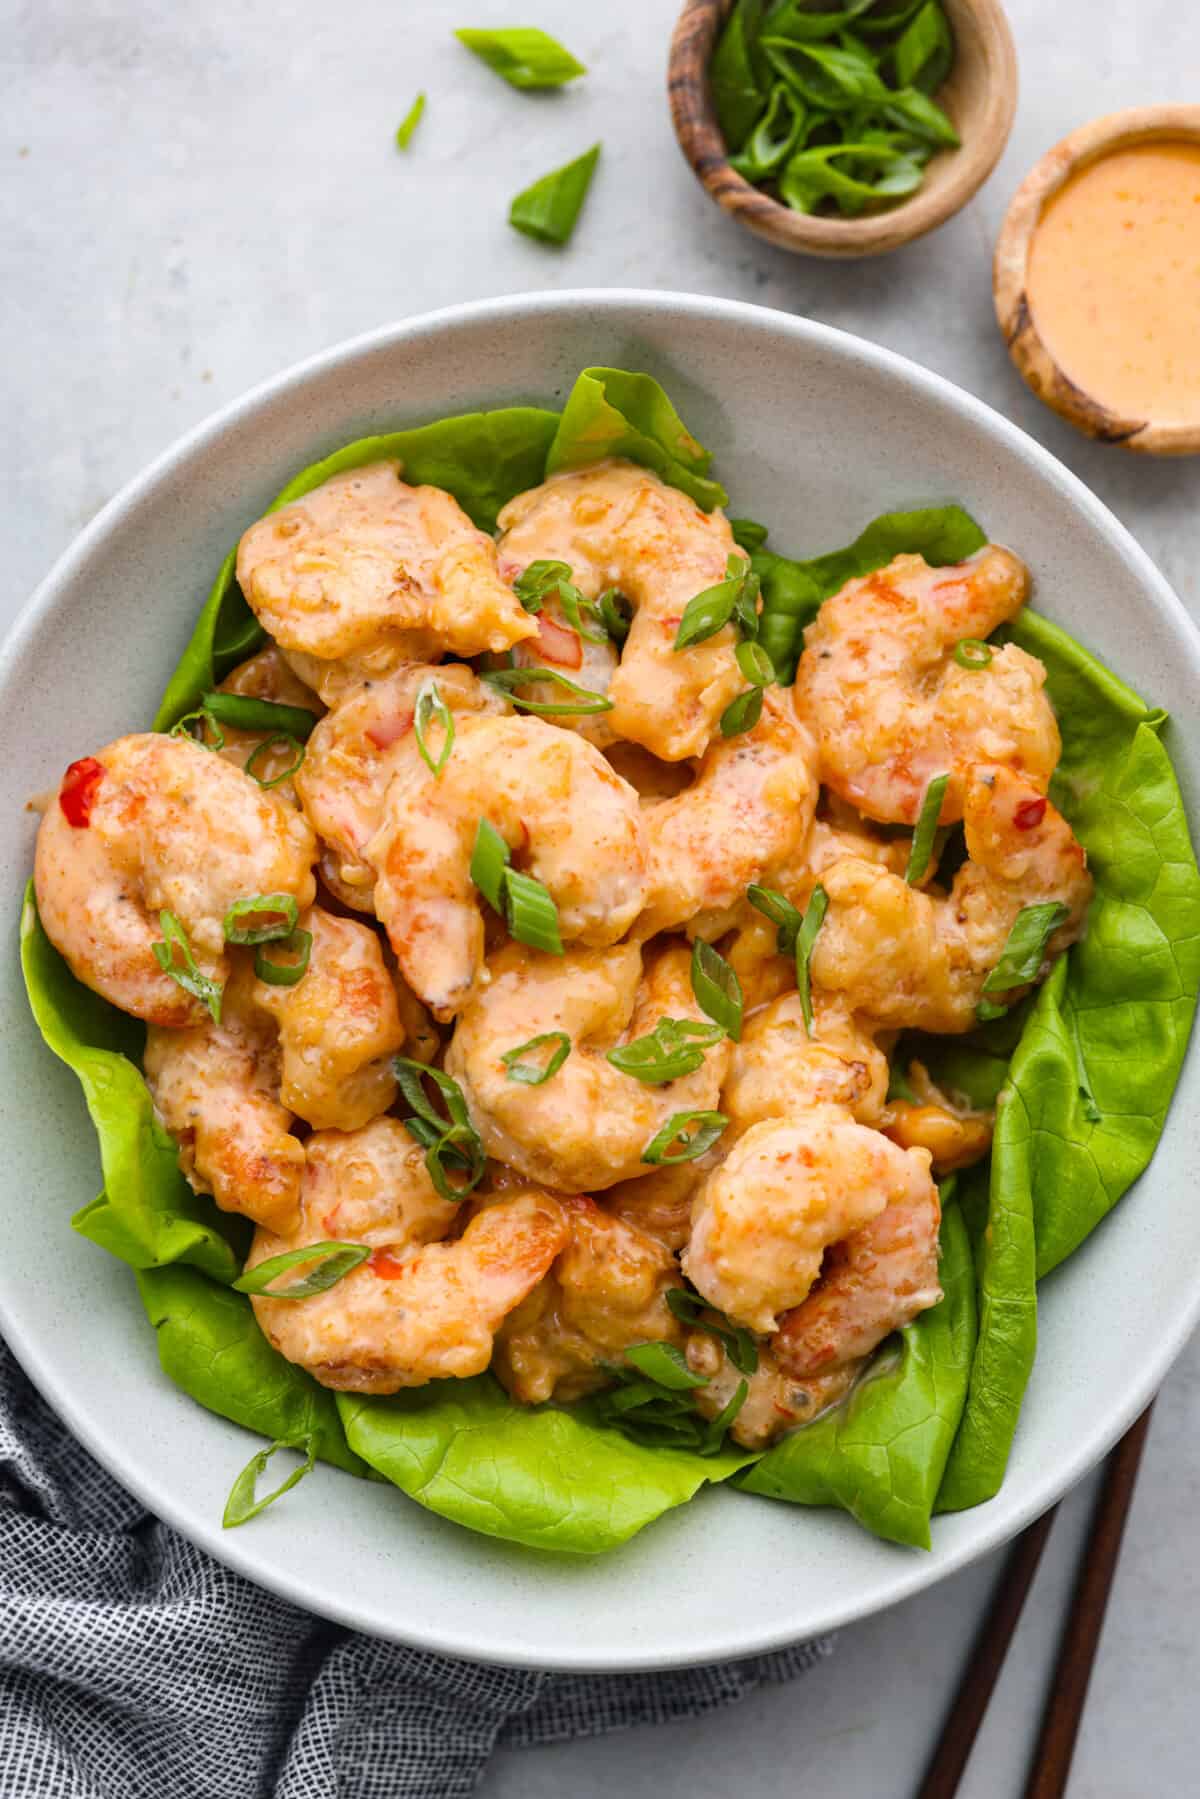
    Bang bang shrimp served over a bed of greens in a white bowl.Bang bang shrimp served over a bed of greens in a white bowl.

    Copycat Bang Bang Shrimp Recipe

    A copycat version of the popular appetizer from Bonefish Grill in Florida! If you’re not familiar, their signature appetizer consists of lightly breaded shrimp (fried of course) tossed in an addictively creamy and spicy mayo-based sauce. What I love so much about this appetizer is it’s not heavy at all. The shrimp are ever-so-slightly fried, with the most delicate coating. (SO good.)

    To achieve this, I used a combination of cornstarch and flour (and plenty of salt of course), which helps to get a super light crust in the end. Bang bang shrimp is always a win and I know you’ll love it as much as I do. It will make everyone in your family a shrimp fan! The flavor and texture of this dish is just too good to resist.

    Ingredients You’ll Need

    You really don’t need too many ingredients to achieve that classic ‘Bang Bang’ flavor. Just some sriracha and sweet chili sauce! You’ll likely have everything else on hand to whip it up.

    • Peeled and Deveined Shrimp: Choose large shrimp for a heartier bite. Make sure they’re peeled, deveined (that’s the dark vein running down the back), and with the tails removed for easy eating.

    What Size Shrimp Should I Use?

    Large or 31-count shrimp. This means there are about 30-33 shrimp per pound.

    Breading:

    • Salt and Pepper: Basic seasonings to add a little flavor.
    • Whole Milk: This helps the cornstarch coating adhere to the bang bang shrimp.
    • Large Egg: Also helps the cornstarch stick and adds a touch of richness.
    • Cornstarch: The corn starch creates a crispy, light coating when fried.

    Bang Bang Sauce:

    • Mayonnaise: The creamy base of the sauce.
    • Honey: For the perfect sweetness and sticky texture.
    • Thai Sweet Chili Sauce: The perfect blend of sweet and spicy! This is a must-add to get the sauce tasting just like Bonefish Grill.
    • Sriracha Sauce: So your sauce has some heat! Adjust the amount to your spice preference.
    • Salt: Enhances all the other flavors in the sauce.

    Let’s Get Cooking!

    Don’t let the frying intimidate you- bang bang shrimp is actually pretty easy to prepare and only takes 30 minutes from start to finish. A restaurant-quality appetizer in a snap? Yes please!

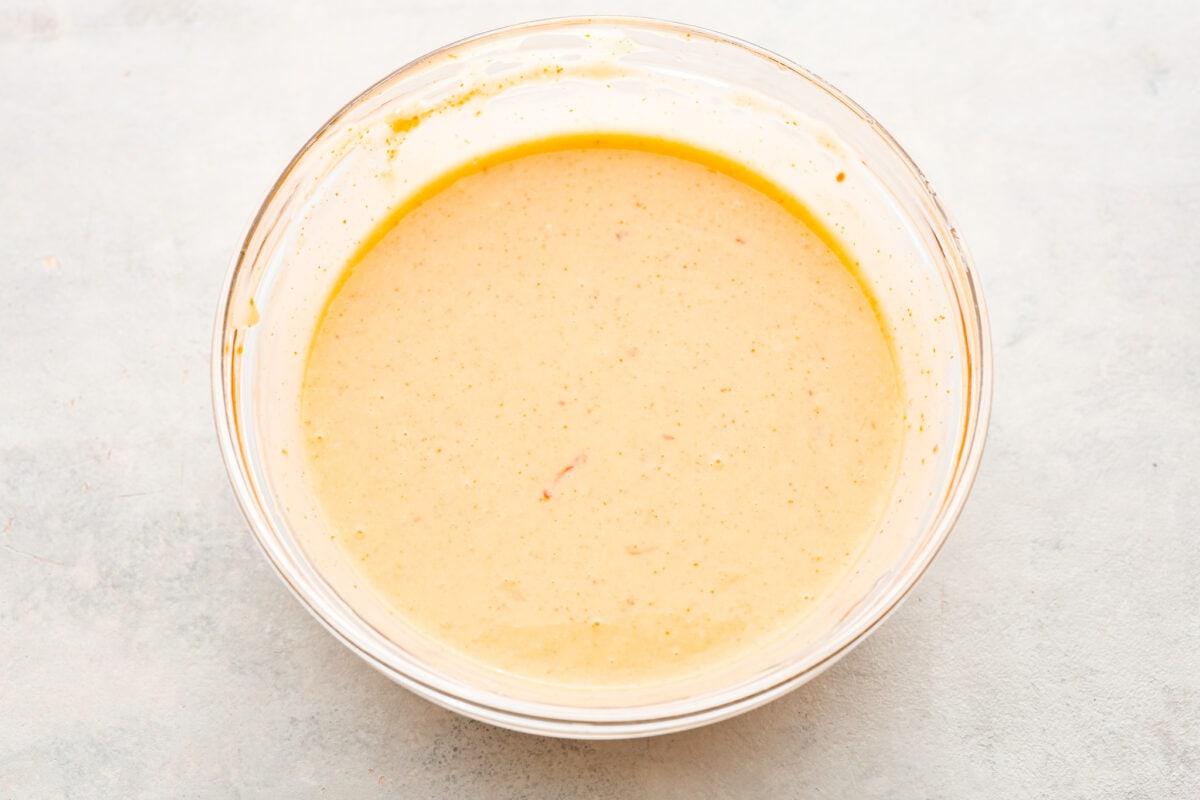
    1. Prepare the Bang Bang Sauce: Prepare the bang bang sauce by adding the mayonnaise, honey, sweet chili sauce, sriracha, and salt to a medium bowl. Whisk to combine and set aside.
    2. Whisk Together the Milk and Egg: In a large bowl, whisk together the milk and egg.
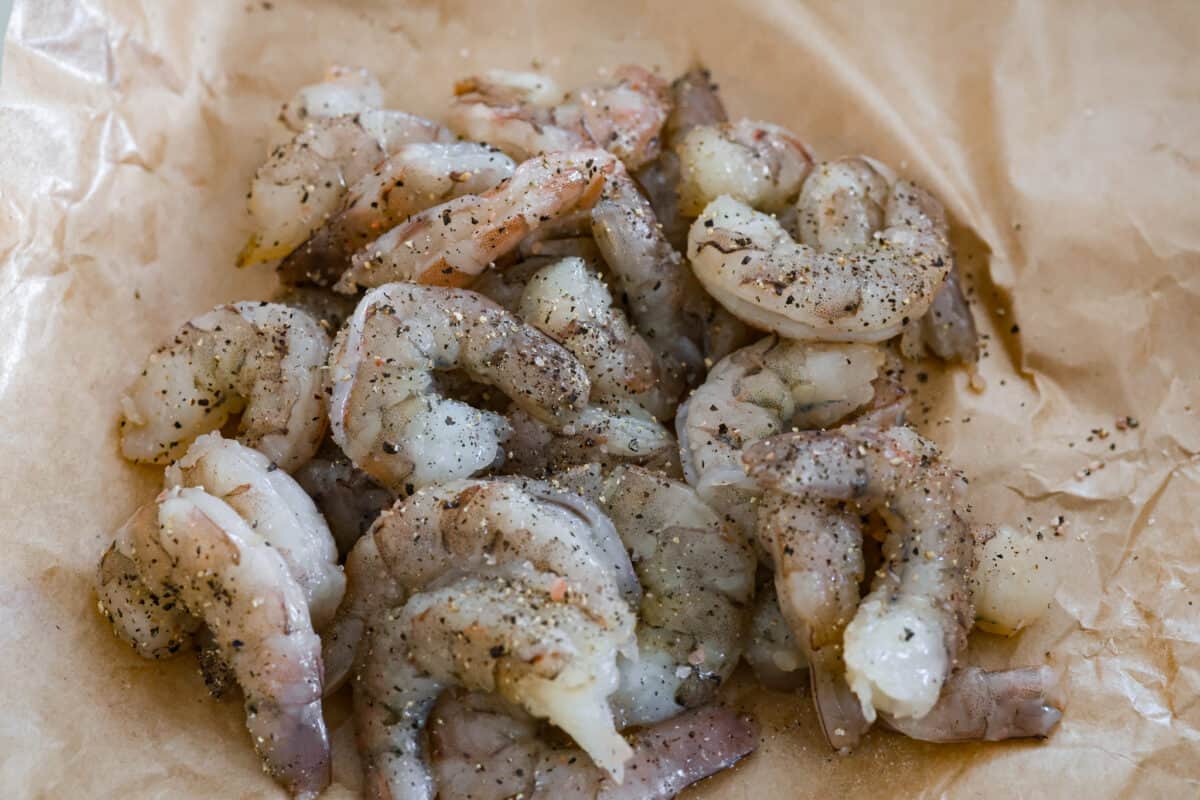
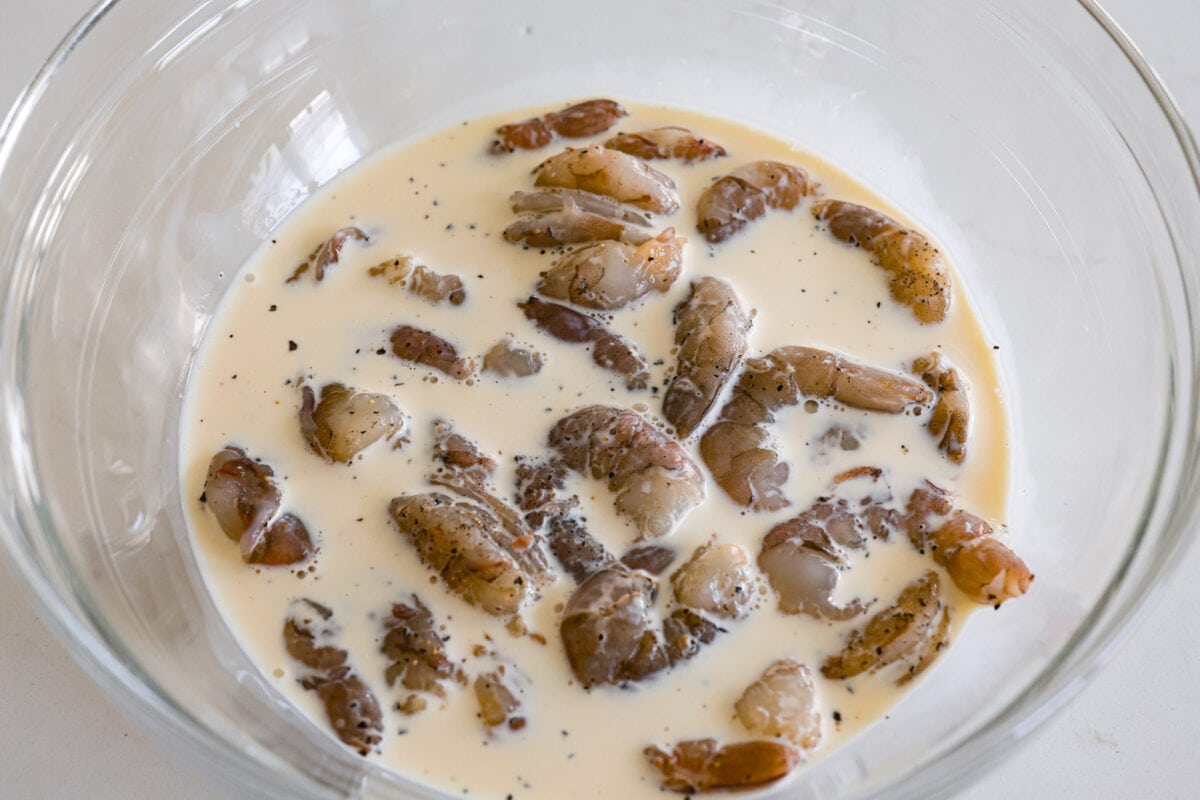
    3. Season and Coat the Shrimp in the Milk Mixture: Season the peeled and deveined shrimp with salt and pepper. Add the shrimp to the milk and egg mixture then toss to coat.
    4. Heat the Oil: Heat the oil in a heavy-bottomed deep pot. Add enough oil to come up about 5 inches. Heat to 375 degrees Fahrenheit.
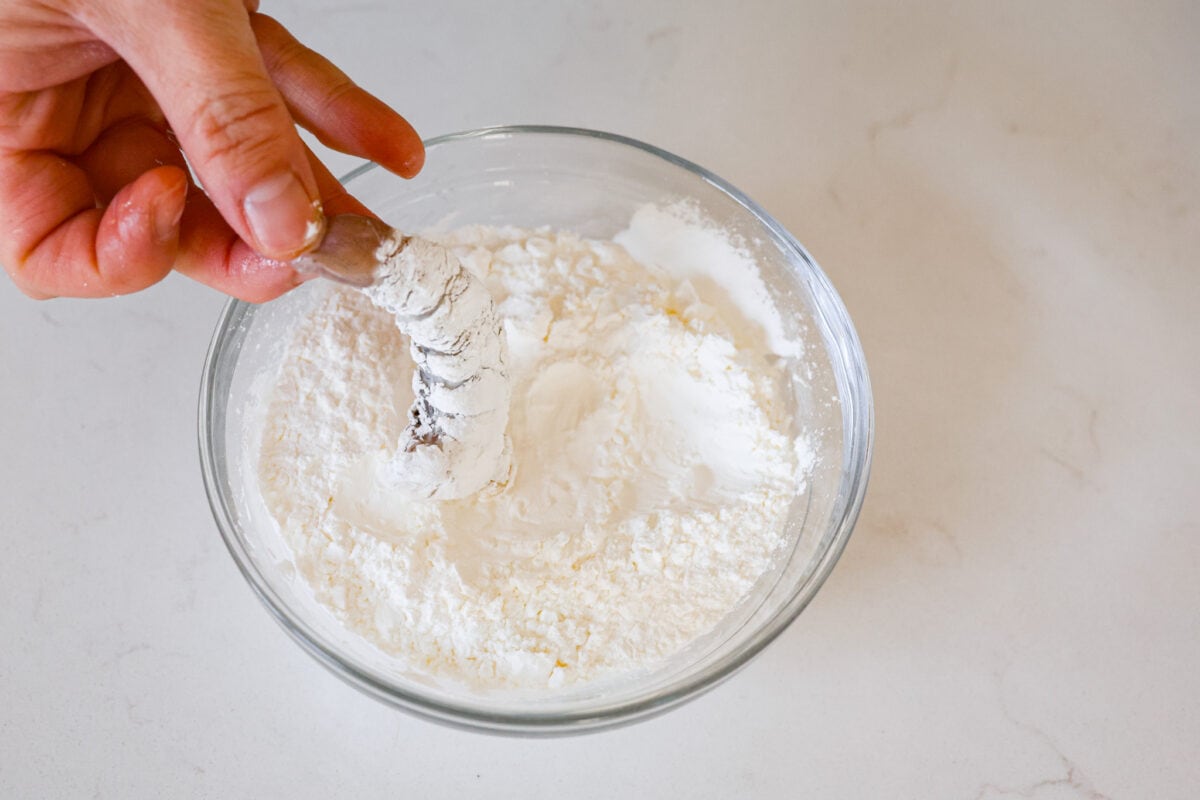
    5. Coat the Shrimp in Cornstarch: In a shallow bowl, add the cornstarch. Working in batches, use tongs to remove 1 shrimp from the milk mixture, letting any excess liquid drip off. Coat the shrimp in cornstarch then place in the hot oil.
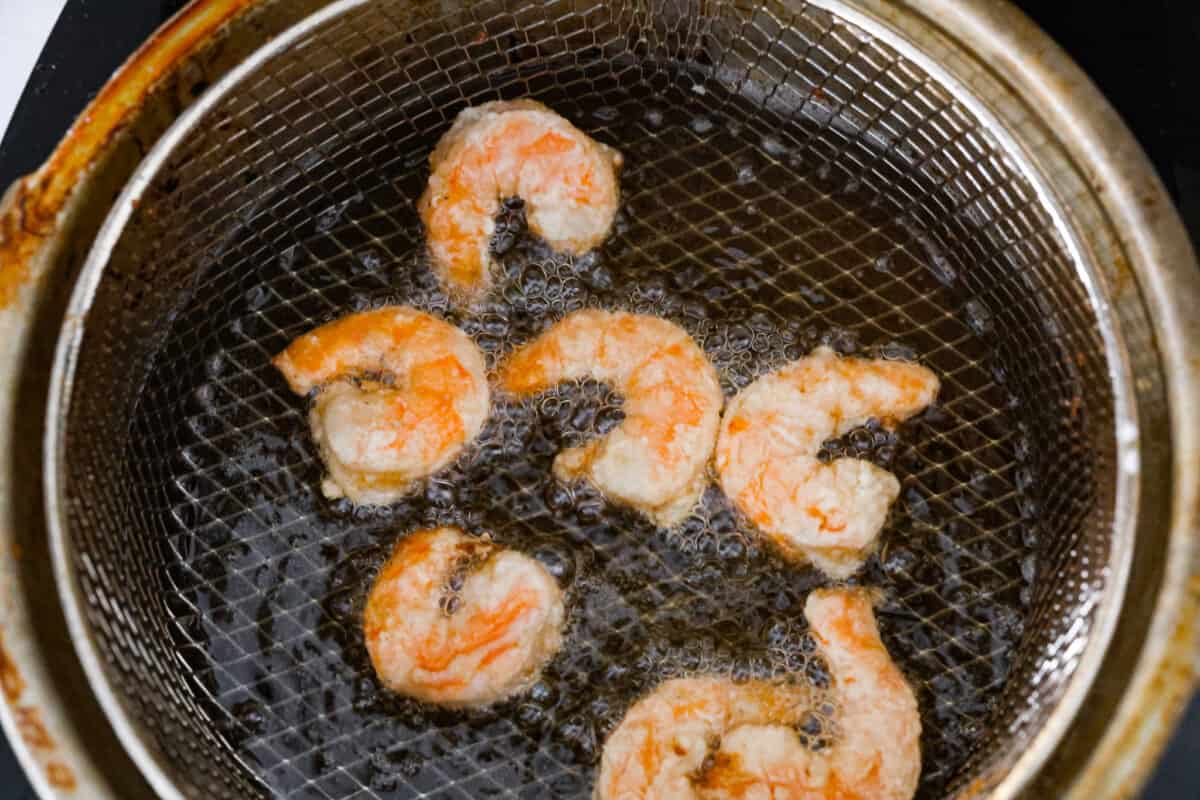
    6. Fry the Shrimp: Fry until golden brown and cooked through, about 2-3 minutes. Remove the shrimp with a slotted spoon and then drain on paper towels. Repeat this process with the remaining shrimp.
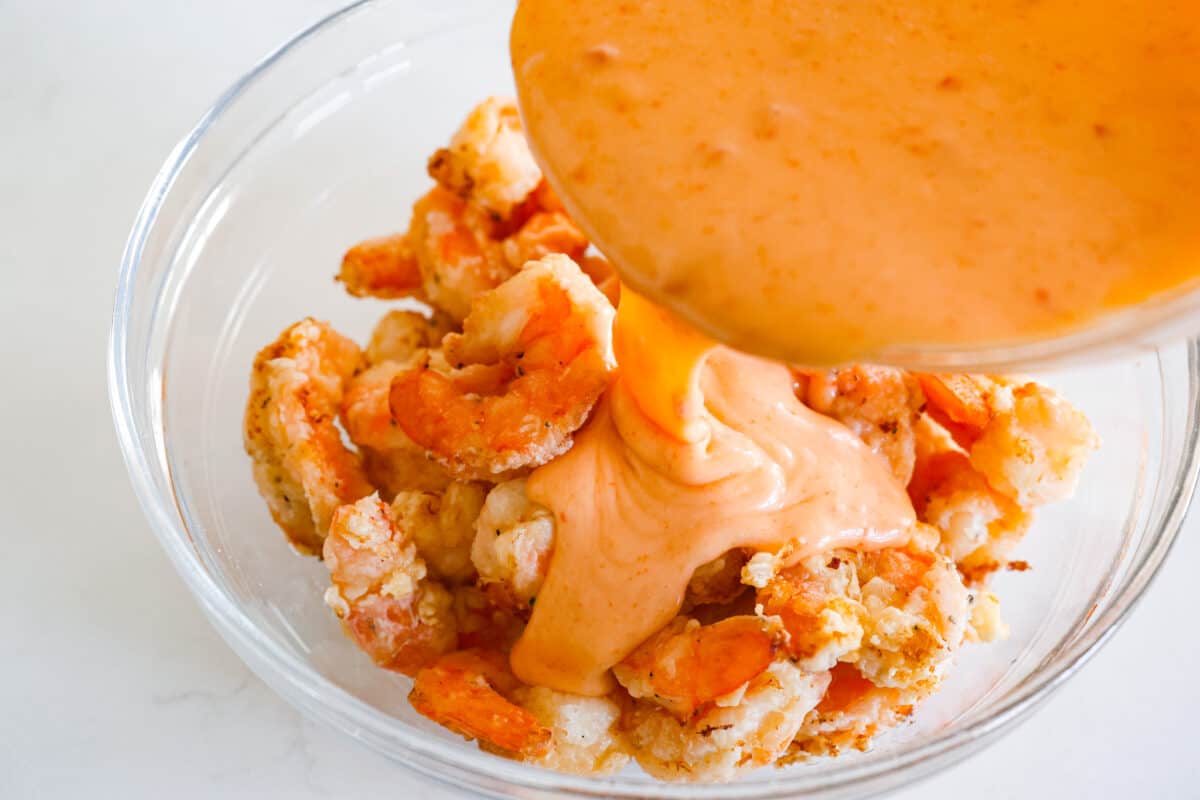
    7. Coat the Shrimp With the Bang Bang Sauce: Toss the fried shrimp with the bang bang sauce then enjoy!
    Bang Bang Shrimp FAQ

    A few extra things to keep in mind so your bang bang shrimp turns out perfectly! Your friends and family are going to go crazy over it.

    • Do I need to take the tails off of my shrimp? This is totally a personal preference. I like to the leave the tails on because it’s pretty, but it’s more practical to take them off, so you can just pop them into your mouth!
    • Can I use low-fat mayo? Absolutely! I actually encourage it. I don’t find there to be a big enough flavor or texture difference in full-fat mayo versus low-fat mayo, so I always suggest doing something that alleviates some of the extra fat and calories.
    • Can I use a mayo substitute? Yes! If you aren’t a fan of mayo, you can swap out the mayonnaise for plain Greek yogurt or sour cream.
    • How many people does this serve? As an appetizer, I would say this bang bang shrimp feeds four people, but if it’s more of an entree (which I completely encourage), then I’d say it feeds two people. I would recommend doubling it if you’re unsure about there being enough for everyone.
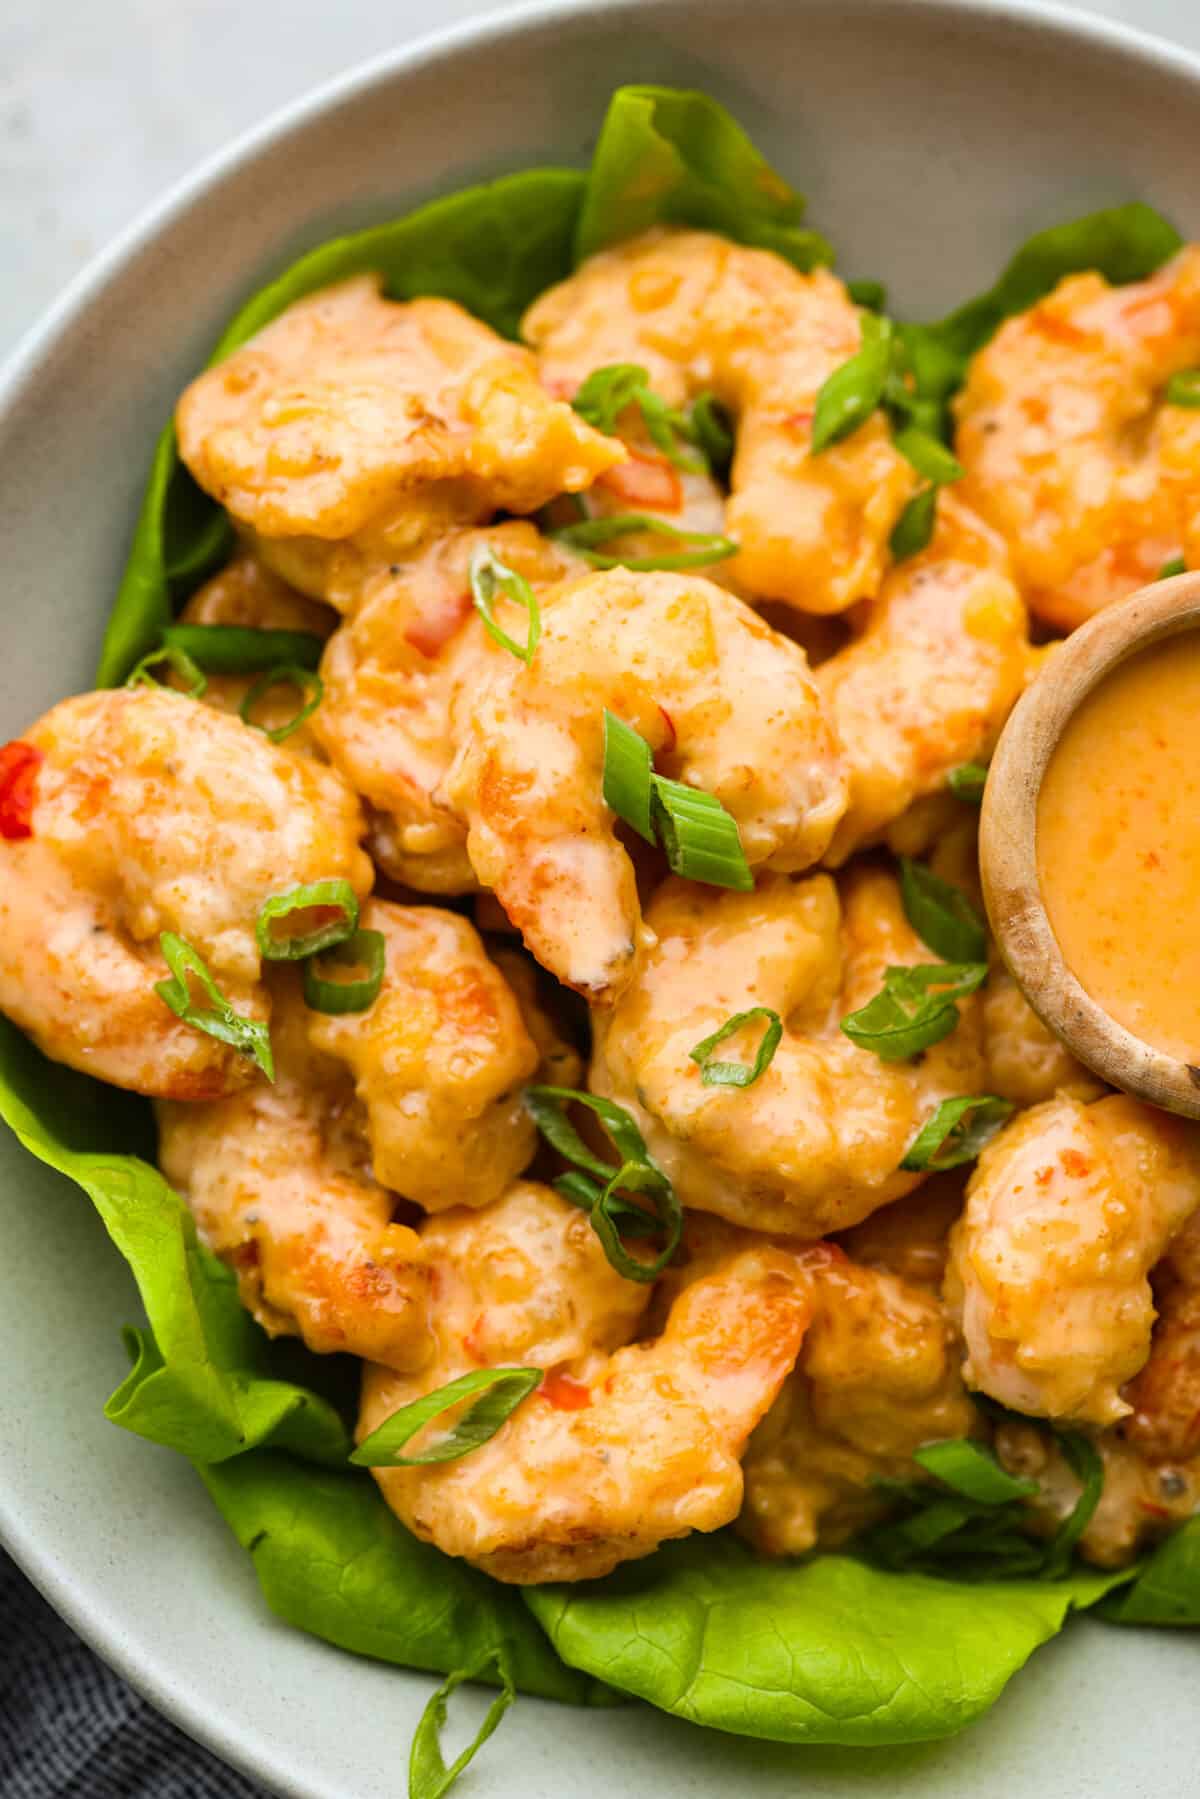
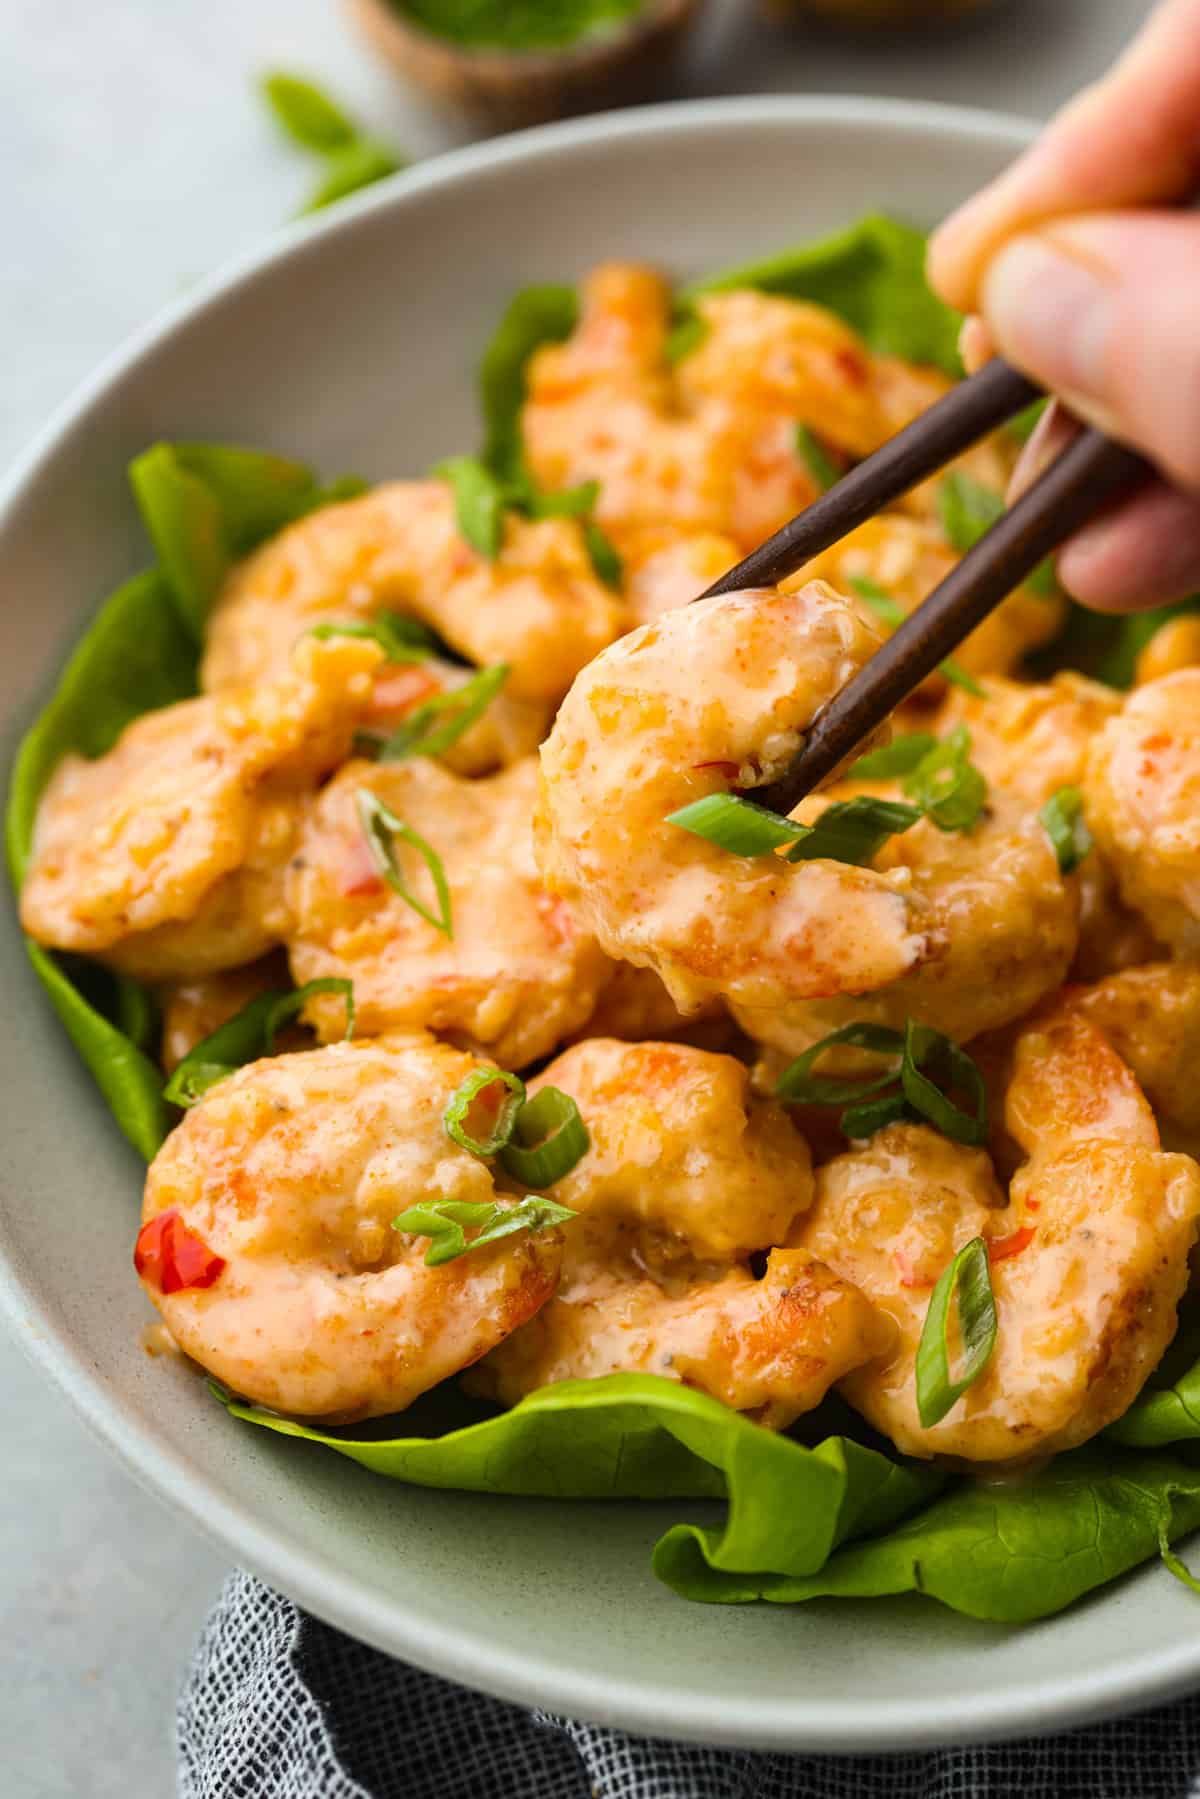
    Closeup of bang bang shrimpCloseup of bang bang shrimp

    Storing Leftover Bang Bang Shrimp and Sauce

    While I recommend enjoying your bang bang shrimp fresh, leftovers can be stored for up to 3 days in the fridge. The key here is to keep the shrimp separate from the sauce to prevent the breading from getting soggy.

    • In the Refrigerator: Let the shrimp cool completely, then store them in an airtight container in the refrigerator for up to 3 days. In an airtight container or jar, the sauce will last for up to 1 week.
    • Reheating: To reheat, skip the microwave and opt for an oven or air fryer to keep things crispy. Bake the shrimp for 10 minutes at 350 degrees Fahrenheit, or until heated through. Alternatively, use your air fryer at 320 degrees Fahrenheit for about 5 minutes. Warm up the bang bang sauce separately in the microwave if needed, and toss the shrimp in it just before serving.
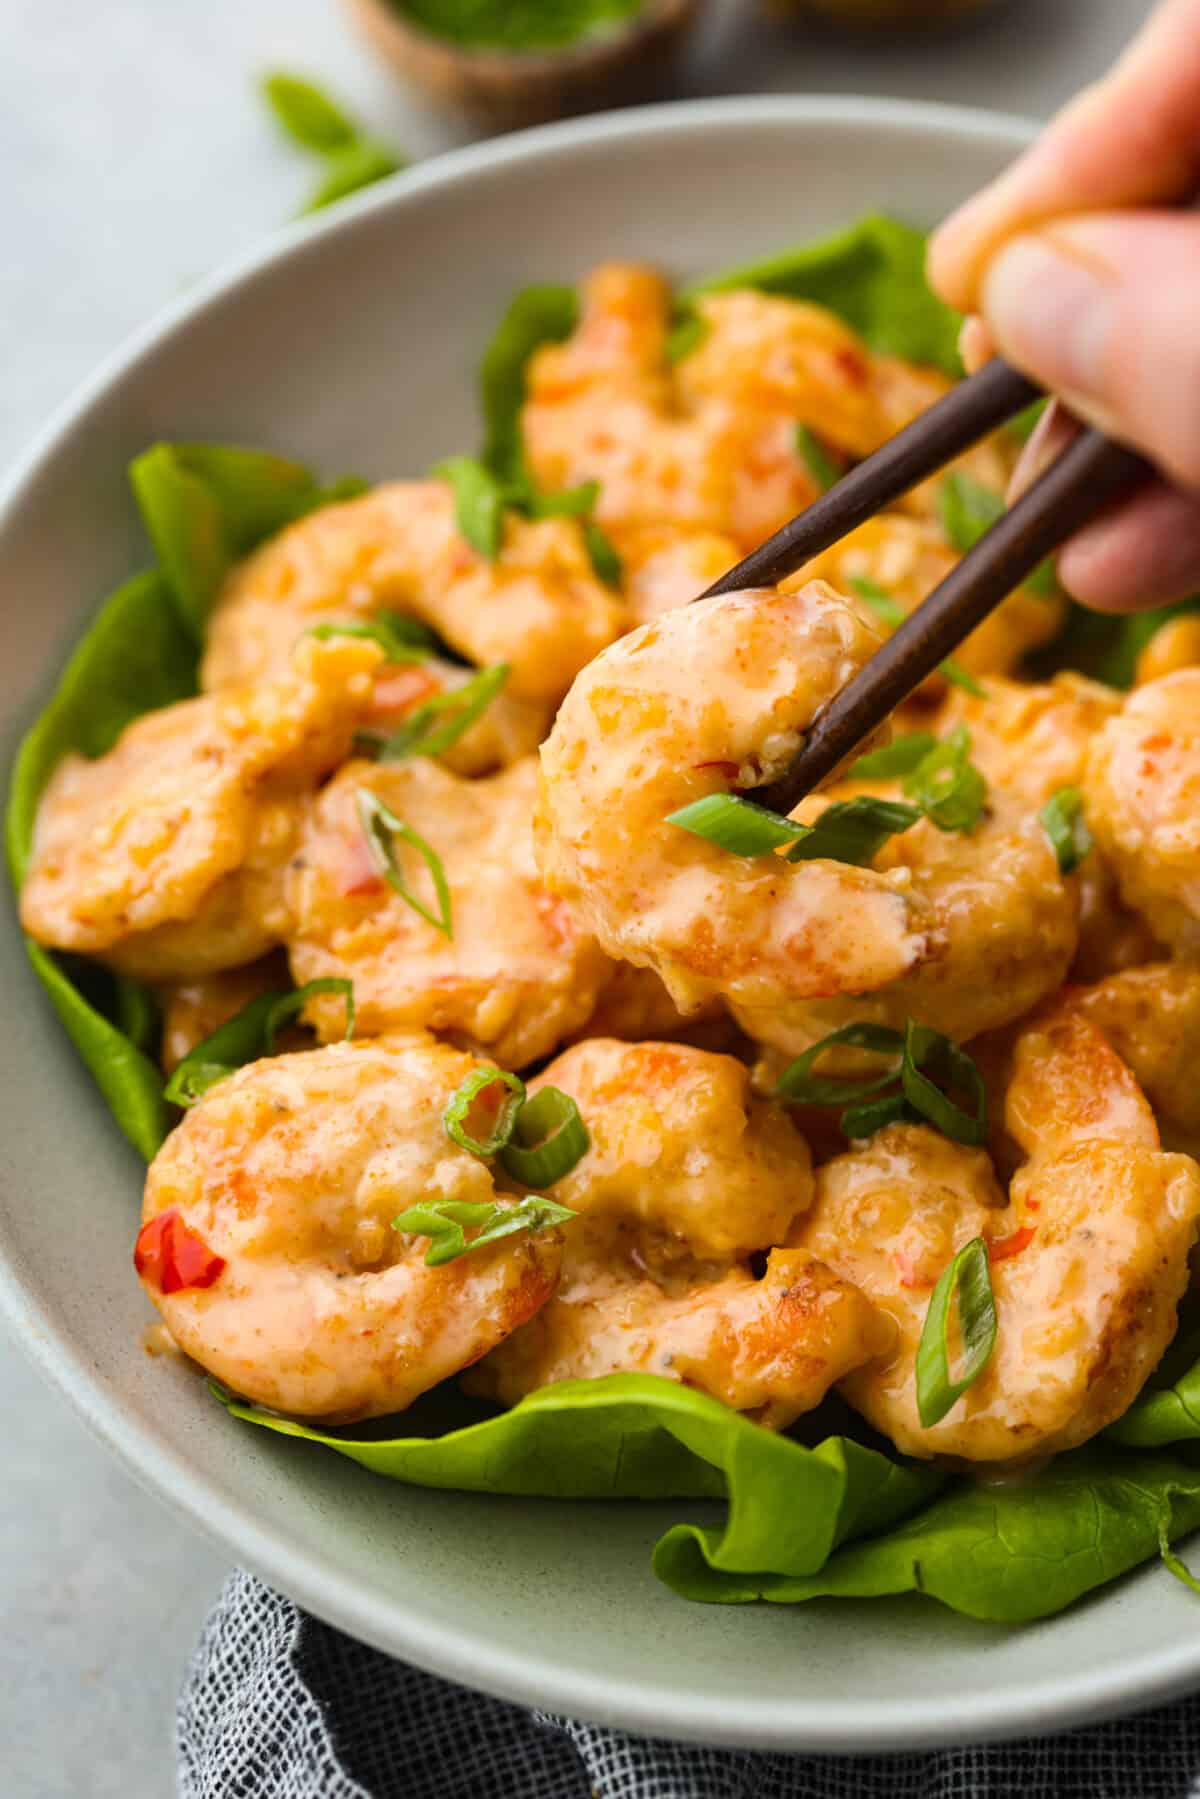
    Picking up a piece of shrimp with chopsticksPicking up a piece of shrimp with chopsticks

    More Irresistible Shrimp Recipes

    Pin this now to find it later

    Pin It


    Source link

  • Easy Almond Butter Recipe

    Easy Almond Butter Recipe

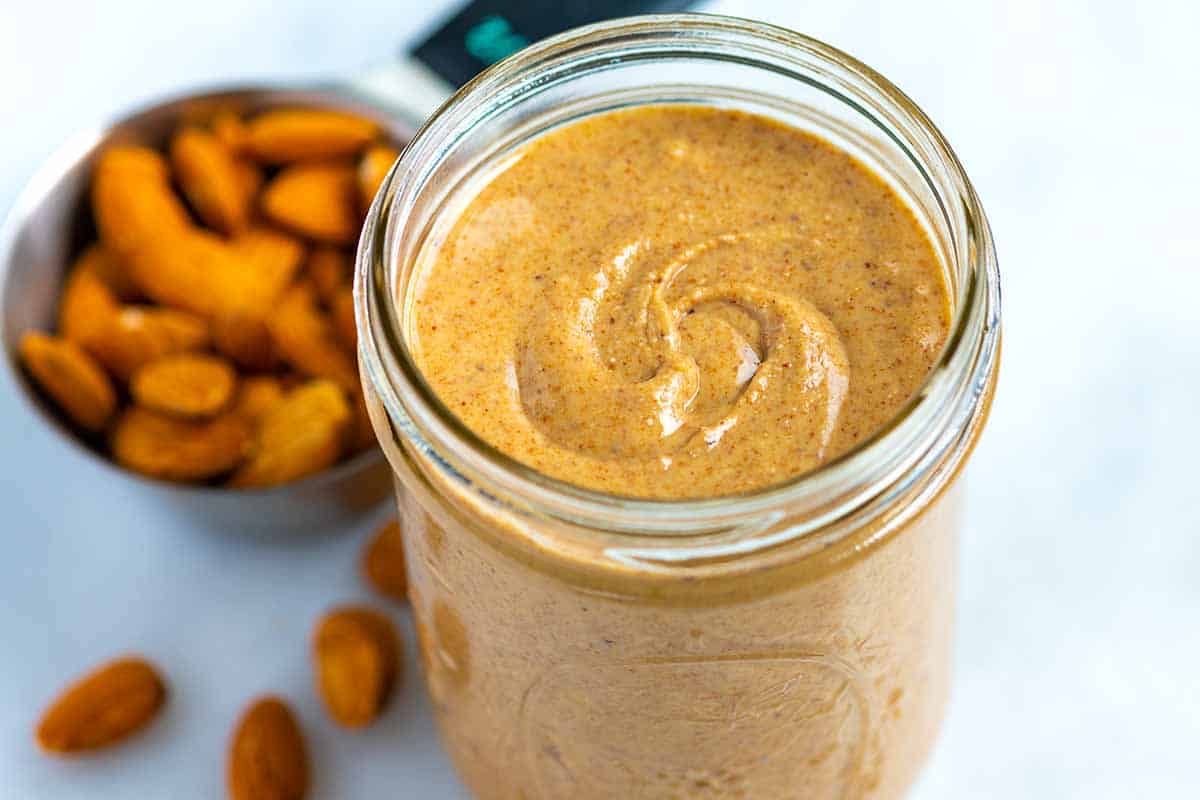
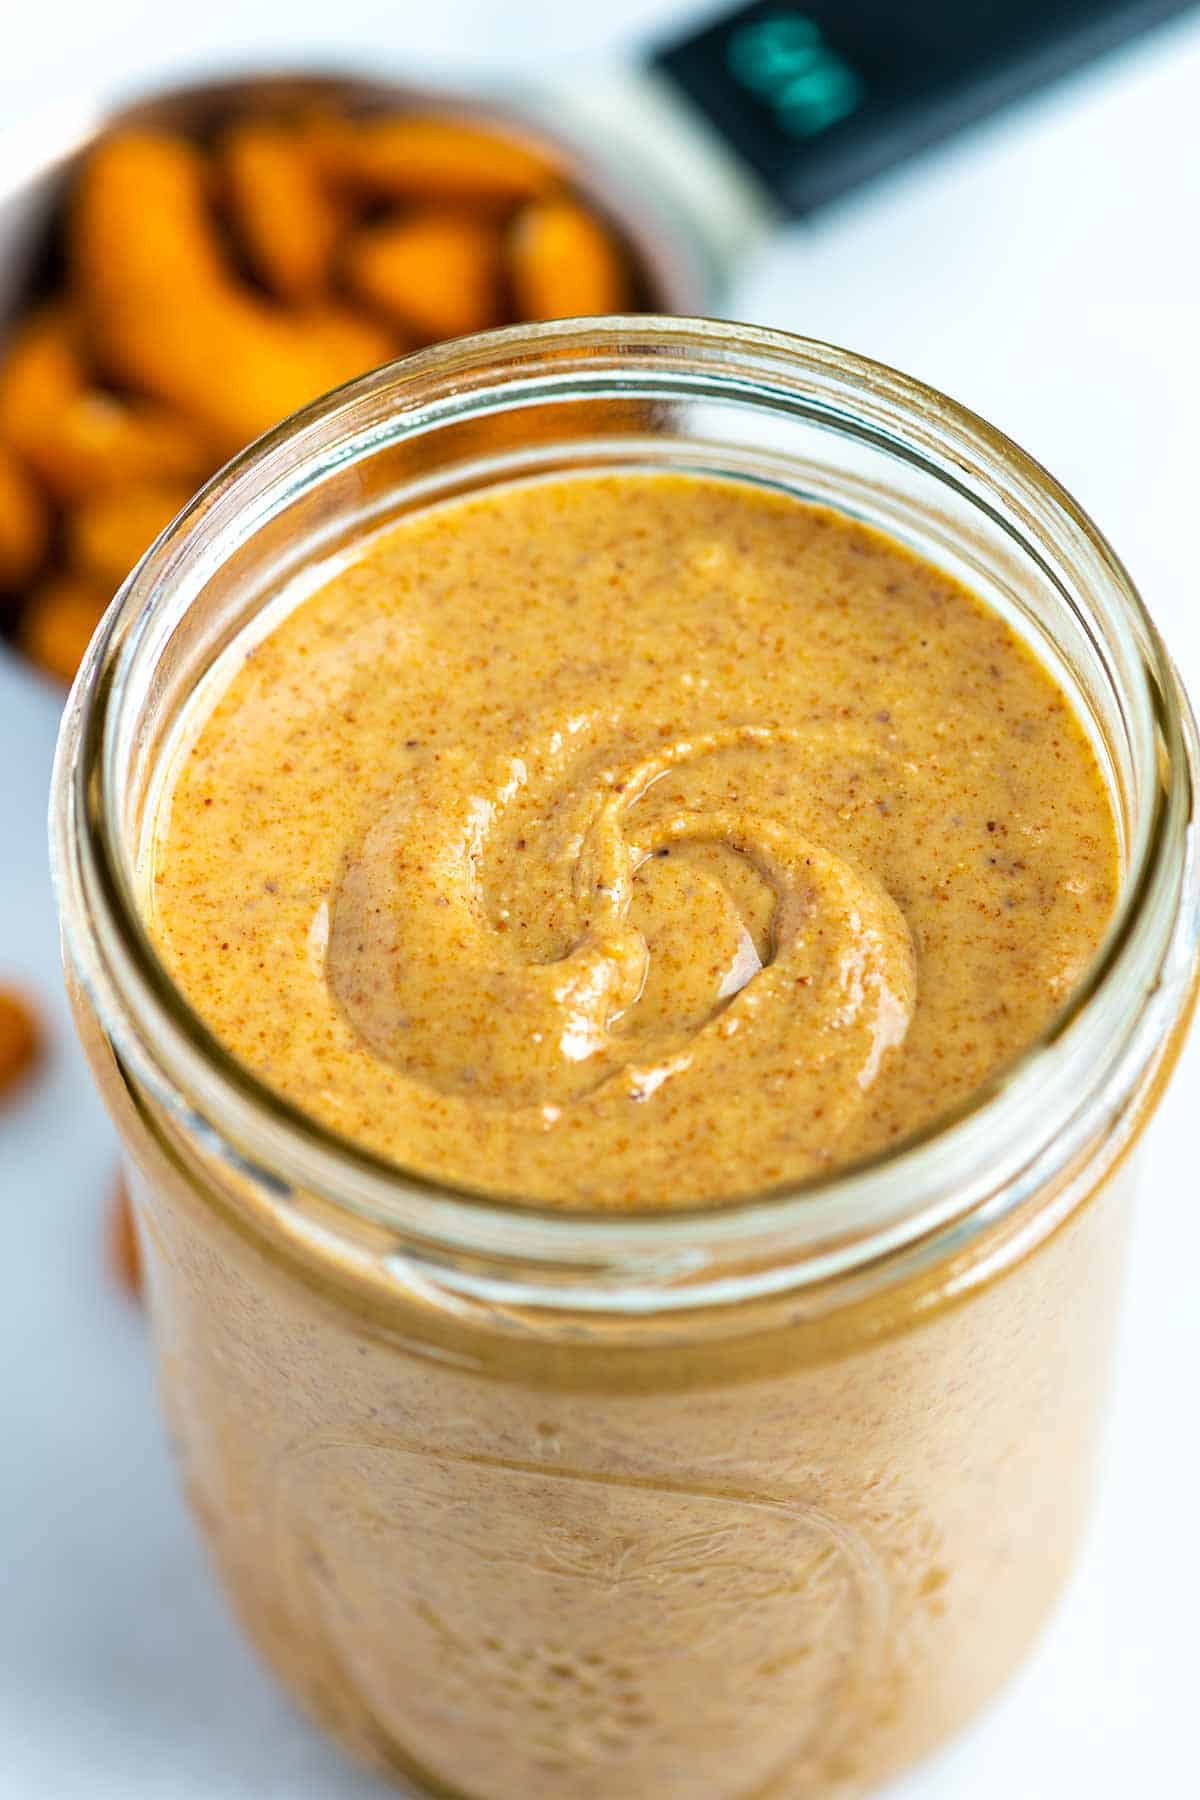
    Our homemade almond butter recipe is thick, creamy and tastes way better than anything you can buy at the store, trust me!

    Homemade Almond Butter

    Every time I make this recipe, I’m amazed at how much better it tastes compared to the jars I’ve bought from the store. My family loves adding a few extras like cinnamon and vanilla, which makes it seriously delicious!

    Making almond butter is just as simple as homemade peanut butter, cashew butter, and tahini. You even can make it super creamy or crunchy. I’ve shared how below.

    Key Ingredients

    • Almonds: I always start with raw, unsalted whole almonds and roast them in the oven until they’re perfectly toasty. Roasting the almonds before blending them into butter brings out their nutty flavor and releases their natural oils, resulting in a creamier texture.
    • Salt: Just a pinch of salt makes all the difference in flavor! You can adjust the amount to your liking.
    • Cinnamon and Vanilla: These are optional additions, but add a warm, sweet flavor that complements the almonds beautifully.
    • Sweetener: I like adding a drizzle of honey or maple syrup to balance the flavors. I don’t add much, but you can adjust it to your taste.

    Find the full recipe with measurements below.

    How to Make Almond Butter

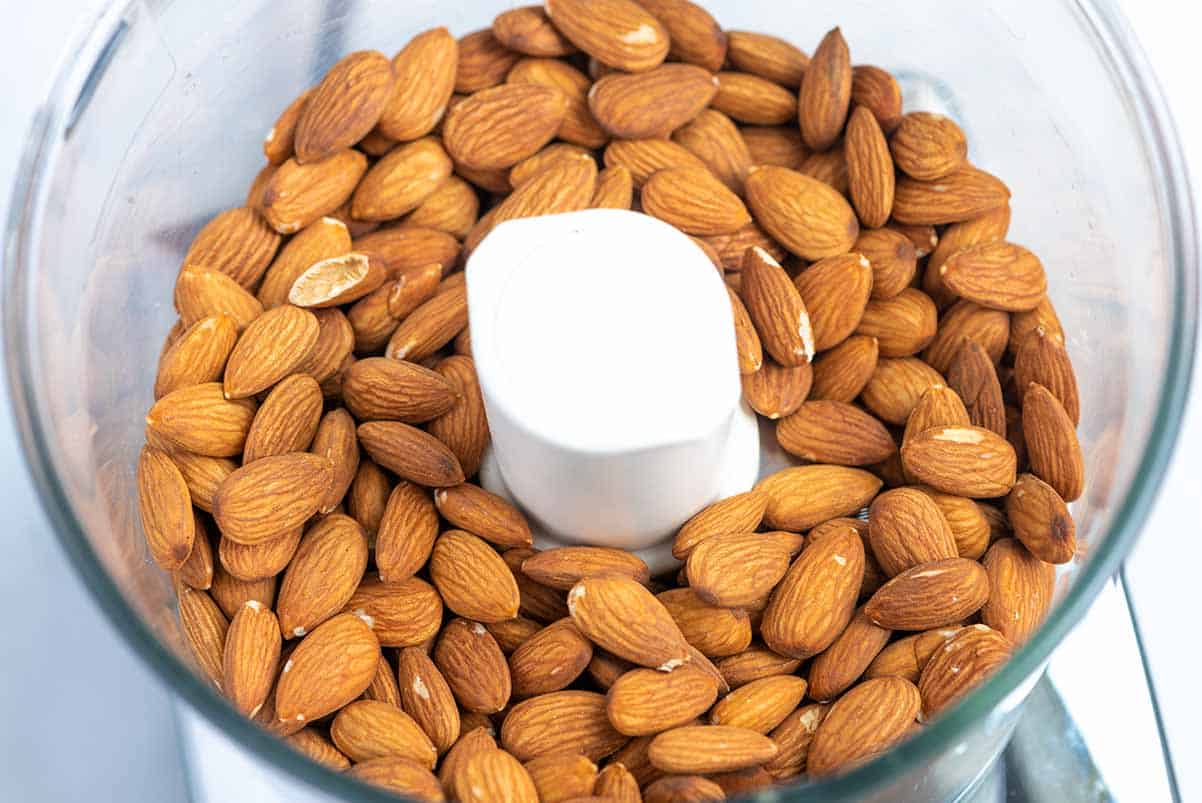
    Tip 1: Toast the almonds. I toast the raw almonds until fragrant in the oven, which takes about 10 minutes. After letting the almonds cool for a few minutes so they are not piping hot, we toss them into our food processor (you can also use a high-speed blender).

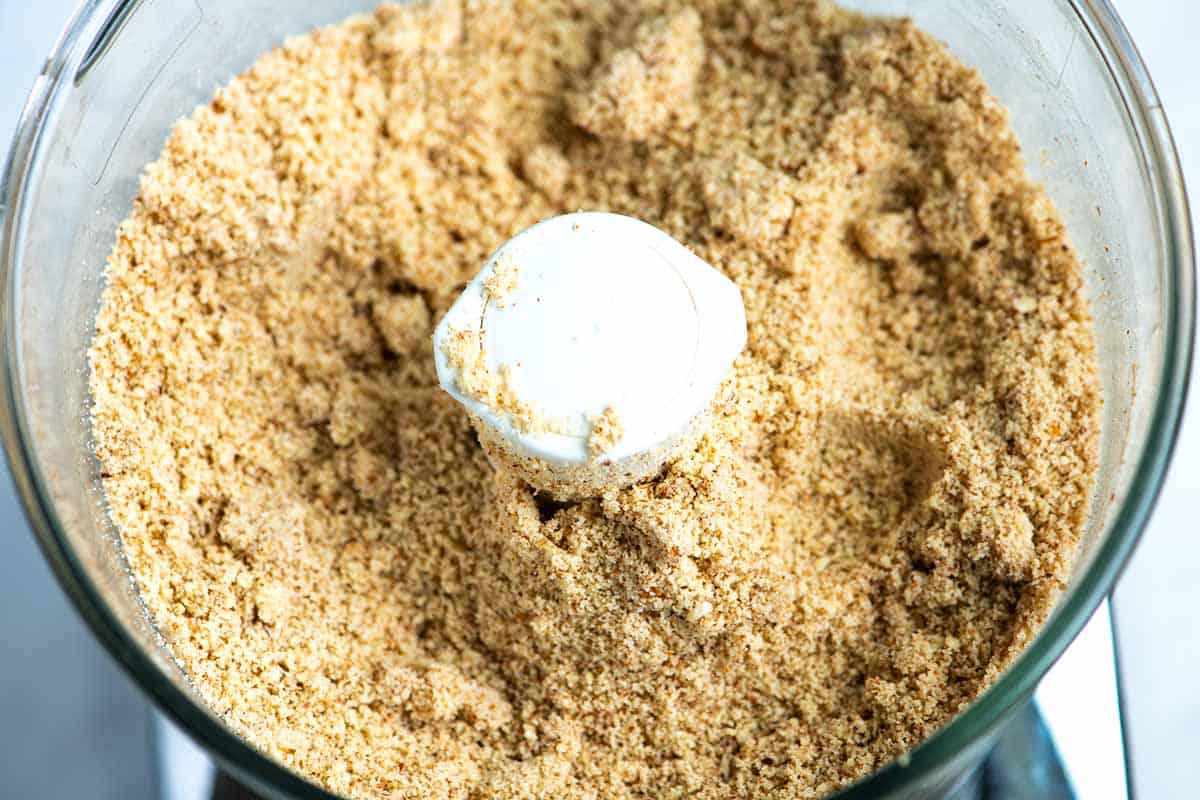
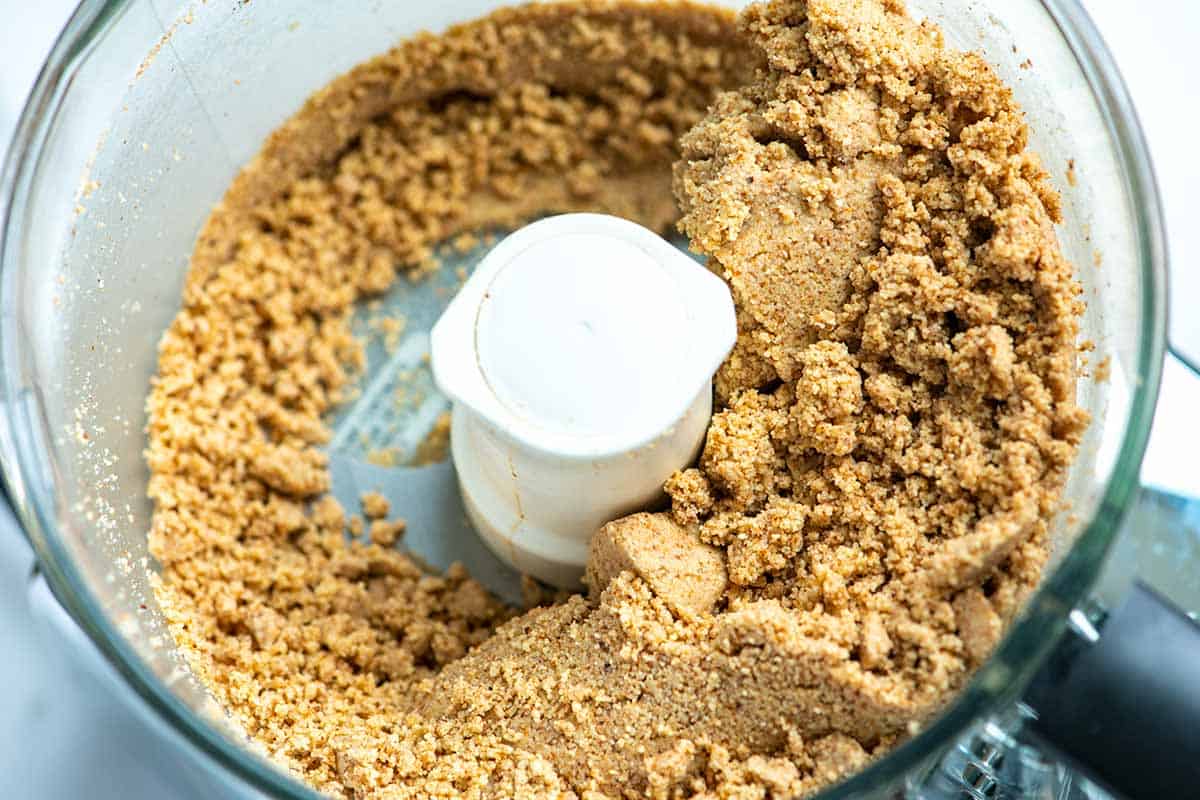
    Tip 2: Use a food processor. After processing for 20 seconds or so, the almonds turn into almond flour. It’s very fine and like a heavy powder. It’s hard to imagine that this eventually turns into silky smooth almond butter, but trust me. Give the almonds longer in the food processor so the heavy powder begins clumping on you. Then, after a minute or two of blending, we have creamy almond butter!

    As you process the almonds, you may need to open the lid, scrape down the sides, and break up any large clumps a few times to help it out.

    Whole toasted almonds in a food processor
    Almonds that have been processed into a almond meal/flour
    A process shot of making almond butter. Before it turns creamy, it looks like a clumpy mess.

    Tip 3: Add extra flavor. Once you have creamy almond butter, you can add seasonings like salt, cinnamon, or vanilla extract. You can also add a sweetener like honey or maple syrup if it needs it. I love a little maple syrup.

    Homemade Almond Butter

    Easy Almond Butter

    • PREP
    • COOK
    • TOTAL

    My family loves this homemade almond butter! If you are anything like my family, you go through jars (and jars) of nut butter every week. We eat oatmeal most mornings and always add almond butter on top.

    We use a 12-cup food processor (10-cup should be sufficient), but a large high powered blender should also work.

    Makes 16 ounces (about 2 cups)

    You Will Need

    1 pound (450g) raw unsalted whole almonds (3 cups)

    1/4 teaspoon fine sea salt, plus more to taste

    1/4 teaspoon ground cinnamon, optional

    1/4 teaspoon vanilla extract, optional

    Honey or maple syrup, optional

    Directions

      1Preheat your oven to 350°F (176°C).

      2Add the almonds to a round or square cake pan (or rimmed baking sheet). Roast them for 3 minutes, shake the pan, then roast another 3 to 5 minutes or until the nuts are lightly browned and smell nutty (be careful as they can burn quickly). Let them cool until you can handle them.

      3For crunchy almond butter: Set aside 1/3 cup of the roasted almonds. Pulse them in a food processor 6 to 8 times until finely chopped. Transfer the chopped almonds to a bowl and set aside.

      4Add the remaining roasted almonds to the food processor. Process for 1 minute, then scrape down the sides of the bowl.

      5Continue processing for another 2 to 3 minutes until the almond butter is smooth and creamy. It will go through different stages, starting as whole nuts, turning into a fine powder, a clumpy mess, and finally, a smooth paste. Scraping down the sides and breaking up any clumps will help speed up the process.

      6Once smooth, add the salt, cinnamon, and vanilla. Process for 10 to 20 seconds.

      7Taste and adjust the seasonings if needed. If you prefer a sweeter almond butter, add a teaspoon or more of honey or maple syrup and process for another 5 to 10 seconds to incorporate it.

      8For crunchy almond butter: Stir in the reserved chopped almonds.

    Adam and Joanne’s Tips

    • Storing: Homemade almond butter lasts 3 to 4 weeks. I like to store mine in mason jars in the refrigerator.
    • Creamier almond butter: If your almond butter is too thick, add 2 to 3 teaspoons of neutral oil (like walnut oil or avocado oil), and process a little longer.
    • Blender method: Use a high-powered blender (which most are). More expensive models with a tamper (like Vitamix) will make the process much quicke
    • The nutrition facts provided below are estimates.

    Nutrition Per Serving
    Serving Size
    About 2 tablespoons
    /
    Calories
    156
    /
    Total Fat
    13.4g
    /
    Saturated Fat
    1g
    /
    Choesterol
    0mg
    /
    Sodium
    36.6mg
    /
    Carbohydrate
    5.8g
    /
    Dietary Fiber
    3.4g
    /
    Total Sugars
    1.2g
    /
    Protein
    5.7g


    AUTHOR:

    Joanne Gallagher

    Adam and Joanne of Inspired Taste

    We are Adam and Joanne Gallagher, the creators of Inspired Taste. Established in 2009, Inspired Taste grew from a childhood dream into one of the internet’s most trusted recipe sites with hundreds of reliable recipes, step-by-step videos, and expert tips.More About Us

    Source link

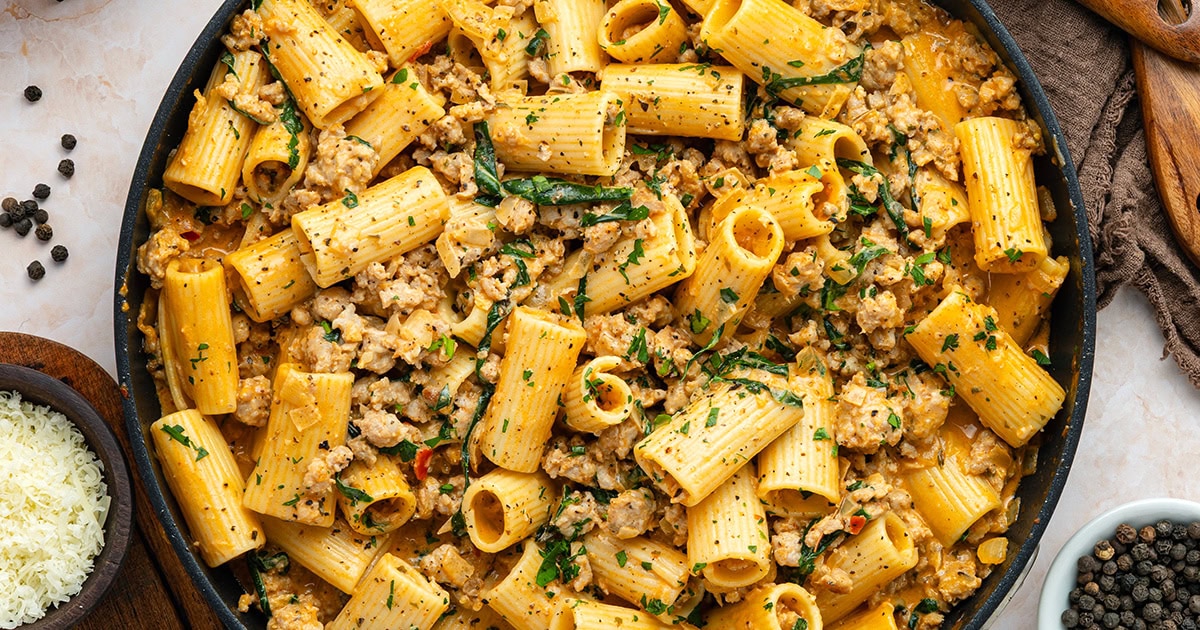
  • Creamy Italian Sausage Pasta

    Creamy Italian Sausage Pasta

    This creamy Italian sausage pasta is weeknight comfort food done right. It’s rich, cozy, and bursting with flavor from sausage, garlic, and parmesan.


    Jump to: ℹ️ Overview | 🛒 Ingredients | 📷 How To Make | 👩‍🍳 Recipe Tips | 🥗 Serving Suggestions | 📝 Full Recipe Card | 🍽 More Pasta Recipes To Try


    This creamy Italian sausage pasta is the kind of dish I pull out when I want dinner to feel a little special but I’ve got zero energy for anything fussy. It’s easy enough for a weeknight, but flavorful enough to serve when friends pop over. The combo of garlicky sausage, a splash of cream, a touch of tomato paste (cooked until it smells amazing), and a generous handful of Parmesan just works.

    It’s rich and cozy, but not heavy in a “food coma” way. The spinach adds a little freshness and color (and let’s be honest, makes me feel like I’ve made a responsible life choice).

    Whether you’re craving something hearty after a long day or just want a one-pan wonder that delivers serious flavor, this one’s a keeper.

    A quick note on the Italian sausage: you can usually find it sold as ground sausage meat—already seasoned and ready to go. It also comes in sausage links (mild, sweet, or fennel), and if that’s what you’ve got, just slice open the casing and use the meat inside. It’s fatty, flavorful, and really the star of this dish.

    👩‍🍳 You might also like these comforting one-pan meals: creamy pesto chicken pasta, Cajun shrimp pasta, marry me chicken orzo bake, chicken risotto with asparagus, or Spanish one pot chicken rice.

    What You’ll Need

    Here is what you’ll need for this creamy Italian sausage pasta recipe. Find the full measurements in the recipe card below.

    • Short pasta like rigatoni or penne – they catch the sauce so well!
    • Olive oil – helps brown the sausage and adds flavor.
    • Tomato paste – adds umami and that concentrated tomato goodness.
    • Chicken broth – lightens the sauce a bit and brings savory depth.
    • Cream – the base of that creamy lusciousness. You can use heavy creamy for extra luxurious feel or regular thinner cooking cream, or lighter cream to cut down on calories.
    • Parmesan cheese – salty, nutty, and rich. Use fresh and grate yourself for best flavor.
    • Red pepper flakes & Italian seasoning – warmth and herby vibes.
    • Yellow onion and garlic – the classic flavor duo.
    • Fresh spinach – for a hit of green and earthy flavor; you can also throw in kale, chard, broccolini or asparagus.
    • Fresh herbs like basil or parsley – totally optional but adds brightness.
    • Italian sausage – Mild, sweet, or fennel-spiced. You can buy it ground by the pound at most butcher counters or grocery stores. Or grab sausage links and remove the casing. Most Italian sausage is pork-based, but beef versions exist too. No Italian sausage? You can mix ground pork or beef with fennel seeds, garlic, paprika, oregano, and chili flakes to make your own. It’s not exact, but it’s close enough for a delicious meal.

    How To Make Creamy Italian Sausage Pasta

    Find the full recipe and nutritional information below. Here are some handy step-by-step photos for creamy Italian sausage pasta.

    • Cook pasta until al dente. Reserve some pasta water before draining. You can do this in parallel with below steps.
    • Brown the Italian sausage in olive oil, breaking it up into crumbles. Set aside.
    • In the same pan, sauté onion until soft. Add garlic, red pepper flakes, and Italian seasoning.
    • Stir in tomato paste and cook until it darkens a little.
    • Pour in chicken broth to deglaze the pan. Add cream and the sausage back in.
    • Simmer until slightly thickened. Stir in Parmesan until smooth.
    • Toss in the pasta and spinach. Add reserved pasta water if needed.
    • Finish with fresh herbs and extra cheese. Serve hot!

    Recipe Tips/Variations

    • Don’t skip cooking the tomato paste for a minute or two—this deepens the flavor and makes it richer.
    • Make it ahead: The sauce keeps well in the fridge for a day or two. Reheat gently and toss with freshly cooked pasta.
    • Storage: Leftovers keep in the fridge for 3 days. Reheat on the stove or in the microwave with a splash of broth or water.
    • Add-ins: Mushrooms, sun-dried tomatoes, or roasted red peppers would all work beautifully.
    • Make it spicy: Use hot Italian sausage or add extra chili flakes.
    • Want to lighten it up? Swap the heavy cream for light cream, half-and-half, or even a mix of milk and Greek yogurt (just stir the yogurt in off the heat to prevent curdling). Use less Parmesan or go for a hard cheese like Grana Padano, which is still flavorful but a bit leaner. For the sausage, look for leaner Italian-style turkey or chicken sausage — tons of flavor, less fat. And if you’re watching carbs, try a high-fiber pasta or a chickpea-based one to bump up the protein and keep things balanced.

    Serving Suggestions

    This dish is pretty rich, so a crisp green salad with a tangy vinaigrette is a perfect match. You could also serve it with some crusty bread to soak up every last drop of that sauce. Try these side dishes:

    💬 If you’ve tried this creamy Italian sausage pasta or any other recipe on the blog then don’t forget to rate the recipe and let me know how you got on in the comments below, I love hearing from you! You can also FOLLOW ME on Instagram, Facebook, Pinterest, YouTube, and or sign up to my Newsletter to see more of my delicious food.

    Want to Save This Recipe?

    Enter your email & I’ll send it to your inbox. Plus, get great new recipes from me every week!

    By submitting this form, you consent to receive emails from Cooked & Loved

    This creamy Italian sausage pasta is weeknight comfort food done right. It’s rich, cozy, and bursting with flavor from sausage, garlic, and parmesan. Find step-by-step photos and more recipe tips above.

    • Bring a large pot of salted water to a boil. Cook pasta until al dente. Reserve ½ cup of pasta water, then drain.

    • Heat olive oil in a large skillet over medium heat. Add sausage, breaking it up with a spoon. Cook until browned and cooked through, 6–8 minutes. Transfer to a plate, leaving a little fat in the pan.

    • In the same pan, sauté the onion until soft, about 3 minutes. Add garlic, red pepper flakes, and Italian seasoning. Cook for 1 minute.

    • Stir in tomato paste and cook for 1–2 minutes until slightly darkened.

    • Deglaze the pan with chicken broth, scraping up any bits. Add the cream and bring to a simmer.

    • Return sausage to the pan. Simmer for 3–4 minutes until the sauce slightly thickens.

    • Stir in Parmesan until melted and smooth. Add the drained pasta and spinach. Toss to coat. Add pasta water a splash at a time if needed to loosen the sauce.

    • Season to taste with salt and pepper.

    • Serve hot with extra Parmesan and fresh herbs on top.

    • What kind of sausage should I use? Go for mild, sweet, or fennel Italian sausage. If you can’t find ground sausage, just remove the casing from regular sausages.
    • Can I make this without cream? Yes! Try half-and-half or even evaporated milk, though the sauce won’t be quite as rich.
    • How do I make it vegetarian? Swap the sausage for plant-based sausage or sautéed mushrooms for a meaty texture.
    • Can I freeze it? Creamy sauces don’t always freeze well—they can split—but it’s okay in a pinch. Just reheat slowly and stir well.
    • Don’t skip cooking the tomato paste for a minute or two—this deepens the flavor and makes it richer.
    • Make it ahead: The sauce keeps well in the fridge for a day or two. Reheat gently and toss with freshly cooked pasta.
    • Storage: Leftovers keep in the fridge for 3 days. Reheat on the stove or in the microwave with a splash of broth or water.
    • Add-ins: Mushrooms, sun-dried tomatoes, or roasted red peppers would all work beautifully.
    • Make it spicy: Use hot Italian sausage or add extra chili flakes.
    • Want to lighten it up? Use a mix of milk and Greek yogurt (just stir the yogurt in off the heat to prevent curdling) intsead of cream. Use less Parmesan or go for a hard cheese like Grana Padano, which is still flavorful but a bit leaner. For the sausage, look for leaner Italian-style sausage or choose turkey or chicken sausage — tons of flavor, less fat. And if you’re watching carbs, try a high-fiber pasta or a chickpea-based one to bump up the protein and keep things balanced.

    Calories: 661kcal | Carbohydrates: 49g | Protein: 22g | Fat: 42g | Saturated Fat: 18g | Polyunsaturated Fat: 4g | Monounsaturated Fat: 17g | Cholesterol: 109mg | Sodium: 838mg | Potassium: 524mg | Fiber: 3g | Sugar: 3g | Vitamin A: 1551IU | Vitamin C: 8mg | Calcium: 152mg | Iron: 2mg

    Keywords: Creamy Italian Sausage Pasta, italian dinner recipes, pasta dinner ideas, pasta and sausage recipes

    More Pasta Recipes To Try


    Source link

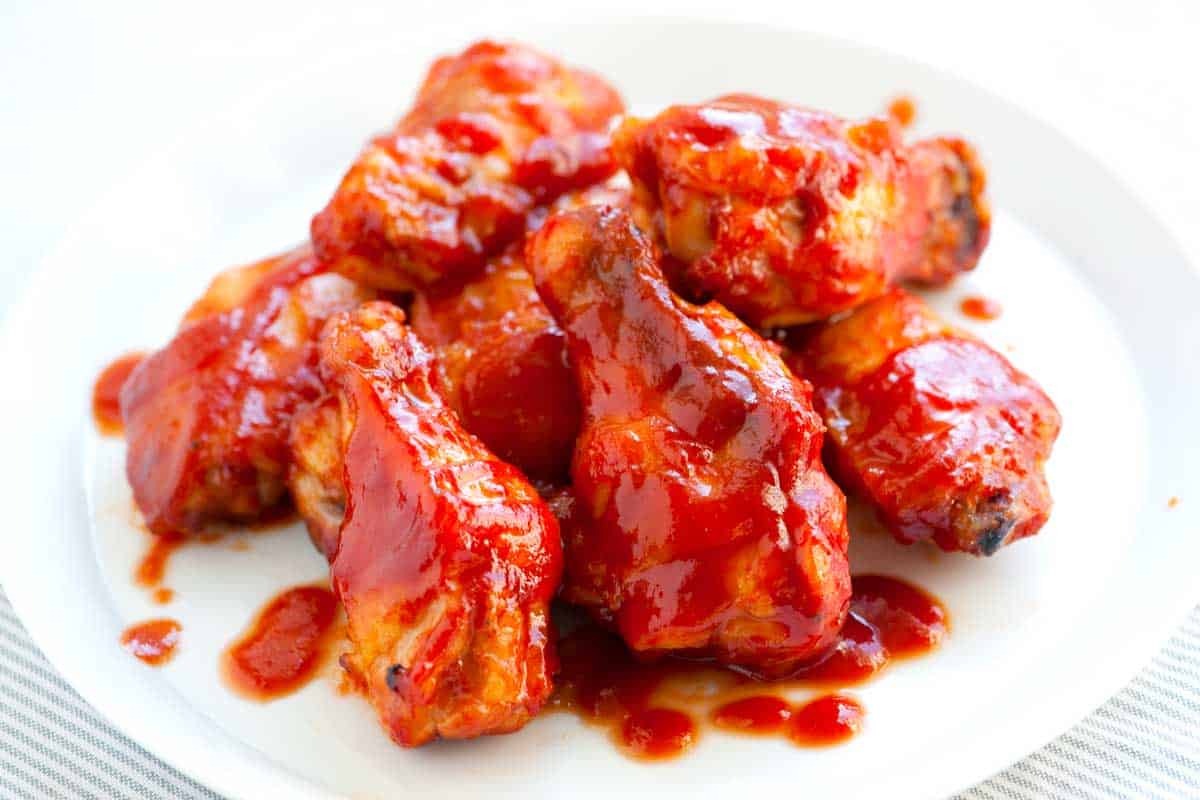
  • Easy BBQ Chicken Wings Recipe

    Easy BBQ Chicken Wings Recipe

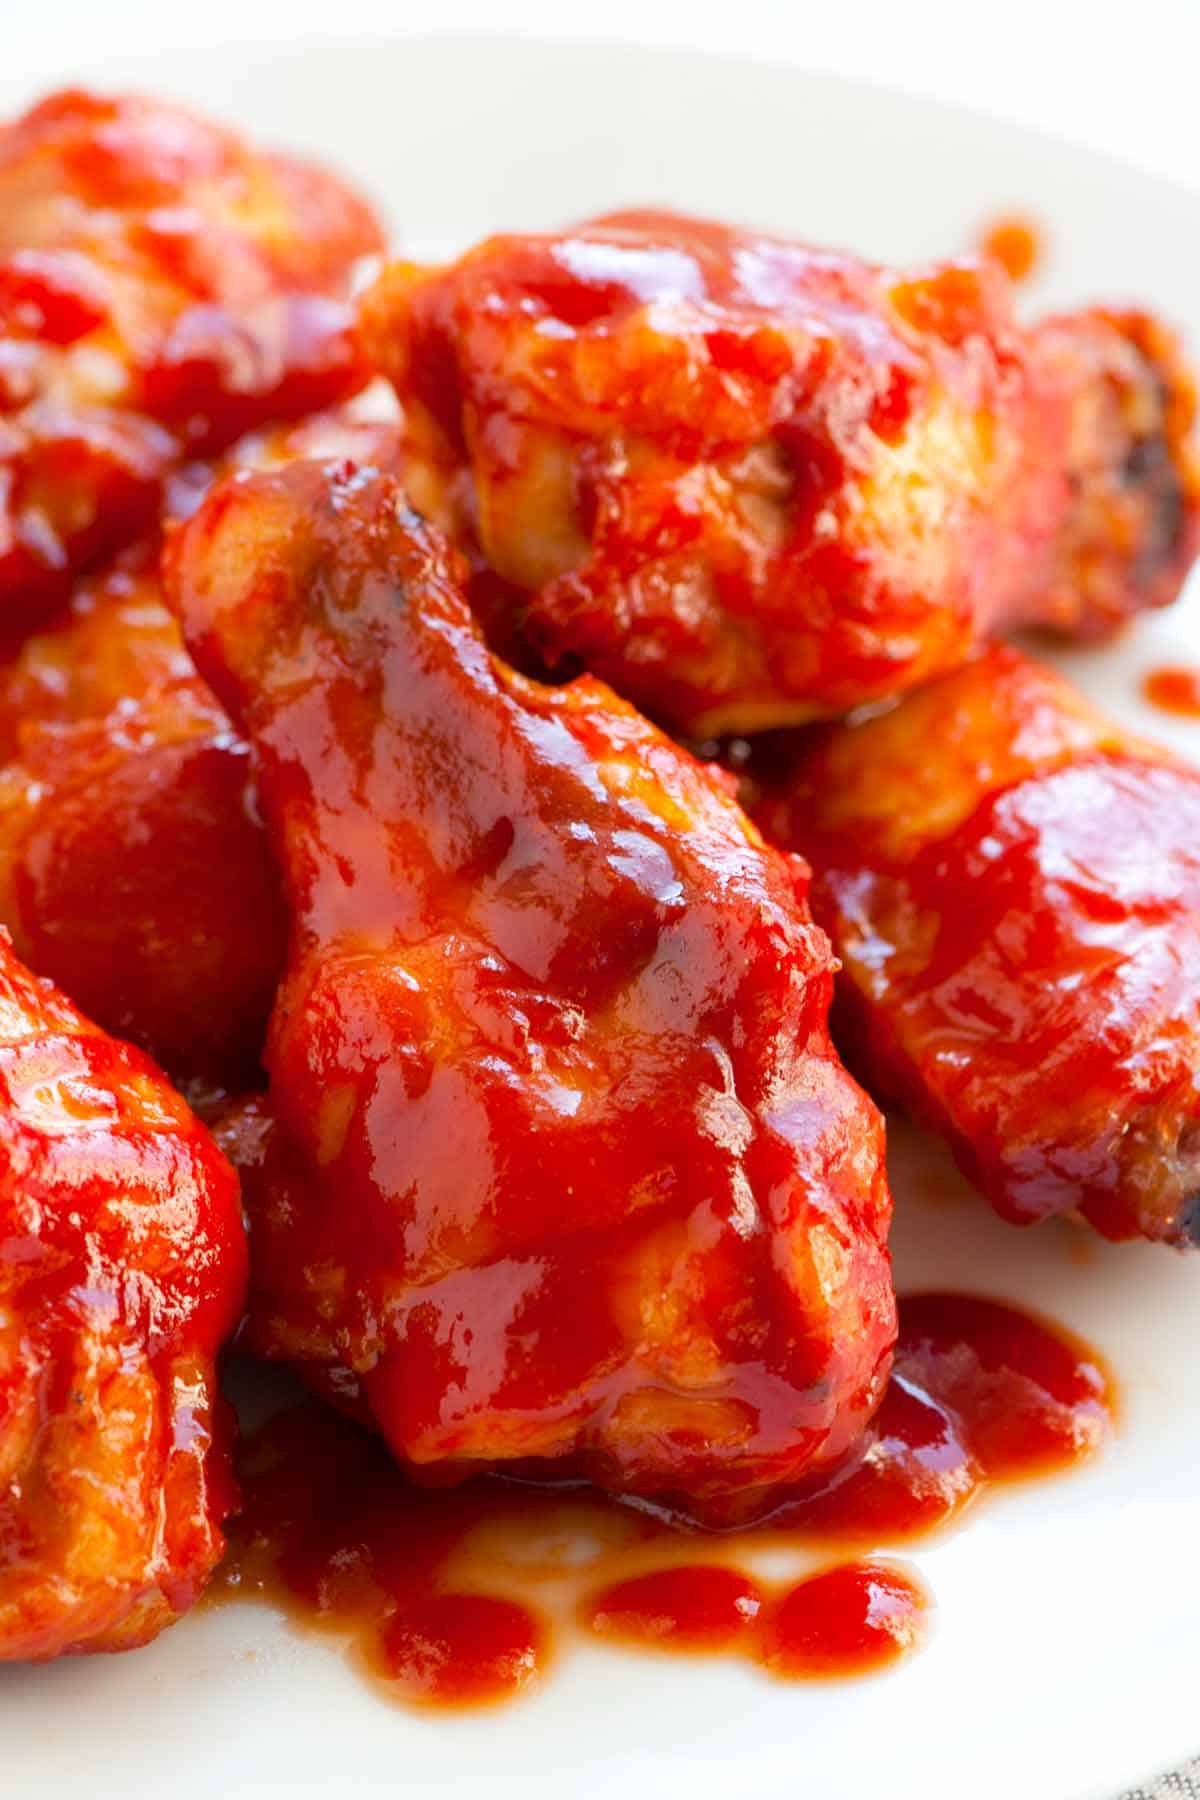
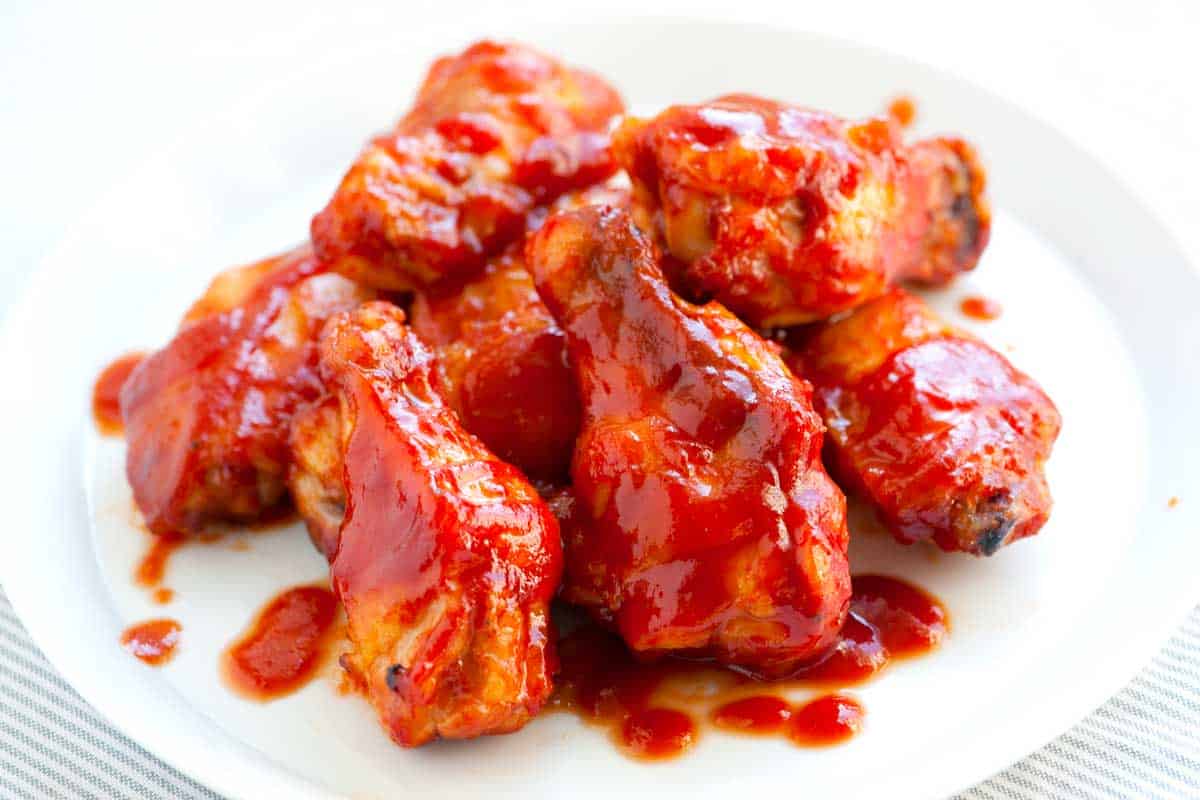
    Our brown sugar baked BBQ chicken wings are easy for you to make at home. With our recipe, you can skip the oil and fryer and make amazing wings tossed in our delicious homemade barbecue sauce. These barbecue wings are sweet, smoky, and just a little sticky!

    Baked BBQ Chicken Wings

    We love chicken wings, but the last thing we want to do at home is use a deep fryer. That’s why we’re such big fans of baking chicken wings at home. For this BBQ chicken wings recipe, we use the same method as our crispy baked hot wings, but instead of tossing the baked wings with buffalo sauce, we use our easy homemade BBQ sauce.

    This recipe guarantees crispy and delicious wings! They are also perfect for serving a crowd. This simple recipe lets you make big batches of wings with little work from you. For more recipes like this, look at our spicy chicken wings or these sweet chili chicken wings.

    Key Ingredients

    • Chicken Wings: We use chicken wings already split into the drumstick and wingette. Most stores sell them this way, but you can separate them yourself if you need to. You can also leave them whole (I do this in my grilled wings recipe). The recipe works either way. If you need guidance on separating the wings, check out our tutorial on how to cut a chicken wing.
    • Homemade BBQ Sauce: For the BBQ sauce, we use a sauce similar to the one we use for our oven baked ribs. You’ll need ketchup, brown sugar, apple cider vinegar, Sriracha, soy sauce, and cumin. It’s quick and easy. I also love this sweet and tangy BBQ sauce, which also works well with these wings.

    How to Make BBQ Chicken Wings

    Making BBQ wings at home is so easy. Below, we share how we make them, how long it takes to bake wings so they are crispy, and a quick and easy barbecue sauce to coat them in. There are 3 things to keep in mind for making the best wings:

    1. Instead of frying them, bake the chicken wings on a wire rack inside a rimmed baking sheet and toss in some homemade BBQ sauce. By cooking the chicken wings on a wire rack, fat drips away from them while they bake, helping to make them extra crispy.
    2. Bake the chicken wings at a high oven temperature (we like 400ºF) for 35 to 45 minutes. (You can bake wings at an even higher temperature, but depending on your oven, you might find the oven smokes a little.)
    3. Toss the baked wings with more BBQ sauce. Then, serve them with your favorite dipping sauce. We like homemade ranch or blue cheese dressing.
    BBQ Chicken Wings with Homemade BBQ Sauce

    Easy BBQ Chicken Wings

    • PREP
    • COOK
    • TOTAL

    Sweet, smoky, and just a little spicy, the sauce for these baked BBQ chicken wings comes together in 5 minutes and is fantastic. If you have a favorite store-bought BBQ sauce, feel free to use it instead. Baking your wings on a rack inset to your baking sheet helps make them extra crispy, so if you have one, use it!

    Serves 6

    You Will Need

    3 pounds (1.3kg) chicken wings, separated at joints, tips discarded

    1 cup (250g) ketchup, try homemade ketchup

    1/2 cup (100g) lightly packed brown sugar

    1 tablespoon apple cider vinegar

    1 tablespoon Sriracha chili sauce

    1 teaspoon light soy sauce

    1/2 teaspoon ground cumin

    Directions

      1Heat oven to 400°F (204°C). Set a wire rack inside a large-rimmed baking sheet. Spray rack with nonstick cooking spray.

      2Make BBQ sauce: In a medium saucepan over medium heat, stir together the ketchup, brown sugar, vinegar, Sriracha, cumin, and soy sauce. Cook for 2 to 3 minutes or until the sugar dissolves. Taste and adjust with additional soy sauce or sugar.

      3Divide the sauce in half, saving half for serving the wings.

      4Toss the chicken wings with the remaining half of BBQ sauce, and then place onto the prepared baking sheet.

      5Bake the chicken wings, turning once during cooking, until an internal thermometer registers 165°F, 35 to 45 minutes.

      6Serve the baked wings with the sauce you set aside earlier, either on the side or tossed with the chicken.

    Adam and Joanne’s Tips

    • No wire rack: If you do not have a wire rack that will fit inside a baking sheet, you can still make wings. Arrange them on the baking sheet, without the rack and rotate a few times during baking.
    • BBQ sauce: You will need 1 ¼ cups barbecue sauce, homemade or store-bought.
    • We have used the USDA database to calculate approximate values. 1 pound of wings will be 8 to 12 wings, depending on size.

    Nutrition Per Serving
    Serving Size
    1/6 of the recipe
    /
    Calories
    554
    /
    Total Fat
    29.2g
    /
    Saturated Fat
    8g
    /
    Cholesterol
    251.6mg
    /
    Sodium
    694mg
    /
    Carbohydrate
    30.4g
    /
    Dietary Fiber
    0.1g
    /
    Total Sugars
    27.2g
    /
    Protein
    39.9g


    AUTHOR:

    Joanne Gallagher

    Previous Post: Easy Cilantro Lime Slaw
    Next Post: Homemade Honey Almond Granola

    Source link

  • Greens and Beans with Sausage

    Greens and Beans with Sausage

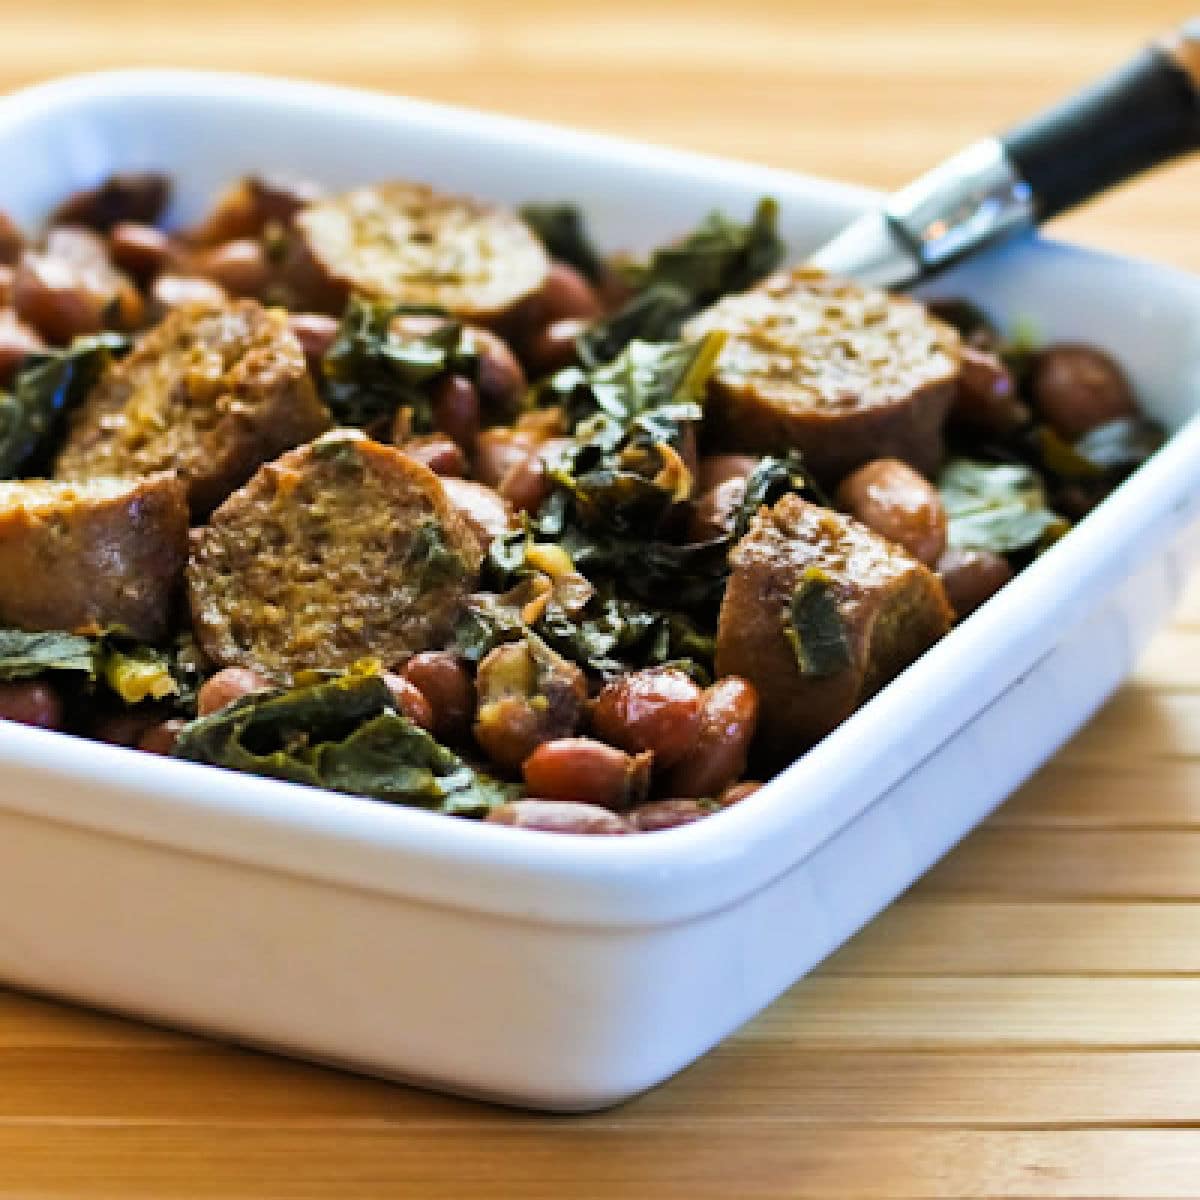
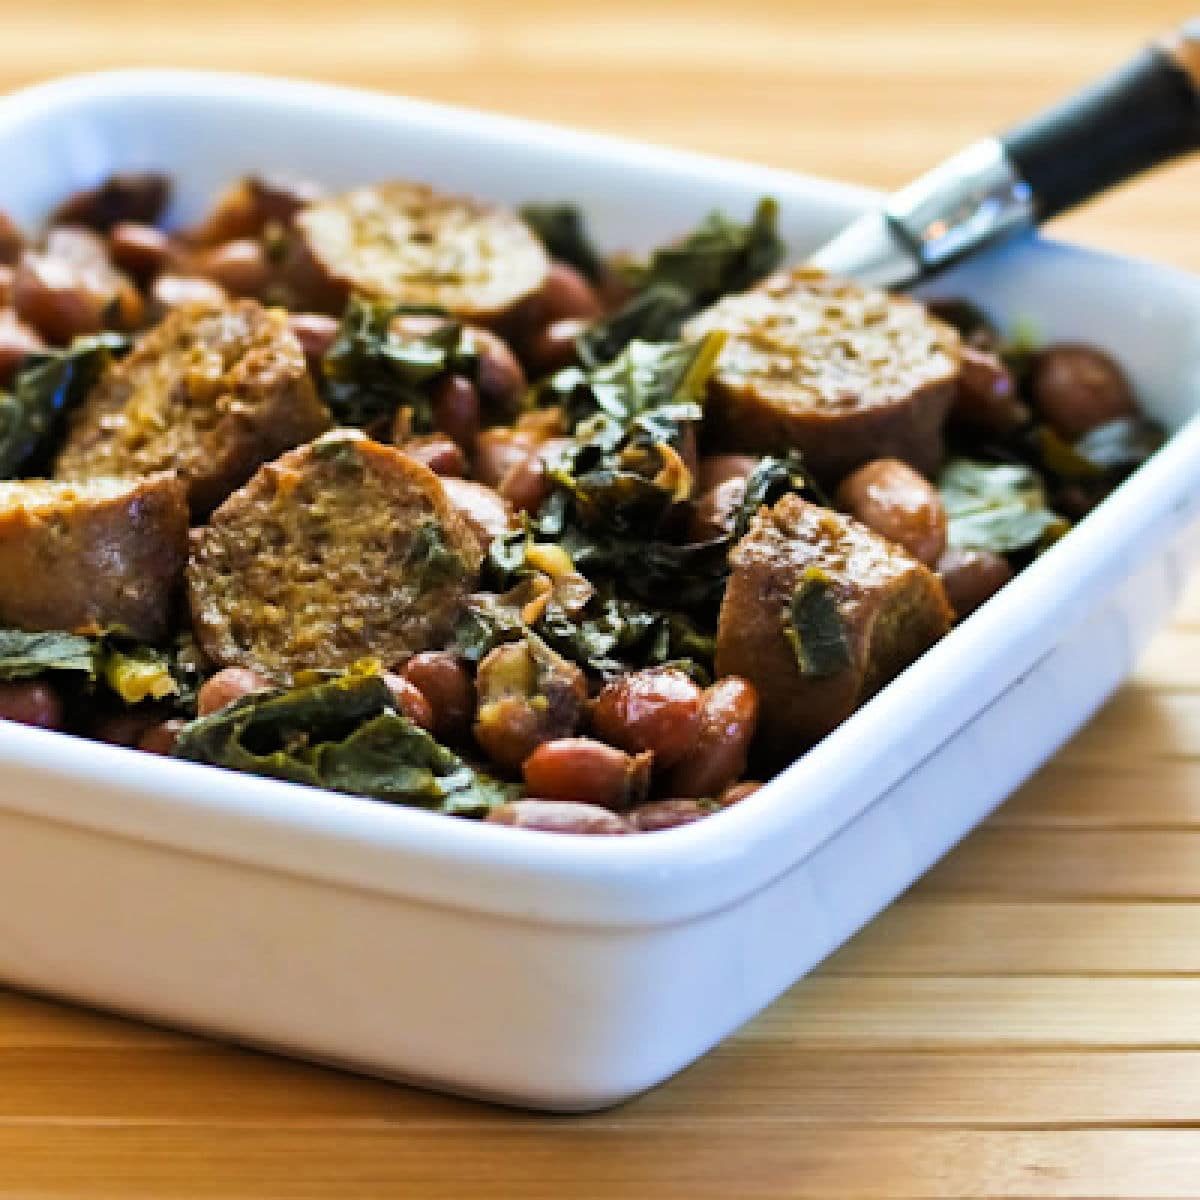
    Greens and Beans with Sausage is an inexpensive, healthy, and delicious dinner to make in the slow cooker. And this fun combination has a lot of greens and sausage and not many beans so it’s surprising low in carbs!

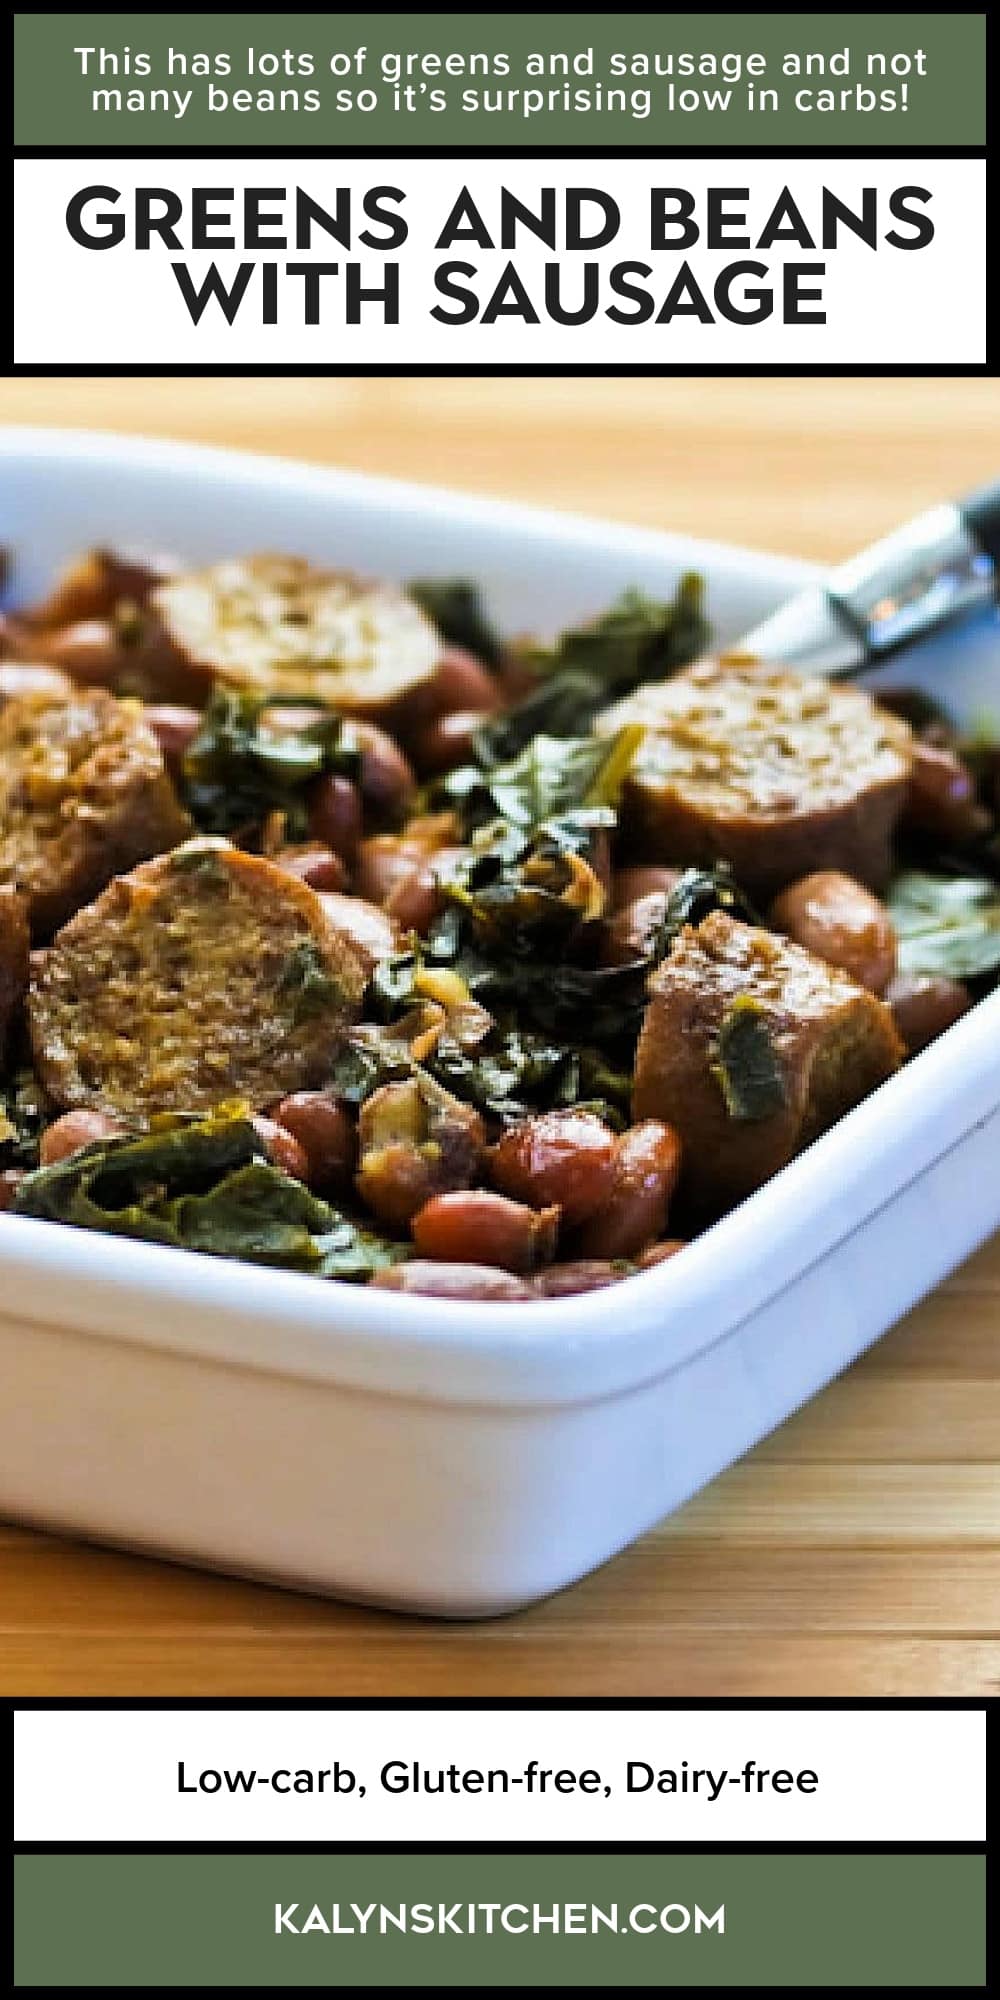
    PIN Greens and Beans with Sausage to try it later!

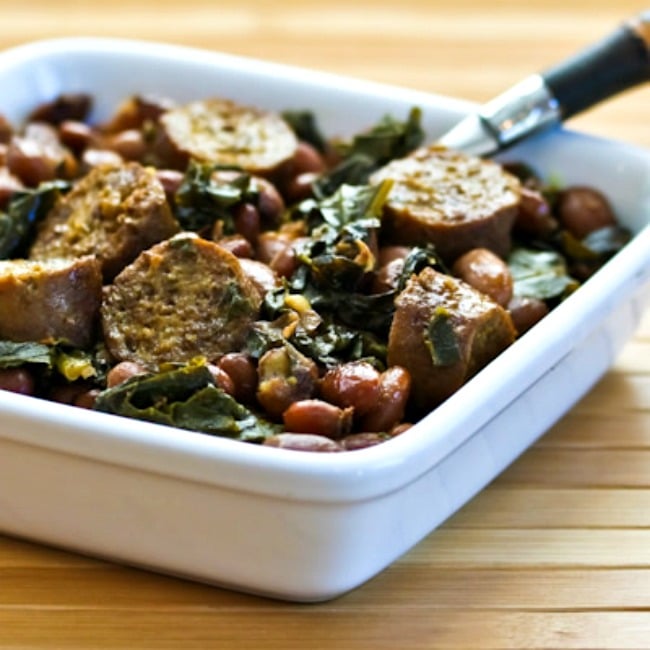
    Greens and Beans with Sausage shown in square serving bowl.

    Greens and Beans with Sausage is a recipe I first made when I had lots of collard greens in my garden. I made it in the slow cooker, and my former neighbor Michelle loved this combination of sausage and beans with healthy greens. And Michelle says you can also cook it on the stove if you’re in a hurry or don’t have a crockpot.

    I used pinto beans, but you could make the Greens and Beans with Sausage with any type of dried beans and any type of sturdy leafy greens. I think you can use Swiss Chard, Kale, or even Bok Choy to replace the collards if that’s what you have.

    Crockpot dishes tend to be not too photogenic, but luckily I had some leftovers to try more than once on the photos. And trust me when I say this picture is a big improvement on the previous one! If you like greens, beans, and sausage, I bet you’re going to love this tasty dish!

    What ingredients do you need for this recipe?

    (This is only a list of ingredients; please scroll down for complete printable recipe. Or if you use the JUMP TO RECIPE link at the top of the page, it will take you directly to the complete recipe with ingredient amounts.)

    • uncooked dried beans, preferably Pinto Beans
    • Garlic Powder (affiliate link)
    • Onion Powder (affiliate link)
    • uncooked hot turkey or pork Italian Sausage 
    • olive oil
    • large bunch collard greens, or other greens of your choice
    • bean cooking liquid (or water plus liquid from canned beans if using canned)
    • Minced Garlic (affiliate link)
    • Parmesan cheese for serving, if desired

    What beans should you use for Greens and Beans with Sausage?

    Most any kind beans will work for this recipe but I’d use pinto beans (shown in the photos) white kidney beans, or small white beans.

    What sausage did I cook with the greens and beans?

    I originally made this recipe with my favorite turkey Italian sausage. But now I sadly can’t find that sausage, so I’d use pork Italian sausage. Personally I’d choose hot Italian Sausage, but if you’re cooking for kids you can use mild Sweet Italian Sausage instead.

    Why is Greens and Beans with Sausage a good summer dinner?

    I’m always a fan of making slow cooker recipes when it’s summer, because slow cookers are a perfect way to cook when you don’t want to heat up your house. That’s why I have a big collection of Slow Cooker Summer Dinners on my Slow Cooker or Pressure Cooker site!

    How low in carbs is Greens and Beans with Sausage?

    Beans and greens are both high in fiber, so if you make this Greens and Beans with Sausage into six servings as the recipe suggests it has only 11 net carbs per serving and 14 grams of protein.

    How to make the recipe even lower in carbs:

    If you’d like to make this sausage, greens, and beans dinner even lower in carbs, just double the sausage and greens and/or use fewer beans for a lower-carb version that will still be delicious!

    Does this Greens and Beans with Sausage freeze well?

    This slow cooker dish definitely freezes well, so don’t be afraid to double the recipe if you have a large slow cooker.

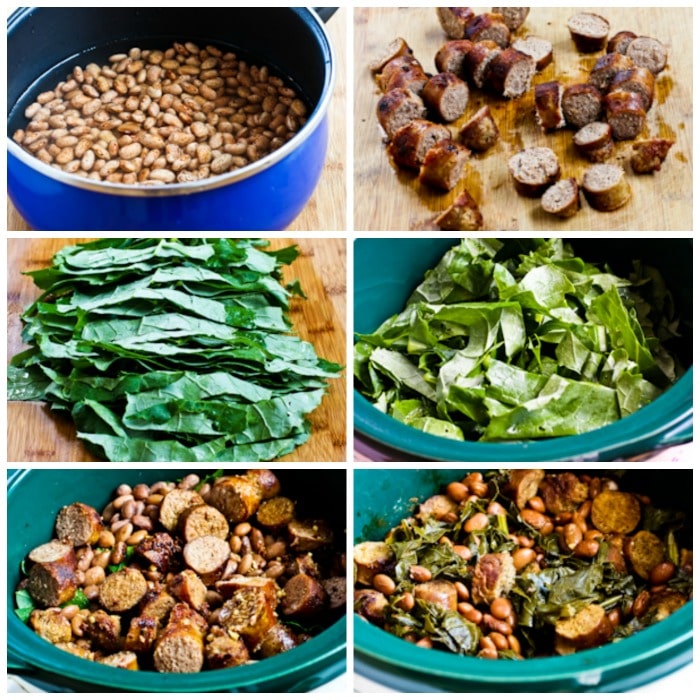
    Crockpot Sausage, Beans, and Greens process shots collageCrockpot Sausage, Beans, and Greens process shots collage

    How to make Greens and Beans with Sausage:

    (This is only a summary of the steps for the recipe; please scroll down for complete printable recipe. Or if you use the JUMP TO RECIPE link at the top of the page, it will take you directly to the complete recipe.)

    1. Soak dried beans overnight, then drain, add fresh water, Garlic Powder (affiliate link), and Onion Powder (affiliate link), and simmer on low heat until beans are soft. Cooking time will depend on how fresh the beans are, but probably 30-45 minutes for most beans. You can also cook the beans in the crockpot or Instant Pot if you prefer.
    2. You can also use two cans of canned beans, but soaked and cooked dried beans are much better.
    3. When beans are almost cooked, brown the sausage well in a non-stick frying pan. (You’ll need to add a little oil for turkey Italian sausage.)
    4. Get the sausage as brown as you can, then let cool and cut into slices.
    5. Also slice up the collard greens.
    6. Put collard greens in the bottom of the crockpot.
    7. Deglaze the pan where you cooked the sausage with 1/2 cup bean cooking liquid and fresh garlic, and cook for 2-3 minutes.
    8. Put drained cooked beans and sausages in the crockpot on top of the collard greens, then pour over the deglazing liquid from the pan.
    9. Cook on low 4-6 hours or on high 2-3 hours, or until collard greens are quite soft. (If your crockpot is larger than I used, you may need to add a bit more water.)
    10. Serve Greens and Beans with Sausage hot, with Parmesan cheese if desired.

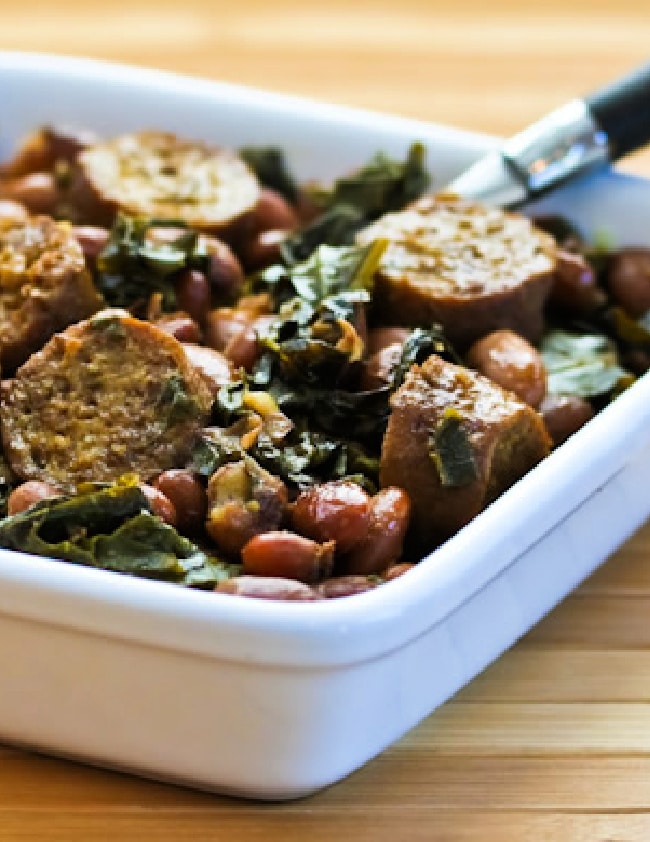
    Greens and Beans with Sausage in serving dish, cropped image.Greens and Beans with Sausage in serving dish, cropped image.

    Weekend Food Prep:

    This recipe has been added to a category called Weekend Food Prep where you’ll find recipes you can prep or cook on the weekend and eat during the week!

    Ingredients

    • 1 cup uncooked dried beans of any type, soaked overnight (see notes)
    • 1/2 tsp. garlic powder
    • 1/2 tsp. onion powder
    • 5 links uncooked hot turkey or pork Italian Sausage (see notes)
    • 2 tsp. olive oil, for browning sausage
    • 1 large bunch collard greens, cut into ribbons and washed
    • 1/2 cup bean cooking liquid (or water plus liquid from canned beans if using canned)
    • 1 tsp. finely minced fresh garlic
    • Parmesan cheese for serving, if desired

    Instructions

    1. Put soaked beans in small saucepan with garlic powder, onion powder, and enough water to cover.
    2. Cook for about 30 minutes, or until beans are nearly done but still have a little bite. Drain beans, saving 1/2 cup of the cooking water.
    3. You can also cook the beans in the crockpot or Instant Pot if you prefer. Fresh cooked beans are by far better, but if you forget to soak some, use two cans of kidney beans, white beans, or pinto beans and save 1/2 cup of water when you rinse them.
    4. While beans cook, brown sausage well in frying pan, adding a little olive oil for turkey sausage. The crock pot kind of removes the color from browned foods, so let them get very brown.
    5. When sausages are nicely browned, remove from pan, cool enough to handle, and cut into slices
    6. Cut stems off collard green, cut into ribbons crosswise, then cut the long ribbons into 2-3 pieces and rinse.
    7. Place collard greens in bottom of crock pot.
    8. Pour 1/2 cup bean cooking liquid into pan where you cooked the sausage, add fresh garlic, and cook 2-3 minutes to deglaze pan.
    9. Put beans in crock pot, top with sausage, and pour deglazing liquid from pan over.
    10. Cook on low 4-6 hours or on high 2-3 hours, or until collard greens are quite soft and flavors are well-combined.
    11. Serve hot, with Parmesan cheese if desired.

    Notes

    I used my Crock-Pot 3-1/2-Quart Slow Cooker (affiliate link) for this recipe. This freezes well, so if you have a larger slow cooker I would double the recipe.

    You could substitute two 15 oz. cans of beans, but freshly-cooked beans are much better!

    I originally used My Favorite Turkey Italian Sausage for this recipe. Now I can’t find that any more so I’d use pork Italian sausage.

    Recipe created by Kalyn.

    Nutrition Information

    Yield

    6

    Serving Size

    1

    Amount Per Serving

    Calories 202Total Fat 10gSaturated Fat 3gTrans Fat 0gUnsaturated Fat 7gCholesterol 35mgSodium 372mgCarbohydrates 15gFiber 4gSugar 4gProtein 14g

    Nutrition information is automatically calculated by the Recipe Plug-In I am using. I am not a nutritionist and cannot guarantee 100% accuracy, since many variables affect those calculations.

    Did you make this recipe?

    Did you make this recipe? Please leave a star rating (under the PRINT button in the recipe) or share a photo of your results on Instagram! THANKS!

    Crockpot Sausage, Beans, and Greens photo of finished dish in serving bowlCrockpot Sausage, Beans, and Greens photo of finished dish in serving bowl

    Low-Carb Diet / Low-Glycemic Diet / South Beach Diet Suggestions:
    I tagged this Beans and Greens with Sausage as low-carb, because with a lot of greens and sausage and not many beans it has only 11 net carbs per serving. If you want an even lower-carb version, use fewer beans and/or more sausage and greens. Everything in this dish is a wonderful choice for any phase of the original South Beach Diet.

    Find More Recipes Like This One:
    Use Slow Cooker Recipes to find more recipes like this one. Use the Diet Type Index to find recipes suitable for a specific eating plan. You might also like to follow Kalyn’s Kitchen on Pinterest, on Facebook, on Instagram, on TikTok, or on YouTube to see all the good recipes I’m sharing there.

    Historical Notes for this Recipe:
    This recipe for Greens and Beans with Sausage was created in 2010 when I had lots of collard greens in my garden. It was last updated with more information in 2025.

    Pinterest image of Greens and Beans with Sausage

    We are a participant in the Amazon Services LLC Associates Program, an affiliate advertising program designed to provide a means for us to earn fees by linking to Amazon.com and affiliated sites. As an Amazon Associate, I earn from qualifying purchases.


    Source link

  • Baked Lemon Chicken Breast Recipe

    Baked Lemon Chicken Breast Recipe

    Say goodbye to dry, flavorless chicken! This easy lemon baked chicken breast recipe has a simple marinade that guarantees incredibly juicy, flavorful chicken.

    Baked Lemon Chicken

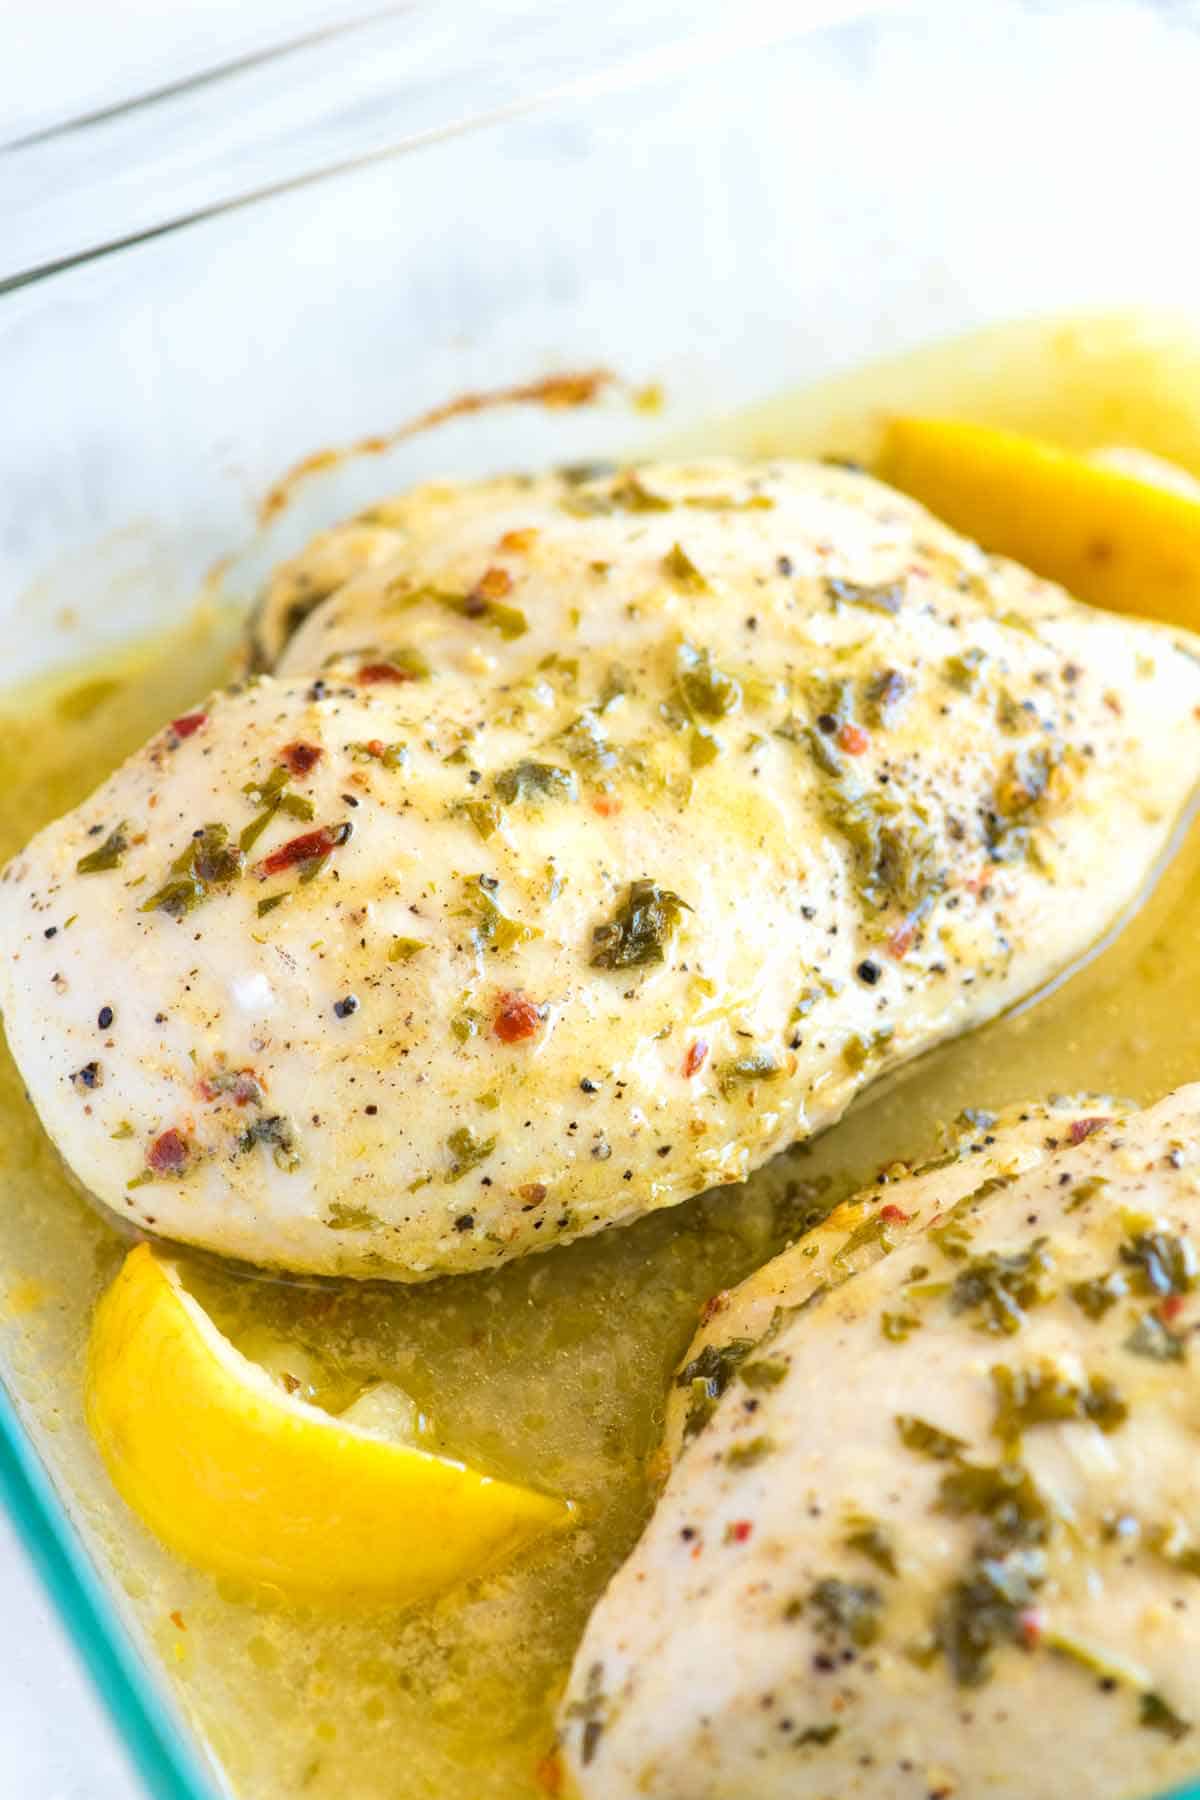
    We have a lot of chicken recipes on Inspired Taste, and honestly, I love them all! These lemon baked chicken breasts fit right in. Thanks to our lemon chicken marinade, they are super flavorful, extra juicy, and tender, thanks to our easy baking method.

    Skinless, boneless chicken breasts are easy to overcook. With our method, you’ll be guaranteed juicy, flavorful chicken! Try our lemon dill chicken breasts for a stovetop method, or for another take on this baked recipe, see these tomato basil baked chicken breasts.

    Key Ingredients

    • Chicken Breasts: While this recipe features chicken breasts, you can easily adapt it to use chicken thighs. Thighs may require a slightly longer cooking time. In fact, we also a recipe for lemon chicken thighs if you are interested.
    • Lemon: I use fresh lemon juice and zest for this. Lemon juice makes the base of the marinade, while the zest gives it an extra lemony punch. I like using a vegetable peeler to make strips of the zest.
    • Olive Oil: I love the flavor of olive oil in this marinade. It makes the chicken more delicious. If you plan to cook your chicken over high heat, consider substituting it with avocado oil.
    • Dijon Mustard: Mustard and lemon work beautifully together, so I always add a little Dijon to this marinade.
    • Garlic: Smashed whole garlic cloves add the right amount of fresh garlic flavor and balance the acidity of the lemon. Keeping them whole also prevents any garlic from burning later on.
    • Fresh Herbs: These are optional, but I love adding fresh herbs to this chicken marinade. I use fresh parsley in the photos, but dill, cilantro, and basil are excellent choices.

    Find the full recipe with measurements below.

    How to Make the Best Baked Lemon Chicken Breast

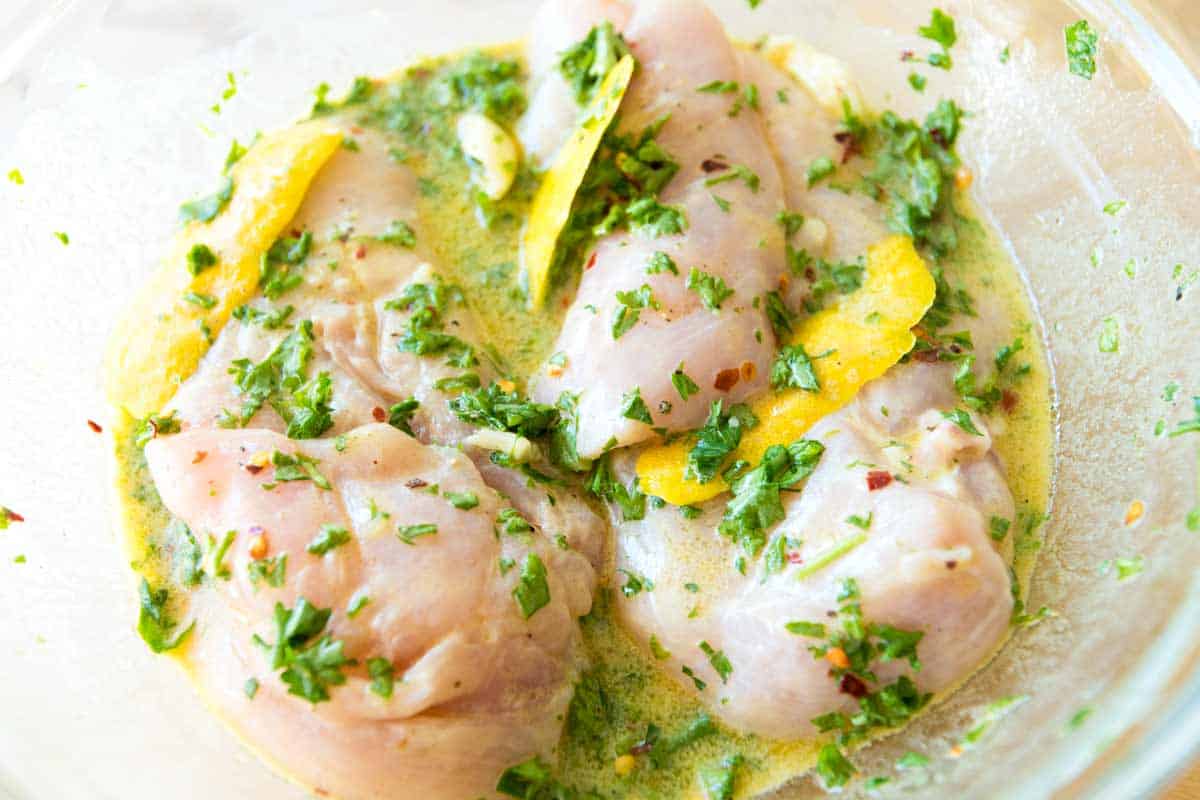
    Tip 1: Use our marinade. In our recipe below, we share a marinade made of fresh lemon, garlic, and Dijon mustard. It’s best to marinate chicken breasts 1 to 2 hours before baking. There isn’t a need to go longer than that.

    Marinating the chicken breasts in a lemon marinade

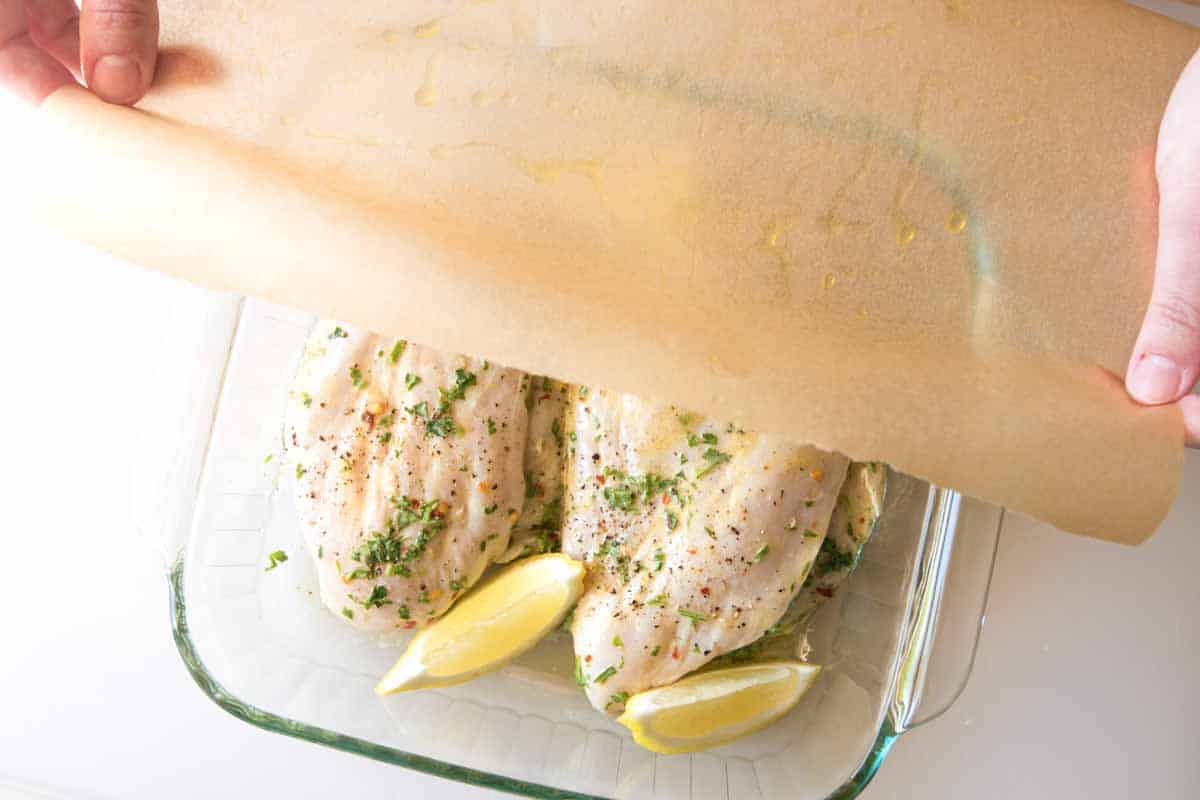
    Tip 2: Bake your chicken covered. After marinating, we add the chicken to a baking dish and loosely cover it with parchment paper (aluminum foil is a good alternative). By loosely covering the chicken, the chicken breasts bake and braise simultaneously, meaning the chicken bakes in its juices. This method of baking chicken breasts keeps the chicken breasts juicy and so tender.

    Loosely covering the chicken before baking.

    Tip 3: Knowing when the chicken is done. The bake time depends on how large your chicken breasts are. I check for doneness around 25 minutes and then proceed from there. Most chicken breasts take 35 to 40 minutes to bake in the oven (I use 400°F). An internal thermometer is one foolproof way to check if your chicken is done. Insert it into the thickest part of the breast and take the chicken out once you see 165°F. Then, let the chicken rest before serving.

    Baked Lemon Chicken Breasts

    Baked Lemon Chicken Breast

    • PREP
    • COOK
    • TOTAL

    For the best, juicy, and tender lemon baked chicken breast remember these three things: marinate first, bake loosely covered, and use a meat thermometer. Before baking in the oven, we marinate the chicken breasts in a magical mixture of fresh lemon, garlic, Dijon mustard, and parsley. If you’re short on time, marinate as close to an hour as you can. If you’re flexible, go for a whole two hours. And since we want to keep things safe, it’s best to marinate the chicken in the refrigerator (no matter how long you do it for).

    4 Servings

    Watch Us Make the Recipe

    You Will Need

    4 boneless, skinless chicken breasts (6 to 8 ounces each)

    2 large lemons

    2 tablespoons olive oil

    1 tablespoon Dijon mustard

    1/2 teaspoon fine sea salt

    1/4 teaspoon red pepper flakes, or more to taste

    1/2 teaspoon fresh ground black pepper

    3 cloves garlic, crushed with the side of a large knife or minced

    1/2 cup loosely packed fresh parsley, roughly chopped

    Directions

    • Marinate Chicken
    • 1Peel or zest the thin, yellow skin (zest) from one lemon, and then juice the lemon so that you have 1/4 cup of fresh lemon juice. (If the first lemon was not enough, Use half of the second lemon to make up the 1/4 cup of juice.)

      2Whisk lemon juice, olive oil, mustard, salt, red pepper flakes, and black pepper until the salt has dissolved. Stir in the garlic, lemon zest, and parsley (if using). Refrigerate and use within 1 to 2 hours.

      3Add the chicken breasts to the marinade and marinate for 1 hour or up to 2 hours in the refrigerator.

    • Bake Chicken Breasts
    • 1Position the oven rack in the middle of the oven and preheat it to 400°F (204°C). Lightly oil one side of a sheet of parchment paper large enough to cover the baking dish. (Aluminum foil can also be used.)

      2Transfer the chicken breasts to the prepared baking dish, removing any large pieces of garlic that might be stuck to them. Season the chicken with salt and pepper.

      3Quarter the second lemon. Scatter lemon wedges around the chicken, then cover with parchment paper, oiled side down, towards the chicken. Loosely tuck the parchment paper around the chicken.

      4Bake until the chicken is opaque all the way through and an internal thermometer reads 165°F when inserted into the thickest part of the breast. Check for doneness in around 25 minutes, and then go from there. Most chicken breasts will take 35 to 40 minutes.

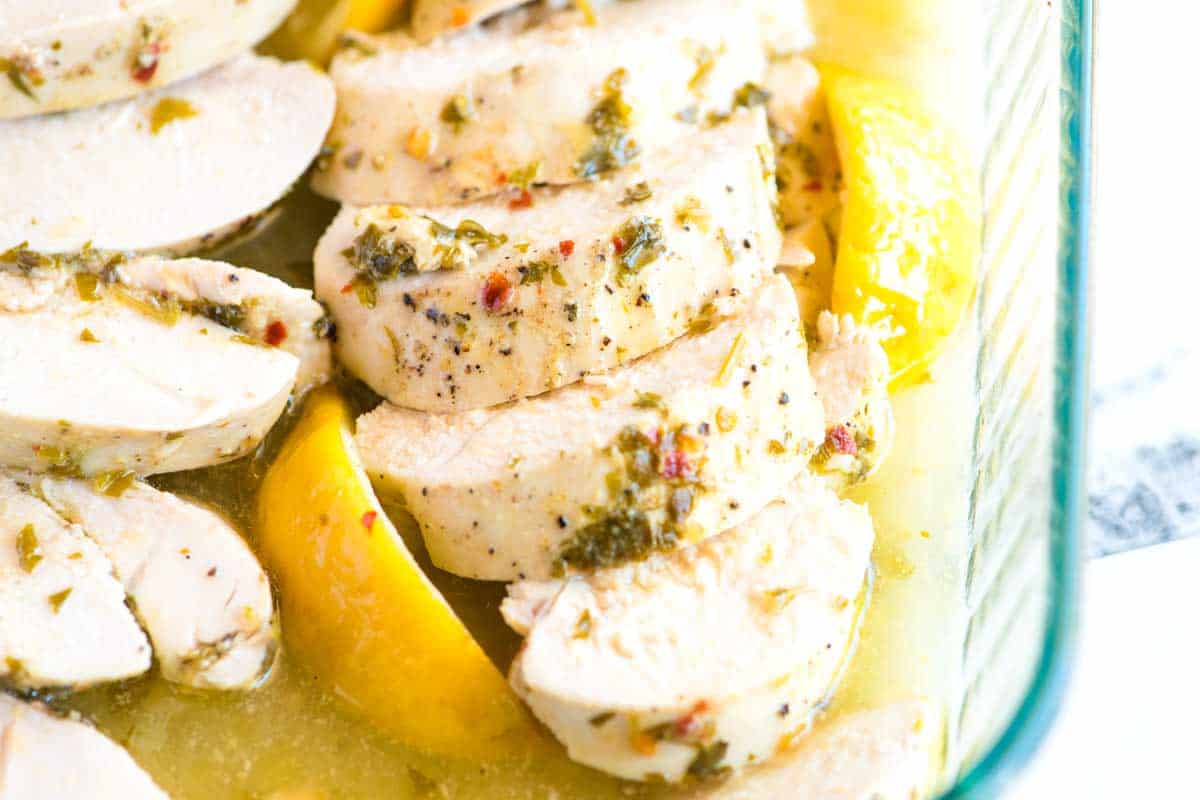
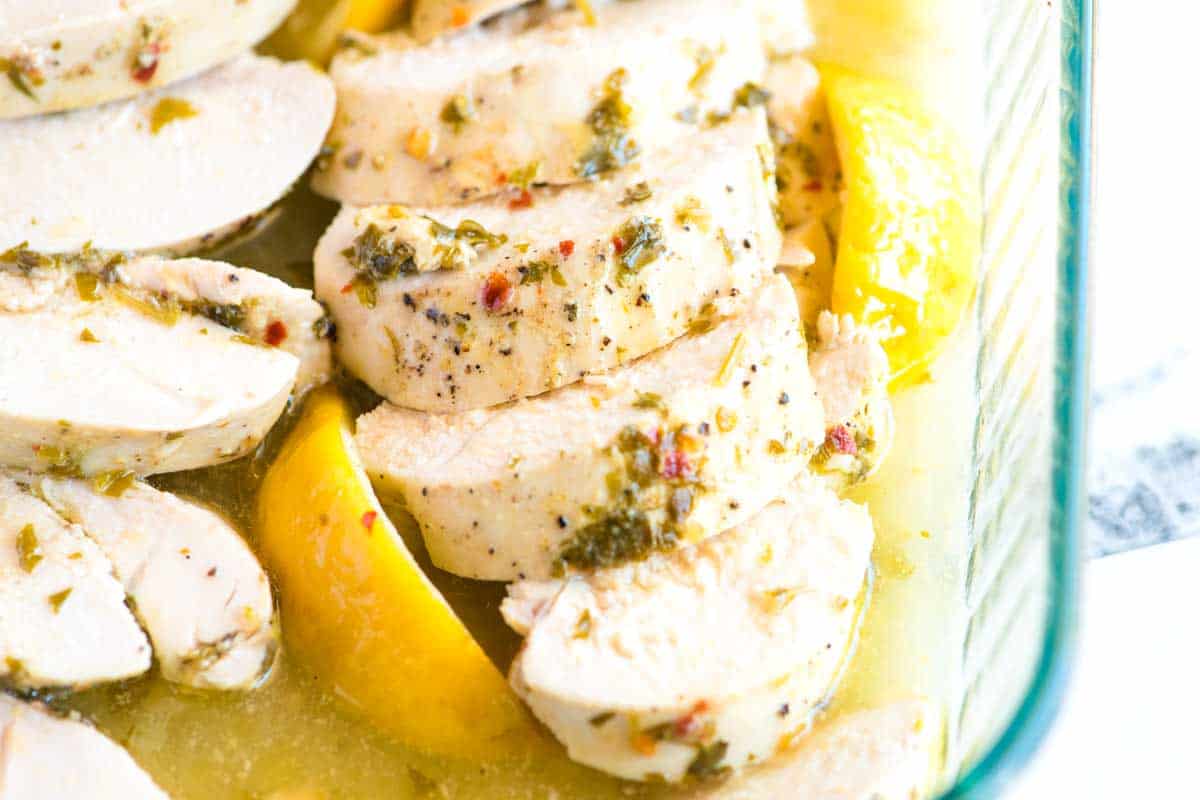
      5Let the chicken rest for about 10 minutes, then serve drizzled with some of the liquid left in the baking dish. You can also slice the chicken and place it back into the baking dish with all the leftover cooking liquid (our favorite).

    Adam and Joanne’s Tips

    • The nutrition facts provided below are estimates.

    Nutrition Per Serving
    Calories
    212
    /
    Protein
    27 g
    /
    Carbohydrate
    4 g
    /
    Dietary Fiber
    1 g
    /
    Total Sugars
    1 g
    /
    Total Fat
    10 g
    /
    Saturated Fat
    2 g
    /
    Cholesterol
    83 mg


    AUTHOR:

    Joanne Gallagher

    Adam and Joanne of Inspired Taste

    We are Adam and Joanne Gallagher, the creators of Inspired Taste. Established in 2009, Inspired Taste grew from a childhood dream into one of the internet’s most trusted recipe sites with hundreds of reliable recipes, step-by-step videos, and expert tips.More About Us

    Source link

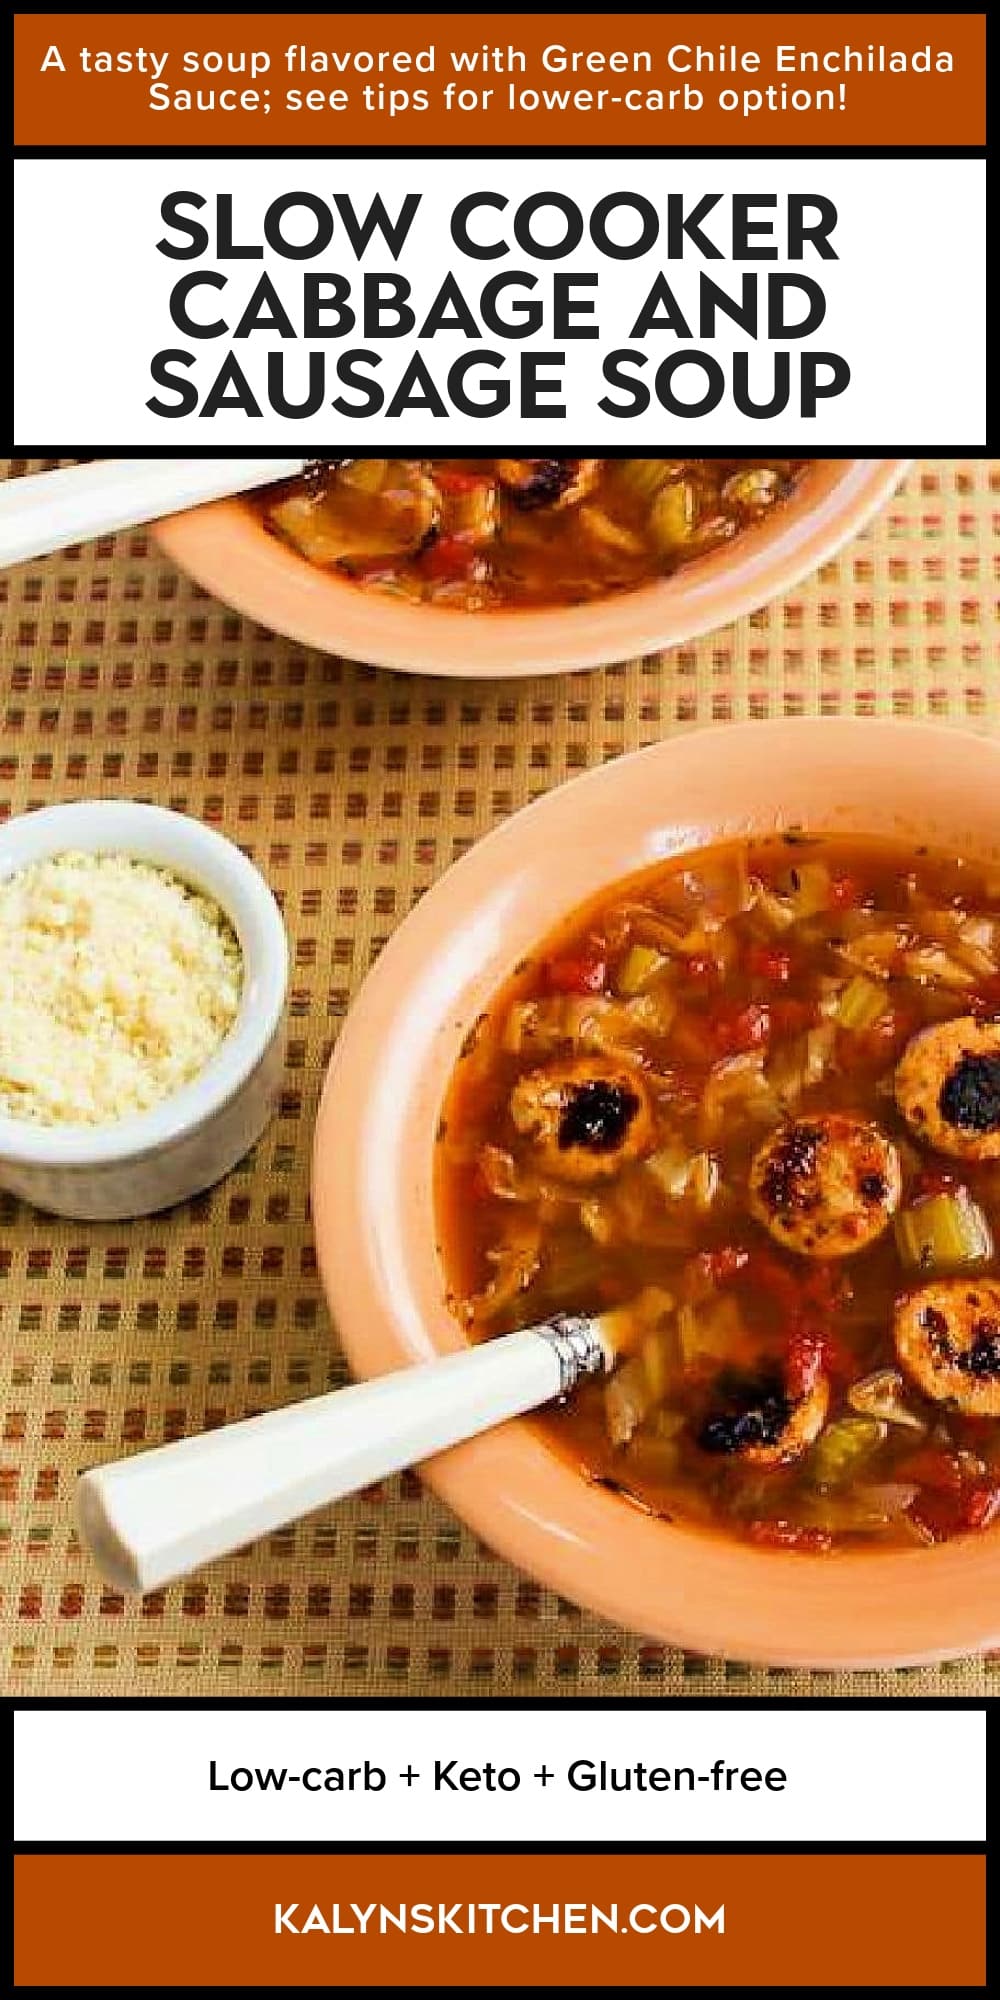
  • Slow Cooker Cabbage and Sausage Soup

    Slow Cooker Cabbage and Sausage Soup

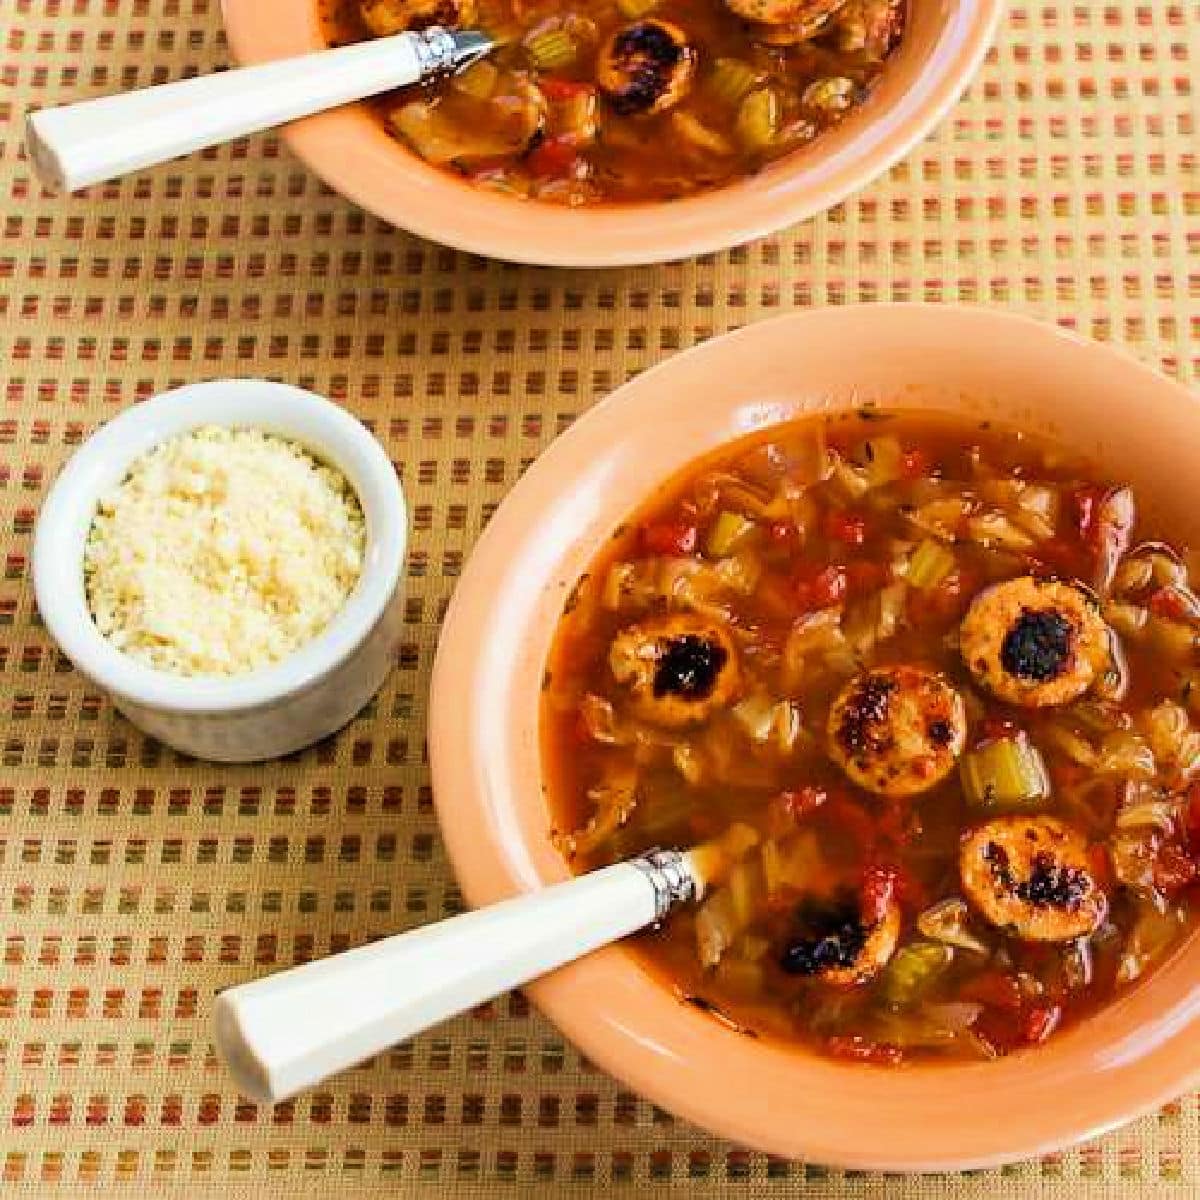
    Slow Cooker Cabbage and Sausage Soup is a tasty low-carb soup that’s easy to make and it’s especially good topped with Parmesan cheese! We used chicken-garlic sausage for this tasty cabbage sausage soup, but use any type of sausage you prefer.

    PIN the Cabbage and Sausage Soup to try it later!

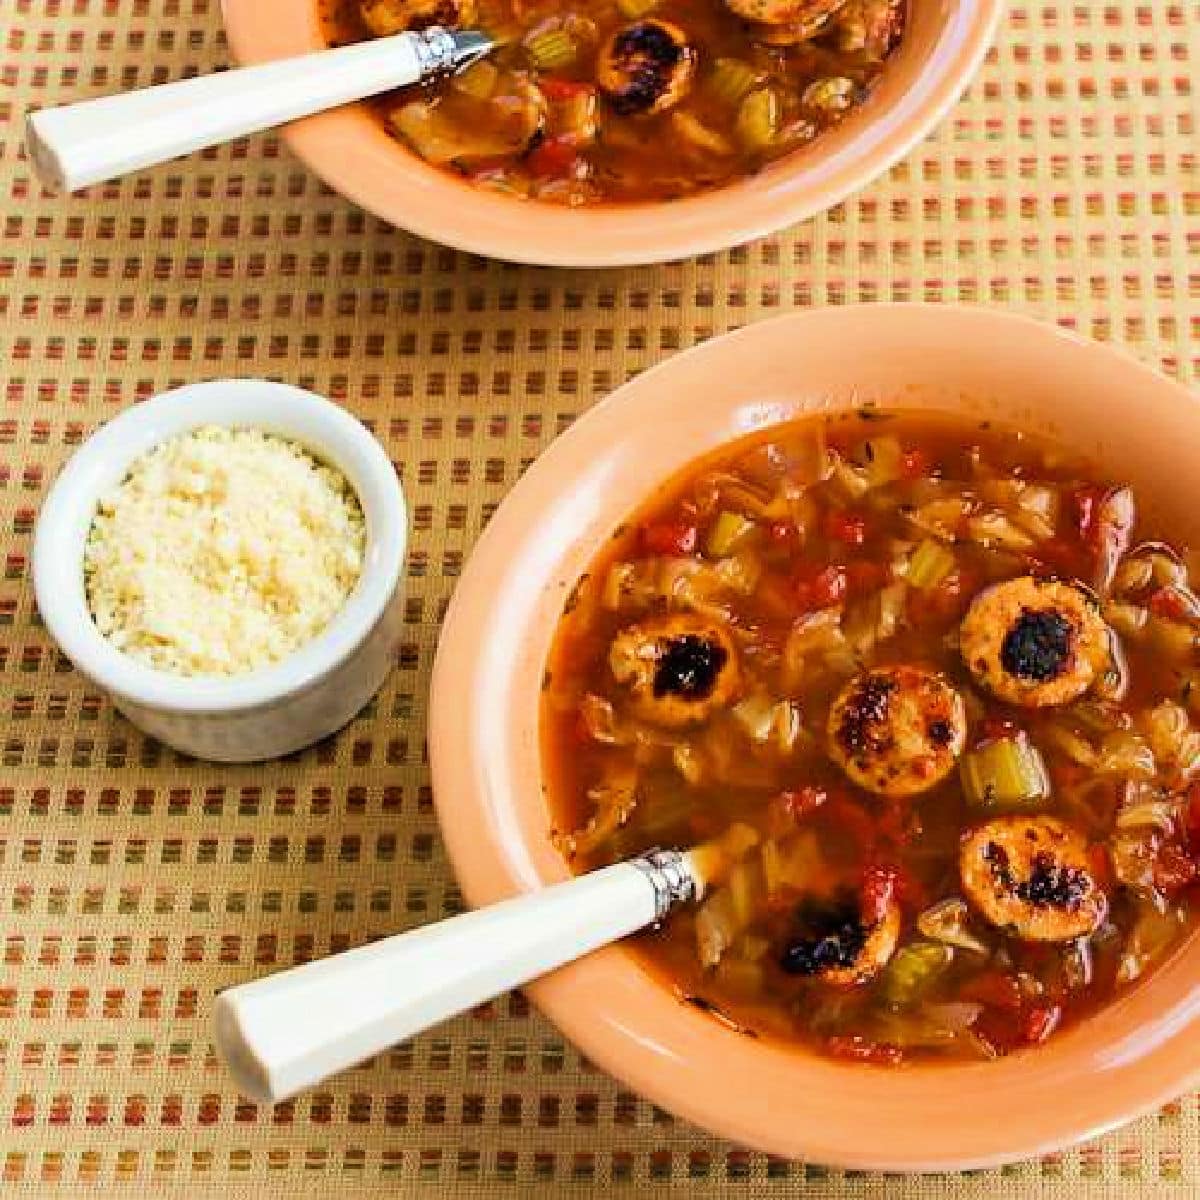
    Square image of Slow Cooker Cabbage Soup with Sausage shown in two bowls with Parmesan Cheese.

    I love this Slow Cooker Cabbage and Sausage Soup! And I really hope no one has flashbacks of the old Cabbage Soup Diet when they hear the name of the recipe, because this is a delicious soup recipe that’s healthy and low in carbs, but you certainly won’t think about being on a diet when you’re eating it.

    My slow cooker cabbage soup is loaded with flavor from tomatoes, beef stock, seasonings, and Chicken-Garlic sausage (or your favorite garlicky sausage), and it gets even better if you top it with a spoonful of freshly grated Parmesan cheese. And best of all, if you do a little chopping the night before, this cabbage and sausage soup is one of those “throw in the slow cooker and cook all day” kinds of recipes that people love.

    When you get home, just brown the sausage, add to the soup, and cook on high for 30-45 minutes more and dinner is ready! If you’re a fan of easy low-carb slow cooker soup, I hope you try this recipe soon!

    What ingredients do you need? 

    (This is only a list of ingredients; please scroll down for complete printable recipe. Or if you use the JUMP TO RECIPE link at the top of the page, it will take you directly to the complete recipe with ingredient amounts.)

    What sausage is good for the Cabbage and Sausage Soup?

    This is the fourth recipe I’ve made with Sabatinos Chicken Sausage with Mozzarella, Artichokes and Garlic (and in case anyone is wondering, Sabatinos certainly hasn’t paid me to promote their sausage.) I’m infatuated with this sausage at the moment, but if you can’t find this brand, use any garlicky sausage that has good flavor. Check the nutritional info if you’re watching carbs, because some sausage has a lot of added sugar.

    Do you have to brown the sausage for this soup?

    I highly recommend you don’t skip the step of browning the sausage for this cabbage and sausage soup. The few minutes it takes to do that will add so much flavor to the finished soup.

    How low in carbs is the Cabbage and Sausage Soup?

    This tasty and easy slow cooker soup has only 8 net carbs per serving and 22 grams of protein with the sausage I used.

    What slow cooker did I use for Cabbage and Sausage Soup?

    I used a 5-Quart Slow Cooker (affiliate link) for this recipe, but it could have been slightly smaller. The soup freezes well, so if you only have a large slow cooker you could double the recipe and stash some in the freezer!

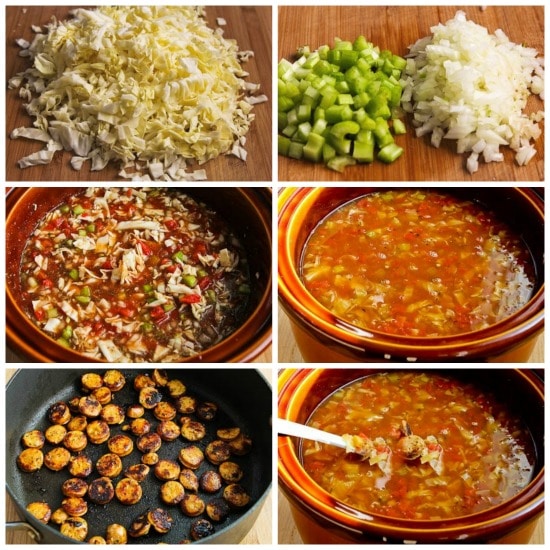
    Low-Carb Slow Cooker Cabbage Soup with Tomatoes, Sausage, and Parmesan found on KalynsKitchen.comLow-Carb Slow Cooker Cabbage Soup with Tomatoes, Sausage, and Parmesan found on KalynsKitchen.com

    How to Make Slow Cooker Cabbage and Sausage Soup:

    (This is only a summary of the steps for the recipe; please scroll down for complete printable recipe. Or if you use the JUMP TO RECIPE link at the top of the page, it will take you directly to the complete recipe.)

    1. You’ll need about a pound of chopped cabbage for this soup.
    2. Also chop up a medium onion and about one cup of celery. I prefer my soup veggies chopped on the small side, but make them a little bigger if you prefer.
    3. Put the cabbage, onion, celery, petite diced tomatoes, beef stock, and spices in the slow cooker and cook all day on low or 3-4 hours on high.
    4. Here’s how the soup will look after you’ve cooked it that long.
    5. Then cut the sausages into thin slices. Heat a little olive oil in a frying pan and brown the sausage well.
    6. Add the sausage to the slow cooker (and turn to high if you were cooking on low) and cook for 30-45 minutes more.
    7. Serve Cabbage and Sausage Soup hot, with freshly grated Parmesan Cheese if desired

    Make it a Low-Carb Meal:

    If you wanted to make the Slow Cooker Cabbage and Sausage Soup into a complete meal, it would be great served with a low-carb bread like Olive Bread, Low-Carb High-Fiber Savory Muffins, or Savory Almond Flour Bread.

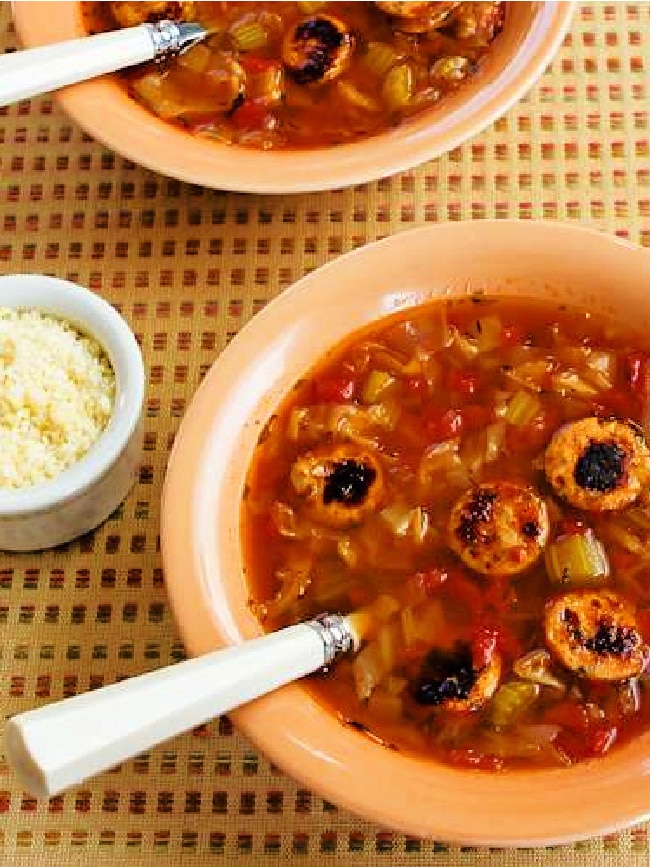
    Slow Cooker Cabbage soup with Sausage finished soup in two serving bowlsSlow Cooker Cabbage soup with Sausage finished soup in two serving bowls

    Want More Tasty Soups with Cabbage?

    Check out Low-Carb Cabbage Soup Recipes for lots more tasty ideas for using nutritious cabbage in soup!

    Weekend Food Prep:

    This recipe for Cabbage and Sausage Soup has been added to a new category called Weekend Food Prep where you’ll find recipes you can prep or cook on the weekend and eat during the week!

    Ingredients

    • 6 cups chopped cabbage (see notes)
    • 1 onion, chopped small
    • 1 cup celery, diced small
    • two 14.5 oz. cans petite dice tomatoes (see notes)
    • 6 cups beef stock (see notes)
    • 2 tsp. dried thyme
    • 1 tsp. ground fennel
    • fresh ground black pepper to taste
    • 6 links Chicken-Garlic Sausage
    • 2 tsp. olive oil

    Instructions

    1. Chop the cabbage, onion, and celery and place in the slow cooker. (If you’re making this to cook while you’re at work I would chop those the night before and store in the fridge in a plastic bag.)
    2. Add the 2 cans of tomatoes, Homemade beef stock or you can use canned beef broth if you don’t have it.), dried thyme (affiliate link), ground fennel (affiliate link), and black pepper to the slow cooker.
    3. Cook 8-9 hours on low or 3-4 hours on high.
    4. When you get home, or when the cabbage is well-softened if you’re cooking on high, slice the sausage into pieces about 1/4 inch thick.
    5. Heat the olive oil in a large non-stick pan and cook over medium-high heat until the sausage is nicely browned. (You might need to do this in 2 batches if you use 6 sausages.)
    6. Add the well-browned sausage to the soup, turn to high if you were cooking on low, and cook 30-45 minutes more.
    7. Serve hot, with freshly-grated Parmesan cheese if desired.

    Notes

    Six cups cabbage is about one pound. You can use only one can of tomatoes if you want to reduce the carbs even more. Homemade beef stock is best, but you can use canned beef broth if you prefer. Use any garlicky sausage that has good flavor.

    I used a 5-Quart Slow Cooker (affiliate link) for this recipe, but it could have been a little smaller.

    Recipe created by Kalyn when she became infatuated with Sabatinos Chicken Sausage with Mozzarella, Artichokes and Garlic, but use any garlicky sausage you prefer for this recipe.

    Nutrition Information

    Yield

    8

    Serving Size

    1

    Amount Per Serving

    Calories 224Total Fat 11gSaturated Fat 3gUnsaturated Fat 7gCholesterol 65mgSodium 448mgCarbohydrates 11gFiber 3gSugar 5gProtein 22g

    Nutrition information is automatically calculated by the Recipe Plug-In I am using. I am not a nutritionist and cannot guarantee 100% accuracy, since many variables affect those calculations.

    Did you make this recipe?

    Did you make this recipe? Please leave a star rating (under the PRINT button in the recipe) or share a photo of your results on Instagram! THANKS!

    Low-Carb Slow Cooker Cabbage Soup with Tomatoes, Sausage, and Parmesan found on KalynsKitchen.comLow-Carb Slow Cooker Cabbage Soup with Tomatoes, Sausage, and Parmesan found on KalynsKitchen.com

    Low-Carb Diet / Low-Glycemic Diet / South Beach Diet Suggestions:
    Cabbage and Sausage Soup is great for low-carb diets, and it’s also gluten-free if you make sure the sausage is gluten-free. If you make the soup with chicken sausage like I used, this is also a great recipe for any phase of the original South Beach Diet. 

    Find More Recipes Like This One:
    Use Soup Recipes or Slow Cooker Recipes to find more recipes like this one. Use the Diet Type Index to find more recipes suitable for a specific eating plan. You might also like to follow Kalyn’s Kitchen on Pinterest, on Facebook, on Instagram, on TikTok, or on YouTube to see all the good recipes I’m sharing there.

    Historical Notes for this Recipe:
    Slow Cooker Cabbage and Sausage Soup was first posted in 2013, and I’ve made it quite a few times since then. The recipe was last updated with more information in 2025.

    Pinterest image of Slow Cooker Cabbage and Sausage Soup  

    We are a participant in the Amazon Services LLC Associates Program, an affiliate advertising program designed to provide a means for us to earn fees by linking to Amazon.com and affiliated sites. As an Amazon Associate, I earn from qualifying purchases.


    Source link

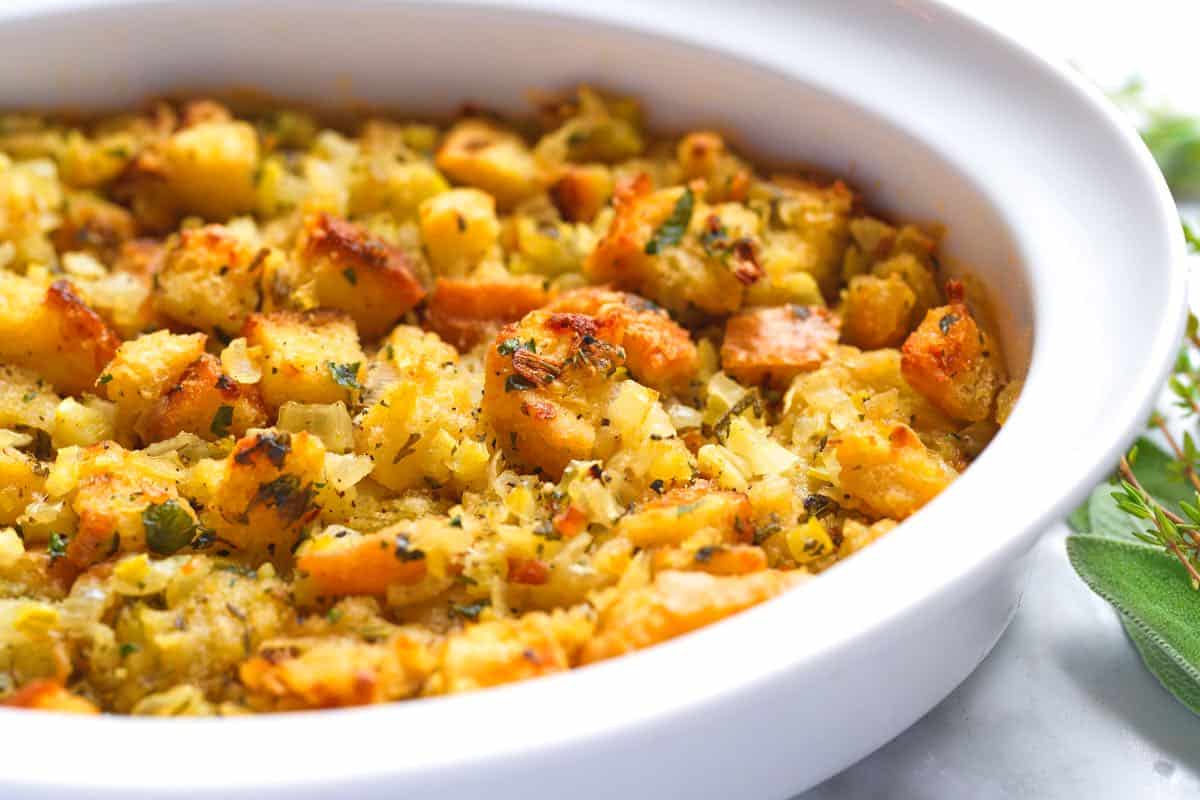
  • Easy Herb Stuffing Recipe

    Easy Herb Stuffing Recipe

    This classic homemade stuffing recipe is the perfect side dish for Thanksgiving and holidays.

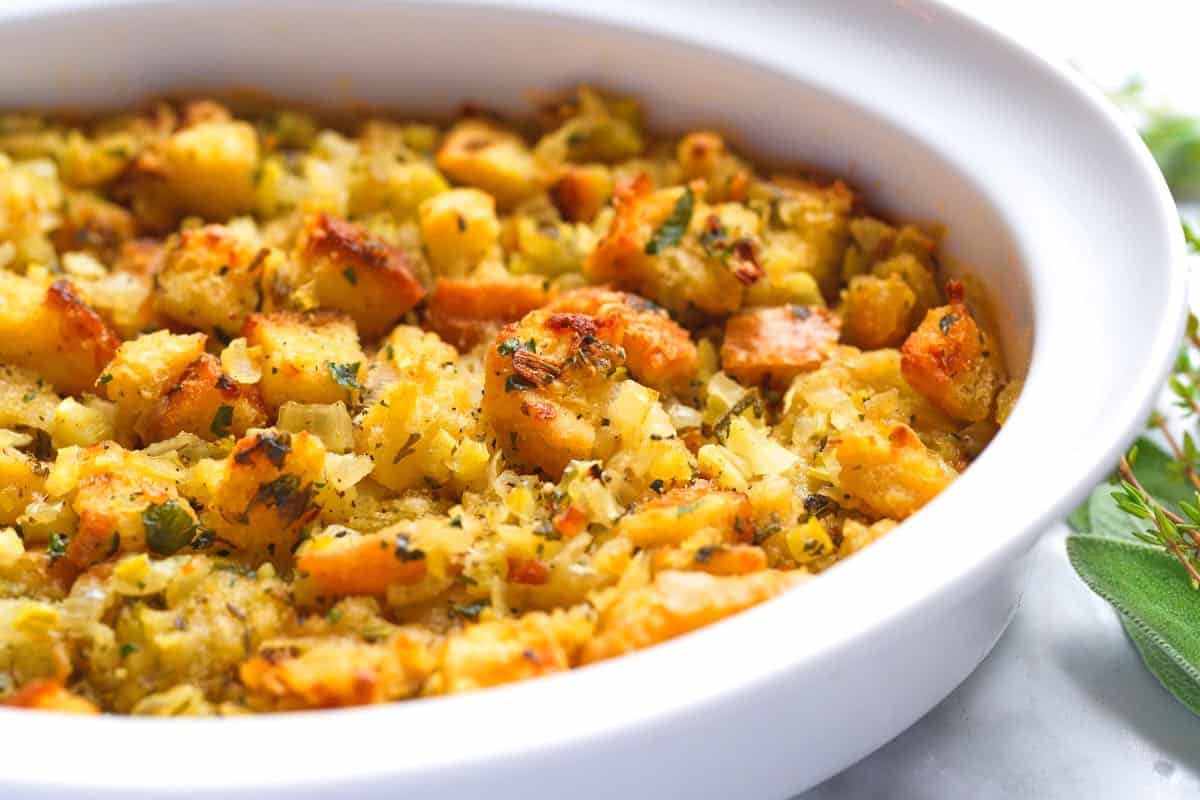
    Homemade Stuffing

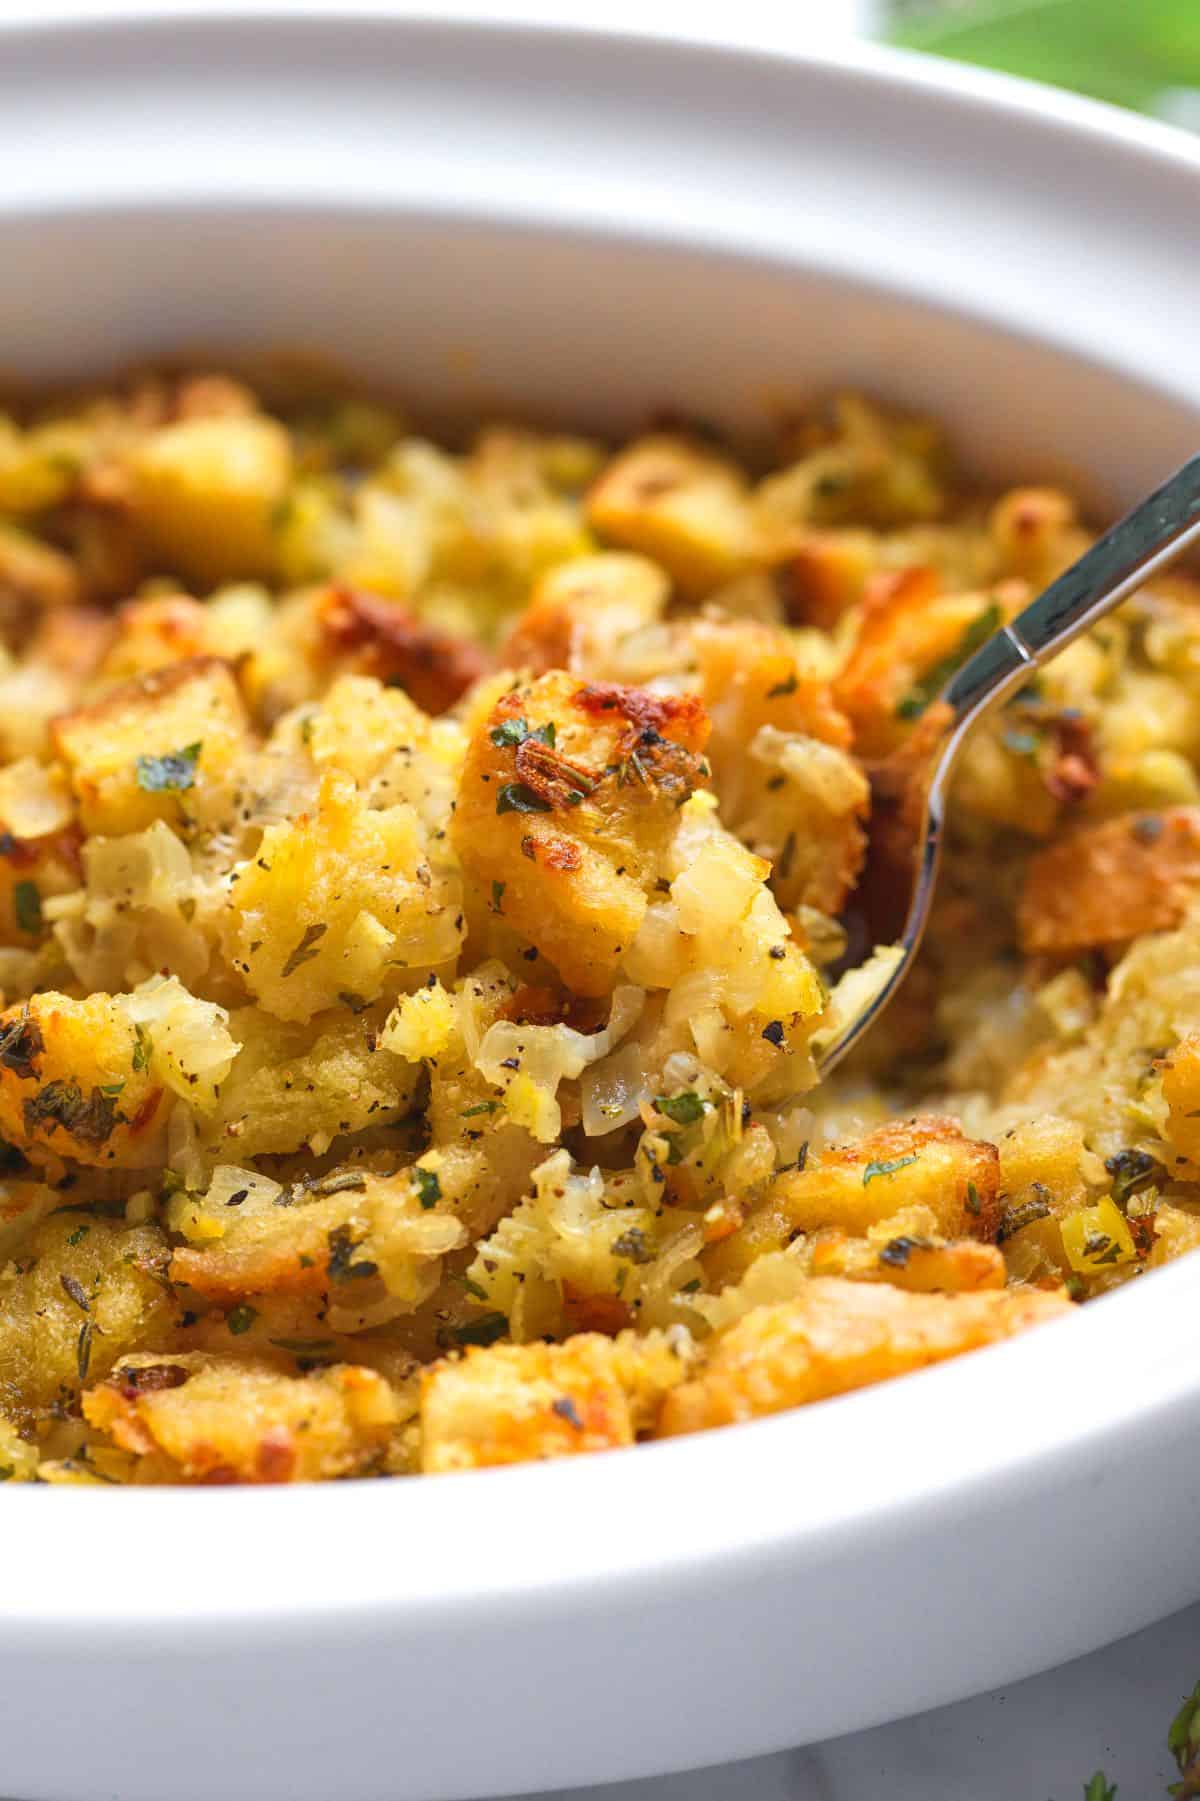
    Your search for the perfect holiday stuffing ends here. It’s so good that my family requests it every single year for Thanksgiving.

    It’s easy to make from scratch, and the traditional combination of buttery onions and fresh sage tastes incredible alongside roasted turkey or roast chicken. If you love mushrooms, try our incredible mushroom stuffing instead.

    Key Ingredients

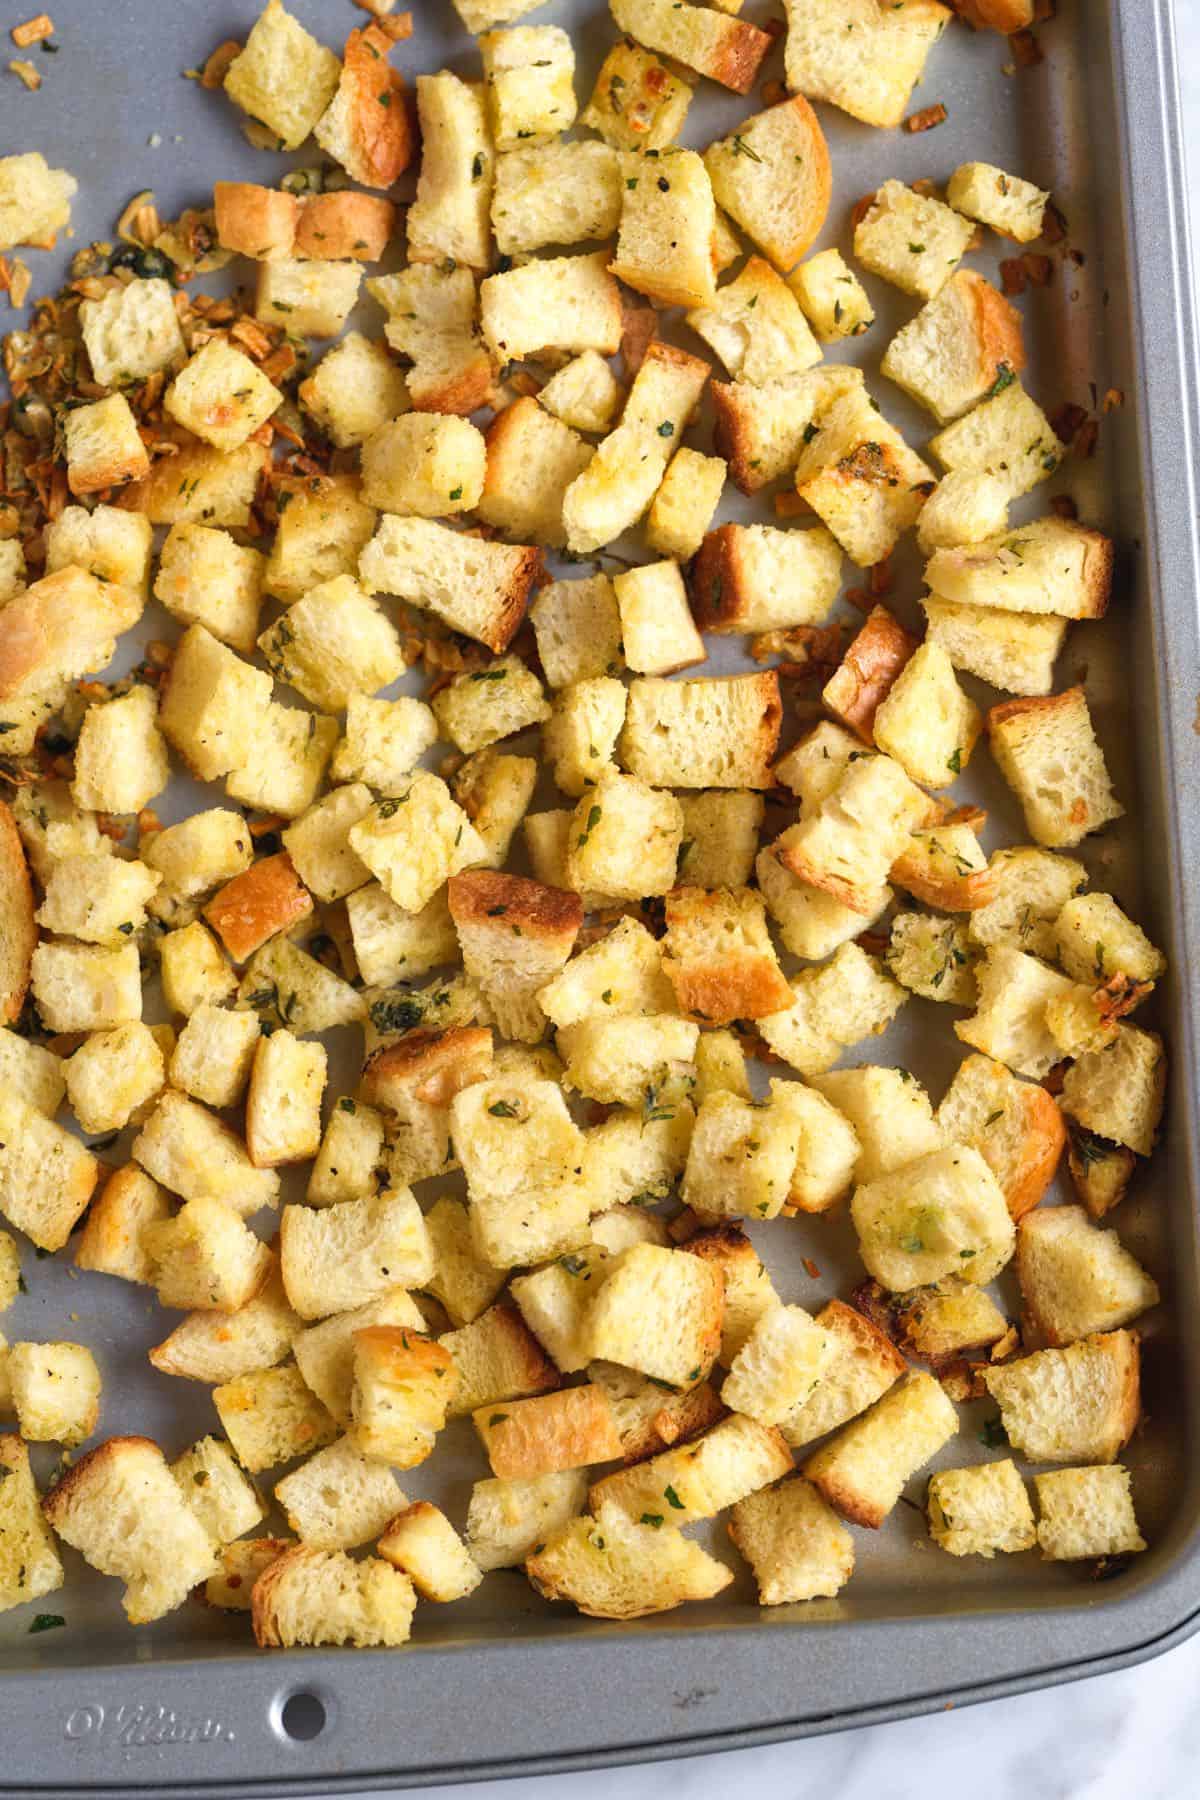
    • Bread: The key to great stuffing is dry bread. For the best stuffing, use homemade garlic croutons. They’re already dried out and packed with flavor, giving your stuffing an incredible texture.
    • Butter: I use salted butter in this recipe. Unsalted or a plant-based butter works great too, especially if you’re making a vegan version. You’ll just need a touch more salt.
    • Onion, Celery, and Garlic: These are the classic, must-have aromatics. You’ll cook them in the butter to build a savory base before adding the broth and bread.
    • Broth: Use your favorite type, whether it’s chicken broth or vegetable broth. It’s the key to a moist stuffing. In other stuffing recipes, eggs serve as a binder, helping to make the mixture fluffy when baked. We use butter and broth in our recipe for our binder and don’t miss the eggs at all.
    • Herbs: For me, stuffing isn’t complete without fresh herbs. I use sage, thyme, and parsley. The sage is my favorite. It reminds me of my grandmother’s stuffing and makes the whole dish taste like the holidays.

    Find the full recipe with measurements below.

    How to Make the Best Homemade Stuffing

    Tip 1: Bread works, but homemade croutons are better. I love using these garlic croutons. They are easy to make and make our stuffing taste so good. I realize this adds a step, but you can make them well in advance (they keep for 2 weeks!). All that said, you can use plain bread. I’ve shared tips for this below the recipe.

    Homemade croutons for stuffing

    Tip 2: There’s no need to brown the onions. When cooking your onions, celery, and garlic, use a skillet with a lid. You aren’t trying to brown them. Instead, we want the soft and sweet. When they are, you can add broth, croutons, and fresh herbs.

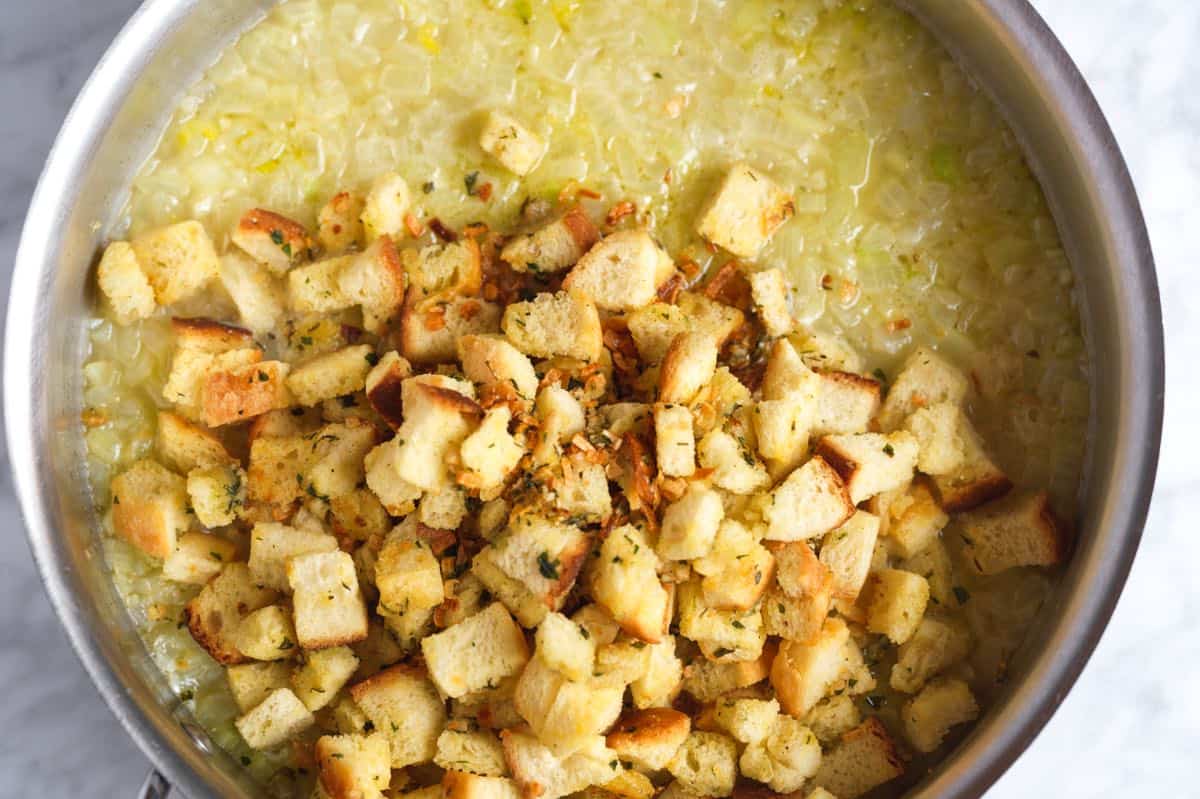
    Toasted bread in a pan with broth, onions, and herbs for homemade stuffing.

    Tip 3: Finish in the oven. Bake your stuffing (uncovered) in a 350°F oven for about 40 minutes. I like to rotate the casserole dish halfway through baking. When baked, the stuffing is moist and set in the middle, with a golden brown and crispy top. Then, let it sit on the counter for a few minutes to firm up before serving.

    Serving Suggestions

    You can make this stuffing recipe anytime, but it’s perfect for Thanksgiving alongside our Best Roast Turkey or Garlic Herb Roasted Turkey Breast. Here are a few more of our favorite side dishes:

    Classic Stuffing

    Easy Herb Stuffing

    • PREP
    • COOK
    • TOTAL

    We love this classic herb stuffing recipe. It is especially good served with roasted chicken and roasted turkey. This is an excellent Thanksgiving stuffing recipe. For extra flavor, we love using our homemade garlic croutons. They are easy to make. If you do not want to use croutons, tips are provided below the recipe for using plain bread.

    Makes 4 to 5 servings

    You Will Need

    8 ounces homemade garlic croutons (about 6 cups), see tips

    4 tablespoons (57g) butter, plus more for baking dish

    1 medium onion, finely chopped, 1 ½ cups

    3 celery stalks, finely chopped, 1 ½ cups

    2 garlic cloves, minced, 2 teaspoons

    1 ¾ cups (415ml) chicken broth or veggie broth

    1 teaspoon chopped thyme

    1 teaspoon chopped sage

    2 ½ tablespoons chopped parsley

    1/8 teaspoon fresh ground black pepper

    1/4 teaspoon to 1/2 teaspoon fine sea salt

    Directions

      1Preheat the oven to 350°F (177°C). Grease a 1 ½ to 2-quart baking dish with butter.

      2Melt the butter in a large skillet (with a lid) over medium heat. Stir in the onion, celery, and garlic. Cover with the lid and cook until translucent, about 5 minutes.

      3Pour in the broth and bring to a simmer. Toss in the croutons, stirring around the pan to combine. Cook for 5 minutes.

      4Stir in the thyme, sage, parsley, and pepper. Taste, and then season with salt. Depending on the broth you have used, you may need to add 1/4 teaspoon to 1/2 teaspoon.

      5Spread the stuffing in the buttered baking dish, and bake uncovered for 40 minutes, or until the middle sets and the top turns golden brown and crisp. Rotate the stuffing halfway through baking. Let stand on the counter for 5 to 10 minutes before serving.

    Adam and Joanne’s Tips

    • Homemade croutons: I love the garlic croutons, and they truly make this stuffing better. You can make the croutons up to two weeks in advance.
    • Plain bread cubes: If you prefer plain bread cubes instead of garlic croutons, cut 8 ounces of crusty white bread into 1/2-inch cubes. We recommend tossing them onto a baking sheet and bake for 10 to 20 minutes in a 350°F oven. This short time in the oven will dry the bread, making it stand up better in the stuffing mixture. Remember, you will lose a bit of herb flavor when not using the croutons.
    • Can you stuff this stuffing into a turkey? Yes, but we prefer not to when preparing a turkey. Stuffing the turkey can affect the overall cooking process. The heat takes longer to penetrate the cavity, and stuffing your turkey pretty much guarantees overcooked turkey meat. By cooking the stuffing separately, we guarantee we cook the turkey and stuffing perfectly without compromise.
    • The nutrition facts provided below are estimates.

    Nutrition Per Serving
    Serving Size
    1/4 of the recipe
    /
    Calories
    268
    /
    Total Fat
    13.3g
    /
    Saturated Fat
    7.6g
    /
    Cholesterol
    638.8mg
    /
    Carbohydrate
    31.8g
    /
    Dietary Fiber
    3.9g
    /
    Total Sugars
    5.8g
    /
    Protein
    6.9g


    AUTHOR:

    Joanne Gallagher

    Adam and Joanne of Inspired Taste

    We are Adam and Joanne Gallagher, the creators of Inspired Taste. Established in 2009, Inspired Taste grew from a childhood dream into one of the internet’s most trusted recipe sites with hundreds of reliable recipes, step-by-step videos, and expert tips.More About Us

    Source link

  • 30-Minute Bang Bang Shrimp Tacos

    30-Minute Bang Bang Shrimp Tacos

    This website may contain affiliate links and advertising so that we can provide recipes to you. Read my disclosure policy.

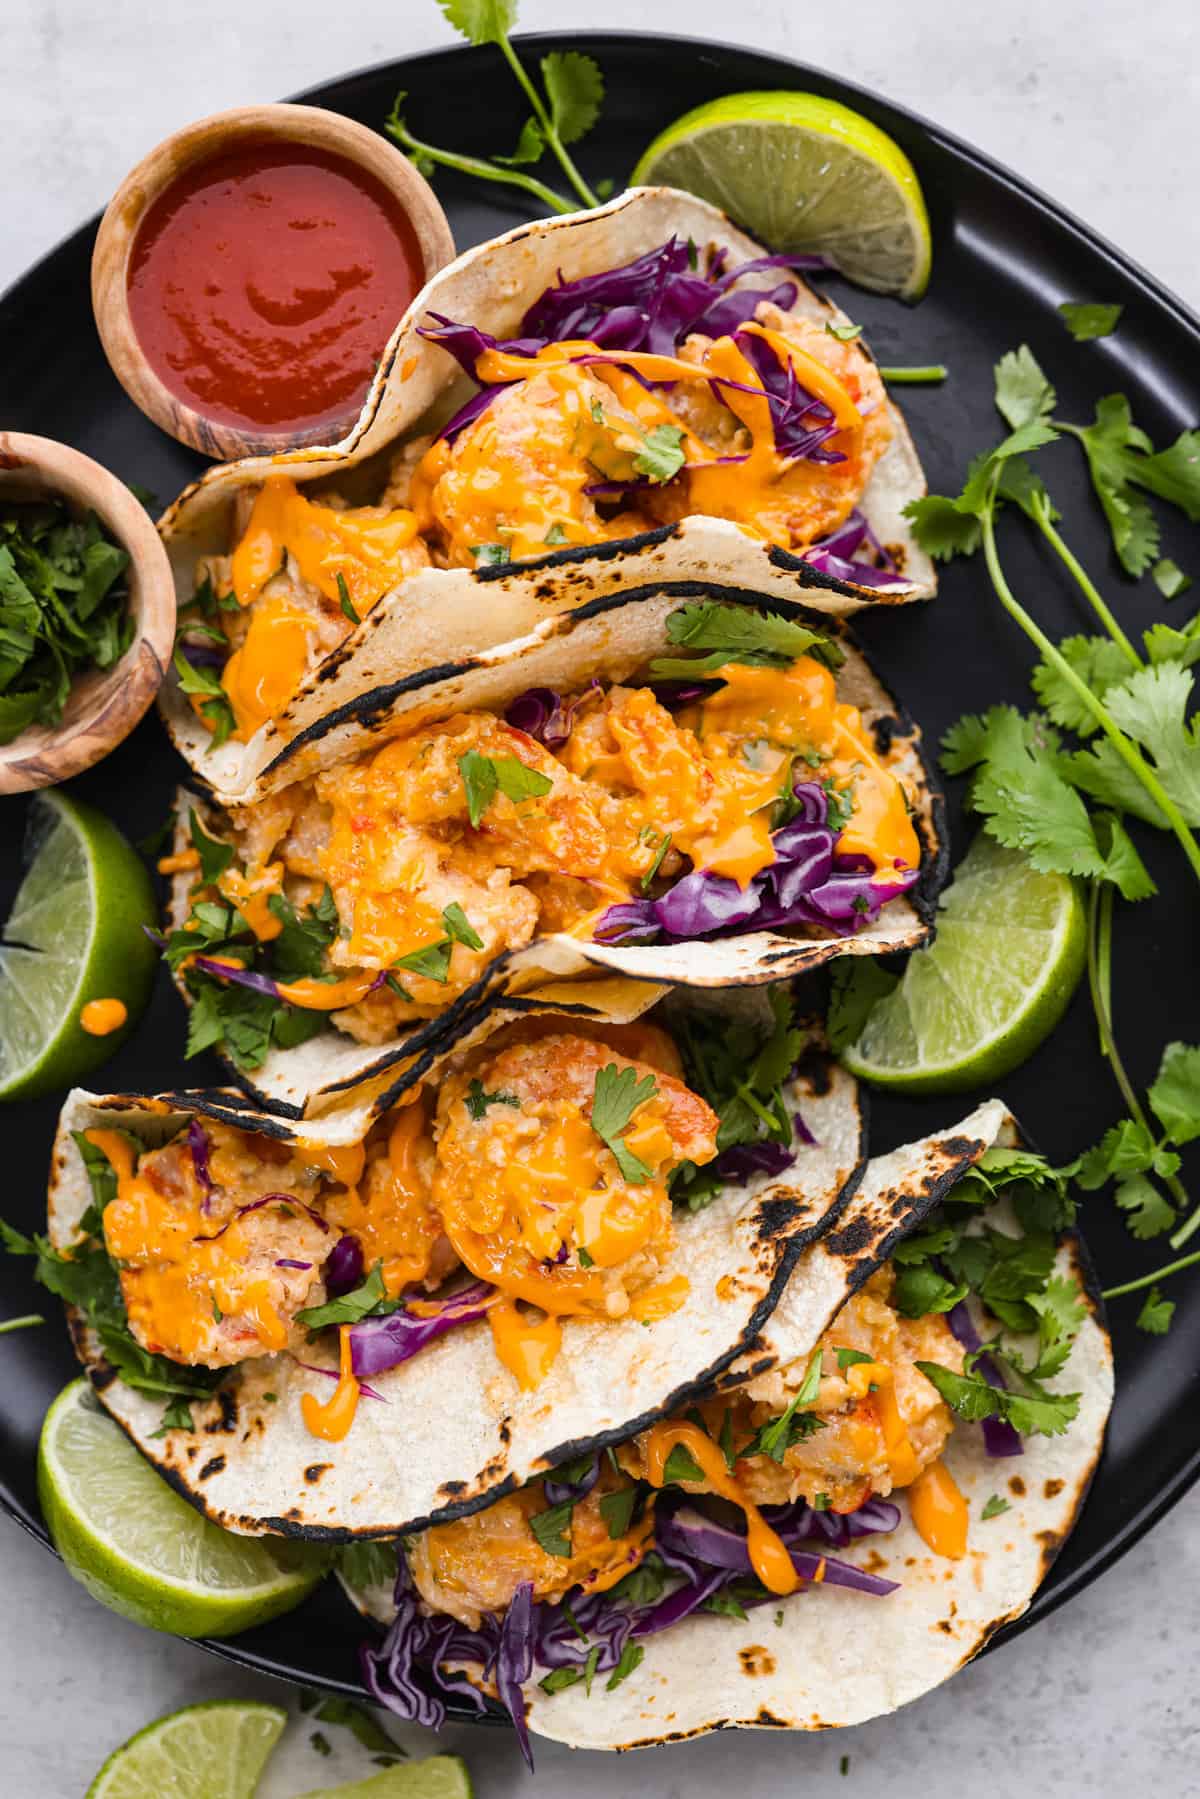
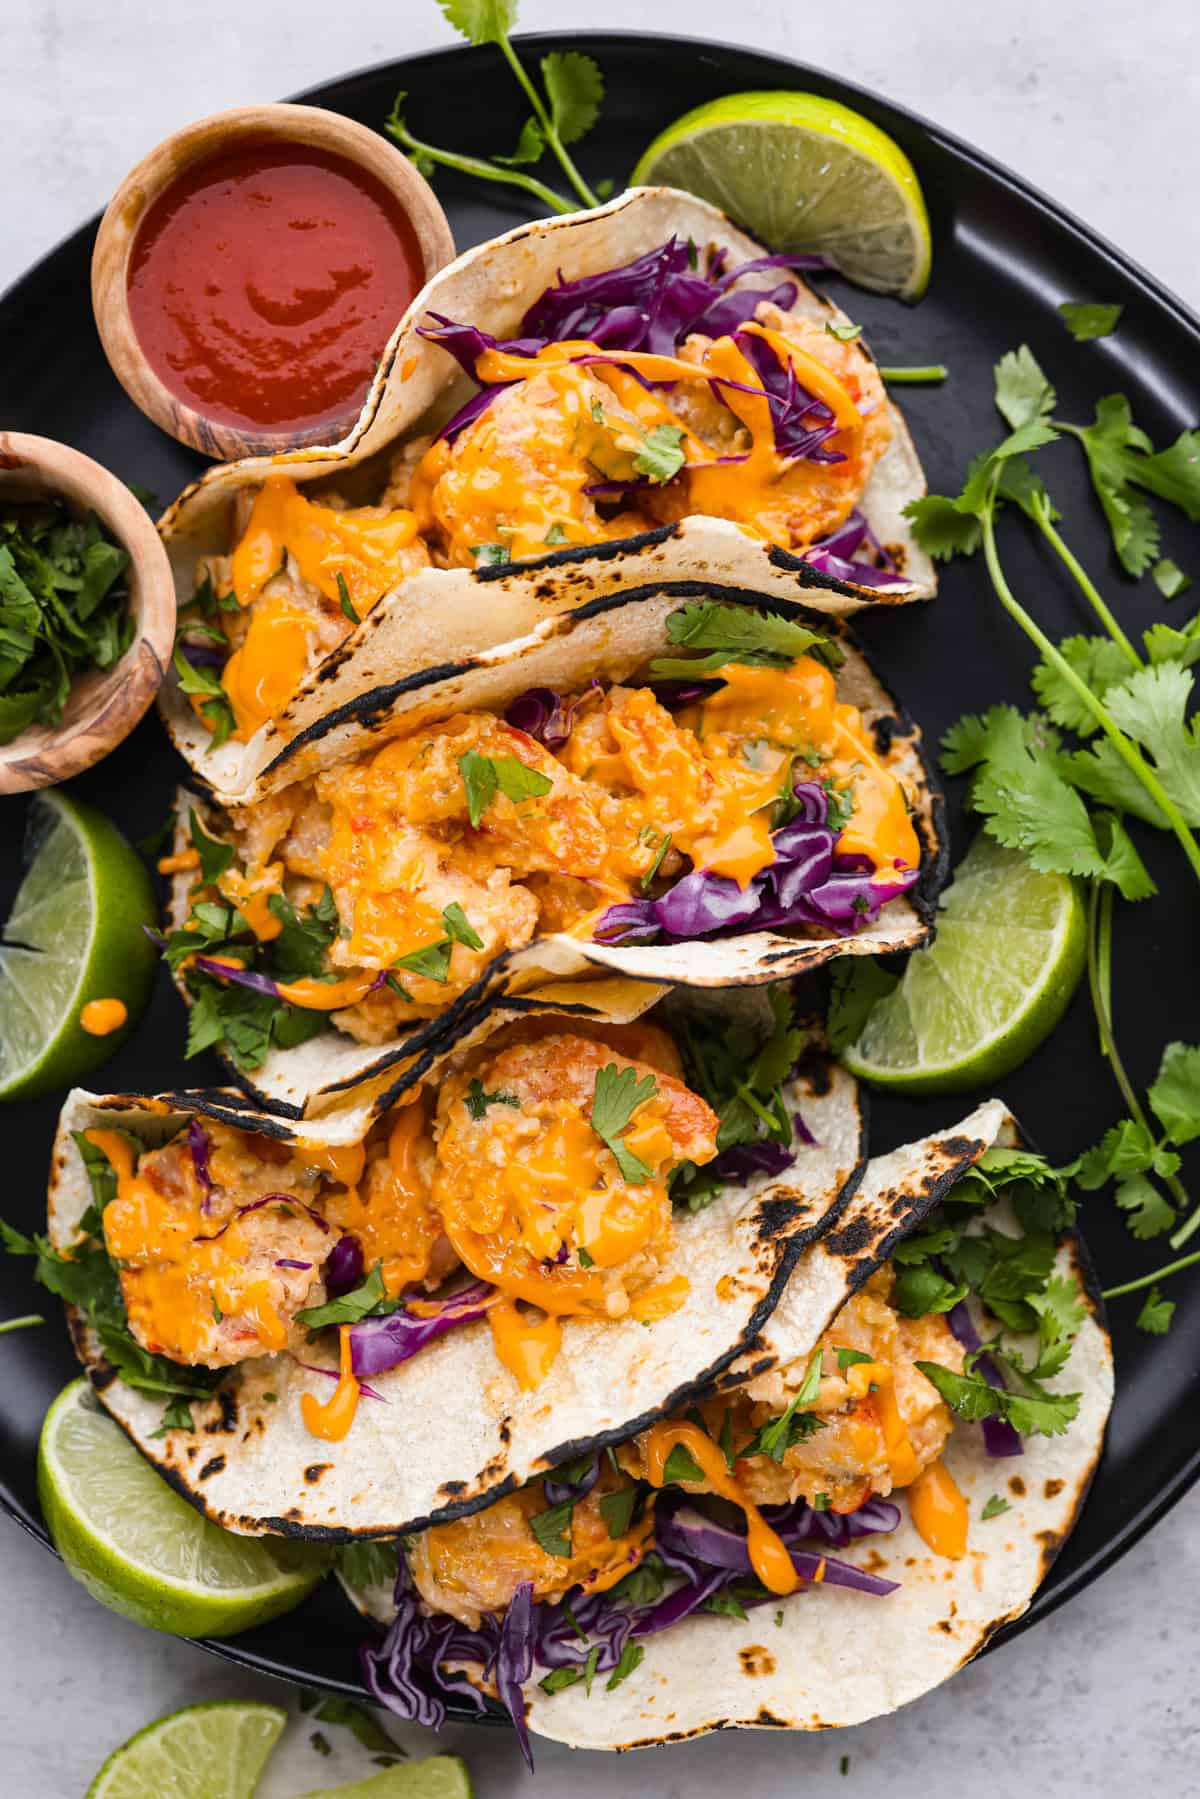
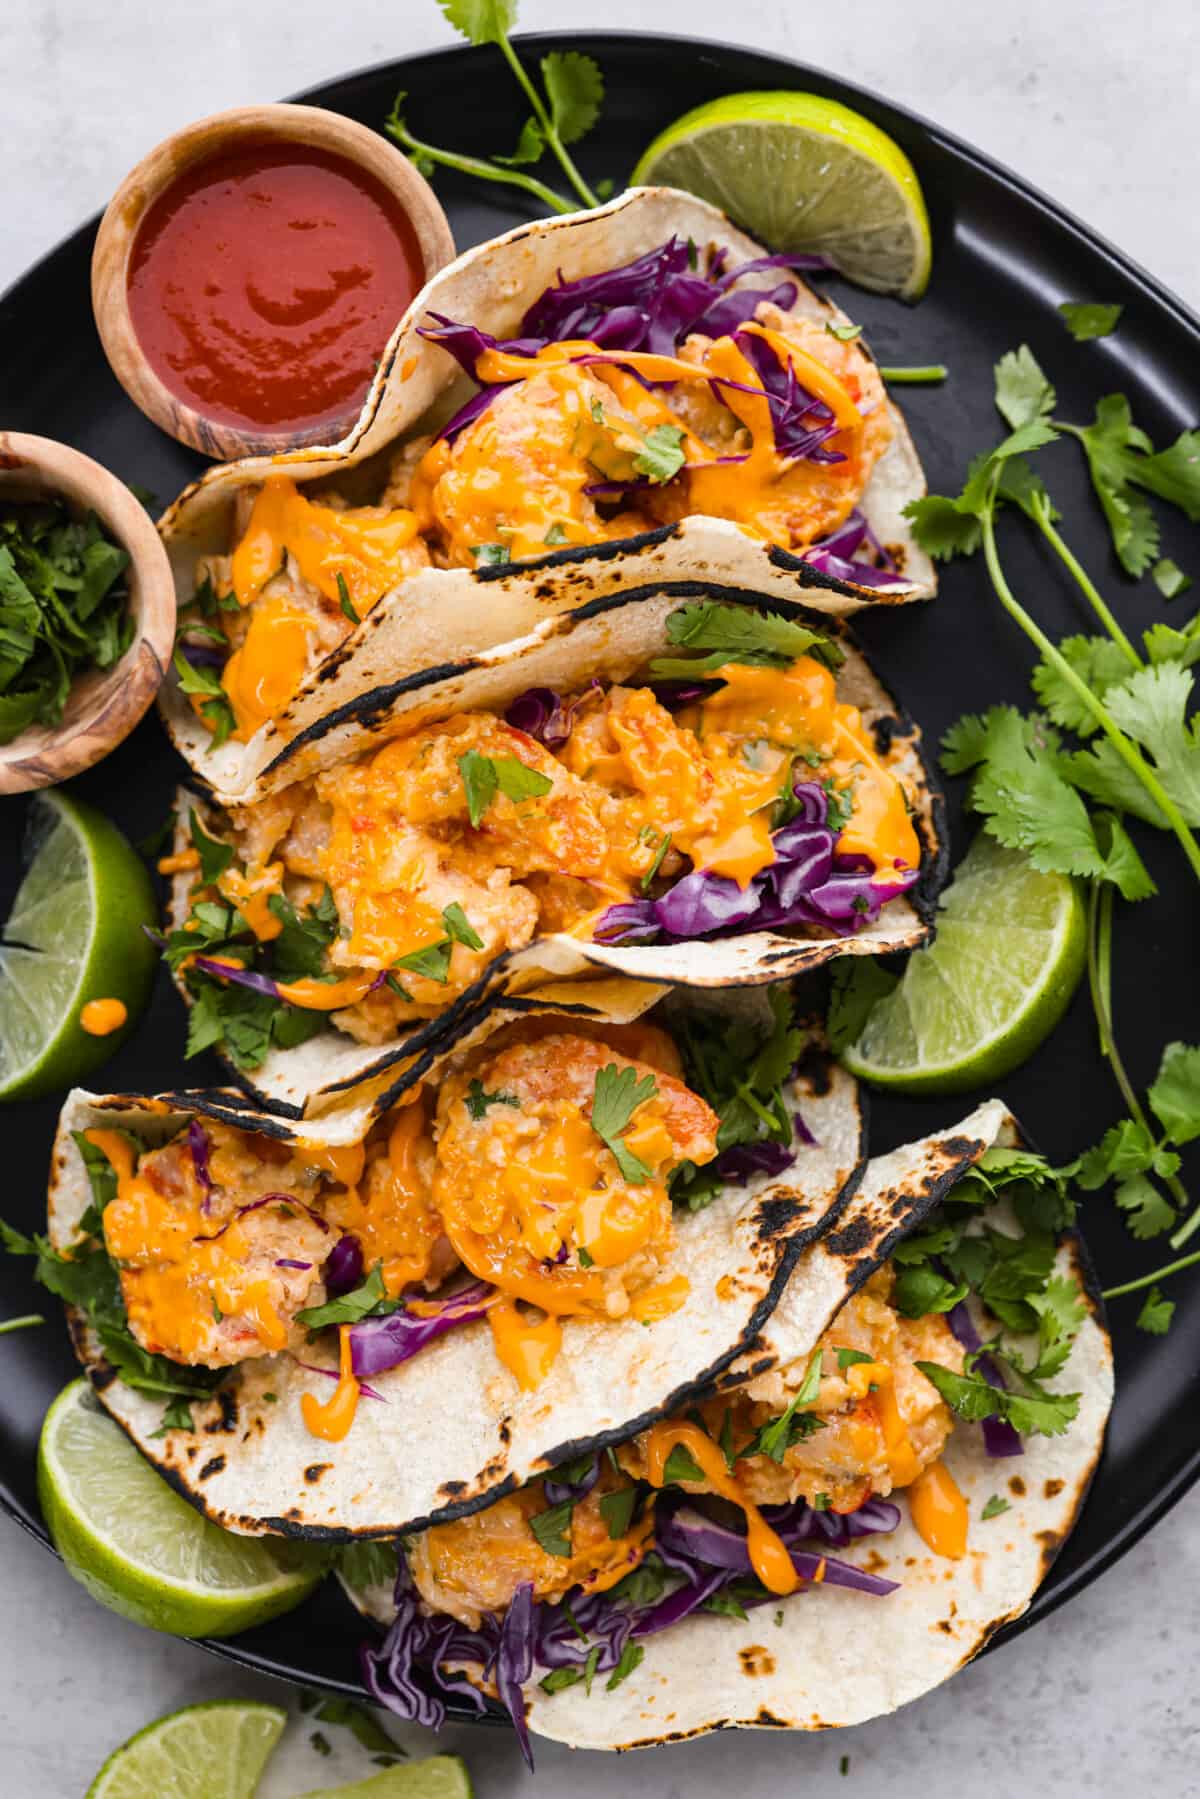
    These Bang Bang Shrimp Tacos are made with deliciously crunchy shrimp cooked to perfection and coated in a special sauce that’s just bursting with flavor! It’s a meal that’s sure to impress.

    Who doesn’t love a delicious shrimp recipe? Check out some other favorites like this Honey Walnut Shrimp or this Hunan Shrimp!

    Bang Bang Shrimp Tacos on a plate. Bang Bang Shrimp Tacos on a plate.

    Reasons You’ll Love Them!

    • You can control the spice! By making these at home, you can crank up the heat or take it down a notch to keep them mild. Just adjust the amount of sriracha sauce!
    • Ready in 30 Minutes: Who doesn’t love a meal that is quick, easy and delicious?!
    • Restaurant Quality: If you have ever had the bang bang shrimp tacos from Bonefish Grill, you are going to be obsessed with this recipe! Just like them (even better in my opinion) and now you can have them at home!!

    Are Bang Bang Shrimp Tacos Spicy?

    Every time one of my recipes has a sauce on it, one of the first questions that I always get asked is, “Is it spicy?”. These tacos have a bit of heat to them but since you are making them at home, thats so easy to adjust! The ingredient that keeps them nice and hot is the sriracha sauce. You can put either more or less of that ingredient in to make these bring on the heat or stay nice and mild.

    What is in Bang Bang Shrimp?

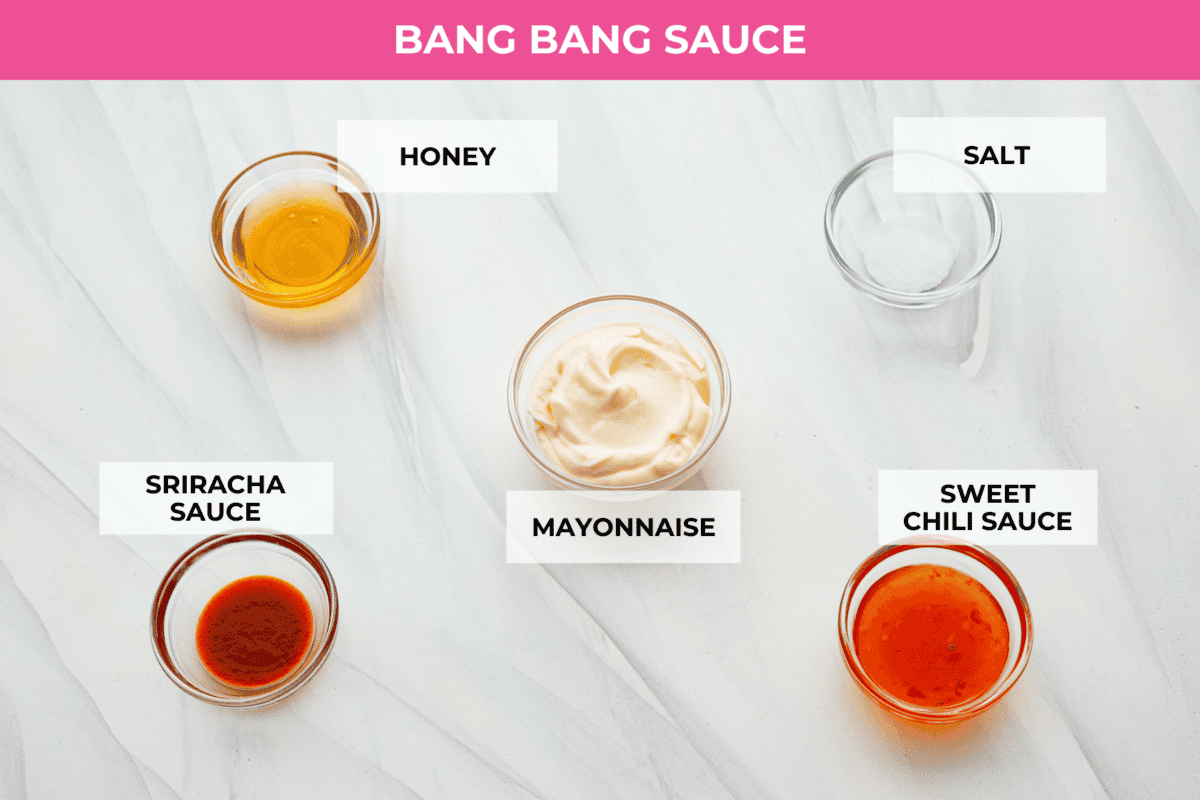
    These tacos get all of their flavor from the bang bang sauce! I make it at home cause it’s so easy! Here are all of the ingredients that you need. Check out the recipe card at the bottom of the post for all of the exact measurements!

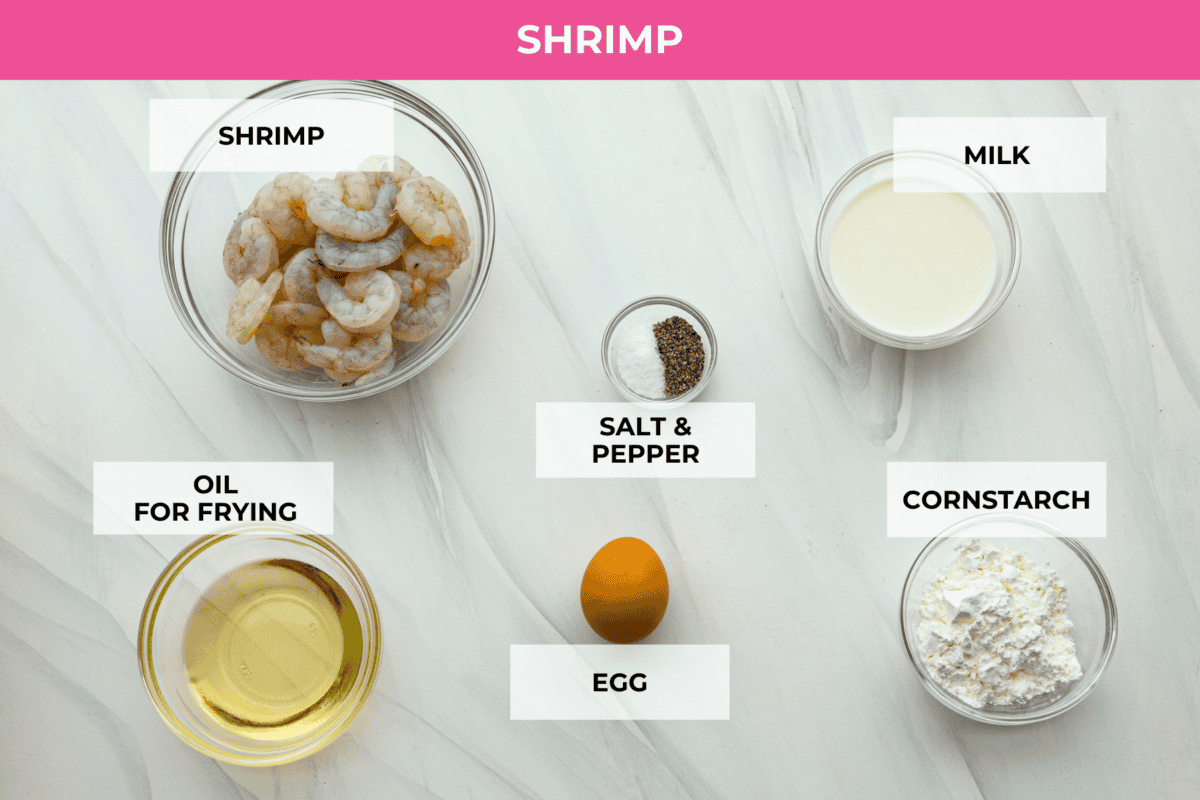
    • Large shrimp, peeled, deveined, tails removed: These are big shrimp that are already prepared for cooking, so you don’t have to do any extra work.
    • Salt and pepper: These are just basic seasonings that make your food taste better.
    • Whole milk: This makes the shrimp coating nice and thick.
    • Egg: This makes the coating stick to the shrimp so that the outside can get crispy.
    • Cornstarch: This makes the outside of the shrimp nice and crispy when you fry them.
    • Oil: You can use vegetable oil or canola oil to fry your shrimp in.
    Shrimp ingredients for bang bang shrimp tacos laid out on a counter and labeled. Shrimp ingredients for bang bang shrimp tacos laid out on a counter and labeled.

    Bang Bang Sauce

    • Mayonnaise: This is what makes the sauce creamy.
    • Honey: It’s a sweetener for the sauce, making it taste nice and balanced.
    • Sweet chili sauce: This adds a bit of sweet and spicy flavor to the sauce.
    • Sriracha sauce: This sauce is spicy and gives the Bang Bang sauce a kick.
    • Salt: This enhances the flavor in the sauce.
    Ingredients on the counter in separate bowls to make bang bang sauce. Ingredients on the counter in separate bowls to make bang bang sauce.

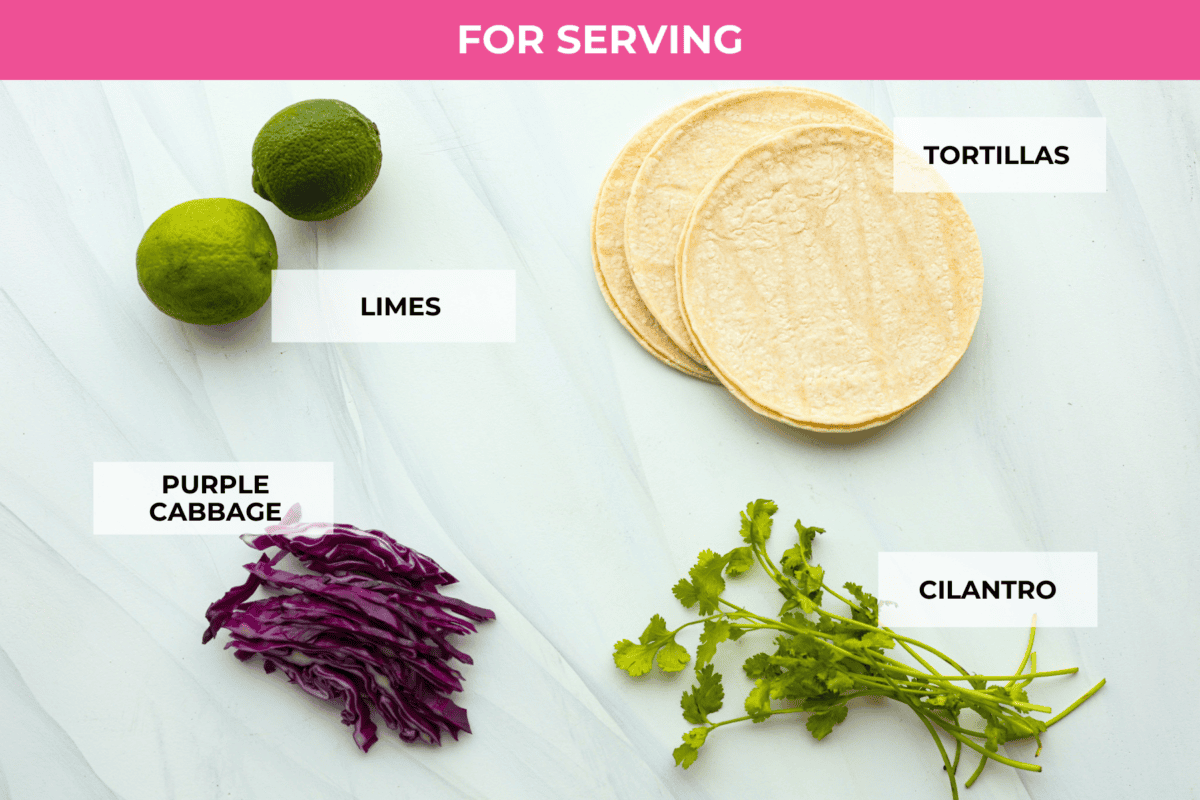
    Toppings

    1. Corn tortillas: These are soft wraps you can put your shrimp in, kind of like tacos.
    2. Purple cabbage, shredded: It’s crunchy and colorful, adding something extra to your shrimp wraps.
    3. Cilantro: This is a fresh herb that adds a tasty, refreshing flavor to your meal.
    4. Lime wedges: Squeezing these over your shrimp adds a tangy taste, making it even yummier.
    Toppings for bang bang shrimp tacos. Toppings for bang bang shrimp tacos.

    How to Make Bang Bang Shrimp Tacos

    This recipe is so simple and you will be enjoying this meal in less than 30 minutes!

    1. Make the Sauce: Prepare the bang bang sauce by adding the mayonnaise, honey, sweet chili sauce, sriracha, and salt to a medium bowl. Whisk to combine and set aside. 

    Cook the Shrimp

    1. Whisk: In a large bowl, whisk together the milk and egg.
    2. Toss the Shrimp: Season the peeled and deveined shrimp with salt and pepper. Add the shrimp to the milk and egg mixture then toss to coat.
    3. Heat up the Oil: Heat the oil in a heavy-bottomed deep pot. Add enough oil to come up about 5 inches. Heat to 375 degrees Fahrenheit.
    4. Coat the Shrimp: In a shallow bowl, add the cornstarch. Working in batches, use tongs to remove 1 shrimp from the milk mixture, letting any excess liquid drip off. Coat the shrimp in cornstarch then place in the hot oil.
    5. Cook in Oil: Fry until golden brown and cooked through about 2-3 minutes. Remove the shrimp with a slotted spoon and drain on paper towels. Repeat this process with the remaining shrimp. 
    6. Add the Sauce: Toss the shrimp with the bang bang sauce and serve in tortillas with your favorite toppings!

    Tips and Variations

    These are just a few extra ways to customize your bang bang shrimp tacos. They’re fast and easy and packed with flavor. Your family will love these tacos!

    • Add Spice: Want to make these tacos even spicier? Add red chili flakes to the sauce or a 1/4 teaspoon of cayenne pepper!
    • Toppings: There are so many delicious toppings to add to your tacos to customize the flavors. Try adding sliced jalapenos, pico, mango salsa, or corn!
    • Swap the Tortillas: I used corn tortillas in this recipe, but you can also use flour tortillas if you prefer.
    • Warm Your Tortillas: To heat flour tortillas all at once, I like to wrap them in foil and place them in a 375 degrees Fahrenheit oven while I’m getting everything ready. It’s also easy to warm tortillas individually in the microwave (just put one on a plate) by heating it for 10-15 seconds.
    • Make it a Bowl or Salad: Ditch the tortillas and add the bang bang shrimp to a rice bowl or salad. It’s easy to serve your shrimp just the way you like. Use the same toppings you would for tacos!

    A close up of bang bang shrimp tacos. A close up of bang bang shrimp tacos.

    Storing Leftovers

    These bang bang shrimp tacos are best eaten fresh but can be stored in the fridge and enjoyed later as well. Make sure to store the shrimp, toppings, and tortillas separately. They are perfect for lunch the next day!

    • In the Refrigerator: Store leftover shrimp in an airtight container in the fridge for up to 3 days. Store toppings and tortillas separately.
    • To Reheat: Heat leftover shrimp in the microwave until warmed through. Assemble the tacos and enjoy!

    A hand holding a bang bang shrimp taco. A hand holding a bang bang shrimp taco.

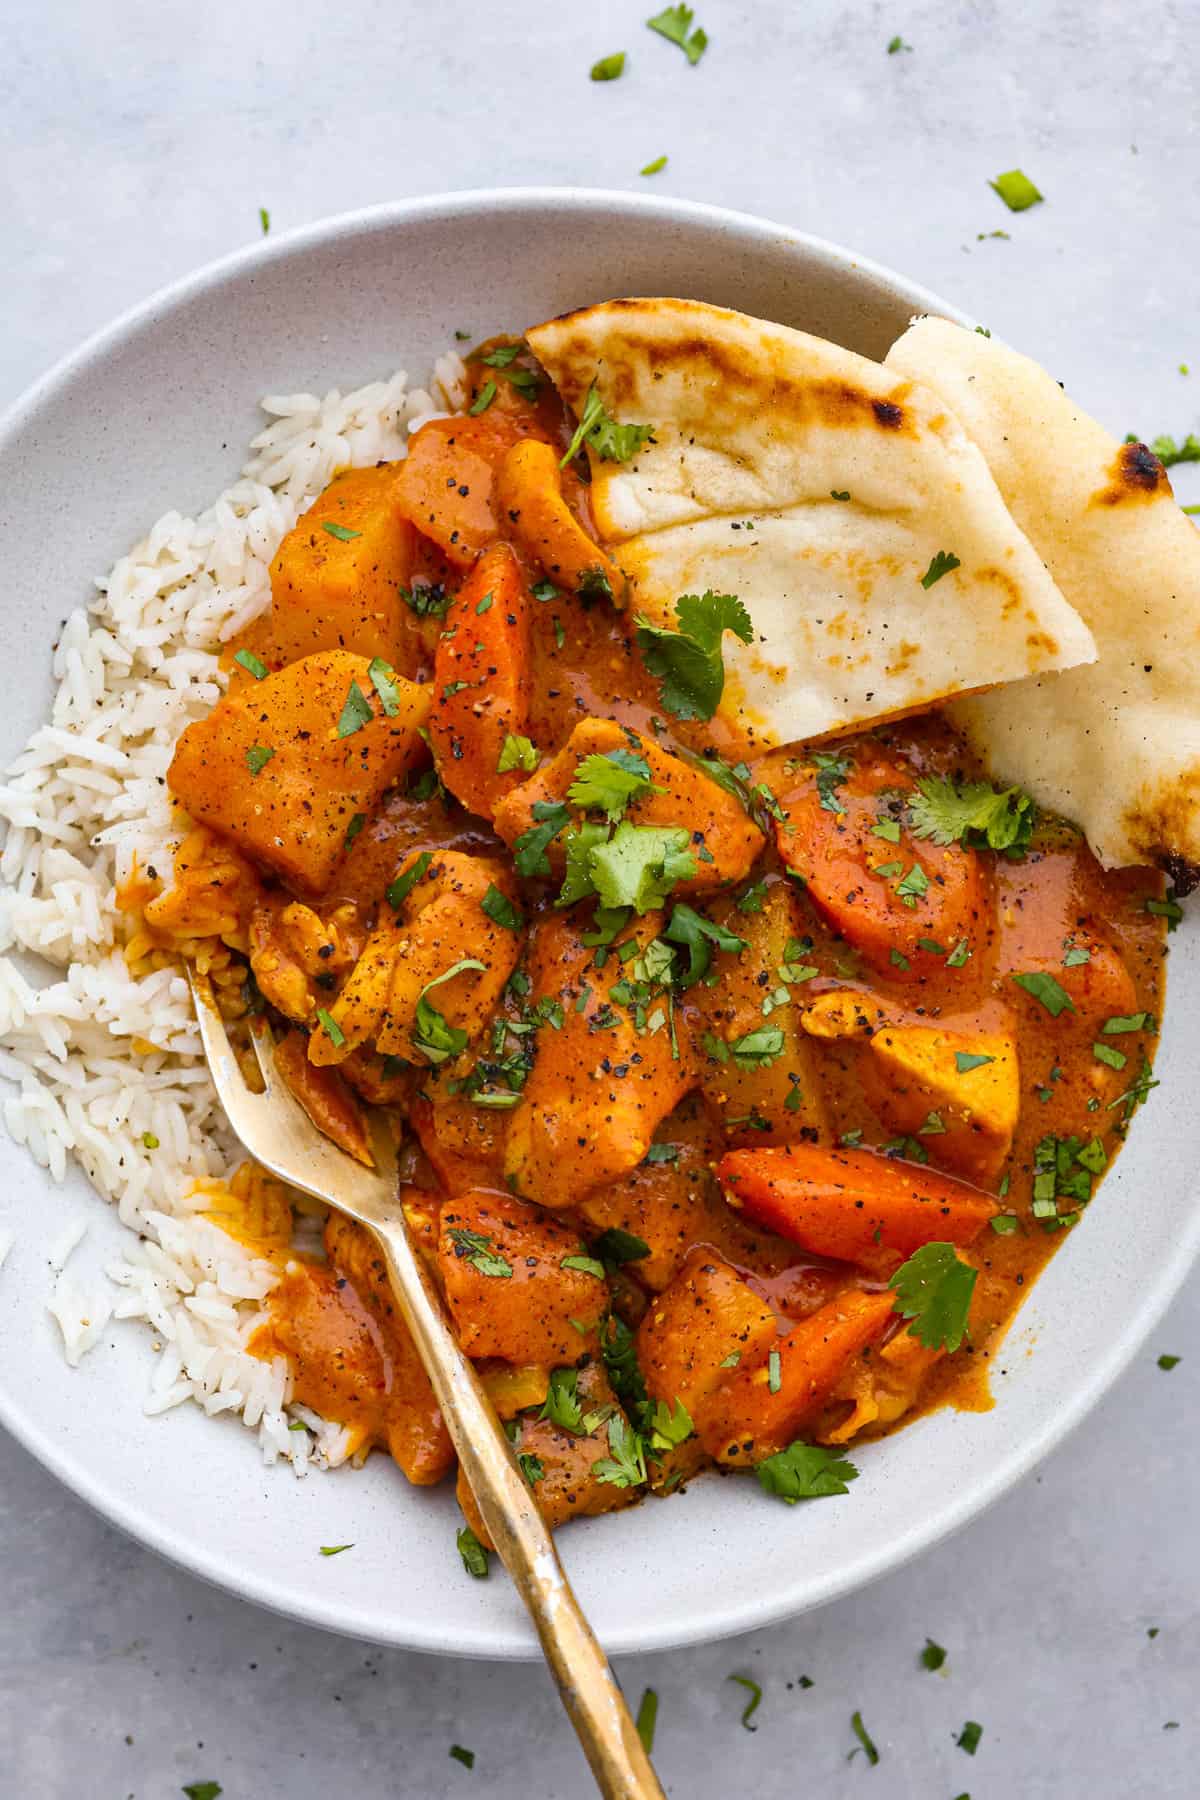
    Coconut Curry Chicken

    4 hours 30 minutes

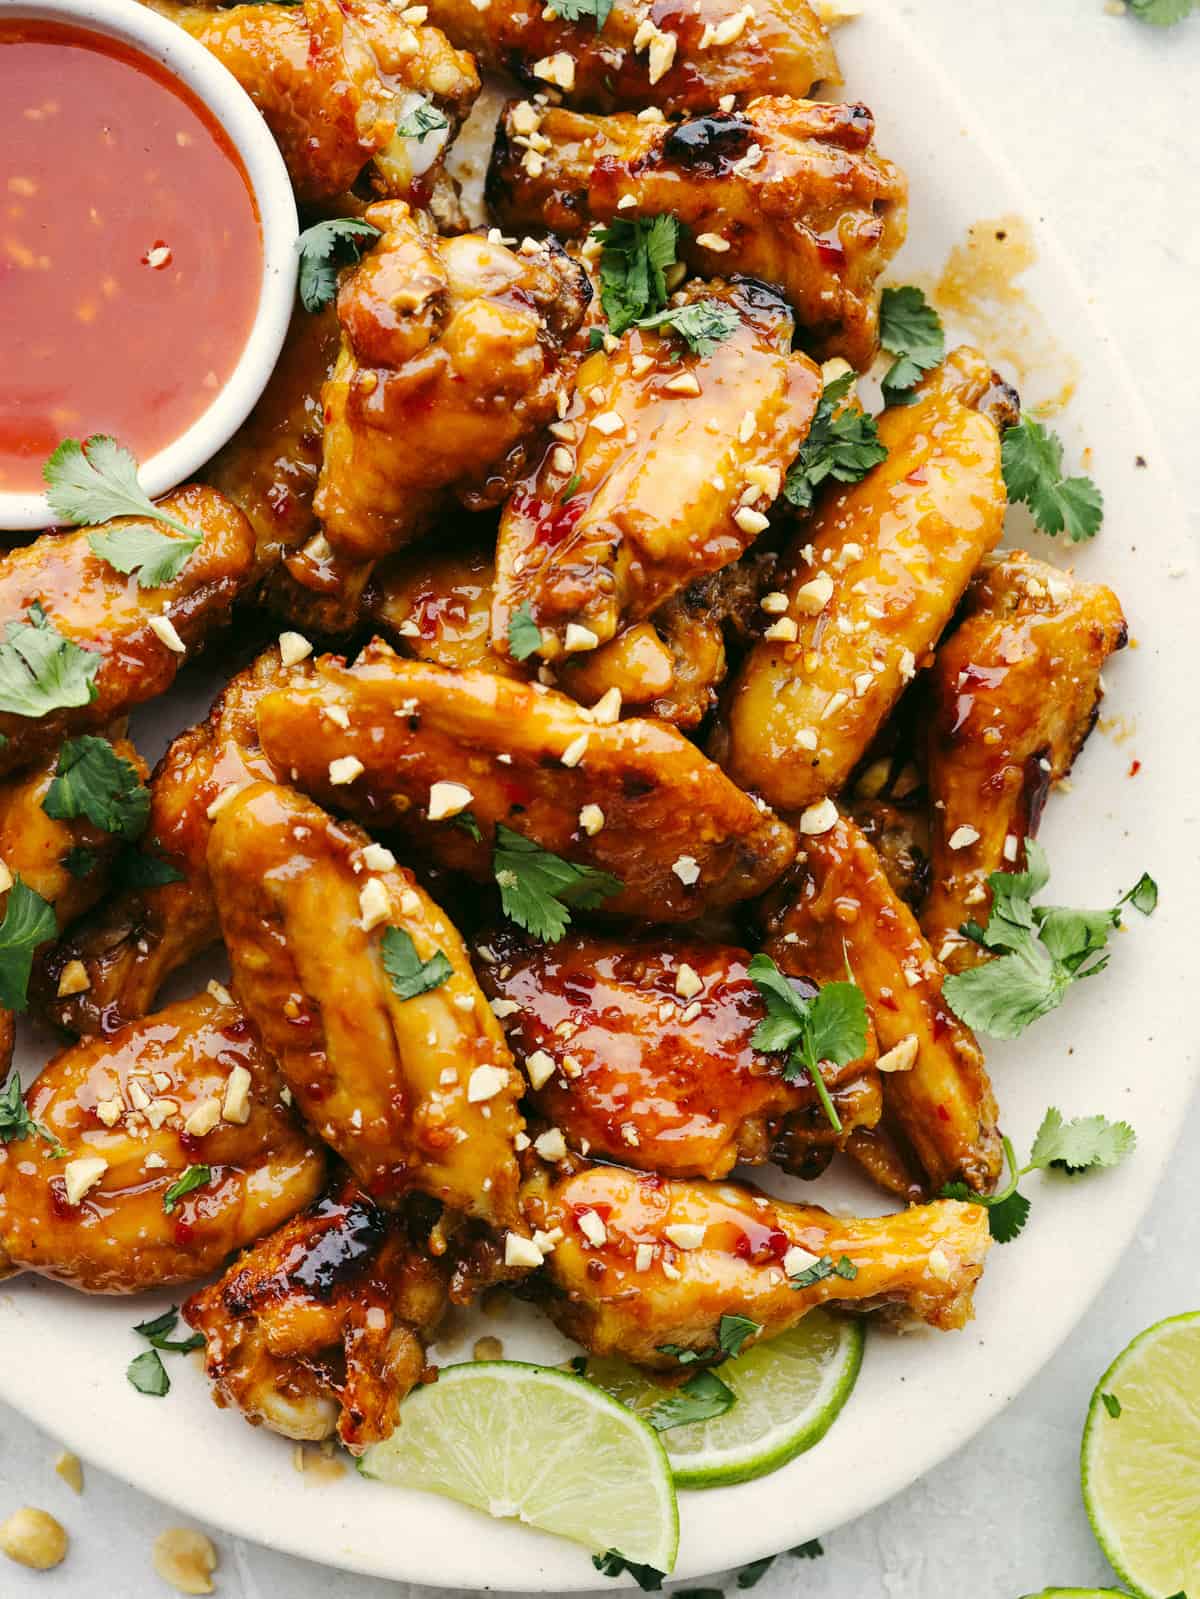
    Thai Glazed Chicken Wings

    55 minutes

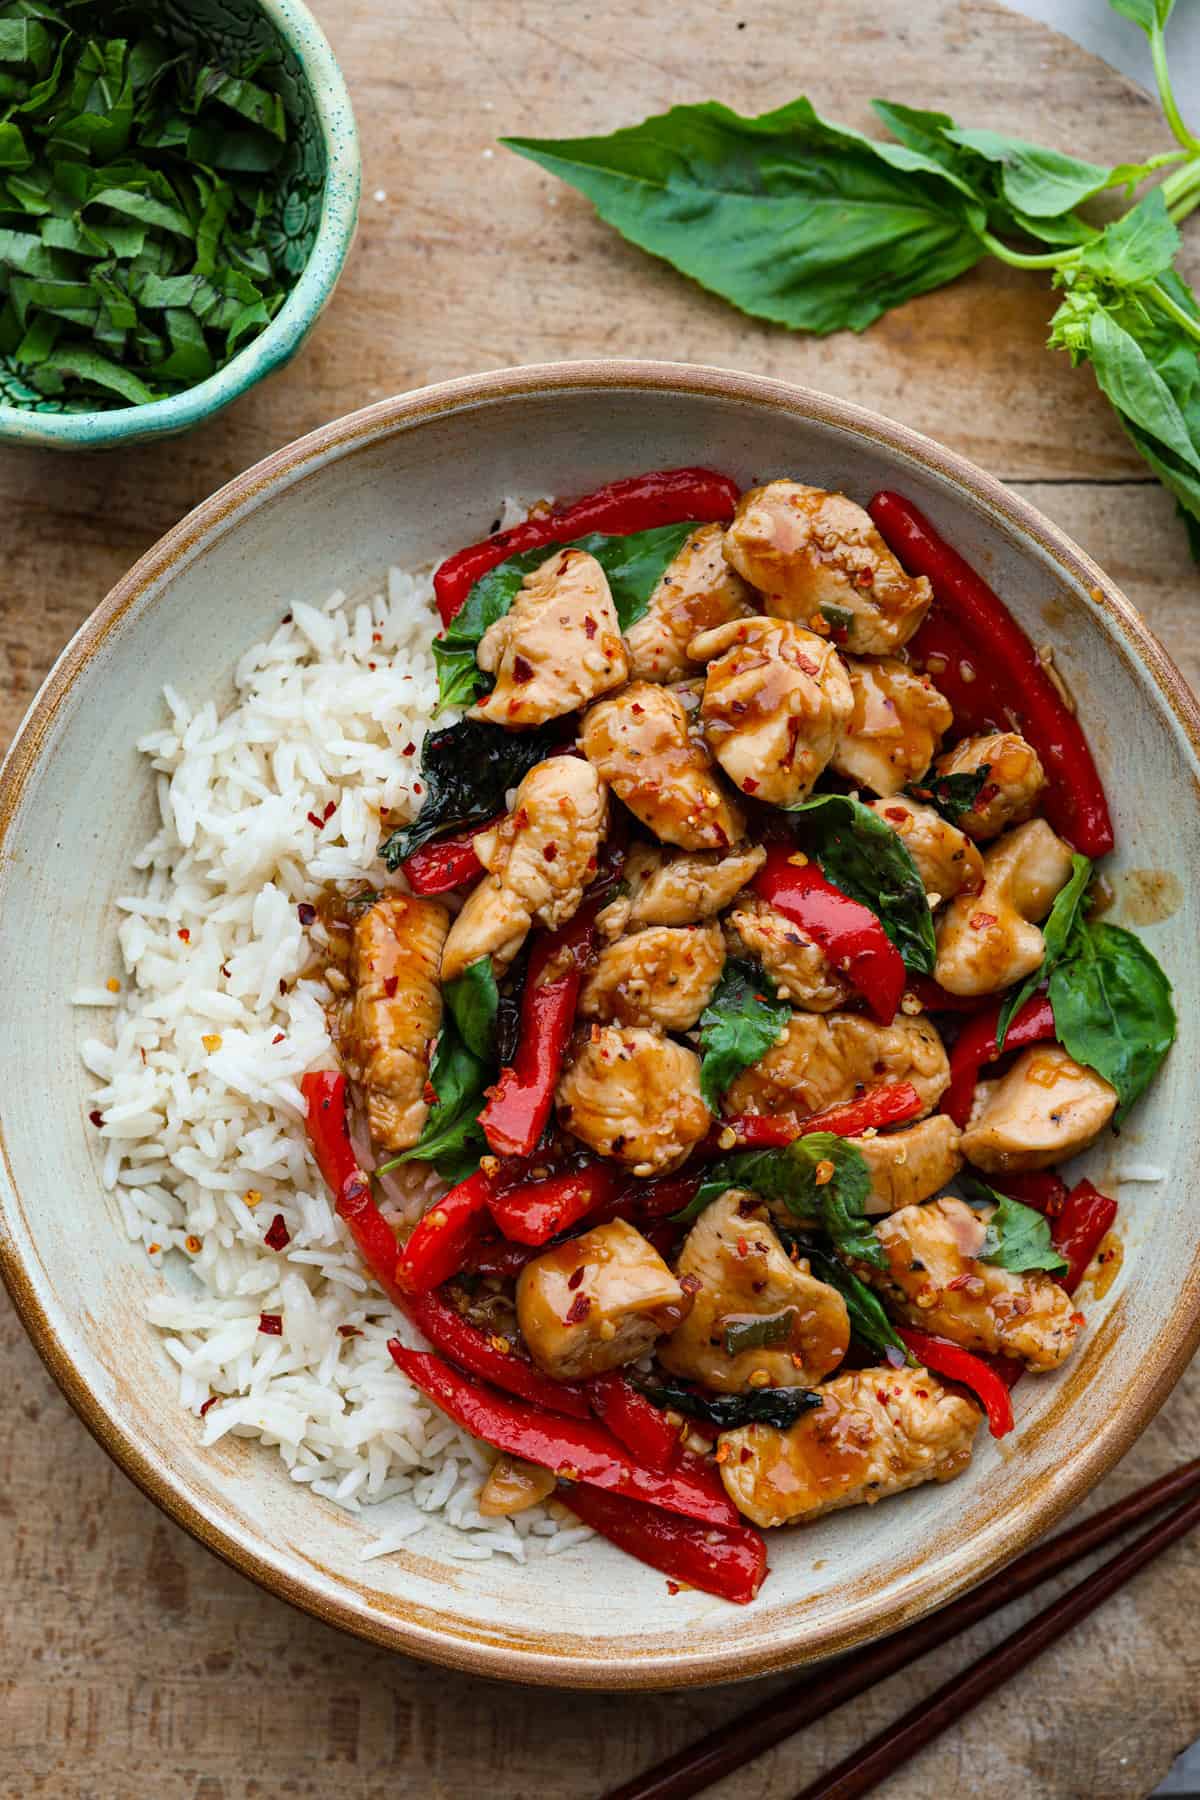
    Thai Basil Chicken

    25 minutes

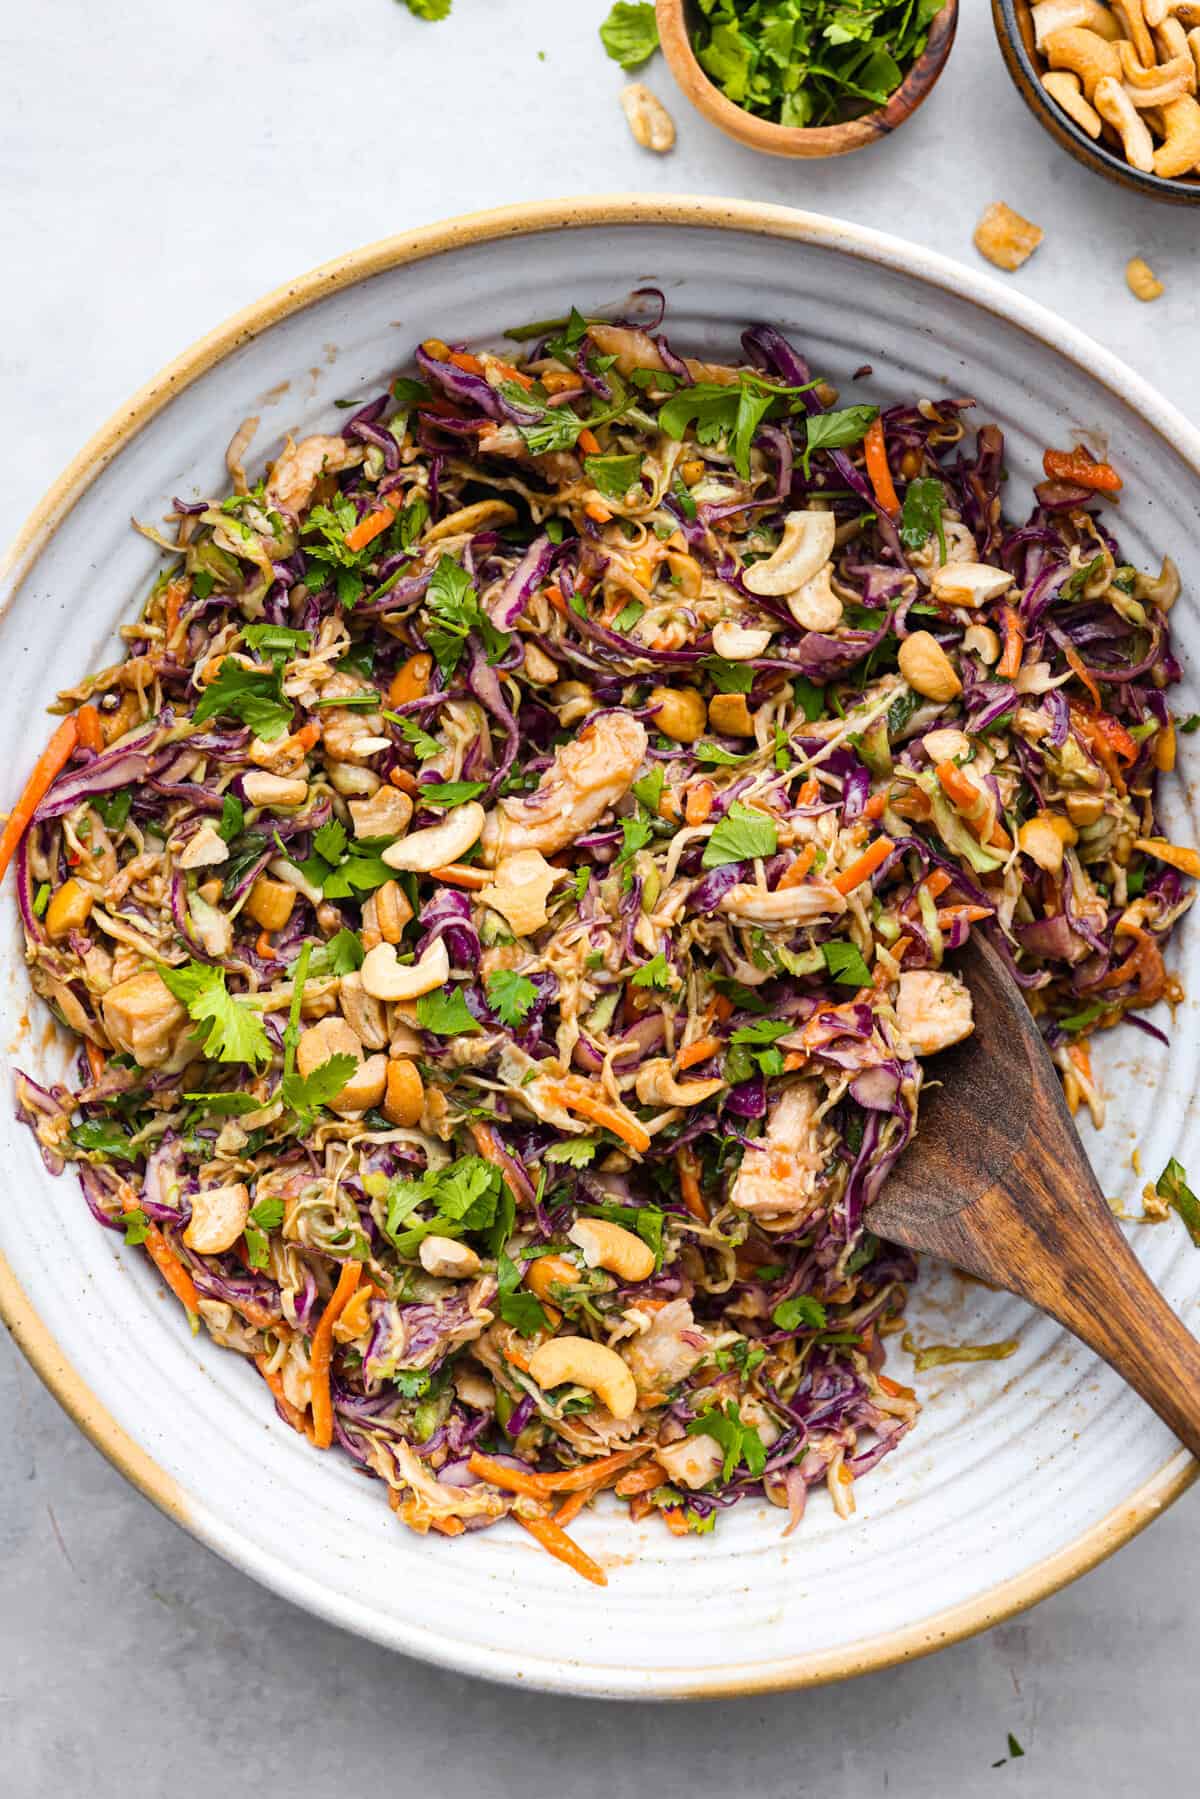
    Thai Chicken Salad

    25 minutes

    Pin this now to find it later

    Pin It


    Source link

  • 30 Slow Cooker Dinner Ideas

    30 Slow Cooker Dinner Ideas

    When you want dinner to cook itself, the slow cooker is hard to beat. These easy slow cooker dinner ideas are comforting, flavor-packed, and perfect for busy days when you want a warm meal waiting for you.

    Jump to: 👩‍🍳 Slow Cooker Tips | 🍗 Chicken | 🥩 Beef & Lamb | 🍛 Curries & Comfort Classics | 🌱 Vegetarian | 🐟 Seafood | 🍽️ More Easy Dinner Inspiration


    Slow cooker dinners are one of my favorite ways to get a satisfying meal on the table with minimal effort. Whether you’re juggling work, family, or just don’t feel like hovering over the stove, the slow cooker does the heavy lifting for you — low, slow heat that builds flavor while you get on with your day.

    This collection brings together a mix of slow cooker chicken dinners, cozy beef and lamb recipes, comforting curries, vegetarian meals, and hands-off family favorites. You’ll find both my own tried-and-true recipes and a few standout slow cooker dishes from other food blogs I love and trust.

    Most of these recipes are great for meal prep, feeding a crowd, or stocking the freezer, and many can be adapted based on what you already have on hand. If you’re looking for simple, hearty dinners that practically cook themselves, you’re in the right place.


    Tips for Making the Most of Your Slow Cooker

    • Don’t lift the lid too often — heat escapes quickly and slows cooking.
    • Browning meat first adds flavour, but many recipes work without it.
    • Cheaper cuts of meat often work best for slow cooking.
    • Most slow cooker meals taste even better the next day.
    • Use leftovers for wraps, bowls, tacos, or freezer meals later in the week.

    🍗 Slow Cooker Chicken Dinners

    Comforting, versatile, and always popular — these slow cooker chicken dinners are perfect for weeknights and meal prep alike.


    🥩 Slow Cooker Beef & Lamb Dinners

    These recipes are all about deep flavor, tender meat, and comforting sauces — ideal for colder nights.


    🍛 Slow Cooker Curries & Comfort Classics

    Warm, saucy, and perfect for hands-off cooking, these braised recipes are perfect for slow cooking.

    Slow Cooker Italian Meatballs

    These slow cooker Italian meatballs cook low and slow in a rich tomato sauce until tender and full of flavor. Ideal for pasta night, meatball subs, or easy meal prep. Recipe from Chef Savvy.

    Slow Cooker Chicken Curry

    This slow cooker chicken curry is comforting and fragrant, with tender chicken simmered in a creamy, spiced sauce. An easy set-and-forget dinner that’s perfect with steamed rice. Recipe from My Food Story.


    🌱 Vegetarian Slow Cooker Dinners

    Hearty, plant-based meals that still deliver big flavor.

    Crockpot Vegetarian Chili

    A classic vegetarian chili made in the slow cooker, perfect for batch cooking. Recipe from Real Food Whole Life.

    Try more Vegetarian slow cooker recipes here.


    🐟 Slow Cooker Seafood (For Something Different)

    If fish and seafood are your preferred protein, try one of these hearty dishes.

    Slow Cooker Shrimp Boil

    This slow cooker shrimp boil is like a lazy weekend seafood feast — tender shrimp, sweet corn, smoky sausage, and red potatoes all simmered in a bold, seasoned broth. Big flavor with barely any hands-on work. Recipe from Mom On Timeout.

    Slow Cooker Jambalaya

    This slow cooker jambalaya brings classic Cajun comfort to the table with sausage, shrimp, rice, and plenty of warming spices. It’s hearty, filling, and great for feeding a hungry crew. Recipe from Simply Recipes.

    Slow Cooker Shrimp Scampi

    All the garlicky, buttery goodness of shrimp scampi made easy in the slow cooker. The shrimp turn out juicy and flavorful, perfect spooned over pasta or rice for a low-effort dinner. Recipe from The Magical Slow Cooker.


    More Easy Dinner Inspiration

    If you love hands-off meals, you might also enjoy:


    Save These Slow Cooker Dinner Ideas To Pinterest

    Source link