Author: admin

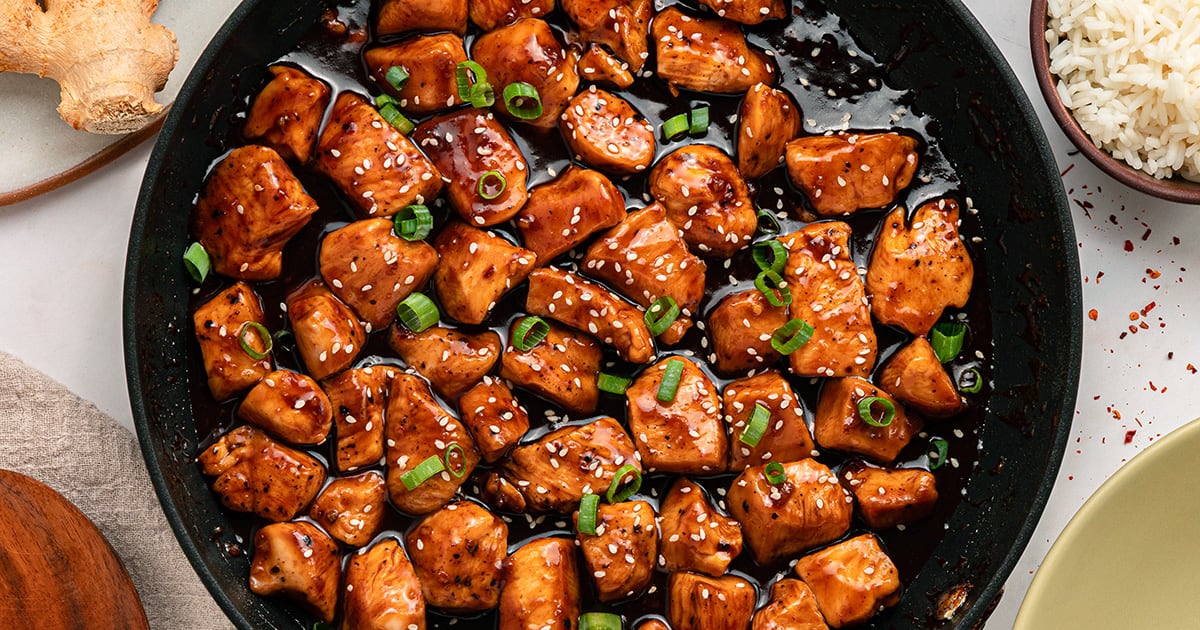
  • Honey Bourbon Chicken

    Honey Bourbon Chicken

    This bourbon chicken is sticky, sweet, and packed with bold flavor—an easy homemade version that tastes better than takeout.


    Jump to: ℹ️ Overview | 🛒 Ingredients | 👩‍🍳 Recipe Tips | 📝Full Recipe Card | 📷 How To Make | 🥗 Serving Suggestions | | 🍽 More Chicken Dinner Recipes


    At A Glance:

    • Ready In: 30 minutes
    • 🍽 Serves: 4
    • 🌱 Diet: Dairy-free
    • 💪 Nutrition Highlights: High in protein, balanced with natural sugars
    • 🥕 Main Ingredients: Chicken breast, bourbon, honey, soy sauce, garlic, ginger
    • 🔥 Flavor Profile: Sweet, savory, slightly smoky with a gentle heat
    • 🧊 Meal-Prep Friendly: Keeps 3–4 days in the fridge
    • Best Served With: Steamed rice, broccoli, or fried rice

    If you’ve ever tried bourbon chicken, you would know that the sauce is the real star here. It’s sweet from the honey, savory from the soy sauce, and layered with garlic and ginger so it doesn’t tip into overly sweet territory. Letting the bourbon simmer briefly gives you that subtle caramel-like depth without any harshness. And yes, you can make this without bourbon!

    What I like about this version is how approachable it is. No complicated techniques, just a good sear on the chicken and a sauce that comes together in the same pan. It’s very similar to the classic mall-style bourbon chicken, but the flavor is more balanced and less sugary. You end up with tender chicken coated in a glossy, sticky sauce that actually clings (not watery or overly thick).

    If you’re after a reliable weeknight dinner that feels a bit indulgent but still straightforward, this one delivers every time.

    👩‍🍳 You might also like these recipes: honey soy ground chicken rice bowls, gochujang chicken, baked honey soy chicken wings, chicken meatballs with honey garlic soy sauce, or honey sriracha chicken.

    What You’ll Need

    Here is what you’ll need for this honey bourbon chicken recipe. Find the full measurements in the recipe card below.

    • Chicken breast – lean and cooks quickly; cut evenly so it cooks at the same rate. Chicken thighs = juicier, slightly more forgiving
    • Cornstarch – helps create that light crust and gives the sauce something to cling to
    • Olive oil – neutral oil for searing
    • Bourbon – adds depth and a slightly smoky, caramel note (don’t skip simmering it first). Can I make this without bourbon? Yes—use apple juice or chicken stock, but you’ll miss some of the depth
    • Honey – brings sweetness and helps create that sticky finish
    • Soy sauce – adds salt and umami; this is what balances the sweetness. Low-sodium soy sauce works well if you prefer less salt.
    • Brown sugar – deepens the flavor rather than just making it sweet
    • Ketchup – sounds simple, but adds tang and body
    • Apple cider vinegar – cuts through the richness (this is key for balance)
    • Garlic & ginger – essential for that classic savory base. Fresh ginger really makes a difference here—worth using if you can.
    • Smoked paprika – adds a subtle smoky layer
    • Red pepper flakes – gentle heat that builds slightly
    • Dijon mustard – small amount, but rounds everything out
    • Cornstarch slurry – thickens the sauce to that glossy consistency

    Recipe Tips

    • Dry chicken properly: This is one of the biggest differences between good and great texture
    • Use a hot pan: If the pan isn’t hot enough, the chicken will release moisture and won’t brown
    • Don’t overcrowd: Cook in batches if needed—this keeps the sear intact
    • Taste the sauce: Before adding the chicken back, adjust sweetness or acidity if needed
    • Watch the sauce: It thickens quickly once the slurry is added
    • Storage & Make-Ahead: Store in an airtight container for up to 4 days. Reheat on the stove or microwave with a splash of water. Freeze up to 2 months (texture is still good after reheating). Sauce can be made ahead and stored separately for up to 3 days

    💬 If you’ve tried this bourbon chicken or any other recipe on the blog then don’t forget to rate the recipe and let me know how you got on in the comments below, I love hearing from you! You can also FOLLOW ME on Instagram, Facebook, Pinterest, YouTube, and or sign up to my Newsletter to see more of my delicious food.

    Want to Save This Recipe?

    Enter your email & I’ll send it to your inbox. Plus, get great new recipes from me every week!

    By submitting this form, you consent to receive emails from Cooked & Loved

    This bourbon chicken is sticky, sweet, and packed with bold flavor—an easy homemade version that tastes better than takeout. FIND STEP-BY-STEP PHOTOS BELOW THIS CARD.

    • Pat chicken dry and season with salt and pepper. Toss with cornstarch.

    • Heat olive oil in a large skillet over medium-high heat.

    • Cook chicken for 4–5 minutes per side until golden and nearly cooked through. Remove and set aside.

    • Lower heat slightly. Add garlic and ginger, cook for 30 seconds.

    • Carefully pour in bourbon and simmer for 1–2 minutes.

    • Add honey, soy sauce, brown sugar, ketchup, vinegar, paprika, and chili flakes. Simmer 3–4 minutes.

    • Stir in cornstarch slurry and cook until thickened and glossy.

    • Return chicken to the pan and coat in sauce. Simmer 3 minutes until sticky.

    • Serve warm over rice and garnish as desired.

    • Dry chicken properly: This is one of the biggest differences between good and great texture
    • Don’t overcrowd: Cook in batches if needed—this keeps the sear intact
    • Taste the sauce: Before adding the chicken back, adjust the sweetness or acidity if needed
    • Watch the sauce: It thickens quickly once the slurry is added
    • Use a hot pan: If the pan isn’t hot enough, the chicken will release moisture and won’t brown
    • Storage & Make-Ahead: Store in an airtight container for up to 4 days. Reheat on the stove or microwave with a splash of water. Freeze up to 2 months (texture is still good after reheating). Sauce can be made ahead and stored separately for up to 3 days
    • Does the alcohol cook off? Most of it cooks off during simmering, leaving behind flavor rather than alcohol taste
    • Can I make this without bourbon? Yes—use apple juice or chicken stock, but you’ll miss some of the depth
    • Why is my chicken not browning? Usually, too much moisture or the pan isn’t hot enough. Make sure to pat the chicken dry well.
    • Why is my sauce too thin? Let it simmer longer or add a little more cornstarch slurry

    Calories: 374kcal | Carbohydrates: 30g | Protein: 38g | Fat: 6g | Saturated Fat: 1g | Polyunsaturated Fat: 1g | Monounsaturated Fat: 3g | Trans Fat: 0.02g | Cholesterol: 109mg | Sodium: 1032mg | Potassium: 721mg | Fiber: 0.4g | Sugar: 25g | Vitamin A: 250IU | Vitamin C: 3mg | Calcium: 24mg | Iron: 1mg

    Keywords: honey, Garlic, Chicken Dinner, Asian bourbon chicken, honey bourbon chicken, bourbon, ginger

    How To Make Bourbon Chicken (Step-By-Step Photos)

    Find the full recipe and nutritional information below. Here are some handy step-by-step photos for how to make bourbon honey chicken.

    • Pat chicken dry, season well, and lightly coat with cornstarch
    • Sear in a hot pan until deeply golden (don’t move it too soon)
    • Remove chicken and set aside
    • Cook garlic and ginger briefly until fragrant
    • Add bourbon and let it simmer to reduce and mellow
    • Stir in remaining sauce ingredients and simmer
    • Add cornstarch slurry and cook until glossy and thick
    • Return chicken and toss until fully coated
    • Simmer until the sauce clings to the chicken

    Serving Suggestions

    I usually serve this over jasmine rice because it soaks up all that sauce, but honestly, anything that can catch the extra glaze works. Fried rice or noodles are great if you want something a bit heartier.

    For balance, I like adding something green on the side—simple sautéed broccoli or steamed green beans work really well. If you want to stretch the meal, toss the chicken with vegetables right at the end and let everything coat in the sauce together.
    More Chicken Dinner Recipes


    Source link

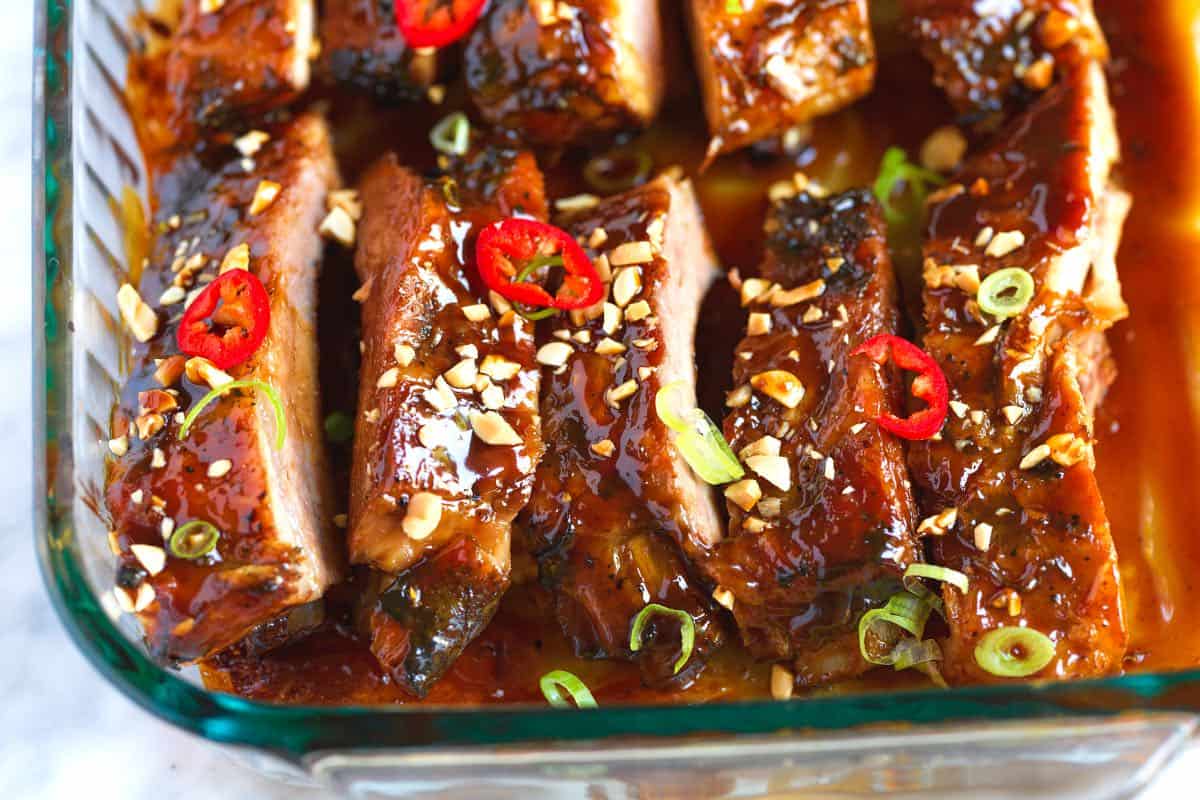
  • Hoisin Sticky Ribs Recipe

    Hoisin Sticky Ribs Recipe

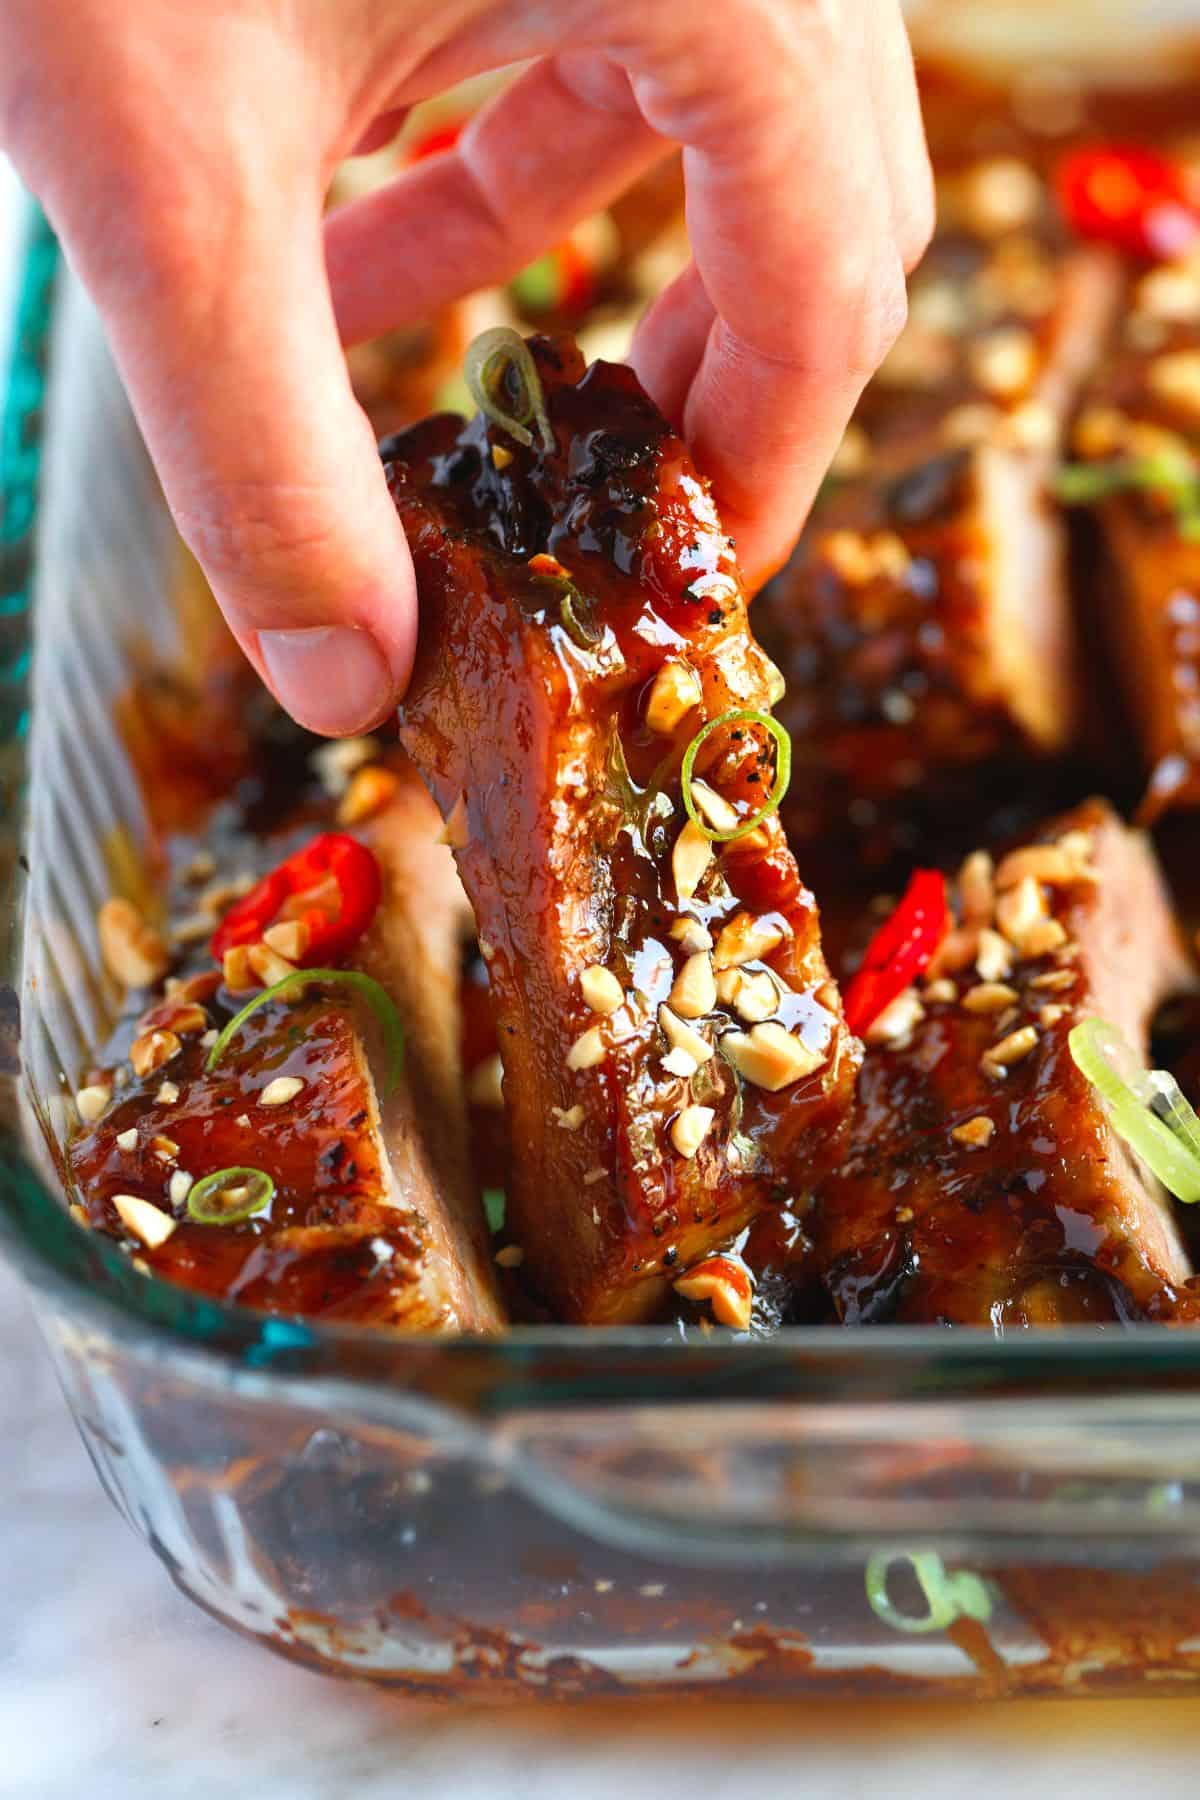
    This irresistible sticky ribs recipe is one of the best things we’ve made. The ribs are unbelievably tender and coated in a delicious homemade hoisin glaze.

    Asian Sticky Ribs

    These ribs are amazing! Every time we make them, we immediately want to make them again. The ribs are slowly baked in the oven with ginger, garlic, and cilantro to become incredibly tender and infused with flavor.

    Then, we slather over our easy to make homemade hoisin sauce to use as the sticky glaze. These ribs are outrageously good!

    Key Ingredients

    • Pork ribs: I’ve used baby back ribs in my photos and video, but you can use baby back, spare ribs, or St. Louis-style ribs in the recipe below.
    • Hoisin sauce: I highly recommend using our easy hoisin sauce, which I have included in the recipe below. It’s easy to make and lasts in the fridge for a month. I usually make a double batch and use it to make these chicken lettuce wraps.
    • Garlic, ginger, and cilantro: For this recipe, we slowly bake our ribs in the oven and love to sneak in some aromatics that slowly infuse the ribs with flavor.
    • Toppings: These are optional, but I love them. I add chopped peanuts, sliced green onion, and sliced red chilies to the ribs for serving.

    Find the full recipe with measurements below.

    Baked Pork Ribs with Asian sticky glaze

    How to Make the Best Sticky Ribs

    Tip 1: Low and slow. I love baking ribs low and slow. We already have this baked ribs recipe on Inspired Taste with over 700 happy reviews. This sticky ribs recipe has a similar baking method, guaranteeing tender, almost falling-off-the-bone ribs!

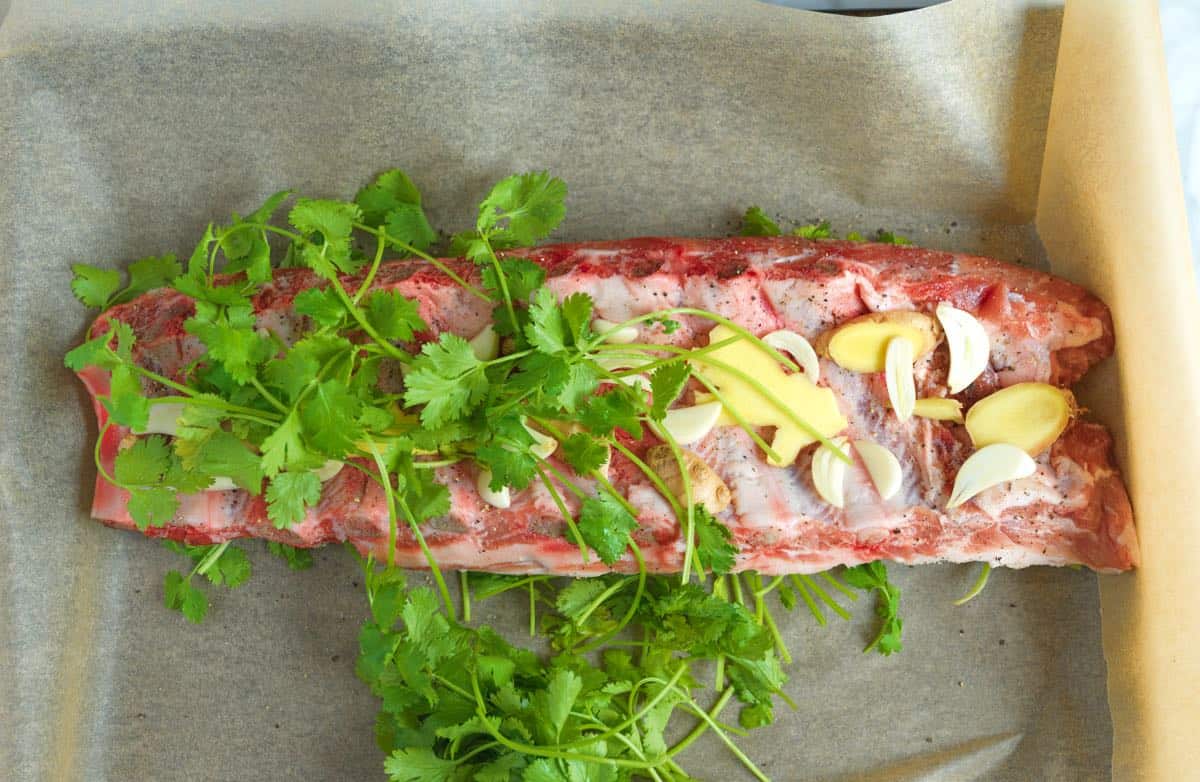
    Layer ribs with sliced garlic, ginger, and cilantro.

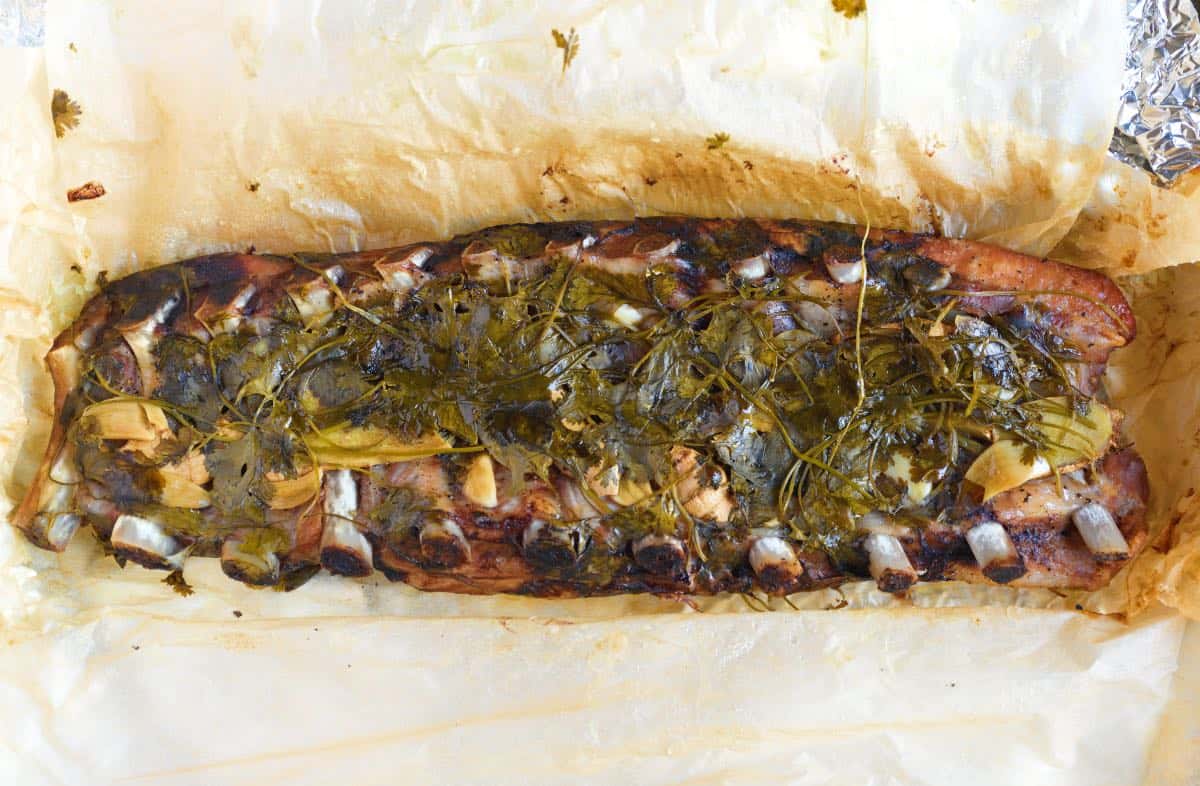
    Tip 2: Bake in flavor. I place the ribs on top of fresh sliced ginger, garlic, and cilantro, then carefully wrap parchment paper around them to create a snug packet. Then, I wrap it once more with foil to really make sure that it is well sealed. As the ribs bake to perfection, they transform, becoming unbelievably tender and infused with ginger, garlic, and cilantro. They bake for 2 to 3 hours.

    The ribs after baking.

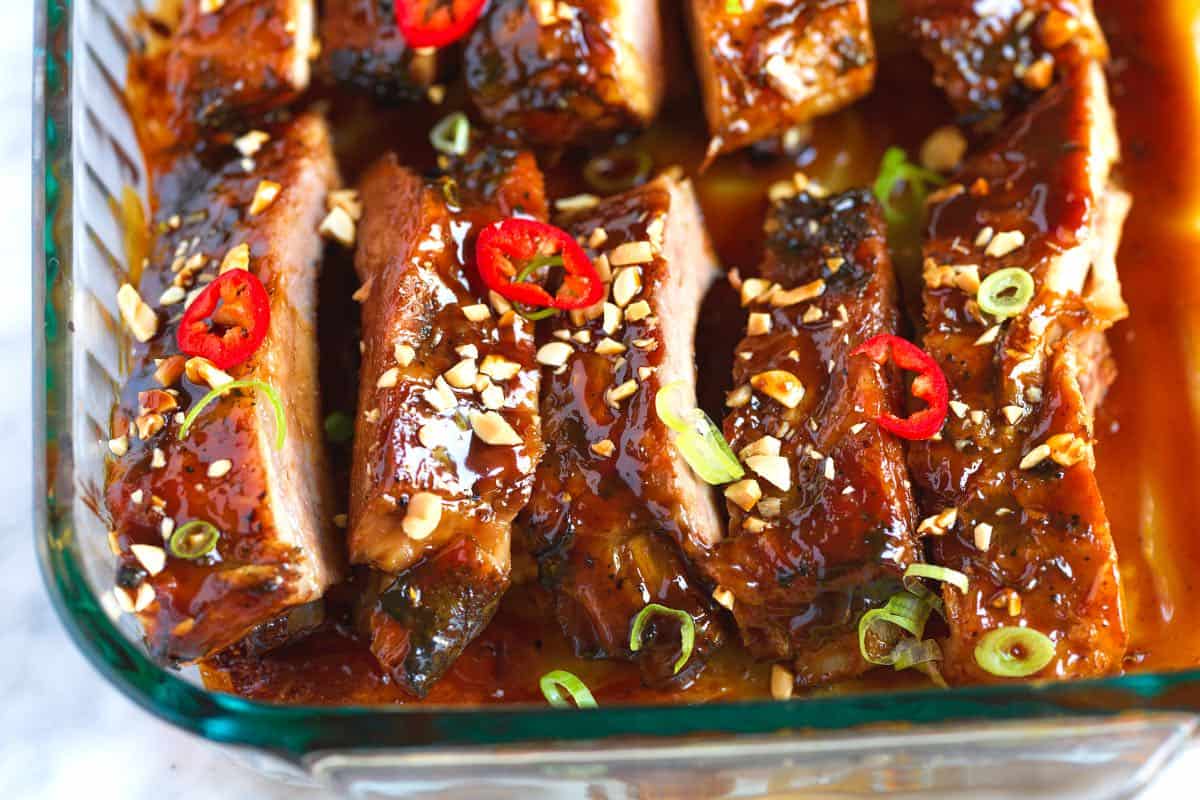
    Tip 3: Making that delicious glaze. Once the ribs are baked and rested, I unwrap them and generously coat them in our homemade hoisin sauce. Then, they return to a hot oven where the sauce bubbles, reduces, and transforms into a delicious sticky glaze.

    Serving Suggestions

    I love serving these with rice, coconut rice, or noodles for dinner. They are also amazing next to fried rice. I also love adding something fresh and crunchy. Try our cilantro lime slaw, garlic green beans, or this cucumber and avocado salad.

    You can also serve them with spring rolls, egg rolls, homemade crab Rangoon, or this spicy ginger edamame.

    More Rib Recipes

    Asian Sticky Ribs

    Hoisin Sticky Ribs

    • PREP
    • COOK
    • TOTAL

    These Asian sticky ribs are unbelievably tender and coated in the most delicious homemade hoisin glaze. They are surprisingly easy to make, and their incredible flavor will have you reaching for more. We love them! The sauce in the recipe below makes the perfect amount for one rack of ribs, but I highly recommend doubling it and storing what you do not use in the fridge for other dishes (it lasts for 1 month).

    Serves 4, 3 to 4 ribs each

    Watch Us Make the Recipe

    You Will Need

    1 rack baby back ribs (loin back ribs), 2 to 2 ½ pounds

    1 cup homemade hoisin sauce, recipe below

    8 cloves garlic, peeled and thinly sliced

    Two 1-inch thumb-size pieces of fresh ginger, sliced thin lengthwise

    Half a bunch of fresh cilantro

    Salt and pepper

    2 tablespoons finely chopped peanuts, optional

    1 Fresno chili pepper, thinly sliced, optional

    1 green onion, finely chopped, optional


    Homemade Hoisin Sauce

    1 tablespoon toasted sesame oil

    2 cloves garlic, finely minced or grated

    One 1-inch thumb-size piece fresh ginger, finely minced or grated

    2 green onions, whites and light green parts only, finely minced

    5 tablespoons (65 grams) light tamari or light soy sauce, plus more to taste

    5 tablespoons (65 grams) pure maple syrup

    2 tablespoons (30 grams) molasses

    1 tablespoon (20 grams) peanut butter, try homemade peanut butter

    1 ½ teaspoons Gochujang, see notes

    1 teaspoon rice wine vinegar

    1/4 teaspoon Chinese Five Spice

    1/4 teaspoon cornstarch

    Directions

    • Bake Ribs
    • 1Preheat the oven to 275°F (135°C) and set aside a large rimmed baking sheet on the counter.

      2Trim excess fat from the ribs and remove any thin membrane on the back of the rack. (Some ribs may already have the membrane removed, I show how to remove it in this ribs recipe).

      3Pat the ribs dry and season them with salt and pepper.

      4Take a piece of parchment paper large enough to wrap around the ribs (you may need to overlap two sheets). Spread half of the garlic, ginger, and cilantro on the parchment paper. Place the ribs on top, with the meaty side facing down. Arrange the remaining garlic, ginger, and cilantro on the bone side of the ribs.

      5Wrap the parchment paper tightly around the ribs, folding the edges to seal. Then, wrap the entire package with foil. Remember which side has the meatiest part of the ribs.

      6Place the wrapped ribs, with the meatiest side facing down, on the prepared baking sheet.

      7Bake the ribs in the preheated oven for 2 ½ to 3 hours. Carefully unwrap the ribs and pierce them with a knife to check for tenderness.

      8While the ribs are baking, you can make the hoisin sauce using the recipe instructions below.

      9Allow the ribs to cool while still wrapped. Let them rest at room temperature, or refrigerate the wrapped package on a baking sheet for up to 3 days.

    • Make Hoisin Sauce
    • 1Heat sesame oil in a small saucepan over medium heat. Stir in the garlic, ginger, and green onion. Cook, stirring occasionally, until tender and translucent, 3 to 5 minutes. Set the saucepan aside to cool.

      2Stir in soy sauce, maple syrup, molasses, peanut butter, Gochujang, rice wine vinegar, and the Chinese Five Spice. Return the saucepan to medium heat and, while stirring, slowly bring to a simmer. Taste the sauce and adjust with 1/2 tablespoon to 1 tablespoon of soy sauce if necessary.

      3Make a cornstarch slurry by mixing 1/2 teaspoon cornstarch with 2 teaspoons water. Whisk the slurry into the sauce. As it simmers, the sauce will thicken. Once thickened, remove it from the heat and let it cool.

    • Adding the Sticky Glaze
    • 1Heat the oven to 425°F (218°C).

      2Gently unwrap the ribs and scrape away the cilantro, garlic, and ginger (these can be discarded).

      3Cut the rack into individual ribs or two- to three-bone portions. Place them in a 13-inch by 9-inch baking dish.

      4Spoon most of the hoisin sauce over the ribs, ensuring they are well covered (save a little sauce for later). Flip the ribs so the meaty side faces down and move them around in the sauce for even coating.

      5Bake the uncovered ribs for 3 to 5 minutes or until the sauce bubbles.

      6Remove the baking dish from the oven and flip the ribs so the meaty side faces up. Tilt the baking dish and gather as much sauce as possible to spoon back over the ribs. This time, the sauce will be thicker. At this point, I like to add a little extra sauce on top.

      7Serve with chopped peanuts, sliced pepper, and green onion.

    Adam and Joanne’s Tips

    • Make Ahead: You can make these Asian ribs 3 days ahead of time. After baking them, wrap them and store them in the refrigerator. Then, when ready to serve, unwrap the ribs and add the hoisin sauce. Finally, bake the ribs in a hot oven until heated through and the sauce becomes sticky.
    • Ribs: I use baby back ribs, but spare ribs, country-style, or St. Louis-style ribs work. Spare ribs may require a little more time in the oven to become tender. I remove the membrane from my ribs, which makes them even more tender (some stores do this for you). See this baked ribs recipe for tips on how to do it.
    • Double or triple the recipe: Wrap each rack individually and then place it on a rimmed baking sheet. You may need more than one baking sheet for multiple racks of ribs.
    • Gochujang and a substitute: Tradtional hoisin sauce incorporates fermented beans. We’ve included Gochujang (a spicy Korean condiment with rice and fermented soybeans). Substitute miso paste and, if you’d like to add some spice, add a dash or two of hot sauce or chili paste like sambal oekek.
    • Hoisin sauce: I love homemade, but if you plan to use store-bought, taste the sauce before adding it to the ribs to ensure it is not too salty. See this article about our homemade sauce for additional notes and substitutions.
    • The nutrition facts provided below are estimates.

    Nutrition Per Serving
    Serving Size
    1/4 of the rack (3 to 4 ribs)
    /
    Calories
    643
    /
    Total Fat
    37.9g
    /
    Saturated Fat
    11.8g
    /
    Cholesterol
    142.8mg
    /
    Sodium
    1066.8mg
    /
    Carbohydrate
    32.7g
    /
    Dietary Fiber
    1.1g
    /
    Total Sugars
    25.2g
    /
    Protein
    45.3g


    AUTHOR:

    Joanne Gallagher

    Adam and Joanne of Inspired Taste

    We are Adam and Joanne Gallagher, the creators of Inspired Taste. Established in 2009, Inspired Taste grew from a childhood dream into one of the internet’s most trusted recipe sites with hundreds of reliable recipes, step-by-step videos, and expert tips.More About Us

    Source link

  • Seriously Good Guinness Beef Stew Recipe

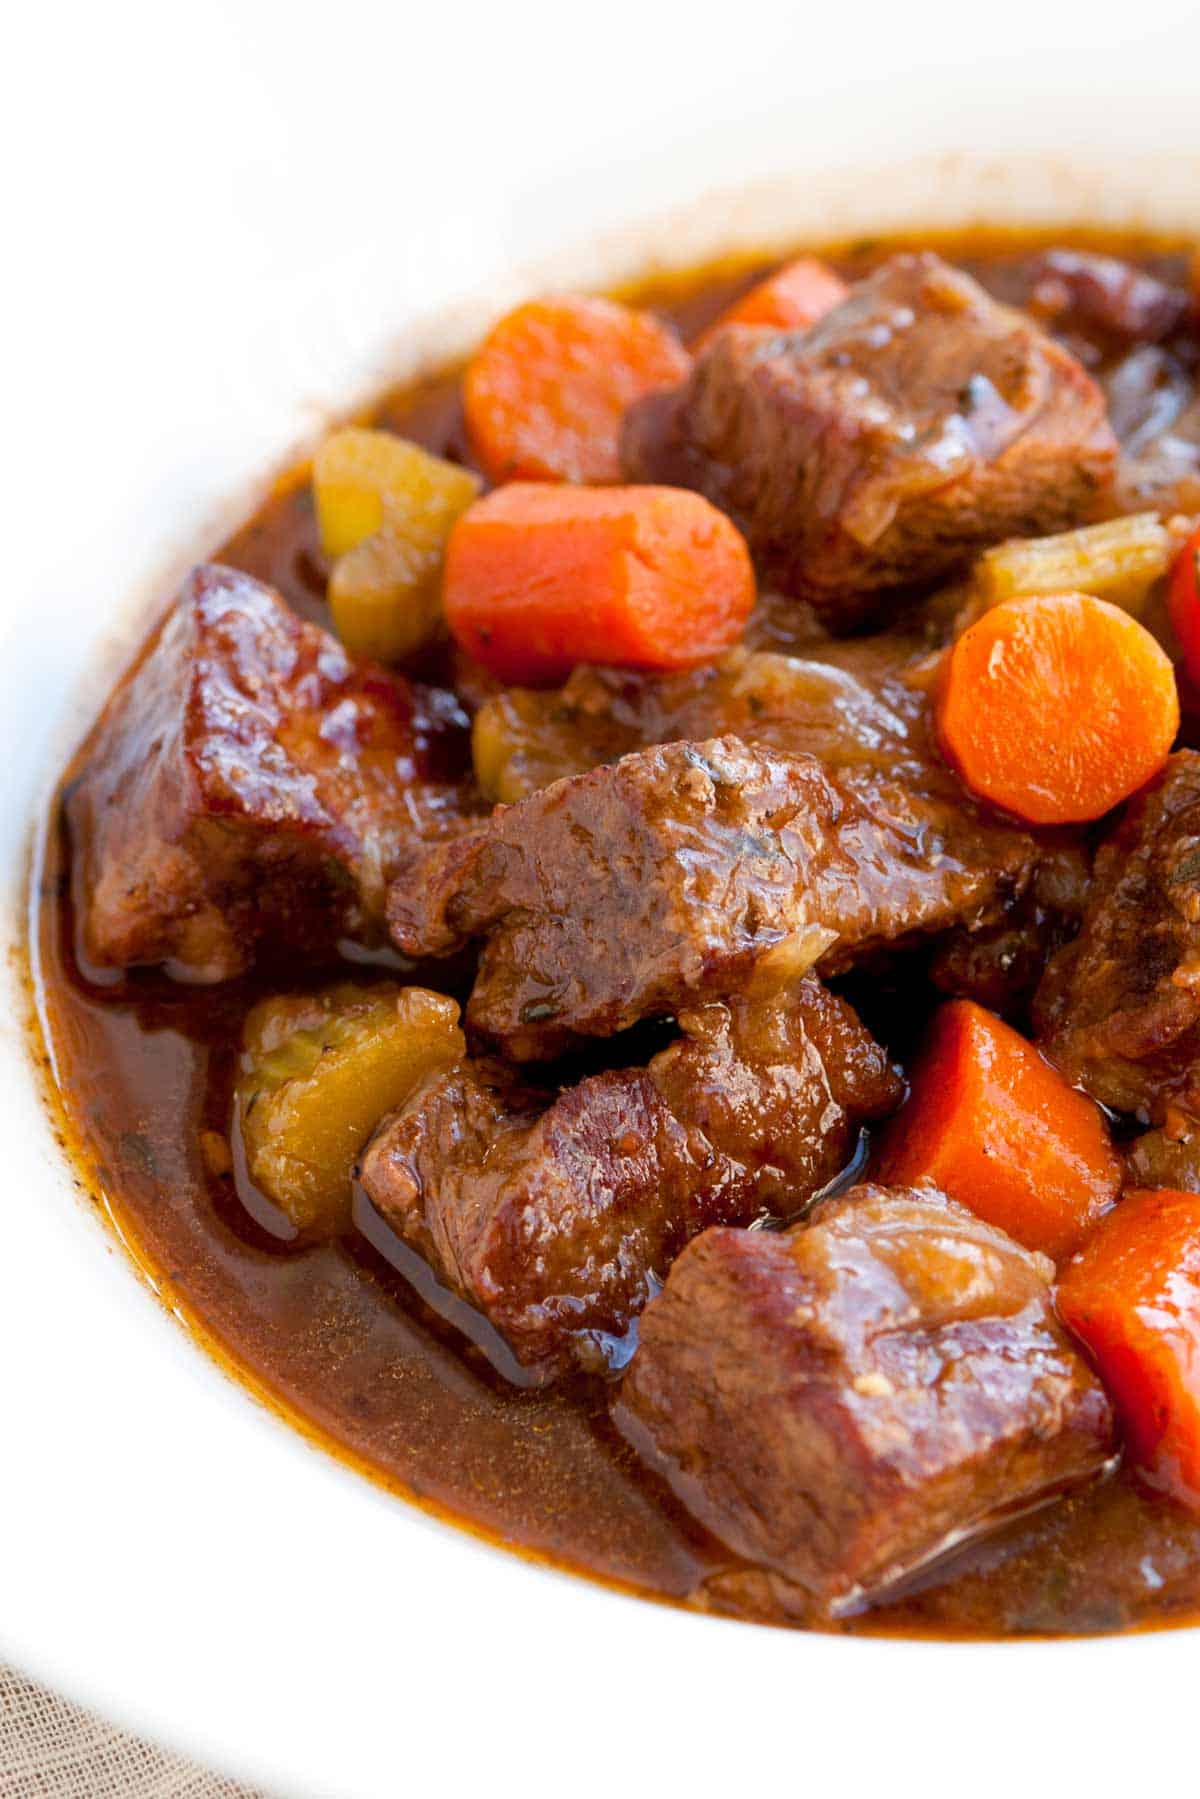
    Seriously Good Guinness Beef Stew Recipe

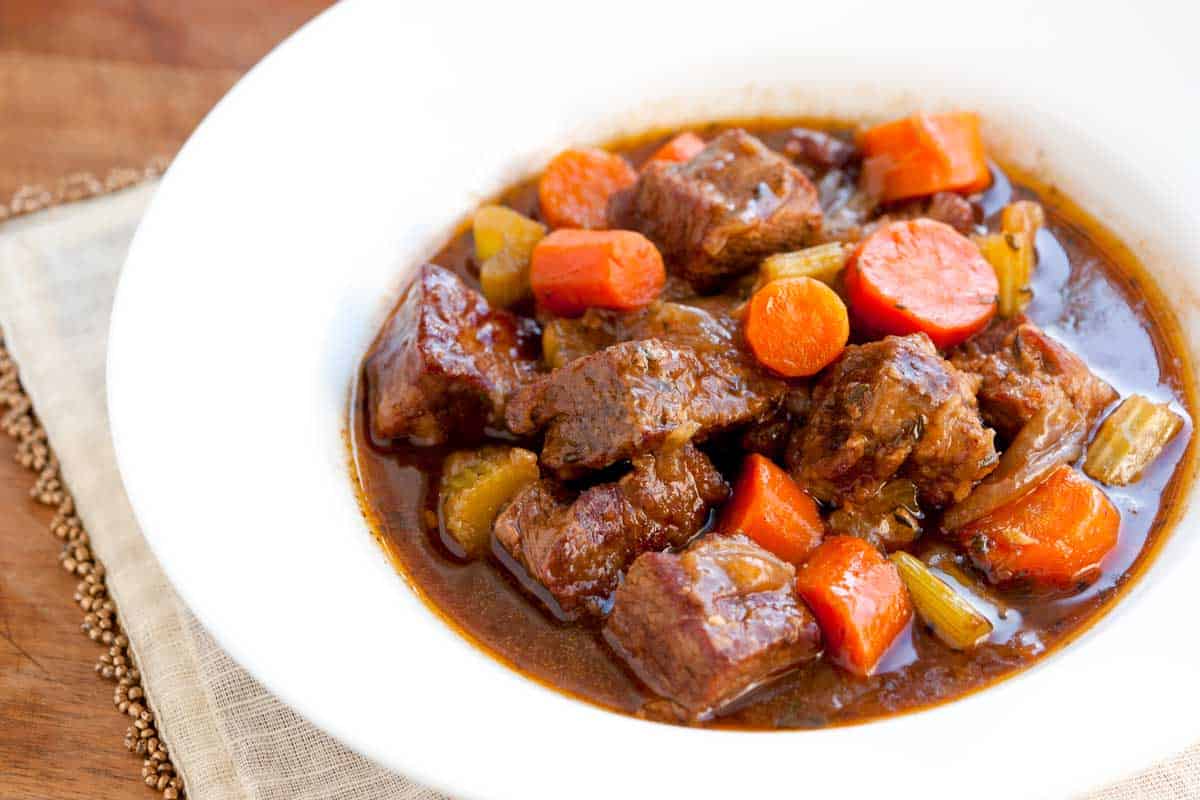
    This unbelievably rich and hearty beef stew made with Guinness beer is the ultimate comfort food. It’s also easy and made in one pot. You’ll love the outrageously delicious melt-in-your-mouth tender beef and gravy!

    Guinness Beef Stew

    I love cooking with Guinness beer, and this beef stew is one of my favorite ways to use it. Dark beer makes the stew rich and unbelievably flavorful. It’s perfect for slowly simmering the meat until it becomes fall-apart tender.

    Believe it or not, beef stew is really simple to make. This version, made with Guinness beer, is no different. You will need just over 2 hours. That’s not 2 hours hovering over a stove, though. The good news is that your hands-on time is about 30 minutes. For more comforting recipes like this stew, try our classic beef stew with red wine, this pot roast made in an Instant Pot, or our favorite braised short ribs.

    Key Ingredients

    • Beef Chuck Roast and Flour: For the best beef stew, use a well-marbled chuck roast. The marbling (those white veins of fat) is key to getting melt-in-your-mouth tender beef. Cut the chuck roast into cubes and toss them with flour for a nice sear and crust. If you’d like to keep it gluten-free, skip the flour!
    • Garlic and Tomato Paste: We build incredible flavor in this stew! It starts with sautéed garlic and tomato paste, which create a rich base for the gravy.
    • Guinness Beer: While any beer will work, we love the deep, roasted notes that Guinness adds to the stew. It intensifies the meaty flavor and creates a truly flavorful gravy. Dry red wine or coffee are also excellent substitutes for the beer.
    • Stock: I recommend using a good-quality chicken or beef stock. If you have the time, homemade beef stock is fantastic.
    • Worcestershire Sauce and Thyme: These are classic for beef stew. If you only have dried thyme, check the tips in the recipe below for how much you will need.
    • Veggies: We add onions, carrots, celery, and potatoes towards the end of cooking to keep them from getting mushy. Feel free to add other root vegetables like parsnips or turnips for even more flavor and heartiness.

    How to Make Guinness Beef Stew

    To make my Guinness beef stew, you are looking at a little hands-on time in the beginning, and then you get to sit back and relax.

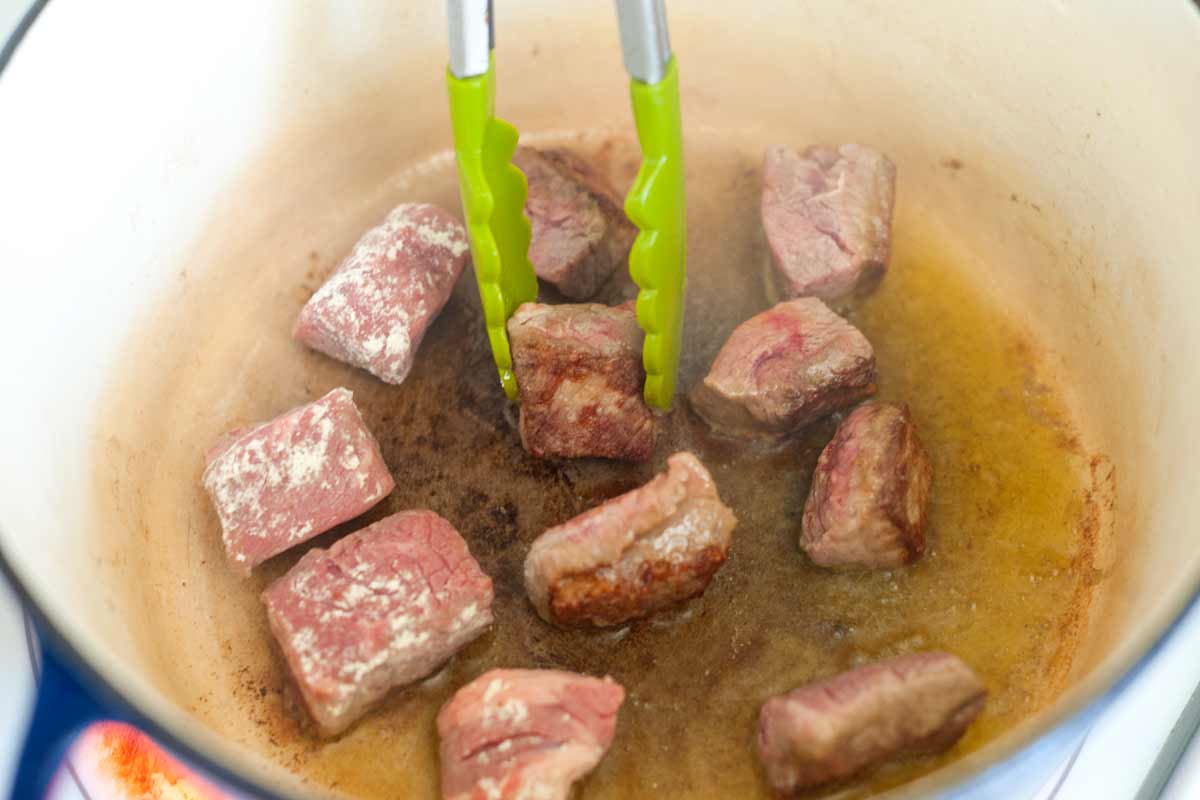
    For the best, most flavorful beef get a good sear on it before simmering in the gravy. To do this, I pat them dry, roll in some flour, and then sear until browned on all sides in some oil. This step goes quickly since we are only browning the meat, not cooking it all the way through.

    How to Make Guinness Beef Stew: Browning the Beef

    Once your meat is ready, you can make the gravy, starting with tomato paste and garlic and then adding the Guinness, beef stock, and remaining stew ingredients.

    When your gravy is ready, nestle the beef into it and cook at a low simmer for about an hour. Toss in your veggies and continue cooking until the veggies are tender and the beef falls apart when pierced with a fork.

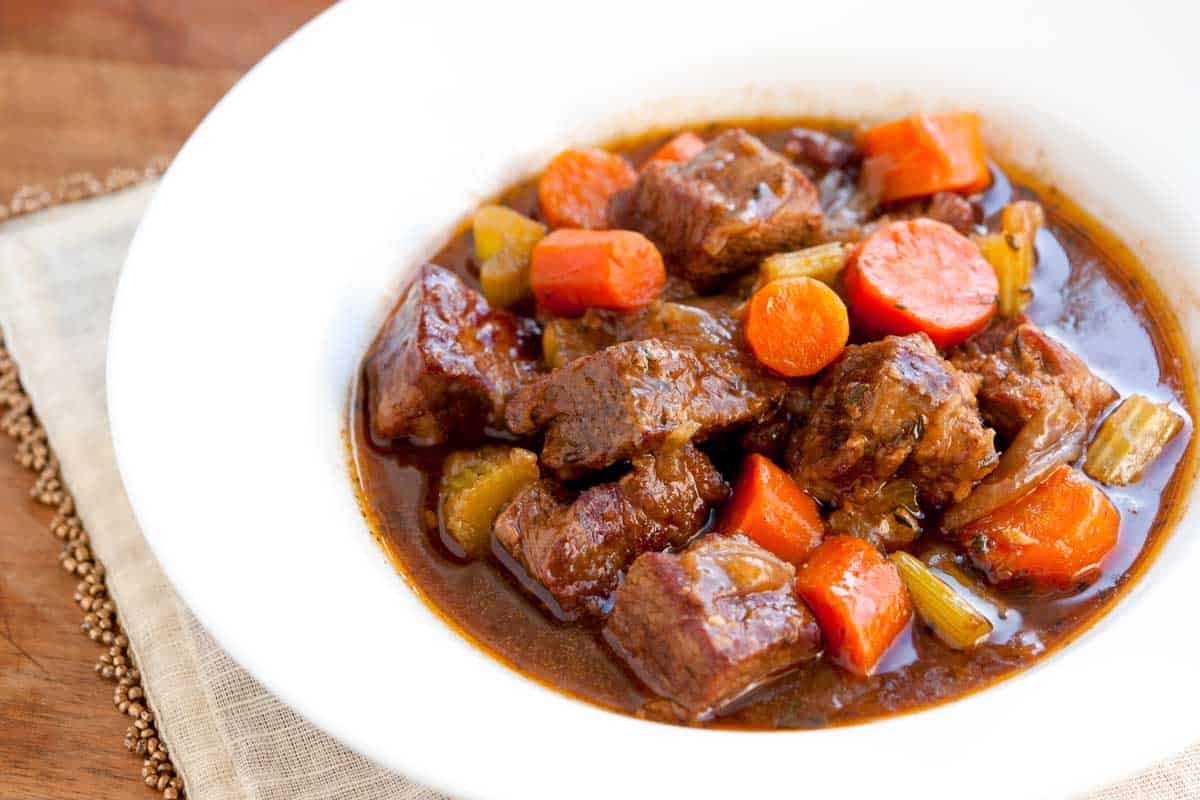
    Irish Guinness Beef Stew

    Seriously Good Guinness Beef Stew

    • PREP
    • COOK
    • TOTAL

    This is an unbelievably delicious Guinness beef stew with melt-in-your-mouth tender beef, carrots, and potatoes. If you don’t have Guinness on hand, use your favorite dark beer, dry red wine, or coffee. As a last resort, use more beef stock.

    Makes 6 servings

    You Will Need

    4 tablespoons vegetable oil, or more as needed

    2 pounds well-marbled boneless beef chuck roast, cut into 1-inch cubes

    Salt and fresh ground black pepper

    1/4 cup flour

    5 garlic cloves, minced

    2 tablespoons tomato paste

    1 (11.5-ounce) bottle Guinness Stout beer

    4 cups beef stock, or more as needed

    1 tablespoon Worcestershire sauce

    4 sprigs fresh thyme or 1 teaspoon dried thyme

    2 medium onions, peeled and cut into large chunks

    1 pound carrots, peeled and cut into large chunks, 5 to 6 carrots

    4 medium ribs celery, cut into large chunks

    8 ounces small waxy potatoes, about 20

    Directions

      1Preheat the oven to 300°F (148°C).

      2Pat the beef cubes dry using paper towels, then season all over with salt and pepper.

      3Add the flour to a bowl or plate, then roll the seasoned beef into the flour so it is lightly coated on all sides.

      4Heat 2 tablespoons of oil in a large Dutch oven over medium-high heat. When the oil shimmers, work in batches and add the floured beef cubes, making sure not to crowd them too much. Cook, turning occasionally, until the beef is well-browned on all sides. Transfer to a plate and then continue with the remaining beef cubes, adding more oil as necessary.

      5Reduce the heat to medium-low, then stir in the garlic and tomato paste. Cook, continuously stirring for about 1 minute.

      6Pour in the beer, and then use a wooden spoon to scrape the bottom and sides of the pot, lifting as many stuck bits as possible.

      7Pour in the beef stock, then add the Worcestershire sauce and thyme.

      8Bring to a low simmer, then add the beef and any juices left on the plate back to the pot. Cover with the pot’s lid and transfer to the oven. Cook, stirring once or twice, for 1 hour.

      9While the beef cooks in the oven, heat another 2 tablespoons of oil in a large skillet over medium heat. Add the onions, carrots, and celery. Season with a pinch of salt and pepper, then cook, stirring often, until the vegetables are lightly browned on all sides, about 10 minutes. Set aside.

      10After 1 hour in the oven, remove the Dutch oven’s lid and stir in the onions, carrots, and celery. Add the potatoes, and then continue to bake, with the lid partially on, until the beef is tender, 45 minutes to 1 hour longer. If the top of the stew becomes dry, add some extra beef stock.

      11Remove the beef stew from the oven, skim off any excess fat from the surface, and remove the thyme stems. Taste, and then adjust with additional salt and pepper. Serve.

    Adam and Joanne’s Tips

    • If you do not have a Dutch oven, you can sear the beef in a large pot on the stovetop then add everything to a large baking dish loosely covered with aluminum foil.
    • The nutrition facts provided below are estimates.

    Nutrition Per Serving
    Serving Size
    1/6 of the recipe
    /
    Calories
    412
    /
    Total Fat
    17.1g
    /
    Saturated Fat
    9.7g
    /
    Cholesterol
    89.4mg
    /
    Sodium
    920.1mg
    /
    Carbohydrate
    25.9g
    /
    Dietary Fiber
    4.4g
    /
    Total Sugars
    7.1g
    /
    Protein
    34.5g


    AUTHOR:

    Joanne Gallagher

    Adam and Joanne of Inspired Taste

    We are Adam and Joanne Gallagher, the creators of Inspired Taste. Established in 2009, Inspired Taste grew from a childhood dream into one of the internet’s most trusted recipe sites with hundreds of reliable recipes, step-by-step videos, and expert tips.More About Us

    Source link

  • Easy Split Pea Soup Recipe

    Easy Split Pea Soup Recipe

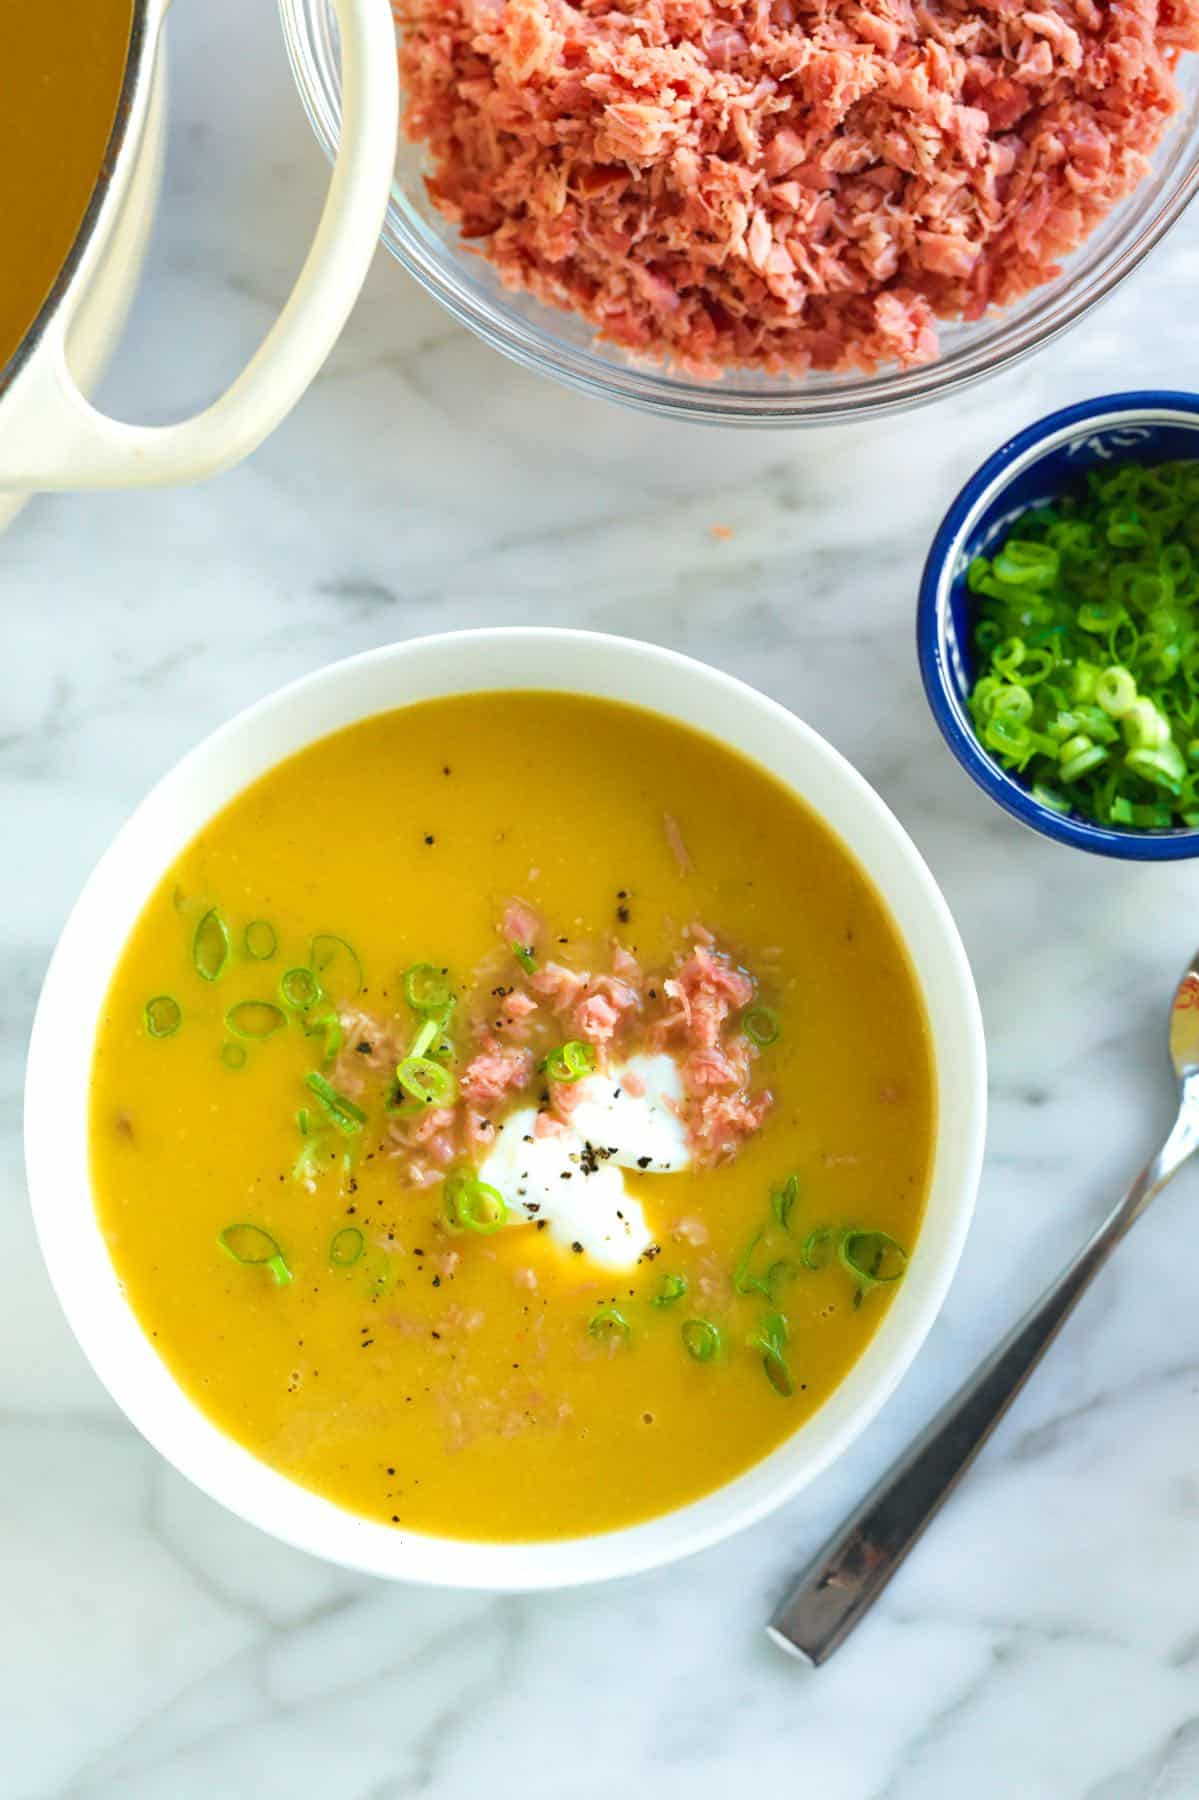
    This split pea soup recipe is outrageously delicious and comforting. Made with simple ingredients and a rich broth, it turns out thick, creamy, and flavorful!

    Homemade Split Pea Soup

    I love hearty soup recipes, and this split pea soup definitely hits the mark! We use dried split peas as the base, and slowly simmer them with aromatic veggies, broth, and thyme until perfectly tender. Then, we blend the soup until smooth for an extra creamy texture. It’s hearty, flavorful, and unbelievably delicious.

    The ham adds a lovely smoky flavor, but if you’d prefer to make this without it, you can (and it will still be delightful).

    Key Ingredients

    • Split Peas: Split peas are dried peas that have been split in half, which helps them cook faster. They have an earthy and slightly sweet flavor. There are two main types: green and yellow. For this soup, we’re using green split peas because they have a slightly sweeter taste and hold their shape better during cooking, resulting in a heartier texture.
    • Ham: I use boneless ham steak and usually find it sold by the pound (or close) in 1/2-inch slices. Bone-in ham is excellent, too. You can add the ham bone to the soup as it simmers for even more flavor. We’ll briefly cook the ham in the pot, remove it, and pulse it in a blender until it is shredded. This seems unusual, but it creates the perfect texture for the soup! We’ll save the shredded ham for serving.
    • Aromatics: We’re keeping it classic with a mixture of onion, carrot, celery, and garlic to create a flavorful base.
    • Herbs: I love the combination of bay leaves and fresh thyme. I usually take 6 or so thyme stalks and tie them with some twine for easy removal later.
    • Broth: Use what you love! That’s chicken stock for me, but veggie broth works perfectly well, too.
    • Wine: A dry white wine adds a bit of complexity to the soup. Use something you already enjoy drinking. I often go for something simple like Pinot Grigio, Sauvignon Blanc, or unoaked Chardonnay. You can also use a dry sherry.
    • Dijon Mustard and Parsley: This is our secret! To add a lovely pop of flavor and color right at the end, we’ll blend in a couple of teaspoons of Dijon mustard and half of a bunch of fresh parsley. It livens everything up and really makes the soup taste incredible.
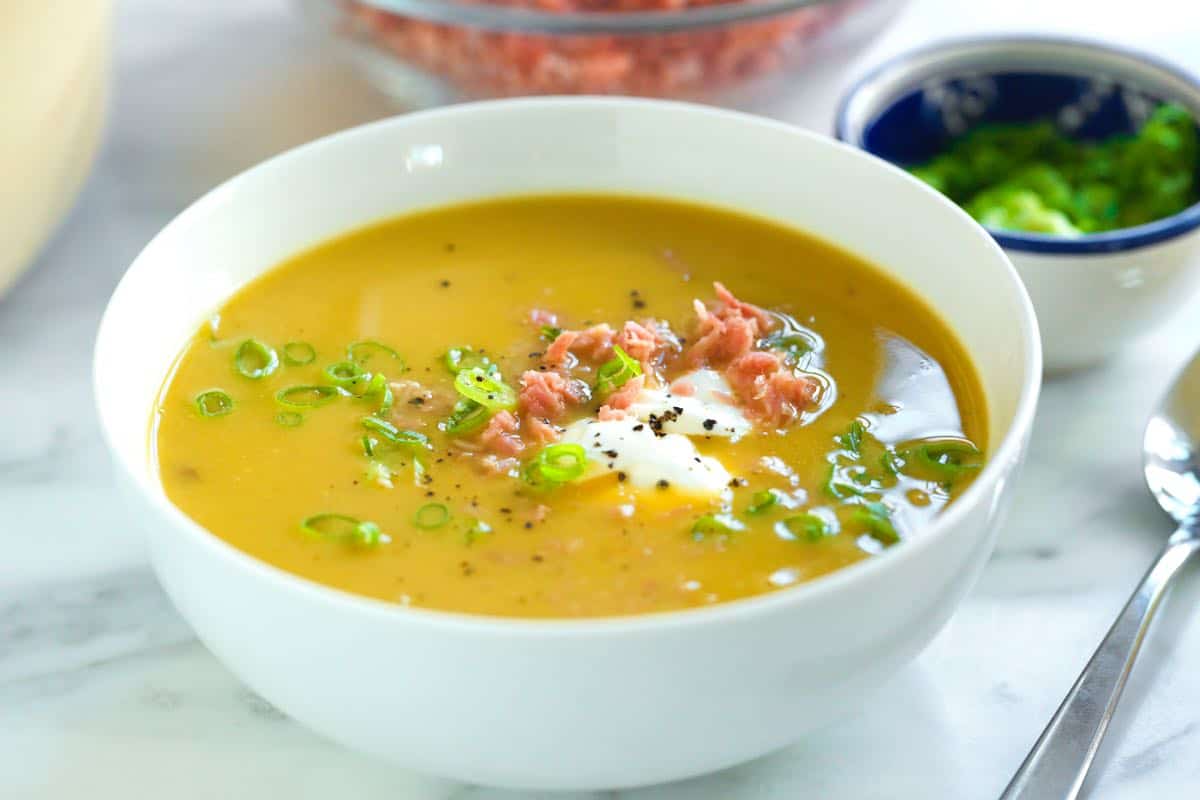
    • Toppings (Optional): When serving this soup, we’ll blend it until smooth and creamy, then top it with the shredded ham, a dollop of sour cream, and some sliced green onion.

    Find the full recipe with measurements below.

    How to Make the Best Split Pea Soup

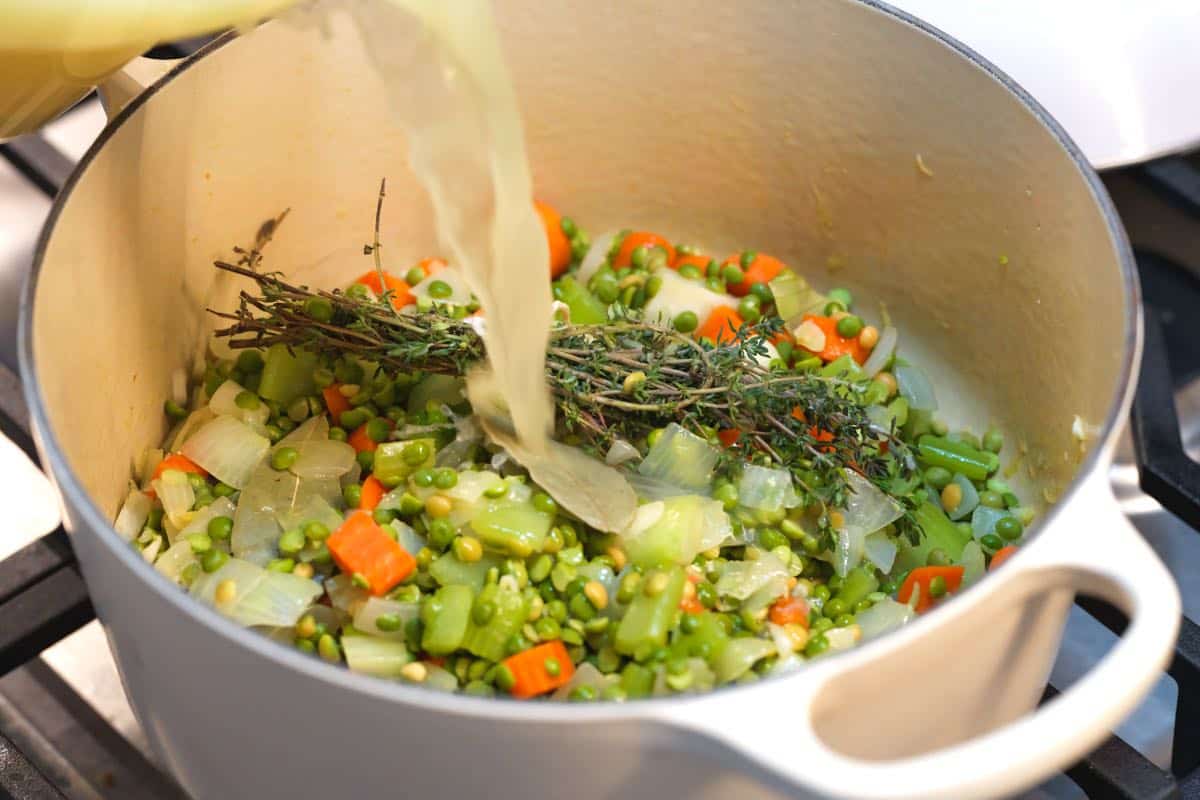
    Tip 1: Build flavors. The trick to this soup is gradually building flavors in your soup pot. So, if you’re adding it, start with the ham and cook it until browned. Remove it, then add your onion, carrot, celery, and garlic. As they cook, they will pick up the flavor from the ham. Finally, finish with the thyme and broth.

    Adding the broth to make split pea soup

    Tip 2: Simmering the split peas. Dried split peas take a bit to become tender, so expect this soup to simmer for about 1 hour.

    Tip 3: Blend the ham. Yep, you read that right! It feels odd to blend ham, but trust me. The ham breaks down into the perfect texture for adding to our serving bowls. See what I mean in our photos.

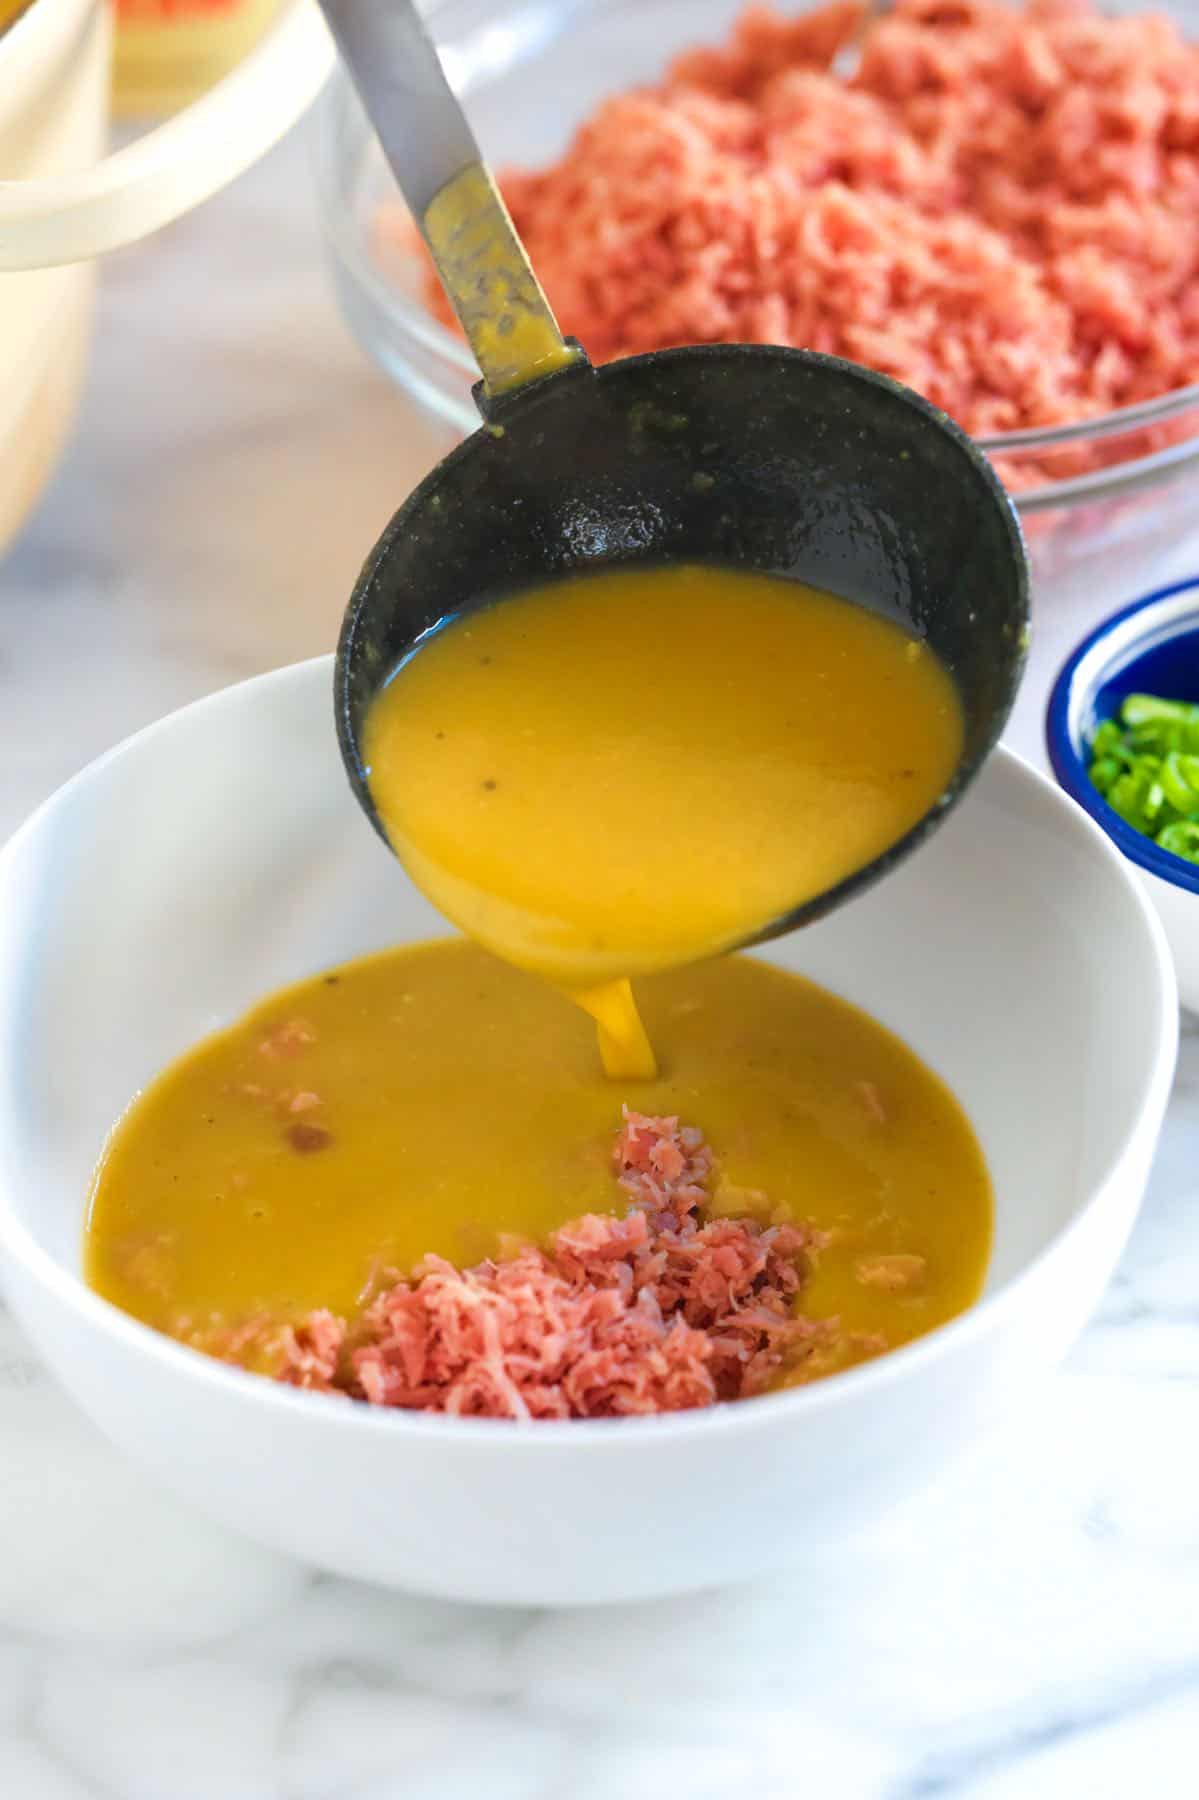
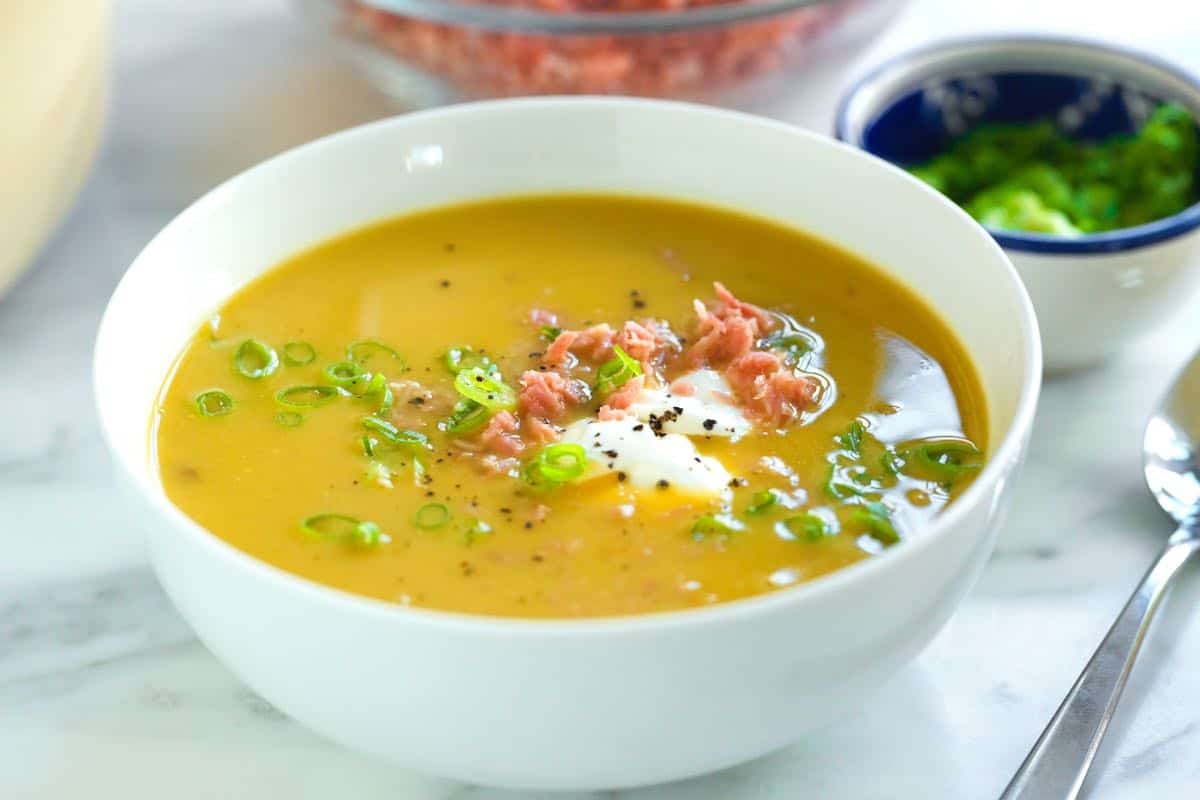
    Tip 4: Serving it. When serving this split pea soup, we place a generous spoonful of ham into the bottom of a bowl and then pour the soup over it. Garnish with more ham, sour cream, and sliced green onions, and enjoy! It would also be amazing with a slice of homemade focaccia or this easy flatbread for dunking!

    Serving Split Pea Soup with Ham

    More Cozy Soup Recipes

    Easy Split Pea Soup

    Easy Split Pea Soup

    • PREP
    • COOK
    • TOTAL

    This split pea soup is absolutely delicious and unbelievably comforting. It’s incredibly easy to make with simple ingredients like dried split peas, carrots, celery, onions, and ham. We love the ham in this soup, but you can easily adapt it to be vegetarian (details for this are in the tips below).

    6 Servings (12 cups)

    Watch Us Make the Recipe

    You Will Need

    2 tablespoons olive oil

    12 ounces ham steak, diced into 1/2-inch cubes (340g)

    2 cups chopped onions, 1 large

    1 cup chopped carrots, 2 medium

    1 cup chopped celery, 3 ribs

    6 cloves garlic, thinly sliced

    1 pound (450g) green split peas (dried)

    2 bay leaves

    1 bundle fresh thyme

    1/3 cup white wine or dry sherry (80ml)

    10 cups low sodium chicken stock or veggie broth (2.4L)

    1/2 bunch fresh parsley

    2 teaspoons Dijon mustard

    Salt and pepper to taste

    6 tablespoons sour cream for serving

    2 green onions, thinly sliced for serving

    Directions

      1Heat a tablespoon of olive oil in a large pot, like a Dutch oven, over medium heat. Add the ham and cook for a few minutes, browning slightly (but don’t dry it out). Remove the ham and set aside.

      2Add another tablespoon of oil, onion, carrots, celery, and garlic to the pot and cook until the onions are translucent, about 5 minutes. Stir in 1/4 teaspoon of salt. Then, add the split peas, bay leaves, and thyme. Cook for 2 minutes.

      3Pour in the wine and stir to lift anything stuck to the bottom of the pot. When the wine evaporates, pour in the chicken stock. Season with some salt (taste to see if you need it – I usually add 1/4 teaspoon or so).

      4Bring to a low simmer, adjusting the heat as needed. Cook covered until the split peas are tender, 50 to 60 minutes. Stir the pot occasionally as it cooks.

      5As the soup simmers, prepare the ham. Place the ham into a blender, working in batches if needed. Pulse until chopped/shredded. Reserve in an airtight container in the fridge until serving.

      6When the split peas are tender, remove the bay leaves and thyme bundle. Add the parsley and mustard, then use an immersion blender to blend the soup until creamy. (You can also use a stand blender, but you will need to work in batches.)

      7When ready to serve, reheat the ham, place a few spoonfuls of the ham at the bottom of the bowl. Pour over the soup and garnish with sour cream, sliced green onions, and a little more ham.

    Adam and Joanne’s Tips

    • Storing: Transfer the soup to an airtight container and store it in the refrigerator for up to 5 days. Or freeze in freezer-safe containers for up to 3 months. Thaw overnight in the fridge before reheating.
    • Reheating the ham: Place the ham on a microwave-safe plate. Cover the plate with a damp paper towel to help retain moisture. Microwave on high for 30 to 60 seconds or until heated through. Or, quickly warm in a skillet with a couple of teaspoons of water.
    • Bone-in ham: If you have a ham bone, add it to the soup as it simmers, and then remove before blending.
    • Vegetarian adaptations: Remove the ham. There are no other necessary changes. For vegan soup, remove the ham and sour cream.
    • Wine: I love the pop of flavor wine adds to this soup, but if you prefer this without wine, feel free to leave it out. Deglaze the pot with a splash of stock and then continue with the remaining recipe steps.
    • The nutrition facts provided below are estimates.

    Nutrition Per Serving
    Serving Size
    1/6 of the recipe
    /
    Calories
    517
    /
    Total Fat
    12.9g
    /
    Saturated Fat
    3.6g
    /
    Sodium
    1030.1mg
    /
    Carbohydrate
    63g
    /
    Dietary Fiber
    21.4g
    /
    Total Sugars
    10.6g
    /
    Protein
    38.7g


    AUTHOR:

    Joanne Gallagher

    Adam and Joanne of Inspired Taste

    We are Adam and Joanne Gallagher, the creators of Inspired Taste. Established in 2009, Inspired Taste grew from a childhood dream into one of the internet’s most trusted recipe sites with hundreds of reliable recipes, step-by-step videos, and expert tips.More About Us

    Source link

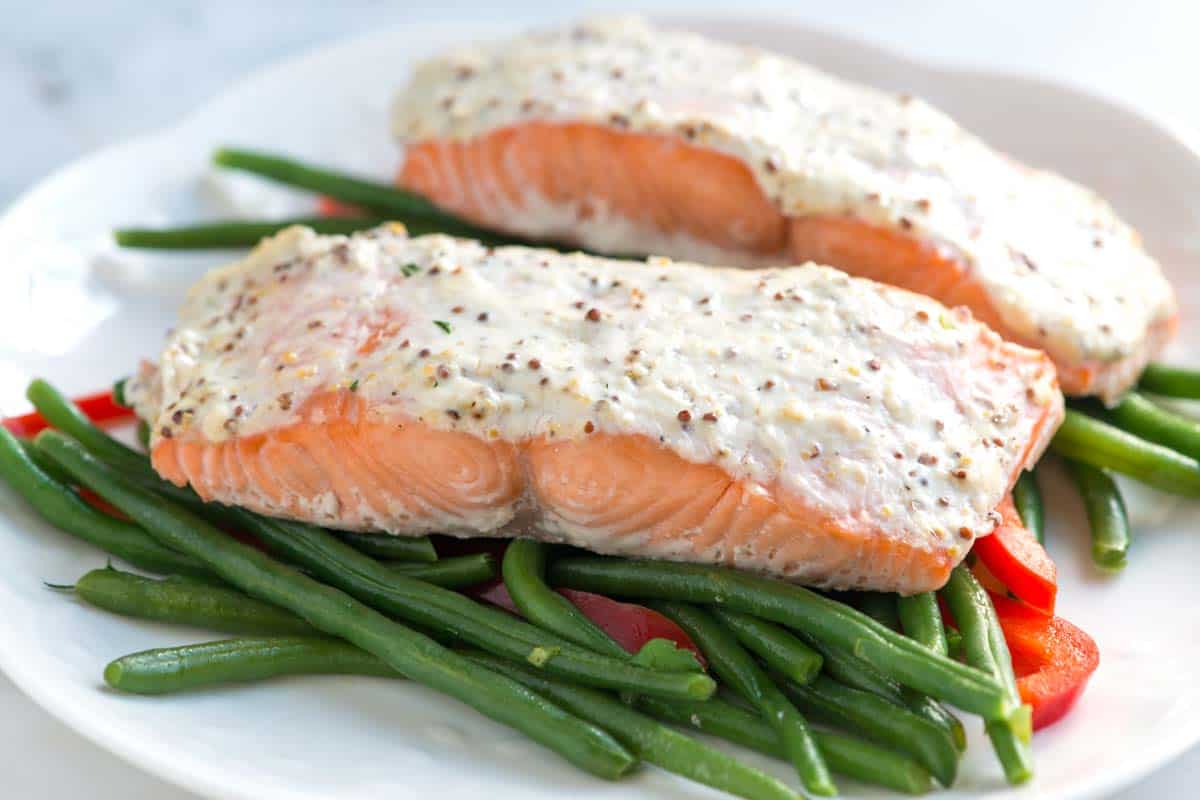
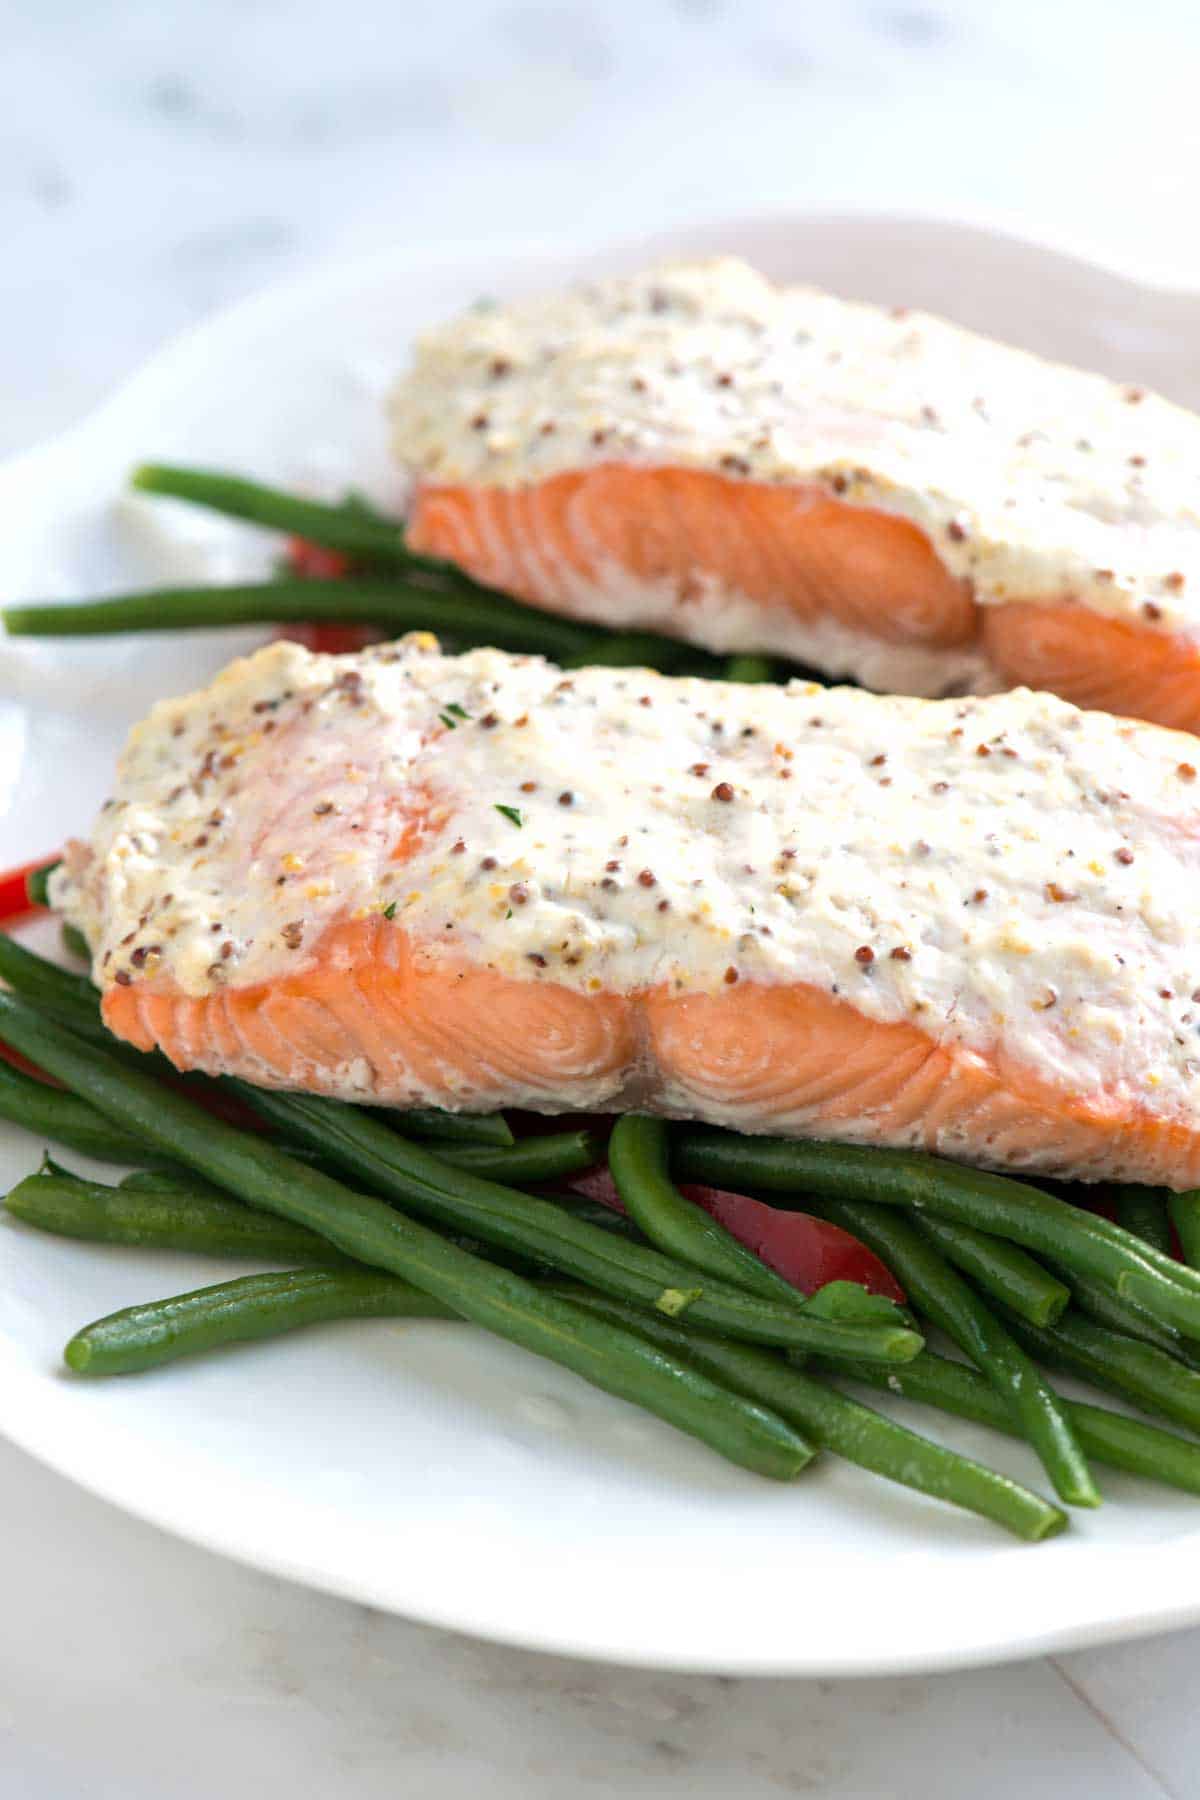
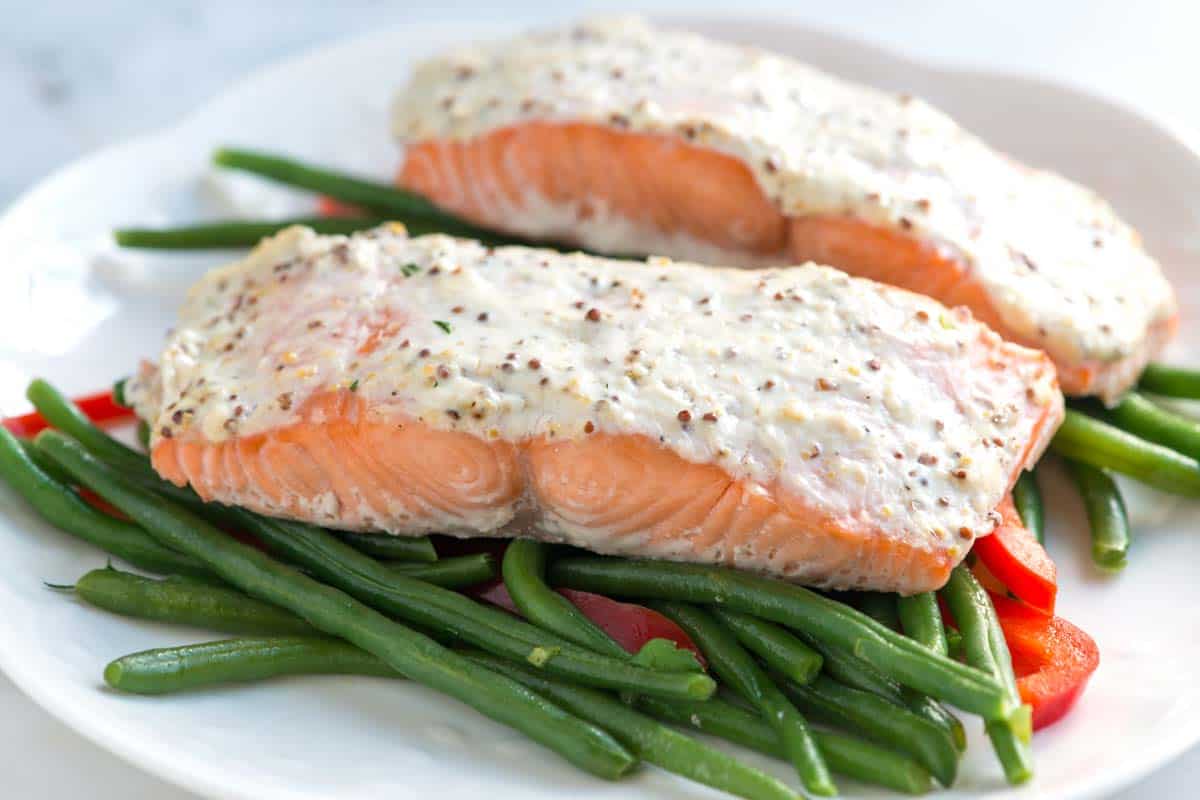
  • Easy Sour Cream Baked Salmon Recipe

    Easy Sour Cream Baked Salmon Recipe

    My easy sour cream baked salmon is quick and so delicious. You’ll spread a simple sour cream and mustard sauce onto salmon fillets and bake until perfectly cooked. I love this easy salmon recipe so much!

    Easy Sour Cream Baked Salmon

    Our family eats a lot of salmon, so we have a long list of delicious salmon recipes. This sour cream and mustard crusted salmon is ridiculously simple to put together.
    Since you bake the salmon with the sour cream sauce, it becomes super moist and flavorful. For another easy recipe, see our brown sugar baked salmon!

    Key Ingredients

    • Salmon: Any salmon fillet will work for this recipe. However, I especially love those with a higher fat content, like sockeye, king, and coho. When baked, these types of salmon stay soft and moist.
    • Sour Cream Sauce: This quick three-ingredient sauce makes our salmon so delicious. You’ll stir sour cream (full fat is best) with whole-grain mustard and grated parmesan cheese. Dijon mustard is a good substitute for whole-grain mustard.

    How to Make Sour Cream Baked Salmon

    We love this salmon recipe! It’s flavorful and takes less than 30 minutes to prepare, which makes it perfect for busy nights. I’ve also served this for a dinner party with rave reviews!

    You’ll bake the salmon in the oven, so place your fillets onto a baking sheet or into a baking dish. Then, generously spread the sour cream sauce all over the top of the salmon fillets.

    Bake the salmon until it flakes easily. For 1-inch salmon fillets, expect 10 to 15 minutes. As it bakes, the sour cream sauce insulates the top of the salmon, so your fish will stay tender and moist inside.

    I love serving this with sautéed veggies, like these sautéed green beans or garlic butter zucchini. Mashed potatoes are a good idea, too!

    Sour Cream Baked Salmon

    Easy Sour Cream Baked Salmon

    • PREP
    • COOK
    • TOTAL

    This easy baked salmon recipe is ideal for a quick weeknight meal but elegant enough to serve for a special occasion. We coat the salmon with a creamy sour cream, mustard, and parmesan cheese sauce. The key to perfectly cooked salmon is to avoid overcooking it. Bake until the salmon is just cooked through at the thickest part, then remove from the oven, loosely cover with foil, and let it rest for a few minutes. This will ensure a moist and flavorful salmon every time.

    4 Servings

    You Will Need

    4 salmon filets, about 6 ounces each

    1/2 (113g) cup sour cream

    1 ½ teaspoons whole-grain mustard

    1/3 cup (20g) finely grated parmesan cheese

    Salt and fresh ground pepper

    Directions

      1Preheat the oven to 425°F (218°C). Lightly oil a rimmed baking sheet or large baking dish (or line with parchment paper).

      2Stir the sour cream, mustard, and parmesan in a small bowl. Season with salt and pepper to taste.

      3Place the salmon on the baking sheet, then spread two tablespoons of the sour cream mixture on top of each filet.

      4Bake for 10 to 15 minutes until barely done in the center at the thickest part of the salmon. The center should be firm, but with a small amount of uncooked salmon in the very center. Depending on how thick your salmon is, it may need a few minutes longer. (We cook salmon to an internal temperature of 125°F).
      5Remove from the oven, cover lightly with aluminum foil, and rest for 5 minutes. Serve.

    Adam and Joanne’s Tips

    • White stuff on cooked salmon: The white stuff around cooked salmon is called albumin. It’s perfectly fine to eat, but since it isn’t the prettiest thing to look at, I quickly scrape it away and spoon a bit of the cooking liquid from the bottom of the dish on top.
    • The nutrition facts provided below are estimates.

    Nutrition Per Serving
    Serving Size
    1 (6oz) fillet
    /
    Calories
    328
    /
    Protein
    40 g
    /
    Carbohydrate
    1 g
    /
    Dietary Fiber
    0 g
    /
    Total Sugars
    1 g
    /
    Total Fat
    17 g
    /
    Saturated Fat
    6 g
    /
    Cholesterol
    111 mg


    AUTHOR:

    Joanne Gallagher

    Previous Post: Perfect Poached Salmon
    Next Post: Lemon Dill Baked Salmon

    Source link

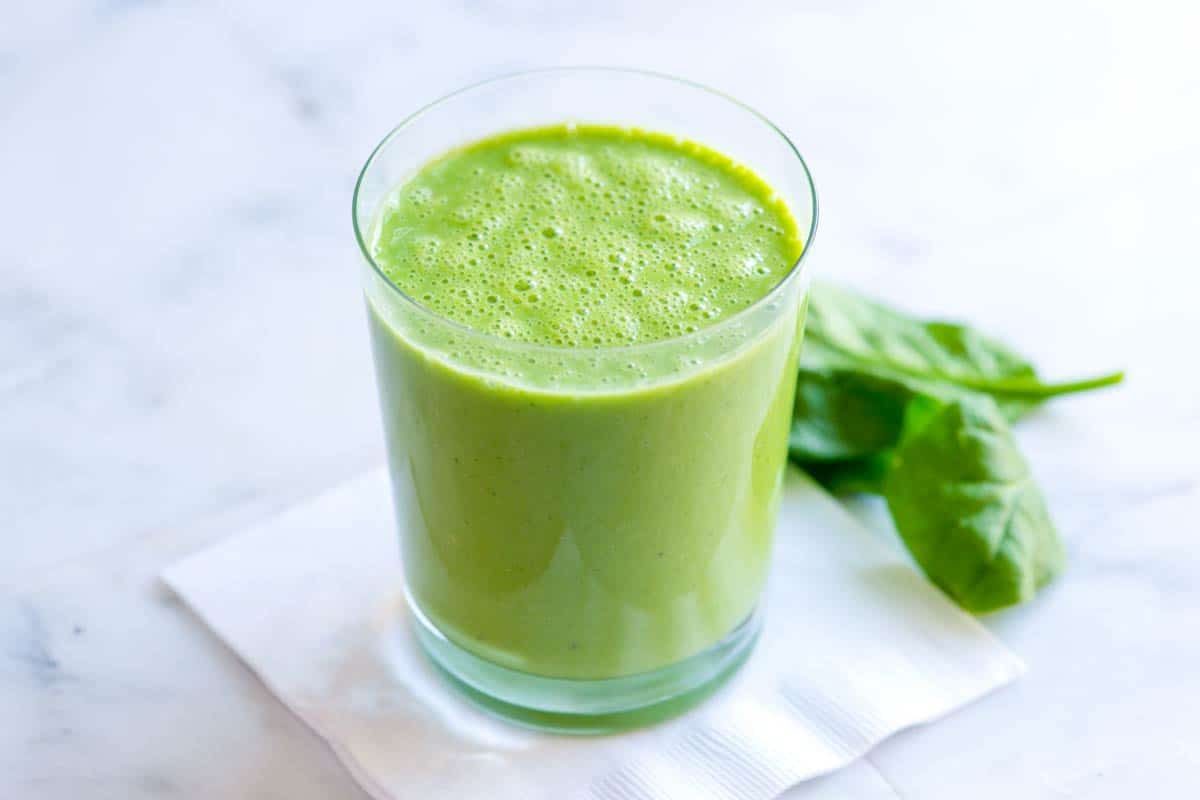
  • Easy Green Smoothie Recipe

    Easy Green Smoothie Recipe

    I love this simple green smoothie recipe, which blends together spinach, banana, and Greek yogurt for added protein. It is naturally sweetened with fruit and tastes incredible!

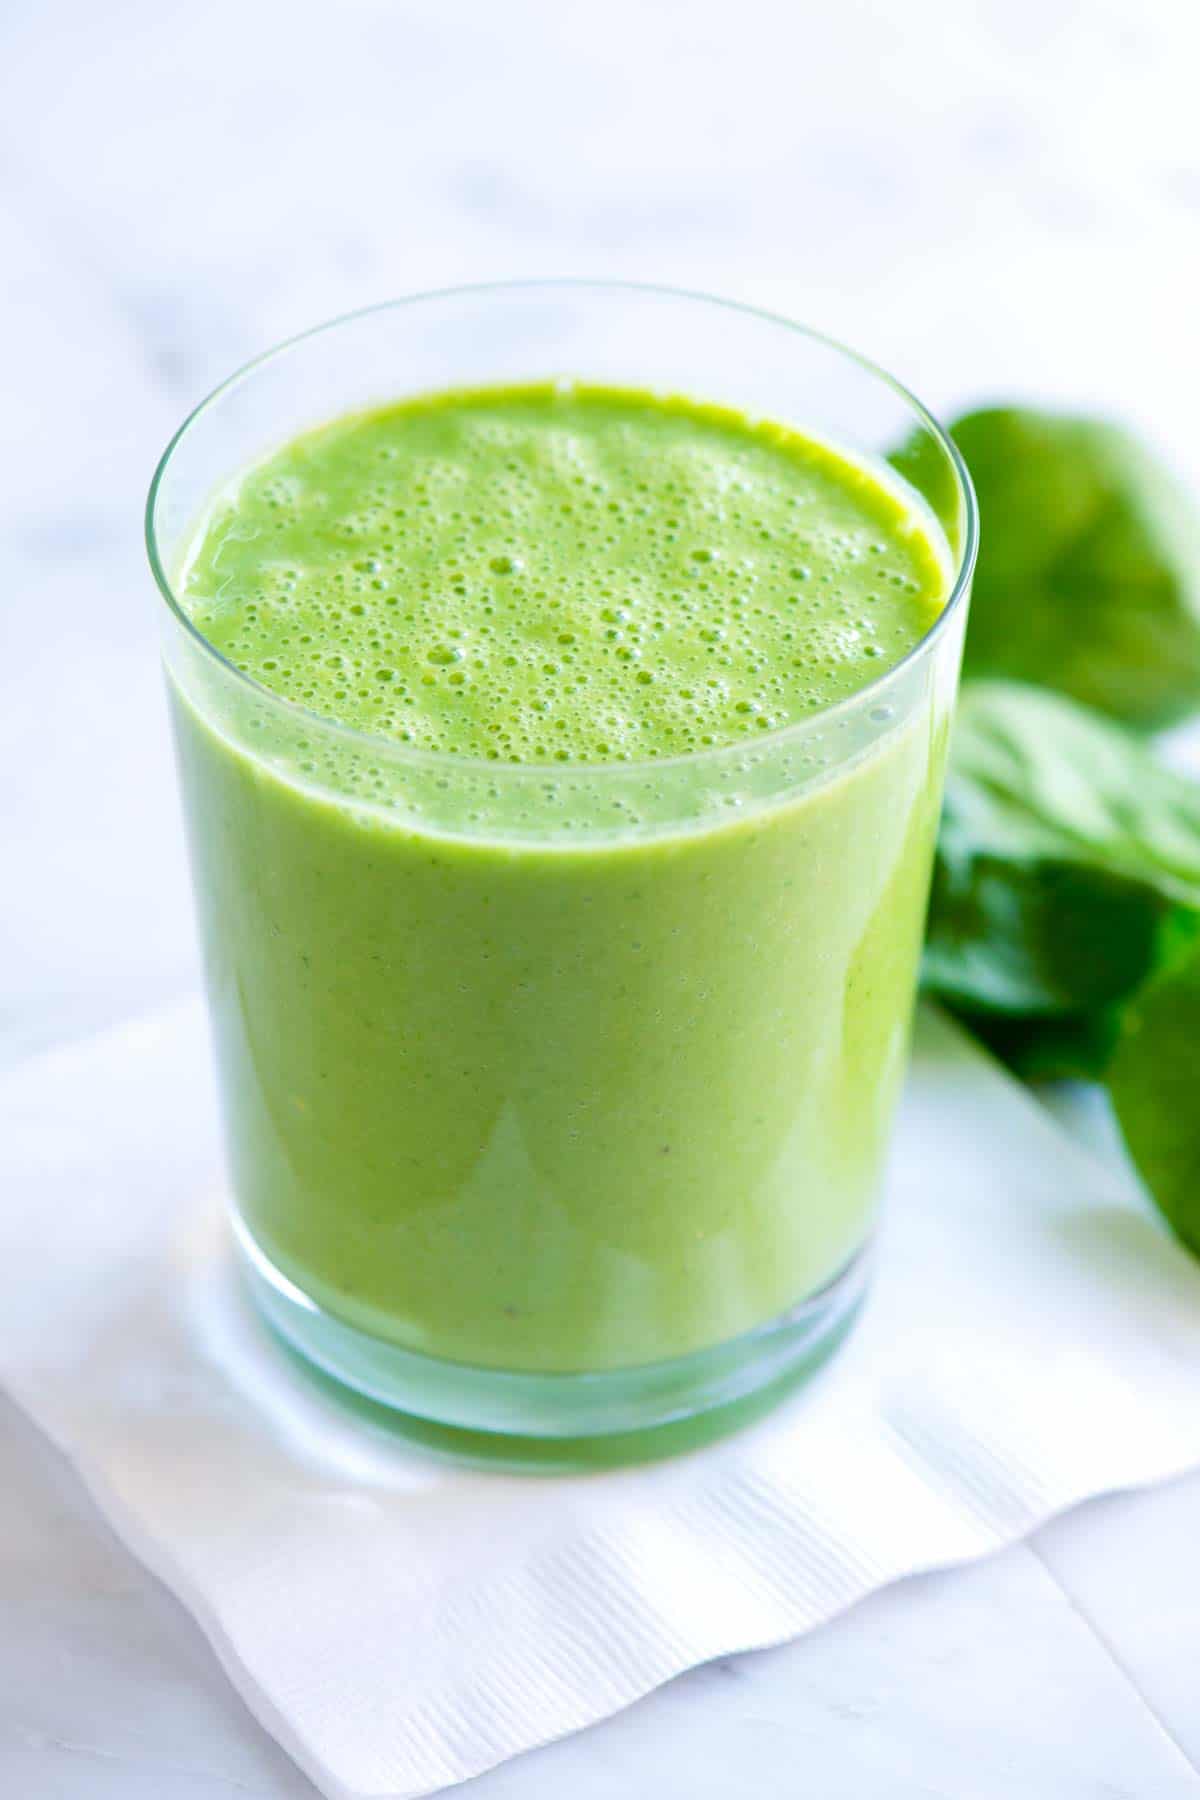
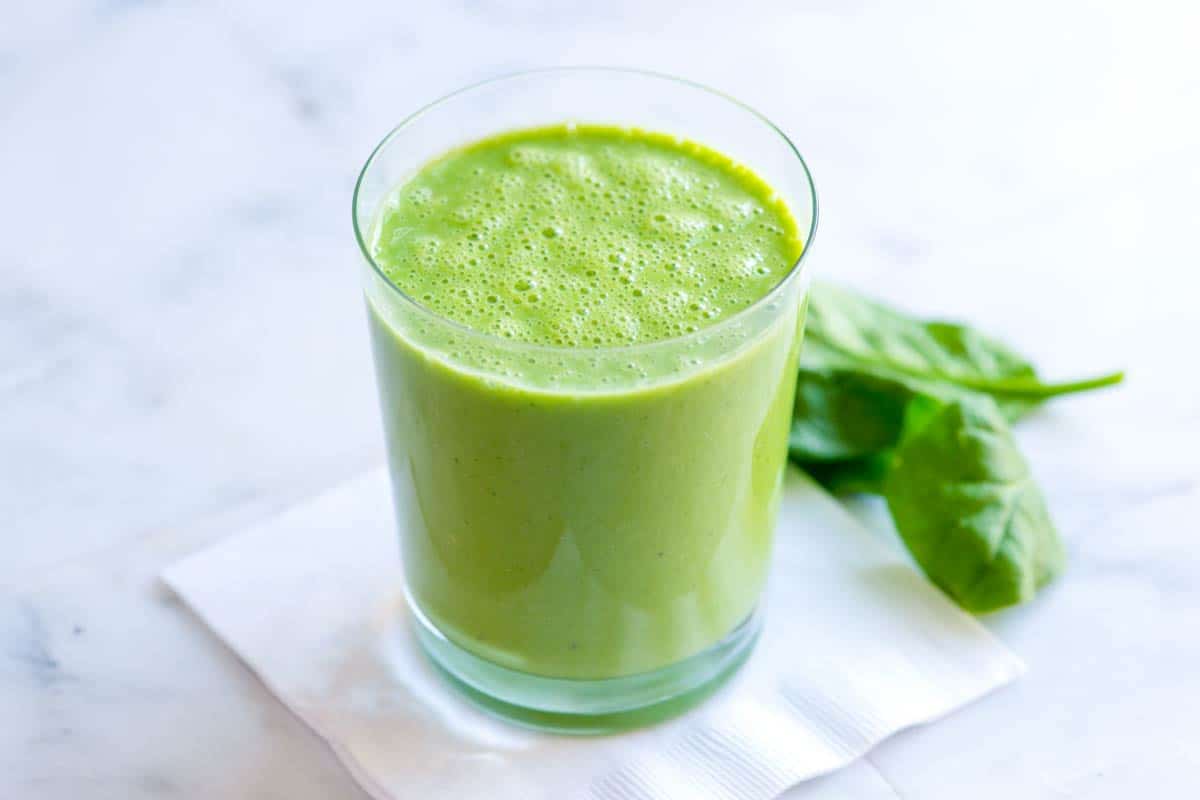
    Easy Green Smoothie

    When it comes to smoothies, simple is best. I can’t keep up with lots of extra ingredients, and if I am going to make something daily, I need it to be quick with ingredients I already have on hand. This green smoothie is perfect!

    Inspired by our popular banana smoothie, you can make this easy green smoothie in 5 minutes or less! It’s easy, healthy, and delicious. For more super simple smoothie recipes, see our blueberry smoothie and strawberry smoothie. You may also enjoy our homemade green juice!

    Key Ingredients

    • Spinach: I blend in 2 cups of baby spinach to make this super green. Even with so much spinach, you won’t really taste it. In fact, this is my son’s favorite smoothie, and he’s pretty sensitive to the taste of spinach. Other greens, like kale, are great, too, but you might taste them a bit more than baby spinach.
    • Banana: I use one banana to make one large or two smaller kid-size smoothies. For the best smoothie, use a ripe banana. For the creamiest smoothie, use frozen banana slices. I’ve shared how I freeze bananas for smoothies in my banana smoothie recipe.
    • Half an Orange: When I have oranges in the house, I love adding them to my morning smoothie. They add extra vitamin C and tropical flavor. You can substitute oranges with other fruits like mango, pineapple, or berries (but remember that berries will change the smoothie’s color).
    • Greek Yogurt: I love adding a spoonful for extra creaminess and protein. If you want more protein, use plain high-protein yogurt or a scoop of your favorite vanilla protein powder.
    • Milk: You need a bit of liquid to thin things out. I love milk or dairy-free milk, but even water will do the trick.
    Easy Green Smoothie

    Easy Green Smoothie

    This creamy, protein-packed green smoothie is simple and only takes a few minutes. We’ve shared a basic recipe below with optional ingredients after that. If you are looking for a substitute for Greek yogurt, leave it out or replace it with more fruit. For an extra boost of protein, add 1 to 2 scoops of your favorite protein powder.

    Makes 2 kid-size smoothies or 1 large

    You Will Need

    Basic Green Smoothie

    1 medium banana, peeled

    1/2 medium orange, peeled and quartered

    1/3 cup plain Greek yogurt

    1/4 cup milk or non-dairy milk

    2 cups fresh spinach


    Optional

    1 tablespoon flaxseed meal or shelled hemp hearts

    1 tablespoon peanut butter or almond butter

    1 to 2 teaspoons pure honey

    1/2 cup mixed frozen berries

    Adam and Joanne’s Tips

    • Using a frozen banana makes this really refreshing and thick.
    • This smoothie tastes best fresh, but it can be frozen for later. To save the smoothie for later, add to a food-safe resealable plastic bag or container and freeze. Then 45 to 60 minutes before needing the smoothie, take out from freezer.

    Nutrition Per Serving
    Serving Size
    1 smoothie (large)
    /
    Calories
    240
    /
    Total Fat
    6.1g
    /
    Saturated Fat
    2.4g
    /
    Cholesterol
    12.3mg
    /
    Sodium
    128.8mg
    /
    Carbohydrate
    38.2g
    /
    Dietary Fiber
    5.5g
    /
    Total Sugars
    22.4g
    /
    Protein
    12.4g


    AUTHOR:

    Joanne Gallagher

    Previous Post: Hibiscus Ginger Beer Mocktail
    Next Post: Honey Roasted Chickpeas

    Source link

  • Easy Smoked Salmon Dip Recipe

    Easy Smoked Salmon Dip Recipe

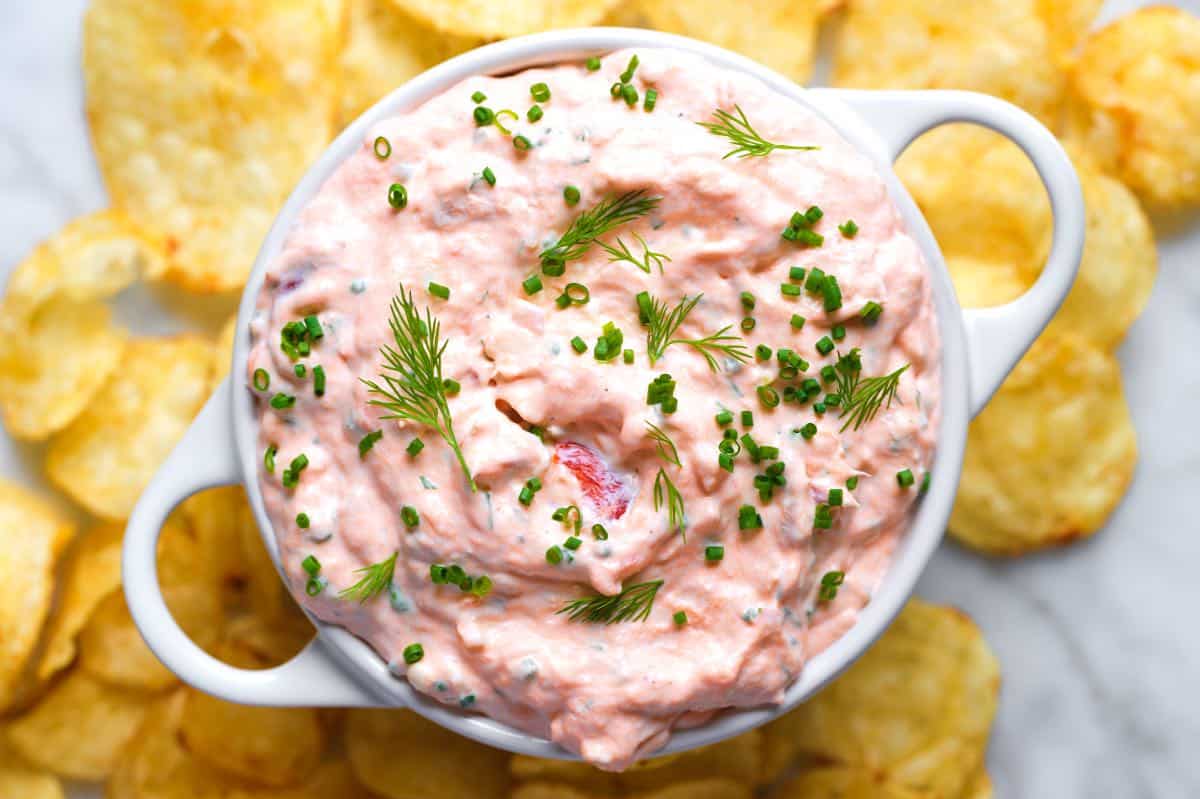
    Our smoked salmon dip recipe is incredibly creamy and delicious. I love serving it with thick potato chips, crackers, sliced bread, or even spread onto bagels.

    Smoked Salmon Dip

    We love smoked salmon and are always looking for more ways to use it. This salmon dip has quickly turned into one of my favorite recipes! It’s a knockout appetizer and works just as well for brunch with bagels!

    This never disappoints at celebrations and get-togethers, and honestly, it’s usually one of the first things to go! Get ready for everyone to ask you for the recipe. For another seafood dip, try our incredible homemade crab dip, which is just as delicious served hot as it is served cold.

    Key Ingredients

    • Hot Smoked Salmon: This is my go-to for this recipe, but you can use cold smoked salmon or gravlax (lox). It has a firm, flaky texture, and the smoky flavor pairs perfectly with the cream cheese base.
    • Cream Cheese: I use full-fat block cream cheese because it makes the dip so delicious.
    • Sour Cream and Mayonnaise: These add flavor and creaminess while lightening the texture of the cream cheese. I love using homemade mayo when I have it in the fridge. For a lighter dip, you can try substituting some of the sour cream for Greek yogurt (although, I do really love the sour cream in this recipe).
    • Shallot and Fresh Herbs: I love the light onion flavor of shallot in this dip, but use your favorite fresh herbs. I love using chives and dill, which complement the salmon well.
    • Lemon: This cuts through the heaviness of the cream cheese, sour cream, and mayo.
    • Worcestershire Sauce: This adds another layer of flavor. A little bit makes creamy dips and sauces so much better. I also use Worcestershire sauce when making homemade ranch.

    Find the full recipe with measurements below.

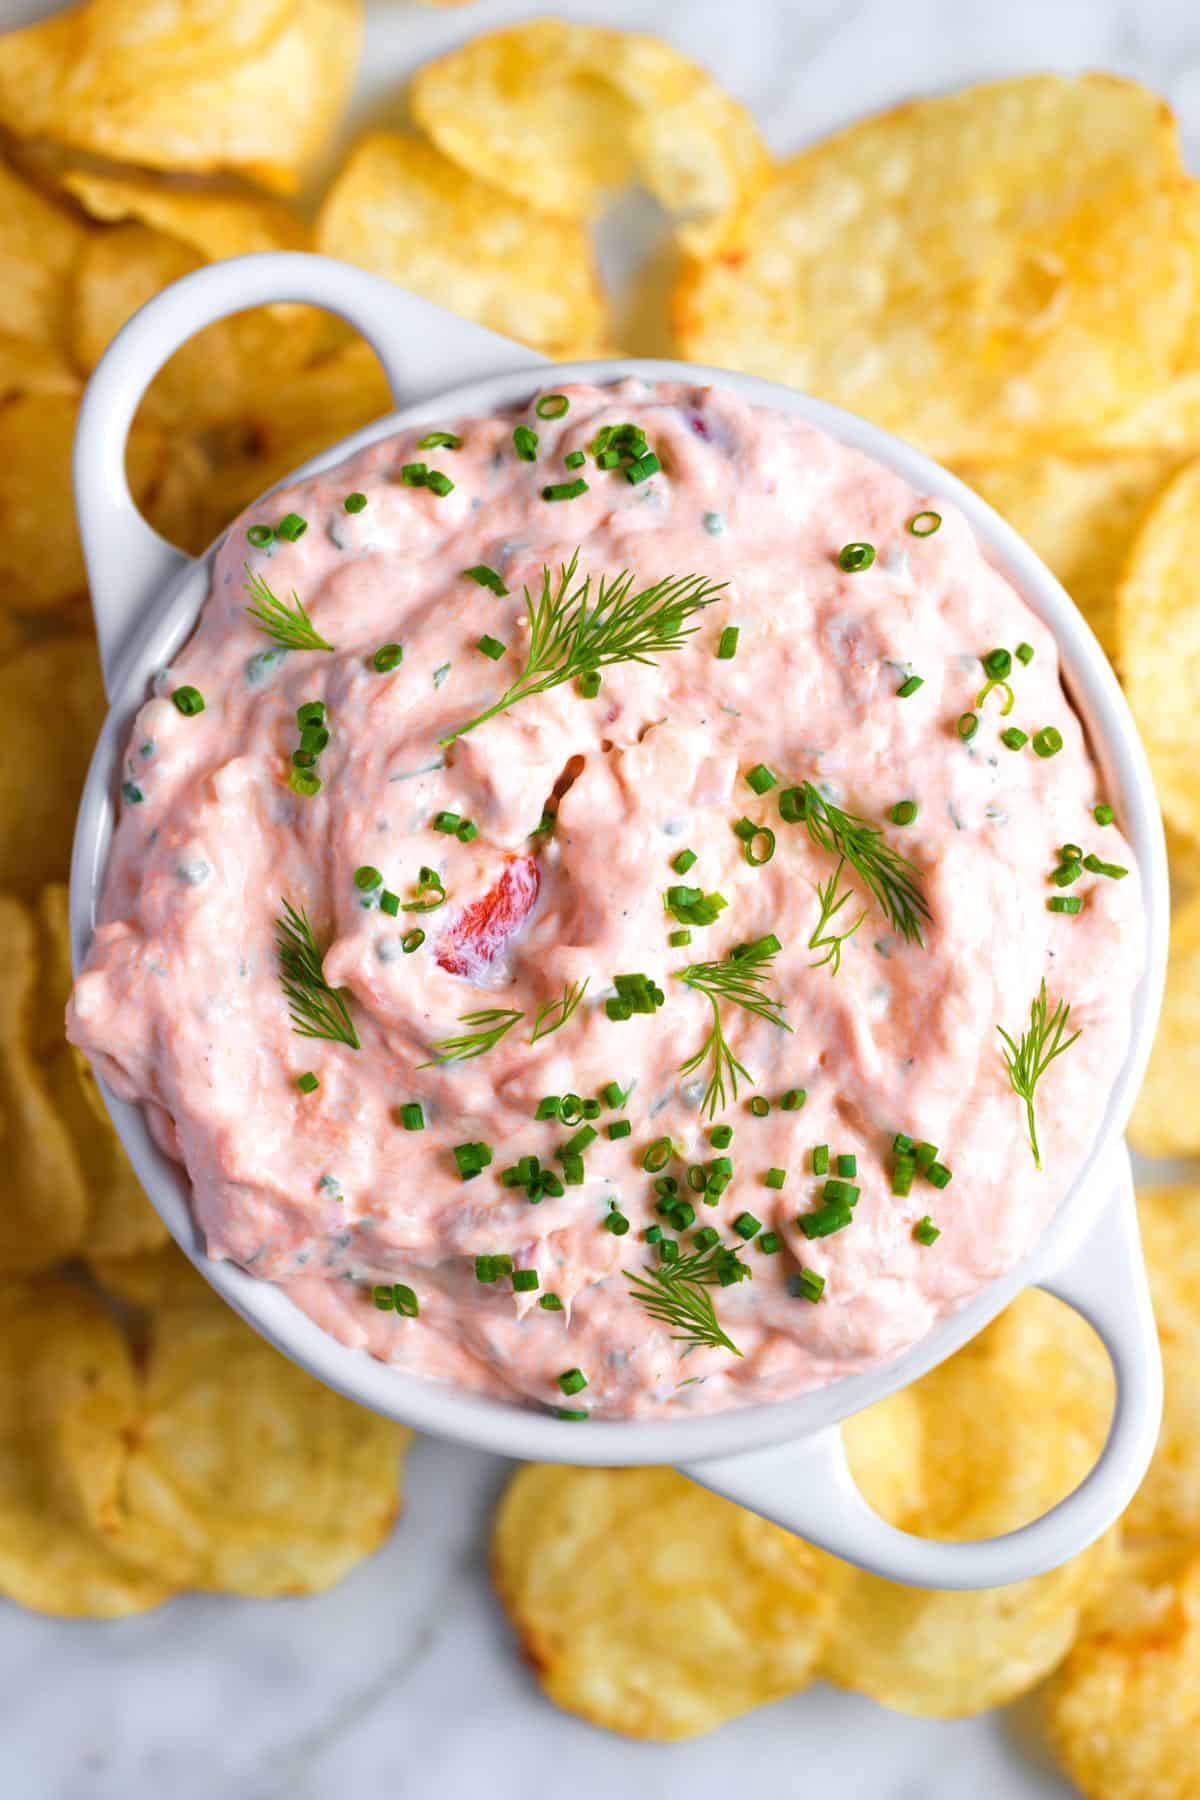
    Homemade Smoked Salmon Dip

    How to Make Our Favorite Smoked Salmon Dip

    Tip 1: Use hot-smoked salmon. You can make this dip with hot-smoked, cold-smoked, or cured salmon (such as gravlax or lox), but I prefer the rich, smoky flavor of hot-smoked salmon. It pairs beautifully with the creamy ingredients, adding a smoky, sweet flavor that makes this dip irresistible.

    Hot smoked salmon ready to be turned into dip

    Tip 2: Use an electric mixer. For a light, fluffy texture, whip the cream cheese with an electric hand mixer or stand mixer. This step gives our salmon dip a smooth, whipped consistency that’s perfect for dipping or spreading.

    Tip 3: Add the salmon last. Once the cream cheese is whipped, light, and fluffy, gently fold in the salmon. Mix just enough to combine. Over-mixing will break the salmon into tiny pieces, rather than leaving those delicious, flaky bits throughout the dip.

    Adding smoked salmon to stand mixer for salmon dip

    More of My Favorite Dips

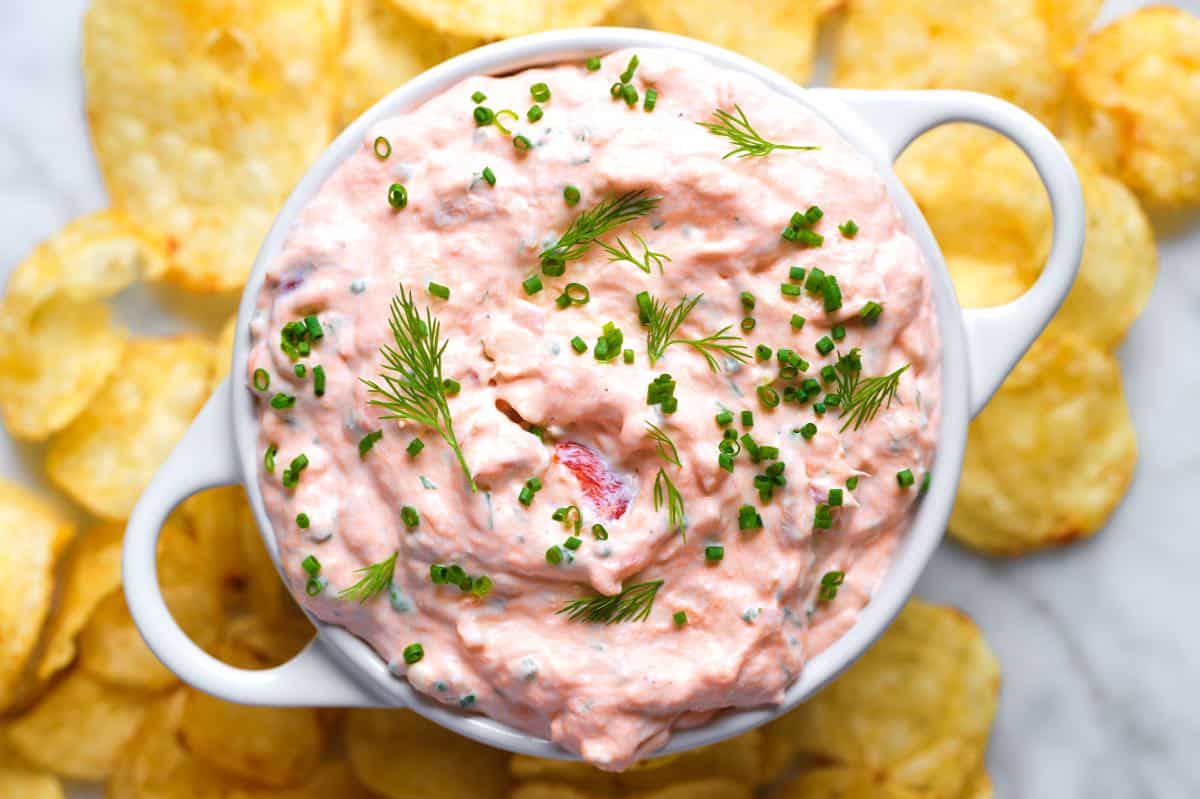
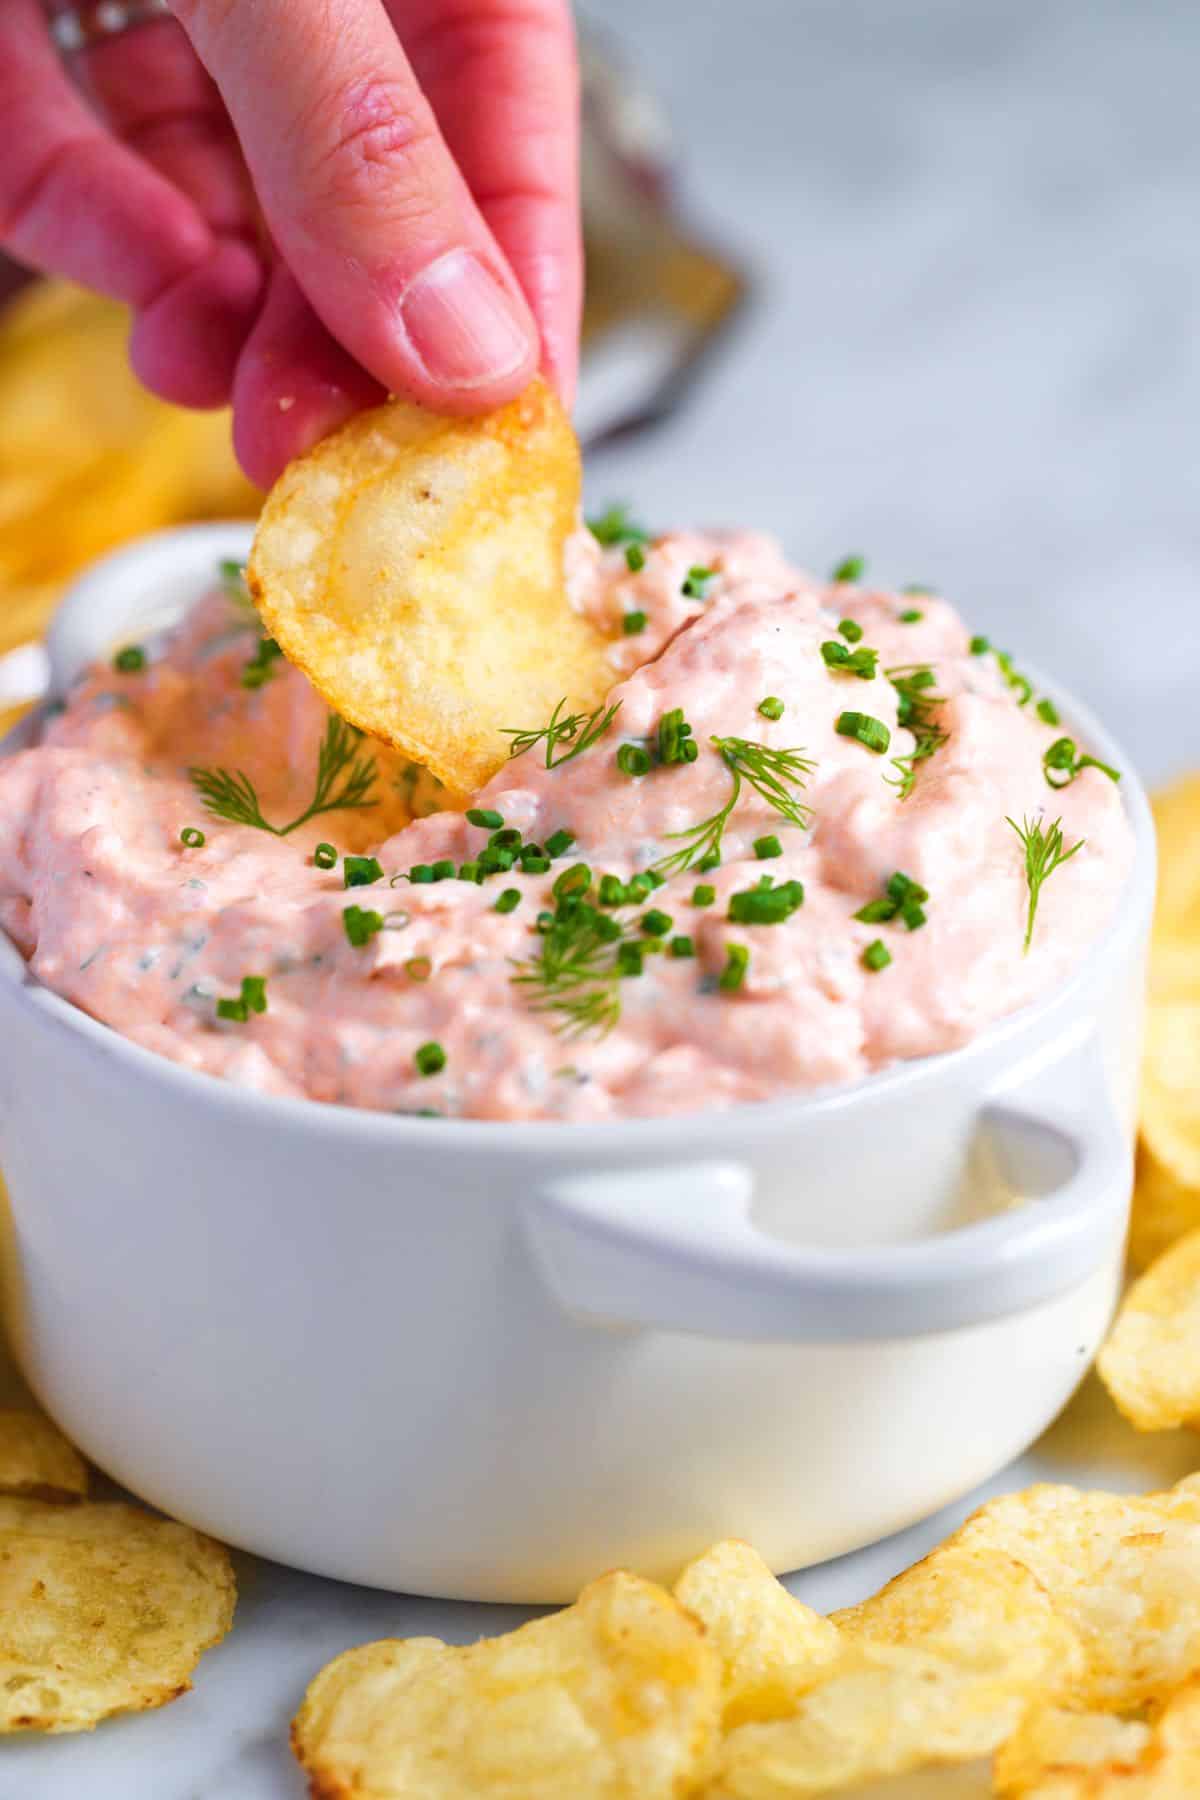
    Easy smoked salmon dip with chips

    Easy Smoked Salmon Dip

    • PREP
    • TOTAL

    This is lovely served with thick potato chips, pita bread, crostini, bagel chips, veggies, and spread onto bagels. For the most flavorful, smoky dip, use hot smoked salmon, as we do in the video. For a more mild, creamy dip, use cold smoked salmon (or cured salmon). If you use cold smoked or cured salmon, finely chop the salmon into tiny bits before mixing it into the dip.

    For the most creamy and whipped texture, use a stand mixer or large mixing bowl with an electric hand mixer.

    Makes 2 1/2 cups

    Watch Us Make the Recipe

    You Will Need

    8 ounces hot smoked salmon (225g)

    1 cup (8oz) cream cheese, softened, see notes

    ½ cup sour cream (120g)

    ½ cup mayonnaise, try homemade mayo (120g)

    Heaped tablespoon minced shallot, from half a small shallot

    1 ½ teaspoons fresh lemon juice

    1 teaspoon Worcestershire sauce or Pickapeppa sauce

    5 twists fresh ground black pepper

    ⅛ teaspoon fine sea salt

    2 tablespoons finely chopped fresh chives, plus more for garnish

    1 tablespoon finely chopped fresh dill, plus more for garnish

    Directions

      1Beat the cream cheese: In a stand mixer or a large mixing bowl with an electric hand mixer, beat cream cheese on medium-low speed until creamy, 30 seconds to 1 minute.

      2Make the dip: Scrape the bottom and sides of the bowl, then add the sour cream, mayonnaise, shallots, lemon juice, Worcestershire sauce, pepper, and salt. Mix on low speed until blended.

      3Add the salmon: Flake in the salmon (do not use the skin). Mix on low speed until blended. If using cold-smoked or cured salmon, finely chop the salmon before adding it to the dip.

      4To finish: Scrape the bowl’s sides and bottom, then scatter over the chives and dill. Mix in on the lowest speed so the herbs don’t bruise. Remove from the mixer and serve with a few extra herbs sprinkled on top. We love this salmon dip served immediately, but it is even better after a night in the refrigerator.

    Adam and Joanne’s Tips

    • Storing: This will last up to 4 days in the fridge. We recommend storing it in an airtight container. Stir the dip well before serving, and consider letting it sit out for 20 minutes to warm up so it is dippable and spreadable. We do not recommend freezing salmon dip.
    • Hot smoked salmon vs. cold smoked salmon: Hot smoked salmon is smoked at a high temperature, while cold smoked salmon is cured in salt for several days. Hot smoked salmon has a firm and flaky texture and is usually sold in 4 to 8 ounces fillets. On the other hand, cold smoked salmon has a silky and delicate texture and is sold sliced, similar to gravlax.
    • Softened cream cheese: For best results, use room-temperature cream cheese to ensure it mixes well.
    • The nutrition facts provided below are estimates.

    Nutrition Per Serving
    Serving Size
    1/4 cup (about 10 servings total)
    /
    Calories
    258
    /
    Total Fat
    20.3g
    /
    Saturated Fat
    7.5g
    /
    Cholesterol
    66.7mg
    /
    Sodium
    196.3mg
    /
    Carbohydrate
    3.4g
    /
    Dietary Fiber
    0.4g
    /
    Total Sugars
    1.1g
    /
    Protein
    16.3g


    AUTHOR:

    Joanne Gallagher

    Adam and Joanne of Inspired Taste

    We are Adam and Joanne Gallagher, the creators of Inspired Taste. Established in 2009, Inspired Taste grew from a childhood dream into one of the internet’s most trusted recipe sites with hundreds of reliable recipes, step-by-step videos, and expert tips.More About Us

    Source link

  • Fresh Green Bean Salad Recipe

    Fresh Green Bean Salad Recipe

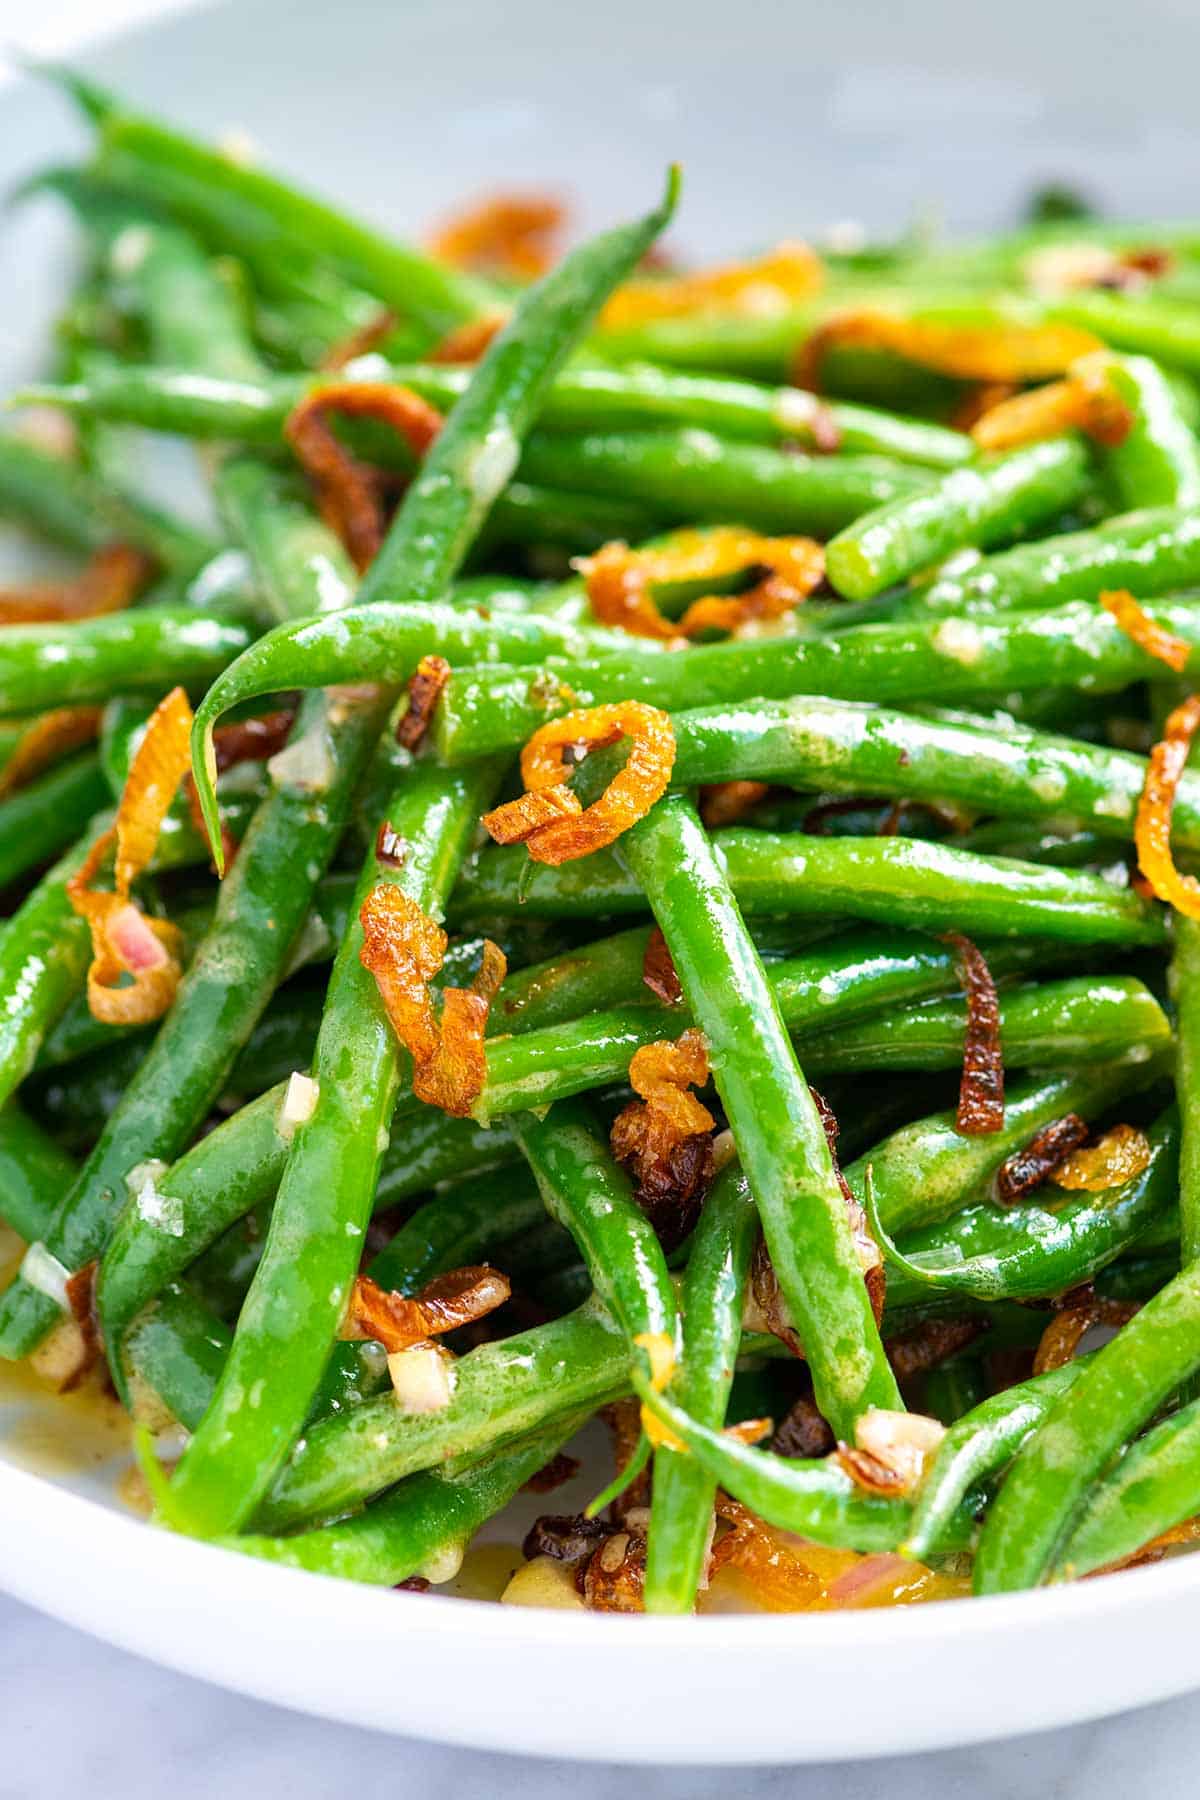
    This green bean salad recipe is one of my favorites. It combines fresh green beans, a simple shallot dressing, and crispy fried shallots!

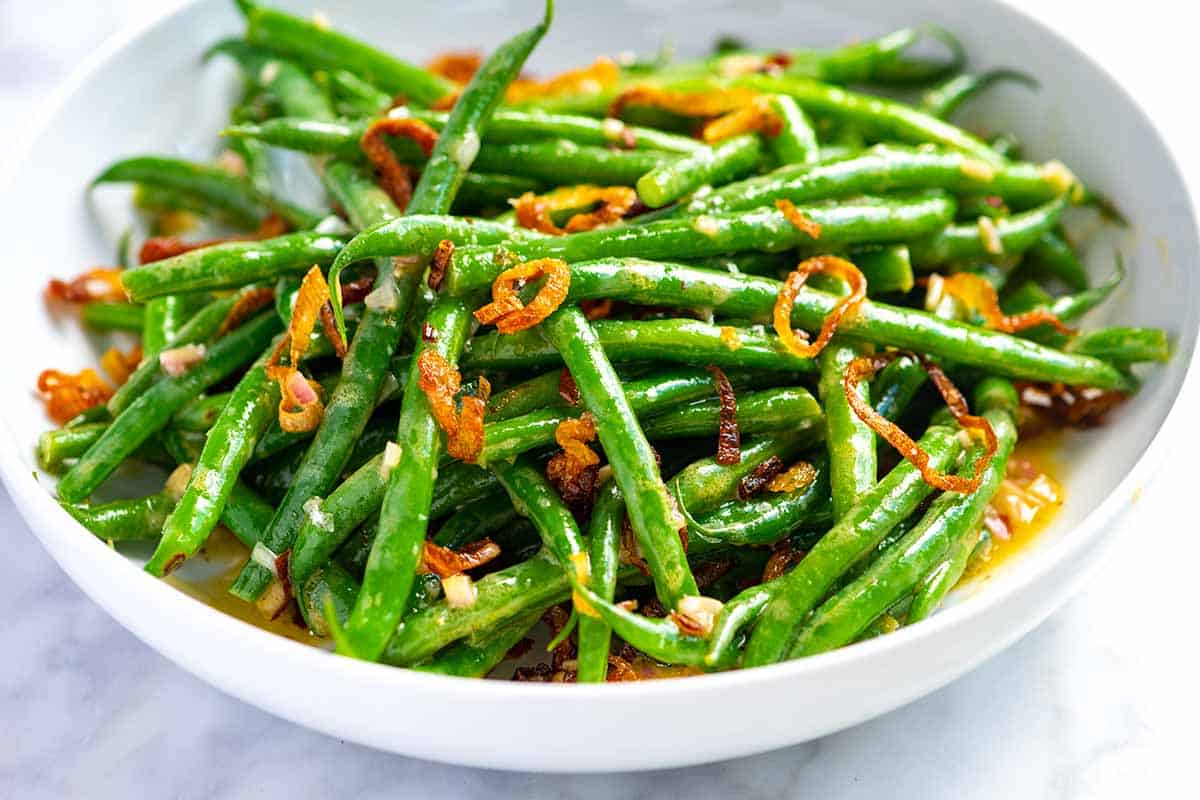
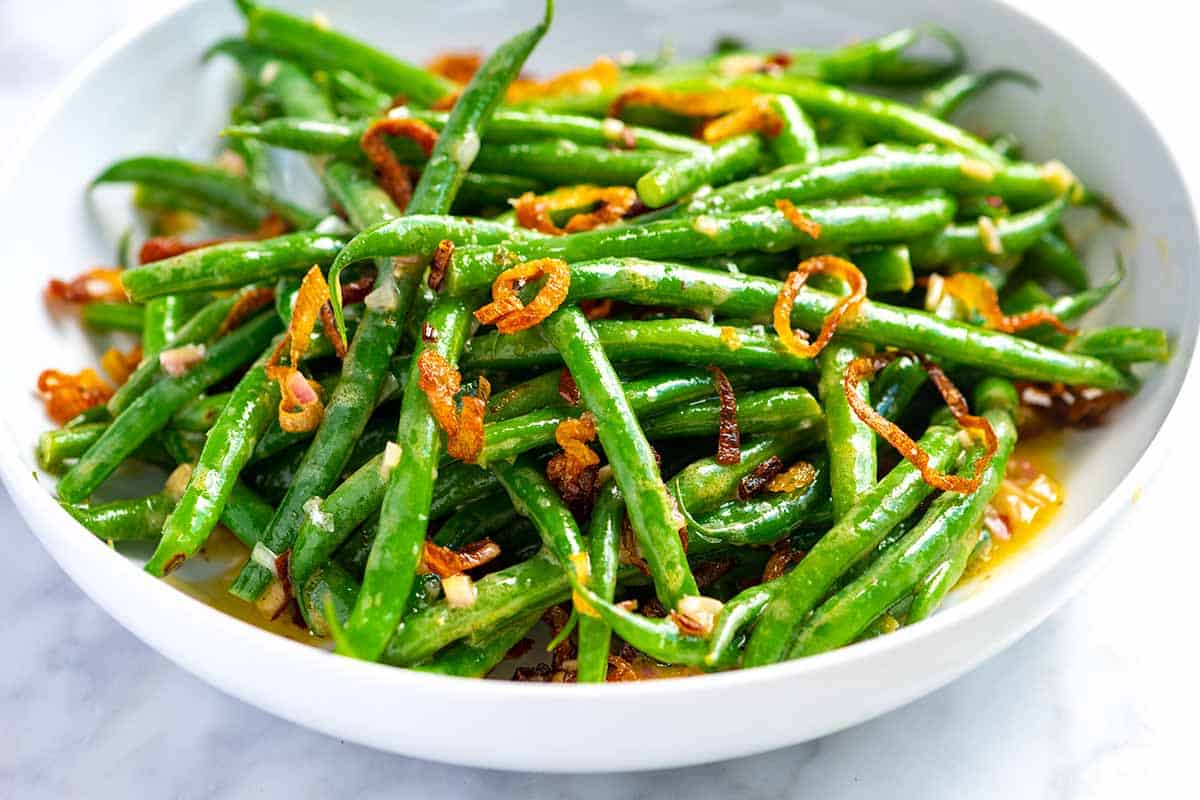
    Cold green bean salad

    When fresh green beans are in season, I jump to make this simple salad! I serve it cold, which means the beans are nice and crisp. You’ll love the shallot vinaigrette, and those crispy shallots are so delicious.

    This salad is a nod to green bean casserole. You can use store-bought fried shallots, fried onions, or make your own like me. Here’s my 15-minute fried shallots recipe.

    Key Ingredients

    • Green Beans: Fresh green beans are in season from summer through early fall. I look for crispy, firm beans without any bruised spots. To prepare my green beans for this salad, I trim the ends. I leave them whole, but if you prefer them cut into smaller pieces, feel free!
    • Shallot Vinaigrette: Everyone needs a good shallot dressing recipe in their back pocket, and this is mine. I whisk finely minced shallots with mustard, red wine vinegar, olive oil, salt, and pepper. It’s easy and so delicious!
    • Fried Shallots: I love salads with different textures, and this cold green bean salad totally hits that mark. You can find fried onions or shallots in the store, but they are simple to make yourself. They last a while, and you can use them in other dishes throughout the week. Here’s my tutorial for how to make fried shallots.

    Find the full recipe with measurements below.

    How to Make the Best Green Bean Salad

    Tip 1: Blanch your green beans. For the best salad, blanch your green beans. To do this, add them to a large pot with boiling salted water and cook for a few minutes. You want them to turn bright green. I always try one before draining and look for it to be tender, with a little crunch left.

    Tip 2: Use ice to stop cooking. When ready, plunge them into icy water to stop the cooking. Then toss them with the simple shallot dressing and top with crispy fried shallots. The combo of green beans and crispy fried shallots is a classic one.

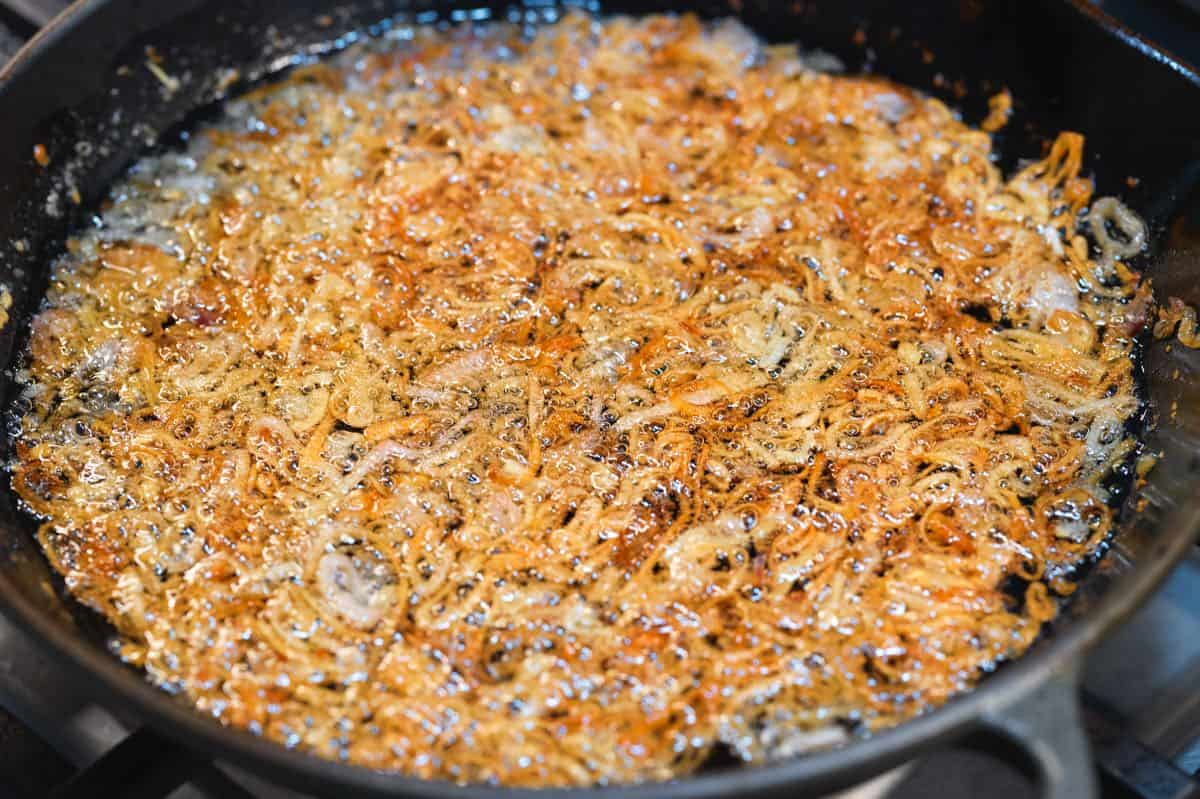
    Tip 3: Making fried shallots. It’s easy! To fry shallots, add them to oil in a skillet and cook slowly, stirring occasionally, until light brown and crispy, about 10 minutes. Let them drain on paper towels, then toss them onto your salad. If you have some leftover, add them to other dishes like mashed potatoes, sautéed green beans, and soups.

    Making crispy fried shallots for green bean salad

    Tip 4: Make it your own. This recipe is incredibly versatile. Here are a few of my favorite variations:

    • Add cheese like crumbled feta, shaved parmesan, or creamy goat cheese.
    • Toss in some cooked and sliced potatoes, like this potato and green bean salad.
    • Toss in a few handfuls of greens like arugula, spinach, or baby kale.
    • Serve the salad alongside seared tuna or your favorite tuna salad, hard-boiled egg, and some olives for a French Nicoise-inspired salad.
    • Add extra protein with juicy chicken breast, poached salmon, crumbled cooked bacon, or poached shrimp.
    Green Bean Salad

    Fresh Green Bean Salad

    • PREP
    • COOK
    • TOTAL

    This incredible cold green bean salad recipe has been a family favorite for years. It’s one of the best ways to enjoy fresh green beans. We toss the beans with a simple shallot vinaigrette and finish with crispy fried shallots (optional). You can buy fried shallots or make them. Here’s our crispy fried shallots recipe.

    Makes 6 servings

    You Will Need

    1 pound (450g) green beans or small haricots verts

    1 tablespoon minced shallots

    1 tablespoon Dijon mustard

    2 tablespoons red-wine vinegar, white wine vinegar or champagne vinegar

    1/4 cup (60ml) olive oil

    Salt and freshly ground pepper

    Crispy fried shallots, optional, our recipe for fried shallots

    Directions

      1Trim ends from green beans and leave them whole. Prepare a bowl filled with cold water and ice.

      2Bring a large pot of salted water to a boil, then add the green beans. Cook until bright green but still crisp. I check for doneness after 2 minutes, then add additional time as needed. Depending on how thin the beans are, they will need 2 to 4 minutes.

      3Drain the beans and toss them into the ice water.

      4Whisk the minced shallots, mustard, vinegar, olive oil, a pinch of salt, and pepper in the bottom of a salad bowl. Taste, then adjust with more salt and pepper if needed.

      5Toss in the green beans, then serve with crispy shallots sprinkled on top (optional).

    Adam and Joanne’s Tips

    • Frozen green beans: Fresh beans are crisper, but you can substitute them for frozen ones. Add the frozen beans to the salted boiling water and cook until heated through and tender. Transfer to the ice bath and then use in the salad as directed above.
    • Storing: The salad will last up to a day in the fridge, after that, it will still taste delicious, but the beans will lose some of their bright green color.
    • Instead of crispy shallots, try frying up some minced or sliced garlic for a green bean salad with crispy garlic.
    • The nutrition facts provided below are estimates.

    Nutrition Per Serving
    Serving Size
    1/6 of the dish
    /
    Calories
    127
    /
    Total Fat
    10g
    /
    Saturated Fat
    1.4g
    /
    Cholesterol
    0mg
    /
    Sodium
    105.2mg
    /
    Carbohydrate
    9.6g
    /
    Dietary Fiber
    3.5g
    /
    Total Sugars
    4.4g
    /
    Protein
    2.6g


    AUTHOR:

    Joanne Gallagher

    Adam and Joanne of Inspired Taste

    We are Adam and Joanne Gallagher, the creators of Inspired Taste. Established in 2009, Inspired Taste grew from a childhood dream into one of the internet’s most trusted recipe sites with hundreds of reliable recipes, step-by-step videos, and expert tips.More About Us

    Source link

  • Easy Honey Teriyaki Chicken Recipe

    Easy Honey Teriyaki Chicken Recipe

    This delicious honey teriyaki chicken recipe is naturally sweetened with fresh orange and honey, and comes together in under 30 minutes!

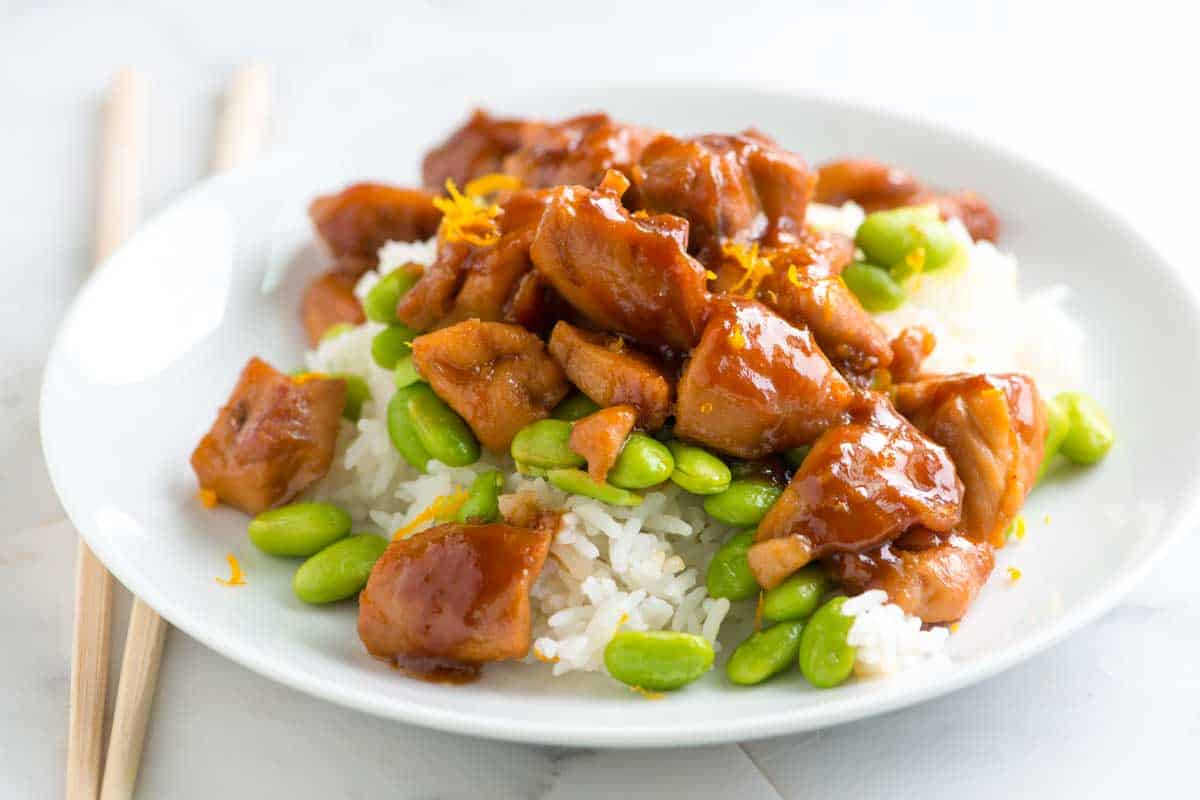
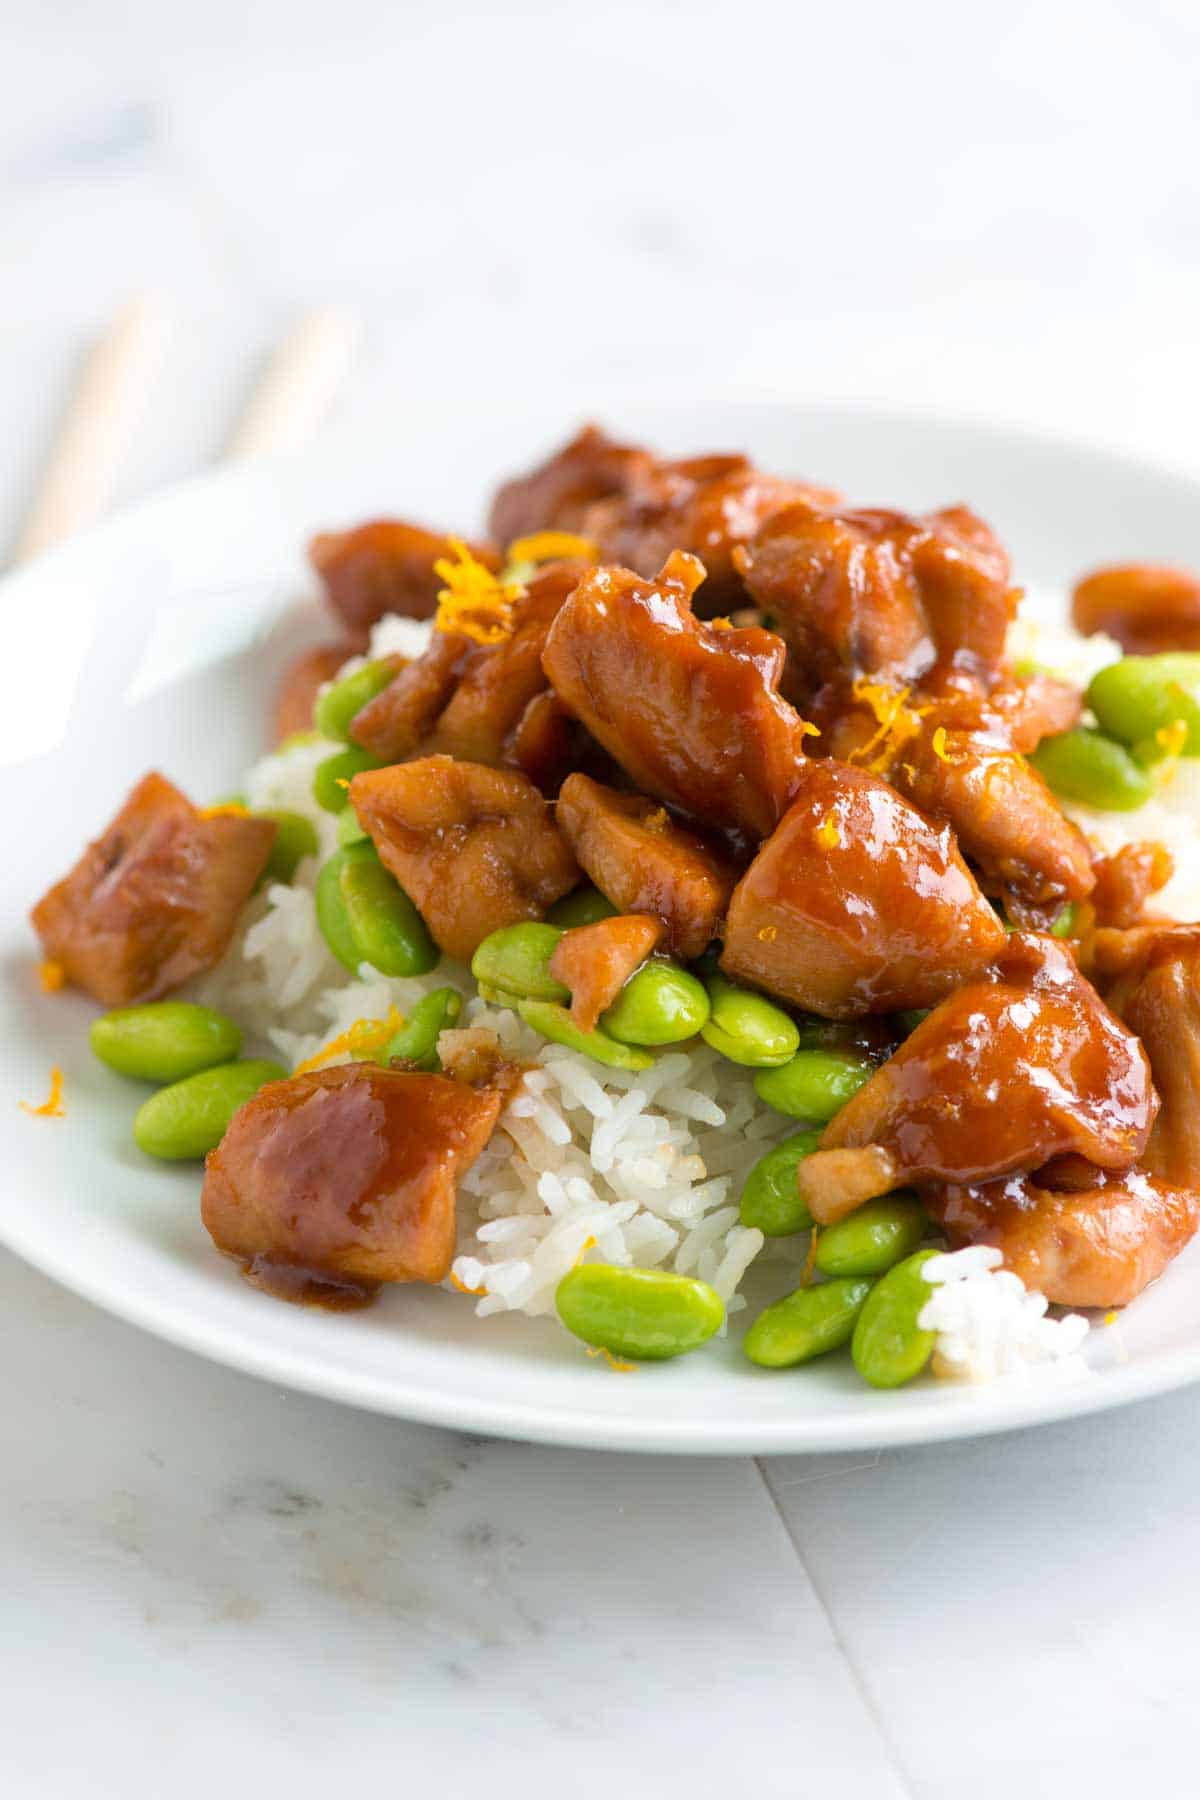
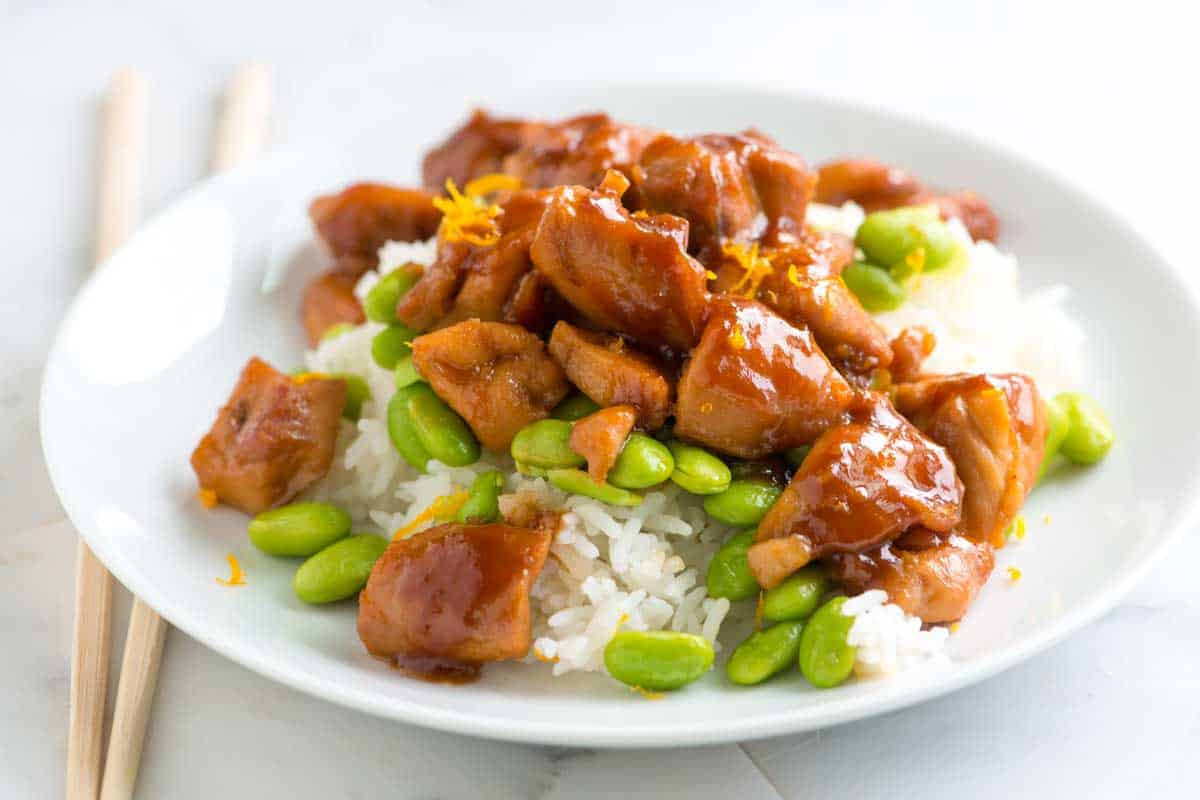
    Honey Teriyaki Chicken served over rice.

    I’m always looking for quick chicken recipes bursting with flavor, and this recipe delivers! We’ve already shared our homemade teriyaki sauce and this sticky teriyaki chicken, so if you liked those recipes, you are sure to love this spin. The sauce does double duty as a quick marinade and requires only 6 simple ingredients.

    I love serving this dish over plain white rice or, my personal favorite, coconut rice. It’s also fantastic paired with veggies like our sautéed bok choy, roasted green beans, or roasted broccoli.

    Key Ingredients

    • Chicken: I love boneless, skinless chicken thighs for this recipe. They cook quickly and turn out so juicy and tender. Feel free to substitute chicken breasts.
    • Honey: I usually use plain sugar for my homemade teriyaki sauce, but in this recipe, I swap the sugar for honey, adding a floral, sweet flavor.
    • Soy Sauce: Use light soy sauce or light tamari. Dark soy sauce or tamari will make the sauce taste too rich.
    • Orange: Another change from authentic teriyaki is using fresh orange juice to add an extra layer of flavor. Fresh squeeze is best as it usually has more of a tart flavor profile, while store-bought is typically a bit more sweet.
    • Ginger: Honey, orange, and ginger work so well that I add a tablespoon of finely grated ginger to this recipe. It makes the dish smell and taste incredible.
    • Mirin: This sweet Japanese rice wine adds flavor and gives the teriyaki sauce a beautiful luster. You can usually find it in the international aisle of larger grocery stores or Asian markets. If you can’t find it, substitutes include dry sherry, sweet marsala wine, dry white wine, or rice vinegar. You may need to add a touch more honey to the sauce when using a substitute.
    • Sesame Oil: I use toasted sesame oil, which adds a lovely, nutty aroma to the sauce.

    Find the full recipe with measurements below.

    How to Make Teriyaki Chicken

    Tip 1: Start by marinating. Whisk the marinade ingredients in a bowl (soy sauce, honey, orange juice, ginger, mirin, and sesame oil). Then, cut the chicken into bite-size pieces and toss them into the marinade. Let the chicken soak up all that flavor for 10 to 15 minutes, then move to the stove to cook it.

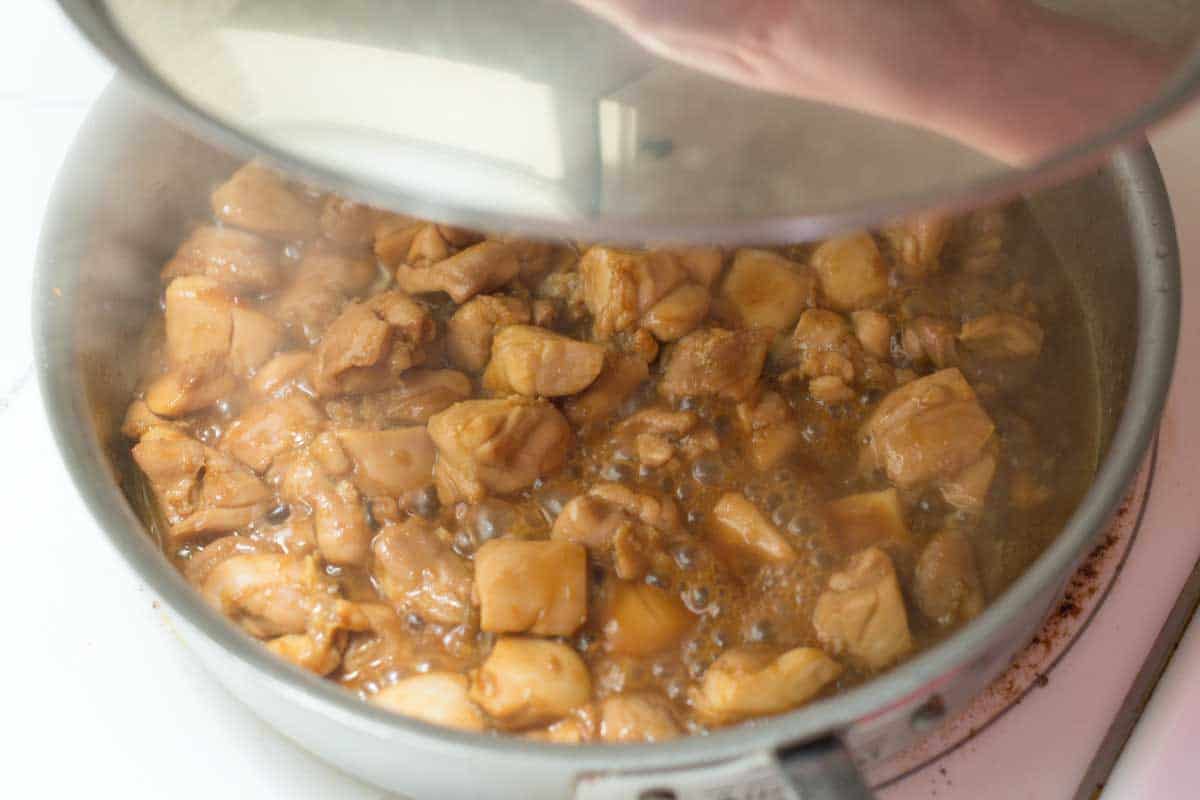
    Tip 2: Our marinade doubles as sauce. Our marinade doubles as our sauce as it cooks down, thickens, and sticks to the chicken. Use a slotted spoon to add the marinated chicken to hot oil in a pan, then cook until browned on all sides. Pour in the marinade and let everything simmer until the chicken is cooked through and the marinade thickens and clings to the chicken. Serve your chicken however you like. I especially love it over rice!

    Cooking the chicken so the honey teriyaki sauce thickens and sticks to the chicken

    More Asian-Inspired Recipes

    Honey Teriyaki Chicken

    Easy Honey Teriyaki Chicken

    • PREP
    • COOK
    • TOTAL

    You will love this quick and easy honey teriyaki chicken! The sauce is so simple and comes together in minutes. Plus, since we cut the chicken into pieces, it cooks quickly, so you can have dinner ready in no time!

    4 Servings

    You Will Need

    1/4 cup (60ml) low-sodium soy sauce

    1/3 cup (80ml) fresh squeezed orange juice, from 2 to 3 oranges

    3 tablespoons pure honey

    1 tablespoon finely grated ginger, 1-inch piece fresh ginger

    2 tablespoons mirin, see tips

    1 teaspoon toasted sesame oil

    1 1/2 pounds (680g) boneless skinless chicken thighs

    1 tablespoon avocado oil or vegetable oil

    2 teaspoons orange zest, optional

    Directions

      1Combine the soy sauce, orange juice, honey, ginger, mirin, and sesame oil in a medium bowl.

      2Cut the chicken thighs into 1-inch pieces, then add them to the marinade. Let marinade for 10 to 15 minutes.

      3Heat the oil in a large skillet or wok with a lid over medium-high heat. When the oil is hot, use a slotted spoon to remove the chicken from the marinade and place it into the pan. Save the marinade for later.

      4Cook the chicken for 2 to 3 minutes per side or until lightly browned.

      5Turn the heat to medium-low, pour in the reserved marinade, and cover the pan with a lid. Cook for 5 minutes. Remove the lid and continue to simmer until the sauce thickens and the chicken is cooked though, about 5 minutes more.

      6Serve over rice sprinkled with orange zest.

    Adam and Joanne’s Tips

    • Ginger: To grate ginger, use a fine microplane. If you don’t have one, mince the ginger very finely.
    • Mirin: This sweet Japanese rice wine adds flavor and gives the teriyaki sauce a beautiful luster. You can usually find it in the international aisle of larger grocery stores or Asian markets. If you can’t find it, substitutes include dry sherry, sweet marsala wine, dry white wine, or rice vinegar. You may need to add a touch more honey to the sauce when using a substitute.
    • The nutrition facts below are estimates.

    Nutrition Per Serving
    Serving Size
    1/4 of the recipe
    /
    Calories
    336
    /
    Total Fat
    11.7g
    /
    Saturated Fat
    2.4g
    /
    Cholesterol
    159.8mg
    /
    Sodium
    626.6mg
    /
    Carbohydrate
    21.1g
    /
    Dietary Fiber
    0.1g
    /
    Total Sugars
    18.8g
    /
    Total Protein
    34.8g


    AUTHOR:

    Adam Gallagher

    Adam and Joanne of Inspired Taste

    We are Adam and Joanne Gallagher, the creators of Inspired Taste. Established in 2009, Inspired Taste grew from a childhood dream into one of the internet’s most trusted recipe sites with hundreds of reliable recipes, step-by-step videos, and expert tips.More About Us

    Source link

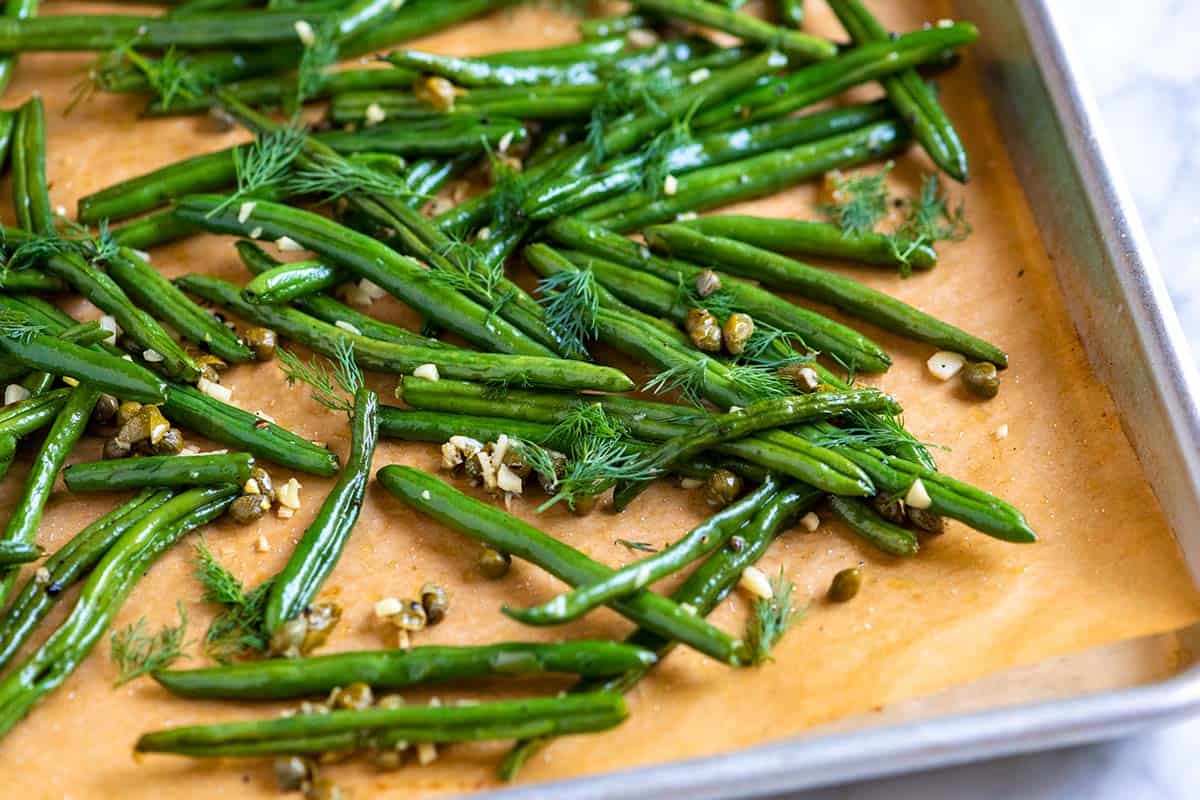
  • Garlic Roasted Green Beans Recipe

    Garlic Roasted Green Beans Recipe

    This oven roasted green beans recipe is the perfect side dish. They turn tender and sweet in the oven, with lightly crisp edges that make them irresistible.

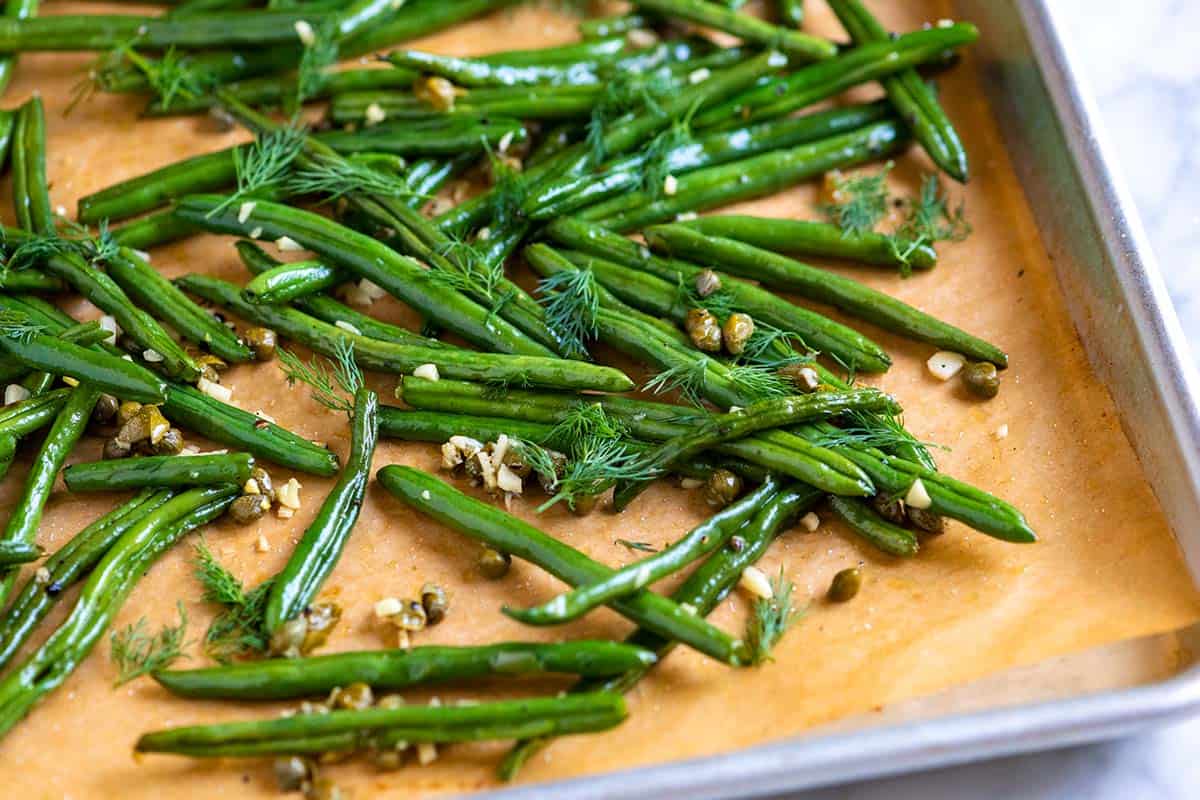
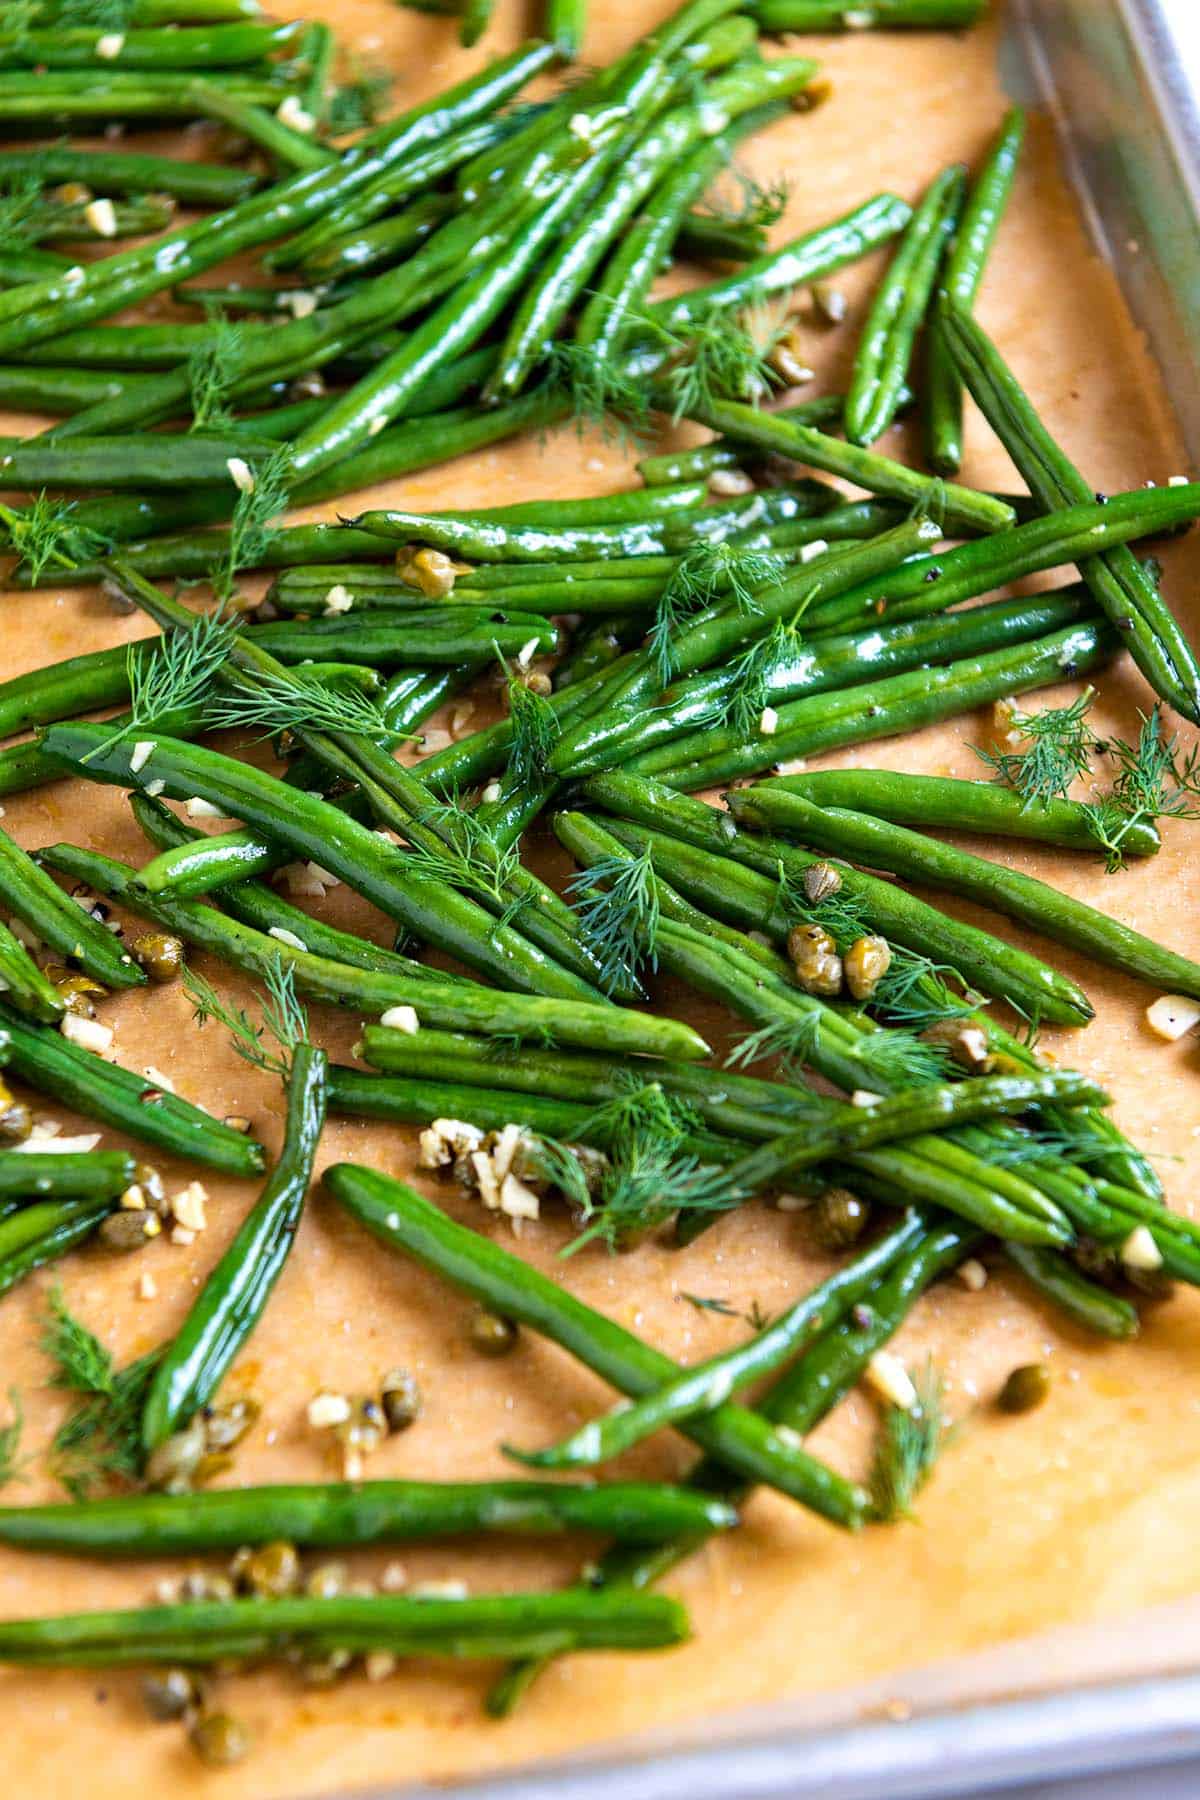
    Garlic Roasted Green Beans

    We have plenty of green bean recipes on Inspired Taste, but roasting might be my favorite way to cook them. If you haven’t tried roasting green beans before, you should. You can keep them simple with just olive oil, salt, and pepper, or dress them up with garlic and capers like we do here. Either way, they’re always a crowd-pleaser.

    Green beans also cook quickly, which makes them easy to add to weeknight dinners. Whenever I see them fresh at the store, I grab a bag.

    Key Ingredients

    • Green Beans: I prefer fresh green beans for this recipe. They should look vibrant green and feel firm. If you bend them, they should snap. String beans, haricot verts, and wax beans work in the recipe below.
    • Garlic: I use three cloves of garlic for this recipe and love it. You can increase or decrease the garlic based on your tastes.
    • Capers: They may seem a little unusual, but capers add a briny, salty bite to this recipe, which is so lovely with the sweetness of the roasted green beans. If you aren’t a fan, feel free to leave them out.
    • Fresh Dill: I love using fresh herbs, so I toss them over almost anything when I have them on hand. Dill is incredible with the garlic and capers in this recipe. Other fresh herbs like parsley or cilantro work, too.

    Find the full recipe with measurements below.

    How to Make the Best Roasted Green Beans

    Tip 1: Prepare the beans. To prepare fresh green beans, line them up on your cutting board so that all the ends are together, then slice away the stringy ends. I leave my beans long, but you can cut them into two or three pieces at this point as well.

    Tip 2: Make basic green beans. Once trimmed, toss the green beans with oil, salt, and pepper. Spread them on a baking sheet in a single layer, then roast them at 425°F until tender and a little wrinkly (10 to 15 minutes). Roasting them at such a high temperature cooks green beans quickly and gives them those delicious blistered spots. They are delicious this way, so feel free to stop here!

    Tip 3: Add more flavor. While the beans are in the oven, mix up some minced garlic and capers. Toss that with the hot roasted green beans and roast for a few minutes more. Then finish with some fresh dill. I use a similar method with feta cheese and herbs when making this roasted zucchini, and I love it!

    Serving Suggestions

    These green beans work well with many of our main dishes, but a few favorites are my garlic caper baked salmon or these easy stuffed pork chops (stuffed with apples, onions, and cheese). I also love them next to roast chicken or this honey glazed lavender chicken.

    More Green Bean Recipes

    Garlic Roasted Green Beans

    Garlic Roasted Green Beans

    • PREP
    • COOK
    • TOTAL

    These perfect roasted green beans are on the table in 20 minutes! Our family loves this simple recipe with its bright, herby flavor. I highly recommend the garlic, capers, and dill, but they are still quite delicious when made with oil, salt, and pepper!

    4 Servings

    You Will Need

    1 pound (450g) fresh green beans, stem ends snapped off

    1 tablespoon avocado oil

    1/4 teaspoon fine sea salt

    1/4 teaspoon fresh ground black pepper

    1 tablespoon minced garlic, 3 to 4 cloves

    2 tablespoons drained capers, roughly chopped

    1 tablespoon chopped fresh dill or use 1 teaspoon dried dill

    1/2 tablespoon salted butter, optional

    Directions

      1Preheat the oven to 425°F (220°C). Line a baking sheet with parchment paper or a silicone baking mat (lining the pan is optional but helps with cleanup).

      2Toss the green beans with the oil, salt, and black pepper in a large bowl.

      3Add the seasoned beans to the baking sheet and spread them into one layer. Roast until the green beans are tender and a little wrinkled, 10 to 15 minutes.

      4Meanwhile, stir the minced garlic and capers in a small bowl.

      5When they are finished roasting, toss the garlic and capers with the roasted beans on the baking sheet. Spread everything into a single layer, and continue roasting for another 2 to 3 minutes so that the garlic cooks.

      6Finish with the butter and dill. Toss well and then serve.

    Adam and Joanne’s Tips

    • Dill Substitute: Any fine herb can be used to substitute the dill. Try basil, parsley, cilantro or tarragon (use about half the amount of tarragon since it has a stronger flavor).
    • The nutrition facts provided below are estimates.

    Nutrition Per Serving
    Serving Size
    1/4 of the baking sheet
    /
    Calories
    87
    /
    Total Fat
    5.3g
    /
    Saturated Fat
    1.4g
    /
    Cholesterol
    3.8mg
    /
    Sodium
    266.6mg
    /
    Carbohydrate
    9.6g
    /
    Dietary Fiber
    3.4g
    /
    Total Sugars
    3.7g
    /
    Protein
    2.5g


    AUTHOR:

    Joanne Gallagher

    Adam and Joanne of Inspired Taste

    We are Adam and Joanne Gallagher, the creators of Inspired Taste. Established in 2009, Inspired Taste grew from a childhood dream into one of the internet’s most trusted recipe sites with hundreds of reliable recipes, step-by-step videos, and expert tips.More About Us

    Source link